• Skip to main content
  • Skip to primary sidebar
  • Terms and Conditions
  • Privacy Policy
  • Contact

Driftwood 4 Us

Just About Driftwood

admin

Driftwood She’ll Art

May 12, 2025 by admin

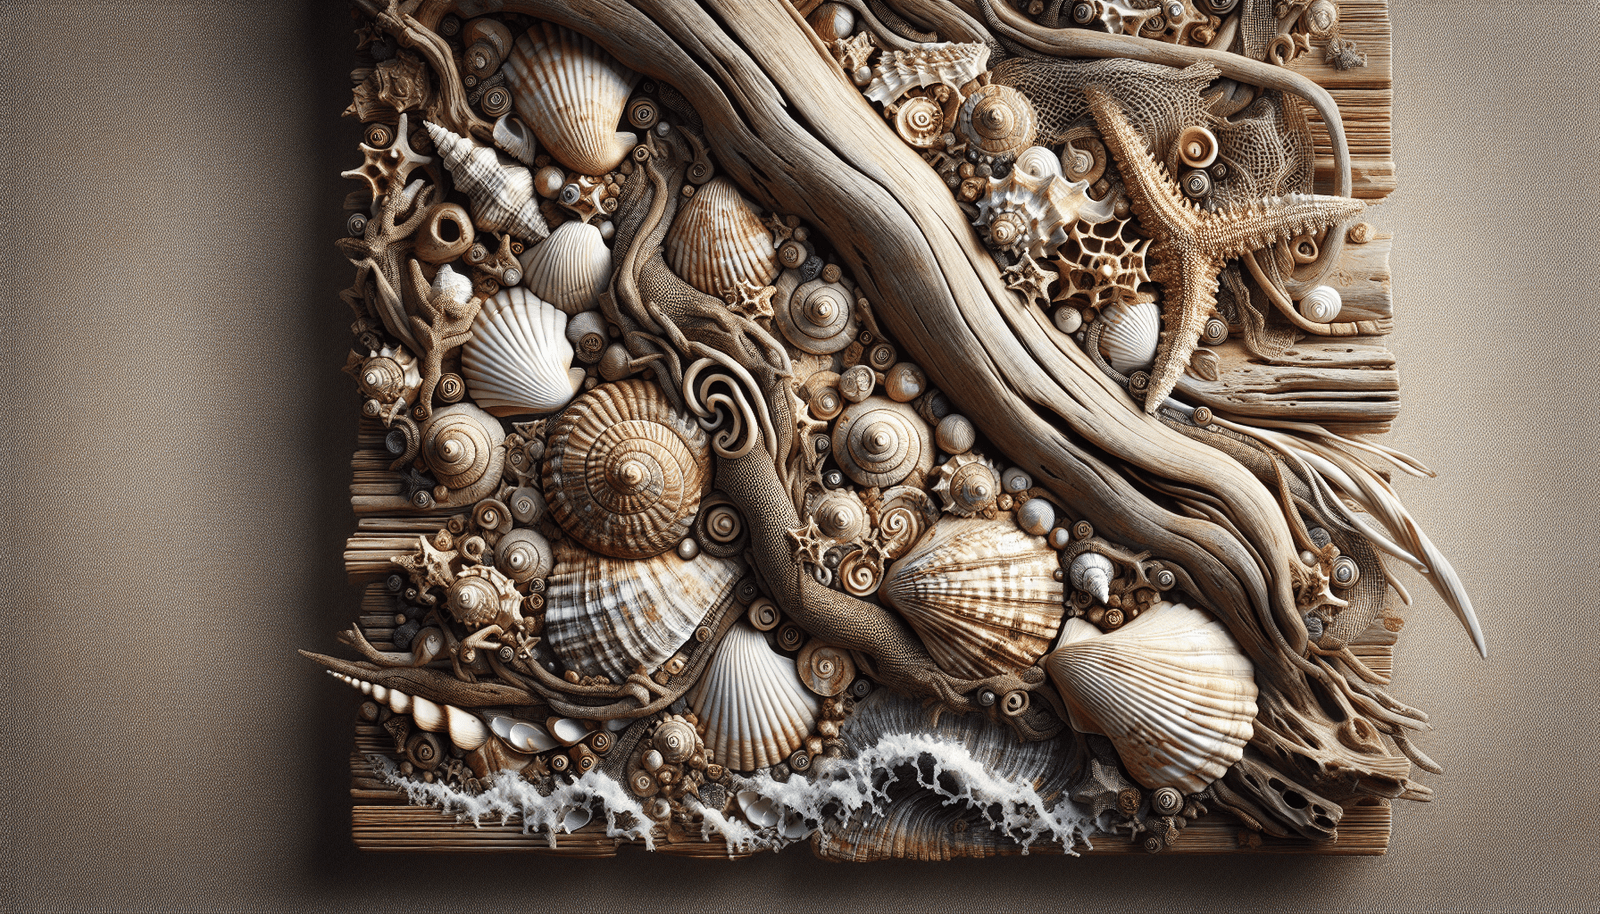
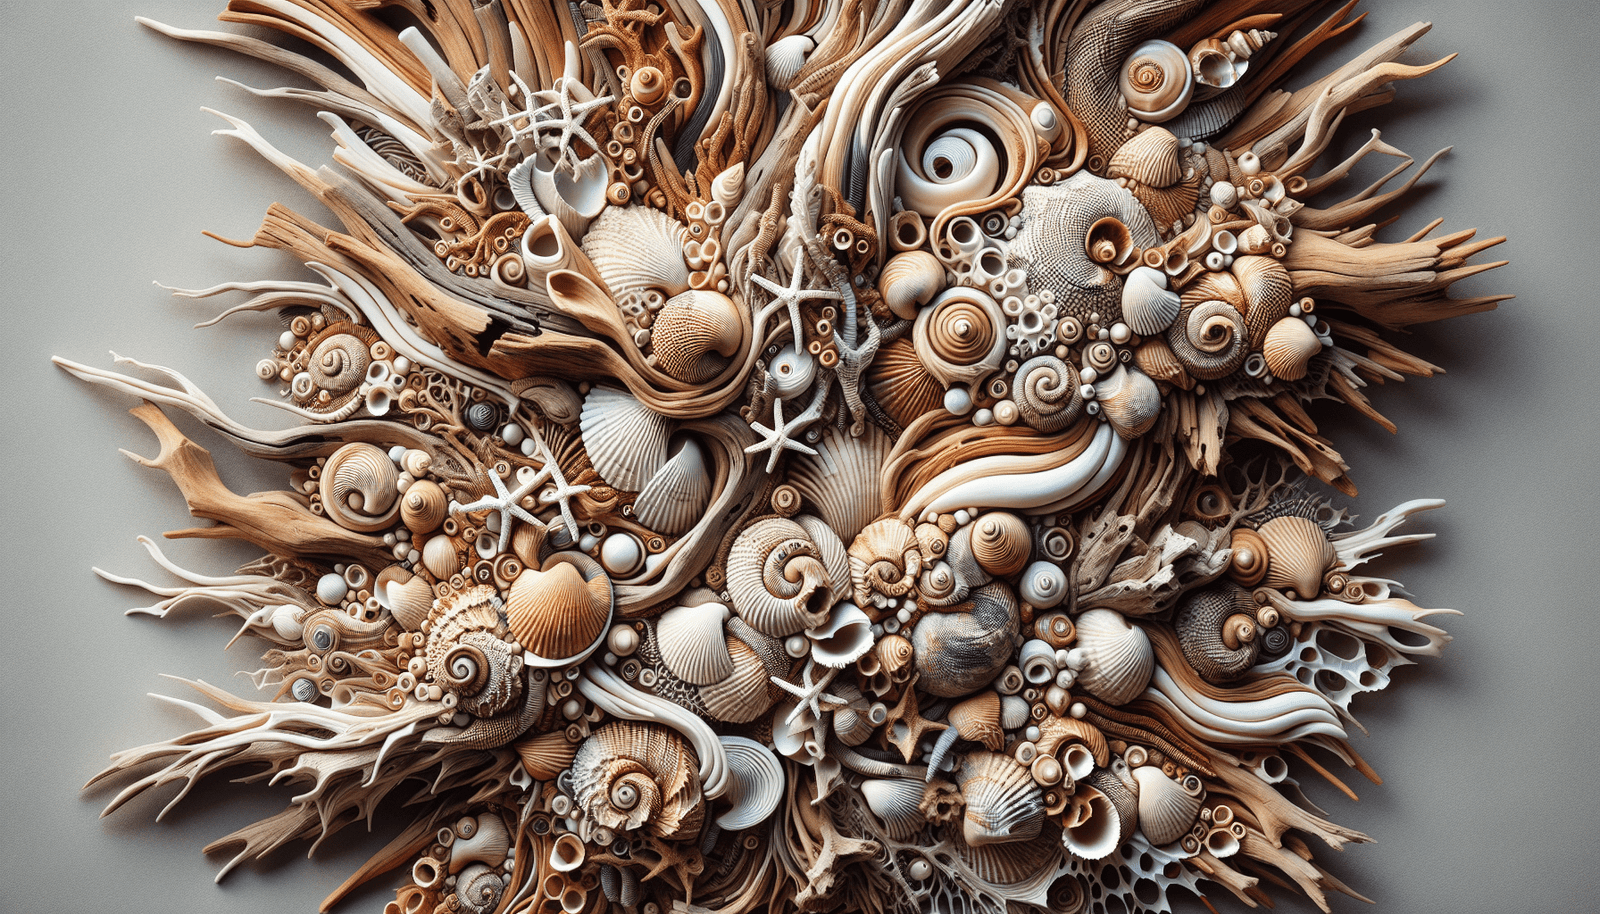
Have you ever gazed at a piece of driftwood, washed ashore by the tides, and wondered about the stories it could tell? Driftwood shell art is a captivating craft that combines the beauty of nature with the creativity of human imagination. It’s about taking those weathered pieces of wood and transforming them into stunning works of art, often incorporating shells and other natural elements. Let’s journey into this fascinating world, where sea meets art, and discover how you can create your own masterpiece.

Driftwood She’ll Art

Understanding Driftwood Shell Art

Driftwood shell art is a delightful form of artistic expression that celebrates the natural beauty of the sea. It involves using pieces of driftwood, which are often plentiful along beaches, and pairing them with seashells and other found objects to create unique sculptures, wall hangings, and other decorative items. This form of art is not only a creative outlet but also a sustainable practice, as it makes use of natural materials that have already been discarded by nature.

Origins of Driftwood Shell Art

Though it’s hard to pinpoint exactly when driftwood shell art began, it’s safe to say that it has long been a part of coastal cultures around the world. The pieces of wood that you find on the shore have traveled great distances, shaped and smoothed by the ocean. This form of art pays homage to that journey, turning what’s often seen as waste into treasures.

Why Choose Driftwood Shell Art?

The charm of driftwood shell art lies in its inherent uniqueness. Each piece of driftwood is one-of-a-kind, with its own texture, size, and shape. When you couple that with shells, each with their distinct colors and forms, the possibilities for creativity are endless. This art form allows you to bring a piece of the sea into your home, offering a rustic and natural decoration that can’t be replicated exactly.

Getting Started with Driftwood Shell Art

Embarking on the journey to creating driftwood shell art can seem daunting, but with a few basic steps and some creativity, you’ll be well on your way to making beautiful art. Before you begin, it’s essential to gather your materials and understand the basics of handling them.

Selecting Your Driftwood

The first step is to find the perfect pieces of driftwood for your project. Keep in mind that driftwood comes in all shapes and sizes, from tiny sticks to large branches. When selecting driftwood, consider the size and shape that will fit your envisioned piece. Look for pieces that have interesting textures or shapes, as these can add character to your artwork.

Tips for Finding Driftwood

  • Location: Visit beaches, riverbanks, or lakeshores, where driftwood is commonly found.
  • Seasonal Collection: Driftwood is often more abundant after storms, as turbulent waters wash more wood ashore.
  • Sustainability: Be mindful not to collect driftwood from protected areas or disturb wildlife habitats.

Cleaning and Preparing Driftwood

Once you’ve gathered your driftwood, cleaning it is crucial to remove any salt, sand, dirt, or small organisms that may be present. Here’s how:

  1. Rinse Thoroughly: Use fresh water to rinse your driftwood and remove surface debris.
  2. Soak in a Solution: Soak the driftwood in a mixture of water and bleach (a 9:1 water to bleach ratio) for a day or two to kill any bacteria and lighten the wood, if desired.
  3. Dry Completely: Allow the driftwood to dry completely in the sun. This helps maintain its shape and prevents mold or mildew growth.

Choosing and Preparing Shells

Just like driftwood, shells are a key component of this art form. When selecting shells, look for various sizes and colors that can complement each other and the driftwood you’ve chosen. Clean the shells by soaking them in a solution of water and vinegar to remove any residue.

Tools and Supplies You’ll Need

Before you start crafting, gather the essential tools and supplies needed for driftwood shell art:

  • Adhesives: A strong adhesive or glue gun is necessary to secure the shells to driftwood.
  • Sealant: To preserve your art, consider using a sealant that protects the materials from dust and fading.
  • Additional Decor: Consider embellishments like beads, feathers, or small stones to enhance your creation.
  • Protective Gear: Gloves and a dust mask to protect your skin and lungs while working with natural materials.

Techniques for Creating Driftwood Shell Art

Now that you have your materials, it’s time to explore various techniques that can be employed to bring your driftwood shell art to life. Your creativity is your most powerful tool, but some tested methods can guide you to stunning results.

Basic Driftwood Shell Crafting Techniques

  • Arranging: Lay out all your materials in front of you, and try different configurations before settling on one that feels right.
  • Layering: Experiment with layering shells on top of each other or on the driftwood to add depth to your work.
  • Combining Elements: Use additional elements like rope or twine to tie pieces together or create hanging art.

Tips for Securing Pieces

Properly securing your shells and driftwood is essential for durability. Always ensure the surfaces are clean and dry before applying adhesive. Glue guns are excellent for smaller projects, while stronger epoxy adhesives work well for heavier or outdoor pieces. Be generous with adhesive application but careful not to overdo it, as excess glue can seep out and affect the aesthetics of your piece.

Creating Specific Projects

To guide you further, here are some ideas and step-by-step processes for creating specific driftwood shell art projects:

Driftwood Shell Wind Chime

Materials Needed:

  • Several pieces of small driftwood
  • Variety of shells
  • String or fishing line
  • Drill
  • Hook for hanging

Steps:

  1. Arrange Driftwood: Lay your driftwood in a line and drill small holes where you’d like to connect them.
  2. Connect with String: Use string to tie the driftwood together, creating a cascading effect.
  3. Attach Shells: Drill tiny holes in the shells and hang them from the wood using fishing line.
  4. Add a Hook: Secure a hook at the top for easy hanging.

Driftwood Shell Wall Art

Materials Needed:

  • Large piece of flat driftwood
  • Assorted shells
  • Strong adhesive
  • Optional: Decorative extras (beads, small stones)

Steps:

  1. Prepare the Surface: Ensure the driftwood surface is clean and dry.
  2. Design Layout: Place your shells on the driftwood without glue, experimenting with different arrangements.
  3. Secure Shells: Once satisfied, use adhesive to secure the shells in place.
  4. Seal and Protect: Apply a clear sealant to protect your art.

Tips for Mastering Driftwood Shell Art

As you continue to explore driftwood shell art, there are a few tips and tricks that can help enhance your creations and ensure your artworks are both beautiful and durable.

Embrace Imperfections

One of the most attractive aspects of driftwood shell art is its natural and rustic appearance. Don’t be afraid to leave pieces slightly imperfect. These imperfections add to the charm and authenticity of the piece.

Experiment with Colors and Textures

Nature offers a rich palette of colors and textures, so take advantage of this in your art. Mix and match different types of shells and driftwood. Adding subtle hues with paints or stains can also customize your piece further while maintaining a natural look.

Sustainability and Ethical Consideration

While creating art, it’s essential to be mindful of the environment. Collect materials responsibly, without disturbing ecosystems or overharvesting. Reuse and recycle materials whenever possible to create meaningful art without contributing to waste.

Caring for Your Driftwood Shell Art

Your art should last for years with proper care, even though it’s made from natural materials. Here’s how to maintain it:

  • Keep out of direct sunlight to prevent fading.
  • Dust regularly with a soft cloth.
  • Avoid high humidity areas to prevent mold.

Driftwood She’ll Art

Connecting with the Driftwood Shell Art Community

Engaging with others who share your passion for driftwood shell art can be rewarding. Whether you seek inspiration, guidance, or camaraderie, connecting with a community of like-minded individuals can elevate your craft.

Finding Inspiration Online

Social media platforms and crafting websites offer a multitude of resources and ideas. Platforms like Pinterest and Instagram are great for discovering creative ideas and tutorials, while forums and groups on platforms like Facebook can connect you with others who share your passion.

Joining Workshops and Exhibitions

Participating in workshops can refine your techniques and expose you to new methods and ideas. Similarly, exhibiting your work in local art fairs or exhibitions can share your creations with a broader audience, offering feedback and recognition.

Sharing Your Craft

Document your progress and share your creations with your community through blogs, vlogs, or social media. Sharing encourages others to pick up the craft and can inspire them to participate in sustainable art practices.

Conclusion

Driftwood shell art allows you to transform naturally discarded beach treasures into remarkable pieces of art. As you embark on this creative journey, remember that each piece you create carries a part of the sea’s story. By practicing sustainability and embracing your artistic instincts, you can craft works that are not only beautiful but also meaningful. Now it’s your turn to let the ocean’s call inspire your next masterpiece in driftwood shell art. Your artistic adventure awaits!

Filed Under: Driftwood Ideas Tagged With: crafts, DIY, Driftwood, home decor, Shell Art

Driftwood Lion

May 12, 2025 by admin

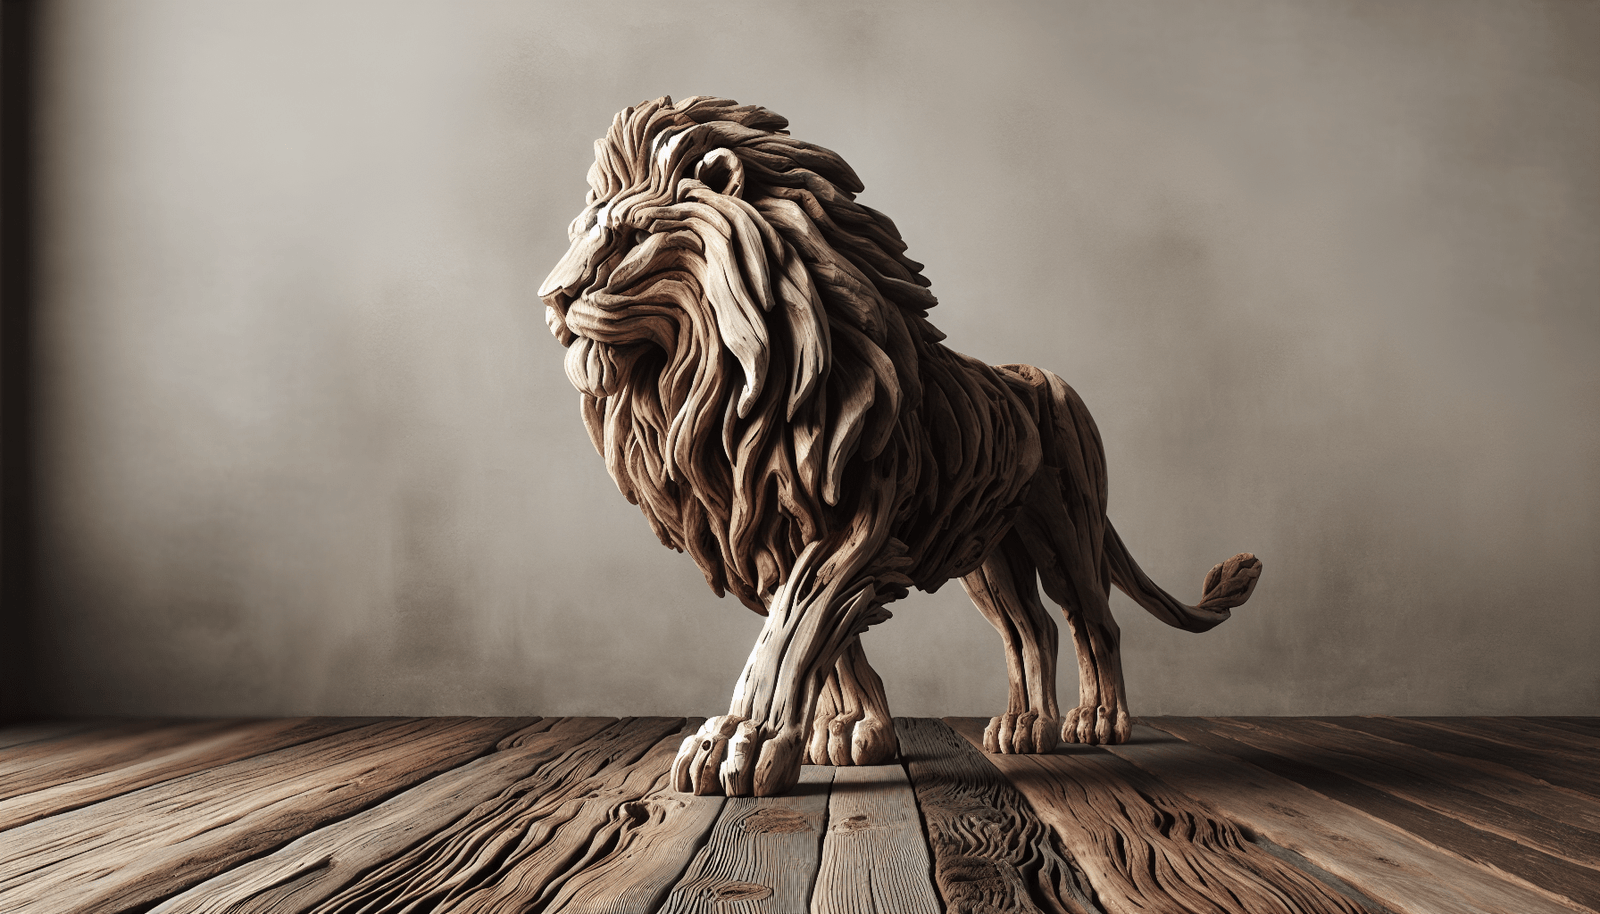
Have you ever wondered how a pile of driftwood can transform into an enchanting piece of art, like a Driftwood Lion? This mystical creation draws on nature’s raw beauty and appeals to the artistic soul within you. It magically combines the elements of art, nature, and wildlife into a single masterpiece.

What is a Driftwood Lion?

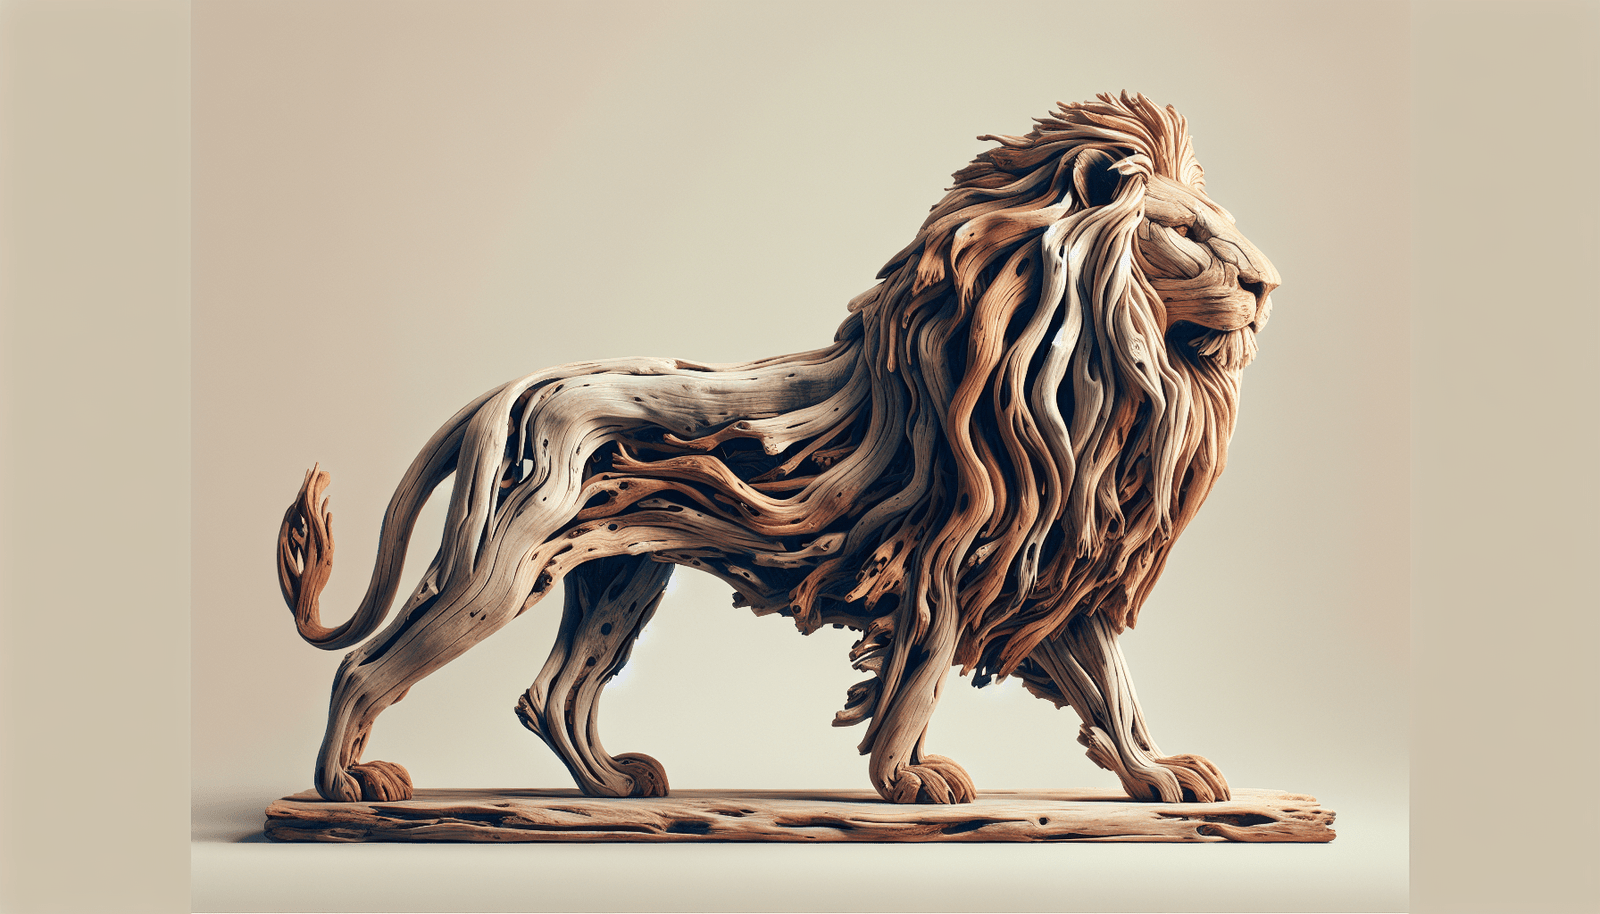
A Driftwood Lion is a sculpture crafted from pieces of driftwood, ingeniously put together to resemble a lion. Using pieces of driftwood, artists assemble the structure, creating a life-like representation of the majestic animal. It’s a unique form of environmental art that merges nature’s power with human creativity.

Driftwood itself is an artistic medium, loaded with character due to its smooth, weathered surfaces and varied shapes. This natural patina, formed by water and weather, adds an intriguing element to the sculpture, allowing each Driftwood Lion to have its own distinct personality.

The Art and Origin of Driftwood Sculptures

A Historical Perspective

Driftwood art has ancient roots, emerging from cultures that lived close to water bodies and utilized available natural resources. Driftwood sculptures have been discovered in various historical contexts, where they were used for practical purposes as well as symbolic and decorative means.

Contemporary Driftwood Art

In modern times, the use of driftwood has evolved into a respected form of artistic expression. Artists today use it not just for its environmental benefits but also for its aesthetic appeal. They see driftwood not as debris but as potential, each piece like a brush stroke in a larger composition.

In the case of a Driftwood Lion, the artist sees beyond the random shapes of the wood, envisioning how they fit together to recreate the regal symmetry and strength that a lion embodies.

Driftwood Lion

Crafting a Driftwood Lion: The Process Unveiled

Selecting the Right Driftwood

Choosing the right pieces of driftwood is essential. Artists often look for pieces that have unique textures and shapes that can mimic the curves and contours of a lion’s body. This process can often take a significant amount of time, as each piece must naturally fit together like a puzzle.

Assembling the Sculpture

The assembly process is where the artist’s vision truly begins to take form. Using a combination of creativity and technical skill, each piece is carefully selected and attached in a way that maintains aesthetic integrity while ensuring structural stability. The key is in balancing artistic vision with practical design.

Tools and Techniques

Creating a Driftwood Lion requires both traditional and innovative woodworking techniques. Tools such as saws, drills, and chisels might be used, but much of the artistry comes from the artist’s hands – fitting, placing, and sometimes breaking pieces to achieve just the right effect.

The Symbolism Behind the Lion

Representation of Courage and Strength

Lions have long been symbols of courage, strength, and royalty across various cultures. In art, a lion often represents these attributes, and the same goes for a Driftwood Lion. The raw, natural form of driftwood combined with the noble shape of a lion evokes a sense of power, making the sculpture not just a decoration, but a statement.

Nature and Wildlife Conservation

Creating art with driftwood can also be seen as an homage to nature and an effort in conservation. By repurposing natural materials, artists highlight the importance of preserving the natural world and appreciating its inherent beauty.

Driftwood Lion

Driftwood Lion in Modern Culture

Popularity and Appeal

With growing awareness of sustainability and environmental consciousness, driftwood sculptures have become highly popular. A Driftwood Lion, with its symbolic resonance and natural allure, attracts collectors, art enthusiasts, and designers alike.

How Driftwood Art Impacts the Community

Local communities often benefit from driftwood art, as it promotes eco-tourism and supports local artists. Art galleries and public installations featuring Driftwood Lions can serve as cultural hubs, fostering a sense of identity and pride among locals.

Building Your Own Driftwood Lion

Basic Principles to Get You Started

Creating your own Driftwood Lion is a journey into creativity. Begin by accumulating driftwood from legal and environmentally sound locations. Clean and prepare the wood by removing dirt and any signs of pest infestation. Envision your lion; sketch the outline and key features like the head, tail, and mane.

Step-by-Step Guide

  1. Plan your design: Visualize or draw the lion’s outline.
  2. Prepare your workspace: Ensure it’s safe and equipped with necessary tools.
  3. Select your pieces: Sort your driftwood, choosing types for different parts of the body.
  4. Begin assembling: Start from a stable base and build upwards.
  5. Secure each piece: Use nails, glue, or wiring, ensuring each piece is firm.
  6. Refine your lion: Carve nuanced features such as the mane with hand tools.
  7. Finish the sculpture: Sand any rough edges and coat with a protective finish if desired.

Displaying and Maintaining Your Driftwood Lion

Display Considerations

When displaying your masterpiece, consider both aesthetic and physical aspects. Choose a spot with good lighting to highlight its texture and form. Ensure the space can support the weight and dimensions of the sculpture.

Regular Maintenance Tips

Driftwood art requires occasional care. Dust it gently with a soft cloth and avoid overexposure to moisture to prevent deterioration. If displayed outdoors, treat it with a water-resistant sealant occasionally to protect against the elements.

Driftwood Lion: A Connection to Nature and Art

To embark on creating or appreciating a Driftwood Lion is to meld artistry with the environment. It is a reminder of the power of human creativity and the enduring strength of the natural world. Each lion takes you on a journey through imagination, immersing you in the simplicity yet profound complexity of turning nature’s remnants into inspiring art.

This form of art also strikes a chord with anyone interested in the fusion of ecology with aesthetics, pushing you to see beyond the ordinary into what might be possible. Whether standing majestically in your living room or as a highlight in a public exhibit, the Driftwood Lion carries profound meaning as a testament to the symbiotic relationship between humanity and nature, and the timeless allure of the lion itself.

In creating or simply appreciating such pieces, you play a part in continuing a tradition that values creativity, respects nature, and symbolizes the powerful attributes of one of the most revered animals in the world. With each Driftwood Lion, you capture a piece of the earth, fossilized in art, telling its own story and inspiring countless others.

Filed Under: Driftwood Ideas Tagged With: driftwood art, Eco-friendly, Lion, nature, Sculpture

Driftwood Lighthouse Diy

May 12, 2025 by admin

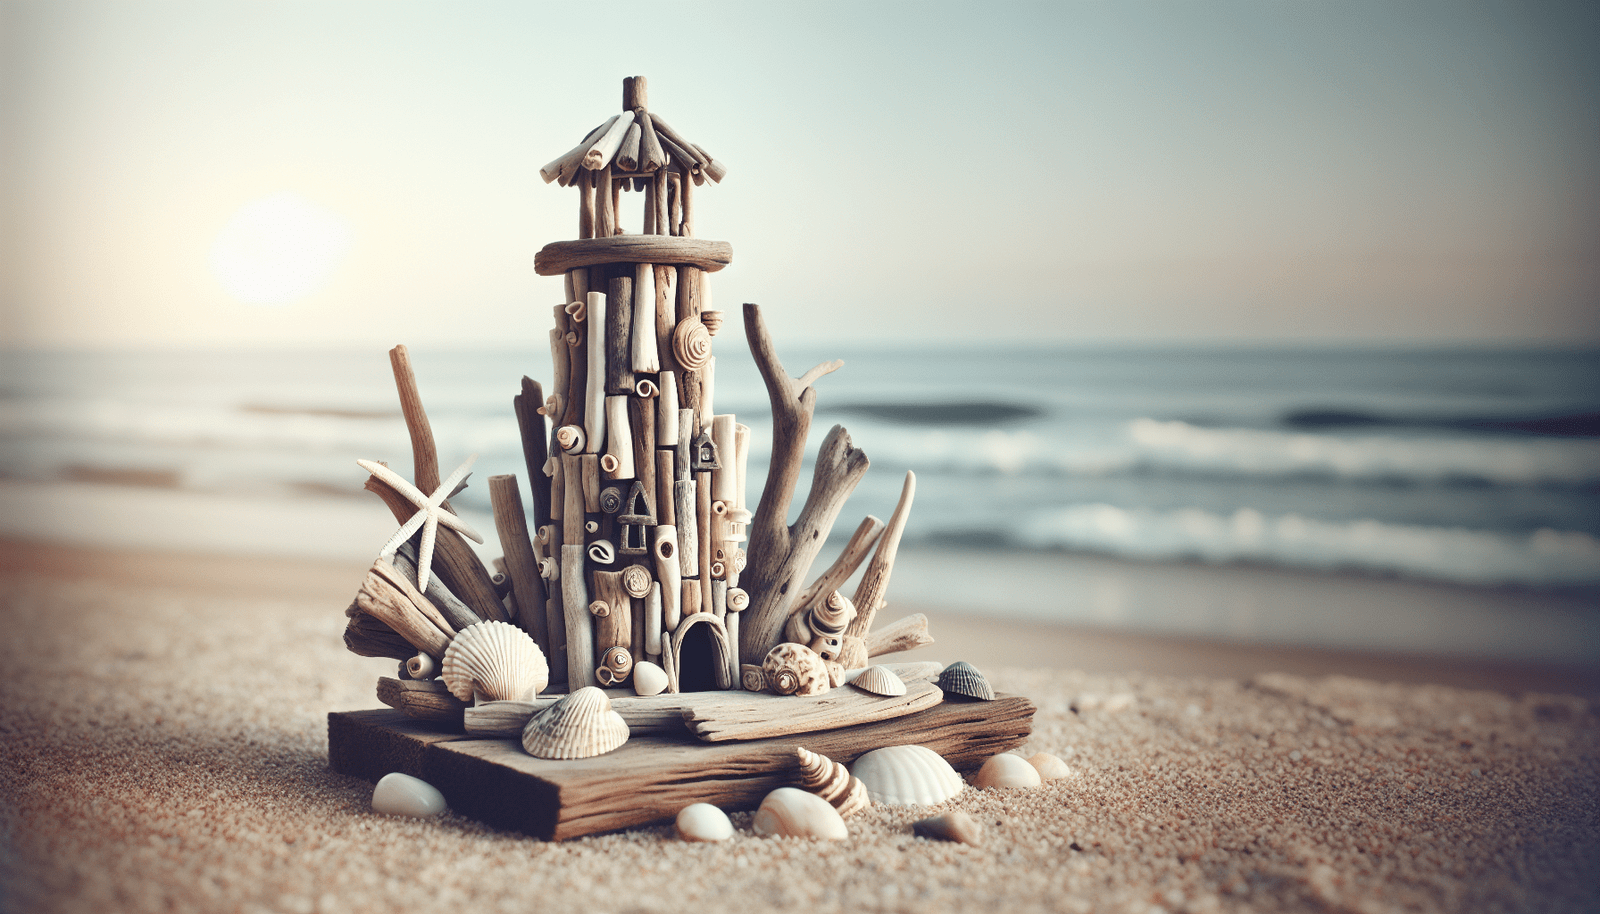
Have you ever found yourself captivated by the coastal charm of lighthouses? There’s something undeniably enchanting about these majestic towers that guide ships safely to shore. If you’ve ever wanted to bring a piece of that seaside elegance into your home, crafting a lighthouse from driftwood might just be the perfect project for you. Not only does it allow you to create a unique piece of decor, but it also repurposes natural materials that are typically found along the shoreline. Let’s embark on this delightful DIY journey together.

Driftwood Lighthouse Diy

Understanding Driftwood and Its Appeal

Before you get started, it’s helpful to understand what makes driftwood so special. Driftwood is essentially wood that has been washed onto the shore by the action of tides or waves. Over time, this wood becomes beautifully weathered and worn, acquiring a distinct texture and appearance that is cherished by crafters and artists alike.

Why Use Driftwood?

When it comes to DIY projects, driftwood offers several compelling benefits. Firstly, every piece is unique due to its natural shaping and texturing, which means your lighthouse will be one-of-a-kind. Additionally, using driftwood is an eco-friendly choice, often viewed as a form of upcycling. By repurposing remnants from nature, you’re minimizing waste and creating a sustainable piece of art.

Collecting Driftwood

For your driftwood lighthouse, you’ll want to gather pieces of varying sizes. Seek out driftwood along the beaches, rivers, or lakes. Be sure you’re allowed to collect in those areas, and remember to select pieces that are relatively clean and dry. Avoid collecting moist driftwood, as it might lead to mold issues later on.

Planning Your Driftwood Lighthouse

Every great DIY project starts with a solid plan. Here’s how to approach building your driftwood lighthouse.

Designing Your Lighthouse

Start by visualizing what your lighthouse might look like. Consider the size, shape, and style you want to achieve. Do you imagine a towering structure with many layers, or a quaint, simple lighthouse? Sketch out your ideas or gather some reference images to set your creative direction.

Gather Your Materials

Creating a driftwood lighthouse requires a mixture of materials and tools. Here’s a list of what you might need:

MaterialsTools
Assorted driftwood piecesGlue gun and glue sticks
A sturdy base (wooden or stone)Hand saw or miter saw
Decorative elements (shells, stones, paint)Sandpaper
LED candle or small light bulbDrill and bits

Preparing the Driftwood

Once you have your materials, it’s time to prepare the driftwood. Sand down any rough edges to avoid splinters and clean the wood if necessary. Use a wire brush or sandpaper to remove debris or loose bark. This ensures your lighthouse looks polished and professional.

Constructing the Driftwood Lighthouse

Armed with your design and materials, you’re ready to start the fun part—assembling your lighthouse.

Building the Base

Begin by securing your largest driftwood piece to your base. This piece will serve as the foundation for your lighthouse. Use a strong adhesive like wood glue or a glue gun to attach it firmly. Ensure it’s sturdy and stable as you’ll be building upwards from it.

Layering Driftwood

Once the base is secure, start stacking additional driftwood pieces. Vary the sizes and shapes as you go to add character to your lighthouse. As you build, take care to maintain balance. Alternating the orientation of the driftwood pieces can also bring an aesthetic appeal to your structure.

Adding Details

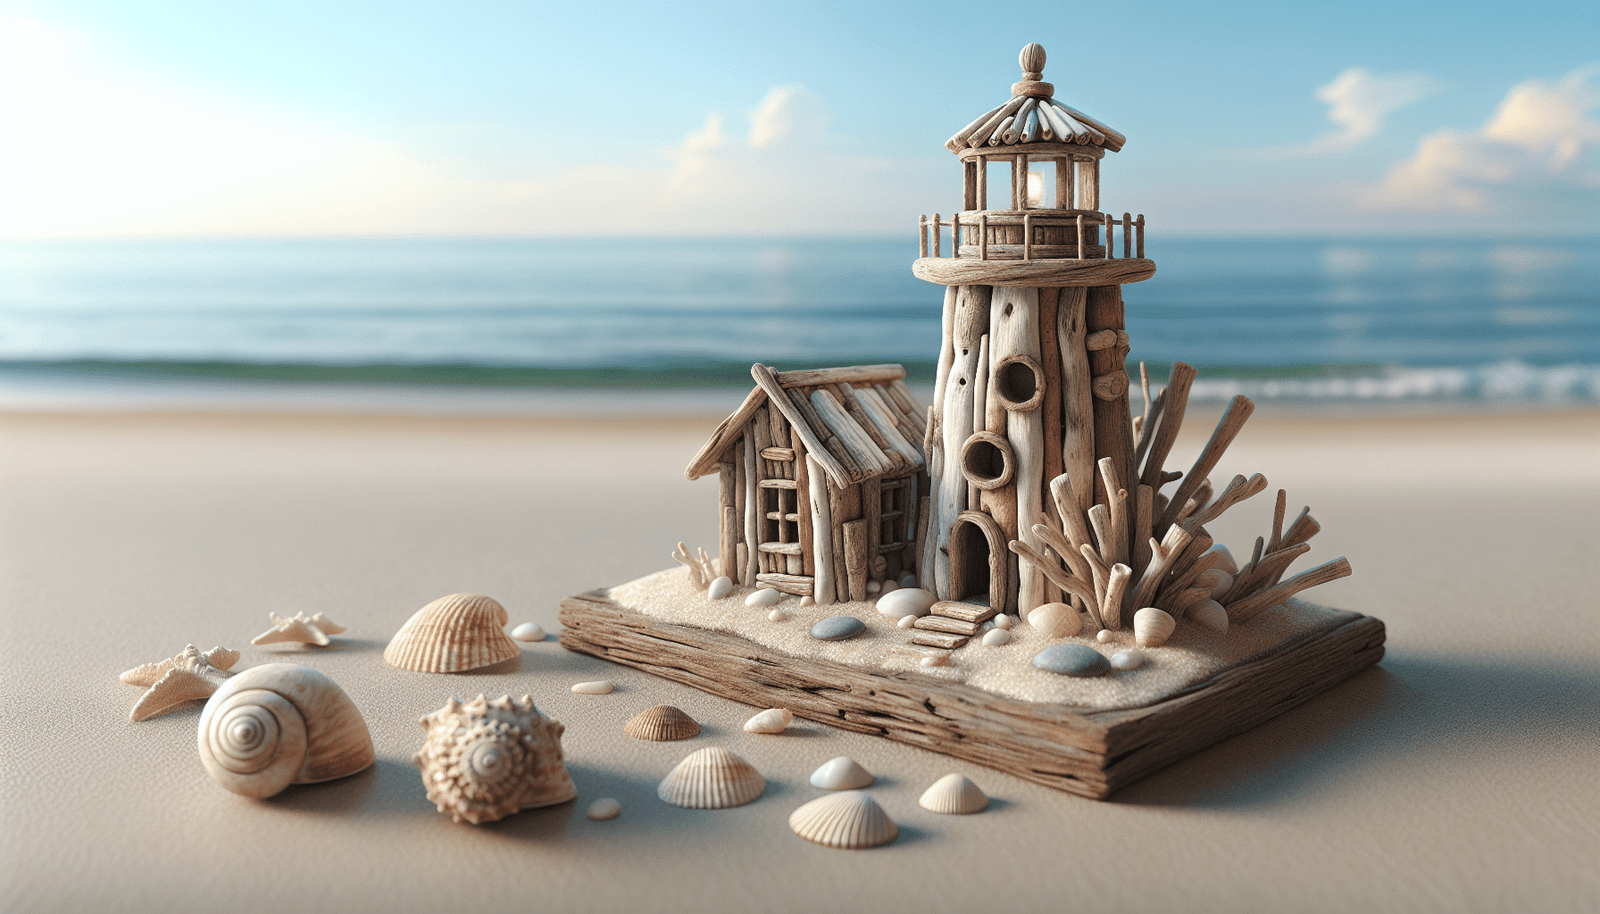
With the main structure complete, think about the details that make lighthouses special. Use smaller pieces of driftwood or decorative elements like shells or stones to create windows, doors, or light rooms on your lighthouse.

For the light, place an LED candle or a small bulb at the top to simulate the lighthouse’s guiding beam. Ensure this light feature is secure and won’t topple over.

Personalized Touches

A driftwood lighthouse isn’t just a structure; it’s an expression of creativity. Here’s how you can make it truly your own.

Painting and Finishing

You may choose to leave the driftwood in its natural state or paint it in classic lighthouse colors (red, white, yellow). If you paint, use acrylic paint for a durable finish. Consider using a sealant to protect your lighthouse from moisture and wear.

Thematic Embellishments

Embed elements of the sea into your lighthouse design. Consider adding a miniature boat, anchor, or wave-themed accents. Personalizing your lighthouse with thematic embellishments can capture the coastal essence you might be seeking.

Display Tips

Once your lighthouse is complete, display it in a place where it can stand out. The mantelpiece, a windowsill, or even the garden (if properly sealed) can be perfect spots. Your handcrafted masterpiece deserves to be showcased.

Driftwood Lighthouse Diy

Troubleshooting Common Issues

Every project might encounter a few hiccups. Here’s how to troubleshoot common problems when crafting your driftwood lighthouse.

Stability Concerns

If your lighthouse isn’t standing firm, reassess its base. Try adding more glue or repositioning the base pieces. Ensuring an even distribution of weight as you build upward can also help maintain balance.

Glue Issues

Glue may not adhere if the wood is still damp. Allow your driftwood pieces to dry completely before assembly, and always apply glue to clean surfaces.

Lighting Malfunction

If your light doesn’t work correctly, check the battery connections. Ensure the light fixture is securely seated within the top section of your lighthouse.

The Joy of Driftwood Crafting

Building a driftwood lighthouse combines the beauty of natural materials with the creative satisfaction of crafting something by hand. Each piece tells a story, and when combined, these pieces recreate the magic of the coast. Embrace the imperfections and let your personality shine through this project. It’s not just about the final product; it’s about enjoying the journey of creation.

Crafting with driftwood can be a soothing escape from the hustle and bustle of everyday life. Whether you craft alone or with friends and family, it provides a wonderful opportunity to connect with nature and creativity in a meaningful way. As you look at your lighthouse, remember each piece of driftwood that has traveled far and wide to finally become part of your artwork.

So, go ahead and begin this delightful project with enthusiasm. Before you know it, you will have your very own driftwood lighthouse casting a warm glow, evoking those cherished memories by the sea.

Filed Under: Driftwood Ideas Tagged With: Beach House Style, Driftwood Crafts, Lighthouse Decor

Driftwood Lighting Ideas

May 11, 2025 by admin

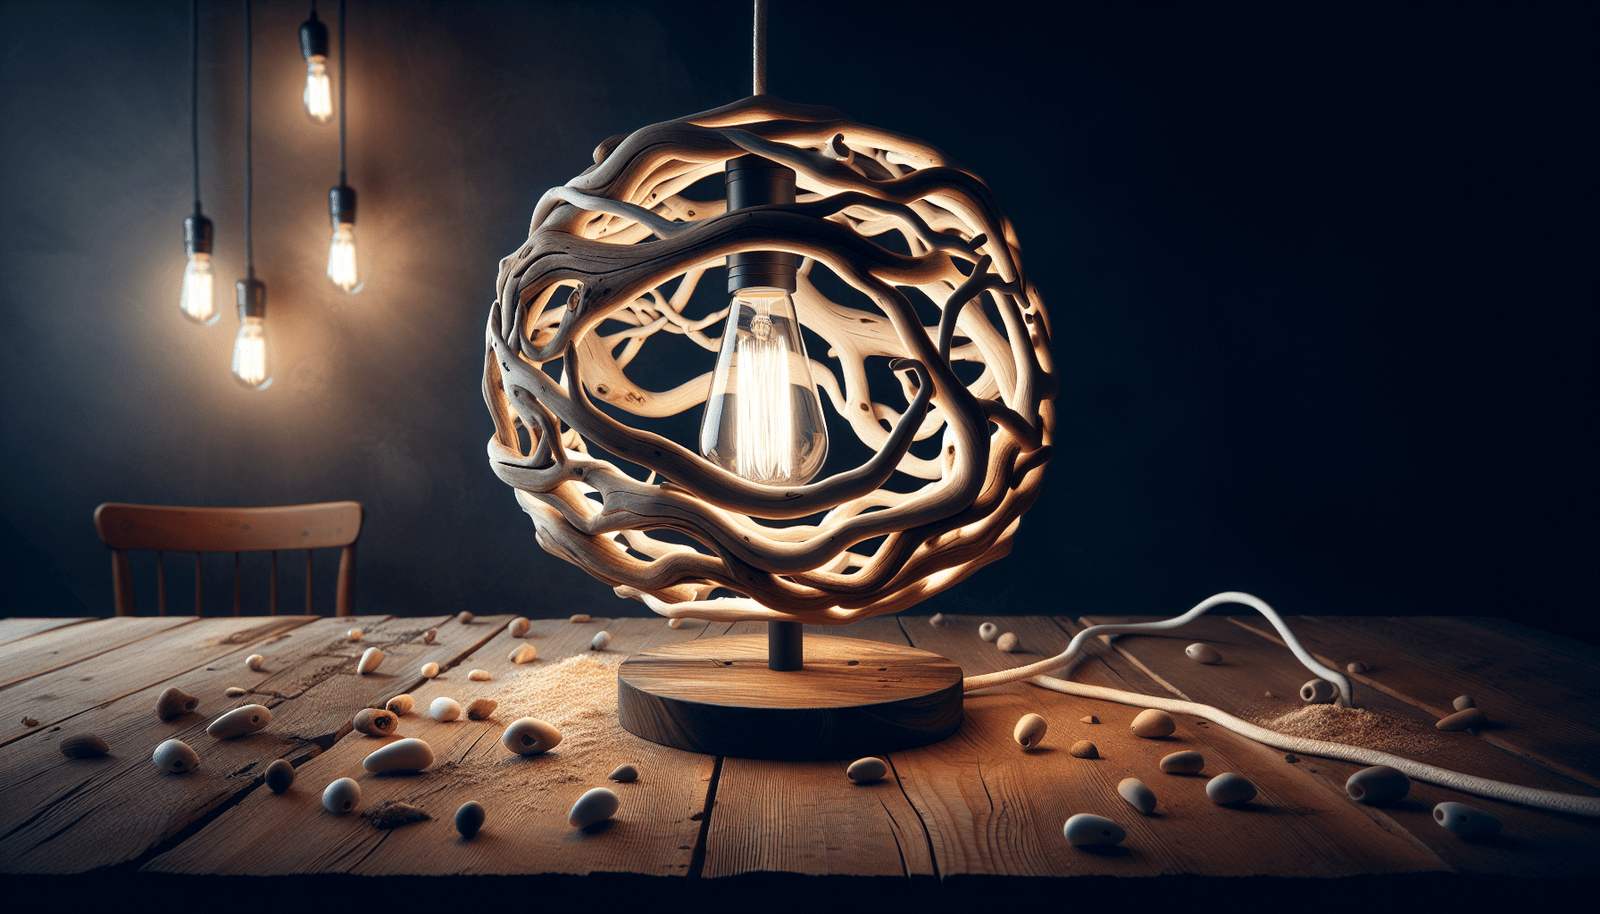
Have you ever considered how the distinct beauty of driftwood could transform your home into a warm and inviting sanctuary? Driftwood, with its unique textures and natural forms, makes an enchanting material for crafting lighting fixtures. By incorporating driftwood into your home decor, you can enjoy personalized design pieces that speak to a love of nature and artistry.

Driftwood Lighting Ideas

What is Driftwood?

Driftwood is wood that has been washed onto a shore or beach by the action of winds, tides, or waves. Its mysterious journey through water shapes each piece uniquely, giving you a one-of-a-kind material to work with. Many people appreciate driftwood in the crafting and design realms because of its distinctive weathered and rustic look.

Benefits of Using Driftwood for Lighting

Using driftwood for lighting goes beyond aesthetic appeal. It also adds a personal and natural touch to your home, reminding you and your guests of the beauty found in nature. Additionally, driftwood is often discarded as waste, so incorporating it into home decor is an eco-friendly choice. You’ll be adding warmth and originality to your living space while promoting sustainable practices.

Types of Driftwood Suitable for Lighting

Before you begin crafting or shopping for driftwood lighting, it’s essential to understand which types of driftwood work best for lighting purposes. Here are a few:

Branch Driftwood

Branch driftwood is valued for its structural solidity and variety of shapes. This type is great for creating chandeliers or hanging light fixtures. Its natural branching offers many possibilities for arranging light bulbs creatively.

Root Driftwood

The intricate and gnarled formations of root driftwood can transform simple lights into stunning focal points. Ideal for creating table lamps or decorative wall lighting, root driftwood provides a sturdy base with a complex texture.

Smooth Driftwood

Resulting from years of erosion by water, smooth driftwood has a refined appearance. It works well in interiors that aim for a minimalist or sleek design, offering a subtle elegance without overpowering other elements of your decor.

Simple Driftwood Lighting Ideas

If you’re new to the concept of creating or purchasing driftwood lighting, starting with simple ideas can be the key. This will give you a feel for how driftwood fits and functions in various spaces.

Driftwood Table Lamp

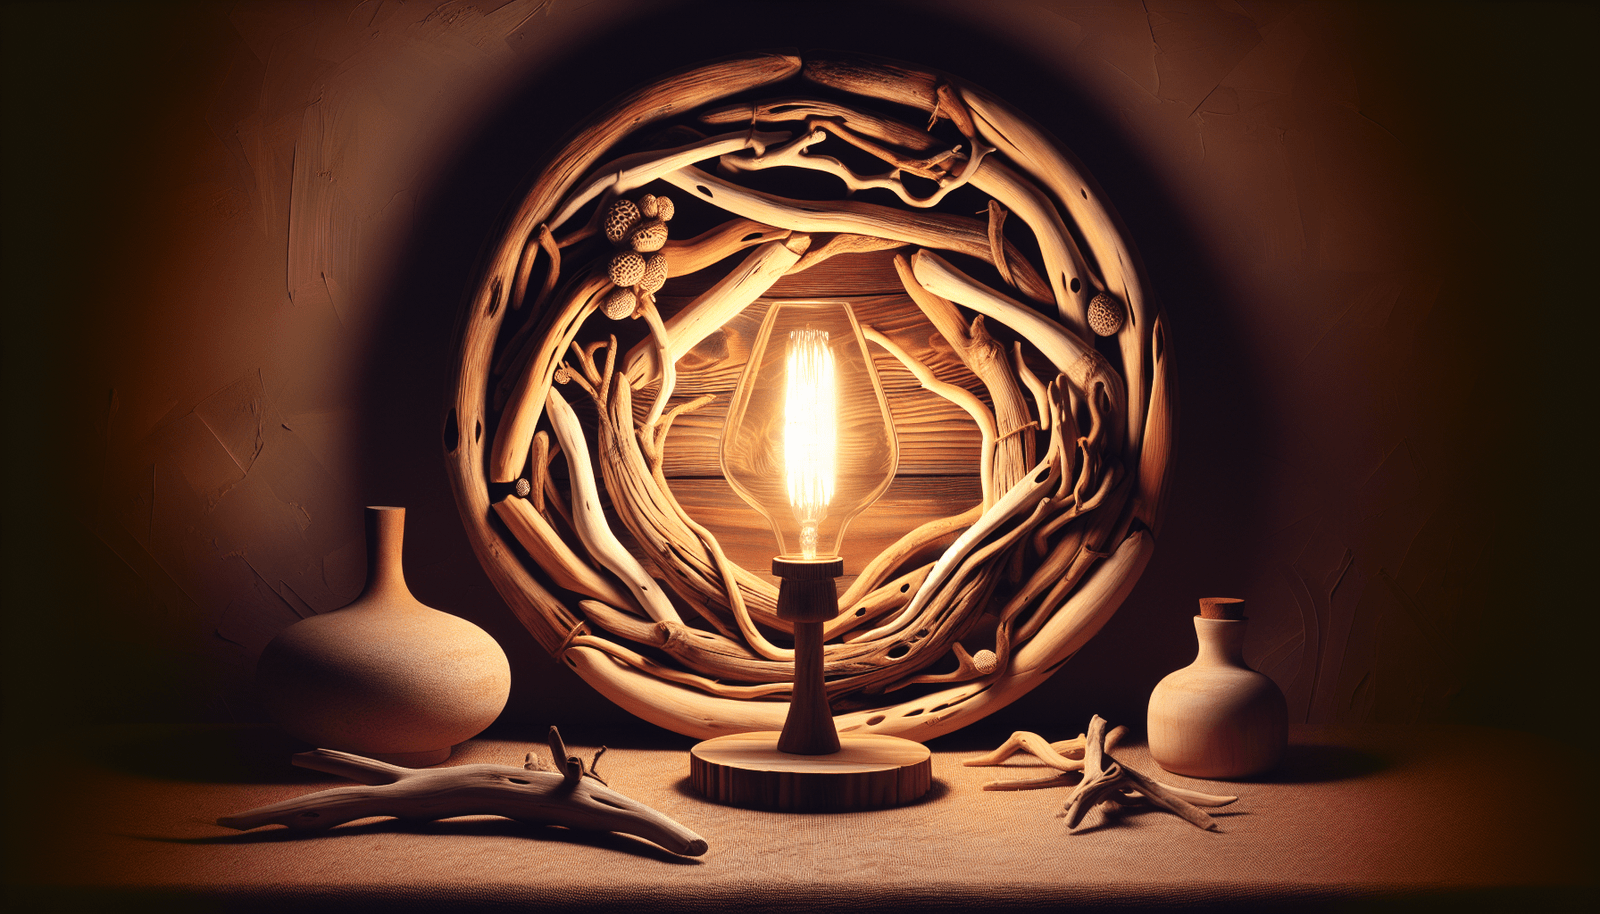
A driftwood table lamp is an excellent starting point for incorporating this material into your lighting design. By using branch or root driftwood as the lamp’s base, you achieve natural elegance with minimal effort. Pair it with a neutral lampshade that allows the wood to be the star of the show.

Driftwood Candle Holders

Consider using small pieces of driftwood to craft rustic candle holders. You can cluster together several pieces and arrange pillars or tea lights around them. This uncomplicated yet effective method provides a beachy ambiance to any room.

Intermediate Driftwood Lighting Projects

Once you’re comfortable with simpler pieces, why not challenge yourself with intermediate driftwood lighting projects?

Driftwood Chandelier

Imagine combining multiple branches of driftwood to create a stunning chandelier. By arranging the pieces in a concentric pattern, you can form a truly unique lighting fixture. A driftwood chandelier complements both dining areas and living spaces, providing a magical touch reminiscent of seashore serenity.

Driftwood Wall Sconce

For wall lighting, use slender driftwood pieces that are balanced in length and width. You can fix them against the wall with a mounted fixture to hold a bulb. Driftwood wall sconces are perfect for adding depth and character to any hallway or living room.

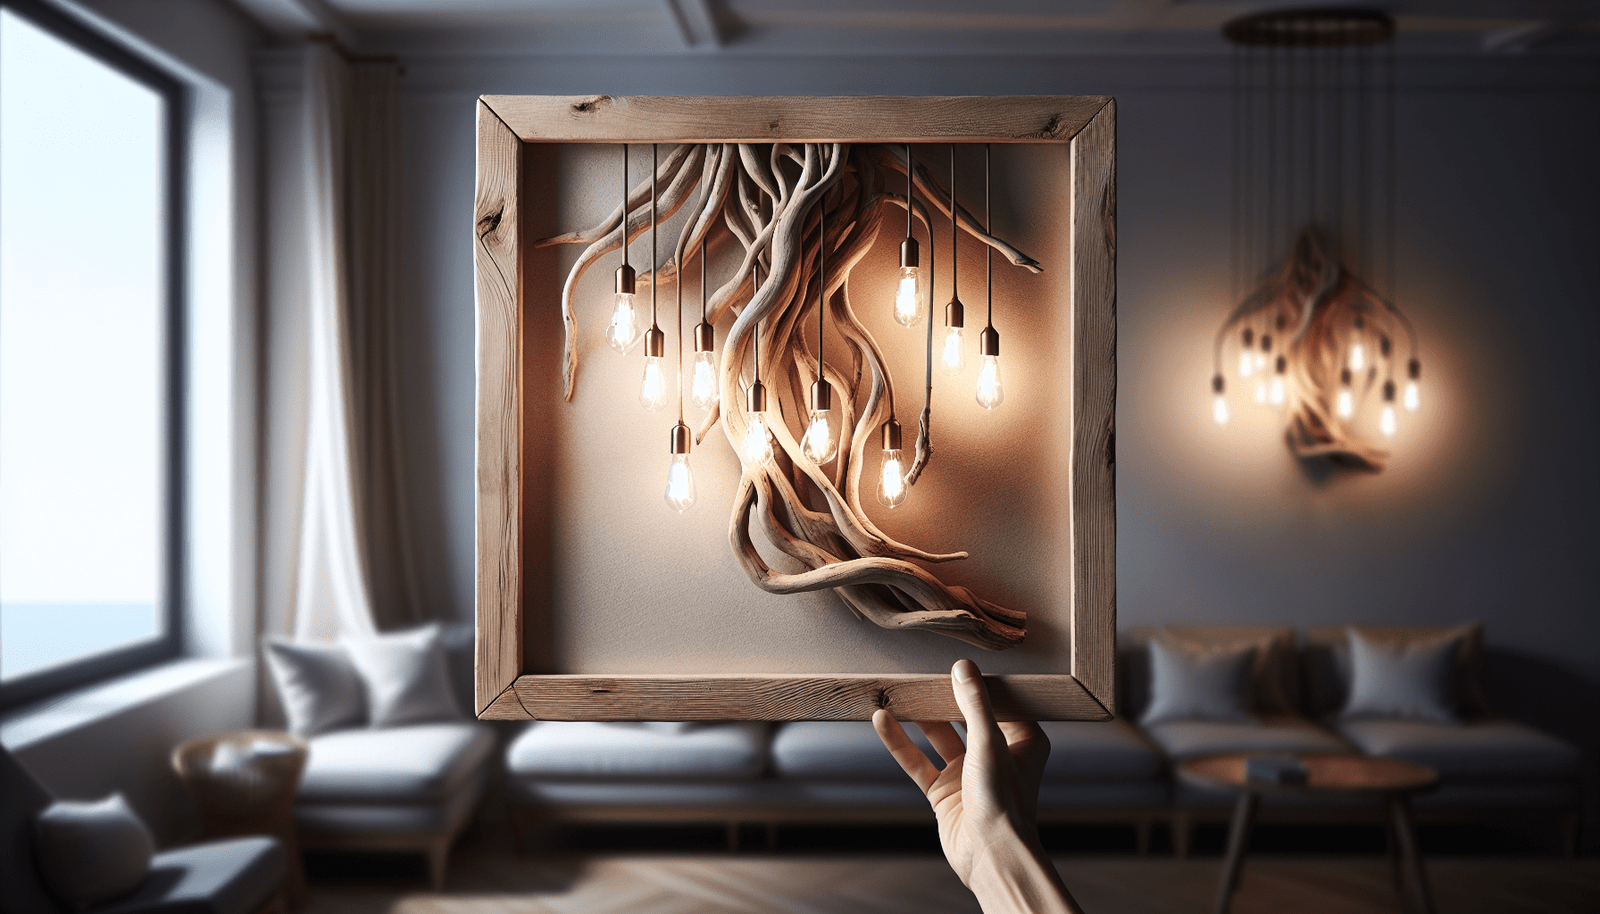
Driftwood Pendant Lights

Pendant lights made using driftwood bring an eye-catching design element overhead. Use smooth driftwood to add a chic, contemporary twist. Hang these over kitchen islands or dining tables for a coastal nod.

Advanced Driftwood Lighting Concepts

If you have honed your skills and want to create a more ambitious project, these ideas might inspire you.

Large Driftwood Floor Lamps

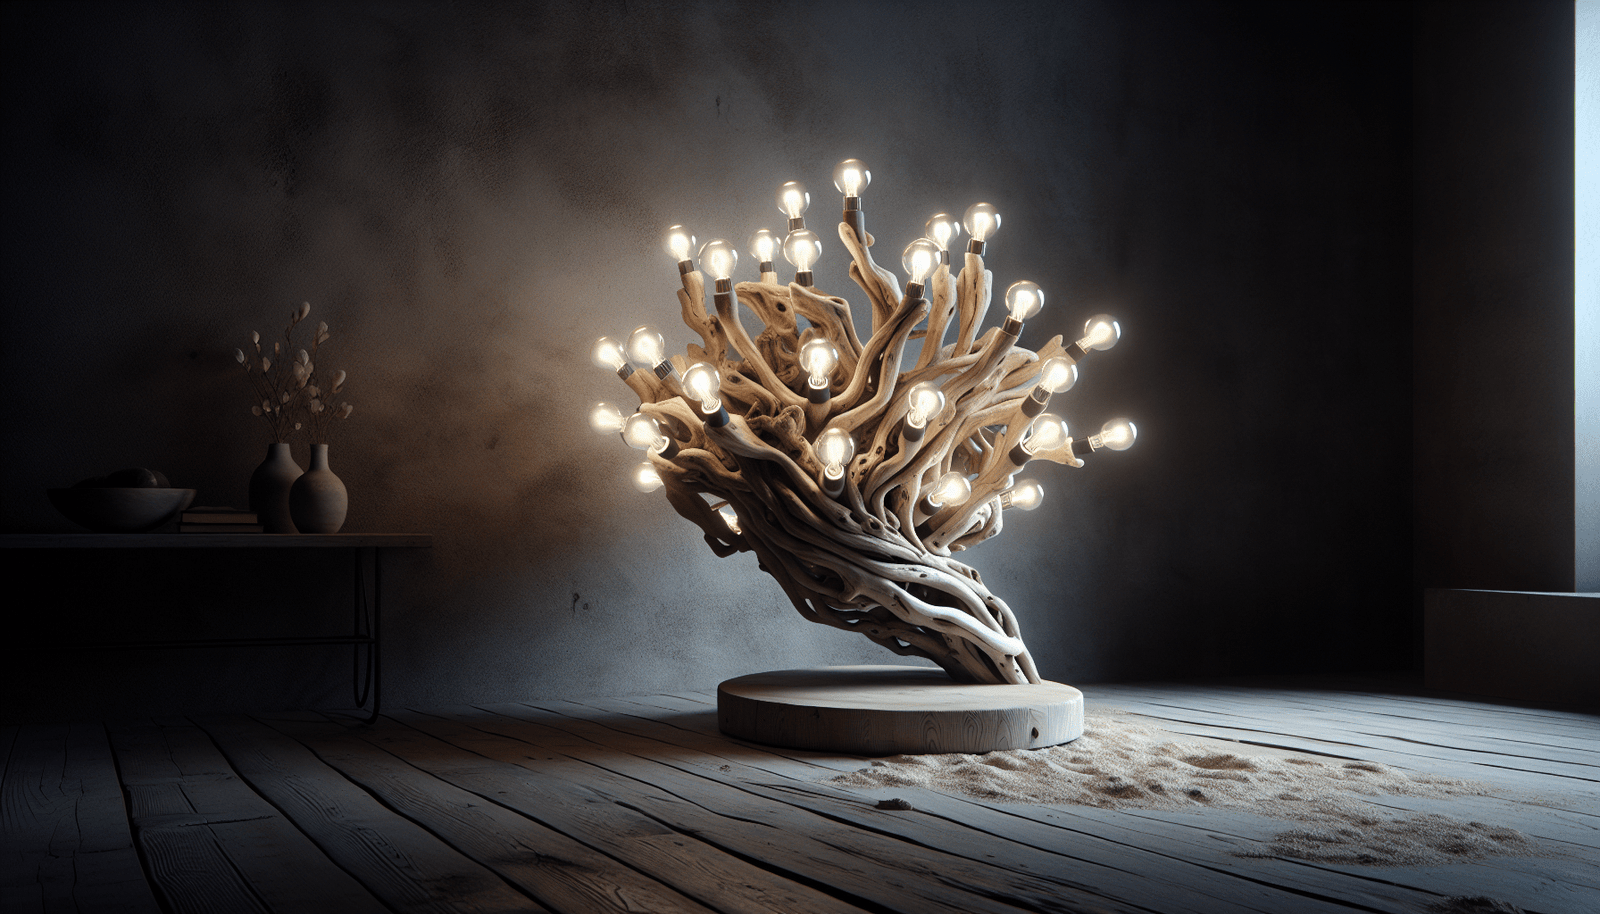
Utilize a tall and substantial piece of driftwood to make a floor lamp that stands proudly at the corner of a room. You can place a soft bulb inside a glass cover at the top, or wind lights along its length for a subtle glow.

Driftwood Sculpture Lighting

Incorporate driftwood into complex sculptures that house multiple lights. This involves arranging several driftwood pieces artistically and embedding LED strip lights. These are ideal for making a bold statement in any room you choose to display this artwork.

Driftwood Lighting Ideas

How to Source Driftwood

Successfully integrating driftwood into lighting depends on sourcing the right pieces. You don’t always have to scour beaches to find driftwood, although it is the most direct way to obtain it.

Local Beaches and Rivers

Scout your local beaches and rivers for driftwood. Ensure you are following local laws and regulations regarding the collection of natural resources. This method gives you direct access to the natural curve and intricacies of the wood.

Specialty Stores and Online Markets

If venturing into nature isn’t feasible, consider checking with specialty stores that sell driftwood. Online platforms like Etsy often have sellers offering unique pieces sourced from beaches across the globe.

Techniques for Preparing and Treating Driftwood

Bringing out the best in driftwood for your lighting project requires some preparation.

Cleaning Driftwood

Start by soaking the driftwood in a bleach and water solution to remove any bacteria or salt that may be embedded. After soaking, rinse thoroughly with clean water. Allow the wood to dry completely before proceeding to design.

Preserving Driftwood

Apply a protective finish like a water-based polyurethane to lock in the beauty of the driftwood. This helps to protect the wood from moisture, insects, and general wear and tear.

Combining Driftwood with Other Materials

Integrating driftwood with other materials can enhance or complement the final design of your lighting fixtures.

Driftwood and Metal

The combination of driftwood with metal frames or accents adds an industrial flair and modern twist to your decor. Consider a driftwood and metal chandelier where the contrasting textures make a sophisticated impression.

Driftwood and Glass

Glass elements paired with driftwood create an elegant, balanced look. You could use glass globes as a cover for bulbs or integrate glass within the driftwood structure itself, creating a fusion of transparency and natural form.

Incorporating Driftwood Lighting into Different Home Styles

Driftwood lighting is versatile and can adapt to various interior design styles.

Coastal Theme

An obvious choice, adding driftwood lighting brilliantly complements a coastal theme. Paired with white or blue accents, it accentuates the airy, laid-back atmosphere of a beach house.

Rustic and Country

Driftwood’s inherent rustic appeal lends itself well to country or farmhouse decor. The organic lines and natural finish sit harmoniously among other wooden elements typical of this style.

Modern Minimalist

Even in a minimalist home, driftwood can serve as a perfect statement piece. Its natural shape and neutral tones contribute to the simplistic aesthetics, emphasizing clean lines and function.

Eclectic Style

For those who embrace an eclectic style, driftwood lighting offers a unique opportunity. Pair it with bold colors, varied textures, and other artistic decorations to create an inviting and expressive atmosphere.

Caring for Your Driftwood Lighting

Maintaining the charm and functionality of your driftwood lighting ensures it remains a beautiful part of your home.

Dusting and Cleaning

Regular dusting will keep your driftwood lighting looking its best. Use a soft cloth to gently wipe the wood, avoiding any harsh chemicals that might damage the finish.

Checking Electrical Components

Ensure any electrical elements remain in good condition. This includes double-checking the integrity of lamp wiring or bulb placements as driftwood can sometimes shift or settle post-installation.

Building a Community of Driftwood Enthusiasts

You don’t have to take on this creative journey alone. Across the globe, many enthusiasts share a passion for driftwood and its decorative potential. Engaging with these communities can enhance your appreciation and skill in working with driftwood.

Online Forums and Social Media Groups

Join forums and groups that focus on driftwood crafting and home decor. Platforms like Facebook, Pinterest, and Reddit offer spaces where people share ideas, projects, and sources of inspiration.

Local Craft Workshops

See if local craft stores or community centers offer workshops on using driftwood in decor. It’s an excellent way to meet like-minded crafters and pick up new techniques.

Conclusion

Driftwood lighting offers a wonderful blend of natural beauty and innovative design. Whether you’re starting with a straightforward table lamp or venturing into creating grand chandeliers, driftwood can become an integral part of your home decor. Not only does it provide unique aesthetics, but it also carries with it the spirit of nature, adding a unique character to your living space. Remember, creativity knows no bounds, and sometimes the best design ideas come from experimenting and looking at things through the prism of your imagination.

Filed Under: Driftwood Ideas Tagged With: DIY, Driftwood, Interior Design, Lighting, Rustic

Driftwood Lights Hanging

May 11, 2025 by admin

Have you ever thought about the unique charm that natural elements bring to your living space? Driftwood lights hanging from your ceiling or walls could be the perfect way to introduce a touch of nature into your home.

What are Driftwood Lights?

Driftwood lights are light fixtures that incorporate pieces of driftwood into their design. Each piece of driftwood is unique, shaped by the waves and weather over time, giving each light fixture its own distinct character. This natural art form adds not only beauty but also a sense of peace and tranquility to your surroundings.

The Appeal of Driftwood Lights

The allure of driftwood lights lies in their natural and organic aesthetic. Often found by the sea, driftwood brings a piece of the outdoors inside your home. Its weathered textures and rugged look create a warm, rustic appeal that’s hard to replicate with manufactured products. Imagine the soft glow of a light filtered through the intricate shapes of a driftwood sculpture, creating a cozy and inviting ambiance in your space.

Advantages of Using Driftwood Lights

Driftwood lights offer several benefits. Beyond their aesthetic appeal, they are environmentally friendly. They make use of driftwood, a sustainable material, which means they have a low environmental impact. Additionally, driftwood is quite lightweight, making it ideal for hanging installations.

Environmental Benefits

By choosing driftwood lights, you’re also choosing to support ecological sustainability. Driftwood is naturally occurring and does not require the cutting down of trees or other environmentally taxing processes to obtain. This reduces your carbon footprint and backs conservation efforts.

Unique and Customizable

Every piece of driftwood is different, offering you the opportunity to own a truly one-of-a-kind piece of decor. Crafting a light fixture from driftwood allows for customization in size, design, and style, making it easy to match with any interior theme.

Driftwood Lights Hanging

Varieties of Driftwood Lights

There is an impressive variety of driftwood lights available, catering to a range of aesthetic preferences and lighting needs. From simple pendant lights to elaborate chandeliers, the options are almost limitless.

Driftwood Pendant Lights

These are perhaps the most common form of driftwood lights. They’re perfect for adding a touch of elegance to a dining area or entryway. Pendant lights made from driftwood tend to serve as a statement piece due to their simplicity and the emphasis on the natural shape of the wood.

Driftwood Chandeliers

For those looking to make an even bolder statement, driftwood chandeliers offer grandeur and elegance. They are intricate pieces that capture attention and become the focal point of any room. Ideal for large spaces, chandeliers can be designed in various styles, incorporating candles or electric bulbs.

Wall-Mounted Driftwood Lights

Wall-mounted options are available for those who prefer their lighting fixtures closer to eye level. These are excellent for creating a warm and intimate setting in living rooms or bedrooms. They can highlight artwork or architectural features by casting interesting shadows and adding depth to the space.

How to Incorporate Driftwood Lights in Your Interior

Integrating driftwood lights into your existing decor can be a seamless process if done thoughtfully. Consider the overall style of your home and identify areas that could benefit from a touch of natural beauty.

Matching Styles and Themes

Driftwood lights naturally complement rustic, coastal, and bohemian themes. However, their versatility means they can be adapted to modern and even industrial interiors. The key is to balance the driftwood’s organic shape with other elements in the room, ensuring it complements rather than overwhelms.

Placement Considerations

Think about where a driftwood light would be most impactful. For example, in open-concept homes, a large driftwood chandelier can define the living area or dining space. For a more understated approach, smaller pendant lights over a kitchen island can maintain the theme without overpowering the room.

Driftwood Lights Hanging

DIY Driftwood Lights

For those who enjoy hands-on projects, creating your own driftwood lights can be a rewarding endeavor. With some creativity and basic DIY skills, you can craft a piece that perfectly suits your home and style.

Collecting Materials

Start by gathering pieces of driftwood. Local beaches or lakeshores are excellent places to find these. Ensure that the pieces are clean and dry before beginning your project. You’ll also need a lighting kit, which can be purchased from most hardware stores.

Assembly Tips

When constructing your light, think about balance and stability. Arrange the pieces of driftwood in a way that looks aesthetically pleasing and distributes the weight evenly. Use strong adhesives or screws to join the pieces, and ensure the lighting kit is safely secured.

Maintenance and Care for Driftwood Lights

Like all art pieces, driftwood lights require some maintenance to ensure they remain as beautiful as the day you installed them.

Cleaning Driftwood Lights

Driftwood can be dusted with a soft, dry cloth. For more thorough cleaning, a damp cloth can be used, but ensure that the wood does not become soaked, as excessive moisture can damage it over time. Avoid aggressive cleaning agents that can strip the wood of its natural finish.

Protecting Against Damage

Keep driftwood lights out of direct sunlight as prolonged exposure can fade the wood. Similarly, maintain a balanced humidity level in your home to prevent the driftwood from cracking or warping. If positioned outside, consider applying a sealant to protect the wood from the elements.

Why Choose Driftwood Lights Over Other Options?

When compared to more conventional lighting options, driftwood lights offer unique advantages in terms of aesthetics and sustainability. While metal and glass fixtures can be both beautiful and durable, they lack the organic charm and individuality that driftwood pieces bring.

Cost-Effectiveness

Though initially, driftwood lights might seem more expensive due to their unique nature, they are often cost-effective in the long run because they are hand-crafted, making them durable and timeless. Their adaptability ensures they remain in style through various decor trends.

Adding Emotional Value

Driftwood lights aren’t just functional pieces; they carry a story within them. Each piece of driftwood has its own history—crafted by nature, touched by the sea, and perfected by time. Adding such a profound element to your home can imbue your space with a sense of depth and character.

Where to Buy Driftwood Lights

If crafting is not your forte, numerous artisans and brands specialize in creating stunning driftwood lights. While small local boutiques often offer bespoke designs, there are also larger online retailers where you can find diverse selections.

Supporting Local Artisans

Buying from local artisans not only supports small businesses but also guarantees a piece that has been crafted with care and expertise. Artisans often offer custom options, allowing you to be involved in the design process.

Online Shopping Options

Large platforms such as Etsy, Wayfair, or artisanal online shops provide a broad range of driftwood lighting options. Here, you can compare prices, read reviews, and choose the best fit for your home without leaving the comfort of your house.

Final Thoughts

Driftwood lights are more than just fixtures. They are symbols of nature’s resilience and beauty, bringing a touch of tranquility and organic charm to any space. Incorporating driftwood lights into your home not only enhances its aesthetic appeal but also makes a sustainable choice for environmentally conscious living. So, whether you’re crafting your own or selecting from a skilled artisan’s collection, driftwood lights offer limitless possibilities for your home’s interior style.

Filed Under: Driftwood Ideas Tagged With: DIY, Driftwood, Eco-friendly, Lighting

Driftwood Lights Diy

May 11, 2025 by admin

Have you ever considered transforming a simple piece of driftwood into something truly spectacular for your home? Perhaps you’re looking for a unique lighting solution that reflects both your creativity and love for natural elements. If so, creating driftwood lights might be the perfect DIY project for you.

Driftwood Lights Diy

What Are Driftwood Lights?

Before you embark on your DIY journey, it’s essential to understand what driftwood lights are. Driftwood lights are creative lighting fixtures made by combining pieces of driftwood with various lighting elements. They leverage the natural beauty and uniqueness of driftwood, which is shaped and smoothed by the ocean, lakes, or rivers over time. These lights can range from simple table lamps to elaborate chandeliers, each one unique depending on the pieces of driftwood you use.

Why Choose Driftwood for Your DIY Lights?

Driftwood has a multitude of benefits that make it an excellent choice for DIY lighting projects. Not only does it offer aesthetic appeal with its weathered look and natural textures, but it is also environmentally friendly as it reuses natural waste material. Using driftwood in your home helps bring a touch of nature indoors, creating a cozy and warm atmosphere. Plus, each piece of driftwood is unique, lending a one-of-a-kind charm to your light fixtures.

Benefits of DIY Driftwood Lights

Creating your own driftwood lights isn’t just about the final product; it’s also about enjoying the process. It allows you to express yourself artistically and gives you full control over the design and functionality of the lighting. Here’s why you might find DIY driftwood lights particularly rewarding:

  • Cost-Effectiveness: Crafting your own lights is often cheaper than buying ready-made fixtures, especially those designed uniquely.
  • Personalized Designs: Your creations will reflect your personal style and can perfectly fit your space’s dimensions and decor.
  • Sustainability: By using natural materials, you promote ecological responsibility.

Gathering Driftwood: The Start of Your Adventure

Once you’ve decided to embark on this artistic journey, the next step is gathering your materials. Driftwood can be found along riverbanks, lakeshores, and beaches. Look for wood that is light, dry, and free from too much rotting. Carry a bag or a cart if you plan on collecting a lot of wood.

Tips for Finding the Perfect Driftwood

While any driftwood can potentially be used for creating lights, certain types work better than others. Here are some tips to keep in mind while gathering driftwood:

  • Look for Unique Shapes: Interesting and unusual shapes can make for more dynamic and eye-catching designs.
  • Check for Stability: Ensure the wood is lightweight yet sturdy enough to hold together when you add lighting elements.
  • Avoid Waterlogged Pieces: Make sure the wood is thoroughly dry to prevent rotting and to make it easier to work with.

Preparing the Driftwood

Before you begin assembling your light, it’s essential to clean and prepare the driftwood. This process involves a few simple steps to ensure your new lighting fixture is safe and long-lasting.

Cleaning Your Driftwood

Cleaning driftwood is critical to remove any dirt, salt, or pests. You wouldn’t want any unwanted critters nesting within your masterpiece! Here’s a simple cleaning process you can follow:

  1. Brush Away Debris: Use a stiff brush or wire brush to remove any loose dirt or debris.
  2. Soak in Water: Fill a tub with fresh water and soak the driftwood for 24 to 48 hours. Change the water several times to flush out any salt.
  3. Bleach Solution: To sanitize, soak the driftwood in a solution of 1 part bleach to 9 parts water for a few hours.
  4. Rinse and Dry: Rinse thoroughly with clean water and let it dry completely in the sun, which also helps remove any remaining bacteria.

Preserving and Finishing

After cleaning, you might want to add a finish to preserve the driftwood and enhance its natural color. A clear wood sealer or a matte finish can protect the wood from future damage while maintaining its rustic charm. Apply the finish with a brush or spray and allow it to dry completely before proceeding.

Driftwood Lights Diy

Designing Your Driftwood Light

Now comes the exciting part – designing your driftwood light! This stage allows your creativity to shine. Consider what kind of light fixture you want to create. A chandelier? A table lamp? A floor lamp? The possibilities are endless.

Considering Design Aspects

When designing your driftwood light, think about the following:

  • Size and Scale: Ensure the light’s size complements the space. A large chandelier suits a grand room, while a petite table lamp might be more suitable for a cozy nook.
  • Functionality: Decide on the type of lighting effect you want. Soft ambient lighting creates a relaxing atmosphere, while directional lighting highlights specific areas.
  • Balance and Stability: Ensure the base is stable and balanced, particularly for free-standing lamps.

Assembling Your Driftwood Light

With your design in mind, it’s time to start assembling your light. For this, you’ll need a few basic tools and materials which are common in most DIY projects.

Tools and Materials Needed

Here’s a list of what you might need:

ToolsMaterials
DrillDriftwood Pieces
SawLight Bulb Socket and Cord
SandpaperLight Bulbs
ScrewdriverLamp Base (if needed)
Hot Glue GunElectrical Wire
Safety GogglesSwitch (optional)

Step-by-Step Assembly Guide

  1. Plan Your Design: Arrange the driftwood pieces to get a clear visual of your design.
  2. Drill Holes for Wiring: Depending on your design, drill holes through which the electrical wires will pass. Be careful to drill straight and avoid splitting the wood.
  3. Assemble the Light Socket: Attach the light bulb socket to your driftwood. You may use hot glue or screws, depending on the design and weight.
  4. Connect Electrical Wires: Safely connect the wires from the socket to the electrical cord. Ensure all connections are tight and secure to prevent electrical hazards.
  5. Install the Light Bulb: Screw a light bulb into the socket. Consider using energy-efficient LED bulbs for sustainability and low heat emission.
  6. Attach the Base: If your light requires a base (like a table lamp), attach it securely. Ensure stability to prevent tipping.
  7. Test Your Light: Carefully plug in your light and switch it on to ensure it’s working correctly. Make any necessary adjustments if it doesn’t work initially.

Adding Personal Touches

Once your basic driftwood light is assembled and functional, consider adding personal touches that reflect your style. This could include painting parts of the wood, adding seashells, or incorporating other natural elements like stones or moss.

Creative Ideas for Decoration

  • Twine or Rope Wraps: Wrapping parts of the driftwood with twine or rope can add texture and interest.
  • Paint Accents: Light washes of pastel or metallic paint can highlight the wood’s textures and add color.
  • Incorporate Other Natural Elements: Integrate seashells, stones, or small plant life for a more nature-inspired feel.

Safety and Maintenance Tips

While creating and enjoying your new driftwood light, it’s essential to keep safety and maintenance in mind.

Safety Precautions

  • Electrical Safety: Always make sure electrical connections are secure and professionally done if you’re uncertain.
  • Stable Structures: Ensure your light fixture is balanced and securely fixed to avoid accidents.
  • Heat Consideration: Use bulbs that don’t produce excessive heat to prevent any fire hazards.

Maintaining Your Driftwood Lights

  • Regular Dusting: Keep your driftwood piece looking fresh by dusting it regularly with a soft cloth.
  • Reapply Finish: Periodically check and refresh the protective finish to keep the wood in good condition.
  • Inspect Wiring: Every few months, check the wiring for wear and tear to ensure continual safety.

Conclusion: Embrace Your Creation

Creating driftwood lights is more than just a craft; it’s a way to breathe life into pieces of nature, turning them into functional art that enriches your home. It’s an accessible project that allows you to explore your creative side while producing something special and unique. Enjoy the process, from the collection of driftwood to the final switch-on. It’s a testament to your creativity and ingenuity, a piece that naturally becomes a conversation starter. Whether it’s a calming light for your bedroom or a statement piece for your living room, your driftwood light is sure to bring a piece of the tranquil outdoors inside.

Filed Under: Driftwood Ideas Tagged With: crafting, DIY Lights, Driftwood, Handmade, home decor

Driftwood Living Room

May 10, 2025 by admin

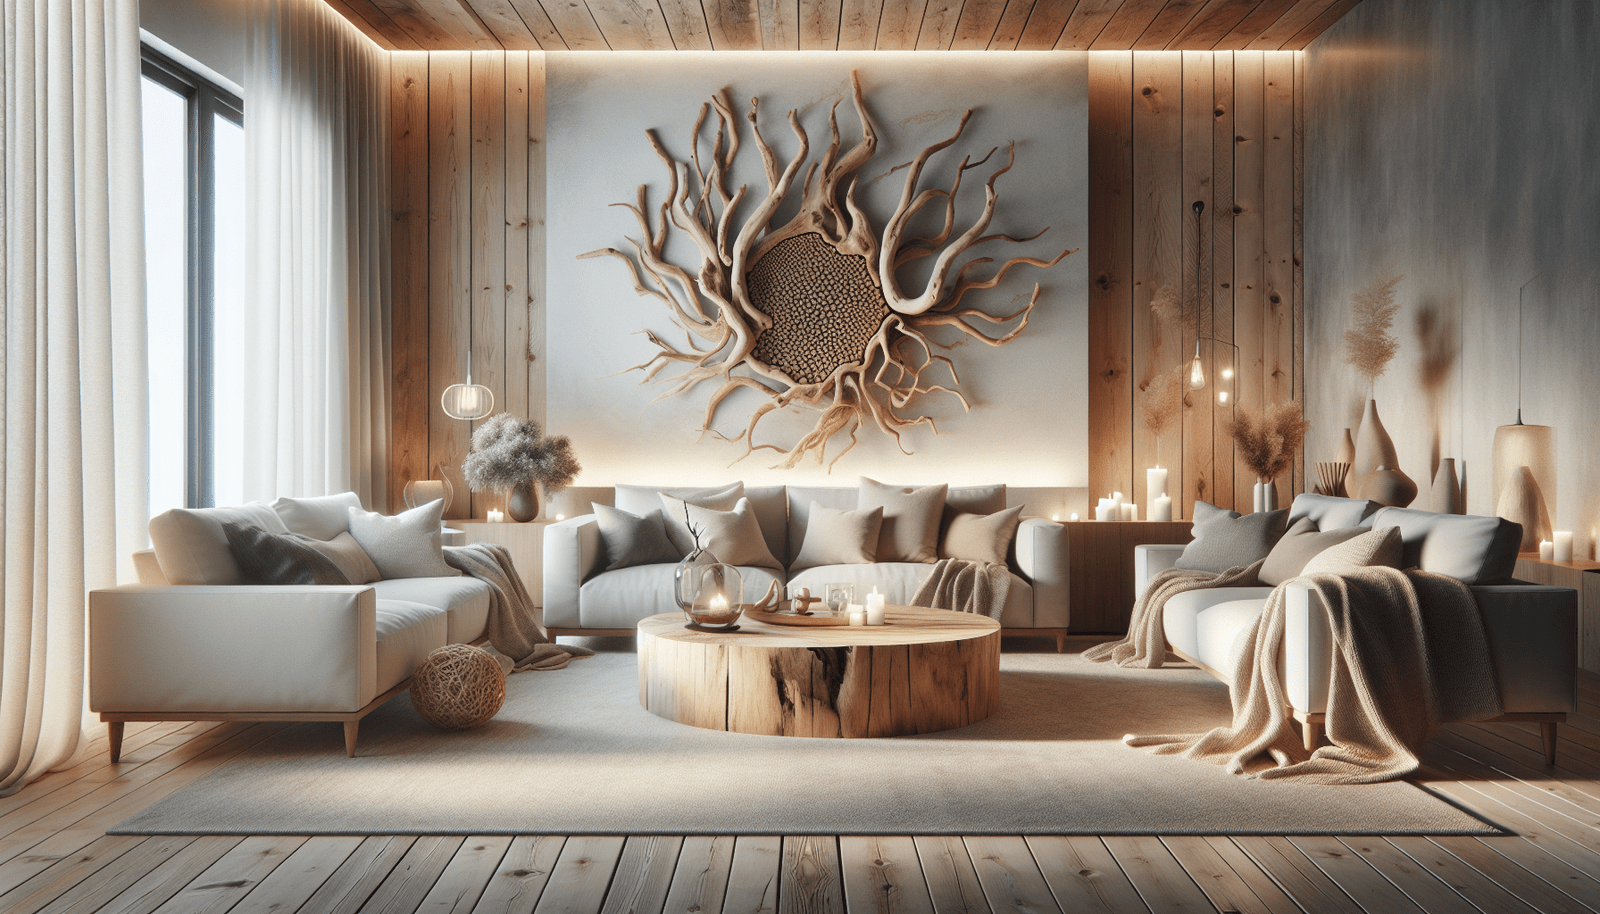
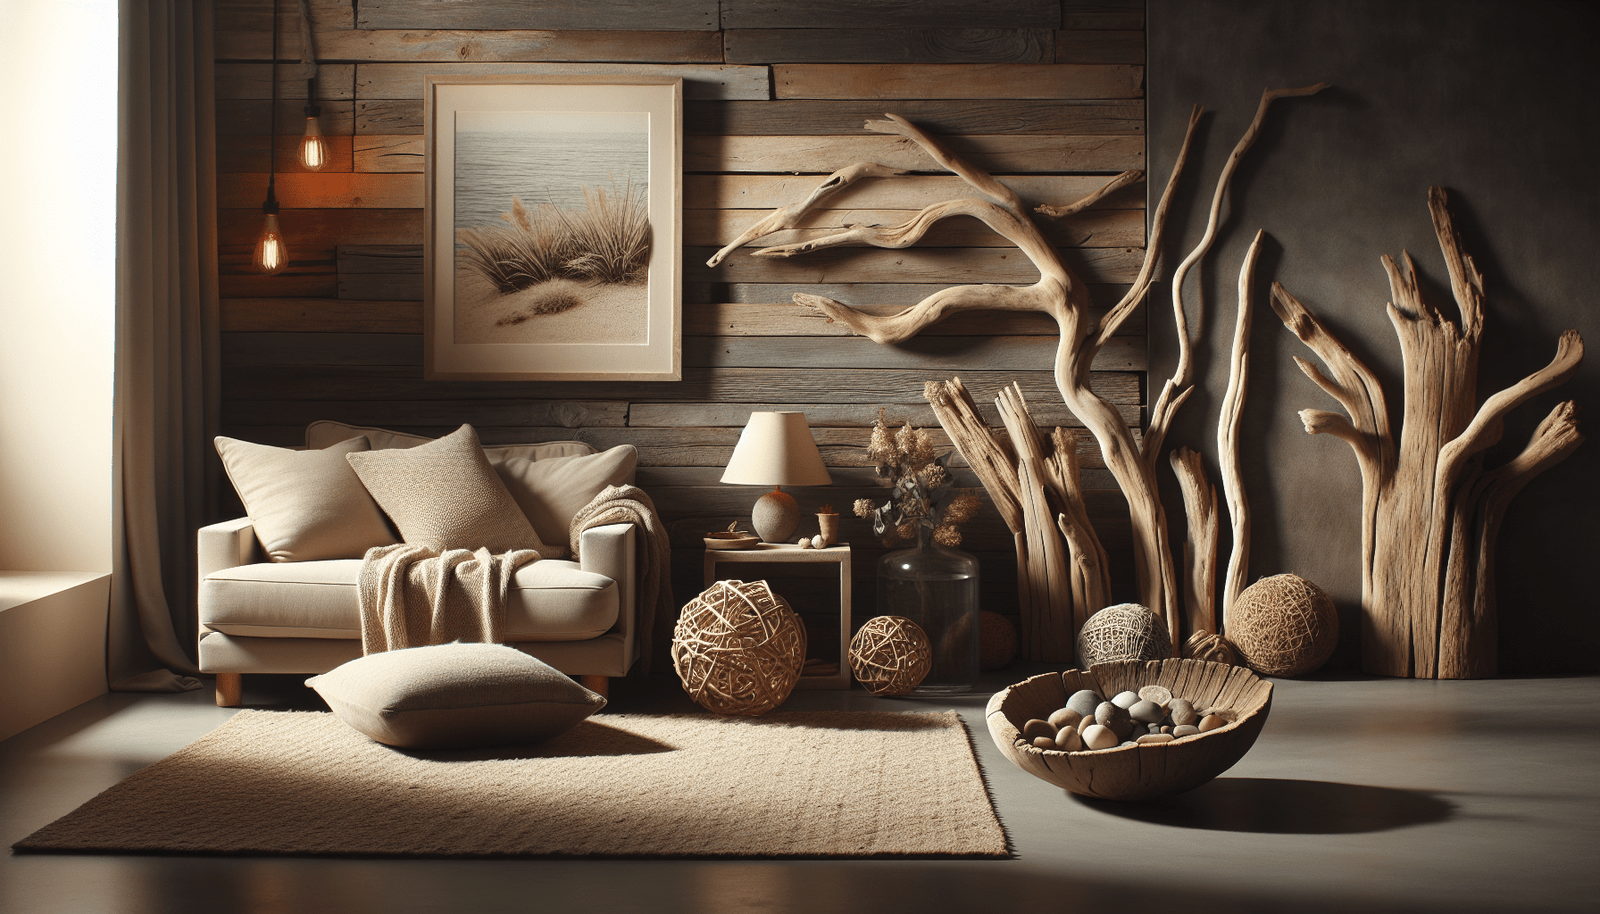
Have you ever thought about transforming a living room into a serene coastal retreat? If you’re a fan of the natural aesthetic, incorporating driftwood into your living room design might just be the perfect approach for you. This organic material offers more than just the beauty of the seaside—it brings an ambiance of tranquility and serenity that can help you create a charming and welcoming living space.

What is Driftwood?

Driftwood refers to wood that has washed ashore or has been carried into a river, lake, or ocean by natural forces like currents, waves, or wind. Over time, this wood becomes weathered and smooth, taking on a unique and rustic appearance. Due to its unique characteristics, driftwood has become a popular choice for decor enthusiasts looking to bring a little piece of nature into their homes.

Why Driftwood?

Driftwood has an inherent beauty that cannot be manufactured. Its natural texture, patterns, and shades are unique and add a touch of authenticity to any room. The soft, earthy tones of driftwood complement a variety of color schemes, making it incredibly versatile. Moreover, incorporating driftwood into your home brings an eco-friendly touch, as you’re using recycled materials that the sea has bestowed upon you.

Designing with Driftwood

Creating a driftwood-inspired living room doesn’t mean you’ll be turning your space into a beach house. Instead, it’s about introducing elements that suggest relaxation, nature, and timeless beauty. Here’s how you can infuse this theme into your space.

Choosing the Right Pieces

When it comes to choosing driftwood pieces, balance is key. You can incorporate driftwood furniture, accessories, or even use it to frame wall art. Decide on the pieces that best suit your space without overwhelming it. The idea is to invoke a natural look without cluttering.

Driftwood Furniture

Driftwood furniture can serve as striking statement pieces. Whether it’s a driftwood coffee table, side table, or a chair made of intertwined wood pieces, these items can become the focal point of your room. These pieces not only create visual interest but also bring a sense of sturdiness and style.

Driftwood Accessories

Accessories such as driftwood picture frames, mirrors, or lamps can subtly integrate this natural element into your living room. Driftwood wall art or sculptures also add a unique touch and introduce interesting textures and forms.

Driftwood PieceUses
FurnitureCoffee tables, chairs, bookshelves
AccessoriesPicture frames, mirrors, lamps
ArtSculptures, wall art

Complementary Colors and Textures

A cohesive design requires the right color and texture palette that complements the driftwood. Consider tones and textures that are coastal and calming.

Natural Tones

Stick with neutral or pastel colors like whites, creams, taupes, soft blues, and greens. These colors accentuate the driftwood without overpowering the space. Keep in mind that the goal is to create a serene environment, so avoid overly bright or harsh colors.

Textures that Work

Introduce textures like jute, linen, and cotton to balance the roughness of the driftwood. Soft, cozy textiles add warmth and comfort, creating a tactile contrast that enhances the overall vibe of the room.

Driftwood Living Room

Incorporating Driftwood into Various Living Room Elements

Approaching your driftwood living room design can be exciting. Here are some specific elements you can tweak to achieve this natural look.

Driftwood in Flooring

If you’re considering a renovation, driftwood-inspired flooring could be ideal. While genuine driftwood flooring might not be practical, opt for a finish that mimics its weathered look. Distressed wood tiles or vinyl plank flooring are both great, low-maintenance options.

Adding Driftwood in Furniture

Incorporating driftwood into furniture requires thoughtful selection. Perhaps a single bold piece, such as a mantle or coffee table, made from driftwood can anchor the room, creating a natural and artistic statement.

Using Driftwood as Accents

For those who prefer a less intrusive approach, use driftwood as accents. A driftwood lamp can be a conversation starter, while a few strategically placed driftwood accessories like candle holders or vases can enhance visual interest without dominating the room.

The Ambiance of a Driftwood Living Room

Creating the right ambiance is crucial when you’re working with driftwood in your living room design, as it helps elevate the tranquility of the seaside to your indoor space.

Lighting

Lighting plays a significant role. Opt for soft, ambient lighting that casts a warm glow over your driftwood elements. Lamps that highlight your driftwood furniture or accessories can make for subtle yet striking displays.

Plants and Driftwood

Introduce plants into your space to mimic the lushness of a coastal environment. Indoor plants like ferns, snake plants, or succulents add fresh greenery, which contrasts beautifully with the rustic tones of driftwood. Use driftwood planters or holders for an added cohesive look.

Sound and Scent

For a multisensory experience, consider the subtle addition of ambient sounds and scents. A sound machine that plays ocean waves can enhance the coastal feel, while candles with sea-inspired scents can transport you to a beachside locale.

Driftwood Living Room

DIY Driftwood Projects for Your Living Room

If you’re feeling crafty, there are plenty of DIY driftwood projects to enhance your living room’s natural charm. Here are a few ideas to get you started:

Making a Driftwood Coffee Table

Constructing your own driftwood coffee table can be an enriching weekend project. Start by collecting flat pieces of driftwood, then assemble them to form a tabletop, securing them with heavy-duty adhesives or using a glass top for added stability.

Crafting Driftwood Wall Art

Creating wall art from driftwood can be as simple or intricate as you desire. Arrange pieces in a pattern, match them with canvas or metal backing, and hang your creation as a focal point.

Designing Driftwood Candle Holders

For smaller crafts, try making candle holders with driftwood. Carve out spaces for tea lights within larger pieces or glue smaller pieces together to form the base of a candle holder.

Challenges of Working with Driftwood

While driftwood brings unique aesthetics and a touch of nature into your living room, there are some challenges to be aware of.

Finding the Perfect Piece

Finding the right piece of driftwood requires patience. Each piece is unique, and it may take time to discover one that fits your design vision.

Preparing Driftwood

Before using driftwood, it needs to be cleaned and treated to remove dirt, pests, and salt. Soak the wood in a mixture of water and bleach, rinse it, and then let it dry thoroughly.

Balancing the Design

Too much driftwood can overwhelm a space, making it feel cluttered. Conversely, too little might not achieve the cohesive look you’re aiming for. Balance is crucial, and sometimes less is more.

Environmental Considerations

While driftwood is a wonderful natural decor element, it’s important to be mindful of its environmental impact.

Sustainable Sourcing

Make sure you’re collecting driftwood responsibly. In some areas, removing driftwood from shorelines is prohibited due to its role in the ecosystem. Always check local regulations before gathering any natural materials.

Eco-Friendly Alternatives

If sourcing driftwood isn’t feasible, consider eco-friendly alternatives like faux driftwood or reclaimed wood that has been treated to look like driftwood. These options can provide the same aesthetic appeal with less environmental impact.

Common Myths About Driftwood Decor

There are several misconceptions about using driftwood in decor that often hold people back from exploring this design avenue.

Myth 1: Driftwood is Only for Beach Houses

One of the biggest myths is that driftwood can only be used in beach-themed homes. In reality, it can complement a range of styles including rustic, farmhouse, and modern, provided it’s integrated thoughtfully.

Myth 2: Driftwood is Difficult to Maintain

While driftwood may seem fragile, with the right preparation and care, it’s quite durable. Once cleaned and sealed, driftwood requires minimal maintenance, only needing occasional dusting.

Conclusion

Creating a driftwood-inspired living room is about capturing the serene essence of the coast and bringing it into your home. By selecting pieces that inspire calmness and pairing them with complementary colors and textures, you can transform your living space into a refreshing retreat. With a bit of creativity and a careful selection of driftwood elements, your living room will exude a warm and welcoming atmosphere that’s perfect for relaxation.

Filed Under: Driftwood Ideas Tagged With: Coastal Living, Driftwood Decor, home decoration, Living Room Ideas, Rustic style

Driftwood Light Fixture Diy

May 10, 2025 by admin

Have you ever considered bringing a touch of nature into your home by creating something truly unique? Crafting your very own driftwood light fixture can add a rustic and charming feel to your living space. It’s an appealing project that combines creativity, sustainability, and functionality, offering an ambiance that is both cozy and aesthetically pleasing. In this guide, you’ll discover how to transform pieces of weathered driftwood into a beautiful light fixture that’s sure to be a conversation starter.

Driftwood Light Fixture Diy

Why Choose Driftwood for Your Light Fixture?

Driftwood is more than just debris washed ashore. Its unique and artistic appeal has made it a favorite for home decor enthusiasts and artisans alike. The natural forms and textures provide an organic, unfinished look that complements various interior styles, from coastal to contemporary. Furthermore, using driftwood is environmentally friendly. By repurposing pieces you find on the beach, you’re supporting a sustainable practice and minimizing waste.

Benefits of Using Driftwood

  • Sustainability: Driftwood is a natural material, often readily available and in abundant supply along coastlines, which means it’s an eco-friendly choice.
  • Unique Designs: Each piece of driftwood is unique, offering endless possibilities for design and creativity.
  • Natural Aesthetic: Driftwood brings a touch of the outdoors inside, creating warm and earthy vibes.
  • Versatility: It fits seamlessly with various decor styles, enhancing rustic, coastal, and even modern interiors.

Gathering and Preparing Driftwood

The first step in creating your driftwood light fixture is gathering the right pieces. It’s important to find driftwood that not only meets your aesthetic requirements but also is suitable for being used structurally.

Where and How to Collect Driftwood

Before you begin, check local regulations regarding collecting driftwood as some areas may have restrictions. Once you’ve confirmed it’s permissible, head to your local beach, riverbank, or lake shore.

  • Timing: Early mornings or late afternoons are ideal times to collect as tides are often lower, revealing more driftwood.
  • Choosing Pieces: Look for pieces that are sturdy, without too many cracks or damage that might compromise their strength. The character in imperfections can be appealing, but ensure they are structurally sound.
  • Transport: Consider bringing a large tote bag or backpack to help you collect and carry your findings.

Cleaning and Prepping Driftwood

Once you have your pieces, you should clean them thoroughly to remove any dirt, sand, or potential pests.

  1. Soak: Submerge the driftwood in a large container filled with a mixture of water and bleach (approximately 1 cup of bleach per gallon of water). Let it soak for 24 hours.
  2. Scrub: Using a stiff brush, scrub each piece to remove debris and any remaining dirt.
  3. Rinse: Rinse the wood thoroughly with fresh water.
  4. Drying: Allow the wood to dry completely in the sun. It can take several days but ensures all moisture and bleach are gone, preventing mold and wood deterioration.

Designing Your Light Fixture

Designing your light fixture is where creativity shines. You’ll want to consider the layout, size, and the type of lighting you wish to implement.

Basic Design Considerations

  • Purpose and Placement: Decide where the fixture will go. Will it be a centerpiece over a dining table, a focal point in the living room, or an accent in a bedroom?
  • Size and Scale: The size of your fixture should be proportionate to the space it’s intended for. Small spaces call for smaller fixtures, while larger areas can accommodate more grandiose setups.
  • Light Source: Determine whether you want to use LED lights, Edison bulbs, or another type of lighting. LEDs are energy-efficient and come in a variety of styles and colors.

Sketching Your Ideas

It’s helpful to sketch your ideas before beginning the construction. This doesn’t have to be a professional drawing; a simple outline detailing your envisioned design will suffice. Include dimensions and consider how the electrical components will fit into the design.

Assembling the Driftwood Fixture

With your design in mind and materials prepared, it’s time to assemble your fixture. This part can be a mix of careful planning and improvisation as you see what works best with the materials at hand.

Required Tools and Materials

Here’s a list of tools and materials you might need for most driftwood light fixture projects:

Tool/MaterialPurpose
DrillFor making holes for wiring and securing driftwood
Screws and bracketsTo securely attach driftwood pieces together
Electric WireTo connect the light fixture to the electrical source
Light Bulbs and SocketsFor lighting
SandpaperTo smooth any rough edges on the driftwood
Wire NutsFor safely securing electrical connections
Mounting HardwareFor attaching the fixture to the ceiling or wall

Constructing the Fixture

Follow these general steps to assemble your driftwood light fixture:

  1. Drill Holes: Carefully drill holes where you plan to run the wiring through the driftwood. Ensure they are just large enough for the wires.
  2. Assemble the Driftwood: Arrange and secure the driftwood pieces together using screws and brackets to form the base or structure of your fixture.
  3. Wire the Fixture: Thread the electrical wire through the drilled holes and connect it to the sockets.
  4. Install the Light Bulbs: Once your wiring is complete, screw in the light bulbs. Consider testing the electrical connections with a non-contact voltage tester before fully assembling.
  5. Final Assembly: Once tested, attach all parts securely. Double-check all connections, ensuring they are tight and safe.

Driftwood Light Fixture Diy

Installing Your Driftwood Light Fixture

Now that your driftwood light fixture is assembled, the next step is to safely install it in your desired location.

Safety First

When handling electrical installations, safety is paramount. If you’re not comfortable working with electrical wiring, it’s always best to hire a professional electrician.

  • Turn Off Power: Ensure that the power to the light fixture’s location is turned off at the circuit breaker.
  • Secure Fixtures: Use appropriate mounting hardware to ensure that your fixture is securely attached to the ceiling or wall.

Installation Steps

  1. Locate Ceiling Joists: Use a stud finder to locate and mark the ceiling joists where you will attach your fixture.
  2. Attach Mounting Bracket: Screw the mounting bracket into the ceiling joists.
  3. Connect Wiring: Connect the fixture’s wiring to the ceiling wiring using wire nuts, matching the colors of the wires.
  4. Secure Fixture: Securely attach your driftwood light fixture to the mounting bracket.
  5. Test the Fixture: Turn the power back on and test to ensure the light fixture works properly.

Maintaining Your Driftwood Light Fixture

A well-maintained fixture will last longer and bring joy to your home for years. Routine cleaning and checks ensure both the aesthetic appeal and functional safety of the fixture.

Cleaning and Care Tips

  • Regular Dusting: Regularly dust your fixture with a soft cloth or duster to prevent dust buildup.
  • Deep Cleaning: Occasionally, a deeper clean might be necessary which includes wiping down the driftwood with a damp cloth. Ensure the fixture is turned off and the bulbs are cool before cleaning.
  • Wiring Check: Occasionally check that wiring remains securely fastened and inspect for any signs of wear.

Troubleshooting Common Issues

Sometimes, fixtures may not function as intended. Here’s a quick troubleshooting guide for some common issues:

IssuePossible CauseSolution
Fixture won’t turn onWiring is loose/disconnectedCheck connections and re-tighten if necessary
Flickering LightsBulb is not tight/has failedTighten or replace the bulb
Circuit breaker tripsOverload or short circuitCheck for any electrical faults and consult a professional if needed

Creating a driftwood light fixture is not just a project; it’s an experience—a way to bring a bit of the beach into your home and express your artistic side. Whether you’re a seasoned DIY enthusiast or new to crafting, this project offers a satisfying challenge that rewards you with a unique piece of decor. By following these simple steps, you’ll have a stunning light fixture that adds warmth and personality to any room. Enjoy the process and the end result, knowing that no two creations will ever be the same.

Filed Under: Driftwood Ideas Tagged With: crafting, DIY, Driftwood, Interior Design, Light Fixture

Driftwood Lighting Chandeliers

May 10, 2025 by admin

Have you ever stopped to consider the magic driftwood brings into your home when transformed into a chandelier? As you imagine this rustic piece hanging above your dining table or brightening up your living room, a serene sense of nature washes over you. Driftwood lighting chandeliers not only light up your space but also infuse it with warmth, character, and a touch of the sea. This natural element adds a unique charm to any room, welcoming an organic feel into your living space while maintaining an elegant aesthetic.

What is Driftwood?

To truly appreciate driftwood lighting chandeliers, it is important to first understand what driftwood is. Driftwood refers to pieces of wood that have been washed onto a shore or beach, typically by the action of winds, tides, or waves. Over time, exposure to the elements smooths and shapes the wood, giving it a unique texture and appearance. Each piece of driftwood is different, its journey telling a story of weathering and resilience.

The Origin of Driftwood

Driftwood begins its journey as a tree, much like those you would see on a hike through the woods. Sometimes felled by storms or rising waters, these trees eventually find their way to rivers or coastal waters. As they travel, their bark is stripped away by the elements, leaving behind smooth and weathered wood. This journey not only gives driftwood its unique texture and hue but also imbues each piece with a history as long and varied as its path through the world.

Environmental Impact

Using driftwood in home decor, particularly in the creation of chandeliers, is environmentally friendly. This sustainable practice repurposes a natural material that would otherwise remain unused. Instead of using newly harvested wood, driftwood allows for the creation of stunning pieces while reducing waste and promoting eco-friendly practices. Every driftwood chandelier you bring into your home contributes to these positive environmental efforts.

Driftwood Lighting Chandeliers: A Unique Lighting Solution

Now that you understand the beauty and sustainability of driftwood, let’s talk about how it becomes a chandelier. Driftwood lighting chandeliers are not your typical light fixtures. They blend functionality with artistry, transforming ordinary lighting into a centerpiece worthy of admiration.

An Artistic Touch

These chandeliers are works of art. Each one is an intricate composition, pieced together from driftwood handpicked for its character and beauty. The natural twists and turns of the wood create a visually striking pattern, while its earthy tones complement a wide range of interior styles. Whether your home boasts a modern, rustic, or coastal theme, a driftwood chandelier can become an integral part of your decor.

Versatility and Style

One of the remarkable traits of driftwood lighting chandeliers is their versatility. Available in various shapes and sizes, they can be customized to suit any space. Whether you are looking for something grand to hang in a foyer or a smaller piece for a cozy dining nook, driftwood chandeliers can be crafted to meet your specific needs. Their organic design fits seamlessly into both minimalist settings and more elaborate interiors.

Lighting Effects

When designed as a chandelier, driftwood doesn’t just serve as a frame for light bulbs; it becomes a conduit for illuminating artistry. The natural gaps and spaces between the pieces of wood allow light to filter through in unexpected ways, creating intriguing patterns and a warm ambiance in any room. This play of light and shadows can enhance the atmosphere, offering a soft glow that’s comforting and inviting.

Driftwood Lighting Chandeliers

Selecting the Perfect Driftwood Chandelier for Your Space

Choosing a driftwood chandelier involves more than simply selecting a light fixture; it is about finding a piece that resonates with your style and space. Here are some considerations to guide you in making the right choice.

Room Size and Chandelier Proportion

The size of your chandelier should complement the dimensions of your room. A chandelier that’s too large can overwhelm a small space, while one that’s too small may get lost in a larger room. Measure your space and consider the furniture and fixtures already in the room to ensure that your chandelier fits well within its environment.

Shape and Design

Driftwood chandeliers come in different configurations—linear designs, circular arrangements, or even abstract shapes. Consider the flow of your room’s design and choose a chandelier shape that enhances that flow. A circular chandelier might suit the center of a room, while a linear design could work well over a rectangular dining table.

Lighting Needs

Evaluate the amount of light you need in the space. Some driftwood chandeliers come with multiple bulbs, providing ample illumination for larger areas, while others may have fewer lights for a softer ambiance. Consider the existing lighting in the room and think about how your chandelier can complement or enhance it.

Budget Considerations

While driftwood chandeliers can range in price depending on their size and intricacy, it is possible to find a piece that fits your budget. Factor in the cost of installation and additional lighting components you might need, such as dimmers or specialized bulbs. Investing in a uniquely crafted piece ensures a balance between quality and cost.

Installation and Maintenance

Installing and maintaining a driftwood chandelier may seem daunting, but with a few pointers, you can ensure your lighting fixture continues to shine beautifully for years to come.

Installation Steps

It’s recommended to have your chandelier installed by a professional electrician. They will ensure that it’s securely mounted and adjusted to the appropriate height. You should discuss your preferred lighting angle with them to make sure the driftwood creates the desired effect in your space.

Cleaning and Care

Driftwood chandeliers are relatively low maintenance. To clean, dust the wood regularly with a soft, dry cloth. Avoid using liquid cleaners, as the wood can absorb moisture. If you notice any areas that appear dry or dull, a light application of wood-safe oil can help maintain its luster without altering its color.

Regular Checks

Check the fixture regularly to ensure all lighting components are securely fastened. Adjust or replace any bulbs as necessary and ensure that all connections remain intact. With proper care, your driftwood chandelier will remain a captivating centerpiece in your home for years.

Driftwood Lighting Chandeliers

DIY Driftwood Chandelier Projects

For those with a flair for creativity, crafting your own driftwood chandelier can be a rewarding project. Here’s a simple guide on how to start.

Collecting Driftwood

Begin by collecting driftwood from local beaches or rivers. Be sure to gather pieces in various sizes and shapes to add visual interest. Remember to check local regulations regarding the collection of driftwood, ensuring that your actions are environmentally responsible.

Materials and Tools

To assemble your chandelier, you will need:

  • Drill
  • Light fixture or pendant kit
  • Sanding paper
  • Protective gloves
  • Screws and fasteners
  • Optional: wood finish or sealant

Assembly Instructions

  1. Design Your Chandelier: Arrange the collected driftwood pieces on the ground to visualize the design. Consider the placement of each piece and how the light will filter through the gaps.

  2. Prepare the Wood: Sand the edges to remove any sharp bits. If desired, apply a finish or sealant to preserve the wood.

  3. Drill and Assemble: Drill holes for the screws, aligning pieces according to your design. Begin assembling the pieces together, securely fastening them with screws and fasteners.

  4. Install the Lighting: Attach the light fixture or pendant kit according to its instructions, ensuring it is securely integrated into the driftwood.

  5. Finalize and Install: Engage a professional to install the chandelier, ensuring it’s safely hung and connected to your electrical supply.

Crafting your own driftwood chandelier can be a fulfilling way to add a personal touch to your home. With creativity and patience, you can craft a piece that resonates with your style and captures your artistic expression.

Conclusion

Driftwood lighting chandeliers provide more than just illumination; they bring natural beauty, elegance, and personality into your space. Understanding the origins and characteristics of driftwood enhances your appreciation for these unique art pieces. Whether you choose to purchase a handcrafted chandelier or embark on a DIY project, driftwood chandeliers can transform the atmosphere and aesthetic of your home. Embrace the warmth, texture, and history that these beautiful fixtures provide, creating a space that is both inviting and inspiring.

Filed Under: Driftwood Ideas Tagged With: Chandeliers, Driftwood, Interior Design, Lighting, Rustic Decor

Driftwood Ledge

May 9, 2025 by admin

Have you ever stumbled upon a piece of driftwood during a stroll along the beach and wondered about its journey or its past life? Exploring nature’s artistry, driftwood ledges offer a unique, mystical charm, enhancing both natural and indoor spaces with their weathered beauty. Whether utilized as a piece of decoration in your home or preserved in its natural habitat, driftwood holds a story etched in the grains of its wood. Let’s unravel these tales and explore the myriad ways driftwood ledges can transform and beautify spaces around you.

Driftwood Ledge

Understanding Driftwood

Driftwood is essentially any piece of wood that has been washed onto the shore by tides, waves, or wind. Originating from trees, this wood may have a past life as a branch, root, or trunk, before embarking on its oceanic journey. As it weathers the elements, each encounter with water and sand smoothens its texture and contributes to its unique form and color—features that make driftwood so appealing.

The Formation of Driftwood

The transformation of a regular piece of wood into driftwood is a natural marvel. Starting its journey in forests or along riverbanks, this wood might get displaced by floods, storms, or tides, coaxing it into the river or ocean. As it traverses these waters, driftwood is exposed to the many faces of nature—salty water, sunlight, rocks, and sand—which collectively strip it of bark and soften its wood, whitening its surface.

Types of Driftwood

Driftwood can vary greatly in type, depending largely on the original wood species and the environments it has encountered. For instance:

  • Hardwoods: Usually originating from trees such as oak or chestnut, hardwoods are dense, slow to decay, and often exhibit intricate, rugged features.
  • Softwoods: Originating from conifers like pine or cedar, these woods are generally lighter, more flexible, and sometimes exhibit a spiraled appearance or unique curvature, which makes them particularly fascinating.

Recognizing the origins and nature of driftwood can help you understand its place within your decorative endeavors, ensuring it aptly matches the aesthetic you’re aiming to achieve.

The Aesthetic and Practical Appeal of Driftwood Ledges

Driftwood ledges offer a natural, eco-friendly decor option that brings a touch of nature indoors. Their unique shapes and textures make them both versatile and visually stunning centerpieces or supportive structures in any room of your home.

Versatility in Design

Driftwood ledges can be integrated into a variety of design styles, ranging from rustic and bohemian to coastal and contemporary. Their organic appearance can soften modern interiors or enhance the warm, natural appeal of more casual spaces. When you choose to incorporate driftwood into your decor, you not only add a piece of nature but also a work of art that tells its own story.

Functional Uses

Beyond their aesthetic benefits, driftwood ledges can serve numerous functional purposes:

  • Shelving: Utilize them as unique and natural shelves for displaying plants, books, or decorative items.
  • Support Features: They can act as reinforcement or support for larger furniture pieces, such as coffee tables or beds, adding both stability and character.
  • Coat Racks or Towel Bars: Transform select pieces into innovative and stylish hangers for coats, towels, or other items.

The adaptability of driftwood ledges makes them excellent elements for both practical uses and innovative design.

Crafting Driftwood Ledges

Creating driftwood ledges requires a balance of creativity and practicality, ensuring each piece not only looks magnificent but fulfills its intended function. Here’s a detailed approach to crafting your own driftwood masterpiece.

Selecting the Right Piece

When choosing driftwood, you must consider both its visual appeal and structural integrity. Look for pieces that are robust and free of rot or soft spots; they should feel solid and dense. Consider the color and texture—some may have stunning grain features or appealing whitened surfaces from long-term water exposure.

Preparing the Driftwood

Once you’ve selected your driftwood piece, it’s essential to clean and treat it properly.

  • Cleaning: Scrub away debris or sand with a stiff brush. Soak the wood in a solution of water and mild detergent to eliminate salt, germs, and any remaining impurities.
  • Drying: Allow it to dry completely, ideally in a warm, dry environment. This could take several days, depending on the wood’s density.
  • Sealing: If you desire longevity or want to maintain a specific hue, consider sealing it with varnish or a wood preservative. This enhances durability and protects the wood from indoor humidity or accidental spills.

Constructing the Ledge

Once prepared, you can move to the assembly process:

  • Measuring and Cutting: Plan the integration of the driftwood with your chosen space, marking out dimensions accurately. If necessary, trimming the driftwood for size or balance is advisable.
  • Mounting: Use secure mounting hardware to affix the driftwood to walls or furniture. This ensures not only stability but also that the integrity of the piece remains intact.

Refinishing and Final Touches

Once your driftwood ledge is secured in place, you can add finishing touches. Consider adjacent elements such as coastal-inspired decorations or plants that align with the natural feel of driftwood. These will help underscore the natural charm and enhance the aesthetic appeal of your space.

Environmental and Artistic Implications

Incorporating driftwood into your home is not merely an artistic choice; it is an environmentally conscious decision that highlights the beauty of recycling nature’s leftovers.

Environmental Benefits

Choosing driftwood as a decor element supports environmental conservation. By reusing materials naturally bequeathed by the earth, you contribute to reducing demand for new wood, helping save trees and protecting forests. Plus, collecting driftwood typically does not damage ecosystems, since these pieces have already washed ashore.

Artistic Expression

Using driftwood in design allows you to express creativity uniquely. Each piece, with its different curves and textures, presents new design opportunities. You can let your imagination run wild—whether you’re aiming for minimalist, ornate, or nostalgic. Driftwood also provides a canvas ripe for artistic transformation, serving as a base for further embellishments or subtle enhancements.

Driftwood Ledge

Conclusion: Embracing Driftwood Ledges

Driftwood ledges are more than just decorative pieces; they are living histories of nature’s relentless power and artistry. Embracing driftwood as a part of your home or garden decor allows you to foster and display sustainability while showcasing the beauty of nature through its journey-storied visage.

By understanding both the beauty and the practical considerations involved in using driftwood, you create a harmonious space that respects and reflects the beauty of our natural world. Allow driftwood ledges to inspire you, interpreting their timeless elegance and integrating it into your sanctuaries. Their stories, etched through years of passage across water and sand, will continue to evolve and blend seamlessly into your journeys within your space. Let driftwood guide the way in your creative explorations and enjoy the tangible connection to earth that these unique objects provide.

Filed Under: Driftwood Ideas Tagged With: DIY, Driftwood, Interior Design, Shelving

  • « Previous Page
  • Page 1
  • …
  • Page 9
  • Page 10
  • Page 11
  • Page 12
  • Page 13
  • …
  • Page 600
  • Next Page »

Primary Sidebar

Driftwood4us.com, is a participant in the Amazon Services LLC Associates Program, an affiliate advertising program designed to provide a means for sites to earn advertising fees by advertising and linking to amazon.com.