• Skip to main content
  • Skip to primary sidebar
  • Terms and Conditions
  • Privacy Policy
  • Contact

Driftwood 4 Us

Just About Driftwood

Driftwood Ideas

Driftwood Kitchen Cabinets Diy

March 3, 2025 by admin

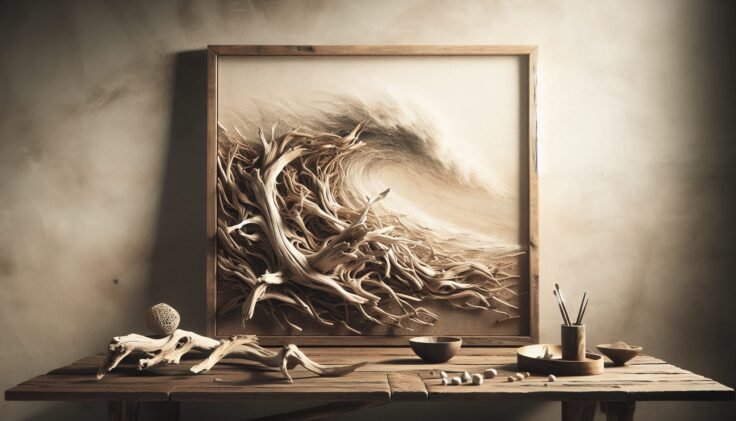
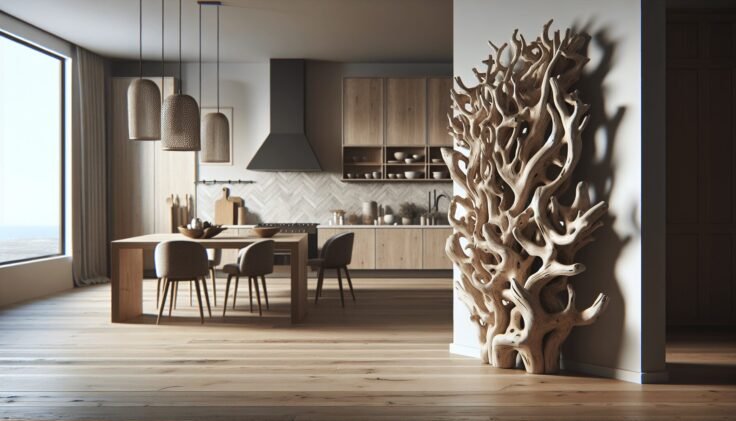
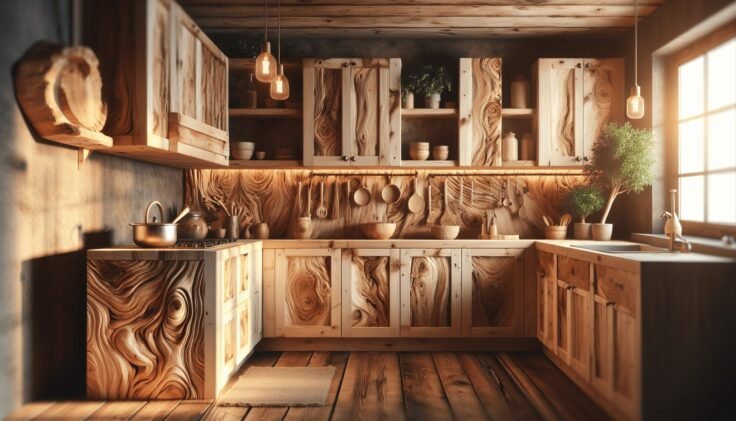
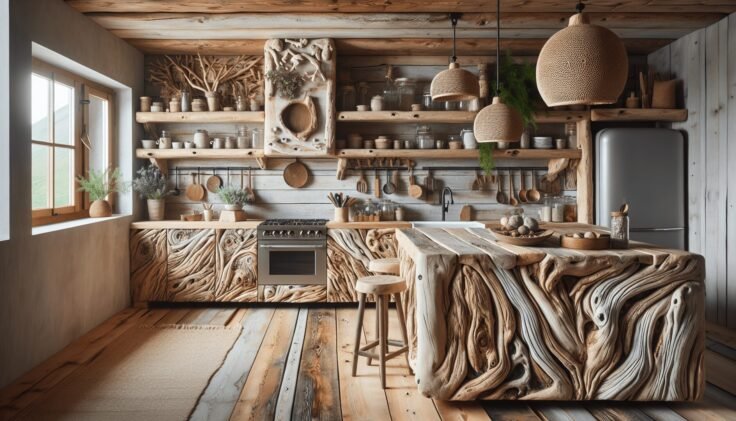
Have you ever looked at your kitchen cabinets and imagined giving them a unique, rustic makeover? Driftwood kitchen cabinets might just be the perfect option for adding a touch of the coast to the heart of your home. In this friendly guide, we’ll explore how to achieve this charming look on your own. Making driftwood kitchen cabinets can be a rewarding and cost-effective DIY project that enhances your space’s aesthetic appeal.
Driftwood Kitchen Cabinets Diy

Understanding the Driftwood Look

Driftwood surfaces mimic the weathered appearance of wood that has been naturally smoothed and bleached by the sun, salt, and sand. This look is characterized by soft grays and browns, giving your kitchen both a natural and tranquil vibe. By transforming your cabinets to have this driftwood finish, you can instantly bring a laid-back, beach-inspired feel to your home, even if you’re miles away from the ocean.

Why Choose Driftwood?

The driftwood aesthetic is popular not only for its beauty but also for its versatility and ability to fit into both modern and rustic decor. Its understated elegance can complement a wide array of color schemes and design choices, making it an ideal option for a variety of homes.

Preparing for the Transformation

Before embarking on your driftwood kitchen cabinet transformation, you’ll need to gather your materials and tools, prepare your workspace, and ensure that you have a clear plan. Preparation is key to making sure your project goes smoothly.

Gathering Materials

To achieve the driftwood look, you’ll need a mix of specific paints, primers, and tools. Here’s a handy list of what you’ll typically require:

Material/ToolPurpose
Sandpaper (Various Grits)For prepping surfaces and achieving a smooth finish
PrimerTo ensure the paint adheres properly
Driftwood Paint or StainTo create the authentic driftwood appearance
Clear SealerTo protect and finish the cabinets
Paintbrushes / RollersFor applying paints and stains
Rags or SpongesFor blending and detailing
ScrewdriverFor removing cabinet doors and hardware
Safety GearTo protect yourself while working

Creating a Suitable Workspace

Transforming your kitchen cabinets will likely be a bit messy, so it’s important to set up a workspace that accommodates the dimensions of your doors and drawers. Lay down a drop cloth and make sure the area is well-ventilated. If you’re working indoors, consider using a dust mask to protect yourself from sanding debris and paint fumes.

Removing Cabinet Doors and Hardware

Taking off the cabinet doors and removing all hardware will make the painting process much easier. Carefully label each door and its corresponding location to avoid confusion when it’s time to reassemble.

The Art of Achieving the Driftwood Finish

Achieving the perfect driftwood finish requires a series of steps, from proper surface preparation to the final touch of sealing the cabinets. Patience and attention to detail will go a long way in ensuring a beautiful end result.

Sanding and Priming the Surface

Begin by thoroughly sanding your cabinet doors and frames. This step is crucial to remove any existing finish or gloss that might prevent the new paint from adhering. Start with a coarser grit sandpaper and gradually move to a finer grit for a smooth surface. Once the sanding is complete, wipe away any dust with a tack cloth.

Apply a primer to ensure the paint grips securely to the cabinets. A good quality primer also helps in preventing any discoloration from bleeding through. Allow the primer to dry completely as per the manufacturer’s recommendations.

Applying the Driftwood Paint or Stain

With the surfaces prepared, it’s time to apply the driftwood paint or stain. Begin with a base coat that reflects the subtle gray tones of driftwood. Use a brush or roller for an even application. Once the base coat dries, you can start layering lighter and darker tones using a combination of paints and stains.

You can achieve variations in color depth by ragging or sponging on lighter shades, reminiscent of the natural weathering process of driftwood. Be creative with your technique—there’s no single “right” way to recreate driftwood. Ensure that the colors blend well, giving a natural and uneven texture typical of driftwood.

Sealing for Durability

Once you’re satisfied with the painted or stained finish, it’s important to protect your hard work with a clear sealer. Choose a non-yellowing, clear finish to maintain the authenticity of your driftwood look. A good sealer not only protects the wood but also makes cleaning the cabinets easier. Apply with smooth, even strokes, and let it dry thoroughly.

Reassembling and Final Touches

Once your cabinets are completely dry, it’s time to reassemble them. Here’s where your earlier organization pays off. Reattach the doors and hardware according to your labeling system.

Reattaching Doors and Hardware

Take care when reattaching the cabinet doors and hardware to avoid damaging the fresh finish. Consider updating your hardware to complement your new driftwood cabinets. Brushed nickel or weathered bronze can enhance the rustic appeal of the driftwood finish.

Adding Personal Touches

If you feel like adding a touch of personalization, this is the perfect opportunity. Think about incorporating elements like glass inserts, decorative moldings, or even open shelving to further capitalize on the new look of your kitchen.
Driftwood Kitchen Cabinets Diy

Caring for Your Driftwood Cabinets

With your gorgeous new cabinets in place, maintaining them is essential to ensure they look their best for years to come. Fortunately, a driftwood finish is low-maintenance.

Routine Cleaning

For everyday cleaning, use a damp microfiber cloth to wipe down the cabinet surfaces. Avoid harsh chemicals or abrasive sponges as they can damage the finish you worked so hard to achieve.

Periodic Maintenance

Every once in a while, check for chips or wear in the paint. Minor touches with matching paint and a detail brush can keep your cabinets looking fresh. Reapply a sealer every couple of years if you notice the finish losing its luster.

Driftwood-Inspired Kitchen Enhancement Ideas

Taking your driftwood kitchen cabinets as the centerpiece, you can extend the coastal theme throughout your kitchen more broadly. Consider these simple enhancements to integrate the driftwood aesthetic fully into your kitchen design.

Complementary Color Schemes

To accentuate your driftwood cabinets, choose kitchen wall colors and accents that harmonize with your cabinets’ soft, neutral tones. Whites, pastel blues, and sandy beiges can create a cohesive and relaxing environment.

Color Scheme OptionsDescription
Coastal Blue + WhiteEvoke a classic ocean vibe with accents of bold coastal blue contrasting with crisp white elements.
Sand + Seafoam GreenMuted seafoam greens alongside sandy beiges offer a natural and calming palette.

Textural Accents

Incorporate natural textures and materials to complement the driftwood feel. Use items like woven baskets, rattan placemats, and linen dish towels to reinforce the coastal atmosphere.

Lighting and Ambiance

Consider adding ambient lighting with driftwood elements, such as pendants or chandeliers made of reclaimed wood or subtle nautical-themed fixtures that mirror your cabinet style. Dimmable lights can enhance the cozy, serene mood of the room, especially in the evenings.

Conclusion

Embarking on a DIY driftwood kitchen cabinet project allows you to put a personal, unique twist on your kitchen decor. With patience and creativity, you can transform ordinary cabinets into the centerpiece of your dream coastal kitchen. Whether you’re by the beach or nestled inland, bringing this charming element of the coastline into your home invites a touch of serenity and natural beauty that is sure to inspire. Enjoy the process of making your kitchen a reflection of your personal style and the tranquility of the ocean’s embrace.
Filed Under: Driftwood Ideas Tagged With: DIY, Driftwood, furniture, Interior Design, kitchen cabinets

Driftwood Easter Crafts

March 3, 2025 by admin

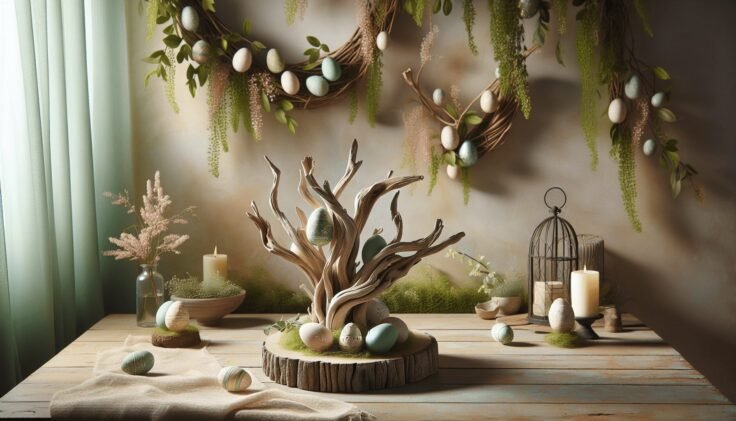
Have you ever thought about bringing a natural, rustic charm to your Easter decorations? Driftwood, with its unique shapes and textures, offers endless possibilities for creating stunning Easter crafts. Not only does it connect you with nature, but it also provides a coastal feel that can blend effortlessly with various decor themes. In this guide, you’ll discover several creative ideas to incorporate driftwood into your Easter festivities, transforming ordinary items into extraordinary pieces.

Understanding Driftwood

What is Driftwood?

Driftwood is natural wood that has been washed onto a shore or beach by the action of winds, tides, or waves. Over time, this wood becomes smooth and uniquely textured due to its exposure to water and elements. Each piece of driftwood carries its own history and story, making it a fascinating material for crafting.

Why Use Driftwood for Crafts?

Driftwood’s versatility, coupled with its natural beauty, makes it an excellent choice for crafting. It’s ecological, as it makes use of materials that have already been deemed forgotten by nature. By utilizing driftwood, you can create sustainable art, contributing to the upcycling trend that’s both environmentally friendly and fashionable.

Crafting Basics: Preparing Your Driftwood

Gathering Driftwood

To start your crafting adventure, you’ll need to gather driftwood. Head to your local beach and look for pieces that are dry, lightweight, and have interesting shapes. Remember to collect only as much as you need to ensure you’re not disrupting the local habitat.

Cleaning and Drying Driftwood

Before starting your project, it’s necessary to clean and dry your driftwood:

  1. Rinse: Wash your collected driftwood thoroughly with water to remove sand and salt.
  2. Scrub: Use a scrub brush to clean any algae or barnacles.
  3. Soak: For a deeper clean, soak the driftwood in a mix of water and mild bleach (1:10 ratio) for 24 hours.
  4. Rinse Again: After soaking, rinse the driftwood to remove any bleach residue.
  5. Dry: Allow it to air dry completely. This could take a few days depending on the humidity levels.

Driftwood Easter Crafts

Driftwood Easter Craft Ideas

Driftwood Easter Wreath

Transform your front door into a welcoming sight with a driftwood Easter wreath. This handcrafted wreath can be adorned with pastel ribbons, faux Easter eggs, or small spring flowers to add color and vibrancy.

Materials Needed:

  • Small pieces of driftwood
  • Hot glue gun or super glue
  • Decorative elements (ribbons, faux eggs, flowers)

Steps:

  1. Arrange the driftwood pieces in a circular shape.
  2. Secure each piece using the hot glue or super glue.
  3. Decorate with your chosen materials, ensuring they are securely glued onto the wreath.

Driftwood Bunny Silhouette

Create a charming bunny silhouette using driftwood as a playful tribute to the Easter Bunny. Perfect for a wall hanging or as a centerpiece on your Easter dining table.

Materials Required:

  • Various sizes of driftwood
  • Pencil and paper for template
  • Saw if cutting is necessary
  • Glue or screws for fixing

Instructions:

  1. Sketch a bunny silhouette on paper.
  2. Lay the driftwood pieces to match your template.
  3. Cut pieces if required for a better fit.
  4. Glue or screw the driftwood pieces together to form the silhouette.

Easter Egg Driftwood Holder

Design a rustic Easter egg holder that prominently features driftwood for each egg. It’s an artistic way to display decorated Easter eggs or use them for an Easter breakfast presentation.

What You Need:

  • Driftwood with natural cavities or flat surfaces
  • Small drill bit
  • Acrylic paint (optional for added color)

How To Make:

  1. Select a piece of driftwood that has enough space to hold several eggs.
  2. Use a drill bit to create small indentations that can cradle the eggs securely.
  3. Paint natural cavities with acrylic paint for added flare if desired.

Driftwood Candle Centerpiece

You can add an intimate glow to your Easter dinner with a driftwood candle centerpiece. This craft ensures your dining table remains stylishly festive.

Supplies:

  • Long, flat pieces of driftwood
  • Votive candles or tealights
  • Drill with bit sized for candle base

Procedure:

  1. Arrange the driftwood into an appealing structure.
  2. Drill shallow holes where the candles will sit snugly.
  3. Place the candles in the holes and light them to set the mood.

Tips for Working with Driftwood

Tools and Techniques

Basic tools such as a glue gun, drill, and saws are sufficient for creating most driftwood crafts. The key is to handle the material delicately to preserve its natural texture and appearance.

Safety Considerations

Always prioritize safety by wearing protective gear when handling tools. Additionally, ensure your driftwood is well-cleaned to avoid any potential health risks associated with natural elements like mold or insects.

Driftwood Easter Crafts

Care and Maintenance of Driftwood Crafts

Driftwood, although resilient, benefits from some care to maintain its beauty. Apply a clear sealant like polyurethane to preserve its natural color and protect it from moisture. Dust your creations regularly and avoid placing them where they can be damaged by direct sunlight or water.

Conclusion

Driftwood easter crafts offer you an unprecedented opportunity to blend creativity with simplicity. Whether it’s a wreath, a candle centerpiece, or a bunny silhouette, each crafted piece carries a part of nature’s raw beauty into your home. Inviting driftwood into your Easter decor not only enhances the holiday spirit but also reminds you to celebrate nature and creativity harmoniously.

By integrating these unique pieces into your Easter celebrations, you’re not just crafting for the moment—you’re carving out memories that blend the rustic with the magical. So gather your materials, prep your driftwood, and let your creativity lead the way to a green and gorgeous Easter!

Filed Under: Driftwood Ideas Tagged With: Decor, DIY, Driftwood, Easter, Handmade

Driftwood Easter

March 2, 2025 by admin

Have you ever considered how Easter, a holiday typically celebrated with vibrant eggs and cute bunnies, could be transformed with a touch of rustic charm and natural beauty? Imagine celebrating Easter a little differently this year, bringing the outdoors inside with elements like driftwood. Driftwood—those beautiful pieces of wood sculpted by nature—adds a unique twist to traditional Easter celebrations. By the time you’ve finished reading, you’ll be brimming with ideas on how to incorporate this natural beauty into your holiday festivities. Let’s embark on this creative journey of crafting a “Driftwood Easter.”

What is Driftwood?

Driftwood often conjures images of sun-kissed beaches and serene oceans. But what exactly is it? Simply put, driftwood is wood that has been washed onto a shore or beach by tides, winds, or waves. These pieces can be remnants from trees or other wood materials that ocean currents transport. Over time, their texture and structure change due to prolonged exposure to water, sun, and sand.

The Aesthetic Appeal of Driftwood

Driftwood’s appeal lies in its varied shapes, sizes, and earthy tones. Each piece is unique, representing a one-of-a-kind artwork created by nature’s forces. Its rustic charm adds an element of warmth and continuity when used in home decor or landscaping. Using driftwood in your Easter celebration brings a touch of nature’s artistry into your home, creating a serene and inviting environment.

Sustainability and Driftwood

Incorporating driftwood into your Easter theme is not just about aesthetics; it’s also about sustainability. Driftwood is a natural and recycled material, meaning that using it helps reduce waste. By opting for driftwood decorations, you’re choosing environmentally friendly decor, aligning your celebration with principles of sustainability.

Preparing for a Driftwood Easter

To celebrate a Driftwood Easter, you need the right materials and some creativity. Let’s outline what you’ll need for your very own driftwood-inspired celebration.

Collecting or Purchasing Driftwood

You might find driftwood when strolling along the beach or visit artisan shops and online marketplaces specializing in natural decor. If you’re collecting driftwood yourself, ensure it’s responsibly gathered, and you’re aware of local regulations regarding collecting natural materials from beaches.

Cleaning and Prepping Driftwood

Once you have your driftwood, clean it thoroughly to remove any impurities. A mild solution of soap and water usually does the trick. Rinse and allow it to dry completely, preferably in the sun, to retain its natural color and prevent mold growth. This process ensures that your driftwood is safe for indoor use and ready for crafting.

Driftwood Easter

Crafting Driftwood Easter Decor

Now that your driftwood is ready, it’s time to let your creative juices flow. Below are some exciting ways to incorporate driftwood into your Easter decor.

Driftwood Easter Egg Holders

Give your Easter eggs a natural pedestal by creating driftwood egg holders. Look for pieces that naturally form small crevices or indentations. Sand down any rough spots, and voilà, you have a unique and natural base for your colorful Easter eggs.

Driftwood Centerpiece

A driftwood centerpiece can be the focal point of your Easter dining table. Arrange several pieces of driftwood artistically along the center. Consider adding elements like small flowers, moss, or candles to complement the driftwood and infuse additional texture and color.

Driftwood Easter Wreath

A wreath made from driftwood is a stunning way to welcome guests into your home. Create a circle with the driftwood pieces, securing them with a strong adhesive or wire. Decorate your wreath with pastel-colored ribbons, small eggs, or spring flowers for a festive touch.

Incorporating Driftwood into Easter Traditions

Aside from decor, there are numerous ways to weave driftwood into the fabric of your Easter traditions.

Easter Egg Hunt with Driftwood

Transform your traditional Easter egg hunt by incorporating driftwood into the clues or hiding places. You can use driftwood as markers or props for hiding spots, enhancing both the aesthetics and fun factor of the hunt. This adds an element of adventure and challenge to the game.

Creating Driftwood Story Stones

For a quieter activity, consider crafting driftwood story stones. Find smooth, flat pieces of driftwood, and draw or paint symbols that can be used to create stories. This is an engaging and collaborative way to share Easter tales or craft new ones with friends and family.

Driftwood Easter

Hosting a Driftwood Easter Gathering

If you’re inviting friends and family over for Easter, using driftwood as part of your planning adds a touch of uniqueness and character. Here’s how you can incorporate it into your gathering plans.

Themed Invitations

Let your guests know about your unique theme right from the start with driftwood-themed invitations. You can use images of driftwood or even attach small collected pieces to give a tactile preview of the event.

Driftwood Table Settings

Enhance your dining experience with driftwood table settings. Use small pieces as placeholders, securing name tags with twine. Contrary to more traditional setups, this rustic approach offers a relaxed yet elegant dining experience.

Menu with Natural Elements

In keeping with the natural theme, plan a menu that reflects this aesthetic. Consider serving dishes made with organic ingredients and presenting them in ways that highlight natural beauty—such as serving platters adorned with small pieces of driftwood.

Benefits of a Driftwood Easter

You might be wondering what makes a Driftwood Easter so special. The benefits extend beyond the charm and beauty; here’s why a Driftwood Easter is well worth considering.

Sustainability and Eco-Friendliness

By using driftwood, you’re making a statement about the importance of recycling and sustainability. It’s a tangible way to reduce waste while beautifying your surroundings with natural elements.

Fostering Creativity

Arranging a Driftwood Easter encourages you to think outside the box and experiment with new ideas. Whether crafting decorations or planning activities, you’re tapping into a reservoir of creativity that might otherwise remain unexplored.

Aesthetically Pleasing

Perhaps the most immediate benefit, though, is the sheer aesthetic pleasure a Driftwood Easter provides. The combination of natural elements and festive traditions results in a celebration that’s both beautiful and memorable.

Conclusion

Incorporating driftwood into your Easter celebration not only transforms it into an eco-friendly event but also weaves a narrative of nature into your traditions. From crafting decor to hosting uniquely themed gatherings, a Driftwood Easter offers endless opportunities to innovate and personalize your holiday. Imagine welcoming the season of renewal with textures and forms shaped by the Earth itself—a celebration that not only honors tradition but also embraces the beauty of the outdoors. As you prepare for a Driftwood Easter, may you find joy, inspiration, and perhaps even a new favorite tradition to share with those closest to you.

Filed Under: Driftwood Ideas Tagged With: Decoration, DIY, Driftwood, Easter, Handmade

Driftwood Kids Crafts

March 2, 2025 by admin

Have you ever walked along the beach, discovering pieces of driftwood scattered along the shore, and wondered what magical creations could be made from these weathered treasures? Driftwood has a unique charm that showcases the power of natural elements like water and wind, crafting beautiful shapes and textures perfect for sparking a child’s creativity. Turn your next family beach trip into an adventure by collecting driftwood, and use this guide to transform those finds into delightful crafts that ignite imagination!

Understanding Driftwood

Before diving into crafting, it’s essential to understand what makes driftwood special. Driftwood refers to wood pieces that have washed ashore, shaped by the elements into smooth forms. They often come from trees or branches, eroded over time by saltwater, sand, and air. These natural processes make driftwood both unique and inspiring for artistic projects.

Why Driftwood Crafts?

Creating crafts from driftwood taps into the opportunity to recycle and reuse nature’s bounty while engaging your children in a learning experience. Driftwood is commonly available, making it an accessible and cost-free material. Kids will love the tactile exploration of each piece, and projects can adapt to various skill levels, offering both a challenging and rewarding pastime.

Safety First: Preparing Driftwood for Use

When working with natural materials, it’s crucial to ensure they’re safe for handling, particularly for young children. Start by cleaning the driftwood:

  • Step 1: Rinse Thoroughly – Rinse each piece under running water to remove sand, dirt, and salt residues.
  • Step 2: Soak in Vinegar – Soak the driftwood in a solution of vinegar and water (1:1 ratio) for several hours to kill bacteria and remove odors.
  • Step 3: Dry Completely – Allow the pieces to dry in the sun, ensuring all moisture is gone to prevent mold growth.

With your driftwood ready, you’re all set to begin a crafting journey filled with creativity and fun!

Driftwood Crafts for Kids

Craft 1: Driftwood Wind Chimes

Wind chimes add a musical note to breeze-filled days, and making them from driftwood provides a personal touch. Engage your kids with this simple craft that provides visual and auditory enjoyment.

Materials Needed:

  • Small pieces of driftwood
  • String or twine
  • Paint (optional)
  • Seashells, beads, or bells
  • Drill (adults can assist)

Step-by-Step Instructions:

  1. Prepare the Driftwood: Select several small driftwood pieces with holes or using a drill, carefully create holes through each piece.
  2. Customize Your Design: Paint each piece with your chosen colors and allow them to dry completely.
  3. Assemble the Chimes: Thread the string through the holes, spacing the driftwood pieces evenly. Attach additional decorative elements like beads, shells, or bells.
  4. Hang Your Creation: Find a suitable branch or larger piece of driftwood to act as the wind chime’s hanger and attach all pieces.

Craft 2: Driftwood Photo Frame

Personalize your child’s space with a frame rich in coastal charm, using driftwood to create a picture-perfect border for their favorite photos.

Materials Needed:

  • Assorted driftwood pieces
  • Strong glue or wood adhesive
  • Cardboard or plywood
  • Scissors
  • Paint (optional)

Step-by-Step Instructions:

  1. Create the Frame
    • Cut a cardboard or plywood piece to your desired frame size.
    • Arrange driftwood pieces around the edges, ensuring they fit snugly.
  2. Glue the Driftwood: Use strong adhesive to attach each piece, pressing down firmly and allowing to dry thoroughly.
  3. Add Personalized Touches: Paint or decorate further for a personal touch.
  4. Insert a Photo: Secure a photo in the center with glue or adhesive strips.

Craft 3: Driftwood Sailboats

Building driftwood sailboats allows children to harness wind power just as ancient mariners did, creating vessels that can set sail on small water bodies or serve as decorative pieces.

Materials Needed:

  • Medium-sized driftwood
  • Small sailcloth or paper
  • Twine or string
  • Scissors
  • Drill (optional)
  • Paint (optional)

Step-by-Step Instructions:

  1. Select the Hull: Choose a sturdy piece of driftwood as the boat’s hull.
  2. Create the Mast: If required, drill a small hole and insert a twine or stick firmly as the mast.
  3. Attach the Sail: Cut sailcloth into a triangle, decorate if desired, and attach it to the mast with string or glue.
  4. Set Sail: Launch your boat into a shallow water puddle or use it as playful décor.

Driftwood Kids Crafts

Learning Through Crafting

Crafting isn’t just an activity; it’s a learning experience. Encourage your children to explore creativity, problem-solving, and cooperation as they engage with each craft. You can turn driftwood crafting into educational lessons by discussing:

  • Environmental Topics: Talk about the water cycle, weathering processes, and ecosystems.
  • Art and Design: Explore balance, symmetry, and aesthetics through arranging driftwood pieces.
  • Cultural History: Introduce stories of sea voyages and historical crafting practices using natural materials.

Providing children with context enriches their crafting experience, transforming simple activities into memorable and meaningful lessons.

Adapting Crafts for Different Ages

Engagement levels will vary depending on age. Tailor each driftwood craft to suit your child’s abilities:

  • Young Children (Ages 3-5): Simplify projects with basic shaping and painting tasks, emphasizing safety.
  • School-aged Children (Ages 6-10): Engage with more intricate designs, introducing basic knot tying or assembly to develop motor skills.
  • Tweens and Teens (Ages 11+): Encourage complex crafting that combines driftwood with other materials, challenging creativity and craftsmanship.

Driftwood Kids Crafts

Tips for Successful Driftwood Crafting

Having a strategic approach makes crafting sessions smooth and enjoyable:

  • Choose the Right Driftwood: Seek pieces that are smooth and the correct size for your project.
  • Plan Your Design: Sketch ideas or brainstorm with your child about their vision for the craft.
  • Involve Everyone: Turn it into a family activity, assigning each member a role in the process.
  • Celebrate the Result: Display finished creations at home, showcasing your child’s craftsmanship and creativity.

Extending Driftwood Crafting Adventures

Want to keep the creativity flowing? Consider these extended activities inspired by driftwood crafting:

Nature Walk Scavenger Hunt

Transform beach trips into treasure hunts, seeking specific driftwood shapes or sizes. Engage your kids with a checklist of natural finds, expanding their exploration beyond driftwood to shells, stones, and seaweed.

Storytelling Through Crafts

After completing driftwood crafts, encourage children to create stories featuring their creations. A driftwood sailboat might star in tales of high seas adventure, promoting imagination and narrative skills.

Turn it into a Science Project

Introduce science concepts through driftwood, discussing buoyancy for floatable projects or erosion processes that transform raw wood into driftwood.

Conclusion

Driftwood offers a unique blend of nature and creativity, providing opportunities for children to connect with the environment in a personal and artistic way. Every beach walk yields new potential for creativity provided by nature’s handiwork. Engaging with driftwood crafts offers an endless frontier of exploration, learning, and joy—an invitation kids eagerly accept! Let these humble pieces of driftwood guide you and your young ones toward endless imaginative pursuits. Happy crafting, and may every piece of driftwood you find tell a new story!

Filed Under: Driftwood Ideas Tagged With: Art Projects, DIY, Driftwood, Handmade, Kids Crafts

Driftwood Easter Decor

March 2, 2025 by admin

Have you ever wondered how you can bring the natural beauty of driftwood into your Easter decorations? Combining the rustic charm of driftwood with the vibrant themes of Easter can create a unique and inviting atmosphere in your home. Driftwood, with its weathered textures and organic shapes, can be transformed into stunning decor pieces that celebrate the season in a fresh and eco-friendly way.

The Allure of Driftwood

Driftwood is more than just wood washed ashore; it’s a canvas shaped by the elements. Each piece tells a story of time spent in the water and exposure to the sun, sea, and wind. The unique patterns and textures make driftwood a favorite among decorators and DIY enthusiasts, offering endless possibilities for creativity.

Why Choose Driftwood for Easter Decor?

You might be asking, why driftwood for Easter? The answer lies in its versatility and natural beauty. Driftwood provides a neutral, earthy base that complements the pastel colors typically associated with Easter. It offers a minimalist backdrop that can highlight the bright hues of Easter eggs, flowers, and other elements. Plus, it connects your decor to nature, grounding seasonal celebrations with a touch of authenticity.

Getting Started with Driftwood

Before you begin crafting your Easter decor, you’ll want to gather the right materials and tools. Choosing the right driftwood is essential for creating elegant pieces that enhance your holiday environment.

Finding and Preparing Driftwood

The first step is to find driftwood that suits your project. Look for pieces on local beaches, rivers, or lakeshores. Choose wood that is sturdy, free from rot, and has visually interesting shapes or textures. Once you’ve gathered your driftwood, cleaning it is crucial. You should scrub the pieces with a mixture of water and mild soap to remove any dirt or salt. Let them dry thoroughly before use, to ensure they are clean and ready for crafting.

Tools and Supplies You’ll Need

To create your decor, you’ll need the right tools. Here’s a list of essential supplies:

Tool/SupplyPurpose
SandpaperSmooth rough edges of driftwood
DrillCreate holes for assembly
Hot glue gunBond pieces of wood and other elements
Twine or natural ropeAdd rustic flair or hang decorations
Paint or wood stainCustomize with colors if desired
Floral wireAttach flowers or decorations securely

With these tools in hand, you’re ready to embark on various DIY projects that bring driftwood and Easter together in enchanting ways.

Driftwood Easter Decor

DIY Driftwood Easter Projects

Creating your own Easter decorations with driftwood can be a rewarding endeavor, filled with opportunities for personalization. Here are some ideas to inspire your creativity:

Driftwood Easter Bunnies

Imagine having adorable driftwood bunnies gracing your mantel or coffee table. These can be crafted by assembling smaller pieces of driftwood into the shape of a rabbit. Use twine for whiskers and small branches for ears. For a whimsical touch, you might paint on a nose or eyes.

Driftwood Easter Egg Display

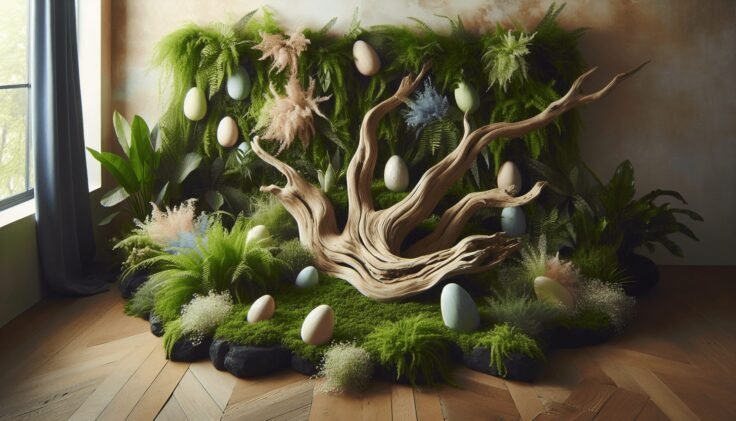
Fashion a stunning display by attaching colorful Easter eggs to a driftwood branch. You can paint real eggs or use plastic ones, securing them with floral wire. The juxtaposition of sleek, colorful eggs with rustic wood creates a striking contrast, perfect for a tabletop centerpiece.

Driftwood Crosses

The Easter holiday is synonymous with the symbol of the cross. Craft a beautiful driftwood cross by binding together two pieces of wood with twine. You might embellish it further with flowers or greenery to add a springtime freshness.

Driftwood and Floral Arrangements

Pairing driftwood with fresh or dried flowers can transform a room. Use driftwood pieces as a base or holder for floral arrangements. The organic lines of the wood guide the eye and amplify the natural beauty of the petals, bringing a touch of the outdoors inside.

Creating a Driftwood Easter Wreath

Wreaths are a classic element of holiday decor, and a driftwood wreath can make a statement on your door or wall. Here’s a step-by-step guide to crafting your own:

  1. Gather Your Materials: You’ll need pieces of driftwood, floral wire, a wire wreath frame, scissors, and optional additions like flowers or ribbon.
  2. Arrange Driftwood: Plan your design by laying the wood around the frame to see how it fits together.
  3. Attach Wood to Frame: Use floral wire to secure each piece of driftwood to the wreath frame. Ensure that each piece is tightly fastened.
  4. Add Decorative Elements: Incorporate flowers, leaves, eggs, or other embellishments to add color and texture.
  5. Hang and Enjoy: Use a hook or ribbon to hang your wreath and admire your handiwork.

This project not only enhances the entryway but also sets a welcoming tone for guests.

Driftwood Easter Decor

Supporting Sustainability with Driftwood Decor

Choosing driftwood for your Easter decorations aligns with eco-friendly principles. It encourages the use of recycled materials and supports a sustainable approach to celebrating holidays.

Eco-Friendly Benefits

Using driftwood is a way to repurpose natural materials, preventing them from contributing to waste. Many DIY enthusiasts appreciate the sustainability aspect, as it reduces the need for manufactured goods and encourages creativity with existing resources.

Ethical Sourcing and Collecting

If collecting driftwood yourself, do so responsibly. Ensure you leave enough for natural environments to thrive, and check local regulations about collecting driftwood from certain areas. Some regions may have restrictions aimed at preserving natural habitats.

Personalizing Your Driftwood Decor

Your driftwood Easter decor can be as unique as you are. Whether you prefer a rustic, minimalist look or something vibrant and eye-catching, there are endless possibilities for personalization.

Adding Personality with Colors

You might opt to paint some driftwood pieces to match your Easter color scheme. Soft pastels, vibrant yellows, or serene greens can all be added with paint or stain to suit your aesthetic.

Incorporating Different Materials

Consider blending fabric, metal, or glass with driftwood. For example, you might wrap fabric around certain parts of the wood to add a softness or include glass beads for a touch of sophistication.

Seasonal Adornments

Think about including seasonal elements such as Easter lilies, faux nests, or themed figurines. These additions can be attached with glue or wire to enhance the seasonal appeal of your decor.

Tips for Displaying Your Driftwood Easter Creations

Once you’ve completed your decor pieces, displaying them effectively can enhance their impact.

Strategic Placement

Consider the flow of a room and how the decor fits within it. A driftwood centerpiece can anchor a dining table, while smaller pieces placed on side tables or shelves can unify a room’s theme.

Lighting Effects

Light plays a crucial role in showcasing the textures and colors of your creations. Use natural light or strategically placed lamps to highlight the unique features of your driftwood decor.

Layering and Grouping

Create visual interest by layering or grouping different pieces together. Grouping can intensify the thematic elements and offer varied visual focal points within a space.

Conclusion

By combining driftwood and Easter themes, you embark on a creative journey that celebrates both natural beauty and the festive spirit of the season. Whether you’re crafting a delicate wreath, a lively egg display, or a serene centerpiece, driftwood provides a versatile foundation rich with possibilities. As you create, you’ll not only decorate but also contribute to an environmentally sustainable way of celebrating Easter. Embrace your creativity, personalize your space, and enjoy the beauty of driftwood Easter decor as it enlivens your home.

Filed Under: Driftwood Ideas Tagged With: crafts, DIY, Driftwood, Easter, Seasonal Decor

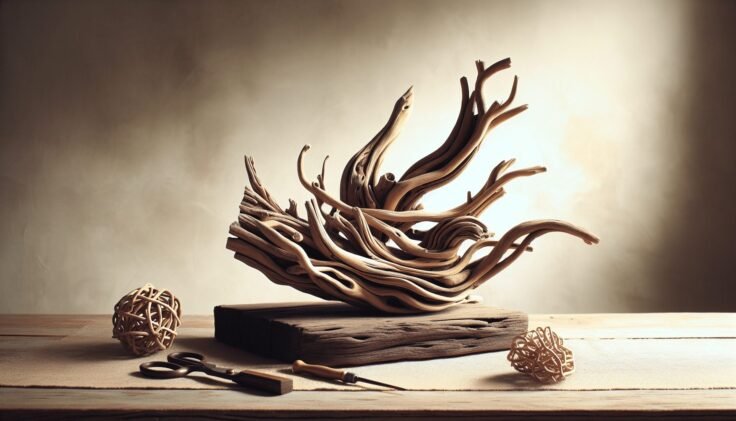
Driftwood Eagle Sculpture

March 2, 2025 by admin

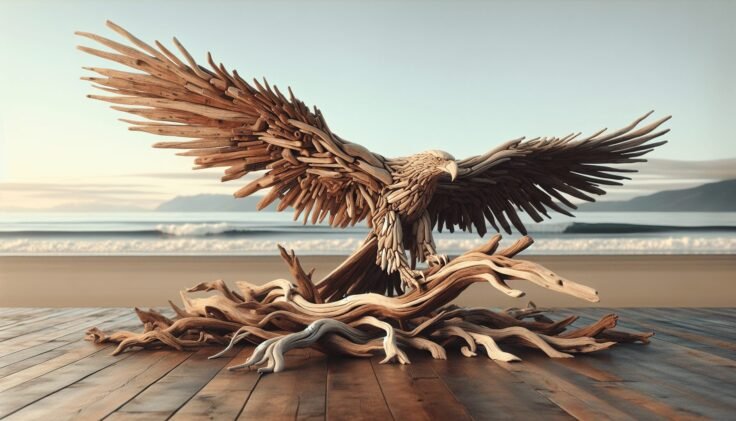
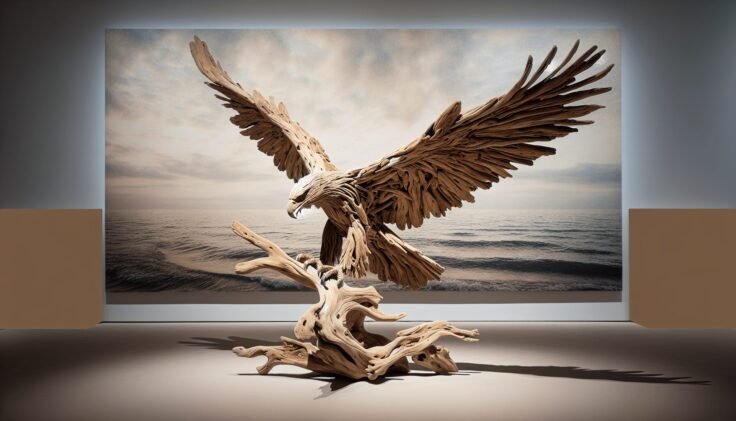
Have you ever marvelled at how nature’s remnants can be transformed into breathtaking art? If not, the world of driftwood eagle sculptures may just ignite your imagination. These stunning creations not only capture the majestic essence of eagles but also highlight the beauty of recycled natural materials. So, let’s journey through the fascinating process of creating these sculptures, the skills involved, and the unique appeal they hold for artists and admirers alike.

The Enchantment of Driftwood

Driftwood is wood that has been washed onto a shore or beach of a sea, river, or lake by the action of winds, tides, or waves. It is often praised for its organic beauty and the way it embodies nature’s artistry, with each piece having its own unique character shaped by the elements. As it’s worn smooth by nature, there’s a softness in its appearance that appeals to the senses.

What Makes Driftwood Special?

Driftwood is celebrated for its distinct characteristics such as varied textures, unpredictable forms, and often intriguing shapes. These characteristics provide a canvas for artists, allowing the wood itself to inspire the final sculpture. Each piece of driftwood tells a story of its journey—whether it’s a storm-tossed branch that has travelled thousands of miles or a tree root from a nearby riverbank.

Benefits of Using Driftwood

Using driftwood in art promotes sustainable practices by recycling natural waste into valuable artistic expressions. Additionally, working with driftwood encourages appreciation for natural processes and the environments from which these works originate. Artists often find a sense of satisfaction in giving a new purpose to something nature intended to discard.

The Art of Sculpting with Driftwood

The process of creating a sculpture from driftwood requires a great deal of creativity, skill, and patience. Artists often rely on the natural shapes and curves of driftwood to inspire the direction of their work, rather than forcing the wood into predetermined forms.

Essential Skills for Driftwood Sculpting

While no formal training is strictly necessary to begin creating driftwood sculptures, certain skills can greatly enhance the process:

  • Visual Imagination: The ability to visualize potential shapes within irregular pieces of wood is crucial.
  • Patience and Precision: Driftwood sculpting can be delicate work, requiring patience and an eye for detail to piece sections together seamlessly.
  • Craftsmanship: Basic woodworking skills can be very beneficial, including knowledge of tools like saws, sanders, and chisels.

Common Tools and Materials

Though each artist may have a preferred set of tools, some essentials include:

ToolPurpose
SawCutting larger pieces of driftwood
SandpaperSmoothing edges and surfaces
ChiselsShaping finer details
Wood glueAssembling different pieces securely
Wire and NailsReinforcing connections

Additional elements like paint, varnish, or stains may also be used to enhance the sculpture’s appearance or increase its durability.

Driftwood Eagle Sculpture

Crafting a Driftwood Eagle Sculpture

Creating a driftwood eagle sculpture involves more than simply assembling pieces of wood into an avian shape. The artist must capture the spirit and grace of the eagle, a symbol of freedom and strength, through careful selection and placement of each fragment.

The Creative Process

1. Selecting Your Driftwood

The first step involves gathering driftwood pieces that complement each other in shape, size, and color. Consideration is given not only to the final form but also to how each piece can contribute to the overall texture and balance. Finding the right wood can be a meditative process, often taking place along various waterlines where nature has unveiled its latest treasures.

2. Visualizing the Eagle

Envision the eagle poised in mid-flight or perched proudly. Do you see its powerful wings, sharp beak, and keen eyes? This mental image will guide the assembly of your sculpture.

3. Building the Structure

Begin by forming the basic framework. The torso often forms the centerpiece, with wings and tail carefully crafted to add balance. The wood is cleverly selected and positioned so the natural curves and grains suggest the intended shapes and movements.

4. Detailing and Refinements

With the primary structure in place, it’s time to bring your eagle to life. Fine details such as feathers, claws, and facial features are meticulously added. Tools like chisels offer precision, while sandpaper ensures a smooth finish. Each tiny adjustment contributes to a realistic portrayal of the eagle’s majesty.

5. Finishing Touches

Decide whether to leave the sculpture in its natural state or add finishing touches such as varnish to protect the wood and enhance its color. Some artists choose to accent features with paint to draw attention to specific details or effects.

The Appeal of Driftwood Eagle Sculptures

Driftwood eagle sculptures have a universal appeal that resonates with art collectors, environmentalists, and nature lovers alike. Their aesthetic appeal lies not only in their appearance but also in the deeper connections they foster between humans and nature.

Aesthetic Beauty and Symbolism

Eagles represent strength, freedom, and vision. Translating these qualities into a sculpture using natural materials adds depth to their artistic value. The beauty of driftwood works synergistically with the noble image of the eagle, offering both a visual and symbolic experience.

Environmental and Cultural Significance

As artworks created from naturally found materials, these sculptures promote sustainability and environmental awareness. Each piece encourages the appreciation of nature where art and ecology intersect. Furthermore, as cultural symbols, eagles arouse a sense of national pride and respect across various societies, enhancing the sculpture’s resonance and value.

Driftwood Sculptures in Modern Art

In contemporary art, driftwood sculptures are celebrated for their innovation and environmental consciousness. More artists continue to embrace these practices, bringing diverse interpretations and techniques to the table, thus expanding the boundaries of traditional sculpture.

Driftwood Eagle Sculpture

Honoring the Craft Through Workshops and Exhibitions

Workshops can provide aspiring artists valuable insights into the nuanced craft of driftwood sculptures, offering hands-on experiences under seasoned professionals. Learn about professional techniques, gain feedback on your approach, and connect with a community that shares your passion for turning natural remnants into wondrous art.

Participating in Driftwood Workshops

Workshops cover a range of topics, from the basics of selecting driftwood to advanced sculpting techniques. Beyond technical skills, they inspire camaraderie among participants, fostering an environment where creativity and ideas flourish.

Exhibitions and Galleries

Numerous art galleries and exhibitions worldwide celebrate driftwood sculptures, providing a stage for showcasing these unique works. Here, artists receive recognition while audiences are introduced to the artistry and thoughtfulness behind each sculpture. Exhibitions can also inspire future generations to continue exploring artistic possibilities found in nature.

Conclusion

Driftwood eagle sculptures offer a harmonious blend of nature’s raw beauty with human creativity, standing as exquisite reminders of the bond between our environments and artistic expression. As you consider how natural materials can be transformed into symbols of strength, freedom, and artistry, the fascinating world of driftwood awaits your discovery. Through the inspired hands of sculptors, these wood fragments soar once more, much like the eagles they embody, inviting us to appreciate both form and meaning in the intricacies they present. Whether you’re an artist, collector, or a nature enthusiast, there’s an aspect of driftwood eagle sculptures that will certainly captivate your heart and feed your imagination.

Filed Under: Driftwood Ideas Tagged With: Artwork, Driftwood, Eagle, Nature Art, Sculpture

Dyi Driftwood Art

March 1, 2025 by admin

Have you ever strolled along a beach and noticed the unique, weathered pieces of driftwood dotting the shore? These natural treasures are not only beautiful but also an invitation to unleash your creativity through DIY driftwood art. Crafting something with your own hands can be both rewarding and therapeutic. Plus, driftwood offers a perfect canvas—it’s rustic, durable, and each piece tells a tale of its journey through the waters.

If the thought of creating driftwood art has piqued your interest, you’re in the right place! Let’s embark on a friendly and thoroughly enjoyable journey into the world of DIY driftwood art. You’ll discover the endless possibilities that lie within those twisted, sun-bleached pieces of wood. Whether you’re a seasoned artisan or new to crafting, this guide will offer tips, ideas, and step-by-step instructions for transforming driftwood into artful masterpieces.

Dyi Driftwood Art

Understanding Driftwood

Driftwood is essentially wood that has been washed onto a shore or beach by weathering, waves, and tides. As the wood takes a journey through the water, it undergoes a physical transformation. This naturally alters its appearance, providing unique textures and shapes cherished by artists and decorators alike.

The Allure of Driftwood

The charm of driftwood lies in its uniqueness. Every piece has a distinct character, molded by its travels through the elements. This natural artistry makes driftwood highly desirable in crafting and home décor. Its neutral tones and organic lines complement a variety of decorative styles, from minimalist to rustic.

Using Found Driftwood Responsibly

While collecting driftwood can be exciting, it’s important to do so responsibly. Ensure you adhere to local guidelines, especially in protected areas or parks where removing natural artifacts might be prohibited. Also, be mindful of the ecosystem—driftwood plays a role in the habitat of coastal species.

Preparing Driftwood for Crafting

Before you can begin your driftwood art project, it’s essential to properly prepare the wood. This ensures that your artwork is safe, clean, and long-lasting.

Cleaning Your Driftwood

To clean driftwood, start by rinsing it thoroughly with fresh water to remove sand, salt, and any debris. You might need to use a brush to get rid of stubborn particles.

Basic Cleaning Steps:

  1. Rinse: Use a hose or a bucket of fresh water.
  2. Scrub: Gently scrub using a soft brush.
  3. Soak: Submerge in water for a few days to remove salt and contaminants.
  4. Dry: Allow it to dry completely in the sun.

Sanitizing Driftwood

Sanitization is necessary to eliminate any potential bacteria or insects. This can be done by soaking the driftwood in a mixture of water and vinegar. Using a ratio of 1 part vinegar to 5 parts water should suffice.

Sanitizing Steps:

  1. Soak: Submerge the driftwood in the vinegar solution for 24-48 hours.
  2. Rinse: Rinse thoroughly with fresh water to remove vinegar.
  3. Dry Again: Leave the driftwood out in the sun to ensure it’s completely dry before usage.

Treating and Sealing**

If you plan to use driftwood indoors or for furniture, applying a sealant can enhance its durability and appearance.

  1. Sand: Lightly sand to remove any rough edges.
  2. Seal: Apply a clear wood sealant or varnish.
  3. Dry: Allow the sealant to cure as per the manufacturer’s instructions.

Crafting Your Driftwood Art

With your driftwood prepped and ready, it’s time to let your creativity flow. The possibilities are as endless as your imagination. Here are some ideas to get you started on your artistic journey.

Driftwood Wall Art

Creating wall art out of driftwood can bring a naturalistic vibe to any room. You might arrange smaller pieces into a collage or utilize a larger piece as a centerpiece.

Step-by-Step Guide:

  1. Design Layout: Arrange pieces on the floor to find the composition you enjoy.
  2. Attach Pieces: Fix pieces together using glue or screws.
  3. Mounting: Attach wall mounts or a backing to support the structure.
  4. Installation: Secure to the wall using proper anchors.

Driftwood Sculptures

Sculptures made from driftwood are remarkable both indoors and outdoors. Their organic form and texture make them stand out pieces.

Basic Steps:

  1. Select Base Pieces: Choose foundational pieces to form the sculpture’s framework.
  2. Build Structure: Use wire, glue, or screws to attach smaller pieces.
  3. Balance: Ensure the sculpture can stand or hang securely.
  4. Finishing Touches: Sand rough edges, if necessary, for a smoother appearance.

Driftwood Furniture

If you are feeling adventurous, create functional art by crafting furniture. Driftwood tables, shelves, and garden benches can be stunning additions to your home.

Creating a Driftwood Table:

  1. Find a Sturdy Base: Choose large, thick pieces for the legs.
  2. Construct Surface: Secure additional driftwood or a glass top.
  3. Fasten Together: Use brackets or wooden dowels for stability.
  4. Finish: Sand, seal, and ensure all pieces are secure.

Driftwood Mirrors

Combine form and function by framing mirrors with driftwood. This project can enhance the light in any space and make the room appear larger.

Steps to Make a Driftwood Mirror:

  1. Select a Mirror: Choose the appropriate size for your space.
  2. Arrange Pieces: Lay driftwood around the mirror to find the desired pattern.
  3. Attach to Frame: Secure pieces using a strong adhesive.
  4. Hang with Care: Ensure proper hanging hardware is used to support the mirror’s weight.

Maintaining Driftwood Art

Once your driftwood art project is complete, you’ll want it to last. Maintaining driftwood art requires minimal effort but ensures longevity.

Regular Cleaning

Keep your driftwood art dust-free with regular cleaning. Use a soft, dry cloth to gently wipe away any dust or dirt. For more thorough cleaning, a slightly damp cloth will do the trick.

Avoiding Sunlight Exposure

Direct sunlight can alter the color and condition of your driftwood. If possible, place your art piece away from windows or in areas with filtered light to maintain its natural appearance.

Re-sealing

For driftwood furniture or art that is heavily handled, consider re-sealing every couple of years. Follow the same sealing process you used initially to keep the wood protected.

Dyi Driftwood Art

Benefits of Crafting with Driftwood

Creating driftwood art isn’t just about the final product; the process itself offers numerous benefits.

Therapeutic and Relaxing

Working with your hands is a fantastic way to relieve stress. The tactile nature of crafting with driftwood is meditative and allows you to disconnect from the digital world.

Boosting Creativity

Driftwood’s unique shapes and textures challenge you to think creatively. This artistic exploration can enhance problem-solving skills and inspire innovation in other areas of life.

Eco-Friendly Crafting

Using driftwood is a sustainable practice, repurposing natural material that might otherwise be overlooked as waste. This aligns with eco-friendly and minimalist lifestyles.

Exploring Driftwood Art Communities

Consider joining online and local driftwood art communities. These groups are fantastic resources for inspiration, sharing tips, and showcasing your work with an appreciative audience.

Online Platforms

Websites like Pinterest or Instagram allow you to explore endless driftwood art ideas. Join groups or follow hashtags to stay connected with fellow driftwood aficionados.

Workshops and Classes

Local arts and crafts stores may offer classes in driftwood art. These sessions provide hands-on experience and the opportunity to meet other enthusiasts.

Art Exhibitions

Attend exhibitions focusing on natural or reclaimed materials. These events can provide new perspectives and spark ideas for future projects.

Final Thoughts

Creating DIY driftwood art is an incredibly rewarding pursuit. It encourages a deep connection with nature and offers an opportunity for personal expression. From simple wall hangings to intricate sculptures, driftwood allows for artistic freedom and innovation.

As you embark on your driftwood crafting journey, remember that each piece of art you create is unique—much like the driftwood itself. So let your intuition, imagination, and inspiration guide you, and enjoy the process of bringing a bit of the beach’s natural beauty into your home.

Filed Under: Driftwood Ideas Tagged With: Art, DIY, Driftwood, home decor

Dyi Driftwood Christmas Tree

March 1, 2025 by admin

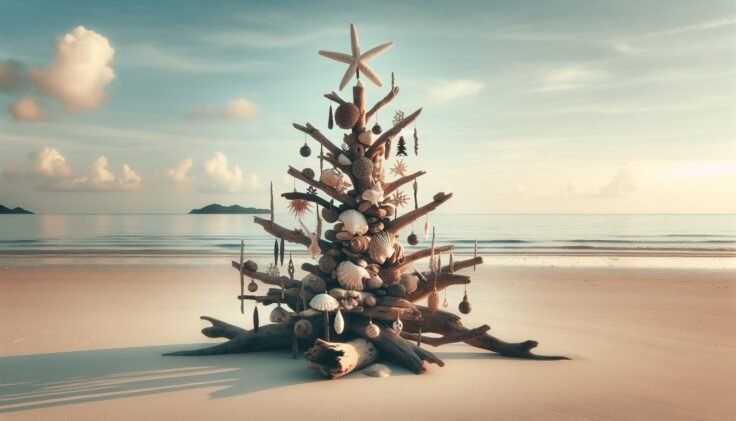
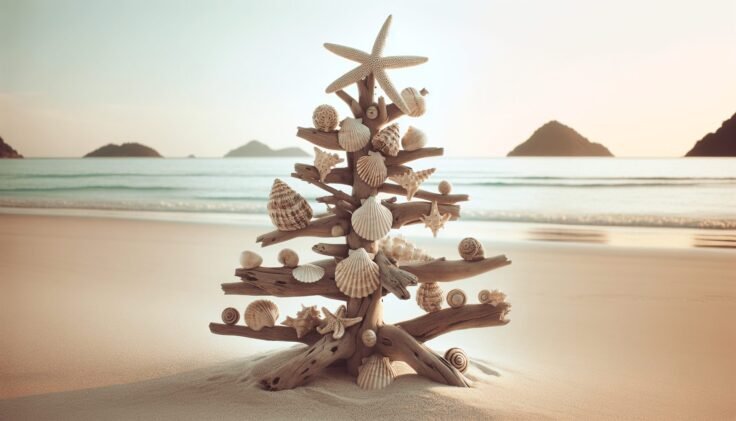
Have you ever thought of bringing a piece of the coastline into your home for the holidays? Crafting your own driftwood Christmas tree can be a wonderful, sustainable way to add a unique and personal touch to your festive decor. This guide will walk you through the process of creating a DIY driftwood Christmas tree, offering tips and suggestions along the way to make it a fun and rewarding experience.

Understanding the Charm of Driftwood

Driftwood possesses a unique beauty, shaped and weathered by nature. Each piece is different, having floated in the ocean and washed ashore, carrying with it stories of the sea. Using driftwood in your Christmas tree project brings a rustic, coastal vibe into your home, perfect for those who cherish the sea or live by the coastline. It’s also an excellent way to recycle what nature provides, making your holiday season a bit more sustainable.

Why Choose a Driftwood Christmas Tree?

Choosing a driftwood Christmas tree over a traditional one can have numerous benefits. Not only does it give a twist to conventional decor, but it also allows you to create something truly unique. A driftwood tree can fit into any interior design style, from minimalistic to bohemian, and serves as a wonderful conversation starter. Plus, it’s a perfect project for those who enjoy crafting.

Materials You’ll Need

Before starting your project, gather the essential materials. The success of your driftwood Christmas tree depends on your preparation and tools.

  1. Driftwood Pieces: Collect pieces in varying sizes; the more varied, the more interesting your tree will be.
  2. Base Stand: Use a sturdy base, such as a tree disc, to anchor your masterpiece.
  3. Drill and Drill Bits: These will help create holes for securing the driftwood.
  4. Metal Rod or Wooden Dowel: Essential for stacking the driftwood pieces.
  5. Sandpaper: Necessary for smoothing any rough edges.
  6. Optional – Lights and Ornaments: To add a festive finish to your tree.

Gathering and Preparing Driftwood

Crafting a driftwood Christmas tree starts with gathering the wood itself. It’s a pleasurable process that can be an adventure on its own.

Where to Find Driftwood

You can find driftwood along coastlines and riverbanks. If you’re near a beach, spend a day combing the shore. Look for pieces that capture your attention—those with interesting shapes, textures, or colors. Make sure to follow local regulations regarding collecting driftwood.

Cleaning and Preparing Your Driftwood

Once you’ve gathered your driftwood, it’s time to prepare it for use. Cleaning is crucial as it removes sand, salt, and any creatures that may have hitchhiked along.

  • Rinse Thoroughly: Use water to rinse off debris and sand.
  • Soak in Freshwater: Soak the pieces for a few days in fresh water to remove salt.
  • Drying: Lay the driftwood out in the sun, ensuring it’s completely dry before use.
  • Sanding: Use sandpaper to smooth any rough spots and edges.

Dyi Driftwood Christmas Tree

Constructing Your Driftwood Tree

Now that your driftwood is ready, you can begin constructing your tree. This process allows for creativity, so there’s no strict right or wrong way to do it.

Assembling the Base

First, prepare your tree’s foundation. Your base should be sturdy enough to support the weight of the driftwood without tipping.

  1. Select Your Base Stand: A thick tree disc or a pre-made wooden stand works well.
  2. Drill a Hole: Drill a center hole in your base for the rod or dowel.

Building the Tree Structure

Building the tree involves stringing your driftwood pieces along a central rod or dowel.

  1. Drill Holes through Driftwood: Each piece of driftwood should have a hole drilled through its center.
  2. Arrange by Size: Lay out your driftwood from largest to smallest so you can easily stack from bottom to top.
  3. Thread the Driftwood: Start threading pieces onto the rod, beginning with the largest. Rotate each piece slightly to mimic a natural, tree-like appearance.

Adding the Finishing Touches

Once your tree structure is complete, it’s time to add festive touches. This is the part where you can truly personalize your creation.

  • Lighting: Wrap strands of fairy lights around your tree to illuminate and highlight the natural beauty of the driftwood.
  • Ornaments: Keep it simple with a few choice ornaments that complement the rustic, airy feel of the driftwood.
  • Star Topper: Consider crowning your tree with a star, made perhaps from intertwined pieces of driftwood or repurposed beach finds.

Caring for Your Driftwood Tree

After the holidays, taking care of your driftwood tree ensures it lasts for many seasons.

Maintenance Tips

  • Storage: Store your tree in a dry, cool place to prevent moisture damage or mold.
  • Regular Checks: Each year, check for wear and tear, re-sanding rough spots if necessary.
  • Re-sealing: Consider using a natural sealant every few years to preserve the wood’s beauty.

Dyi Driftwood Christmas Tree

The Eco-Friendly Charm

Crafting a driftwood Christmas tree not only adds aesthetic value but also embraces eco-friendly practices. By using materials offered by nature, you’re reducing reliance on traditional holiday decorations which often use non-recyclable materials.

Environmental Impact

  • Sustainable Material Use: Driftwood is a sustainable resource, taking nothing new from the environment.
  • Recycling: By creating a tree that can be reused year after year, you’re minimizing waste during the holiday season.
  • Reduction in Carbon Footprint: Transport and manufacture of artificial trees contribute significantly to carbon emissions, something you can help reduce with a driftwood alternative.

Getting Creative

Your driftwood Christmas tree project can extend beyond this primary endeavor. Consider crafting additional decor to complement your new creation.

Additional Decor Ideas

  1. Driftwood Garlands: String smaller pieces together to create a garland with twine.
  2. Driftwood Wreaths: Form a circular wreath to hang as part of your holiday decorations.
  3. Beach-themed Ornaments: Create ornaments using shells and small pieces of driftwood.

Expanding Your Crafting Skills

This project can be the start of a newfound love for crafting with natural materials. Challenge yourself to work with other beach finds, perhaps incorporating sea glass, shells, or pebbles into your decor projects.

With a little creativity and some basic tools, you can transform everyday elements from nature into beautiful, unique holiday decorations. Crafting a DIY driftwood Christmas tree is not just about holiday decor but embracing the beauty and sustainability of what the natural world offers. Enjoy every step of the process, from gathering your materials to seeing your final creation take pride of place in your festive celebrations.

Filed Under: Driftwood Ideas Tagged With: christmas tree, crafts, Driftwood, Handmade, Holiday decor

Driftwood Kitchen Decor

March 1, 2025 by admin

Have you ever strolled along a beach and found yourself enamored with the beautiful, weather-worn pieces of driftwood that wash ashore? These natural treasures not only tell stories of their journeys across the sea but also bring a touch of nature into your home when used in decor. Driftwood kitchen decor offers a unique way to incorporate rustic charm and a sense of peace into your cooking space, making it both aesthetically pleasing and functional.

Understanding the Charm of Driftwood

What Makes Driftwood Special?

Driftwood is wood that has been washed onto a shore by the action of winds, tides, or waves. Over time, it is polished by natural elements, resulting in unique textures and shapes that exude natural beauty. Its muted colors and organic form make driftwood a versatile element in home decor, easily fitting into various interior designs, especially coastal, rustic, or bohemian styles.

How to Incorporate Driftwood in Your Kitchen

Wall Art and Shelves

Driftwood can be transformed into stunning pieces of wall art. Whether it’s a simple piece hung as is, or driftwood glued together to form a more elaborate design, it adds a touch of nature to any kitchen. You can also consider using driftwood as a base for shelves, maintaining functionality while adding an artistic touch.

Functional Centerpieces

Imagine using driftwood as the centerpiece of your kitchen island or table. It can be a standalone piece or combined with fresh flowers and candles for a more elegant look. This type of centerpiece draws the eye and becomes a conversation starter.

Driftwood as Utensil Holders

Use sanded pieces of driftwood with drilled holes to hold kitchen utensils. This not only keeps your utensils organized but also introduces the natural beauty of driftwood into everyday use. It’s a perfect blend of aesthetics and practicality.

Driftwood Kitchen Decor

DIY Projects to Enhance Your Kitchen Decor

Crafting Driftwood Candle Holders

You can easily create candle holders using driftwood by drilling small openings to hold candles. The warm glow from the candles reflects beautifully against the natural wood tones, creating a calming atmosphere.

Driftwood Chalkboard for Notes

Fix a driftwood piece to a simple chalkboard for notes or shopping lists. Hang it in a visible spot in your kitchen to create a functional art piece that keeps you organized.

Building a Driftwood Spice Rack

A driftwood spice rack not only organizes your spices but also enhances your kitchen’s rustic charm. Securely attach shelves or holders to a piece of driftwood and mount it where accessible during cooking.

Benefits of Driftwood Decor

Eco-Friendly and Sustainable

Using driftwood is environmentally friendly, as it reuses natural resources that would otherwise go to waste. It’s a sustainable way to bring the raw beauty of nature into your home without causing harm to the environment.

Unique and Personal Touch

No two pieces of driftwood are alike, which means every piece of driftwood decor is unique. This uniqueness allows you to add a personal touch to your kitchen, setting your space apart with distinct natural artistry.

Low Maintenance

Driftwood requires little maintenance. A periodic dusting or wiping with a damp cloth is usually sufficient to keep it looking its best. This makes it an ideal choice for those who love decor but have a busy lifestyle.

Driftwood Kitchen Decor

Considerations for Using Driftwood in Your Kitchen

Sourcing Driftwood Responsibly

When collecting driftwood, ensure that you are following local guidelines and environmentally responsible practices. Some areas may have restrictions to protect natural habitats.

Preparing Driftwood for Home Use

It’s important to properly clean and treat driftwood before bringing it into your home. Soak the driftwood in a bleach solution to rid it of any insects or mold, and rinse it thoroughly before use.

Enhancing Kitchen Themes with Driftwood

Modern Coastal Aesthetics

Driftwood fits seamlessly into coastal-themed kitchens. Pair it with pastel colors, blues, and whites to enhance the sea-shore vibe, creating a kitchen that feels like a peaceful retreat.

Rustic and Bohemian Touches

If your style is more rustic or bohemian, driftwood can be used to complement warm, earthy tones and textures, adding depth and interest to your kitchen.

Complementary Materials and Colors

Driftwood pairs well with other natural materials such as stone, metal, and glass. By combining different textures, you can create a well-balanced and inviting kitchen space.

Conclusion

Driftwood kitchen decor encapsulates the essence of nature’s beauty and brings it right into your home. Its versatility allows for endless creative possibilities, letting you personalize your space while enjoying the tranquility that comes with natural elements. Through thoughtful integration of driftwood, you can transform your kitchen into a unique environment that not only serves as a place for cooking but also as a haven for relaxation and inspiration. Whether crafted into wall art, used functionally, or simply appreciated in its natural form, driftwood enhances the kitchen’s aesthetic while respecting the environment.

Filed Under: Driftwood Ideas Tagged With: Coastal Style, DIY, Driftwood, Kitchen Decor, natural materials

Driftwood Dyi

March 1, 2025 by admin

Have you ever stumbled upon a piece of driftwood and wondered how you might transform this natural beauty into a DIY masterpiece? Driftwood, with its unique textures and shapes, offers a wealth of creative opportunities to infuse your space with a touch of nature’s artistry. Whether you’re new to DIY projects or an experienced crafter, working with driftwood can be an enjoyable and rewarding experience.

This article will guide you through the fascinating world of driftwood DIY projects. You’ll discover everything from sourcing and preparing driftwood to crafting inventive pieces for your home. This journey will unveil various creative possibilities, allowing your imagination to run wild and helping you create something truly extraordinary.

Driftwood Dyi

Introduction to Driftwood

Driftwood is not just a piece of wood you find washed ashore on a beach; it is a remnant of a tree that has weathered the elements, traveling through water bodies, and acquiring unique features along the way. Its weathered appearance, smoothed edges, and interesting colors make it a favorite medium for artistic and decorative projects.

What is Driftwood?

Driftwood refers to any wood that has been washed ashore by rivers, lakes, or oceans. It often travels great distances, occasionally carrying entire ecosystems of plants and animals. This journey, coupled with the continuous wear from water and sand, gives driftwood its distinctive appearance.

Why Use Driftwood for DIY Projects?

Driftwood is an incredibly versatile material, cherished by artists and craftspeople for its unique beauty and texture. Its practicality and aesthetics make it an excellent choice for adding a natural, rustic touch to your decor. Additionally, using driftwood promotes sustainability as it’s a way of reusing a naturally-occurring material that might otherwise go to waste.

Aesthetic Appeal

One of the primary reasons driftwood is popular among DIY enthusiasts is its inherent beauty. Each piece is unique, with twisted forms and weathered looks that bring a sense of nature indoors. Whether as a centerpiece or a subtle accent, driftwood can add warmth and charm to any setting.

Eco-friendly and Sustainable

Incorporating driftwood into your projects is an eco-friendly choice. It’s a form of recycling and repurposing, reducing the demand for new wood and helping to minimize deforestation. Embracing driftwood means supporting the natural cycle and promoting environmental stewardship.

Sourcing Driftwood

Once you’re convinced of the beauty and sustainability of driftwood, the next step involves sourcing it. Driftwood can be found in various environments, and there are a few considerations to keep in mind when collecting it.

Where to Find Driftwood

Driftwood can be found along beaches, riverbanks, and lakeshores. Before collecting, ensure you are allowed to do so, as there may be regulations in place to protect natural habitats.

  • Beaches: Coastal beaches are great places to find saltwater driftwood. Keep an eye out for restrictions or protected areas.

  • Rivers and Lakes: Freshwater driftwood tends to have a slightly different texture and may be found along banks or sandbars.

Legal and Ethical Considerations

Before you start collecting driftwood, it’s important to understand the legal and ethical considerations. Always respect local regulations and guidelines concerning natural resource collection. Some areas have restrictions in place to protect ecological systems, and taking wood from these places may result in fines.

Choosing the Right Pieces

When selecting driftwood, look for pieces that inspire you. Whether it’s the shape, size, or texture, ensure the wood is free from rot or excessive splintering. Consider the project you have in mind and select accordingly.

Preparing Driftwood for Use

Once you’ve gathered your driftwood, the preparation phase is crucial. Proper preparation ensures your pieces are clean, preserved, and ready to be transformed into beautiful DIY creations.

Cleaning Driftwood

Cleaning is the first step. Driftwood often carries salt, sand, and sometimes critters. Washing your pieces thoroughly will help preserve them and make them ready for crafting.

  1. Remove Debris: Start by brushing off as much loose debris as possible.

  2. Soak and Scrub: Soak your driftwood in freshwater for a few hours or overnight. Use a stiff brush to scrub away sand, salt, or algae.

  3. Rinse Thoroughly: After scrubbing, rinse the driftwood with clean water to remove any remaining residue.

Drying the Driftwood

Once cleaned, drying the driftwood is essential to prevent mold and decay. Allow the wood to dry naturally in a warm, dry place. This process can take a few days to weeks, depending on the size and moisture content of the wood.

Preserving Driftwood

While not always necessary, preserving driftwood can add durability and longevity to your projects. This process might involve sealing or bleaching, depending on your preferences.

  • Bleaching: If you wish to lighten the driftwood, you can apply a diluted bleach solution. Rinse thoroughly after bleaching and allow to dry completely.

  • Sealing: Applying a wood sealant can prevent moisture absorption and enhance the wood’s natural appearance. Ensure that any product you use is safe for indoor use if your project will be inside.

Driftwood DIY Project Ideas

With your driftwood clean and prepped, it’s time for the fun part: creating! The possibilities with driftwood are almost limitless. Here are some project ideas to spark your creativity.

Driftwood Wall Art

Driftwood wall art is a fantastic way to bring a piece of nature into your home. Wall hangings, mirrors, and even sculptures can add character and depth to any room.

Tools and Materials:

  • Driftwood pieces
  • Adhesive or frame
  • Hooks or wire for hanging

Steps:

  1. Arrange your driftwood pieces on a flat surface until you’re satisfied with the design.

  2. Secure the pieces to a backing using strong adhesive or nails.

  3. Attach hooks or wire for easy hanging.

Driftwood Shelves

Creating shelves with driftwood is not only practical but can also add a rustic touch to your home decor. The natural, uneven surface of driftwood offers a unique aesthetic.

Tools and Materials:

  • Long, flat driftwood pieces
  • Wall brackets
  • Screws and drill

Steps:

  1. Select driftwood pieces that will serve as sturdy shelves.

  2. Secure brackets to the wall and attach the driftwood using screws.

  3. Ensure the shelves are level and can support the weight of items you wish to display.

Driftwood Candle Holders

Another simple yet elegant project is fashioning candle holders from driftwood. These can create a cozy, calming atmosphere.

Tools and Materials:

  • Various sizes of driftwood
  • Drill and drill bits
  • Tea light candles or votives

Steps:

  1. Choose pieces of driftwood that have a flat, stable base.

  2. Drill shallow holes into the wood to fit the candles snugly.

  3. Place the candles and enjoy the warm glow they emit.

Driftwood Furniture

For those feeling particularly ambitious, driftwood can be used to create furniture pieces like tables, chairs, or headboards. Crafting furniture from driftwood will require some woodworking skills, but the results can be truly remarkable.

Tools and Materials:

  • Large pieces of driftwood
  • Wood screws
  • Sandpaper
  • Wood glue

Steps:

  1. Design your furniture piece, keeping in mind the shapes and sizes of the driftwood.

  2. Use wood screws and glue to attach the pieces together, ensuring stability.

  3. Sand any rough edges to prevent splinters, and seal the wood to protect it from wear.

Driftwood Dyi

Safety Tips for Working with Driftwood

When embarking on your driftwood DIY projects, safety should always be a priority. Working with natural materials and tools can pose risks, so it’s essential to take precautions.

Using Tools Safely

  • Always use the appropriate tools for the job and handle them with care.
  • Wear protective gear such as gloves, goggles, and masks when cutting or sanding driftwood.

Handling Chemicals

  • If you choose to bleach or seal your driftwood, ensure you are in a well-ventilated area.
  • Follow all safety instructions on chemical products and use them sparingly.

Lifting and Transporting Driftwood

  • Be mindful of the weight and size of the driftwood you choose. Lifting heavy materials can cause injury if not done properly.
  • Use a cart or enlist help for transporting large pieces to avoid strain.

Benefits of Driftwood Projects

Delving into DIY driftwood projects comes with a myriad of benefits. Not only do you get the gratification of creating something beautiful, but you also enrich your environment and personal wellbeing.

Boosting Creativity and Skills

Working with driftwood can enhance your creativity and problem-solving skills. Every project presents unique challenges, encouraging you to think outside the box and adapt.

Adding Unique Home Decor

Driftwood projects infuse your home with a unique, personal touch that store-bought items cannot match. Each piece you create is a one-of-a-kind work of art.

Fostering a Connection with Nature

DIY driftwood projects are a wonderful reminder of the natural world. Surrounding yourself with elements from nature can have a grounding effect, promoting relaxation and mindfulness.

Common Challenges and Solutions

Like any DIY venture, working with driftwood can present challenges. Understanding potential issues and their solutions will ensure a smooth crafting experience.

Dealing with Unstable Pieces

Driftwood can have unusual shapes and may not always sit flat. Use sandpaper to level bases or attach felt pads to stabilize your pieces.

Preventing Cracks and Splits

Driftwood can be prone to cracking as it dries. To minimize this, dry the wood slowly and naturally. If splits occur, you can use wood glue to mend cracks discreetly.

Ensuring Durability

Projects meant for functional use, like furniture, need to be especially durable. Reinforce joints with screws and ensure all attachments are secure.

Conclusion

Embracing driftwood for DIY projects allows you to combine creativity, sustainability, and functionality. As you embark on your driftwood journey, remember that each piece you create carries the spirit of nature’s artistry. These projects not only elevate your decor but also nurture a peaceful, natural state in your living environment. Whether you’re crafting a simple candle holder or an elaborate piece of furniture, the world of driftwood invites you to explore and express your creativity with open arms.

Filed Under: Driftwood Ideas Tagged With: crafts, Driftwood, Handmade, home decor, Upcycling

  • « Previous Page
  • Page 1
  • …
  • Page 18
  • Page 19
  • Page 20
  • Page 21
  • Page 22
  • …
  • Page 183
  • Next Page »

Primary Sidebar

Driftwood4us.com, is a participant in the Amazon Services LLC Associates Program, an affiliate advertising program designed to provide a means for sites to earn advertising fees by advertising and linking to amazon.com.