• Skip to main content
  • Skip to primary sidebar
  • Terms and Conditions
  • Privacy Policy
  • Contact

Driftwood 4 Us

Just About Driftwood

Driftwood Ideas

Driftwood Mobile Diy

May 29, 2025 by admin

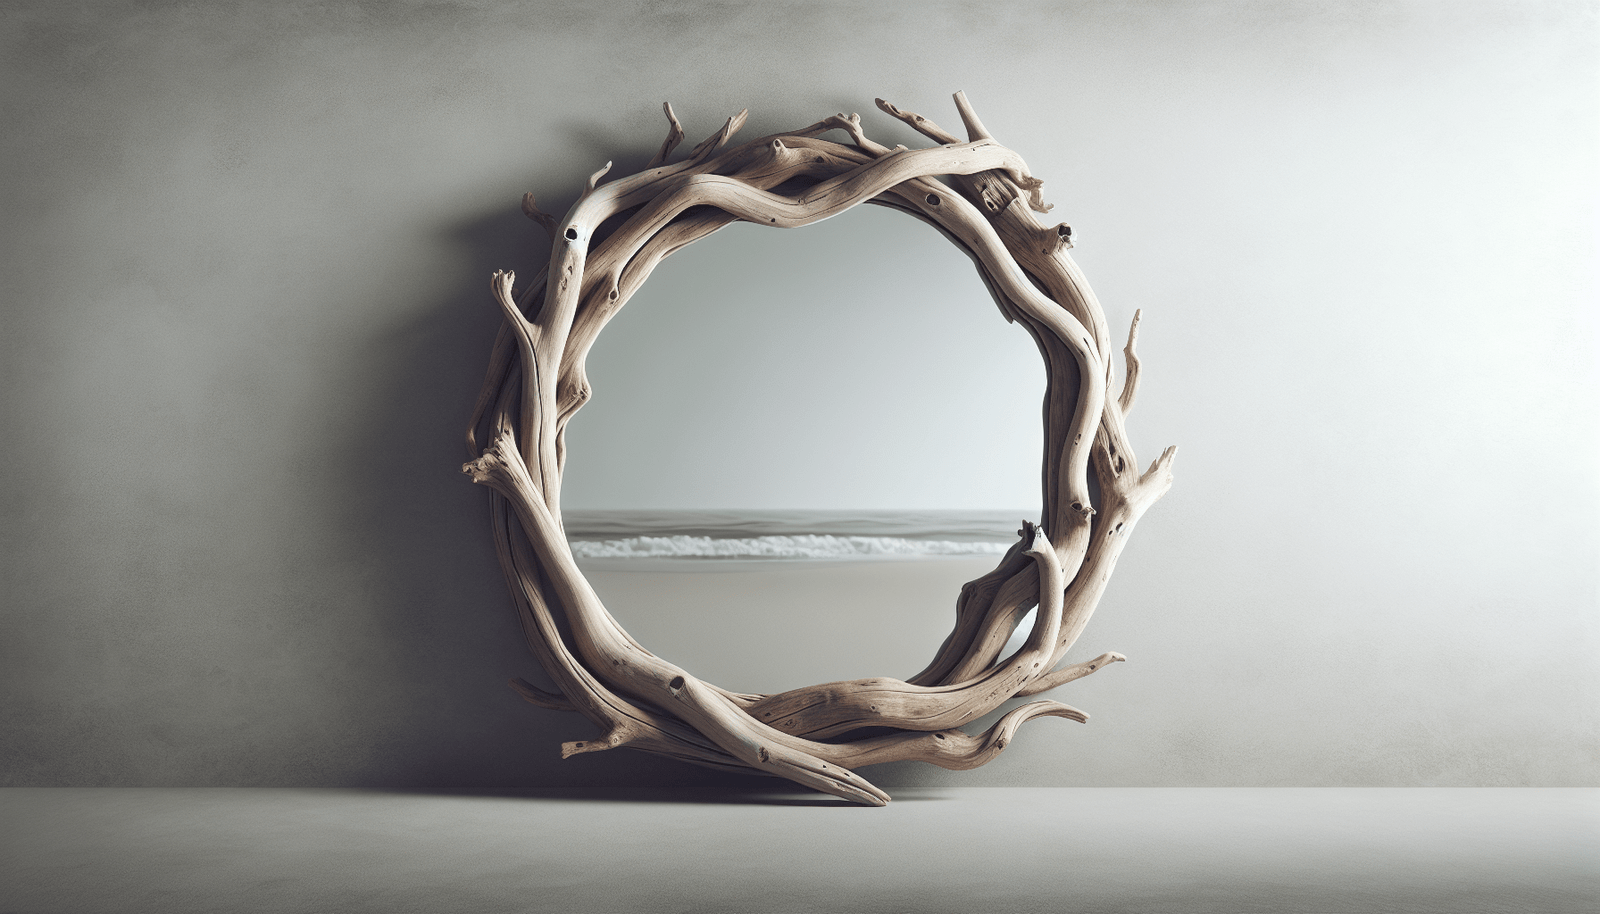
Have you ever wandered along a sunlit beach and stumbled upon a uniquely shaped piece of driftwood, its weathered texture telling a story of time and tide? If so, you’re not alone! Driftwood’s natural beauty and rustic charm make it a popular choice for home decor, especially when it comes to creating stunning mobiles. Making a driftwood mobile can be a delightful and creative way to bring a piece of nature into your home. Not only is it an enjoyable project, but it also offers a wonderful opportunity to express your creativity.

Driftwood Mobile Diy

What is Driftwood?

Driftwood is essentially any piece of wood that has been washed ashore by the action of tides, winds, or currents. Over time, the continuous motion of the sea smooths its surface, creating an organic, natural texture that is both visually appealing and tactile. These pieces can vary greatly in size, shape, and color, making each piece unique.

Where to Find Driftwood

Finding the right piece of driftwood is the first step in creating your mobile. Often, you’ll find driftwood on beaches along lakes, rivers, and oceans. It’s important to check local regulations before collecting driftwood, as some areas consider it a protected resource. Plan your collection during low tide when the shoreline is more exposed.

Why Choose Driftwood for a Mobile?

Driftwood is not only visually appealing but also highly durable. Its natural resilience to water makes it a lasting part of any decor feature. Moreover, using driftwood supports a sustainable lifestyle by repurposing natural materials rather than relying on manufactured products. A driftwood mobile can effortlessly blend with various interior design themes, whether you prefer modern minimalistic, rustic, or coastal.

Materials You’ll Need

Getting started on your driftwood mobile DIY project is exciting. Let’s prepare by gathering the materials and tools necessary for this craft. Ensure you have the following items ready before you start:

Material/ToolPurpose
Driftwood piecesThe main component of your mobile.
Fishing line or twineFor suspending the driftwood pieces.
Hooks or eye screwsTo attach pieces of driftwood to each other.
Beads and seashellsOptional decorations to add visual interest.
ScissorsTo cut the line or twine to the desired length.
Drill or screwdriverFor making holes in driftwood, if needed.
SandpaperTo smooth any rough edges or surfaces on the driftwood.

Tips on Selecting Your Materials

Choose driftwood pieces of varying lengths and widths for an attractive, layered effect. It’s essential to ensure that the twine or fishing line is durable enough to support the weight of each piece. Lightly sanding the driftwood can help ensure a safer handling experience and improve the longevity of your mobile.

Preparing Your Driftwood

Once you’ve collected your driftwood and gathered necessary materials, the next step is preparation. Preparing the driftwood is a straightforward process that ensures your creation is both a lasting and beautiful one.

Cleaning and Drying

Cleaning your driftwood before use is important to remove any residual sea salt, sand, or potential pests that might inhabit the wood. Here’s a simple cleaning process:

  1. Rinse the driftwood pieces thoroughly with fresh water to wash away salt and sand.
  2. Soak them in a mixture of water and mild bleach for a few hours. This step helps in disinfecting them.
  3. Rinse again and let them dry completely in a sunny spot. This could take a few days, depending on the size and thickness of the wood.

Inspecting and Sanding

After your pieces are cleaned and dried, inspect them for any sharp edges or splintering. Using sandpaper, smooth out any rough areas to prevent injury and to ensure the pieces look polished once they’re assembled.

Designing Your Mobile

The design phase is where your creativity truly gets to shine. Consider the final location of your mobile and how it might complement or contrast with existing decor.

Determining the Arrangement

A balanced design starts with experimentation. Lay out your driftwood pieces on a large flat surface and try several configurations until you find one that pleases you. Consider varying the distance between pieces and testing different combinations of long and short pieces.

Adding Additional Elements

Adding beads, seashells, or other natural elements can enhance your mobile’s aesthetic. Incorporate these elements by threading them onto the fishing line or twine, placing them between each driftwood piece for added visual interest.

Driftwood Mobile Diy

Assembling Your Driftwood Mobile

With a design in mind and supplies ready, it’s time to bring your mobile to life. The assembly process requires a bit of patience and precision to ensure each piece hangs correctly.

Drilling and Connecting

For large or heavy pieces, drilling small holes for hooks or eye screws is the first step. Ensure the holes are centered to maintain balance. For lighter pieces, a simple knot may suffice.

  1. Drill holes where necessary on each piece of driftwood.
  2. Attach the eye screws or hooks.
  3. Tie the fishing line or twine to each piece, leaving enough length for it to dangle at your desired height.

Balancing Your Mobile

Achieving balance is crucial to ensure that your mobile hangs freely and doesn’t tip. Make adjustments as necessary by shortening or lengthening the line between pieces or shifting the position of the line along the driftwood. This process might need some trial and error, so don’t hesitate to rearrange until you’re satisfied with the balance.

Displaying Your Driftwood Mobile

Your mobile is now assembled and ready to display! Consider where it will have the most visual impact and be sure it’s safe from playful pets or areas of high traffic that could cause it to swing aggressively.

Best Places to Hang a Mobile

Driftwood mobiles look stunning in a variety of settings:

  • Living rooms: An ideal space, especially near a window where natural light accentuates the wood texture.
  • Bedrooms: Above the bed or in a reading nook as a comforting, calming piece.
  • Outdoor spaces: Hang it on a porch or patio, but ensure it’s protected from extreme weather when necessary.

Proper Hanging Techniques

When hanging your mobile, ensure that the overhead support can handle the weight of the mobile. Using a strong ceiling hook is essential. If hanging near a window, confirm that the mobile won’t be obstructed by curtains or blinds.

Maintenance and Care

To keep your driftwood mobile looking pristine, periodic maintenance is necessary. This involves gentle cleaning and inspection to ensure the safety and aesthetic integrity of the mobile.

Cleaning Your Mobile

Over time, dust accumulation is expected. Use a soft cloth or feather duster to gently remove dust from the driftwood and additional elements. If your mobile includes easily removable decorations, you might want to clean them separately.

Long-Term Tips

Avoid exposing your mobile to excessive moisture, which could lead to mold or mildew growth. Consider occasionally inspecting the twine or fishing line for wear, which can weaken over time and potentially cause your mobile to fall.

Conclusion

Creating a driftwood mobile is an enriching experience that combines collecting, crafting, and decorating. It not only adds a personal touch to your home decor but also reminds you of the serene beauty of nature. Whether placed in your living room, bedroom, or outdoor patio, a driftwood mobile captures attention and resonates with calm. With the right tools, creativity, and a bit of patience, you can craft a piece that is distinctly yours.

If you haven’t already tried making your own driftwood mobile, maybe it’s time to plan a beach trip or visit your local lakefront for some inspiration. Remember to enjoy the process—it’s just as beautiful as the result!
Filed Under: Driftwood Ideas Tagged With: craft, DIY Project, Driftwood, home decor, Mobile

Driftwood Minwax Stain On Red Oak

May 29, 2025 by admin

Have you ever wondered how to achieve that perfect, rustic look with your woodworking projects? If you’re looking to add a touch of coastal elegance to your red oak furniture or flooring, using a driftwood Minwax stain could be just the answer. This guide will take you through everything you need to know about using driftwood Minwax stain on red oak, making sure your project ends up with a finish that you’ll love.

What is Driftwood Minwax Stain?

Driftwood Minwax stain is a popular choice for those looking to create a weathered, nautical appearance similar to the natural look of weather-beaten wood washed ashore. This stain highlights the wood’s natural grain while imparting a subtle grayish hue that adds depth and character to any piece. Whether you’re finishing a small piece of furniture or an entire room of red oak flooring, driftwood Minwax stain can transform the ordinary into something extraordinary.

Understanding the Driftwood Color

The driftwood color is often desired for its sophisticated yet relaxed aesthetic. Imagine the aged look of wood that has drifted through sea foam, gradually taking on a silvery gray tone. It’s perfect for those aiming for a shabby chic, coastal, or even modern farmhouse style. When applied to red oak, a wood known for its warm tones and pronounced grain, the driftwood stain can create a striking contrast that enhances the wood’s natural beauty.

Why Choose Red Oak?

Red oak is a widely used hardwood in the United States, favored for its durability and attractive grain patterns. It has a warm, reddish hue that can vary from light pink to brownish-red. Its natural character allows for a beautiful transformation when treated with stains, making it perfect for capturing that driftwood look.

Preparing Your Red Oak for Staining

Preparation is key to achieving a flawless finish. Before you start staining, it’s important to properly prepare the wood surface to ensure the stain absorbs evenly and showcases the desirable characteristics of red oak.

Sanding the Wood

Start by sanding your red oak thoroughly. Use a progression of sandpaper grits, beginning with a coarse 80-grit to remove any rough patches or imperfections, and working your way up to a fine 220-grit for a smooth finish. Sanding opens up the wood’s grain to allow the stain to penetrate more deeply, which is essential for achieving that desired weathered look.

Cleaning the Surface

Once sanding is complete, make sure to clean the surface meticulously. Use a soft cloth or tack cloth to remove any dust particles that could interfere with the stain application. Even the smallest particles can cause uneven staining, so it’s worth taking the time to ensure a spotless surface.

Driftwood Minwax Stain On Red Oak

Applying Driftwood Minwax Stain

With your red oak surface prepared, you’re ready to apply the driftwood Minwax stain. Here’s a step-by-step guide to ensure you apply it correctly and achieve the desired finish.

Choosing the Right Tools

Use a high-quality, synthetic brush or a clean, lint-free cloth for applying the stain. The choice between a brush or cloth can depend on your personal preference and the size of the project at hand. Brushes often offer more control, while cloths can provide a softer application for more subtle effects.

Application Process

  1. Test the Stain: Before applying the stain to the entire surface, test it on a small section or a scrap piece of red oak. This test will show you the color and intensity, allowing you to adjust your technique if necessary.

  2. Apply the First Coat: Generously apply the stain with your brush or cloth, following the direction of the wood grain. Ensure the stain goes on evenly to prevent streaks and patches.

  3. Wipe Off Excess Stain: Allow the stain to sit for about 5-10 minutes, letting it soak into the wood, then wipe off any excess with a clean, dry cloth. The longer you let it sit, the darker the finish will become, so adjust the timing based on your desired intensity.

  4. Allow to Dry: Let the first coat dry completely, typically overnight, depending on humidity and temperature conditions.

  5. Assess and Reapply: Assess the dried stain. If a deeper color is desired, repeat the application. Sometimes multiple coats are necessary to achieve the perfect driftwood gray.

Finishing Touches

Once you’re pleased with the stain’s color, you may consider adding a clear protective finish. A polyurethane topcoat will help protect the wood from scratches and wear, while subtly enhancing its appearance. Choose between water-based or oil-based polyurethane based on the desired durability and finish.

Troubleshooting Common Issues

Even with the best preparations, sometimes things don’t turn out as expected. Here are a few solutions to common issues.

Uneven Stain Application

Uneven staining can occur if the surface wasn’t sanded or cleaned thoroughly. In this case, you can try lightly sanding the uneven areas and applying another coat of stain. Sometimes re-applying the stain while the first coat is still wet can help blend any inconsistencies.

The Stain is Too Light or Too Dark

If the stain is too light, apply additional coats, allowing sufficient drying time between each. For a stain that’s too dark, gentle sanding can lighten the effect, or you can use a stain remover specifically designed for wood surfaces.

Driftwood Minwax Stain On Red Oak

Achieving the Perfect Finish

Mastering the driftwood finish on red oak takes patience and practice. However, once you’ve succeeded, you’ll have created a stunning piece that captures the essence of coastal beauty. It’s both a rewarding and transformative process that makes all the time and effort worthwhile.

Consistency is Key

When working on larger projects or multiple pieces, consistency is crucial. Be sure to maintain the same application technique, drying times, and number of coats across all surfaces for a uniform look.

Maintenance and Care

To maintain the driftwood finish, regular cleaning with a dry or slightly damp cloth is recommended. Avoid harsh chemicals or abrasive cleaners that can damage the wood or the finish.

Conclusion

Transforming your red oak projects into stunning driftwood-inspired pieces involves careful preparation and precise application of Minwax stain. By following the steps outlined in this guide, you’ll be well on your way to creating a beautiful, lasting finish that enhances the natural beauty of red oak. So, embrace the process, and you’ll find that achieving a perfect driftwood look is both attainable and highly satisfying. With your newfound knowledge, you’re sure to impress with your woodworking prowess and stylistic flair.

Filed Under: Driftwood Ideas Tagged With: DIY woodworking, Driftwood Stain, Minwax, Red Oak, Wood Finishing

Driftwood Miniature Houses Diy

May 28, 2025 by admin

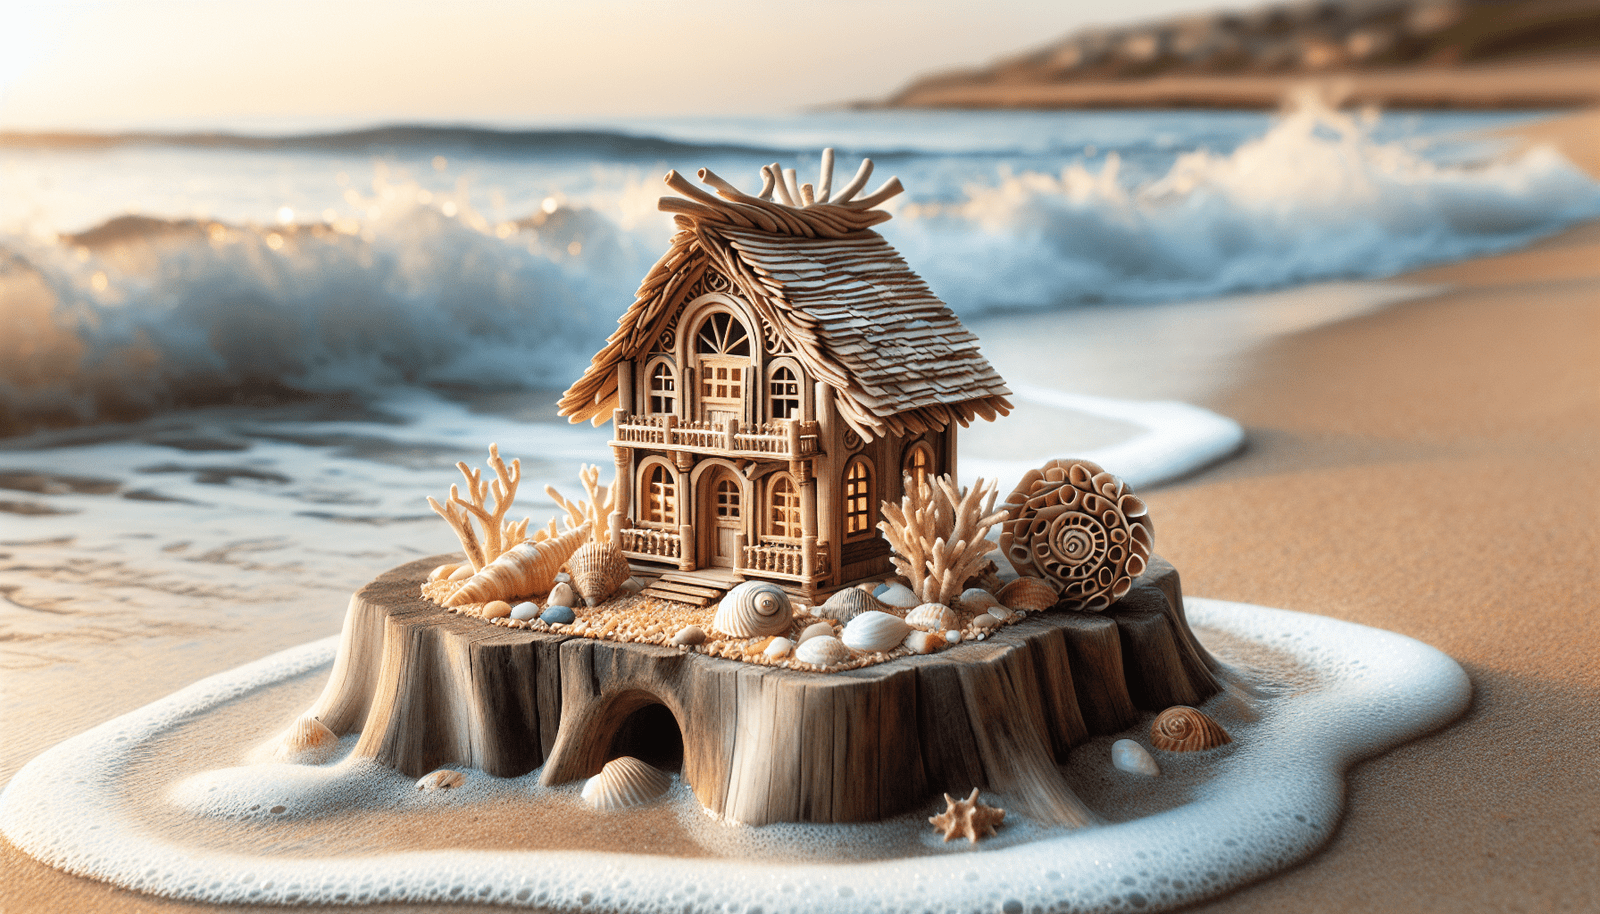
Have you ever gazed at a piece of driftwood and wondered about the story it might tell? There’s something inherently captivating about these naturally weathered pieces of wood—perhaps it’s their journey through rivers and oceans, or the way nature shapes them into unique forms. If you’ve ever felt inspired to create something magical from these pieces, then driftwood miniature houses could be your new favorite project. Let’s explore how you can transform ordinary driftwood into enchanting little homes!

Driftwood Miniature Houses Diy

Understanding Driftwood

What is Driftwood?

Driftwood is wood that has been washed onto a shore, riverbank, or beach by the action of winds, tides, or waves. These pieces often have a distinctive, weather-beaten appearance, resulting from prolonged exposure to water and sunlight. Each piece of driftwood is unique, with its own distinct shape, color, and texture.

Why Use Driftwood for Miniature Houses?

Driftwood offers a natural, rustic charm that perfectly complements miniature houses. Its varied shapes and textures provide endless creative possibilities. Using driftwood also embraces sustainability, repurposing natural materials instead of synthetic ones.

Gathering Your Materials

Selecting the Right Driftwood

Before starting your project, you need the right pieces of driftwood. Look for pieces that have interesting shapes or resemble structures you might use in a house, such as flat pieces for roofs or long, slender pieces for chimneys or fence posts.

Additional Materials

Apart from driftwood, here are some essentials you’ll need:

  • Glue: A strong adhesive, such as wood glue or a hot glue gun, to hold your structures together.
  • Cutting Tools: A small saw or craft knife to shape your pieces as needed.
  • Paint and Brushes: For adding color or details to your houses.
  • Sealer: To protect the wood and give it a finished look.
  • Additional Decorations: Items like pebbles, moss, shells, or miniature accessories to enhance your design.

Preparing the Driftwood

Cleaning and Drying

It’s crucial to clean your driftwood before use. Start by rinsing it thoroughly to remove sand and debris. For a more thorough clean, soak the wood in a solution of water and vinegar, which can help remove any remaining salt and potential pests. Once cleaned, let the wood dry completely—this may take several days depending on the humidity and size of the wood.

Shaping Driftwood

While driftwood comes in many interesting shapes, you might need to refine it a bit. Use a saw to cut larger pieces down to size or a craft knife for more precise shaping. Remember to work with the natural form of the wood to maintain its unique character.

Constructing Your Driftwood Miniature House

Creating the Base

Start by choosing a sturdy, flat piece of driftwood to serve as the base of your house. This will provide stability for your structure and a starting point for layout. You can place additional smaller pieces around the base to create the appearance of landscape or garden elements.

Building the Structure

Once you have your base, begin by arranging the main elements of your house. Use flat, wide pieces for floors and roof panels, stacking or layering them to create walls. Secure each piece with glue, allowing sufficient time for it to set before moving on to the next.

Adding Details

This is where you can let your creativity shine. Consider carving or affixing door and window shapes onto the walls. Use slender bits of driftwood for railings, fences, or chimney stacks. This is your chance to personalize the house with unique touches.

Painting and Sealing

You have the option to paint your driftwood house, though many prefer to leave the wood’s natural hues. If you decide to add color, use water-based paints for a more subtle, washed-out effect. Lastly, apply a sealant to protect your house from moisture and ensure it withstands the elements.

Driftwood Miniature Houses Diy

Decorating and Finishing Touches

Landscaping with Natural Elements

Enhance your driftwood house with elements like moss roofs, pebble pathways, and tiny shell gardens. These natural additions create a whimsical, enchanted appearance befitting of a fairy tale.

Incorporating Miniature Accessories

Seek out miniature furniture or inhabitants that can bring your driftwood house to life. Consider tiny figurines, miniature garden tools, or little lanterns to give a sense of occupancy and activity.

Displaying Your Driftwood Creation

Indoor Display Ideas

Your driftwood house can become a conversation piece indoors. Place it on a shelf with complementary decorations, perhaps accompanied by coastal-themed art or a collection of other unique miniatures.

Outdoor Display Ideas

If you’ve treated your house with weatherproof sealant, consider displaying it in the garden. Nestle it amongst plants or create a designated area for a fairy garden, where it can be surrounded by flowers and nature.

Additional DIY Driftwood Projects

Beyond Houses: Other Driftwood Crafts

Once you’ve mastered making miniature houses, consider expanding into other projects. Driftwood can be used to create picture frames, decorative wall art, or even functional furniture like tables and coat racks. The possibilities are boundless.

Sharing Your Craft

Consider sharing your driftwood creations with a community of crafters. Join online forums dedicated to driftwood art or participate in local craft fairs. Many find joy in both creating and sharing their work with others.

Safety and Preservation Tips

Crafting Safely

Always prioritize safety while crafting. Use tools with care, and have a first-aid kit handy for any minor injuries. Work in a well-ventilated area, especially when using glue and sealants.

Maintaining Your Driftwood Pieces

Over time, exposure to elements can cause driftwood to degrade. Periodically check your creations for signs of wear, and reapply sealant as needed to extend their lifespan.

Conclusion

Creating driftwood miniature houses is a delightful way to use natural materials to craft something extraordinary. It’s a hobby that combines art, nature, and storytelling, offering endless opportunities to express your creativity. Whether you keep your creations for personal enjoyment or share them with others, each piece is a testament to the beauty and wonder that can come from the simplest materials. So next time you see a piece of driftwood, remember the enchanting little world you can build just beneath the surface.

Filed Under: Driftwood Ideas Tagged With: crafts, DIY Projects, Driftwood, home decor, Miniature Houses

Driftwood Mini Uggs

May 28, 2025 by admin

Are you looking for the perfect pair of cozy and stylish shoes for the chilly months ahead? Let’s talk about Driftwood Mini Uggs and why they might just be the ideal addition to your wardrobe. With a rich history and a reputation for combining comfort with fashion, these iconic boots deserve attention. So, let’s jump in and uncover all there is to know about them.

Driftwood Mini Uggs

The Origin of Ugg Boots

From the Sea to the Streets

Ugg boots have a fascinating history that stretches back to the early 20th century. Originally worn by Australian surfers to keep their feet warm after catching waves, the design has long surpassed its humble beginnings. You might be surprised to learn that these boots had already gained popularity among aviators during World War I, who prized them for their warmth at high altitudes.

The Journey to Global Fame

Although these boots began in Australia, their global recognition took off in the late 20th century when they were introduced to a broader audience. With endorsements from celebrities and appearances in media, Uggs transitioned from niche footwear to a global fashion staple. This journey to fame was not just about celebrity influence but also the boots’ undeniable comfort, which won over the masses.

What Sets Driftwood Mini Uggs Apart?

The Perfect Blend of Style and Comfort

The Driftwood Mini Uggs are a standout model among the diverse range of Ugg boots. These boots are designed with a shorter shaft, allowing for easy wear and versatility in styling. Not only do they provide the signature comfort Uggs are known for, but their mini size offers a sleek and modern look, perfect for both casual and slightly dressier occasions.

Quality Materials

When you invest in a pair of Driftwood Mini Uggs, you benefit from high-quality materials. The boots are typically crafted from premium sheepskin, known for its natural insulation properties, keeping your feet warm in winter and cool in summer. The outer suede not only looks luxurious but also wears well over time, developing a unique character as you use them.

Styling Your Driftwood Mini Uggs

Versatile Pairing Options

One of the greatest advantages of Driftwood Mini Uggs is their versatility. You can pair them with almost any outfit, be it jeans, leggings, or even a casual dress. The neutral tones available make them easy to integrate into your wardrobe, complementing a wide range of colors and styles.

Transitioning Through Seasons

These boots aren’t confined to a single season either. While they are certainly cozy enough for the colder months, their breathability means you can wear them during transitional times like spring or autumn. Consider them a year-round companion that adapts to your needs.

Caring for Your Uggs to Ensure Longevity

Cleaning and Maintenance Tips

To keep your Driftwood Mini Uggs looking their best, some care and maintenance are necessary. Regularly brushing the suede helps retain its softness and sheen. When they encounter dirt or stains, using a gentle cleaning solution specifically designed for Uggs can make all the difference. Always follow any cleaning with a protective spray to shield the boots from moisture and spots.

Storage Suggestions

Proper storage is essential for maintaining the shape of your boots. It’s advisable to avoid leaving them in direct sunlight or damp environments, which can damage the materials. Instead, store them in a cool, dry place, ideally standing upright or on a shoe rack.

Driftwood Mini Uggs

Debunking Myths About Uggs

Are They Ethical and Sustainable?

Uggs often come under scrutiny regarding their sourcing of materials. However, the company has been working diligently to improve their sustainability practices. They now implement strict guidelines to ensure humane treatment of animals and are investing in sustainable materials to reduce their environmental impact.

The Comfort vs. Fashion Debate

A common myth is that comfortable footwear can’t be fashionable. With Driftwood Mini Uggs, you don’t have to sacrifice style for comfort. The sleek design and luxurious feel allow you to enjoy the best of both worlds, keeping you in vogue without compromising on foot comfort.

Conclusion

Why Driftwood Mini Uggs Are Worth the Hype

The allure of Driftwood Mini Uggs lies not just in their comfort but also in their timeless style and quality craftsmanship. They bridge the gap between practicality and fashion, making them a go-to choice for those who appreciate versatility and comfort. Understanding the history, material quality, and versatility of these boots can help you make an informed decision, ensuring you enjoy every step in them.

Whether you’re considering your first pair or adding to your collection, Driftwood Mini Uggs are indisputably a wise choice that you can rely on for many seasons to come.

Filed Under: Driftwood Ideas Tagged With: Driftwood, footwear, Style, Uggs, Winter

Driftwood Mirror Diy How To Make

May 28, 2025 by admin

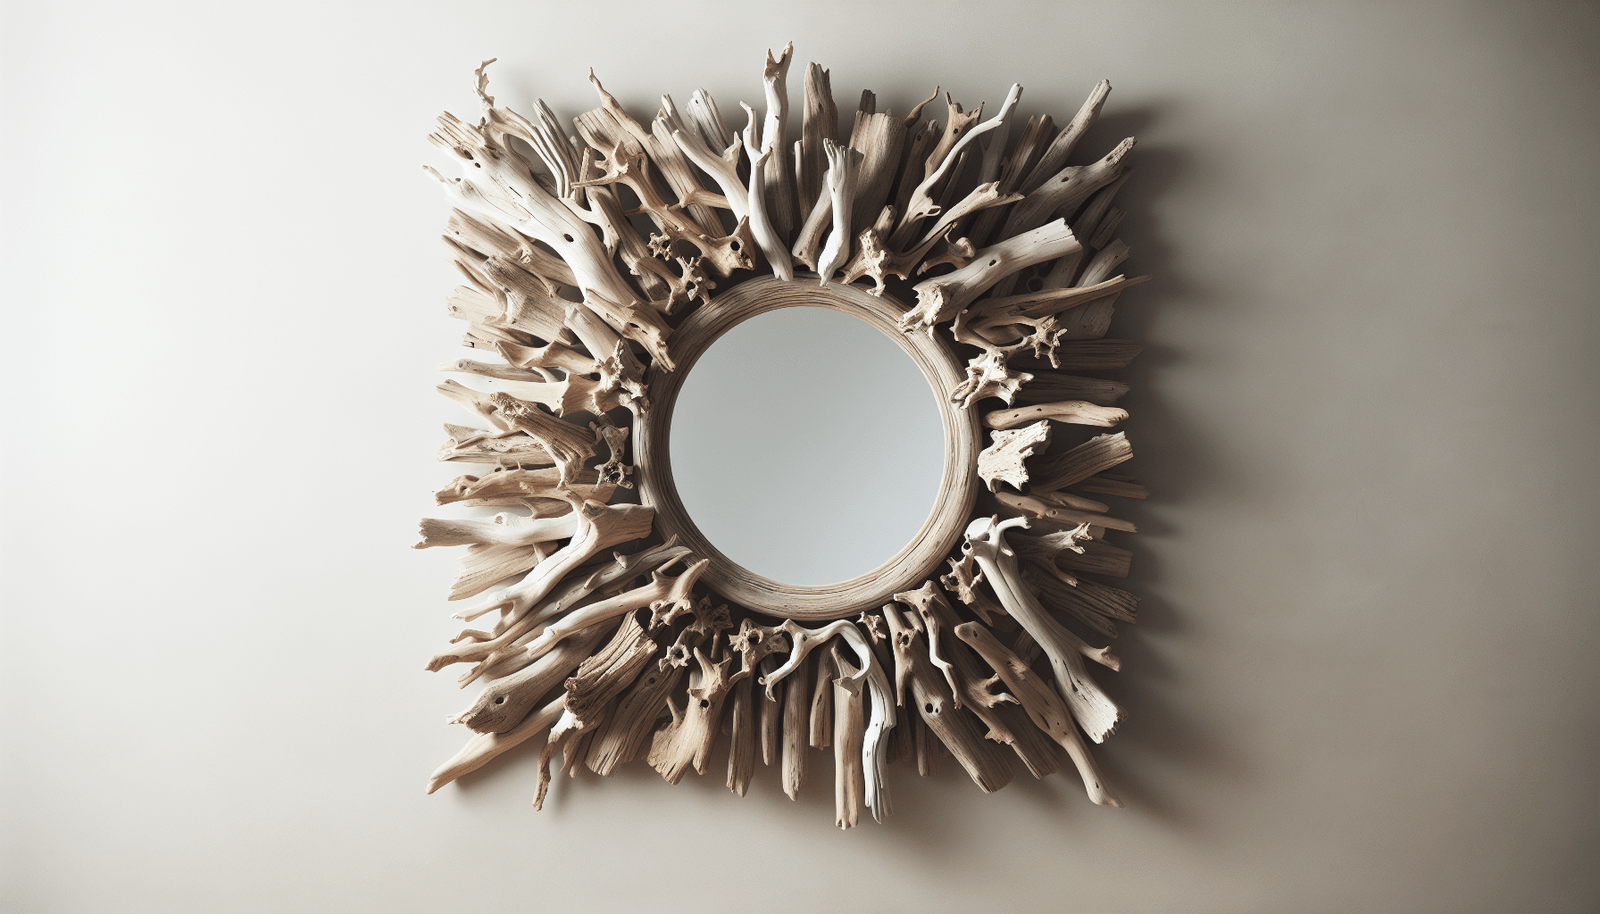
Have you ever admired the rustic charm and natural beauty of driftwood mirrors in coastal or bohemian interiors and thought to yourself, “Could I create something like that?” The good news is that not only is it possible, but making a driftwood mirror is an enjoyable and satisfying project you can tackle on your own! In this guide, I will walk you through everything you need to know to create your own stunning driftwood mirror. From sourcing your driftwood to putting the final touches on your masterpiece, you’ll learn all the steps necessary to craft a mirror that will be the envy of anyone who steps into your home.

Understanding Driftwood

What is Driftwood?

Before you begin collecting materials for your DIY project, it helps to understand what driftwood is. Driftwood refers to pieces of wood that have been washed onto shores by the action of tides, winds, or waves. Over time, these pieces of wood are naturally weathered, giving them their unique appearance. The natural sculpting process creates interesting shapes and textures, making each piece one-of-a-kind.

Why Use Driftwood?

Driftwood is not only beautiful; it is sustainable and eco-friendly. By using driftwood, you repurpose materials already in existence, minimizing environmental impact. This makes driftwood an excellent choice for those who want to incorporate more environmentally responsible pieces into their home decor.

Finding Driftwood

Driftwood can often be found along beaches, riverbanks, or lakeshores. Each location offers unique characteristics to the driftwood, whether it’s the type of wood or the way it’s been shaped by nature. When collecting driftwood, always ensure it’s legal to do so in your chosen location and that you’re not disrupting any natural habitats.

Gathering Materials for Your Driftwood Mirror

Before you roll up your sleeves and get started, you’ll need to gather all your materials. Here’s what you’ll need to craft your driftwood mirror:

Materials Needed

  • Driftwood Pieces: Gather a variety of pieces in different sizes and shapes.
  • Mirror: Choose a base mirror of your desired size and shape.
  • Strong Adhesive: Opt for industrial-strength adhesives like Epoxy or a hot glue gun for bonding the driftwood to the mirror.
  • Backing Board: This could be plywood or MDF to provide extra stability, especially if your mirror will be large.
  • Sandpaper: To smooth any rough edges on the driftwood.
  • Saw: For trimming driftwood as needed.
  • Cloth and Water: For cleaning the driftwood pieces.
  • Hangers: To mount the finished mirror on a wall.

Optional Materials

  • Wood Finish: For those who want to give the driftwood a polished or stained look.
  • Tapestry Needles: Useful if you are threading smaller pieces together before attaching them to the mirror.
  • Protective Gear: Gloves and goggles to keep you safe while working with tools and adhesives.

Driftwood Mirror Diy How To Make

Preparing Your Driftwood

Cleaning Driftwood

Once you have your driftwood, it’s important to clean it thoroughly. Given that driftwood comes from natural bodies of water, it might be covered in algae, salt, sand, or even insects. Here’s how you can clean your driftwood:

  1. Rinse Thoroughly: Use water and a sturdy brush to clean off any debris or dirt.
  2. Soak in Water: Submerge your driftwood in water for several hours to dissolve any ocean salt or trapped sand.
  3. Use Mild Soap: For particularly stubborn dirt, consider using a mild soap to help lift it away.
  4. Dry Completely: After cleaning, let the driftwood pieces dry completely. Place them in a well-ventilated area for several days to ensure they are fully dried.

Treating Driftwood

For additional preservation and to avoid any potential pests:

  • Boil the Driftwood: If your pieces fit into a pot, boiling them for an hour can help eliminate pests.
  • Freeze Method: Alternatively, placing driftwood in the freezer for a week can also help kill any insects.

Optional Sanding

Using sandpaper, gently sand any edges or surfaces you prefer to be smoother. This can make handling the driftwood easier and may enhance the final appearance by giving a more finished look.

Designing Your Driftwood Mirror

Plan Your Design

The first step in designing your mirror is to plan how you want your driftwood to be laid out around it. Here’s how you can approach this:

  • Arrange Without Glue: Place your driftwood pieces around your mirror to get an idea of how you want them arranged.
  • Mix Sizes and Shapes: Use a variety of shapes and sizes to create an appealing and natural look. Sporadically placing larger and smaller pieces can give a balanced aesthetic.
  • Consider Depth and Layers: Think about layering some pieces on top of others for added depth.

Finalizing the Design

Once you’re satisfied with your layout, take a photograph or sketch it out. This will help you remember the placement when it’s time to attach the pieces.

Driftwood Mirror Diy How To Make

Assembling Your Driftwood Mirror

Attaching Driftwood to a Backing Board

For larger mirrors, using a backing board can add stability. Here’s how you can do it:

  1. Cut the Backing Board: Ensure it matches the dimensions of your mirror. You can extend it slightly if desired for a ‘floating’ look.
  2. Attach the Mirror to the Board: Use your strong adhesive to attach the mirror securely onto the backing board’s center.

Gluing the Driftwood

With your arrangement in mind, begin attaching the driftwood pieces:

  • Apply Adhesive: Generously apply adhesive to the driftwood and press it onto the mirror’s border or the backing board.
  • Press Firmly: Hold each piece for a few seconds to ensure it adheres securely.
  • Work in Sections: Attach one section at a time, referring back to your photo or sketch for accuracy.

Let it Set

Allow the adhesive to cure according to its instructions. This can take anywhere from a few hours to a full day. Patience during this step is crucial for ensuring your mirror is sturdy and safe for hanging.

Finishing Touches

Sealing the Wood

If you opted to use a wood finish, now is the time to apply it. Sealing the wood can enhance the color, give it a uniform appearance, and provide a layer of protection.

Attach Hanging Hardware

Once your mirror is fully assembled and the glue has dried:

  • Choose Hanging Hardware: D-rings and picture wire, or sawtooth hangers, are popular choices.
  • Align to the Backing Board: Ensure the hardware is aligned so the mirror will hang straight and securely.

Positioning Your Mirror

Find the ideal spot on your wall to hang your mirror. Consider factors like lighting, visibility, and what it will reflect back into your space.

Troubleshooting Tips

Problematic Adhesion

If your driftwood pieces do not stick well:

  • Check Adhesive Use: Make sure you’re using enough adhesive and pressing firmly.
  • Surface Prepping: Lightly scuff the back of the wood or the adhesive area to give a better grip.

Warping Over Time

If any driftwood pieces warp:

  • Secure Reinforcement: You may need to remove and reattach these pieces or reinforce them with additional adhesive or a small wood nail.

Caring for Your Driftwood Mirror

Regular Maintenance

Maintaining your driftwood mirror will keep it looking beautiful for years to come:

  • Dust Regularly: Use a soft cloth or duster to keep the mirror and wood clean.
  • Avoid Moisture: Keep it away from high-moisture environments unless treated to handle humidity.

Restoring Luster

If the driftwood’s color fades over time:

  • Reapply Wood Finish: Refresh the driftwood by applying a wood finish or wax to restore its appearance.

Congratulations! You’ve now created your own driftwood mirror. Your handmade piece isn’t just a safe guarder of reflection; it’s a story of sustainability, creativity, and natural beauty. Hopefully, this driftwood mirror instills in your home a touch of nature’s coastline charm. If you have any thoughts or additional tips to share about making driftwood mirrors, feel free to contribute. Your experiences will surely inspire and aid other aspiring DIY enthusiasts.

Filed Under: Driftwood Ideas Tagged With: crafts, DIY, Driftwood, Home Projects, Mirror

Driftwood Mist Sherwin Williams

May 27, 2025 by admin

Have you been on the hunt for the perfect paint color to transform your living space? Choosing the right hue can be a game-changer, turning an ordinary room into a serene sanctuary. Driftwood Mist by Sherwin Williams might just be the shade you’ve been dreaming of. In this article, let’s dive into what makes Driftwood Mist a favorite among homeowners and interior designers alike, and how it can bring a soothing yet stylish vibe to your home.

What is Driftwood Mist by Sherwin Williams?

Driftwood Mist is a beautiful, soft neutral paint color offered by Sherwin Williams, a well-respected name in the paint industry. Known for its versatility, this shade has the ability to blend seamlessly with a variety of décor styles. Whether you’re updating your modern apartment or revamping a cozy cottage, Driftwood Mist could be the perfect backdrop.

Characteristics of Driftwood Mist

Driftwood Mist is often described as a gentle neutral with subtle undertones that shift between gray, beige, and hints of soft blue, depending on the lighting. This adaptability is part of its charm. It offers a relaxed, earthy feel reminiscent of natural driftwood found along serene beaches.

The Psychology Behind Driftwood Mist

Color psychology plays a vital role in interior design. The colors you choose for your home have a significant impact on how you feel in the space. Neutrals, like Driftwood Mist, are known for bringing calmness and balance. This color can create an environment of tranquility and peace, ideal for living rooms, bedrooms, and even bathrooms.

Why Neutral Is Good for You

Neutral colors work well because they tend to be more versatile and timeless. They’re perfect for those who want a color that won’t quickly go out of style and offers flexibility when it comes to changing furniture or accessories.

Driftwood Mist Sherwin Williams

Practical Applications of Driftwood Mist

You might be wondering, “Where can I use Driftwood Mist?” The good news is, this color suits a wide array of spaces due to its adaptable nature. Whether you’re looking to paint a single accent wall or entire rooms, this hue is a reliable choice.

Living Room

In the living room, Driftwood Mist can serve as a soothing backdrop for your daily life, allowing you to experiment with bolder colors in your furniture or artwork without overwhelming the space.

Kitchen

For your kitchen, this color can offer a clean, fresh look. It pairs well with modern stainless-steel appliances or rustic wooden cabinets, highlighting different styles effortlessly.

Bedroom

The bedroom is a personal sanctuary, and Driftwood Mist helps establish this serene atmosphere. Its calming essence can promote relaxation and restful sleep.

Bathroom

Bathrooms also benefit from the calming effects of Driftwood Mist. Its light and airy feel can make smaller bathrooms appear more spacious and inviting.

How Driftwood Mist Compares to Other Colors

Choosing one specific shade out of thousands can be tough. Understanding how Driftwood Mist stands in relation to similar colors can help inform your decision.

Driftwood Mist vs. Agreeable Gray

While both are soft, neutral tones, Agreeable Gray leans slightly more towards the gray side with a bit more warmth, whereas Driftwood Mist has a cooler, breezier undertone.

Driftwood Mist vs. Accessible Beige

Accessible Beige is warmer and richer compared to Driftwood Mist, which has a lighter, more refreshing feel.

Driftwood Mist vs. Repose Gray

Repose Gray is a slightly darker and more complex shade than Driftwood Mist, with more pronounced gray tones creating a more dramatic effect.

Table Comparison

Color NameUndertone DescriptionTone
Driftwood MistCool, gray-beigeLight
Agreeable GrayWarm grayMedium
Accessible BeigeWarm, brown-beigeMedium
Repose GrayCool grayMedium-Dark

Driftwood Mist Sherwin Williams

Tips for Using Driftwood Mist in Your Home

To ensure you make the most of Driftwood Mist, consider these practical tips.

Sample It First

Always sample the paint on your walls before making the final decision. Light reflects differently depending on the room’s positioning, time of day, and weather.

Pair with Whites and Woods

Driftwood Mist works beautifully when paired with crisp whites and natural woods, which enhances its soft, neutral appeal.

Accents and Décor

Consider incorporating textured elements and accents such as cushions, throws, and plants to balance the neutrality. Driftwood Mist provides a neutral canvas, allowing your personal style and creativity to shine through.

The Importance of Lighting with Driftwood Mist

Lighting can greatly affect how a paint color appears. Driftwood Mist will adapt to your lighting situation, but understanding its interaction with light can help achieve the best results.

Natural Light

In spaces with ample natural light, Driftwood Mist will appear more vivid and airy, enhancing its subtle blue undertones.

Artificial Light

In rooms primarily lit by artificial sources, you might notice Driftwood Mist taking on a more muted or warm appearance.

Mixing Light

For balanced lighting, consider a mix of natural and artificial light to bring out the different attributes of Driftwood Mist throughout the day.

Why Choose Sherwin Williams?

Sherwin Williams isn’t just renowned for their color selection, but also for the quality of their paints.

Quality and Durability

Sherwin Williams paints provide long-lasting durability, which ensures your walls hold up well over time, making them a wise investment for your home.

Color Selection and Customization

Their vast color selection means that you can easily find complementary shades for Driftwood Mist or create custom color schemes that fit your style perfectly.

Eco-Friendly Options

Sherwin Williams also offers eco-friendly paint options, so you can enjoy beautiful walls while minimizing environmental impact.

Real-Life Transformations with Driftwood Mist

Many homeowners have successfully used Driftwood Mist to enhance their living spaces. Here are a few ways you can incorporate this versatile hue based on real-life scenarios.

Case Study: Modern Family Home

Imagine a modern family home where Driftwood Mist serves as the perfect neutral throughout main living areas, pairing effortlessly with colorful furniture and varied textures for a lively, welcoming environment.

Case Study: Cozy Cottage

Picture a cozy cottage where Driftwood Mist radiates warmth and comfort, effortlessly blending with rustic elements like exposed beams and vintage furnishings for a classic, inviting feel.

Conclusion: Is Driftwood Mist Right for You?

Ultimately, Driftwood Mist by Sherwin Williams could be the paint color that ties your entire home together. It offers flexibility, a calming presence, and timeless appeal. If you’re still unsure, remember that sampling different shades in your home and observing them in varying lights is key to making a confident choice.

Driftwood Mist is suitable for anyone looking to create a seamless and serene environment. Whether you aim to highlight modern living or bring a touch of nature indoors, this shade has something to offer. Give it a try, and see how Driftwood Mist can transform your living space to reflect your style and create the perfect atmosphere.

Filed Under: Driftwood Ideas Tagged With: Driftwood Mist, home decor, Interior Design, Paint, Sherwin Williams

Driftwood Mirror Bathroom

May 27, 2025 by admin

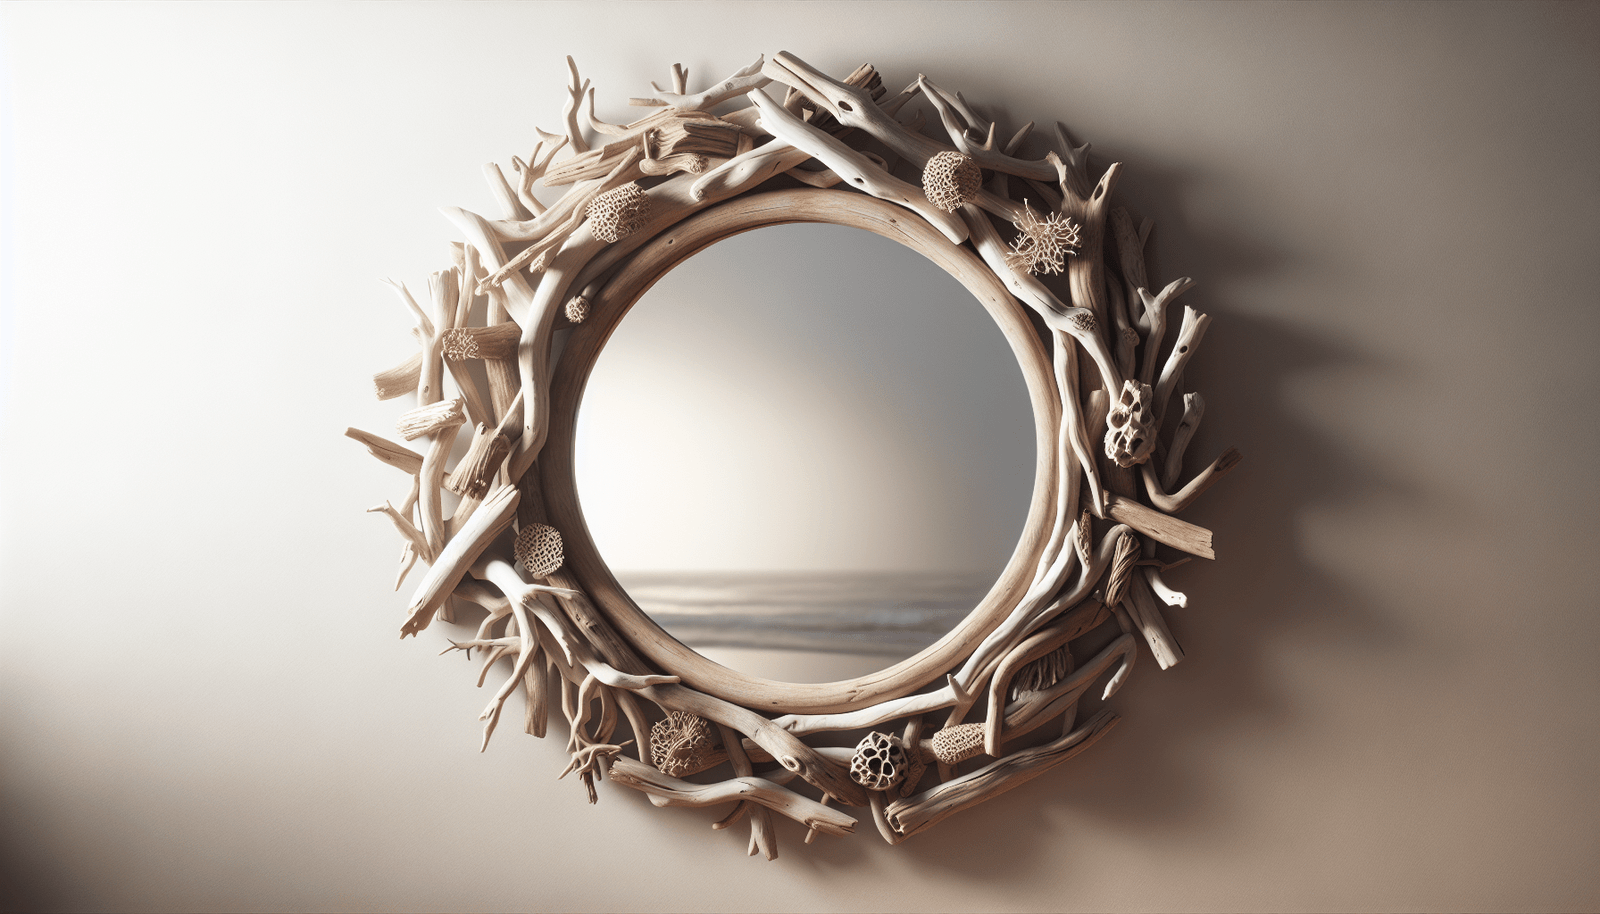
Have you ever considered how the right mirror can transform your bathroom into a sanctuary? A thoughtfully chosen mirror not only serves a functional purpose but can also become a statement piece. Specifically, have you thought about a driftwood mirror for your bathroom? With its natural appeal and rustic charm, a driftwood mirror is more than just a reflective surface—it’s an art piece that enhances your space with character and warmth.

Driftwood Mirror Bathroom

Understanding Driftwood Mirrors

What is Driftwood?

Driftwood is wood that has been washed onto a shore or beach by the action of winds, tides, or waves. It is often weathered by saltwater and offers unique textures and shapes as a result of natural wear over time. This weathering process gives driftwood its distinctive, rustic appearance that many people find appealing.

The Appeal of Driftwood Mirrors

Driftwood mirrors capture the essence of nature’s raw beauty. Each piece of driftwood is unique, carrying with it the story of its journey—a narrative that’s etched into its grooves and curves. These mirrors add a warm, organic feel to any space and can complement a variety of design styles, from coastal and rustic to modern and eclectic.

Why Choose Driftwood Mirrors for Your Bathroom?

Unique Aesthetic

The allure of a driftwood mirror lies in its uniqueness. No two pieces of driftwood are the same, meaning every mirror crafted with it is one-of-a-kind. This singular quality can turn an ordinary bathroom into a personal retreat that reflects your individual taste and style.

Versatility in Design

Driftwood mirrors fit seamlessly into numerous design themes. Whether your bathroom embodies a sleek modern look or a cozy rustic vibe, a driftwood mirror can enhance the space. Its natural texture pairs beautifully with both neutral tones and bold colors, bridging various design elements effortlessly.

Eco-Friendly Choice

By choosing driftwood, you’re selecting a sustainable and environmentally friendly option. Driftwood is a natural, biodegradable, and often reclaimed material that doesn’t require additional resources to produce. Incorporating it into your home is a responsible choice that supports environmental conservation efforts.

How to Integrate Driftwood Mirrors in Your Bathroom

Finding the Perfect Spot

Placement is key when adding a driftwood mirror to your bathroom. Consider the lighting in your space; placing the mirror where it can reflect natural light enhances its beauty and brightens the room. Positioning it above the sink is a common choice, but feel free to get creative!

Complementing Existing Decor

While a driftwood mirror is versatile, it’s beneficial to consider how it will harmonize with your existing decor. If your bathroom has wooden elements, a driftwood mirror can tie these features together. Similarly, if your fixtures are modern and sleek, the contrast with the organic texture of driftwood can create an exciting design dynamic.

Size and Scale

Selecting the right size is crucial. A large mirror can serve as a focal point, making your bathroom feel more spacious and open. However, if your bathroom is on the smaller side, a medium-sized or even compact mirror can add charm without overwhelming the space.

Maintaining Driftwood Mirrors

Cleaning and Care

Keeping your driftwood mirror looking its best involves regular maintenance. Clean the surface with a soft, damp cloth to avoid scratches. For the driftwood frame, avoid using harsh chemicals; a gentle dusting should suffice. Occasionally, you can apply a light coat of beeswax or mineral oil to the wood to preserve its natural luster.

Handling Humidity

Bathrooms are inherently humid environments, which can affect the durability of driftwood. To mitigate any potential damage, ensure your bathroom is well-ventilated. Installing an exhaust fan can help regulate moisture levels and preserve the condition of your driftwood mirror.

Driftwood Mirror Bathroom

Driftwood Mirrors: A Craft Project?

D.I.Y. Enthusiasts

If you’re a D.I.Y. enthusiast, crafting your own driftwood mirror might be an exciting project. Gathering pieces of driftwood during a walk on the beach can be a fulfilling experience—and assembling your custom mirror adds a personal touch to your bathroom decor.

Crafting Your Own

Start by collecting driftwood pieces that appeal to you. Consider their shapes and sizes to envision a cohesive final look. Next, you’ll need a basic mirror and a strong adhesive suitable for wood. Arrange the driftwood around the mirror’s edge, experimenting until you find the perfect configuration. Once satisfied, secure the driftwood in place and let it dry thoroughly before hanging your masterpiece.

Choosing the Right Driftwood Mirror for Your Bathroom

Shopping Tips

When purchasing a driftwood mirror, consider the quality and craftsmanship. Look for mirrors made with authentic driftwood rather than synthetic alternatives. Examine the construction to ensure it’s sturdy and well-assembled—quality materials and good craftsmanship mean your mirror will last for years to come.

Budget Considerations

Driftwood mirrors can range extensively in price. If budget is a concern, shop around for the best deals, or consider secondhand options that may offer the desired look at a fraction of the price. Sometimes, local artisans or craft markets can be great places to find unique and affordable driftwood mirrors.

The Broader Impact: Driftwood’s Environmental Role

Shoreline Ecosystems

Driftwood plays a vital role in shoreline ecosystems. It provides habitat for wildlife, from small invertebrates to birds. As it decomposes, it contributes nutrients to surrounding soil and plants. By collecting driftwood responsibly or purchasing from ethical sources, you help preserve its ecological roles.

Balancing Aesthetics and Ecology

While driftwood is beautiful in home decor, balancing its use with environmental considerations is crucial. Ensure that any driftwood you use is collected sustainably, without disrupting coastal ecosystems. Purchasing driftwood from reputable suppliers who practice ethical sourcing is one way to enjoy its beauty responsibly.

Conclusion

By choosing a driftwood mirror for your bathroom, you’re embracing a piece of nature that offers both aesthetic appeal and ecological consciousness. Its unique charm transforms your space, making it more than just a functional room but a reflection of nature’s beauty infused into your daily life. With thoughtful care and integration into your decor, a driftwood mirror can become a cherished aspect of your home, offering both utility and a touch of seaside serenity. Appreciate the narratives told by each ripple and curve of the wood, and let it inspire a deeper connection to the natural world within your sanctuary.

So, are you ready to let a driftwood mirror enhance your bathroom’s charm and functionality?

Filed Under: Driftwood Ideas Tagged With: Bathroom, DIY, Driftwood, Mirror, Rustic

Driftwood Minwax Stain On Pine

May 27, 2025 by admin

Have you ever wondered how to achieve a rustic, beachy look in your home decor using wood surfaces? If you’ve been searching for a way to transform ordinary pine into a stylish piece of art, you might want to consider using Driftwood Minwax stain. It’s an ingenious way to bring the tranquility of the seaside right into your living space. But how does it work, and what makes it special on pine wood? Let’s embark on this journey of understanding how this specific stain can elevate your home aesthetics.

What is Driftwood Minwax Stain?

Driftwood Minwax stain is a wood stain specifically designed to give wood surfaces that beautiful, weathered driftwood look. Imagine the serene and calming hues of driftwood found washed up on the shore. This stain captures that essence and allows you to transfer it onto your wood projects. It’s particularly popular among DIY enthusiasts who are looking to give their furniture or wood crafts an antique, rustic appearance without the complex procedures usually associated with aging wood.

The Appeal of Driftwood Finish

The driftwood finish is incredibly appealing because it embodies a relaxed coastal feel. Its subtle, muted tones offer a unique way to incorporate nature into your home. Whether you’re looking to revamp an old piece of furniture or start a new woodworking project, this stain provides a timeless look that fits seamlessly into both contemporary and traditional decor.

Why Pine?

Pine is a common choice for woodworking projects, and for good reasons. It’s versatile, affordable, and easily accessible, making it a favorite among woodworkers. Its light color and smooth grain make it an ideal candidate for staining, especially when aiming for a more natural, rustic look. But how does Driftwood Minwax stain work particularly well on pine?

Pine Wood Characteristics

Pine wood has a variety of characteristics that make it both a challenge and a delight to work with. Its grain pattern is typically straight, but it can have knots and other blemishes that add character to the finished project. Since it is relatively soft, pine absorbs stains unevenly, which can lead to a unique, personalized appearance. This uneven absorption results in a more authentic, weathered look when using a stain like Driftwood Minwax.

Enhancing Pine’s Natural Beauty

When you apply Driftwood Minwax stain to pine, you enhance the natural beauty of the wood while adding an artificial aging process that brings depth and character. This combination is perfect if you like the idea of your furniture or wood pieces telling a story of its own – a story of time, nature, and transformation.

Driftwood Minwax Stain On Pine

How to Apply Driftwood Minwax Stain on Pine

Now, let’s get into the practical side of things. Applying driftwood stain on pine isn’t overly complicated, but attention to detail is key. Here’s a step-by-step guide to assist you in your staining project.

Step 1: Gather Your Materials

To start, make sure you have all the necessary materials. Here’s a quick checklist:

  • Driftwood Minwax stain
  • Sandpaper (80-grit and 220-grit)
  • Paintbrush or rag
  • Wood conditioner (optional but recommended)
  • Protective gloves
  • Drop cloth or newspaper
  • Safety goggles

Step 2: Prepare the Wood Surface

Before you start applying the stain, it is crucial to prepare the wood properly. Begin by sanding the pine with 80-grit sandpaper to smooth out any rough spots. Follow this with 220-grit sandpaper to achieve a finer finish. Always sand in the direction of the wood grain to avoid scratches that could disrupt the final result.

Step 3: Apply Wood Conditioner

Pine is a softwood and can absorb stains unevenly. This is where a wood conditioner comes in handy. Applying a wood conditioner helps ensure a more even stain by sealing the wood fibers slightly, which reduces blotching. Let the conditioner dry according to the instructions on the product label before moving on to the next step.

Step 4: Apply the Driftwood Minwax Stain

Now it’s time for the main event: applying the Driftwood Minwax stain. Stir the stain thoroughly before usage to ensure even coloration. Using a paintbrush or a rag, apply the stain uniformly across the wood surface. Be generous but not excessive, ensuring the stain penetrates fully into the wood.

Step 5: Remove Excess Stain

After applying the stain, let it sit for around 5 to 15 minutes, depending on how deep you want the color to be. Then, gently wipe off the excess with a clean rag. Wiping away the excess will prevent it from becoming sticky and ensures that the wood absorbs just the right amount of color.

Step 6: Allow to Dry

Allow the stain to dry fully. Drying times can vary due to room temperature and humidity, but generally, it’s good to give it at least 24 hours. Before any further finishing, check that the stain has cured completely.

Finishing Options for Stained Pine

Once your pine is beautifully stained, you might be keen on sealing and finishing the wood to preserve its newfound beauty. Let’s explore some options.

Protective Clear Coat

Applying a clear protective coat can safeguard your stained wood from scratches, spills, and environmental damage. Polyurethane is a popular choice due to its durability. Simply apply with a brush, let it dry, and then lightly sand with a fine-grit paper before applying a second coat for maximum protection.

Matte vs. Gloss Finish

The type of finish you choose can significantly affect the look of your wood. A matte finish will maintain a more natural, understated appearance, while a gloss finish will add a shiny, polished look. Consider the overall aesthetic you want to achieve – coastal and rustic themes may benefit more from a matte finish.

Driftwood Minwax Stain On Pine

Common Mistakes and How to Avoid Them

Even the most seasoned DIYer can make mistakes. Here are some common pitfalls and how you can avoid them.

Uneven Stain Application

Uneven stain application often results from inadequate surface preparation. Ensure you’ve sanded the pine consistently and applied the wood conditioner. Stir the stain well before and during application to provide even color distribution.

Over-application

Applying too much stain can lead to sticky, blotchy surfaces. Remember, it’s always better to start with a thin layer and add more if needed. You can build up the color gradually by adding more coats rather than trying to achieve your desired hue in one go.

Benefits of Using Driftwood Minwax Stain

Choosing the right stain is critical in enhancing both the aesthetic and longevity of your wood project. Here are a few benefits of using Driftwood Minwax stain:

Economic and Versatile

Driftwood Minwax stain is both economical and versatile. It can be used on different types of wood surfaces beyond pine and fits various home styles and decoration themes.

Timeless Aesthetics

This stain provides a timeless look ideal for multiple interior designs. Whether your home is modern, traditional, or eclectic, the driftwood finish can perfectly complement any style.

Access to a Range of Shades

Although driftwood is its own distinct color, you can mix stain shades to further customize the final appearance. This flexibility allows you to experiment until you achieve the color that’s just right for your space.

Creative Ideas for Using Driftwood Stain on Pine

Let’s ignite your creativity with a few project ideas that would look fantastic with a Driftwood Minwax stain on pine.

DIY Driftwood Coffee Table

Transform your living room with a unique coffee table, showcasing its natural wood grain and rustic charm. The driftwood stain offers a sophisticated look that is both simple and stylish.

Rustic Shelving Units

Create open shelving units that enhance any room with functionality and style. Use the driftwood stain to give the shelves a weathered finish, perfect for displaying books, plants, or decorative items.

Accent Wall

Consider using stained pine planks to create an accent wall. This project could serve as a backdrop in a living room, bedroom, or hallway, adding texture and a splash of serenity to your home.

Outdoor Furniture

The driftwood stain’s natural, earthy tones make it an excellent choice for outdoor furniture. By applying a protective finish, these pieces can withstand the elements while enriching your outdoor space.

Conclusion

Driftwood Minwax stain on pine offers a path to create beautiful, rustic decor with a coastal twist. Its timeless charm and versatile application make it an exceptional choice for anyone interested in transforming ordinary pine wood projects into sophisticated works of art. Now that you’ve learned about the process, characteristics, and creative possibilities, you can confidently undertake your next DIY project with a newfound appreciation for this wonderful combination of stain and wood. So, are you ready to bring a piece of the seaside into your home?

Filed Under: Driftwood Ideas Tagged With: Driftwood Stain, Minwax, Pine Wood, Staining Techniques, Wood Finishing

Driftwood Minwax Stain

May 26, 2025 by admin

Have you ever wondered how you could enhance the natural beauty of your wooden furniture while adding a touch of sophistication? You might want to consider the Driftwood Minwax Stain! With its ability to accentuate the unique grain patterns in wood, this stain could be the perfect way to achieve a stylish, rustic finish. Let’s explore what Driftwood Minwax Stain has to offer, from how it works to how you can use it successfully on your DIY projects.

Driftwood Minwax Stain

What is Driftwood Minwax Stain?

Driftwood Minwax Stain is a popular wood stain that mimics the look of weathered driftwood, giving your wooden pieces an appealing aged and natural look. This stain is part of Minwax’s larger collection of wood-finishing products. Minwax, a trusted brand in the wood finishing industry, has crafted this particular stain to meet the aesthetic needs of both amateurs and professionals seeking a rustic touch.

By using this stain, you’re aiming to enhance the wood’s natural grain and beauty. Whether you are working on furniture, cabinets, or floors, Driftwood Minwax Stain offers a distinctive finish that automatically elevates your projects to a new level.

Ingredients and Composition

The Driftwood Minwax Stain is known for its woodworking-friendly formula. Although its exact ingredient composition is proprietary, it typically consists of dyes or pigments, solvents, and binders that work together to penetrate the wood surface. The balance between these elements ensures that the stain delivers a long-lasting finish without compromising the wood’s texture.

Understanding the basic composition can prepare you for how the stain will react with different types of wood. A good stain should allow the wood grain to remain visible, enhancing rather than obscuring the natural allure of the material. With Driftwood Minwax Stain, you can achieve just that.

Benefits of Using Driftwood Minwax Stain

When choosing a wood stain, numerous factors come into play, such as the desired finish, durability, and ease of application. Driftwood Minwax Stain offers a set of benefits that may align perfectly with your needs.

1. Versatile Application

One of the key advantages of this stain is its versatility. It’s suitable for a wide variety of wood types, including pine, oak, and maple. The adaptability allows you to use the stain on different projects without worrying about compatibility. Whether you are working on a large piece of furniture or smaller decor items, this stain provides equally compelling results.

2. Enhances Wood Grain Appearance

Driftwood Minwax Stain excels at enhancing the appearance of wood grain. Its unique formula penetrates the wood deeply, highlighting the complex patterns inherent in the material. This quality makes it suitable for creating statement pieces or enhancing subtle woodwork details.

3. Long-Lasting Finish

Durability is often a significant concern when selecting a wood stain, and Driftwood Minwax Stain doesn’t fall short in this aspect. Once applied correctly and with appropriate sealing, this stain offers a long-lasting finish that withstands the test of time. The color continues to remain consistent, even after years of exposure to various environmental conditions.

4. Easy to Use

Simplifying the staining process, Driftwood Minwax Stain is designed to be user-friendly. Even if you’re a beginner at woodworking or DIY projects, you will find applying this stain relatively simple. It doesn’t require specialized tools or advanced techniques—just some patience and a bit of practice.

Preparing to Use Driftwood Minwax Stain

Before diving into the application process, preparation is key for achieving the best results with Driftwood Minwax Stain. This includes gathering necessary tools, prepping your workspace, and getting your wood surface ready for staining.

Essential Tools and Materials

To start, you’ll want to have all your tools and materials at your fingertips. The essentials include:

  • Driftwood Minwax Stain
  • Applicator pads or brushes
  • Clean, lint-free rags
  • Sandpaper (medium to fine grit)
  • Protective gear (gloves, safety goggles)
  • Sealant (if desired for additional protection)

Having everything ready makes the process smoother and ensures you won’t need to pause mid-project to locate a missing item.

Preparing the Workspace

Setting up a suitable workspace is crucial for safely and effectively staining wood. A well-ventilated area is necessary to ensure you aren’t inhaling fumes. Remember to cover your working surface with a drop cloth or newspaper to protect from any possible spills or splatter.

Preparing the Wood Surface

Properly preparing the wood surface ensures maximum penetration and adhesion of the stain. Begin by sanding the wood thoroughly to remove any existing finish and to smooth out imperfections. Choose a medium-grit sandpaper initially, then move to a finer grit for a smooth surface.

After sanding, clean the wood with a damp rag to remove dust and debris. Let the wood dry completely before moving on to staining. Clean wood surfaces allow the stain to adhere properly, providing a consistent, even finish.

How to Apply Driftwood Minwax Stain

With the preparation steps completed, you are now ready to apply Driftwood Minwax Stain to your wooden project. Following these step-by-step guidelines can help you achieve a flawless finish.

Step 1: Apply the Stain

Using an applicator pad or brush, apply a generous amount of Driftwood Minwax Stain to the wood surface. Work in the direction of the wood grain to ensure the stain penetrates evenly. For larger projects, stain a small section at a time, wiping off excess stain as you go.

Step 2: Let It Penetrate

After applying the stain, let it sit for 5 to 15 minutes, depending on the desired color intensity. The longer the stain sits, the darker and richer the color will become. However, don’t leave it on for too long, as it might result in an uneven finish.

Step 3: Wipe Off Excess

Use a clean, lint-free rag to wipe off any excess stain. Again, follow the wood grain in your wiping motion. It’s crucial to remove any extra stain to avoid sticky surfaces and ensure that the wood grain still shines through.

Step 4: Allow to Dry

Let the stained wood dry completely, typically for 24 hours. Different environmental conditions may affect drying times, so ensure the piece feels dry to the touch before proceeding.

Optional Step: Apply a Sealant

If you want to add an extra layer of protection, apply a clear sealant over the stain once it is completely dry. Sealants can also add a subtle sheen to the wood finish, enhancing the overall look. Polyurethane or polycrylic are both excellent choices for a topcoat.

Driftwood Minwax Stain

Tips for Achieving the Best Results

Even with clear instructions, a few additional tips can be helpful for ensuring your driftwood stain project ends with stunning results.

Choose the Right Environment

Temperature and humidity can affect the drying time and final appearance of the stain. Aim to work in moderate temperatures and low humidity conditions for the best results.

Test Before Committing

If you’re unsure about the color or finish, it’s always wise to test the stain on a scrap piece of the same wood or an inconspicuous area first. This way, you’ll get an idea of how long to let it penetrate for your desired effect.

Consider Multiple Coats

Depending on the depth of color you’re aiming for, multiple coats may be necessary. Be sure to allow each coat to dry thoroughly before applying another to avoid a blotchy appearance.

Troubleshooting Common Issues

No woodworking project is without its challenges. Here are some common issues you might face when using Driftwood Minwax Stain and how to remedy them.

Uneven Color

Uneven color might appear if the stain was not applied consistently or if the wood remained untreated in certain spots. To fix this, sand down the uneven area and reapply the stain, ensuring an even spread this time.

Sticky Finish

A sticky finish usually indicates that excess stain wasn’t wiped off, or the wood wasn’t entirely dry before sealing. Sanding lightly and applying a second coat, ensuring excess is removed, can help mitigate this problem.

Blotching

Blotchy finishes often result from inconsistent pore saturation, particularly with softwoods like pine. Using a pre-stain conditioner can help minimize blotchiness by creating a more uniform surface for the stain.

Creative Uses for Driftwood Minwax Stain

Driftwood Minwax Stain isn’t limited to furniture alone. When it comes to creative projects, the possibilities are endless.

Revamping Cabinetry

Kitchen or bathroom cabinets can benefit greatly from a makeover with driftwood stain. The elegant gray tones add a touch of sophistication, making your space feel more modern and chic.

Unique Home Décor

Smaller items like picture frames, jewelry boxes, and shelves can also be enhanced with this stain. If you’re into crafts, personalized gifts stained with driftwood can make for meaningful presents.

Artistic Statements

For a more artistic approach, use the stain to create DIY art pieces. Stencil a design onto a stained wood canvas, and you have a unique piece of wall art ready to display.

Pros and Cons of Driftwood Minwax Stain

Like any product, Driftwood Minwax Stain has its merits and limitations. Here’s a summarized table to provide a balanced view.

ProsCons
Enhances wood grainMay require multiple coats for darkness
Durable and long-lastingNot suitable for all wood types
Easy application processCan be affected by humidity and temperature
Versatile for different projectsTesting often required for desired color
Creates a sophisticated lookRequires sealing for added protection

Conclusion

Using Driftwood Minwax Stain allows you to enrich the natural characteristics of wood while adopting a stylish, weathered appearance reminiscent of driftwood. With its user-friendly application and myriad uses, it can transform ordinary wooden items into extraordinary pieces of art. Armed with this detailed guide, you’re well-prepared to embark on your creative journey. Whether you’re a seasoned woodworker or a DIY enthusiast, this stain could be the perfect tool to bring your vision to life. Happy staining!

Filed Under: Driftwood Ideas Tagged With: Driftwood Finish, Minwax, Wood Stain, Woodworking

Driftwood Mirror Frame

May 26, 2025 by admin

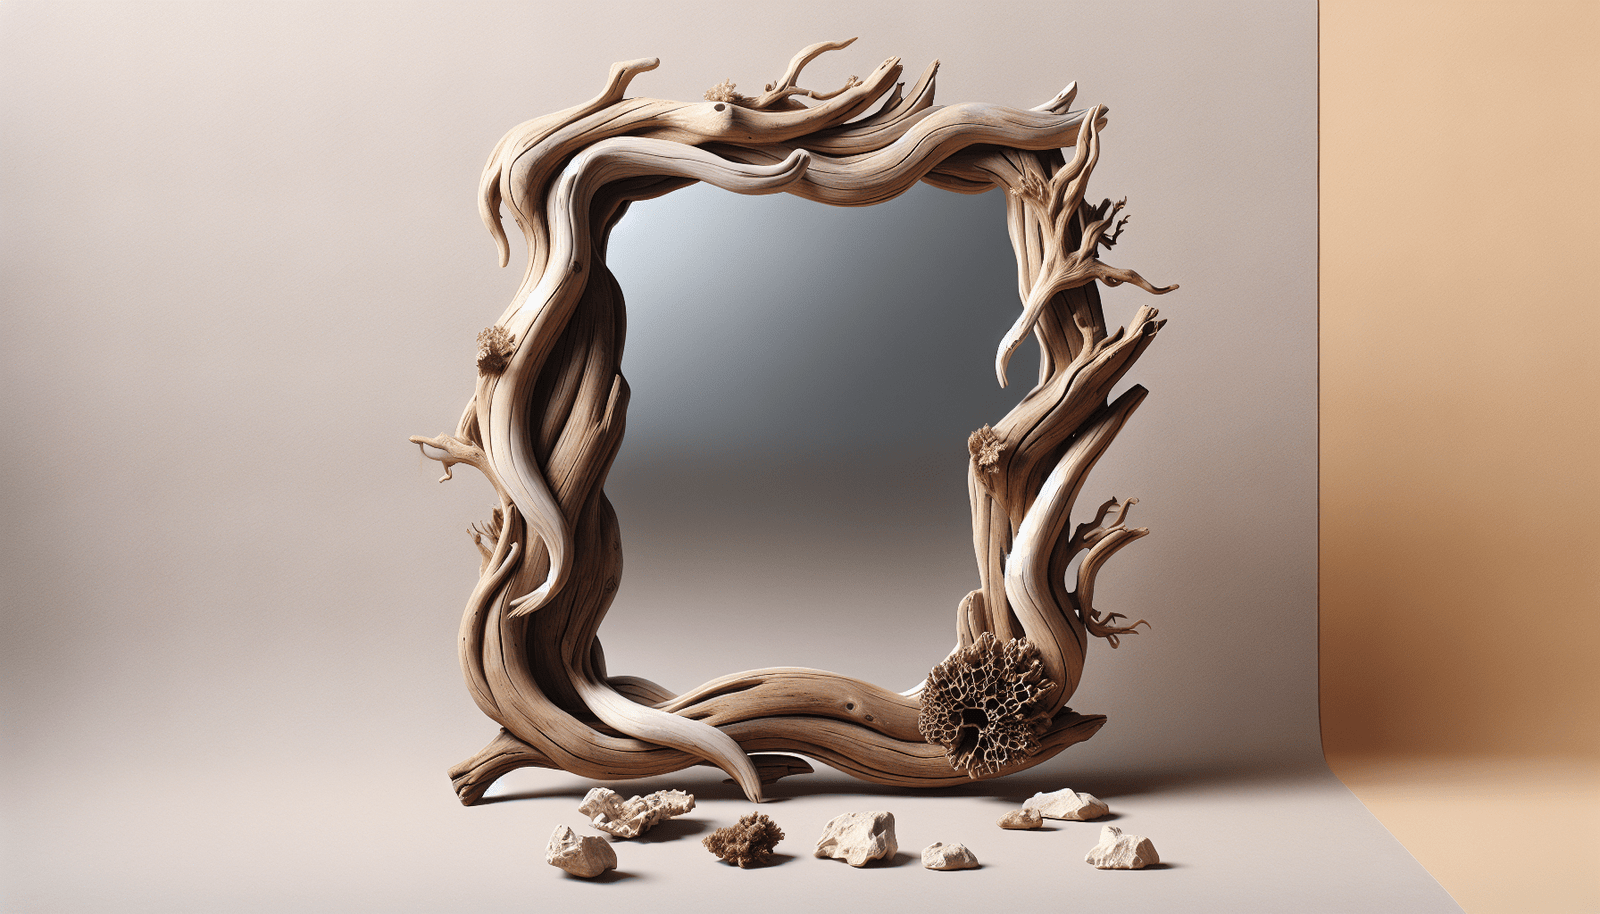
Have you ever thought about adding a touch of nature to your home decor? A driftwood mirror frame might just be the perfect project for you. With its rustic elegance, a driftwood mirror frame can transform any ordinary space into one that echoes the tranquility and beauty of the coast. Imagine gazing into a mirror framed with pieces of driftwood, each telling its own story and resonating with the spirit of the ocean.

Driftwood Mirror Frame

What is a Driftwood Mirror Frame?

A driftwood mirror frame is a mirror framed with pieces of driftwood. Driftwood refers to wood that has been washed onto the shore by the tides and waves. Known for its smooth texture and unique shapes, driftwood adds an exotic and natural aesthetic to home decor. The weathered appearance of driftwood makes each piece distinct, offering a one-of-a-kind frame every time.

Why Choose Driftwood?

Driftwood has a unique charm that speaks volumes about nature and its resilience. Each piece is crafted by the elements, resulting in a wide variety of textures and shapes that are both pleasing to the eye and environmentally sustainable. When you choose driftwood for your DIY projects, you’re selecting a material that’s not only naturally beautiful but also eco-friendly.

The Charm of Incorporating Driftwood Into Your Decor

Bringing driftwood into your home decor creates a calming and peaceful ambience. Its natural hues and textures add a touch of warmth without overwhelming the space. By incorporating driftwood, you’re able to subtly nod to beachside aesthetics, bringing in the sophistication of a natural environment without the need for seashells or overly nautical elements.

Versatility and Style

Driftwood works fabulously with various design styles. Whether your home is modern, rustic, or coastal, driftwood has the versatility to blend seamlessly. It can add an organic touch to minimalist settings or enhance the raw charm of rustic spaces. The key lies in how you integrate it with the rest of your decor, making sure it complements rather than competes.

Gathering the Perfect Driftwood

Ready to begin your project? The first step is collecting the right pieces of driftwood. This can be an enjoyable process, allowing you to explore the beach and discover various forms provided by nature.

Where to Find Driftwood

Start by visiting local beaches or rivers known for washed-up driftwood. These are often found post-storms when waves push large amounts of driftwood ashore. National parks or protected natural areas may limit collecting, so be sure to follow any local regulations in place.

Selecting the Right Pieces

When selecting driftwood pieces, pay attention to their size, shape, and texture. Ideally, you’ll want pieces that are sturdy and free from excessive rot. Variations in color and size provide character and depth, enhancing the overall aesthetic of your frame.

Preparing Driftwood for Use

Before you start building your mirror frame, it’s crucial to prepare your driftwood properly. This ensures longevity and a clean, polished look that won’t harm the rest of your decor.

Cleaning Your Driftwood

Begin by brushing off any loose particles and scrubbing off dirt with mild soap and water. Be gentle to avoid stripping the wood of its natural charm. Once clean, soak the pieces in a solution of water and household bleach to kill any insects or bacteria, rinsing thoroughly afterward.

Drying and Sanding

After cleaning, let the driftwood dry completely. Place the pieces in a sunny, well-ventilated area for several days. Once dry, you can gently sand any rough edges with fine-grit sandpaper. This step not only cleans but also smooths the pieces for safe handling and an aesthetically pleasing result.

Driftwood Mirror Frame

Designing Your Driftwood Mirror Frame

Now that your driftwood is prepped and ready, it’s time to design your frame. The design process involves envisioning how you want the final piece to look and ensuring it complements your existing decor.

Planning the Layout

Lay your driftwood pieces around the mirror to experiment with different arrangements. Start with the corners, since these areas will naturally draw the eye and anchor the design. Once satisfied with a basic layout, capture the design with a photo for reference as you assemble.

Mirror and Backing Selection

Choose a mirror size that complements the space where it will hang. The driftwood will extend the mirror’s borders, so take into account this extra width. For backing, you will need a sturdy board or plywood that fits the dimensions of your completed frame for mounting purposes.

Construction: Assembling the Frame

With your design in place, it’s time to bring it to life. Construction involves securing the driftwood pieces with either glue or screws.

Tools You’ll Need

The tools required for this project include a drill, a strong wood adhesive, screws, and clamps. All of these will assist in securely attaching the driftwood to both the mirror and the backing.

Assembling the Frame

Begin by attaching your driftwood pieces to the backing according to your design. Use clamps to hold the pieces securely in place while the adhesive dries. You can reinforce this with screws for added stability, ensuring the screws are short enough not to pierce through the front of the driftwood.

Adding Finishing Touches

Finishing touches can elevate your driftwood mirror frame from a simple project to a stunning work of art.

Sealing the Driftwood

Once your frame is assembled and the adhesive has dried fully, apply a clear sealant. This will protect the driftwood from any potential moisture, preserving its natural finish and preventing decay.

Hanging Your Mirror

Select sturdy hanging hardware to match the weight of the mirror and frame. Consider using wall anchors or picture-hanging wire for additional support. Ensure the frame is securely hung to prevent any accidents.

Maintaining Your Driftwood Mirror Frame

A little care and attention will keep your driftwood mirror frame looking its best for years to come. Regular dusting with a soft cloth will maintain its appearance, while avoiding excessive moisture will prevent damage.

Touch-Ups and Repairs

From time to time, inspect your frame for any signs of wear or damage. Minor scratches or chips can be gently sanded, while any loose pieces should be re-glued promptly.

Unique Ideas and Inspirations

Driftwood mirror frames can be as varied as the driftwood pieces themselves. Here are some creative ideas to inspire your next project.

Color Accents

Consider adding subtle color accents with washed-out shades that complement the natural wood. This can be achieved with color washes or diluted paint for a soft touch that won’t overpower the driftwood.

Additional Materials

Integrate additional natural elements like pebbles, shells, or sea glass to enhance the coastal aesthetic. These can be glued in place or strategically placed to catch the light and add sparkle.

Conclusion

Crafting your own driftwood mirror frame is not only a relaxing and rewarding endeavor but also a wonderful way to bring a piece of the natural world into your home. By combining the organic beauty and unique charm of driftwood with your personal style, you create a functional piece of art that reflects both your creativity and appreciation for nature. Enjoy the process and the satisfaction that comes with personalizing your space with such a distinctive and eco-friendly touch.

Filed Under: Driftwood Ideas Tagged With: crafts, Driftwood, Interior Design, Mirror

  • « Previous Page
  • Page 1
  • …
  • Page 4
  • Page 5
  • Page 6
  • Page 7
  • Page 8
  • …
  • Page 183
  • Next Page »

Primary Sidebar

Driftwood4us.com, is a participant in the Amazon Services LLC Associates Program, an affiliate advertising program designed to provide a means for sites to earn advertising fees by advertising and linking to amazon.com.