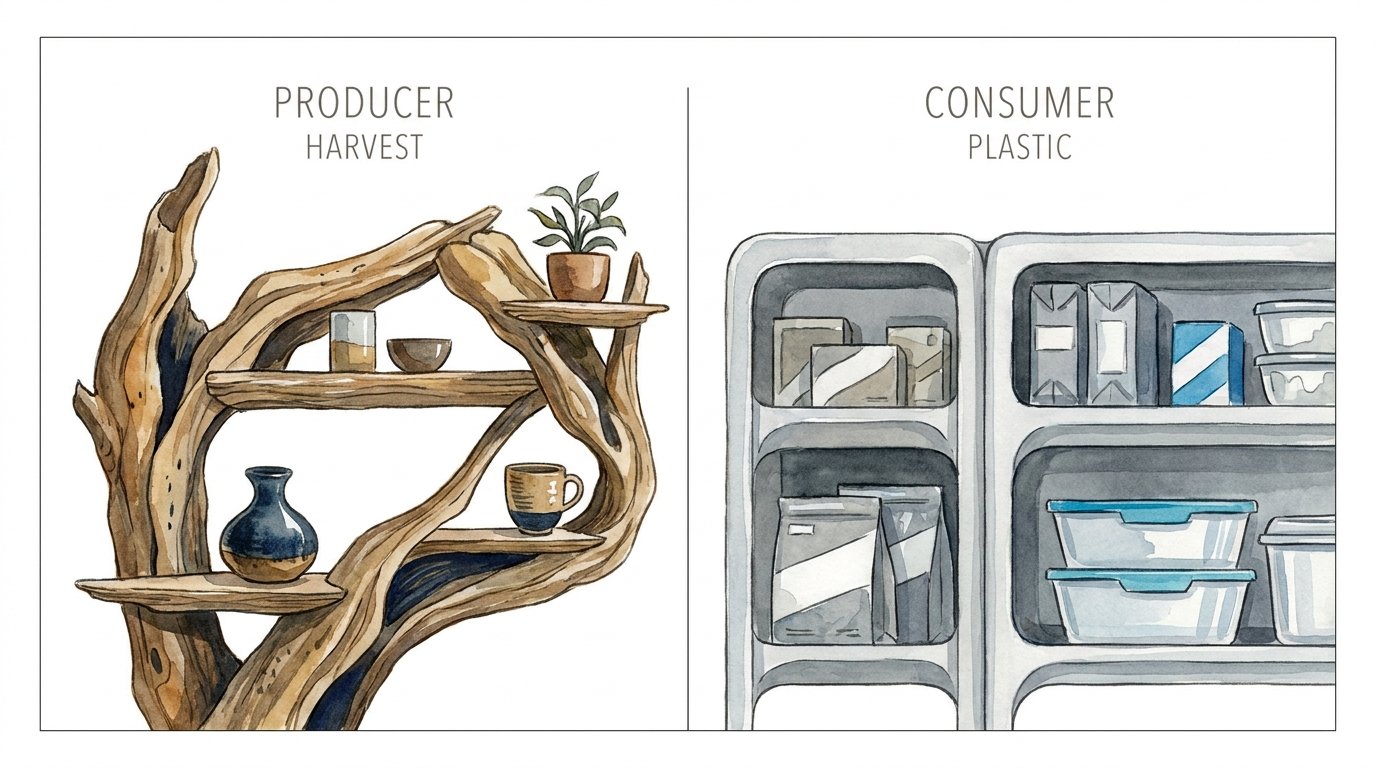
Diy Driftwood Shelf Vs Store Bought
Why settle for a plastic imitation when you can harvest the authentic legacy yourself? Every year, we spend millions on plastic imitations of things nature gives away. You can be a consumer, buying a ‘coastal vibe’ in a box that will end up in a landfill, or you can be a producer. Harvesting your own driftwood shelf isn’t just about saving money—it’s about the connection to the object. Every knot and salt-stain on your wall becomes a story you lived, not a receipt you filed.
[affiai]Nature does the heavy lifting for you, curing the timber in a brine of salt and sun until only the heartwood remains. When you find that perfect plank on a windswept shore, you aren’t just finding trash. You are finding a survivor that has crossed oceans to meet you. This guide will help you bring that survivor into your home safely, legally, and with the structural integrity it deserves.
Diy Driftwood Shelf Vs Store Bought
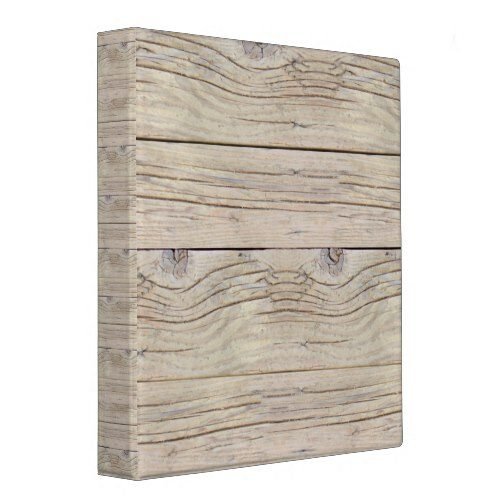
A driftwood shelf is a piece of functional art born from the collision of land and sea. In the real world, these shelves serve as rugged focal points in homes ranging from coastal cottages to industrial lofts. They are prized for their silver-grey patina and the tactile history etched into their grain. Unlike standard lumber, driftwood has been stripped of its soft bark and sapwood by the abrasive power of sand and current, leaving behind a dense, weathered skeleton.
Store-bought driftwood shelves are often mass-produced using “driftwood-style” finishes on pine or, worse, molded plastic that mimics the texture of real wood. These imitations lack the density and unique structural “memory” of a piece that actually spent a decade at sea. A genuine DIY shelf exists because you were willing to walk the beach, spot the potential in a greyed-out log, and do the work to make it habitable.
In terms of context, a store-bought shelf is a transaction; a DIY driftwood shelf is a harvest. The store-bought version offers convenience and predictable dimensions, which can be useful if you are fitting a shelf into a tight, pre-measured alcove. However, the DIY version provides a level of soul and durability that no factory can replicate. When you build it yourself, you control the cleaning process, ensuring no stowaway pests enter your home, and you choose the mounting method that respects the wood’s natural geometry.
How to Harvest and Prepare Driftwood Safely
Harvesting driftwood is the first test of the producer mindset. You must be part scout, part legal scholar, and part mule. Not every beach is a free-for-all, and not every piece of wood is worth the carry.
Understanding the Legality of the Harvest
Before you set foot on the sand with a pair of work gloves, you need to know the rules of the territory. In the United States, regulations vary wildly by jurisdiction. For instance, California state parks often allow the collection of up to 50 pounds or one single piece of driftwood per person per day for personal use, provided no tools or vehicles are used for the extraction. Conversely, Washington state parks generally prohibit collection except for immediate use as firewood within the park.
National Parks and Wildlife Refuges are almost always off-limits. These areas view driftwood as a critical part of the ecosystem, providing habitat for shorebirds and stabilizing dunes against erosion. Private property is another hurdle; taking wood from a private beach without permission is technically theft. Always check with the local Department of Natural Resources or the park ranger’s office before you haul a 20-pound timber to your truck.
Selection: Identifying Quality Timber
Look for “cured” wood. This is wood that feels light for its size, indicating that the moisture and sap have been replaced by salt or air. Avoid “punky” wood—if you can poke a finger into the surface and it feels soft or spongy, the wood is rotting from the inside out. True driftwood should be bone-dry and produce a sharp, resonant “clack” when struck against a rock.
The best pieces are often found after a major storm or near river mouths where the current deposits debris. Hardwoods like oak, maple, or cedar make the best shelves because they resist rot and have a tighter grain. Softwoods like pine are common but may require more chemical stabilization to prevent crumbling over time.
The Cleaning and Disinfection Process
You cannot bring raw beach wood directly into your living room. It is a haven for salt, sand, and microscopic organisms that would love to eat your drywall. Follow this rigorous protocol:
- Initial Scrub: Use a stiff-bristled brush or an air compressor to knock off loose sand, dried salt, and any remaining bark.
- The Bleach Soak: Submerge the wood in a large bin filled with a solution of 1 part household bleach to 9 parts water. If you want to keep the natural color, use a weaker 1:20 ratio. Soak for 12 to 24 hours. This kills bacteria and forces out any boring insects hiding in the core.
- The Rinse: Remove the wood and spray it down thoroughly with fresh water. You want to wash away the bleach residue and any loosened silt.
- Drying: This is where most people fail. Driftwood must be completely dry before you apply a finish or mount it. Leave it in a sunny, well-ventilated spot for at least a week. If the piece is small enough, you can “bake” it in an oven at 110-200 degrees Fahrenheit for several hours to ensure it is bone-dry and sterile.
How to Construct and Mount Your Shelf
Building a shelf from irregular wood requires a different approach than working with squared-off 2x4s. You are working with a live edge that was shaped by chaos, not a sawmill.
Leveling the Irregular Surface
A driftwood plank is rarely flat. To make it functional, you have to decide which side is the “top.” Use a hand plane or a belt sander to create a flat landing zone on the top surface where items will sit. You don’t need to flatten the entire board—part of the charm is the undulating texture—but you need enough level space to keep a glass of water from sliding off.
Mounting Techniques: Brackets vs. Floating
There are two primary ways to get your harvest onto the wall. The method you choose depends on the weight of the wood and the look you desire.
Industrial Pipe Brackets: Using black iron pipe fittings is a favorite for driftwood because the rugged metal matches the weathered wood. This method is incredibly forgiving. You mount the flanges to the wall studs, screw in the pipe lengths, and rest the wood on top. Because the pipes are round, you can adjust the wood’s position until it looks right, then secure it from underneath using pipe strap clamps.
Hidden Floating Brackets: For a cleaner look, you can use heavy-duty floating shelf rods. This requires drilling deep, straight holes into the back edge of the driftwood. This is challenging because driftwood grain is often twisted. Use a drill guide to ensure your holes are perfectly perpendicular to the back edge. Once the rods are mounted to the wall studs, the shelf slides over them, appearing to hover against the drywall.
Finishing the Wood
Raw driftwood is beautiful but thirsty. If left untreated, it will soak up oils from your hands and dust from the air, eventually looking dingy. A light coat of clear matte polyurethane will preserve the grey “silver” look while providing a wipeable surface. Alternatively, a natural oil like linseed or tung oil will darken the wood significantly, bringing out deep ambers and browns you didn’t know were there.
Benefits of the DIY Approach
Choosing to harvest and build your own driftwood shelf offers more than just a weekend project; it provides measurable advantages in quality and personal satisfaction.
A primary benefit is unmatched durability. Nature has already tested this wood. If it survived years of salt spray, crashing waves, and UV radiation, it is not going to warp or crack under the weight of a few books. Most store-bought shelves use kiln-dried wood that hasn’t been “tempered” by the elements, making them more prone to movement in humid environments.
The economic value is also significant. While the tools represent an initial investment, the material cost for the wood itself is zero. A high-end, artisan-made driftwood shelf can retail for $200 to $500. By producing it yourself, you are essentially “earning” that margin through your own labor. Furthermore, you gain customization control. You can choose a piece that is exactly the length of your hallway or one that has a specific branch nub perfect for hanging a set of keys.
Challenges and Common Mistakes
The path of the producer is littered with rotted wood and crooked shelves. Understanding where others stumble will save you a lot of frustration.
Ignoring the Studs: This is the most frequent error. Driftwood is heavy—often significantly heavier than pine or plywood. You cannot rely on drywall anchors. If your brackets don’t hit a wooden stud behind the wall, the lever-action of a 10-pound shelf will eventually rip a hole in your plaster. Always use a stud finder and aim for at least two points of contact with the home’s framing.
Under-Cleaning: Some collectors get impatient and skip the soak. Six months later, they find “frass” (insect droppings) on their floor or notice a faint smell of sea-decay. If you don’t use a disinfectant like bleach or vinegar, you are essentially inviting a small ecosystem into your bedroom. Do not cut corners on the sanitation phase.
Inaccurate Drilling: For floating shelves, even a half-degree error in your drill angle will result in a shelf that slants downward or won’t slide onto the brackets at all. If you aren’t confident in your drilling, stick to external brackets like L-bars or pipe fittings.
Limitations of Driftwood Shelves
While driftwood is versatile, it isn’t the right choice for every scenario. It is important to be realistic about where this material excels and where it fails.
One limitation is weight-bearing capacity. Because the wood is often irregularly shaped, the center of gravity is not always where you think it is. This makes it a poor choice for heavy-duty storage like a full encyclopedia set or a 40-gallon aquarium. It is best used for decorative items, small books, or plants.
Another constraint is environmental impact. While picking up a few pieces of wood seems harmless, large-scale removal of driftwood can damage coastal ecosystems. If you live in an area where the beaches are already stripped bare, it is better to look for “inland driftwood”—branches found in creek beds or lake shores—rather than contributing to the erosion of sensitive coastal dunes.
Comparison: DIY vs. Store Bought
To help you decide which path to take, consider this breakdown of the measurable factors involved in each choice.
| Factor | DIY Harvest | Store-Bought |
|---|---|---|
| Total Cost | Low ($20-$50 for hardware) | High ($100-$400) |
| Time Investment | High (10-14 days including drying) | Low (Minutes to order) |
| Authenticity | 100% Genuine salt-cured wood | Often faux or treated pine |
| Skill Level | Intermediate (Drilling, Leveling) | Beginner (Basic mounting) |
| Sanitation | User-verified deep clean | Factory-processed (Variable) |
Practical Tips for Success
If you are ready to begin your harvest, keep these best practices in mind to ensure a professional-looking result.
- Check for Creosote: If the wood smells like oil, coal, or chemicals, or if it feels “waxy,” it might be an old railroad tie or pier piling treated with creosote. Do not bring this into your home. It is toxic and the smell will never leave.
- Use a Level… Twice: Check the level of your brackets before you put the wood on. Then, check the level of the wood once it is on. Adjust the wood by adding thin shims between the bracket and the timber if necessary.
- Sand the Back Edge: The side of the wood that meets the wall must be as flat as possible. Use a belt sander to create a flush surface so there are no gaps where the shelf meets the drywall. This makes the shelf look integrated rather than just “leaning” against the wall.
- Weight Distribution: Always place your heaviest items closest to the wall brackets. This reduces the torque on the screws and keeps the shelf from sagging over time.
Advanced Considerations for the Serious Builder
For those who want to take their driftwood projects to the next level, consider the chemistry and physics of your build.
Epoxy Inlays: Many pieces of driftwood have deep cracks or “checks.” While these add character, they can be structural weaknesses. You can fill these voids with clear or tinted epoxy resin. This not only reinforces the wood but also creates a stunning visual contrast between the grey, weathered wood and a glassy, smooth resin.
Lighting Integration: Because driftwood is often hollowed out by time, it is easy to hide wiring. You can route a small channel in the back of the shelf to hide a LED strip. This creates an “under-glow” effect that highlights the texture of the wood from below, turning a simple shelf into a high-end lighting fixture.
Scaling: If you find a truly massive piece of timber, don’t try to hang it with standard hardware. Consider using timber screws that go 4 inches into your wall studs or custom-welded steel brackets. For pieces over 30 pounds, the sheer weight of the wood becomes the primary design constraint.
Example Scenario: The Hallway Console
Imagine you find a 4-foot length of silvered cedar on a beach in Oregon. It is roughly 8 inches deep and 3 inches thick.
You take it home, soak it in a 1:9 bleach solution in your bathtub (much to your spouse’s chagrin), and let it dry in the garage for two weeks. You decide on an industrial look, so you buy two 1/2-inch black iron floor flanges, two 6-inch pipe nipples, and two caps.
You find the studs in your hallway, which are 32 inches apart. You mount the flanges, screw in the pipes, and lay the cedar on top. Because the cedar has a slight curve, you rotate it until the high point is in the center. You secure it with two small pipe clamps. Total cost? $32. Total value? A one-of-a-kind piece that would cost $350 at a boutique, plus the memory of that foggy Oregon morning when you hauled it off the sand.
Final Thoughts
Building a driftwood shelf is more than a home improvement task; it is an exercise in seeing value where others see debris. It requires you to step out of the role of a passive consumer and into the role of a deliberate producer. By understanding the legalities of the harvest and the physics of the mount, you create something that bridges the gap between the wild outdoors and your domestic sanctuary.
The practical value is clear: you get a higher-quality, more durable, and more meaningful object than anything you could buy at a big-box store. You also gain a set of skills—cleaning, leveling, and mounting—that apply to any woodworking project.
Take your time with the process. Don’t rush the drying, and don’t settle for “close enough” when it comes to the wall studs. The sea spent years shaping that wood; the least you can do is spend a few weeks getting it right. Once that shelf is up, it will serve as a permanent reminder that the best things in life aren’t manufactured—they are found.
Sources
1 hawk-hill.com (https://www.hawk-hill.com/how-to-clean-driftwood/) | 2 wikihow.com (https://www.wikihow.com/Preserve-Driftwood) | 3 todenind.com (https://todenind.com/blogs/inside-the-modular-mind/is-it-cheaper-to-buy-or-build-shelves) | 4 mwawoodworks.com (https://www.mwawoodworks.com/posts/floating-shelves) | 5 youtube.com (https://www.youtube.com/watch?v=PuvfxCEht7Y) | 6 samprimeusa.com (https://www.samprimeusa.com/blogs/shelving/is-it-cheaper-to-buy-or-build-garage-shelves) | 7 marcusfishtanks.com (https://marcusfishtanks.com/blogs/news/diy-aquarium-driftwood-preparing-and-using-it-safely) | 8 shelfology.com (https://shelfology.com/pages/the-ultimate-guide-to-floating-shelves) | 9 a1garageconversion.com (https://a1garageconversion.com/diy-garage-shelving-is-it-cheaper-to-build-or-buy/) | 10 youtube.com (https://www.youtube.com/watch?v=ggDsw1nQDQ8) | 11 youtube.com (https://www.youtube.com/watch?v=BU7cfvtIxFU)