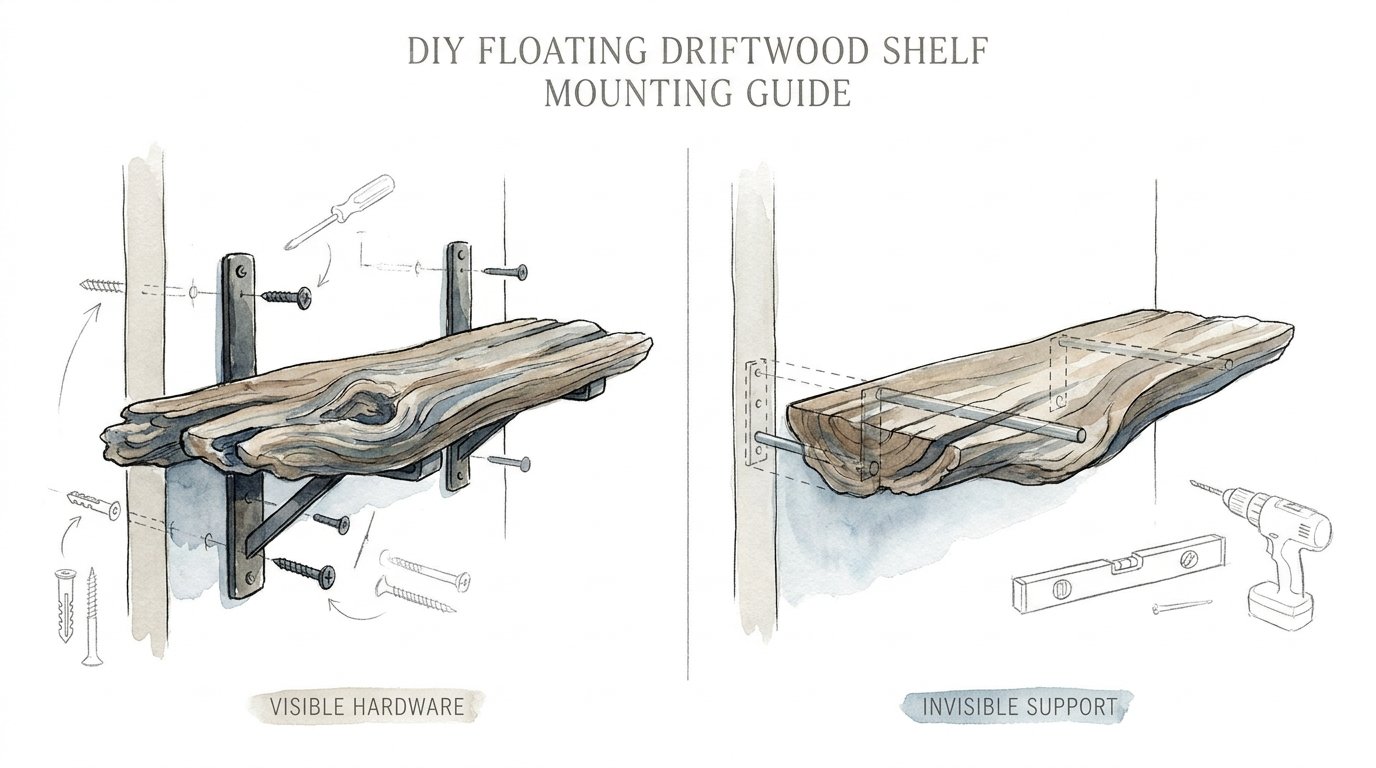
Diy Floating Driftwood Shelf Mounting Guide
Why let industrial metal ruin a masterpiece that took the ocean twenty years to carve? Most DIYers ruin the ‘beach find’ aesthetic by slapping on cheap hardware from the big-box store. A pro knows that the best support is the one you never see. Learn how to core your driftwood for internal steel rods and make your shelves look like they’re growing right out of the drywall.
[affiai]There is a specific kind of satisfaction in rescuing a piece of weather-beaten timber from the shoreline and giving it a second life. Driftwood isn’t just wood; it is a story of salt, sun, and time. When you decide to mount it as a floating shelf, the last thing you want is a clunky black bracket screaming for attention underneath it. True craftsmanship lies in the invisible architecture that holds the heavy, irregular weight of the sea’s gift against your wall with rock-solid stability.
This guide isn’t about the easy way out. It is about doing it right. We are going to look at the physics of blind shelf supports, the specialized tools required to core out deep, straight channels in twisted wood, and the grit needed to ensure your masterpiece doesn’t end up on the floor. Whether you are a beginner looking to step up your game or an experienced maker wanting to refine your hidden-mounting technique, you will find the answers here.
Diy Floating Driftwood Shelf Mounting Guide
A floating driftwood shelf is a wall-mounted display where the support system—usually internal steel rods or heavy-duty lag bolts—is completely hidden within the body of the wood. Unlike standard lumber, driftwood is rarely straight or uniform. This means you cannot rely on off-the-shelf kits without some serious modification. The “invisible” look is achieved by drilling deep, precision-aligned holes into the back of the wood that slide over metal rods anchored directly into the wall studs.
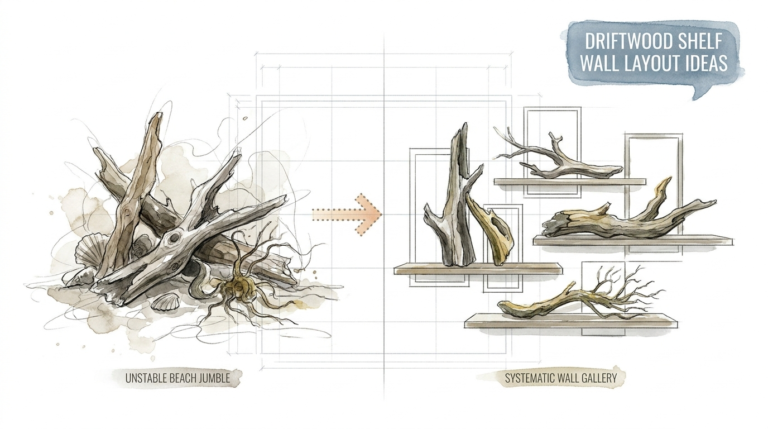
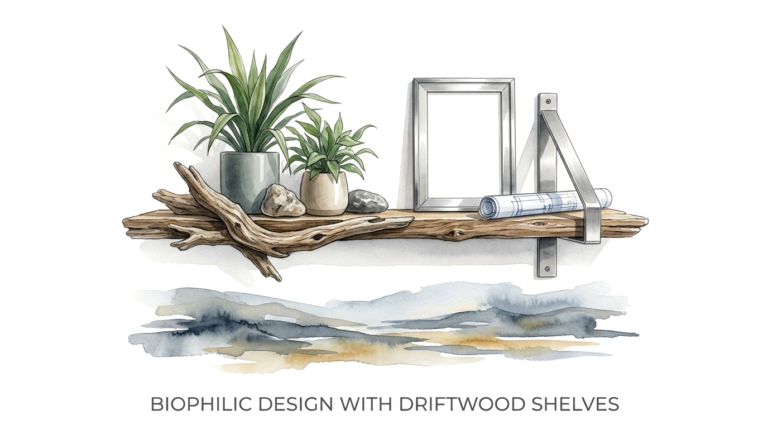
In the real world, these shelves serve as functional art in bathrooms, coastal living rooms, or as rugged fireplace mantles. They allow the organic silhouette of the wood to take center stage. Because driftwood can be surprisingly heavy and often carries internal stresses or soft spots from its time in the water, the mounting method must be robust enough to handle leverage. Think of it like a prosthetic bone; the steel rod becomes the new spine of the wood, transferring the load of your books or decor directly into the framing of your house.
This mounting style is also favored because it eliminates the “bounce” often found in cheap L-bracket installations. When you core the wood and use high-strength steel, the shelf becomes an extension of the wall itself. This guide will walk you through the cleaning, coring, and installation process so you can achieve that high-end, gallery-worthy finish without the high-end price tag.
How the Internal Support System Works
The secret to a successful floating shelf is the mechanical advantage of the steel rod. When you anchor a 1/2-inch or 5/8-inch steel rod 3 to 4 inches into a wall stud, it creates a cantilever that can support significant weight. Most high-quality internal rods are rated for at least 50 pounds each when properly engaged with a stud. If you use two or three rods for a single piece of driftwood, you are looking at a weight capacity that far exceeds what you would actually place on a decorative shelf.
The process generally follows these fundamental steps:
- Preparation: Cleaning and stabilizing the wood to ensure it won’t rot or crumble.
- Layout: Matching the drill points in the wood to the exact center of the wall studs.
- Coring: Using a long-ship auger bit or a specialized drill guide to bore a deep hole into the irregular timber.
- Anchoring: Installing the rods into the wall, often using threaded rods, lag bolts with the heads removed, or specialized blind shelf brackets.
- Fitting: Sliding the wood onto the rods and securing it with friction or a hidden set screw.
The hardest part of this process is the “handshake” between the wall and the wood. Walls are rarely perfectly flat, and driftwood is never perfectly straight. Success depends on your ability to keep your drill bits perfectly perpendicular to the mounting surface.
Benefits of Hidden Steel Rod Support
Choosing an internal rod system over external brackets isn’t just about looks; it’s about structural integrity. When you use external brackets, the weight of the shelf pulls down on the screws, often causing them to sag or pull out of the drywall over time. Internal rods, however, sit inside the heart of the wood, distributing the load more evenly across the entire depth of the shelf.
One major advantage is the ability to mount shelves in tight spaces where a bracket would simply get in the way. For instance, in a small bathroom, a protruding bracket can snag clothing or look cluttered. The invisible mount keeps the lines clean. Furthermore, internal rods allow you to mount very thick, heavy slabs of wood that would otherwise require massive, industrial-looking supports to stay level.
Finally, there is the longevity factor. Driftwood can be susceptible to movement if it wasn’t fully dried before installation. A steel rod provides an internal “skeleton” that helps the wood maintain its shape and prevents it from bowing as it adjusts to the humidity levels in your home.
Challenges and Common Mistakes
The most common pitfall in DIY floating shelf projects is missing the stud. Drywall alone will not hold a floating shelf; the leverage will rip the anchors out in a matter of days. You must use a high-quality stud finder or the “small nail” method to find the exact center of your framing. If you miss the center by even a quarter-inch, your rod won’t have enough wood to bite into, leading to a dangerous, sagging shelf.
Another frequent error is drilling the holes in the wood “by eye.” If your drill bit wanders even slightly to the left or right during the coring process, the shelf will not slide onto the rods. Because you are often drilling 6 to 10 inches deep, a 1-degree error at the start becomes a 1/2-inch error at the end of the hole. This is why using a drill guide or a jig is non-negotiable for serious practitioners.
Common mistakes also include:
- Using wood that is too wet: If the driftwood isn’t fully cured, it will shrink and the holes will tighten, making it impossible to remove or adjust the shelf later.
- Inadequate rod length: The rod should extend at least 70% of the way into the shelf’s depth to prevent the wood from snapping under load.
- Wrong drill bit type: Standard twist bits don’t clear chips well in deep holes. Use a ship auger bit, which is designed to pull sawdust out as it drills.
Limitations of the Invisible Method
While internal rods are incredibly strong, they aren’t magic. There are physical limits to what a piece of driftwood can handle. If your wood is “punky” or soft in the center, the steel rod will eventually crush the internal fibers, causing the shelf to tilt downward. This method works best on wood that is at least 2 inches thick. Anything thinner and you risk the drill bit “blowing out” the top or bottom of the wood during the coring process.
Environmental factors also play a role. If you are mounting a shelf in a high-humidity area like a sauna or a small bathroom with no ventilation, the steel rods can eventually rust if they aren’t galvanized or powder-coated. This rust can expand and crack the wood from the inside out. Always choose hardware that is treated for the environment it will live in.
Lastly, this method offers very little “wiggle room.” Once those holes are drilled and the rods are in the wall, you cannot easily move the shelf an inch to the left or right to center it under a mirror. Your layout must be perfect from the start.
Comparison: Internal Rods vs. External Brackets
When deciding which hardware to use, consider the following trade-offs. While we advocate for the invisible look, sometimes the “rustic bracket” look is better suited for the project’s vibe or the wood’s condition.
| Factor | Internal Steel Rods | External L-Brackets |
|---|---|---|
| Visual Impact | Completely invisible; “Floating” look. | Visible hardware; can be bulky. |
| Skill Level | Advanced; requires precision drilling. | Beginner; simple screw-in process. |
| Weight Capacity | Very high (if rods are in studs). | Moderate (limited by bracket flex). |
| Wall Damage | Requires deep holes in studs. | Requires standard screw holes. |
| Wood Thickness | Must be > 2″ for best results. | Can be used on thin boards. |
Practical Tips and Best Practices
If you want a professional result, don’t rush the “cleaning” phase. Driftwood often contains salt, sand, and tiny organisms that can damage your tools or your home. Soak the wood in a 1:10 bleach-to-water solution for 24 hours, then let it dry in a shaded, well-ventilated area for at least two weeks before you even touch a drill. This ensures the wood is sanitized and stable.
When it comes to drilling, use a “pecking” motion. Drill in an inch, pull the bit out to clear the chips, and repeat. This prevents the bit from overheating and burning the wood, which can weaken the internal structure. If the wood is particularly dense, a drop of mineral oil on the tip of the auger bit can act as a lubricant, making the core-drilling much smoother.
- Use a Laser Level: Walls are crooked; a laser line across your studs ensures your rods are on the same horizontal plane.
- The “Toothpaste” Hack: To mark the wood, put a dab of toothpaste on the ends of the installed wall rods, then press the shelf against them. The marks tell you exactly where to drill.
- Chemical Anchors: For heavy mantles, use a two-part epoxy inside the wood holes before sliding it onto the rods for a permanent, vibration-proof bond.
Advanced Considerations: Dealing with Irregular Backs
One of the hardest parts of using driftwood is that the side facing the wall is rarely flat. If you try to mount a “bumpy” piece of wood against a flat wall, you will have unsightly gaps. Serious practitioners use a technique called “scribing.” You hold the wood up to the wall, use a compass to trace the wall’s profile onto the back of the wood, and then use a rasp or power carver to remove material until the wood fits the wall like a glove.
Another advanced technique is the “recessed bracket.” Instead of just a rod, you can use a router to create a shallow pocket (mortise) in the back of the wood. This allows the base plate of a heavy-duty blind bracket to sit flush inside the wood, ensuring there is zero gap between the shelf and the drywall. This is essential if you want the shelf to look like it is physically growing out of the wall.
Scenario: The Coastal Bathroom Mantle
Imagine you have found a 4-foot piece of cedar driftwood, roughly 4 inches thick and 8 inches deep. It’s heavy—about 25 pounds. You want to mount it over the toilet in a master bathroom. In this scenario, you would find three studs (spaced 16 inches apart). You would use 1/2-inch diameter threaded rods, each 10 inches long.
You would drill 4 inches into the center of each stud using a 7/16-inch bit (slightly smaller than the rod for a tight “interference fit”). Using a pipe wrench, you’d thread the rods into the studs so 6 inches remain protruding. After using the toothpaste marking method, you would core three 6.5-inch deep holes into the driftwood using a 1/2-inch auger bit. Sliding the cedar onto the rods, you might find the wall has a slight hump. A quick bit of sanding on the back of the wood, and the shelf snaps into place, tight and true, capable of holding towels, candles, and heavy glass jars without a hint of sag.
Final Thoughts
Mounting a floating driftwood shelf is a test of patience as much as it is a test of skill. It requires you to respect the natural irregularities of the wood while imposing the rigid precision of modern engineering. By moving away from visible hardware and mastering the internal rod system, you elevate your DIY projects from “crafty” to “custom-built.”
The beauty of this method is that it can be applied to any heavy timber, not just driftwood. Live-edge slabs, reclaimed barn beams, and even thick plywood box-shelves benefit from the structural integrity of internal steel. Once you understand the physics of the cantilever and the importance of the wall stud, the only limit is the weight of the wood you can find on the beach.
Don’t be afraid to fail on your first attempt. Practice coring on a scrap 4×4 post before you take the drill to your prized ocean find. With enough elbow grease and a sharp auger bit, you can create a home feature that will spark conversation for decades. Now, get out there, find your masterpiece, and give it the invisible support it deserves.
Sources
1 youtube.com (https://www.youtube.com/watch?v=btlysSKCpj4) | 2 instructables.com (https://www.instructables.com/Easy-Floating-Shelf-All-Wood-Bracket-NO-WELDING/) | 3 lagunatools.com (https://info.lagunatools.com/creating-floating-shelves) | 4 youtube.com (https://www.youtube.com/watch?v=gxFGvipchnE) | 5 youtube.com (https://www.youtube.com/watch?v=dTi_uYnG1Jg) | 6 youtube.com (https://www.youtube.com/watch?v=eOkSqhbKq4s) | 7 dksstores.com (https://dksstores.com/blog-post49) | 8 wurthbaersupply.com (https://wurthbaersupply.com/product/782931/FLOAT-SHLF-ROD-FLAT-7X1.75X1.75-FB-10505) | 9 protoolreviews.com (https://www.protoolreviews.com/diy-floating-shelf-tutorial-how-to-do-it-yourself/) | 10 lakewedoweelife.com (https://www.lakewedoweelife.com/lake-life/driftwood-art-and-treasures-by-tammy-lovvorn) | 11 shelfology.com (https://shelfology.com/pages/the-ultimate-guide-to-floating-shelves) | 12 themortiseandthehare.com (https://themortiseandthehare.com/blogs/news/uneven-custom-floating-shelf-installation) | 13 diydriftwood.com (https://diydriftwood.com/driftwood-refinishing-techniques/) | 14 hawk-hill.com (https://www.hawk-hill.com/diy-floating-driftwood-shelf/) | 15 lincolnstwoodworks.com (https://lincolnstwoodworks.com/blogs/posts/how-to-build-floating-shelves-3-ways-from-beginner-to-advanced) | 16 federalbrace.com (https://www.federalbrace.com/floating-shelf-support-rods-279) | 17 wurthlac.com (https://wurthlac.com/product/175638/1-3-4-x-6-Floating-Shelf-Support-Rod-Steel-Finish) | 18 reddit.com (https://www.reddit.com/r/woodworking/comments/1holnu3/help_with_floating_shelf/) | 19 homedepot.com (https://www.homedepot.com/p/Federal-Brace-Floating-Shelf-6-in-Steel-Support-Rod-32152/300083673)