diy kids playground outdoor
Cheap toys break. Legacies endure. What are you building in your backyard?
[affiai]Stop the cycle of buying and tossing. Build a play structure that will last through childhood and into the next generation. Here is how to build for longevity.
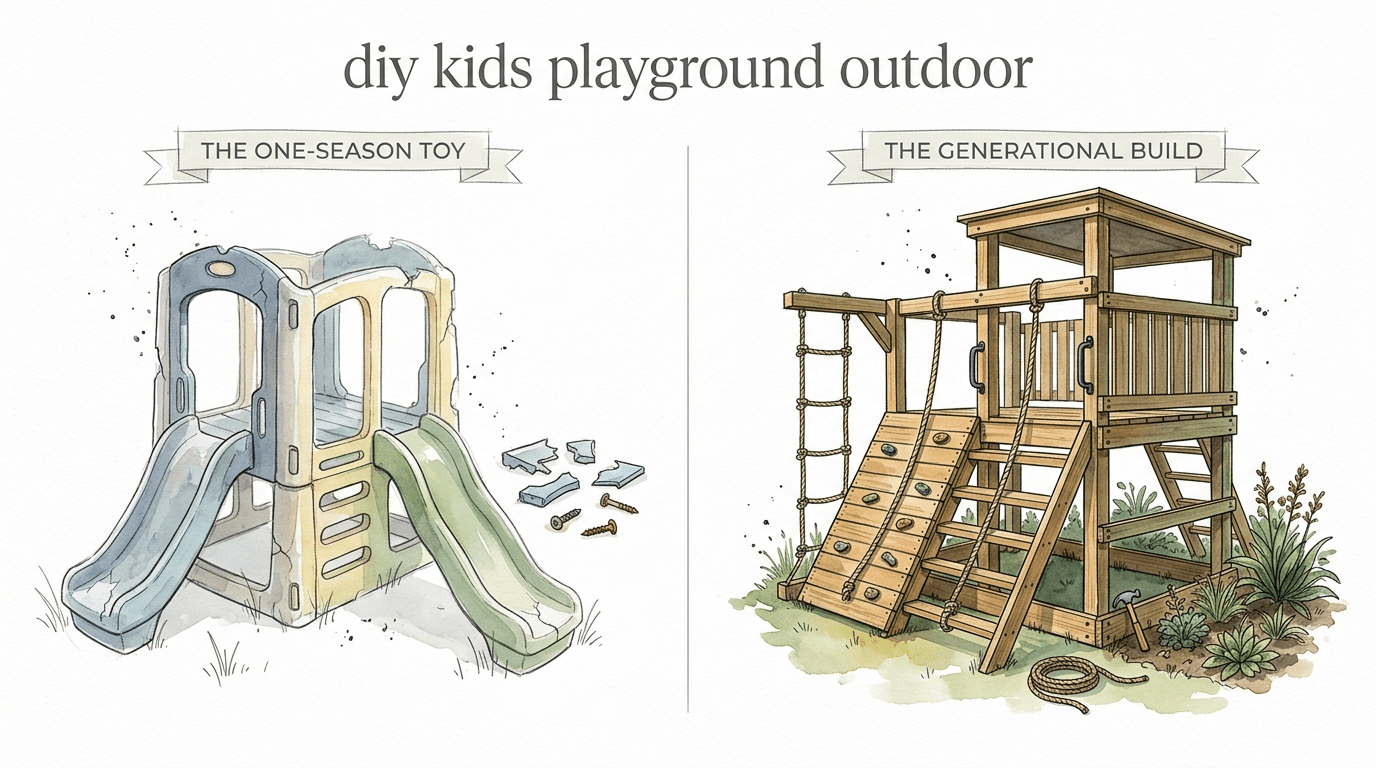
The standard backyard experience has become a disposable one. Many parents buy a thin-walled, cedar-stained kit from a big-box store, spend three days assembling it, and watch it wobble by the second summer. That is the “one-season toy” approach. It is expensive, wasteful, and eventually ends up in a landfill.
Building for longevity requires a shift in mindset. You are not just putting together a kit; you are engineering a permanent outdoor asset. By choosing the right materials, mastering the ground preparation, and following professional safety standards, you can create a space that survives the elements and the aggressive play of growing kids.
diy kids playground outdoor
A diy kids playground outdoor project is the construction of a custom play environment tailored to your specific landscape and your children’s needs. Unlike pre-packaged sets, a custom build allows you to control every variable, from the thickness of the support beams to the quality of the bolts.
In the real world, these structures serve as the anchor of a family’s outdoor life. They provide a safe zone for physical development, risk assessment, and imaginative play. When you build it yourself, you aren’t limited by a manufacturer’s cost-cutting measures. You can use 4×4 or 4×6 posts where a kit might use 2x4s, ensuring the structure remains rock-solid as your toddlers turn into teenagers.
Think of it as the difference between a fast-fashion t-shirt and a tailored suit. One is meant to be used and forgotten; the other is designed to stand the test of time and provide a superior experience every single day.
How to Build for Longevity: The Step-by-Step Process
Building a generational structure starts long before you pick up a hammer. It begins with the soil and the selection of materials that can withstand rot, insects, and UV radiation.
1. Site Selection and Ground Prep
The ground is where most playgrounds fail. If the site isn’t level or has poor drainage, the wood will rot from the bottom up, and the structure will shift. Start by identifying a high spot in your yard or creating one through grading. Remove all grass and organic matter from the “use zone”—typically a 6-foot perimeter around the structure.
2. Choosing the “Forever” Wood
For a build that lasts 20+ years, you have three primary choices:
- Western Red Cedar: Naturally resistant to rot and insects, it is beautiful and smells great. However, it is a softer wood and may require more frequent staining.
- Redwood: The gold standard. It is incredibly durable and holds its shape well, though it can be expensive and harder to find in some regions.
- Ground-Rated Pressure-Treated Pine: Modern treatments are safe for play. It is the most affordable and strongest option, but you must ensure it is “ground contact” rated for any posts touching the earth.
3. High-Performance Hardware
Never use the hardware that comes with a cheap kit. For a generational build, use hot-dipped galvanized or 316-grade stainless steel fasteners. Stainless steel is essential if you live near the coast to prevent salt-air corrosion. Use carriage bolts for structural joints to keep the surface smooth for little hands.
4. The Modular Design Strategy
Build in phases. Start with a solid 5’x5′ deck and a slide for the toddler years. Design it so you can bolt on a swing beam later, or replace a bucket swing with a tire swing as the kids grow. This modularity keeps the playground relevant for a decade or more.
Benefits of the Generational Build
Choosing a custom, heavy-duty build over a store-bought kit offers measurable advantages in safety, cost-over-time, and play value.
Superior Stability: Heavy-duty lumber (4×4 and 4×6 posts) creates a structure that doesn’t “walk” or shimmy when multiple kids are swinging. This stability reduces the mechanical stress on the joints, leading to a much longer lifespan.
Custom Safety Zones: You can design the “fall zone” to exceed the minimum 6-foot requirement, providing extra peace of mind. Using professional-grade surfacing like 12 inches of engineered wood fiber (EWF) or rubber mulch provides superior impact attenuation compared to grass.
Property Value: A well-built, aesthetically pleasing wood structure acts as a permanent landscape feature. Unlike a peeling, plastic-heavy kit, a custom cedar or redwood playground can actually increase the perceived value of your home.
Challenges and Common Mistakes
Even the best materials won’t save a project if the execution is flawed. Here are the most frequent errors DIYers make:
- Ignoring Drainage: If water pools under the playground, the safety surfacing will become a swamp and the posts will rot. Always ensure a 1% to 2% pitch away from the structure.
- Undersized Footings: Posts should be set in concrete footings or on deck blocks that sit on a compacted gravel base. Never just “stick it in the dirt” and hope for the best.
- Entrapment Hazards: Avoid gaps between 3.5 and 9 inches. These are “head entrapment” zones where a child’s body might pass through but their head gets stuck.
- Dissimilar Metals: Using stainless steel bolts on galvanized brackets can cause galvanic corrosion. Stick to one type of metal for all hardware components.
Limitations: When This Approach May Not Work
While a custom build is superior for most, there are situations where it might not be the right move.
Extreme Slopes: If your yard has a significant grade, you may need a professional engineer or a specialized landscaping crew to terrace the area first. Building a playground on a steep hill is a recipe for instability and injury.
HOA Restrictions: Some homeowners’ associations have strict rules on the height, color, or placement of outdoor structures. Always check your local bylaws before buying a single board.
Time Constraints: A generational build takes time. If you need a playground “by Saturday,” a pre-packaged kit or a professional installation is your only option. A true custom build is a multi-weekend commitment.
Comparison: Cedar vs. Pressure-Treated Pine
| Factor | Cedar | Pressure-Treated Pine |
|---|---|---|
| Lifespan | 15-20 years (with maintenance) | 20-30 years |
| Cost | High | Moderate |
| Appearance | Beautiful, natural red/yellow | Greenish tint, needs staining |
| Maintenance | Annual staining/sealing | Stain after wood dries (6 months) |
Practical Tips for a Better Build
Sand Every Edge: Use a router with a 1/2″ radius bit on every corner of the lumber. This virtually eliminates splinters and makes the wood much safer if a child bumps into a post.
North-Facing Slides: Position your slides so they face north. This ensures they get the least amount of direct midday sun, preventing the plastic from becoming hot enough to burn skin.
Use Timberlock Screws: For heavy structural connections, swap traditional lag bolts for structural timber screws (like Timberlocks). They provide incredible holding power without the need for pre-drilling in many cases, saving hours of labor.
Set Posts in Gravel, Not Dirt: If you are burying posts, put 6 inches of gravel at the bottom of the hole before pouring concrete. This allows water to drain away from the bottom of the post, preventing “bottom rot.”
Advanced Considerations: The Pro Build
For those who want to go beyond the basics, consider these “pro-level” upgrades:
Engineered Drainage Systems: Instead of just grading, install a French drain around the perimeter of the play area. This ensures that even during a heavy downpour, the playground remains dry and the wood isn’t sitting in moisture.
Structural Reinforcement: Use steel corner brackets to reinforce every major 90-degree joint. This prevents the “racking” that eventually loosens bolts and causes structures to lean over time.
Unitary Surfacing: If your budget allows, skip the mulch and go for poured-in-place rubber or high-density synthetic turf. These “unitary” surfaces are much easier to maintain, are ADA-accessible, and don’t require the constant raking that loose-fill materials do.
Example Scenario: The 10-Year Growth Plan
Imagine a family with a 2-year-old. They decide to build for longevity.
Phase 1 (Year 1): They build a 5’x5′ cedar tower with a 4-foot deck height. They install a toddler bucket swing and a small, gentle slide. The base is filled with 12 inches of rubber mulch.
Phase 2 (Year 4): The child is now 6. The parents raise the deck to 5 feet (using pre-planned modular posts) and swap the toddler swing for a heavy-duty belt swing. They add a 10-foot wavy slide and a rock-climbing wall.
Phase 3 (Year 8): The child is now 10. The parents add a set of monkey bars and a “ninja” hanging obstacle course. Because the structure was built with 4×4 posts and stainless steel hardware, it is still as sturdy as the day it was built.
Final Thoughts
Building a diy kids playground outdoor structure is an investment in your family’s future. It is about more than just physical activity; it is about creating a permanent landmark for childhood memories. By ignoring the temptation of cheap kits and focusing on heavy-duty materials, proper ground prep, and modular design, you create a legacy that can last for decades.
Take the time to do it right. Research your local soil conditions, buy the highest quality lumber you can afford, and never compromise on the quality of your fasteners. The result will be a backyard anchor that stands strong through the rain, the snow, and the thousands of hours of play it was built to handle.
Don’t just build a toy. Build a legacy. Experiment with different layouts, involve your kids in the planning, and enjoy the satisfaction of knowing you built something that will outlast the childhoods it was designed to protect.
Sources
1 bergfeldrecreation.com (https://www.bergfeldrecreation.com/how-to-create-the-perfect-backyard-with-outdoor-play-structures/) | 2 discountplaygroundsupply.com (https://discountplaygroundsupply.com/blog/choosing-the-right-fasteners-and-bolts-for-your-swing-set/) | 3 treehousesupplies.com (https://www.treehousesupplies.com/blogs/treehouse-supplies/how-to-plan-and-build-the-perfect-playground) | 4 frameitall.com (https://frameitall.com/blogs/frame-it-all/how-to-build-playground-box) | 5 playstarinc.com (https://www.playstarinc.com/how-to-prepare-your-yard-for-a-playset) | 6 playsetservices.com (https://www.playsetservices.com/learn-blog/types-of-lumber-to-use-for-a-swing-set) | 7 penndutchstructures.com (https://www.penndutchstructures.com/blog/best-wood-outdoor-swing-set/) | 8 bigjerrysfencing.com (https://bigjerrysfencing.com/cedar-vs-redwood-fence/) | 9 recreationsoutlet.com (https://recreationsoutlet.com/blogs/a-backyard-dream-come-true/modular-playsets-guide) | 10 swingsetwarehouse.com (https://www.swingsetwarehouse.com/cedar-vs-redwood-what-you-need-to-know-when-buying-a-wooden-swing-set)