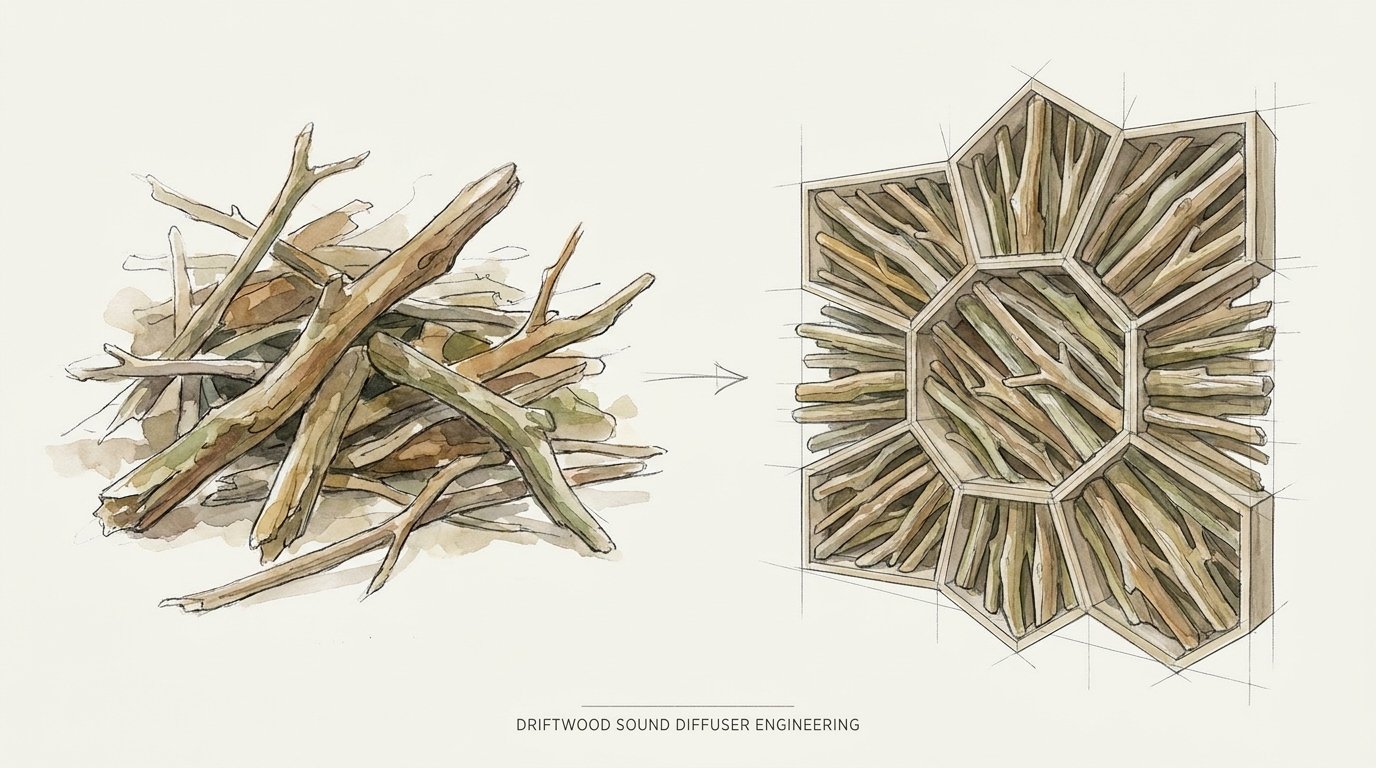
Driftwood Sound Diffuser Engineering
The ocean has already carved the perfect sound waves—you just need to learn how to arrange them. Most people treat driftwood as a visual craft. The pro knows it’s an acoustic miracle. Because no two pieces are identical, driftwood is the world’s best material for breaking up standing sound waves. Here is how to stop guessing and start engineering your room’s soul.
[affiai]Acoustic treatment is often reduced to gray foam and fabric squares. While those tools have their place in soaking up energy, they often leave a room feeling “dead” and unnatural. True sound engineering isn’t just about killing noise; it is about controlling where it goes and how it behaves. This is where the ancient, salt-worn textures of driftwood become a master-class tool for the modern studio or home theater.
Every curve and notch in a piece of shore-washed wood acts as a miniature redirector for high and mid-range frequencies. When you mount these pieces strategically, you aren’t just decorating a wall. You are building a complex scattering array that mimics the acoustic complexity of a forest or a rocky coastline. It turns a sterile box into a living, breathing sonic environment.
Driftwood Sound Diffuser Engineering
A driftwood sound diffuser is a specialized acoustic treatment designed to scatter sound waves rather than absorb them. Unlike flat walls that reflect sound like a mirror reflects light, a diffuser breaks the energy into smaller, lower-intensity reflections that travel in multiple directions. This process, known as diffusion, maintains the “liveliness” of a room while eliminating problematic echoes and “flutter” sounds that occur between parallel surfaces.
Engineering these panels involves understanding the relationship between the depth of the wood and the frequencies it can affect. In the world of acoustics, the physical depth of a diffuser’s surface determines the lowest frequency it can successfully scatter. Driftwood, with its organic variations in thickness and protrusion, naturally covers a broad spectrum of frequencies without the “clinical” or repetitive sound signatures found in mass-produced plastic diffusers.
These devices are primarily used in critical listening environments such as recording studios, mastering suites, and high-end home theaters. By placing a driftwood array on the rear wall of a control room, an engineer can prevent sound from bouncing directly back into their ears. This creates a wider “sweet spot” and a more accurate sense of depth in the music. It is the difference between hearing the room and hearing the recording.
The Physics of Scattering
When a sound wave hits a flat, hard surface, it bounces back at the same angle it arrived. This is called a specular reflection. If your room has two flat walls facing each other, the sound bounces back and forth like a ping-pong ball, creating a “metallic” ringing sound. A driftwood diffuser replaces that flat surface with thousands of varied angles. The sound wave is chopped into “fragments” and scattered across a 180-degree arc.
This scattering is categorized into two main types: 1D and 2D diffusion. A 1D diffuser, often made of vertical slats or aligned driftwood branches, scatters sound in a single horizontal plane. This is excellent for keeping sound away from the listener’s ears in a narrow room. A 2D diffuser, which uses blocks or pieces of varying heights and widths, scatters sound both horizontally and vertically. This is more common for ceilings or large back walls where you want the sound to “disappear” into the room’s volume.
How to Design and Build Your Array
Building a driftwood diffuser requires a blend of artistic intuition and mathematical awareness. You cannot simply throw sticks at a wall and expect a perfect acoustic result. You must engineer the depth and density of the wood to match the needs of your space. Here is the step-by-step process for turning raw beach wood into a professional-grade acoustic tool.
Step 1: Harvesting and Selection
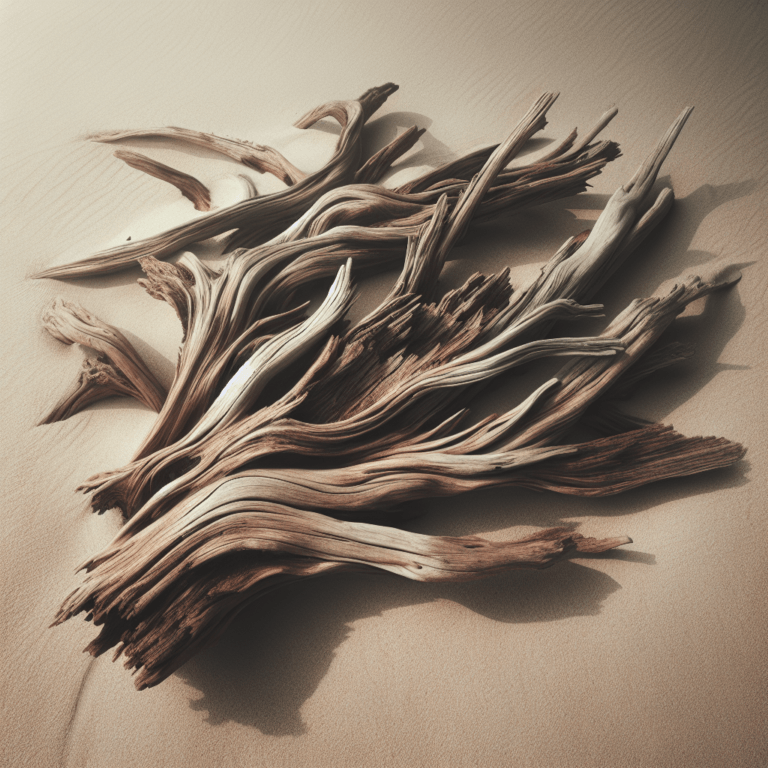
Look for “hard” driftwood that hasn’t started to rot. Soft, spongy wood will absorb sound rather than scatter it, which defeats the purpose of a diffuser. You want pieces that feel dense and heavy for their size. Aim for a variety of thicknesses, ranging from thin twigs (for high frequencies) to thick, 4-inch “trunks” (for mid-range control).
Ensure that the pieces have interesting “geometry.” Curves, knots, and splits are your friends. These irregularities are what break up the phase correlation of sound waves, preventing the “comb filtering” effect that makes audio sound thin or nasal. Avoid pieces that are too flat, as they will still act like a standard wall surface.
Step 2: Cleaning and Sanitization
Never bring raw driftwood into your home without a thorough cleaning. It is often home to salt, sand, tannins, and microscopic pests. To prepare the wood, scrub it with a stiff brush to remove loose debris. Most pros recommend a soaking method: submerge the wood in a solution of one part bleach to nine parts water for at least 24 hours. This kills any organisms living deep in the grain.
After soaking, the wood must be dried completely. If you have a kiln, use it; otherwise, let the wood sit in a dry, low-humidity environment for at least two weeks. Moisture trapped in the wood can cause it to warp or rot once it is mounted to your wall. Once dry, a light coat of linseed oil or a matte sealant can help preserve the wood without creating a “shiny” surface that reflects high-frequency “zing.”
Step 3: Calculating Depth and Placement
The deepest part of your diffuser should be at least 4 to 6 inches for meaningful mid-range diffusion. If your room is small, you may need to stick to a 3-inch maximum depth to prevent the panel from feeling “claustrophobic.” Use the “prime number” logic found in Quadratic Residue Diffusers (QRD). While driftwood is irregular, you can still arrange the pieces so that the “average” depth across the panel fluctuates in a way that avoids repetition.
For the best results, place your driftwood panels at the “first reflection points”—the spots on the side walls where sound from your speakers hits first. You can find these points by having a friend slide a mirror along the wall while you sit in the listening position; when you see the speaker in the mirror, that is where the diffuser (or an absorber) should go.
Benefits of Driftwood Diffusion
Choosing driftwood over commercial acoustic products offers several distinct advantages that go beyond mere aesthetics. It is a choice for the practitioner who values the unique “signature” of a room as much as its frequency response.
- Unique Acoustic Signature: Commercial diffusers are often made from identical molds. This can lead to “repetitive” reflections. Because every piece of driftwood is unique, the scattering pattern it creates is truly random and natural, leading to a smoother, more pleasing room tone.
- Cost-Effectiveness: While high-end wood diffusers can cost thousands of dollars, driftwood is essentially free for those willing to do the legwork. Your main costs will be the mounting hardware, backing board, and cleaning supplies.
- Broadband Effectiveness: Unlike thin foam, a deep driftwood array can scatter frequencies from 500Hz all the way up to 10kHz. This covers the most critical range for human speech and musical clarity.
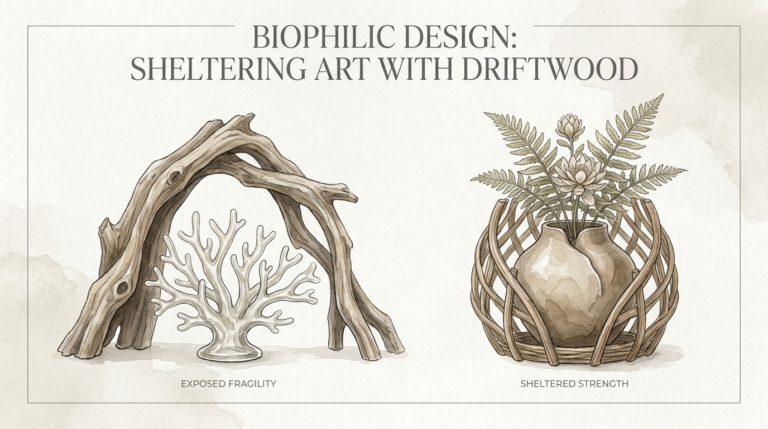
- Biophilic Design: Bringing natural elements into a workspace or studio has been shown to reduce stress and improve focus. The “pioneer-grit” aesthetic of weathered wood provides a grounding atmosphere that synthetic materials cannot match.
Challenges and Common Mistakes
Engineering with organic materials is harder than working with pre-cut lumber. Precision is often sacrificed for “character,” and if you aren’t careful, you can create new acoustic problems while trying to solve old ones. One of the biggest mistakes is failing to secure the wood properly. Driftwood can be heavy, and if a piece vibrates against the backing board, it will create a “buzz” or “rattle” that ruins your recordings.
Another pitfall is “over-diffusion.” If you cover every square inch of your room in diffusers, the sound will become “smeared” and lose its punch. You need a balance of absorption (to remove excess energy) and diffusion (to manage what’s left). A common rule of thumb is to use 20% to 30% coverage for diffusion, focused mainly on the rear wall and the ceiling.
Do not forget about the “lobing” effect. This happens when a diffuser is too close to the listener. If you sit within three feet of a deep driftwood panel, you may hear strange phase shifts or “honking” sounds. Always ensure there is enough distance (typically 3-5 feet) for the scattered waves to “re-combine” before they hit your ears.
Limitations: When Driftwood Is Not Ideal
While driftwood is an acoustic miracle for mids and highs, it is almost useless for “bass trapping.” Low-frequency sound waves (below 100Hz) are massive—some are over 10 feet long. A 4-inch piece of wood will do nothing to stop a bass wave; the wave will simply wrap around the wood as if it wasn’t there. If your room has “boomy” bass, you need thick mineral wool or corner traps, not diffusers.
Environmental constraints also play a role. If you live in a very humid climate, driftwood can absorb moisture from the air, causing it to expand, contract, and eventually crack. In such environments, you must use a high-quality wood stabilizer or sealant. Additionally, in very small rooms (like a walk-in closet converted into a booth), diffusion can actually make the space feel smaller and more cluttered. In those cases, pure absorption is often the better path.
Random Sticks vs. Tuned Geometry
In the world of acoustics, there is a constant debate between “quasi-random” arrays and “tuned” arrays like the QRD (Quadratic Residue Diffuser). While tuned geometry is mathematically superior for preventing any phase correlation, a well-built driftwood array can achieve about 80% of the same performance with a much more natural sound.
| Factor | Driftwood (Random Sticks) | Commercial QRD (Tuned) |
|---|---|---|
| Frequency Accuracy | Variable / Natural | Mathematically Precise |
| Visual Impact | Organic / Rustic | Modern / Industrial |
| Ease of Build | Moderate (Requires cleaning) | Hard (Requires complex math) |
| Weight | Heavy | Light to Moderate |
| Cost | Low (DIY) | High |
Practical Tips and Best Practices
To get the most out of your driftwood sound diffuser, follow these professional-level tips. These will ensure your project is both acoustically sound and structurally safe.
- Use a Heavy Backing: Mount your driftwood to a piece of 3/4-inch plywood rather than directly to the drywall. This adds mass to the panel and prevents the wall itself from vibrating.
- Vary the Angles: When gluing or screwing your pieces down, don’t keep them all parallel. Rotate some pieces 15 to 30 degrees to create a more effective “cross-pattern” of scattering.
- Hide the Screws: Use a countersink bit to drill holes into the wood, then hide the screw heads with wood putty or smaller “twigs” glued over the top. This maintains the “found object” look.
- Backlighting: For a stunning visual effect, install LED strips behind the plywood frame. The shadows cast by the driftwood will emphasize the texture and make the panel a centerpiece of the room.
- Mix Your Woods: Combining salt-bleached driftwood with darker “river wood” can create a beautiful contrast that highlights the different densities and acoustic properties of the materials.
Advanced Considerations: Tuning Your Room
Serious practitioners can take their driftwood arrays a step further by “tuning” the panel to a specific frequency range. If you know your room has a “ring” at 2kHz, you can ensure that a high percentage of your driftwood pieces have a thickness that corresponds to that wavelength. This requires a bit of measurement: at 70 degrees Fahrenheit, a 2kHz wave is roughly 6.7 inches long. A diffuser with “wells” or gaps around 3 to 4 inches deep will be most effective at disrupting that specific frequency.
Consider the “fractal” approach. This involves building a large diffuser out of medium-sized pieces, and then attaching even smaller twigs to those pieces. This creates “diffusion on top of diffusion,” which is how the most expensive recording studios in the world (like those designed by George Massenburg or Russ Berger) handle high-frequency airiness. It gives the room a “shimmer” without any harsh reflections.
Example Scenario: The “Ocean Attic” Studio
Consider a 12′ x 15′ attic space converted into a mixing room. The walls are angled, creating “dead spots” and weird bass buildups in the corners. The engineer installs two 4′ x 4′ driftwood panels on the rear wall, directly behind the mixing desk. The wood pieces vary in depth from 1 to 5 inches.
Before the panels, the room had a “boxy” sound that made it hard to hear the reverb tails in the mix. After installation, the rear wall “disappears.” The sound waves that used to bounce back and “smear” the stereo image are now scattered into the ceiling and side walls. The engineer can now hear the precise placement of the drums and vocals because the “early reflections” from the back of the room have been neutralized.
Final Thoughts
Engineering a driftwood sound diffuser is more than a weekend project; it is a way to bridge the gap between the chaotic beauty of the natural world and the precision of modern acoustics. By understanding the principles of scattering and depth, you can turn a pile of “river junk” into a professional tool that rivals expensive commercial treatments.
The goal is never to make a room perfectly silent. Silence is for the grave. A great room should feel alive, supporting the music rather than fighting it. Driftwood provides that life. It offers a random, organic complexity that math alone cannot replicate, creating a sonic texture that is as deep and varied as the ocean it came from.
Start small. Collect a few pieces from your next trip to the coast or the riverbank. Clean them, dry them, and mount them. Once you hear the difference a single panel can make in the “clarity” and “air” of your space, you’ll never look at a piece of gray foam the same way again. Experiment, tune your geometry, and let the ocean help you find your room’s true voice.
Sources
1 acousticalsurfaces.com (https://www.acousticalsurfaces.com/blog/acoustics-education/what-is-sound-diffusion-and-absorption/) | 2 tudagrass.co.uk (https://www.tudagrass.co.uk/blogs/news/how-to-fit-acoustic-wall-panels-the-ultimate-guide) | 3 csicreative.com (https://www.csicreative.com/blog-category/wood-sound-diffuser-natural-sound-dispersion-the-beauty-of-wooden-sound-diffusers/) | 4 rulonco.com (https://rulonco.com/wood-sound-absorbers-enhancing-spaces-with-curvatone/) | 5 arrowzoom.com (https://arrowzoom.com/blogs/news/the-ultimate-wood-diffuser-guide-enhance-sound-quality-like-never-before) | 6 illuminated-integration.com (https://illuminated-integration.com/blog/absorption-vs-diffusion/) | 7 acousticgeometry.com (https://acousticgeometry.com/how-sound-diffusers-work/) | 8 long-mcquade.com (https://www.long-mcquade.com/blog/1290/Absorption-vs-Diffusion-for-Acoustic-Treatment.htm) | 9 frankleonardwalker.com (https://www.frankleonardwalker.com/post/19-a-reflection-rear-wall-diffusion) | 10 kef.com (https://ap.kef.com/blogs/news/what-are-diffusion-and-absorption) | 11 gikacoustics.com (https://www.gikacoustics.com/blogs/knowledge-base/understanding-diffusion) | 12 groupdiy.com (https://groupdiy.com/threads/distribution-of-sound-deadening-diffusors.51170/) | 13 hawk-hill.com (https://www.hawk-hill.com/how-to-clean-driftwood/) | 14 diydriftwood.com (https://diydriftwood.com/how-to-clean-driftwood/) | 15 reddit.com (https://www.reddit.com/r/audioengineering/comments/f4qdng/whats_the_difference_between_absorbtion_panels/) | 16 gikacoustics.com (https://www.gikacoustics.com/blogs/knowledge-base/diffusion-dimension-download-1d-2d-scattering) | 17 youtube.com (https://www.youtube.com/watch?v=OEr2J3v0Vec) | 18 mymumthedreamer.com (https://mymumthedreamer.com/how-to-clean-driftwood-for-crafting/) | 19 coreybautistaaudio.com (https://www.coreybautistaaudio.com/diy-acoustic-panel-guide) | 20 acceldistrib.com (https://acceldistrib.com/blogs/news/how-to-install-acoustic-wood-panels-a-step-by-step-guide)