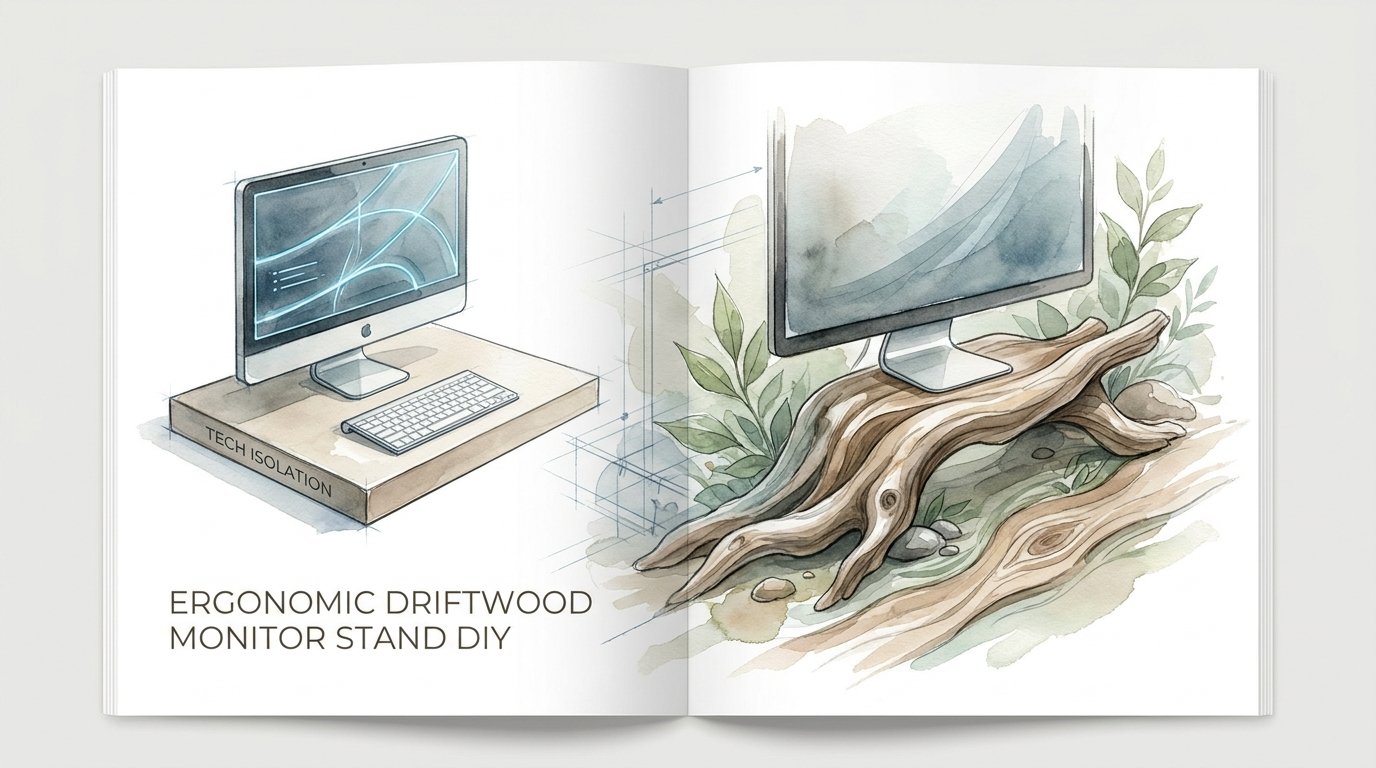
Ergonomic Driftwood Monitor Stand Diy
Is your workspace a digital cage or a coastal retreat? Staring at a screen for 8 hours is hard enough; staring at a plastic-wrapped desk makes it worse. I replaced my industrial monitor stand with a solid piece of storm-tossed cedar. Now, my tech doesn’t feel like an intruder in my home—it feels like it’s part of the scenery.
[affiai]If you spend your days tethered to a keyboard, you know the physical toll of a poor setup. The standard plastic riser is a monument to convenience over character. But there is a different way to lift your view. This is about reclaiming the space between your hands and your eyes, turning a functional necessity into a piece of the natural world.
The tension between TECH ISOLATION and ORGANIC INTEGRATION is a silent struggle in the modern home office. We surround ourselves with sleek, cold aluminum and high-gloss finishes, then wonder why we feel disconnected. An ergonomic driftwood monitor stand DIY project is the antidote. It brings the grit of the coastline to the sterile environment of the digital age.
This guide is for those who aren’t afraid to get their hands dirty to make their lives better. We aren’t just building a shelf; we are anchoring a workspace. You will learn how to source, sanitize, and stabilize a piece of timber that the ocean has already spent years perfecting.
Ergonomic Driftwood Monitor Stand Diy
An Ergonomic Driftwood Monitor Stand Diy project is the process of selecting and refined a piece of reclaimed coastal wood to serve as a functional riser for a computer screen. This isn’t just about rustic aesthetics; it is a calculated effort to align your digital tools with the biological needs of your body. In the real world, “found” wood is often discarded as debris, but for the pioneer-spirited maker, it is a structural asset.
Driftwood is unique because it has already survived the harshest environments. It has been sand-blasted by the wind, tumbled by the tides, and bleached by the sun. This removes the “weak” outer layers of the wood, leaving behind a dense, hardened core. When you use this material for a monitor stand, you are using wood that has been naturally “kiln-dried” by the elements.
The primary purpose of this stand is ergonomics. Most monitors sit too low on a standard desk, forcing the user to hunch forward. By using a heavy, stabilized piece of driftwood, you raise the screen so that your eyes align naturally with the top third of the display. This posture reduces the strain on your cervical spine and opens up your chest, allowing for better breathing and focus.
Think of it like building a bridge. On one side, you have the cold, precise world of software and silicon. On the other, you have the jagged, unpredictable history of the Pacific or Atlantic coast. Bringing them together requires more than just glue; it requires an understanding of how to make an irregular object function with 100% reliability in a high-tech environment.
The Step-by-Step Reclamation Process
Building a stand from the sea requires patience. You cannot simply pull a log from the sand and set a $900 monitor on it. Salt, moisture, and hidden organisms are your enemies. The process begins with the hunt and ends with a finish that feels as smooth as bone.
The first step is selecting the right specimen. Look for “deadwood” that is silver-grey and feels surprisingly light for its size—this indicates that the sap has been replaced by air or salt. Avoid pieces that feel spongy or “punky,” as these have begun to rot from the inside. Ideally, you want a piece with at least one relatively flat side that can serve as the base, or a branch structure that can be trimmed into a tripod.
Once you have your wood, you must sanitize it. Driftwood is often a hotel for maritime insects and bacteria. Submerge the piece in a solution of one part bleach to nine parts water. Let it soak for at least six to twelve hours. This kills the “creepy crawlies” and halts any remaining rot. If the wood floats, anchor it down with a heavy brick or stone.
After the bath, the wood needs to dry completely. This is where many makers fail. If you seal moisture inside the wood, it will eventually crack or grow mold. Place the piece in a sunny, well-ventilated area for at least three to five days. If you are in a humid climate, you may need a week or more. The wood is ready when it no longer feels cool to the touch and rings with a hollow sound when tapped.
Sanding is where the character emerges. Start with a coarse 80-grit paper to knock down the rough scales and splinters. Move through the grits—120, 180, and finally 320—until the surface is velvet-soft. You aren’t trying to make it look like a factory-made board; you are trying to highlight the grain that the ocean already started revealing.
Benefits of the Organic Riser
The most immediate benefit is physical. When your monitor is at the correct height—meaning the top of the screen is at eye level—your head remains balanced over your shoulders. This eliminates “tech neck,” a condition caused by the 10 to 12 pounds of pressure your head puts on your spine when tilted forward. A driftwood stand is a heavy, stable platform that doesn’t wobble like cheap plastic risers.
Beyond the physical, there is a profound psychological advantage to ORGANIC INTEGRATION. Modern offices are often devoid of natural textures. This lack of “biophilic” elements can increase stress levels and decrease cognitive performance. Touching a piece of sun-bleached cedar or oak throughout the day provides a tactile grounding that a glass or metal desk simply cannot offer.
Sustainability is another factor that cannot be ignored. Every piece of driftwood you reclaim is a piece of furniture that didn’t require a factory, a plantation, or a global shipping lane. You are taking “waste” and turning it into a high-value tool. It is the ultimate expression of the pioneer spirit—making do with what the land (or sea) provides and making it better than the store-bought alternative.
Finally, there is the benefit of uniqueness. No two pieces of driftwood are the same. Your stand will have knots, whorls, and burls that are entirely its own. It serves as a conversation piece and a personal landmark in your home. In a world of mass production, having a workspace anchored by a singular piece of natural history is a quiet but powerful rebellion.
Challenges and Common Pitfalls
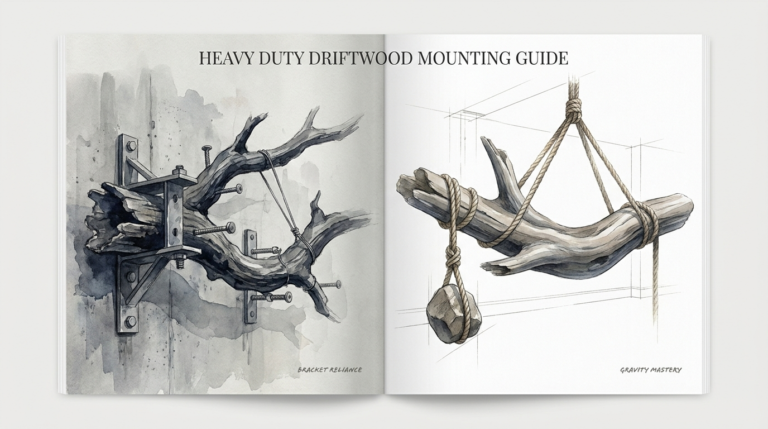
The biggest challenge in an Ergonomic Driftwood Monitor Stand Diy project is structural stability. Driftwood is inherently irregular. A piece that looks beautiful on the beach might be dangerously top-heavy once a monitor is perched on it. If your stand wobbles even a fraction of an inch, it is a failure. You must ensure the footprint is wide enough to support the center of gravity of your screen.
Hidden pests are a legitimate concern. If you skip the bleaching or kiln-drying step, you risk introducing wood-boring beetles into your home. These insects can migrate from your monitor stand to your flooring or other furniture. Never assume a piece of wood is “clean” just because it looks dry. The ocean is full of life, and some of it likes to hide in the cracks of a log.
Salt crystallization is another pitfall. Driftwood is saturated with salt. If not properly cleaned and sealed, this salt can pull moisture from the air, leading to a “sweating” effect that can damage your desk or even the electronics of your monitor. A thorough fresh-water rinse after the bleach soak is mandatory to leach out the remaining salinity.
Lastly, there is the “leveling” problem. Because driftwood is rarely flat, your monitor may sit at a slight tilt. This might seem like a minor aesthetic issue, but over months of use, a tilted screen will cause you to subconsciously tilt your head, leading to lopsided neck strain. You must use a spirit level during the assembly phase to ensure the mounting surface is perfectly horizontal.
Limitations of Driftwood Construction
While driftwood is strong, it has its limits. It is not ideal for ultra-wide or heavy “super-ultrawide” monitors that exceed 30 or 40 pounds unless you are working with a massive, heavy-duty log. The internal structure of driftwood can be unpredictable; what looks like a solid branch might have a hollow core or a hidden soft spot that could give way under extreme weight.
Space is another constraint. Organic shapes are not space-efficient. A driftwood stand will likely take up more “desk real estate” than a sleek metal arm. If you are working in a cramped cubicle or on a small floating desk, the irregular footprint of a coastal branch might be more of a hindrance than a help.
Maintenance is also a factor. Unlike a plastic stand that you can wipe down with a damp cloth once a year, an organic stand requires occasional care. Depending on the finish you choose, you may need to re-apply oil or wax every few years to prevent the wood from becoming brittle or dusty. It is a living part of your office, not a static piece of hardware.
Comparison: Driftwood vs. Industrial Stands
| Feature | Driftwood DIY Stand | Standard Plastic Riser |
|---|---|---|
| Material Origin | Reclaimed, natural, sun-bleached | Petroleum-based, mass-produced |
| Ergonomic Flex | Custom-cut to exact eye level | Fixed increments or limited range |
| Stability | High (due to weight of solid wood) | Moderate (often hollow or flimsy) |
| Aesthetic Impact | Organic, warm, unique | Industrial, cold, generic |
| Cost | Low (sweat equity over dollars) | $20 – $60 (disposable) |
As the table illustrates, the choice between the two is a choice between character and convenience. The industrial stand is a “set it and forget it” solution, while the driftwood stand is an investment in your environment. For someone practicing ORGANIC INTEGRATION, the extra effort of the DIY approach pays dividends in daily comfort and mental clarity.
Practical Tips and Best Practices
When working on your stand, use a three-point contact system for the base. In geometry and physics, three points define a plane, meaning a tripod-style base will never wobble, even on an uneven desk. If your driftwood has four or more “feet,” you will likely struggle to get them all perfectly flush. Trimming the piece down to three solid contact points is the secret to a rock-solid setup.
Drilling into driftwood can be tricky because the wood density varies wildly. Always use a pilot hole before driving any screws. If you don’t, the hardened, brittle fibers of the sea-aged wood are likely to split. Use a drill bit that is slightly smaller than the shank of your screw. For an even cleaner look, consider using “blind” joints or dowels so that no metal hardware is visible in the final piece.
Consider the “shadow gap.” When you place a flat monitor base on a curved piece of wood, there will be gaps. You can fill these with clear epoxy resin for a “river wood” look, or you can use a piece of black felt or leather as a gasket. This gasket not only hides the gaps but also protects the bottom of your monitor stand from being scratched by the wood’s natural texture.
Finish the wood with a high-quality drying oil. Tung oil or linseed oil are excellent choices. They penetrate deep into the fibers and harden, providing a water-resistant barrier without the “plastic” look of polyurethane. If you prefer a more matte, bone-like finish, a simple application of beeswax and mineral oil will keep the wood hydrated without adding a glossy sheen.
Advanced Considerations for Serious Makers
For those who want to take their Ergonomic Driftwood Monitor Stand Diy to the next level, consider routing “hidden” cable channels into the back of the wood. Modern tech is plagued by cable clutter. Using a router or a set of chisels to create a groove along the natural curves of the wood allows you to “tuck” your power and HDMI cables out of sight. This enhances the illusion that your tech is floating above the wood.
Stabilization with resin is another advanced technique. If you find a piece of driftwood that is beautiful but has a large crack or a hollow spot, you can “cast” that section in clear or tinted epoxy. This reinforces the structural integrity of the wood while adding a modern, polished element to the rustic aesthetic. It creates a bridge between the raw and the refined.
If you use a dual-monitor setup, don’t try to build one giant stand. Instead, build two separate, complementary stands. This allows you to angle the monitors independently to match your field of vision. It also makes the pieces easier to move and adjust if you change desks or offices in the future. Matching the “character” of the wood across two pieces is a satisfying challenge for any artisan.
Think about the weight distribution of your specific monitor. If your screen is curved, the center of gravity is often further forward than you think. You may need to extend the “toes” of your driftwood stand forward to prevent a tip-over. Always test the stability by gently pushing on the top of the monitor once it is mounted; if there is any “give,” the base needs to be widened.
Scenarios and Examples
Imagine a home office in a high-rise city apartment. The walls are white, the floor is polished concrete, and the furniture is all glass and steel. This is the peak of TECH ISOLATION. By introducing a massive, 20-pound piece of storm-tossed oak as a monitor stand, you break the monotony. The wood acts as a visual anchor, drawing the eye away from the cables and toward a piece of history.
In another scenario, consider a creative studio nestled in the woods. The desk is a simple slab of pine. A driftwood monitor stand here acts as a bridge, pulling the outside world onto the desktop. Because the stand is custom-built, the maker has cut it to the exact height needed for their specific chair and torso length, ensuring they can work for 10 hours without the “stiff neck” that usually ends a productive day.
One practitioner found a piece of driftwood that had a natural “cradle” shape. They used this cradle to hold their laptop at a 45-degree angle, turning the laptop screen into a secondary vertical display while a larger monitor sat on the main branch. This setup utilized the irregular geometry of the wood to solve a complex ergonomic problem that no store-bought stand could handle.
Final Thoughts
The transition from a standard workspace to one anchored by natural elements is more than a design choice. It is a commitment to your own well-being. By taking the time to complete an Ergonomic Driftwood Monitor Stand Diy project, you are creating a workspace that respects your body’s need for proper alignment and your mind’s need for natural beauty.
The process of finding, cleaning, and shaping a piece of the coast is a meditative act that prepares you for the digital work ahead. It reminds us that even in an age of AI and instant communication, we are still biological creatures who thrive when connected to the earth. Your monitor stand isn’t just a riser; it is a piece of the wild that has been invited into your home.
Experiment with different wood types and finishes. Don’t be afraid to fail on your first attempt—every piece of wood you work with teaches you something about the balance between form and function. Once you’ve experienced the difference of an organic workspace, you’ll find it hard to ever go back to the digital cage of a plastic-wrapped desk.
Sources
1 youtube.com (https://www.youtube.com/watch?v=LWWzD_aIdYs) | 2 dksstores.com (https://dksstores.com/blog-post49) | 3 youtube.com (https://www.youtube.com/watch?v=umaklOjkocE) | 4 wikihow.com (https://www.wikihow.com/Preserve-Driftwood) | 5 youtube.com (https://www.youtube.com/watch?v=PuvfxCEht7Y) | 6 homify.co.uk (https://www.homify.co.uk/diy/12998/5-things-used-to-preserve-driftwood-and-make-it-home-decor) | 7 parklanejewelry.com (https://www2.parklanejewelry.com/how-to-wash-driftwood/) | 8 alberenz.com (https://alberenz.com/blogs/news/the-perfect-monitor-height-guide-for-gaming-and-work) | 9 oldredbarn.eu (https://www.oldredbarn.eu/creative-corner/tips/exploring-natural-wood-finishes/) | 10 youtube.com (https://www.youtube.com/watch?v=uE_Y-7hPd70) | 11 wholesalecuttingboards.com (https://www.wholesalecuttingboards.com/news/food-safe-finishes-explained–mineral-oil-vs.-beeswax-vs.-tung-oil-259.aspx) | 12 scube-ergo.com (https://www.scube-ergo.com/blog/ergonomic-monitor-positioning-your-ultimate-guide-for-2025)