Extracting Natural Pigments From Driftwood
The ‘rubbish’ wood on the shore is actually a concentrated battery of natural color waiting to be released. Modern fashion relies on toxic chemicals, but our ancestors knew that the tannins locked inside salt-cured wood were the secret to permanent, beautiful hues. That grey wood you’re stepping over isn’t waste; it’s the fuel for your next masterpiece. Learn how to extract deep coastal pigments for $0.
[affiai]Walking along a storm-swept coastline reveals more than just debris. Every piece of driftwood, bleached silver by the sun and pickled by the sea, carries a hidden history of resilience. These fragments of oak, cedar, and mangrove have spent months or years absorbing minerals and shedding their softer resins, leaving behind a dense core of tannic acid. This process, often called salt-curing, prepares the wood in a way that no kiln-dried lumber can match.
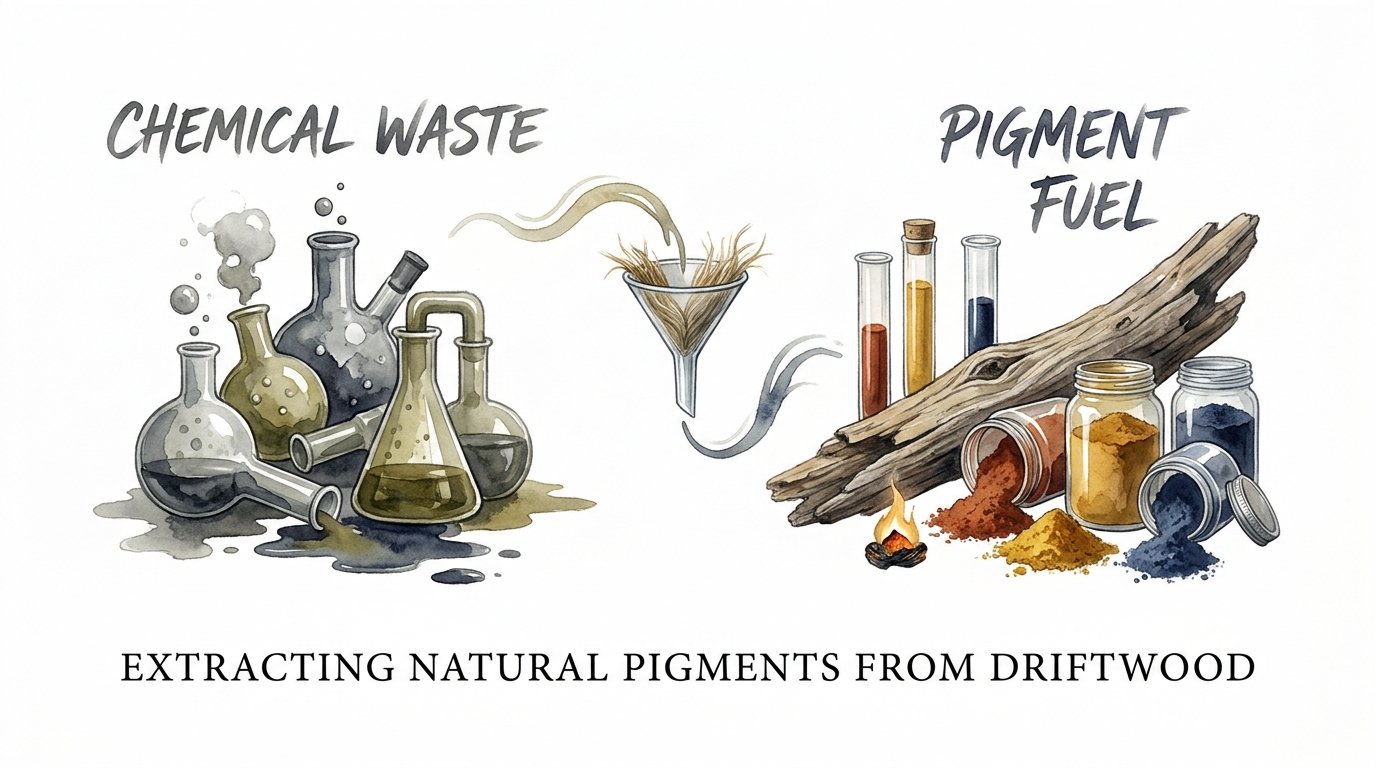
Using these found materials isn’t just about saving money. It is about reconnecting with a traditional craft that treats the environment as a partner rather than a resource to be exploited. In an era dominated by synthetic dyes that poison waterways, the return to driftwood pigments represents a shift from chemical waste to what we call pigment fuel. This fuel powers a creative process that is as unpredictable as the tide and as rewarding as the find.
Extracting Natural Pigments From Driftwood
Extracting natural pigments from driftwood involves drawing out the concentrated tannins that remain after the wood has been weathered by the elements. Tannins are polyphenolic compounds found in various plant tissues, acting as a natural defense mechanism against insects and decay. When wood is submerged in seawater, the salt and minerals act as a slow-motion curing agent, locking these pigments into the fibers of the wood. This makes driftwood a uniquely potent source for the natural dyer.
In real-world applications, these pigments are used to create earth-toned dyes ranging from pale sand and warm gold to deep chocolate brown and charcoal grey. Unlike many other natural dyes that require expensive metal salts to “stick” to fabric, driftwood tannins are substantive. This means they have a natural affinity for fibers, particularly cellulose-based materials like cotton and linen, as well as protein fibers like wool and silk. The salt from the ocean acts as a built-in mordant, helping the color penetrate deep into the textile.
Think of driftwood as a pre-packaged dye kit created by the ocean. The sun has already done the work of breaking down the lignin on the surface, making the internal pigments more accessible. Your job is simply to provide the right conditions—heat, time, and water—to invite those pigments out of their wooden cage and onto your fabric. Whether you are a hobbyist looking for a weekend project or a serious practitioner of sustainable fashion, driftwood offers a professional-grade pigment source for the cost of a beach walk.
The Chemistry of Coastal Tannins
Tannins are the primary color-bearers in wood. On the coast, the specific species of driftwood you find will dictate your color palette. Oak and chestnut are legendary for their high tannin content, often yielding rich, dark browns. Mangrove, common in tropical coastal areas, can contain up to 40% tannin, producing intense reddish-browns. Even “softer” woods like cedar or redwood, when weathered by salt, offer surprising depths of peach and sienna.
Seawater plays a vital role in this chemical makeup. The sodium chloride and magnesium found in the ocean interact with the wood’s cellular structure during its time at sea. This “seawater scouring” removes much of the volatile oils and saps that can sometimes interfere with the dyeing process. What remains is a purified, mineral-rich wood fiber that is primed for extraction. When you simmer this wood, you aren’t just getting color; you are getting a complex mineral solution that bonds exceptionally well to fabric.
The Step-by-Step Extraction Process
The journey from the shore to the dye pot requires a bit of pioneer-grit. You cannot simply throw a whole log into a pot and expect results. The pigment lives in the heartwood and the inner layers, meaning you must increase the surface area of your find to get a successful extraction. Follow these steps to turn your coastal finds into a concentrated liquid gold.
1. Selection and Preparation
Look for wood that feels heavy for its size, as this often indicates a higher density of tannins. Grey, weathered wood is perfect, but avoid pieces that are actively rotting or covered in heavy barnacles, as these can introduce unwanted odors or biological contaminants. Once home, scrub the wood with a stiff brush and plain water to remove sand and salt crust. Do not use soap, as it can alter the pH and ruin your dye bath later.
Next, break the wood down. Use a hatchet, a mallet, or even a heavy-duty wood chipper if you have one. The goal is to create small chips or shavings. The smaller the pieces, the faster the extraction. If the wood is particularly hard, like aged oak, soaking the chips in plain water for 24 hours before heating can help soften the fibers and start the leaching process.
2. The Simmering Stage
Place your wood chips in a large stainless steel pot. Avoid aluminum or unseasoned iron pots at this stage, as they will react with the tannins and change the color prematurely. Cover the wood with just enough water to allow it to move freely. Bring the pot to a gentle simmer—not a rolling boil. Maintaining a temperature around 190°F (88°C) for two to four hours is the sweet spot for maximum yield without “cooking” the pigment into a duller shade.
You will notice the water turning a deep tea color within minutes. As the hours pass, it will darken into something resembling black coffee. Once the liquid is dark and opaque, turn off the heat. For the best results, let the wood chips sit in the cooling liquid overnight. This “cold-soak” phase allows the last of the deep-seated tannins to migrate into the water.
3. Straining and Concentrating
Strain the liquid through a fine mesh sieve lined with cheesecloth or an old t-shirt. It is crucial to remove all woody debris, as even small splinters can cause dark spots or “hotspots” on your fabric during the dyeing process. If the resulting liquid feels too thin, you can simmer the strained dye bath further to reduce the volume and concentrate the pigment. This concentrated “master liquor” can be used immediately or stored in glass jars for several weeks in a cool, dark place.
The Power of the Iron Shift
While driftwood tannins produce beautiful browns and golds on their own, their true magic is revealed when they meet iron. This is a process often called “saddening” the color. When tannic acid reacts with iron, it creates a chemical compound called ferric tannate, which is a traditional base for permanent black inks and dyes. This reaction allows you to shift a pale tan driftwood dye into a range of dramatic greys, slate blues, and midnight blacks.
You do not need to buy expensive chemicals to achieve this. You can make your own “iron liquor” using items found in a typical workshop. Simply place a handful of rusty nails, bolts, or a bit of steel wool into a glass jar. Add two parts water and one part white vinegar. Cover the jar loosely and let it sit for two to three weeks. The liquid will turn a murky orange or black. A few tablespoons of this iron liquor added to your driftwood dye bath will instantly transform the color profile.
Benefits of Using Driftwood Pigments
Choosing driftwood as a pigment source offers several practical and environmental advantages over both synthetic dyes and even some other natural dye sources. It is a method that rewards patience and observation, providing results that are both durable and aesthetically unique.
- Zero Cost Input: The raw materials are free for the taking on any public beach. Unlike purchasing indigo or madder, driftwood requires only your time and a bit of elbow grease.
- High Lightfastness: Tannins are famously stable. While many floral dyes (like those from flower petals) fade quickly in the sun, driftwood dyes are incredibly resistant to UV degradation.
- Superior Bonding: Because tannins are substantive, they bond to fabric without the need for toxic heavy-metal mordants like chrome or tin. This makes the process safer for you and the environment.
- Waste Stream Upcycling: You are taking “rubbish” wood that might otherwise rot and release carbon and turning it into a long-lasting aesthetic finish.
- Unique Aesthetic: Every beach and every storm brings different wood. Your dye batches will have a “terroir” similar to wine, reflecting the specific ecology of your coastline.
Challenges and Common Mistakes
Natural dyeing is an art of variables, and driftwood extraction is no different. Beginners often run into a few common hurdles that can lead to frustration if not understood. Precision in the preparation phase is usually what separates a masterpiece from a muddy mess.
The most frequent mistake is insufficient extraction time. Tannins are locked deep within the heartwood. If you only simmer for 30 minutes, you will get a fleeting, pale color that washes out. You must be willing to commit to the long simmer and the overnight soak. Another pitfall is overcrowding the dye pot. If you put too much fabric into the bath at once, the dye cannot circulate evenly, leading to streaking or patchy color. Always ensure your fabric can swim freely in the liquid.
Another issue involves fabric preparation. Even the strongest driftwood dye will fail if the fabric hasn’t been properly “scoured.” New fabrics are often coated in waxes, oils, or “sizing” from the factory. If these aren’t removed by boiling the fabric in a bit of soda ash or pH-neutral soap first, the dye will simply sit on the surface and rinse away during the first wash. Grit means doing the dirty work of cleaning the fabric before you ever think about the color.
Limitations and Constraints
While driftwood dyeing is a powerful tool, it is not a universal solution for every color need. Understanding its boundaries will help you use it more effectively in your practice. It is a method of earth tones, not neon brightness.
First, the color range is limited. You will not achieve bright pinks, vibrant blues, or emerald greens using driftwood alone. You are working within the spectrum of the earth: cream, sand, gold, russet, brown, grey, and black. If your project requires high-chroma vibrancy, you will need to look toward other botanical sources or traditional minerals.
Second, driftwood from certain regions may have absorbed pollutants. In highly industrial port areas, driftwood can soak up oils, heavy metals, or chemical runoff. While the boiling process kills biological pathogens, it won’t remove heavy chemical pollutants. Always forage from clean, rural, or protected coastlines to ensure your dye bath is as non-toxic as intended. Lastly, driftwood dyeing is a slow process. If you are in a rush to finish a garment for tomorrow, the 48-hour extraction and dyeing cycle of the driftwood method will not suit your timeline.
Comparison: Driftwood Dye vs. Synthetic Dye
To understand why this method matters, we must look at how it compares to the modern industrial standard. The following table breaks down the differences between using coastal “pigment fuel” and conventional “chemical waste” dyes.
| Factor | Driftwood (Natural) | Synthetic (Industrial) |
|---|---|---|
| Resource Cost | $0 (Found materials) | High (Retail chemicals) |
| Toxicity | Non-toxic / Biodegradable | High (Heavy metals, VOCs) |
| Complexity | Medium (Requires time) | Low (Instant results) |
| Permanence | Excellent (Tannin-based) | Variable (Depends on type) |
| Water Impact | Safe for compost/garden | Hazardous waste |
Practical Tips for Best Results
To elevate your driftwood dyeing from a simple experiment to a professional-grade finish, apply these best practices during your next session. These adjustments focus on efficiency and color depth.
- Use Rainwater: If your tap water is very “hard” (high in calcium), it can sometimes cause the tannins to precipitate out of the solution before they hit the fabric. Rainwater is naturally soft and ideal for clear, deep extractions.
- The Solar Steep: During the summer, you can extract pigment using the sun. Place wood chips and water in a large glass carboy and leave it in a sunny spot for two weeks. This slow, low-heat extraction often produces the most nuanced and delicate shades.
- Weight of Fiber (WOF): For consistent results, weigh your dry fabric and use at least an equal weight of driftwood chips (1:1 ratio). For deeper colors, go up to 2:1 or even 4:1 wood-to-fabric.
- The Vinegar Rinse: After dyeing, rinse your fabric in a bath of water with a splash of white vinegar. This helps “reset” the pH and can brighten the warm tones of the wood.
- Layering Colors: Do not be afraid to dip your fabric multiple times. A light driftwood tan followed by a quick dip in an iron bath, then another soak in the driftwood dye, creates a depth of color that a single bath can never achieve.
Advanced Considerations
For the serious practitioner, the next level of driftwood dyeing involves manipulating the pH of the dye bath to unlock hidden hues. Tannins are pH-sensitive. Adding an alkaline substance, such as wood ash water (lye) or soda ash, can shift the standard browns toward a more reddish or even purple-brown tone. Conversely, adding an acid like citric acid or lemon juice can pull the color toward a lighter, more golden yellow.
Another advanced technique is eco-printing with driftwood shards. Instead of making a liquid dye, you can place small, flat shards of tannin-rich driftwood directly onto wet, scoured fabric. Roll the fabric tightly around a dowel, tie it with string, and steam it for two hours. The tannins will migrate directly from the wood into the fabric, creating permanent, ghostly imprints of the wood’s texture and grain. This creates a literal map of the shore on your textile.
Finally, consider the after-mordant sequence. Many practitioners find that applying an alum mordant *after* the tannin bath, rather than before, can “lock” the color in a way that increases its brilliance. This is because the alum bonds to the tannin-fiber complex, creating a shield that prevents the pigment from bleeding out during future washes.
Practical Example: The Storm-Washed Linen Throw
Imagine you have found a large, heavy piece of driftwood oak after a winter gale. You want to transform a plain white linen throw into a piece of coastal art. You begin by chipping the oak into one-inch pieces until you have two pounds of chips for your two-pound linen throw. You simmer the chips for three hours, let them soak overnight, and strain the liquid into a large vat.
Before adding the linen, you boil it in a pot with a tablespoon of soda ash to remove any factory residues. You then submerge the damp linen into the driftwood bath. You heat the bath to a gentle simmer for one hour, stirring every ten minutes to prevent fold-lines from forming. After an hour, the linen is a beautiful, warm honey-oak color.
To add drama, you prepare a secondary basin with five gallons of water and one cup of your homemade iron liquor. You lift the honey-colored linen out of the dye bath and plunge it into the iron water. Within seconds, the fabric shifts from honey-gold to a deep, sophisticated slate grey. You rinse the throw in clear water, hang it in the shade to dry, and you are left with a permanent, lightfast textile that carries the soul of the coast in every thread. This is the practical power of the driftwood battery.
Final Thoughts
The transition from viewing driftwood as rubbish to seeing it as a battery of natural color is a fundamental shift in perspective. It requires us to slow down, to observe the cycles of the tide, and to value the slow chemistry of the natural world over the instant gratification of synthetic products. By mastering the extraction of coastal tannins, you gain the ability to create colors that are not only beautiful but also deeply connected to a specific place and time.
This process is more than a craft; it is a form of environmental stewardship. Every gallon of synthetic dye avoided is a victory for our waterways, and every piece of storm-washed wood upcycled is a testament to human ingenuity. The results of this work—the deep browns, the weathered greys, and the midnight blacks—carry a weight and a history that no factory-made color can replicate. They are hues with grit, earned through heat and patience.
As you continue your journey into the world of natural pigments, remember that the best teacher is the shore itself. Experiment with different wood species, play with the timing of your iron shifts, and observe how different fibers respond to the salt-cured tannins. The shore is always waiting with a fresh supply of fuel. Your next masterpiece is currently bobbing in the surf, waiting for you to find it and release the color held within.
Sources
1 hardwoodsgroup.com (https://hardwoodsgroup.com/understanding-tannin-staining-in-oak-causes-and-effective-treatments/) | 2 3springshandworks.com (http://www.3springshandworks.com/documents/wooddyeinstructions.pdf) | 3 karinpersan.com (https://karinpersan.com/blogs/news/iron-juice-and-dyeing-with-rust) | 4 saltinmycoffee.com (https://saltinmycoffee.com/diy-iron-modifier/) | 5 atelange.com (https://www.atelange.com/natural-dye-vs-chemical-dye-which-one-is-better-for-you-the-planet/) | 6 youtube.com (https://www.youtube.com/watch?v=LB9kW1EFqTo)