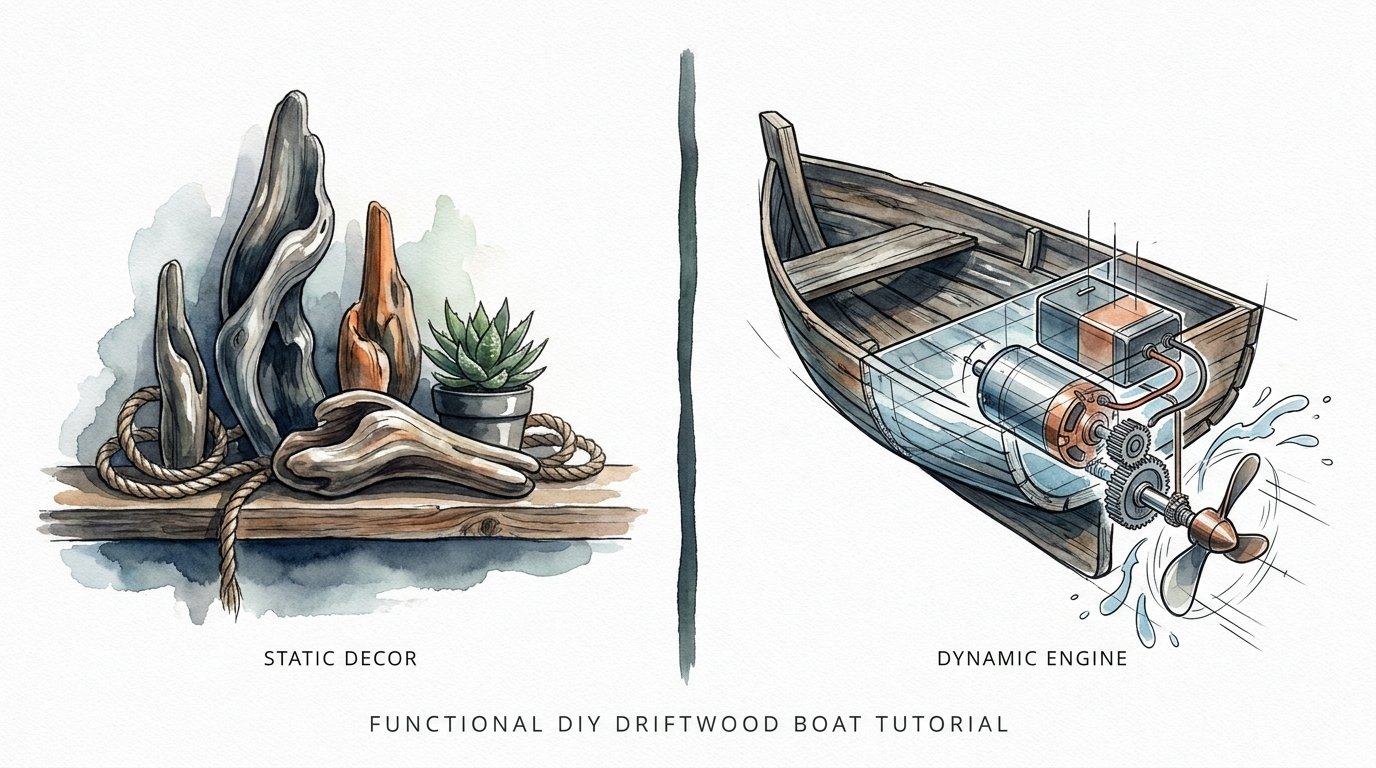
Functional Diy Driftwood Boat Tutorial
Most people build a ‘model’ for a shelf; the wise build a tool for the tides. Don’t let your driftwood projects end up as shelf-warmers. The ocean gave this wood life once—now it’s your turn to give it movement. Move from decoration to dynamics by learning the physics of wind capture and hull displacement to turn your ‘craft’ into a functioning engine that lives on the water.


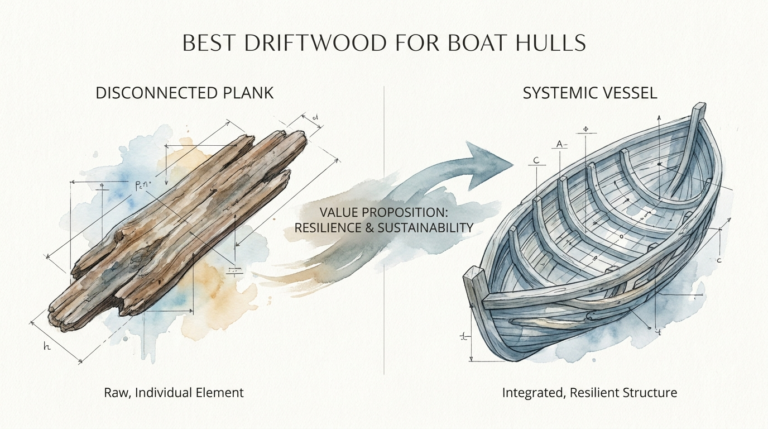
Building a functional vessel from found materials is a pursuit that demands more than just aesthetic intuition. It requires an understanding of how fluid dynamics and aerodynamic forces interact with the irregular, weathered surfaces of salt-soaked timber. When you transition from making something that looks like a boat to something that acts like a boat, you enter the realm of true woodcraft. This guide will walk you through the transition from static art to a dynamic, water-borne engine.
Functional Diy Driftwood Boat Tutorial
A functional DIY driftwood boat is a small-scale sailing vessel constructed primarily from naturally weathered wood found along shorelines, designed specifically to navigate water under its own power. Unlike decorative models that use hot glue to hold a few sticks together, a functional boat is engineered to manage the stresses of wind and current. These projects exist at the intersection of primitive survival skills and modern hobbyist engineering.
In real-world terms, building a functional model is a masterclass in naval architecture on a micro-scale. You are dealing with the same principles that govern a multi-million dollar racing yacht: buoyancy, center of gravity, and the Bernoulli principle. Whether you are teaching a child about the power of the wind or testing your own ability to read the grain of nature, these boats serve as practical laboratories for understanding the world around us.
Visualizing the concept starts with the wood itself. Imagine a piece of cedar that has been tumbled in the Pacific for months. Its density has changed, its surface is pitted, and its shape is a product of the elements. Your job is to find the “boat” hidden within that shape, much like a pioneer would identify a natural curve in an oak branch to serve as a ship’s rib.
How It Works: The Mechanics of a Driftwood Engine
The primary challenge of a functional driftwood boat is turning a chaotic, natural object into a balanced machine. This process relies on three critical systems working in harmony: the hull, the keel, and the sail plan.
To begin, you must select a hull piece that offers natural displacement. Archimedes’ principle states that the upward buoyant force exerted on a body immersed in a fluid is equal to the weight of the fluid that the body displaces. Because driftwood is often less dense than water, it floats well, but its irregular shape makes it unstable. You must carve or select a hull with a low center of gravity.
Once the hull is selected, you move to the rigging. The sail captures the wind, creating a force known as the Center of Effort (CE). This force wants to push the boat forward but also wants to tip it over. To counter this, you must install a keel—a weighted fin beneath the boat. The keel provides the Center of Lateral Resistance (CLR). When the CE and CLR are properly aligned, the boat moves forward. If they are misaligned, the boat will simply spin in circles or capsize.
Step-by-step construction for a functional build includes:
- Selecting the Hull: Look for “heavy” driftwood like oak or mahogany that has some natural weight to help it sit deeper in the water.
- Drilling the Mast Step: Use a drill bit slightly smaller than your mast stick to create a friction-fit hole. Do not go all the way through the hull.
- Shaping the Keel: Attach a thin, flat piece of wood or a metal plate to the bottom of the hull. This prevents the boat from sliding sideways across the water.
- Rigging the Sail: Use a lightweight fabric like muslin or scrap canvas. A triangle (Bermuda rig) is easiest to tune, while a square rig is more nostalgic but harder to sail upwind.
Benefits of Choosing a Dynamic Approach
Building a dynamic engine instead of a static model provides measurable cognitive and practical rewards. You are no longer just gluing; you are problem-solving.
Practical benefits include a deeper understanding of fluid dynamics. When you watch your boat struggle against a current, you learn how water interacts with different hull shapes. A narrow, pointed hull will slice through water with less resistance (drag), while a wide, flat hull offers more stability but moves slower.
Observable advantages of a functional build include:
- Interactive Utility: The project doesn’t end when the glue dries; it begins when you reach the water’s edge.
- Skill Versatility: You learn woodcarving, basic physics, and knot-tying all in one project.
- Durability: Because these boats are designed to be submerged, you will naturally use better glues (like waterproof wood glue or marine epoxy) and sturdier joints.
Challenges and Common Pitfalls
The most frequent error in DIY driftwood boat building is ignoring the Metacentric Height—essentially, the relationship between the center of buoyancy and the center of gravity. Most beginners build a mast that is far too tall and a sail that is far too large for the lightweight driftwood hull. This results in a boat that capsizes the moment a breeze hits it.
Another common mistake is using materials that absorb too much water. Soft, “punky” driftwood that has been rotting on the beach for years acts like a sponge. As the wood absorbs water, its weight increases and its buoyancy decreases, eventually leading to a sunken project. Always look for “silvered” wood that is hard to the touch and rings when struck against a rock.
Mistakes also happen during the rigging phase. Beginners often tie the sail too tightly to the mast. A functional sail needs a “belly” to capture the wind and create the pressure differential required for lift. Without this curve, the sail acts as a flat board, and the boat will struggle to move even in high winds.
Limitations of Natural Materials
Driftwood is inherently unpredictable. Unlike kiln-dried lumber from a hardware store, driftwood contains internal stresses and varying moisture levels. This means your boat might warp as it dries out after its first voyage.
Environmental limitations also play a role. Saltwater is incredibly corrosive to metal fasteners and certain types of twine. If you use standard steel screws or cotton string, your boat will eventually fall apart. Using brass or stainless steel hardware and synthetic or high-grade treated hemp string is a necessary trade-off for longevity.
Practical boundaries exist regarding the size of the boat. A very small driftwood boat (under 6 inches) often lacks the mass to overcome the surface tension of the water, making it “stick” rather than sail. Conversely, a very large boat becomes difficult to transport and requires a keel weight so heavy that it might exceed the structural strength of the driftwood hull.
Static Decor vs. Dynamic Engine
Choosing between a decorative piece and a functional engine changes every aspect of the build. Use the table below to understand the technical differences.
| Factor | Static Decor | Dynamic Engine |
|---|---|---|
| Primary Goal | Visual appeal and aesthetics. | Stability and wind performance. |
| Hull Shape | Irregular, artistic, often flat-bottomed. | V-shaped or rounded for displacement. | Hot glue or light tacks. | Deep-drilled mast step with friction fit. |
| Sail Material | Lace, paper, or delicate fabric. | Heavy canvas, ripstop nylon, or muslin. |
| Keel Requirement | None (often detrimental to display). | Mandatory weight to prevent capsizing. |
| Maintenance | Dusting only. | Drying, re-oiling, and rigging checks. |
Practical Tips and Best Practices
For immediate improvement in your boat’s performance, focus on the ballast. If your boat is tipping, do not just make the sail smaller. Instead, add weight to the very bottom of the keel. A few lead fishing weights or even a heavy copper wire wrapped around the base of the keel will drastically increase the “righting moment” of the vessel.
Tuning adjustments can be made at the water’s edge. If the boat consistently turns into the wind and stops (weather helm), move the mast slightly forward. If it turns away from the wind and runs (lee helm), move the mast slightly aft. This adjusts the relationship between the Center of Effort and the Center of Lateral Resistance.
Optimization techniques for the hull:
- Sand the Hull: While the “rough” look is nice, a smoother bottom reduces friction and increases speed.
- Apply a Sealant: A simple coat of linseed oil or beeswax will prevent the driftwood from soaking up water without ruining the natural patina.
- Balance the Load: Ensure the boat sits level in the water before you ever add the mast. If it leans to one side, carve away wood from the heavy side.
Advanced Considerations for Serious Practitioners
Serious practitioners should explore hydrodynamic lift. As a boat moves through water, a well-shaped keel acts like an underwater wing, creating a pressure difference that actually “pulls” the boat upwind. This allows the boat to sail at an angle toward the wind rather than just blowing downwind like a leaf.
Scaling considerations are also important. If you decide to build a larger driftwood boat (over 24 inches), you must consider the structural integrity of the wood. Driftwood often has “checking” or long cracks. Under the pressure of a large sail, these cracks can split the hull. Reinforcing the mast step with a metal sleeve or wrapping the hull in thin copper bands can prevent catastrophic failure.
Advanced builders also experiment with articulated rudders. A fixed rudder will keep a boat on a straight course, but a weighted, pivoting rudder can allow the boat to “tack” or change direction automatically based on wind pressure. This is a complex mechanical balance that requires significant testing in a controlled environment like a pond or tub.
Example Scenario: The Mountain Stream Launch
Imagine you have found a perfect 10-inch piece of weathered cedar on a lake shore. You decide to turn it into a functional sloop.
The process begins with carving a 1-inch deep mast step exactly 3 inches from the bow. You select a straight willow branch for the mast, standing 12 inches tall. You cut a triangular sail from an old canvas drop cloth, ensuring the “luff” (the edge attached to the mast) is straight while the “leech” (the back edge) has a slight curve.
Underneath, you attach a 4-inch deep keel made from a thin piece of slate found nearby, secured with marine epoxy. When you place it in the water, the boat sits upright. A gust of wind hits the sail, the keel bites into the water, and instead of tipping, the boat leans 10 degrees and shoots forward, cutting across the current. This is the difference between a project and a machine.
Final Thoughts
Building a functional DIY driftwood boat is a journey back to the roots of engineering. It forces you to respect the materials provided by nature while applying the rigid laws of physics to achieve motion. You move beyond the role of a decorator and become a small-scale shipwright, responsible for the survival of your craft on the water.
This practice instills a sense of “pioneer grit” that modern, pre-packaged hobbies cannot replicate. There is a specific satisfaction in watching a piece of wood you found in the mud transform into a vessel that masters the wind. It teaches patience, observation, and the value of a balanced life—both on the water and off.
Encourage yourself to experiment with different woods and rigging styles. Every piece of driftwood has a different story and a different set of physical properties. By learning to harness these variations, you turn the “drift” in driftwood into a directed, purposeful engine. Take your tools to the shore, find your hull, and let the tides teach you the rest.
Sources
1 thecountrychiccottage.net (https://www.thecountrychiccottage.net/my-very-own-driftwood-sailboat_29/) | 2 gcwmultimedia.com (https://www.gcwmultimedia.com/diy-driftwood-sailboat/) | 3 quantumsails.com (https://www.quantumsails.com/en/resources-and-expertise/articles/finding-balance) | 4 latsatts.com (https://latsatts.com/how-does-a-sailboat-sail-against-the-wind/) | 5 aip.org (https://physicstoday.aip.org/features/the-physics-of-sailing) | 6 youtube.com (https://www.youtube.com/watch?v=-cRG_Z3jkf0) | 7 jordanyachts.com (https://www.jordanyachts.com/4023) | 8 usvmyg.org (https://usvmyg.org/articles/sailing/helm-balance-with-simple-calculations-of-center-of-effort-and-center-of-lateral-resistance/) | 9 rachelteodoro.com (https://www.rachelteodoro.com/2010/05/driftwood-sailboat.html) | 10 carbonautica.com (https://shop.carbonautica.com/how-do-sailboats-sail-into-the-wind/) | 11 youtube.com (https://www.youtube.com/watch?v=iaFjoe_pwhQ) | 12 boatus.com (https://www.boatus.com/expert-advice/expert-advice-archive/2026/february/guide-to-marine-woods) | 13 exoticwoodzone.com (https://exoticwoodzone.com/blogs/e/the-art-of-boat-building-choosing-the-right-wood) | 14 boatdesign.net (https://www.boatdesign.net/threads/first-timer-what-wood-to-use.3721/) | 15 sandypointboatworks.com (https://sandypointboatworks.com/boat-building-articles-journals/boat-building-articles/wood-types-and-uses) | 16 lwyc.us (https://lwyc.us/resources/Documents/Physics%20of%20Sailing.pdf) | 17 boatdesign.net (https://www.boatdesign.net/threads/center-of-lateral-resistance.1898/) | 18 sailingschoolmalta.com (https://www.sailingschoolmalta.com/blog/the-physics-behind-a-sailing-boat)