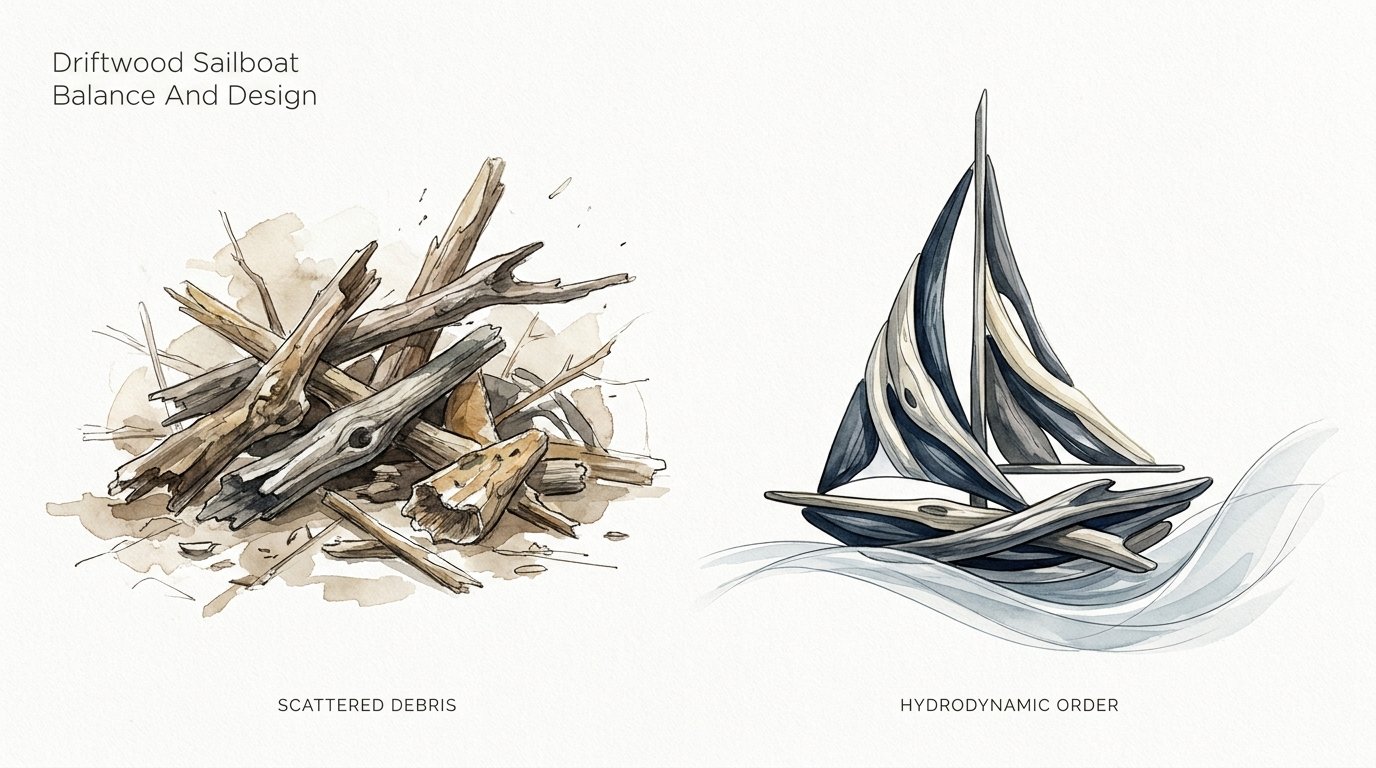
Driftwood Sailboat Balance And Design
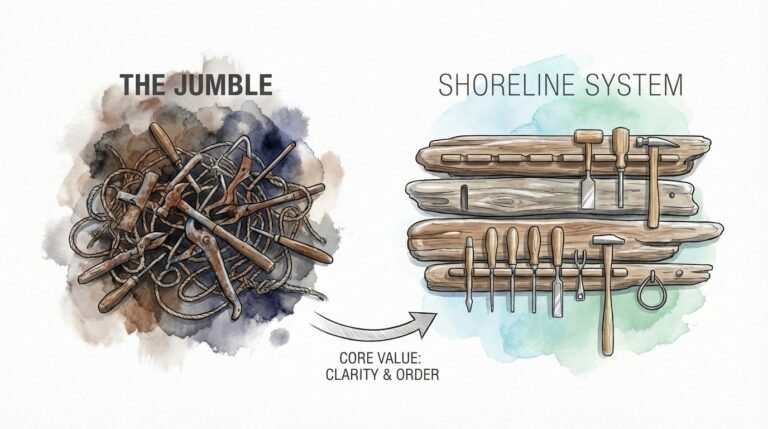
One is a mess you would step over; the other is a vessel that commands the wind. Every piece of wood on the shore is part of a giant, disassembled puzzle. While the crowd sees a mess, the strategist sees the precise geometry needed to conquer the waves. It is time to stop walking past your best building materials and start turning the ocean’s chaos into a precision-engineered vessel.


Building a driftwood sailboat is more than a craft; it is a lesson in maritime physics. It requires you to look at a salt-bleached branch and see a mast, or a heavy, water-logged trunk and see a stable hull. By understanding how to harness the forces of nature using found materials, you bridge the gap between primitive survival and modern engineering.
This guide will walk you through the grit and the geometry of creating a functional, balanced driftwood vessel. Whether you are building a small-scale model to test your understanding of hydrodynamics or a larger craft to navigate a quiet pond, the principles remain the same. You are seeking to impose order on the scattered debris of the tide.
Driftwood Sailboat Balance And Design
The core of any successful vessel lies in the delicate relationship between two invisible points: the Center of Effort (CE) and the Center of Lateral Resistance (CLR). In a driftwood sailboat, these points are often difficult to find because the materials are irregular, asymmetrical, and unpredictable.
The Center of Effort represents the average point where the wind’s force acts upon the sail. If your sail is a perfect triangle, this point is easy to calculate. If your sail is a ragged piece of canvas lashed to a crooked branch, you must estimate where that force will concentrate.
The Center of Lateral Resistance is the underwater equivalent. It is the point where the water pushes back against the hull and any submerged appendages like a keel or rudder. When the CE and CLR are aligned vertically, the boat moves straight. If they are out of sync, the boat will naturally want to turn toward the wind (weather helm) or away from it (lee helm).
Design in this context is the art of selection. You are not milling wood to fit a blueprint; you are searching the shore for a blueprint that already exists in nature. A slightly curved piece of wood might make a poor mast but an excellent hull with a natural “sweep” that cuts through the water.
How the Balance of a Driftwood Vessel Works
Achieving balance starts with the hull. Driftwood is often unevenly dense. One end of a log may be waterlogged and heavy, while the other is sun-dried and buoyant. You must find the natural balance point of the wood before you ever step a mast.
Place your chosen hull in the water and observe how it sits. If it rolls or dips to one side, it lacks stability. In boat building, this is often corrected with ballast—weight added to the bottom of the hull to lower the center of gravity. For a driftwood boat, this might mean lashing a heavy stone to the underside or carving out a small cavity to hold lead weights or sand.
Once the hull sits level, you introduce the mast and sail. This adds top-heavy weight and creates a “lever arm” that the wind will use to try and flip the boat. To counter this, you must ensure the hull’s width (beam) or its weight (ballast) is sufficient to resist the heeling force of the wind.
The final step is the alignment of the sail plan. If your boat constantly turns into the wind, your sail is too far back. If it turns away, the sail is too far forward. Adjusting the mast’s position—or “raking” the mast forward or aft—allows you to fine-tune this balance without rebuilding the entire structure.
The Practical Process of Building
The first step is sourcing your primary timber. Look for “dead-standing” wood that has been washed into the surf. This wood is often seasoned by the salt, which helps prevent rot. Hardwoods like oak or tropical species are preferable for their weight and durability, while cedar or pine offer better buoyancy but less structural toughness.
Shaping the hull requires a sharp adze or a drawknife. You want to remove the outer layer of soft, punky wood until you reach the solid “heartwood.” The shape should be widest at the middle (the beam) and taper toward the ends to reduce drag. A rounded bottom is efficient but unstable; a flat bottom is stable but will “slap” against waves.
For the mast, find a straight, tapered branch. It should be flexible enough to bend slightly under a heavy gust—this “spilling” of the wind prevents the boat from capsizing. Drill a hole into the hull about one-third of the way back from the bow. This “mast step” must be deep enough to provide leverage, or you will need to support the mast with stays made of twine or cordage.
The sail itself can be made from canvas, old linen, or even heavy-duty plastic. A simple “Lateen” rig—a triangular sail on a long yard—is excellent for driftwood boats because it handles shifting winds well and is easy to adjust. Lash the sail to the mast using a “clove hitch” or a “timber hitch” for maximum security.
Benefits of Using Driftwood for Boat Design
The primary advantage is resourcefulness. You are utilizing materials that would otherwise rot on the shore. This creates a deep connection between the builder and the environment, as every knot and curve in the wood dictates the final form of the vessel.
Building with driftwood also teaches “pioneer-grit.” You cannot rely on precision power tools to fix a poor choice of material. You must learn to read the grain, understand the density, and work with the natural geometry of the wood. This develops a level of intuition that modern “kit-building” cannot provide.
From an aesthetic standpoint, no two driftwood boats are the same. The silver-grey patina of salt-worn wood provides a timeless, nostalgic look. These vessels are as much works of art as they are functional tools, representing a triumph of human ingenuity over the chaotic forces of the sea.
Challenges and Common Pitfalls
The most common mistake is ignoring the “Center of Mass.” A beautiful piece of driftwood might look like a hull, but if its internal weight is distributed poorly, it will never sail. It will simply roll over the moment the wind catches the sail. You must test your hull’s stability in a “dead-calm” environment before adding the rig.
Another pitfall is using “punky” or rotted wood. If you can push your fingernail easily into the wood, it is too soft. It will soak up water like a sponge, losing its buoyancy and eventually falling apart under the tension of the rigging. Always strip away the soft exterior to find the hard core.
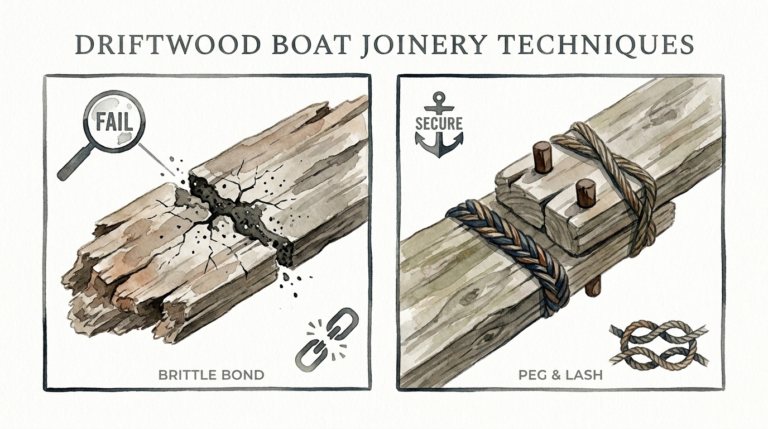
Inadequate lashing is a frequent point of failure. The wind exerts a surprising amount of force on a sail. If your knots are loose or your twine is of poor quality, the mast will snap or the sail will tear free. Use natural fibers like hemp or manila for a traditional look, or high-tensile nylon for a more durable, modern approach.
Limitations of Driftwood Vessels
Environmental constraints are the biggest hurdle. A driftwood sailboat is generally a “fair-weather” craft. Because you are working with found materials, you cannot guarantee the structural integrity required for high-seas navigation or gale-force winds. These boats are best suited for protected bays, lakes, or ponds.
Size is another limitation. Finding a single piece of driftwood large enough for a man-sized dugout is rare and requires heavy machinery to move. Most driftwood projects are limited to “pocket-sized” racers or small rafts. Trying to scale up without proper joinery and framing—tasks that move away from the “found-material” ethos—introduces significant risks of hull failure.
The lack of symmetry is also a trade-off. While a crooked hull adds character, it also adds “drag” on one side. This means the boat will always perform better on one “tack” (side of the wind) than the other. If you are looking for high-performance racing, driftwood is likely not your primary material.
Comparing Driftwood vs. Milled Lumber
| Feature | Driftwood | Milled Lumber |
|---|---|---|
| Cost | Zero / Minimal | Moderate to High |
| Symmetry | Natural / Irregular | Precision / Identical |
| Durability | Variable (requires selection) | High (standardized) |
| Build Time | Long (searching/shaping) | Short (ready to use) |
| Skill Needed | Intuitive / Primitive | Technical / Carpentry |
Practical Tips for Success
Start by “seasoning” your wood. If you find a piece you love, don’t build with it immediately while it’s dripping wet. Let it dry in a shaded, well-ventilated area for several weeks. This prevents the wood from warping or cracking after you have finished the build.
Use fire to your advantage. If you are hollowing out a hull, a controlled fire (charring) followed by scraping with an adze is an ancient and effective method. This also helps seal the wood fibers and provides a natural resistance to pests and rot.
When rigging your sail, always include a “downhaul.” This is a line that pulls the bottom of the sail toward the deck. It allows you to flatten the sail in heavy winds, reducing the “bagginess” that can cause the boat to heel over too far. A flat sail is a controllable sail.
Best Practices for Stability
- Always place the heaviest part of the hull below the waterline.
- Ensure your mast is centered laterally to avoid a natural lean.
- If the boat is “tippy,” add a small outrigger—a secondary piece of driftwood floating alongside the main hull.
- Use eye-screws at the bow and stern to create tension points for your rigging.
Advanced Considerations for Serious Practitioners
For those who want to move beyond simple rafts, consider the “Lateral Plane.” This is the total surface area of the boat that resists being pushed sideways. By adding a “daggerboard”—a removable wooden blade that slides through the hull—you can dramatically improve the boat’s ability to sail upwind.
Hydrodynamic drag can be further reduced by “fairing” the hull. This involves sanding or shaving the wood so that water flows smoothly from the bow to the stern. Pay particular attention to the “exit” of the water at the stern; a clean, sharp edge prevents a vacuum from forming, which would otherwise pull the boat backward.
Advanced builders also look at “Mast Rake.” By tilting the mast slightly backward, you move the Center of Effort aft. This creates a slight “weather helm,” which is a safety feature. If you let go of the tiller, a boat with weather helm will naturally turn into the wind and stop, rather than jibing uncontrollably away from it.
Examples of Driftwood Design Scenarios
Imagine you find a piece of Western Red Cedar that is roughly four feet long and naturally curved like a banana. This is your hull. Because cedar is very light, you realize it will sit high in the water, making it unstable. You carve a channel along the bottom and lash a two-pound piece of lead fishing weight into it. Now, the hull sits deep and resists rolling.
Next, you find a straight, thin branch of White Oak for the mast. Oak is heavy, so you keep the mast short to avoid making the boat top-heavy. You cut an old canvas bag into a “Gunter” rig—a rectangular sail that allows for a shorter mast while still providing plenty of surface area.
You launch the boat in a local pond. The wind catches the sail, and the boat immediately turns left. You realize the mast is too far forward. You drill a new mast step two inches further back. On the second launch, the boat tracks straight and true, cutting through the ripples with a quiet, satisfying hiss.
Final Thoughts
Turning the ocean’s castaways into a precision vessel is a journey into the heart of maritime tradition. It requires patience to find the right materials, a sharp eye for geometry, and the grit to work with wood that has been hardened by the elements.
The result is a craft that tells a story—not just of its construction, but of the tides and storms that shaped the wood before you ever touched it. Every balanced driftwood boat is a testament to the idea that there is no such thing as debris, only disassembled potential waiting for a strategist’s hand.
Experiment with different sail shapes, test various hull weights, and never stop reading the water. The skills you gain on the shore will serve you well on any vessel, regardless of its material. Now, stop stepping over the pieces and start building the ship.
Sources
1 quantumsails.com (https://www.quantumsails.com/en/resources-and-expertise/articles/finding-balance) | 2 jordanyachts.com (https://www.jordanyachts.com/4023) | 3 youtube.com (https://www.youtube.com/watch?v=gApFUvpnpjE) | 4 youtube.com (https://www.youtube.com/watch?v=nr_eOGzU5IU) | 5 gcwmultimedia.com (https://www.gcwmultimedia.com/diy-driftwood-sailboat/) | 6 homeonthecorner.com (https://homeonthecorner.com/2018/02/26/diy-driftwood-sailboat/) | 7 driveaboatcanada.ca (https://driveaboatcanada.ca/types-of-hulls/) | 8 diydriftwood.com (https://diydriftwood.com/make-a-driftwood-sailboat/) | 9 coeurcustoms.com (https://www.coeurcustoms.com/uncategorized/best-wood-for-building-a-boat/)