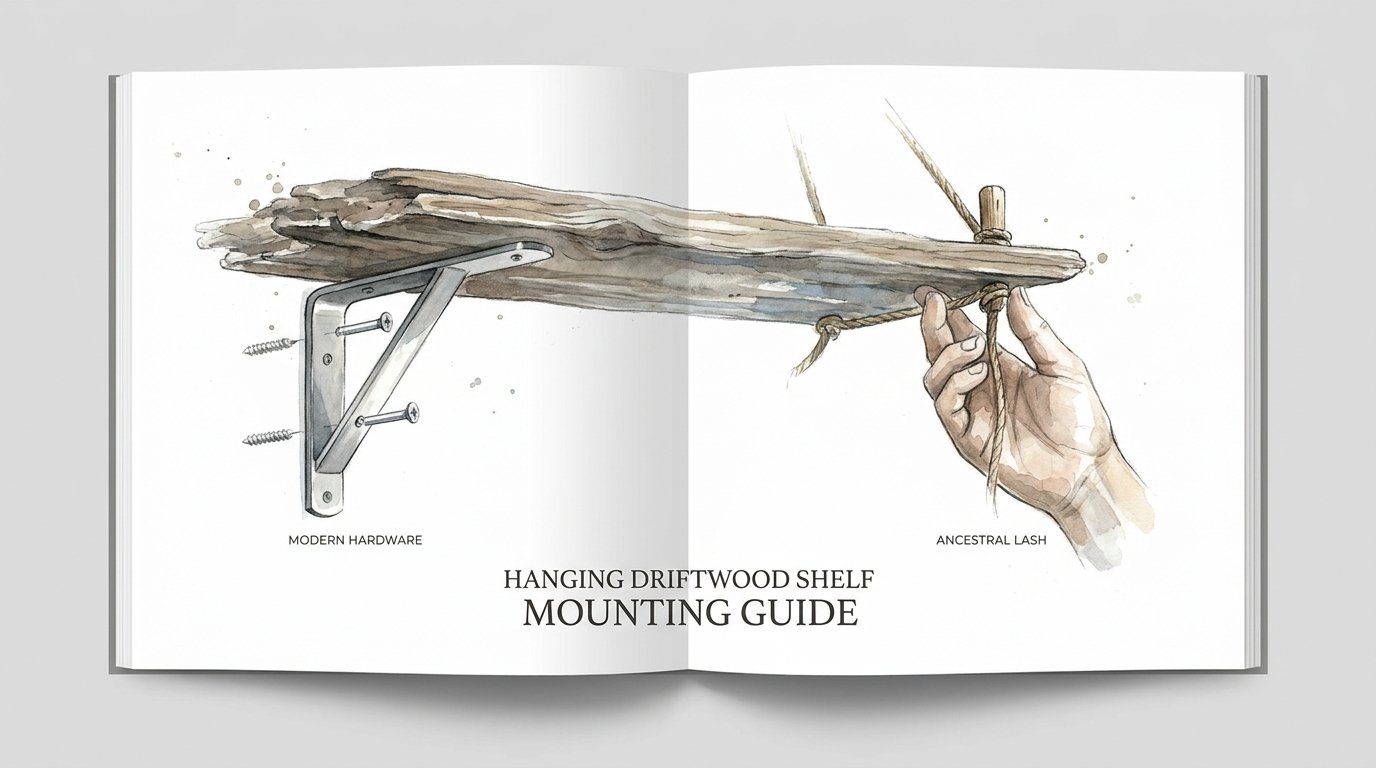
Hanging Driftwood Shelf Mounting Guide
Why do we trust our heavy treasures to a 5-cent piece of plastic when our ancestors used the tide to hold their world together? We’ve been taught to rely on flimsy modern hardware that eventually fails. But for a piece of wood that has survived decades at sea, only ancestral cordage and gravity-based tension provide the security it deserves.
[affiai]Working with driftwood requires a shift in mindset. You are no longer just hanging a board on a wall. You are negotiating with a piece of history that has its own weight, its own curves, and its own center of gravity. Traditional methods respect these traits rather than trying to flatten them.
The beauty of a gravity-based system lies in its honesty. If the knot is weak or the balance is off, the shelf tells you immediately. When done correctly, the result is a shelf that feels like part of the architecture, held firm by the very forces that try to pull it down. This guide will walk you through the process of merging salt-cured timber with the timeless strength of cordage.
Hanging Driftwood Shelf Mounting Guide
A hanging driftwood shelf is a functional piece of art that uses suspension rather than rigid brackets to stay level. These shelves rely on the weight of the wood and its contents to create tension in the rope, which in turn holds the wood securely against or away from the wall. Unlike standard floating shelves that use hidden metal rods, these are visible, structural, and deeply rooted in maritime tradition.
In the real world, this method is used by those who value modularity and natural aesthetics. You see similar principles in ship rigging and old-world storehouses where heavy loads were suspended to keep them away from damp floors. A single piece of driftwood, often irregular in shape, find its perfect horizontal plane through a series of adjustable loops and knots.
Visualizing this concept is simple. Imagine a swing set. The seat stays level because the ropes on either side distribute the weight evenly. Your shelf works the same way, but with the added complexity of the wood’s organic shape. Each knot acts as a stabilizer, ensuring that as you add weight, the system becomes more secure, not less.
How the Suspension System Works
Gravity is the primary engine of this mounting style. When you suspend a piece of wood from a single point or a series of points, the downward pull of the earth creates tension in the fibers of the rope. This tension is what keeps the shelf from wobbling or tipping.
To begin the process, you must first understand the anatomy of your driftwood. Most pieces are not uniform. One end might be water-logged and dense, while the other is sun-bleached and airy. Identifying the center of mass is your first technical hurdle.
The “Plumb Line” method is the most reliable way to find this center. Suspend your wood from a loose string and let it hang. Gravity will pull the heaviest part directly beneath the suspension point. By marking the vertical line that the string creates and repeating this from a different angle, you find the exact point where the wood is perfectly balanced.
Preparing the Driftwood
Raw wood from the beach often carries salt, sand, and hitchhiking organisms. You must stabilize the material before it enters your home. Start by scrubbing the piece with a stiff wire brush to remove loose bark and dried salt crust.
Rinsing the wood in fresh water helps draw out deep-seated salts that can attract moisture and lead to rot. Let the wood air-dry in a shaded, well-ventilated area for at least a week. Avoid direct sunlight during this phase, as rapid drying can cause the wood to check or split.
If you prefer a finished look, a light application of beeswax or hemp oil will deepen the color without masking the natural grain. These traditional finishes allow the wood to breathe while providing a barrier against dust and household spills.
Selecting Your Cordage
Ancestral cordage refers to natural fibers like manila, hemp, or sisal. These materials are superior for driftwood shelves because they have a high “grip” factor. Synthetic ropes like nylon are often too slippery, causing knots to migrate under load.
Manila rope is the gold standard for this work. It is made from abaca fibers and has a natural resistance to rot and a high tensile strength. It also looks the part, with a golden-brown hue that complements the silver-grey of weathered wood. Hemp is a softer alternative that provides excellent flexibility for intricate lashing.
The Mounting Process: Step-by-Step
Creating a stable shelf requires a blend of geometry and knot-work. You can choose between drilling through the wood or lashing around it. Drilling offers a cleaner look, while lashing preserves the integrity of the timber.
Step 1: Finding the Balance Points
Place your driftwood on a flat surface and decide which side will face the wall. This “back” edge should be as flat as possible to prevent the shelf from rocking. Measure the total length and mark two points approximately one-fifth of the way in from each end.
These marks are where your support ropes will attach. If the wood is extremely heavy on one side, you may need to move one mark closer to the center to compensate. Test the balance by lifting the wood at these two points with your fingers.
Step 2: Drilling or Lashing
If you choose to drill, use a spade bit that is slightly larger than the diameter of your rope. This allows the rope to pass through easily while leaving enough wood for the knot to rest against. Drill your holes vertically, ensuring they are aligned with your balance marks.
If you choose lashing, you will use a “Clove Hitch” or a “Timber Hitch” to secure the rope around the girth of the wood. Lashing is ideal for “found” pieces that are too thin or too brittle to survive a drill bit. Ensure the rope is seated in a natural groove or notch in the wood to prevent it from sliding off the end.
Step 3: Creating the Suspension Loop
The most common suspension setup is the “Triangle” or “Y” mount. Two ropes rise from the shelf and meet at a single hook or ring on the wall. This configuration is inherently stable because it centers the weight on a single axis.
Use a “Bowline” knot to create the loops at the ends of your rope. The Bowline is known as the “King of Knots” because it will not slip under load but is easy to untie even after holding hundreds of pounds. It provides a secure eye for your wall hook to grab.
Step 4: Leveling and Tensioning
Once the shelf is hanging, it will likely be crooked. This is where the “Taut-Line Hitch” becomes invaluable. This adjustable knot allows you to slide the rope up or down to find the perfect level and then locks into place under tension.
Place a spirit level on the shelf and adjust your knots until the bubble is centered. If your driftwood has a natural curve, you may need to decide if you want the “average” plane of the wood to be level or the specific area where objects will sit. Most practitioners choose to level the primary display surface.
Benefits of the Ancestral Approach
Choosing rope and gravity over metal brackets offers several practical advantages. The first is the preservation of the wood. Driftwood is often fragile or unusually shaped; forcing a rigid metal bracket into it can cause the wood to crack as it expands and contracts with the seasons.
A rope suspension system is also modular. You can easily adjust the height of the shelf by sliding a knot, or swap out the wood piece entirely if you find a better one on your next beach walk. This flexibility is impossible with fixed hardware.
The aesthetic harmony cannot be overstated. A piece of wood that spent years being shaped by water looks out of place when held up by cold, industrial steel. The organic texture of natural fiber rope creates a visual bridge between the wall and the timber, making the installation feel intentional and cohesive.
Challenges and Common Mistakes
The biggest challenge in this method is “racking” or side-to-side swaying. Because the shelf is suspended, it can move if bumped. To mitigate this, ensure the back edge of the driftwood makes light contact with the wall. This contact creates friction that dampens movement.
Rope stretch is another frequent issue. Natural fibers will settle and elongate over the first few weeks of use. This is especially true if you are placing heavy books or stones on the shelf. Anticipate this by setting the shelf slightly higher than your desired final height.
A common mistake is using a single suspension point for a very long piece of wood. If the driftwood exceeds three feet in length, a single triangle mount may not be enough to prevent the ends from drooping. In these cases, a four-point suspension—where each corner has its own vertical rope—is much more stable.
Limitations of the Method
This mounting style is not suitable for every environment. In high-traffic areas where children or pets might pull on the ropes, a suspended shelf can become a hazard. The swinging motion could knock over fragile items or pull the wall hook loose if it isn’t properly anchored.
Weight limits are also a factor. While manila rope can hold immense weight, the limiting factor is often the wall hook or the wood itself. If the driftwood is “punky” or soft from rot, the rope could eventually pull through the drilled holes. Always test the integrity of the wood by trying to dent it with your thumbnail; if it sinks in easily, the wood is too soft for heavy loads.
Environmental humidity also affects natural cordage. In very damp rooms, like a bathroom with poor ventilation, hemp and sisal can absorb moisture, leading to mold or a slight “earthy” smell. In these specific cases, a high-quality “ProManila” (synthetic that looks like natural) might be a necessary compromise.
Comparison: Ancestral Lash vs. Modern Hardware
| Feature | Ancestral Lash (Rope) | Modern Brackets (Steel) |
|---|---|---|
| Installation Speed | Moderate (Knot-work takes time) | Fast (Drill and screw) |
| Adjustability | High (Infinite leveling options) | Low (Fixed position) |
| Structural Integrity | High (Distributes weight through fibers) | Moderate (Creates stress points in wood) |
| Aesthetic Impact | Rustic, Organic, Integrated | Industrial, Modern, Stark |
| Tool Requirements | Minimal (Rope, Hands, maybe a Drill) | High (Drill, Level, Driver, Stud Finder) |
Practical Tips and Best Practices
Always secure your wall hook into a structural stud. While a heavy-duty drywall anchor might claim to hold 50 pounds, the dynamic nature of a suspended shelf adds extra stress that can eventually wiggle an anchor loose. Find the timber behind the plaster and use a deep-threaded lag eye-bolt for maximum security.
When working with manila or sisal, wrap the ends of the rope in “whipping” or electrical tape before cutting. This prevents the three strands from unraveling. For a truly ancestral look, use a small piece of twine to perform a traditional “Common Whipping” on the ends of your suspension lines.
If your shelf is intended for display only, you can increase stability by adding a small “kickstand” to the back. This is simply a small, hidden piece of wood or a rubber bumper that sits between the shelf and the wall. It forces the shelf to lean slightly forward into the rope’s tension, locking it in place.
Advanced Considerations: Multi-Tiered Shelves
For those looking to expand their storage, the “Ladder” method allows you to hang multiple driftwood planks from the same set of ropes. This requires a high degree of precision in your knot spacing. You must ensure that the distance between the knots on the left rope perfectly matches the distance on the right.
Using “Overhand” knots or “Figure-Eight” knots beneath each board is the simplest way to create a ladder shelf. However, for a cleaner look, you can drill a smaller hole next to the main rope hole and use a wooden dowel or a “Togging” pin to hold the board in place. The weight of the board pushes the pin into the fibers of the rope, creating a friction lock.
Advanced practitioners may also experiment with “Floating Suspension.” This involves using a hidden pulley system or a counterweight behind a wall panel. While complex, it creates the illusion that the driftwood is hovering, held only by the tension of the cords crossing through it.
Examples of Driftwood Application
Consider a scenario where you have a five-foot long piece of cedar driftwood found at the high-tide line. It has a beautiful silver patina but is twisted like a corkscrew. A modern bracket would require you to plane the wood flat, destroying its character.
Instead, you use three vertical manila ropes. One rope is placed at the heavy “root” end, and two are placed at the lighter “tail” end to form a stabilizing triangle. By adjusting the tension in the two tail-end ropes, you can find a level plane for a small succulent pot and a lighthouse lantern, even though the wood itself is wild and irregular.
Another example is the “Kitchen Herb Shelf.” Using small, thin pieces of driftwood and simple jute cord, you can create a series of suspended tiers. Because the cords are thin, they don’t overwhelm the small space. The natural grip of the jute ensures that even if you accidentally bump a jar of spice, the shelf absorbs the impact rather than vibrating and shaking items off the edge.
Final Thoughts
Hanging a driftwood shelf is a project that rewards patience and observation. It asks you to look at a piece of wood and understand where it wants to sit in space. By using ancestral cordage and the simple laws of gravity, you create a connection between your home and the natural world that hardware alone can never provide.
The strength of these systems has been proven by centuries of maritime use. A well-tied knot in a quality rope is more than just a fastener; it is a mechanical advantage that works with the earth’s forces rather than against them. This method ensures that your treasures are held with the same integrity as the ships that once sailed with these very fibers.
As you build your own shelf, don’t be afraid to experiment with different knots or rope thicknesses. Every piece of wood is unique, and every installation is a new puzzle to solve. The more you work with these natural materials, the more you will come to trust the tension of the rope and the steady pull of gravity to hold your world together.
Sources
1 youtube.com (https://www.youtube.com/watch?v=ggDsw1nQDQ8) | 2 youtube.com (https://www.youtube.com/watch?v=WHovJVofQlk) | 3 homedepot.com (https://www.homedepot.com/c/ah/how-to-hang-shelves/9ba683603be9fa5395fab90a500e3e8) | 4 scienceworld.ca (https://www.scienceworld.ca/resource/finding-centre-gravity/) | 5 iropes.com (https://www.iropes.com/blog/insights-4/synthetic-vs-natural-fiber-ropes-which-is-best-183) | 6 girlscoutsccc.org (https://www.girlscoutsccc.org/content/dam/girlscoutsccc-redesign/documents/pageForms/K2017LashingManual20160926.pdf) | 7 homedepot.com (https://www.homedepot.com/c/ah/how-to-make-a-rope-shelf/9ba683603be9fa5395fab90dccb2af7) | 8 specialeditionart.com (https://specialeditionart.com/blogs/theoracle/how-to-hang-driftwood-on-your-wall-a-comprehensive-guide) | 9 salvagedinspirations.com (https://salvagedinspirations.com/diy-hanging-rope-shelf/) | 10 hearthandvine.com (https://hearthandvine.com/diy-hanging-rope-shelf/)