How To Mount Driftwood Without Brackets
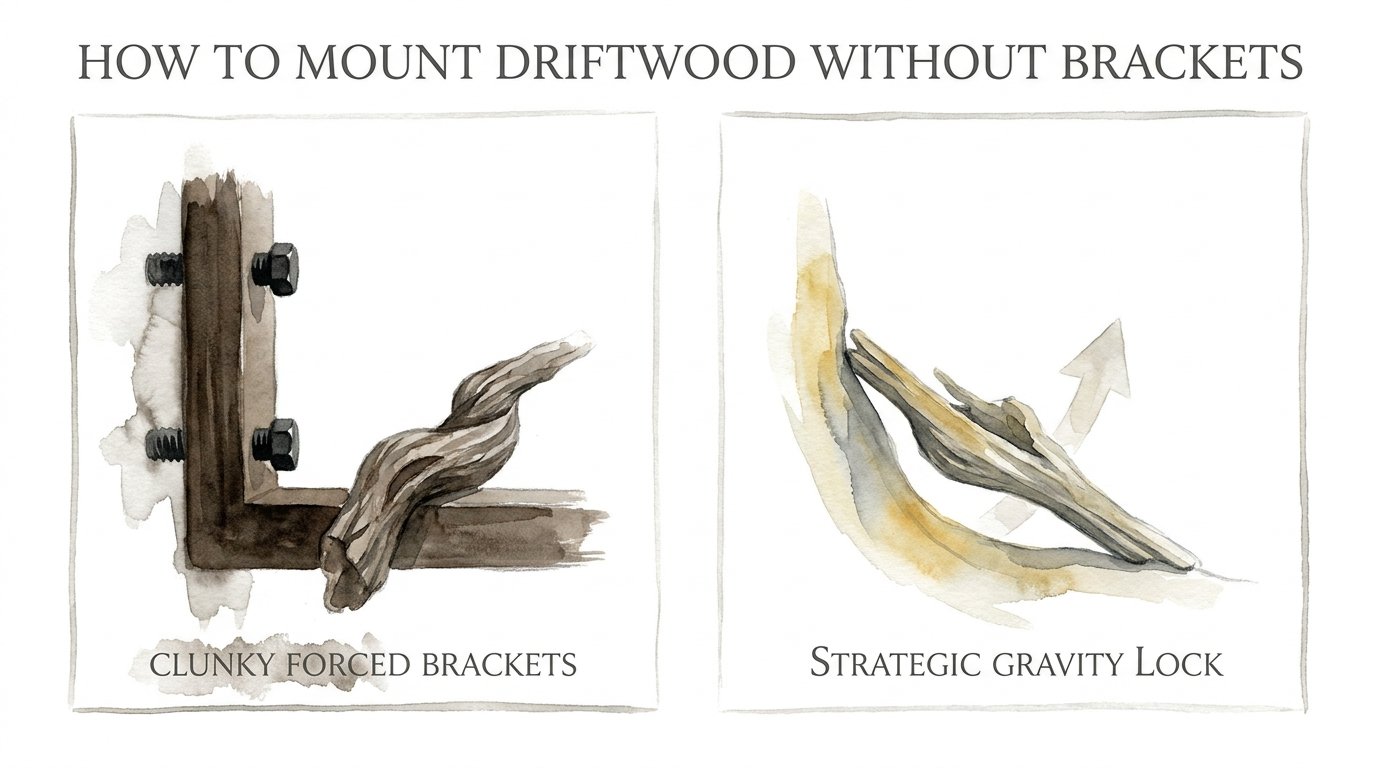
Stop fighting the wood’s shape and start using its natural architecture to hold itself up. Why spend money on clunky metal brackets that destroy the organic aesthetic? The ocean has already carved natural notches and balance points into the timber. Using a hidden internal mounting strategy lets the wood’s own geometry do the heavy lifting while the hardware stays invisible.
[affiai]Hanging a piece of driftwood is not the same as hanging a picture frame. You are dealing with irregular densities, eccentric centers of gravity, and surfaces that refuse to sit flush against a flat wall. Most people give up and use L-brackets or wire, which ends up looking like a science fair project gone wrong.
True craftsmanship requires a different approach. You have to look at the wood not as an obstacle, but as a structural partner. This guide will walk you through the process of internal hardware integration, turning a found object into a permanent part of your home’s architecture.
How To Mount Driftwood Without Brackets
Mounting driftwood without brackets refers to the practice of using internal fasteners—usually steel rods, lag bolts, or hidden dowels—to secure wood to a wall without any visible support hardware. Instead of the wood sitting on top of a shelf or being held by a metal arm, the support mechanism is buried deep within the heart of the timber.
This technique exists because driftwood is rarely cooperative. It is often twisted, heavy on one end, and possesses a “live edge” on every single side. Real-world applications range from creating floating driftwood mantels and headboards to installing massive vertical “tide-lines” in high-end coastal homes.
Imagine a massive cedar root pulled from a rocky inlet. If you screw a bracket into its side, you kill the illusion of it belonging there. But if you drill into the dense core and slide it onto a pre-set steel rod in a wall stud, the wood appears to grow directly out of the drywall. It is a fusion of ancient nature and modern engineering.
How It Works: The Internal Rod Strategy
The most reliable way to achieve a bracket-less mount is the “Blind Pin” or “Threaded Rod” method. This involves three critical components: a wall stud, a high-strength steel rod, and a precisely drilled hole in the driftwood.
First, you must identify the structural points of your wall. Driftwood, especially when water-logged or from dense species like oak or manzanita, can be surprisingly heavy. You cannot rely on drywall anchors alone. You need the grit of a 2×4 or 2×6 stud to bite into.
Second, you determine the wood’s center of gravity. Because driftwood is asymmetrical, it will naturally want to rotate. You find the balance point by supporting the piece with one hand until it stops tipping. This is where your primary mounting rod will go.
Third, the connection is made using a “gravity lock” or an epoxy-set rod. You drill a hole slightly larger than your hardware into the back of the wood. A corresponding rod is driven into the wall stud. When the wood is slid onto the rod, the friction and the downward force of gravity keep it locked in place.
Benefits of Hidden Mounting
Choosing a hidden mounting system is about more than just looks. It is about the structural integrity of the installation and the longevity of the wood itself.
One of the primary benefits is the **Organic Aesthetic**. Without metal flanges or shiny screws visible, the viewer’s eye focuses entirely on the texture, grain, and salt-bleached color of the wood. It creates a “museum-grade” finish that feels intentional rather than improvised.
Another advantage is **Customizable Orientation**. Traditional brackets force you to mount the wood in a way that the bracket can accommodate. Hidden rods allow you to tilt, rotate, and angle the wood in three-dimensional space. You can mount a branch diagonally across a corner or have a piece of timber “float” several inches away from the wall to create dramatic shadows.
Finally, internal mounting provides **Superior Load Distribution**. By drilling into the dense center of the wood, you are utilizing the strongest part of the material. This reduces the risk of the wood splitting or cracking over time, which often happens when weight is concentrated on a small screw near the surface.
Challenges and Common Mistakes
Working with driftwood presents unique challenges that you won’t find at a lumber yard. The most common mistake is failing to account for **Rot and Soft Spots**. Driftwood spends years in the water; while the outside might look silver and hard, the inside could be “punky” or soft. If you drill into a soft core, your mounting rod will eventually pull out.
Another frequent error is **Misjudging the Leverage**. A long, reaching branch acts like a lever. Even a lightweight piece can exert hundreds of pounds of “torque” on a wall screw if that screw is at the end of a long lever arm. This is why multi-point mounting is often necessary for long or wide pieces.
Ignoring the **Drywall Crush Factor** is also a pitfall. If you mount a heavy piece of wood directly against drywall without a wide base of support, the wood’s weight can actually crush the gypsum board over time. This leads to the wood sagging downward. Using a hidden “shim” or a small wooden spacer behind the driftwood can distribute this pressure across a larger area of the wall.
Limitations: When This May Not Be Ideal
While hidden mounting is the gold standard for aesthetics, it isn’t always the right choice. Environmental constraints and the physical state of the wood can dictate a different path.
Extremely thin or spindly pieces of driftwood may not have enough “meat” to accommodate an internal rod. If the branch is less than two inches thick at the mounting point, drilling a half-inch hole for a rod will compromise the structural integrity of the wood, making it prone to snapping.
Similarly, if you are renting a space or mounting to a wall with metal studs (common in modern apartments), the “Hidden Rod” method becomes much more complex. Metal studs do not have the same “grip” as timber, and they may require specialized toggle bolts that are harder to hide behind the wood’s natural curves.
Finally, consider the **Permanence**. Once you drill a large hole into the back of a rare piece of driftwood and set it with epoxy, that piece is modified forever. If you plan on moving the art frequently, a more “reversible” method like hidden D-rings or a French cleat might be more appropriate, even if they aren’t quite as invisible.
The Comparison: Internal Rods vs. Hidden Cleats
There are two main ways to achieve the “no bracket” look. Understanding which one fits your project is vital.
| Feature | Internal Threaded Rods | Hidden French Cleats |
|---|---|---|
| Best For | Heavy, round, or irregular logs | Flat-backed or lighter pieces |
| Weight Capacity | Very High (Stud-dependent) | Medium (Anchor-dependent) |
| Installation Difficulty | High (Requires precise drilling) | Moderate (Requires flat surface) |
| Adjustability | Low (Set once) | High (Can slide left/right) |
The internal rod method is the “pioneer-grit” solution. It is permanent, rock-solid, and works on wood that has no flat sides. The hidden cleat is more of a “carpenter’s trick” for wood that has at least one flat face where a wooden or metal rail can be attached.
Practical Tips and Best Practices
If you are ready to start drilling, keep these best practices in mind to ensure a professional result.
- Use a Drill Guide: Driftwood is never level. If you try to drill a straight hole into a curved log by hand, you will almost certainly come out at an angle. Use a portable drill guide to ensure your mounting hole is perfectly perpendicular to the back surface.
- The Tape Template Trick: To align your wall rods with your wood holes, place a piece of painter’s tape over the holes in the wood. Poke holes in the tape where the rods will go. Transfer that tape directly to the wall to mark your drill points.
- Epoxy is Your Friend: If the hole in the wood is a little too loose, don’t panic. Use a two-part wood epoxy to fill the void before sliding it onto the rod. This creates a custom-molded socket that fits your hardware perfectly.
- Seal the Back: The back of the driftwood (the part touching the wall) should be sealed with a clear polyurethane. This prevents any residual salt or moisture in the wood from leaching out and staining your paint or wallpaper.
Advanced Considerations: Dealing with Dynamic Loads
For serious practitioners mounting massive timber—think a 10-foot log used as a mantel—you have to think about dynamic loads. A mantel doesn’t just hold itself up; it might hold heavy statues, books, or even the weight of someone leaning against it.
In these cases, you should use **Chemical Anchoring**. This is a technique used in heavy construction where a threaded rod is set into a wall stud or masonry using a high-strength resin. Unlike a standard screw, a chemically anchored rod becomes part of the wall’s structure.
You also need to consider the **Species Behavior**. Different woods react differently to internal hardware. Cedar is soft and may compress over time, whereas Oak is incredibly dense and may require “relief cuts” to prevent the wood from splitting as the rod is driven in. Always research the specific wood type you found on the beach before you start putting steel into it.
An Example Scenario: The Floating Branch Mantel
Let’s look at how this works in a real-world scenario. Suppose you found a 5-foot piece of sun-bleached cypress on the coast. It weighs 40 pounds and has a beautiful, arching shape.
1. **Preparation:** Clean the wood with a mild bleach solution to kill any hitchhiking insects. Let it dry in the sun for at least a week.
2. **Balancing:** Hold the wood against the wall. Mark the two points where the wood naturally makes contact with the studs (usually 16 or 32 inches apart).
3. **Drilling:** Using a 5/8-inch spade bit, drill 4 inches deep into the back of the wood at those two marks.
4. **Hardware:** Drive two 1/2-inch x 8-inch lag bolts into the wall studs, leaving 4 inches of the bolt sticking out. Use a hacksaw to cut the heads off the bolts, leaving two smooth steel pins.
5. **Mounting:** Slide the cypress onto the pins. If it’s a bit wobbly, remove it, add some wood epoxy into the holes, and slide it back on. Support it with a temporary brace until the epoxy cures.
The result is a 40-pound piece of nature that looks like it is defying the laws of physics. There are no brackets, no visible screws, and no mystery—just the wood and the wall.
Final Thoughts
Mounting driftwood without brackets is a rewarding challenge that elevates a simple beach find into a sophisticated piece of architectural art. It requires you to respect the wood’s history while applying modern mechanical principles. By hiding the hardware, you honor the journey the timber took from the forest to the sea and finally to your home.
This method isn’t the fastest way to get wood on a wall, but it is the best way. It demands patience, precision, and a bit of that pioneer-grit. Once you master the internal rod technique, you will never look at a piece of wood the same way again. You will see its balance points, its hidden strength, and the invisible lines that can tether it to your world.
Take your time, choose your hardware wisely, and don’t be afraid to experiment with the natural geometry of your finds. The ocean did the hard work of shaping the wood; your job is simply to give it a place to rest without getting in the way of its story.
Sources
1 instructables.com (https://www.instructables.com/Driftwood-into-art/) | 2 themortiseandthehare.com (https://themortiseandthehare.com/blogs/news/avoid-floating-shelves-hidden-bracket-errors) | 3 youtube.com (https://www.youtube.com/watch?v=ng_I9g-nDv0) | 4 hometalk.com (https://www.hometalk.com/diy/decorate/rooms/q-how-to-hang-a-large-heavy-driftwood-piece-42096700)