Modern Live Edge Shelf Cost Vs Diy
Why are you paying a month’s rent for a piece of wood the ocean is currently giving away for free? We have been conditioned to believe that ‘luxury’ comes from a catalog. In reality, the most stunning, durable, and unique shelving on the planet is currently washing up on a beach near you. Stop paying for the middleman and start harvesting from the tide.


The allure of a modern live edge shelf lies in its raw, unfiltered connection to nature. Retailers know this, which is why they slap three-figure price tags on slabs of wood that were once considered industrial waste. But you don’t need a high-end furniture gallery to bring that organic aesthetic into your home.
Foraging for your own materials is more than a cost-saving measure; it is a way to reclaim the story behind your decor. Every knot, salt-bleached streak, and weathered groove in a piece of driftwood or reclaimed slab tells a tale of survival against the elements. By taking the DIY route, you are choosing a path of resourcefulness over passive consumption.
This guide will walk you through the entire process of transforming “tide-delivered” treasures into functional art. We will look at the harsh realities of retail markups, the specific steps required to sanitize found wood, and the heavy-duty hardware you need to make sure your shelf doesn’t come crashing down. It’s time to build something that actually means something.
Modern Live Edge Shelf Cost Vs Diy
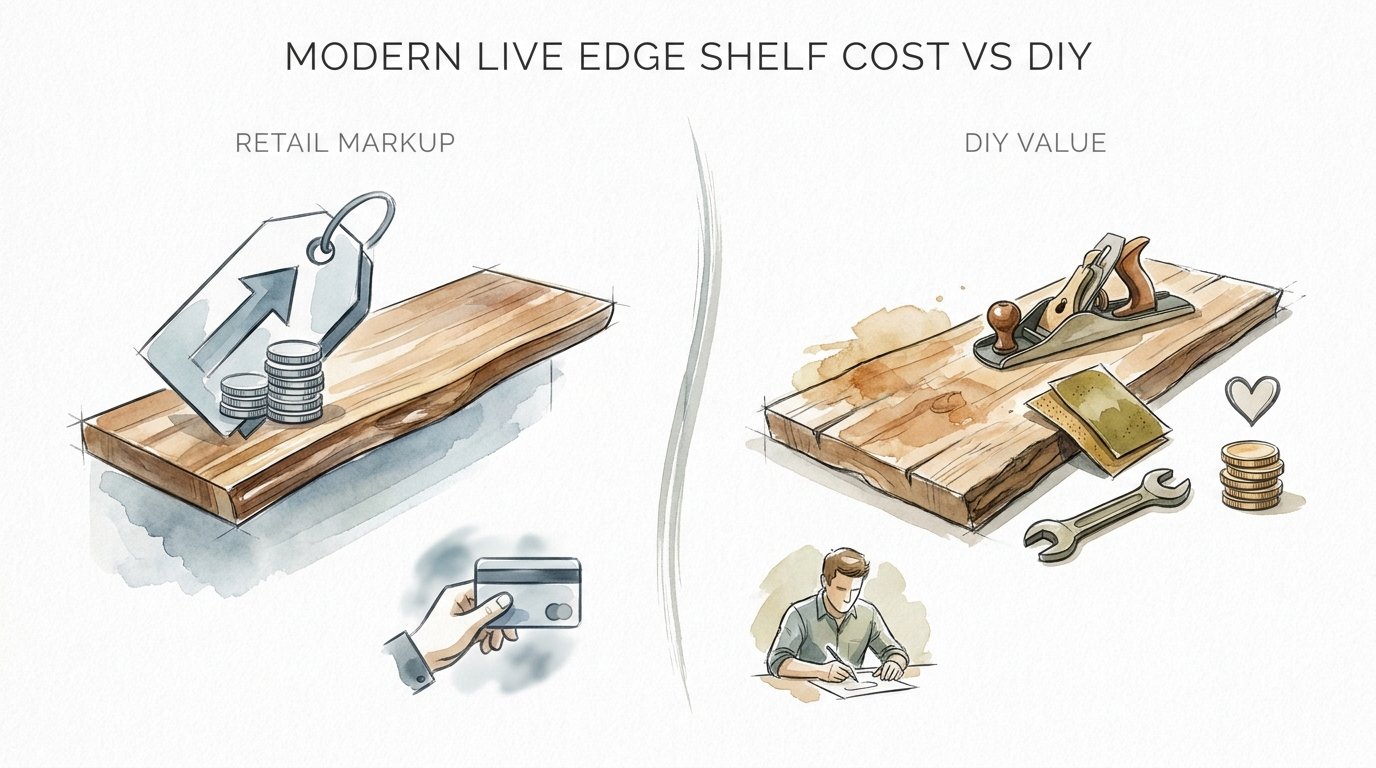
When you walk into a store like West Elm or browse custom Etsy shops, you are seeing the final result of a long, expensive supply chain. A 36-inch walnut live edge shelf can easily retail for $180 to $300, while larger maple or mahogany slabs can soar past $500. You aren’t just paying for the wood; you are paying for the kiln-drying, the warehouse storage, the marketing, and the brand name.
In contrast, the DIY approach relies on your own grit and a bit of sweat equity. If you harvest a piece of driftwood or source a raw slab from a local sawmill, your material cost is essentially zero or very low. Your primary investments will be your time and the hardware required to mount it safely.
Retail shelves often come pre-finished with generic chemicals, but the DIY route allows you to choose eco-friendly oils that highlight the wood’s true character. You aren’t settling for a mass-produced “look” that mimics nature; you are working with the real thing, shaped by the actual currents of the sea or the growth rings of a local tree.
The biggest difference isn’t just in the wallet, though. A retail shelf is a transaction. A DIY live edge shelf is a trophy. You will remember the day you found it, the way the salt smelled, and the effort it took to sand it down to its hidden beauty.
How to Process Driftwood for Home Decor
Transforming a piece of wood from the beach into a safe, indoor shelf requires a specific sequence of steps to ensure it doesn’t rot, warp, or invite unwanted guests into your home. You cannot simply pull a log out of the surf and screw it to your wall.
The first and most critical step is desalinization. Salt is hygroscopic, meaning it pulls moisture from the air. If you don’t remove the salt, your wood will constantly feel damp and will eventually ruin any finish you apply. To fix this, you must soak the wood in fresh water for several days, changing the water daily until the salt is leached out.
After the salt is gone, you must address pests and bacteria. Found wood is often a high-rise apartment for wood-boring beetles and termites. A common and effective method is to bake the wood in an oven at roughly 200°F (93°C) for several hours to kill any larvae. If the piece is too large for an oven, a solution of bleach or borax can be used to treat the surface and penetrate the cracks.
Once sanitized, the wood needs to be seasoned. It must be completely dry before you sand or seal it. Using a moisture meter is a professional-grade tip to ensure the internal moisture is below 10-12%. If you seal wet wood, it will almost certainly crack or grow mold underneath the finish.
Finally, the shaping and finishing phase begins. You will likely need to plane or sand the “back” of the wood to create a perfectly flat surface for mounting against the wall. Start with a coarse 60-grit sandpaper and work your way up to 220-grit or higher for a glass-smooth finish that still retains the live edge’s natural peaks and valleys.
Benefits of Harvesting Your Own Shelving
The most obvious benefit of the DIY approach is the drastic reduction in cost. When you remove the retail middleman, you can afford higher-quality mounting hardware—the kind that actually supports 100+ pounds—without exceeding a $50 budget. You are getting a “luxury” product for the price of a few sheets of sandpaper and some oil.
Sustainability is another major advantage. By using driftwood or salvaged lumber, you are preventing new trees from being harvested and processed. You are engaging in a form of upcycling that is carbon-neutral and keeps natural materials in use rather than letting them rot and release carbon back into the atmosphere.
From a design perspective, DIY shelves offer unmatched customization. Most retail shelves come in standard depths of 6, 8, or 10 inches. With a raw slab, you can follow the natural curve of the wood, allowing the shelf to be deeper in some areas and narrower in others. This organic flow is the hallmark of high-end interior design.
Finally, there is the benefit of structural integrity. Many retail “floating” shelves are actually hollow-core boxes made of thin veneer over MDF. They look like thick slabs, but they can’t handle a heavy stack of books. A solid wood slab is exactly what it looks like: a heavy, dense, durable piece of history that will last for generations.
Challenges and Common DIY Mistakes
One of the most frequent errors beginners make is rushing the drying process. Wood is a living, breathing material that moves as it loses moisture. If you try to finish a piece of wood that is still “green” or damp from the ocean, it will likely warp or develop deep cracks called “checking” as it dries inside your climate-controlled home.
Another pitfall is underestimating the weight of a solid slab. A 4-foot oak slab can weigh 40 pounds or more before you even put a single book on it. Many DIYers try to use cheap L-brackets or small wall anchors. For a true live edge look, you need hidden floating shelf brackets that are bolted directly into the wall studs.
The “insect issue” is often ignored until it is too late. If you see tiny holes and fine dust (frass) appearing under your shelf after a few weeks, you have an active infestation. This is why the sterilization step—whether through heat or chemical treatment—is non-negotiable. Don’t risk your home’s structural timber for the sake of a cool shelf.
Lastly, people often choose the wrong finish. Polyurethane provides a tough, plastic-like shield, but it can sometimes make driftwood look fake or overly shiny. For a truly high-end look, penetrating oils like Tung oil or Danish oil are better because they soak into the fibers and enhance the grain without creating a thick, artificial-looking film.
Limitations: When the Tide Isn’t the Best Option
While the ocean is a generous provider, not every piece of wood on the beach is suitable for a shelf. If the wood is “punky”—meaning it feels soft or spongy when you press your thumbnail into it—it has begun to rot. No amount of sanding or oiling will make punky wood structurally sound for holding weight.
You also have to consider environmental and legal regulations. In many national parks and protected coastal areas, it is illegal to remove driftwood because it provides critical habitat for shoreline ecosystems and helps prevent coastal erosion. Always check local laws before you start loading your truck; in places like California or Oregon, there are often strict limits on the weight or number of pieces you can take for personal use.
Size can also be a limitation. Finding a perfectly straight, 6-foot long, 2-inch thick piece of driftwood is a rare occurrence. If your design requires perfect uniformity or specific species like American Walnut that don’t typically grow near your coastline, you may still need to visit a local sawmill or specialty lumber yard.
Finally, remember that DIY projects require a set of tools. If you don’t have access to a drill, a level, a sander, and a stud finder, the “free” wood starts to become expensive very quickly. This method is ideal for those who enjoy the process of building, not just those looking for the absolute cheapest option.
Retail Markup vs. Tide Delivered Comparison
Understanding where your money goes can help you decide if the DIY effort is worth it. Below is a breakdown of the typical costs involved in a mid-sized (approx. 36″) live edge floating shelf project.
| Factor | Retail Purchase | DIY (Tide Delivered) |
|---|---|---|
| Material Cost | $150 – $400 | $0 (Free foraged) |
| Mounting Hardware | Included (often low quality) | $25 – $60 (High-grade steel) |
| Labor/Time | None | 10 – 15 hours (Prep & Finish) |
| Environmental Impact | High (Shipping & Industrial Log) | Zero to Low (Upcycled) |
| Total Estimated Cost | $250+ | $40 – $80 |
Practical Tips for a Professional Finish
If you want your DIY shelf to look like it belongs in an architectural magazine, you need to pay attention to the details. When sanding the live edge, use a nylon brush or a stiff-bristled brush to clean out the crevices without flattening the natural texture. You want to remove the dirt and loose bark but keep the “peaks” of the wood intact.
When it comes to mounting, the “Floating” Illusion is all about the hardware. Use a specialized floating shelf bracket from a reputable company like Shelfology or Sheppard Brackets. These consist of a flat backplate that screws into your wall studs and long steel rods that slide into holes you drill into the back of your wood slab. This provides incredible strength with zero visible support.
- Use a Drill Guide: When drilling the deep holes for the bracket rods, use a drill guide or a drill press. If your holes are even slightly crooked, your shelf will not sit level or flush against the wall.
- The Water Test: Before applying your final finish, wipe the wood with a damp cloth. This will show you exactly how the wood will look once oiled and help you identify any spots that need more sanding.
- Flattening the Back: If you don’t have a jointer, you can use a hand plane or even a belt sander to flatten the side of the shelf that meets the wall. A tight fit against the drywall is essential for stability.
Advanced Considerations for Serious Crafters
For those looking to take their shelving to the next level, consider Bowtie or Butterfly Inlays. If your slab has a natural crack that you want to keep for its aesthetic value, you can “stitch” it together using a decorative wooden bowtie. This prevents the crack from widening over time while adding a mark of true craftsmanship.
Another advanced technique is the use of Epoxy Resin. If you find a piece of driftwood with deep, beautiful voids or rot holes, you can fill them with clear or tinted epoxy. This stabilizes the wood, making it solid and easy to clean, while creating a “river” effect that highlights the wood’s internal geometry.
Think about lighting. A live edge shelf is a sculptural element. Installing a small LED strip on the bottom or back of the shelf can cast shadows that emphasize the organic shape of the live edge at night. This simple addition transforms a piece of wood into a focal point of the entire room.
Example: The 5-Foot Mantel Project
Imagine finding a massive, weathered cedar log on the Pacific Northwest coast. It’s too big for a bookshelf, so you decide to make a fireplace mantel. After hauling it home, you spend a week soaking it in a makeshift trough (a plastic tarp over a wood frame) to pull out the salt.
Once dried for two months in a garage, you find the internal moisture has dropped to 9%. You use a chainsaw to make the initial flat cut for the back, then a hand plane to get it perfect. You choose a 1/2-inch thick heavy-duty steel bracket system that hits four separate wall studs. After three coats of satin-finish Tung oil, the cedar glows with a deep red warmth that a factory-made shelf simply cannot replicate.
The total cost for this project? About $75 for the bracket and $20 for the oil. A retail mantel of this size and quality would easily exceed $800. More importantly, every time you sit by the fire, you see the wood you rescued from the tide.
Final Thoughts
Building your own modern live edge shelf is an exercise in patience and a celebration of the natural world. It challenges the modern notion that quality must be purchased from a store. By learning to see the potential in a piece of weathered driftwood, you are developing a skill set that goes far beyond simple home improvement.
The process of desalinating, sanitizing, and finishing your own wood allows you to control every variable, from the safety of the chemicals used to the structural integrity of the mounting. You end up with a piece of furniture that is not only cheaper and stronger than the retail alternative but also carries a soul and a story that no catalog can provide.
Don’t be afraid to get your hands dirty. Head to the coast, look for the grain beneath the grey, and start your journey from the tide to your home. Once you’ve hung your first “found” shelf, you’ll never look at a furniture catalog the same way again.
Sources
1 oneninefurniture.com (https://oneninefurniture.com/collections/shelves-live-edge) | 2 brickmillfurniture.com (https://brickmillfurniture.com/collections/live-edge-shelves) | 3 federalbrace.com (https://www.federalbrace.com/maple-live-edge-floating-shelves-1136) | 4 thriftyfun.com (https://www.thriftyfun.com/Sterilizing-and-Desalinizing-Driftwood.html) | 5 eccashelf.com (https://www.eccashelf.com/live-edge-floating-shelves/) | 6 shelfology.com (https://shelfology.com/collections/floating-shelf-brackets)