Professional Driftwood Coffee Table Design
The secret to high-end coastal furniture isn’t more wood—it’s selecting the one piece with the perfect structural soul. Most DIY driftwood projects look like a bird’s nest because they lack a focal point. The pro knows that one heavy, salt-cured root ball is worth a thousand small sticks. It’s about finding the geometry that nature already perfected.
[affiai]Working with driftwood is a lesson in patience and respect for the elements. You aren’t just building a table; you are preserving a survivor. A piece of wood that has been tumbled by the Pacific or bleached by the Atlantic carries a density and a story that kiln-dried lumber simply cannot match. To turn this raw, weathered material into a piece of professional furniture, you have to look past the surface grit and see the engineering underneath.
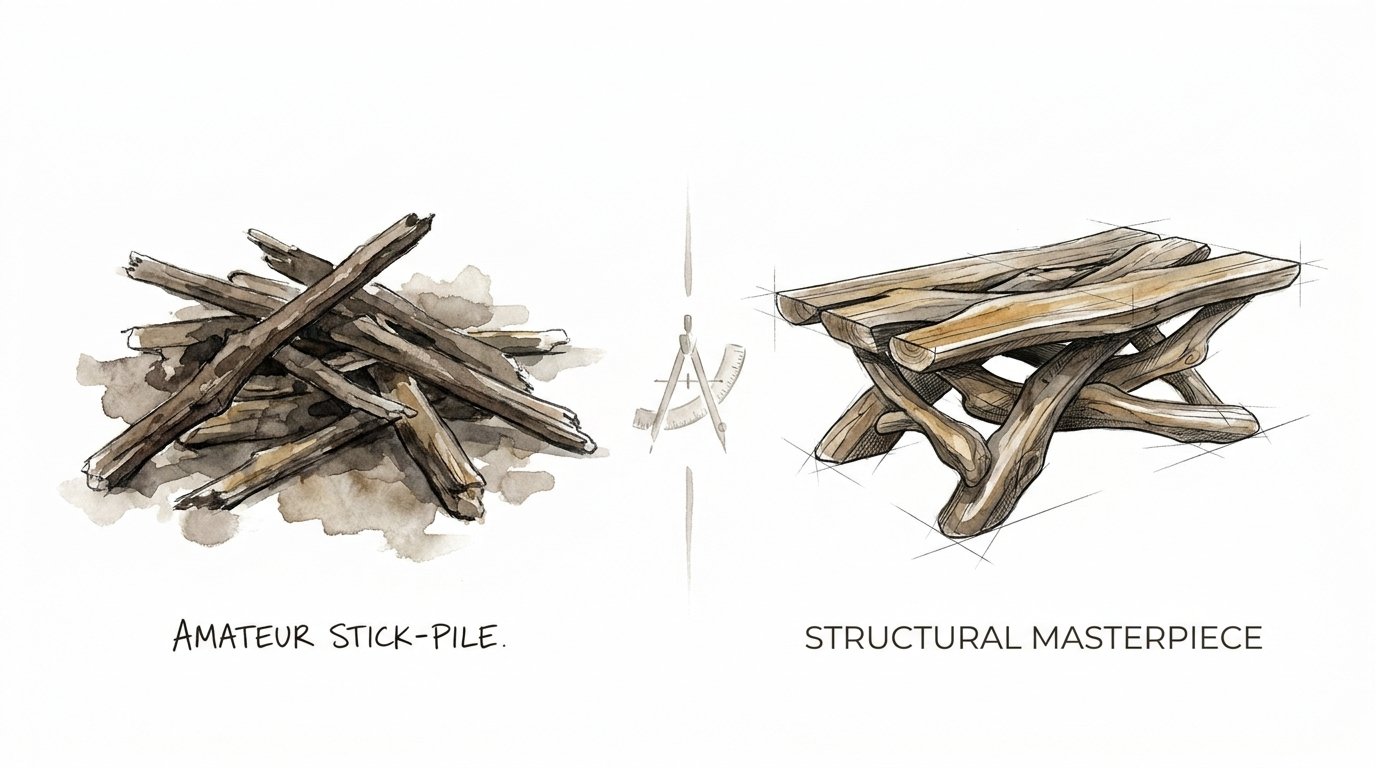
Most beginners make the mistake of over-complicating the design. They try to “build” a table by screwing branches together until it looks roughly like a box. The result is usually a wobbly, cluttered mess that looks like it washed up on a neglected beach. A structural masterpiece, however, relies on the inherent strength of a single, substantial piece—typically a root system or a thick trunk junction—that can support weight without needing a forest of support sticks.
This guide isn’t about crafting a beach-themed novelty; it’s about executing a professional driftwood coffee table design that commands the room. We will walk through the grit of selection, the chemistry of sanitation, and the precision of leveling that separates the amateur from the craftsman.
Professional Driftwood Coffee Table Design
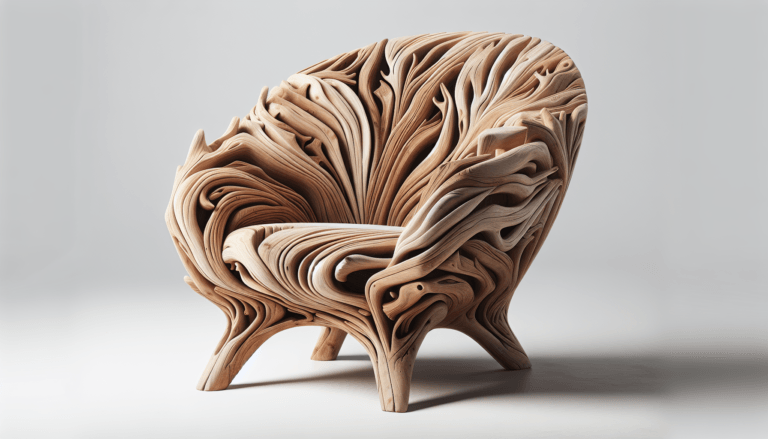
A professional driftwood coffee table is a functional sculpture. It serves as a bridge between the raw, chaotic energy of the natural world and the clean, ordered lines of a modern living room. Unlike standard carpentry, where you cut wood to fit a blueprint, driftwood design requires you to find the blueprint already hidden within the wood. It is used in high-end coastal estates, minimalist urban lofts, and rugged mountain cabins as a way to ground a room with an organic, one-of-a-kind anchor.
The core concept of professional design here is focal integrity. Instead of creating a “nest” of thin branches, the pro identifies a single heavy mass—often called the root ball or the stump. This mass provides the necessary weight for a low center of gravity, ensuring the table won’t tip when a heavy book or a tray of drinks is placed on the edge. The design exists to showcase the movement of the wood grain, the history of the knots, and the silvery patina of the salt-cure.
Think of it like a diamond in a setting. The driftwood is the stone, and the glass top is the setting that allows you to see the stone from every angle. In a real-world setting, these tables are appreciated because they don’t block light; the transparency of a glass top allows the complex, twisted base to remain the star of the show. It’s about balance, not just in weight, but in visual weight—the “heaviness” of the gnarled wood balanced by the “lightness” of the glass.
The Structural Soul: Selecting Your Foundation
The first rule of driftwood furniture is that not all wood is created equal. You aren’t looking for “sticks.” You are looking for a structural masterpiece. The best pieces are usually hardwoods like oak, mahogany, or cedar that have been submerged and tumbled for years. This process leaches out the soft sugars and sap, leaving behind a dense, petrified-like core that is resistant to rot and pests.
Look for the Root Ball: The most stable coffee tables come from the root systems of trees. Roots grow in three dimensions to anchor a massive tree against wind; they are naturally engineered to distribute weight. When you find a root ball that has been bleached by the sun and scoured by sand, you have found a ready-made tripod. A tripod is the most stable geometry in nature, and finding three main “points” of contact on the bottom will make your build significantly easier.
Salt-Cured vs. Freshwater: Coastal driftwood is generally superior for furniture. The salt water acts as a natural preservative, and the constant movement of the tide “sands” the wood more effectively than any river current. Freshwater driftwood can often be “punky” or soft in the center because it hasn’t been pickled by salt. If you can push your fingernail into the wood and it feels spongy, leave it on the beach. It will never hold a screw or a finish properly.
Sanitation and Survival: Preparing the Wood
You cannot bring a piece of the ocean into a living room without dealing with the stowaways. Driftwood is often home to sand gnats, wood-boring beetles, and microscopic bacteria that will eventually cause a foul odor or structural decay if not treated. Professional preparation is a multi-step process that takes time but ensures the piece lasts for generations.
- Mechanical Cleaning: Start with a stiff-bristle brush or a power washer. You need to blast away the loose sand, salt crust, and decaying outer fibers. If there is bark remaining, it must be removed. Use a flathead screwdriver or a paint scraper to pry it off until you reach the solid, weathered heartwood.
- The Bleach Soak: To kill organisms and lighten the wood, submerge it in a solution of one part bleach to nine parts water. For a heavy root ball, you may need a large plastic trough. Soak the piece for 24 to 48 hours. This doesn’t just clean the wood; it pulls out the lingering tannins that can cause staining later on.
- Neutralizing and Drying: After the bleach soak, rinse the wood thoroughly with fresh water. The drying phase is critical. Driftwood must be bone-dry before you apply any finish. This can take weeks in a dry, ventilated area. If you are in a rush, you can use a homemade kiln (a small tent with a dehumidifier), but slow, natural air-drying prevents the wood from cracking or “checking.”
Engineering the Level: From Raw Root to Flat Surface
This is where the amateur fails. A professional table must be level to within a fraction of an inch, or the glass top will wobble and eventually shatter. Because driftwood is irregular, you cannot rely on simple measurements. You must use the “scribe” method.
Place the base on a known level surface (like a workshop floor). Use shims to get the base sitting exactly how you want it to look. Once the base is positioned, determine the height of your table—usually 16 to 18 inches. Use a laser level or a block of wood with a pencil attached to “scribe” a line around the top of the branches where they will meet the glass. This line follows the contour of the floor, ensuring that when you cut along it, the resulting surface will be perfectly parallel to the ground.
Use a Japanese pull saw or a fine-tooth handsaw for these cuts. Power saws can be too aggressive and might splinter the weathered fibers. After cutting, sand the flat spots until they are perfectly smooth. You are looking for at least three—ideally four—contact points for the glass to rest upon. If one point is slightly low, do not sand the others down; instead, use a clear epoxy to “build up” the low point until it meets the glass level.
Finishing for Longevity: Oil vs. Plastic
The goal of a professional finish is to protect the wood without making it look like it’s been dipped in plastic. You want to preserve the “driftwood” feel—the tactile, matte quality that makes people want to touch it.
Hardwax Oils: Products like Rubio Monocoat or Osmo are the gold standard for high-end driftwood. These oils bond with the wood fibers at a molecular level. They provide excellent water resistance while maintaining a completely matte, natural look. If the table gets a scratch, you can simply rub a little more oil into the spot—no need to sand the whole table. This “breathable” finish also allows the wood to expand and contract with the seasons without cracking.
Polyurethane: If the table will be in a high-traffic area with a high risk of spills (like a rental property or a home with small children), a water-based polyurethane is a durable choice. Avoid “gloss” at all costs; it looks cheap on driftwood. A “Dead Flat” or “Ultra Matte” sheen will provide a hard, plastic-like shield while remaining largely invisible. Be warned: polyurethane can darken the wood and fill in the beautiful microscopic textures of the weathered grain.
The Glass Marriage: Mounting and Safety
The glass top is not just a surface; it’s a safety component. For a coffee table, you must use tempered glass, usually 1/2-inch to 3/4-inch thick. Tempered glass is much stronger than standard plate glass and, if broken, it shatters into small, dull cubes rather than dangerous shards.
How do you attach the glass to an irregular wood base? You don’t use glue. You use silicone bumpers (also known as “bumpons”). These are small, clear, adhesive-backed discs that provide friction and a slight cushion. They prevent the glass from sliding and compensate for any tiny imperfections in your leveling. For a more high-end look, some pros use stainless steel standoffs that are screwed into the wood, though this requires drilling holes into the glass, which must be done at the factory before tempering.
Ensure the glass has a “pencil polish” or “flat polish” edge. This removes the sharpness and gives the glass a sophisticated, thick appearance that complements the ruggedness of the wood base.
Benefits of Professional Driftwood Design
Choosing this path over a mass-produced furniture item offers several practical and aesthetic advantages:
- Unparalleled Uniqueness: Nature never repeats a root structure. Your table is a 1-of-1 piece of art that cannot be replicated.
- Structural Durability: A single, salt-cured root ball is nearly indestructible. Unlike IKEA-style particle board, it won’t sag or strip over time.
- Sustainable Luxury: You are repurposing “waste” material. Driftwood is a renewable resource that requires no logging or industrial processing beyond the initial harvest.
- Visual Openness: The combination of a complex base and a transparent top makes a room feel larger by allowing the eye to see through the furniture.
Challenges and Common Mistakes
The biggest pitfall is the “Bird’s Nest Syndrome.” This happens when a builder uses too many thin pieces. Not only does this look cluttered, but every joint where two sticks meet is a point of potential failure. Screws can pull out of thin driftwood easily. A professional build minimizes joints by maximizing the use of a single, thick foundation.
Another mistake is insufficient drying. If you seal wood that still has 20% moisture inside, that moisture will eventually try to escape. It will blow the finish right off the wood or, worse, create a pocket of mold between the wood and the glass. Invest in a cheap moisture meter and don’t start finishing until the wood is below 10% moisture content.
Lastly, ignore the “guess and check” method for leveling. If you just keep sanding “where it looks high,” you will end up with a table that is 10 inches tall and still wobbly. Use the scribe method or a laser level from the start.
Limitations: When Driftwood May Not Work
While beautiful, these tables are heavy. A solid oak root ball can easily weigh over 150 pounds before the glass is even added. If you live in an apartment with thin floors or plan on moving frequently, a large-scale driftwood piece might be a logistical nightmare.
Furthermore, driftwood does not handle extreme humidity fluctuations well. Even when finished, the irregular grain of a root system can “move” significantly. If you live in a climate that swings from 10% to 90% humidity, you might notice your glass top developing a slight rock over time as the wood shifts. This isn’t a defect; it’s the nature of the material, but it’s something to consider before placing a $5,000 piece of glass on a “living” base.
Comparison: Amateur Stick-Pile vs. Structural Masterpiece
| Feature | Amateur Stick-Pile | Structural Masterpiece |
|---|---|---|
| Foundation | Multiple thin branches screwed together. | Single, heavy root ball or trunk junction. |
| Stability | Wobbly; relies on glue/screws for rigidity. | Self-weighting; low center of gravity. |
| Aesthetics | Cluttered; “crafty” look. | Clean; “sculptural” high-end furniture. |
| Longevity | Prone to joints loosening and rot. | Heirloom quality; salt-cured durability. |
Practical Tips for Success
- Sanding Grits: Don’t jump to fine sandpaper too quickly. Start with 60 or 80 grit to remove the weathered “gray” if you want to see the brown wood underneath. Only move to 120, 180, and 220 once the shape is perfect.
- The “Wet” Test: If you’re unsure how the wood will look with a finish, wipe it with a damp cloth. This “wet” look is exactly how the wood will appear once oiled.
- Suction Pads: For extra safety, use suction pads instead of flat bumpers. They “grab” the glass, making it much harder for a child or a pet to slide the top off the base.
- Weight Distribution: Always ensure the glass overhang is equal on all sides. If the base is 30 inches wide, a 36-inch glass top gives you a safe 3-inch overhang. Any more than 6 inches of unsupported glass can become a tipping hazard.
Advanced Considerations: Stabilizing the Void
Serious practitioners often encounter “voids” or soft spots in the wood. Instead of cutting them out, you can stabilize them using clear casting resin. This keeps the organic shape of the hole but fills it with a rock-hard, transparent material. When sanded and polished, these resin-filled sections look like water trapped within the wood, further enhancing the coastal theme.
Additionally, if you find a piece that is visually perfect but lacks a third leg for stability, don’t just screw on a random stick. Consider “drilling and doweling” a matching piece of driftwood into the main body. Use a 1/2-inch oak dowel and marine-grade epoxy. If done correctly, the joint will be stronger than the wood itself and completely invisible once sanded.
Example Scenario: The 150lb Cedar Root
Imagine finding a massive Western Red Cedar root ball on a beach in Oregon. It’s been bleached white by the sun and is roughly 40 inches across. After power washing and a 48-hour bleach soak, the wood dries for six weeks in a garage. Using a moisture meter, you confirm it’s at 8%.
You set it on the floor and realize it has four points of contact on the bottom, but the top is a jagged mess of roots. You use a laser level set at 17 inches and mark each upward-reaching root. After cutting them with a pull saw, you sand them flat. You apply two coats of matte hardwax oil, which turns the white wood into a deep, warm amber. Finally, you set a 48-inch round, 1/2-inch tempered glass top on silicone bumpers. The result is a 200lb masterpiece that looks like it grew out of the living room floor.
Final Thoughts
Professional driftwood coffee table design is an exercise in restraint. The temptation to add more—more wood, more stain, more hardware—is the path to an amateur result. By focusing on the structural soul of a single, significant piece of wood, you allow nature to do the heavy lifting of the design.
Remember that the beauty of driftwood lies in its imperfections. The scars from the rocks, the holes from the tides, and the bleaching from the sun are not flaws to be sanded away; they are the resume of a piece of wood that survived the ocean. When you treat these elements with the precision of an engineer and the eye of an artist, you create more than just furniture.
Take your time with the prep work and the leveling. The difference between a table that lasts a season and one that lasts a century is found in the grit of the sanitation and the accuracy of the scribe. Experiment with different oils and glass shapes, but always come back to that one heavy, salt-cured root. That is where the soul of the table lives.
Sources
1 youtube.com (https://www.youtube.com/watch?v=cvYtcWH_qtg) | 2 wikihow.com (https://www.wikihow.com/Preserve-Driftwood) | 3 parklanejewelry.com (https://www2.parklanejewelry.com/how-to-clean-driftwood/) | 4 entriways.com (https://entriways.com/how-to-acheive-the-perfect-driftwood-finish-coffee-table/) | 5 dksstores.com (https://dksstores.com/blog-post49) | 6 marcusfishtanks.com (https://marcusfishtanks.com/blogs/news/caring-for-different-types-of-driftwood-tips-and-techniques) | 7 commonwoodco.com (https://www.commonwoodco.com/post/hardwax-oil-vs-polyurethane-which-one-s-best-for-your-furniture)