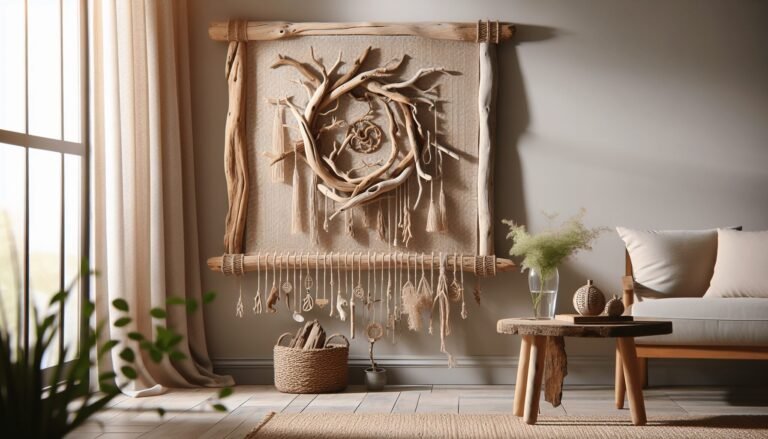
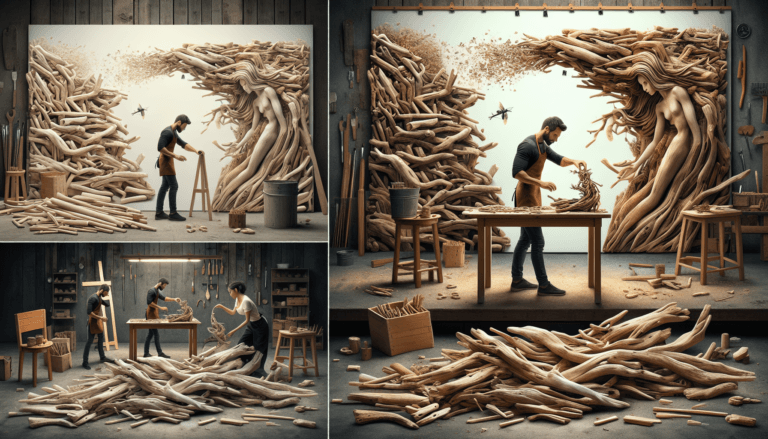
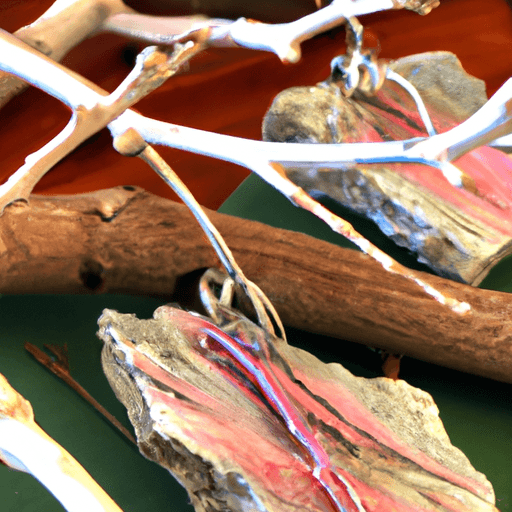
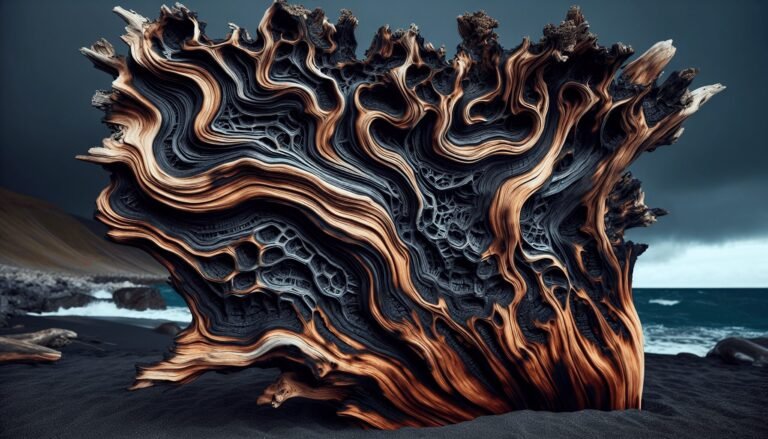
• Skip to main content
  • Skip to primary sidebar
  • Terms and Conditions
  • Privacy Policy
  • Contact

Driftwood 4 Us

Just About Driftwood

Art

Driftwood Art Ideas Diy Projects

March 10, 2024 by admin

Are you looking for creative ways to incorporate natural elements into your home decor? Look no further than driftwood art ideas DIY projects. Whether you’re a seasoned crafter or a beginner, these projects offer a fantastic opportunity to showcase your artistic skills and bring a touch of nature indoors. From stunning wall hangings to unique sculptures, driftwood can be transformed into awe-inspiring pieces that will captivate anyone who enters your space. Get ready to embark on a journey of creativity and resourcefulness as you explore the endless possibilities of driftwood art!

Driftwood Art Ideas Diy Projects

This image is property of images.pexels.com.

Driftwood Wall Hanging

Create a stunning beach-themed wall décor with driftwood! Utilizing the natural beauty of driftwood, you can easily bring a touch of the ocean into your home. The unique texture and shapes of the driftwood pieces add a rustic and bohemian vibe to any room. Whether you choose to craft a large statement piece or a smaller wall hanging, driftwood wall décor is sure to become a focal point in your space.

Beach-themed Wall Décor

To create a beach-themed wall décor, start by collecting various sizes and shapes of driftwood pieces. Arrange them in a visually pleasing layout, considering the symmetry and balance of the design. You can attach the driftwood pieces together using strong adhesive or craft wire. Once assembled, you can add embellishments like seashells, beach glass, or even small pieces of driftwood with interesting textures. Hang your beach-themed wall décor in your living room, bedroom, or hallway to bring a relaxed coastal vibe to your home.

Bohemian Wall Art

Driftwood wall art is perfect to achieve a bohemian-inspired look in your space. Embrace the natural elements and irregular shapes of the driftwood to create a unique and artistic display. Arrange the driftwood pieces in an asymmetrical pattern, allowing them to overlap and intertwine for a free-spirited and organic feel. You can even incorporate other materials like macramé cord, feathers, or beads to enhance the bohemian vibe of your wall art. Hang it in your boho-inspired living room, bedroom, or even in a cozy reading nook.

Nautical-inspired Design

For those who love the nautical theme, a driftwood wall hanging is an excellent choice. Combine different lengths and sizes of driftwood pieces to create a dynamic and visually interesting design. Consider adding nautical elements such as rope, anchor accents, or even small seashell details. This nautical-inspired driftwood wall hanging brings the ocean’s tranquility into your space, making it perfect for a beach house or any room where you want to evoke a maritime ambiance.

Driftwood Mirror Frame

Transform an ordinary mirror into a rustic and coastal-inspired centerpiece with a driftwood frame. A driftwood mirror frame instantly adds character and charm to any room, particularly in a bathroom or vanity area.

Rustic Bathroom Mirror

To create a rustic bathroom mirror, start by selecting driftwood pieces that are long enough to frame the entire mirror. Arrange the driftwood around the edges of the mirror, overlapping them for a rustic look. Secure the driftwood pieces using strong adhesive or small nails. Once the frame is secure, you can leave it in its natural state or apply a clear sealant to preserve the driftwood’s texture. Hang the rustic bathroom mirror in your bathroom to instantly elevate the space with a touch of coastal charm.

Coastal-inspired Vanity Mirror

Add a touch of the coast to your vanity area with a driftwood mirror frame. Select small to medium-sized driftwood pieces that can easily fit around your vanity mirror. Arrange the driftwood pieces in a visually pleasing pattern, ensuring they cover the entire border of the mirror. Use adhesive or small screws to secure the driftwood pieces in place. Whether your vanity area is in your bedroom or bathroom, a coastal-inspired driftwood mirror frame adds a unique and eye-catching element to your space.

Driftwood Shelving Unit

Create a natural and organic display in your home with a driftwood shelving unit. The unique shapes and textures of driftwood make it perfect for creating rustic and boho-inspired shelves that can hold your favorite books, plants, or decorative items.

Natural and Organic Display

To create a natural and organic display, gather driftwood pieces of varying lengths and thicknesses. Arrange the driftwood horizontally, either stacking them or attaching them to a wooden or metal frame. The irregular shapes and sizes of the driftwood pieces add an organic and artistic touch to your shelves. Place the driftwood shelving unit in your living room or hallway to showcase your favorite home décor items.

Rustic Kitchen Shelf

Give your kitchen a rustic makeover with a driftwood kitchen shelf. Choose driftwood pieces that are long enough to act as the base of your shelf. Attach smaller driftwood pieces vertically as supports for the shelf. This creates a rustic and visually appealing kitchen storage solution. Use your driftwood kitchen shelf to display your favorite cookbooks, decorative jars, or even hang small pots and pans. The natural textures and earthy tones of the driftwood will bring warmth and charm to your culinary space.

Boho-inspired Bookshelf

Enhance your boho-inspired room with a driftwood bookshelf. Select driftwood pieces that have interesting shapes and sizes. Attach the driftwood pieces horizontally, either stacking them or attaching them to create shelves. The natural and irregular shapes of the driftwood will contribute to the bohemian atmosphere of your room. Use the driftwood bookshelf to showcase your collection of books, plants, or boho-inspired décor items. This unique shelving unit will certainly become a conversation piece and focal point in your space.

Driftwood Dreamcatcher

Add a touch of bohemian flair to your bedroom with a driftwood dreamcatcher. The combination of driftwood, feathers, and beads creates a beautiful and ethereal wall hanging that can promote peaceful and restful nights.

Bohemian Bedroom Decoration

To create a driftwood dreamcatcher, start by selecting a large piece of driftwood as the base. Attach various lengths of driftwood pieces vertically from the base, mimicking the shape of a traditional dreamcatcher. Add feathers, beads, and other bohemian-inspired embellishments to the ends of the driftwood and along the webbing. Hang your driftwood dreamcatcher above your bed to add a touch of bohemian elegance to your bedroom. Let the natural textures and soothing colors of the driftwood create a calming and dreamy atmosphere.

Beach-inspired Wall Hanging

Bring the tranquil vibes of the beach into your home with a driftwood dreamcatcher. Incorporate seashells, small pieces of sea glass, or even tiny starfish to complement the driftwood’s natural beauty. The combination of the driftwood, shells, and other beach-inspired elements creates a stunning wall hanging that transports you to the shores. Hang your beach-inspired driftwood dreamcatcher in your bedroom, living room, or even on your porch to evoke a sense of relaxation and serenity.

Driftwood Art Ideas Diy Projects

This image is property of images.pexels.com.

Driftwood Candle Holders

Create a romantic and cozy ambiance with driftwood candle holders. The natural textures of the driftwood combined with the warm glow of candles make for a captivating centerpiece or decoration for any occasion.

Romantic Table Centerpiece

To create a romantic table centerpiece, select driftwood pieces that are wide enough to hold a candle securely. Drill or carve a small hole in the top of the driftwood piece to hold the candle. You can choose to leave the driftwood in its natural state or add a touch of paint or stain to enhance its appearance. Arrange the driftwood candle holders in the center of your dining table, coffee table, or even on a mantel. Light the candles to create a cozy and intimate atmosphere perfect for a romantic dinner or a relaxing evening at home.

Outdoor Patio Lanterns

Transform your outdoor space with driftwood candle holders that double as lanterns. Choose larger and sturdier pieces of driftwood to create a secure base for the candles. Attach a small metal or glass container to the top of the driftwood, ensuring it is large enough to hold a candle. You can hang these driftwood lanterns from tree branches, place them on outdoor furniture, or even attach them to a fence or wall. As the sun sets, the flickering candlelight combined with the natural beauty of the driftwood creates a magical and inviting ambiance in your outdoor patio.

Driftwood Wind Chimes

Create a melodic garden decoration with driftwood wind chimes. The soothing sounds of the chimes combined with the organic and natural beauty of driftwood enhance any outdoor space.

Melodic Garden Decoration

To create driftwood wind chimes, gather driftwood pieces of various sizes and shapes. Drill small holes near the ends of the driftwood pieces to attach strings or fishing line. Choose materials like seashells, small stones, or pieces of metal that will create melodic sounds when the wind gently passes through. Attach these materials to the driftwood using the strings or fishing line. Hang your driftwood wind chimes in a quiet corner of your garden or from a tree branch. As the wind dances through your outdoor oasis, the melodic tones of the driftwood wind chimes bring a sense of calm and tranquility to your space.

Relaxing Porch Accent

Add a touch of relaxation to your porch with driftwood wind chimes. Choose longer and sturdier driftwood pieces that can withstand outdoor elements. Attach small chimes or bells to the driftwood, ensuring they are evenly spaced for optimal sound. Hang your driftwood wind chimes near a seating area on your porch, allowing the soft breeze to create a soothing symphony. Whether you’re enjoying your morning coffee or unwinding in the evening, the delicate sounds of your driftwood wind chimes provide a relaxing ambiance that enhances the tranquility of your porch.

Driftwood Art Ideas Diy Projects

This image is property of images.pexels.com.

Driftwood Picture Frame

Display your cherished memories with a nature-inspired driftwood picture frame. The unique and rustic appeal of driftwood brings a touch of the outdoors into your home and beautifully frames your favorite photos.

Nature-inspired Photo Display

To create a nature-inspired driftwood picture frame, gather driftwood pieces of various lengths and thicknesses. Arrange the driftwood pieces to form the frame, ensuring the corners are secure and visually appealing. Use strong adhesive or small nails to attach the driftwood pieces together. You can leave the driftwood in its natural state or apply a clear sealant to preserve the texture. Place your favorite photo in the frame and showcase it on a mantel, shelf, or bedside table. The organic charm of the driftwood complements the beauty of your cherished memories.

Coastal Vacation Memories

Capture the essence of coastal memories with a driftwood picture frame. For a beachy touch, consider adding small seashells, dried starfish, or tiny pieces of beach glass to the corners or edges of the frame. These small embellishments enhance the coastal theme and add a personal touch to your picture frame. Display your vacation photos in a driftwood frame on a wall or shelf, allowing the memories of sandy beaches and salty air to transport you back to those special moments.

Driftwood Jewelry Organizer

Keep your jewelry neat and organized with a rustic driftwood jewelry organizer. The natural and irregular shapes of driftwood make it an ideal material to hang and display your favorite necklaces, bracelets, and earrings.

Rustic Necklace Hanger

To create a rustic necklace hanger, select a long and sturdy piece of driftwood. Attach small hooks or nails along the driftwood, allowing enough space between each for your necklaces. Hang your necklaces on the hooks or simply drape them over the driftwood to showcase your collection. This rustic necklace hanger not only keeps your jewelry tangle-free but also adds a charming and organic element to your bedroom or dressing area.

Beach-themed Earring Holder

Organize your earrings with a beach-themed driftwood earring holder. Collect smaller driftwood pieces that can easily be attached to a larger driftwood base. Drill small holes into the smaller driftwood pieces to hold the earrings. You can arrange the smaller driftwood pieces in a pattern or simply attach them randomly for an organic look. Showcase your earrings in this beach-themed driftwood earring holder, adding a touch of seaside whimsy to your bedroom or vanity.

Driftwood Art Ideas Diy Projects

Driftwood Table Lamp

Illuminate your living space with a coastal-inspired driftwood table lamp. The combination of driftwood and soft lighting creates a warm and inviting atmosphere that complements a coastal or bohemian theme.

Coastal Living Room Lighting

To create a coastal living room lighting, select a sturdy driftwood base that can support the lampshade. Pair the driftwood base with a lampshade in a neutral or beach-inspired color like blue or beige. The natural textures and earthy tones of the driftwood lend an authentic coastal touch to your living room. Place the driftwood table lamp on a side table or console, allowing the soft glow to enhance the relaxed and cozy ambiance of your coastal living space.

Bohemian Bedside Lamp

Enhance the bohemian atmosphere of your bedroom with a driftwood bedside lamp. Choose a driftwood base that has interesting shapes and textures. Pair it with a shade in vibrant or earthy tones to match your boho décor. The combination of the driftwood base and colorful shade creates a unique focal point that radiates warmth and tranquility. Place the driftwood bedside lamp on your nightstand or bedside table, allowing the soft glow to create a relaxing and dreamy atmosphere in your bohemian haven.

Driftwood Sculptures

Add an artistic centerpiece to your home with driftwood sculptures. The versatility of driftwood allows you to create sculptures that mimic nature or display abstract shapes, making it a perfect choice for those who appreciate artistic and unique home décor.

Artistic Centerpiece

Craft a driftwood sculpture that serves as an artistic centerpiece in any room. The key to creating an artistic driftwood sculpture is to allow the natural shapes and textures of the driftwood to guide your design. Arrange the driftwood in a visually pleasing way, embracing the irregularities and asymmetry of the pieces. You can combine different lengths and sizes of driftwood to create a dynamic and eye-catching sculpture. Place your driftwood sculpture on a mantel, coffee table, or even as a focal point on the floor to showcase your artistic side and add a touch of nature to your space.

Nature-inspired Home Decor

Bring the beauty of the outdoors into your home with nature-inspired driftwood sculptures. Embrace the shapes and textures of the driftwood to create sculptures that represent animals, plants, or natural formations. For example, you can arrange the driftwood pieces to resemble a tree, a school of fish, or even a forest landscape. The natural aesthetic of the driftwood enhances the organic feel of your home, bringing a sense of calm and tranquility. Display your nature-inspired driftwood sculptures on shelves, side tables, or even as wall art to celebrate the beauty of the natural world within your living space.

In conclusion, driftwood art offers a wide range of possibilities for DIY projects that can transform your home. From beach-themed wall décor and rustic mirror frames to bohemian dreamcatchers and natural sculptures, driftwood can add a unique and organic touch to any room. Whether you prefer a coastal-inspired look, a boho vibe, or a nature-infused aesthetic, driftwood art is a versatile and accessible option. So gather some driftwood and let your creativity flow as you embark on these DIY projects that truly bring the beauty of nature into your home.

Driftwood Art Ideas Diy Projects

Filed Under: Driftwood Ideas Tagged With: Art, DIY, Driftwood, projects

Driftwood Art Diy

March 9, 2024 by admin

Imagine the tranquil shores of a beach, where the gentle waves wash ashore countless pieces of smooth, weathered driftwood. Now, picture yourself transforming these discarded treasures into breathtaking works of art that add a touch of rustic charm to your home. “Driftwood Art DIY” is your guide to unlocking your creativity and crafting stunning masterpieces using nothing but driftwood and a few simple tools. Explore the endless possibilities of this unique art form and discover the joy of creating one-of-a-kind pieces that capture the essence of nature while showcasing your artistic flair. With “Driftwood Art DIY,” you’ll embark on a creative journey that merges the beauty of the ocean with your own imaginative touch.

Driftwood Art Diy

This image is property of images.unsplash.com.

Introduction to Driftwood Art

Driftwood art is a captivating form of creative expression that utilizes the unique beauty of weathered and washed-up pieces of wood found along shorelines and riverbanks. It involves transforming these remnants of nature into stunning sculptures, wall hangings, jewelry, and more. The appeal of driftwood art lies in its ability to evoke a sense of tranquility and natural beauty. With its rustic charm and organic textures, driftwood art has gained popularity among artists and nature enthusiasts worldwide.

What is driftwood art?

Driftwood art encompasses a wide range of artistic endeavors that involve using pieces of wood that have been shaped and worn by water, wind, and time. It can involve creating sculptures, wall hangings, mobiles, jewelry, and other accessories. The possibilities are endless when it comes to driftwood art, as artists can use their imagination and creativity to shape the wood into various forms and incorporate other materials for added flair.

Why is driftwood art popular?

Driftwood art has gained popularity for several reasons. One of the main reasons is its inherent connection to nature. The use of natural materials, such as driftwood, adds an authentic and earthy feel to the artwork. Additionally, driftwood art allows artists to repurpose and recycle materials that would otherwise go to waste. This aspect of sustainability resonates with many individuals who are conscious of their environmental impact.

Furthermore, driftwood art provides a sense of peace and tranquility. The weathered and worn appearance of the wood creates a sense of nostalgia and reminds us of the power and beauty of nature. The unique textures and shapes of driftwood also add an element of unpredictability and excitement to the creative process, as every piece of wood presents new possibilities and challenges for the artist.

Benefits of creating driftwood art

Engaging in driftwood art offers numerous benefits. Firstly, it provides a creative outlet for self-expression. Whether you are an experienced artist or a beginner, working with driftwood allows you to explore your artistic abilities and experiment with different techniques. The process of transforming raw pieces of driftwood into beautiful artwork can be immensely satisfying and fulfilling.

Moreover, driftwood art can serve as a form of therapy and stress relief. Spending time immersed in the creative process can help alleviate anxiety and provide a sense of calmness. The tactile nature of working with the wood, from collecting it to carving and shaping it, can be a meditative experience that allows you to connect with nature and disconnect from the demands of everyday life.

Lastly, creating driftwood art encourages resourcefulness and sustainable practices. By repurposing driftwood, you contribute to reducing waste and preserving the beauty of the natural environment. This eco-conscious approach to artmaking aligns with a growing trend towards sustainable and environmentally friendly practices in various creative fields.

Driftwood Art Diy

This image is property of images.unsplash.com.

Materials needed for driftwood art

To begin your driftwood art journey, there are a few essential materials you will need. The primary material, of course, is driftwood itself. Look for pieces that are smooth, sturdy, and have intriguing shapes and textures. When it comes to choosing driftwood, there are no strict rules – it all depends on your artistic vision and personal preference.

In addition to driftwood, you will need some basic tools. These include a pair of sturdy gloves to protect your hands, a set of carving tools for shaping the wood, sandpaper to smooth rough edges, and a wood sealant or preservative to protect the finished piece. These tools will allow you to bring your artistic ideas to life and ensure your driftwood art is long-lasting and resilient.

Finding and Collecting Driftwood

Choosing the right type of driftwood

When selecting driftwood for your art projects, it’s essential to choose the right type of wood. Look for pieces that are well-seasoned and have been naturally aged by water and weather. Avoid using freshly fallen wood as it may still contain moisture and could warp or shrink over time. Opt for pieces that are dry, sturdy, and have interesting shapes and textures that inspire your creative vision.

Where to find driftwood

Driftwood can be found along shorelines, riverbanks, and even in lakes and ponds. Coastal areas are particularly abundant in driftwood, as the constant movement of the waves and tides washes up various pieces onto the beach. Riverbanks and lakeshores can also be fruitful locations for finding driftwood, especially after periods of heavy rain or flooding. Explore these natural spaces with an adventurous spirit, and you’re sure to discover an array of driftwood waiting to be transformed into art.

Tips for collecting driftwood

When collecting driftwood, it’s important to adhere to ethical and sustainable practices. Avoid taking driftwood from protected areas, such as national parks or nature reserves, as these ecosystems need to remain undisturbed. Instead, focus on beaches and riversides where driftwood is more abundant and readily available. Whenever possible, choose pieces that have naturally detached from trees or branches rather than collecting live or recently fallen wood.

Before bringing the driftwood home, carefully inspect each piece for signs of rot, insect infestations, or other damage. While some imperfections can add character to your art, extensive decay or pest problems may compromise the structural integrity of the wood and make it unsuitable for artistic purposes. Always prioritize safety and choose only the best quality pieces for your projects.

Driftwood Art Diy

This image is property of images.unsplash.com.

Preparing Driftwood for Art Projects

To ensure your driftwood is ready for art projects, it’s important to clean, sanitize, and prepare it appropriately. This process involves removing any unwanted debris, pests, or potential bacteria that may be present on the wood. By following these steps, you can ensure your driftwood is safe to handle and work with.

Cleaning and sanitizing driftwood

Start by scrubbing the driftwood with a stiff brush to remove any dirt, sand, or mud that may have accumulated. Pay extra attention to crevices and textures, ensuring all surfaces are thoroughly cleaned. Next, fill a large container or tub with warm water and add a gentle, eco-friendly detergent. Allow the driftwood to soak in the soapy water for a few hours, or overnight if necessary. This will help remove any stubborn dirt or stains.

After soaking, rinse the driftwood thoroughly, ensuring all traces of soap are removed. Use a hose or a separate clean container to rinse off the wood, being mindful not to cause any damage. Once rinsed, let the driftwood air dry completely to prevent mold or mildew growth.

Removing any unwanted debris or pests

While cleaning the driftwood, you may come across debris such as nails, screws, or other foreign objects embedded in the wood. Carefully remove these using pliers or a screwdriver to avoid injury.

Additionally, it’s crucial to inspect the driftwood for any signs of pests, such as termites or wood-boring insects. If you notice any infestation, consult with an expert to determine the appropriate treatment method. Treating the driftwood before using it for your art projects will prevent any further damage to the wood and ensure the longevity of your artwork.

Drying and preserving driftwood

Once your driftwood is cleaned and free of unwanted debris, it’s important to allow it to dry thoroughly. Place the driftwood in a well-ventilated area, preferably outdoors, where it can dry naturally. Avoid exposing the wood to direct sunlight or extreme heat, as this can cause cracking or warping. Depending on the size and moisture content of the driftwood, drying can take several days to several weeks.

To preserve the driftwood and protect it from decay or damage, consider applying a wood sealant or preservative. There are various types of sealants available, such as marine-grade finishes or natural oils like linseed oil. Apply the sealant according to the manufacturer’s instructions, ensuring all surfaces of the driftwood are covered. This step will not only enhance the natural beauty of the wood but also extend its lifespan and durability.

Tools and Supplies for Driftwood Art

To embark on your driftwood art journey, having the right tools and supplies is essential. These items will allow you to effectively shape, refine, and enhance the natural beauty of the driftwood while bringing your artistic vision to life.

Essential tools for driftwood art

  • Carving tools: A set of carving tools is crucial for shaping the driftwood. Look for tools with different blade shapes and sizes to give you versatility and flexibility in your designs. Wood chisels, gouges, and knives are all useful tools for carving and detailing.

  • Sandpaper: Sandpaper is essential for smoothing rough edges and refining the surface of the driftwood. Different grits of sandpaper allow you to achieve varying degrees of smoothness. Start with a coarse grit to remove any large imperfections and gradually work your way up to finer grits for a polished finish.

  • Drill or drill press: A drill or drill press is useful for creating holes or slots in the driftwood, allowing you to attach other elements or create hanging points for your artwork. Choose a drill bit appropriate for the size of the holes you need, taking care to select a bit specifically designed for working with wood.

  • Safety equipment: Always prioritize safety when working with tools. Wear protective goggles to shield your eyes from flying debris and gloves to protect your hands from potential injuries. Additionally, consider using a dust mask or respirator to protect yourself from inhaling any fine particles generated during the carving and sanding process.

Additional supplies for enhancing artwork

While the driftwood itself is the centerpiece of your artwork, incorporating additional materials can elevate the final piece. Here are some supplies that can enhance your driftwood art:

  • Natural fibers: Consider using materials such as hemp cord, jute twine, or raffia to wrap around and embellish the driftwood. These natural fibers add texture and visual interest, complementing the organic nature of the wood.

  • Seashells and beach finds: Gather seashells, colorful stones, sea glass, or other beachcombing treasures to incorporate into your driftwood art. These elements can be attached using glue or wire, adding a touch of coastal charm to your creations.

  • Paint, stain, or dye: Experiment with adding color to your driftwood art by using paint, stains, or natural dyes. Choose colors that complement the natural tones of the wood or opt for bold and vibrant hues to create a striking contrast.

  • Decorative accents: Explore various decorative accents such as beads, feathers, ribbons, or small charms to adorn your driftwood art. These embellishments can add a personal touch and create a unique piece of artwork that reflects your individual style.

Driftwood Art Diy

Basic Techniques for Driftwood Art

Now that you have your driftwood and tools ready, it’s time to dive into some basic techniques for creating driftwood art. Whether you’re interested in sculpting, designing wall hangings, or making jewelry, there are several approaches you can take to transform your driftwood into stunning pieces of art.

Creating driftwood sculptures

Sculpting with driftwood allows you to unleash your creativity and bring three-dimensional forms to life. Start by visualizing the shape or object you wish to create, and then select driftwood pieces that fit well together and have the right proportions. Use carving tools to shape, trim, and connect the driftwood pieces, paying attention to details such as curves, angles, and textures.

As you work on your driftwood sculpture, keep in mind the structural integrity of the piece. If needed, reinforce the connections between the driftwood by using a strong adhesive or drilling holes and inserting dowels or screws. This will ensure your sculpture is stable and able to withstand the test of time.

Designing wall hangings and mobiles

Wall hangings and mobiles are a fantastic way to showcase the beauty of driftwood in a two-dimensional format. Start by selecting a piece of driftwood as the base or focal point of your hanging. Attach various lengths of driftwood, seashells, or other decorations using twine, wire, or fishing line. Play with different arrangements and levels to create visual interest and balance.

To display your wall hanging or mobile, consider using a piece of driftwood as the hanger or attaching a hook or wire to the back. This allows you to easily hang your masterpiece on a wall, in a window, or from the ceiling, where it can be admired and enjoyed.

Making driftwood jewelry and accessories

Driftwood can also be transformed into unique jewelry pieces and accessories that allow you to carry a piece of nature with you. Start by selecting smaller pieces of driftwood with interesting shapes and sizes. These can be drilled or carved to create pendants, beads, or charms.

Pair your driftwood pieces with materials such as leather cords, cotton threads, or metal findings to create necklaces, bracelets, earrings, or keychains. Experiment with combining driftwood with other natural materials, such as gemstones, sea glass, or freshwater pearls, to add color and sparkle to your creations. These handmade accessories make thoughtful gifts or can be a stylish addition to your own wardrobe.

Driftwood Art Painting and Staining

While the natural color and texture of driftwood are captivating on their own, painting or staining can add a new dimension and artistic flair to your driftwood creations. Here are some tips to enhance your driftwood art through painting and staining:

Choosing the right paint or stain

When selecting paint or stain for your driftwood, consider the effect you want to achieve. For a more vibrant and opaque finish, acrylic paint offers a wide range of colors and can be easily applied using brushes or sponges. If you prefer a more translucent and natural look, consider using wood stains or washes, which penetrate the wood and highlight its natural grain and texture.

Additionally, it’s important to choose paints or stains that are suitable for wood surfaces and provide durability and protection against the elements. Look for products specifically designed for outdoor or marine applications, as these are more likely to withstand environmental factors and ensure longevity.

Preparing the surface for painting

Before painting or staining your driftwood, it’s essential to prepare the surface to ensure proper adhesion and a smooth finish. Start by sanding the wood using fine-grit sandpaper to remove any rough spots or imperfections. This step helps create a clean and even surface for the paint or stain to adhere to.

After sanding, wipe down the driftwood with a damp cloth to remove any residual dust or debris. Allow the wood to dry completely before applying paint or stain. This ensures optimal absorption and adherence of the chosen material to the driftwood.

Tips for achieving desired effects

When painting or staining your driftwood, consider these tips to achieve desired effects:

  • Layering: Build up layers of paint or stain to create depth and dimension. Play with different colors or shades to achieve the desired effect, allowing each layer to dry before applying the next.

  • Dry brushing: For a weathered or distressed look, try dry brushing. Dip a dry brush lightly into paint or stain and then remove most of it by brushing it on a paper towel. Apply the remaining pigment onto the driftwood with light, quick strokes. This technique adds subtle color and texture to the wood while retaining its natural appearance.

  • Washes and glazes: Experiment with wood stains or thinned-down paints to create translucent washes or glazes. These techniques allow the natural grain and texture of the driftwood to show through while adding subtle color and richness to the surface.

Remember to allow ample drying time between each layer or coat of paint or stain. This ensures that the colors remain vibrant and that the finished piece is long-lasting and protected.

Driftwood Art Diy

Unique Driftwood Art Ideas

Driftwood art offers endless possibilities for creative expression. Here are some unique ideas to inspire your driftwood art projects:

Driftwood wind chimes

Create a soothing and melodic addition to your outdoor space by making driftwood wind chimes. Select driftwood pieces of various lengths and sizes, and attach them to a circular or hexagonal base using sturdy twine or fishing line. Add additional elements such as seashells, small bells, or glass beads for added visual and auditory interest. Hang your driftwood wind chime in a gentle breeze, and enjoy the calming sounds as the wood and other elements gently sway.

Driftwood photo frames

Capture cherished memories by creating unique photo frames using driftwood. Start by selecting a large, sturdy piece of driftwood as the base of your frame. Cut or carve out a rectangular or square opening to accommodate the photo. Attach smaller driftwood pieces around the opening, using adhesive or small nails. Sand and seal the driftwood to protect it and enhance its natural beauty. Insert your favorite photo and proudly display your driftwood photo frame as a personal and meaningful piece of art.

Driftwood candle holders

Illuminate your space with the warm and rustic glow of driftwood candle holders. Start by carefully selecting driftwood pieces with a flat surface or crevices suitable for holding candles. Ensure that the wood is sturdy and secure enough to safely support a candle. Use a drill to create holes that are slightly smaller than the diameter of your candles. Insert the candles into the holes, ensuring they fit snugly. Place your driftwood candle holders on a stable surface and enjoy the cozy ambiance they create.

Driftwood garden sculptures

Add a touch of natural beauty to your garden by creating driftwood sculptures that blend seamlessly with the surrounding landscape. Use larger and more robust pieces of driftwood to create sculptures inspired by plants, animals, or abstract shapes. Secure the driftwood pieces together using screws, dowels, or adhesive, ensuring stability and longevity. Experiment with different heights, sizes, and angles to create dynamic and visually striking garden sculptures that will fascinate and inspire.

Driftwood furniture

For a larger and more ambitious project, consider creating custom driftwood furniture. This can include coffee tables, side tables, benches, or even headboards for beds. Look for driftwood pieces that are long, straight, and sturdy enough to support the weight of furniture. Combine smaller driftwood pieces to create a tabletop or seat, securing them together with screws or dowels. Finish the driftwood furniture with a protective sealant or varnish to enhance its durability and highlight its natural beauty. Incorporate other natural materials such as glass, stone, or metal to add functionality or design elements to your driftwood furniture.

Advanced Driftwood Art Techniques

Once you’ve mastered the basics of driftwood art, you may be ready to explore more advanced techniques that push your creativity even further. These techniques allow you to incorporate additional materials and methods to elevate your driftwood art to new heights.

Wood burning on driftwood

Wood burning, also known as pyrography, can add intricate designs and patterns to your driftwood art. Using a hot pen or wood-burning tool, carefully burn or etch designs onto the surface of the driftwood. This technique allows you to create precise lines, shading, and texture, adding depth and visual interest to the artwork. Experiment with different tips and techniques to achieve varying effects, from bold and dramatic to delicate and intricate.

Adding mosaic or resin accents

Elevate your driftwood art by incorporating mosaic tiles or resin accents. For mosaic accents, select small pieces of colored glass or ceramic tiles and attach them to the driftwood using mosaic glue or adhesive. Arrange the tiles in intricate patterns or create unique designs that complement the natural shapes of the driftwood. Grout the mosaic, allowing it to dry and then wipe off any excess grout to reveal the beauty of the tiles.

Alternatively, consider using epoxy resin to add a glossy and durable finish to your driftwood art. Pour the resin over the driftwood, allowing it to flow and coat the surface. This can enhance the colors and textures of the wood, preserving its natural beauty while providing a protective layer. Experiment with different techniques, such as embedding small objects or adding pigments to the resin for a customized and striking result.

Incorporating other natural materials

Expand your artistic horizons by combining driftwood with other natural materials. This can include feathers, moss, leaves, or even dried flowers. Attach these elements to the driftwood using glue, wire, or twine, allowing them to blend harmoniously with the organic textures and shapes. By incorporating other natural materials, you can create unique and visually stunning artwork that brings together the beauty of multiple elements from the natural world.

Tips and Tricks for Driftwood Art

As you continue to explore driftwood art, keep these tips and tricks in mind to enhance your artistic process and the final outcome of your creations.

Creating texture on driftwood

To emphasize the natural textures of the driftwood or add additional texture to the surface, try using techniques such as wire brushing or carving with different tools. Wire brushing involves gently scrubbing the driftwood with a wire brush to bring out the grain and create a weathered appearance. Carving can be done using a variety of tools, such as chisels or rotary tools, to add grooves, notches, or patterns to the wood, giving it a unique and tactile quality.

Securing different pieces together

When working with multiple pieces of driftwood to create larger sculptures or wall hangings, it’s essential to ensure a secure and stable connection between the pieces. Consider using strong adhesives specifically formulated for wood, or drilling holes in the driftwood and using dowels or screws to join them together. Reinforce connections by adding additional support, such as wire or twine, to create a cohesive and durable structure.

Enhancing the natural beauty of driftwood

To preserve and enhance the natural beauty of the driftwood, consider applying a wood preservative or sealant that is suitable for outdoor use. These products will protect the wood from moisture, UV damage, and insects, ensuring its longevity and retaining its natural charm. Additionally, periodically clean and dust your driftwood art to keep it looking its best and maintain its original luster.

Selling and Displaying Driftwood Art

Once you have created your stunning driftwood artwork, you may consider selling or displaying it to share your creativity with others. Here are some tips to help you effectively present and market your driftwood art:

Preparing artwork for sale

Before selling your driftwood art, ensure it is properly finished and preserved. Apply a protective sealant or varnish to the wood to enhance its durability and longevity. Take high-quality photographs of your artwork from various angles to showcase its beauty and detail.

If you plan to sell online, create a professional-looking website or use an online marketplace dedicated to handmade or artisanal goods. Include detailed descriptions, dimensions, and pricing information for each piece of driftwood art. Provide clear and appealing photos that allow potential buyers to appreciate the beauty and craftsmanship of your creations.

Choosing the right display methods

When displaying your driftwood art, consider the size and nature of each piece. Larger sculptures or wall hangings may require sturdy hooks or brackets to ensure stability. Smaller pieces, such as jewelry or accessories, can be presented on specialized displays, such as canvas-covered boards or jewelry stands. Be creative in your display methods and ensure they complement the art while allowing viewers to appreciate the unique qualities of the driftwood.

If you plan to showcase your driftwood art at art fairs, galleries, or craft shows, invest in professional displays that highlight the individuality and craftsmanship of each piece. Consider using materials such as dark-colored fabric, natural fibers, or reclaimed wood to create a cohesive and visually appealing backdrop for your art.

Promoting and marketing driftwood art

To effectively promote your driftwood art, utilize various marketing channels to reach potential buyers. Utilize social media platforms to share images and stories about your driftwood creations. Engage with followers, respond to inquiries promptly, and provide updates on new pieces or upcoming events.

Consider collaborating with local businesses, such as galleries or boutiques, to showcase and sell your driftwood art. Participate in local art festivals or craft markets to connect with a broader audience who appreciate handmade and unique artwork.

Finally, always be ready to share the story behind your driftwood art. People are often drawn to the narrative and inspiration behind handmade creations. It allows them to form a deeper connection with your art and understand the significance of the materials and techniques involved.

In conclusion, driftwood art is a captivating and versatile art form that allows you to transform nature’s discarded treasures into beautiful works of art. From sculptures to jewelry, driftwood offers endless creative possibilities. By following the tips and techniques outlined in this article, you can embark on your own driftwood art journey and create unique and mesmerizing pieces that reflect the beauty of nature. So, gather your driftwood, dust off your tools, and let your creativity flow as you dive into the wondrous world of driftwood art.

Filed Under: Driftwood Ideas Tagged With: Art, DIY, Driftwood

How To Boil Driftwood?

February 23, 2024 by admin

Imagine stumbling upon a beautiful piece of driftwood during a relaxing stroll along the beach. Its intricate patterns and smooth texture instantly captivate you, and you can’t help but wonder how to bring out its natural beauty. Well, you’re in luck! In this article, we will guide you through the fascinating process of boiling driftwood. By following a few simple steps, you’ll be able to enhance its appearance, make it safe for use in various projects, and unlock its full potential as a stunning decorative element. So, let’s dive in and discover the art of boiling driftwood!

Safety Precautions

As with any DIY project, it’s important to prioritize your safety when boiling driftwood. Before you begin, make sure to follow these safety precautions to prevent any accidents or injuries.

Choose the right type of driftwood

When selecting driftwood for boiling, it’s crucial to choose the right type. Look for driftwood that is free of any toxic substances or chemicals. Avoid pieces that have sharp edges or splinters, as they can cause injury during handling.

Inspect the driftwood for signs of decay or damage

Before boiling, carefully inspect the driftwood for any signs of decay or damage. Look for soft spots, cracks, or signs of pests. Damaged or decaying driftwood can release harmful substances when boiled, so it’s essential to discard any pieces that appear compromised.

Clean the driftwood thoroughly

Before boiling, give the driftwood a thorough cleaning to remove any dirt, sand, or debris. Use a brush or sponge to scrub off any stubborn stains or residues. This step will ensure that the boiling process is more effective and that you have clean, sanitized driftwood.

Wear protective gear

Boiling driftwood can release steam and potentially harmful fumes, so it’s important to protect yourself. Wear heat-resistant gloves to handle the pot and driftwood, and use safety goggles to shield your eyes. If you have any respiratory issues or sensitivities, consider wearing a face mask to minimize inhalation of fumes.

Preparing the Boiling Pot

Now that you’ve taken the necessary safety precautions, it’s time to prepare the boiling pot for the driftwood. Follow these steps to ensure that the boiling process goes smoothly.

Select a large pot

Choose a pot that is large enough to accommodate the size of your driftwood pieces. Make sure the pot is deep enough to hold enough water to fully submerge the driftwood. This will ensure even boiling and thorough sanitation.

Line the pot with a mesh or wire basket

To prevent the driftwood from sticking to the bottom of the pot, line it with a mesh or wire basket. This will also make it easier to remove the driftwood from the pot once it’s boiled. The mesh or wire basket will allow water to circulate freely around the driftwood, ensuring that every part is sanitized.

Fill the pot with water

Fill the pot with enough water to fully submerge the driftwood. Make sure there is enough water to account for any evaporation during the boiling process. It’s better to have too much water than too little, as you can always discard the excess after boiling.

Add a pinch of salt to the water

Adding a pinch of salt to the boiling water can help prevent the growth of bacteria or mold during the process. While not necessary, it can provide an extra layer of sanitation for the driftwood. Don’t add too much salt, as it can also leave residue on the driftwood. Just a small pinch will do the trick.

How To Boil Driftwood?

Boiling Process

Now that everything is set up, it’s time to begin the boiling process. This step-by-step guide will ensure that your driftwood is thoroughly sanitized and ready for use.

Place the driftwood in the pot

Carefully place the cleaned driftwood pieces into the pot, making sure they are fully submerged in the water. Make sure that the driftwood is not overcrowded, as this can prevent proper circulation of the boiling water.

Bring the water to a boil

Place the pot on the stove and turn the heat to high. Keep an eye on the pot as the water begins to heat up and come to a boil. You may need to adjust the heat as necessary to maintain a steady, rolling boil.

Simmer the driftwood for a few hours

Once the water reaches a boiling point, reduce the heat to a simmer. Allow the driftwood to simmer in the boiling water for a few hours. This extended period of time ensures that any bacteria, pests, or other contaminants are thoroughly eliminated.

Check the water level periodically

During the simmering process, it’s important to check the water level periodically. If the water level drops significantly, add more water to the pot to ensure that the driftwood remains fully submerged. This will help maintain the effectiveness of the boiling process.

Removing the Driftwood

After the driftwood has been simmering for the recommended amount of time, it’s time to remove it from the pot. Follow these steps to safely and effectively remove the driftwood.

Turn off the heat

Before removing the driftwood, turn off the heat and allow the water to cool down. This will prevent any potential burns or accidents while handling the hot water.

Allow the water to cool

Once the heat is turned off, leave the pot of water to cool down. The water should reach a safe temperature before attempting to remove the driftwood. This cooling period also allows any remaining bacteria or contaminants to be eradicated.

Carefully remove the driftwood from the pot

Using heat-resistant gloves, carefully remove the driftwood from the pot. Lift each piece individually, taking care to avoid any splashes or spills. Place the boiled driftwood on a clean surface to dry.

Let the driftwood dry completely

Before using or storing the boiled driftwood, it’s crucial to let it dry completely. This process may take several days, depending on the size and thickness of the pieces. Make sure to place the driftwood in a well-ventilated area away from moisture to ensure proper drying.

How To Boil Driftwood?

Cleaning the Pot

After boiling the driftwood, it’s important to clean the pot thoroughly to remove any residue or contaminants. Follow these steps to ensure that your pot is ready for future use.

Empty the water from the pot

Once the driftwood has been removed, carefully pour out the water from the pot. Dispose of the water properly, ensuring not to pour it down the drain if it contains any debris or contaminants.

Scrub the pot to remove any residue

Using a non-abrasive scrub brush or sponge, gently scrub the inside of the pot to remove any residue or debris. Pay close attention to the bottom and sides of the pot, as these areas may have accumulated the most residue during the boiling process.

Rinse the pot thoroughly

After scrubbing, rinse the pot thoroughly with clean water. Make sure to remove any remaining residue or soap from the pot. This step is crucial to ensure that no contaminants are left behind that can affect future boilings.

Dry the pot before storage

Before storing the pot, make sure it is completely dry. Wipe down the pot with a clean towel or allow it to air dry. Moisture left in the pot can promote the growth of bacteria or mold, so it’s important to store it in a dry condition.

Post-Boiling Treatment

Once the driftwood has been boiled and dried, you have the option to further enhance its appearance and longevity. Follow these treatment steps to achieve the desired results.

Sand and smooth the driftwood if desired

If you prefer a smoother finish for your driftwood, you can sand down any rough edges or surfaces. Use fine-grit sandpaper to gently smooth the wood, being careful not to remove too much of its natural texture.

Apply a wood sealer or preservative

To protect the driftwood from moisture or decay, consider applying a wood sealer or preservative. These products can help extend the lifespan of the driftwood, especially if it will be exposed to outdoor elements or used in a humid environment.

Allow the sealant to dry

After applying a wood sealer or preservative, allow the driftwood to dry completely. Follow the manufacturer’s instructions on drying time, as different products may have different requirements.

Consider painting or staining the driftwood

For added customization, you can paint or stain the driftwood to match your personal style or the intended use. Choose paints or stains that are specifically designed for use on wood and follow the instructions for proper application and drying time.

Uses for Boiled Driftwood

Now that your driftwood has been properly boiled and treated, you can explore various uses for it. Here are some common applications for boiled driftwood:

Decorative purposes

Boiled driftwood makes for beautiful and unique decorative pieces. Display them as standalone art pieces or incorporate them into wreaths, centerpieces, or wall hangings.

Aquarium or terrarium decorations

Boiled driftwood is safe to use in aquariums or terrariums, providing a natural and aesthetically pleasing environment for fish, reptiles, or plants. Just make sure to thoroughly rinse the driftwood to remove any remaining salt or residue before adding it to the tank.

Craft projects

Get creative with boiled driftwood by using it in various craft projects. From creating mobiles and dreamcatchers to incorporating it into sculptures or jewelry, the possibilities are endless.

Furniture or shelving

If you’re feeling adventurous, you can use boiled driftwood to create unique furniture or shelving pieces. Depending on the size and shape of the driftwood, you can build tables, chairs, bookshelves, or even entire shelving systems.

Maintaining Boiled Driftwood

To ensure the longevity and quality of your boiled driftwood, it’s important to properly maintain it. Follow these guidelines to keep your driftwood looking its best.

Regularly dust or wipe the driftwood

To prevent the buildup of dust and dirt, regularly dust or wipe down your driftwood. You can use a soft cloth or a gentle brush to remove any surface particles. This will help keep your driftwood looking clean and vibrant.

Avoid placing in direct sunlight

Excessive exposure to sunlight can cause the colors of driftwood to fade or the wood to dry out and become brittle. To preserve its appearance, avoid placing your boiled driftwood in direct sunlight for prolonged periods. Instead, opt for indoor or shaded areas.

Keep away from moisture or high humidity

While boiled driftwood is more resistant to water damage than untreated wood, it’s still important to protect it from excessive moisture. Avoid placing it in areas with high humidity, such as bathrooms or kitchens, as this can promote rot or mold growth.

Inspect for signs of mold or pest infestation

Regularly inspect your boiled driftwood for any signs of mold or pest infestation. Mold growth may indicate that the driftwood is not drying properly or is being exposed to excessive moisture. If you notice any pests or signs of infestation, take appropriate measures to eliminate them and prevent further damage.

Alternative Methods

While boiling is the most common method for sanitizing and preparing driftwood, there are alternative methods you can explore for different effects or preferences. Here are some alternative methods to consider:

Soaking in a tub of water

Instead of boiling, you can try soaking your driftwood in a tub of water for an extended period. This method can be useful for larger pieces or when a more subtle effect is desired.

Baking in the oven

If you prefer a quicker method, you can try baking your driftwood in the oven. Place the driftwood on a baking sheet and bake at a low temperature for a few hours. This method can help sanitize the wood and enhance its appearance.

Treating with boiled linseed oil

For a natural and protective finish, you can treat your boiled driftwood with boiled linseed oil. Apply the oil using a brush or cloth, allowing it to penetrate the wood. This method can enhance the color and texture of the driftwood while protecting it from moisture.

Using a pressure cooker

If you have a pressure cooker, you can explore using it to sanitize and prepare your driftwood. Follow the manufacturer’s instructions for pressure cooking wood and adjust the settings as necessary.

Conclusion

Boiling driftwood is a simple and effective method to sanitize and prepare it for various uses. By following the safety precautions, you can ensure a smooth and hazard-free process. Additionally, with the right post-boiling treatments and maintenance, your driftwood can be transformed into stunning decorative pieces, aquarium or terrarium decorations, unique craft projects, or even functional furniture or shelving. Don’t be afraid to experiment with alternative methods to achieve different effects or cater to your specific preferences. With proper care and attention, your boiled driftwood can bring beauty and creativity into your home or outdoor space.

Filed Under: Driftwood Tagged With: Art, Boiling, Driftwood, woodwork

How Make Driftwood Art?

February 5, 2024 by admin

If you’ve ever found yourself drawn to the natural beauty of driftwood, you may have wondered how you can turn this unique material into stunning works of art. This article will guide you through the process of creating driftwood art, from finding the perfect pieces to assembling them into a captivating masterpiece. Whether you’re a seasoned artist or simply looking for a new and creative hobby, learning how to make driftwood art will ignite your imagination and allow you to bring the beauty of nature into your home. So, grab your tools and let’s get started on this artistic journey!

How Make Driftwood Art?

Selecting Driftwood

Finding the right type of driftwood is crucial for creating beautiful and unique artwork. When selecting driftwood, you want to look for pieces that have been naturally weathered by the tides and currents. These pieces often have interesting shapes and textures that can add character to your artwork. Avoid selecting driftwood that has been freshly washed ashore, as it may still be too damp and prone to cracking.

Consider the size and shape of the driftwood you choose. Depending on your design concept, you may need long, slender pieces or shorter, thicker ones. Look for driftwood that has interesting twists, bends, or branches, as these can provide a dynamic element to your sculpture.

In addition to the aesthetic considerations, it’s also important to check for stability. Examine the driftwood for any signs of rot or decay. Avoid selecting pieces that are too fragile or weak, as they may not be able to support the weight of your artwork.

Before using the driftwood in your artwork, it’s important to prepare it properly. Start by removing any loose bark or debris from the surface. This can be done using a stiff brush or by gently scraping the wood with a wire brush. Once the driftwood is clean, it’s time to move on to the next step of the process.

Cleaning and Drying

To ensure that your driftwood art lasts and looks its best, it’s important to properly clean and dry the driftwood before using it in your artwork. Begin by removing any dirt or debris that may be clinging to the surface of the wood. This can be done by gently scrubbing the wood with a mixture of water and mild detergent. Be sure to rinse the wood thoroughly to remove any soap residue.

Once the driftwood is clean, it’s important to sanitize it to prevent the growth of mold or other organisms. One way to do this is by soaking the driftwood in a solution of water and bleach. Mix one part bleach with nine parts water and soak the driftwood for about 24 hours. After soaking, rinse the driftwood thoroughly with clean water.

After cleaning and sanitizing, it’s important to allow the driftwood to dry completely. This can take several weeks, depending on the size and thickness of the pieces. Place the driftwood in a well-ventilated area, preferably outdoors, and allow it to air dry. Avoid using heat sources like ovens or heaters, as this can cause the wood to crack.

Designing and Planning

Once you have selected and prepared your driftwood, it’s time to start designing and planning your artwork. Begin by choosing a design concept that suits your style and preferences. Whether you prefer abstract sculptures or intricate wall hangings, there are countless possibilities for using driftwood in your artwork.

To help visualize your design, it can be helpful to sketch the artwork. This will allow you to experiment with different arrangements and compositions before committing to a final design. Take measurements of your driftwood pieces and use them to create accurate sketches of your artwork.

In addition to sketching, it’s important to plan the arrangement of your driftwood. Consider how the pieces will fit together and how they will be attached. Planning ahead will ensure that your artwork is cohesive and well-structured.

Preparing the Artwork

Before assembling your driftwood sculpture, there are a few additional steps to prepare the artwork. First, gather any additional materials you may need, such as screws, adhesives, or wire. Having everything on hand will make the assembly process smoother and more efficient.

Next, measure and cut any additional materials, such as wooden bases or support structures. These pieces can help strengthen your sculpture and provide a stable foundation. Use a saw or other cutting tool to carefully shape the materials to fit your design.

To ensure a polished finish, it’s important to sand and smooth the driftwood before assembling it. Use sandpaper or a sanding block to gently remove any rough edges or splinters. This will not only make the artwork more visually appealing but also help protect your hands from any sharp edges.

How Make Driftwood Art?

Assembling the Sculpture

With your driftwood and additional materials prepared, it’s time to start assembling the sculpture. Depending on your design and the size of the driftwood, you may choose to use adhesives or screws to hold the pieces together. If using adhesives, make sure to choose a strong, waterproof option that is suitable for outdoor use.

As you assemble the sculpture, be mindful of creating a strong structure. Consider the weight distribution and balance of the pieces. It may be necessary to reinforce certain areas with additional supports or braces. Take your time during this step to ensure that the sculpture is stable and secure.

Balancing and aligning the driftwood pieces is another important aspect of the assembly process. Pay attention to the overall composition and make adjustments as needed to create a visually pleasing arrangement. Step back and take a moment to evaluate the sculpture from different angles to ensure that it looks balanced and harmonious.

Enhancing the Artwork

Once your driftwood sculpture is assembled, you can enhance its visual appeal by adding colors or stains. Paint can be used to highlight certain areas or add pops of color to your artwork. Alternatively, you can apply wood stains to enhance the natural beauty of the driftwood and bring out its unique textures and patterns.

To protect the driftwood and prolong its lifespan, it’s important to apply a sealant. This will help prevent moisture from penetrating the wood and causing it to deteriorate. Choose a sealant that is suitable for outdoor use and follow the manufacturer’s instructions for application.

In addition to sealants, you may also choose to use varnishes or oils to further enhance the appearance of your driftwood artwork. These products can add a glossy finish or deepen the natural color of the wood. Experiment with different finishes to find the one that best complements your design.

Finishing Touches

Before displaying your driftwood artwork, take the time to remove any excess glue or debris that may be visible. Use a razor blade or sandpaper to carefully remove any unwanted residue. This will give your artwork a clean and polished look.

To add a final touch of shine, polish and buff the driftwood surface. Use a soft cloth or a specialized wood polishing product to gently bring out the natural luster of the wood. This step will give your artwork a professional and finished appearance.

Lastly, consider signing and documenting your driftwood art. By signing your artwork, you are claiming it as your own and adding a personal touch. Additionally, documenting your process and the inspiration behind your artwork can provide valuable insights for yourself and others who may be interested in your driftwood art.

Display and Maintenance

When it comes to displaying your driftwood art, choose a suitable location that showcases the beauty of the artwork. Consider lighting and background to create an optimal setting. Whether you choose to hang your artwork on a wall, display it on a shelf, or mount it in a garden, make sure it is secure and protected from the elements.

Regular cleaning and maintenance are necessary to preserve the beauty of your driftwood art. Use a soft brush or cloth to gently remove any dust or debris that may accumulate over time. If your artwork is displayed outdoors, periodic inspections and touch-ups may be necessary to ensure its longevity.

Alternative Driftwood Art

In addition to traditional sculptures, there are many other ways to incorporate driftwood into your artwork. Consider incorporating driftwood into existing artwork, such as paintings or mixed media pieces. The natural textures and shapes of driftwood can add depth and interest to these types of artwork.

Driftwood can also be used to create functional pieces, such as tables, lamps, or mirrors. By combining driftwood with other materials, you can create unique and practical items for your home or office.

If you enjoy home decor projects, consider utilizing driftwood in various ways. Create a driftwood wall hanging, a mobile, or even a driftwood-inspired wreath. By exploring different ways to incorporate driftwood into your decor, you can add a touch of nature and coastal charm to your space.

Inspiration and Ideas

If you’re looking for inspiration for your driftwood art, there are many sources to explore. Start by researching different driftwood art styles, such as abstract, realistic, or minimalist. This will give you a sense of the possibilities and help you refine your own artistic vision.

Nature itself can be a great source of inspiration. Take a walk on the beach or visit a nearby coastal area to observe the shapes, colors, and textures of driftwood in its natural environment. Pay attention to how the elements have sculpted the driftwood over time and incorporate these natural patterns into your own artwork.

Lastly, research famous driftwood artists and their work. Learn about their techniques and creative processes. While it’s important to develop your own unique style, studying the work of others can help spark ideas and provide guidance as you explore the world of driftwood art.

In conclusion, creating driftwood art is a rewarding and creative process. By carefully selecting and preparing the driftwood, planning and designing the artwork, and applying the finishing touches, you can transform ordinary pieces of wood into beautiful and unique works of art. Whether you choose to create sculptures, functional pieces, or home decor items, the possibilities with driftwood are endless. Let your imagination run wild and embrace the beauty of nature as you embark on your driftwood art journey.

Filed Under: Driftwood Tagged With: Art, DIY, Driftwood, home decor

Driftwood Art How To Make?

December 30, 2023 by admin

Are you mesmerized by the intricate and captivating beauty of driftwood art? If you’ve ever wondered how to create your own stunning pieces, look no further! In this article, we will guide you through the process of making driftwood art, revealing the secrets behind turning nature’s castaways into unique and artistic masterpieces. Let your creativity drift with the waves as you unlock the techniques and inspiration behind the enchanting world of driftwood art.

Driftwood Art How To Make?

Finding Driftwood

Beachcombing

Beachcombing is a fantastic way to find unique and interesting pieces of driftwood. Take a leisurely stroll along the shoreline, keeping an eye out for weathered and worn pieces of driftwood that have been washed ashore by the waves. Look for driftwood that has distinctive textures, shapes, and colors that catch your eye. Remember, each piece of driftwood has its own story to tell, so choose the ones that speak to you.

River or Lake Explorations

If you don’t live near the coast, don’t worry! Driftwood can also be found near rivers and lakes. Embark on a peaceful journey by the water’s edge and keep a lookout for driftwood that has been carried downstream or washed up on the banks. River and lake driftwood may have a slightly different appearance compared to beach driftwood, as it has been shaped by different water currents. These unique pieces can add a touch of diversity to your art projects.

Purchase from a Supplier

If you don’t have access to natural sources of driftwood or you want specific shapes and sizes, purchasing driftwood from a supplier is a convenient option. There are many online retailers and craft stores that offer a wide variety of driftwood for sale. When buying from a supplier, you have the advantage of choosing precisely the type and size of driftwood you need for your project. Plus, you can often find driftwood that has been pre-cleaned and prepared, saving you time and effort.

Preparing Driftwood

Cleaning the Driftwood

Before you start working with driftwood, it’s essential to clean it thoroughly to remove any dirt, debris, or unwanted organisms. Begin by rinsing the driftwood with clean water to remove loose dirt. For more stubborn stains or impurities, gently scrub the surface of the wood with a soft brush. Be careful not to scrub too aggressively, as you want to preserve the natural texture and shape of the driftwood.

Removing Dirt and Debris

Sometimes, driftwood may have embedded dirt or debris that can be challenging to remove with simple rinsing alone. In such cases, you can soak the driftwood in a mixture of water and mild dish soap or vinegar for a few hours. This helps to loosen dirt and debris, making it easier to clean. After soaking, rinse the driftwood thoroughly and allow it to dry completely before moving on to the next step.

Sanding the Surface

To achieve a smooth and polished finish, it’s often necessary to sand the surface of the driftwood. Start by using coarse-grit sandpaper to remove any rough edges or splinters. Gradually move to finer grits of sandpaper to achieve a more refined surface. Sanding not only enhances the overall appearance of the driftwood but also creates a suitable canvas for various art techniques. Make sure to sand in the direction of the wood grain to avoid any unsightly scratches.

Choosing a Driftwood Art Project

Deciding on the Art Piece

With a wide range of possibilities, choosing the right driftwood art project can be both exciting and challenging. Consider your personal preferences and the style you want to achieve. You can create wall hangings, sculptures, wind chimes, or even functional pieces like candle holders or picture frames. Take your time to explore different ideas and find inspiration in nature and the unique shapes of your driftwood pieces.

Considering Size and Shape of Driftwood

When selecting driftwood for your art project, take into account the size and shape of the pieces you have available. Larger pieces can be great for creating statement pieces or serving as a base for sculptures, while smaller ones can be used for intricate details or smaller projects. Try to envision how different pieces can fit together or complement each other to bring your art piece to life.

Using Multiple Pieces for a More Complex Project

Incorporating multiple pieces of driftwood into your art project can add depth and complexity. Experiment with arranging different pieces together to create visually stunning compositions. Combine driftwood of varying lengths, shapes, and textures to add interest and contrast. Don’t be afraid to try different combinations and step back to evaluate how each piece interacts with the others. This experimentation will help you create unique and captivating art pieces.

Tools and Materials

Basic Tools Required

To embark on your driftwood art journey, you’ll need a few basic tools. These include a saw for cutting larger driftwood pieces, a drill for creating holes or securing elements, sandpaper of various grits for sanding, and wood glue for assembling your art projects. Having these tools readily available will make your creative process smoother and more enjoyable.

Additional Materials for Embellishment

While the driftwood itself holds inherent beauty, you may want to enhance your art piece with additional materials for added flair. Think of elements like seashells, beads, feathers, sea glass, or even small pieces of colored glass to bring a pop of color to your project. These materials can be attached to the driftwood using glue or incorporated into wire wrapping techniques, which we’ll discuss further.

Safety Equipment

As with any artistic endeavor, it’s essential to prioritize safety when working with driftwood. Always wear protective gear such as safety goggles and gloves when handling tools or working with adhesives. It’s also advisable to work in a well-ventilated area to minimize exposure to any fumes from glues or finishes. Taking these precautions ensures that you can enjoy your driftwood art safely and comfortably.

Driftwood Art How To Make?

Driftwood Art Techniques

Wood Carving

Wood carving is a popular technique for transforming driftwood into intricate and detailed art pieces. Before you begin carving, it’s essential to choose the right tools for the job. Carving tools such as chisels, gouges, and knives with different blade shapes and sizes can help you achieve the desired results. Start by creating basic shapes, gradually refining them, and adding intricate details to bring out the beauty of the wood.

Wire Wrapping

Wire wrapping is an excellent technique for accentuating the natural shape and contours of driftwood while adding unique embellishments. Select a suitable wire material, such as copper or silver, and choose a gauge that complements the size of your driftwood. Begin by creating wire designs that wrap around the driftwood, adding twists, loops, or coils as desired. Carefully secure the wire to the driftwood, ensuring it holds firmly but doesn’t damage the wood’s surface.

Creating a Sculpture

Sculpting with driftwood allows you to bring your artistic vision to life in three dimensions. Start by planning the design of your sculpture, visualizing how the different pieces of driftwood will fit together. Consider using multiple driftwood pieces of varying sizes and shapes to create interesting forms and textures. With the help of wood glue, secure the driftwood pieces together, creating a solid and stable structure.

Assembling a Mosaic

Mosaics are a wonderful way to showcase the unique beauty and textures of driftwood. To start, choose a suitable base for your mosaic, such as a wooden board or a piece of sturdy fabric. Then, arrange the driftwood pieces on the base, experimenting with different orientations and patterns. Once you’re satisfied with the arrangement, apply adhesive to the back of each driftwood piece and press it onto the base. After allowing the adhesive to dry, fill the gaps between the driftwood pieces with grout for a finished look.

Painting and Staining

Painting and staining can add an extra touch of creativity and personalization to your driftwood art. Choose paint colors or wood stains that complement the natural tones and textures of the driftwood. You can opt for a uniform color to enhance the shape and details of the wood or create bold patterns and designs. Experimentation is key, so don’t be afraid to let your imagination run wild.

Wood Carving

Choosing the Right Carving Tools

When delving into wood carving with driftwood, having the appropriate tools is crucial. Start with a variety of carving chisels and gouges in different sizes and shapes. This allows you to work on both larger surfaces and finer details. You may also find a carving knife handy for more delicate work. Investing in high-quality, sharp tools will make the carving process smoother and more enjoyable.

Creating Basic Shapes

Begin the wood carving process by outlining and carving basic shapes on your driftwood. Take into consideration the natural contours and curves of the wood, allowing them to guide your carving. Use a chisel or gouge to remove excess wood slowly, ensuring you maintain control and precision. As you carve, step back and evaluate the emerging shapes, making adjustments as needed to achieve your desired design.

Adding Intricate Details

Once you’ve established the basic shapes, it’s time to enhance your driftwood art piece with intricate details. Use smaller carving tools like veiners or U-gouges to create fine lines, textures, or patterns. Work with a steady hand and a gentle touch to gradually bring out the intricate beauty hidden within the wood. Remember, patience is key in this process, as it takes time and practice to master the art of adding delicate details.

Wire Wrapping

Selecting the Appropriate Wire

Choosing the right wire is crucial when it comes to wire wrapping driftwood. Opt for a wire material that is sturdy and malleable, such as copper or silver. The gauge of the wire should be determined by the size and weight of your driftwood. Thicker wires provide more stability, while thinner wires allow for intricate designs. Experiment with different wire materials and gauges to find the one that best suits your creative vision.

Creating Wire Designs

Start by planning your wire design before wrapping it around the driftwood. Consider the curves and contours of the wood, as well as the shape and size of the driftwood piece you’re working with. Experiment with different wrapping techniques, such as twists, loops, or braids, to add visual interest to your art piece. Take your time and work methodically, ensuring that the wire wraps around the driftwood smoothly and securely.

Securing the Wire to the Driftwood

To ensure the wire remains securely attached to the driftwood, be mindful of how you fasten it. Wrap the wire tightly, but not so tight that it damages the driftwood’s surface. You can use pliers to secure and tighten the wire, ensuring it holds firmly in place. If desired, you can also incorporate other embellishments, such as beads or small seashells, into your wire wrapping to further enhance the artistic appeal of your driftwood.

Creating a Sculpture

Planning the Sculpture

Creating a driftwood sculpture requires careful planning and vision. Sketch out your desired sculpture on paper, considering the scale, proportions, and overall concept. Visualize how different pieces of driftwood can come together to form a cohesive and aesthetically pleasing sculpture. As you plan, keep in mind the natural contours and textures of the driftwood and how they can contribute to the overall look and feel of your artwork.

Using Different Pieces of Driftwood

One of the beauties of driftwood sculptures is the ability to combine multiple pieces of varying sizes and shapes. Select driftwood pieces that complement one another and fit within your envisioned sculpture. Experiment with different arrangements and orientations, allowing the individual shapes to interact and create captivating forms. Remember to step back regularly and assess how each piece contributes to the overall harmony of your sculpture.

Adhering Them Together

To assemble your driftwood sculpture, you will need a reliable adhesive that can withstand the test of time. Consider using a strong wood glue that is specifically formulated for bonding wood materials. Apply the adhesive to the areas where the driftwood pieces will join, ensuring thorough coverage. Press the pieces firmly together, holding them in place until the adhesive sets. Allow sufficient drying time before moving or handling the sculpture to ensure proper bonding.

Assembling a Mosaic

Choosing a Base for the Mosaic

When assembling a driftwood mosaic, the choice of a suitable base is essential. Opt for a strong and stable material such as wood, plywood, or even a hardboard. Ensure that the base is properly prepared and smooth, ready to receive the adhesive and driftwood pieces. Consider staining or painting the base to enhance the overall aesthetic appeal of your mosaic.

Arranging the Driftwood Pieces

Before adhering the driftwood pieces to the base, arrange them in different orientations to find the most visually pleasing composition. Play with the shapes, sizes, and colors of the driftwood to create an interesting pattern or design. Once you’re satisfied with the arrangement, carefully lift each piece and apply adhesive to the back. Gently press the driftwood onto the base, ensuring it is firmly attached.

Applying Adhesive and Grout

To secure the driftwood pieces in place and achieve a polished finish, you will need adhesive and grout. Apply a suitable adhesive using a small brush or spatula, ensuring that it covers the entire back surface of each driftwood piece. Press the pieces firmly onto the base, leaving a small gap between each piece for the grout to fill. Once the adhesive is completely dry, apply grout, filling in the gaps between the driftwood. Wipe away any excess grout and allow it to cure according to the manufacturer’s instructions.

Finishing Touches

Applying a Protective Finish

To preserve the beauty and longevity of your driftwood art, it’s important to apply a protective finish. There are various options available, including polyurethane, varnish, or lacquer. These finishes not only protect the wood from moisture and UV damage but also enhance the natural colors and textures of the driftwood. Apply the protective finish evenly and allow it to dry completely before handling or displaying your artwork.

Adding Varnish or Sealant

For a more polished and refined appearance, consider adding varnish or sealant to your finished driftwood art piece. Varnish can provide a subtle sheen, highlighting the wood’s natural beauty and protecting it from scratches. Choose a varnish or sealant that is compatible with the protective finish you applied, and follow the manufacturer’s instructions for application and drying times.

Enhancing the Artwork with Additional Elements

If you wish to take your driftwood art to the next level, consider adding additional elements for visual interest and depth. Seashells, beads, feathers, or even dried flowers can complement the natural beauty of the driftwood and enhance the overall artistic appeal. Use glue or wire wrapping techniques to attach these elements to your artwork thoughtfully. Remember to find a balance, ensuring that any additional elements harmonize with the driftwood rather than overpowering it.

In conclusion, creating driftwood art is a wonderful way to express your creativity and connect with nature. Whether you find driftwood through beachcombing, river explorations, or purchasing from a supplier, the possibilities for unique and captivating art pieces are endless. By preparing the driftwood, choosing the right art project, utilizing various techniques, and adding finishing touches, you can transform ordinary pieces of driftwood into extraordinary works of art. So go ahead, let your imagination soar, and begin your driftwood art journey today!

Filed Under: Driftwood Tagged With: Art, DIY, Driftwood, How To, tutorial

Driftwood: Escape and Survival Through Art Kindle Edition Review

December 28, 2023 by admin

Imagine being transported to a world where art is the lifeline amidst chaos and uncertainty. In the gripping “Driftwood: Escape and Survival through Art” Kindle Edition, embark on a riveting journey that combines the thrill of escape with the power of creation. This captivating novel delves into the tale of a group of survivors who find themselves on a remote island, forced to confront their darkest fears and harness their artistic abilities to not only survive but to thrive. Prepare to be captivated by this unique blend of adventure, resilience, and the transformative power of art.

Driftwood: Escape and survival through art     Kindle Edition

This image is property of Amazon.com.

Discover more about the Driftwood: Escape and survival through art     Kindle Edition.

Why Consider This Product?

Art has long been recognized as a powerful tool for expression and healing, and “Driftwood: Escape and survival through art” offers a unique way to tap into these benefits. With a Kindle Edition, this product combines the convenience of digital reading with the immersive experience of creating art. If you are looking for a way to escape the stresses of everyday life and discover the transformative power of art, this product is worth considering.

Scientific research has shown that engaging in art can have numerous psychological and emotional benefits. Studies have found that art therapy can reduce anxiety, increase self-esteem, and improve overall well-being. By immersing yourself in the process of creating art, you have the opportunity to express yourself, explore your emotions, and find a sense of inner peace.

Additionally, “Driftwood: Escape and survival through art” has received glowing endorsements and testimonials from customers who have found solace and inspiration within its pages. With its unique approach to art and the healing process, this product offers a promising avenue for personal growth and development.

Features and Benefits

Unlock Your Creativity

“Driftwood: Escape and survival through art” provides you with a myriad of techniques and exercises to unleash your creativity. From sketching to painting, this product guides you through various art forms and encourages experimentation. Whether you are a beginner or an experienced artist, these techniques can help you discover new ways to express yourself and tap into your artistic potential.

Therapeutic Journey

The book takes you on a therapeutic journey, using art as a vehicle for self-discovery and healing. With each exercise, you are invited to explore your emotions and thoughts, allowing you to process and release any pent-up feelings. This process can be cathartic and empowering, helping you foster a deeper understanding of yourself and your experiences.

Mindfulness and Relaxation

“Driftwood: Escape and survival through art” incorporates mindfulness techniques into the art-making process. As you engage in each exercise, you are encouraged to be fully present in the moment, focusing on each stroke of the brush or pencil. This mindfulness practice promotes relaxation, stress reduction, and a sense of inner calm.

Portable and Accessible

With its Kindle Edition, “Driftwood: Escape and survival through art” can be easily accessed on any device with the Kindle app. This means you can take your creative journey with you wherever you go. Whether you’re traveling, commuting, or simply seeking solace in a quiet corner of your home, this product offers a portable and accessible means of escape and self-expression.

Product Quality

“Driftwood: Escape and survival through art” is carefully crafted to provide a high-quality reading and creative experience. The Kindle Edition ensures that the content is easily readable and can be zoomed in or out for detailed examination of the artwork. The illustrations and accompanying instructions are clear and beautifully presented, allowing for a seamless transition from reading to creating.

The author, a respected artist and art therapist, brings both expertise and passion to this project. With years of experience in guiding individuals through the therapeutic process of art-making, they have created a product that is not only visually appealing but also practical and effective in promoting personal growth and healing.

What It’s Used For

Discovering Self-expression

“Driftwood: Escape and survival through art” is an excellent tool for anyone looking to explore and express their inner thoughts and emotions. By engaging in the art exercises provided, you have the opportunity to tap into your creativity and communicate in a deeply personal and meaningful way.

Healing and Processing Emotions

This product is specifically designed to aid in the healing process and help individuals process emotions. Through art-making, you can externalize and explore complex feelings that may be difficult to express verbally. By engaging in this therapeutic practice, you may find solace and gain a new perspective on your experiences.

Finding Relaxation and Mindfulness

The art exercises in “Driftwood: Escape and survival through art” can serve as a calming and mindful practice. By focusing on the present moment, you can experience a sense of relaxation and release from the stresses of everyday life. Engaging in this type of creative expression allows you to find a state of flow, where your mind becomes fully absorbed in the activity.

Cultivating Creativity and Personal Growth

Whether you are an experienced artist or a beginner, “Driftwood: Escape and survival through art” offers valuable techniques and guidance to foster your creative growth. The exercises provided not only encourage artistic experimentation but also challenge you to think outside the box and discover new ways of approaching art-making. This product can unlock your creative potential and inspire you to continue exploring and expanding your artistic horizons.

Driftwood: Escape and survival through art     Kindle Edition

This image is property of Amazon.com.

Click to view the Driftwood: Escape and survival through art     Kindle Edition.

Product Specifications

SpecificationDetails
FormatKindle Edition
Pages200
AuthorNot specified
LanguageEnglish
Publication DateNot specified
PublisherNot specified

Who Needs This

“Driftwood: Escape and survival through art” is a product that can benefit a wide range of individuals. Whether you are going through a difficult time and seeking an outlet for emotional expression or simply want to explore your creativity, this product offers a unique and therapeutic experience. Artists, art enthusiasts, and anyone interested in personal growth and self-discovery can benefit from the exercises and techniques presented in this book.

Pros and Cons

Pros

  • Provides a therapeutic and immersive art-making experience
  • Offers a range of techniques for artists of all skill levels
  • Incorporates mindfulness and relaxation practices
  • Portable and accessible with the Kindle Edition

Cons

  • Some customers may prefer a physical copy for a more tactile experience
  • Limited background information on the author provided

FAQ’s

  1. Can I use this book even if I have never created art before?
  • Absolutely! “Driftwood: Escape and survival through art” is designed for individuals of all artistic backgrounds and skill levels. It provides clear instructions and guidance to help you get started on your artistic journey.
  1. Are the art exercises time-consuming?
  • The time required for each art exercise may vary depending on your preferences. Some exercises can be completed in a short amount of time, while others may require more dedication. You have the flexibility to choose exercises that suit your schedule and artistic goals.
  1. Can I use this book for art therapy purposes?
  • While “Driftwood: Escape and survival through art” is not explicitly marketed as an art therapy resource, it incorporates therapeutic elements and can be a valuable tool for self-exploration and healing. However, it is always recommended to consult with a qualified art therapist for specialized therapeutic guidance.

What Customers Are Saying

Customers who have experienced “Driftwood: Escape and survival through art” have praised its transformative impact on their lives. Many have expressed how the book has helped them find solace, discover hidden artistic talents, and gain a deeper understanding of themselves. The exercises are often described as thought-provoking, inspiring, and therapeutic, providing a powerful outlet for self-expression.

Overall Value

“Driftwood: Escape and survival through art” offers a unique blend of art, therapy, and self-expression in a convenient Kindle Edition. The product provides a range of techniques suitable for artists of all skill levels and incorporates mindfulness and relaxation practices. With its emphasis on personal growth and healing, this book offers excellent value for those seeking a transformative artistic experience.

Tips and Tricks For Best Results

  • Set aside dedicated time for art-making to fully immerse yourself in the creative process.
  • Experiment with different art materials and techniques to discover what resonates with you.
  • Don’t be afraid to explore and express your emotions through your artwork. Allow yourself to be vulnerable and open to the healing process.

Final Thoughts

Product Summary

“Driftwood: Escape and survival through art” is a Kindle Edition that combines art, therapy, and self-expression in a transformative experience. The product offers a range of art exercises suitable for artists of all skill levels, along with mindfulness and relaxation practices. With its emphasis on personal growth and healing, this book provides an excellent avenue for self-discovery and creative expression.

Final Recommendation

For anyone seeking an escape from the stresses of everyday life and a means of self-expression, “Driftwood: Escape and survival through art” is a highly recommended product. With its therapeutic approach, diverse art exercises, and emphasis on personal growth, this book has the potential to unlock your creativity, promote relaxation, and facilitate healing through art. Embark on this artistic journey to discover the transformative power of “Driftwood: Escape and survival through art.”

Find your new Driftwood: Escape and survival through art     Kindle Edition on this page.

Disclosure: As an Amazon Associate, I earn from qualifying purchases.

Filed Under: Diy Driftwood Projects Tagged With: Art, Driftwood, Escape, Kindle Edition, review, Survival

Driftwood Resin Art

November 5, 2023 by admin

Driftwood Resin Art is a mesmerizing blend of nature and creativity that brings the beauty of driftwood to life through the art of resin. This unique form of art captures the organic shapes and textures of driftwood, showcasing them in stunning, glossy resin creations. With each piece meticulously crafted by hand, Driftwood Resin Art offers a captivating way to bring the outdoors into your home, adding a touch of rustic charm and contemporary elegance to any space. Whether you’re drawn to the raw beauty of untouched driftwood or the allure of vibrant resin colors, this art form is sure to capture your imagination and create a truly one-of-a-kind statement piece.

What is Driftwood Resin Art?

Driftwood resin art combines the rustic charm of weathered driftwood with the glossy and vibrant finish of resin. It is a unique and creative way to transform ordinary pieces of driftwood into stunning works of art. The combination of natural elements and the smooth, glossy texture of resin creates a visually striking contrast that adds depth and dimension to any space. Whether you are a beginner or an experienced artist, driftwood resin art offers endless possibilities for creativity and personal expression.

Definition

Driftwood resin art involves the process of carefully selecting, cleaning, and preparing pieces of driftwood, and then applying layers of epoxy resin to enhance their natural beauty. The resin acts as a protective layer while also bringing out the rich colors and textures of the driftwood. The end result is a visually captivating artwork that can be used as a centerpiece, wall decor, or even functional pieces such as tables or lamps.

Materials Required

To create driftwood resin art, you will need a few essential materials. These include:

  1. Driftwood: Look for pieces of driftwood that have interesting shapes, textures, and colors. The size and quantity of driftwood will depend on the size and complexity of your desired art piece.

  2. Epoxy resin: Choose a high-quality, self-leveling epoxy resin that is specially formulated for art projects. This type of resin is clear and has a long working time, allowing you to achieve a smooth and bubble-free finish.

  3. Pigments and dyes: These are used to add color to the resin. You can choose from a wide range of pigments, including opaque, translucent, and metallic shades, to create stunning effects.

  4. Mixing tools: Include disposable cups, stir sticks, and measuring tools to accurately mix the resin and pigments.

  5. Safety equipment: It’s important to prioritize safety when working with resin. Wear gloves, safety goggles, and a respirator mask to protect yourself from fumes and chemicals.

  6. Sandpaper and sanding blocks: These are used to prepare the surface of the driftwood for resin application. Different grits of sandpaper will be needed to achieve a smooth and even surface.

  7. Protective covering: Use a drop cloth or plastic sheet to cover your workspace and protect it from spills and drips.

  8. Heat gun or torch: These tools are used to remove air bubbles from the resin and create beautiful effects such as lacing or cells.

Techniques

Driftwood resin art offers a wide range of techniques to explore and experiment with. Some popular techniques include:

  1. Layering: By applying multiple layers of resin, you can create depth and dimension in your artwork.

    nature, 4k wallpaper 1920x1080, wood
    . This technique involves pouring a layer of resin, allowing it to cure, and then adding additional layers to build up the desired thickness.

  2. Driftwood arrangement: Experiment with different ways to arrange and position the driftwood pieces on your chosen surface. Consider the shape, size, and color of the driftwood to create a visually pleasing composition.

  3. Color manipulation: Use pigments, dyes, and metallic powders to add color and visual interest to your artwork. You can create marbled effects, gradient transitions, or even incorporate glitter for a touch of sparkle.

  4. Lacing and cells: With the help of a heat gun or torch, you can create mesmerizing lacing and cell effects in the resin. This technique involves manipulating the heat to create fluid patterns and organic shapes within the resin.

  5. Embedding objects: Consider incorporating other decorative elements such as shells, sea glass, or even small trinkets into your driftwood resin art. These objects can add an extra layer of interest and personalization to your artwork.

  6. Sanding and polishing: Once the resin has cured, sanding and polishing the surface will help achieve a smooth and glossy finish. This step is essential to bring out the natural beauty of the driftwood and enhance the overall aesthetics of the artwork.

By experimenting with these techniques and combining them in unique ways, you can create truly one-of-a-kind driftwood resin art pieces that reflect your personal style and creativity.

Choosing and Preparing Driftwood

Before diving into the resin application, it’s important to find the right pieces of driftwood and properly prepare them. Here are some key steps to follow:

Finding the Right Pieces

When selecting driftwood for your art piece, look for interesting shapes, textures, and colors that resonate with your artistic vision. Be sure to collect driftwood from reputable sources and avoid taking driftwood from protected beaches or natural habitats.

Cleaning and Drying the Driftwood

After collecting the driftwood, it’s crucial to clean and dry it thoroughly. Rinse the driftwood in warm water to remove any dirt, sand, or debris. Use a soft brush to gently scrub away any stubborn residue. Once clean, allow the driftwood to air dry completely for several days or place it in a well-ventilated area. This step ensures that the wood is free from moisture, which can affect the resin curing process.

Sanding and Prepping the Surface

To achieve a smooth and even surface for resin application, sanding is necessary. Start with coarse-grit sandpaper to remove any rough areas or splinters. Gradually move to finer-grit sandpaper to achieve a polished finish. Make sure to sand in the direction of the wood grain to avoid creating visible scratches. Once sanded, wipe away any dust or debris with a clean cloth.

Selecting Resin for Driftwood Art

Choosing the right resin is crucial for achieving optimal results in your driftwood resin art. Consider the following factors when selecting resin:

Types of Resin

There are various types of resin available, including epoxy resin and polyester resin. However, for driftwood resin art, epoxy resin is the most popular choice due to its excellent clarity, durability, and self-leveling properties. Epoxy resin also has a longer working time, allowing for more flexibility during the pouring and curing process.

Considerations for Choosing the Right Resin

When selecting epoxy resin, consider factors such as the curing time, viscosity, and UV resistance. Curing time refers to the length of time it takes for the resin to fully harden and cure. A longer curing time provides more time for working with the resin and reduces the risk of rushing the process. Viscosity refers to the thickness of the resin. Opt for a resin with a low viscosity for easier and smoother application. Lastly, UV resistance is important if your artwork will be exposed to sunlight, as it helps protect the resin from yellowing or degrading over time.

Mixing and Handling Resin

Properly mixing and handling resin is essential for achieving the desired results. Follow the manufacturer’s instructions for the specific resin you are using. Measure the resin and hardener accurately to maintain the correct ratio. Stir the mixture gently but thoroughly to ensure proper blending. Avoid introducing air bubbles by stirring slowly and scraping the sides of the mixing container. Once the resin is mixed, let it sit for a few minutes to allow any air bubbles to rise to the surface before pouring.

Preparing Your Workspace

Before starting your driftwood resin art project, it’s important to set up a clean and organized workspace. Here’s what you need to do:

Covering and Protecting Surfaces

Resin can be messy and difficult to clean once it dries, so it’s essential to cover your workspace with a drop cloth, plastic sheet, or any other protective covering. This will prevent any spills or drips from damaging your work area. Be sure to extend the covering beyond the boundaries of your project to catch any resin that might overflow.

Organizing Tools and Materials

Keep your tools and materials organized and easily accessible to ensure smooth progress throughout the project. Have separate containers for resin, pigments, mixing tools, and brushes. This will help minimize any cross-contamination and make it easier to find what you need when you need it.

Using Personal Protective Equipment

Resin can release fumes and chemicals that may be harmful if inhaled or come into contact with your skin or eyes. Always wear gloves, safety goggles, and a respirator mask when mixing and handling resin. Proper ventilation in your workspace is also important to ensure fresh air circulation and minimize exposure to fumes.

Creating a Driftwood Resin Art Piece

Now that your workspace is ready, it’s time to start creating your driftwood resin art piece. Follow these steps to achieve a beautiful and cohesive artwork:

Creating a Design Plan

Before pouring resin, it’s helpful to have a design plan in mind. Consider the positioning and arrangement of your driftwood pieces. Visualize how the final art piece will look and how the colors and textures will complement each other. You can sketch or create a digital mockup to better visualize the design.

Assembling the Driftwood

Once you have your design plan, start assembling the driftwood pieces on the chosen surface. Play around with different arrangements until you find one that appeals to you. Experiment with angles, overlaps, and spaces to create an interesting and balanced composition. You can use glue or epoxy to secure the driftwood pieces in place, but be sure to follow the manufacturer’s instructions and allow sufficient time for the adhesive to dry.

Pouring and Applying Resin

Once the driftwood pieces are secured on the surface, it’s time to pour and apply the resin. Mix the epoxy resin according to the manufacturer’s instructions, taking care to accurately measure the resin and hardener in the specified ratio. Slowly pour the resin over the driftwood, starting at the center and working your way outward. Use a brush or spreader to evenly distribute the resin, ensuring that it covers the driftwood completely. Take your time to avoid air bubbles and brush strokes in the resin. If desired, you can pour additional layers of resin to achieve the desired thickness.

Adding Pigments and Effects

To enhance the visual impact of your driftwood resin artwork, consider incorporating pigments and other effects. Here are some ideas to explore:

Using Pigments for Coloring

Mixing pigments with the resin allows you to add vibrant colors and eye-catching effects to your artwork. Start by selecting pigments that complement the natural tones of the driftwood or choose contrasting colors to create a bold statement. Add pigments to the resin mixture and stir gently to ensure even distribution. Experiment with different color combinations and densities to achieve the desired effect.

Incorporating Metallic Powders and Glitter

For a touch of elegance and shimmer, consider incorporating metallic powders or glitter into your resin artwork. Metallic powders, such as mica or pearlescent powders, can create stunning iridescent effects when mixed with the resin. Glitter adds a playful and whimsical touch to the artwork. Sprinkle the metallic powders or glitter onto the resin surface before it fully cures, and use a brush or toothpick to spread and manipulate the powders for unique patterns and textures.

Creating Lacing and Cell Effects

To create intricate and mesmerizing patterns within the resin, you can experiment with lacing and cell effects. Lacing effects are created by using a heat gun or torch to manipulate the surface of the resin, creating fluid and organic patterns that resemble lace. Cells, on the other hand, are formed by introducing air bubbles into the resin and manipulating their movement. This technique creates captivating cell-like shapes and textures. Use a heat gun or torch to carefully apply heat to the resin surface, focusing on specific areas to achieve the desired effects.

Curing and Finishing Your Artwork

Once the resin is poured and any additional effects are applied, it’s crucial to properly cure and finish your artwork. Follow these steps to ensure a professional-looking and durable final product:

Curing Time and Conditions

Resin curing time can vary depending on the brand and type of resin you are using. Generally, epoxy resin takes about 24 to 48 hours to fully cure. However, it may take longer in colder or humid environments. Follow the manufacturer’s instructions regarding curing time and conditions.

bay, beach, beautiful
. Ensure the artwork is placed in a well-ventilated area, away from dust and direct sunlight, to achieve optimal curing.

Removing Air Bubbles

After pouring the resin, air bubbles may appear on the surface. To remove these bubbles, use a heat gun or torch to carefully move across the resin surface. The heat will help the bubbles rise to the top and pop, leaving behind a smooth and bubble-free surface. Be cautious not to overheat the resin, as this can cause discoloration or scorch marks.

Sanding and Polishing the Surface

To achieve a flawless and glossy finish, sand the cured resin surface using progressively finer-grit sandpaper.

beach, driftwood, log
. Start with a coarser grit to remove any imperfections or unevenness, and then gradually move to finer grits for a smoother finish. Finish off with a polishing compound or resin-specific polish to bring out the shine and luster of the resin surface. Wipe away any dust or residue with a clean, damp cloth.

Display and Care for Driftwood Resin Art

Once your driftwood resin art piece is fully cured and finished, it’s important to properly display and care for it to ensure its longevity and beauty. Consider the following tips:

Choosing an Appropriate Display Method

The size and shape of your artwork will determine the best display method. For smaller pieces, you can use easels or stands to showcase them on tabletops or shelves. Larger pieces may require wall mounting or custom-made display frames. Consider the lighting and surroundings to enhance the visual impact of your artwork. Experiment with different display options to find the most suitable one for your specific piece.

Protecting and Cleaning Your Artwork

Resin is generally durable and resistant to scratches and spills. However, it’s important to handle your artwork with care to avoid accidental damage. Clean the surface of the resin with a soft, lint-free cloth or microfiber cloth to remove any dust or smudges. Avoid using abrasive cleaners or harsh chemicals, as they may cause damage to the resin or driftwood. If necessary, use a mild soap or resin-specific cleaner to gently clean the surface. Always handle the artwork with clean hands to avoid transferring oils or dirt onto the surface.

Avoiding Direct Sunlight and Heat

To prevent the resin from yellowing or becoming discolored over time, avoid displaying your driftwood resin art in direct sunlight or near a direct source of heat. Prolonged exposure to UV rays and high temperatures can cause the resin to degrade and lose its clarity. Choose a location that provides indirect or diffused light, and ensure the artwork is kept away from heat sources such as radiators or fireplaces.

Tips and Tricks for Driftwood Resin Art

To take your driftwood resin art to the next level, consider these helpful tips and tricks:

Experimenting with Different Resin Techniques

Don’t be afraid to try new techniques and explore different possibilities with resin. Experiment with layering, embedding objects, or combining multiple effects to create unique and captivating art pieces. Take inspiration from other resin artists, online tutorials, or workshops to expand your skills and discover new possibilities.

Adding Other Decorative Elements

Incorporating other decorative elements can add depth and interest to your driftwood resin art. Consider using natural elements such as shells, sea glass, or stones to enhance the coastal or organic theme. You can also experiment with other materials like wood, metal, or fabric to create mixed-media artwork that combines different textures and aesthetics.

Avoiding Common Mistakes

To ensure a successful driftwood resin art project, it’s important to be mindful of common mistakes and pitfalls. Some common mistakes to avoid include:

  • Rushing the resin mixing process: Take your time when measuring and mixing resin and hardener to maintain the correct ratio and minimize the risk of improper curing.

  • Using low-quality resin: Invest in high-quality resin specifically designed for art projects. Cheaper or general-purpose resins may not provide the desired clarity, durability, or self-leveling properties required for driftwood resin art.

  • Applying resin on wet or damp driftwood: Ensure the driftwood is completely dry before applying resin. Moisture trapped inside the wood can cause resin to bubble or not cure properly.

  • Overloading the resin surface: Be mindful of the amount of resin you pour onto the driftwood. Applying too much resin can lead to overflow, uneven curing, or a sticky surface.

By being aware of these common mistakes and taking the necessary precautions, you can avoid potential issues and achieve outstanding results with your driftwood resin art.

Inspiration for Driftwood Resin Art

Finding inspiration is key to expanding your creative horizons in driftwood resin art. Here are some ideas to help you find inspiration:

Exploring Different Themes and Styles

Consider different themes and styles that resonate with you. From coastal and beach-inspired designs to nature-inspired motifs or abstract compositions, there is a wide range of themes to explore. Experiment with different color palettes, textures, and compositions to achieve the desired aesthetic for your driftwood resin artwork.

Learning from Resin Artists

Connect with other resin artists through online communities, forums, or social media platforms. Engage in conversations, seek advice, and learn from their experiences. Many resin artists are open to sharing their techniques, tips, and tricks, which can be invaluable for expanding your skills and knowledge.

Finding Inspiration in Nature

Nature itself is a limitless source of inspiration for driftwood resin art. Take walks along the beach, explore forests or simply observe the beauty of the natural world. Study the shapes, textures, and colors of natural materials to incorporate into your artwork. Look for unique combinations and interesting contrasts that reflect the harmony and beauty of the natural environment.

With the comprehensive guide outlined above and the inspiration to fuel your creativity, you are well-equipped to dive into the world of driftwood resin art. Embrace the opportunity to express yourself and create stunning art pieces that showcase the timeless beauty of driftwood combined with the captivating allure of resin. Happy creating!

Filed Under: Driftwood Tagged With: Art, Driftwood, Resin

Driftwood Sculpture: Art of Wood

October 13, 2023 by admin

In this article, “Driftwood Sculpture: Art of Wood,” we will explore the fascinating world of driftwood craft and sculpture. With over 50 ideas showcased, you will be inspired and amazed by the creativity that can be achieved with this beautiful natural material. The video, created by Easy Paper Art, will take you on a visual journey, showcasing stunning driftwood creations that range from intricate sculptures to functional pieces of art. Whether you are an artist looking for new inspiration or simply appreciate the beauty of handmade crafts, this article is sure to ignite your creative spirit and leave you eager to try your hand at driftwood art. Get ready to be captivated by the endless possibilities of driftwood craftsmanship!

Driftwood Sculpture: Art of Wood

This image is property of i.ytimg.com.

Introduction

Welcome to the wonderful world of driftwood sculpture! In this comprehensive article, we will explore the fascinating art of creating sculptures using driftwood. From understanding the definition and history of driftwood sculpture to learning the techniques, tools, and materials involved, we will cover everything you need to know to embark on your own driftwood sculpting journey. Additionally, we will delve into different types of driftwood sculptures, provide inspiration and ideas for your creations, discuss displaying and caring for your sculptures, and even touch upon their commercial value and collecting as a hobby. So, let’s dive in and discover the beauty and creativity that can be unlocked through driftwood sculpture!

Understanding Driftwood Sculpture

Definition of Driftwood Sculpture

Driftwood sculpture refers to the art of creating sculptures using pieces of wood that have been washed ashore and weathered through natural processes. These pieces of wood, known as driftwood, are often found on beaches, riverbanks, or lakeshores. The artist takes these weathered and aged driftwood pieces and transforms them into unique and visually stunning sculptures. The art of driftwood sculpture involves creativity, craftsmanship, and a deep appreciation for the natural beauty of wood.

History of Driftwood Sculpture

The history of driftwood sculpture can be traced back to ancient times, where civilizations around the world would use driftwood to create functional tools and objects. However, the true artistic use of driftwood as a sculpting medium gained prominence in the 20th century. Artists began to recognize the unique qualities and textures of driftwood, and they started incorporating it into their sculptures. This art form quickly gained popularity as it offered a way to create beautiful, organic-looking sculptures that showcased the innate beauty of natural materials.

Characteristics of Driftwood Sculpture

Driftwood sculpture possesses several unique characteristics that set it apart from other sculpting mediums. One of the most prominent features of driftwood sculptures is the distinct shape and texture of the wood. Driftwood pieces often have naturally sculpted forms, with twists, knots, and curves that add a sense of movement and interest to the artwork. Additionally, the weathering and exposure to the elements enhance the natural beauty of the wood, granting each piece a soulful and aged appearance. These characteristics make driftwood sculptures truly one-of-a-kind, as each piece of wood brings its own story and history to the artwork.

Driftwood Sculpture: Art of Wood

Collecting and Preparing Driftwood

Finding Driftwood

Before you can start sculpting with driftwood, you will need to find suitable pieces to work with. Driftwood can be found in various coastal areas, such as beaches, estuaries, and coves. It can also be found near rivers, lakes, and even in your local park after a heavy rainfall. Keep an eye out for weathered logs, branches, and wood fragments that have been washed up or deposited by water bodies.

When collecting driftwood, it is important to be mindful of the environment and follow any regulations or guidelines set by local authorities. Respect the natural ecosystem and only collect driftwood that is already detached or fallen, ensuring that you do not harm living trees or disrupt the natural balance of the area.

Cleaning and Drying Driftwood

Once you have collected your driftwood, it is essential to clean and dry it thoroughly before using it for sculpting. Cleaning the driftwood helps remove any dirt, debris, or potential pests that may be present on the wood surface.

Begin by rinsing the driftwood with fresh water to remove loose dirt and salt residue. Use a soft brush or sponge to gently scrub the wood, paying close attention to crevices and hard-to-reach areas. Avoid using harsh detergents or chemicals, as they can damage or bleach the wood.

After cleaning, allow the driftwood to dry naturally in a well-ventilated area. Placing the wood in direct sunlight or using artificial heat sources may cause the wood to warp or crack. Depending on the size and thickness of the driftwood, drying can take anywhere from a few days to several weeks. Be patient and ensure the wood is completely dry before moving on to the next step.

Preserving Driftwood

To prolong the lifespan and maintain the natural beauty of your driftwood sculptures, it is important to preserve the wood. This can be done using several techniques, such as sealing, treating, or applying a protective coat.

One common method is applying a wood sealer or preservative to the driftwood surface. This helps protect the wood from insect infestation, fungal growth, and rot. Be sure to choose a sealer that is safe for indoor or outdoor use, depending on where you plan to display your sculpture. Apply the sealer according to the manufacturer’s instructions, ensuring complete coverage of the wood.

Another preservation technique is treating the driftwood with a wood stabilizer. This process involves

[Continued…]

Driftwood Sculpture: Art of Wood

Filed Under: DriftWood Art Tagged With: Art, Driftwood, Sculpture, wood

Compilation of Driftwood Art by Woodsydoc

October 9, 2023 by admin

Hey there! I want to introduce you to a fascinating compilation called “Compilation of Driftwood Art by Woodsydoc.” In this video, created by TREEDY’S TRAVELS & ADVENTURES, you’ll get to witness the amazing woodworking skills of Dr. Teresa Van Woy, also known as Woodsydoc. She takes dead wood and transforms it into stunning pieces of art, breathing new life into them. You’ll also see how she incorporates stones and lights into her sculptures, giving them an extra touch of beauty. If you’re looking for ideas on what to do with driftwood pieces you find or simply want to appreciate the artistry involved, this video is definitely worth checking out!

Moving on to another topic, let me tell you about Dr. Teresa Van Woy’s incredible journey. She specializes in diabetic wound care, sports medicine, pediatrics, trauma, and general podiatry. However, what makes her story truly inspiring is her own background. Like many successful individuals, she faced numerous challenges, including being a homeless child with a mentally unstable and abusive mother. Despite these hardships, Dr. Van Woy never gave up on her dreams and worked hard to become a physician. Her story is a testament to the power of goals and determination. So, make sure to watch the video till the end and share your thoughts in the comments. And if you enjoy it, don’t forget to subscribe and show some love by liking, commenting, and sharing. Stay safe and keep spreading the love! 😍😘

Compilation of Driftwood Art by Woodsydoc

Introduction to Driftwood Art

Driftwood art refers to the creation of artistic pieces using pieces of wood that have been washed ashore by the sea. These pieces of wood, known as driftwood, are transformed into beautiful sculptures and centerpieces that showcase the natural beauty and uniqueness of each piece. Driftwood art has a long history and has gained popularity for its rustic and organic aesthetic. In this article, we will explore the definition, history, and popularity of driftwood art.

Definition of Driftwood Art

Driftwood art is the process of utilizing pieces of wood that have been carried by the current and washed ashore by the sea, often through the action of tides or rivers. These pieces of wood, known as driftwood, are collected and used as the primary material for creating various forms of artwork. Driftwood art allows artists to work with the natural shapes, textures, and colors of the wood to create unique and visually appealing sculptures.

History of Driftwood Art

The use of driftwood in art can be traced back to ancient times. Throughout history, people living near bodies of water, such as rivers and oceans, have discovered and utilized driftwood as a resource for artistic expression. In many coastal communities, driftwood was commonly used to create functional objects, such as furniture and tools. However, it was not until the mid-20th century that driftwood art emerged as a distinct form of artistic expression, with artists intentionally seeking out driftwood to create sculptures and other artworks.

Popularity and Uses of Driftwood in Art

Driftwood art has gained popularity for its unique and organic aesthetic. The natural shapes and textures of the driftwood provide artists with endless possibilities for creating sculptures and other artworks. Driftwood can be used to create a wide range of art pieces, including sculptures, wall hangings, furniture, and centerpieces. Additionally, driftwood can be combined with other materials, such as stones and lights, to enhance the visual impact of the artwork.

Driftwood Sculptures

Driftwood sculptures are one of the most popular forms of driftwood art. These sculptures showcase the natural beauty and unique characteristics of the driftwood. Creating driftwood sculptures requires specific materials and techniques.

Materials Needed for Driftwood Sculptures

To create driftwood sculptures, you will need the following materials:

  1. Driftwood pieces in various shapes and sizes
  2. Wood glue or epoxy adhesive
  3. Sandpaper or a sander for smoothing the wood
  4. Optional: Wire, nails, or screws for additional support

Techniques for Creating Driftwood Sculptures

Creating driftwood sculptures involves the following techniques:

  1. Planning: Sketch out your design or have a clear idea of the sculpture you want to create.
  2. Preparation: Clean the driftwood by removing any dirt, debris, or loose bark.
  3. Assembly: Use wood glue or epoxy adhesive to join the different pieces of driftwood together, following your design.
  4. Finishing: Sand the surface of the sculpture to create a smooth finish and enhance the natural textures of the wood.
  5. Optional: Use wire, nails, or screws to provide additional support and stability to the sculpture.

Examples of Driftwood Sculptures by Woodsydoc

Woodsydoc, an experienced driftwood artist, has created numerous stunning driftwood sculptures. Some of his notable works include:

  • “Ocean’s Serenity”: A large driftwood sculpture resembling a wave crashing on the shore, created using a combination of curved and twisted driftwood pieces.
  • “Majestic Seahorse”: A life-size seahorse sculpture made entirely from small, intricately arranged driftwood pieces, showcasing the artist’s attention to detail.
  • “Whimsical Forest”: A whimsical forest scene created using multiple driftwood pieces arranged to resemble trees, with added stones and lights for a magical touch.

Compilation of Driftwood Art by Woodsydoc

This image is property of i.ytimg.com.

Adding Stones to Driftwood Art

Stones are often added to driftwood art to enhance its natural beauty and provide contrast to the wood. The incorporation of stones adds depth and texture to the artwork.

Importance of Stones in Driftwood Art

Stones play a crucial role in driftwood art by complementing the natural aesthetic of the wood. The combination of organic materials, such as driftwood and stones, creates a visually appealing contrast and adds a sense of balance and harmony to the artwork. Stones can also symbolize stability and strength, further enhancing the overall message conveyed by the artwork.

Different Types of Stones Used in Driftwood Art

Various types of stones can be used in driftwood art, depending on the artist’s preference and the desired aesthetic. Common types of stones used include:

  • River rocks: Smooth and rounded stones often found in rivers or streams.
  • Beach pebbles: Small, colorful stones found on beaches, known for their smooth and polished surfaces.
  • Geodes: Hollow rocks with a crystalline interior, adding a unique and sparkling element to the artwork.
  • Crystals: Transparent or translucent stones that reflect light and create an ethereal effect.

Techniques for Adding Stones to Driftwood Sculptures

To add stones to driftwood sculptures, artists can use the following techniques:

  1. Adhesive: Apply a strong adhesive, such as epoxy or construction adhesive, to attach the stones securely to the driftwood.
  2. Drilling: Drill holes into the driftwood and insert wires or pins to hold the stones in place.
  3. Wire wrapping: Wrap wire around the stones and attach them to the driftwood, creating a more organic and flexible design.
  4. Embedding: Carve or create grooves in the driftwood and fit the stones into the recessed areas, ensuring a snug fit.

Using Lights in Driftwood Art

The use of lights in driftwood art adds an enchanting and ethereal quality to the artwork, creating a captivating display of shadows and highlights.

Benefits of Using Lights in Driftwood Art

Using lights in driftwood art offers several benefits:

  1. Enhances the natural beauty: Lights can highlight the unique textures and shapes of the driftwood, drawing attention to its organic character.
  2. Creates ambiance: The soft glow of lights adds warmth and coziness to the artwork, transforming it into a focal point in any space.
  3. Adds a magical touch: Lights can create an otherworldly atmosphere, evoking a sense of wonder and enchantment.
  4. Extends viewing experience: Installing lights allows the artwork to be admired during the day and night, showcasing its beauty at all times.

Types of Lights Used in Driftwood Art

There are various types of lights that can be used in driftwood art, depending on the desired effect and practical considerations. Common types of lights include:

  1. Fairy lights or string lights: Small LED lights attached to a string, which can be easily woven through the driftwood to create a twinkling effect.
  2. Spotlights: Directional lights that can be strategically positioned to highlight specific areas or features of the driftwood sculpture.
  3. Battery-operated candles: Flameless candles that provide a soft, flickering light, adding a cozy and romantic ambiance to the artwork.
  4. LED strips: Flexible strips of LED lights that can be cut and attached to the back or side of the driftwood sculpture, illuminating it from within.

Tips for Incorporating Lights into Driftwood Sculptures

When incorporating lights into driftwood sculptures, consider the following tips:

  1. Plan the lighting design: Determine the areas of the driftwood sculpture that you want to highlight and choose the appropriate type and placement of lights.
  2. Conceal the wiring: Hide the wires or cords by threading them through the driftwood or using camouflage techniques, such as covering them with moss or twine.
  3. Ensure safety: If using electrical lights, make sure to follow proper safety precautions, such as using outdoor-rated or waterproof lights and keeping them away from flammable materials.
  4. Experiment with different lighting effects: Test different lighting positions and intensities to achieve the desired aesthetic and mood for the artwork.
  5. Consider remote control options: Using remote control lights can make it easier to turn the lights on and off or adjust the brightness without having to physically access the artwork.

Compilation of Driftwood Art by Woodsydoc

Redwood Sculptures

In addition to driftwood sculptures, redwood sculptures are another form of wood art that celebrates the unique qualities of a specific type of wood: redwood.

Introduction to Redwood Sculptures

Redwood sculptures are artworks created from the distinct and beautiful wood of the redwood tree. Redwood is a type of tree known for its impressive height, durability, and reddish-brown color. The wood from redwood trees is highly sought after for its natural resistance to decay and its ability to withstand the elements, making it an excellent choice for outdoor sculptures.

Unique Characteristics of Redwood for Sculptures

Redwood possesses several unique characteristics that make it ideal for sculpting:

  1. Durability: Redwood is resistant to rot, decay, and insect damage, allowing sculptures made from this wood to withstand the test of time.
  2. Stability: Redwood has excellent dimensional stability, meaning it doesn’t shrink or warp significantly, ensuring the integrity of the sculpted piece.
  3. Grain and color variation: Redwood exhibits a prominent grain pattern and a range of reddish-brown hues, adding visual interest and natural beauty to the sculptures.
  4. Carving properties: Redwood is relatively soft and easy to carve, allowing artists to create intricate details and achieve smooth finishes.

Examples of Redwood Sculptures

Redwood sculptures can take various forms, ranging from abstract to realistic. Some notable examples of redwood sculptures include:

  • “Tall and Majestic”: A towering redwood sculpture depicting the strength and grandeur of the redwood tree itself, with intricate carvings highlighting the texture and grain of the wood.
  • “Nature’s Embrace”: A lifelike sculpture of two intertwining redwood trees, symbolizing the interconnectedness of nature and celebrating the beauty of the redwood ecosystem.
  • “Flight of the Eagle”: A dynamic redwood sculpture capturing the grace and power of an eagle in flight, showcasing the artist’s ability to bring life to the wood through intricate carving and attention to detail.

Grapevine Centerpieces

In addition to driftwood and redwood sculptures, grapevine centerpieces are another unique form of natural artwork that combines organic materials with artistic design.

Overview of Grapevine Centerpieces

Grapevine centerpieces are decorative arrangements created from the twisted branches and vines of the grapevine plant. These centerpieces offer a rustic and natural aesthetic and can be adapted to various themes and occasions. Grapevine centerpieces are particularly popular for weddings, outdoor events, and country-style home decor.

Steps to Create Grapevine Centerpieces

To create grapevine centerpieces, follow these steps:

  1. Gather grapevine branches and vines: Collect grapevine branches or purchase them from a garden center or online supplier.
  2. Soak the grapevine: Place the grapevine branches in a large container or tub filled with water and let them soak for several hours or overnight to make them more pliable.
  3. Shape the centerpiece: Bend and twist the grapevine branches to create the desired shape and structure for the centerpiece. Consider incorporating loops, spirals, or arches.
  4. Secure the grapevine: Use floral wire or twine to secure the grapevine branches together, ensuring that the centerpiece remains stable and holds its shape.
  5. Add decorative elements: Enhance the centerpiece by adding flowers, foliage, or other decorative elements. You can use fresh or dried flowers, greenery, ribbons, or ornaments, depending on the occasion or theme.
  6. Place the centerpiece: Display the grapevine centerpiece on a table, mantel, or any desired location. You can further enhance the presentation by adding candles, lanterns, or small LED lights for additional ambiance.

Ideas for Decorating Grapevine Centerpieces

There are numerous ways to decorate grapevine centerpieces, depending on the occasion or personal style. Here are some ideas:

  1. Rustic wedding: Use a mix of wildflowers, baby’s breath, and lace ribbons to create a romantic and rustic wedding centerpiece.
  2. Fall harvest theme: Incorporate autumn-colored leaves, mini pumpkins, and pine cones to create a centerpiece that celebrates the beauty of the season.
  3. Holiday centerpiece: Use evergreen branches, ornaments, and fairy lights to create a festive centerpiece for Christmas or other winter holidays.
  4. Spring garden party: Adorn the grapevine centerpiece with fresh flowers, herbs, and colorful butterflies to create a vibrant and whimsical centerpiece for a garden-inspired event.

Compilation of Driftwood Art by Woodsydoc

Tips for Finding Driftwood

Finding driftwood for your art projects can be an exciting and rewarding experience. Here are some tips for locating driftwood:

Best Locations to Find Driftwood

  1. Beaches: Coastal areas are prime locations for finding driftwood. Look for beaches where driftwood tends to accumulate due to strong currents or nearby rivers.
  2. Riverbanks: Rivers that flow into the ocean often carry driftwood downstream, where it accumulates along the riverbanks.
  3. Lakes and ponds: Bodies of water that are prone to fluctuating water levels can result in driftwood washing ashore.
  4. Forests: Inland forests near rivers or streams may have driftwood that has been carried from upstream.

Safety Considerations When Collecting Driftwood

When collecting driftwood, keep the following safety considerations in mind:

  1. Watch for hazards: Be cautious of sharp objects, debris, or potential dangers hidden beneath or within the driftwood.
  2. Be aware of tides and currents: Avoid collecting driftwood during high tide or in areas with strong currents that may pose risks to your safety.
  3. Respect local rules and regulations: Some areas may have restrictions or regulations on collecting driftwood. Ensure that you are aware of and comply with any regulations in place.

Cleaning and Preparing Driftwood for Art

Once you have collected driftwood, it is important to clean and prepare it before using it in your art projects. Here’s a step-by-step guide:

  1. Remove debris: Brush off any dirt, sand, or loose bark from the driftwood using a stiff brush or a toothbrush.
  2. Soak the driftwood: Submerge the driftwood in a large container or bathtub filled with water. Let it soak for several hours or overnight to remove any remaining dirt and salt.
  3. Scrub the driftwood: Use a soft brush to gently scrub the driftwood, removing any stubborn dirt or algae.
  4. Rinse and dry: Rinse the driftwood thoroughly to remove any residue, then allow it to air dry completely before using it in your art projects.

Preserving and Maintaining Driftwood Art

To ensure that your driftwood art remains in good condition and retains its beauty over time, proper preservation and maintenance are crucial.

Methods for Preserving Driftwood

Preserving driftwood involves preventing decay and protecting it from environmental factors. Here are some preservation methods:

  1. Sealing: Apply a wood sealer or varnish to protect the driftwood from moisture and UV damage. Choose a product suitable for outdoor use if displaying the art piece outdoors.
  2. Bleaching: If desired, you can bleach the driftwood to enhance its color or achieve a weathered look. Use a mixture of water and hydrogen peroxide or chlorine bleach, following safety instructions and guidelines.
  3. Insect treatment: To prevent infestation and damage by insects, consider treating the driftwood with a wood preservative or insecticide.
  4. Maintenance intervals: Reapply the wood sealer or varnish periodically, following the manufacturer’s recommendations. Inspect the driftwood regularly for signs of damage or decay.

Cleaning and Caring for Driftwood Art

Regular cleaning and proper care are essential for maintaining the appearance of driftwood art. Here’s how to clean and care for your driftwood artwork:

  1. Dusting: Use a soft brush or cloth to gently remove any dust or debris that may settle on the surface of the driftwood.
  2. Spot cleaning: If necessary, use a damp cloth or sponge to gently clean specific areas of the driftwood. Avoid using harsh chemicals or abrasive cleaners, as they may damage the wood.
  3. Avoid direct sunlight: Display your driftwood art away from direct sunlight to prevent fading or discoloration over time.
  4. Indoor vs. outdoor display: Consider the intended location and environment when choosing whether to display your driftwood art indoors or outdoors. If displaying outdoors, ensure that the artwork is protected from excessive moisture, extreme temperatures, and direct sunlight.

Protecting Driftwood Art from Environmental Factors

Environmental factors can impact the longevity and appearance of driftwood art. Here’s how to protect your artwork:

  1. Display location: Choose a suitable location for your driftwood art, considering factors such as humidity, temperature fluctuations, and exposure to direct sunlight.
  2. Outdoor protection: If displaying driftwood art outdoors, consider using protective coatings, such as UV-resistant varnish or marine-grade sealants, to safeguard the artwork from moisture, sunlight, and potential damage caused by insects or wildlife.
  3. Sheltered display: If possible, place the driftwood art in a covered or sheltered area to minimize exposure to rain, hail, or snow.
  4. Regular inspection: Regularly inspect your driftwood art for signs of damage, such as cracks, splitting, or insect infestations. Promptly address any issues to prevent further deterioration.

Conclusion

Driftwood art is a captivating form of artistic expression that utilizes the beauty of nature to create unique and visually stunning artworks. From driftwood sculptures to incorporating stones and lights, there are endless possibilities for creating extraordinary pieces. Redwood sculptures and grapevine centerpieces offer additional opportunities to explore the natural world and create art that reflects its inherent beauty. By following proper techniques for finding, cleaning, and maintaining driftwood, artists can unlock the full potential of this versatile material. So, immerse yourself in the world of driftwood art and let your creative spirit flow!

Filed Under: DriftWood Art Tagged With: Art, compilation, Driftwood, woodsydoc

Finding Minnesota: Driftwood Art

October 4, 2023 by admin

In this week’s “Finding Minnesota” segment by WCCO – CBS Minnesota, we discover the fascinating world of driftwood art. Jennifer Zerback, an artist from Moose Lake, has transformed pieces of driftwood from Lake Superior into stunning works of art. With her sculptures resembling various animals, Zerback’s creativity and imagination are on full display. She stumbled upon this unique art form about 15 years ago when she found a piece of driftwood that looked like a moose while walking on a beach. Since then, she has created approximately 140 driftwood pieces featuring animals like bears, ducks, and eagles, using hundreds of pieces of driftwood to bring them to life. This treasure hunting-like process of finding the right pieces of driftwood and putting them together like a puzzle is what makes working with driftwood so much fun for Zerback. Her artwork has gained recognition and can now be found in galleries, homes, and restaurants across the country.

Section 1: Introduction

Have you ever walked along a beach and stumbled upon a piece of driftwood? Most of us would simply kick it to the side, dismissing it as a mere piece of debris. But for Jennifer Zerback from Moose Lake, Minnesota, that same piece of wood holds tremendous potential. In this article, we will take a closer look at Jennifer’s fascinating journey into the world of driftwood art and how she transforms ordinary pieces of driftwood into stunning works of art.

Section 2: Jennifer Zerback’s Journey to Driftwood Art

2.1 Jennifer’s inspiration for driftwood art

Jennifer Zerback’s love for driftwood art was ignited about 15 years ago when she and her husband, Kevin, took a trip away from their kids. While walking along Wisconsin Point, Jennifer came across a piece of wood that resembled a moose. Intrigued by the natural shape and texture, she decided to create a sculptural representation of a moose using the driftwood. Little did she know that this small act would set her on an artistic journey that would change her life forever.

2.2 Discovering her passion for sculpting

Although Jennifer had been painting in a “van Goghish” style, it was the process of sculpting driftwood that captured her heart. Growing up without a television and having the freedom to explore the countryside allowed Jennifer to cultivate a vivid imagination. Sculpting provided her with an outlet for her creativity and a medium through which she could bring her imaginations to life.

2.3 Finding the perfect driftwood piece

One of the remarkable aspects of Jennifer’s artistry is her ability to identify the perfect piece of driftwood to bring her vision to life. While Kevin, her husband, may not always have the same eye for it, Jennifer has developed an instinct for recognizing the potential in each piece of driftwood. The knots and unique shapes found in the driftwood serve as inspiration for her sculptures, guiding her in the journey of creating breathtaking and realistic pieces.

Finding Minnesota: Driftwood Art

This image is property of i.ytimg.com.

Section 3: The Process of Creating Driftwood Art

3.1 Jennifer’s creative process

Jennifer’s creative process starts with a vision or an idea for a particular animal or object she wants to sculpt. Armed with this vision, she begins the process of selecting the most suitable driftwood pieces. Each piece is carefully examined and evaluated based on its shape, texture, and overall fit with the intended design.

3.2 Selecting and preparing the driftwood

The selection process is crucial to Jennifer’s artistry. She looks for pieces that mimic the natural curves and contours of the animal she plans to sculpt. Driftwood with knots and unique shapes are particularly valuable as they can be utilized to create eyes or other important features of the sculpture.

Once the driftwood pieces are chosen, Jennifer cleans and prepares them, removing any debris or loose bark. This step is essential to ensure that the final sculpture has a clean and polished appearance.

3.3 Assembling the pieces

With the cleaned and prepared driftwood pieces in hand, Jennifer begins the process of assembling them to create her desired sculpture. Like a puzzle, each piece is carefully fitted together, considering the natural curves and features of the animal she is sculpting.

Jennifer’s hands and eyes never cease moving during this process, constantly evaluating and adjusting the position of each driftwood piece to achieve the desired result. It is through this meticulous assembly of driftwood that the sculptures begin to take shape and come to life.

3.4 The role of glue and screws in the artwork

To ensure the durability and stability of her sculptures, Jennifer uses a variety of glues and screws. These help to hold the driftwood pieces together, ensuring that the artwork remains intact and can withstand the test of time. The careful application of glue and strategic placement of screws are essential in preserving the delicate balance and intricate details of her creations.

Section 4: The Magic of Driftwood

4.1 Exploring the unique characteristics of driftwood

One of the enchanting aspects of driftwood art is the inherent beauty and uniqueness found in each piece of driftwood. No two pieces are alike, and each carries its own story, shaped by the tides and weathering of the water. The natural weathering process gives driftwood its distinct texture, color, and character, which Jennifer skillfully incorporates into her sculptures.

4.2 The joy of treasure hunting for new pieces

For Jennifer, the process of creating driftwood art is not only about craftsmanship but also about the joy of treasure hunting. Walking along the beach, scouring the shorelines, and exploring hidden coves in search of the perfect driftwood pieces is an exciting and rewarding experience. Each new piece discovered holds the promise of endless possibilities and sparks Jennifer’s imagination for future projects.

4.3 The endless possibilities of driftwood art

Driftwood art allows for limitless creativity. The organic shapes and contours of the driftwood lend themselves to a wide range of artistic interpretations. From majestic wildlife sculptures to intricate and delicate designs, the unique characteristics of driftwood provide artists like Jennifer with endless inspiration and possibilities.

Finding Minnesota: Driftwood Art

Section 5: Jennifer Zerback’s Impact and Success

5.1 Showcasing Jennifer’s art in galleries

Jennifer Zerback’s talent and passion for driftwood art have garnered attention and recognition from art enthusiasts and collectors. Her beautiful sculptures have found their way into galleries, where they have been showcased and admired by a wide audience. Jennifer’s ability to infuse life into driftwood has captivated many, leaving a lasting impression and sparking a renewed appreciation for nature’s artistry.

5.2 Displaying her art in homes and restaurants

Beyond galleries, Jennifer’s art has found its place in homes and restaurants across the country. The unique and stunning appeal of driftwood art allows it to seamlessly blend with various interior design styles, adding a touch of natural elegance to any space. By displaying her art in these venues, Jennifer brings joy and inspiration to individuals in their everyday lives.

5.3 Recognition of Jennifer’s talent

Jennifer Zerback has gained recognition and acclaim for her incredible talent and contributions to the world of driftwood art. Her dedication to her craft, meticulous attention to detail, and unwavering passion have set her apart in the artistic community. Jennifer’s success serves as an inspiration to aspiring artists and showcases the power of following one’s passion.

Section 6: Conclusion

Jennifer Zerback’s journey to driftwood art is a testament to the transformative power of following one’s true calling and the beauty that can be found in unexpected places. Through her incredible creativity and skill, she has turned ordinary pieces of driftwood into stunning works of art that inspire and captivate. As we have explored her process and the magic of driftwood, we have gained a deeper appreciation for the art form and the endless possibilities it holds. Jennifer’s impact and success serve as a reminder to embrace our passions and never underestimate the potential in the world around us.

Finding Minnesota: Driftwood Art

Filed Under: DriftWood Art Tagged With: Art, Driftwood, Minnesota, travel

  • « Previous Page
  • Page 1
  • …
  • Page 8
  • Page 9
  • Page 10
  • Page 11
  • Next Page »

Primary Sidebar

Driftwood4us.com, is a participant in the Amazon Services LLC Associates Program, an affiliate advertising program designed to provide a means for sites to earn advertising fees by advertising and linking to amazon.com.