• Skip to main content
  • Skip to primary sidebar
  • Terms and Conditions
  • Privacy Policy
  • Contact

Driftwood 4 Us

Just About Driftwood

Wall Hangings

Drift Wood Ideas Driftwood Art Wall Hangings

June 23, 2024 by admin

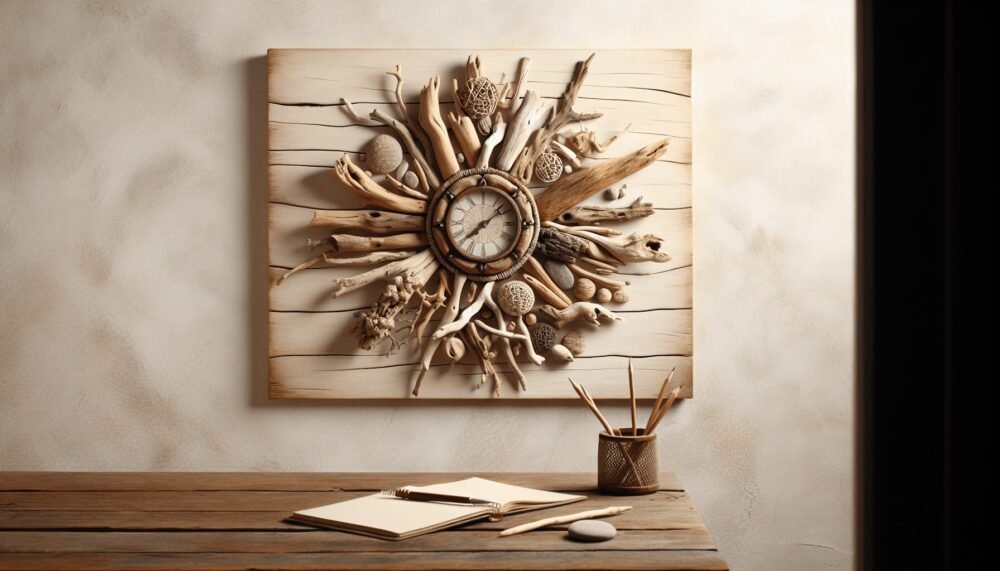
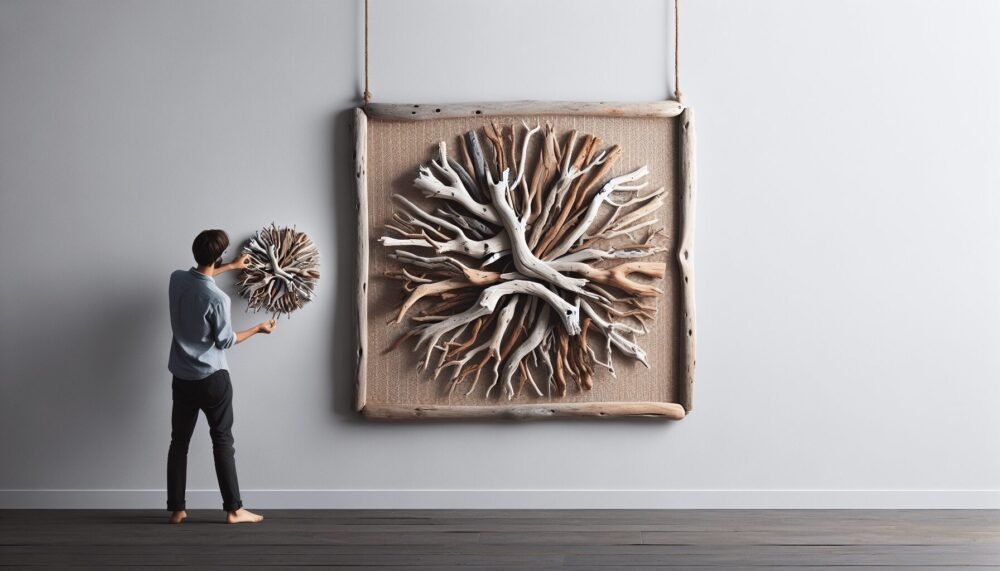
Welcome to the enchanting world of “Drift Wood Ideas: Driftwood Art Wall Hangings.” In this piece, you’ll explore creative and inspiring ways to transform simple driftwood into stunning art pieces that can adorn your walls. From rustic, nature-inspired designs to chic, modern arrangements, discover how you can bring the beauty of the beach into your home with ease. Whether you’re a seasoned DIY enthusiast or just looking to add a unique touch to your décor, this article will guide you through the endless possibilities that driftwood offers. Dive in and let your creativity flow! Have you ever strolled along the beach and stumbled upon a beautiful piece of driftwood, only to wonder how you could incorporate it into your home decor? If so, you’re not alone! Driftwood has a way of sparking creativity and evoking a sense of adventure. With its natural beauty and unique shapes, driftwood can be transformed into stunning art pieces, especially wall hangings.

What is Driftwood?

Driftwood refers to wood that has been washed onto the shore by the action of waves, tides, or wind. Over time, these pieces of wood are naturally weathered and eroded, giving them a distinctive appearance. It’s like Mother Nature’s own art, crafted from broken branches, logs, and trees.

Why Use Driftwood for Art?

There are several reasons why driftwood is a favorite material among artists and DIY enthusiasts:

  • Natural Aesthetic: Driftwood’s organic shapes and textures provide a unique, rustic charm.
  • Sustainability: Using driftwood for art is an eco-friendly way to recycle natural materials.
  • Versatility: Driftwood can be used in various forms of art, from simple wall hangings to intricate sculptures.

Getting Started with Driftwood Art

To begin your journey into the world of driftwood art, you’ll need to consider a few key points.

Collecting Driftwood

First and foremost, you’ll need to collect suitable pieces of driftwood. Here are some tips to help you find the best pieces:

  • Visit Different Beaches: Beaches with rocky shores or near river mouths tend to have more driftwood.
  • Check Tides: Low tide often reveals more driftwood that might be hidden underwater during high tide.
  • Respect the Environment: Be mindful not to disturb wildlife or the natural habitat while collecting driftwood.

Preparing Driftwood

Before you start creating, it’s essential to clean and prepare your driftwood:

  1. Clean: Remove any debris, sand, or seaweed by rinsing the driftwood with fresh water.
  2. Dry: Allow the driftwood to dry completely, either by air drying or using a kiln if available.
  3. Treat: To prevent any mold or pests, you can treat the driftwood with a mixture of water and bleach (90% water, 10% bleach).

Drift Wood Ideas Driftwood Art Wall Hangings

Driftwood Art Wall Hangings

Now that you have your driftwood ready, let’s dive into creating some beautiful wall hangings.

Basic Driftwood Wall Hanging

A basic driftwood wall hanging is a great way to start and acquaint yourself with the material.

Materials Needed:

  • Driftwood pieces
  • Jute or twine
  • Hooks or nails
  • Scissors

Instructions:

  1. Select Pieces: Choose a few pieces of driftwood with interesting shapes and textures.
  2. Arrange Layout: Lay the pieces on a flat surface to decide on the arrangement.
  3. Tie Together: Use jute or twine to tie the driftwood pieces together securely.
  4. Hang: Attach hooks or nails to the wall and hang your driftwood creation.

Driftwood Photo Display

A driftwood photo display adds a personal touch, perfect for showcasing your favorite memories.

Materials Needed:

  • Driftwood branch
  • Small picture frames with clips
  • Hooks or nails
  • Twine or fishing line

Instructions:

  1. Choose a Branch: Select a sturdy driftwood branch.
  2. Attach Frames: Use twine or fishing line to hang picture frames from the branch.
  3. Hang on Wall: Securely attach the driftwood branch to the wall using hooks or nails.
  4. Add Photos: Clip in your favorite photos to complete the display.

Driftwood Mirror Frame

For a functional yet artistic piece, consider making a driftwood mirror frame.

Materials Needed:

  • Plain mirror
  • Driftwood pieces
  • Strong adhesive (like E6000)
  • Hanging hardware

Instructions:

  1. Arrange Driftwood: Lay out the driftwood pieces around the mirror to decide on the design.
  2. Glue Pieces: Apply adhesive to the back of each driftwood piece and press firmly around the mirror.
  3. Secure Hanging: Attach the hanging hardware to the back of the mirror.
  4. Mount on Wall: Hang your new driftwood mirror frame in a place where it can catch light beautifully.

Driftwood Dreamcatcher

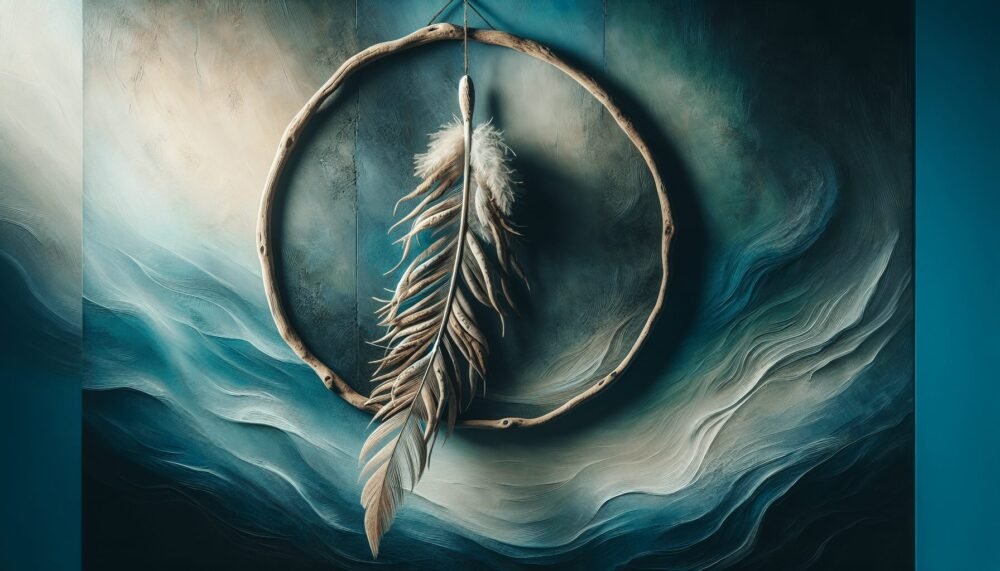
Driftwood makes a perfect frame for a unique, coastal-themed dreamcatcher.

Materials Needed:

  • Driftwood ring (or a curved piece of driftwood)
  • Feathers, beads, shells
  • Suede lace or string
  • Scissors
  • Glue

Instructions:

  1. Create the Frame: If you don’t have a ring, bend a curved driftwood piece into a circle and secure the ends with twine.
  2. Weave the Web: Use suede lace or string to weave an intricate web inside the frame.
  3. Add Decorations: Attach feathers, beads, and shells to the bottom of the dreamcatcher.
  4. Hang: Use a piece of string to hang your driftwood dreamcatcher from the wall.

Driftwood Shelf

A functional piece like a driftwood shelf combines practicality with artistry.

Materials Needed:

  • Sturdy driftwood pieces
  • L-brackets
  • Screws
  • Drill
  • Level

Instructions:

  1. Select Wood: Choose driftwood pieces that are sturdy and flat enough to hold objects.
  2. Attach Brackets: Secure L-brackets to the wall at the appropriate height and spacing.
  3. Mount Driftwood: Place the driftwood pieces onto the brackets and secure them in place with screws.
  4. Level and Adjust: Ensure the shelf is level and make adjustments as needed.

Advanced Driftwood Art Techniques

Once you’ve mastered the basics, you can explore more advanced driftwood art techniques.

Combining Driftwood with Other Materials

Incorporate other natural elements, like stones, shells, or sea glass, to create multifaceted art pieces.

Example: Driftwood and Stone Sculpture

  1. Arrange Stones: Select a variety of stones and arrange them alongside your driftwood pieces.
  2. Securely Attach: Use industrial-strength adhesive to attach the stones and driftwood together.
  3. Balance Shapes: Ensure the final piece is balanced and aesthetically pleasing.

Lighting with Driftwood

Adding lighting elements can transform your driftwood art into an enchanting focal point.

Example: Driftwood Lamp

  1. Drill Holes: Drill holes into a sturdy piece of driftwood to accommodate wiring.
  2. Insert Lights: Insert and secure LED string lights or a bulb socket inside the driftwood.
  3. Secure Base: Create a stable base using stones or a platform to prevent tipping.
  4. Plug In: Place your new lamp in your desired location and plug it in to illuminate the room.

Drift Wood Ideas Driftwood Art Wall Hangings

Tips for Selling Driftwood Art

If you become passionate about creating driftwood art, you might consider selling your pieces.

Where to Sell

  • Online Marketplaces: Etsy, eBay, or your own website.
  • Local Markets: Art fairs, farmer’s markets, and craft fairs.
  • Consignment: Local boutiques and home decor stores might accept your pieces on consignment.

Pricing Your Art

Consider the cost of materials, time spent, and the uniqueness of your piece when pricing. It’s important to find a balance between making a profit and offering fair prices.

Marketing

Use social media platforms like Instagram, Facebook, and Pinterest to showcase your work. High-quality photos and engaging posts can help attract potential buyers.

Conclusion

Driftwood art is not just a creative outlet but also a way to bring the beauty of nature into your home. Whether you create simple wall hangings or intricate sculptures, the possibilities are endless. So next time you find yourself on a beach, keep an eye out for those unique pieces of driftwood — they might just become your next masterpiece!

Happy crafting! If you have any unique ideas or would like to share your driftwood creations, feel free to connect. We’d love to see what you make!

Filed Under: Driftwood Ideas Tagged With: Art, DIY, Driftwood, Home Design, Wall Hangings

Driftwood Fish Art Wall Hangings

June 21, 2024 by admin

Welcome to the enchanting world of Driftwood Fish Art Wall Hangings, where creativity and nature blend to bring a unique coastal charm to your home decor. Imagine stepping into your living space and being instantly greeted by the rustic allure of driftwood, meticulously crafted into beautiful fish art pieces that tell a story of the ocean. Each wall hanging is a testament to the beauty of natural materials and skilled craftsmanship, perfect for adding a touch of seaside tranquility to any room. Dive into this article to discover how these one-of-a-kind artworks can transform your home into a serene coastal retreat. Have you ever wondered how you could give your home a touch of coastal charm that’s both unique and nature-inspired?

Driftwood Fish Art Wall Hangings

Introducing driftwood fish art wall hangings – a fantastic way to bring a piece of the ocean into your living space. These pieces not only make for stunning decor but also tell a story of nature, artistry, and sustainability. Let’s dive into what makes these art forms so captivating and how you can incorporate them into your home.

What is Driftwood?

Driftwood is wood that has been washed onto the shore of a sea, river, or lake. It has usually spent a significant amount of time floating in the water, which gives it its distinctive, weathered appearance. The wood is often smoothed and bleached by the sun, wind, and water, making each piece unique.

The Beauty of Driftwood Fish Art

Creating art from driftwood, especially in the form of fish, captures the essence of coastal life. The natural shapes and textures of driftwood lend themselves perfectly to crafting fish figures, each with its own character and story. This type of art embodies a blend of creativity, craftsmanship, and the inherent beauty of nature.

Why Fish?

Fish are symbolic creatures in many cultures. They often represent freedom, prosperity, and harmony. When fashioned from driftwood, fish art combines these symbolic meanings with the tranquil and rustic aesthetics of the ocean and nature.

Driftwood Fish Art Wall Hangings

Benefits of Driftwood Art

Let’s take a closer look at why driftwood fish art wall hangings are an excellent choice for your home decor.

Unique and One-of-a-Kind

No two pieces of driftwood are the same. This uniqueness ensures that every driftwood fish art piece is a one-of-a-kind creation. Your wall hanging will be a singular expression of natural beauty and human craftsmanship.

Eco-Friendly

Using driftwood is an eco-friendly way to create art. Rather than cutting down trees, artists repurpose wood that has naturally found its way to shore. This sustainable practice helps in conservation efforts and reduces waste.

Versatility

Driftwood fish art wall hangings can fit into various decor styles:

  • Coastal/Nautical
  • Rustic/Farmhouse
  • Modern/Minimalist
  • Bohemian

They seamlessly blend into any interior, adding a touch of nature and artistry.

How to Choose the Perfect Driftwood Fish Art Wall Hanging

Selecting the right piece for your home involves considering several factors. Let’s break it down for easier understanding.

Size

Consider the size of the wall where you want to hang your art. Driftwood fish art pieces come in various dimensions, ranging from small, delicate fish to large, statement-making figures.

Wall SpaceSuggested Art Size
Small12″ – 18″
Medium18″ – 36″
Large36″ and above

Theme and Style

Think about the existing decor of your space. Do you have a particular theme or color scheme? Driftwood art can be found in a variety of styles, such as:

  • Abstract: When shapes are more fluid and imaginative.
  • Realistic: Closely resembling actual fish species.
  • Whimsical: Fun and playful designs.

Color and Finish

Some driftwood pieces are left in their natural state, showcasing the beautiful, weathered wood. Others may be painted or treated to add color and protection. Choose a finish that complements your room’s palette.

Driftwood Fish Art Wall Hangings

Where to Place Your Driftwood Fish Art

The placement of your driftwood fish art wall hanging can dramatically impact your space’s ambiance. Here are a few ideas for incorporating it into different areas of your home.

Living Room

A driftwood fish art piece can serve as a focal point above a sofa or fireplace. It adds a sense of calm and wonder to your living space while sparking conversations.

Bedroom

Hang a piece above your bed for a soothing, nature-inspired headboard alternative. It brings in a sense of tranquility and connection to the outdoors, perfect for creating a restful environment.

Entryway

Welcome guests with a driftwood fish art piece in your entryway. It sets a welcoming, coastal tone as soon as someone steps into your home.

Bathroom

Driftwood’s natural, water-washed look makes it ideal for bathroom decor. A small piece on the wall can add a spa-like, serene touch to the space.

DIY Driftwood Fish Art

Feeling crafty? You might enjoy making your own driftwood fish art. Here’s a simple guide to get you started.

Materials Needed

  • Driftwood pieces
  • Craft glue or wood glue
  • Sandpaper
  • Paint (optional)
  • Hooks or hanging hardware

Steps to Create

  1. Gather Driftwood: Collect pieces that resemble or can be shaped into the body, fins, and tail of a fish.
  2. Clean and Sand: Rinse and dry the driftwood. Sand any rough edges to avoid splinters.
  3. Assemble Fish: Arrange the pieces to form a fish shape. Use glue to attach the parts securely.
  4. Optional Painting: If desired, paint your fish in colors that match your decor.
  5. Add Hanging Hardware: Attach hooks or a wire to the back of your artwork for easy mounting.

Caring for Your Driftwood Art

Like all natural materials, driftwood requires some care to keep it looking its best. Here are some tips to ensure your art piece remains beautiful for years to come.

Regular Dusting

Use a soft cloth or feather duster to remove dust. Avoid using water directly, as it can damage the wood.

Keep Away from Moisture

Although driftwood originates from water, exposure to moisture in your home can lead to mold growth or warping. Ensure the piece stays dry and in a well-ventilated area.

Protect from Sunlight

Prolonged exposure to direct sunlight can bleach the colors of any painted areas and may dry out the wood too much, leading to cracks.

Buying Driftwood Fish Art

If DIY isn’t your thing, purchasing driftwood fish art from skilled artisans is a wonderful option. Here’s what to look for when buying.

Authenticity

Ensure that the driftwood used is genuine and has been ethically sourced. Sometimes, commercial pieces might use synthetic wood to replicate the driftwood look.

Craftsmanship

Examine the details of the piece. Well-crafted fish art will have securely attached parts and a balanced overall design.

Artist Reputation

Consider buying from recognized artists or sellers who specialize in driftwood art. This ensures reliability and can even add value to the piece if you’re interested in collectibles.

Driftwood Fish Art in Interior Design

Interior designers love using driftwood fish art for its versatility and natural beauty. Here’s how it can enhance different design styles.

Coastal or Nautical Themes

Driftwood fish art naturally complements coastal or nautical themes. It adds authenticity and reinforces the oceanic vibe.

Modern Designs

In contemporary spaces, a piece of driftwood art can serve as an organic contrast to sleek lines and polished surfaces, adding warmth and texture.

Rustic and Farmhouse Styles

The weathered, natural appeal of driftwood fits seamlessly into rustic or farmhouse decor, enhancing the cozy, lived-in feel.

Driftwood Fish Art as Gifts

Looking for a thoughtful, unique gift? Driftwood fish art makes an excellent present for various occasions.

Housewarming Gifts

A driftwood fish art piece is a wonderful housewarming gift that adds character and charm to any home. It’s personal, artistic, and ties into the idea of new beginnings.

Anniversaries

Celebrate a relationship with driftwood art, symbolizing strength and the beauty of growth. It’s a meaningful way to honor shared memories and look forward to new adventures.

Birthdays and Holidays

Perfect for the ocean lover, nature enthusiast, or anyone who appreciates unique, handcrafted items. Driftwood fish art is a cherished and memorable gift.

Custom Driftwood Fish Art

Did you know you can commission custom pieces? This adds a personalized touch and can be tailored to your specific tastes and interior requirements.

Personalization

You can choose specific designs, sizes, and even ask for particular types of driftwood. Personal touches or inscriptions can make the piece more special.

Collaborating with Artists

Working directly with an artist allows you to discuss your vision and get something uniquely crafted to suit your decor. It’s also a fantastic way to support artisans and their craft.

Conclusion

Driftwood fish art wall hangings add a captivating blend of natural beauty and artistic expression to any space. Whether you’re decorating your home, crafting a DIY project, or looking for a unique gift, these pieces are a stunning choice. Embrace the tranquility and rustic charm of driftwood to create a serene and stylish environment. Ready to dive in? Explore the world of driftwood fish art and let these beautiful creations bring a touch of the ocean’s magic into your life.

Filed Under: Driftwood Ideas Tagged With: Driftwood, Fish Art, Handmade Art, home decor, Wall Hangings

Driftwood Crafts Wall Hangings Art

June 19, 2024 by admin

You’ve stumbled upon a treasure trove of creativity with “Driftwood Crafts Wall Hangings Art.” In this article, you’ll explore the captivating world of turning humble driftwood into stunning wall art. Each piece of driftwood, weathered and shaped by the sea, holds its own unique charm, ready to be transformed into a beautiful hanging for your home. Discover DIY tips, design ideas, and the joy of bringing a bit of nature indoors with these handmade creations. Dive into this artistic adventure and let your imagination set sail! Have you ever come across a piece of driftwood and thought about its journey through the elements to arrive in its current state? This natural treasure, shaped by water and time, presents an ideal medium for creating beautiful, rustic wall hangings. Driftwood crafts wall hangings art allows you to bring a piece of nature’s artistry into your home, merging the organic with your creative expression. Let’s dive into the world of driftwood wall hangings and explore how you can turn simple pieces of wood into striking art.

The Beauty of Driftwood

Driftwood Crafts Wall Hangings Art

When you look at a piece of driftwood, you’re seeing the result of a long, transformative journey. Its unique texture and shape come from the relentless work of water, wind, and sun. Driftwood boasts an array of earthy tones and intricate patterns – each piece distinct from the next. This individuality makes driftwood an excellent material for crafting one-of-a-kind wall hangings.

Why Driftwood?

Driftwood has many appealing qualities:

  • Natural Aesthetic: Its organic look blends seamlessly into various decorating styles.
  • Sustainability: Using driftwood for crafts is an environmentally-friendly practice, as it repurposes natural elements.
  • Texture and Shape: Every piece has a unique story, offering a natural element that mass-produced items can’t match.

Table of Driftwood Properties and Benefits

PropertyBenefit
Unique ShapeOne-of-a-kind art pieces
Natural TonesComplement various interior designs
Eco-FriendlySustainable and repurposed material
Textured SurfaceAdds depth and interest to art

Gathering Driftwood

Finding the perfect piece of driftwood is an adventure in itself. Whether you’re strolling along a beach, riverbank, or lake, keep an eye out for pieces with interesting shapes and textures.

Where to Find Driftwood

Driftwood can be found in various natural settings, especially:

  • Beaches: Coastal areas are hotspots for driftwood, with plenty of variety.
  • Rivers and Lakes: Inland bodies of water can also have driftwood, often with a different character compared to coastal wood.
  • Local Stores: Some crafting stores or online marketplaces sell driftwood if you’re not near a natural source.

Driftwood Crafts Wall Hangings Art

Preparing Your Driftwood

Before you start your craft, it’s crucial to clean and prepare your driftwood. This process ensures that your art will be both beautiful and durable.

Cleaning Driftwood

You can follow these steps to clean your driftwood:

  1. Rinse Thoroughly: Wash the driftwood with fresh water to remove any debris or salt.
  2. Soak: Submerge the driftwood in a mixture of water and a mild bleach solution (1 part bleach to 9 parts water) for 1-2 days to kill any organisms or bacteria.
  3. Scrub: Use a brush to scrub off any remaining dirt.
  4. Dry: Let the driftwood dry completely in the sun to ensure it is free of moisture.

Designing Your Wall Hanging

The design phase is where your creativity truly shines. Consider the overall theme and style you want to achieve with your wall hanging.

Concept and Inspiration

Where do you find inspiration for your driftwood art? Nature itself is often the best muse:

  • Floral Motifs: Use driftwood to create the forms of flowers or trees.
  • Geometric Designs: Combine several pieces of driftwood to form geometric shapes.
  • Abstract Art: Embrace the natural irregularity and texture of the wood for a more abstract design.

Tools and Materials

Here are the basic tools and materials needed for most driftwood wall hanging projects:

  • Glue or Epoxy: For attaching pieces of wood together.
  • String or Wire: For hanging or embellishing pieces.
  • Drill or Dremel Tool: To create holes for hanging or stringing pieces.
  • Screws or Nails: For secure attachments.
  • Sealer: To protect the wood and enhance its natural hues.

Table of Tools and Materials

Tool/MaterialPurpose
Glue/EpoxyAttaching wood pieces securely
String/WireHanging and embellishing
Drill/Dremel ToolCreating precise holes for hanging
Screws/NailsSecure attachments
SealerProtecting and enhancing the wood

Driftwood Crafts Wall Hangings Art

Creating Your Driftwood Wall Hanging

Now that you have your materials and design in mind, it’s time to bring your vision to life.

Step-by-Step Process

Here’s a step-by-step guide to creating a simple driftwood wall hanging:

  1. Plan Your Layout: Arrange your driftwood pieces on a flat surface. Play around with the arrangement until you find a composition you like.
  2. Cut and Shape: If needed, cut the driftwood into desired shapes. Sand any rough edges to ensure they’re smooth.
  3. Drill Holes: Drill small holes where you plan to thread the string or wire.
  4. Attach Pieces: Use glue or epoxy to attach pieces together. Be sure to let it cure fully.
  5. Seal the Wood: Apply a coat of sealer to protect the driftwood and bring out its natural color.
  6. Hang: Thread string or wire through the drilled holes and securely tie off the ends. Attach a hook or loop for wall hanging.

Personalize Your Wall Hanging

Adding personal touches to your driftwood wall hanging makes it even more special. Consider these ideas for customization:

Adding Color

Incorporating color can make your wall hanging pop. Options include:

  • Paint: Use acrylic paint to add accents or fully color some of the wood pieces.
  • Stains: Apply wood stains to enhance the natural grain and provide a more uniform appearance.

Embellishments

Consider adding different elements to your artwork, such as:

  • Shells and Stones: Glue small shells or polished stones to the driftwood.
  • Textiles: Weave in fabric or thread to add texture and color.
  • Personal Mementos: Attach small keepsakes for a more personal touch.

Maintaining Your Driftwood Art

Proper maintenance ensures that your driftwood wall hanging remains beautiful for years to come. Here are some tips for keeping your art in great shape:

Indoor Care

  • Dust Regularly: Use a soft brush or cloth to gently remove dust.
  • Avoid Direct Sunlight: Prolonged exposure to direct sunlight can cause the wood to fade or crack.

Outdoor Care

If you plan to display your driftwood art outdoors:

  • Use Outdoor Sealer: Apply a sealant designed for outdoor use to protect against the elements.
  • Shield from Extreme Weather: Try to place your artwork in a sheltered area to avoid direct rain or snow exposure.

Driftwood Art: Beyond Wall Hangings

While wall hangings are a wonderful way to display driftwood, this versatile material can be used for numerous other types of art and crafts. Consider expanding your driftwood creations with these ideas:

Furniture

Driftwood can create unique, rustic furniture pieces such as:

  • Tables: Use larger driftwood pieces for table legs combined with a glass or wooden top.
  • Shelves: Mount driftwood on the wall as natural shelving.

Home Decor

Add driftwood elements throughout your home:

  • Centerpieces: Combine driftwood with candles or flowers as a stunning table centerpiece.
  • Mirrors and Frames: Frame mirrors or photos with driftwood for a coastal, chic look.

Jewelry

Smaller pieces of driftwood can be crafted into:

  • Necklaces: Carve or attach charms to driftwood pieces.
  • Bracelets: Shape driftwood into smooth, wearable pieces.

Sharing Your Art

Creating driftwood art is not only about personal enjoyment but can also be a fulfilling way to connect with others. Here’s how you can share your driftwood creations:

Gifting

Handmade driftwood wall hangings make thoughtful, personalized gifts for:

  • Housewarmings: A unique piece of driftwood art can be a charming addition to a new home.
  • Birthdays: Customized art that reflects the recipient’s personality is always appreciated.
  • Weddings: Driftwood art can serve as a meaningful, handcrafted wedding gift.

Selling Your Art

If you find yourself with a surplus of driftwood art, consider selling your pieces. Platforms like Etsy provide a marketplace for handmade crafts. Be sure to:

  • Take Quality Photos: Good lighting and clear images make a big difference in online sales.
  • Write Detailed Descriptions: Include the size, materials, and any special care instructions for your art.

Hosting Workshops

Share your skills and passion for driftwood art by hosting workshops. This can be a fun way to teach others and build a community of craft enthusiasts:

  • Local Craft Stores: Partner with craft stores or community centers to host in-person workshops.
  • Online Tutorials: Create video tutorials or live online classes to reach a wider audience.

Conclusion

Driftwood crafts wall hangings art bring the beauty of nature into your home, allowing you to create personal and unique pieces that tell a story. Whether you’re a seasoned crafter or just starting, the possibilities are endless. From sourcing and preparing your driftwood to designing and creating a stunning wall hanging, each step is an opportunity to unleash your creativity and connect with the natural world. So next time you come across a piece of driftwood, don’t just walk past it – pick it up, take it home, and let your imagination turn this simple yet extraordinary material into a beautiful work of art. Happy crafting!

Filed Under: Driftwood Ideas Tagged With: DIY Crafts, Driftwood, Handmade Art, home decor, Wall Hangings

Driftwood Art Ideas Wall Hangings Beach Houses

June 17, 2024 by admin

Everyone loves a touch of coastal charm, and what better way to bring the beach into your home than with driftwood art? In “Driftwood Art Ideas Wall Hangings Beach Houses,” you’ll find a treasure trove of creative and inspiring ways to transform simple pieces of driftwood into striking wall hangings. Tailored for beach house decor, these art ideas not only celebrate the natural beauty of weathered wood but also add a unique, personal touch to your living space. Dive in and discover how to bring the relaxing, carefree vibes of the seashore right to your walls! Have you ever found yourself strolling along the beach, the salty air filling your lungs and the sound of waves crashing against the shore being music to your ears? If so, you might have noticed pieces of driftwood scattered along the sand and thought they were just remnants of old trees. But did you know that these pieces of driftwood can be transformed into stunning pieces of art? Especially for beach houses, driftwood art wall hangings can add a touch of coastal charm and rustic beauty to your living space.

In this article, we will dive into the world of driftwood art, exploring various creative ideas for wall hangings that can turn any beach house into a seaside sanctuary. Let’s embark on this creative journey together!

Why Driftwood?

Driftwood, having been naturally sanded and weathered by the sea, has a unique, rustic appearance that makes it a favorite among artists and decorators. Its natural textures and tones evoke the beauty of the coastline, bringing a touch of the beach into your home. Whether you live by the ocean or just want to capture its essence, driftwood offers a versatile medium for artistic expression.

Unique Qualities of Driftwood

Driftwood is not just any wood; it’s wood that has been polished by nature itself. Here are a few reasons why it stands out:

  • Durability: The exposure to water makes it surprisingly durable, ensuring your art pieces last for years.
  • Texture: The smooth, weathered texture gives a rustic and natural feel.
  • Color Variations: From soft grays to warm browns, the color variations in driftwood add depth to any piece.

Getting Started: Gathering and Preparing Driftwood

Before you can turn driftwood into art, you need to gather and prepare it properly. This process is both an adventure and a crucial step in ensuring your artwork looks its best and lasts long.

Collecting Driftwood

The first step is to head to your nearest beach and start collecting. Look for pieces that inspire you, whether they are large branches for a statement piece or smaller bits for intricate designs. Ensure that you:

  • Check Local Regulations: Some beaches have rules about collecting natural materials.
  • Consider Size and Shape: Think about the project in mind and choose pieces that fit your vision.
  • Inspect for Damage: Ensure the wood is solid and free from excessive rot or infestation.

Cleaning and Preparing Driftwood

Once you’ve got your driftwood, the next step is to clean and prepare it. This ensures it’s free from salt, sand, and any potential pests. Here’s how you can do it:

  1. Rinse Thoroughly: Use fresh water to rinse off any salt and sand.
  2. Soak in Water and Bleach: Soak the wood for a day in a mixture of one-part bleach to ten-parts water to kill any bugs and fungi.
  3. Dry Completely: Let the wood dry outdoors in a shaded area. This can take several days depending on the size of the pieces.

Driftwood Art Ideas Wall Hangings Beach Houses

Driftwood Art Ideas for Wall Hangings

Now that you’re ready with clean, dry driftwood, let’s explore some creative ideas for using it in wall hangings. These ideas can cater to various styles, whether you prefer something minimalist or more elaborate.

Driftwood Mirrors

Mirrors framed with driftwood can add a whimsical touch to any room. By surrounding a mirror with driftwood pieces, you create a focal point that reflects light and adds depth to your space. Here’s how you can create one:

  1. Materials Needed:

    • A mirror
    • Driftwood pieces
    • Strong adhesive
    • A backing board (optional)
  2. Steps:

    • Arrange the driftwood pieces around the mirror on a flat surface to find the best layout.
    • Attach the driftwood pieces to the mirror frame or backing board using strong adhesive.
    • Let it Dry completely before hanging on the wall.

Driftwood Shelves

Functional and decorative, driftwood shelves can hold anything from beach treasures to everyday items. Here’s a simple way to make them:

  1. Materials Needed:

    • Flat, sturdy pieces of driftwood
    • Brackets or driftwood for support
    • Screws and wall anchors
  2. Steps:

    • Measure and Mark: Decide where you want the shelves and mark the wall.
    • Attach Brackets: Secure the brackets to the wall using screws and wall anchors.
    • Place Driftwood: Lay the driftwood on the brackets securely.

Driftwood Wall Sculptures

If you’re aiming for a true art piece, consider a driftwood wall sculpture. These can range from simple designs to more elaborate forms like trees, fish, or abstract shapes.

  1. Materials Needed:

    • Various driftwood pieces
    • A backing board or mesh
    • Screws or strong adhesive
  2. Steps:

    • Plan Your Design: Sketch your design on paper or directly onto the backing board.
    • Arrange Driftwood: Lay the driftwood according to your design.
    • Secure Pieces: Attach the driftwood to the backing board with screws or adhesive.

Driftwood Crosses

A driftwood cross can be a serene addition to your wall decor, especially in a beach house where spirituality and nature often blend seamlessly.

  1. Materials Needed:

    • Two pieces of driftwood
    • Rope or twine
    • Strong adhesive (optional)
  2. Steps:

    • Cross the Wood: Position the pieces to form a cross.
    • Secure: Use twine to wrap the center where the two pieces cross or use adhesive for additional strength.
    • Hang: Attach a hook or loop to the back for wall hanging.

Driftwood Mobiles

A driftwood mobile adds movement to your space and can be a simple yet striking piece of art. Great for living rooms or patios, it’s a project that’s both easy and rewarding.

  1. Materials Needed:

    • Driftwood pieces
    • Fishing line or twine
    • A drill (optional)
  2. Steps:

    • Drill Holes: Drill small holes in the driftwood pieces.
    • Thread and Tie: Thread the fishing line through the holes and tie securely.
    • Assemble: Attach the pieces to a larger piece of driftwood or a frame at various lengths.

Driftwood Signs

Personalize your space with driftwood signs. Whether it’s a welcoming message or a quote, driftwood signs are a great way to add character to your home.

  1. Materials Needed:

    • Flat pieces of driftwood
    • Paint and brushes
    • Stencils (optional)
    • Hooks or string for hanging
  2. Steps:

    • Clean and Sand the driftwood surface if necessary.
    • Design and Paint: Use stencils for more precise letters or paint freehand.
    • Attach Hooks: Secure hooks or string to the back for hanging.

Tips for Designing Your Driftwood Art

Creating driftwood art is all about letting your creativity flow but keeping a few tips in mind can elevate your artwork.

Balance and Proportion

When designing your driftwood piece, maintain a balance in the size and proportion of the driftwood used. Larger, heavier pieces should be at the bottom to provide stability and a grounded look, while smaller pieces can be used to create a more intricate design on top.

Natural Variations

Embrace the natural variations in driftwood. Each piece has its own character, so let these unique features play a part in your design. Natural curves, knots, and textures can enhance the beauty of your creation.

Color Coordination

While driftwood generally comes in shades of gray and brown, you can add splashes of color to your art piece. Consider the color palette of the room where the art will be displayed. You can paint certain pieces of driftwood or use colored accents to tie the artwork with the room’s decor.

Layering

Creating layers in your driftwood art can add depth and dimension. This can be achieved by overlapping pieces or using different sizes and thicknesses of driftwood. Layering can make flat designs more dynamic and visually interesting.

Driftwood Art Ideas Wall Hangings Beach Houses

Maintaining Your Driftwood Art

Once you’ve created your driftwood masterpiece, proper maintenance will ensure it remains beautiful and intact for years to come.

Dusting

Regularly dust your driftwood art with a dry cloth. For more stubborn dust, a slightly damp cloth can be used, but avoid excessive moisture.

Avoid Direct Sunlight

Prolonged exposure to direct sunlight can cause the driftwood to fade or crack. Try to place your art in a location with indirect sunlight or use UV-protective coatings.

Humidity Control

While driftwood is fairly resilient, extreme changes in humidity can cause it to warp. Maintain a stable indoor environment to preserve your artwork.

Occasional Polishing

Consider using a wood polish suitable for driftwood to keep its natural luster. Test the polish on a small area first to ensure it does not alter the color or texture of the driftwood.

The Joy of Creating Driftwood Art

Creating driftwood art is not just about the end product; it’s about the joy of the process. From collecting driftwood on your favorite beach to designing and assembling your art piece, each step is a chance to connect with nature and express your creativity.

A Family Activity

Driftwood art projects can be a wonderful family activity. Involve your children in collecting driftwood and designing simple pieces. It’s a creative and educational experience that can teach them about coastal ecosystems and the beauty of natural materials.

Sustainable Decor

By using driftwood, you’re also making an eco-friendly choice. Driftwood is a sustainable material that repurposes natural debris, reducing waste and promoting a connection with the environment.

Personal Touch

Finally, every driftwood art piece you create is infused with your personal touch. It reflects your style, your experiences, and your creativity. Whether it’s a gift for a loved one or a decoration for your own home, driftwood art carries a story and a piece of your heart.

Conclusion

Driftwood art offers endless possibilities for creating beautiful, unique wall hangings that can transform any beach house into a cozy, serene retreat. From practical shelves and personalized signs to intricate sculptures and gleaming mirrors, each piece of driftwood can find a place in your home.

So next time you walk along the beach, keep an eye out for those weathered pieces of driftwood. They’re not just remnants of old trees; they’re potential masterpieces waiting to be created. And with the ideas and inspiration from this article, you’re well on your way to crafting your own driftwood art wall hangings.

Happy creating!

Filed Under: Driftwood Ideas Tagged With: Beach Houses, Coastal Decor, DIY, driftwood art, Wall Hangings

Diy Driftwood Projects Wall Hangings

May 25, 2024 by admin

Dive into the world of DIY driftwood projects and transform your walls into coastal masterpieces. “DIY Driftwood Projects Wall Hangings” brings you easy-to-follow instructions and inspirational ideas to create stunning, nature-inspired home decor. You’ll discover the beauty and versatility of driftwood, as well as tips for sourcing, preparing, and arranging pieces that reflect your unique style. Whether you’re a seasoned crafter or a beginner, this guide will help you bring a touch of the seaside into your home with charming and creative wall hangings.

DIY Driftwood Projects: Wall Hangings

Have you ever found a unique piece of driftwood on the beach and wondered what to do with it? Driftwood can add a natural, rustic touch to your home decor, transforming plain walls into artistic statements. This article will guide you through various DIY driftwood wall hanging projects. You’ll learn how to prepare your driftwood, gather the necessary materials, and create beautiful wall hangings. By the end, you’ll have a treasure of ideas and tips to get you started on your own driftwood adventure.

Why Choose Driftwood for Wall Hangings?

Driftwood is not just a piece of wood; it’s nature’s art. Each piece has its own story, shaped and weathered by time and the elements. It’s eco-friendly and sustainable, making it a great choice for crafters who care about the environment.

Benefits of Using Driftwood

  1. Uniqueness: Every piece of driftwood is different, providing a one-of-a-kind look.
  2. Eco-Friendly: Reusing natural materials helps to reduce waste.
  3. Versatility: Driftwood can be used in various crafts beyond wall hangings.
  4. Ease of Use: With basic tools, you can easily transform driftwood into art.

Gathering Your Driftwood

Before diving into your project, you need to gather some driftwood. This is usually the fun part!

Where to Find Driftwood

  1. Beaches: Coastal areas are the best places to find driftwood.
  2. Riverbanks: Rivers can also wash up interesting pieces.
  3. Lakes: Edges of lakes can sometimes have smaller bits of driftwood.

Choosing the Right Pieces

When selecting driftwood, look for pieces that are:

  • Sturdy and not rotting.
  • Free from pests or excessive barnacles.
  • Visually appealing in terms of shape and texture.

Safety Precautions

Always wear gloves and sturdy shoes when scavenging for driftwood. Be mindful of your surroundings and respect local regulations about removing natural items from beaches and rivers.

Diy Driftwood Projects Wall Hangings

Preparing Your Driftwood

Once you’ve collected your driftwood, it’s essential to prepare it before turning it into a wall hanging.

Cleaning the Driftwood

  1. Rinsing: Use a hose to rinse off any sand, dirt, or salt.
  2. Scrubbing: Use a stiff brush to remove any remaining debris.
  3. Soaking: Soak your driftwood in fresh water for 1-2 weeks to remove any remaining salt and to kill any pests. Change the water every few days.

Drying the Driftwood

After cleaning, place the driftwood in a sunny spot to dry thoroughly. This can take a few days to a couple of weeks, depending on the size of the wood. Ensure the driftwood is entirely dry before starting your project to prevent mold growth.

Materials and Tools You’ll Need

For most driftwood wall hanging projects, you’ll need a few basic materials and tools.

Basic Tools

ToolPurpose
SandpaperTo smooth rough edges and surfaces
SawTo cut driftwood to the desired length
DrillTo make holes for hanging or connecting pieces
Screws/NailsTo secure pieces together
GlueTo bond pieces, especially for lighter items

Additional Materials

MaterialPurpose
Twine/WireFor hanging or connecting pieces
HooksFor hanging the final piece on the wall
Paint/StainOptional, for adding color or protecting wood
Beads/OrnamentsOptional, for additional decoration

Diy Driftwood Projects Wall Hangings

Driftwood Wall Hanging Project Ideas

Now that you have your materials ready, let’s explore some creative ideas for making driftwood wall hangings. These projects range from simple to a bit more complex, so there’s something here for everyone.

Driftwood Wall Art

Driftwood wall art can be as simple or intricate as you like. You can arrange pieces of driftwood in a pattern or shape that appeals to you and secure them with glue or nails.

Steps to Create Driftwood Wall Art

  1. Plan Your Design: Lay out your driftwood pieces on the ground to decide on a pattern.
  2. Cut and Sand: Cut pieces to size if needed and sand any rough edges.
  3. Assemble: Use glue, nails, or screws to attach the driftwood pieces together.
  4. Add Hanging Hardware: Attach hooks or loops to the back for hanging on the wall.

Driftwood Mirror Frame

A driftwood mirror frame can add a coastal vibe to any room. This project requires a bit more precision and planning but is entirely achievable.

Steps to Create a Driftwood Mirror Frame

  1. Choose a Mirror: Select a mirror with a flat edge.
  2. Plan Your Layout: Lay out driftwood pieces around the mirror to decide on the arrangement.
  3. Cut and Sand: Trim pieces to fit and sand the edges.
  4. Attach Wood to Mirror: Use strong glue or screws to attach the driftwood to the edge of the mirror.
  5. Final Touches: Allow adequate drying time and then secure any loose pieces.

Driftwood Mobile

Driftwood mobiles are elegant and can be hung in various places, from nurseries to living rooms.

Steps to Create a Driftwood Mobile

  1. Select Pieces: Choose a mixture of long and short pieces.
  2. Drill Holes: Drill small holes through the center of each piece.
  3. Thread Twine or Wire: Thread twine or wire through the holes, tying knots beneath each piece to keep them spaced apart.
  4. Create Balance: Adjust the lengths of the twine or wire to ensure the mobile hangs evenly.
  5. Hang the Mobile: Secure a larger piece of driftwood to use as the top and hang the threaded pieces from it.

Driftwood Shelf

A driftwood shelf can serve both functional and decorative purposes. It’s perfect for displaying small items or plants.

Steps to Create a Driftwood Shelf

  1. Select Wood: Choose a sturdy piece of driftwood for the shelf and two shorter pieces for supports.
  2. Cut and Sand: Cut the supports to size and sand all pieces.
  3. Assemble the Shelf: Secure the support pieces to the wall using screws, ensuring they are level. Place the main piece of driftwood on top and secure it in place.
  4. Add Final Touches: Check stability and adjust as needed.

Driftwood Sign

A driftwood sign can add a personal touch to your home, whether it’s a welcome sign, a name plaque, or an inspirational quote.

Steps to Create a Driftwood Sign

  1. Choose Your Driftwood: Select a flat piece of driftwood.
  2. Clean and Sand: Ensure it is clean and smooth.
  3. Stenciling or Freehand: Use stencils or freehand your design or text onto the driftwood.
  4. Painting or Engraving: Paint the lettering or use a wood-burning tool for a carved effect.
  5. Seal it: Apply a clear sealant to protect your sign.

Driftwood Planter

A driftwood planter is an excellent project for bringing a touch of nature indoors.

Steps to Create a Driftwood Planter

  1. Choose Wood: Select a piece suitable for holding a small pot or soil arrangement.
  2. Cut and Shape: Hollow out a section if necessary.
  3. Place Plants: Secure small pots in place or fill the hollowed section with soil and plant directly.
  4. Waterproofing: Ensure any added soil is in a waterproof container to prevent damage to the driftwood.

Maintenance of Driftwood Wall Hangings

Once you’ve created your driftwood masterpiece, you’ll want to ensure it stays beautiful for years to come. Here are some tips for maintaining driftwood wall hangings.

Regular Dusting

Dust your driftwood wall hangings regularly using a soft cloth or duster. This will keep them looking fresh and prevent the buildup of dust in the crevices.

Occasional Cleaning

Every few months, you can clean your driftwood pieces with a damp cloth. Avoid soaking the wood, as it may weaken the piece over time.

Inspect for Pests

Keep an eye out for any signs of pests. While soaking the driftwood should have eliminated any initial contaminants, it’s always good to be vigilant.

Sealing Driftwood

To protect your driftwood projects further, consider applying a wood sealant. This can help prevent moisture damage and ensure the longevity of your art.

Tips for Success

Learning from others’ experiences can be incredibly helpful. Here are some tips to help you succeed in your driftwood wall hanging projects.

Choose High-Quality Materials

Invest in good-quality glue, screws, and tools. These can make a significant difference in the durability and appearance of your final piece.

Start Simple

If you’re new to driftwood projects, start with a simple project. Build your confidence and skills before tackling more complex designs.

Practice Safety

Always use appropriate safety gear, such as gloves, eye protection, and a mask when cutting or sanding driftwood.

Keep it Balanced

When creating wall hangings, ensure your piece is balanced and securely fastened. This will prevent it from falling and causing damage or injury.

Personalize Your Projects

Add your unique touch to each project. Whether it’s a splash of color, a bit of decor, or a personalized engraving, make your driftwood wall hangings a true reflection of your style.

Conclusion

Driftwood wall hangings are a delightful and rewarding DIY project. They bring a piece of nature into your home, adding warmth and character to your space. Whether you’re a seasoned crafter or a beginner, there’s a driftwood project for you. With a bit of creativity and effort, you can turn these natural treasures into stunning pieces of art.

Now that you have all the information and inspiration you need, why not start your driftwood wall hanging project today? Who knows, your next beach walk might be the beginning of an exciting crafting journey!

Filed Under: Driftwood Ideas Tagged With: crafts, DIY Projects, Driftwood, home decor, Wall Hangings

Driftwood Feather Wall Hangings

April 29, 2024 by admin

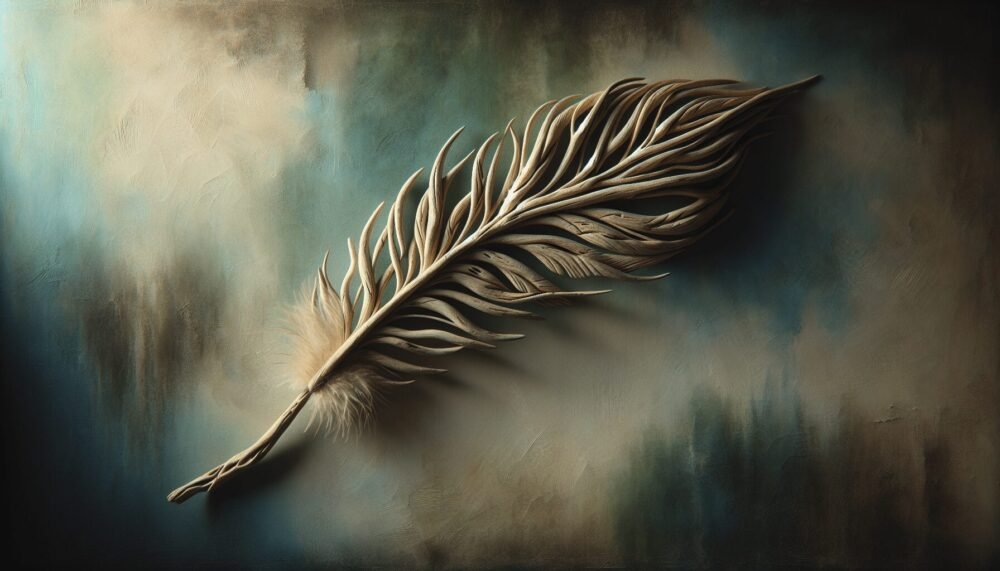
Are you looking to bring a touch of nature and rustic charm to your home decor? Look no further than our exquisite collection of Driftwood Feather Wall Hangings. Handcrafted from carefully selected pieces of driftwood, each wall hanging features delicately carved feathers that add an organic and artistic element to any space. Whether you’re aiming for a coastal, bohemian, or farmhouse aesthetic, these unique pieces will surely captivate your guests and serve as a focal point in any room. Embrace the beauty of nature and add a whimsical touch to your walls with our Driftwood Feather Wall Hangings.

What is a Driftwood Feather Wall Hanging?

A driftwood feather wall hanging is a unique and charming piece of decor that adds a touch of nature and whimsy to any space. It is essentially a collection of feathers made from driftwood, which are then arranged and hung on a wall or other vertical surface. These beautiful creations are often handcrafted and can vary in size, shape, and color, making each one truly one-of-a-kind.

Definition

A driftwood feather wall hanging is a decorative item that incorporates natural materials, specifically driftwood, in the form of feathers. These feathers can be standalone pieces or arranged in a pattern or design, and they are typically hung on a wall using strings, wires, or hooks. Their purpose is to bring a rustic and organic feel to a space, evoking a sense of nature and tranquility.

Origin and History

The use of driftwood in home decor has a long history, dating back to ancient civilizations who found beauty and utility in these unique pieces of wood. Driftwood is wood that has been washed up onto shorelines or riverbanks by the ocean or rivers, usually after being carried by currents or tides. Its unique shapes and textures make it a popular choice for crafting various items, including wall hangings.

The idea of using driftwood to create feather-shaped wall hangings can be traced back to coastal communities and beach houses, where people would collect driftwood and repurpose it into decorative objects. These pieces captured the essence of the seaside, blending natural materials with artistic flair. Over time, the trend spread, and today, driftwood feather wall hangings are enjoyed by people all around the world.

Materials Used

The primary material used to create driftwood feather wall hangings, as the name suggests, is driftwood. This wood is typically collected from beaches, rivers, or lakes, where it has been naturally weathered and worn by water and time. The unique shapes and textures of driftwood give each feather a distinct and organic look.

In addition to driftwood, other materials may be used to create the feathers, such as paint, dye, or other natural and sustainable materials. These can add color, patterns, and accents to the feathers, enhancing their visual appeal.

The feathers are typically attached to strings, twine, or wires, allowing them to be hung and displayed on a wall or other surface. These strings or wires can also be adorned with beads, shells, or other decorative elements to add further visual interest to the wall hanging.

Design and Styles

Driftwood feather wall hangings come in a variety of design options and styles, allowing you to choose the perfect one to complement your home decor. From feather shapes and sizes to color variations and hanging arrangements, there are endless possibilities for customization and personalization.

Feather Shapes and Sizes

One of the fascinating aspects of driftwood feather wall hangings is the diversity of feather shapes and sizes available. Feathers can range from small and delicate to large and striking, depending on the size and shape of the driftwood used. Some feathers may have smooth, curving edges, while others may be more jagged or asymmetrical, adding a rustic and imperfect charm.

Leaf-like feathers, long and slender feathers, and fan-shaped feathers are just a few examples of the various shapes you can find. The combination of different feather shapes in a wall hanging creates an artistic and visually captivating display.

Color Variations

Driftwood feathers can retain their natural wood color, showcasing the beautiful earthy tones and textures of the wood. However, they can also be colored or painted to add a pop of vibrant hues or to match a specific color scheme. Natural dyes or environmentally-friendly paints can be used, allowing for a wide range of color options.

Some wall hangings may feature feathers with a gradient effect, where the color transitions from one shade to another. This adds depth and dimension to the overall design, making it visually interesting and dynamic.

Hanging Arrangements

The arrangement of the driftwood feathers plays a significant role in the overall aesthetic of the wall hanging. Feathers can be hung individually, allowing each one to stand out and make a statement on its own. They can also be grouped together in specific patterns or designs, creating a cohesive and visually pleasing arrangement.

Some wall hangings feature a cascading effect, with feathers arranged in a downward flow, while others may have a more symmetrical or structured arrangement. The choice of hanging arrangement depends on personal preference and the desired visual impact.

Driftwood Feather Wall Hangings

DIY Driftwood Feather Wall Hangings

Creating your own driftwood feather wall hanging can be a rewarding and enjoyable craft project. It allows you to unleash your creativity and customize the design to suit your style and preferences. Here is a step-by-step guide on how to make your own driftwood feather wall hanging:

Gathering Materials

To begin your DIY project, you will need the following materials:

  • Driftwood: Collect driftwood from a beach, river, or lake. Look for pieces that are not too heavy or bulky and have interesting shapes and textures.

  • Saw or Pruning Shears: Use a saw or pruning shears to cut the driftwood into feather shapes. You can opt for long, narrow feathers or experiment with different shapes and sizes.

  • Sandpaper: Smooth out any rough edges on the driftwood feathers using sandpaper. This will give them a polished and finished look.

  • Paints or Dyes (optional): If desired, you can add color to the feathers using paints or natural dyes. Choose colors that complement your decor or create a specific theme.

  • String or Wire: Select string or wire to attach the feathers together and hang them. Nylon thread or floral wire are popular choices for this purpose.

  • Beads, Shells, or Decorative Elements (optional): If you want to add extra embellishments to your wall hanging, gather beads, shells, or other decorative elements.

Preparing the Driftwood

Once you have gathered all the necessary materials, it’s time to prepare the driftwood for your feather wall hanging:

  1. Clean the driftwood: Remove any traces of dirt, sand, or debris from the driftwood. You can rinse them with water and let them dry completely before proceeding.

  2. Cut the driftwood into feather shapes: Using a saw or pruning shears, carefully cut the driftwood into feather shapes. Experiment with different lengths and widths to create a diverse selection of feathers.

  3. Sand the edges: Use sandpaper to smooth out any sharp or rough edges on the driftwood feathers. This will make them safe to handle and give them a more polished appearance.

  4. Optional: Add color or patterns (if desired): If you wish to add color or patterns to your feathers, you can paint them using acrylic paints or natural dyes. Allow the paint or dye to dry completely before moving on to the next step.

Creating the Feather Designs

Now that your driftwood feathers are prepared, it’s time to create the design for your wall hanging:

  1. Arrange the feathers: Lay out your driftwood feathers on a flat surface and experiment with different arrangements. You can create a symmetrical design, a cascading arrangement, or any other pattern that appeals to you.

  2. Attach the feathers: Once you are satisfied with the arrangement, use the string or wire to attach the feathers together. Tie knots at the top of each feather, leaving enough length to hang them. You can also add beads, shells, or other decorative elements to the strings or wires for added visual interest.

  3. Hang your creation: Find a suitable spot to hang your driftwood feather wall hanging. Use hooks or nails to secure it to the wall, ensuring that it is level and centered.

Enjoy the fruits of your creative labor and admire your handmade driftwood feather wall hanging, proudly displayed in your home.

Where to Buy Driftwood Feather Wall Hangings

For those who prefer not to embark on a DIY project, or simply wish to explore ready-made options, there are several places where you can find driftwood feather wall hangings to purchase. Here are a few options:

Online Retailers

Online retailers such as Etsy, Amazon, and other craft-focused websites offer a wide selection of driftwood feather wall hangings. These platforms allow you to browse through different styles, designs, and price ranges, making it convenient to find the perfect wall hanging for your home.

When purchasing online, be sure to read customer reviews, check the dimensions and materials used, and consider the shipping options available to ensure a smooth and satisfactory buying experience.

Local Art and Craft Stores

Many art and craft stores feature a section dedicated to locally-made or handcrafted items, including driftwood feather wall hangings. These stores allow you to support local artisans and often provide a unique and curated selection of products.

Visit your nearest art and craft stores and explore their home decor or handmade goods section. You may be pleasantly surprised to discover one-of-a-kind driftwood feather wall hangings that perfectly suit your taste and style.

Artisan Markets

Artisan markets are a treasure trove for those seeking unique and handmade products, including driftwood feather wall hangings. These markets often bring together local artisans, craftspeople, and creators, offering a diverse range of handcrafted goods.

Check local event listings or community bulletin boards for information about upcoming artisan markets in your area. These markets provide an opportunity to directly interact with the makers and learn more about their creative processes. You may even find yourself inspired to try your hand at making your own driftwood feather wall hanging after interacting with these talented artisans.

Driftwood Feather Wall Hangings

How to Choose the Right Driftwood Feather Wall Hanging

Choosing the right driftwood feather wall hanging for your home involves considering various factors, such as size, color scheme, and the theme or style of your interior. Here are some tips to help you make a decision:

Determining Size and Proportions

Consider the available wall space where you intend to hang the wall hanging. Measure the area and take note of any furniture or other elements that will be nearby. This will help you determine the appropriate size and proportions for the wall hanging, ensuring that it fits harmoniously within the space.

A larger wall hanging may be suitable for spacious rooms or areas with tall ceilings, while a smaller one might be better suited for more compact spaces. Be sure to consider the overall visual balance and proportion when selecting the size of your driftwood feather wall hanging.

Matching the Color Scheme

Take into account the existing color scheme of the room where the wall hanging will be displayed. Consider the dominant colors, as well as any accent colors or patterns. Choose a driftwood feather wall hanging that complements or harmonizes with the color palette, enhancing the overall design of the space.

If your room features neutral tones, a wall hanging with natural wood colors or subtle hues can seamlessly blend in. On the other hand, if your space has vibrant or bold colors, consider selecting a wall hanging with complementary or contrasting colors to create a visually striking focal point.

Considering the Theme and Style

Driftwood feather wall hangings can be incorporated into a variety of interior design themes and styles. Consider the overall theme and style of your space, whether it’s bohemian, coastal, minimalistic, rustic, or any other design aesthetic.

For a bohemian or coastal-themed space, opt for wall hangings that feature feathers in earthy tones and organic arrangements. If your interior is minimalistic and Scandinavian inspired, select a wall hanging with simple and clean feather designs. For a rustic or nature-inspired theme, look for wall hangings that incorporate different types of driftwood and feathers with more texture and variety.

By considering the theme and style of your interior, you can ensure that the driftwood feather wall hanging becomes a harmonious and complementary element within your overall design scheme.

Using Driftwood Feather Wall Hangings in Home Decor

Driftwood feather wall hangings can be a versatile and eye-catching addition to your home decor. Here are some creative ways to incorporate them into different areas of your home:

Living Room Decoration

The living room is often the central gathering space in a home, making it an ideal location to display a driftwood feather wall hanging. Hang it above a sofa or fireplace to create a focal point that commands attention. The natural and organic elements of the wall hanging can add warmth and texture to the room, enhancing the overall ambiance.

Consider pairing the wall hanging with other natural or beach-inspired decor, such as seashells, woven baskets, or potted plants, to create a cohesive and inviting living space. You can also play with different hanging arrangements, such as combining several smaller wall hangings for a gallery wall effect.

Bedroom Accent

A driftwood feather wall hanging can bring a peaceful and serene vibe to a bedroom. Hang it above the headboard to add visual interest and create a calming atmosphere. The gentle sway of the feathers can create a soothing effect, enhancing relaxation and sleep.

An alternative approach is to hang the wall hanging near a vanity or dressing area, creating a charming and whimsical corner. The unique and organic nature of the driftwood feathers adds a touch of personality and individuality to your private space.

Outdoor Display

Driftwood feather wall hangings are not limited to indoor use. These versatile pieces can also be displayed outdoors, adding a natural and rustic touch to your patio, garden, or balcony. Hang them on a wall, fence, or pergola to create an outdoor focal point.

Outdoor spaces with a coastal or beach theme are particularly well-suited for driftwood feather wall hangings. Their weathered appearance and natural materials blend seamlessly with nature, helping to create a relaxing and inviting outdoor oasis.

Remember to protect your outdoor wall hanging from extreme weather conditions, such as rain or harsh sunlight, to ensure its longevity and durability.

Caring and Maintaining Driftwood Feather Wall Hangings

To ensure that your driftwood feather wall hanging remains in good condition and retains its beauty for years to come, proper care and maintenance are essential. Here are some tips to help you care for and maintain your wall hanging:

Cleaning Methods

Regularly dust your driftwood feather wall hanging with a soft cloth or a feather duster to remove any surface dirt or dust that may accumulate. If necessary, you can also use a vacuum with a soft brush attachment to gently remove debris from the feathers and crevices.

Avoid using water or liquid cleaners on your wall hanging, as this can damage the wood and affect its appearance. If there are any stubborn stains or marks, consult a professional cleaner who specializes in delicate materials like wood.

Preventing Damage

Driftwood is a natural material that can be susceptible to certain types of damage. To prevent your wall hanging from getting damaged, follow these guidelines:

  • Keep your wall hanging away from direct sunlight, as prolonged exposure to UV rays can cause the colors to fade and the wood to become brittle.

  • Avoid placing your wall hanging near sources of heat or humidity, such as radiators or bathroom showers, as extreme fluctuations in temperature and moisture can warp or crack the wood.

  • Be cautious when handling or moving your wall hanging to prevent any accidental breakage or damage. Always lift it from the secure hanging point rather than pulling on the feathers.

Storage Tips

If you need to store your driftwood feather wall hanging for a period of time, follow these storage tips to keep it in optimal condition:

  • Clean the wall hanging thoroughly before storing it to remove any dirt or dust that may attract insects or cause discoloration.

  • Wrap the wall hanging in acid-free tissue paper or a soft cloth to protect it from dust and scratches. Avoid using plastic bags or containers, as they may trap moisture and encourage mold growth.

  • Store the wall hanging in a cool, dry place, away from direct sunlight and extreme temperature fluctuations. Attics, basements, or storage rooms with controlled humidity levels are ideal.

By following these care and maintenance tips, you can enjoy your driftwood feather wall hanging for years to come, preserving its natural beauty and charm.

Driftwood Feather Wall Hangings as Gifts

Driftwood feather wall hangings make thoughtful and unique gifts for various occasions and recipients. Whether you are looking to surprise a loved one or express gratitude, consider the following options:

Occasions and Recipients

  • Housewarming: A driftwood feather wall hanging can be a perfect housewarming gift for anyone moving into a new home. It adds a touch of nature and personalization to their space, making it feel warm and inviting.

  • Birthdays: Celebrate a friend or family member’s birthday by gifting them a driftwood feather wall hanging. Consider their personal style and taste when selecting the design, ensuring that it complements their existing decor.

  • Weddings and Anniversaries: Driftwood feather wall hangings can be a unique and meaningful gift for couples celebrating their wedding or anniversary. Choose a design that symbolizes their love and relationship to create a truly sentimental gift.

  • Mother’s Day or Father’s Day: Surprise your parents with a driftwood feather wall hanging that speaks to their individual interests or hobbies. Whether it’s gardening, beachcombing, or simply a love for nature, the thoughtful gesture will surely be appreciated.

Personalization Options

To make your gift even more special, consider personalizing the driftwood feather wall hanging. Some ways to add a personal touch include:

  • Engraving: If the driftwood allows, consider engraving a short message or the recipient’s name onto the wood. This adds a unique element and makes the gift more memorable.

  • Custom Color Palette: If you’re creating or commissioning a custom driftwood feather wall hanging, choose colors that hold special meaning for the recipient. This could be their favorite colors, birthstone hues, or colors associated with significant memories.

  • Integrate Personal Memorabilia: Consider incorporating small personal items, such as seashells collected on a memorable beach trip or charms that hold sentimental value to the recipient. These additions can make the gift even more meaningful and personal.

Gifting Tips

When presenting a driftwood feather wall hanging as a gift, keep the following tips in mind:

  • Include a thoughtful note explaining the symbolism or inspiration behind the driftwood feather wall hanging. This adds an extra layer of meaning and allows the recipient to appreciate the gift on a deeper level.

  • Provide care instructions or a small care package along with the gift. This shows that you care about the longevity and maintenance of the wall hanging, ensuring that it remains a cherished item for years to come.

  • Consider the packaging and presentation of the gift. Opt for eco-friendly materials and wrapping styles that reflect the organic and natural elements of the driftwood feather wall hanging.

By choosing a driftwood feather wall hanging as a gift, you are giving a unique and meaningful item that will be treasured and appreciated for its beauty and craftsmanship.

Incorporating Driftwood Feather Wall Hangings in Different Interiors

Driftwood feather wall hangings can seamlessly blend into various interior design styles, lending a touch of natural beauty and rustic elegance. Here are some style recommendations for incorporating these wall hangings into different interiors:

Bohemian and Coastal Styles

Driftwood feather wall hangings naturally complement bohemian and coastal-inspired interiors. Their organic shapes and textures align with the relaxed and carefree vibes of these design aesthetics.

Pair the wall hanging with natural materials such as jute rugs, macrame plant hangers, and woven textiles. Incorporate light and airy fabrics in pastel or earthy tones to create a harmonious and soothing atmosphere. The combination of driftwood feathers with dreamcatchers and seashells can enhance the overall bohemian or coastal theme, creating a space that welcomes relaxation and tranquility.

Minimalistic and Scandinavian Designs

Minimalistic and Scandinavian interiors focus on simplicity, clean lines, and a neutral color palette. Driftwood feather wall hangings can add a touch of nature and warmth to these spaces without overwhelming the minimalist aesthetic.

Opt for a driftwood feather wall hanging with simple and clean designs, such as long and slim feathers or an arrangement of feathers in a subtle pattern. Hang it against a white or light-colored wall to create a striking contrast. The muted and natural tones of the driftwood feathers will blend harmoniously with the simple and understated decor, allowing the wall hanging to become a subtle yet eye-catching design element.

Rustic and Nature-inspired Themes

Rustic and nature-inspired interiors often feature materials such as wood, stone, and natural fibers. Driftwood feather wall hangings effortlessly align with these design themes, adding an extra layer of rustic charm and organic beauty.

Combine the wall hanging with rustic wooden furniture, natural textiles like linen or burlap, and earth-toned color palettes. Display it alongside potted plants, woven baskets, and other nature-inspired elements to create a cohesive and inviting space. The combination of the driftwood feathers’ texture and the warmth of the natural materials will evoke a comforting and earthy ambiance.

By incorporating driftwood feather wall hangings into different interior design styles, you can create a cohesive and visually appealing space that reflects your personal style and appreciation for nature.

Driftwood Feather Wall Hangings in Commercial Spaces

Driftwood feather wall hangings can also be used to enhance the aesthetic appeal of commercial spaces. Whether it’s a cafe, boutique, or hotel, these unique wall hangings can create a memorable and inviting atmosphere for guests. Here are some ideas for incorporating driftwood feather wall hangings in commercial spaces:

Cafes and Restaurants

Driftwood feather wall hangings can add a touch of charm and warmth to cafes and restaurants, creating a cozy and relaxed ambiance.

Hang the wall hangings near seating areas, walls, or entrances to provide a visual focal point that draws attention and sparks conversation. Combine them with other natural and rustic decor elements, such as wooden furniture, plants, and warm lighting, to create a cohesive and inviting space. The whimsical and organic nature of the driftwood feathers can contribute to a unique and memorable dining experience.

Boutiques and Shops

In a retail setting, driftwood feather wall hangings can serve as eye-catching displays that capture the attention of shoppers and create a memorable impression.

Hang the wall hangings near entrances or throughout the store to add a natural and rustic touch to the overall decor. Their unique shapes and textures can create an interesting backdrop for showcasing products, allowing them to stand out and create a visually appealing environment. Consider incorporating elements that complement the wall hangings, such as wooden display shelves, natural fabric signage, or potted plants, to enhance the overall aesthetic.

Hotels and Resorts

Hotels and resorts can incorporate driftwood feather wall hangings to create a calming and nature-inspired setting for their guests.

Hang the wall hangings in common areas or in guest rooms to provide a unique and memorable decor element. The natural and rustic appearance of the driftwood feathers can evoke a sense of tranquility and relaxation. Combine them with other coastal or bohemian-inspired decor elements, such as rattan furniture, seashell accents, and soft, neutral tones, to create a serene and inviting atmosphere.

Filed Under: Driftwood Ideas Tagged With: Driftwood, Feather, Wall Hangings

Driftwood Art Sculpture Wall Hangings

April 28, 2024 by admin

Imagine transforming your living space into a coastal sanctuary with the simple addition of Driftwood Art Sculpture Wall Hangings. These captivating pieces combine the beauty of handcrafted artwork with the raw elegance of nature itself. Each sculpture is carefully crafted from natural driftwood, showcasing its unique textures and shapes. From intricate designs representing marine life to abstract creations that mimic the ebb and flow of the ocean, these wall hangings effortlessly bring a touch of coastal charm to any room. Embrace the tranquility of the seaside and let these stunning driftwood sculptures transport you to a world of coastal bliss.

Driftwood Art Sculpture Wall Hangings

Introduction

What are driftwood art sculpture wall hangings?

Driftwood art sculpture wall hangings are artistic creations made from pieces of driftwood that have been collected from beaches, rivers, or lakes. These sculptures are carefully crafted and designed to be hung on walls as unique and eye-catching pieces of artwork.

Why are they popular?

Driftwood art sculpture wall hangings have gained popularity for several reasons. First and foremost, they offer a rustic and natural aesthetic that appeals to many individuals who appreciate the beauty of nature. The unique shapes and textures of driftwood create one-of-a-kind artworks that can add a touch of uniqueness to any space.

Furthermore, driftwood art sculpture wall hangings are also popular due to their eco-friendly nature. By repurposing driftwood, which is often washed ashore, these sculptures contribute to reducing waste and promoting sustainability.

Materials used in driftwood art sculpture wall hangings

The primary material used in driftwood art sculpture wall hangings is, of course, driftwood. Driftwood refers to pieces of wood that have been washed up on shore by natural forces such as tides and waves. The wood is typically weathered and worn, which gives it a distinct appearance.

In addition to driftwood, artists may incorporate other materials such as twine, wire, seashells, and even metal accents to add further visual interest to their sculptures. These materials are carefully chosen to complement the natural beauty of the driftwood and enhance the overall aesthetic of the artwork.

Finding or Collecting Driftwood

Finding driftwood at the beach

The beach is a prime location for finding driftwood. To find driftwood at the beach, take a leisurely stroll along the shoreline, paying attention to areas where the water meets the land. Driftwood is often deposited in these areas due to the ebb and flow of the waves. Look for interesting shapes and sizes that catch your eye.

It’s important to note that collecting driftwood from the beach may be regulated in certain areas, so be sure to check local regulations and obtain any necessary permits before collecting driftwood.

Collecting driftwood from rivers or lakes

If you don’t have easy access to a beach, rivers and lakes can also be excellent sources of driftwood. Look for areas where the water has receded or where fallen trees or branches have accumulated near the water’s edge.

When collecting driftwood from rivers or lakes, it’s crucial to prioritize safety. Be cautious of slippery rocks or unstable riverbanks, and always wear appropriate footwear and outdoor gear. It’s also worth noting that private property laws may apply, so be sure to obtain permission from landowners before collecting driftwood.

Safety precautions while collecting driftwood

When collecting driftwood, it’s essential to take safety precautions to protect yourself and the environment. Here are a few safety tips to keep in mind:

  1. Wear gloves to protect your hands from sharp edges or splinters.
  2. Use caution when lifting heavy pieces of driftwood to avoid strains or injuries.
  3. Be mindful of the tides and waves when collecting driftwood at the beach to avoid getting swept away or caught in dangerous currents.
  4. Respect the natural environment and avoid damaging vegetation or disturbing wildlife habitats when collecting driftwood.

By following these safety precautions, you can ensure a safe and enjoyable driftwood collecting experience.

Preparing Driftwood for Sculpture

Cleaning and sanitizing the driftwood

Before starting your driftwood sculpture, it’s important to clean and sanitize the driftwood to remove any dirt, debris, or potential contaminants. Begin by rinsing the driftwood thoroughly with water to remove loose dirt and salt. You can use a hose or a bucket of water for this step.

Next, fill a large container with water and add a solution of bleach and water (ratio of 1 part bleach to 10 parts water). Submerge the driftwood in the solution for 24 to 48 hours to kill any bacteria, fungi, or insects that may be present.

After the soaking period, remove the driftwood from the bleach solution and rinse it thoroughly with clean water. Allow the driftwood to dry completely before proceeding to the next steps.

Removing loose bark and debris

Once the driftwood is dry, inspect it for any loose bark or debris that may be attached to the wood. Use a stiff brush or a wire brush to gently remove the loose bark and debris. Be careful not to remove too much of the wood’s natural texture or character.

If there are stubborn bits of bark that are difficult to remove, you can carefully use a chisel or a small knife to scrape them away. Take your time and work slowly to avoid damaging the wood.

Treating the driftwood to prevent rot or infestations

To ensure the longevity of your driftwood sculpture, it’s important to treat the wood to prevent rot or infestations. There are various methods for treating driftwood, but one common approach is to apply a wood preservative or sealer.

You can find wood preservatives or sealers specifically designed for outdoor use at your local hardware store. Follow the manufacturer’s instructions carefully when applying the product to the driftwood. Pay special attention to the ends of the driftwood, as these areas are more susceptible to rot.

By properly cleaning, removing loose bark, and treating the driftwood, you are preparing it for the sculpting process and ensuring that your finished artwork will be durable and long-lasting.

Tools and Supplies

Essential tools for driftwood sculpture

To bring your driftwood sculpture to life, you will need a few essential tools. Here are some tools that are commonly used in driftwood sculpture:

  1. Chainsaw or handsaw: A saw will come in handy for cutting larger pieces of driftwood or shaping them according to your design.
  2. Woodcarving knife: A sharp woodcarving knife is necessary for more intricate carving work and adding finer details to your sculpture.
  3. Chisels: Chisels of different sizes can help you remove excess wood or create grooves and textures in your driftwood.
  4. Sandpaper or sanding blocks: Sandpaper or sanding blocks are essential for smoothing the rough edges and surfaces of the driftwood.
  5. Drill with various drill bits: A drill will allow you to create holes in the driftwood for adding additional elements or attaching the sculpture to the wall.

Additional supplies for adding embellishments

In addition to the essential tools, you may also want to gather some supplies to add embellishments or finishing touches to your driftwood sculpture. Here are a few suggestions:

  1. Twine or wire: Twine or wire can be used to wrap and secure driftwood pieces together or to create hanging elements.
  2. Seashells, beads, or stones: These natural elements can be incorporated into your sculpture to add visual interest or create a thematic effect.
  3. Metal accents: Small metal accents such as nails, screws, or brackets can be added to the sculpture for a more industrial or contemporary look.
  4. Waterproof glue: Waterproof glue is useful for attaching various elements to the driftwood securely.

Safety equipment for working with driftwood

When working with driftwood, it’s important to prioritize safety and protect yourself from potential hazards. Here are some safety equipment items you should consider:

  1. Safety goggles: Safety goggles protect your eyes from flying debris or wood particles while cutting or carving.
  2. Dust mask: When sanding or cutting driftwood, a dust mask will prevent you from inhaling fine wood dust, which can irritate your respiratory system.
  3. Work gloves: Sturdy work gloves will protect your hands from cuts, splinters, or blisters.
  4. Ear protection: If you’re using power tools such as a chainsaw or a drill, ear protection will help prevent damage to your hearing.

By using the appropriate tools and safety equipment, you can ensure a safe and enjoyable sculpting experience.

Driftwood Art Sculpture Wall Hangings

Techniques for Sculpting Driftwood

Chip carving

One popular technique for sculpting driftwood is chip carving. Chip carving involves selectively removing small chips of wood to create intricate patterns or designs. This technique is often used to add texture or decorative elements to the surface of the driftwood.

To chip carve driftwood, begin by marking your desired design on the wood using a pencil or a stencil. Then, using a sharp woodcarving knife, carefully remove small chips of wood along the marked lines. Take your time and work slowly to achieve clean, precise cuts.

Whittling

Whittling is another common technique used in driftwood sculpture. Whittling involves shaping the driftwood by removing thin shavings of wood using a sharp knife. This technique is often used to create smooth curves or three-dimensional shapes.

To whittle driftwood, start by sketching or visualizing your desired design. Then, using a woodcarving knife, slowly and carefully remove thin layers of wood, gradually shaping the driftwood according to your design. Keep the knife sharp to achieve clean and smooth cuts.

Wood burning

Wood burning, also known as pyrography, is a technique that involves using a heated metal tool to burn designs or patterns into the driftwood. This technique allows for intricate detailing and shading effects on the surface of the wood.

To wood burn driftwood, you will need a wood burning tool with different tips or attachments. Begin by sketching your design lightly on the driftwood using a pencil. Then, using the wood burning tool, carefully trace over the pencil lines, applying gentle pressure to create the desired effect. Experiment with different tips and temperatures to achieve various textures and shades.

Sanding and smoothing

Regardless of the techniques used to shape or carve the driftwood, sanding and smoothing are important steps to refine the sculpture’s appearance. Use sandpaper or sanding blocks of varying grits to gradually smooth the surface of the wood, removing any rough patches or splinters.

Start with a coarser grit sandpaper to remove major imperfections and gradually move to finer grits for a smoother finish. Pay attention to the details and contours of the driftwood, ensuring that they are well-defined and visually appealing.

Design Ideas and Inspiration

Creating abstract driftwood sculptures

Abstract driftwood sculptures allow for creative expression and interpretation. The natural shapes and textures of driftwood lend themselves well to abstract designs. Consider experimenting with different arrangements and orientations of driftwood pieces to create visually intriguing sculptures that evoke emotions or tell stories.

You can also combine different materials such as metal accents, seashells, or colored glass to add further visual interest and contrast to your abstract driftwood sculpture.

Incorporating driftwood into nature-inspired designs

Driftwood’s inherent connection to nature makes it an excellent choice for nature-inspired designs. Consider incorporating other natural elements such as leaves, flowers, or feathers into your driftwood sculpture. These elements can be attached to the driftwood using wire, glue, or other means.

In addition to natural elements, you can also paint or stain the driftwood to mimic the colors and patterns found in nature. By creating a harmonious composition that blends driftwood with other natural elements, you can capture the essence of the outdoors in your artwork.

Using driftwood to depict animals or human figures

Driftwood’s unique shapes and textures can be skillfully utilized to depict animals or human figures in sculpture form. Take time to study the forms and characteristics of the subject you wish to portray and carefully select driftwood pieces that can mimic those shapes.

You can use carving techniques, wood burning, or a combination of both to add finer details and bring life to your driftwood animal or figure. Experiment with different arrangements and poses to create a sculpture that captures the essence and spirit of the subject.

Adding Color and Finish

Choosing appropriate finishes for driftwood

When it comes to adding color to your driftwood sculpture, there are several options to consider. You can choose to leave the driftwood in its natural state, showcasing its raw beauty. Alternatively, you can enhance the colors and textures of the driftwood by applying a clear wood stain or varnish.

If you prefer a more vibrant and bold look, you can explore painting techniques that allow you to add color to specific areas of the sculpture while still maintaining the natural appearance of the wood in other areas.

Ultimately, the choice of finish will depend on your personal preference and the overall aesthetic you wish to achieve with your driftwood sculpture.

Painting techniques and color schemes

If you decide to paint your driftwood sculpture, consider using techniques such as dry brushing or layering to achieve a weathered or distressed look that complements the driftwood’s natural texture. A monochromatic color scheme or a limited palette can evoke a sense of unity and harmony in your artwork.

You can also experiment with color blocking, where different sections of the sculpture are painted with bold, contrasting colors, creating a playful and contemporary visual impact. Play around with different painting techniques and color schemes to find the style that resonates with you and enhances the overall appeal of your driftwood sculpture.

Sealing and protecting the driftwood sculpture

Once you have finished painting or applying any desired finishes to your driftwood sculpture, it’s important to protect it from the elements and ensure its longevity. Applying a clear sealant or varnish specifically designed for outdoor use will help protect the driftwood from moisture, UV damage, and other environmental factors.

Follow the manufacturer’s instructions carefully and apply the sealant evenly to all surfaces of the sculpture. Allow the sealant to dry completely before handling or hanging the sculpture.

Hanging and Displaying Driftwood Art

Determining the ideal location for hanging

When it comes to hanging your driftwood art sculpture, consider the overall aesthetic and theme of the room or space where it will be displayed. Look for a wall that provides a suitable backdrop and ample space to showcase the sculpture effectively. Consider the lighting conditions, as natural or well-placed artificial light can enhance the sculpture’s visual impact.

The height at which you hang the sculpture can also impact its presence in the room. Experiment with different heights to find the sweet spot that allows the sculpture to be appreciated and admired.

Selecting appropriate hanging hardware

Choosing the right hardware for hanging your driftwood sculpture is crucial to ensure its stability and safety. Depending on the size and weight of the sculpture, you may need to use heavy-duty picture hanging hooks, wall anchors, or brackets to securely hold the driftwood in place.

Consider consulting a professional or a knowledgeable individual at your local hardware store to determine the best hanging hardware for your specific sculpture and wall type.

Creating a cohesive display with multiple driftwood sculptures

If you have multiple driftwood art sculptures that you would like to display together, it’s important to create a cohesive and visually pleasing arrangement. Start by carefully considering the size, shape, and overall aesthetic of each sculpture.

Look for common themes, styles, or colors among the sculptures and arrange them in a way that allows each piece to be appreciated individually while still forming a unified display. Play with different heights, angles, and orientations to find the arrangement that best showcases the unique qualities of each sculpture.

Caring for Driftwood Art Sculpture Wall Hangings

Regular cleaning and dusting

To keep your driftwood art sculpture wall hangings looking their best, it’s important to incorporate regular cleaning and dusting into your routine. Use a soft, dry cloth or a feather duster to gently remove dust or debris that may accumulate on the surface of the sculpture.

Avoid using harsh chemical cleaners or abrasive materials that could damage the driftwood or any applied finishes. Instead, opt for natural cleaning methods that won’t compromise the integrity of the artwork.

Repairing any damages or loose elements

Over time, driftwood sculptures may experience wear and tear or develop loose elements. It’s important to regularly inspect your sculptures for any damages and perform necessary repairs.

If you notice any loose pieces, secure them back in place using waterproof glue or appropriate adhesive. If the sculpture has sustained more significant damage, such as cracks or breaks, consult a professional to assess the best course of action for repair.

Protecting the sculptures from direct sunlight or excessive moisture

Driftwood sculptures, like any wooden artwork, can be sensitive to direct sunlight and excessive moisture. Prolonged exposure to sunlight can cause the colors to fade or the wood to deteriorate. Excessive moisture can lead to mold or rot.

To protect your driftwood sculptures, consider hanging them in areas away from direct sunlight or windows. Avoid placing them in areas prone to high humidity or moisture, such as bathrooms or near water sources. Additionally, use curtains or blinds to filter harsh sunlight and maintain a more stable environment for the sculptures.

Conclusion

Appreciating the beauty and uniqueness of driftwood art

Driftwood art sculpture wall hangings offer a unique and visually captivating way to incorporate nature into your home or space. The beauty of driftwood lies in its inherent shapes, textures, and history. Every piece of driftwood has its own story to tell, and capturing that story in the form of art allows us to appreciate the beauty and uniqueness of nature.

Exploring further possibilities with driftwood sculpture

By exploring the techniques, design ideas, and care tips shared in this article, you can embark on your own journey of driftwood sculpture. Whether you’re a seasoned artist or a beginner, driftwood sculptures provide limitless possibilities for creativity and self-expression. So gather your tools, head out to the beach or river, and let the beauty of driftwood inspire your next artistic adventure.

Filed Under: Driftwood Ideas Tagged With: Driftwood, Sculpture, Wall Hangings

Driftwood Art Ideas Wall Hangings

April 1, 2024 by admin

Have you ever wondered how to incorporate the natural beauty of driftwood into your home decor? Driftwood Art Ideas Wall Hangings is here to inspire and guide you in transforming ordinary pieces of driftwood into stunning wall art. Discover creative ideas and techniques that will breathe new life into these weathered treasures, adding a touch of rustic charm to any space. From minimalist designs to intricate masterpieces, let your imagination drift away as you explore the endless possibilities of driftwood art. Get ready to create unique and captivating wall hangings that will leave your guests in awe.

Introduction to Driftwood Art

Definition and Background

Driftwood art refers to the creation of various artistic pieces using driftwood as the primary material. Driftwood, as the name implies, is wood that has been washed ashore by the tides and currents of bodies of water such as rivers, lakes, and oceans. Over time, these weathered and worn-out pieces of wood develop a unique and rustic charm that makes them perfect for artistic endeavors.

The art of using driftwood dates back centuries and can be seen across different cultures around the world. From functional items such as furniture and tools to decorative pieces like sculptures and wall hangings, driftwood has been transformed into stunning works of art. This form of artistic expression allows individuals to embrace the beauty of nature and create one-of-a-kind pieces that bring a touch of the outdoors into their living spaces.

The Popularity of Driftwood Art

In recent years, driftwood art has experienced a surge in popularity. People are increasingly drawn to the organic and natural appeal of driftwood, finding it to be a refreshing alternative to more traditional materials. Driftwood’s weathered and textured appearance adds a unique touch to any space, creating a rustic and coastal ambiance that resonates with many.

Moreover, the rise of sustainable and eco-friendly living has also contributed to the growing popularity of driftwood art. By repurposing driftwood that would otherwise be discarded, individuals can contribute to reducing waste and minimizing their environmental impact.

Unique Characteristics of Driftwood

What makes driftwood truly special is its distinctive characteristics. Every piece of driftwood has its own shape, texture, and color, making each artwork truly one-of-a-kind. The smooth, worn surface of driftwood adds a sense of history and charm to any piece, creating a connection to the natural world.

Driftwood’s unique characteristics also bring versatility to its applications. Whether it’s a small wall hanging or a large sculpture, the irregular shapes and sizes of driftwood pieces can be arranged in various ways, allowing for endless creative possibilities.

Choosing and Preparing Driftwood

Finding Driftwood

Finding driftwood can be an exciting adventure. Head to nearby beaches, riverbanks, or lake shores during low tide to increase your chances of finding a good haul. Keep an eye out for unique shapes and sizes, as well as any interesting textures or colors that catch your eye.

It’s important to note that not all driftwood is suitable for art projects. Look for pieces that are sturdy and in good condition, avoiding those that are rotting or infested with bugs. Collecting driftwood may also be subject to local regulations, so be sure to respect any restrictions in place and only gather what is allowed.

Cleaning and Sanitizing

Before bringing your driftwood finds indoors and incorporating them into your art, it’s crucial to clean and sanitize them thoroughly. Start by removing any loose debris, dirt, or sand by gently brushing or shaking the pieces. Rinse the driftwood under running water to wash away any remaining dirt, salt, or bacteria.

To ensure the wood is free of potential pests and organisms, it’s recommended to soak the driftwood in a mild bleach solution or a mixture of water and hydrogen peroxide. This will help kill any bacteria and sanitize the wood effectively. After soaking, rinse the driftwood thoroughly with clean water and allow it to dry completely before moving on to the next step.

Drying and Treating

Proper drying is crucial to prevent mold and rot from developing on the driftwood. After cleaning and rinsing, lay the pieces out in a well-ventilated area, preferably outdoors or in a covered space with good airflow. Avoid direct sunlight, as it can cause the wood to warp or crack. Allow the driftwood to air-dry completely for several weeks, depending on the size and thickness of the pieces.

Once the driftwood is thoroughly dried, consider treating it with a protective finish to enhance its appearance and durability. Options include clear sealants, varnishes, or natural oils like teak oil or linseed oil. Apply the chosen treatment evenly using a paintbrush or cloth, following the manufacturer’s instructions. This step not only enhances the natural beauty of the driftwood but also helps preserve it for years to come.

Driftwood Art Ideas Wall Hangings

Tools and Materials

Basic Tools for Driftwood Art

To get started with driftwood art, you’ll need a few essential tools. These tools will help you shape, assemble, and finish your driftwood pieces:

  1. Handsaw or jigsaw: For cutting driftwood to the desired lengths and shapes.
  2. Sandpaper or sanding block: To smooth rough edges and surfaces of the driftwood.
  3. Drill and drill bits: Necessary for drilling holes if you plan to create hanging or mobile pieces.
  4. Hot glue gun or wood glue: For securing the driftwood pieces together during assembly.
  5. Clamps: Useful for holding the driftwood pieces in place while the glue dries.
  6. Paintbrushes: If you wish to add color or finishes to your driftwood art, various paintbrush sizes will come in handy.
  7. Protective gear: Safety goggles and gloves are recommended to protect yourself from any potential hazards while working with tools and materials.

Supplementary Materials

In addition to the basic tools, you’ll also need some supplementary materials to bring your driftwood art to life. These materials can range from decorative elements to hanging hardware, depending on your specific project:

  1. Decorative accents: Shells, beach glass, feathers, or other natural materials can add an extra touch of charm to your driftwood art.
  2. Picture hanging wire or hooks: For wall-mounted driftwood pieces, these items will allow you to easily hang and display your art.
  3. Fishing line or twine: To create mobiles or hanging sculptures, these materials are perfect for suspending multiple driftwood pieces.
  4. Paint or wood stain: If you want to add color to your driftwood, choose paints or wood stains suitable for outdoor or indoor use, depending on where you plan to display your art.
  5. Varnish or clear sealant: These finishes can provide added protection to your driftwood art, especially if it will be exposed to the elements.

Basic Driftwood Wall Hanging Techniques

Creating a Simple Driftwood Wall Hanging

Making a simple driftwood wall hanging is a great starting point for beginners in driftwood art. To create a basic design, follow these steps:

  1. Select several driftwood pieces with varying lengths and shapes.
  2. Lay them out on a flat surface, arranging them in a visually pleasing way.
  3. Once satisfied with the layout, use a pencil to mark the desired positions for each piece.
  4. With a drill and appropriately sized drill bit, create holes at the marked positions on the driftwood.
  5. Thread a piece of fishing line or twine through the drilled holes, tying knots to secure each piece in place.
  6. Leave extra length of fishing line or twine on each end for hanging purposes.
  7. Attach picture hanging wire or hooks to the back of the driftwood arrangement, ensuring it can be easily hung on the wall.
  8. Hang your completed driftwood wall hanging in your desired location and enjoy the natural beauty it brings to your space.

Designing a Driftwood Mobile

A driftwood mobile adds a whimsical and captivating element to any room or outdoor space. To create your own driftwood mobile, follow these steps:

  1. Choose a larger, sturdy driftwood piece to act as the base or central element of your mobile.
  2. Select several smaller driftwood pieces of different lengths.
  3. Drill small holes near the ends of each smaller driftwood piece.
  4. Attach fishing line or twine to the drilled holes, tying knots to secure them in place.
  5. Create a small hole near the top of the central driftwood piece for hanging purposes.
  6. Thread a longer piece of fishing line or twine through the hole, tying a knot to secure it.
  7. Attach the smaller driftwood pieces to the lower end of the longer piece of fishing line or twine, using knots or beads between each piece to create separation and movement.
  8. Hang your completed driftwood mobile from a ceiling hook or a tree branch, adjusting the lengths of the fishing line or twine to achieve the desired balance and visual effect.

Constructing a Driftwood Wall Sculpture

For those looking to create a larger and more intricate driftwood art piece, constructing a driftwood wall sculpture is a great option. Follow these steps to bring your vision to life:

  1. Gather a variety of driftwood pieces in different lengths, shapes, and sizes.
  2. Divide the driftwood into smaller groups according to their respective qualities or characteristics.
  3. Start with the largest driftwood piece, determining its placement on the wall.
  4. Use a pencil to mark the desired position for the central piece on the wall.
  5. Carefully drill holes into the marked positions on the wall, ensuring they are deep enough to hold the larger driftwood piece securely.
  6. Insert screws or wall anchors into the drilled holes, leaving them slightly sticking out.
  7. Align the central driftwood piece with the screws or wall anchors, gently pressing it into place.
  8. Gradually build the sculpture by attaching the smaller groups of driftwood pieces around the central piece, using the same process of drilling holes and inserting screws or wall anchors.
  9. Take time to step back and assess the overall balance and composition of the sculpture.
  10. Once you are satisfied with the arrangement, use hot glue or wood glue to secure the driftwood pieces to the screws or wall anchors.
  11. Allow the glue to dry completely before making any final adjustments or additions to the sculpture.
  12. Stand back and admire your stunning driftwood wall sculpture, knowing that you have created a unique and captivating piece of art.

Driftwood Art Ideas Wall Hangings

DIY Driftwood Wall Art Ideas

Driftwood Dream Catcher

The dream catcher has long been a symbol of protection and positive energy. Combine this meaningful symbol with the natural beauty of driftwood by creating your own driftwood dream catcher:

  1. Form a circular shape using a sturdy piece of driftwood as the base of your dream catcher.
  2. Wrap the circular driftwood base with twine or fishing line, securing it tightly in place.
  3. Attach additional driftwood pieces of varying lengths to the bottom of the dream catcher, allowing them to dangle freely.
  4. Decorate the dream catcher with feathers, shells, or beads, attaching them to the base with twine or fishing line.
  5. Hang your driftwood dream catcher above your bed or in a window, allowing it to catch and filter your dreams.

Driftwood Wreath

Bring a touch of nature to your front door or interior walls by crafting a stunning driftwood wreath:

  1. Create a circular wreath base using a wire wreath frame or a flexible branch.
  2. Wrap the wreath base with twine, securing it at regular intervals to keep the twine in place.
  3. Attach driftwood pieces of various lengths and sizes to the wreath base, using hot glue or wire.
  4. Arrange the driftwood pieces in a visually appealing way, ensuring they cover the entire wreath base.
  5. Embellish the driftwood wreath with dried flowers, faux greenery, or other decorative elements, attaching them with hot glue or wire.
  6. Hang your driftwood wreath on your front door or wall, welcoming guests with its natural charm.

Driftwood Macrame

Combine the bohemian art of macrame with driftwood to create a unique wall hanging or curtain:

  1. Select a long, sturdy piece of driftwood as the top bar of your macrame project.
  2. Attach individual strands of macrame cord to the driftwood, allowing them to hang down evenly.
  3. Follow macrame knotting techniques to create intricate and decorative patterns with the cord, incorporating beads or other embellishments for added visual interest.
  4. Continue knotting until you are satisfied with the length and design of your driftwood macrame project.
  5. Hang your driftwood macrame in a prominent place, allowing it to add texture and bohemian flair to your space.

Driftwood Mirror Frame

Transform an ordinary mirror into a stunning focal point with a handmade driftwood frame:

  1. Measure the dimensions of your mirror and cut driftwood pieces to fit around the edges.
  2. Arrange the driftwood pieces around the mirror, overlapping them slightly for a rustic look.
  3. Use hot glue or wood glue to secure the driftwood pieces to one another and to the mirror frame.
  4. Allow the glue to dry completely before hanging your driftwood-framed mirror, reflecting the beauty of nature in your space.

Driftwood Photo Display

Display cherished memories and photographs with a driftwood photo display:

  1. Select several smaller driftwood pieces and attach them vertically or horizontally to a larger driftwood base.
  2. Use mini clothespins or small clips to hang photographs from the driftwood branches or twigs.
  3. Arrange the driftwood photo display on a shelf, mantel, or wall, allowing it to showcase your favorite moments and images.

Driftwood Shelving Unit

Create a functional and artistic shelving unit using driftwood:

  1. Choose a larger, sturdy driftwood piece to serve as the base or shelf support.
  2. Attach shorter driftwood pieces horizontally to the base using wood screws or strong adhesive.
  3. Create multiple shelves with additional layers of driftwood, securing them in place with the same method as the base.
  4. Ensure the shelves are level and secure before placing decorative items, books, or plants on them.
  5. Display your driftwood shelving unit in any room, providing both storage and a unique artistic element.

Inspiring Driftwood Wall Hanging Ideas

Nautical Theme Wall Decor

Embrace the coastal vibes with nautical-themed driftwood wall decor. Incorporate elements such as seashells, starfish, and rope to enhance the maritime feel. Arrange the driftwood in shapes reminiscent of anchors, sailboats, or lighthouses to bring your nautical vision to life.

Beach House Vibes

If you want to create a relaxed and beachy atmosphere, opt for driftwood wall hangings with a rustic and weathered look. Leave the driftwood pieces in their natural state or lightly sand them to maintain their original texture. Combine them with neutral and sandy colored accents, such as jute rope or woven baskets, to evoke the feeling of being by the seashore.

Bohemian and Rustic Styles

For a bohemian or rustic aesthetic, choose driftwood pieces with interesting shapes and irregular edges. Arrange them asymmetrically on the wall, combining them with macrame, woven textiles, or dried flowers. Incorporate warm and earthy tones into your color palette to complete the bohemian or rustic vibe.

Abstract and Modern Designs

If you prefer a more contemporary look, experiment with abstract and modern designs using driftwood. Arrange the driftwood pieces in geometric patterns or create a sculptural arrangement that adds visual interest to your space. Combine different wood finishes and paint colors for a bold and artistic statement.

Personalized Driftwood Wall Art

Add a personal touch to your driftwood wall art by incorporating elements that hold sentimental value. Attach small picture frames, trinkets, or hand-painted signs to the driftwood arrangement, showcasing cherished memories or meaningful quotes. Personalized driftwood art allows you to create a unique and meaningful piece that resonates with your individual story.

Tips for Decorating with Driftwood

Choosing the Right Location

When decorating with driftwood, consider the location and purpose of the piece. Driftwood wall hangings can enhance the visual appeal of a living room, bedroom, or even a bathroom. If you have a particular theme or style in mind, choose a location that complements and enhances the overall aesthetic of your space.

Considering Color Palette and Style

Ensure that the color palette of your driftwood art complements the existing colors and decor in the room. Driftwood’s inherently neutral tones can easily blend with various styles, from coastal and bohemian to rustic and modern. Use the texture, shape, and size of the driftwood pieces to enhance the overall design and feel of your space.

Bringing Dimension with Lighting

Illuminate your driftwood art by strategically placing lighting fixtures nearby. Use soft and warm lights to create a cozy and inviting atmosphere, or opt for cool and directional lights to highlight specific features of your driftwood piece. Experiment with different lighting angles and strengths to achieve the desired effect, adding depth and dimension to your art.

Maintenance and Care

Cleaning and Dusting

To keep your driftwood art looking its best, regular cleaning and dusting are important. Use a soft brush or cloth to gently remove any dust or debris that may have accumulated on the driftwood. Avoid using water or cleaning products unless absolutely necessary, as they can alter the natural appearance and texture of the wood.

Preventing Fading

Driftwood can fade over time when exposed to direct sunlight or harsh indoor lighting. To prevent fading, consider placing your driftwood art away from direct sunlight or using UV-blocking window films. If displayed outdoors, periodically move the art to shady areas or apply a protective sealant to minimize fading caused by sun exposure.

Handling Humidity and Moisture

Driftwood is relatively resilient to humidity and moisture, but extended exposure to high levels of moisture can cause deterioration or mold growth. Avoid placing driftwood art in areas prone to moisture, such as bathrooms or humid basements. If you notice any signs of mold or rot, remove the affected driftwood pieces and address the issue promptly to prevent further damage.

Selling and Showcasing Driftwood Art

Creating an Online Presence

If you’re looking to sell your driftwood art or showcase it to a wider audience, consider creating an online presence. Set up a website or online store where you can showcase your creations and provide information about your artistic process. Utilize high-quality photographs and engaging descriptions to captivate potential buyers and art enthusiasts.

Local Craft Fairs and Markets

Participating in local craft fairs and markets is a great way to showcase your driftwood art and connect with potential customers in your community. Rent a booth space, set up an eye-catching display, and engage with visitors to share the story behind each piece. Networking with fellow artisans and sharing your passion for driftwood art can lead to new opportunities and collaborations.

Promoting through Social Media

Harness the power of social media platforms to promote your driftwood art. Create accounts on popular platforms such as Instagram, Facebook, or Pinterest, and regularly share captivating images of your art. Engage with your followers by responding to comments, sharing behind-the-scenes moments, and offering exclusive promotions or discounts. Social media provides a vast and accessible audience, allowing you to reach people who appreciate and value driftwood art.

Conclusion

Appreciating the Beauty of Driftwood Art

Driftwood art is a unique and captivating form of artistic expression that allows individuals to embrace the beauty of nature and create stunning pieces. The organic and rustic charm of driftwood adds a touch of the outdoors to any space, resonating with those who appreciate the natural world. By repurposing and crafting driftwood, artists can create one-of-a-kind works that bring joy, tranquility, and a renewed connection to nature.

Exploring Creative Possibilities

With its distinctive characteristics and versatility, driftwood offers endless creative possibilities. From simple wall hangings to intricate sculptures, there is no limit to what can be achieved with driftwood art. Whether you choose to create your own pieces or admire the works of others, exploring the world of driftwood art allows you to dive into a world of imagination, inspiration, and artistic fulfillment.

Filed Under: Driftwood Ideas Tagged With: Driftwood, ideas, Wall Hangings

Driftwood Art Diy Wall Hangings

March 10, 2024 by admin

Discover the creative world of driftwood art with these delightful DIY wall hangings. Made using pieces of driftwood, these unique creations bring a touch of nature’s beauty into your home. Crafted with love and attention to detail, these wall hangings offer a charming and rustic addition to any space. Get ready to embark on a journey of creativity as you explore the endless possibilities of driftwood art DIY wall hangings.

Driftwood Art Diy Wall Hangings

This image is property of images.pexels.com.

Materials needed

To create your own driftwood wall hanging, you will need the following materials:

Driftwood pieces

Collect a variety of driftwood pieces in different shapes and sizes. Look for smooth, weathered pieces that have washed up on the beach.

Assorted seashells and sea glass

Gather an assortment of seashells and sea glass to add decorative elements to your driftwood wall hanging. Look for shells in various shapes and sizes, and choose sea glass in colors that complement your desired color scheme.

Hot glue gun

A hot glue gun will be your best friend when it comes to securing the different components of your wall hanging together. Make sure you have plenty of glue sticks on hand.

Jute twine or fishing line

You will need jute twine or fishing line to create the macrame hanger for your driftwood wall hanging. Choose a sturdy material that can support the weight of the driftwood.

Scissors

Having a good pair of scissors is essential for cutting and trimming various materials throughout the creative process.

Acrylic paint and paintbrushes

To add a touch of color to your driftwood wall hanging, gather some acrylic paint in your preferred color scheme. Make sure to have a variety of paintbrushes on hand for different techniques and details.

Preparing the driftwood

Before you can start creating your wall hanging, it’s important to properly prepare the driftwood. Follow these steps to ensure your driftwood is clean and ready to use:

Clean the driftwood

Begin by cleaning the driftwood to remove any dirt, debris, or salt. Use a soft brush or cloth to gently scrub the surface. If necessary, you can also rinse the driftwood with water.

Sand the driftwood

Next, use sandpaper to smooth out any rough edges or splinters on the driftwood. Sanding will also help enhance the natural texture of the wood.

Apply a clear protective finish

To preserve the natural beauty of the driftwood and protect it from the elements, apply a clear protective finish. This can be a spray-on sealant or a brush-on varnish. Follow the instructions on the product for proper application.

Creating the base

Now that your driftwood is prepared, it’s time to create the base of your wall hanging. Follow these steps to create a sturdy foundation for your design:

Arrange the driftwood pieces

Lay out your driftwood pieces in a design that you find aesthetically pleasing. Experiment with different arrangements until you find the perfect composition.

Use the hot glue gun to secure them together

Once you are satisfied with the arrangement, carefully apply hot glue to the points where the driftwood pieces meet. Press them together firmly to create a strong bond. Be cautious when working with hot glue to avoid burns.

Let it dry completely

Allow the glue to dry completely before moving on to the next steps. This will ensure that the base of your wall hanging is secure and stable.

Adding decorative elements

Now comes the fun part – adding decorative elements to your driftwood wall hanging. Let your creativity shine with these steps:

Attach seashells and sea glass to the driftwood

Using your hot glue gun, carefully attach seashells and sea glass to the surface of the driftwood. Consider different arrangements and patterns to achieve the desired look.

Experiment with different designs and patterns

Feel free to experiment with different designs and patterns when attaching the decorative elements. Create a symmetrical or asymmetrical design, or let the natural shapes of the materials guide your creativity.

Ensure they are securely fastened

As you attach the seashells and sea glass, make sure they are securely fastened to the driftwood. Apply enough glue to create a strong bond, but be careful not to add excessive amounts that may be visible.

Driftwood Art Diy Wall Hangings

This image is property of images.pexels.com.

Painting the driftwood

Adding a bit of color to your driftwood wall hanging can make it even more visually appealing. Follow these steps to paint your driftwood:

Choose a color scheme

Decide on a color scheme that complements your overall design. Consider using colors that evoke a coastal or beachy vibe, or choose hues that match your existing home decor.

Apply a base coat

Using a paintbrush, apply a base coat of your chosen color to the entire surface of the driftwood. This will provide a solid foundation for adding details and patterns later on.

Add details and patterns with different colors

Once the base coat is dry, use different paint colors to add details and patterns to the driftwood. Consider painting intricate designs, stripes, or even simple dots. Let your imagination guide you.

Let it dry completely

Allow the paint to dry completely before moving on to the next steps. This will prevent smudging or smearing of the paint.

Enhancing with accessories

To add a personal touch and extra flair to your driftwood wall hanging, consider enhancing it with accessories. Follow these steps to take your creation to the next level:

Attach small hooks or knobs for hanging

To make your wall hanging functional, attach small hooks or knobs to the back of the driftwood. This will allow you to easily hang it on a wall.

Add additional embellishments like beads or charms

If you want to add more visual interest, consider attaching additional embellishments such as beads or charms. Thread them onto jute twine or fishing line and tie them to the driftwood.

Personalize with initials or quotes

To make your driftwood wall hanging even more meaningful, personalize it with initials or quotes. Use paint or permanent markers to add these personal touches to the driftwood.

Driftwood Art Diy Wall Hangings

This image is property of images.pexels.com.

Creating a macrame hanger

To display your driftwood wall hanging in style, consider creating a macrame hanger. Follow these steps to create a beautiful and functional hanger:

Cut four lengths of jute twine or fishing line

Measure and cut four equal lengths of jute twine or fishing line. The length will depend on how long you want your wall hanging to hang.

Tie them together at the top to create a loop

Take the four lengths of twine or fishing line and tie them together at the top, creating a loop. Make sure it is secure and tight.

Divide the strands into pairs and tie knots about halfway down

Divide the strands into pairs and tie knots about halfway down from the top loop. This will create a decorative macrame pattern.

Create additional knots further down for extra support

To provide additional support, create additional knots further down the strands. These knots will help hold the driftwood and prevent any sagging.

Hang the driftwood wall hanging from the top loop

Once your macrame hanger is complete, hang the driftwood wall hanging from the top loop. Adjust the length as desired and ensure it is securely attached.

Alternative hanging methods

If macrame is not your style or you prefer a different hanging method, there are alternative options to consider. Explore these ideas for hanging your driftwood wall hanging:

Attach a sawtooth hanger to the back of the driftwood

For a more traditional hanging method, attach a sawtooth hanger to the back of the driftwood. This will allow you to easily hang it on a nail or hook.

Use removable adhesive hooks to hang the driftwood

If you want a temporary and removable hanging solution, consider using adhesive hooks specifically designed for hanging lightweight items. This option is ideal for renters or those who like to frequently change their decor.

Experiment with different types of hooks and hardware

Take a trip to your local hardware store and explore different types of hooks and hardware that can be used to hang your driftwood wall hanging. Get creative and find a solution that suits your style and needs.

Driftwood Art Diy Wall Hangings

Displaying and caring for driftwood wall hangings

Once you have hung your driftwood wall hanging, it’s important to properly care for it to ensure its longevity. Follow these tips for displaying and caring for your driftwood art:

Hang the driftwood away from direct sunlight to prevent fading

Direct sunlight can cause the colors on your driftwood wall hanging to fade over time. Hang it in a location where it is protected from direct sunlight to preserve its vibrancy.

Avoid hanging in areas prone to high humidity or moisture

Driftwood is a natural material that can be influenced by humidity and moisture. Avoid hanging your wall hanging in areas prone to high humidity, such as bathrooms or near moisture sources, to prevent damage.

Dust the driftwood regularly to keep it clean

To keep your driftwood wall hanging looking its best, dust it regularly with a soft cloth or duster. This will help remove any dirt or buildup that may accumulate over time.

Inspect and reattach any loose elements periodically

Periodically inspect your driftwood wall hanging for any loose elements or attachments. If you notice anything coming loose, use hot glue or other appropriate adhesive to reattach them securely.

Exploring driftwood art variations

Once you have mastered the art of creating driftwood wall hangings, you can explore other variations of driftwood art. Here are a few ideas to inspire your creativity:

Create a driftwood mobile

Using driftwood pieces of various lengths, create a driftwood mobile that can be hung from the ceiling or in front of a window. Attach small seashells, bells, or other lightweight objects to add movement and visual interest.

Make a driftwood photo display

Combine driftwood pieces with small clothespins or clips to create a unique photo display. Attach photos, postcards, or other mementos to the driftwood to showcase your favorite memories.

Design a driftwood mirror frame

If you’re feeling ambitious, use a large piece of driftwood to create a frame for a mirror. Attach the mirror to the driftwood using appropriate adhesive or hardware, and hang it on a wall for a stunning focal point.

With these comprehensive steps and ideas, you’re well on your way to creating beautiful and personalized driftwood wall hangings. Let your imagination run wild and enjoy the process of crafting your own unique piece of art. Happy creating!

Driftwood Art Diy Wall Hangings

Filed Under: Driftwood Ideas Tagged With: Art, DIY, Driftwood, Wall Hangings

Driftwood Crafts Diy Wall Hangings

March 5, 2024 by admin

If you’re looking to add a touch of rustic charm and natural beauty to your home decor, then look no further than driftwood crafts DIY wall hangings. These unique pieces bring a sense of coastal serenity to any space and can be easily personalized to match your style and preferences. With just a few simple materials and a creative mindset, you can transform ordinary pieces of driftwood into stunning wall art that will captivate and inspire. Whether you’re a seasoned DIY enthusiast or just starting out, driftwood crafts DIY wall hangings offer a fun and rewarding project that allows you to bring a piece of the beach into your own home.

Driftwood Crafts Diy Wall Hangings

This image is property of images.unsplash.com.

Introduction to Driftwood Crafts DIY Wall Hangings

Driftwood crafts are a wonderful way to express your creativity and bring a touch of nature into your home decor. DIY wall hangings made with driftwood offer a unique and rustic charm that is both stylish and eco-friendly. Whether you are a seasoned crafter or a beginner, creating driftwood wall hangings allows you to add a personal and artistic touch to your living space. In this comprehensive guide, we will explore the world of driftwood crafts, from choosing and preparing driftwood to advanced techniques and tips on caring for your wall hangings.

What are driftwood crafts?

Driftwood crafts involve using pieces of wood that have been washed ashore by rivers, lakes, or the ocean. These weathered and worn pieces of wood can vary in size, shape, and texture, making them perfect for creating unique and one-of-a-kind decorative pieces. By repurposing driftwood, you not only give it a new lease on life but also reduce waste and contribute to a more sustainable lifestyle.

Why make DIY wall hangings with driftwood?

Driftwood wall hangings serve as exquisite focal points in any room. They add a natural and organic element, bringing warmth and texture to your walls. By incorporating driftwood into your DIY projects, you can create beautiful and meaningful art pieces that reflect your personal style. Additionally, making your own driftwood wall hangings allows you to customize and design according to your preferences, ensuring that your home reflects your unique personality.

Benefits of driftwood crafts DIY wall hangings

There are numerous benefits to creating DIY wall hangings with driftwood. First and foremost, it is a cost-effective way to add style to your home. Driftwood can often be found for free or at a low cost, making it an affordable material for crafting. Additionally, driftwood wall hangings promote sustainability and eco-consciousness by repurposing natural materials that would otherwise go to waste. Furthermore, engaging in driftwood crafts can be a therapeutic and relaxing activity, allowing you to unwind and unleash your creativity.

Choosing and Preparing Driftwood

Finding suitable driftwood

When searching for driftwood, it’s important to consider size, shape, and condition. Look for pieces that are sturdy and haven’t been easily broken or damaged. While smaller pieces can be used for intricate designs and detailing, larger pieces can serve as the main focus of your wall hanging. Beaches, riverbanks, and lakeshores are great places to find driftwood, but be sure to check local regulations before collecting any natural materials.

Cleaning and sanitizing the driftwood

Before using driftwood in your crafts, it’s crucial to clean and sanitize it properly. Start by removing any dirt, sand, or debris by gently scrubbing the surface with a brush or a toothbrush. Next, soak the driftwood in a mixture of water and mild soap or vinegar for a few hours. This step not only cleans the wood but also helps eliminate any unpleasant odors. Rinse the driftwood thoroughly with clean water and allow it to dry completely before moving on to the next step.

Drying and treating the driftwood

Once the driftwood is clean and dry, it’s essential to treat it to protect it from pests and decay. One effective method is to bake the driftwood in the oven at a low temperature for several hours. This process removes any moisture and kills any insects or larvae that may be hiding within the wood. Alternatively, you can use a wood preservative or sealant to enhance the durability and longevity of the driftwood. Apply the chosen treatment according to the product instructions and allow it to dry completely before using it in your wall hangings.

Tools and Materials Needed

Basic tools for driftwood crafts DIY

To get started with driftwood crafts, there are a few basic tools that you’ll need. These include a handsaw or a jigsaw for cutting and shaping the driftwood, sandpaper or a sander for smoothing the edges, a drill for creating holes, and a hot glue gun for secure attachment of elements. Additionally, having a ruler, a pencil, and a set of clamps or vice grips will make your crafting process much easier and more precise.

Additional materials for wall hangings

In addition to the basic tools, you’ll need a few materials to complete your driftwood wall hangings. These can include various types of strings or ropes for hanging the wall hangings, decorative elements such as beads, shells, or feathers, and other natural materials like dried flowers or twigs for added embellishment. You may also consider using paint or stain to further customize and enhance the appearance of your wall hangings.

Safety precautions

When working with tools and materials, it’s important to prioritize safety. Always wear protective goggles and gloves to prevent any injuries. Use tools correctly and make sure they are in good working condition. Take breaks when needed and be mindful of your surroundings. Keep your workspace clean and organized to avoid accidents. By taking these safety precautions, you can enjoy your driftwood crafting experience without any worries.

Creating Simple Driftwood Wall Hangings

Design ideas for beginners

If you’re new to driftwood crafts, starting with simple designs can help you gain confidence and develop your creative skills. Some ideas for beginners include creating geometric shapes, such as triangles or hexagons, using different sizes of driftwood. You can also experiment with arranging driftwood in a cascading or cascading pattern to create a dynamic and visually appealing composition. Another beginner-friendly design idea is to create a driftwood mobile by suspending multiple pieces from a centered focal point.

Step-by-step instructions for a basic wall hanging

To create a basic driftwood wall hanging, follow these step-by-step instructions:

  1. Gather all the necessary tools and materials.
  2. Select the driftwood pieces you want to use, ensuring they are clean and treated.
  3. Arrange the driftwood on a flat surface, experimenting with different layouts until you find a design you like.
  4. Once you’re satisfied with the arrangement, take measurements and mark the locations for drilling holes if needed.
  5. Use a drill to create holes in the driftwood pieces as necessary.
  6. Attach the driftwood pieces together using strings, ropes, or wires, securing them tightly.
  7. If desired, add any additional decorative elements or embellishments to further enhance the wall hanging.
  8. Attach a string or a rope to the top of the wall hanging to enable hanging.
  9. Hang your creation on a wall and step back to admire your unique and handmade driftwood wall hanging.

Adding decorative elements

To add visual interest and personalization to your driftwood wall hangings, consider incorporating decorative elements. Shells, beads, or feathers can be attached to the driftwood using hot glue or by drilling holes to thread strings through. Dried flowers or twigs can be intertwined with the driftwood for a natural and whimsical touch. These additions not only enhance the overall aesthetic but also create a sense of texture and depth.

Driftwood Crafts Diy Wall Hangings

This image is property of images.unsplash.com.

Advanced Driftwood Wall Hanging Techniques

Intricate weaving patterns

For those looking to challenge their crafting skills, exploring intricate weaving patterns can take your driftwood wall hangings to the next level. Weaving different types of strings or ropes through the holes in the driftwood can create stunning geometric or organic patterns. Experiment with different weaving techniques, such as macramé knots or basket-weave patterns, to add complexity and visual interest to your wall hangings.

Macramé techniques

Macramé is a popular art form that involves creating intricate patterns by knotting strings or ropes together. Incorporating macramé techniques into your driftwood wall hangings can result in stunning and bohemian-inspired designs. Experiment with various knotting patterns, such as square knots, half-hitch knots, or spiral knots, to achieve different textures and effects. Macramé can be used to create cascading fringe, elaborate designs, or even a macramé hammock to suspend from a driftwood frame.

Using other materials in combination with driftwood

To add variety and depth to your driftwood wall hangings, consider combining driftwood with other materials. For example, incorporating colored or textured yarns can create an eye-catching contrast against the natural tones of the wood. You can also experiment with incorporating metal accents or recycled materials like wire or bottle caps. The combination of different materials can result in unique and visually captivating wall hangings that truly reflect your personal style.

Painting and Staining Driftwood

Choosing the right paint or stain

Painting or staining driftwood can bring a splash of color or a touch of elegance to your wall hangings. When selecting paint or stain, consider the overall aesthetic you want to achieve. Acrylic or latex paints offer a wide range of colors and can be easily applied to the driftwood. For a more natural and transparent look, wood stains provide a beautiful finish that enhances the natural grain of the driftwood.

Applying paint or stain to the driftwood

Before applying paint or stain, ensure that the driftwood is clean and dry. Use a brush or a sponge to apply an even coat of paint or stain, following the grain of the wood. Allow the first coat to dry completely before applying additional coats for a more opaque or intense color. For staining, wipe away any excess to achieve the desired level of transparency. Experiment with layering different colors or blending shades to create depth and dimension in your wall hangings.

Creative painting techniques

To take your driftwood wall hangings to the next level, explore creative painting techniques. Consider using stencils or templates to create intricate designs or patterns on the driftwood. Dip the ends of the driftwood in paint to create a gradient effect. Experiment with splatter painting or marbling techniques for a unique and artistic finish. These creative approaches allow you to add your personal touch and make your driftwood wall hangings truly stand out.

Driftwood Crafts Diy Wall Hangings

This image is property of images.unsplash.com.

Embellishing Driftwood Wall Hangings

Adding shells, beads, or feathers

Adding shells, beads, or feathers to your driftwood wall hangings can bring a touch of nature and whimsy. Use hot glue or drill holes in the driftwood to attach shells or beads. You can thread strings or wires through the drilled holes to hang feathers from the driftwood, creating a bohemian-inspired look. These embellishments add texture, color, and dimension to your wall hangings, making them visually captivating and unique.

Using ropes or strings to hang additional elements

Ropes or strings can be used not only to hang the driftwood wall hangings but also to suspend additional elements. Consider attaching small glass jars or vases to the ropes and filling them with fresh or dried flowers. You can also hang miniature terrariums or small potted plants to add a touch of greenery to your wall hangings. These additions create a dynamic and organic display, transforming your driftwood wall hanging into a living art piece.

Incorporating other natural materials

Expand your creative possibilities by incorporating other natural materials into your driftwood wall hangings. Dried leaves, moss, or pine cones can be attached to the driftwood using hot glue or thin wires. Twigs or branches can be arranged around the driftwood to create a rustic and woodland-inspired composition. By blending different natural elements, you can create wall hangings that reflect the beauty and diversity of the natural world.

Displaying and Hanging Driftwood Wall Hangings

Considerations for wall placement

When deciding where to display your driftwood wall hangings, consider the size and visual impact of the piece. Larger wall hangings can become a statement piece in your living room or above a mantel. Smaller wall hangings can be grouped together to create a gallery wall or used to enhance a cozy corner. Also, consider the color scheme and decor style of the room to ensure that the wall hanging complements the overall aesthetic.

Alternative display options

Although traditional wall hanging is a popular choice, there are alternative ways to display your driftwood creations. You can lean larger driftwood wall hangings against the wall, creating a casual and laid-back atmosphere. Another option is to suspend the wall hangings from the ceiling using wire or ropes, allowing them to gently sway and creating a mobile-like display. Explore your creativity and think outside the box when it comes to displaying your driftwood wall hangings.

Proper hanging techniques

To ensure that your driftwood wall hangings are securely hung, it’s important to use proper hanging techniques. For lighter pieces, simply attach a strong string or rope to the back of the wall hanging and hang it from a hook or a nail on the wall. For larger or heavier pieces, consider using picture hanging hardware or anchor screws to provide extra support. It’s also important to double-check the stability of the hanging mechanism regularly to prevent accidents or damage.

Driftwood Crafts Diy Wall Hangings

Customizing Driftwood Crafts DIY Wall Hangings

Personalizing with quotes or messages

To add a personal touch to your driftwood wall hangings, consider incorporating quotes or messages. You can use letter stencils or paint pens to write inspirational words or meaningful phrases directly on the driftwood. For a more subtle approach, use small wooden or metal letters to spell out a word or a name and attach them to the driftwood with hot glue. Personalizing your wall hangings adds sentimental value and allows them to reflect your unique story.

Creating themed wall hangings

Themed wall hangings can add a whimsical and cohesive element to your home decor. Consider creating driftwood wall hangings that align with a specific theme, such as a beach or coastal theme, a bohemian or tribal theme, or a nature-inspired theme. Incorporate elements like seashells, nautical ropes, dreamcatchers, or animal motifs to enhance the chosen theme. Themed wall hangings create a cohesive look and tell a story within your living space.

Using different sizes and shapes of driftwood

By varying the sizes and shapes of the driftwood used in your wall hangings, you can add visual interest and depth. Combining long and slender pieces with shorter and thicker ones creates a balanced and dynamic composition. Experiment with different shapes, such as driftwood branches or gnarled pieces, to add texture and character to your wall hangings. Mixing and matching various sizes and shapes allows you to create truly captivating and unique art pieces.

Caring for Driftwood Wall Hangings

Cleaning and maintaining the wall hangings

To keep your driftwood wall hangings looking their best, regular cleaning and maintenance are essential. Use a soft brush or a cloth to gently remove any dust or debris that may accumulate on the surface of the driftwood. If the wall hanging is placed in a humid environment, occasional wiping with a damp cloth can help prevent the growth of mold or mildew. Avoid using harsh cleaners or abrasive materials that could damage or scratch the driftwood.

Protecting against pests and decay

Over time, driftwood wall hangings may become susceptible to pests or decay. To protect your creations, regularly inspect the driftwood for any signs of insects or wood-boring pests. If you notice any infestation, promptly address it by applying appropriate wood treatments or contacting a professional for assistance. To prevent decay, ensure that your wall hangings are not exposed to excessive moisture or direct sunlight, as these can accelerate the deterioration of the driftwood.

Refreshing and refurbishing over time

Driftwood wall hangings may change over time due to natural weathering or fading. To refresh the appearance of your wall hangings, consider applying a fresh coat of paint or stain. You can also replace any embellishments or decorative elements that have become worn or damaged. Take this opportunity to unleash your creativity and give your driftwood wall hangings a new life. By periodically refreshing and refurbishing your creations, you can continue to enjoy their unique beauty for years to come.

Driftwood Crafts Diy Wall Hangings

Filed Under: Driftwood Ideas Tagged With: crafts, DIY, Driftwood, Wall Hangings

  • Page 1
  • Page 2
  • Next Page »

Primary Sidebar

Driftwood4us.com, is a participant in the Amazon Services LLC Associates Program, an affiliate advertising program designed to provide a means for sites to earn advertising fees by advertising and linking to amazon.com.