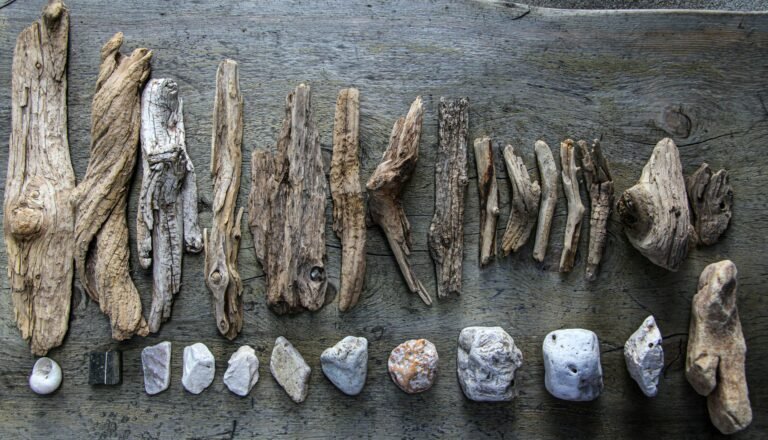
• Skip to main content
  • Skip to primary sidebar
  • Terms and Conditions
  • Privacy Policy
  • Contact

Driftwood 4 Us

Just About Driftwood

Art

Driftwood Stained Glass Art

March 27, 2024 by admin

Imagine stepping into a world where intricate pieces of stained glass dance delicately within the rugged embrace of driftwood. Driftwood Stained Glass Art is an exquisite fusion of nature’s wonders and the artist’s creativity. Each piece is meticulously crafted, allowing the beauty of the stained glass to mingle gracefully with the organic textures of driftwood. The result? A collection that captures both the timeless elegance of stained glass and the rugged allure of the sea. Embark on a visual journey through this unique art form, where craftsmanship and nature intertwine to create breathtaking masterpieces.

What is Driftwood Stained Glass Art

Driftwood stained glass art combines the natural beauty of driftwood with the vibrant colors and textures of stained glass. It is a unique form of art that brings together elements from the natural world and the artistry of glass crafting. This art form allows for endless creativity, as each piece of driftwood and each stained glass design is different and can be customized according to the artist’s vision.

Definition of Driftwood Stained Glass Art

Driftwood stained glass art refers to the process of creating artwork by incorporating stained glass pieces onto driftwood. This artform involves several steps, including finding inspiration in nature, designing the artwork, preparing the driftwood, cutting and shaping the stained glass, applying copper foil, soldering the pieces together, cleaning and finishing, and finally, hanging and displaying the artwork.

How Driftwood Stained Glass Art is Made

The process of creating driftwood stained glass art involves various steps and requires specific materials and tools. The materials needed include driftwood, stained glass pieces, a glass cutter, a soldering iron, flux, copper foil, solder, patina, and wire for hanging. By following these steps and using these materials, artists can create stunning and unique pieces of art that showcase both the organic beauty of driftwood and the brilliance of stained glass.

Materials Needed

To create driftwood stained glass art, you will need several materials and tools. These include:

Driftwood

First and foremost, you will need a piece of driftwood as the base for your artwork. Driftwood is wood that has been washed ashore by rivers, lakes, or the ocean. It typically has a weathered appearance and unique shapes that add character to the artwork.

Stained Glass Pieces

Stained glass comes in a variety of colors, textures, and patterns. You can choose glass that suits your artistic vision, whether it be vibrant and bold or subtle and gentle. Stained glass pieces are the main attraction of your artwork and will be affixed to the driftwood.

Glass Cutter

A glass cutter is an essential tool for creating clean and precise cuts in the stained glass pieces. It allows you to shape the glass according to your design and create the desired effect.

Soldering Iron

A soldering iron is necessary for joining the stained glass pieces together. It melts the solder, which acts as a bonding agent, creating a strong and secure connection between the glass pieces.

Flux

Flux is a chemical compound that helps the solder flow smoothly and adhere to the glass pieces. It also prevents oxidation, ensuring a clean and sturdy solder joint.

Copper Foil

Copper foil is an adhesive copper tape that is applied to the edges of the stained glass pieces. It helps create a tight seal and provides a surface for the solder to adhere to.

Solder

Solder is a metal alloy, typically a mixture of tin and lead, which is melted with a soldering iron and used to join the stained glass pieces together. It forms a strong bond and adds stability to the artwork.

Patina

Patina is a chemical solution that can be applied to the soldered areas to give the artwork an aged or antique appearance. It adds depth and character to the finished piece.

Wire for Hanging

To display your driftwood stained glass art, you will need wire or hooks to securely attach it to a wall or other hanging surface. Choose a wire that can support the weight of your artwork and ensure it is securely fastened.

Driftwood Stained Glass Art

This image is property of images.unsplash.com.

Inspiration and Design

Finding inspiration in nature is a crucial aspect of creating driftwood stained glass art. The unique shapes and textures of driftwood can spark ideas and guide the design process. Consider the natural curves, grooves, and knots in the wood, as well as any interesting patterns or colors. You can also draw inspiration from the surrounding environment, such as seascapes, forests, or any other natural elements that resonate with you.

Creating unique designs in driftwood stained glass art allows you to showcase your individual artistic style. Experiment with different combinations of stained glass pieces, colors, and patterns. Consider the overall composition and balance of the artwork. Sketching your design on the driftwood can help you visualize the final piece and make adjustments as needed.

Preparing the Driftwood

Before you can attach the stained glass pieces, it is important to prepare the driftwood. Start by cleaning the driftwood to remove any dirt, debris, or insects. You can use a soft brush or cloth to gently scrub the wood, being careful not to damage its natural texture.

Once clean, you may choose to sand the driftwood to create a smooth surface. Sanding can also help remove any rough or uneven areas that may interfere with the placement of the stained glass. Use sandpaper of varying grits to achieve the desired smoothness, starting with a coarse grit and gradually moving to a finer grit.

To protect the driftwood and enhance its natural beauty, you may apply a finish or sealant. This can help prevent further weathering and enhance the colors and patterns of the wood. Consider using a clear varnish or wood stain that is compatible with the type of wood you are working with. Apply the finish according to the manufacturer’s instructions and allow it to dry completely before proceeding with the next steps.

Driftwood Stained Glass Art

This image is property of images.unsplash.com.

Cutting and Shaping Stained Glass

Choosing the right glass is essential in achieving the desired effect in your driftwood stained glass art. Consider the colors, textures, and transparency of the glass as you select your pieces. You can mix and match different types of glass to create a dynamic and visually interesting composition.

Creating templates for glass shapes can help ensure accuracy and consistency in your design. Trace the desired shapes onto a piece of cardboard or paper and use them as a guide for cutting the glass. This can be especially helpful if you have intricate or complex designs.

Cutting the glass requires a steady hand and precision. Use a glass cutter to score the glass along the traced lines, applying even pressure throughout the cut. Once scored, carefully snap or separate the glass along the score line. Practice cutting on scrap pieces of glass before working on your final design to improve your technique.

After cutting, it is important to grind and smooth the glass edges to remove any sharp or rough areas. A glass grinder or dedicated grinding tool can be used to carefully grind away any imperfections. Take your time and make sure all the edges are smooth to prevent any injuries during the handling and assembly process.

If desired, you can also heat the glass to create curved or shaped pieces. This can be done by carefully heating the glass in a kiln or using a torch to soften and manipulate the glass. Always follow proper safety precautions when working with heat and wear protective gear.

Copper Foil Method

The copper foil method is commonly used in creating driftwood stained glass art. This method involves applying copper foil to the edges of the glass pieces before soldering them together. The copper foil acts as an adhesive and provides a surface for the solder to adhere to.

To apply copper foil, start by cutting strips of foil that are slightly longer than the edges of the glass pieces. Peel off the paper backing from the foil and carefully wrap it around the edges of each glass piece. Make sure the foil adheres tightly to the glass and covers the edges completely. Use a fid or burnishing tool to press the foil firmly onto the glass, ensuring a secure bond.

Soldering the Pieces

Before you begin soldering, it is important to set up a well-ventilated workspace. Soldering produces fumes that can be harmful if inhaled, so ensure you have proper ventilation or work in an outdoor area. Additionally, make sure you have all necessary safety equipment, such as safety glasses and heat-resistant gloves.

To solder the pieces together, start by applying flux to the foiled edges of the glass. Flux helps clean the surfaces and allows the solder to flow smoothly and evenly. Use a small brush or applicator to apply a thin layer of flux along the foiled edges.

Next, heat your soldering iron to the appropriate temperature. Touch the heated iron to the foiled edge and allow the solder to flow onto the copper foil and create a bond between the glass pieces. Move the soldering iron along the foiled edge, applying the solder until it covers the entire edge evenly. Be careful not to apply too much heat or solder, as this can result in an unsightly and bulky joint.

If there are any gaps between the glass pieces, use additional solder to fill them in. Apply flux to the gap and melt the solder into the space, ensuring a smooth and seamless connection. Take your time and be patient, as achieving a neat solder joint may require multiple passes with the soldering iron.

Driftwood Stained Glass Art

This image is property of images.unsplash.com.

Cleaning and Finishing

Once the soldering is complete, it is important to clean the soldered piece to remove any flux residue or debris. Use a soft cloth or brush soaked in warm water to gently clean the soldered areas. Be careful not to scrub too hard, as this can damage the artwork. Allow the piece to dry completely before proceeding to the next step.

For an aged or antique look, you may choose to apply patina to the soldered areas. Patina adds depth and character to the finished piece by creating an aged or weathered appearance. Apply the patina according to the manufacturer’s instructions, ensuring even coverage. After a suitable amount of time, use a soft cloth to gently remove any excess patina and reveal the desired effect.

To enhance the overall appearance of the driftwood stained glass art, polishing the glass is essential. Using a glass cleaner or a mixture of warm water and mild soap, carefully clean the glass surfaces. Ensure all cleaning residue is removed and dry the glass thoroughly. Consider using a soft cloth or a lint-free cloth to prevent any scratches or streaks.

To protect the artwork and preserve its beauty, consider adding a protective finish. This can be achieved by applying a clear sealer or wax to both the glass and the driftwood. The finish will help protect the artwork from exposure to moisture, UV rays, and other environmental factors that can cause damage over time.

Hanging and Displaying

When it comes to hanging and displaying your driftwood stained glass art, it is important to choose the right method and location. Attaching wire or hooks securely to the back of the artwork will ensure it hangs properly and remains stable. Be sure to use a wire or hooks that can support the weight of the artwork and consider the size and shape of the driftwood piece when determining the best placement for the hanging hardware.

Choosing the right location for display is crucial in showcasing your artwork effectively. Consider the overall aesthetic of the room or space you plan to hang the art and ensure it complements the surrounding decor. Natural light can enhance the colors and textures of the stained glass, so consider placing the artwork near a window or another source of natural light for optimal effect.

When considering lighting and background, it is important to experiment and find the best combination for your driftwood stained glass art. Different lighting conditions can create various effects, highlighting different aspects of the artwork. Experiment with different lighting fixtures, filters, or curtains to achieve the desired ambiance.

Driftwood Stained Glass Art

Variations and Ideas

Driftwood stained glass art offers endless possibilities for creativity and customization. Here are a few ideas and variations to consider:

Using different colors and textures of glass:

Explore the vast array of stained glass colors and textures available to create unique and eye-catching combinations. Experiment with bold, vibrant colors or opt for subtle and muted tones to evoke different moods or themes.

Incorporating other materials like shells or beads:

To add even more visual interest and dimension to your artwork, consider incorporating other materials such as shells, beads, or small found objects. These can be carefully embedded into the driftwood or strategically placed between the stained glass pieces to create added texture and detail.

Creating themed driftwood stained glass art:

Consider creating artwork that follows a specific theme or motif. For example, you could create marine-themed pieces by incorporating shells, seahorses, or other sea-inspired elements. Or, you could create nature-themed pieces by using stained glass pieces in the shape of leaves, flowers, or animals.

The art of driftwood stained glass requires patience, creativity, and an appreciation for the beauty of diverse materials coming together harmoniously. By following the steps outlined in this article and allowing your imagination to guide you, you can create stunning pieces of art that showcase the unique beauty of both driftwood and stained glass. So gather your materials, let inspiration take hold, and embark on your own driftwood stained glass art journey!

Filed Under: Driftwood Ideas Tagged With: Art, Driftwood, Stained Glass

Driftwood Fiber Art

March 27, 2024 by admin

Imagine being able to bring the beauty of the ocean into your own home with a unique and captivating piece of art. Driftwood Fiber Art offers a mesmerizing collection that combines the natural allure of driftwood with the intricate artistry of fiber crafting. Each piece tells a story, showcasing the harmonious blend of earth and sea. With every stroke of the artist’s hand, the textures and colors of the fibers intertwine with the weathered charm of the driftwood, creating a truly one-of-a-kind masterpiece that will make a stunning statement in any space. Embrace the beauty of nature and add a touch of coastal elegance to your décor with Driftwood Fiber Art.

Introduction to Driftwood Fiber Art

What is Driftwood Fiber Art?

Driftwood fiber art is a unique and creative form of art that combines the natural beauty of driftwood with various fiber materials to create stunning and one-of-a-kind pieces. This art form involves the use of driftwood, which are pieces of wood that have been weathered and worn by the ocean waves, and various fibers such as yarn, rope, and fabric to create intricate designs and patterns. Driftwood fiber art is a wonderful way to bring the beauty of nature into your home and express your creativity.

Origins of Driftwood Fiber Art

The art of incorporating driftwood into fiber art has a rich history that dates back centuries. It is believed to have originated from Indigenous cultures around the world who would use driftwood and natural fibers to create functional and decorative items. These cultures recognized the beauty and versatility of driftwood, and it became an integral part of their artistic traditions. In recent years, driftwood fiber art has gained popularity as a unique and eco-friendly form of art.

Materials Used in Driftwood Fiber Art

Driftwood fiber art incorporates a variety of materials to create beautiful and intricate designs. The main material, of course, is driftwood, which is sourced from beaches, rivers, and other natural environments. Other materials commonly used include yarn, rope, fabric strips, feathers, shells, and beads. These materials add texture, color, and depth to the artwork, allowing for endless creative possibilities. It is important to use high-quality and sustainable materials to ensure the longevity and environmental friendliness of the art pieces.

Creating Driftwood Fiber Art

Selecting and Preparing Driftwood

When creating driftwood fiber art, the first step is to select and prepare the driftwood. Look for pieces of driftwood that have an interesting shape, texture, and color. Consider the overall size and weight of the driftwood to ensure it is suitable for the desired project. Once you have chosen the perfect piece of driftwood, it is important to clean and prepare it before use. Remove any dirt, sand, or loose debris by gently scrubbing the wood with a brush. Allow the driftwood to fully dry before moving on to the next step.

Choosing Fiber Materials

The choice of fiber materials is key to creating visually stunning driftwood fiber art. Yarn, rope, fabric strips, and other natural fibers can be used to create a wide range of textures and patterns. Consider the color palette, thickness, and durability of the chosen fibers. Experiment with different materials to achieve the desired look and feel. It is also important to consider the compatibility between the fibers and the driftwood, ensuring they complement each other aesthetically and structurally.

Tools and Techniques

Driftwood fiber art can be created using a variety of tools and techniques. Basic tools needed include scissors, a hot glue gun, and a drill (if necessary for your specific project). Scissors are used to cut the fibers to the desired length, while a hot glue gun is used to secure the fibers to the driftwood. The drill can be used to create holes in the driftwood for attaching additional fibers or decorative elements. Techniques such as weaving, knotting, wrapping, and macrame can be employed to create intricate and unique designs.

Design Considerations

When creating driftwood fiber art, it is important to consider the overall design and layout of the piece. Think about the intended purpose of the artwork and the aesthetic you want to achieve. Are you looking to create a wall hanging, sculpture, or dreamcatcher? Consider the placement of different fibers, colors, and textures to create a visually balanced and cohesive design. Experiment with different patterns, shapes, and sizes to create a truly unique piece of art.

Driftwood Fiber Art

This image is property of images.pexels.com.

Types of Driftwood Fiber Art

Wall Hangings

Wall hangings are one of the most popular types of driftwood fiber art. These pieces are designed to be hung on walls, adding a touch of natural beauty and creativity to any space. Wall hangings can vary in size, shape, and design, allowing for endless possibilities. From simple, minimalist designs to intricate and elaborate patterns, wall hangings can be customized to suit any style or preference.

Sculptures

Driftwood sculptures are another unique and captivating form of driftwood fiber art. These sculptures are three-dimensional, incorporating the natural shape and texture of the driftwood with fiber materials to create stunning and dynamic pieces. Sculptures can range in size from small tabletop pieces to large-scale installations, making them versatile and impactful. The combination of natural and man-made elements in driftwood sculptures creates a visually interesting and thought-provoking art form.

Macrame with Driftwood

Macrame is a technique that involves knotting fibers together to create intricate patterns and designs. When combined with driftwood, macrame creates a stunning contrast between the rigid structure of the wood and the soft, flowing fibers. Macrame with driftwood can be used to create wall hangings, plant hangers, or even jewelry. The possibilities are endless, and the result is a beautiful and eye-catching piece of art.

Dreamcatchers

Dreamcatchers have a long-standing history in Indigenous cultures, where they were believed to catch and filter out bad dreams, allowing only good dreams to pass through. Driftwood fiber art incorporates the symbolism and beauty of dreamcatchers into unique and personal creations. By combining driftwood, fibers, feathers, and beads, artists can create dreamcatchers that not only provide a touch of beauty but also hold a deeper meaning.

Mobiles

Mobiles are a playful and whimsical form of driftwood fiber art. These hanging sculptures feature a combination of driftwood, fibers, and other lightweight materials, creating a balanced and dynamic artwork. Mobiles can be hung from ceilings or placed near windows, adding movement and charm to any space. The gentle swaying of the mobiles creates a soothing and calming effect, making them perfect for nurseries, bedrooms, or meditation spaces.

Inspiration and Ideas for Driftwood Fiber Art

Natural Themes

The natural world is a great source of inspiration for driftwood fiber art. Draw inspiration from elements such as leaves, flowers, animals, and landscapes. Use fibers in earthy tones and incorporate natural elements such as feathers, shells, or dried flowers to enhance the natural theme. Driftwood fiber art inspired by nature brings a sense of tranquility and connection to the outdoors into your space.

Beach and Coastal Designs

Driftwood is often washed ashore on beaches, making beach and coastal designs a perfect fit for driftwood fiber art. Incorporate fibers in shades of blues and whites, and use shells, coral, or netting to create a beachy aesthetic. Capture the essence of the ocean and sandy beaches in your artwork, and bring a touch of the coast into your home.

Bohemian and Tribal Influences

Embrace the bohemian and tribal influences in your driftwood fiber art. Use vibrant colors, intricate patterns, and a mix of textures to create a boho or tribal-inspired design. Incorporate elements such as tassels, beads, or feathers to add depth and visual interest. This style of driftwood fiber art brings a sense of adventure and free-spiritedness to your space.

Geometric Patterns

Geometric patterns are clean, modern, and visually striking. Use driftwood as the base and accentuate it with fibers in geometric shapes, such as triangles, circles, or lines. Consider using contrasting colors or monochromatic tones to create a bold and contemporary look. Geometric-inspired driftwood fiber art adds a touch of modern elegance to any space.

Driftwood Fiber Art

This image is property of images.pexels.com.

Tips for Beginners in Driftwood Fiber Art

Start with Simple Projects

If you are new to driftwood fiber art, it is best to start with simple projects to build your skills and confidence. Begin with small wall hangings or dreamcatchers that require fewer materials and techniques. As you become more experienced, you can gradually take on more complex projects and challenge yourself creatively.

Learning Basic Knots and Weaving Techniques

Learning basic knots and weaving techniques is essential for creating driftwood fiber art. Take the time to practice common knots such as the square knot, lark’s head knot, and half-hitch. Experiment with different weaving techniques such as over-under, diagonal weaving, and macrame knots. These skills will serve as the foundation for creating beautiful and intricate designs.

Experimenting with Colors and Textures

Don’t be afraid to experiment with colors and textures in your driftwood fiber art. Play with different color combinations to create a harmonious design or use contrasting colors for a bold and eye-catching effect. Mix and match different fibers to create interesting textures and patterns. The beauty of driftwood fiber art lies in its versatility, so don’t be afraid to let your creativity soar.

Taking Inspiration from Experienced Artists

Look to experienced driftwood fiber art artists for inspiration and guidance. Explore their artwork, read about their techniques, and even reach out to them for advice. Joining online forums and social media groups dedicated to driftwood fiber art can also provide a wealth of knowledge and inspiration. Learn from others, but also find your own unique style and voice in this art form.

Display and Care for Driftwood Fiber Art

Choosing the Right Location

When displaying driftwood fiber art, consider the right location to showcase its beauty. Choose a spot that allows the artwork to be easily seen and appreciated. Consider the lighting in the area, as natural light can enhance the textures and colors of the piece. Avoid displaying the artwork in direct sunlight, as it can cause fading or damage to the fibers over time.

Hanging and Mounting Options

Driftwood fiber art can be hung or mounted in various ways depending on the design and size of the piece. Wall hangings can be displayed using hooks, nails, or a hanging system specifically designed for art pieces. Sculptures can be placed on shelves, pedestals, or mounted on a sturdy base. Consider the weight and stability of the artwork when choosing the appropriate hanging or mounting option.

Cleaning and Maintenance

To keep your driftwood fiber art looking its best, regular cleaning and maintenance are necessary. Dust the artwork gently using a soft brush or cloth to remove any loose dirt or debris. Be cautious when using water or cleaning products, as they can potentially damage the fibers or driftwood. If needed, consult with the artist or refer to specific care instructions provided with the artwork to ensure proper cleaning and maintenance techniques.

Driftwood Fiber Art

This image is property of images.pexels.com.

Driftwood Fiber Art as a Gift

Unique and Personalized Gifts

Driftwood fiber art makes a wonderful and unique gift for any occasion. Each piece is one-of-a-kind and carries the beauty of nature within it. Consider selecting a driftwood fiber art piece that resonates with the personality, style, or interests of the recipient. Personalize the gift further by choosing colors, patterns, or symbols that hold special meaning for them. This thoughtful gift will be cherished and admired for years to come.

Meaning and Symbolism

Driftwood fiber art often carries deep meaning and symbolism, making it a powerful and meaningful gift. The combination of natural elements and fiber materials can represent concepts such as strength, resilience, growth, or interconnectedness. Consider the intended message or sentiment you want to convey with your gift and select a driftwood fiber art piece that aligns with those ideas.

Suitable Occasions for Gifting Driftwood Fiber Art

Driftwood fiber art can be a meaningful gift for various occasions. It can be given as a housewarming gift to add a touch of nature and creativity to a new home. It can also be a thoughtful birthday or anniversary gift, symbolizing growth and connection. Consider gifting driftwood fiber art during times of change or celebration, or simply as a way to show someone you care and appreciate their unique style.

Where to Find and Buy Driftwood Fiber Art

Local Artisan Markets and Craft Fairs

Support local artists and discover unique driftwood fiber art pieces by visiting artisan markets and craft fairs. These events often showcase a variety of talented artists who create original and handcrafted artwork. By purchasing directly from the artist, you not only support their passion and creativity but also have the opportunity to learn more about their process and inspiration behind their pieces.

Online Art Marketplaces

Online art marketplaces offer a convenient way to explore a wide range of driftwood fiber art from artists all over the world. Platforms such as Etsy, Artfinder, and Saatchi Art feature a diverse selection of driftwood fiber art pieces that can be purchased with just a few clicks. Take your time to browse through different artists and styles, read reviews, and ask questions to ensure you are making an informed purchase.

Commissioning Custom Pieces

For those seeking a truly personalized and unique driftwood fiber art piece, consider commissioning a custom piece from an artist. Many artists are open to creating custom artwork tailored to your specific needs and preferences. Through a collaborative process, you can work closely with the artist to choose the driftwood, fiber materials, colors, and design elements to create a one-of-a-kind masterpiece that reflects your style and vision.

Driftwood Fiber Art

Discovering Driftwood Fiber Art Communities

Joining Online Forums and Social Media Groups

Joining online forums and social media groups dedicated to driftwood fiber art is a great way to connect with other artists, share ideas, and gain inspiration. These communities often provide a platform for learning, asking questions, and exchanging tips and techniques. Engaging with others who share your passion for driftwood fiber art can foster creativity and provide a sense of camaraderie.

Attending Workshops and Classes

Attending workshops and classes focused on driftwood fiber art is an excellent way to further develop your skills and knowledge. Look for local art schools, community centers, or artist studios that offer workshops or classes specific to driftwood fiber art. These hands-on experiences provide the opportunity to learn from experienced artists, engage in a supportive learning environment, and expand your artistic horizons.

Connecting with Local Artists

Building connections with local artists who specialize in driftwood fiber art can be valuable for your artistic journey. Attend local art events or exhibitions to meet and network with artists in your area. Connect with them personally to gain insights into their artistic process, ask for advice, and potentially collaborate on future projects. Local artists can provide a sense of community and mentorship, enriching your experience in driftwood fiber art.

Driftwood Fiber Art and Sustainability

Using Sustainable Materials

Sustainability is an essential aspect of driftwood fiber art. When creating or purchasing driftwood fiber art, be mindful of the materials used in the artwork. Opt for natural fibers that are sustainably sourced, such as organic cotton or hemp. Choose driftwood that has been responsibly collected and consider reusing or upcycling materials whenever possible. By prioritizing sustainable materials, you contribute to the preservation of natural resources and promote eco-friendly practices.

Preserving Natural Resources

Driftwood fiber art celebrates the beauty of nature, and it is important to be mindful of the impact on natural resources. Avoid collecting driftwood directly from sensitive ecosystems or protected areas, as it can disrupt ecosystems and negatively impact wildlife habitats. Instead, gather driftwood from beaches or riverbanks where it is naturally washed ashore. By preserving natural resources, you ensure the longevity and sustainability of driftwood fiber art.

Ethical Sourcing Practices

When purchasing driftwood fiber art, consider the ethical sourcing practices of the artist or retailer. Ensure that the driftwood used in the artwork has been collected legally and without causing harm to the environment. Verify that the fibers and other materials used are ethically sourced and have not been produced using exploitative practices. Supporting artists and retailers who prioritize ethical sourcing promotes responsible and sustainable art consumption.

In conclusion, driftwood fiber art is a fascinating and creative form of art that combines the natural beauty of driftwood with various fiber materials to create visually stunning pieces. Through careful selection of driftwood, choosing appropriate fiber materials, and employing various tools and techniques, artists can create a wide range of wall hangings, sculptures, macrame pieces, dreamcatchers, and mobiles. Drawing inspiration from nature, beaches, tribal influences, and geometric patterns, artists can create unique and personalized driftwood fiber art. For beginners, starting with simple projects, learning basic knots and weaving techniques, and experimenting with colors and textures are key. Proper display, care, and maintenance of driftwood fiber art are essential for preserving its beauty. Driftwood fiber art also makes a meaningful and personal gift, with deep symbolism and versatility suitable for various occasions. Whether buying from local artisans or online marketplaces, or commissioning custom pieces, driftwood fiber art can be found in various places. Joining driftwood fiber art communities, attending workshops, and connecting with local artists can further enhance and expand your artistic journey. Lastly, prioritizing sustainability, preserving natural resources, and supporting ethical sourcing practices are essential in promoting responsible and eco-friendly driftwood fiber art. With its unique beauty and eco-consciousness, driftwood fiber art is a wonderful way to bring the outdoors and your creativity into your home.

Driftwood Fiber Art

Filed Under: Driftwood Ideas Tagged With: Art, Driftwood, Fiber

Framed Driftwood Art

March 25, 2024 by admin

You have stumbled upon a captivating form of artwork known as “Framed Driftwood Art.” This unique art form features pieces of weathered driftwood, carefully selected and arranged into beautiful compositions, then artfully framed to create stunning visual masterpieces. The organic shapes and textures of the driftwood bring a touch of nature indoors, while the framing adds a touch of elegance and sophistication. Whether you are a nature lover or an art enthusiast, Framed Driftwood Art will surely captivate your imagination and add a touch of coastal charm to any space.

What is Framed Driftwood Art

Definition

Framed driftwood art refers to the practice of creating unique and visually stunning artwork using pieces of driftwood, which are collected from beaches, lakes, or rivers. These pieces of driftwood are carefully arranged and secured onto a backing board, and then framed to create a finished piece. This form of art celebrates the natural beauty and texture of driftwood, resulting in one-of-a-kind pieces that can enhance any space.

Materials Used

The primary material used in framed driftwood art is, of course, driftwood. This wood has been weathered by water and sun, giving it a distinct texture and appearance. Other materials commonly used in the creation of framed driftwood art include a backing board or canvas, wood glue or adhesive, and a suitable frame to enclose the artwork. Additional embellishments such as shells, stones, or paint may also be incorporated to further enhance the artwork.

Inspiration Behind Driftwood Art

The inspiration behind framed driftwood art often stems from a deep appreciation for nature and the beauty found in natural materials. Artists are drawn to the unique shapes, textures, and colors of driftwood, which can ignite their creativity and provide endless possibilities for creating visually captivating pieces. The organic nature of driftwood also contributes to its popularity, as it adds a touch of rustic charm and a connection to the natural world.

Creating Framed Driftwood Art

Collecting Driftwood

The first step in creating framed driftwood art is to collect the driftwood itself. When collecting driftwood, it is important to choose pieces that are both sturdy and visually appealing. Look for interesting shapes and textures, and ensure that the wood is not rotten or damaged. Beaches, riversides, and lakeshores are often prime locations for finding driftwood, but it is important to respect local regulations and obtain any necessary permits when collecting from protected areas.

Cleaning and Preparing Driftwood

Once you have collected the driftwood, it is essential to clean and prepare it before using it in your artwork. Start by removing any dirt, sand, or debris from the wood by gently rinsing it with water. If there are any stubborn stains or discolorations, you can use a mild detergent or bleach solution to remove them. After cleaning, let the driftwood dry completely before moving on to the next step.

Designing the Art Piece

Designing your framed driftwood art is where your creativity truly shines. Consider the overall theme or concept you want to convey and start arranging the pieces of driftwood on your backing board or canvas. Experiment with different layouts and orientations until you find a design that is visually appealing and balanced. Keep in mind any additional embellishments or materials you plan to incorporate, and ensure that they complement the driftwood.

Attaching the Driftwood

Once you are satisfied with your design, it is time to attach the pieces of driftwood to the backing board or canvas. Use a reliable wood glue or adhesive to secure the driftwood in place. Apply the adhesive to both the back of the driftwood and the backing board or canvas, and press the pieces firmly together. Allow the adhesive to dry completely before proceeding with framing.

Choosing the Perfect Frame

Choosing the right frame for your framed driftwood art can significantly enhance its overall presentation. Consider the style and size of your artwork when selecting a frame. Natural wood frames often complement the rustic and organic nature of driftwood, but sleek metal frames can provide a modern and sophisticated look. Ultimately, choose a frame that enhances the colors and textures of the driftwood while also complementing your personal style and the intended location of the artwork.

Framed Driftwood Art

This image is property of images.unsplash.com.

Styles and Themes

Nautical Themes

Nautical-themed framed driftwood art is a popular choice, especially for coastal and beach-inspired spaces. These artworks often incorporate driftwood pieces shaped like anchors, boats, or other maritime symbols. The natural color variations and textures of driftwood beautifully mimic the worn and weathered appearance of nautical elements, creating a captivating and authentic aesthetic.

Coastal Landscapes

Another common theme in framed driftwood art is coastal landscapes. Artists use driftwood pieces to depict sandy beaches, rolling waves, and serene sunsets. The natural earth tones of driftwood lend themselves perfectly to these scenes, creating a sense of tranquility and capturing the essence of coastal living.

Abstract Designs

For those who prefer a more contemporary or artistic approach, framed driftwood art can also encompass abstract designs. Artists arrange and layer driftwood pieces to create unique patterns, shapes, or textures, resulting in visually striking and thought-provoking art pieces. The combination of the organic forms of driftwood and the artist’s interpretation of abstract concepts creates a fascinating dialogue between nature and art.

Animal and Marine Life

The beauty of driftwood also lends itself well to sculptures and depictions of animals and marine life. Artists utilize the natural shapes and textures of driftwood pieces to create intricate and lifelike representations of creatures such as seahorses, dolphins, or birds. These artworks celebrate the diversity of the natural world and serve as a reminder of the connection between humans and the environment.

Inspirational Words and Quotes

In addition to visual motifs, framed driftwood art can also incorporate inspirational words and quotes. Using driftwood as a canvas, artists paint or carve uplifting messages, adding a touch of positivity and motivation to the artwork. These pieces not only provide visual appeal but also serve as reminders of the power of words and their ability to uplift and inspire.

Popular Design Ideas

Framed Driftwood Mirror

One popular design idea is creating a framed driftwood mirror. This involves attaching driftwood pieces of varying sizes and shapes around the border of a mirror, creating a unique and eye-catching frame. The combination of the reflective surface of the mirror and the earthy textures of the driftwood adds depth and character to any space.

Driftwood Wall Sculpture

Driftwood wall sculptures are another popular design idea that can transform a plain wall into a captivating focal point. Artists arrange driftwood pieces in a three-dimensional manner, creating intricate and dynamic sculptures. These sculptures can depict natural scenes, abstract forms, or even spell out words. The versatility and texture of driftwood make it an ideal material for creating visually stunning wall art.

Driftwood Picture Frame

Using driftwood to create a picture frame is a unique and charming way to display cherished photographs or artwork. Artists fashion driftwood pieces into a frame shape, often featuring overlapping layers or creative angles. These frames add a touch of rustic elegance to any photograph or artwork, while also providing a conversation piece.

Driftwood Jewelry Holder

For those looking to combine functionality with aesthetics, a driftwood jewelry holder is a perfect choice. By attaching driftwood pieces to a backboard or vertical surface, artists create a beautiful and practical way to display and organize jewelry. Driftwood’s natural hooks, branches, and crevices serve as ideal spots for hanging necklaces, bracelets, and earrings, while also adding a touch of nature to the space.

Framed Driftwood Art

This image is property of images.unsplash.com.

Decorating with Framed Driftwood Art

Living Room

The living room is a space where framed driftwood art can truly shine. A large, statement piece of framed driftwood art can serve as a striking focal point above a fireplace or sofa, adding texture, warmth, and visual interest to the room. Smaller pieces can be arranged on shelves or side tables to add a touch of coastal charm to the overall decor.

Bedroom

In the bedroom, framed driftwood art can create a serene and calming atmosphere. A driftwood wall sculpture or framed coastal landscape can evoke a sense of tranquility, serving as a soothing backdrop for rest and relaxation. For a more personalized touch, driftwood picture frames can showcase cherished photographs or artwork, adding sentimental value to the space.

Bathroom

Framed driftwood art can also make a unique and stylish addition to the bathroom. The natural and earthy tones of driftwood can complement various bathroom decor styles, from coastal to rustic to contemporary. Hang a framed driftwood mirror or display a small driftwood sculpture on a countertop to add a touch of nature and create a spa-like ambiance.

Office Space

In an office space, framed driftwood art can add a touch of inspiration and creativity. Choose pieces that feature inspirational words or abstract designs to create a positive and thought-provoking atmosphere. Place framed driftwood art on shelves, hang it above a desk, or create a gallery wall to infuse the space with personality and visual interest.

Outdoor Spaces

Framed driftwood art is not limited to indoor spaces alone. It can also be a stunning addition to outdoor areas such as a patio, garden, or balcony. The natural textures and weather-resistant properties of driftwood make it an ideal material for outdoor art. Hang a driftwood wall sculpture on a garden fence or display a framed coastal landscape on an outdoor wall to bring the beauty of nature into your outdoor living space.

Sourcing and Buying Framed Driftwood Art

Local Artisans and Crafters

Supporting local artisans and crafters is a great way to find unique and high-quality framed driftwood art. Visit local art fairs, craft markets, or galleries to discover artists who specialize in this medium. Not only will you have the chance to find one-of-a-kind pieces, but you will also have the opportunity to meet and support talented artists within your community.

Online Marketplaces

Online marketplaces provide a convenient and vast selection of framed driftwood art. Websites such as Etsy, Amazon, or even dedicated driftwood art websites offer a wide range of styles, themes, and sizes to suit different tastes and budgets. When purchasing online, make sure to read descriptions, ask questions, and review customer feedback to ensure the quality and authenticity of the artwork.

Art Galleries and Exhibitions

Art galleries and exhibitions are excellent venues for discovering framed driftwood art created by established and emerging artists. Attend local art events or visit galleries specializing in nature-inspired or coastal-themed art. Not only will you have the opportunity to appreciate the artworks in person, but you may also be able to connect with the artist and learn more about their creative process.

Thrift and Vintage Stores

Thrifting or visiting vintage stores is a budget-friendly way to find framed driftwood art with a touch of history and character. These stores often carry a selection of second-hand or pre-loved framed artworks, including driftwood pieces. With some luck and patience, you may stumble upon a hidden gem that fits perfectly with your decor and adds a unique vintage flair to your space.

Framed Driftwood Art

This image is property of images.unsplash.com.

DIY Framed Driftwood Art

Step-by-Step Guide

If you are feeling crafty and want to create your own framed driftwood art, here is a step-by-step guide to get you started:

  1. Collect driftwood: Start by collecting a variety of driftwood pieces from your chosen location.
  2. Clean and prepare driftwood: Remove any dirt or debris from the driftwood by rinsing it with water. Optionally, use a mild detergent or bleach solution to clean stubborn stains. Let the driftwood dry completely.
  3. Design your art piece: Sketch out your desired design or layout on a piece of paper. Experiment with different arrangements until you are satisfied.
  4. Attach the driftwood: Use wood glue or adhesive to attach the driftwood pieces to a backing board or canvas, following your chosen design. Apply adhesive to both the driftwood and the backing surface, pressing them together firmly. Allow the adhesive to dry completely.
  5. Choose and attach a frame: Once your artwork is complete, choose a frame that complements the style and size of your piece. Attach the frame securely to the backing board or canvas.

Tools and Materials Needed

To create your own framed driftwood art, you will need the following tools and materials:

  • Driftwood pieces
  • Wood glue or adhesive
  • Backing board or canvas
  • Frame
  • Paint or sealant (optional, for additional embellishments)
  • Paintbrushes (if using paint)
  • Sandpaper (optional, for sanding rough edges)

Tips and Tricks for Beginners

  • Start small: If you are new to framed driftwood art, start with a smaller project to familiarize yourself with the process and techniques involved.
  • Experiment with layouts: Don’t be afraid to try different layouts and arrangements of the driftwood pieces before committing to one design. Play around with the shapes and sizes to find a visually pleasing composition.
  • Use protective gear: When working with wood glue or adhesive, it is important to protect yourself by wearing gloves and working in a well-ventilated area.
  • Allow sufficient drying time: Ensure that the adhesive is completely dry before handling or framing the artwork. Follow the manufacturer’s instructions for optimal drying time.

Caring for Framed Driftwood Art

Cleaning and Dusting

To keep your framed driftwood art looking its best, it is important to regularly clean and dust it. Use a soft, dry cloth or a feather duster to gently remove any dust or dirt from the surface of the artwork. Avoid using harsh chemicals or abrasive cleaners, as they can damage the driftwood or the frame.

Avoiding Direct Sunlight

Direct sunlight can cause the colors of the driftwood to fade over time. To preserve the vibrancy of your framed driftwood art, avoid displaying it in areas where it will be exposed to direct sunlight for extended periods. If you cannot avoid sunlight, consider using UV-protective glass when framing the artwork.

Preventing Moisture Damage

Driftwood is naturally resistant to moisture, but excessive exposure to water or high humidity can still cause damage over time. To prevent moisture damage, avoid displaying your framed driftwood art in areas prone to moisture, such as bathrooms or near windows that are regularly opened. Additionally, ensure that the room is properly ventilated to minimize humidity levels.

Repairing and Restoring Driftwood

If you notice any damage or deterioration to your framed driftwood art, it is possible to repair and restore it. Small cracks or chips in the driftwood can be filled with wood putty or epoxy resin. Additionally, you can sand down rough edges or splintered areas using fine-grit sandpaper. For extensive damage, it may be best to consult a professional restorer or artisan who specializes in driftwood art restoration.

Framed Driftwood Art

Framed Driftwood Art as Gifts

Occasions to Give Framed Driftwood Art

Framed driftwood art makes a unique and thoughtful gift for various occasions. Consider giving it as a housewarming gift to someone moving into a coastal or nature-inspired home. It can also be a meaningful present for birthdays, anniversaries, or weddings, especially for individuals who appreciate nature and art. Additionally, framed driftwood art can be a perfect gift for nature lovers, beach enthusiasts, or anyone who appreciates the beauty of the natural world.

Personalizing the Gift

To make your framed driftwood art gift even more special, consider personalizing it. You can incorporate the recipient’s favorite colors, quote, or symbol into the design. Alternatively, attach a heartfelt note or message to the back of the artwork, expressing your wishes or sentiments.

Packaging and Presentation

When presenting framed driftwood art as a gift, thoughtful packaging and presentation can elevate the overall experience. Consider wrapping the artwork in tissue paper or craft paper and tying it with a ribbon or twine. You can also include a small card or tag explaining the significance of the gift. If possible, present the gift in person, allowing you to share the story behind the artwork and express your thoughtfulness.

Conclusion

Framed driftwood art is a captivating and versatile form of artistic expression that celebrates the natural beauty and textures found in driftwood. From nautical themes to abstract designs, there are endless possibilities for creating unique and visually stunning pieces. Whether you choose to purchase framed driftwood art or embark on a DIY project, these artworks can add charm, warmth, and a connection to nature to any space. So, why not bring a touch of the beach or coastal living into your home or give a meaningful gift that captures the essence of nature’s beauty? Explore the world of framed driftwood art and let your creativity drift to new shores.

Framed Driftwood Art

Filed Under: Driftwood Ideas Tagged With: Art, Driftwood, Framed

Driftwood Art For Walls

March 25, 2024 by admin

Step into a world where nature and art seamlessly merge, as you discover the mesmerizing beauty of Driftwood Art For Walls. This unique form of artistic expression celebrates the intricate and organic shapes of driftwood, transformed into captivating wall decor. Each meticulously crafted piece tells a story of its own, bringing a touch of rustic charm and coastal elegance to any space. Immerse yourself in the wonders of nature and experience the transformative power of driftwood art that effortlessly captures the essence of the sea and the serenity it holds. With Driftwood Art For Walls, let the beauty of nature adorn your living spaces in an enchanting and captivating way.

Driftwood Art For Walls

This image is property of images.pexels.com.

Introduction to Driftwood Art

Driftwood art is a unique and captivating form of artistic expression that utilizes the beauty and character of driftwood to create stunning wall decorations. It is a wonderful way to bring a touch of nature into your home or office space, and it has gained immense popularity in recent years. In this article, we will explore the definition and origins of driftwood art, the reasons for its popularity in wall decor, the materials and techniques used in its creation, and much more. So, let’s dive in and explore the wonderful world of driftwood art for walls!

Definition and Origins of Driftwood Art

Driftwood art refers to the practice of using pieces of driftwood – wood that has been washed ashore by the sea or rivers – to create beautiful and unique wall decorations. This art form embraces the imperfections and unique shapes of the driftwood, allowing them to dictate the design and aesthetic appeal of the final piece. The origins of driftwood art can be traced back to ancient civilizations that lived near water bodies. However, it has gained significant recognition in recent years as a form of modern and contemporary art.

Popularity of Driftwood Art for Walls

Driftwood art has gained immense popularity among individuals who appreciate the charm and beauty of natural elements in their home decor. The use of driftwood for wall decorations offers a rustic and coastal vibe that effortlessly adds character and warmth to any space. People are drawn to the organic and unique shapes of driftwood, which create visually stunning focal points and conversation starters. Moreover, driftwood art allows individuals to display their love for nature in a creative and artistic manner, making it an attractive choice for many.

Materials and Techniques Used in Driftwood Art

To create driftwood art, artists primarily rely on driftwood pieces retrieved from beaches, rivers, or lakes. The wood must be thoroughly cleaned and inspected for stability before it can be used. Glue, nails, and screws are commonly employed to hold the driftwood pieces together and create the desired shapes and designs. Additionally, artists may incorporate other materials, such as ropes, wires, shells, or even paint, to enhance the overall aesthetic appeal of the artwork. The unique techniques used in driftwood art allow artists to showcase their creativity and transform simple pieces of wood into stunning wall decorations.

Driftwood Art For Walls

This image is property of images.pexels.com.

Benefits of Driftwood Art for Walls

Driftwood art for walls offers numerous benefits that make it a popular choice for interior decor. Let’s explore some of these benefits in detail.

Eco-Friendly and Sustainable Decor

One of the most appealing aspects of driftwood art is its eco-friendly nature. By utilizing driftwood that has washed ashore, this art form repurposes materials that would otherwise go to waste, promoting sustainability and environmental consciousness. By choosing driftwood art for your walls, you can showcase your commitment to reducing waste and creating a greener living space.

Unique and Natural Aesthetic Appeal

Driftwood, with its intriguing shapes, textures, and colors, offers a unique and natural aesthetic appeal. No two pieces of driftwood are the same, which means that each driftwood art piece is one-of-a-kind. The natural beauty and character of the wood, combined with the artist’s creative vision, result in visually stunning wall decorations that can effortlessly elevate the overall ambiance of your space.

Versatility in Design and Placement

Driftwood art is incredibly versatile when it comes to design and placement. Whether you prefer abstract sculptures, geometric wall hangings, or nature-inspired scenes, driftwood can be shaped and arranged to suit your personal style and preferences. Additionally, driftwood art can complement various interior design themes, ranging from coastal and rustic to modern and minimalist. It can be effortlessly incorporated into any room, be it the living room, bedroom, or office, adding a touch of natural beauty wherever it is placed.

Choosing the Right Driftwood

When choosing driftwood for your wall art, there are several factors you should consider to ensure the best possible outcome. Here are some tips to help you choose the right driftwood:

Types of Driftwood

Driftwood comes in various shapes, sizes, and species of wood. Some common types include weathered branches, logs, and roots. Each type offers its own unique characteristics and brings a distinct visual appeal to your wall art. Consider the style and look you desire for your space and choose the type of driftwood that aligns with your vision.

Considerations for Size and Shape

The size and shape of the driftwood pieces play a crucial role in determining the overall design and impact of your wall art. Larger pieces can create a bold and striking statement, while smaller ones add intricacy and detail. Consider the available wall space and the desired visual effect when selecting the size and shape of the driftwood.

Inspecting for Damage and Stability

Before using driftwood for your wall art, it is important to inspect it for any signs of damage or instability. Look for cracks, rot, or loose parts that may compromise the durability and longevity of your artwork. Choosing sturdy and well-preserved driftwood will ensure that your wall art remains intact and visually appealing for years to come.

Driftwood Art For Walls

This image is property of images.pexels.com.

Preparing Driftwood for Wall Art

Once you have selected the perfect driftwood for your wall art, it is important to properly prepare it to enhance its natural beauty and ensure its longevity. Here are the essential steps to prepare driftwood for wall art:

Cleaning and Removing Debris

Begin by cleaning the driftwood thoroughly to remove any sand, dirt, or debris. Gently scrub the surface with a soft brush or sponge using a mixture of mild soap and water. This process will not only remove the external impurities but also reveal the wood’s original color and texture.

Drying and Treating Driftwood

After cleaning, ensure that the driftwood is completely dry before using it for wall art. Moisture trapped in the wood can lead to mold or rot, compromising the integrity of your artwork. Place the cleaned driftwood in a well-ventilated area to naturally air dry for a few days. If necessary, you can aid the drying process by using a fan or a dehumidifier.

To further protect the driftwood from decay, you may consider treating it with a wood preservative or a sealant. These products help to increase the wood’s resistance to moisture and insects, ensuring its longevity and durability.

Enhancing Natural Beauty with Finishes

If desired, you can enhance the natural beauty of the driftwood by applying a finish. A clear varnish or a wood wax can be used to bring out the wood’s color, texture, and grain patterns, giving it a polished and finished look. When applying finishes, make sure to follow the manufacturer’s instructions and apply the products in a well-ventilated area.

Design Ideas for Driftwood Wall Art

Driftwood art offers endless design possibilities. Here are a few popular design ideas to inspire your creativity when it comes to creating driftwood wall art:

Abstract Sculptures

Create visually captivating and unique abstract sculptures by arranging and combining driftwood pieces of different shapes, sizes, and angles. The natural curves, twists, and knots of the wood can be used to create intriguing and thought-provoking forms that add an artistic and modern touch to your walls.

Geometric Wall Hangings

For those who appreciate clean lines and geometric patterns, consider designing geometric wall hangings with driftwood. Arrange the driftwood pieces in symmetrical or asymmetrical patterns to create visually striking shapes and angles. These wall hangings can add a contemporary and minimalist vibe to your space.

Inspired Nature Scenes

Let the beauty of nature come to life on your walls by creating driftwood art inspired by natural landscapes and elements. Combine driftwood pieces with other natural materials, such as shells, stones, or dried flowers, to depict serene ocean shores, lush forests, or majestic mountain ranges. These nature-inspired scenes can bring tranquility and a sense of calm into your living space.

Functional Shelving and Hooks

Driftwood art can also serve practical purposes. By utilizing sturdy driftwood pieces, you can create functional shelving or hooks to display and organize small decorative items or everyday essentials. These pieces not only add visual interest to your walls but also provide useful storage solutions.

Driftwood Art For Walls

DIY Driftwood Wall Art

Creating your own driftwood wall art can be a rewarding and fulfilling experience. Here’s what you’ll need and a step-by-step guide to help you get started:

Tools and Materials Needed

  • Driftwood pieces
  • Hammer
  • Nails or screws
  • Sandpaper
  • Drill (optional)
  • Hanging hardware (e.g., picture hooks or adhesive strips)
  • Protective gloves and safety goggles

Step-by-Step Instructions

  1. Plan your design: Decide on the design and arrangement of your driftwood art. Consider the size, shape, and color of the driftwood pieces you have selected and visualize how they will come together to form your desired artwork.

  2. Clean and prepare the driftwood: Follow the cleaning and preparation steps mentioned earlier in this article to ensure that your driftwood is free from debris and properly treated.

  3. Arrange the driftwood: Lay out your driftwood pieces on a flat surface according to your planned design. Take your time to experiment with different arrangements until you are satisfied with the overall look.

  4. Secure the driftwood: Once you have finalized the arrangement, use nails or screws to secure the driftwood pieces together. If needed, you can use a drill to create pilot holes to prevent the wood from splitting. Take caution and wear protective gloves and safety goggles while working with tools.

  5. Add hanging hardware: Attach the appropriate hanging hardware to the back of your driftwood art. This can be picture hooks, D-rings, or adhesive strips, depending on the weight and size of your artwork. Ensure that the hanging hardware is securely attached to provide proper support.

  6. Hang your driftwood art: Choose the right location on your wall and hang your driftwood art using the appropriate method for your chosen hanging hardware. It’s helpful to use a level to ensure that your artwork is straight and properly aligned.

Tips and Tricks for Success

  • Before attaching the driftwood pieces together, you can lightly sand the contact points to help create a stronger bond.
  • Play with different sizes and textures of driftwood to add visual interest and depth to your artwork.
  • Experiment with different arrangement ideas on the floor before transferring them to the wall to ensure the desired effect.
  • Take your time during the construction process and make adjustments as needed to achieve the desired look and stability.

Where to Buy Driftwood Art

If you prefer to purchase driftwood art rather than creating your own, there are several places where you can find a wide variety of options. Here are a few suggestions:

Online Artisan Marketplaces

Online artisan marketplaces such as Etsy and Handmade at Amazon offer a vast selection of driftwood art pieces created by talented artists and craftspeople from around the world. These platforms provide an opportunity to discover unique and handcrafted driftwood art that perfectly suits your style and preferences.

Local Art Galleries and Boutiques

Explore your local art galleries, boutiques, and home decor stores to find driftwood art created by local artists. This not only supports the local art community but also allows you to personally experience the charm and beauty of each piece before making a purchase.

Custom Driftwood Artists and Craftspeople

If you have a specific vision or design idea in mind, consider reaching out to custom driftwood artists and craftspeople. They can work closely with you to create a bespoke driftwood art piece that aligns perfectly with your style, space, and preferences.

Driftwood Art For Walls

Displaying and Hanging Driftwood Art

Once you have acquired or created your driftwood art piece, it’s important to consider the best way to display and hang it on your wall. Here are some key considerations:

Choosing the Right Wall

Select a wall that provides a suitable backdrop for your driftwood art. Consider factors such as lighting, existing decor, and the size of the artwork. A wall with neutral colors or a contrasting feature wall can help highlight the beauty of your driftwood art.

Single Art Pieces vs. Groupings

Decide whether you want to display a single driftwood art piece or a grouping of multiple pieces. A single larger piece can create a striking focal point, while a series of smaller pieces arranged in a gallery-style layout can add visual interest and depth to your space.

Creative Arrangement and Composition

When hanging multiple driftwood art pieces together, pay attention to the arrangement and overall composition. Experiment with different spacing and arrangements to create a visually appealing and balanced display. It’s helpful to use a measuring tape or painter’s tape to plan and visualize the placement of each piece before hanging them.

Caring for Driftwood Art

Taking proper care of your driftwood art is essential to maintain its beauty and ensure its longevity. Here are some tips for caring for your driftwood art:

Regular Dusting and Cleaning

Dust your driftwood art regularly using a soft, dry cloth or a feather duster. This will prevent dust and debris from accumulating on the surface and keep the wood looking clean and vibrant. If necessary, you can also gently wipe the driftwood with a damp cloth to remove stubborn dirt or stains.

Avoiding Direct Sunlight and Moisture

To prevent fading, cracking, or warping of your driftwood art, avoid placing it in direct sunlight or in areas with high humidity. Prolonged exposure to sunlight can cause the wood to fade over time, while excessive moisture can lead to mold or decay. Position your driftwood art in a well-ventilated area away from direct sunlight to ensure its longevity.

Repair and Restoration Techniques

If your driftwood art experiences any damage, such as loose pieces or broken sections, it’s important to address it promptly. Use wood glue, nails, or screws to reattach any loose driftwood pieces. For larger repairs or restoration, consult a professional or skilled craftsman who specializes in driftwood art restoration.

Conclusion

Driftwood art for walls offers a captivating and unique way to incorporate the beauty of nature into your home or office space. With its eco-friendly and sustainable nature, versatile design possibilities, and undeniable aesthetic appeal, driftwood art has rightfully gained popularity as a form of modern and contemporary wall decor. Whether you choose to create your own driftwood art or purchase from talented artists, the beauty and charm of this art form are sure to mesmerize your guests and remind you of the elegance and artistry found in nature. Embrace the beauty of driftwood art for walls and continue the tradition of nature-inspired decor in your own unique way.

Filed Under: Driftwood Ideas Tagged With: Art, Driftwood, Walls

Driftwood Art For Kids

March 24, 2024 by admin

Get ready to unleash your child’s creativity with the fascinating world of driftwood art! This unique and captivating form of artistic expression offers a wonderful opportunity for kids to explore their imagination and create stunning masterpieces. With its natural and rustic appeal, driftwood art allows children to connect with nature while experimenting with different shapes, textures, and colors. From adorable animal sculptures to whimsical dreamcatchers, the possibilities are endless. Let your child’s imagination soar as they embark on an exciting journey of creating stunning art using driftwood.

Driftwood Art For Kids

This image is property of images.pexels.com.

1. What is Driftwood Art?

– Definition

Driftwood art involves creating sculptures, mobiles, paintings, and collages using pieces of driftwood found along beaches, riverbanks, or other bodies of water. Driftwood refers to pieces of wood that have been washed ashore by waves and currents. Artists use these natural materials to create unique and visually appealing works of art.

– Materials Used

The primary material used in driftwood art is, of course, driftwood. It can be found in a variety of shapes, sizes, and textures, making each piece unique. Other materials commonly used in driftwood art include glue, paint, varnish, canvas, and other craft supplies depending on the specific project.

– Importance for Kids

Driftwood art is particularly valuable for kids as it allows them to engage in a creative and educational activity. It helps foster their imagination, develop their fine motor skills, encourage problem-solving, and instill a sense of environmental awareness. Additionally, driftwood art provides an opportunity for kids to explore and appreciate nature’s beauty, transforming discarded materials into stunning works of art.

2. Benefits of Driftwood Art for Kids

– Enhances Creativity

Engaging in driftwood art encourages kids to think outside the box and find creative uses for natural objects. It allows them to experiment with different arrangements, shapes, and colors, giving them the freedom to express their unique artistic vision.

– Develops Fine Motor Skills

Working with driftwood requires precision and dexterity, which helps children develop their fine motor skills. They learn to handle delicate pieces of wood, use glue and paint with control, and manipulate small objects while constructing their artwork.

– Encourages Problem Solving

Creating driftwood art often involves overcoming challenges and finding solutions. Whether it’s figuring out how to balance a mobile or secure pieces for a sculpture, kids learn problem-solving skills as they explore different techniques and experiment with various methods of construction.

– Fosters Environmental Awareness

Driftwood art provides an excellent opportunity to educate children about the natural environment and the impact of human activity on coastal ecosystems. By using materials that have been washed ashore, kids learn to appreciate the beauty of nature and the importance of preserving it.

3. Safety Precautions

– Handling Sharp Edges

Driftwood pieces may have sharp edges or splinters, so it is essential to handle them with care. Kids should be taught to wear gloves and exercise caution when picking up and manipulating driftwood to avoid injury. Sanding down rough edges can also help minimize the risk of accidents.

– Choosing Non-Toxic Materials

When using paints, glues, or varnishes, it is crucial to select non-toxic materials that are safe for children. Choosing water-based paints and non-toxic adhesives ensures that kids can work on their driftwood art projects without exposure to harmful chemicals.

– Supervision and Guidance

Adult supervision and guidance are important when children are working on driftwood art projects. This ensures their safety and helps them learn proper techniques for handling tools and materials. Additionally, adults can provide assistance in more complex steps, such as using power tools for sculpting or assembling intricate pieces.

4. Driftwood Art Ideas for Kids

– Driftwood Mobiles

Driftwood mobiles are a popular choice for kids as they can be hung up and enjoyed from any angle. To create a driftwood mobile, children can select different sizes and shapes of driftwood and use strings or fishing line to suspend them in an appealing arrangement. Adding small decorative items such as shells or beads can create additional visual interest.

– Driftwood Sculptures

Driftwood sculptures allow kids to transform their imagination into three-dimensional artworks. They can experiment with different shapes and sizes of driftwood, creating creatures, abstract designs, or even functional sculptures such as pen holders. Using glue or wire, children can secure the pieces together to build their unique driftwood sculptures.

– Driftwood Paintings

Driftwood paintings combine the natural textures of driftwood with artistic techniques using paint. Kids can choose a suitable canvas or piece of wood and use paint to create a driftwood scene, abstract patterns, or even incorporate the found driftwood as part of the artwork. The combination of textures and colors adds depth and visual interest to the finished painting.

– Driftwood Collages

Driftwood collages allow kids to explore different textures and colors while creating a visually captivating composition. They can select a background material such as cardboard or canvas and arrange pieces of driftwood in various shapes and patterns. Adding other materials like seashells, pebbles, or even dried flowers can enhance the collage further.

Driftwood Art For Kids

This image is property of images.pexels.com.

5. Step-by-Step Guide: Creating a Driftwood Mobile

– Materials Needed

To create a driftwood mobile, you will need:

  • Several pieces of driftwood in different shapes and sizes
  • Clear fishing line or sturdy string
  • Small hooks or rings
  • Decorative items like shells or beads (optional)
  • Scissors or wire cutters

– Finding and Preparing Driftwood

Start by collecting driftwood pieces of your choice from a beach or riverbank. Look for pieces with interesting textures and shapes. Once you have gathered the driftwood, inspect each piece for sharp edges or splinters. Use sandpaper to smooth any rough surfaces and ensure they are safe to handle.

– Designing and Assembling the Mobile

Plan your design by experimenting with different arrangements of the driftwood. Visualize how they will hang together and the spacing between each piece. Once you are satisfied with the design, cut lengths of fishing line or string and tie them securely to each piece of driftwood. Attach small hooks or rings to the top of each driftwood piece. Finally, attach the driftwood pieces to a central hook or ring, allowing them to hang freely and balance each other.

– Adding Personal Touches

If desired, you can add decorative items such as shells, beads, or even small twinkle lights to your driftwood mobile. Experiment with different combinations and arrangements until you achieve the desired aesthetic. Be sure to use lightweight materials and secure them properly to maintain a balanced mobile.

6. Step-by-Step Guide: Creating a Driftwood Sculpture

– Materials Needed

To create a driftwood sculpture, gather the following materials:

  • Assorted pieces of driftwood in various sizes
  • Strong glue or epoxy
  • Wire or string (optional for added stability)
  • Wire cutters or a saw (if needed)

– Selecting the Base and Pieces

Choose a sturdy base for your driftwood sculpture, such as a wooden block or a flat rock. Secure it in place to provide stability for your sculpture. Select a variety of driftwood pieces that have interesting shapes and can fit together to form your desired design.

– Building and Securing the Sculpture

Start by arranging the driftwood pieces on the base, experimenting with different configurations until you find a design you like. Once you have determined the arrangement, use strong glue or epoxy to secure the pieces together. Hold them in place until the glue sets firmly. For added stability, you can also use wire or string to reinforce the joints between pieces.

Driftwood Art For Kids

This image is property of images.pexels.com.

7. Step-by-Step Guide: Creating a Driftwood Painting

– Materials Needed

To create a driftwood painting, gather the following materials:

  • Canvas or a piece of wood
  • Acrylic or water-based paint
  • Paintbrushes of different sizes
  • Mixture of sand and glue (optional for texture)
  • Driftwood pieces of various sizes and shapes
  • Strong glue or adhesive

– Preparing the Canvas

If using a canvas, make sure it is clean and free from any dust or debris. If using wood, sand it lightly to smooth the surface. You can also create texture on the canvas by mixing sand and glue together and applying it to specific areas. Allow the canvas or wood to dry completely before proceeding to the next step.

– Designing and Painting the Driftwood Scene

Plan your composition by arranging the driftwood pieces on the canvas or wood. Experiment with different arrangements until you achieve a visually appealing design. Once you are satisfied, secure each piece in place using strong glue or adhesive. Begin painting around the driftwood pieces, using a combination of colors and brush techniques to create the desired effect. Allow the paint to dry completely before displaying your driftwood painting.

8. Step-by-Step Guide: Creating a Driftwood Collage

– Materials Needed

To create a driftwood collage, gather the following materials:

  • Sturdy background material (cardboard, canvas, or wood panel)
  • Assorted pieces of driftwood
  • Strong glue or adhesive
  • Additional decorative materials (optional)

– Selecting and Preparing the Background

Choose a sturdy background material for your collage. If using cardboard, cut it to the desired size. If using canvas or a wood panel, ensure it is clean and free from debris. You may also consider painting the background with a solid color or creating a textured effect using sand and glue.

– Arranging and Attaching Driftwood Pieces

Start by arranging the driftwood pieces on the background material, experimenting with different layouts until you are satisfied with the composition. Once happy with the arrangement, apply strong glue or adhesive to the back of each piece and press them firmly onto the background. Make sure to reinforce any loose pieces and ensure they are securely attached. To enhance the collage further, you can add other decorative materials such as seashells or dried flowers using the same adhesive.

Driftwood Art For Kids

9. Displaying and Preserving Driftwood Art

– Hanging Mobiles and Sculptures

Driftwood mobiles and sculptures can be displayed by suspending them from ceilings, hooks, or stands. Choose a location that allows the artwork to move freely and be admired from different angles. Consider the weight and size of the artwork and use appropriate hooks or hanging mechanisms to ensure it is securely displayed.

– Framing and Mounting Paintings and Collages

Driftwood paintings and collages can be framed or mounted to preserve and enhance their presentation. Select a frame that complements the artwork and provides proper protection. Alternatively, you can mount the artwork onto a wooden plaque or attach hangers to the back for easy wall hanging. Ensure the framing or mounting process does not damage or compromise the integrity of the artwork.

– Treating Driftwood for Longevity

To preserve the beauty of driftwood art and ensure its longevity, it is essential to treat the driftwood properly. Clean the driftwood thoroughly, removing any dirt, sand, or organic matter. Allow it to dry completely before applying a protective coating such as varnish or a sealant to safeguard the wood from moisture and decay. Regularly inspect and clean the driftwood art to maintain its appearance and durability.

10. Driftwood Art as a Teaching Tool

– Exploring Nature and the Environment

Driftwood art provides an excellent opportunity for kids to connect with nature and explore the environment. They can learn about the origins of driftwood, how it is formed, and the role of waves and currents in shaping coastlines. This exposure to natural materials and processes can foster a deeper appreciation for the beauty and fragility of our planet.

– Learning about Tides and Erosion

Driftwood art can spark discussions about tides, erosion, and their impact on coastal and marine ecosystems. Kids can learn about how tides affect the movement of driftwood, how erosion shapes the landscape, and the importance of preserving coastal habitats.

– Understanding Marine Life and Habitats

Driftwood often serves as a habitat and provides shelter for various marine organisms. Through driftwood art, children can learn about the diverse species that rely on these natural structures for survival. They can develop an understanding of the interconnectedness of marine ecosystems and the importance of protecting them.

In conclusion, driftwood art offers countless opportunities for children to engage in a creative, educational, and environmentally conscious activity. By encouraging their creativity, developing their fine motor skills, fostering problem-solving abilities, and promoting environmental awareness, driftwood art provides a well-rounded learning experience. Whether creating driftwood mobiles, sculptures, paintings, or collages, children can explore their artistic talents while appreciating the beauty of nature and the importance of preserving our natural resources.

Driftwood Art For Kids

Filed Under: Driftwood Ideas Tagged With: Art, Driftwood, kids

Etsy Driftwood Art

March 24, 2024 by admin

Imagine strolling along the beach, the warm sand beneath your feet, when you stumble upon a piece of driftwood. Its twisted and weathered appearance captivates you, sparking a creative vision in your mind. With Etsy Driftwood Art, that vision can become a reality. Etsy Driftwood Art offers a stunning collection of unique and handcrafted driftwood art pieces, each carefully crafted to enhance the natural beauty of this organic material. From intricate wall hangings to charming sculptures, these one-of-a-kind creations are sure to add a touch of coastal charm to any space. Embrace the beauty of nature and bring the serenity of the sea into your home with Etsy Driftwood Art.

Etsy Driftwood Art

This image is property of images.unsplash.com.

What is Etsy Driftwood Art?

Etsy Driftwood Art refers to the unique and beautiful pieces of artwork made from driftwood that you can find on the popular online marketplace, Etsy. Driftwood art is a form of sculpture that utilizes pieces of wood that have been washed ashore by rivers, lakes, or oceans. These weathered and worn pieces of wood are transformed into stunning artwork that adds a rustic and natural touch to any space.

Definition of Etsy Driftwood Art

Etsy Driftwood Art encompasses a wide range of artistic creations that utilize driftwood as the main medium. From wall hangings and sculptures to wind chimes and jewelry, driftwood art allows artists to showcase their creativity and skill in transforming a natural element into something visually stunning.

Materials Used in Etsy Driftwood Art

The main material used in Etsy Driftwood Art is, of course, driftwood. Driftwood refers to pieces of wood that have been carried by water currents and eventually washed ashore. These pieces of wood are often weathered, worn, and unique in shape and texture, which adds character and charm to the finished artwork.

In addition to driftwood, artists may also incorporate other materials such as seashells, stones, beads, and various natural fibers like jute or hemp to enhance the aesthetic appeal of their creations. These materials are carefully chosen to complement the organic and rustic nature of the driftwood, creating a harmonious and visually appealing composition.

Styles and Designs of Etsy Driftwood Art

Etsy Driftwood Art offers a wide range of styles and designs to suit various tastes and preferences. Whether you prefer a minimalist and contemporary look or a more bohemian and eclectic style, you can find driftwood art pieces on Etsy that cater to different interior design aesthetics.

Some popular styles and designs of Etsy Driftwood Art include:

  • Coastal and nautical themes: These artworks often feature elements such as seashells, starfish, and rope, evoking a beachy and ocean-inspired atmosphere.
  • Abstract and modern designs: These pieces focus on the natural shapes and curves of the driftwood, creating sculptures that are visually striking and unique.
  • Nature-inspired motifs: Artists often incorporate botanical elements like leaves, flowers, and branches into their driftwood art, bringing a touch of the outdoors into the interior space.
  • Bohemian and eclectic styles: These pieces may feature an array of vibrant colors, macramé accents, and mixed media elements, reflecting a free-spirited and artistic aesthetic.

With the diverse range of styles and designs available, there is something for every taste and home decor style in the world of Etsy Driftwood Art.

Popular Driftwood Art Items on Etsy

Driftwood Wall Hangings

Driftwood wall hangings are one of the most popular items in Etsy Driftwood Art. These art pieces are designed to be hung on a wall and serve as a focal point in the room. They come in various sizes and designs, ranging from simple and minimalist compositions to more intricate and detailed installations. Driftwood wall hangings often feature a combination of driftwood pieces, feathers, seashells, and other natural elements carefully arranged to create a visually stunning and eye-catching display.

Driftwood Sculptures

Driftwood sculptures are another sought-after category in Etsy Driftwood Art. These sculptures are typically three-dimensional and can take the form of animals, human figures, abstract shapes, or even functional objects. The artists use their creativity and craftsmanship to transform the natural shapes and textures of the driftwood into captivating pieces of art. Driftwood sculptures can add a touch of whimsy, elegance, or intrigue to any space, making them a popular choice for art collectors and interior enthusiasts alike.

Driftwood Wind Chimes

Driftwood wind chimes are not only visually appealing but also provide a soothing and melodic sound when the wind blows. These wind chimes are made by attaching carefully selected pieces of driftwood to strings or chains, which are then suspended from a central focal point. Some artists may also incorporate other materials like glass or metal beads to enhance the sound and aesthetic of the wind chimes. Driftwood wind chimes make for a beautiful addition to outdoor spaces such as gardens, patios, and porches, bringing a sense of tranquility and serenity.

Driftwood Jewelry

Driftwood jewelry is a unique and fashionable way to incorporate a piece of nature into your personal style. Etsy offers a wide range of driftwood jewelry, including earrings, necklaces, bracelets, and rings. These jewelry pieces often feature small and intricately shaped pieces of driftwood combined with metal accents, gemstones, or other natural materials. The organic and earthy feel of driftwood jewelry adds a touch of individuality and bohemian charm to any outfit.

Driftwood Mirrors

Driftwood mirrors are a functional and decorative item that combines the beauty of driftwood with the practicality of a mirror. These mirrors typically feature a border or frame made entirely or partially out of driftwood pieces. The natural shapes and colors of the driftwood create a visually stunning frame that adds a rustic and coastal vibe to any room. Driftwood mirrors can be placed in entryways, bathrooms, living rooms, or bedrooms, serving as a stylish and unique statement piece.

Unique Features of Etsy Driftwood Art

One-of-a-Kind Pieces

One of the unique features of Etsy Driftwood Art is that each piece is one-of-a-kind. Since driftwood is a natural resource, no two pieces are alike in terms of size, shape, texture, or color. This means that when you purchase Etsy Driftwood Art, you can be sure that you are getting a truly unique and individual piece of art that cannot be replicated. This exclusivity adds value and charm to the artwork, making it a special addition to your home decor or a meaningful gift for a loved one.

Eco-Friendly Art

Etsy Driftwood Art is not only visually appealing but also environmentally friendly. The use of driftwood as the main material is a sustainable practice that helps reduce waste and utilize natural resources that would otherwise go unused. By choosing Etsy Driftwood Art, you are supporting artists who prioritize ethical and eco-friendly practices, making a positive impact on the environment.

Bringing Nature Indoors

One of the delightful aspects of Etsy Driftwood Art is its ability to bring a touch of nature indoors. The natural and organic shapes of the driftwood, combined with the use of other natural materials, create a connection to the outdoors and evoke a sense of calm and serenity. Whether it’s a driftwood wall hanging or a sculpture, these art pieces serve as a reminder of the beauty of the natural world and can help create a peaceful and harmonious atmosphere in your home.

Versatility in Home Decor

Etsy Driftwood Art offers versatility when it comes to home decor. The wide range of styles, designs, and sizes available allows you to find the perfect piece to complement your existing decor or make a statement in a specific area of your home. Driftwood art can seamlessly blend in with various interior design styles, from rustic and coastal to modern and bohemian. Whether you’re looking for a small accent piece or a large statement artwork, Etsy Driftwood Art offers something for every space and style.

Techniques and Processes in Creating Etsy Driftwood Art

Selecting and Preparing Driftwood

The first step in creating Etsy Driftwood Art is selecting suitable pieces of driftwood. Artists carefully scour beaches, riverbanks, and lakeshores to find driftwood that possesses interesting shapes, textures, and colors. They look for pieces that are well-seasoned and have been naturally smoothed by water and weather elements.

Once the driftwood is collected, it needs to be prepared before it can be used in the artwork. Depending on the condition of the driftwood, artists may need to remove any loose or splintered parts, sand down rough edges, or drill holes for attaching other elements. This preparation stage ensures that the driftwood is safe to handle and provides a stable foundation for the artwork.

Cleaning and Treating Driftwood

Before incorporating driftwood into their artwork, artists typically clean and treat the driftwood to ensure its longevity and aesthetic appeal. Cleaning involves removing any dirt, debris, or marine organisms that may be attached to the driftwood. Artists may use water, brushes, or gentle cleaners to clean the surface, taking care not to damage or alter the natural color and texture of the wood.

Once the driftwood is clean, it may need to be treated to prevent future decay or infestation. Artists often use non-toxic wood preservatives or sealants to protect the wood from humidity, insects, and UV rays. This treatment helps preserve the integrity of the driftwood and ensures that the artwork remains in good condition for years to come.

Designing and Assembling the Artwork

The design and assembly process of Etsy Driftwood Art requires careful planning and a keen eye for composition. Artists use their creativity and artistic vision to arrange the driftwood pieces and other materials in a visually appealing and cohesive way. This involves considering factors such as balance, proportion, color coordination, and overall aesthetic appeal.

Depending on the complexity of the design, artists may use various techniques to secure the driftwood pieces together. They may use glue, wire, nails, or strings to attach the driftwood and other elements seamlessly. Each piece is strategically placed to create a cohesive and visually pleasing artwork that showcases the natural beauty of the driftwood.

Finishing Touches and Protective Coatings

Once the artwork is assembled, artists add the finishing touches and protective coatings to enhance the overall look and ensure the longevity of the piece. This may involve applying a clear varnish or sealant to protect the driftwood from moisture, dust, and sunlight. The protective coating also adds a subtle sheen and highlights the natural colors and textures of the driftwood, giving the artwork a polished and finished appearance.

Artists may also choose to add additional embellishments such as seashells, beads, feathers, or metal accents to further enhance the artwork’s aesthetic or reflect a specific theme or style. These final touches bring the artwork to life and make it a truly unique and captivating piece of Etsy Driftwood Art.

Etsy Driftwood Art

This image is property of images.unsplash.com.

Inspiration for Etsy Driftwood Art

Seaside and Coastal Themes

One of the major sources of inspiration for Etsy Driftwood Art is the seaside and coastal environment. The serene beauty of the ocean, the sound of crashing waves, and the abundance of natural treasures found on the shore inspire artists to create artworks that capture the essence of these coastal landscapes. Driftwood, being a natural element commonly found on beaches, is the perfect medium to evoke the soothing and breezy atmosphere of the coast.

Seaside-inspired driftwood art often incorporates elements like seashells, starfish, sand dollars, and rope to create a cohesive coastal theme. These artworks serve as a reminder of beach vacations, the joy of collecting seashells, and the tranquility of being near the ocean.

Natural and Organic Shapes

Nature itself serves as a profound source of inspiration for Etsy Driftwood Art. The unique shapes, patterns, and textures found in the natural world inspire artists to interpret and recreate these elements using driftwood as their medium. Driftwood, with its naturally sculpted form, offers artists an opportunity to replicate the organic shapes and curves found in plants, animals, and geological formations.

Artists may choose to enhance the natural shapes of the driftwood or use them as a starting point for their creative exploration. The resulting artworks often celebrate the beauty of imperfections and highlight the intricate details found in nature.

Wabi-Sabi Aesthetic

The wabi-sabi aesthetic is a Japanese philosophy that embraces the beauty of imperfection, impermanence, and the natural state of things. This philosophy deeply influences the creation of Etsy Driftwood Art, as the natural appearance of driftwood aligns perfectly with the wabi-sabi principles.

Wabi-sabi-inspired driftwood art celebrates the weathered, worn, and imperfect look of driftwood. Artists may intentionally leave the driftwood unaltered, preserving its original appearance and showcasing the unique marks and textures created by nature. This aesthetic choice creates a sense of authenticity and uniqueness in the artwork while also inviting contemplation and appreciation for the passage of time.

Influence of Sustainable Living

The increasing awareness and importance of sustainable living have influenced the creation of Etsy Driftwood Art. Artists who prioritize eco-friendly practices choose to work with driftwood due to its sustainable nature. They see the potential in repurposing and upcycling materials that would otherwise end up as waste or contribute to environmental harm.

By using natural materials like driftwood, artists promote the concept of repurposing and encourage others to consider sustainable choices in their own lives. Etsy Driftwood Art serves as a visual representation of the beauty that can emerge from resourcefulness and eco-consciousness, inspiring others to adopt a more sustainable mindset.

Tips for Buying Etsy Driftwood Art

Consider the Size and Scale

When buying Etsy Driftwood Art, it’s important to consider the size and scale of the artwork in relation to the space you intend to place it. Take measurements of the area where you plan to hang or display the art and compare them to the listed dimensions provided by the seller. This will help you ensure that the artwork fits harmoniously in your space without overwhelming or appearing too small.

You may also want to consider the visual weight of the artwork. Some driftwood pieces may be intricately designed and appear bulkier or heavier, while others may have a more delicate and lightweight appearance. Think about the overall aesthetic and feel you want to achieve in your space to make an informed decision about the size and scale of the artwork.

Check Seller Reviews and Ratings

When purchasing Etsy Driftwood Art, it’s essential to check the seller’s reviews and ratings to ensure a positive purchasing experience. Reading feedback from previous customers can provide valuable insights into the quality of the artwork, the seller’s communication and customer service, and the overall satisfaction of buyers.

Pay attention to the overall rating, as well as any specific comments or reviews related to the quality, packaging, and shipping of the artwork. This will give you a sense of the seller’s reliability and professionalism, helping you make an informed decision about your purchase.

Ask About Shipping and Packaging

Before making a purchase, it’s a good idea to ask the seller about their shipping and packaging practices. Since driftwood art can be delicate and fragile, it’s important to ensure that it will be packaged securely to prevent any damage during transit. Ask the seller what materials they use for packaging, such as bubble wrap, foam, or sturdy boxes.

You may also want to inquire about shipping options and the estimated delivery time. Some sellers offer expedited shipping for an additional cost, while others provide standard shipping that may take longer. Discussing these details with the seller will help you understand the shipping process and set appropriate expectations for the arrival of your Etsy Driftwood Art.

Customization Options

If you have specific requests or preferences, don’t hesitate to ask the seller about customization options. Some Etsy sellers are open to creating custom pieces based on your specifications. Whether it’s a specific color scheme, size, or design, discussing customization options with the seller can result in a unique and personalized piece of driftwood art that perfectly matches your vision.

Remember to communicate your preferences clearly and provide any necessary details to ensure that the final artwork meets or exceeds your expectations. Keep in mind that customization may involve additional costs or longer production times, so be prepared for any potential adjustments in price or delivery schedule.

Etsy Driftwood Art

This image is property of images.unsplash.com.

How to Care for Etsy Driftwood Art

Placing and Displaying the Artwork

When it comes to caring for Etsy Driftwood Art, proper placement and display can make a significant difference in maintaining its appearance and longevity. Choose an appropriate location that is away from direct sunlight, extreme heat sources, and areas with high humidity. Driftwood is a natural material that can expand, contract, or warp under certain conditions, so it’s important to provide a stable environment to prevent any damage.

Avoid placing driftwood art near open windows or outdoor areas where it may be exposed to moisture. This can cause the wood to deteriorate or mold. Additionally, keeping the artwork away from direct sunlight will help prevent fading or discoloration over time.

Cleaning and Dusting

Regular cleaning and dusting are essential to keep your Etsy Driftwood Art looking its best. Use a soft, dry cloth or a feather duster to gently remove any dust or debris that may accumulate on the surface of the artwork. Avoid using harsh chemicals or abrasive cleaners, as they can damage the natural finish of the driftwood or alter its color.

If there are stubborn stains or spots on the driftwood, you can use a slightly damp cloth or a soft brush to remove them. Gently wipe or brush the affected area, being careful not to oversaturate the wood. Once the stain is removed, wipe the area with a dry cloth to remove any excess moisture.

Protecting from Moisture and Sunlight

To protect your Etsy Driftwood Art from moisture and sunlight, it’s important to take necessary precautions. If you live in a humid environment or have a space with high humidity, consider using a dehumidifier or placing a moisture-absorbing product, such as silica gel packets, near the artwork. This will help prevent any potential moisture-related damage to the driftwood.

Direct sunlight can fade or discolor the driftwood over time. To protect the artwork, consider using curtains or blinds to filter or block out direct sunlight. You can also use UV-blocking film on windows or apply a clear protective coating on the driftwood to minimize the impact of sunlight exposure.

Repairing and Restoring

In the event that your Etsy Driftwood Art becomes damaged or requires repair, it’s essential to address the issue promptly to prevent further deterioration. If a piece of driftwood becomes loose or detached, you can use a suitable adhesive recommended for wood to reattach it securely. Follow the manufacturer’s instructions and allow ample time for the adhesive to dry and set.

For any severe damage or deterioration, it may be best to consult a professional art restorer or someone with expertise in driftwood restoration. They will be able to assess the extent of the damage and recommend the appropriate restoration techniques to preserve the integrity and beauty of the artwork.

DIY Driftwood Art Projects on Etsy

Step-by-Step Tutorials for Beginners

If you’re feeling inspired by Etsy Driftwood Art and want to try your hand at creating your own driftwood masterpieces, there are plenty of DIY tutorials available on Etsy. These step-by-step tutorials guide beginners through the process of selecting, preparing, and creating their own driftwood art.

These tutorials often provide detailed instructions, accompanied by clear and visually appealing photographs, making it easy for anyone to follow along. Whether you want to create a driftwood wall hanging, a sculpture, or a wind chime, these tutorials will give you the guidance and confidence to unleash your creativity and create your own stunning driftwood art.

Tools and Materials Needed

To embark on a DIY driftwood art project, you will need a few essential tools and materials. The specific items required may vary depending on the project, but here are some common tools and materials needed for most driftwood art projects:

  • Driftwood pieces
  • Sandpaper or sanding block
  • Wood glue or epoxy adhesive
  • A small saw or clippers (if necessary for trimming or shaping the driftwood)
  • String, wire, or fishing line for attaching the driftwood pieces
  • Optional materials such as seashells, beads, feathers, or other decorative elements
  • Protective coatings such as varnish or sealant (if desired)

These basic tools and materials will provide you with the foundation to begin your DIY driftwood art project. As you gain experience and explore different techniques, you may choose to expand your collection of tools and materials to further enhance your creations.

Creative Ideas and Inspiration

If you’re looking for creative ideas and inspiration for your DIY driftwood art projects, Etsy is a treasure trove of inspiration. Browse through the extensive collection of driftwood art available on Etsy to gain insight into different styles, designs, and techniques used by experienced artists.

Pay attention to the composition and arrangement of the driftwood pieces, as well as any additional materials or embellishments that catch your eye. Explore various themes, from abstract designs to nature-inspired motifs, and look for creative ways artists have incorporated driftwood into their artwork. This exposure to different artists and their unique styles will fuel your own creativity and help you develop your own personal artistic voice in the world of driftwood art.

Etsy Driftwood Art

Etsy Driftwood Art as a Gift

Occasions and Recipients

Etsy Driftwood Art makes a thoughtful and unique gift for various occasions and recipients. Whether you’re searching for a birthday present, an anniversary gift, or a housewarming gesture, driftwood art offers a one-of-a-kind and meaningful token that will be cherished.

Consider the recipient’s personal style and taste when choosing the artwork. If they have a preference for coastal decor or embrace a bohemian aesthetic, a driftwood wall hanging or a sculpture may be the perfect choice. On the other hand, if they have a fondness for jewelry or small decorative items, a driftwood necklace or a miniature driftwood sculpture could be ideal.

The versatility and range of options available on Etsy allow you to find a piece of driftwood art that resonates with the recipient, reflects their personality, and embodies the sentiment you wish to convey.

Personalization and Customization

To make your Etsy Driftwood Art gift even more special, consider personalization or customization options. Many Etsy sellers offer the possibility to add initials, names, or meaningful dates to their driftwood art pieces. This personal touch adds an extra layer of significance and demonstrates the thought and care put into selecting the gift.

Additionally, if you have a specific design or idea in mind, you can discuss customization options with the seller. They may be able to create a custom driftwood art piece that incorporates specific colors, symbols, or elements that hold significance for the recipient. Customization ensures that the gift is truly one-of-a-kind and tailored to the recipient’s tastes and preferences.

Presentation and Packaging Ideas

The presentation and packaging of your Etsy Driftwood Art gift can enhance the overall gifting experience and make it even more memorable. Consider the following presentation ideas to add an extra special touch:

  • Use natural elements like jute, twine, or raffia to wrap the gift.
  • Attach a handwritten note or a small card expressing your well-wishes and the meaning behind the gift.
  • Consider placing the driftwood art in a beautiful gift box or a handmade driftwood display stand.
  • Include a small booklet or card showcasing the artist’s story, their creative process, or the inspiration behind the driftwood art.
  • If the driftwood art is delicate or fragile, provide clear instructions for handling and care to ensure that the recipient can enjoy the artwork for years to come.

By paying attention to the presentation and packaging details, you can truly elevate the gifting experience and demonstrate your thoughtfulness and care.

Supporting Independent Artists on Etsy

Importance of Supporting Small Businesses

When you purchase Etsy Driftwood Art, you are not only acquiring a unique and beautiful piece of artwork but also supporting independent artists and small business owners. It’s important to recognize the value of supporting small businesses and the positive impact it has on both the artists and the art community as a whole.

By purchasing from independent artists, you help ensure that their creative pursuits can continue. Your support contributes to their financial stability and allows them to dedicate more time and resources to their craft. Additionally, supporting small businesses fosters diversity and innovation in the art community, as artists are often able to explore unconventional ideas and experiment with different techniques freely.

Positive Impact on Art Community

Supporting independent artists on Etsy has a positive ripple effect on the art community at large. When artists are empowered and encouraged through sales and positive feedback, they gain the confidence and inspiration to continue creating. This continuous creative cycle fuels the growth and development of the art community, enriching it with fresh perspectives, styles, and innovations.

By engaging with independent artists on Etsy, you become a part of this larger ecosystem that celebrates and sustains the arts. You have the opportunity to discover new talents, connect with artists on a personal level, and contribute to the cultural fabric of society through the appreciation and support of their creations.

Reviewing and Sharing the Artwork

Another way to support independent artists on Etsy is by leaving reviews and sharing your experiences with their artwork. Your feedback and testimonials can help artists build their reputation and attract new customers. Take the time to write a positive review, highlighting the aspects of the artwork that resonated with you, the quality of the craftsmanship, and the overall satisfaction with your purchase.

Sharing your experiences and photographs of the artwork on social media platforms or personal blogs can also help increase the visibility and reach of the artist’s work. Tagging the artist or using relevant hashtags can attract like-minded individuals who appreciate the art, leading to potential sales and exposure for the artist.

By actively participating in the Etsy community, you contribute to the growth and success of independent artists, making a lasting impact on their artistic journey.

Etsy Driftwood Art

Filed Under: Driftwood Ideas Tagged With: Art, Driftwood, Handmade

Kristy Elson Driftwood Art

March 24, 2024 by admin

Have you ever marveled at the intricate beauty of driftwood art? If so, then you’re in for a treat! Allow me to introduce you to the incredible world of “Kristy Elson Driftwood Art.” With her unique talent and creative vision, Kristy Elson transforms ordinary pieces of driftwood into extraordinary works of art. Each piece tells its own story, with the natural curves and textures of the wood bringing to life stunning sculptures and captivating wall hangings. Get ready to be mesmerized by the enchanting artistry of Kristy Elson and her passion for creating extraordinary masterpieces from nature’s gifts.

About Kristy Elson

Background and upbringing

Kristy Elson is a renowned artist who specializes in creating unique and captivating artwork using driftwood as her medium. Born and raised in a coastal town, Kristy developed a deep connection with nature from a young age. Growing up surrounded by the beauty of the ocean and the coastline, she became fascinated by the intricate shapes and textures of driftwood that washed ashore. This early exposure to the natural world would later serve as the foundation for her artistic career.

Artistic influences

Throughout her life, Kristy has been influenced by various artists and art movements that have shaped her artistic style. She draws inspiration from the works of renowned sculptors such as Andy Goldsworthy and Anselm Kiefer, who create art in harmony with nature. Additionally, she finds inspiration in the organic shapes and patterns found in abstract expressionism, as well as the tranquility and harmony portrayed in traditional Japanese art. These influences combine to create a unique and distinct style in Kristy’s driftwood art.

Style and techniques

Kristy’s style can be described as organic and ethereal, with an emphasis on natural forms and textures. She uses driftwood as her primary medium, allowing the materials to dictate the shape and composition of her artwork. Her techniques involve meticulously selecting and assembling pieces of driftwood, carefully considering their individual shapes and textures to create a harmonious composition. Through her art, she seeks to evoke a sense of wonder and connection with the natural world.

Driftwood as a Medium

Introduction to driftwood art

Driftwood art is a form of sculptural and mixed-media art that utilizes driftwood as its primary material. Driftwood refers to wood that has been washed ashore by the waves or currents of a body of water, typically the ocean. This natural material possesses a unique aesthetic appeal, with its weathered appearance, smooth textures, and varied colors. Artists like Kristy Elson see the potential in driftwood to create stunning and evocative pieces of art that capture the essence of the natural world.

The appeal of driftwood

One of the main reasons why driftwood appeals to artists like Kristy Elson is its sheer beauty and uniqueness. Each piece of driftwood is distinct, carrying with it the history of its journey through the water. The weathering process gives the wood a worn and aged appearance, adding character and charm to the finished artwork. Furthermore, the natural shapes and textures found in driftwood offer endless possibilities for artistic expression, allowing artists to create truly one-of-a-kind pieces.

Sustainability and environmental awareness

Another significant aspect of driftwood art is its commitment to sustainability and environmental consciousness. By utilizing materials that are readily available in nature, artists like Kristy Elson minimize their ecological footprint while creating art. Driftwood is a renewable resource that is abundant in coastal areas, making it a more environmentally friendly alternative to traditional art materials. By incorporating driftwood into her art, Kristy aims to raise awareness about the importance of preserving and appreciating nature.

Kristy Elson Driftwood Art

This image is property of images.pexels.com.

Kristy Elson’s Driftwood Art

Early works and evolution

Kristy Elson’s journey as a driftwood artist began with small-scale works that showcased her affinity for the natural world. These early pieces were characterized by intricate details and a focus on the unique shapes and textures of the driftwood. Over time, her art evolved as she experimented with larger installations and sculptures, pushing the boundaries of her creativity and technical skills. Today, Kristy’s artwork is highly sought after for its captivating compositions and ability to evoke a sense of awe and wonder.

Inspiration and sources

As a driftwood artist, Kristy finds inspiration in the world around her. She spends countless hours exploring the coastline, searching for unique pieces of driftwood that speak to her artistic vision. The colors, textures, and natural shapes found in the driftwood guide her creative process and play a crucial role in the direction of her artwork. Additionally, she draws inspiration from the ever-changing landscape and the harmony she finds in the delicate balance of nature.

Themes and subjects in her art

Kristy’s artwork often explores themes of resilience, transformation, and the delicate balance between human existence and the natural world. Her pieces embody the idea of finding beauty in imperfections and celebrating the intricate details that make each individual unique. By incorporating natural elements such as shells, feathers, and other organic materials into her artwork, she creates a harmonious and cohesive narrative that resonates with viewers on a deep, emotional level.

Techniques and Process

Collecting and selecting driftwood

A crucial part of Kristy Elson’s artistic process involves collecting and selecting the perfect pieces of driftwood for each artwork. She spends hours combing the coastline, carefully examining each piece she comes across. Her keen eye for detail allows her to discern the unique shapes, textures, and colors that will complement her artistic vision. Each piece of driftwood is meticulously chosen to create a harmonious and balanced composition.

Preparation and cleaning

Before incorporating the driftwood into her artwork, Kristy takes great care in cleaning and preparing the materials. This involves removing any debris or impurities from the driftwood, as well as treating it to ensure its longevity. By using environmentally friendly techniques and materials, she ensures that her art remains sustainable and environmentally conscious throughout the entire process.

Assembling and sculpting the pieces

Once the driftwood has been collected and cleaned, Kristy begins the process of assembling and sculpting the pieces. She meticulously arranges the driftwood, experimenting with different compositions until she achieves the desired aesthetic. Through a combination of weaving, gluing, and sculpting, she brings the individual pieces together to create a cohesive and visually striking artwork. The process requires patience, precision, and a deep understanding of the materials she is working with.

Kristy Elson Driftwood Art

This image is property of images.pexels.com.

Variety of Artistic Creations

Large scale sculptures

One of the most impressive aspects of Kristy Elson’s driftwood art is her ability to create large-scale sculptures that captivate viewers. These sculptures often depict natural forms such as birds, trees, or abstract shapes that evoke a sense of movement and vitality. The use of driftwood in these large-scale pieces adds an element of texture and depth, further enhancing the visual impact of the artwork.

Wall hangings and installations

In addition to sculptures, Kristy also creates stunning wall hangings and installations using driftwood. These works often feature intricate weavings and arrangements of driftwood, creating a three-dimensional effect that demands attention. These pieces can vary in size and can be customized to fit any space, making them versatile and adaptable to different environments.

Functional and decorative items

Kristy Elson’s creativity extends beyond traditional art forms, as she also creates functional and decorative items using driftwood. From furniture pieces such as tables and chairs to smaller decorative items like mirrors and vases, she showcases the versatility of driftwood as a medium. These pieces seamlessly blend art and functionality, adding a touch of natural beauty to any space.

Exhibitions and Recognition

Solo exhibitions

Throughout her career, Kristy Elson has showcased her artwork in several solo exhibitions, giving audiences the opportunity to immerse themselves in her unique artistic vision. These exhibitions provide a comprehensive view of her artistic evolution, allowing viewers to witness the progression of her style and techniques over time. Solo exhibitions also offer an intimate and personal experience for viewers to connect with the artist and gain a deeper understanding of her inspirations and processes.

Group shows and collaborations

In addition to solo exhibitions, Kristy has also participated in numerous group shows and collaborations with other artists. These opportunities allow her to engage with a wider artistic community and showcase her work alongside other talented individuals. Collaborations often lead to groundbreaking and innovative projects that push the boundaries of what is possible in driftwood art, allowing artists to learn from and inspire one another.

Awards and accolades

Kristy Elson’s exceptional talent and dedication to her craft have garnered her recognition and accolades within the art community. She has received several awards for her contributions to the field of driftwood art, including recognition for her innovative techniques and the emotional impact of her artwork. These awards serve as a testament to her skill and artistic vision, solidifying her place as a respected and influential artist within her field.

Kristy Elson Driftwood Art

This image is property of images.pexels.com.

Commissions and Custom Pieces

Working with clients and their vision

Kristy Elson offers a unique opportunity for individuals to commission custom driftwood art pieces. Through open and collaborative communication, she works closely with clients to understand their vision and bring their ideas to life. This collaborative process ensures that the final artwork aligns with the client’s desires while still incorporating Kristy’s distinct style and artistic interpretation.

Process of creating custom driftwood art

Creating custom driftwood art involves a series of stages that begin with an initial consultation. During this consultation, Kristy and the client discuss the desired size, subject matter, and overall aesthetic of the artwork. Once the details have been agreed upon, Kristy sets to work sourcing the perfect pieces of driftwood and creating a preliminary design. Regular updates and communication with the client ensure that the artwork evolves in alignment with their vision. The final piece is a unique and meaningful expression of the client’s desires, expertly crafted by Kristy’s skilled hands.

Stories and significance behind commissioned pieces

Commissioned driftwood art pieces often carry great significance and tell personal stories. Kristy takes the time to understand the client’s emotional connection to the subject matter and incorporates these elements into the artwork. Whether it’s a sculpture that represents a cherished memory or a wall hanging that evokes a sense of serenity, each commissioned piece is imbued with meaning and becomes a precious heirloom that can be passed down through generations.

Availability and Pricing

Availability of Kristy Elson’s artwork

Kristy Elson’s artwork is available for purchase through various channels, including art galleries, her personal website, and select exhibitions and events. Due to the unique and handmade nature of her pieces, availability may vary, and certain works may be one-of-a-kind. However, Kristy continues to create new works and maintain a diverse inventory that caters to different artistic preferences and budgets.

Pricing considerations

The pricing of Kristy Elson’s driftwood art is determined by a variety of factors, including the size, complexity, and materials used in each piece. As an accomplished artist with a growing reputation, Kristy’s artwork is highly sought after, and her prices reflect the value and quality of her craftsmanship. However, she strives to ensure that her art remains accessible to a wide range of individuals who appreciate its beauty and uniqueness.

How to purchase her driftwood art

To purchase Kristy Elson’s driftwood art, interested individuals can visit her website or contact her directly. Online galleries and art platforms may also offer her artwork for sale. Each purchase includes a certificate of authenticity, ensuring that collectors have a genuine piece of Kristy’s art. Whether acquiring a ready-made piece or commissioning a custom artwork, purchasing driftwood art from Kristy Elson is a delightful experience that allows individuals to own a truly exceptional and meaningful piece of art.

Kristy Elson Driftwood Art

Community Engagement and Workshops

Teaching driftwood art workshops

As an artist deeply committed to promoting creativity and environmental consciousness, Kristy Elson leads driftwood art workshops to share her knowledge and passion with others. These workshops provide an opportunity for participants to learn her techniques, gain insights into her artistic process, and create their own driftwood art. By teaching others, Kristy aims to inspire a sense of connection with nature and foster an appreciation for the beauty that can be found in unexpected places.

Community involvement and outreach

In addition to workshops, Kristy actively engages with her local community through various initiatives and events. She collaborates with environmental organizations and participates in beach clean-ups, highlighting the importance of preserving natural habitats and raising awareness about the impact of human activity on the environment. Her involvement extends beyond the art world, as she seeks to make a positive change through her artwork and community engagement.

Promoting creativity and environmental consciousness

Kristy Elson’s ultimate goal is to promote creativity and environmental consciousness through her art. By using driftwood as her medium, she encourages individuals to see the beauty in discarded objects and to think creatively about repurposing materials. Through her workshops and community involvement, she aims to inspire others to appreciate and protect natural resources, fostering a greater sense of environmental responsibility and stewardship.

Future Projects and Aspirations

Upcoming exhibitions and events

Kristy Elson continues to push the boundaries of driftwood art and explore new avenues for artistic expression. She has several upcoming exhibitions and events planned, where she will showcase her latest works and engage with audiences on a deeper level. These opportunities allow her to connect with art enthusiasts, receive feedback, and gather inspiration for future projects.

Exploring new techniques and styles

As a lifelong learner and passionate artist, Kristy Elson is constantly exploring new techniques and styles to further develop her artistic practice. She seeks to push the boundaries of what is possible with driftwood as a medium, experimenting with different forms and materials to create innovative and awe-inspiring pieces. Through this exploration, she continues to evolve as an artist, captivating viewers with her ever-growing repertoire.

Long-term goals and aspirations

Looking to the future, Kristy aims to expand her reach and impact as an artist. She aspires to collaborate with artists from different disciplines and create large-scale installations that have a profound visual and emotional impact. Additionally, she hopes to share her art with a wider audience through international exhibitions and public art projects. Ultimately, Kristy Elson’s long-term goals revolve around using her art to inspire others, foster a connection with nature, and advocate for sustainability and environmental conservation.

In Conclusion,

Kristy Elson’s driftwood art is a testament to the beauty and potential found in nature’s castaways. Through her art, she transforms discarded driftwood into captivating sculptures, installations, and functional pieces that evoke a sense of wonder and appreciation for the natural world. With her unique style, commitment to sustainability, and dedication to promoting environmental consciousness, Kristy Elson continues to inspire and captivate viewers with her one-of-a-kind creations.

Kristy Elson Driftwood Art

Filed Under: Driftwood Ideas Tagged With: Art, Driftwood, Kristy Elson

Driftwood Art Easy

March 23, 2024 by admin

Imagine transforming ordinary pieces of driftwood into stunning works of art with just a few simple steps. With “Driftwood Art Easy,” you can unlock your creativity and create unique masterpieces that capture the beauty of nature. Get ready to discover the endless possibilities that driftwood offers, as you embark on a creative journey that is both fun and rewarding. From rustic wall hangings to intricate sculptures, this article will guide you through the process of turning driftwood into captivating pieces of art. Let your imagination run wild as you explore the art of driftwood and bring a touch of nature into your home with ease.

Driftwood Art Easy

This image is property of images.pexels.com.

Driftwood Art Ideas

If you are looking to add a touch of natural beauty to your home, driftwood art is the perfect choice. With its unique shapes and weathered charm, driftwood can be transformed into stunning artworks that capture the essence of the seaside. Whether you want to create sea creature sculptures, wall hangings, mobiles, or driftwood wind chimes, there are endless possibilities for expressing your creativity. In this article, we will guide you through the process of making driftwood art and offer tips and tricks to help you achieve the best results. So, let’s dive in and explore the wonderful world of driftwood art!

Sea Creature Sculptures

Creating sea creature sculptures with driftwood is a fantastic way to bring the magic of the ocean into your home. Here’s how you can do it:

Collecting Driftwood

To begin, you’ll need to collect driftwood from a beach or riverside. Look for pieces that have interesting shapes and textures. Remember to only gather driftwood that has already washed ashore and avoid taking any from protected areas. It’s important to respect the environment and ecosystems of the beach.

Cleaning and Preparing Driftwood

Once you have gathered your driftwood, it’s time to clean and prepare it for your sculpture. Give the pieces a thorough rinse with water to remove any sand or debris. You can also soak the wood in a mixture of water and bleach for a few hours to disinfect and lighten the color of the driftwood. After soaking, rinse the pieces again and allow them to air dry completely.

Assembling the Sculpture

Next, use a hot glue gun to carefully and securely attach the driftwood pieces together. Experiment with different arrangements and angles to create the desired shape of your sea creature sculpture. Take your time to ensure the pieces are firmly joined to avoid any accidents or breakages later on.

Painting and Decorating

Once the sculpture is assembled, you can add some color and flair to your artwork with paint and decorative accents. Use acrylic paint and brushes to bring your sculpture to life. You can choose natural colors to enhance the organic feel of the driftwood or go bold with vibrant hues that reflect the vibrant life under the sea. Add seashells, beads, or other small decorative elements to further personalize your sculpture. Let your imagination run wild and have fun with the process!

Wall Hangings

If you want to add a statement piece to your home decor, creating a driftwood wall hanging is an excellent choice. Follow these steps to make your own unique wall art:

Choosing Driftwood Pieces

Just like with sea creature sculptures, you’ll want to find interesting driftwood pieces with unique shapes and textures. Look for a variety of sizes and lengths to create visual interest in your wall hanging.

Arranging and Securing Driftwood

Lay out your chosen driftwood pieces on a flat surface and experiment with different arrangements until you find a composition that pleases you. Once you have decided on the arrangement, use a hot glue gun to attach the pieces together. Be sure to dry fit the pieces first to make sure they fit together well before applying the glue.

Attaching Decorations

To add extra charm to your wall hanging, consider attaching seashells, starfish, or other decorative accents to the driftwood. Simply use hot glue to secure the decorations in place. You can also paint or stain the driftwood to further enhance their natural beauty.

Hanging the Artwork

After completing your wall hanging, it’s time to find the perfect spot to display it. Choose a wall that complements the colors and style of your home. To hang the artwork, use appropriate hanging hardware such as hooks or nails. Make sure to select hardware that can support the weight of your wall hanging securely.

Mobiles

Driftwood mobiles are not only visually appealing but also bring a sense of movement and tranquility to any space. Here’s how you can make your own driftwood mobile:

Selecting Driftwood and Hanging Materials

For a mobile, you’ll need several smaller pieces of driftwood that vary in length. Look for pieces that have interesting curves and shapes. You will also need a sturdy piece of driftwood or a metal ring for the top of the mobile, as well as twine or fishing line to suspend the driftwood pieces.

Balancing the Mobile

Balancing the mobile is an essential step to ensure that it hangs evenly and gently sways with the breeze. Start by attaching a piece of twine or fishing line to the top of each driftwood piece. Then, tie the other end of the twine or fishing line to the main support piece or metal ring. Adjust the lengths of the strings until the mobile hangs evenly.

Adding Decorative Elements

To add a touch of whimsy to your mobile, consider attaching decorative elements such as seashells, feathers, or beads. These can be secured to the driftwood pieces using hot glue or by tying them to the strings. Experiment with different combinations and placements to create a visually pleasing and balanced mobile.

Hanging the Mobile

Once your driftwood mobile is complete, it’s time to find the perfect location to hang it. Choose an area where it can catch the breeze and gently sway. You can hang it near a window, on a porch, or in a garden to enjoy the soothing movement and captivating beauty of your creation.

Driftwood Art Easy

This image is property of images.pexels.com.

Driftwood Wind Chimes

The tranquil sound of wind chimes is a delightful addition to any outdoor space. By incorporating driftwood into your wind chimes, you can create a pleasing aesthetic that captures the essence of the beach. Follow these steps to make your own driftwood wind chime:

Choosing Driftwood and Chime Materials

For the driftwood wind chime, you’ll need several small to medium-sized pieces of driftwood. Look for pieces that have interesting shapes and textures. You will also need chime materials such as metal tubes, seashells, or wooden beads, which will create the sound when the wind moves the chime.

Constructing the Wind Chime

To construct the wind chime, drill small holes in the bottom of each driftwood piece. Then, thread a piece of twine or fishing line through the hole and tie a knot to secure it in place. Repeat this process for each driftwood piece. Next, attach the chime materials to the bottom of each piece of driftwood using twine or fishing line. Ensure that the materials are evenly spaced to create a balanced sound.

Adding Decorative Touches

To make your driftwood wind chime even more visually appealing, consider adding decorative touches such as seashells, beads, or feathers. Use hot glue or string to attach these accents to the driftwood or chime materials. Feel free to get creative and personalize your wind chime to reflect your own style and taste.

Hanging the Wind Chime

When it comes to hanging your driftwood wind chime, select a location where it can catch the gentle breeze. This could be on a porch, in a garden, or by a window. Ensure that the wind chime is securely attached to a sturdy hook or hanger. Listen to the melodic sounds of the wind moving through your driftwood wind chime and let it transport you to the peaceful shores of the beach.

Tips and Tricks

Now that you have a good understanding of how to create various driftwood art pieces, here are some tips and tricks to help you enhance your artwork:

Using Natural Curves and Shapes

When selecting and assembling driftwood for your art pieces, pay attention to the natural curves and shapes of the wood. Incorporating these organic elements can add interest and depth to your artwork.

Experimenting with Colors and Textures

Don’t be afraid to experiment with different paint colors and textures when creating your driftwood art. Consider using metallic paints, distressing techniques, or even sea-inspired colors like blues and greens to enhance the overall look and feel of your artwork.

Using Sealant for Longevity

To ensure the longevity of your driftwood art, consider using a sealant or varnish to protect the wood from the elements. This will help prevent the wood from drying out and potentially splitting or cracking over time.

Personalizing with Beach Finds

To add a personal touch to your driftwood art, incorporate seashells, coral, sea glass, or other beach finds. These treasures can be attached using hot glue or integrated into the design of your artwork.

Driftwood Art Easy

This image is property of images.pexels.com.

Safety Precautions

While working with driftwood and art supplies, it’s important to prioritize safety. Here are some safety precautions to keep in mind:

Wearing Protective Gear

When handling hot glue or power tools, wear protective gear such as gloves and safety glasses to avoid burns or injuries.

Using Hot Glue Carefully

Hot glue guns can cause burns if mishandled. Be cautious and work in a well-lit area with a heat-resistant surface to avoid accidents. Keep a bowl of cold water nearby in case of any accidental burns.

Working in a Well-Ventilated Area

When using paint or sealants, make sure to work in a well-ventilated area to avoid inhaling fumes. Open windows or use fans to promote air circulation.

Displaying and Caring for Driftwood Art

Once you have completed your driftwood art, it’s important to display and care for it properly. Here are some tips to help you:

Choosing the Right Location

When displaying your driftwood art, choose a location that complements the overall decor of your home. Consider placing it on shelves, mantels, or even hanging it on walls to showcase its natural beauty.

Cleaning and Dusting

To keep your driftwood art looking its best, clean and dust it regularly. Use a soft brush or cloth to gently remove any dust or debris that may accumulate over time. Avoid using harsh cleaning products that may damage or discolor the wood.

Avoiding Direct Sunlight

To prevent fading or discoloration of your driftwood art, avoid placing it in direct sunlight. Prolonged exposure to sunlight can cause the wood to dry out and lose its natural patina.

Repairs and Restoration

If your driftwood art becomes damaged or requires repair, act promptly to avoid further deterioration. Use hot glue or appropriate adhesives to reattach any loose pieces. If necessary, touch up the paint or sealant to restore its original beauty.

Driftwood Art Easy

Conclusion

Driftwood art is a wonderful way to bring the coastal charm into your home and unleash your creativity. Whether you choose to create sea creature sculptures, wall hangings, mobiles, or wind chimes, the possibilities are endless. By following the steps and tips outlined in this article, you can create stunning driftwood art that reflects your personal style and adds a touch of natural beauty to your surroundings. So gather your materials, let your imagination soar, and get ready to enjoy the process of creating and displaying your very own driftwood art. Embrace the beach vibes and immerse yourself in the enchanting world of driftwood art!

Filed Under: Driftwood Ideas Tagged With: Art, Driftwood, Easy

Driftwood Art Diy How To Make

March 23, 2024 by admin

You’re in for a creative treat with this article on driftwood art DIY. Get ready to unleash your artistic side as we guide you on how to make stunning pieces of artwork using driftwood. Discover the beauty of nature’s raw materials and learn simple steps to transform them into captivating decor pieces. From wall hangings to sculptures, you’ll find endless inspiration in this comprehensive guide. So grab your tools, find some driftwood, and let’s dive into the world of DIY driftwood art!

Materials Needed

To create beautiful driftwood art, you will need the following materials:

Driftwood pieces

The key ingredient for any driftwood art project is, of course, driftwood itself. Collect various sizes and shapes of driftwood pieces to use in your creations. Look for pieces that have interesting textures and natural curves to add visual interest to your art.

Sandpaper

Before you can start working with driftwood, it’s important to clean and smooth the surface. Sandpaper of different grits will help you achieve the desired finish and texture.

Paint and paintbrushes

Adding color to your driftwood art can bring it to life. Choose a variety of paint colors and brushes to suit your artistic vision. Acrylic paints are a popular choice for working with driftwood.

Craft glue

A reliable craft glue is essential for securing driftwood pieces together. Look for a glue that dries clear and works well on both porous and non-porous surfaces.

Power drill

If you plan on creating more intricate driftwood art pieces, a power drill will be a valuable tool. It will allow you to drill holes in the driftwood to attach different elements or hang your creations.

Jute or twine

Jute or twine can add a rustic and natural touch to your driftwood art. Use them for hanging mobiles, creating garlands, or attaching decorative elements.

Optional: sealer or varnish

To protect your driftwood art from the elements and give it a finished look, you can choose to apply a sealer or varnish. This step is optional but can prolong the lifespan of your creations.

Preparation

Before diving into your driftwood art projects, there are a few essential preparation steps to follow:

Collecting driftwood

The first step in creating driftwood art is to collect the driftwood itself. Take adventurous walks along the beach, keeping an eye out for unique pieces. Remember to only collect driftwood that is already dead and washed ashore, as removing living driftwood can harm ecosystems.

Cleaning the driftwood

Once you have gathered your driftwood pieces, they may be covered in dirt, sand or even sea salt. Cleaning the driftwood will enhance its natural beauty. Gently scrub each piece with a brush and water to remove any debris or unwanted substances. Allow the driftwood to dry completely before moving on to the next step.

Sanding the driftwood

To create a smooth and polished surface for your driftwood art, use sandpaper to sand away any rough edges or splintered areas. Start with a coarse grit sandpaper to remove larger imperfections, then progress to a finer grit for a smoother finish. Be mindful not to sand away too much, as the rugged texture of driftwood is one of its charming characteristics.

Driftwood Art Diy How To Make

This image is property of images.unsplash.com.

Creating Basic Driftwood Art

Once your preparation is complete, you can start creating basic driftwood art pieces. Here are a few ideas to get you started:

Driftwood mobile

A driftwood mobile is a lovely way to display the beauty of driftwood while adding movement to your space. Attach pieces of driftwood, varying in size and shape, to a central branch. Hang the mobile from jute or twine, and watch as the driftwood gently sways with the breeze.

Driftwood wall hanging

Create a stunning driftwood wall hanging by arranging different pieces of driftwood in an artistic composition. Secure the driftwood together with craft glue or by drilling holes and using jute or twine to tie them together. Hang the finished piece on a wall to create a unique focal point.

Driftwood garland

Add a touch of coastal charm to your home by creating a driftwood garland. String together smaller driftwood pieces using jute or twine, leaving a small gap between each piece. Hang the garland across a mantel, along a staircase, or even as a curtain tieback for a whimsical effect.

Advanced Driftwood Art Techniques

Once you have mastered the basics, you can try your hand at more advanced driftwood art techniques. Here are a few ideas to push your creativity:

Driftwood sculpture

Let your imagination run wild and transform driftwood into captivating sculptures. Experiment with different shapes and sizes of driftwood, combining them to create unique and abstract art pieces. Use craft glue or a power drill to assemble and secure the driftwood together.

Driftwood vase or planter

Turn a large piece of driftwood into a striking vase or planter for your favorite blooms or plants. Use a power drill to create a hollowed-out space to hold your floral arrangements or potting soil. Finish it off with a waterproof sealant to protect the wood from moisture.

Driftwood jewelry

If you’re feeling particularly crafty, you can create stunning driftwood jewelry. Use smaller driftwood pieces as the focal point for necklaces, earrings, or bracelets. Combine them with beads, feathers, or other decorative elements to make your jewelry truly unique.

Driftwood Art Diy How To Make

This image is property of images.unsplash.com.

Driftwood Painting

Painting driftwood allows you to add a personal touch and inject color into your creations. Follow these steps to create beautifully painted driftwood art:

Choosing a design

Before painting your driftwood, decide on a design or pattern that complements the natural beauty of the wood. Consider incorporating elements like waves, shells, or coastal landscapes into your design. Sketch your design on paper before transferring it to the driftwood.

Preparing the driftwood

To ensure the paint adheres properly, prepare the driftwood by lightly sanding the surface with fine-grit sandpaper. This will create a slightly rough texture for the paint to grip. Wipe away any dust or debris with a clean cloth before painting.

Painting techniques

Experiment with different painting techniques to achieve various effects on your driftwood. Use a combination of brushes, sponges, and even your fingers to apply the paint. Consider layering colors, blending shades, or adding texture with brushstrokes to enhance the visual appeal of your driftwood art.

Adding Decorative Elements

To take your driftwood art to the next level, consider adding decorative elements that complement the natural beauty of the wood. Here are a few ideas:

Seashells and sea glass

For a truly beachy feel, attach seashells and sea glass to your driftwood creations using craft glue. Arrange them in a visually pleasing way, and let the natural colors and textures of the seashells and sea glass enhance the driftwood’s rustic charm.

Vintage keys and locks

For a touch of nostalgia and intrigue, incorporate vintage keys and locks into your driftwood art. Attach them securely using craft glue or wire. The contrast between the rustic driftwood and the aged keys and locks adds a unique and whimsical element to your creations.

Feathers and beads

To create a bohemian or nature-inspired vibe, add feathers and beads to your driftwood art. Attach them using jute or twine, and let them dangle from branches or hang from wall hangings. The delicate movement of the feathers and the shimmer of the beads will add a touch of whimsy to your creations.

Driftwood Art Diy How To Make

This image is property of images.unsplash.com.

Driftwood Home Decor Ideas

Incorporating driftwood into your home decor can create a coastal and relaxed atmosphere. Here are a few ideas for using driftwood in your home:

Driftwood candle holders

Create rustic and unique candle holders by using driftwood as a base. Choose pieces that have a flat surface for stability and drill shallow holes to hold tea lights or small candles. Arrange them on a mantel, coffee table, or centerpiece to add a cozy and natural ambiance to your space.

Driftwood picture frames

Transform ordinary picture frames into eye-catching pieces by adorning them with pieces of driftwood. Use craft glue to attach the driftwood around the frame, leaving some gaps for visual interest. It’s a simple and effective way to add a touch of the beach to your favorite memories.

Driftwood mirrors

Using driftwood to frame a mirror can instantly transform it into a statement piece. Secure the driftwood pieces around the edges of a mirror, making sure they are evenly spaced and securely attached. The organic shapes and textures of the driftwood will create a stunning focal point in any room.

Driftwood Furniture Projects

For those seeking larger-scale projects and a more substantial impact in their home decor, consider creating driftwood furniture pieces. Here are a few ideas to inspire you:

Driftwood coffee table

Bring a unique and organic touch to your living room by building a driftwood coffee table. Arrange larger driftwood pieces in a sturdy frame or attach them directly to a base. Choose a glass top to showcase the beauty of the driftwood or create a solid surface with smaller pieces securely attached.

Driftwood bench

Create a cozy seating area in your garden or patio by building a driftwood bench. Use larger pieces of driftwood as the seat and backrest, securing them to a frame. Finish with a weather-resistant sealant to protect the driftwood from outdoor elements and ensure longevity.

Driftwood headboard

Transform your bedroom into a tranquil retreat by crafting a driftwood headboard. Arrange larger driftwood pieces vertically or horizontally, creating a visually appealing pattern. Attach them to a sturdy base or directly to the wall for a dramatic and rustic statement piece.

Driftwood Art Diy How To Make

Tips for Success

As you embark on your driftwood art journey, keep these tips in mind to ensure a successful and enjoyable experience:

Start with smaller projects

If you’re new to driftwood art, start with smaller projects to get the hang of it. Focus on one technique or idea at a time, gradually building your skills and confidence. This will allow you to learn from any mistakes and refine your techniques along the way.

Experiment with different techniques

Driftwood art offers countless possibilities for creativity. Don’t be afraid to experiment with different techniques, styles, and materials. Mix and match elements, try out new painting techniques, and challenge the boundaries of conventional driftwood art. Embrace the freedom to explore and let your imagination guide you.

Embrace imperfections

One of the beautiful aspects of driftwood art is its organic and imperfect nature. Embrace the natural flaws, knots, and weathered textures of the driftwood. These imperfections add character and authenticity to your creations, making them truly one-of-a-kind.

Conclusion

Creating driftwood art is a wonderful and fulfilling way to bring nature’s beauty into your home. Whether you’re starting with basic projects like mobiles and garlands or diving into more advanced techniques like sculptures and painting, the possibilities are endless. With some creativity, a few basic materials, and a love for the whimsical allure of driftwood, you can transform ordinary pieces of wood into stunning works of art. So go ahead, embrace your artistic side, and let the magic of driftwood inspire your creativity. Happy crafting!

Driftwood Art Diy How To Make

Filed Under: Driftwood Ideas Tagged With: Art, DIY, Driftwood, tutorial

Driftwood Art Decor

March 22, 2024 by admin

Imagine transforming a simple piece of driftwood into a stunning piece of art that adds a touch of natural beauty to your home. With Driftwood Art Decor, you can bring the enchanting allure of the ocean right into your living space. Each meticulously crafted piece showcases the intricate beauty and unique character of driftwood, making it a captivating addition to any room. From mesmerizing sculptures to exquisite wall hangings, Driftwood Art Decor offers a diverse range of handcrafted creations that will inspire a sense of awe and wonder. Discover the perfect piece to complement your style and immerse yourself in the captivating world of driftwood art.

What is Driftwood Art Decor?

Driftwood art decor refers to the practice of using pieces of driftwood to create various decorative items such as sculptures, wall hangings, candle holders, picture frames, mirrors, and even furniture. It involves collecting driftwood from beaches, cleaning and preparing it, and then using it to craft unique and visually appealing pieces that bring a touch of nature into your home.

Definition

Driftwood art decor is a form of artistic expression that utilizes pieces of wood that have been washed up on shores, rivers, or lakes. These pieces of driftwood are often weathered and worn by the elements, giving them a distinct and organic appearance. Artists and crafters use their creativity and skill to transform these pieces into beautiful and functional home decor items.

Origin and History

The use of driftwood in art decor can be traced back to ancient civilizations who recognized the beauty and uniqueness of these natural materials. In coastal regions, where driftwood is abundant, it has been traditionally used by indigenous peoples to create tools, utensils, and even shelter. In more recent years, driftwood has gained popularity as a medium of artistic expression, with artists and designers utilizing its natural form and texture to create stunning pieces that evoke a sense of the outdoors.

Types of Driftwood Art Decor

Driftwood art decor encompasses a wide range of items that can be used to adorn your living space. Here are some of the most common types:

Sculptures

Driftwood sculptures are three-dimensional artworks created by joining and shaping pieces of driftwood. Artists often draw inspiration from nature, animals, or abstract forms, and use fasteners or adhesives to create a cohesive structure. Driftwood sculptures can serve as striking focal points in your home or garden, bringing a touch of natural beauty and artistic expression.

Wall Hangings

Driftwood wall hangings are crafted by arranging and attaching driftwood pieces to create visually interesting designs. From simple geometric patterns to intricate nature-inspired motifs, wall hangings can add a unique and artistic touch to any wall. Whether used as standalone decor or as part of a gallery wall, they can create a captivating visual impact.

Candle Holders

Driftwood candle holders are both functional and decorative. By carving or drilling holes into suitable driftwood pieces, you can create a natural and organic holder for candles. These candle holders can be used to create a cozy and romantic atmosphere in your home or as a centerpiece for special occasions.

Picture Frames

Driftwood picture frames offer a rustic and unique way to display your favorite photographs. By selecting driftwood pieces of suitable size and shape, you can create a one-of-a-kind frame that adds a touch of natural beauty to your cherished memories. The irregular shapes and textures of the driftwood can bring an element of charm and character to your photos.

Mirrors

Driftwood mirrors combine the functionality of a mirror with the beauty and texture of driftwood. Choosing a suitable mirror base and attaching driftwood pieces around its edges can create a stunning focal point in any room. Additionally, incorporating lighting elements can further enhance the visual impact of the mirror, creating a warm and inviting ambiance.

Furniture

Driftwood furniture is a unique and eco-friendly option for those looking to incorporate natural elements into their home decor. By planning, measuring, and constructing frames and supports, you can create one-of-a-kind furniture pieces that are both functional and visually appealing. Driftwood panels or accents can be added to tables, chairs, or cabinets to create a rustic and organic look.

Driftwood Art Decor

This image is property of images.unsplash.com.

Materials and Tools for Driftwood Art Decor

To embark on your driftwood art decor journey, you will need a variety of materials and tools. Here are some of the essentials:

Driftwood

The most crucial material for driftwood art decor is, of course, driftwood itself. It can be found on beaches, riverbanks, or lakeshores. Look for pieces that have an interesting shape, texture, and color. Pay attention to the size and weight of the driftwood, as larger pieces may be more suitable for furniture or sculptures, while smaller ones can be used for smaller decor items.

Cleaning Supplies

Before using driftwood in your decor projects, it is important to clean and sanitize it properly. This can be done using a mix of mild detergent, water, and a stiff brush to remove any dirt, sand, or debris. Additionally, you may need bleach or vinegar to disinfect the driftwood and prevent any potential pests or mold growth.

Power Tools

Depending on the complexity of your projects, power tools such as a saw, drill, or sander may come in handy. These tools can help you shape, carve, and smooth the driftwood to achieve your desired design. Ensure that you have the appropriate safety equipment and follow proper safety precautions when using power tools.

Hand Tools

Hand tools like chisels, files, and sandpaper can be used for more detailed work or to refine the shape and texture of the driftwood. These tools allow for more precision and control during the crafting process. Having a variety of hand tools in different sizes and shapes will provide you with more flexibility in your creative endeavors.

Fasteners

Depending on the type of project, you may need fasteners such as screws, nails, or adhesives to join and secure the driftwood pieces together. Consider the weight and stability requirements of your project to determine the most appropriate fastening method. Choose fasteners that are compatible with the type of wood and ensure that they are sturdy and reliable.

Finishes and Sealants

To protect the driftwood from environmental factors and enhance its natural beauty, you can apply finishes and sealants. These can include varnish, wax, or oil-based products that provide a protective layer, enhance the color and texture of the wood, and increase its durability. Select finishes that are suitable for the type of driftwood you are working with and follow the manufacturer’s instructions for application.

Finding and Preparing Driftwood

Before you can begin creating your driftwood art decor, you must find and prepare the driftwood. Here are the necessary steps:

Beachcombing

The first step in finding driftwood is to visit beaches or other bodies of water where driftwood tends to accumulate. Look for areas where there is a high likelihood of driftwood washing up, such as rocky or sandy shores. Be respectful of local regulations and avoid removing driftwood from protected areas or private property.

Cleaning and Drying

Once you have collected your driftwood, it is important to clean and dry it thoroughly. This can be done by brushing off any dirt or debris using a stiff brush and rinsing it with water. After cleaning, allow the driftwood to dry completely in a well-ventilated area. This will prevent mold or rot from developing and ensure that the driftwood is ready for further preparation.

Removing Bark and Splinters

To achieve a smoother and more refined look, you may choose to remove the bark from your driftwood. This can be done using a chisel or a scraper to gently peel off the bark. Additionally, inspect the driftwood for any sharp or protruding splinters and remove them carefully using sandpaper or a file.

Sanding and Smoothing

To further refine the surface of your driftwood, sanding is often necessary. Using sandpaper of varying grits, begin with a coarser grit to remove any rough spots or imperfections. Gradually work your way to finer grits to achieve a smooth and even finish. Sanding also helps to highlight the natural grain and textures of the driftwood.

Driftwood Art Decor

This image is property of images.unsplash.com.

Creating Driftwood Sculptures

Driftwood sculptures offer a unique way to showcase the beauty and versatility of driftwood. Here is a step-by-step guide to creating your own driftwood sculpture:

Design and Inspiration

Begin by sketching or visualizing the design or concept for your sculpture. Look for inspiration in nature, animals, or abstract forms. Consider how the driftwood pieces can be joined together to bring your vision to life. Feel free to experiment with different arrangements and angles to achieve the desired aesthetic.

Joining Pieces

To create a sturdy and durable sculpture, you will need to join the driftwood pieces together using fasteners or adhesives. Depending on the size and weight of the pieces, screws, nails, or dowels may be suitable options. Alternatively, strong adhesives designed for wood can be used to securely bond the driftwood pieces. Take care to align the pieces accurately and allow sufficient time for the adhesive to dry or the fasteners to set.

Shaping and Carving

Once the driftwood pieces are joined together, you can further shape and carve them to achieve your desired form. Power tools such as saws or chisels can be used to remove excess wood or create unique textures. Hand tools like files or rasps are also useful for refining the shape and adding finer details to your sculpture. Be sure to sand the surface smooth after any carving or shaping to achieve a polished finish.

Finishing Touches

To protect and enhance the finished sculpture, consider applying a suitable finish or sealant. This can help bring out the natural colors and textures of the driftwood while adding a layer of protection. Choose a finish that is compatible with the type of wood and follow the manufacturer’s instructions for application. Once the finish has dried, your driftwood sculpture is ready to be displayed and admired.

Designing Driftwood Wall Hangings

Driftwood wall hangings provide an opportunity to create unique and visually captivating decorative pieces. Here’s a step-by-step process for designing your own driftwood wall hanging:

Choosing a Theme or Pattern

Before you start arranging your driftwood pieces, decide on a theme or pattern for your wall hanging. It could be nature-inspired, geometric, or abstract. This will help guide your selection and arrangement of the driftwood pieces. Consider the overall aesthetic and color scheme of the room where the wall hanging will be displayed.

Arranging and Attaching Driftwood

Lay out your driftwood pieces in the desired order and arrangement. Experiment with different configurations until you find a composition that is visually appealing and balanced. Once you are satisfied with the arrangement, attach the driftwood pieces together using screws, nails, or adhesives. Take care to align the pieces accurately and ensure that they are securely fastened.

Adding Other Elements

To enhance the visual impact of your wall hanging, consider incorporating other elements such as shells, beads, or small pieces of glass. These can be attached to the driftwood using glue or wire, adding an extra layer of interest and texture to the overall composition. Experiment with different combinations and placements to achieve your desired effect.

Mounting and Hanging

To mount your driftwood wall hanging, attach a suitable wall hook, bracket, or wire to the back of the piece. Ensure that the mounting method is secure and can support the weight of the wall hanging. Once mounted, carefully hang the wall hanging on a sturdy hook or nail, taking note of the desired height and positioning. Step back and admire your unique driftwood creation.

Driftwood Art Decor

This image is property of images.unsplash.com.

Making Driftwood Candle Holders

Driftwood candle holders are a beautiful and functional addition to any space. Here’s how you can create your own:

Selecting Suitable Driftwood

Choose a piece of driftwood that is thick and stable enough to hold a candle securely. Look for a naturally curved or shaped piece that will provide visual interest. Ensure that the surface of the driftwood is clean and free from splinters or rough edges.

Carving and Drilling for Candles

Using a saw or carving tools, create a cavity or notch in the driftwood piece to hold the candle securely. Take measurements of the candle’s diameter and depth to ensure a snug fit. Similarly, you can use a drill to create holes of appropriate size to hold several smaller candles. Be careful to maintain a level and stable surface while carving or drilling.

Decoration and Finishing

To enhance the beauty of your driftwood candle holder, consider adding decorative elements such as shells, beads, or small stones. These can be securely attached to the driftwood using hot glue or other suitable adhesives. Additionally, sanding the surface of the driftwood and applying a protective finish can help bring out its natural colors and textures.

Placing and Using Candle Holders

Once your driftwood candle holder is complete, carefully place the candle or candles in the designated cavities or holes. Ensure that the candles are stable and positioned securely. When using the candle holder, always follow safety precautions and never leave candles unattended. Enjoy the warm and inviting glow that the driftwood candle holder brings to your space.

Crafting Driftwood Picture Frames

Driftwood picture frames offer a unique and rustic way to display your cherished photographs. Here’s an overview of the process:

Choosing Driftwood Pieces

Select driftwood pieces that are straight and long enough to frame your desired photo size. Consider the overall dimensions and style you want for your picture frame. Look for pieces with interesting textures, shapes, and colors that complement the photograph you will be displaying.

Cutting and Assembling Frame

Measure and cut the driftwood pieces to the desired lengths using a saw or other cutting tools. Take care to ensure clean cuts and maintain straight edges. Arrange the cut pieces to form the frame, ensuring that the corners meet at right angles. Apply wood glue to the joints and secure them with clamps until the glue dries. You can also reinforce the frame with small nails or screws for added stability.

Adding Backing and Glass

Cut a suitable piece of backing material, such as cardboard or plywood, to fit the back of the picture frame. Secure the backing to the frame using small nails or staples. Next, cut a piece of glass or acrylic to fit the opening of the frame and place it on top of the backing. Ensure that the glass is clean and free from any marks or smudges.

Mounting and Displaying Photos

Once the frame is assembled, you can mount your desired photograph in the frame. Place the photo on top of the glass, ensuring that it is centered and aligned properly. If desired, you can also include a mat or additional decorative elements between the photo and the glass. Secure the back of the frame with nails or staples, ensuring that the photo is held securely in place. Finally, display your unique driftwood picture frame proudly and enjoy the memories it holds.

Driftwood Art Decor

Designing Driftwood Mirrors

Driftwood mirrors offer a unique and nature-inspired focal point for any room. Here’s how you can design your own driftwood mirror:

Selecting a Mirror Base

Choose a mirror base that suits the style and size you want for your driftwood mirror. Consider both the dimensions of the mirror and the overall dimensions of the room. A round, oval, or rectangular mirror can work well depending on the aesthetic you are going for. Ensure that the mirror is of good quality and securely mounted within its frame.

Attaching Driftwood Elements

Lay out your driftwood pieces around the mirror base, experimenting with different placements and orientations. Once you are satisfied with the arrangement, begin attaching the driftwood to the mirror base using screws, nails, or adhesives. Ensure that the driftwood is securely fastened and that the mirror’s surface remains unobstructed and free from scratches.

Enhancing with Lighting

To further enhance the visual impact of your driftwood mirror, consider incorporating lighting elements. LED strip lights or small battery-powered spotlights can be discreetly attached behind or around the mirror to create a warm and inviting glow. This not only highlights the intricate textures of the driftwood but also adds an element of ambiance to the room.

Hanging and Maintenance

Before hanging your driftwood mirror, ensure that you have chosen a suitable wall space that can support its weight. Use appropriate wall hooks or brackets to securely mount the mirror, ensuring that it is level and centered. Regularly clean the mirror surface using an appropriate glass cleaner and avoid using harsh chemicals or abrasive materials that can damage the driftwood or the mirror.

Building Driftwood Furniture

Creating driftwood furniture allows you to bring natural beauty and functionality into your living space. Here’s an outline for building your own driftwood furniture piece:

Planning and Measuring

Begin by planning the design and function of your driftwood furniture. Consider the purpose, size, and style you want to achieve. Take accurate measurements to ensure that the furniture piece will fit your desired space and be comfortable to use. Sketch or use design software to visualize the final product.

Constructing Frame and Supports

Using sturdy materials such as plywood or hardwood, construct the frame and supports for your driftwood furniture piece. Cut the materials to the appropriate dimensions and assemble them using screws, nails, or adhesives. Ensure that the frame is stable and provides adequate support for the weight of the driftwood panels or accents.

Adding Driftwood Panels or Accents

Once the frame and supports are in place, begin adding the driftwood panels or accents to the furniture. Select driftwood pieces that complement the style and design of the piece. Secure the driftwood to the frame using screws, nails, or adhesives, ensuring that they are securely fastened and provide a stable surface.

Finishing and Sealing

To protect the driftwood and enhance its natural beauty, finish the furniture piece with an appropriate sealant or finishing product. This will help to prevent damage from moisture and provide a durable and long-lasting finish. Choose a product that is suitable for the type of wood and follow the manufacturer’s instructions for application.

By following these steps and using your creativity and imagination, you can create your own unique driftwood furniture that adds an organic and rustic touch to your home.

In conclusion, driftwood art decor offers a unique and creative way to bring nature into your living space. Whether through sculptures, wall hangings, candle holders, picture frames, mirrors, or furniture, the beauty and versatility of driftwood can be showcased in various forms. By finding, preparing, and crafting with driftwood, you can create one-of-a-kind pieces that add a touch of natural beauty, character, and warmth to your home. So, grab your tools, embrace your creativity, and explore the world of driftwood art decor to create your own stunning and unique pieces.

Driftwood Art Decor

Filed Under: Driftwood Ideas Tagged With: Art, Decor, Driftwood

  • « Previous Page
  • Page 1
  • …
  • Page 6
  • Page 7
  • Page 8
  • Page 9
  • Page 10
  • Page 11
  • Next Page »

Primary Sidebar

Driftwood4us.com, is a participant in the Amazon Services LLC Associates Program, an affiliate advertising program designed to provide a means for sites to earn advertising fees by advertising and linking to amazon.com.