• Skip to main content
  • Skip to primary sidebar
  • Terms and Conditions
  • Privacy Policy
  • Contact

Driftwood 4 Us

Just About Driftwood

craft

Noble Driftwood

June 12, 2025 by admin

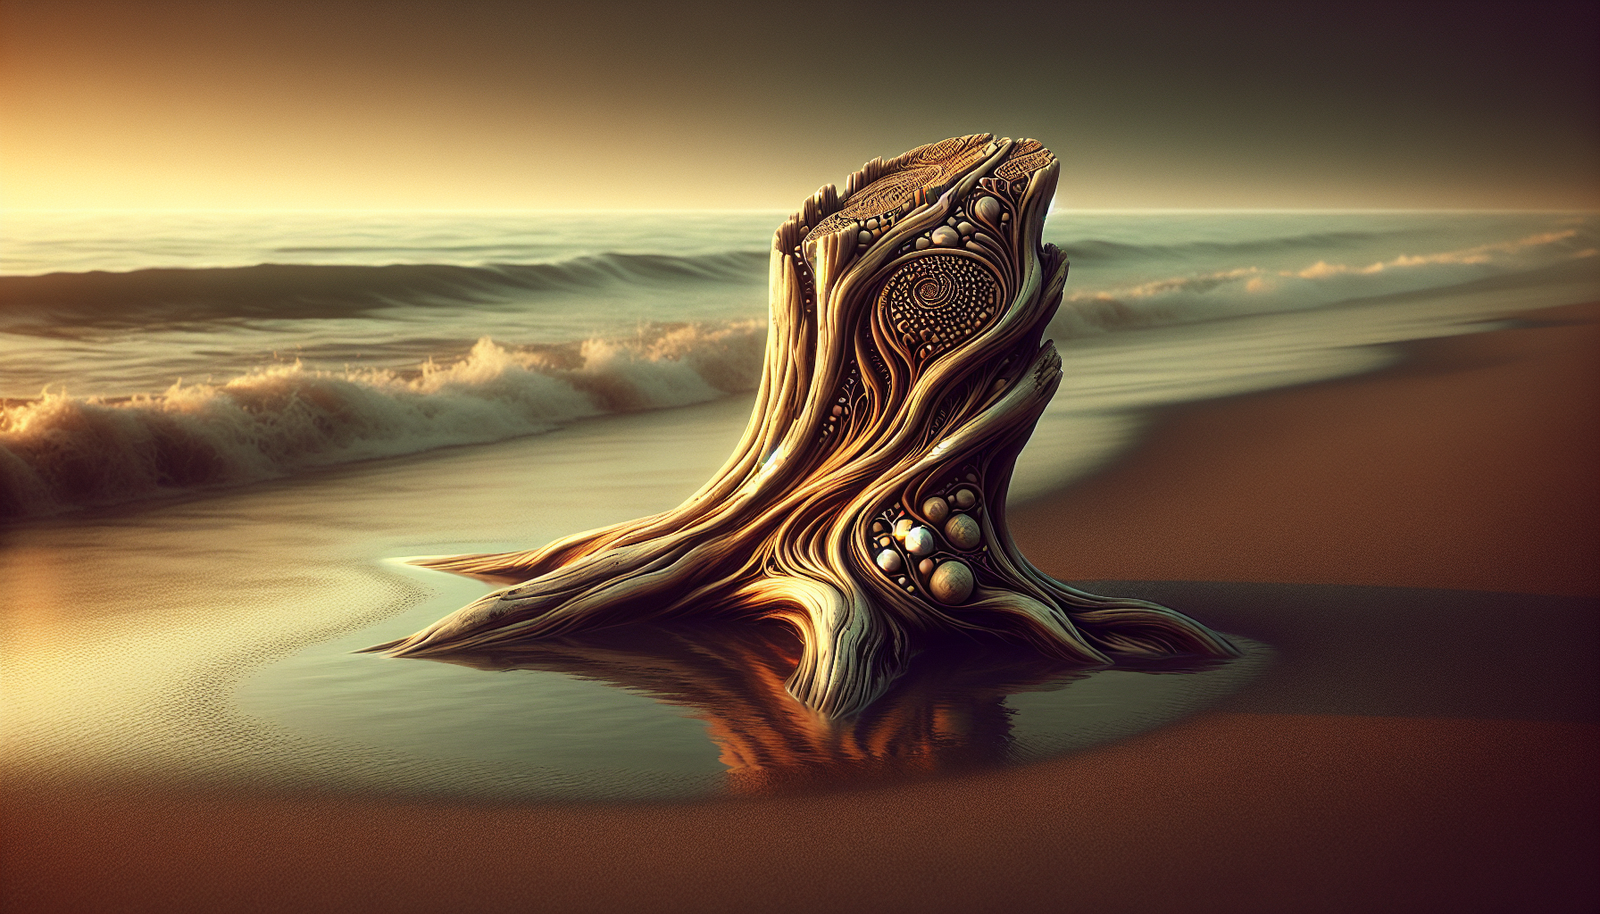
Have you ever thought about how something as simple as driftwood could transform into objects of beauty and intrigue? It’s often overlooked or seen as a product of nature’s own journey, but driftwood holds stories untold, carrying secrets from the depths of oceans or the banks of lazy, winding rivers.

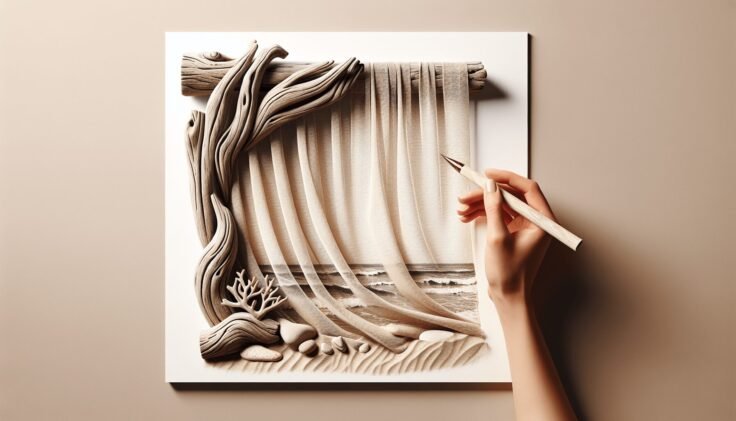
Noble Driftwood

The Journey of Driftwood

Driftwood does not begin its life as a weathered sculpture or a gallery-worthy piece of art. Its journey is complex, beginning as a piece of wood from a tree that might have grown deep within a forest or along a riverbank. The wood becomes driftwood when it’s carried by water to a new location, molded by the elements, turning into what we recognize as driftwood.

The Origin of Driftwood

Where does driftwood start its journey? Typically, driftwood originates from trees that grow near rivers, seas, or any large bodies of water. These trees might be felled by storms, or their branches may break off and end up in the water. River currents and tides take over from there, transporting them to new destinations. Throughout this journey, driftwood is subjected to various natural forces, such as water, wind, and sun, each contributing to its unique appearance.

Transformative Forces of Nature

Driftwood is shaped by several natural forces. The main transformative force is water. As wood is carried by rivers or waves, water acts as a natural sculptor, smoothing surfaces, removing bark, and rounding sharp edges. Sunlight contributes to driftwood’s character by bleaching it, sometimes imparting white or grey tones. Wind can also add character by etching subtle patterns into its surface.

The Artistic Appeal of Driftwood

What makes driftwood so appealing compared to other types of wood? It’s the uniqueness and unpredictability of its form and texture. No two pieces of driftwood are alike because they undergo different journeys. This individuality makes driftwood a favorite among artists and craftspeople, prized for its uniqueness and the stories it signifies.

Uses of Driftwood

Driftwood is more than just a naturally weathered piece of wood; its uses extend both practically and artistically. From home décor to functional art, driftwood has found its way into many aspects of everyday life, as well as in remarkable artistic creations.

Driftwood in Home Décor

One of the most popular uses for driftwood is in home décor. Its rustic and organic feel brings a touch of natural beauty into any space. Here are a few common ways driftwood is incorporated into home design:

Decor ItemDescription
Driftwood ShelvesBuilt from longer, sturdy pieces, adding a natural floating element.
CenterpiecesCrafted from uniquely shaped pieces, sometimes combined with plants or candles for tabletop displays.
MirrorsDriftwood frames create rustic mirrors for living spaces.

Driftwood in Art

Driftwood offers artists an inspiring medium to express creativity. Artists often enjoy working with driftwood due to its irregular forms and natural beauty, challenging them to see potential in its shape and texture.

Sculptures

Artists create intricate sculptures by assembling pieces of driftwood, utilizing the wood’s twists and grains to inform the final piece. These sculptures can range from abstract forms to realistic representations like animals or human figures.

Wall Art

Driftwood is often used to create stunning wall art. By combining pieces of various shapes and sizes, artists can form intricate patterns or even three-dimensional art pieces that add dynamic elements to walls.

Functional Uses

Beyond its artistic and decorative appeal, driftwood also serves functional purposes. Its durability and lightweight nature make it ideal for certain applications:

  • Furniture: Tables, chairs, or benches crafted from driftwood retain a natural elegance and often become the centerpiece of a room.
  • Aquarium Décor: In aquariums, driftwood serves both practical and aesthetic purposes, offering fish places to explore and hide.
  • Garden Features: Used in garden paths or as borders, driftwood complements natural settings, enhancing the garden’s organic feel.

Cultural Significance of Driftwood

Throughout history and across cultures, driftwood has held various symbolic and practical significances. For some cultures, it’s seen as a gift from the sea, carrying mystical properties or spiritual importance.

Driftwood in Oceanic Cultures

In Pacific Islander cultures, driftwood is often regarded as a sacred material. The ocean, a central element in many Oceanic cultures, is viewed as a source of life and wealth. Driftwood, being shaped and delivered by the sea, is seen as a bestowed gift.

Myths and Legends

Driftwood often features in myths and legends, symbolizing journeys, transformation, and resilience. It is sometimes depicted as a material carrying whispering sea deities’ secrets or messages from those who’ve traversed great waters.

Symbol of Sustainability

In modern times, driftwood also symbolizes sustainability. It is a naturally recycled material, requiring no industrial processing, which appeals to eco-conscious individuals seeking to reduce their impact on the environment.

How to Collect and Preserve Driftwood

If you’re inspired by driftwood and want to start your own collection, there are a few things to consider. Collecting driftwood can be a rewarding experience, but it’s essential to do it responsibly and preserve the pieces properly.

Responsible Collection

Before gathering driftwood, check local regulations. Some areas prohibit removal from beaches to preserve natural habitats. Always take care to disturb the environment as little as possible.

Tips for Collecting

  • Observe: Look for pieces that are visually interesting or could serve a purpose in your home or art.
  • Timing: Collect after storms or during specific tidal cycles when the water has just receded to find fresh driftwood.
  • Respect Wildlife: Check for and avoid pieces used by wildlife (like bird nests).

Cleaning and Preserving Driftwood

Once you’ve collected driftwood, it’s crucial to clean and preserve it to maintain its beauty and prevent decay.

Cleaning Process

  1. Rinse Thoroughly: Use fresh water to rinse off sand and salt. A brush can help remove stubborn debris.
  2. Soak in Mild Disinfectant: This will eliminate any remaining saltwater organisms. Use a solution of water and mild bleach (1:10 ratio) for soaking.
  3. Dry Completely: Air drying is recommended in a well-ventilated area until the wood is free of moisture. Avoid direct sunlight to prevent cracking.

Preservation Techniques

To maintain driftwood’s beauty, consider applying a natural oil or wax. This can help preserve the wood’s structure and bring out its texture and color without changing its organic appearance.
Noble Driftwood

Creating with Driftwood

If you’re feeling creative and inspired by the potential of driftwood, there are numerous projects you can undertake. Whether you’re a seasoned craftsman or a novice, driftwood offers a flexible medium suited to a variety of skill levels.

Simple DIY Projects

For those new to working with driftwood, start with simple projects:

  • Driftwood Garland: String together small pieces to create a natural garland that can adorn your home.
  • Votive Candle Holder: Craft a simple holder using smaller driftwood pieces bound together to hold votive candles.

Intermediate Projects

For those with some experience, try these intermediate projects:

  • Driftwood Lamp Base: Incorporate driftwood into your lighting fixtures for a unique, rustic appeal.
  • Photo Frames: Use driftwood to create bespoke frames that capture memories.

Advanced Projects

Experienced artisans can challenge themselves with more complex works:

  • Furniture Construction: Design and build furniture pieces utilizing larger driftwood planks, combining with other materials like metal or glass.
  • Intricate Sculptures: Craft detailed sculptures that showcase driftwood’s natural form, leveraging its twists and whorls for artistic effect.

The Future of Driftwood Art

As the world becomes increasingly aware of the need for sustainable practices, driftwood art and usage will likely continue to grow in popularity. Its natural beauty, coupled with the story each piece carries, makes it an attractive choice for those looking to incorporate more ecologically-minded practices into their lives.

Driftwood and Environmental Awareness

Using driftwood promotes awareness about nature and environmental conservation. By choosing materials like driftwood, there’s a move towards reducing waste and appreciating naturally sourced elements.

Innovation in Driftwood Craftsmanship

Artists and designers will continue to explore innovative ways to use driftwood in their creations. There is potential in collaborating with technology, such as using 3D scanning and printing to enhance or replicate patterns found in driftwood, merging the organic with the digital.

Conclusion

Driftwood, with its noble journey from forest to sea and then into our lives, represents far more than a simple piece of wood. It is emblematic of nature’s artistry, endurance, and the continuous cycle of transformation. Whether adorning your living room, supporting eco-friendly practices, or inspiring your next creative endeavor, driftwood offers endless possibilities and continues to captivate those who appreciate its understated elegance. So the next time you encounter a piece of driftwood, consider the journey it has taken, and imagine the stories it might tell.
Filed Under: Driftwood Ideas Tagged With: Art, craft, Decor, Driftwood, NATURAL

Driftwood Napkin Holder

June 5, 2025 by admin

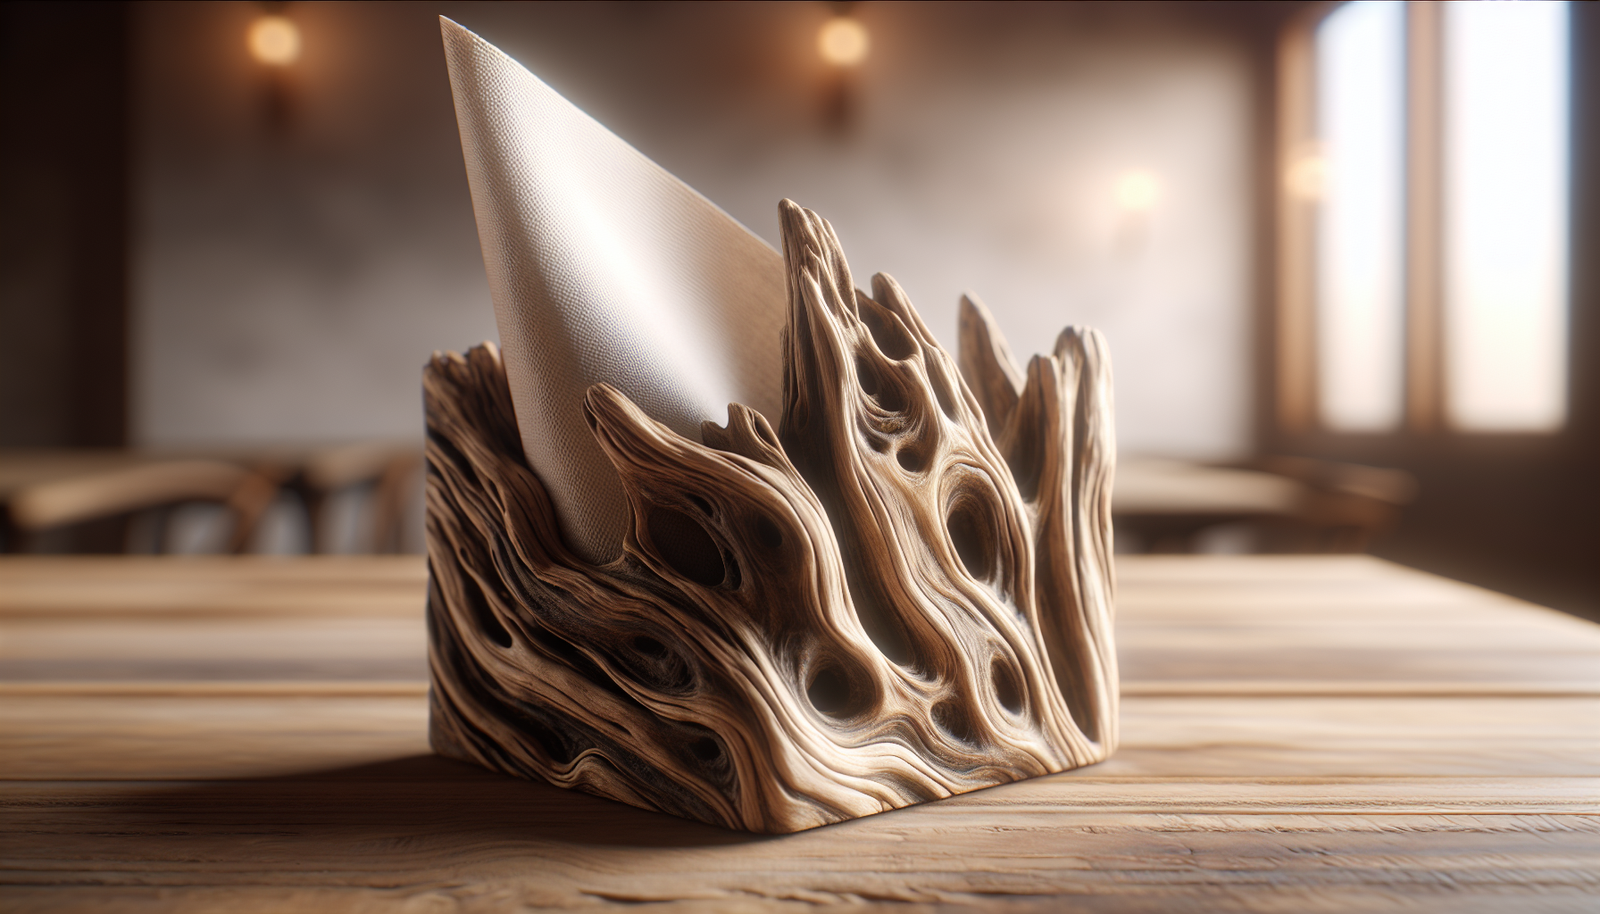
Have you ever thought about bringing a piece of nature’s artistry into your home décor? One such captivating way is by utilizing driftwood, which offers a rustic, natural aesthetic. If you’ve ever strolled along a beach, you might have noticed these beautiful weather-worn wood pieces, each telling its own story. Today, we’ll focus on how you can transform driftwood into a charming napkin holder, bringing both function and a touch of coastal charm to your living space.

Driftwood Napkin Holder

What is Driftwood?

Understanding Driftwood

Driftwood is essentially wood that has been washed onto a shore by the action of winds, tides, or waves. Over time, this wood becomes bleached and softened by the sun and the saltwater it encounters, resulting in smooth and uniquely shaped pieces. Each piece of driftwood is distinct, shaped by its journey through the water and exposure to natural elements.

The Appeal of Driftwood

Driftwood captivates not only with its natural beauty but also with its eco-friendly allure. By using driftwood in your home, you are not just adding an aesthetically pleasing item but also incorporating a sustainable piece of nature, reflecting a bit of the ocean’s timeless beauty. It brings the outdoors inside, providing a sense of calm and connection to the natural world.

The Charm of a Driftwood Napkin Holder

Why a Napkin Holder?

While there are countless uses for driftwood in home décor—such as in furniture, art, or as wall hangings—a napkin holder is a perfect choice for those starting with smaller projects. A napkin holder is not only a practical addition to your dining or kitchen area but also acts as a subtle conversation starter, inviting admiration and inquiries from guests.

Advantages of a Driftwood Napkin Holder

  • Aesthetic Appeal: It offers natural beauty with an artistic, coastal twist.
  • Eco-Friendly: Using driftwood means repurposing natural materials.
  • Uniqueness: No two napkin holders will be the same, each offering a one-of-a-kind piece of art.

Creating Your Driftwood Napkin Holder

Materials Needed

Basic Material List:

ItemDescription
Driftwood PiecesChoose pieces that fit together naturally and will hold napkins in place.
SandpaperFor smoothing out rough edges.
Wood Glue or NailsFor securing the pieces together.
Clear FinishTo protect the wood and enhance its natural color.

Each of these materials can either be found at local craft stores or even gathered from nature, making this a project that has the potential to be very budget-friendly.

Follow These Steps:

  1. Select Your Driftwood: Start by picking pieces of driftwood that have a natural fit when placed together. You’ll need two main pieces; one for the base and another to act as a stopper or a backing for the napkins.

  2. Prepare the Wood: Use sandpaper to smooth out any jagged edges, being cautious not to remove the distinctive texture that gives driftwood its charm.

  3. Assembly: Arrange the driftwood pieces into your desired configuration. Once satisfied, use wood glue or small nails to hold them together securely. Allow them to dry completely if you are using glue.

  4. Finishing Touches: Apply a clear finish to protect the driftwood and bring out its natural tones. Ensure this is done in a well-ventilated area and allow it to dry thoroughly.

  5. Testing: Place some napkins in your holder to ensure stability and functionality.

Tips for Crafting

  • Balancing Artistry and Functionality: While it might be tempting to create something purely artistic, ensure that your napkin holder functions effectively.
  • Safety First: Always handle the tools and materials carefully, especially when cutting or sanding the wood.

Integrating Your Driftwood Napkin Holder Into Your Décor

Where to Display

A driftwood napkin holder can seamlessly blend into various settings. Here are a few ideas:

  • Dining Room: An excellent choice to bring a natural element to your dining table.
  • Outdoor Patio: Complements an outdoor setting, enhancing the natural appeal.
  • Beach-Themed Bathroom: Adds a cohesive element to a beach-themed interior.

Complementary Décor Elements

Consider pairing your napkin holder with other natural or coastal-themed items:

  • Seashells and Starfish: Place around or in a decorative bowl near the holder to enhance the seaside vibe.
  • Marine-Inspired Fabrics: Use tablecloths or napkins with patterns or colors that mirror the ocean’s hues, offering a complete look.
  • Coastal Art: Hang artwork depicting ocean waves or beach scenes nearby to emphasize your theme.

Extending the Driftwood Theme

Beyond the Napkin Holder

If your first driftwood project inspires you, consider expanding the theme further into your décor. Here are other driftwood items you might enjoy crafting or adding:

  • Photo Frames: Use smaller driftwood pieces to frame pictures of your favorite beach memories.
  • Mirrors: A mirror bordered with driftwood can become a stunning focal point in any room.
  • Candle Holders: Create simple, yet elegant, driftwood candle holders for adding ambient light.

Driftwood in Seasonal Décor

Driftwood isn’t only for summer; it can be part of your home year-round:

  • Holiday Decor: Incorporate it into wreaths or centerpieces for a rustic holiday look.
  • Spring Arrangements: Combine driftwood with flowers or greenery for a fresh, vibrant display.

Caring for Your Driftwood Items

Maintenance Tips

Once you’ve incorporated these beautiful pieces into your décor, you’ll want them to last a long time. Here are some maintenance tips:

  • Dusting: Regularly dust your driftwood items with a soft cloth to keep them clean.
  • Avoid Moisture: Although driftwood originates from water, keeping your décor pieces dry is crucial. Excess moisture can damage the wood over time.
  • Occasional Refinishing: Applying a new coat of protective finish every now and then will maintain the wood’s appearance.

Understanding Driftwood’s Broader Appeal

Environmental Impact

Incorporating driftwood into your décor speaks to a broader trend of eco-conscious living. Utilizing natural materials helps reduce waste and the need for mass-produced goods. As a result, you not only improve your home’s aesthetic but also contribute positively to the environment.

The Use of Driftwood Globally

Around the world, driftwood is used in a variety of ways. Different cultures have embraced this versatile material to create art, construct homes, and even build intricate sculptures. It has been a staple in eco-friendly building practices and artisanal crafts across continents, demonstrating its timeless appeal and utility.

Conclusion

Creating a driftwood napkin holder is a delightful project that combines creativity, sustainability, and a love for nature’s artistry. Not only will it serve as a functional item in your home, but it will also bring a piece of the beach to your living space. By following the steps and ideas presented, you can enjoy a unique and beautiful addition to your home décor—one that sparks joy and conversation alike. So, are you ready to let your creativity flow and bring a touch of the coast into your home with a driftwood napkin holder?

Filed Under: Driftwood Ideas Tagged With: craft, DIY, Napkin Holder, Woodworking

Driftwood Mobile Diy

May 29, 2025 by admin

Have you ever wandered along a sunlit beach and stumbled upon a uniquely shaped piece of driftwood, its weathered texture telling a story of time and tide? If so, you’re not alone! Driftwood’s natural beauty and rustic charm make it a popular choice for home decor, especially when it comes to creating stunning mobiles. Making a driftwood mobile can be a delightful and creative way to bring a piece of nature into your home. Not only is it an enjoyable project, but it also offers a wonderful opportunity to express your creativity.

Driftwood Mobile Diy

What is Driftwood?

Driftwood is essentially any piece of wood that has been washed ashore by the action of tides, winds, or currents. Over time, the continuous motion of the sea smooths its surface, creating an organic, natural texture that is both visually appealing and tactile. These pieces can vary greatly in size, shape, and color, making each piece unique.

Where to Find Driftwood

Finding the right piece of driftwood is the first step in creating your mobile. Often, you’ll find driftwood on beaches along lakes, rivers, and oceans. It’s important to check local regulations before collecting driftwood, as some areas consider it a protected resource. Plan your collection during low tide when the shoreline is more exposed.

Why Choose Driftwood for a Mobile?

Driftwood is not only visually appealing but also highly durable. Its natural resilience to water makes it a lasting part of any decor feature. Moreover, using driftwood supports a sustainable lifestyle by repurposing natural materials rather than relying on manufactured products. A driftwood mobile can effortlessly blend with various interior design themes, whether you prefer modern minimalistic, rustic, or coastal.

Materials You’ll Need

Getting started on your driftwood mobile DIY project is exciting. Let’s prepare by gathering the materials and tools necessary for this craft. Ensure you have the following items ready before you start:

Material/ToolPurpose
Driftwood piecesThe main component of your mobile.
Fishing line or twineFor suspending the driftwood pieces.
Hooks or eye screwsTo attach pieces of driftwood to each other.
Beads and seashellsOptional decorations to add visual interest.
ScissorsTo cut the line or twine to the desired length.
Drill or screwdriverFor making holes in driftwood, if needed.
SandpaperTo smooth any rough edges or surfaces on the driftwood.

Tips on Selecting Your Materials

Choose driftwood pieces of varying lengths and widths for an attractive, layered effect. It’s essential to ensure that the twine or fishing line is durable enough to support the weight of each piece. Lightly sanding the driftwood can help ensure a safer handling experience and improve the longevity of your mobile.

Preparing Your Driftwood

Once you’ve collected your driftwood and gathered necessary materials, the next step is preparation. Preparing the driftwood is a straightforward process that ensures your creation is both a lasting and beautiful one.

Cleaning and Drying

Cleaning your driftwood before use is important to remove any residual sea salt, sand, or potential pests that might inhabit the wood. Here’s a simple cleaning process:

  1. Rinse the driftwood pieces thoroughly with fresh water to wash away salt and sand.
  2. Soak them in a mixture of water and mild bleach for a few hours. This step helps in disinfecting them.
  3. Rinse again and let them dry completely in a sunny spot. This could take a few days, depending on the size and thickness of the wood.

Inspecting and Sanding

After your pieces are cleaned and dried, inspect them for any sharp edges or splintering. Using sandpaper, smooth out any rough areas to prevent injury and to ensure the pieces look polished once they’re assembled.

Designing Your Mobile

The design phase is where your creativity truly gets to shine. Consider the final location of your mobile and how it might complement or contrast with existing decor.

Determining the Arrangement

A balanced design starts with experimentation. Lay out your driftwood pieces on a large flat surface and try several configurations until you find one that pleases you. Consider varying the distance between pieces and testing different combinations of long and short pieces.

Adding Additional Elements

Adding beads, seashells, or other natural elements can enhance your mobile’s aesthetic. Incorporate these elements by threading them onto the fishing line or twine, placing them between each driftwood piece for added visual interest.

Driftwood Mobile Diy

Assembling Your Driftwood Mobile

With a design in mind and supplies ready, it’s time to bring your mobile to life. The assembly process requires a bit of patience and precision to ensure each piece hangs correctly.

Drilling and Connecting

For large or heavy pieces, drilling small holes for hooks or eye screws is the first step. Ensure the holes are centered to maintain balance. For lighter pieces, a simple knot may suffice.

  1. Drill holes where necessary on each piece of driftwood.
  2. Attach the eye screws or hooks.
  3. Tie the fishing line or twine to each piece, leaving enough length for it to dangle at your desired height.

Balancing Your Mobile

Achieving balance is crucial to ensure that your mobile hangs freely and doesn’t tip. Make adjustments as necessary by shortening or lengthening the line between pieces or shifting the position of the line along the driftwood. This process might need some trial and error, so don’t hesitate to rearrange until you’re satisfied with the balance.

Displaying Your Driftwood Mobile

Your mobile is now assembled and ready to display! Consider where it will have the most visual impact and be sure it’s safe from playful pets or areas of high traffic that could cause it to swing aggressively.

Best Places to Hang a Mobile

Driftwood mobiles look stunning in a variety of settings:

  • Living rooms: An ideal space, especially near a window where natural light accentuates the wood texture.
  • Bedrooms: Above the bed or in a reading nook as a comforting, calming piece.
  • Outdoor spaces: Hang it on a porch or patio, but ensure it’s protected from extreme weather when necessary.

Proper Hanging Techniques

When hanging your mobile, ensure that the overhead support can handle the weight of the mobile. Using a strong ceiling hook is essential. If hanging near a window, confirm that the mobile won’t be obstructed by curtains or blinds.

Maintenance and Care

To keep your driftwood mobile looking pristine, periodic maintenance is necessary. This involves gentle cleaning and inspection to ensure the safety and aesthetic integrity of the mobile.

Cleaning Your Mobile

Over time, dust accumulation is expected. Use a soft cloth or feather duster to gently remove dust from the driftwood and additional elements. If your mobile includes easily removable decorations, you might want to clean them separately.

Long-Term Tips

Avoid exposing your mobile to excessive moisture, which could lead to mold or mildew growth. Consider occasionally inspecting the twine or fishing line for wear, which can weaken over time and potentially cause your mobile to fall.

Conclusion

Creating a driftwood mobile is an enriching experience that combines collecting, crafting, and decorating. It not only adds a personal touch to your home decor but also reminds you of the serene beauty of nature. Whether placed in your living room, bedroom, or outdoor patio, a driftwood mobile captures attention and resonates with calm. With the right tools, creativity, and a bit of patience, you can craft a piece that is distinctly yours.

If you haven’t already tried making your own driftwood mobile, maybe it’s time to plan a beach trip or visit your local lakefront for some inspiration. Remember to enjoy the process—it’s just as beautiful as the result!

Filed Under: Driftwood Ideas Tagged With: craft, DIY Project, Driftwood, home decor, Mobile

Driftwood Menorah

May 24, 2025 by admin

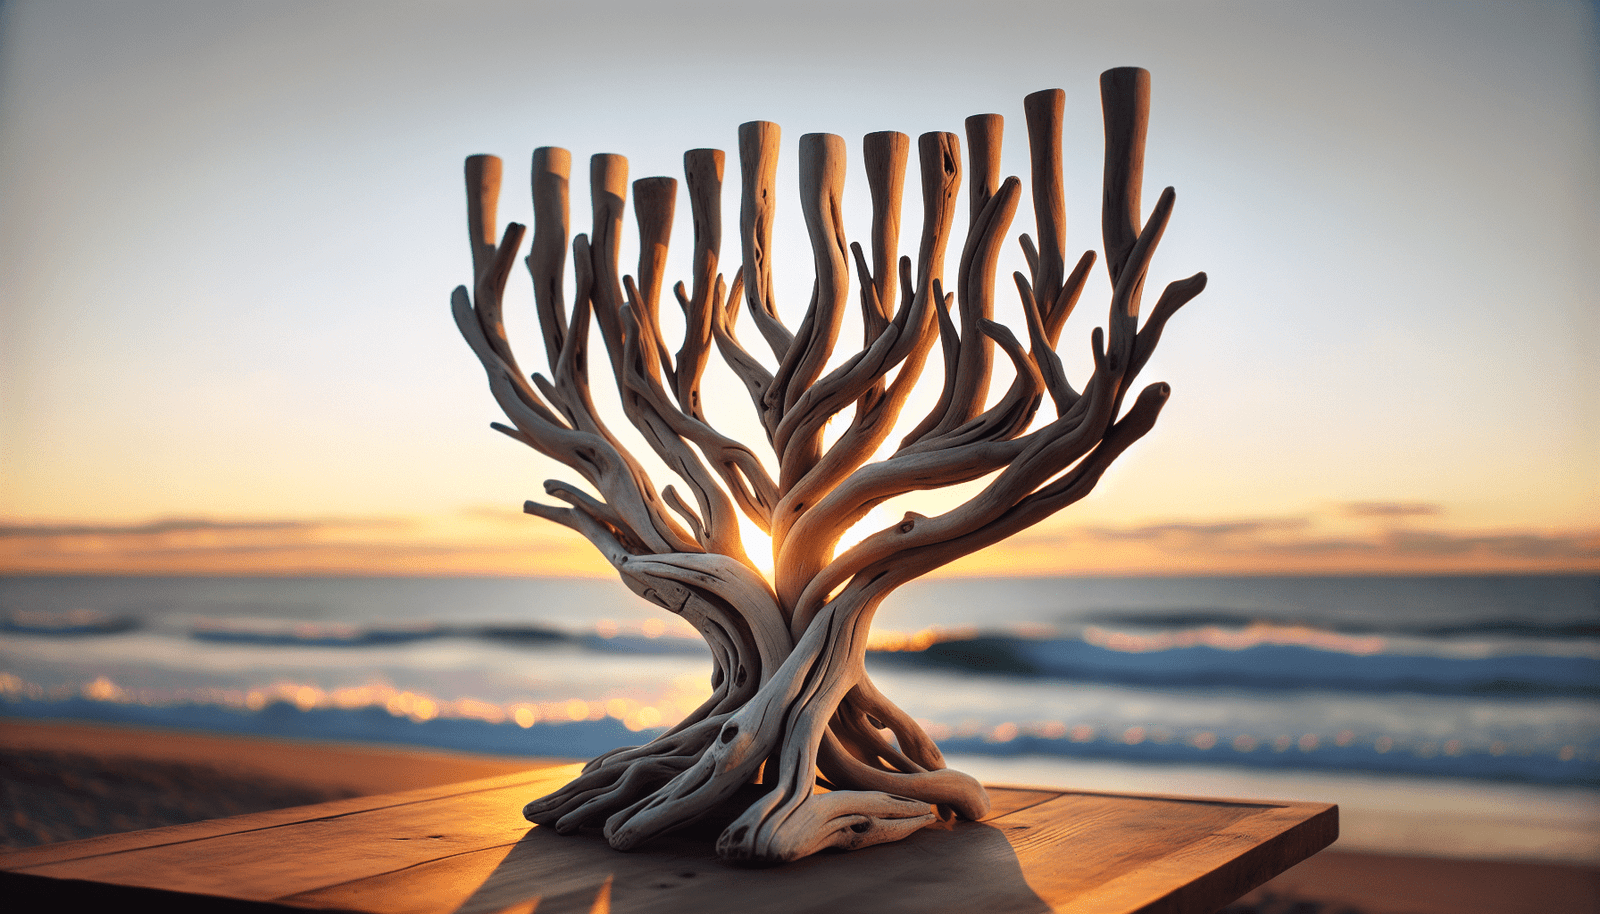
Have you ever wondered how elements of nature can merge beautifully with cultural traditions? The merging of natural and spiritual worlds can often lead to remarkable creations that enhance the beauty and depth of our experiences. One such fascinating intersection is the creation of a driftwood menorah, where the quiet elegance of driftwood meets the symbolic and historical significance of the menorah in Jewish tradition.

Driftwood Menorah

Understanding the Menorah

The Menorah’s Historical Significance

The menorah is a profound symbol in Jewish heritage. Traditionally, it is a seven-branched candelabrum used in the ancient Holy Temple in Jerusalem. Its design is attributed to a divine instruction given to Moses, emphasizing its sacred origins. Over time, it has come to symbolize enlightenment, divine inspiration, and the strive towards wisdom.

Modern Day Menorah: Hanukkiah

During Hanukkah, a holiday known as the Festival of Lights, a special kind of menorah known as a Hanukkiah is used. Unlike the seven-branched traditional menorah, the Hanukkiah has nine branches. Eight branches are for each night of Hanukkah, and the ninth, the shamash, is used to light the others. The Hanukkiah stands as a reminder of the miraculous victory of the Jews over their oppressors and the miracle of the oil that lasted eight days.

Driftwood: Nature’s Art

What is Driftwood?

Driftwood refers to wood that has been washed onto shore by tides. It’s often weather-beaten, smoothed, and worn from its time spent in the water and on the sand. Each piece of driftwood tells its own story. Its journey through elements, its unique shapes, curves, and textures make each piece a natural work of art.

Collecting Driftwood

Collecting driftwood can be an adventure in itself. The anticipation of what unique pieces you might find along a beach or a riverbank can be exciting. However, it’s essential to ensure that the collection is done sustainably, respecting local wildlife and ecosystems. Before collecting, it’s a good idea to check regional regulations as driftwood may play a vital role in certain ecosystems.

Creating a Driftwood Menorah

Why a Driftwood Menorah?

Combining driftwood with a menorah not only results in a striking visual centerpiece but also embodies the fusion of nature with spirituality. It stands as a testament to resilience, adaptation, and the beauty found at the intersection of nature and human tradition.

Materials and Tools Needed

Creating a driftwood menorah requires a few simple materials:

  • Driftwood pieces: Ensure they have dried thoroughly.
  • Candle holders: Fire-safe holders to secure the candles to the driftwood.
  • Candles: Traditionally, Hanukkah candles are used.
  • Adhesive: A strong adhesive for securing holders to the wood.
  • Tools: Drill, sandpaper, and perhaps a saw, depending on your design.

Here’s a simple table summarizing these materials and tools:

Material/ToolPurpose
Driftwood piecesThe base of the menorah
Candle holdersTo secure candles to the driftwood
CandlesLight source for the menorah
AdhesiveTo attach holders to the driftwood
Tools (Drill, sandpaper, saw)For crafting the driftwood

Crafting Your Driftwood Menorah

To transform driftwood into a beautiful menorah, follow these steps:

  1. Plan Your Design: Consider how the natural shapes of the driftwood can be used to hold the candles. Will you need multiple pieces or just one?

  2. Prep the Driftwood: Ensure your driftwood is free of dirt and debris. Sand it down gently to remove any rough edges and expose the natural beauty of the wood.

  3. Attach the Candle Holders: Using your adhesive or drill, securely attach candle holders to the driftwood. Make sure the holders are stable and evenly spaced.

  4. Insert Candles: Once the adhesive is dry, place your candles in the holders. Ensure they are secure and upright for safe burning.

  5. Final Touches: Check for stability, and make any finishing touches to the wood, such as a coat of varnish to enhance its color and protect it.

Personalizing Your Driftwood Menorah

While the beauty of driftwood lies in its natural form, personal touches can make your menorah truly unique. Consider adding elements such as:

  • Decorative Stones: Incorporate pebbles or sand around the base for a natural look.
  • Paint: Add subtle gold or silver touches to highlight certain features.
  • Carvings: Carefully carve symbols or initials to personalize it further.

Safety Considerations

Ensuring Safe Use

Safety is essential when using any menorah, especially one crafted from wood. Here are some pointers:

  • Supervision: Always keep an eye on the menorah when lit.
  • Secure Placement: Position it on a stable, heat-resistant surface.
  • Candle Safety: Ensure candles are firmly in place and that flames are not near other combustible materials.
  • Extinguish Properly: Use a snuffer to extinguish candles instead of blowing them out to reduce fire risks.

Maintenance Tips

To keep your driftwood menorah in excellent condition, consider these maintenance tips:

  • Cleaning: Dust it regularly and avoid using water, which can warp the wood.
  • Storage: Store it in a dry place when not in use to prevent moisture damage.
  • Refreshing Look: Reapply a varnish or oil finish periodically to maintain its shine.

Driftwood Menorah

Embracing Tradition in New Ways

The Symbolism of Your Creation

A driftwood menorah is more than decoration; it’s a symbol of resilience, adaptability, and the harmonious blend of natural beauty with tradition. Driftwood has survived the storms and seas, much like the stories told during Hanukkah. Both elements carry stories of perseverance and hope.

Sharing Stories

The creation of a driftwood menorah is a journey, from gathering driftwood to lighting the candles. Each step can be shared with family or friends, turning this artistic endeavor into an opportunity for bonding and sharing stories—a modern way of celebrating tradition while cherishing nature.

Conclusion

Crafting a driftwood menorah is a delightful way to honor tradition while expressing individuality and creativity. It’s a project that embraces the beauty and serenity of nature and combines it with the profound spiritual symbolism of the menorah. Whether displayed in your home or shared as a meaningful gift, a driftwood menorah stands as a testament to the enduring resilience and hope in traditions old and new. Maybe now, as you stand in front of this artistic creation, you’ll find yourself reflecting on the deep roots of tradition intertwined with the whimsical beauty of the natural world around you.

Filed Under: Driftwood Ideas Tagged With: craft, Driftwood, Handmade, Jewish Holiday, Menorah

Driftwood Epoxy Art

April 15, 2025 by admin

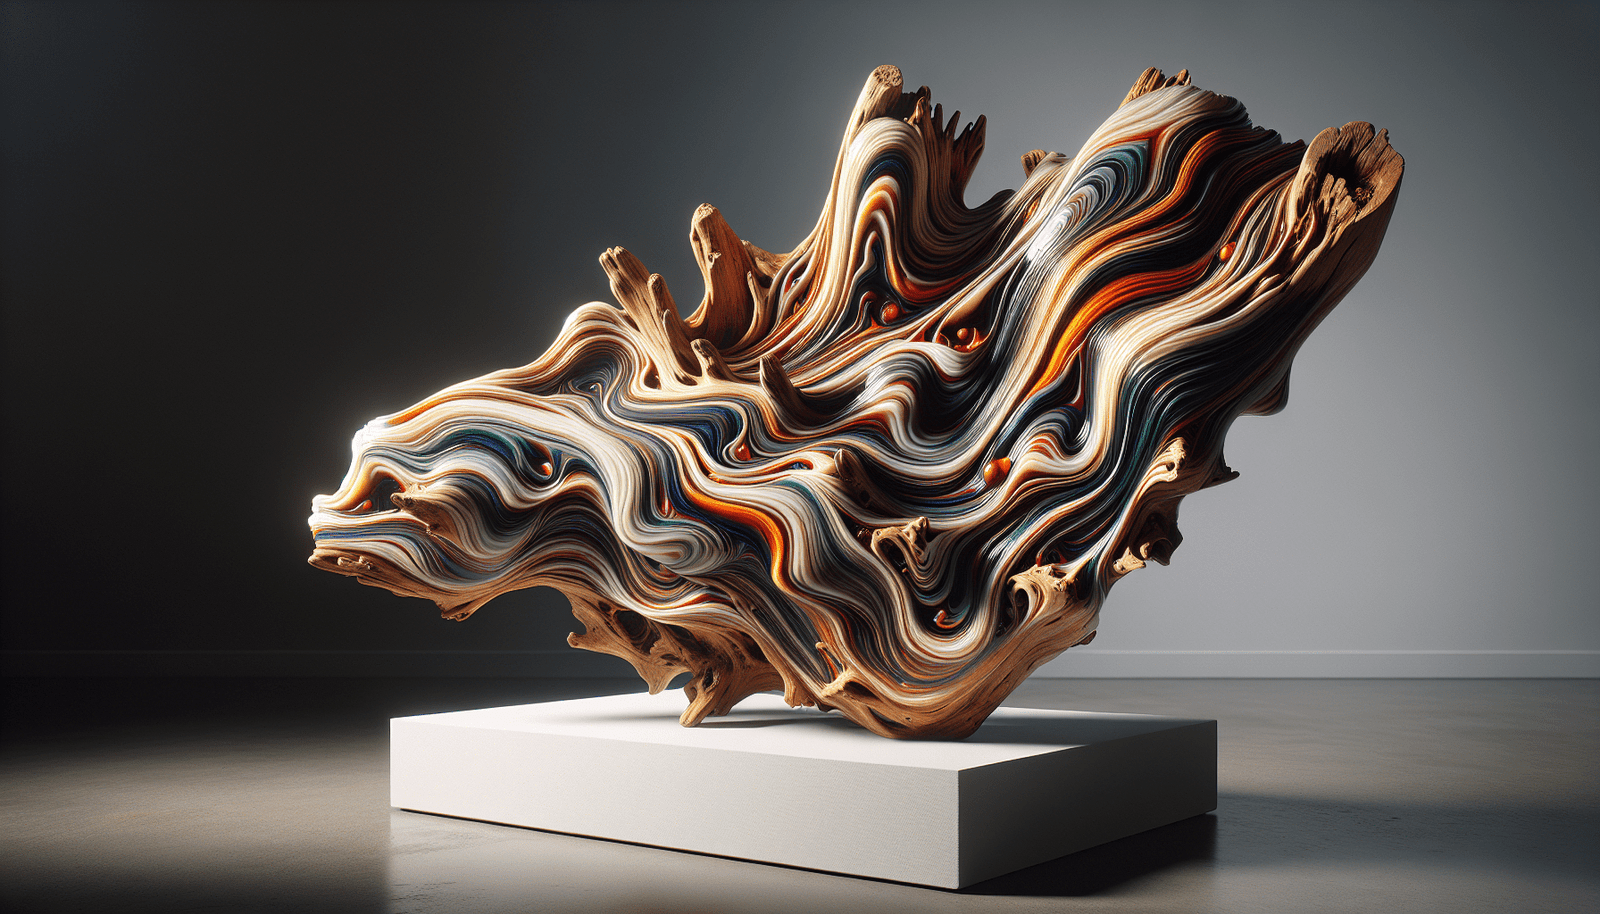
Have you ever found yourself walking along the shoreline, spotting pieces of driftwood, and wondering about their potential in art and decoration? Driftwood, with its naturally weathered appearance and unique shapes, offers an excellent medium for creating stunning art pieces, especially when combined with epoxy resin. If you’ve ever been curious about how to transform oceanic treasures into captivating works of art, you’re in the right place. Let’s delve deeper into the world of driftwood epoxy art, exploring what makes it special, the tools and materials you need, and how to craft your very own masterpiece.

Driftwood Epoxy Art

What is Driftwood Epoxy Art?

Driftwood epoxy art merges the organic allure of driftwood with the glossy, modern finish of epoxy resin. These two materials together create pieces that are both rustic and polished, offering a blend of natural beauty and intricate artistry. The result can be anything from functional items like tables and lamps to purely decorative pieces such as wall hangings and sculptures.

The Appeal of Driftwood

Driftwood is wood that has been washed onto shore by the action of winds, tides, or waves. Its unique texture and form are a result of years of exposure to the elements. Each piece has its own story, etched into its surface by water and time, which makes it an ideal medium for artists who cherish one-of-a-kind materials.

Benefits of Using Epoxy Resin

Epoxy resin is a versatile polymer known for its high-gloss finish and durability. It acts as both a glue and a protective coat, offering clarity that enhances the natural beauty of the encased driftwood. It is especially loved by artists for its ability to preserve and highlight organic materials while adding an additional layer of depth and dimension.

Tools and Materials Needed

Embarking on a project in driftwood epoxy art requires some specific tools and materials. Whether you’re a seasoned artist or a beginner, having the right equipment can make all the difference. Here’s a breakdown of what you might need:

Basic Materials

  • Driftwood: Select pieces that speak to you, factoring in the shape, size, and texture.
  • Epoxy Resin: Choose a high-quality brand that offers clarity, UV protection, and longevity.
  • Measuring Cups and Stirring Sticks: Accurate measurement is crucial for mixing epoxy resin.
  • Protective gear: Gloves, goggles, and a mask to ensure your safety from fumes and spills.

Tools for Crafting

  • Saws: To cut driftwood to size if necessary.
  • Power Sander: For smoothing any rough edges and surfaces.
  • Brushes: Useful for applying epoxy and ensuring it covers all areas.
  • Heat Gun or Torch: To remove bubbles from the resin surface.

Driftwood Epoxy Art

Selecting and Preparing Your Driftwood

Finding the perfect piece of driftwood is an adventure in itself. Each piece offers a distinct character, challenging and inspiring your creative vision. These are steps to follow to prepare the driftwood:

Finding the Ideal Piece

Search along beaches, riverbanks, and lakeshores where debris is likely to accumulate. Take note of the wood’s condition; it should be neither too fragile nor too dense.

Cleaning and Sanitizing

It’s essential to clean your driftwood to remove any salt, sand, algae, and insects. Begin by rinsing it thoroughly with fresh water. Then, soak it in a bleach solution (1 part bleach to 9 parts water) for at least 24 hours to disinfect it. Finally, rinse it again and let it dry completely in sunny conditions or a well-ventilated area.

Smoothing and Shaping

Using a sander, smooth away any overly rough patches. Shape the wood as desired, keeping in mind the vision you have for your art piece.

Working with Epoxy Resin

Epoxy resin might seem intimidating at first, but with practice, it becomes a rewarding part of the creative process. Here’s how you can work with this material to get the best results.

Mixing the Resin

Follow the product instructions carefully, usually calling for a proper ratio mix of resin and hardener. Use separate measuring cups for each component before mixing them in one container. Stir slowly to avoid introducing air bubbles.

Applying Epoxy to Driftwood

Pour the mixed epoxy over the driftwood, ensuring it covers all surfaces uniformly. Use a brush to spread it out evenly, paying special attention to crevices and curves.

Removing Bubbles

After application, you might notice bubbles forming. Use a heat gun or torch gently to eliminate them, ensuring a crystal-clear finish without altering the texture beneath.

Design Inspirations and Ideas

Driftwood epoxy art can be as varied as your imagination allows. Whether you’re interested in functional pieces or purely decorative ones, there are countless possibilities.

Functional Art Pieces

  • Driftwood Tables: Use larger pieces of driftwood as bases or accents for table tops covered in epoxy resin.
  • Lamps and Light Fixtures: Integrate lighting elements to create bespoke pieces that add warmth and intrigue to any space.

Decorative Artworks

  • Wall Hangings: Arrange smaller driftwood pieces into artistic collages, safely enclosed in epoxy.
  • Sculptures: Let the natural form of the driftwood guide you in assembling free-standing sculptures.

Finishing and Preserving Your Artwork

After successfully crafting your driftwood epoxy art, finishing touches are crucial for longevity and presentation.

Final Sanding and Polishing

Once the resin is fully cured, you may need to perform a final sanding to remove any imperfections. Follow this with a polish using fine-grit sandpaper to achieve a sleek finish.

Preserving the Art

Consider adding a UV-resistant topcoat to prevent any yellowing and enhance durability. Also, ensure the driftwood is securely bonded to any mounting surface, providing stability over time.

Troubleshooting Common Issues

Even with careful preparation, challenges can arise. Addressing them is part of the learning journey.

Common Problems

  1. Bubbles in Resin: Ensure you mix slowly and use a heat gun to remove any bubbles during application.
  2. Discoloration: This can be due to contamination. Ensure your pots, stirrers, and environment are clean.

Solutions

If discoloration or other minor defects are unavoidable, they can often be fixed by applying an additional layer of epoxy or sanding down and re-polishing the surface.

Conclusion

Driftwood epoxy art is a testament to nature’s beauty and human creativity working in harmony. Whether you’re making functional furniture or creating sculptures and wall art, the combination of driftwood and epoxy provides endless opportunities for artistic expression. So, next time you find yourself on a beach walk, you might just see those pieces of driftwood through the lens of an artist, ready to transform them into something truly remarkable.

Through understanding the materials, refining your techniques, and being unwavering in experimenting, you stand at the cusp of creating breathtaking pieces that capture the organic elegance of the natural world, complemented by the sleek brilliance of epoxy resin. Let the driftwood guide your creativity, and may your artistic journey be as fluid and enchanting as the waves that brought your materials to shore.

Filed Under: Driftwood Ideas Tagged With: Art, craft, DIY, Driftwood, Epoxy

Driftwood Earrings Diy

March 3, 2025 by admin

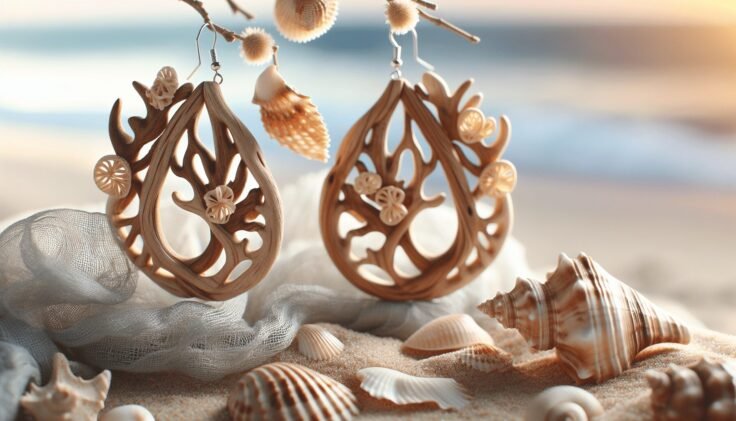
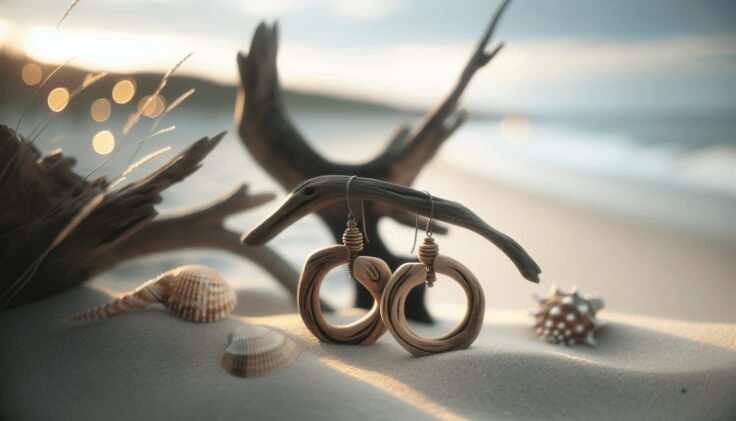
Have you ever been walking along the beach and noticed that there’s something inherently enchanting about pieces of driftwood? These unique items, shaped by the sea and wind, carry a bit of nature’s charm and hold countless stories within their grain. Imagine turning these treasures into a piece of wearable art. If you’re someone who cherishes DIY projects and eco-friendly fashion, making your own driftwood earrings is a delightful way to blend creativity with sustainability.

Understanding Driftwood: Nature’s Unique Castaway

What is Driftwood?

Driftwood refers to the pieces of wood that have washed up onto shorelines, often adrift for months or even years before reaching land. These pieces have usually broken away from trees naturally through erosion or as debris from logging and construction activities. Over time, the sea smoothens these pieces, giving them a distinct, polished appearance.

Why Driftwood for Earrings?

Choosing driftwood for crafting earrings is not just about their beauty, but also about their uniqueness and symbolism. Each piece of driftwood is one-of-a-kind, thanks to its journey and the elements it has encountered. This means your earrings will carry individuality, much like nature’s own signature on your accessory choice. Moreover, crafting with driftwood promotes sustainable use of resources by repurposing nature’s castaways into something beautiful and wearable.

Gathering Your Materials

Before you can start creating your driftwood earrings, you need to gather some supplies. Luckily, the list is short and manageable, perfect for a beginner or a seasoned crafter looking for a new project.

Essential Items for Your Driftwood Earrings

Here is a simple table to help you gather your materials:

MaterialDescription
Driftwood piecesSmall and lightweight pieces that appeal to your sense of style and aesthetics.
Earring hooksYou can find these at any jewelry supply store or online. Opt for hypoallergenic if you have sensitivities.
Jump ringsSmall metal rings used to attach your driftwood pieces to the earring hooks.
Drill or DremelUseful for making precise holes in your driftwood.
SandpaperTo smooth any rough edges and shape your driftwood a bit, if necessary.
Wood sealantOptional, for preserving the wood and preventing changes from moisture.

Optional Additions

Besides the essentials, consider adding some decorative elements such as beads, shells, or small charms to give your earrings a personal touch. These additions can help accentuate the natural beauty of the driftwood and reflect your individual style.

Driftwood Earrings Diy

Preparing Your Driftwood

Preparation is key in any craft project, and driftwood earrings are no exception. Properly preparing your driftwood will ensure your earrings are safe and durable.

Cleaning Your Driftwood

Start by thoroughly cleaning each piece of driftwood. Use a stiff brush and some mild soap to scrub them and remove sand, salt, and other residues. Rinse them well with fresh water. This not only helps in cleaning but also in understanding the texture of each piece, assisting you in seeing which will work best for your earrings.

Drying and Sanding

Let your driftwood dry completely before moving to the next step. Depending on the size of your pieces and the humidity in your area, drying can take from a day to a week. Once dried, use sandpaper to smooth any rough edges, taking care not to sand away too much of the character that the sea has imparted onto the wood. If you prefer a rustic look, you might choose to leave the wood as is; otherwise, sand more for a sleeker finish.

Sealing the Wood

Applying a clear wood sealant is an optional step but could be beneficial in preserving your earrings. This can help prevent future cracking and protect the wood from moisture changes. Simply apply a thin coat using a small brush or cloth, and allow it to dry thoroughly.

Crafting Your Driftwood Earrings

With your materials prepped, it’s time for the fun part: crafting! This is where your creativity truly gets to shine.

Drilling Holes in Your Driftwood

Using a drill or Dremel, carefully drill a small hole near the top edge of each driftwood piece. This hole will allow you to attach the jump ring, which connects the driftwood to the earring hook. Be cautious to avoid splitting the wood by supporting the piece on a hard surface and drilling slowly.

Adding Jump Rings and Earring Hooks

Utilizing the jump rings is straightforward:

  1. Open a jump ring using a pair of pliers.
  2. Thread the jump ring through the hole in your driftwood.
  3. Close the jump ring securely to prevent it from coming off during wear.

Once your jump rings are attached, slide them onto the earring hooks. Again, ensure everything is fastened tightly but comfortably to allow pleasant movement.

Customizing Your Earrings

This step is entirely up to your interpretation! If you’ve chosen to add decorative elements, now is the time to attach them. You might want to dangle small beads or shells alongside the driftwood for a nautical-themed look. Alternatively, mix in some colorful accents for a pop of contrast.

Driftwood Earrings Diy

Maintaining Your Driftwood Earrings

After completing your unique earrings, maintenance ensures they remain as lovely as the day you crafted them.

Regular Cleaning

To keep your earrings in top condition, regularly wipe them down with a soft, dry cloth. This will help remove any buildup of natural skin oils or dirt. Avoid submerging them entirely in water, as excessive moisture can affect the driftwood over time.

Storing Properly

When not in use, store your earrings in a dry, safe place away from direct sunlight or heat sources. A jewelry box, lined pouch, or similar container works well to prevent scratching and dust accumulation.

Restoring Shine

If the driftwood begins to look dull, you can lightly sand them again and reapply a thin layer of sealant. This will help maintain their natural luster and extend their longevity.

Why Create Driftwood Earrings?

The beauty of crafting your own driftwood earrings lies not only in the act of creation but also in its environmental impact, personal satisfaction, and style statement.

Eco-Friendly Fashion Statement

By using driftwood, you’re making a conscious choice to utilize recycled and natural materials. This decision supports sustainability and opens a dialogue on eco-friendly fashion — something both you and admirers of your earrings will appreciate. It can encourage conversations about the importance of repurposing materials, reflecting your commitment to the environment.

A Personal Touch

Creating something unique with your own hands carries with it a sense of accomplishment and pride. Your earrings will not only be a reflection of your individuality but also a testament to your creativity and resourcefulness. Whether you wear them yourself or gift them to a loved one, they’re sure to carry a personal significance that adds another layer to their charm.

Versatile Style

Driftwood earrings can be customized to fit any aesthetic, making them additions to anyone’s wardrobe. From beachy casual to sleek modern, these earrings can be adapted to almost any style preference. This versatility ensures they will remain a staple in your accessory collection for years to come.

Inspiration and Ideas for Further Projects

Once you’ve nailed down making driftwood earrings, you might wonder what else you can create with similar techniques or materials.

Expanding to More Accessories

Consider creating matching sets like necklaces or bracelets. By using similar designs, you can create cohesive accessories that elevate any outfit. Experiment with using larger pieces of driftwood for statement necklaces or combining multiple smaller pieces for a layered bracelet.

Incorporating Other Natural Materials

Driftwood plays beautifully with other natural elements such as stones, sea glass, or botanicals. Incorporate these into your designs for a richer narrative. Perhaps you could embed small seed pods or use pebbles collected from your favorite nature spot.

Exploring Different Styles

Feeling adventurous with your designs? Try sculpting larger driftwood pieces for home decor or blending wood types to create contrast in your designs. Driftwood’s organic shapes and textures offer ample opportunity to push creative boundaries.

This journey, from discovering a weather-worn piece of driftwood to crafting unique earrings, not only highlights artistic ingenuity but symbolizes a delightful exploration of sustainable style. By taking a small piece of nature and transforming it into an accessory, you’re engaging in a conversation about fashion’s impact and the power of do-it-yourself solutions. Now, the next time you find yourself on a sandy shore or a morning walk by the sea, a simple piece of driftwood might just catch your eye, sparking another round of inspired creativity.

Filed Under: Driftwood Ideas Tagged With: craft, Driftwood, Earrings, Handmade, Jewelry

Driftwood Key Holder Diy

February 23, 2025 by admin

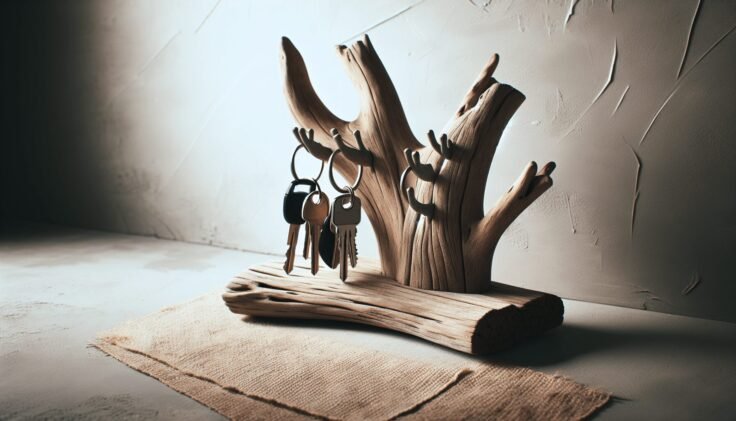
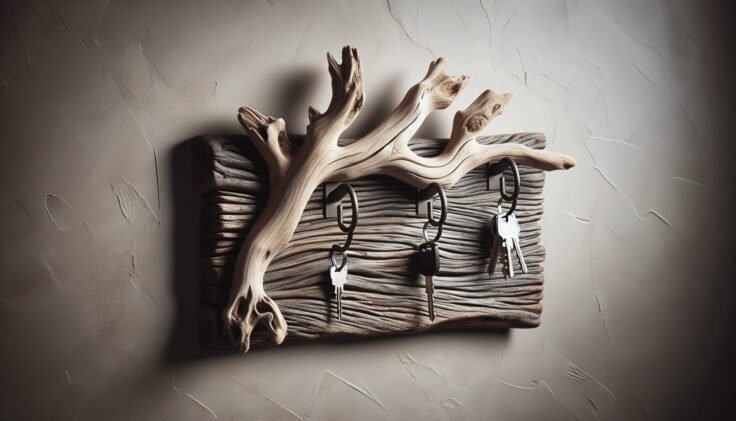
Have you ever found yourself rummaging around for that elusive set of keys just when you need to rush out the door? It’s a common occurrence, and surely it’s happened to all of us at one point or another. Now, what if you could create a unique and aesthetically pleasing solution to this everyday issue, using something as simple yet charming as driftwood? You’re about to discover how crafting your own driftwood key holder can not only help you keep your keys organized but also add a touch of nature-inspired decor to your living space. With driftwood’s rustic, weather-beaten appeal, you can bring a piece of the beach or riverbank into your home, transforming it into a practical and decorative item.

Driftwood Key Holder Diy

Why Driftwood?

Natural Beauty and Uniqueness

Driftwood is wood that has been washed onto a shore or bank by the action of winds, tides, or waves. Every piece of driftwood carries a unique story, having traveled through water and time to become naturally smoothed and bleached by the elements. No two pieces are the same, and this natural variety adds character and uniqueness to your craft.

Sustainability and Cost-Effectiveness

Opting for driftwood means you are using a material that’s already been discarded by nature, thus making it an eco-friendly choice. It’s cost-effective as you can collect driftwood from local beaches or riverbanks, making it a budget-friendly option for your home decor projects.

Preparing Your Driftwood

Collecting the Driftwood

Before you start crafting, you need to gather some driftwood. Head to your nearest coastline or riverbank and search for pieces that are about 12-24 inches long, sturdy, and aesthetically pleasing to your eye. Keep an eye out for driftwood with a flat surface so it can be easily mounted on a wall.

Cleaning and Drying

Once you’ve gathered your driftwood, it’s important to clean it thoroughly to remove any lingering dirt, sand, or salt. Soak the driftwood in a bucket of water with some bleach added to it for a few hours. After soaking, scrub it gently using an old toothbrush to remove any remaining debris.

Rinse the wood thoroughly with clean water and let it dry completely. Depending on its initial condition, drying could take anywhere from a few days to a week. Ensure that it’s fully dry before moving on to the next steps to prevent any mold or mildew growth.

Designing Your Key Holder

Visualizing Your Project

Now that you have a piece of driftwood ready, take a minute to visualize how you want your key holder to look. Consider the placement of hooks or any additional decorative elements you might want to add. Do you want it to be minimal, or do you prefer something a bit more embellished?

Gathering Additional Materials

To turn your driftwood into a functional key holder, you’ll need a few additional materials:

MaterialPurpose
Screw hooksTo hold the keys securely
Drill and drill bitsFor creating holes to mount the hooks
SandpaperTo smooth any rough edges
Wall hooksTo mount your key holder onto the wall
Paint or varnishOptional, for finishing touches or to enhance the wood’s look

Layout Planning

Before attaching anything, it’s a good idea to lay out your materials and have a mock setup. Measure the driftwood and place the hooks evenly spaced. Figuring out the spacing in advance will prevent adjustments later on, which could potentially damage the wood.

Crafting the Key Holder

Drilling and Installation

Start by marking where each hook will be placed. Ensure the marks are evenly spaced and are a distance apart that accommodates your keys comfortably. Use a power drill with a drill bit that matches the size of your screw hooks to create pilot holes for the hooks.

Insert the hooks once the holes are ready. Twist them in securely, ensuring they’re facing the right direction for ease of use.

Finishing With Care

If you want to maintain the natural appearance of the driftwood, opt for a clear varnish. If you’re looking to give it a more customized look, consider painting it in colors that match your home decor. After painting or varnishing, let it dry completely.

Optionally, use sandpaper on any parts that feel rough to the touch. This extra step ensures a smooth finish which can prevent any injuries when grabbing for your keys.

Mounting the Key Holder

The final step is mounting your driftwood key holder on the wall. Depending on the weight of the driftwood and number of keys you plan to hang, using strong wall hooks or a mounting bracket can provide greater stability.

Choose a location near an entrance for convenience. Mark the spots for wall hooks, drill pilot holes, place the anchors, and screw in the wall hooks. Finally, hang your driftwood key holder securely.

Driftwood Key Holder Diy

Adding Personal Touches

Incorporating Additional Decorations

Personalize your driftwood key holder with other elements that resonate with your style. Consider adding small decorative items like seashells, mini plants, or a small chalkboard for notes.

Paint and Stencil Art

Stencils can be a fun way to add some art to your key holder. Consider painting motivational quotes or patterns using a stencil for a more polished look.

Benefits of a Driftwood Key Holder

Practical Organization

The primary benefit is practicality—having a designated spot for your keys can help reduce clutter and streamline your daily routine. No more lost keys!

Aesthetic Enhancement

Apart from serving a practical purpose, a driftwood key holder adds a rustic and natural touch to your interior decor. It’s a subtle yet effective way to integrate elements of nature into your home.

Conversation Starter

A unique piece like a driftwood key holder is sure to catch the eyes of visitors. It can become a conversation starter and a way to showcase your creativity and DIY skills.

Troubleshooting and Tips

Securing Loose Hooks

If you find that any of the hooks have become loose over time, consider applying a small amount of wood glue before re-inserting them for extra hold.

Ensuring Longevity

To ensure your driftwood key holder withstands the test of time, consider reapplying varnish every year or two to protect it from wear and tear.

Testing Stability

Before hanging keys, test the stability of your key holder on a wall to ensure it is securely mounted and can support the weight.

Conclusion

Creating your own driftwood key holder is not just a craft project; it’s a way to bring functionality and a touch of nature into your everyday life. The process from start to finish involves a mixture of creativity, practicality, and sustainability. As you enjoy the benefits of your handcrafted piece, you’ll likely find yourself inspired to embark on more driftwood adventures. So, why keep rummaging when you can create a stunning solution? Let the natural beauty of driftwood transform your home’s organization and aesthetics today.

Filed Under: Driftwood Ideas Tagged With: craft, Driftwood, Handmade, home decor, Key Holder

Driftwood Cube

February 6, 2025 by admin

Have you ever come across a piece of driftwood and wondered about its journey? Driftwood holds a historical narrative of its own, shaped by its travels through water and time. This article is dedicated to the fascinating concept of the “Driftwood Cube”—a unique creation crafted from driftwood that not only embodies artistry but also captures the intrigue and wonder of nature’s sculpture. Let’s journey together into the details of what makes the Driftwood Cube a captivating element in both art and design. Ready to learn more?

The Allure of Driftwood

Driftwood, with its naturally weathered appearance, brings a sense of rustic charm and mystique. When you think about driftwood, you might imagine a piece of wood washed ashore, but its appeal goes beyond that. It speaks of a natural weathering process that involves water, wind, and sun, each element contributing to its unique character.

The Natural Formation Process

Driftwood starts its journey as an ordinary piece of wood, often a fallen branch or tree. As it makes its way into water systems like rivers and oceans, the motion and elements continuously shape it. This process, which includes erosion by water and exposure to various elements, results in its smooth finish and intricate patterns.

Unique Characteristics

No two pieces of driftwood are the same, largely due to their unpredictable journey. The texture, size, and shape all contribute to its individuality. These characteristics make driftwood highly sought after for various artistic and decorative purposes, including the creation of the Driftwood Cube.

Understanding the Driftwood Cube

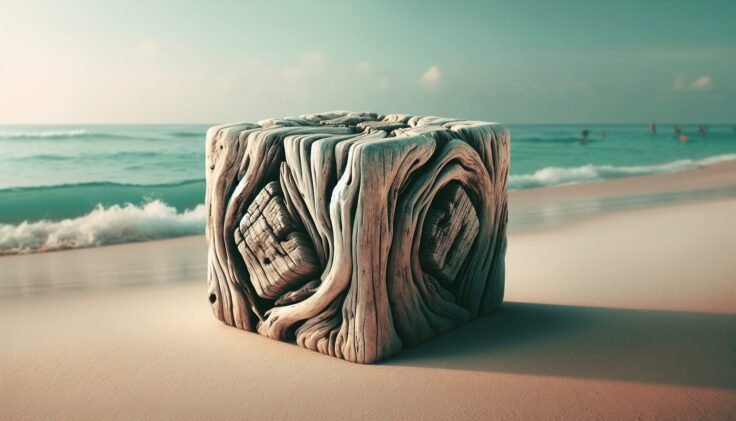
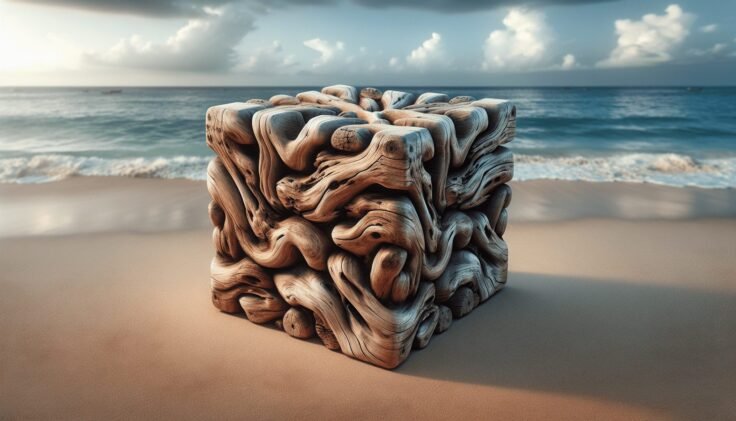
The Driftwood Cube is an artistic creation that merges the natural beauty of driftwood with the geometric precision of a cube. This concept combines nature-inspired aesthetics with human creativity, making it a popular choice for art enthusiasts and designers.

The Creative Process

Creating a Driftwood Cube involves selecting the right pieces of driftwood, often focusing on texture, grain, and color. These pieces are meticulously cut and fitted together to form a cube. The process emphasizes precision, ensuring that each piece fits seamlessly, yet retains its natural, rugged look.

Symbolism and Meaning

The Driftwood Cube is more than a physical object; it symbolizes the harmony between nature and manmade design. The cube shape, often representing stability and order, contrasts with the organic irregularity of driftwood, hence creating a balance between chaos and structure. This duality is what makes the Driftwood Cube so intriguing.

Driftwood Cube

Practical Uses and Aesthetic Appeal

Whether used as a decorative element in homes or as a statement piece in galleries, the Driftwood Cube serves various functional and aesthetic purposes. Its versatility makes it compatible with different styles and settings, from minimalist to coastal themes.

Home Décor

Incorporating a Driftwood Cube into your home can add a touch of nature-inspired beauty. It’s perfect for tabletops, shelves, or as a standalone piece that adds warmth and texture to any room. Its neutral tones and organic shape can complement a wide range of color schemes and themes.

Artistic Installations

In art galleries, Driftwood Cubes can be part of larger installations or standalone pieces that invite viewers to explore their textures and form. Artists often use them to evoke themes of nature, transformation, and the passage of time.

Step-by-Step Guide to Making Your Own Driftwood Cube

Creating your own Driftwood Cube can be a rewarding experience that allows you to engage with the materials and understand the nuances of driftwood.

1. Gather Your Materials

Start by collecting pieces of driftwood. Look for different sizes and shapes, ensuring they are relatively straight for easier construction. You will also need tools such as a saw, sandpaper, wood glue, and a measuring tape.

2. Prepare the Driftwood

Clean the driftwood thoroughly to remove any salt, sand, or debris. Once cleaned, dry the pieces completely.

3. Cut and Fit

Measure and cut the driftwood into uniform pieces that will form the sides of the cube. Sand the edges smoothly for a better fit.

4. Assemble the Cube

Using wood glue, attach the pieces together, forming each side of the cube. Allow the glue to dry before assembling the entire structure. Once complete, you can apply a wood finish if desired.

5. Finishing Touches

Check for any rough patches or uneven edges. Use sandpaper to smooth out any imperfections and ensure your Driftwood Cube looks polished and refined.

Driftwood Cube

Caring for Your Driftwood Cube

To maintain the beauty and integrity of your Driftwood Cube, regular care and maintenance are essential. Driftwood, being a natural material, can be sensitive to environmental changes.

Environmental Considerations

Keep your Driftwood Cube away from excessive moisture and direct sunlight to avoid warping or discoloration. Ensure it’s placed in a stable environment to preserve its condition.

Cleaning Practices

Regular dusting with a soft cloth will keep your Driftwood Cube looking its best. Avoid using water or harsh chemicals, which might damage the wood. If deeper cleaning is necessary, opt for a gentle wood cleaner.

Driftwood Cube as a Market Trend

In recent years, the Driftwood Cube has gained attention as a market trend in home décor and art. Its unique combination of natural beauty and craftsmanship makes it a desirable item for collectors and enthusiasts alike.

Growing Popularity

As more people seek sustainable and eco-friendly options in décor, driftwood-based creations, such as the Driftwood Cube, have seen increased interest. These pieces are valued for their low environmental impact and natural aesthetic.

Artisans and Designers

Many artisans and designers focus on creating unique Driftwood Cubes, often selling them in galleries, online platforms, and craft fairs. The demand for bespoke and handcrafted items continues to drive the market, offering opportunities for creative entrepreneurship.

Conclusion

The Driftwood Cube encapsulates the essence of nature and art, offering a mesmerizing blend of organic charm and geometric precision. By understanding and appreciating its formation, crafting process, and significance, you can gain a deeper appreciation for this remarkable piece. Whether you choose to create your own or acquire one from a skilled artisan, the Driftwood Cube undoubtedly adds a unique and meaningful touch to any space you choose to enhance. Have you envisioned how a piece of driftwood could transform into an artful statement in your own home or creative space?

Filed Under: Driftwood Ideas Tagged With: craft, Driftwood, home decor, Sculpture, Woodworking

Driftwood Curtain Rod Diy

February 4, 2025 by admin

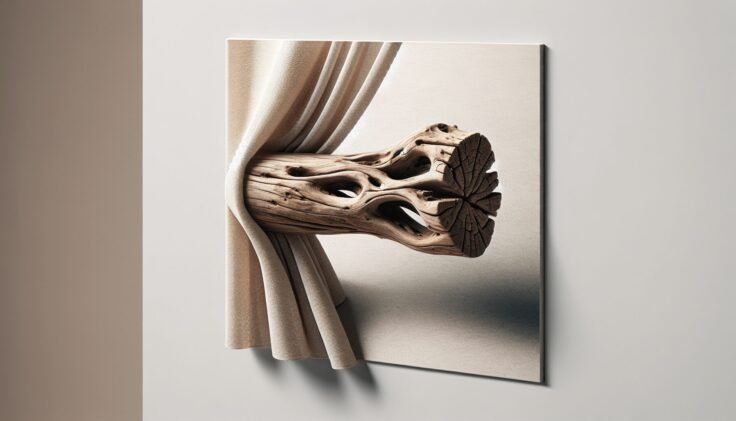
Have you ever considered infusing a touch of natural beauty into your home decor? Driftwood, with its rustic charm and organic beauty, can transform an ordinary space into an extraordinary one. One of the simplest yet most impactful ways to incorporate this beautiful, natural element is by creating your own driftwood curtain rod. Not only is this a cost-effective project, but it also results in a stunning focal point for any room. Let’s explore how you can bring a piece of nature indoors by crafting your very own driftwood curtain rod.

Why Choose Driftwood for Your Curtain Rod?

Embracing Nature’s Imperfections

Driftwood is nature’s artwork. Each piece tells a story of its journey through water, having been weathered by the elements of nature. This creates a unique appearance with intricate details and knots, which add character and charm that a standard curtain rod cannot replicate. By choosing driftwood, you invite the imperfections that make it special and one-of-a-kind.

Eco-Friendly and Sustainable

Choosing driftwood is an environmentally conscious decision. Rather than buying a curtain rod made from processed materials, reusing a piece of driftwood means you are making use of materials already available, reducing waste, and minimizing your carbon footprint. This DIY project is not only beautiful but also responsible.

Budget-Friendly

Who doesn’t like saving money on home decor? Driftwood can often be found for free on beaches or beside rivers and lakes. If you’re not near a body of water, many craft stores sell driftwood at reasonable prices. Crafting your curtain rod from driftwood can be less expensive than purchasing a ready-made rod from a store.

Preparing Your Driftwood

Selecting the Perfect Piece

Start by selecting your driftwood. Look for a piece that is straight enough to function as a curtain rod, while still exhibiting some of the beautiful curves and twists that make driftwood unique. The length should be appropriate for your window size, allowing for a slight overhang on either side.

Cleaning and Sanding

Once you have your driftwood, it’s vital to clean it thoroughly. Remove any dirt, sand, or other debris using a brush. Next, soak the driftwood in a bleach solution (one part bleach to ten parts water) for a few hours, then rinse it thoroughly. Allow it to dry completely. Once dry, gently sand any rough areas to prevent splinters and to ensure a nice finish.

Finishing Touches

Seal your driftwood if you’d like to protect it from potential moisture in the room (especially if it’s a bathroom). Using a clear, matte sealant can help preserve the wood’s natural look while protecting it over time. Let the sealant dry completely before moving forward with assembling your curtain rod.

Driftwood Curtain Rod Diy

Assembling the Driftwood Curtain Rod

Materials Needed

Before you begin, gather the following materials:

  • Your cleaned and finished piece of driftwood
  • Curtain rod brackets (available at hardware stores)
  • Screws and wall anchors
  • Drill
  • Measuring tape
  • Pencil

Measuring and Installing Brackets

Measure the width of your window and mark where you want the driftwood to hang. Use your pencil to mark where the brackets will be installed on the wall. Ensure that they are level and equidistant from the window edge. Drill holes for the wall anchors if necessary, then attach the brackets securely.

Attaching the Driftwood

With the brackets in place, rest your driftwood on them. Ensure it’s centered and balanced, then step back and make any adjustments needed for height or placement. If your driftwood is heavy, consider adding an extra support bracket in the middle to prevent sagging.

Styling Your Driftwood Curtain Rod

Curtain Selection

Choosing curtains that complement the rustic nature of the driftwood can elevate the overall aesthetic. Opt for natural fabrics such as linen or cotton, which pair beautifully with the organic feel of the driftwood. Keep colors neutral to let the wood be the star, or choose a bold contrast for a modern twist.

Adding Decorative Elements

Enhance your driftwood curtain rod with some decorative elements. You can tie thin ribbons or rope to it for a bohemian look, or hang small hanging planters for a touch of greenery. This is your opportunity to express creativity and match the driftwood to your personal style.

Room Aesthetic Integration

Consider the overall room aesthetic when styling your driftwood feature. Driftwood pairs well with coastal themes, rustic decor, or environments that emphasize natural and earthy materials. Use your driftwood curtain rod as a starting point to blend other elements, such as wicker baskets, wooden furniture, or seashell decor, for a cohesive look.

Driftwood Curtain Rod Diy

Driftwood Curtain Rods for Different Spaces

Living Room Charm

A driftwood curtain rod in the living room creates a warm, inviting atmosphere. Pair it with cozy textiles and soft lighting to create a perfect space for relaxation.

Bedroom Serenity

Bring a sense of calmness and serenity with a driftwood curtain rod in the bedroom. Its natural aesthetics complement soothing color palettes, offering a restful environment.

Kitchen Nature Touch

In kitchens, where visual differences can help define spaces, a driftwood curtain rod can add an unexpected touch. Its organic texture contrasts beautifully with the clean lines of kitchen decor.

Bathroom Rustic Spa

Transform your bathroom into a spa-like retreat by using a driftwood curtain rod. Enhance the theme with soft towels, candles, and plants, creating a space to unwind after a long day.

Overcoming Common Challenges

Finding the Right Size

Sometimes, driftwood pieces may not match the precise size needed. In such cases, you can use a saw to cut the piece to the right length. Alternatively, adapt your curtain length to better match the driftwood.

Balancing Weight

Ensuring that your driftwood curtain rod can hold the weight of your chosen curtains is crucial. Opt for sturdy wall brackets, and if in doubt, add an extra bracket for support.

Maintaining a Balanced Look

Driftwood’s natural unevenness might make it challenging to achieve a traditional straight look. Embrace the natural curvature by ensuring it doesn’t compromise the rod’s functionality.

Conclusion

Creating a driftwood curtain rod is as much about the journey as it is about the destination. It’s a delightful project that allows you to bring a piece of the outdoors into your space, reflecting your unique style and connection with nature. Not only will this DIY project enhance the aesthetic value of your home, but it will also provide a sense of satisfaction in having created something both beautiful and sustainable. By following these steps, you’ll be well on your way to crafting a driftwood curtain rod that is perfect for your space and style. Embrace the imperfections and let the natural beauty of driftwood inspire and elevate your home decor.

Filed Under: Driftwood Ideas Tagged With: craft, Curtain Rod, DIY, Driftwood, Home Improvement

Driftwood Cross Diy

February 3, 2025 by admin

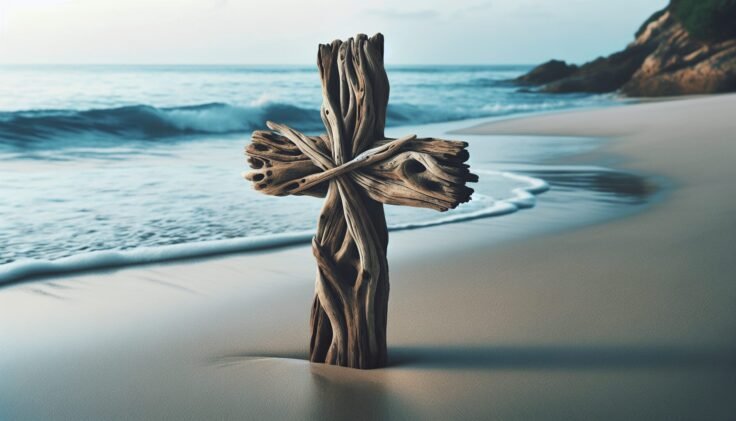
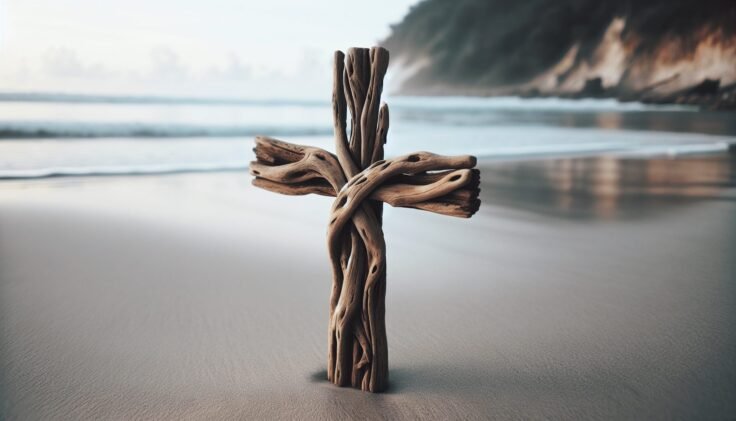
Have you ever stumbled upon a beautiful piece of driftwood while walking along the beach and wondered how you could transform it into something unique for your home? Crafting a driftwood cross can be a fulfilling project that infuses a touch of nature and spirituality into your space. With a bit of creativity and some basic materials, you can create a stunning piece that resonates with personal meaning and rustic charm.

Driftwood Cross Diy

Understanding Driftwood

Before you begin your DIY project, it’s essential to understand what driftwood is and why it’s a fantastic material for crafting. Driftwood refers to the weathered pieces of wood that wash ashore on beaches, having been shaped and smoothed by water and sand over time. Each piece tells its own story, with its unique textures and patterns.

Why Choose Driftwood for DIY?

Choosing driftwood for your DIY projects offers both aesthetic and environmental benefits. Not only does each piece serve as a unique canvas, but using driftwood repurposes natural materials that might otherwise go unused. Its rustic appeal complements various decor styles, adding a hint of coastal ambiance to your home.

Collecting the Perfect Piece of Driftwood

Finding the right driftwood pieces is both an adventure and a mindful process. While walking along the beach, look for pieces that are lightweight, relatively dry, and without rot. Remember to check local regulations, as some areas may have restrictions on collecting driftwood.

Materials and Tools You’ll Need

Gathering the right materials and tools is crucial for a smooth crafting process. Here’s what you’ll need:

  • Driftwood Pieces: Look for a selection of lengths that can be layered to form a cross.
  • Wood Glue: A strong adhesive to hold your structure together.
  • Small Drill and Drill Bits: For making holes if you decide to use screws.
  • Screws: Optional, for added stability.
  • Wood Sandpaper: To smooth any rough edges.
  • Protective Finish or Sealant: To preserve the wood.
  • Twine or Wire: For additional support or a decorative element.
  • Saw or Pruning Shears: To cut the wood down to size if needed.
  • Decorative Items: Like shells, stones, or small plants to personalize your creation.

Steps to Create Your Driftwood Cross

Creating a driftwood cross involves a few straightforward steps. Planning and organizing will ensure your project comes together beautifully.

Step 1: Design Your Cross

Start by visualizing the shape and size of your cross. Arrange your driftwood pieces on a flat surface. Play around with different configurations until you find the one that speaks to you. Don’t worry about perfection—part of the charm lies in its uniqueness.

Step 2: Prepare Your Driftwood

Once you’re satisfied with the layout, it’s time to prepare your driftwood for assembly. Use sandpaper to address any rough spots. This step ensures your final piece is smooth and safe to handle. If needed, use a saw to resize any pieces for your desired dimensions.

Step 3: Assemble the Cross

With your design settled and wood prepared, start assembling. Begin with the vertical piece and attach the horizontal one at your preferred position to form the cross. Apply wood glue at the joining point. Hold the pieces together while the glue sets. For added strength, consider drilling and using screws.

Step 4: Secure with Twine or Wire

After assembling, grab some twine or wire to wrap around the central junction. This not only strengthens the hold but adds to the rustic, natural aesthetic. Wrap firmly but not too tight to avoid breaking the wood.

Step 5: Add Finishes

When your cross structure is solid, apply a protective finish or sealant. This step will protect it from environmental factors, deepening the wood’s natural hues.

Step 6: Customize with Decorations

Personalize your driftwood cross further by adding decorations. Glue shells, small stones, or incorporate small plants for a touch of greenery. Think of colors and elements that complement your overall theme.

Troubleshooting Tips

Every DIY project comes with its challenges. Here are a few tips to help you navigate common pitfalls when crafting your driftwood cross.

Securing Loose Pieces

If you find driftwood pieces are not adhering well, assess whether more wood glue, twine, or wire is needed. Sometimes, adding additional glue and allowing extra drying time solves loose piece issues.

Dealing with Fragile Wood

Driftwood can sometimes be fragile. Avoid forceful sanding, and handle with care during assembly. If a piece seems too fragile, consider replacing it with a stronger one.

Driftwood Cross Diy

Displaying Your Driftwood Cross

Once your cross is complete, choosing where and how to display it becomes part of the creative process. Consider hanging options or standing it against a backdrop.

Hanging Your Cross

For hanging, attach discreet hooks at the back or loop a strong wire that blends with your wall color. Choose a wall that offers contrast, allowing your creation to shine.

Creating a Stand

If you prefer to have it freestanding, attach a base or weighted stand. Use wood or a heavier rock, securing with wood glue or screws, and ensure your cross can balance.

Caring for Your Driftwood Cross

Regular Dusting

Keep your cross looking fresh by dusting it regularly. Use a soft, dry cloth or a duster to remove any accumulated dirt or dust.

Resealing If Necessary

Over time, your driftwood cross may require resealing to maintain its beauty. Monitoring the sealant’s integrity and reapplying as needed ensures preservation.

The Meaning Behind the Cross

A driftwood cross holds personal significance for many. Bringing together nature and spirituality, it represents connections to both the earth and a higher power.

Spiritual Significance

For many, a cross is a symbol of faith and hope. Creating one from driftwood is an opportunity for reflection, making it meaningful for your spiritual journey.

Nature’s Touch

A driftwood cross captures the essence of nature’s beauty. It’s a reminder of the calming presence and strength found in the natural world.

How to Gift a Driftwood Cross

Driftwood crosses make thoughtful gifts. Their personal touch and handmade charm convey deep sentiment.

Presentation Ideas

Consider wrapping in recyclable materials, staying consistent with its natural theme. A simple paper wrap with a twine bow or an eco-friendly gift bag would enhance its rustic appeal.

Writing a Personal Note

Accompany your gift with a handwritten note. Share the inspiration and thoughts behind your creation, adding a personal touch that the recipient will cherish.

Exploring Further Projects

Creating a driftwood cross may inspire you to explore more DIY projects. Here are some ideas to extend your creativity using driftwood.

Driftwood Picture Frames

Design and create unique driftwood picture frames to showcase your favorite photographs. The rugged texture juxtaposed with photographs adds depth and charm.

Driftwood Wall Art

Form intricate wall patterns by assembling various driftwood pieces, creating art that speaks both subtlety and modernity.

Driftwood Furniture

For the more adventurous, crafting small furniture items like tables or stools using driftwood can be a rewarding challenge.

Conclusion

Crafting a driftwood cross is not just a project but a journey merging creativity, nature, and personal meaning. The steps outlined here guide you from concept to completion, allowing you to enjoy the crafting process while ending with a beautiful piece that resonates personally. Your driftwood cross will be more than a decorative item; it will be an emblem of craftsmanship and inspiration. Enjoy your crafting adventure, and may your new creation bring warmth and joy to your space or to those you choose to gift it.

Filed Under: Driftwood Ideas Tagged With: craft, cross, Driftwood, Handmade, home decor

  • Page 1
  • Page 2
  • Page 3
  • …
  • Page 5
  • Next Page »

Primary Sidebar

Driftwood4us.com, is a participant in the Amazon Services LLC Associates Program, an affiliate advertising program designed to provide a means for sites to earn advertising fees by advertising and linking to amazon.com.