• Skip to main content
  • Skip to primary sidebar
  • Terms and Conditions
  • Privacy Policy
  • Contact

Driftwood 4 Us

Just About Driftwood

craft

Driftwood Heart Wreath

October 23, 2024 by admin

Have you ever thought about how you can bring a piece of nature into your home with a personal touch? Driftwood heart wreaths might be the perfect answer. These beautiful creations not only add a rustic charm to your living space but also carry with them a unique story shaped by nature’s elements. Today, you’re about to embark on a journey where you’ll learn everything there is to know about crafting your own driftwood heart wreath.

Driftwood Heart Wreath

Understanding Driftwood

Before jumping into the creation process, it’s essential to understand what driftwood is and why it’s so special. Driftwood refers to the pieces of wood that have been washed onto the shore by the action of winds, tides, or waves. Each piece of driftwood is thoroughly sculpted by water, offering a smooth and unique texture that is perfect for crafting.

The Appeal of Driftwood

Why is driftwood so cherished in art and decor? You might wonder. Driftwood presents an organic and rustic aesthetic. Its naturally weathered appearance adds a sense of tranquility and natural beauty. By incorporating driftwood into your homemade wreath, you’re introducing elements of the earth, water, and time into your personal space.

Where to Find Driftwood

Locating driftwood for your project can be part of the adventure. Generally, beaches along the coastlines are the primary source. Look for secluded beaches with minimal human activity to maximize your chances of finding high-quality pieces. Do remember to check regional regulations, as collecting driftwood might be restricted in some areas.

Essential Tools and Materials

Before beginning your project, you’ll need some essential supplies and tools. This section will guide you through everything you need to create a driftwood heart wreath.

Materials Needed

To craft your wreath, gather the following materials:

  • Assorted pieces of driftwood
  • A heart-shaped wreath frame
  • Strong adhesive or wood glue
  • Hemp or jute twine
  • Optional: Seashells, sea glass, or other coastal embellishments

Tools You’ll Use

Equally important are the right tools which will help streamline the crafting process:

  • A glue gun
  • Scissors
  • Sandpaper
  • A small saw (for trimming driftwood pieces)
  • Wire cutters

Preparing Your Driftwood

Preparation is key in ensuring your wreath not only looks beautiful but is also sturdy and long-lasting. Follow these steps to prepare your driftwood effectively.

Cleaning Your Driftwood

Begin by giving each piece of driftwood a thorough cleanse. Soak the pieces in clean water to remove salt and debris. After soaking, scrub them with a brush to eliminate any remaining dirt or algae.

Drying Driftwood

Once washed, allow your driftwood to dry completely. Place them in a sunny spot for at least a week. This drying process helps in preventing mildew and ensures they bond well with glue.

Shaping and Sanding

With your driftwood clean and dry, it’s time for some minor shaping. Use sandpaper to smooth out any rough edges and a small saw to trim pieces to the desired size. Ensure that the driftwood is manageable in size and complements the heart-shaped frame.

Crafting the Driftwood Heart Wreath

Now, it’s time to bring the vision to life. Follow these steps to put together your wreath effortlessly.

Building the Base

Start by laying out your heart-shaped frame. First, pick one piece of driftwood and decide where it will sit on the frame. Secure it with hot glue, pressing firmly to ensure a strong bond. Continue to attach the remaining pieces until you see the outline of a heart shape.

Layering and Designing

Next, layer additional driftwood pieces to build depth and texture. Think of them as the intricate details that make your wreath unique. Use a small amount of wood glue or hot glue to adhere these pieces, careful not to overlap excessively.

Adding Personal Touches

This is the fun part where your personality shines through. Embellish your wreath with items like seashells or sea glass. Secure these using glue, ensuring they complement rather than overpower the driftwood’s natural beauty.

Driftwood Heart Wreath

Caring for Your Driftwood Heart Wreath

A little regular maintenance will keep your wreath looking fresh for years to come. Here’s how you can care for your creation.

Protection from the Elements

If you plan to hang your wreath outdoors, consider applying a sealant to protect against weather changes. This will help preserve its color and texture against sun and rain.

Dusting and Cleaning

For indoor display, occasionally dust your wreath using a duster or soft cloth. Should it require deeper cleaning, a gentle wipe with a slightly damp cloth should suffice.

Creative Variations and Themes

Flex your creative muscles by exploring different themes and variations for your driftwood heart wreath.

Theme Ideas

Think of different themes such as a beach getaway, nautical journey, or a serene forest retreat. You can incorporate elements like fishing nets for a nautical style or pinecones for a woodland look.

Seasonal Wreaths

Why not tailor your wreath to suit different seasons? Adding dried flowers for spring, vibrant leaves for autumn, or small ornaments for a festive touch can keep your wreath evolving with time.

Inspiration and Community

Remember that you are not alone on this creative journey. There is a vibrant community enthusiastic about driftwood crafts that you can join.

Online Communities and Forums

Consider joining online crafting groups and forums. These platforms are excellent for exchanging ideas, getting feedback, and finding new inspiration.

Crafting Workshops

Seek out local workshops and classes focusing on driftwood art. Not only will you refine your skills, but you’ll also meet like-minded individuals who share your passion.

The Joy of Crafting

In making a driftwood heart wreath, you’re doing more than just assembling pieces of wood. You’re shaping memories, creating a piece of decor with personal significance, and maybe even discovering a new passion. Enjoy the process as much as the end product, and you’ll find great satisfaction in the world of crafting.

Driftwood heart wreaths are beautiful, simple to make, and can become your next favorite hobby! These projects are a wonderful blend of creativity and nature, using materials that hold the stories of the winds and waves that brought them to you. Now it’s your turn to transform these natural treasures into something memorable and uniquely yours.

Filed Under: Driftwood Ideas Tagged With: Beach decor, craft, DIY, Driftwood, Heart Wreath

Driftwood Hat Hanger

October 15, 2024 by admin

Have you ever considered using natural elements to enhance the decor of your home? Embracing nature through home decor isn’t just a growing trend; it’s a timeless way to bring warmth and uniqueness into your space. Driftwood, with its soft, weathered textures and unique shapes, is a perfect example of such an element. It’s no wonder that many people are intrigued by the idea of using driftwood to create functional art like a hat hanger. Imagine combining the beauty of nature with the practicality of storage – that’s the charm of a driftwood hat hanger.

Driftwood is more than just what the tide washes ashore. Each piece tells a story of its journey through winding rivers and open seas. When utilized creatively, these stories can become a part of your home, offering an eclectic touch to any room. In this guide, I will take you on a journey to understand the allure of a driftwood hat hanger, discovering how such a simple item can transform the aesthetic of your space.

Driftwood Hat Hanger

What is Driftwood?

Before you delve into crafting your hat hanger, it helps to know what driftwood truly is. Driftwood refers to wood that has been washed onto a shore, river, or lake, often by winds, tides, or waves. This wood has an underlying beauty, shaped and weathered by its experiences. You may find pieces that have floated in freshwater or have been tossed around in the ocean’s salty currents. It’s this natural exposure that gives driftwood its unique appearance.

The Natural Journey of Driftwood

Driftwood begins as trees, branches, or logs from fallen trees that find their way into bodies of water. Over time, they are shaped and polished by the elements. The impact of water and sun add depth and character to each piece, creating unique textures and tones of color. The wood often becomes bleached and smoothed out, providing a distinct look that is hard to replicate artificially. Understanding its journey can give you a deeper appreciation for its aesthetic and potential uses.

The Charm of Driftwood in Home Decor

There’s something undeniably captivating about incorporating natural elements into your home. Driftwood brings a distinct rustic charm with an element of surprise due to its unrefined beauty. Using driftwood in home decor reflects an appreciation for nature’s artistry and can significantly change the ambiance of your space.

Why Choose Driftwood for a Hat Hanger?

There are practical as well as aesthetic reasons to choose driftwood for creating a hat hanger. It is naturally durable and can support the weight of hats, while its unique structure makes each hanger visually interesting. Each piece of driftwood is different, giving you a truly one-of-a-kind creation. All these factors contribute to its ability to enhance any foyer, mudroom, or hallway.

Creating a Driftwood Hat Hanger

Turning driftwood into a practical piece of art like a hat hanger is an enjoyable and rewarding DIY project. This process allows your creativity to flourish while working with a piece of nature’s art.

Selecting the Right Piece of Driftwood

Selecting the right driftwood is the first and one of the most important steps. Look for a piece that has natural hooks or curves where hats can easily hang. It should be sturdy enough to handle the weight and have a smooth surface to avoid damaging your hats. When selecting driftwood, consider its size, shape, and character to ensure it fits aesthetically into your intended space.

Driftwood Selection Criteria

CriterionDescription
SizeChoose a size that fits the space where it will be mounted.
ShapeLook for natural hooks or areas where hats can hang.
Texture and SmoothnessEnsure it’s smooth enough not to catch material from hats.
SturdinessCheck its durability and strength to hold weight.

Cleaning and Treating Driftwood

Once you have found the perfect piece, it’s essential to clean and treat it properly. This helps remove any dirt, salt, or organisms that have made the driftwood their temporary home. Start by scrubbing the driftwood with a brush and rinsing it with fresh water. You may need to soak it in a mixture of water and bleach to ensure any bacteria or mold is eliminated.

Steps for Cleaning and Treating

  1. Scrub: Gently scrub with a stiff brush to remove debris and dirt.
  2. Rinse: Thoroughly rinse with fresh water.
  3. Soak: Immerse in a solution of water and bleach (1 part bleach to 9 parts water) for several hours to sterilize.
  4. Dry: Allow the driftwood to sun-dry completely for at least a week.

Designing Your Hat Hanger

Once cleaned, the fun part begins: designing your driftwood hat hanger. Consider the placement and number of hooks needed. You can use metal or wooden hooks or even get creative with other materials like ropes or strings to hang the hats.

Designing Tips

  • Placement: Plan for balanced spacing of hooks.
  • Number of Hooks: Decide based on the number of hats you intend to hang.
  • Aesthetic: Ensure that the design complements the decor of your space.

Mounting Your Driftwood Hat Hanger

The final step in your project is mounting your creation on the wall. It’s crucial to ensure that the hanger is securely fastened to prevent it from falling and to maintain the decor.

Choosing the Right Location

The location of your hat hanger can greatly impact its utility and style contribution. Place it where it’s easily accessible while also considering the overall home aesthetics. Hallways, entryways, or mudrooms are ideal spots.

Mounting Tips:

  • Height: Ensure it’s at a convenient height for easy access.
  • Wall Type: Consider the wall material for the appropriate mounting hardware.
  • Security: Use suitable brackets or screws to ensure it holds the weight effectively.

Installation Steps

  • Mark the Spot: Use a level to ensure even alignment and mark the wall where screws will be placed.
  • Drill Holes: Use a drill to make holes for the screws or wall anchors.
  • Mount: Position the driftwood and secure it with screws and brackets.

Driftwood Hat Hanger

Care and Maintenance of Your Driftwood Hat Hanger

Once installed, your driftwood hat hanger requires minimal maintenance. However, occasional care will keep it looking its best. Simply dust it regularly and keep it out of direct sunlight to prevent discoloration.

Simple Upkeep Tips

  • Dusting: Regular dusting keeps it clean and highlights its natural beauty.
  • Avoiding Sunlight: Prolonged exposure to direct sunlight may lead to fading.

Conclusion

Creating a driftwood hat hanger offers you a unique way to blend natural beauty with practicality. The process itself is a creative adventure — from selecting the perfect piece of driftwood to the satisfaction of hanging that last hat. This project isn’t just about creating a household item; it’s about crafting something natural and personal that can be a conversation piece and a functional addition to your home.

By bringing elements of nature indoors, you invite warmth, creativity, and a sense of tranquility into your living space. So, why not give it a try and add a slice of the outdoors to your home with your very own driftwood hat hanger?

Filed Under: Driftwood Ideas Tagged With: craft, DIY, Driftwood, Hat Hanger, Rustic

Gold Painted Driftwood

September 21, 2024 by admin

Have you ever wondered how you can bring a touch of nature into your home with a glamorous twist? Gold painted driftwood may be the perfect solution to infuse your living space with natural beauty and an elegant sheen. Transforming something as simple as driftwood into a striking decorative piece can elevate your interior décor with minimal effort but significant impact.

What is Driftwood?

Driftwood refers to wood that has been washed onto the shore by waves, wind, or tides. Often found on beaches, riverbanks, and lake shores, these wood pieces have usually traveled long distances, acquiring unique textures, shapes, and patinas along the way.

Types of Driftwood

Different types of driftwood originate from various species of trees, providing multiple options for colors, shapes, and textures:

Type of DriftwoodCharacteristics
PineLightweight, pale, and with a soft texture.
OakHeavier, darker, and very durable.
CypressResistant to rot, usually has a rugged appearance.
CedarAromatic, with a fine, even texture.

Benefits of Using Driftwood in Décor

Incorporating driftwood into your home décor offers an array of benefits:

Natural and Eco-Friendly

Driftwood is naturally sourced and doesn’t require any cutting down of trees, making it an eco-friendly choice for your interior design needs.

Unique Aesthetic

Every piece of driftwood is unique in shape and texture, ensuring that your decorative elements are one-of-a-kind.

Materials You Need

Before starting your gold-painted driftwood project, gather the necessary materials:

  • Driftwood pieces
  • Sandpaper
  • Primer
  • Gold paint (spray or liquid)
  • Paintbrushes
  • Sealer (optional)

Gold Painted Driftwood

Preparing the Driftwood

Preparation is key to ensuring your driftwood pieces look their best and the paint adheres well.

Cleaning

Start by cleaning the driftwood pieces. Soak them in a mixture of water and a small amount of bleach to kill any bacteria and remove salts. Rinse thoroughly with fresh water and let them dry completely.

Sanding

Once the driftwood is dry, use sandpaper to smooth out any rough edges or splinters. This helps the paint adhere better and gives the wood a polished look.

Choosing the Right Gold Paint

The type of gold paint you choose can significantly affect the final appearance of your driftwood.

Spray Paint vs. Liquid Paint

Gold Paint TypeAdvantagesDisadvantages
Spray PaintEasy to apply, even coatingLess control over details, can be messy
Liquid PaintMore control, better for detailed workTakes longer to apply, may require multiple coats

Finish Options

Gold paint comes in various finishes such as matte, satin, and glossy. Choose based on the look you aim to achieve:

  • Matte: Great for a subtle, understated look.
  • Satin: Offers a balanced appearance with a slight sheen.
  • Glossy: Perfect for a bold, high-impact statement.

Painting Your Driftwood

With your gold paint and prepared driftwood, you’re ready to begin the transformation.

Priming

Priming the driftwood is essential for paint adherence and to create a smooth base. Apply a layer of primer and let it dry completely before moving on to painting.

Applying Gold Paint

Using your chosen gold paint, apply an even coat covering all surfaces of the driftwood. Allow it to dry and add additional coats as needed to achieve the desired richness of color.

Gold Painted Driftwood

Sealing Your Art

Though not always necessary, sealing your painted driftwood can add longevity and enhance its appearance. Use a clear sealer to protect the paint and give it added shine.

Display Ideas

The versatility of gold-painted driftwood lends itself to numerous creative uses:

Table Centerpieces

Arrange several pieces in the center of your dining table for a stunning, natural focal point.

Wall Décor

Hang a statement piece in your living room or bedroom to add texture and elegance to the walls.

Garden Art

Incorporate painted driftwood into your garden for an unexpected metallic element amidst the greenery.

Caring For Your Pieces

To keep your gold-painted driftwood looking pristine:

  • Avoid placing them in direct sunlight, which can fade the paint.
  • Dust them regularly with a dry cloth.
  • Keep them dry to avoid any possible damage to the paint or wood.

Personal Touches

Don’t be afraid to customize your gold-painted driftwood. Add elements like:

  • Shells and Stones: Glue small shells and stones onto the pieces for added texture and color.
  • Fairy Lights: Wrap fairy lights around driftwood for a whimsical, glowing effect.
  • Letters and Words: Use stencils to paint words or initials onto the driftwood for personalized décor.

Sharing Your Creations

One of the joys of crafting is sharing your creations. Post pictures of your gold-painted driftwood on social media or consider giving them as thoughtful, handmade gifts to friends and family.

Troubleshooting Common Issues

Paint Not Adhering

Ensure the driftwood is thoroughly cleaned and primed. Sanding well also helps the paint to adhere better.

Uneven Coating

Apply multiple thin layers of paint rather than one thick coat to avoid runs and drips.

Flaking Paint

If you notice paint flaking off, consider applying a clear sealer to protect your work.

Final Thoughts

Creating gold-painted driftwood pieces can be a remarkably satisfying project, blending the raw beauty of nature with the polished sheen of gold. It’s a wonderful way to add a unique, personal touch to your home décor while also enjoying the process of making something beautiful with your own hands. Plus, with the versatility and timeless appeal of gold, these pieces can blend seamlessly into various styles and settings. Now, it’s your turn to gather your materials and see what masterpieces you can create!

Filed Under: Driftwood Ideas Tagged With: craft, DIY, Driftwood, Interior Design

Driftwood Sculpture

September 4, 2024 by admin

Have you ever wandered along a beach, stumbling upon gnarled pieces of driftwood, and imagined the various shapes they could become in the hands of a skilled artist? Driftwood sculpture is an exquisite art form that transforms nature’s remnants into mesmerizing pieces of art. If you’ve ever been curious about how these rugged wood pieces turn into stunning sculptures, you’re in the right place.

What is Driftwood Sculpture?

Driftwood sculpture involves creating art from wood that has been washed ashore, often shaped and smoothed by the elements over time. These natural sculptures acquire a unique character, each one telling its own story through the textures, forms, and patterns granted by water and sand.

The Beauty of Natural Forms

The real allure of driftwood sculptures lies in their organic forms. Each piece of wood has been naturally crafted by the elements, giving it a distinct personality. The challenge and charm of driftwood art come from finding the potential within these irregular shapes and transforming them into something beautiful and purposeful.

The Origins of Driftwood Sculptures

Ancient Practices

The use of driftwood in art is not a recent phenomenon. Primitive cultures often utilized what they found in their environment for both practical and decorative purposes. Ancient tribes in coastal regions used driftwood to make tools, shelter, and even ceremonial objects. They saw the potential in these naturally shaped pieces long before modern artists did.

Evolution Through Time

As civilizations evolved, so did their artistic expressions. In the 20th century, with a growing interest in environmental art and sustainable practices, driftwood sculptures gained popularity. Artists began to see these pieces not just as debris but as materials ripe for creative exploration, leading to the sophisticated driftwood art forms we appreciate today.

Why Use Driftwood for Sculpture?

Sustainability

One of the foremost reasons for using driftwood is its eco-friendliness. Driftwood sculptures are essentially a form of recycling, turning what would otherwise be waste into art. By using materials that nature has already broken down, artists contribute to a more sustainable practice.

Unique Aesthetic Qualities

Driftwood possesses aesthetic qualities that are hard to replicate. Its weathered texture and unique grain patterns give each piece a one-of-a-kind look.

wood, shipworm, flotsam
. The natural erosion process grants driftwood an antique appeal that simply can’t be mimicked with new wood.

Types of Driftwood

Hardwoods vs. Softwoods

There are various types of driftwood, broadly categorized into hardwoods and softwoods. Hardwoods, like oak and maple, are denser and more durable, making them suitable for detailed and sturdy sculptures. Softwoods, such as pine and cedar, are lighter and easier to manipulate but might not hold intricate details as well.

Freshwater vs. Saltwater

The environment where driftwood originates also affects its characteristics. Freshwater driftwood is typically smoother and less weathered compared to saltwater driftwood, which often exhibits highly textured surfaces due to prolonged exposure to salt and waves.

The Creative Process

Collecting Driftwood

Before you can start sculpting, you need to collect driftwood. Walk along coastlines, rivers, and lakes to find pieces that speak to you. Always check local regulations to ensure collecting driftwood is permitted in your area. Remember to select pieces that are free from rot and mold.

Basic Tools

To create driftwood sculptures, you’ll need a few essential tools. Here’s a quick reference table:

ToolPurpose
HandsawCutting and shaping large pieces
ChiselDetailed carving and sculpting
SandpaperSmoothing surfaces
Wire and NailsAssembling pieces
Wood GlueSecuring smaller pieces together
Finishing OilsProtecting and enhancing texture

Cleaning and Preparing

Once you’ve collected your driftwood, clean it thoroughly to remove sand, dirt, and any potential pests. Soak the wood in a mixture of water and bleach for about 24 hours, then rinse and allow it to dry completely. This step is crucial to preserve the wood and prevent decay.

Designing and Sketching

Before you start carving, spend some time studying the driftwood. Look at its shape, grains, and natural contours. Sketch your design ideas, keeping in mind the wood’s natural features. This preparatory phase helps you visualize the final piece and plan the steps needed to achieve your vision.

Carving and Shaping

Begin the carving process with rough cuts to outline your design. Use your handsaw for larger sections and chisels for finer details. Work slowly and patiently, letting the wood guide your movements. Sandpaper will help you smooth out rough spots and refine the sculpture.

Assembling the Pieces

If your sculpture involves multiple pieces of driftwood, you’ll need to assemble them carefully. Use nails, wire, or wood glue to connect the parts securely. Ensure each piece fits well with the others, maintaining the natural flow of the overall design.

Finishing Touches

The final step involves finishing touches to enhance and protect your sculpture. Apply finishing oils to bring out the wood’s natural beauty and provide a protective layer against moisture and decay. Let the sculpture dry completely before displaying it.

Styles and Techniques

Abstract Sculptures

Some artists prefer to create abstract forms, focusing on the natural curves and textures of the driftwood. These sculptures often evoke emotions and interpretations without representing specific objects, allowing viewers to connect with the art on a personal level.

Figurative Sculptures

Other artists might choose to create figurative sculptures, depicting animals, human figures, or other recognizable forms. This style requires more precise shaping and detailing, often blending the wood’s natural form with the intended subject.

Combination of Materials

In some cases, artists might combine driftwood with other materials like metal, stone, or glass to create mixed-media sculptures. This approach can add complexity and contrast to the artwork, enriching its visual and tactile appeal.

Popular Themes and Symbolism

Nature and Wildlife

Given its natural origins, driftwood is often used to create sculptures that reflect nature and wildlife themes. Birds, fish, and other animals are popular subjects, celebrating the connection between the artwork and its source material.

Human Emotions and Forms

Driftwood sculptures can also explore human emotions and forms.

flow, driftwood, water
. The organic shapes lend themselves well to abstract representations of human figures, capturing movement, emotion, and expression in a unique manner.

Spiritual and Mystical

Many driftwood artists incorporate spiritual and mystical themes into their work. The aged quality of driftwood can evoke a sense of timelessness and mystery, making it an ideal medium for sculptures that aim to touch on deeper, existential questions.

Famous Driftwood Sculptors

Deborah Butterfield

Deborah Butterfield is renowned for her horse sculptures made from driftwood. Her work has been displayed in prominent galleries worldwide. Butterfield’s sculptures are often cast in bronze but retain the intricate details of the original driftwood, marrying the organic and the durable.

Jeffro Uitto

Jeffro Uitto is another notable driftwood artist who creates large-scale sculptures of animals and fantastical creatures. His pieces often incorporate dramatic twists and turns of driftwood, showcasing its natural beauty and his meticulous craftsmanship.

James Doran-Webb

James Doran-Webb is celebrated for his lifelike animal sculptures made from driftwood and reclaimed wood. His work is highly detailed, capturing the essence and energy of his subjects through the natural grains and forms of the wood.

Caring for Driftwood Sculptures

Indoor vs. Outdoor Display

Where you choose to display your driftwood sculpture can significantly affect its longevity. Indoor displays help protect the sculpture from elements like humidity, sunlight, and pests, prolonging its life and maintaining its appearance.

FactorIndoor DisplayOutdoor Display
Exposure to ElementsMinimalHigh
MaintenanceLowRegular cleaning and oiling required
LongevityLongerProne to weathering

Regular Maintenance

Proper care involves regular dusting and occasional reapplication of finishing oils to keep the wood hydrated and prevent cracking. For outdoor sculptures, periodic cleaning with a mild soap solution and protective sealant offers additional protection against weathering.

Avoiding Pests

If you live in an area prone to pests like termites, extra caution is necessary. Treat the wood with insecticide before using it for sculpture and repeat the treatment periodically to keep pests at bay.

Starting Your Own Driftwood Sculpture Project

Choosing the Right Driftwood

Start by selecting pieces that resonate with you. Look for pieces with interesting shapes, textures, and sizes that match your vision. Remember that the wood’s natural form will largely dictate the final outcome of your sculpture, so choose wisely.

Simple Projects for Beginners

If you’re new to driftwood sculpting, start with simple projects. Create small decorative items like candle holders, picture frames, or basic animal shapes. These projects help you get accustomed to the properties of driftwood without overwhelming complexity.

Advanced Projects and Challenges

As you gain experience, challenge yourself with more complex sculptures. Combine multiple pieces of driftwood, incorporate other materials, or attempt detailed figurative work. Each new project will refine your skills and expand your artistic repertoire.

Conclusion

Driftwood sculpture is a rewarding and sustainable art form that connects you with nature while allowing for boundless creativity. Whether you’re a seasoned artist looking for a new medium or a beginner eager to try your hand at something new, driftwood offers endless possibilities.

snow on driftwood in lake, snow, lake
. Embrace the unique challenge of turning nature’s remnants into breathtaking works of art, and discover the joy of seeing potential where others see only debris.

Filed Under: Driftwood Ideas Tagged With: Artworks, craft, Driftwood, Handmade, Sculpture

Driftwood Necklace

August 18, 2024 by admin

Have you ever considered how natural materials can transform ordinary accessories into unique pieces that connect you with nature? Driftwood necklaces are perfect examples of such creativity. Combining a distinct rustic charm with a touch of craftsmanship, they capture the essence of the sea and bring a piece of the ocean’s serenity into your daily life.

Driftwood Necklace

What is Driftwood?

Driftwood refers to pieces of wood that have been washed onto the shore by the action of winds, tides, or waves. Over time, this wood is naturally weathered and smoothed by the elements, giving it a unique texture and appearance. Driftwood comes in various shapes, sizes, and colors, making each piece uniquely beautiful.

Origins and Types

Driftwood can originate from multiple sources:

  • Natural Sources: Trees and branches that fall into rivers or seas.
  • Human Activity: Discarded wooden materials from ships or coastal buildings.

Different types of wood can generate varied driftwood, such as:

  • Hardwoods: Denser and take longer to weather.
  • Softwoods: Generally lighter and weather quickly.

The type of wood and its origin can affect its final appearance and texture, making each driftwood necklace a one-of-a-kind creation.

The Art of Making Driftwood Necklaces

Crafting a driftwood necklace involves more than just stringing a piece of wood on a chain. It’s an art form that requires patience, creativity, and a deep appreciation for natural beauty. Below are the essential steps involved in creating a driftwood necklace.

Collecting Driftwood

The journey begins by collecting driftwood from beaches or riverbanks. This task can be a meditative process as you walk the shorelines, searching for pieces that catch your eye.

Tips for Collection:

  1. Timing: Go after a high tide or a storm for fresh pieces.
  2. Selection: Look for sturdy pieces without too much decay.
  3. Legal Considerations: Ensure you are allowed to collect driftwood in your chosen location.

Preparing the Driftwood

Once your driftwood pieces are collected, you need to prepare them for crafting. This process includes cleaning, drying, and sometimes treating the wood.

Steps for Preparation:

  1. Cleaning:
    • Rinse the wood with fresh water to remove salt, sand, and debris.
    • Scrub gently with a brush for a deeper clean.
  2. Drying:
    • Air-dry in a shaded area to avoid cracking.
    • Ensure the wood is completely dry to prevent mold and decay.
  3. Optional Treatment:
    • Treat with a wood preservative for extra durability.

Designing and Crafting

The design phase is where your creativity shines. You can use your driftwood pieces as pendants, beads, or even combine them with other materials like crystals, shells, or metals.

Design Ideas:

  • Minimalist: A single piece of driftwood on a leather cord.
  • Boho: Combine driftwood with colorful beads and tassels.
  • Elegant: Pair driftwood with delicate chains and gemstones.

Crafting Steps:

  1. Drilling Holes: If needed, drill small holes in the driftwood for stringing.
  2. Sanding and Shaping: Lightly sand the wood to smooth any rough edges.
  3. Assembly: Use jewelry findings like jump rings, clasps, and cords to assemble your necklace.

Benefits of Wearing Driftwood Necklaces

Driftwood necklaces offer more than aesthetic appeal. They provide several benefits that enhance your connection to nature and well-being.

Eco-Friendly and Sustainable

Using driftwood supports sustainability by repurposing natural materials instead of using plastics or synthetics. It’s a small yet effective way to reduce waste and minimize your environmental impact.

Unique and Personal

Each driftwood piece is unique, ensuring that no two necklaces are exactly alike. Wearing one can be a personal statement, showcasing your individuality and your appreciation for natural beauty.

Emotional and Mental Well-Being

Having a piece of nature with you can be calming and grounding. Driftwood necklaces remind you of the ocean’s tranquility, which can help reduce stress and enhance your emotional well-being.

Versatile and Timeless

Driftwood necklaces are versatile fashion accessories. They can complement casual or formal wear and never go out of style, thanks to their timeless natural appeal.

How to Care for Your Driftwood Necklace

Caring for your driftwood necklace ensures it remains beautiful and durable for years to come. Follow these simple steps to maintain its condition:

Cleaning

Occasionally clean your driftwood necklace to remove dirt and oils.

  • Gently Wipe: Use a soft, damp cloth to wipe the driftwood.
  • Avoid Chemicals: Do not use harsh chemicals or cleaners that could damage the wood.

Storing

Proper storage helps prevent damage and extends your necklace’s lifespan.

  • Keep Dry: Store in a dry place to avoid moisture buildup.
  • Use a Box or Pouch: Protect it from dust and physical damage by storing it in a jewelry box or pouch.

Occasional Treatment

Treat the driftwood occasionally with natural oils or wood conditioner to keep it from drying out and to enhance its appearance.

Driftwood Necklace

Conclusion

Driftwood necklaces are more than just striking pieces of jewelry; they are a testament to the beauty and resilience of nature. From picking the perfect piece of wood on a serene beach walk to crafting it into a personal adornment, the process itself is enriching. Whether you seek a deeper connection with nature, a unique fashion statement, or eco-friendly accessories, a driftwood necklace offers all these and more. Cherish the intricate patterns and textures that each piece of driftwood brings, making every necklace a story of its own—your own little piece of the ocean to carry with you always.

Filed Under: Driftwood Ideas Tagged With: Accessories, craft, Driftwood, Handmade, Necklace

Driftwood And Gemstones

July 25, 2024 by admin

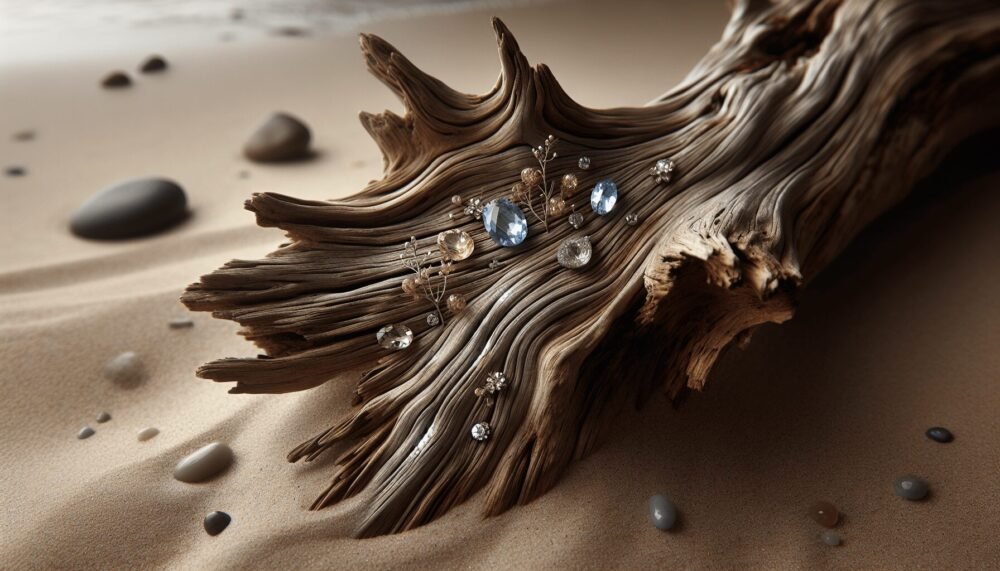
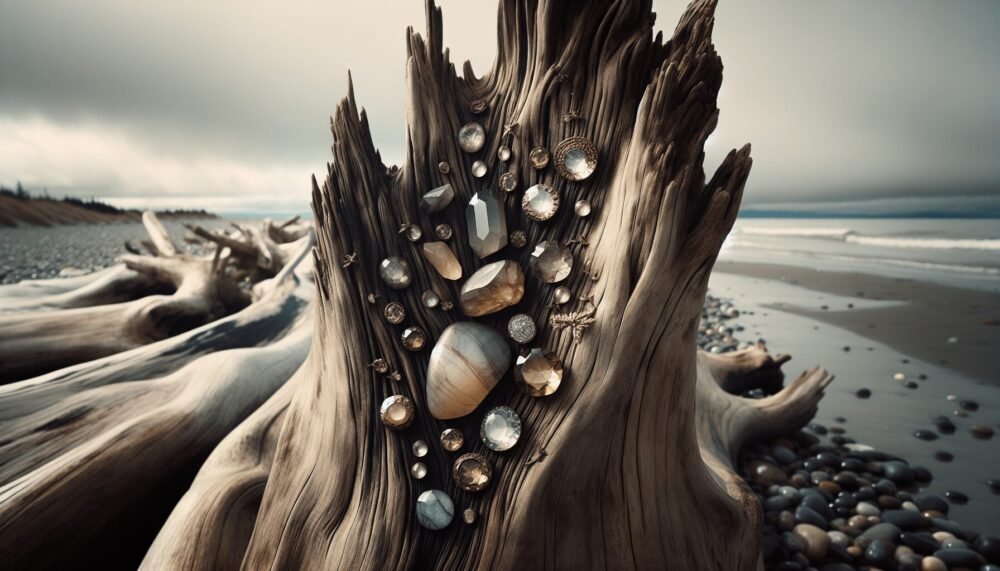
Driftwood And Gemstones” is an enchanting dive into the world of natural beauty and hidden treasures. In this short but mesmerizing article, you will explore the fascinating journey of driftwood as it dances through the waves, beautifully weathered and uniquely sculpted by nature. Alongside, you will uncover the captivating allure of gemstones, each with its own story and radiance. Together, these two elements form a harmonious blend, contrasting and complementing one another in the most extraordinary ways. Whether you’re a nature enthusiast or a lover of precious stones, this read promises to whisk you away on an inspiring adventure, showcasing the raw elegance of driftwood and the shimmering fascination of gemstones. Have you ever been captivated by the natural beauty of driftwood, or mesmerized by the sparkle of gemstones? If so, you’re not alone! Many people are drawn to the organic allure of these earthly treasures. Today, we’ll dive deep into the fascinating world of driftwood and gemstones, discovering how these two seemingly different natural wonders can come together to create breathtaking art and décor.

What is Driftwood?

Driftwood is wood that has been washed onto the shore of a sea, river, or lake by the action of winds, tides, or waves. The journey that driftwood undergoes before reaching the shore can be an incredible story of resilience and change.

Formation of Driftwood

Driftwood starts its life as a tree, just like any other piece of wood. The primary difference is the journey it takes to become driftwood. The following steps illustrate this journey:

How Driftwood Forms

StageDescription
1. Tree FallsA tree falls into a body of water. This can happen due to natural erosion, storms, or human activities.
2. Water TransportThe wood is carried away by the water, traveling sometimes thousands of miles on ocean currents.
3. WeatheringOver time, the wood is weathered by water, wind, and sand. It becomes smooth and light, often losing its bark and becoming bleached by the sun.
4. Shoreline ArrivalFinally, the driftwood is deposited on shores, where it can be collected and admired.

Uses of Driftwood

Driftwood isn’t just a piece of wood that’s washed ashore; it’s a versatile material that has various uses, especially in art and design. Here are some popular uses:

  • Artistic Sculptures: Unique shapes make excellent bases for artistic sculptures.
  • Furniture: Sturdy and often intricate, driftwood can be transformed into one-of-a-kind pieces of furniture.
  • Décor: It can be used in home décor for a rustic, nautical charm.
  • Aquariums: Driftwood is also popular in aquariums because it mimics natural habitats.

What Are Gemstones?

Gemstones are minerals, rocks, or organic materials that have been cut and polished and are usually used to make jewelry or other adornments. These stones are admired for their beauty and rarity.

Types of Gemstones

There are two primary types of gemstones: precious and semi-precious. The table below breaks down the types:

TypeExamplesDescription
PreciousDiamond, Ruby, Sapphire, EmeraldThese are rare and highly valuable because of their beauty, durability, and rarity.
Semi-preciousAmethyst, Peridot, TopazThese are more readily available than precious gemstones but are still beautiful and valuable.

How Gemstones Are Formed

Gemstones are formed in a variety of ways, depending on the type of gemstone and the minerals that compose them. Here are a few common methods:

  • Metamorphism: When minerals are subjected to high pressure and temperature, they transform into new minerals.
  • Crystallization: As magma cools, minerals crystallize to form gemstones.
  • Organic Formation: Some gemstones like pearls are formed by living organisms.

Uses of Gemstones

Gemstones have a multitude of uses beyond their beauty:

  • Jewelry: The most common use, gems are set into rings, necklaces, earrings, and more.
  • Healing: Believed by some to have metaphysical properties that can heal and provide energy.
  • Collecting: Some people collect gemstones as a hobby, appreciating their beauty and rarity.
  • Decorative Arts: Used in mosaics, carvings, and other art forms.

Driftwood And Gemstones

The Unique Combination: Driftwood and Gemstones

Combining driftwood and gemstones might seem unusual at first, but when done right, it creates stunning pieces of art. The rustic, weathered look of driftwood perfectly complements the polished shine of gemstones, creating a fascinating juxtaposition.

Driftwood and Gemstone Art

Artisans around the world are now exploring the endless possibilities of combining driftwood and gemstones. These artworks can include:

  • Wall Hangings: Driftwood serves as a frame or base, with gemstones set into the wood.
  • Sculptures: Artists craft intricate designs incorporating both materials.
  • Jewelry: Combining raw driftwood pieces with polished gemstones to make unique wearable art.

DIY Projects

If you’re feeling creative, you might want to try some DIY projects combining driftwood and gemstones. Here are a few ideas to get you started:

  • Driftwood Gemstone Mobile: Suspend pieces of driftwood and gemstone from a central wooden piece.
  • Gemstone Inlay Driftwood Candle Holder: Carve a space in a piece of driftwood to place a candle and surround it with gemstones.
  • Driftwood and Gemstone Mirror Frame: Adorn a plain mirror with driftwood pieces embellished with gemstones.

Collecting Driftwood and Gemstones

Before you start your artistic endeavors, you’ll want to collect some beautiful driftwood and gemstones.

Where to Find Driftwood

Depending on your location, finding driftwood can be as easy as visiting a nearby beach, river, or lake. Here are a few tips:

  • Locations: Coastal areas, lakesides, and riverbanks.
  • Times: After storms or high tides, more driftwood is typically washed ashore.
  • Ethical Collection: Be mindful of local laws and ecological impacts. Collect responsibly.

Where to Find Gemstones

Gemstones can be procured from various sources including:

  • Gemstone Mines: Some mines allow you to dig for your own gemstones for a fee.
  • Online Retailers: Numerous online shops specialize in gemstones.
  • Gem Shows: Exhibitions where vendors showcase and sell gemstones.

Driftwood And Gemstones

Caring for Your Driftwood and Gemstones

Proper care ensures that your driftwood and gemstones will last a long time.

Cleaning and Preserving Driftwood

Before using driftwood in your projects, it’s important to clean and preserve it. Here’s a simple guide:

  1. Rinse: Use freshwater to rinse away salt and debris.
  2. Scrub: Use a soft brush to clean the surface.
  3. Soak: Soak the driftwood in a bleach solution (1 part bleach to 9 parts water) for a few days.
  4. Dry: Let the driftwood air dry completely in the sun.

Cleaning and Caring for Gemstones

Gemstones should also be cleaned and cared for to maintain their sparkle:

  • Use Mild Soap: Clean with mild soap and water; avoid harsh chemicals.
  • Soft Cloth: Use a soft cloth to wipe gemstones.
  • Avoid Abrasion: Keep gemstones away from abrasive materials to prevent scratches.

Driftwood and Gemstones in Home Décor

Introducing driftwood and gemstones into your home décor can add an element of natural beauty and sophistication. Below are some ideas to inspire you.

Driftwood and Gemstone Sculptures

Adding sculptures made of driftwood and gemstones can make a sophisticated statement in any room. These pieces can range from elegant to whimsical, depending on your style.

Driftwood Furniture with Gemstone Inlays

One of the most striking ways to use driftwood and gemstones together is in furniture. Driftwood furniture is already unique; adding gemstones makes it even more exclusive.

Driftwood and Gemstone Lighting

Natural materials add a warm glow to living spaces. Consider creating or purchasing lighting elements that combine driftwood and gemstones, such as:

  • Lamps: Use driftwood as the base and adorn it with gemstones.
  • Chandeliers: Hang gemstones and driftwood from a central fixture.

Conclusion

There you have it—a detailed look at the captivating worlds of driftwood and gemstones, and how they can be combined to create stunning art and décor. Whether you are an artist, a decorator, or simply someone who appreciates beauty, driftwood and gemstones offer endless possibilities for creativity and expression. So why not get started on your own driftwood and gemstone project today? Happy creating!

Filed Under: Driftwood Ideas Tagged With: craft, DIY, Driftwood, Gemstones, home decor

Driftwood Frame

July 24, 2024 by admin

Welcome to the world of rustic charm with your very own driftwood frame! Crafted from beautifully weathered pieces of driftwood, this unique and eco-friendly decor piece effortlessly brings the calming essence of the beach right into your home. Displaying your cherished memories in a driftwood frame adds a touch of natural beauty and coastal flair to any room. Whether you’re framing family photos, stunning landscapes, or even your own artwork, this driftwood frame promises to be a delightful addition to your space, radiating warmth and inviting vibes. Have you ever looked at a piece of driftwood on the beach and wondered how you could turn it into something beautiful for your home? If so, you’re not alone. Many people are drawn to the unique textures and shapes of driftwood, which can be transformed into stunning works of art. In this article, we’ll dive into the world of driftwood frames, discussing their appeal, how you can make one yourself, and ways to incorporate them into your home décor.

Driftwood Frame

What is Driftwood?

Driftwood is wood that has been washed onto the shore by the action of waves, tides, or wind. The journey through various natural elements gives driftwood its unique, weathered appearance, marked by smooth surfaces, unusual shapes, and rich textures. This natural process often strips the wood of bark and finishes, leaving behind a raw, organic look that is incredibly appealing for home décor.

Types of Driftwood

While all driftwood shares some common characteristics, there are several types that you might encounter:

TypeCharacteristics
Softwood DriftwoodGenerally lighter and easier to shape.
Hardwood DriftwoodHeavier, more durable, and robust.
Root DriftwoodOften intricate, with tangled roots and tendrils.
Branch DriftwoodStraight or slightly crooked, suitable for frames.

Knowing the type of driftwood you’re working with can help you choose the best pieces for your project.

Why Driftwood Frames?

So, why are driftwood frames so popular? The answer lies in their rustic charm and the story they tell. Driftwood frames bring a touch of nature into your home and can complement various styles—from coastal to rustic chic. Plus, they are an eco-friendly way to repurpose natural materials that would otherwise go to waste.

Gathering Driftwood

Before you can start crafting your driftwood frame, you need to gather your materials. This is often one of the most enjoyable parts of the project, as it involves spending time outdoors and exploring beautiful places.

Best Locations

Driftwood can be found in various locations, but certain spots are more likely to yield high-quality pieces. Here are some suggestions:

  • Beaches: Look for driftwood along the shorelines, especially after a storm.
  • Riverbanks: River currents can carry wood downstream, depositing it along the banks.
  • Lakeshores: Similar to rivers, lakes can also be great places to find driftwood.

Legal Considerations

Before you start collecting, it’s important to know the rules and regulations regarding the removal of driftwood in your area. Some places have restrictions in place to protect the environment, so always check with local authorities.

Tips for Collecting

Here are some tips to ensure you gather the best driftwood:

  1. Look for Quality Wood: Choose pieces that are sturdy and free of rot.
  2. Select Various Sizes: Having a range of sizes can help you create a more interesting and dynamic frame.
  3. Consider the Shape: Think about how the shape of each piece will fit together in your frame.

Preparing Driftwood

Once you’ve gathered your driftwood, it’s time to prepare it for crafting. This step is crucial to ensure your frame is clean, safe, and durable.

Cleaning

Driftwood often carries salt, sand, and small organisms, so it needs a thorough cleaning. Here’s how to do it:

  1. Rinse: Use a hose to rinse off sand and debris.
  2. Scrub: Use a brush and mild detergent to scrub the wood.
  3. Soak: Soak the wood in a mixture of water and bleach (1:9 ratio) for 24 hours to kill any remaining organisms.

Drying

After cleaning, the wood needs to dry completely:

  1. Rinse Again: Rinse the wood thoroughly to remove any bleach residue.
  2. Air Dry: Let the wood dry in a well-ventilated area. This can take several days depending on the humidity and temperature.

Sanding

Sanding helps to smooth out rough edges and prepare the wood for assembly:

  1. Coarse Sandpaper: Start with coarse sandpaper to remove larger imperfections.
  2. Fine Sandpaper: Finish with fine sandpaper to achieve a smooth surface.

Crafting Your Driftwood Frame

Now that your driftwood is prepared, you’re ready to start crafting your frame. This process can be as simple or as complex as you like, depending on your skill level and the tools you have available.

Tools and Materials

Before you begin, make sure you have the following:

  • Driftwood Pieces: Various sizes and shapes.
  • Saw: For cutting the wood to size.
  • Sandpaper: For smoothing edges.
  • Wood Glue: For assembling the frame.
  • Clamps: To hold pieces together while the glue dries.
  • Backing Board: For the back of the frame.
  • Glass Insert: If you want to protect the artwork or photo.
  • Hanging Hardware: To mount your frame on the wall.

Step-by-Step Instructions

  1. Design Your Frame: Lay out the pieces in the shape you want for your frame. Take time to arrange them in a way that looks balanced and aesthetically pleasing.
  2. Cut to Size: Use a saw to cut the pieces to the desired lengths. Make sure the cuts are straight.
  3. Sand the Ends: Sand the ends of the cut pieces to ensure they fit together smoothly.
  4. Glue and Clamp: Apply wood glue to the ends and clamp the pieces together. Let them dry for at least 24 hours.
  5. Attach Backing Board: Once the frame is dry, attach the backing board using glue or small nails.
  6. Insert Glass and Artwork: If you’re using a glass insert, place it in the frame, followed by your artwork or photo.
  7. Add Hanging Hardware: Attach the hanging hardware to the back of the frame.

Driftwood Frame

Decorating with Driftwood Frames

A driftwood frame can be a stunning addition to various rooms in your home. Here are some ideas on how to incorporate them into your décor:

Living Room

Place a large driftwood frame above the fireplace or sofa. Choose a piece of artwork or a family photo that complements the rustic theme.

Bedroom

Use smaller driftwood frames on your bedside tables or as part of a gallery wall. They add a touch of warmth and coziness to the room.

Bathroom

Driftwood frames can bring a spa-like feel to your bathroom. Use them for mirrors or as a unique way to display shells and other beachcombing finds.

Entryway

Create a memorable first impression by hanging a driftwood frame in your entryway. It sets a welcoming tone and introduces guests to your style.

Caring for Your Driftwood Frame

To keep your driftwood frame looking its best, a little care goes a long way.

Regular Dusting

Dust your frame regularly with a soft cloth to keep it looking clean.

Avoid Direct Sunlight

Prolonged exposure to direct sunlight can cause driftwood to fade. Try to place your frame in a spot with indirect light.

Sealing

If you want to protect your frame from the elements, consider applying a clear wood sealant. This step can help preserve the color and texture of the wood.

Benefits of Using Driftwood Frames

Choosing driftwood frames offers several benefits beyond their aesthetic appeal:

Eco-Friendly

Using driftwood is a great way to recycle natural materials and reduce waste. It’s a sustainable choice for environmentally-conscious decorators.

Unique Design

No two pieces of driftwood are the same, which means every frame is a one-of-a-kind work of art.

Versatile

Driftwood frames can complement a variety of décor styles, from beachy and coastal to rustic and farmhouse.

Cost-Effective

If you live near a coastline or river, collecting driftwood can be a free or low-cost way to create beautiful home décor.

Conclusion

Creating a driftwood frame is a rewarding DIY project that allows you to bring a piece of the natural world into your home. Whether you’re an experienced crafter or a beginner, this project offers the opportunity to express your creativity while making a unique and eco-friendly decoration. By following the steps outlined in this article, you’ll be able to craft a driftwood frame that truly reflects your style and adds a touch of rustic charm to any space. So, the next time you find yourself wandering along a beach or riverbank, keep an eye out for driftwood—you never know what kind of beautiful creation it might inspire.

Filed Under: Driftwood Ideas Tagged With: craft, DIY, Driftwood, Frame, Rustic

Driftwood Centerpiece

July 19, 2024 by admin

Creating your own driftwood centerpiece is a delightful way to bring the rustic charm of nature into your home. You’ll discover how to select the perfect pieces of driftwood, prepare them, and assemble a stunning centerpiece that will leave your guests in awe. Get ready to transform a simple gathering of driftwood into a captivating focal point for your table that adds a touch of the coastal outdoors to your decor. Have you ever looked at a piece of driftwood and imagined the decorative possibilities it holds? Finding beauty in nature is an art, and transforming that beauty into a functional piece of decor is a rewarding journey. In this article, you’ll discover how to create a stunning driftwood centerpiece that can become the talking point of any room.

Driftwood Centerpiece

What is Driftwood?

Driftwood refers to wood that has been washed onto the shore of a sea, river, or lake by the winds, tides, or waves. It can be anything from small branches to large tree trunks. The natural weathering process gives it a unique, rustic appearance and an array of colors, which makes it a favorite material for home décor projects.

Why Use Driftwood for a Centerpiece?

Natural Beauty

One of the main reasons to use driftwood is its inherent beauty. The unique textures and shapes add a touch of nature to your living space. No two pieces are alike, making your centerpiece one-of-a-kind.

Eco-Friendly

Using driftwood is a great way to incorporate eco-friendly practices into your home. Instead of buying manufactured materials, you are re-purposing something from nature, reducing your carbon footprint.

Versatility

Driftwood is extremely versatile. It can be painted, stained, adorned with additional elements, or left in its natural state. Whatever your style, driftwood can be integrated seamlessly into your decor.

Gathering Your Materials

Before you get started, gather all the materials you’ll need. This way, you won’t have to interrupt your creative flow to hunt for supplies.

Essential Materials

Here’s a handy table of the essentials you’ll need for your driftwood centerpiece:

MaterialPurpose
DriftwoodThe core of your centerpiece.
SandpaperTo smooth the wood.
Hot Glue GunFor attaching elements together.
Wood Finish (optional)To treat and enhance the wood’s appearance.
Decorative ElementsItems such as shells, stones, and candles to enhance your centerpiece.
Protective GlovesTo protect your hands while handling the wood and using tools.

Optional Materials

Depending on your design, you may need some optional materials:

  • Paint or stain for color.
  • Varnish for a glossy finish.
  • Moss or small plants for added decoration.
  • Twine or rope for a rustic touch.

Preparing the Driftwood

Preparation is key to making a beautiful centerpiece. Here’s how to prepare your driftwood for the project:

Cleaning the Wood

Driftwood found on the beach can be quite dirty. Start by rinsing it thoroughly with fresh water. Scrub off any sand, algae, or remaining debris. You might also consider soaking the driftwood in a bleach solution (1 part bleach to 9 parts water) for a few hours to remove any hidden bacteria or insects.

Drying Process

Once clean, let the driftwood dry completely. This can take anywhere from a few days to a couple of weeks. Place it in a dry, well-ventilated area. Be patient; this step is crucial in preventing any potential mold or rot.

Sanding the Driftwood

Use sandpaper to smooth out any rough spots. This will not only make it safer to handle but also enhance its natural beauty. Start with a medium-grit sandpaper and finish with a fine-grit for the best results.

Driftwood Centerpiece

Designing Your Centerpiece

Choosing a Theme

Decide on the overall theme for your driftwood centerpiece. Is it coastal, rustic, minimalistic, or bohemian? Your theme will guide the decorative elements you choose and how you arrange them.

Planning Your Layout

Lay out all your materials and start planning the arrangement. Play around with different configurations until you find one that looks cohesive and balanced.

Assembling Your Driftwood Centerpiece

Building the Base

Choose one or more large, flat pieces of driftwood for the base. This foundation should be sturdy enough to support additional elements. Arrange smaller pieces around it, using a hot glue gun to secure them.

Adding Decorative Elements

Once the base is secure and stable, it’s time to add your decorative elements. Here are some ideas:

Candles

Candles are a popular choice for driftwood centerpieces. They add a warm, inviting light that complements the natural aesthetics of the wood. Use hot glue or small candle holders to keep them in place.

Shells and Stones

For a coastal theme, integrate shells and stones. Glue them in clusters or scatter them sporadically for a more natural look.

Mini Plants or Moss

Living elements like small plants or moss can add a touch of greenery and life to your centerpiece. Use small amounts of soil or just hot glue for non-rooted plants.

Final Touches

Look over your masterpiece and add any final touches. Maybe some twine around a piece of wood or a touch of paint for added color. Be sure not to overdo it; sometimes less is more.

Placing Your Centerpiece

Once your driftwood centerpiece is complete, finding the perfect spot for it is key. Here are some placement ideas:

Dining Table

A driftwood centerpiece can be a showstopper on your dining table. It adds a touch of tranquility and serves as a great conversation starter.

Coffee Table

A smaller driftwood centerpiece is perfect for a coffee table. It’s an eye-catching addition that can help create a cozy atmosphere.

Mantelpiece

For a more traditional look, place your driftwood centerpiece on the mantel. It will draw the eye upward and can anchor the room’s décor.

Outdoor Spaces

Driftwood fits seamlessly into outdoor settings as well. Use it as a centerpiece for patio or garden tables to bring a bit of the indoors out.

Maintaining Your Driftwood Centerpiece

Like any piece of decor, your driftwood centerpiece will need some maintenance to keep it looking its best.

Dusting and Cleaning

Regular dusting with a soft cloth will keep your centerpiece clean. For a deeper clean, use a damp cloth and avoid soaking the wood.

Replacing Elements

Over time, some decorative elements may need replacement or refreshment, particularly if your centerpiece includes living plants or candles.

Preventing Damage

Keep your centerpiece out of direct sunlight to prevent the wood from drying out and cracking. Also, avoid placing it in overly humid environments, as this can encourage mold growth.

Customization Ideas for Your Driftwood Centerpiece

Adding Personal Touches

Incorporate personal items like small photo frames or souvenirs to make your centerpiece uniquely yours.

Seasonal Changes

Update your driftwood centerpiece with the seasons. Add autumn leaves and mini pumpkins for fall, holly and pinecones for winter, and flowers for spring.

Light It Up

Fairy lights can add a whimsical touch to your centerpiece. Weave them through the driftwood and turn them on for a soft, magical glow.

Conclusion

Creating a driftwood centerpiece is a fulfilling and creative project that brings the beauty of nature into your home. With a bit of preparation and a dash of creativity, you’ll craft a unique piece that reflects your personal style and adds an earthy, artistic touch to any space. So why not give it a try? Your perfect centerpiece is waiting to be created.

Filed Under: Driftwood Ideas Tagged With: Centerpiece, craft, DIY, Driftwood, Home Design

Diy Driftwood Jewelry Stand

July 3, 2024 by admin

You’re about to discover a delightful project that effortlessly combines functionality with natural beauty. In this guide to creating your very own DIY Driftwood Jewelry Stand, you’ll learn how to transform a simple piece of driftwood into a charming and unique jewelry display. Perfect for showcasing your favorite pieces, this stand adds a touch of coastal elegance to your space while keeping your accessories neatly organized. Dive into the steps and enjoy the satisfaction of crafting a stand that is as practical as it is beautiful. Have you ever stumbled upon a beautiful piece of driftwood during a beach stroll and wondered what you could do with it? If so, let me introduce you to the perfect project: a DIY Driftwood Jewelry Stand! This easy and creative endeavor not only puts those lovely pieces of naturally sculpted wood to good use but also adds a unique, rustic charm to your home decor. Plus, it provides a practical solution for organizing your jewelry.

In this guide, you’ll learn everything you need to know to create your very own driftwood jewelry stand. Let’s get started!

Why Choose Driftwood for a Jewelry Stand?

Driftwood is a versatile and aesthetically pleasing material that can add a touch of nature and personality to any space. It’s sturdy enough to support hanging items, yet light and whimsical in appearance. Each piece of driftwood is unique, so your jewelry stand will truly be one-of-a-kind. Moreover, collecting driftwood can be an enjoyable outdoor activity, allowing you to reconnect with nature.

Benefits of Using Driftwood

Using driftwood for your jewelry stand offers several benefits:

  • Eco-Friendly: Repurposing driftwood is a form of recycling and reduces waste.
  • Cost-Effective: Driftwood can often be collected for free, making it an economical choice.
  • Aesthetic Appeal: The natural look of driftwood adds a rustic and organic charm to your decor.
  • Customizable: Each piece of driftwood is unique, giving you the opportunity to create a stand that reflects your personal style.

Materials You’ll Need

Once you’ve secured your piece of driftwood, the next step is gathering the necessary materials. Here’s a handy list to get you started:

MaterialsPurpose
DriftwoodMain structure of the jewelry stand
SandpaperFor smoothing out rough edges on the driftwood
Small hooks or nailsUsed to hang jewelry
Wooden base (optional)Provides extra stability for your stand (if necessary)
Screws and screwdriverFor attaching the driftwood to its base if using one
Paint or wood stain (optional)For adding color or protecting the wood
Small saw or rotary tool (optional)For modifying the driftwood
Measuring tape or rulerTo ensure proper placement of hooks/nails
Pencil or markerFor marking placements
Sealant (optional)To protect the wood from further wear and tear

Preparing the Driftwood

Preparation is key to making sure your driftwood is clean, smooth, and ready for use.

  1. Cleaning: Rinse the driftwood under fresh water to remove any dirt, salt, or debris. If it’s particularly dirty, you can use a soft brush and mild soap.
  2. Drying: Allow the driftwood to dry completely. This could take a few days, so be patient.
  3. Sanding: Use sandpaper to smooth out rough or sharp edges. Be careful not to over-sand, as you want to preserve the natural look and feel of the wood.
  4. Cutting: If necessary, use a small saw or rotary tool to trim the driftwood to your desired shape and size.

Diy Driftwood Jewelry Stand

Designing Your Stand

Now, for the fun part – designing your stand! Think about the type and amount of jewelry you plan to display. Will you need more hooks for necklaces and bracelets, or a flat area to hold rings and earrings? Visualize your ideal stand and sketch a rough design if that helps.

Placement of Hooks or Nails

Careful planning and placement of hooks or nails will ensure your jewelry stand is both functional and visually appealing.

  1. Marking: Use a pencil or marker to mark where each hook or nail will go. Even spacing is key to avoid a cluttered look.
  2. Measuring: Use a measuring tape or ruler to maintain symmetry and balance. This step is especially important if you’re a perfectionist!
  3. Installing: Screw in the hooks or hammer the nails into the marked spots. Make sure they are secure enough to hold the weight of your jewelry.

Optional Base

If your piece of driftwood is not stable enough to stand on its own, consider adding a base.

  1. Choosing a Base: Select a flat, sturdy piece of wood that complements the driftwood.
  2. Attaching the Driftwood: Use screws and a screwdriver to attach the driftwood to the base. Make sure the attachment is strong and stable.
  3. Finishing Touches: Sand and paint or stain the base to match or complement the driftwood.

Adding Color and Protection

While natural driftwood has its own charm, you might want to add some color or a protective finish.

  1. Painting: Choose a paint color that matches your decor. Use a brush to apply a thin, even coat. Allow it to dry, and add additional coats if necessary.
  2. Staining: If you prefer a more natural look, consider using a wood stain. Apply using a cloth or brush, following the direction of the wood grain.
  3. Sealing: To protect your jewelry stand from wear and tear, consider applying a wood sealant. This will also enhance the natural beauty of the driftwood.

Assembly and Final Adjustments

With all parts prepared, it’s time to assemble your jewelry stand. Double-check all connections and make sure everything is secure. Place it in the desired location and make any final adjustments.

Testing

Test the stability and functionality of your stand by hanging a few pieces of jewelry. Make any necessary tweaks to ensure it meets your needs.

Displaying Jewelry

Arrange your jewelry on the stand in a way that showcases your favorite pieces. This is your chance to get creative and have fun with your new stand!

Diy Driftwood Jewelry Stand

Maintenance Tips

Although driftwood is relatively low-maintenance, a few simple steps can keep your stand looking its best:

  1. Dust Regularly: Use a soft cloth to dust the driftwood and jewelry.
  2. Avoid Moisture: Keep the stand in a dry area to prevent any potential warping or mold growth.
  3. Re-seal if Needed: If you notice the wood looking dull or worn, consider applying another coat of sealant.

Additional Ideas for Customization

Once you’ve created your driftwood jewelry stand, you might want to explore more ways to customize it. Here are some ideas:

  • Add Beads or Shells: Glue shells, beads, or other small decorations to the driftwood for a beachy vibe.
  • Include a Mirror: Attach a small mirror to the base or to a branch of the driftwood for added functionality.
  • Incorporate Lighting: Wrap a string of fairy lights around the driftwood for a whimsical look that highlights your jewelry.

Troubleshooting Common Issues

Creating something by hand often comes with its own set of challenges. Here are a few common issues you might encounter and how to solve them:

IssueSolution
Driftwood is unstableMake sure the base is flat and secure, or use a heavier base
Hooks or nails are looseEnsure they are tightened properly, or use a stronger adhesive
Uneven placement of hooksMeasure again and adjust as needed
Paint or stain not adheringSand the surface lightly and reapply

Inspiration and Variations

The classic driftwood jewelry stand is just one way to use driftwood creatively. Here are some variations and inspiration:

Driftwood Wall Hanger

Instead of a stand, create a driftwood wall hanger.

  1. Flat Driftwood Piece: Choose a relatively flat piece of driftwood.
  2. Wall Mounting: Attach hooks to the driftwood and mount it on the wall.
  3. Decorative Hooks: Use decorative hooks that match your room’s theme.

Driftwood Earring Holder

This version focuses exclusively on earrings.

  1. Drill Small Holes: Drill small holes in the driftwood to insert earring posts.
  2. Hanging Display: String a wire or thin rope through the driftwood to hang it.

Combination Stand

For those with lots of jewelry, combine features of different designs.

  1. Multiple Branches: Use a piece of driftwood with several branches.
  2. Mixed Hooks and Holes: Incorporate both hooks and drilled holes.
  3. Base and Wall Mount: Use both a base for stability and wall mounting for added strength.

Conclusion

Creating a DIY Driftwood Jewelry Stand is an enjoyable and rewarding project that combines creativity, practicality, and a touch of nature. It’s a fantastic way to organize your jewelry while showcasing the unique beauty of driftwood. From choosing the perfect piece of driftwood and preparing it properly to adding custom touches and ensuring its stability, every step offers a chance to infuse your personal style into the project.

Now that you have all the knowledge you need, it’s time to roll up your sleeves and start crafting! Whether it’s for your own use or as a thoughtful, handmade gift, a driftwood jewelry stand is sure to be a cherished piece.

Happy crafting!

Filed Under: Driftwood Ideas Tagged With: craft, Driftwood, Handmade, home decor, Jewelry Stand

Jewelry On Driftwood

July 2, 2024 by admin

Jewelry On Driftwood” is a fascinating concept that merges the natural beauty of weathered wood with the elegance of finely crafted jewelry pieces. Imagine walking along a serene beach, discovering unique pieces of driftwood adorned with glimmering gems and metals. This combination creates stunning art that not only celebrates nature but also showcases the artistic talent of artisans who breathe life into these unique treasures. Whether you display them in your home or wear them as a statement piece, jewelry on driftwood offers an enchanting blend of rustic charm and sophisticated allure. Have you ever wondered how to combine the natural beauty of driftwood with the sparkle of jewelry? If you’re a lover of nature and fashion, we’ve got a creative idea that you’ll absolutely adore! Combining jewelry with driftwood is not only a unique way to display your treasures, but it’s also a stunning way to bring a touch of the sea into your home. In this article, we will dive deep into the art of “Jewelry On Driftwood.”

Jewelry On Driftwood

The Allure of Driftwood

Driftwood has a unique charm that’s hard to ignore. Smooth, weathered, and each piece telling its own story of a journey across water, driftwood can add a rustic, earthy element to any space.

What is Driftwood?

Driftwood is wood that has been washed onto a shore or beach by the action of winds, tides, or waves. This process imparts a smooth, weather-beaten look to the wood, making each piece a unique artifact.

Where to Find Driftwood

Finding driftwood can be as simple as walking along a beach, riverbank, or lakeshore. Look for pieces that stand out in size, shape, and texture.

LocationDriftwood Type
Seaside BeachesSalty and more weather-worn
RiverbanksSmoother and less weathered
LakeshoresOften larger, less salty

Preparing Driftwood for Use

Before using driftwood for any craft projects, it’s essential to clean and prepare it. This ensures it’s free from mold, insects, and other unwanted elements.

  1. Cleaning: Soak the driftwood in a mixture of boiling water and bleach for a few hours.
  2. Drying: Let it air-dry completely, preferably under the sun.
  3. Finishing: Consider sanding rough edges and applying a coat of varnish or sealant to preserve its beauty.

The Charm of Jewelry

Jewelry has been a form of personal adornment for centuries, transcending cultures and ages. When you combine the organic allure of driftwood with the sparkle of jewelry, you create something truly special.

Why Jewelry and Driftwood Go Together

Driftwood serves as a stunning, natural backdrop for jewelry, accentuating its beauty. The rustic texture of the wood contrasts beautifully with the shimmer and sophistication of jewelry pieces.

Types of Jewelry Suitable for Driftwood Display

Certain types of jewelry are particularly well-suited for this kind of display. Here’s a look at some of the choices:

Jewelry TypeIdeal Driftwood Setup
NecklacesLong, horizontal driftwood pieces
BraceletsVertical or smaller pieces
EarringsSlim, flat pieces with holes
RingsSmall, compact driftwood pieces

DIY Jewelry On Driftwood Projects

Getting crafty with jewelry and driftwood doesn’t have to be difficult. Here are some fun, easy projects to get you started.

Necklace Hanger

A necklace hanger using driftwood can add both functionality and aesthetic appeal to your bedroom or bathroom.

Materials Needed:

  • A piece of driftwood (preferably long and straight)
  • Eye screws
  • Fishing line or wire
  • Hooks

Steps:

  1. Select Your Driftwood: Choose a piece that’s sturdy and visually appealing.
  2. Attach Hooks: Screw in hooks at regular intervals along the driftwood.
  3. Add Eye Screws: Attach eye screws at both ends of the driftwood for hanging.
  4. Hanging: Use fishing line or wire to hang the driftwood on your wall.

Bracelet Stand

Creating a bracelet stand is simple and a great way to keep your bangles and bracelets untangled.

Materials Needed:

  • A vertical piece of driftwood
  • A small base (wooden or stone)
  • Strong adhesive or screws

Steps:

  1. Choose Your Driftwood: Select a piece that stands upright.
  2. Base Preparation: Prepare a small wooden or stone base.
  3. Attach Driftwood: Use strong adhesive or screws to attach the driftwood to the base securely.
  4. Decorate: Add your bracelets for a stunning display.

Earring Holder

Turn a piece of driftwood into a rustic yet elegant earring holder.

Materials Needed:

  • A flat piece of driftwood with some holes or perforations
  • Fishing line or thin wire

Steps:

  1. Select Your Driftwood: Choose a piece with natural holes or create some using a small drill.
  2. Attach Hanging Line: Attach a piece of fishing line or wire to both ends of the driftwood.
  3. Insert Earrings: Place your earrings through the holes for an organized and beautiful showcase.

Tips for Success

Combining jewelry and driftwood can be a fun, creative project. Here are some additional tips to ensure success:

Pick the Right Driftwood

Not all driftwood is created equal. Pick pieces that are stable and visually appealing.

Coordinate Colors and Styles

Whether you’re grouping necklaces, bracelets, or earrings, try to coordinate colors and styles for a cohesive look.

Ensure Stability

Ensure your driftwood display is securely fastened, whether it’s hanging on a wall or standing on a surface.

Get Creative

Let your creativity flow. Mix and match different pieces of jewelry with various types of driftwood to create a look that’s uniquely yours.

Jewelry On Driftwood

Display Ideas

Now that you’ve created your driftwood jewelry hangers, stands, and holders, here are a few ideas for displaying them in your home.

Bedroom Decor

Add a coastal vibe to your bedroom by hanging your driftwood necklace hanger above your vanity.

Bathroom Accent

Utilize a small piece of driftwood as an eye-catching earring holder on your bathroom counter.

Living Room Showcase

A sturdy driftwood bracelet stand on a coffee table can give your living room a touch of elegance and charm.

Maintenance and Care

Once you’ve created your driftwood and jewelry displays, a bit of maintenance can help keep them looking their best.

Regular Dusting

Driftwood can accumulate dust over time. A quick dusting with a soft cloth can help keep your display clean.

Jewelry Care

Ensure your jewelry remains in good condition by following general care tips, like keeping pieces away from moisture and sunlight.

Maintenance TaskFrequency
Dusting DriftwoodWeekly
Checking Hooks/ScrewsMonthly
Cleaning JewelryAs needed
Inspecting for DamageSemi-annually

Preserving Memories

One of the most beautiful aspects of combining jewelry with driftwood is the memories each piece holds. Whether it’s driftwood you collected on a memorable trip or a piece of jewelry handed down through generations, these displays can serve as both functional decor and cherished keepsakes.

Personal Touch

Adding a personal touch, like writing the location where the driftwood was found or tagging the jewelry pieces, can create a more meaningful display.

Family Heirlooms

Using driftwood to display family heirloom jewelry adds a rustic, heartfelt touch and makes these treasured pieces a focal point in your home.

Conclusion

Combining the natural beauty of driftwood with the sophisticated sparkle of jewelry offers a unique and alluring way to display your treasures. From necklace hangers to bracelet stands and earring holders, the possibilities are as endless as your creativity. Take the time to explore different techniques, play with styles, and most importantly, have fun with it! By doing so, you can turn everyday items into extraordinary works of art that you’ll cherish for years to come.

So why not gather your favorite pieces of driftwood and jewelry, roll up your sleeves, and start crafting. You’ll not only create something beautiful but also bring a piece of the natural world into your home. Happy crafting!

Filed Under: Driftwood Ideas Tagged With: craft, Design, Driftwood, Handmade, Jewelry

  • « Previous Page
  • Page 1
  • Page 2
  • Page 3
  • Page 4
  • Page 5
  • Next Page »

Primary Sidebar

Driftwood4us.com, is a participant in the Amazon Services LLC Associates Program, an affiliate advertising program designed to provide a means for sites to earn advertising fees by advertising and linking to amazon.com.