• Skip to main content
  • Skip to primary sidebar
  • Terms and Conditions
  • Privacy Policy
  • Contact

Driftwood 4 Us

Just About Driftwood

craft

Driftwood Sailboat Wall Art

June 27, 2024 by admin

Imagine transforming your living space with a touch of coastal charm, breathing life into your home with a piece of nature. Driftwood Sailboat Wall Art brings the serene beauty of the ocean right to your walls, capturing the essence of a seaside escape. Each piece is meticulously crafted, featuring rustic driftwood collected from the shore, artistically assembled into a captivating sailboat design. This unique art effortlessly blends with your décor, adding a whimsical yet sophisticated flair that will have guests admiring your impeccable taste. Indulge in the tranquil vibes and let your walls tell a story of the sea. Ever look at a blank wall and wonder how you could transform it into a stunning focal point? Perhaps you’ve considered painting it a different color or hanging some photographs, but have you ever thought about driftwood sailboat wall art? In this guide, you’ll discover the charm and uniqueness of driftwood sailboat wall art, from why it’s a great choice to how you can make your own. Let’s set sail on this creative journey!

Driftwood Sailboat Wall Art

Why Driftwood Sailboat Wall Art?

Natural Aesthetics

One of the biggest draws of driftwood sailboat wall art is its natural beauty. Driftwood, by its very nature, carries a rustic charm that other materials just can’t replicate. Its weathered texture and unique patterns make each piece one-of-a-kind, adding an organic element to your decor.

Eco-Friendly

If you aim to make eco-friendly choices in your home decor, driftwood is a fantastic option. Since driftwood is naturally sourced, it doesn’t contribute to deforestation. Additionally, repurposing driftwood can help in cleaning up shorelines, making it a win-win situation.

Versatility

Driftwood sailboat wall art can fit into a range of interior styles, from coastal themes to minimalist designs. The neutral tones of the wood pair well with almost any color scheme, making it easy to incorporate into your existing home decor.

Choosing the Perfect Driftwood

Types of Driftwood

There are several types of driftwood you can use for your sailboat wall art. Here are some common types:

TypeDescription
SaltwaterTypically smoother due to constant motion in the ocean.
FreshwaterOften has more texture because it doesn’t undergo as much wear from tides.
RiverGenerally lighter in color and may have unique knots and bends.

Size and Shape

When choosing driftwood, size and shape matter a lot. Larger pieces can serve as the hull of your sailboat, while smaller, thinner pieces are perfect for the sails and masts. Ensure that the pieces you pick have interesting textures and are long enough to bring your vision to life.

Preparing the Wood

Once you’ve selected your driftwood, it’s essential to prepare it before crafting. Here’s how you can do it:

  1. Clean the Wood: Use a brush and soapy water to scrub off any dirt or algae.
  2. Dry it Out: Allow the wood to dry completely in the sun.
  3. Sand Rough Edges: Use sandpaper to smooth out any splinters or rough spots.
  4. Seal the Wood: Optionally, you can apply a wood sealant to preserve its texture and color.

Designing Your Driftwood Sailboat Wall Art

Basic Components

To create a driftwood sailboat, you need to gather the following materials:

  • Driftwood (various sizes)
  • Twine or thin rope
  • Glue (wood glue or hot glue works best)
  • Paint (optional)
  • Hooks or mounting hardware

Planning Your Design

It’s always a good idea to sketch your design beforehand. Here’s a simple layout for a sailboat:

  1. Hull: A large, sturdy piece of driftwood.
  2. Mast: A longer, thinner piece.
  3. Sails: Smaller, flat pieces arranged like sails.
  4. Rigging: Twine or thin rope to mimic the boat’s rigging.

Assembling the Sailboat

Once you have your design, follow these easy steps to assemble your driftwood sailboat:

  1. Create the Hull: Place the largest piece of driftwood at the base.
  2. Attach the Mast: Secure a longer piece vertically using glue. Allow it to dry thoroughly.
  3. Add the Sails: Arrange smaller pieces to resemble sails and glue them onto the mast and hull.
  4. Add Rigging: Use twine or thin rope to create the appearance of rigging lines.

Customizing with Paint

If you want to add a splash of color to your driftwood sailboat, consider painting some sections. Soft whites, blues, or even bright colors can make your piece pop while still maintaining its rustic charm.

Hanging Your Sailboat Wall Art

Choosing the Placement

Deciding where to hang your driftwood sailboat wall art is almost as crucial as the art itself. Here are some prime spots:

  • Above the fireplace
  • In the hallway or entryway
  • In the living room behind the sofa
  • In a nautical-themed bathroom

Mounting Tips

To securely mount your driftwood sailboat:

  1. Use Proper Hooks: Heavy-duty hooks or wall anchors ensure that your masterpiece stays put.
  2. Balanced Weight: Make sure the weight of your driftwood is evenly distributed to avoid it tipping to one side.
  3. Secure with Twine: If your piece is large and heavy, consider using twine to attach extra mounting points to evenly distribute the weight.

Driftwood Sailboat Wall Art

Maintenance and Care

Dusting

Driftwood can collect dust over time, just like any other decorative piece. Use a soft brush or a dust cloth to keep your artwork looking pristine.

Avoiding Moisture

Since driftwood is naturally porous, it can absorb moisture, which could potentially damage it. Try to avoid hanging your artwork in overly humid locations. If you’ve used a sealant, this will also help protect against moisture.

Seasonal Updates

Feel free to refresh your driftwood sailboat with the seasons. Add some winter-themed decor during the holidays or summer accents when the weather warms up. This way, your wall art stays dynamic and engaging all year round.

Inspiring Ideas and Variations

Adding Personal Touches

Personalizing your driftwood sailboat can make it even more special. Consider adding:

  • Family Photos: Attach small photos to the sails or hull for a personal touch.
  • Names or Dates: Paint names or special dates onto the driftwood.
  • Decorative Elements: Add seashells, anchors, or other nautical elements to complement your sailboat.

Advanced Designs

If you want to challenge yourself, try more intricate designs. Here are some ideas:

IdeaDescription
Multi-SailboatsCreate a series of smaller sailboats instead of one large piece.
Background ScenePaint a backdrop of the ocean and sky on your wall and mount the sailboat in front of it.
Lighted SailboatIncorporate small LED lights to make your sailboat glow.

FAQs About Driftwood Sailboat Wall Art

Can I Use Any Driftwood?

Essentially, yes, as long as it’s dry and clean. Different types of driftwood will give you different textures and looks, so feel free to experiment.

What Tools Do I Need?

Basic tools like sandpaper, a hot glue gun, and scissors for cutting twine should suffice for most projects.

Is Driftwood Sailboat Wall Art Heavy?

This can vary, but typically it’s not too heavy. Just ensure you use proper mounting hardware to secure it safely to your wall.

Can I Buy Ready-Made Driftwood Sailboat Wall Art?

Absolutely! There are plenty of artisans who sell beautiful driftwood sailboat wall art. Check out local craft stores, online marketplaces like Etsy, or even art fairs.

How Long Does it Take to Make?

This largely depends on the complexity of your design and the drying times for glue and paint. A simple project can be completed in a few hours, while more intricate designs may take a bit longer.

Conclusion

Creating driftwood sailboat wall art is not just a rewarding DIY project but a chance to bring a piece of the ocean’s magic into your home. Each creation will be as unique as the driftwood pieces you choose, making your decor truly one-of-a-kind. Whether you want a rustic, beachy feel or a modern nautical theme, driftwood sailboat wall art offers endless possibilities. Ready to make your walls come to life? Time to embark on this artistic adventure!

Filed Under: Driftwood Ideas Tagged With: craft, DIY, Driftwood, sailboat, Wall Art

Driftwood Hanger Wall Art

June 21, 2024 by admin

Imagine transforming your living space with a touch of natural elegance—Driftwood Hanger Wall Art brings just that. This unique piece combines the rustic charm of driftwood with functional artistry to create a compelling focal point for any room. You’ll appreciate how the organic textures and shapes of the driftwood seamlessly blend with various decor styles, making it a versatile addition to your home. Whether you’re hanging it in your entryway, living room, or bedroom, this wall art effortlessly adds a warm, coastal vibe that invites nature indoors. Have you ever wondered how you could bring the serenity and beauty of the beach into your home? Driftwood hanger wall art is a timeless and charming way to achieve just that. It’s an inventive and sustainable form of decoration that adds a unique, rustic touch to any room. Not only is driftwood beautiful to look at, but using it in art projects can also be a peaceful and rewarding experience.

Driftwood Hanger Wall Art

What is Driftwood Hanger Wall Art?

Driftwood hanger wall art involves creating decorative pieces using driftwood and various other materials. These pieces typically hang on the wall, adding texture and natural beauty to your space. It’s an art form that can be as simple or complex as you like, making it accessible for beginners and intriguing for seasoned DIYers.

The Beauty of Driftwood

Driftwood, the natural wood washed ashore by water bodies like rivers, lakes, or oceans, has a distinctive charm. Its weathered appearance, unique shapes, and textured surfaces tell the story of its journey through water and time. Each piece of driftwood is different, making every artwork made from it unique.

Why Choose Driftwood Hanger Wall Art?

There are so many reasons to love driftwood hanger wall art. Here are a few:

  • Eco-Friendly: Reusing driftwood reduces waste and promotes sustainability.
  • Versatile: It complements various decor styles, from rustic to coastal.
  • Creative: There’s no right or wrong way to create this art, making it a liberating and enjoyable process.

Essential Materials and Tools

Before starting your driftwood hanger wall art project, you’ll need to gather some essential materials and tools. Here’s a basic list to get you started:

MaterialPurpose
DriftwoodThe main feature of your artwork
Hooks/NailsFor hanging pieces of driftwood
Twine/stringTo connect pieces or hang the artwork
Beads/CrystalsOptional embellishments
Paints/VarnishTo protect or color the driftwood
SandpaperFor smoothing rough edges
DrillFor making holes in the driftwood

Finding Driftwood

One of the most enjoyable parts of this project is gathering your driftwood. This can be a fun day out, whether you’re walking along the beach, riverbank, or lakeside. Look for pieces that have interesting shapes, textures, and sizes. It’s essential to ensure that the driftwood is dry and free from pests.

Preparation

Once you’ve collected your driftwood, it’s time to prepare it:

  1. Clean the driftwood: Rinse it with fresh water to remove any salt, sand, or dirt.
  2. Dry thoroughly: Allow the driftwood to dry completely to prevent mold or rot.
  3. Sand the edges: Use sandpaper to smooth out any rough edges that might be hazardous.

Designing Your Driftwood Hanger Wall Art

Let your imagination run wild with the design of your driftwood hanger wall art. Here are some steps to help you organize your project:

Conceptualize Your Design

Start with a rough sketch of your idea. Decide if you want your driftwood to form a particular shape or pattern. Think about the colors and additional elements you’d like to include, such as beads, shells, or small mirrors.

Arrangement

Lay out your pieces of driftwood and arrange them in various ways until you find a composition you like. This is your chance to play around with shapes and sizes.

Connecting the Pieces

Depending on your design, you might need to connect the pieces of driftwood. You can do this using twine, string, or even wire. Drill small holes into the driftwood to thread your connecting material through, tying knots to secure it.

Adding Embellishments

Adding extra elements like beads, crystals, or paint can enhance the visual appeal of your art. Be mindful not to overdo it; sometimes, simplicity is the key to elegance.

Step-by-Step Guide to a Classic Driftwood Hanger

Creating a classic piece of driftwood hanger wall art can be a great starting point. Here’s a step-by-step guide to help you:

Step 1: Gather Materials

Collect all your materials and tools. Make sure everything is clean and dry.

Step 2: Plan Your Design

Sketch out a simple design on paper. For example, you might want to create a horizontal hanger with multiple pieces of wood hanging vertically.

Step 3: Prepare Your Driftwood

Clean, dry, and sand your driftwood pieces.

Step 4: Drill Holes

Drill small holes into the top and bottom of each piece of driftwood where you plan to string them together. Ensure the holes are evenly spaced.

Step 5: Connect the Driftwood

Thread twine or string through the holes and tie knots to secure each piece. Ensure the connections are firm but allow the driftwood to dangle.

Step 6: Add Embellishments

If you want, add beads or small shells between the pieces of driftwood for extra charm.

Step 7: Hang Your Artwork

Install hooks or nails on the wall where you wish to hang your artwork. Securely attach your driftwood piece, ensuring it’s balanced.

Driftwood Hanger Wall Art

Various Styles of Driftwood Hanger Wall Art

Driftwood hanger wall art can be adapted to suit various styles and preferences. Here are a few ideas:

Coastal Chic

Enhance the natural beauty of driftwood by embracing a coastal theme. Use light colors, shells, and nautical elements to complement your artwork.

Rustic Farmhouse

Pair driftwood with metal hooks or rustic hardware to create a farmhouse-inspired look. Sand certain parts of the driftwood more heavily to reveal lighter wood beneath, adding a distressed touch.

Bohemian Vibes

Combine driftwood with macrame, colorful beads, and feathers for a boho-chic piece of art. This style allows for a plethora of textures and colors.

Minimalist Elegance

Keep it simple by using just a few carefully chosen pieces of driftwood. Avoid additional embellishments and let the natural beauty of the wood speak for itself.

Tips for Success

Creating driftwood hanger wall art is relatively straightforward, but here are some tips to ensure your project goes smoothly:

Choose Quality Driftwood

Not all driftwood is created equal. Look for pieces that are sturdy and well-weathered, as these will be the most beautiful and durable.

Take Your Time

Allow yourself plenty of time to experiment with different designs and arrangements. This will ensure that you’re happy with the final result.

Use Quality Tools

Having the right tools on hand, like a good drill and sandpaper, can make the process much more manageable and fun.

Safety First

Always wear protective gear, such as gloves and goggles when handling tools. Ensure your workspace is well-ventilated.

Maintaining Your Driftwood Art

To ensure your driftwood wall art remains beautiful for years, a little maintenance may be required. Here are some tips:

Dust Regularly

Dust your artwork lightly with a soft cloth or feather duster to keep it clean.

Avoid Direct Sunlight

Although driftwood is naturally sun-weathered, prolonged exposure to direct sunlight can cause additional fading and wear.

Re-seal if Necessary

If you’ve used a varnish or sealant on your driftwood, you might need to reapply it occasionally to maintain protection.

Conclusion

Driftwood hanger wall art is an excellent way to bring a piece of the outdoors into your home. Whether you’re a seasoned DIY enthusiast or a beginner looking to try something new, the versatility and beauty of driftwood make it an ideal material. Remember to enjoy the process, experiment with different designs, and let your creativity flow. Whether you aim for a coastal chic, rustic farmhouse, bohemian, or minimalist style, your final piece will undoubtedly add charm and personality to any space. Happy crafting!

Filed Under: Driftwood Ideas Tagged With: craft, DIY, Driftwood, Home Design, Wall Art

Driftwood Heart Wall Art

June 21, 2024 by admin

Driftwood Heart Wall Art” is a delightful and inspiring guide to creating a beautiful piece of home decor using nature’s materials. In this heartwarming article, you’ll discover how to transform simple pieces of driftwood into a stunning heart-shaped wall art that adds a touch of rustic charm to any room. You’ll be walked through the entire process, from gathering the perfect driftwood pieces to assembling and finishing your unique creation. Embrace your creativity and bring the outdoors into your home with this lovely, handcrafted decoration that truly comes from the heart. Have you ever stumbled upon a beautiful piece of driftwood at the beach and wondered how you could incorporate it into your home décor? Driftwood Heart Wall Art might just be the perfect way to bring a touch of nature and a sense of personalized charm into your living space. Let’s explore how you can create and display this unique art that combines the raw beauty of nature with the warmth of a heartfelt gesture.

Driftwood Heart Wall Art

What is Driftwood Heart Wall Art?

Driftwood Heart Wall Art is exactly what it sounds like—an art piece created using driftwood shaped into a heart. This type of wall art can be a meaningful addition to your home, bringing a bit of the natural world indoors while also serving as a focal point in your décor. The rustic and whimsical nature of driftwood makes it an ideal material for creating a heart-shaped piece that can symbolize love, connection, and the uniqueness of nature.

Why Choose Driftwood for Art?

Driftwood is nature’s own masterpiece. Each piece is unique, shaped by the elements and tumbled smooth by the sea. Here are a few reasons why driftwood makes an excellent material for art:

  • Eco-friendly: Using driftwood is a way of recycling natural resources.
  • Unique: No two pieces of driftwood are the same, ensuring that your art piece will be one-of-a-kind.
  • Aesthetic Appeal: Driftwood has a natural, rustic look that adds charm and warmth to any space.

Materials Needed for Driftwood Heart Wall Art

Creating your own Driftwood Heart Wall Art can be a fun and rewarding DIY project. Here’s a list of materials you’ll need to get started:

MaterialDescription
DriftwoodCollected pieces of varying lengths and shapes.
Backing BoardA sturdy piece of wood or canvas to attach the driftwood to.
Strong AdhesiveIndustrial glue or a hot glue gun to secure the driftwood pieces.
Picture HangersTo mount the art on the wall.
SandpaperOptional, for smoothing rough edges on the driftwood.
Pencil & RulerFor marking the outline of the heart on the backing board.
Optional: Paint or VarnishIf you want to add a layer of color or protection to your project.

Collecting Driftwood

The first step in your project is to gather driftwood. This can be a fun adventure on its own! Head to your nearest beach, lake, or riverbank and start collecting. Look for pieces that are interestingly shaped and smooth. Aim for a variety of lengths to give your heart a more textured and layered look.

Step-by-Step Guide to Making Driftwood Heart Wall Art

Here’s a detailed guide on how to create your own Driftwood Heart Wall Art from scratch.

Step 1: Prepare Your Backing Board

Before you start attaching driftwood, you’ll need a backing for your heart. This can be a simple piece of wood or canvas.

  1. Choose your backing board: Select something sturdy enough to hold the weight of your driftwood.
  2. Outline the heart shape: Use a pencil to lightly sketch a heart shape on your backing board. You can use a ruler to ensure symmetry if you desire.

Step 2: Arrange the Driftwood Pieces

This is where your creativity shines. Lay out your driftwood pieces within the heart outline to ensure they fit well together.

  1. Dry fit the pieces: Without using glue, arrange the driftwood inside the heart outline. This is your chance to play around with different placements.
  2. Layering: Consider layering smaller pieces over larger ones for a 3D effect.

Step 3: Attach the Driftwood

Once you’re happy with the arrangement, it’s time to start attaching the pieces.

  1. Glue the driftwood: Begin gluing each piece to the backing board, starting from the bottom and working your way up. Use a strong adhesive to ensure that the pieces stay securely in place.
  2. Hold until set: Some adhesives may require you to hold the pieces in place for a few seconds until they set.

Step 4: Add Finishing Touches

After all the pieces are glued, you might want to add a few finishing touches to make your art piece stand out.

  1. Sand rough edges: Use sandpaper to smooth any rough or splintered edges if necessary.
  2. Option to paint or varnish: If you desire, add a layer of paint or varnish to protect the wood and give it a polished look.

Step 5: Hang Your Art

Now that your Driftwood Heart Wall Art is complete, it’s time to display it!

  1. Attach picture hangers: Secure picture hangers to the back of the board.
  2. Find the perfect spot: Choose a prominent place in your home to hang your new artwork.

Decorating with Driftwood Heart Wall Art

Once you’ve created your piece, you’ll want to find the perfect place to display it. Here are some ideas on how to incorporate Driftwood Heart Wall Art into your décor.

In the Living Room

Hang your Driftwood Heart Wall Art above the mantle or a prominent wall to make it a focal point of the room. Pair it with other natural elements like plants, stones, or seashells to create a cohesive look.

In the Bedroom

Bring a sense of calm and nature into your bedroom by hanging the heart art above your bed. It can serve as a symbolic gesture of love and connection, perfect for a personal space.

In the Entryway

Greet your guests with a touch of rustic charm by placing your art in the entryway. It’s a great way to set the tone for the rest of your home’s décor and adds a personal touch right from the start.

Driftwood Heart Wall Art

Caring for Your Driftwood Art

Once your Driftwood Heart Wall Art is in place, you’ll want to keep it looking its best. Here are some tips on caring for your art piece:

Dusting

Dust your driftwood heart regularly. Use a soft cloth or a feather duster to gently remove any dust build-up.

Avoiding Moisture

While driftwood comes from the water, it’s best to keep your finished art piece dry to prevent mold or decay. Avoid placing it in areas with high humidity.

Handling with Care

Driftwood can be fragile. Handle your art piece with care, especially when moving or cleaning it.

The Symbolism of Driftwood Heart Wall Art

Beyond its aesthetic appeal, Driftwood Heart Wall Art holds deeper meaning and symbolism.

Love and Connection

Creating a heart shape symbolizes love and connection, making this art piece a sentimental addition to your home.

Nature and Sustainability

Using driftwood highlights a commitment to sustainability and an appreciation for the natural world. Each piece of wood tells a story of its journey and transformation.

Personal Touch

Because you create it yourself, Driftwood Heart Wall Art embodies your personal touch and creativity. It’s a reflection of your taste, style, and the effort you put into making something special.

Customizing Your Driftwood Heart Wall Art

Every piece of Driftwood Heart Wall Art can be as unique as the person who makes it. Here are some ideas for personalizing your creation.

Adding Color

While the natural look of driftwood is beautiful, adding a splash of color can make your art piece stand out. Consider painting a few driftwood pieces in pastel hues or metallics for a modern twist.

Incorporating Other Materials

Mix in other natural elements like sea glass, shells, or stones to add texture and variety. These additional materials can enhance the coastal feel of your wall art.

Personalized Messages

Incorporate small plaques or tags with personalized messages, names, or dates, making your driftwood heart a meaningful keepsake or a unique gift.

Conclusion

Driftwood Heart Wall Art is more than just a decorative piece; it’s a testament to creativity, sustainability, and the beauty of nature. By following these steps, you can create a unique and heartfelt art piece that speaks to your personal style and adds charm to any room. So, gather your materials and let your creativity flow—your stunning driftwood heart is just a few steps away from adorning your walls with love and natural beauty.

Filed Under: Driftwood Ideas Tagged With: craft, DIY, Driftwood, Heart Art, Wall Decor

Driftwood Wall Art Diy Ideas

June 20, 2024 by admin

Creating your own driftwood wall art can be a delightful and personal way to bring a touch of nature and creativity into your home. With these DIY ideas, you’ll find a variety of inspiring projects that are both simple and fun to make, whether you’re a seasoned crafter or just starting out. From rustic arrangements to intricate designs, driftwood offers endless possibilities for unique and charming wall decor that adds warmth and character to any room. Let your imagination flow as you explore these inventive and eco-friendly ways to turn beach finds into one-of-a-kind masterpieces. Have you ever felt that empty wall in your living room could use a touch of coastal magic? Well, my friend, you’re in for a treat! Let’s chat about how you can transform that bland space into a stunning piece of art with some driftwood wall art DIY ideas.

Creating art with driftwood is not just about beautifying your home; it’s a fun and engaging way to bring a piece of nature indoors. Driftwood, with its unique textures and shapes, lends an organic charm that artificial materials often can’t match. Plus, this DIY project is kinder to the environment, repurposing what’s already naturally available. So, let’s dive into these wonderful DIY ideas!

Gathering and Preparing Driftwood

Before you start turning your vision into reality, you need to get your hands on some driftwood. There’s a bit of an adventure in this, don’t you think? Imagine taking a trip to the beach, strolling along the shore, and picking pieces of driftwood that speak to you.

Where to Find Driftwood

You can find driftwood on beaches, lakeshores, and riverbanks. Just think about your next beach trip. While everyone else is tanning, you could be hunting for that perfect piece of driftwood. It’s a beautiful way to connect with nature too!

Cleaning Driftwood

After collecting your pieces, the first step is cleaning them. You don’t want any mold or little critters taking up residence in your house! Here’s a simple method to clean driftwood:

  1. Rinse with Fresh Water: Use a hose to remove sand, dirt, and any loose material.
  2. Scrub: With a stiff brush, scrub each piece thoroughly to remove any stubborn bits.
  3. Soak in Water and Bleach Solution: Soak the driftwood in a mix of one part bleach to nine parts water for 24 hours. This will help to disinfect and whiten the wood.
  4. Rinse Again: After soaking, rinse each piece thoroughly to remove any bleach residue.
  5. Dry: Let the driftwood dry completely in the sun, which could take several days depending on the size of the wood.

Once your driftwood is clean and dry, you’re ready to unleash your creative talents!

Driftwood Wall Art Ideas

Now, let’s explore some beautiful and doable driftwood wall art DIY ideas. Each project can range from simple to slightly complex, but don’t worry. I’ll walk you through every step.

Driftwood Hanger

A driftwood hanger is one of the simplest projects and an excellent place to start. It can be used to hang small items like keys, jewelry, or even lightweight decor.

You’ll Need:

  • A piece of driftwood
  • Hook screws
  • Twine or wire for hanging
  • Drill (optional)

Instructions:

  1. Ensure your driftwood piece is strong and long enough to hold your desired items.
  2. Screw the hooks into the driftwood at evenly spaced intervals.
  3. Attach twine or wire to both ends of the driftwood for hanging.
  4. Nail or screw your driftwood hanger to the wall and voila, you have a functional and decorative piece!

Driftwood Photo Frame

A driftwood photo frame can be a beautiful way to display your favorite memories. Here’s how to make it:

You’ll Need:

  • Driftwood sticks
  • Photo frame (optional)
  • Hot glue gun or wood glue
  • String or fishing line

Instructions:

  1. Lay out the driftwood sticks around your frame to create a rough outline.
  2. Once you’re happy with the layout, start gluing the driftwood sticks onto the frame, layering them to create dimension.
  3. Ensure the sticks are securely glued and let it dry thoroughly.
  4. Attach a string or fishing line to the back of the frame for hanging.
  5. Place your chosen photo inside and hang your new frame on the wall.

Driftwood Wall Sculpture

If you’re up for a bit more creative challenge, a driftwood wall sculpture is a fantastic option. This type of art can serve as a statement piece in any room.

You’ll Need:

  • Several pieces of driftwood in various sizes
  • Wood glue
  • Nails and a hammer
  • A wooden board or frame

Instructions:

  1. Arrange the driftwood pieces on the board/frame until you create a design you like.
  2. Once you have your design, start piecing them together with wood glue and nails for extra stability.
  3. Allow the glue to dry fully.
  4. Hang your driftwood sculpture on the wall using the appropriate hanging hardware based on its weight.

Driftwood Shelf

A driftwood shelf combines functionality with rustic charm. It’s perfect for any room that needs extra storage and a touch of nature.

You’ll Need:

  • A sturdy piece of driftwood
  • Shelf brackets
  • Screws
  • Drill

Instructions:

  1. Select a piece of driftwood that is flat and strong enough to hold items.
  2. Attach shelf brackets to the wall at the desired height and distance apart.
  3. Secure the driftwood to the brackets using screws.
  4. Make sure it’s level and can support the weight you plan to place on it. Then, go ahead and decorate your new shelf!

Driftwood Mirror Frame

Another beautiful idea is a driftwood mirror frame. It adds a rustic and sophisticated touch to any space.

You’ll Need:

  • An existing mirror
  • Driftwood pieces
  • Hot glue gun or wood glue
  • Sandpaper

Instructions:

  1. Sand the edges of the driftwood to remove rough edges.
  2. Arrange the pieces around the mirror to create a border you like.
  3. Attach the driftwood to the mirror frame with the hot glue gun or wood glue.
  4. Let it dry thoroughly before hanging it on the wall.

Driftwood Wall Art Diy Ideas

Creative Tips and Tricks

A few tips can really elevate your driftwood wall art, making it stand out and ensuring it lasts longer.

Finishing Touches

Sealing your driftwood with a clear varnish can protect it and enhance its natural beauty. This is especially useful if you plan to hang your art in areas with varying humidity, like bathrooms or kitchens.

Personal Touch

Incorporate personal items in your driftwood art. For example, you can add small seashells, stones, or even photographs to give it a unique and personal touch.

Lighting

Lighting plays a crucial role in highlighting your driftwood art. Specially positioned spotlights or natural light can cast interesting shadows and bring out the texture of the driftwood.

Safety Tips

Your safety is paramount when working on DIY projects. Here are some safety tips to keep in mind.

Work in a Well-Ventilated Area: Particularly when cleaning or gluing driftwood, make sure you’re in a well-ventilated space to avoid inhaling harmful fumes.

Gloves and Masks: Wear gloves and a mask when handling bleach and driftwood to protect your hands and respiratory system.

Tools: Always handle tools like drills, nails, and hammers carefully. Keep them away from the reach of children.

Driftwood Wall Art Diy Ideas

Conclusion

There you have it! Several beautiful and straightforward driftwood wall art DIY ideas that can add an element of nature to your home. The best part is, this is not just a creative endeavor; it’s a chance to enrich your environment with personalized, handmade decor. Getting started is as simple as heading to your nearest beach and collecting some driftwood!

We hope you’ll enjoy creating these unique pieces and perhaps even come up with your own creative ideas. Happy crafting!

Filed Under: Driftwood Ideas Tagged With: craft, DIY Projects, Driftwood, Wall Art

Driftwood Frame Diy

June 16, 2024 by admin

Creating your very own driftwood frame is a delightful and rewarding DIY project that brings the calming essence of the beach into your home. By using found pieces of driftwood, you can craft a unique, rustic frame perfect for showcasing your favorite photos or artwork. This guide will walk you through the steps and provide helpful tips for selecting, preparing, and assembling your driftwood, helping you to create a personalized piece of coastal charm that reflects your creativity and love for nature. Have you ever strolled along the beach, picking up pieces of driftwood and wondering what you could create with them? Driftwood, with its weathered and unique appearance, can be the perfect natural element to bring into your home decor. Creating a DIY driftwood frame not only adds a touch of seaside charm to your space but also offers a fantastic way to display your favorite photos or artwork. Ready to get started on this crafty project? Let’s dive into the step-by-step process of making your very own driftwood frame.

Driftwood Frame Diy

Gathering Your Materials

Before you start constructing your driftwood frame, you need to gather all the necessary materials. By preparing in advance, you can ensure a smooth crafting experience. Here’s a list of what you will need:

Basic Materials

MaterialPurpose
DriftwoodPrimary material for the frame
Picture FrameBase structure to attach the driftwood to
Strong GlueAdhesive to secure driftwood pieces
SandpaperSmoothing the edges of driftwood
Clamps/WeightsTo hold glued pieces in place
Varnish/SealantOptional, to preserve the wood
Picture HangerTo hang your frame on the wall

Additional Tools

ToolPurpose
SawCutting driftwood to size
PaintbrushApplying varnish/sealant or glue
GlovesProtecting your hands
ClothFor cleaning driftwood before use

Having these items ready will make the assembly of your driftwood frame much easier and more enjoyable.

Preparing the Driftwood

Driftwood found on the beach is often covered in salt, sand, and other debris. Preparing it properly is crucial to creating a beautiful and durable frame.

Cleaning the Driftwood

Firstly, you should clean the driftwood to remove any dirt and debris. Here’s how you can do it:

  1. Rinse Thoroughly: Rinse each piece under running water, using a brush to scrub off any stubborn dirt.
  2. Soak in Water: Soak the driftwood in a bucket of fresh water for a day or two. This helps to leach out any remaining salt and impurities.
  3. Drying: After soaking, allow the driftwood to dry completely. It’s best to let them dry naturally in the sun, which can take several days depending on the size of the pieces.

Sanding the Driftwood

Once your driftwood is cleaned and dried, you may want to smooth out any rough edges or splinters. Use sandpaper to gently sand the surface, focusing on areas that might have sharp edges. This will make handling and attaching the pieces easier and safer.

Constructing the Frame

Now comes the fun part—assembling your driftwood frame! Below is a detailed guide to help you through each step of the process.

Step 1: Design Your Layout

Before you start gluing the pieces, lay out your driftwood around the picture frame. Experiment with different arrangements to see what looks best. You can place larger pieces at the corners and fill the gaps with smaller pieces. Ensure the driftwood covers the entire perimeter of the picture frame.

Step 2: Cutting Driftwood to Size

Using a saw, cut any excessively long pieces of driftwood to fit within the design you laid out. This will help achieve a neat and well-fitted frame. Remember to wear gloves and work carefully to avoid injury.

Step 3: Gluing the Driftwood

Apply a strong glue to each piece of driftwood and press it firmly onto the picture frame. Work in small sections to ensure the glue doesn’t dry before you place the driftwood. After applying each piece, use clamps or weights to hold the driftwood in place until the glue dries completely.

Step 4: Layering for Depth

For added texture and depth, you can layer smaller pieces of driftwood on top of the base layer. Apply glue to the smaller pieces and attach them, again using clamps or weights as needed. This layering technique will give your frame a more three-dimensional and intricate look.

Adding the Finishing Touches

To make your driftwood frame look even more polished and to ensure its longevity, consider adding some finishing touches.

Applying Varnish or Sealant

If you want to protect the driftwood and give it a slight sheen, apply a layer of varnish or sealant. Use a paintbrush to evenly coat the surface and let it dry according to the manufacturer’s instructions. This step is optional but can enhance the appearance and durability of the frame.

Attaching the Picture Hanger

After the varnish or sealant is completely dry, attach a picture hanger to the back of the frame. Follow the instructions that come with the hanger, ensuring it is securely fastened to the frame. This will allow you to proudly display your driftwood frame on the wall.

Driftwood Frame Diy

Keeping Your Driftwood Frame in Great Condition

Maintaining your driftwood frame is quite simple and ensures it remains a beautiful focal point in your home.

Dusting

Regularly dust your driftwood frame to keep it looking clean and fresh. Use a soft cloth or feather duster to gently remove dust from the surface.

Avoiding Moisture

Since driftwood can be susceptible to moisture, try to keep your frame in a dry environment. Avoid placing the frame in areas where it might be exposed to high humidity or direct water contact.

Creative Variations

Once you’ve mastered the basic driftwood frame, you might want to experiment with some creative variations. Here are a few ideas to get your creativity flowing:

Adding Embellishments

Personalize your driftwood frame by adding embellishments such as seashells, small pebbles, or even pieces of colored sea glass. These additional elements can be glued onto the driftwood for an extra touch of seaside charm.

Painted Driftwood

For a more colorful option, consider painting some of the driftwood pieces before gluing them to the frame. You can use muted tones for a subtle effect or bright colors for a bold statement. Make sure to use paint suitable for wood.

Lighting Accents

Incorporate small LED lights or fairy lights into your driftwood frame design. This can add a magical glow and make your frame stand out even more, especially in the evening.

Conclusion

Creating a driftwood frame is a fantastic way to bring the essence of the beach into your home. With its natural beauty and unique texture, driftwood provides an excellent crafting material to express your creativity. Whether hanging in your living room, bedroom, or office, a driftwood frame can serve as a charming and personalized decorative piece. Plus, the process of designing and assembling it can be a relaxing and gratifying experience.

So, why not take your next beachcombing trip as an opportunity to gather supplies for your driftwood frame DIY project? With a bit of time and effort, you’ll have a beautiful frame that evokes the tranquil, timeless allure of the sea. Enjoy the crafting journey and the joy it brings to your space!

Filed Under: Driftwood Ideas Tagged With: craft, DIY, Driftwood, Frame, home decor

Driftwood Wall Art Diy

June 4, 2024 by admin

Welcome to the world of Driftwood Wall Art DIY! Picture yourself strolling along the beach, discovering beautiful pieces of driftwood washed ashore by the tide. This article will guide you on how to transform these natural treasures into stunning wall art for your home. You’ll learn step-by-step techniques to craft unique pieces that bring a touch of coastal charm to any room. Dive in and let your creativity flow as you create personalized driftwood masterpieces! Have you ever found yourself strolling along the beach, admiring the washed-up driftwood and envisioning the endless possibilities it offers for home decor? Crafting a piece of driftwood wall art might just be the perfect project for you! It’s a wonderful way to bring a bit of seaside charm into your home and to repurpose natural materials in an eco-friendly way. Whether you’re a seasoned DIY enthusiast or just starting out, this guide will help you create stunning driftwood wall art that will be a delightful addition to your living space.

What Is Driftwood and Why It’s Perfect for DIY Projects

Driftwood is wood that has been washed onto the shore of a sea, river, or lake by winds, tides, or waves. It is often weathered and worn, creating a unique texture and look that makes it perfect for crafting. Due to its durable nature, driftwood can be used to create a vast range of decorative items, including wall art.

Benefits of Using Driftwood for Wall Art

  1. Natural Aesthetic: Driftwood brings a rustic, natural look to any room.
  2. Uniqueness: Each piece of driftwood is unique, making your art one-of-a-kind.
  3. Sustainability: Using driftwood is an eco-friendly way to incorporate nature into your home decor.

Gathering Your Supplies

Before diving into your DIY driftwood wall art project, you will need to gather a few essential supplies. Here’s what you’ll need:

SuppliesRequired/OptionalDescription
Driftwood PiecesRequiredCollect from the beach or purchase online.
Backing BoardRequiredWood, canvas, or other sturdy materials serve as the base for your art.
AdhesiveRequiredStrong glue or nails depending on method of attachment.
SandpaperOptionalTo smooth rough edges of the driftwood.
Paint/SealantOptionalTo seal or paint the driftwood.
Protective GearOptionalGloves and mask for sanding or cutting driftwood.

Having everything ready before you start can make the process much smoother.

Driftwood Wall Art Diy

Preparing Your Driftwood

Once you’ve gathered all your supplies, the next step is to prepare your driftwood. This involves cleaning, drying, and possibly treating it to ensure it’s ready for use.

Cleaning Driftwood

Driftwood found on the beach is often coated in salt and debris. Here’s how you can clean it:

  1. Brush off loose debris: Use a soft brush to remove sand and loose dirt.
  2. Soak in freshwater: Soak the driftwood in a tub or bucket of freshwater for a few days, changing the water daily to remove salts and other impurities.
  3. Scrub stubborn areas: For tougher dirt, scrub the driftwood with a brush and some mild soap.

Drying and Treating Driftwood

After cleaning, it’s crucial to properly dry the driftwood to prevent mold and decay:

  1. Air Drying: Let the driftwood air dry in a sunny, well-ventilated area for a week or more until completely dry.
  2. Oven Drying: As an optional step, you can dry your driftwood pieces in the oven at a low temperature (between 200-250°F) for a couple of hours to ensure all moisture is removed and to kill any insects.

Some DIY enthusiasts like to treat their driftwood further with wood preservatives or sealants to prolong its life, especially if the art will be placed in a humid area.

Designing Your Driftwood Wall Art

Designing your driftwood wall art is one of the most fun and creative parts of the project. Here’s a step-by-step guide to help you through the design phase:

Sketch Your Design

Start with a rough sketch of what you want your wall art to look like. This will serve as your blueprint and help you determine the placement of your driftwood pieces. You can sketch directly on your backing board or on a piece of paper.

Arrange Your Driftwood Pieces

Lay out your driftwood pieces on your backing board according to your design. Play around with different arrangements until you find one that you’re happy with. Don’t be afraid to snap or cut pieces to fit your design perfectly.

Secure Your Driftwood

Once you’ve settled on a design, it’s time to secure the driftwood pieces to the backing board. You can use strong adhesive or nails depending on the weight and size of your driftwood:

  • Using Adhesive: Apply an even layer of strong adhesive on the contact points of your driftwood pieces and press them onto the backing board. Hold each piece in place for a few seconds to ensure a strong bond.

  • Using Nails: For larger or heavier pieces, use small nails or screws to secure the driftwood to the backing board. Make sure to pre-drill holes to prevent the wood from splitting.

Driftwood Wall Art Diy

Creative Driftwood Wall Art Ideas

The possibilities for driftwood wall art are only limited by your imagination. Here are a few ideas to spark your creativity:

Abstract Art

Create abstract shapes and designs by arranging driftwood pieces in a seemingly random, yet aesthetically pleasing manner. This type of art is flexible and can transform any space into a modern, artistic haven.

Driftwood Signs

Use driftwood to create rustic signs with meaningful words or quotes. Paint or etch letters on the driftwood pieces and arrange them on the backing board to spell out the desired message.

Driftwood Sculptures

Craft three-dimensional sculptures such as animals, trees, or intricate patterns by layering and securing various driftwood pieces together. This type of art can serve as a stunning focal point in any room.

Driftwood Frames

Create a frame using driftwood pieces around a picture or mirror. This can add a touch of coastal charm to your photos or mirrors, making them stand out on your wall.

Driftwood Mobiles

While not traditional wall art, driftwood mobiles can be hung from the ceiling near a wall to create a dynamic and interesting decor element. Combine driftwood with shells, feathers, or other natural elements for added visual interest.

Finishing Touches

Adding finishing touches to your driftwood wall art can elevate its overall look and ensure its longevity.

Sanding

If any driftwood pieces have rough edges or splinters, use sandpaper to smooth them out. This will make your artwork safer to handle and give it a polished appearance.

Sealing

Seal your driftwood wall art with a clear sealant or varnish to protect it from moisture and wear. This is especially important if your art will be displayed in a bathroom or other humid environment. Apply the sealant according to the manufacturer’s instructions and allow it to dry completely.

Mounting

Finally, consider how you will mount your driftwood wall art. Here are a few mounting options:

  1. D-rings and Wire: Attach D-rings to the back of the backing board and use wire to hang the art on a wall hook.
  2. Sawtooth Hangers: Secure sawtooth hangers to the back of the backing board for a flush mount.
  3. French Cleat: Use a French cleat for heavy or large pieces to ensure they are securely mounted on the wall.

Safety Considerations

While working on your driftwood wall art project, keep safety in mind:

  • Wear gloves to protect your hands from splinters and cuts.
  • Use a dust mask while sanding driftwood to avoid inhaling dust particles.
  • Follow the safety instructions for adhesives, sealants, and tools used.

Maintenance and Care

Once your driftwood wall art is complete and mounted, it’s essential to maintain it properly to ensure it continues looking great for years to come.

Dusting

Regularly dust your driftwood wall art with a soft cloth or duster to keep it clean. Avoid using water or cleaning solutions, as they can damage the wood.

Inspection

Periodically inspect your driftwood art for any signs of wear or damage. Check that all pieces are securely attached and reseal them if necessary to prevent any issues over time.

Avoiding Direct Sunlight

Try to keep your driftwood wall art out of direct sunlight, as prolonged exposure can cause the wood to fade and deteriorate.

Conclusion

Creating your own driftwood wall art is a fulfilling and enjoyable DIY project that allows you to bring a piece of nature into your home. By following this guide, you’ll be well on your way to crafting a unique and beautiful piece of art that reflects your personal style and adds a touch of coastal elegance to any room. So, the next time you find yourself beachcombing, remember that the driftwood you collect can be transformed into something truly special. Happy crafting!

Filed Under: Driftwood Ideas Tagged With: craft, Driftwood, Handmade, home decor, Wall Art

Unique Driftwood Art

May 2, 2024 by admin

Imagine stumbling upon a hidden treasure while walking along the beach – unique driftwood art that captivates your imagination. The beauty and intricacy of these one-of-a-kind pieces created from weathered wood washed ashore by the waves are truly mesmerizing. From delicate sculptures that seem to come alive to breathtaking wall hangings that evoke a sense of tranquility, each piece of driftwood art tells its own story. With their natural charm and rustic allure, these creations are sure to bring a touch of coastal magic into your home.

Types of Driftwood Art

Sculptures

Driftwood sculptures are one of the most popular forms of driftwood art. Artists use their creativity and skill to create stunning sculptures from the natural, weathered pieces of driftwood they find. The sculptures can range from realistic animal shapes to abstract and imaginative designs. With the right combination of carving, sculpting, and painting techniques, driftwood sculptures can be transformed into beautiful works of art.

Wall Hangings

Driftwood wall hangings are a great way to add a touch of nature and rustic beauty to any space. These pieces of art can vary in size and shape, from small and simple designs to larger, more intricate creations. By arranging and attaching pieces of driftwood together, artists can create unique and eye-catching wall hangings that can become a focal point in a room. Whether it’s a single piece or a collection of driftwood, wall hangings can bring a sense of peace and tranquility to your home.

Mobiles

Driftwood mobiles are a creative and playful way to incorporate the natural beauty of driftwood into your home decor. By suspending pieces of driftwood from strings or wires, artists can create mobiles that gently sway and dance with the breeze. Mobiles can feature a combination of different driftwood shapes and sizes, creating a dynamic and visually appealing display. Hang a driftwood mobile near a window or in a corner of a room, and you’ll bring a sense of movement and serenity to your space.

Jewelry

Driftwood can also be transformed into unique and stylish pieces of jewelry. From earrings and necklaces to bracelets and rings, artists can carve, shape, and polish driftwood into stunning accessories. The organic and earthy feel of driftwood adds a distinctive charm to the jewelry, making each piece a one-of-a-kind statement. Whether you’re looking for a bold statement piece or a delicate and understated design, driftwood jewelry is a beautiful way to showcase your love for nature.

Furniture Pieces

Another creative way to incorporate driftwood into your home is by using it to create furniture pieces. From coffee tables and dining tables to chairs and shelves, driftwood furniture can add a rustic and coastal charm to any room. The natural textures and colors of the driftwood create a unique and visually striking look, making each furniture piece a true work of art. Whether you’re looking to update your living room or create a cozy reading nook, driftwood furniture can transform your space into a natural sanctuary.

Finding Driftwood

Beachcombing

One of the most exciting and rewarding ways to find driftwood is by beachcombing. Head to the nearest beach and explore the shoreline for pieces of driftwood that have been washed up by the waves. Look for interesting shapes and sizes, as well as pieces that have unique textures and colors. Remember to only collect driftwood that is already on the beach and avoid taking any live or protected wood. Beachcombing is not only a great way to find driftwood, but it’s also a fun outdoor activity that allows you to connect with nature.

Online Marketplaces

If you’re unable to access a beach or simply want to expand your search, online marketplaces can be a great resource for finding driftwood. Websites like Etsy and eBay offer a wide variety of driftwood pieces, from small branches to larger logs. Take your time to browse through different listings and look for sellers who specialize in driftwood. This way, you can find unique and high-quality pieces that suit your artistic vision. When purchasing online, pay attention to the size and condition of the driftwood, as well as any seller ratings or reviews.

Antique Shops

Antique shops and vintage stores can often be treasure troves for finding driftwood with character and history. The aged and weathered appearance of driftwood fits perfectly with the vintage aesthetic, making it a popular choice for antique collectors and decorators. Explore local shops in your area and keep an eye out for driftwood pieces that catch your eye. Talk to the shop owners or staff, as they may have additional information about the origin or history of the driftwood. Shopping at antique shops not only allows you to find unique driftwood but also supports local small businesses.

Nature Reserves

Nature reserves and national parks often have designated areas where driftwood can be collected. These areas are typically regulated to ensure that the natural ecosystem is not disturbed, and only dead or washed-up wood can be taken. Check with your local nature reserve or park for any specific guidelines or permits required for collecting driftwood. Exploring nature reserves not only allows you to find beautiful pieces of driftwood but also offers the opportunity to enjoy the natural beauty and serenity of these protected areas.

Unique Driftwood Art

Preparing Driftwood

Cleaning

Before starting any driftwood art project, it’s important to clean the driftwood to remove any dirt, sand, or debris. Start by rinsing the wood with water to remove loose particles. For more stubborn dirt or algae, gently scrub the surface with a soft brush. Avoid using harsh chemicals or detergents, as they can damage the natural patina and texture of the driftwood. Once cleaned, allow the driftwood to air dry completely before moving on to the next step.

Sanding

Sanding the driftwood is an essential step to smooth out any rough edges or splinters. Use medium-grit sandpaper to gently sand the surface of the driftwood, going with the grain of the wood. The goal is to create a smooth and even surface without removing too much of the natural texture and character of the wood. Take your time and pay attention to the details, ensuring that each piece of driftwood is sanded to your desired finish.

Disinfecting

To prevent the growth of mold or fungi, it’s important to disinfect the driftwood. Fill a bucket with a mixture of water and white vinegar, using a 1:10 ratio. Soak the driftwood in the solution for approximately 10-15 minutes, making sure that all surfaces are submerged. Vinegar is a natural disinfectant that helps kill bacteria and fungi while being safe for the environment. After disinfecting, rinse the driftwood with water and allow it to air dry thoroughly.

Drying

Before using the driftwood for any art projects, it’s crucial to ensure that it is completely dry. Moisture trapped inside the wood can cause warping or mold growth, which can ruin your artwork. Place the cleaned and disinfected driftwood in a well-ventilated area, preferably outdoors or near an open window. Depending on the size and thickness of the wood, it may take several days or weeks for it to dry completely. Avoid using heat sources such as ovens or hair dryers, as they can damage the wood.

Tools and Materials

Clamps

Clamps are essential tools when working with driftwood, as they help hold the pieces together securely while the glue or paint dries. Choose clamps that are appropriate for the size and weight of the driftwood you’re working with. Spring clamps and C-clamps are commonly used for smaller and medium-sized pieces, while bar clamps are suitable for larger driftwood sculptures or furniture pieces.

Saw

A saw is necessary for cutting and shaping the driftwood to your desired size and design. Depending on the intricacy of the cuts, you may need different types of saws. A handsaw or jigsaw is great for basic cuts, while a scroll saw can allow for more detailed and precise cuts. When using a saw, always wear safety goggles and work in a well-ventilated area.

Drill

A drill is a versatile tool that can be used to create holes in the driftwood for various purposes, such as attaching pieces together or adding decorative elements. A cordless drill is recommended for ease of use and mobility. Make sure to choose drill bits of appropriate sizes for your specific project. Additionally, consider using a clamp or vise to secure the driftwood while drilling.

Wood Glue

Wood glue is essential for assembling driftwood pieces together. Choose a high-quality wood glue that dries clear, providing a strong and durable bond. Apply the glue evenly to the surfaces that will be joined together and firmly press the pieces together. Wipe off any excess glue with a damp cloth before it dries. Allow the glue to fully cure according to the manufacturer’s instructions before handling or moving the driftwood.

Unique Driftwood Art

Techniques

Carving

Carving is a technique that allows you to shape the driftwood and create intricate details. Use carving tools such as chisels or wood carving knives to carefully remove layers of wood and sculpt the desired shape. Start with rough shaping and gradually refine the details until you achieve the desired result. Pay attention to the natural grain and texture of the driftwood while carving, as it can add depth and dimension to your artwork.

Sculpting

Sculpting involves using your hands or tools to manipulate the driftwood and create three-dimensional forms. Whether you’re sculpting animals, abstract shapes, or human figures, it’s important to have a clear vision of your design before you start. Begin by removing unnecessary parts of the driftwood and then sculpt the remaining sections to bring your design to life. Experiment with different tools and techniques to add depth and texture to your sculptures.

Assembling

Assembling is the technique of connecting different pieces of driftwood together to create a larger artwork. Depending on your design, you can use a combination of clamps, wood glue, and screws to securely attach the pieces. Take your time to arrange the driftwood in a way that is visually pleasing and structurally sound. Pay attention to the balance and stability of the artwork, especially for larger and heavier sculptures or furniture pieces.

Painting

Painting is a popular technique used in driftwood art to enhance the natural beauty of the wood or to add vibrant colors and patterns. Before painting, make sure the driftwood is clean and smooth. Use acrylic or water-based paints that adhere well to wood surfaces. Apply multiple thin coats of paint, allowing each coat to dry completely before applying the next. Consider adding a layer of varnish or sealant after painting to protect the artwork and enhance its longevity.

Inspiration from Nature

Animal Shapes

Nature provides endless inspiration for driftwood art, and animal shapes are a popular choice among artists. The natural forms and textures of driftwood lend themselves well to creating realistic or abstract animal sculptures. From majestic birds and graceful horses to playful dolphins and curious cats, let your imagination run wild and let the driftwood guide you in creating unique and lifelike animal shapes.

Sea Creatures

The ocean and its inhabitants are a rich source of inspiration for driftwood art. Use the curves, twists, and textures of driftwood to sculpt and assemble sea creatures such as fish, seahorses, and turtles. Enhance the natural colors of the driftwood with paint to bring these marine creatures to life. Whether you prefer a realistic or stylized approach, creating sea creatures from driftwood can add a touch of the ocean to your home decor.

Branches and Roots

Driftwood branches and roots offer a beautiful and organic element to driftwood art. These natural forms can be used as standalone sculptures or incorporated into larger artworks. By arranging and assembling driftwood branches and roots, artists can create stunning and sculptural compositions that mimic the shapes and patterns found in nature. Combine different sizes and angles to add depth and visual interest to your artwork.

Landscapes

Driftwood can also be used to create miniature landscapes that capture the beauty of nature. Use various pieces of driftwood to represent trees, rocks, and even mountains. Paint or carve intricate details such as leaves, flowers, or animals to bring the landscape to life. Arrange the driftwood in a deep frame or shadow box to add depth and create a unique wall hanging that transports you to your favorite natural surroundings.

Creative Ideas for Driftwood Art

Combining with Seashells

For a truly coastal-inspired look, consider combining driftwood with seashells. By attaching seashells to the driftwood using glue or wire, you can create beautiful and unique compositions. Arrange the shells in patterns or create focal points by clustering them together. The combination of the weathered driftwood and the delicate seashells adds a whimsical and beachy touch to any driftwood artwork.

Incorporating Sea Glass

Sea glass, with its smooth and vibrant colors, can be a stunning addition to driftwood art. Drill holes in the driftwood and use wire or string to attach sea glass pieces, creating an eye-catching element. Arrange the sea glass in patterns or create gradients of color. The translucent nature of sea glass allows light to pass through, creating a beautiful effect when combined with the textured driftwood.

Adding LED Lights

Illuminate your driftwood art by incorporating LED lights. Drill small holes in the driftwood and insert LED lights, either battery-powered or connected to a power source. The soft glow of the lights enhances the natural colors and textures of the driftwood, creating a warm and inviting ambiance. Experiment with different placements and arrangements to achieve the desired lighting effect.

Creating a Wind Chime

Transform pieces of driftwood into a soothing and melodic wind chime. Attach strings or fishing line to the driftwood and hang various objects such as shells, glass beads, or small bells. Hang the wind chime in a place where it can catch the breeze, such as on a porch or balcony. The gentle tinkling sound of the wind chime combined with the movement of the driftwood creates a calming and peaceful atmosphere.

Driftwood Art for Home Decor

Living Room Wall Art

Add an artistic touch to your living room with a driftwood wall art piece. Whether it’s a large sculpture or a collection of smaller pieces arranged in a collage, driftwood can create a captivating focal point on any wall. Opt for neutral or earthy colors to complement a bohemian or coastal-themed living room. The natural textures and unique shapes of driftwood bring warmth and character to the space, making it a conversation starter and a true reflection of your personal style.

Centerpiece for Dining Table

Elevate your dining table decor with a driftwood centerpiece. Select a long and sturdy piece of driftwood and place it in the center of the table. Arrange a variety of small potted plants, candles, or seashells around the driftwood for a natural and organic look. The combination of the textured driftwood and the vibrant colors of the decorations will create a visually stunning centerpiece that brings nature closer to your dining experience.

Bathroom Shelving

Bring a touch of coastal charm to your bathroom with driftwood shelving. Use smaller pieces of driftwood as brackets or supports for glass shelves. The natural color and texture of the driftwood will add visual interest to your bathroom decor while providing a functional storage solution. Arrange decorative items such as seashells, glass jars, or plants on the shelves to complete the coastal-inspired look.

Outdoor Garden Decor

Enhance your outdoor space with driftwood art that blends seamlessly with nature. Create a driftwood sculpture or install a driftwood fence to add a rustic and organic element to your garden. Use larger pieces of driftwood to create pathways or borders. You can also hang driftwood wind chimes or sun catchers from trees or pergolas for a whimsical and bohemian touch. The natural beauty of driftwood complements the greenery and serenity of the outdoors, creating a harmonious and inviting atmosphere.

Driftwood Art as Gifts

Birthday Presents

Driftwood art makes a unique and personal birthday gift for your loved ones. Consider their taste and style when choosing or creating a driftwood piece. Personalize the gift by choosing a sculpture or wall hanging that reflects their interests or hobbies. The thought and effort put into selecting a driftwood art piece as a birthday present will make it a cherished and memorable gift.

Anniversary Gifts

Celebrate a special anniversary with a driftwood art piece that represents the beauty and strength of your relationship. Choose a sculpture or wall hanging that symbolizes your shared experiences and memories. Couples can also consider attending a driftwood art workshop together to create a collaborative piece that represents their journey together. The sentimental value of a driftwood art anniversary gift will make it a cherished heirloom for years to come.

Housewarming Presents

Give a warm welcome to friends or family members who are moving into a new home with a driftwood art housewarming present. Consider their interior design style and choose a driftwood piece that complements their decor. A driftwood wall hanging or centerpiece can add a touch of natural beauty to any space. The symbolism of driftwood as a material that has weathered and adapted to its surroundings makes it a meaningful and thoughtful housewarming gift.

Holiday Season Gifts

During the holiday season, surprise your loved ones with unique and handmade driftwood art gifts. Choose or create ornaments or small sculptures that capture the magic of the season. Hang driftwood ornaments on a Christmas tree or use them as decorations for a festive centerpiece. The natural and rustic aesthetic of driftwood adds a charming and earthy element to holiday decor, making it a perfect gift for the nature lovers in your life.

Preserving Driftwood Art

Applying Varnish

To protect your driftwood art from the elements and to enhance its natural beauty, apply a coat of varnish. Varnish acts as a protective barrier, preventing moisture and dust from damaging the wood. Choose a clear, water-based varnish that will not alter the color or texture of the driftwood. Apply the varnish evenly using a brush or a sponge, following the direction of the wood grain. Allow the varnish to dry completely before handling or displaying the driftwood art.

Using Wood Sealant

If you prefer a more natural and matte finish, consider using a wood sealant instead of varnish. Wood sealant penetrates the wood, providing protection without adding a glossy or shiny layer. Choose a sealant that is specifically formulated for driftwood or outdoor use. Apply the sealant using a brush or a cloth, making sure to cover all surfaces of the driftwood. Allow the sealant to fully cure according to the manufacturer’s instructions before exposing the driftwood art to moisture or sunlight.

Avoiding Direct Sunlight

To prevent the fading or discoloration of your driftwood art, avoid placing it in direct sunlight. Prolonged exposure to sunlight can cause the wood to become dry and brittle, as well as fade the natural colors and patina. Choose a location in your home or garden where the driftwood art is protected from direct sunlight, such as a shaded area or a spot with indirect light. By taking this simple precaution, you can ensure that your driftwood art remains vibrant and beautiful for years to come.

Regular Cleaning

To maintain the appearance and longevity of your driftwood art, it’s important to regularly clean the surfaces. Use a soft brush or cloth to gently remove any dust or dirt that may accumulate over time. Avoid using water or cleaning products, as they can damage the wood or remove the protective finish. By incorporating regular cleaning into your routine, you can keep your driftwood art looking fresh and vibrant.

Filed Under: Driftwood Ideas Tagged With: craft, Driftwood, Sculpture, Unique

Driftwood Feather Art

May 1, 2024 by admin

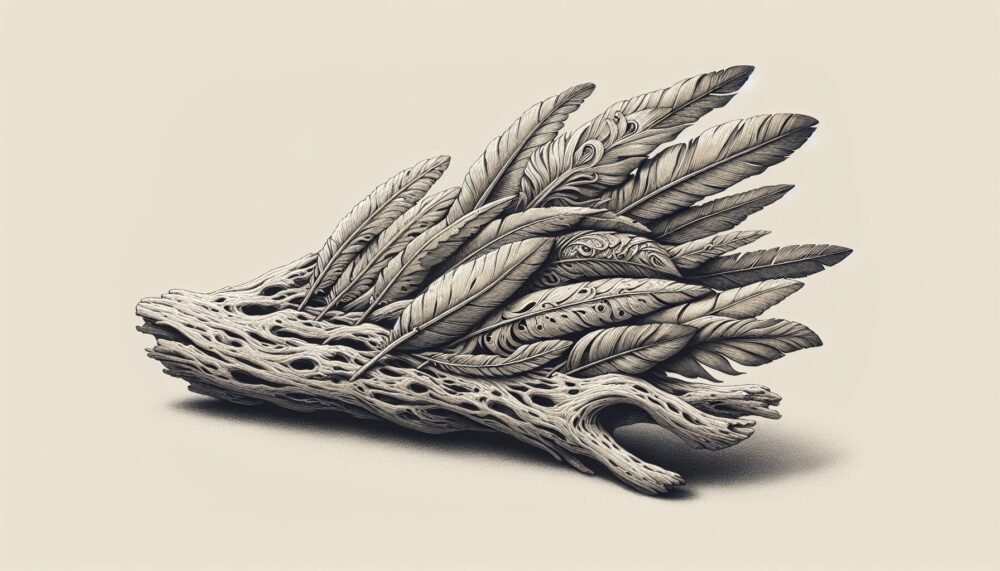
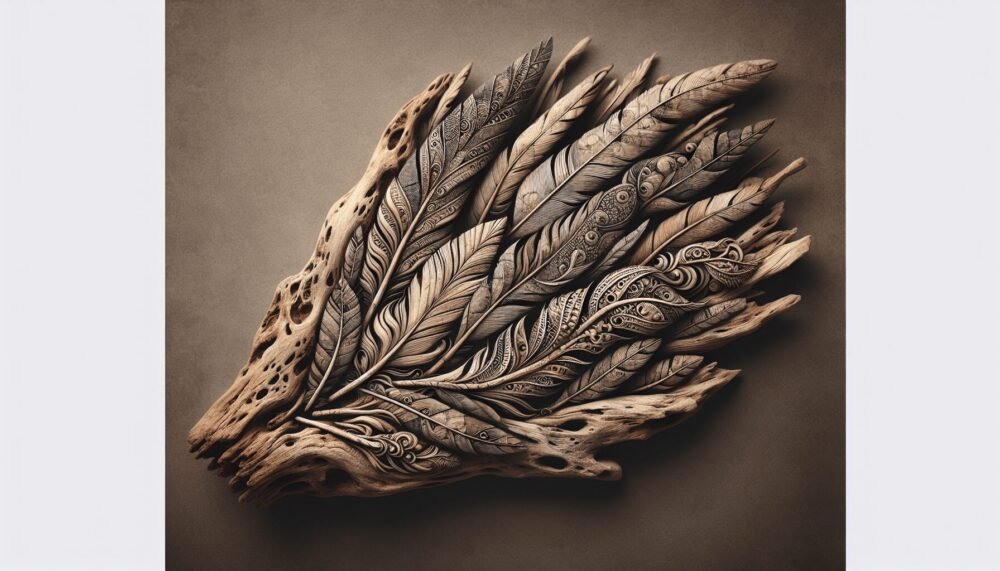
Imagine walking along a serene beach, the waves gently crashing against the shore as the sun begins to set. As you wander, you stumble upon a breathtaking sight: a collection of exquisite artwork made entirely from driftwood and feathers. These intricate creations, aptly named “Driftwood Feather Art,” combine the raw simplicity of nature with the delicate intricacies of fine art. Each piece tells a unique story, inviting you to marvel at the creativity and craftsmanship that can emerge from materials found in the most unexpected places. Prepare to be captivated by this remarkable fusion of nature and art, where driftwood and feathers come together to create stunning masterpieces.

Driftwood Feather Art

What is Driftwood Feather Art

Driftwood feather art is a unique and creative form of artistic expression that combines the natural beauty of driftwood with the delicate elegance of feathers. This art form involves the use of driftwood, which is wood that has been washed ashore by the tide, and feathers from various birds. The combination of these two elements creates stunning and visually captivating artworks that can be used as wall hangings, mobiles, or sculptures.

Definition

Driftwood feather art refers to the practice of crafting and creating artwork using driftwood as the primary material and incorporating feathers as decorative elements. The art pieces can be designed in various ways, ranging from simple and minimalistic designs to intricate and complex compositions. The natural textures and forms of driftwood, combined with the vibrant colors and patterns of feathers, result in visually striking artworks that bring the beauty of nature into any space.

Materials Used

To create driftwood feather art, you will need a few key materials. The primary material is, of course, driftwood. Look for pieces of driftwood that have interesting shapes, textures, and colors. Feathers from different birds are the other essential component. Consider collecting feathers from sustainable sources or using feathers that have been responsibly obtained.

In addition to driftwood and feathers, you may also want to gather a few additional materials such as beads, shells, or crystals, to add embellishments to your artwork. Tools such as drills, glue, and wire may be needed for attaching feathers to the driftwood.

Techniques

Driftwood feather art incorporates various techniques to create unique and visually appealing pieces. The most common techniques involve attaching feathers to driftwood using drilling, gluing, or wire wrapping. Drilling small holes in the driftwood allows for the seamless attachment of feathers. Gluing feathers directly onto the surface of the driftwood provides a secure and long-lasting bond. Wire wrapping involves carefully wrapping wire around the driftwood and feathers to securely hold them together.

The choice of technique depends on the design and desired outcome of the artwork. Experimenting with different techniques can yield fascinating results and allow for personal creativity to shine through.

Finding Driftwood and Feathers

Beachcombing

One of the best ways to find driftwood for your feather art projects is by beachcombing. Take a leisurely stroll along the shoreline, and keep an eye out for interesting pieces of driftwood that have washed ashore. Beaches with rocky shores or areas exposed to strong tides often yield a greater abundance of driftwood. Remember to respect the environment and only collect driftwood that is legal to take from the beach.

Natural Areas

If you don’t live near a beach, you can still find driftwood by exploring natural areas such as riversides, lakeshores, or forests near bodies of water. These places often have driftwood carried by the currents or washed up after heavy rainfall. Be mindful of any permits or regulations regarding the collection of natural materials in these areas and always leave the ecosystem undisturbed.

Online Stores

If finding driftwood in your local area proves challenging, you can also purchase it from online stores specializing in natural materials and craft supplies. These stores often offer a wide range of driftwood pieces in different sizes and shapes, allowing you to find the perfect ones for your projects. While this may require some shipping and delivery time, it ensures that you have access to high-quality driftwood for your feather art endeavors.

Preparation of Driftwood and Feathers

Cleaning

Before using driftwood in your feather art, it’s important to clean it thoroughly. Start by removing any loose debris, such as sand and seaweed, by gently brushing or shaking the wood. Next, prepare a mixture of mild soap and water and use a soft brush to scrub the surface of the driftwood. Rinse the driftwood thoroughly to remove any soap residue, and allow it to dry completely before moving on to the next step.

Drying

After cleaning, you’ll need to ensure that the driftwood is completely dry before incorporating it into your artwork. Proper drying prevents the wood from rotting or developing mold over time. Place the cleaned driftwood in a warm and well-ventilated area, preferably with some airflow. Depending on the size and moisture content of the wood, drying may take several days to a few weeks. Patience is key to achieving the best results.

Sorting and Selecting

When working with driftwood, take the time to sort and select the pieces that fit your artistic vision. Consider the size, shape, and color of the driftwood and how it will complement the feathers you plan to use. The uniqueness of each piece of driftwood adds character to your artwork, so embrace the natural variations and choose the ones that resonate with you.

Types of Driftwood Feather Art

Wall Hangings

Wall hangings are a popular choice for displaying driftwood feather art. These art pieces can range from small and delicate designs to large and dramatic compositions. When creating a wall hanging, consider the available space and the desired visual impact. Arrange the driftwood and feathers in a way that complements your chosen design and creates a harmonious display on the wall.

Mobiles

Driftwood feather mobiles are an enchanting way to incorporate movement into your art. Mobiles typically consist of multiple pieces of driftwood and feathers suspended from a central structure, allowing them to gently sway in the breeze. When designing a mobile, ensure that it is well-balanced and capable of hanging freely. Experiment with different lengths and weights to achieve a pleasing visual and kinetic experience.

Sculptures

For those seeking a more three-dimensional approach, sculptural driftwood feather art offers endless possibilities. Sculptures can be abstract or representational, depending on your artistic preference. Use the natural curves and contours of the driftwood to guide your design, and carefully attach feathers to enhance the overall form. Consider incorporating other materials such as wire or clay to further shape and define your sculpture.

Driftwood Feather Art

Design and Layout

Color Scheme

When planning your driftwood feather art, think about the overall color scheme you want to achieve. Feathers come in a wide range of colors, from vibrant and bold to soft and muted. Consider whether you want to create a monochromatic piece, a complementary color palette, or a mix of contrasting hues. Experiment with different combinations to find the color scheme that resonates with you.

Arrangement

Arranging the driftwood and feathers in a visually pleasing composition is an essential aspect of creating impactful art. Consider the balance and placement of each element. Opt for a focal point within the artwork to draw the viewer’s attention. Experiment with different arrangements by laying out the materials before attaching them permanently. Take a step back and assess the overall composition to ensure it meets your artistic vision.

Symmetry and Balance

Symmetry and balance play crucial roles in the design of driftwood feather art. Achieving symmetry can give the artwork a sense of harmony and order. However, intentional imbalances can also create an interesting and dynamic composition. Explore different symmetrical and asymmetrical arrangements to find the balance that best conveys your artistic message.

Attaching Feathers to Driftwood

Drilling Holes

One common method for attaching feathers to driftwood is by drilling small holes into the wood. Carefully select a drill bit that matches the size of the feather shaft. Mark the desired location for each feather and drill a hole at a 90-degree angle to the surface of the driftwood. Gently insert the feather into the hole, ensuring it is secure but not too tightly compressed. This method allows for flexibility and ease when arranging the feathers.

Gluing

Another popular technique for attaching feathers is by using a strong adhesive. Apply a small amount of glue to the base of the feather and press it firmly onto the surface of the driftwood. Hold the feather in place for a few seconds to allow the glue to set properly. Take care not to use an excessive amount of glue, as it may seep out and affect the appearance of the artwork. This method provides a secure bond and is ideal for feathers that do not have a sturdy shaft.

Wire Wrapping

Wire wrapping is a versatile technique that allows for greater control over the placement and positioning of feathers on the driftwood. Cut a length of wire and wrap it tightly around the base of the feather, ensuring that the wire is securely attached to both the feather and the driftwood. This method is particularly useful for creating intricate designs or for feathers with delicate shafts. It provides stability and durability, making it suitable for larger or heavier feathers.

Adding Embellishments

Beads

Adding beads to your driftwood feather art can enhance its visual appeal and create additional points of interest. The choice of beads can vary depending on your desired aesthetic. Consider using beads in complementary or contrasting colors to the feathers. Thread the beads onto wire or string and attach them to the driftwood in strategic locations. Beads can be used sparingly or in larger quantities, depending on the overall design of your artwork.

Shells

Shells can add a touch of coastal charm to your driftwood feather art. Select shells of various shapes, sizes, and colors that harmonize with the driftwood and feathers. Adhere shells to the driftwood using a strong adhesive, ensuring they are securely attached. Experiment with different shell arrangements, such as creating patterns or clusters, to create a visually captivating effect.

Crystals

For a touch of sparkle and elegance, consider incorporating crystals into your driftwood feather art. Choose crystals that catch the light and complement the colors of your feathers and driftwood. Attach crystals using wire wrapping or glue. Place them strategically to create focal points or to highlight certain elements of your artwork. Crystals add a touch of glamour and sophistication to your creation.

Sealing and Protecting the Artwork

Varnishing

Applying a varnish or sealant to your driftwood feather art helps protect the piece from dust, moisture, and fading. Look for a varnish that is suitable for the specific materials used in your artwork. Apply the varnish smoothly and evenly, following the manufacturer’s instructions. Multiple coats may be necessary to achieve the desired level of protection and sheen. Allow each coat to dry completely before applying the next.

Using Wax

Wax serves as an alternative to varnishing and can provide a protective layer while adding a soft sheen to the driftwood and feathers. Choose a wax specifically designed for wood and apply it using a soft cloth or brush. Gently rub the wax onto the surface of the driftwood, ensuring uniform coverage. Allow the wax to dry and buff it gently to achieve a subtle shine. Waxing is a natural and eco-friendly option for preserving your artwork.

UV Protection

Exposure to direct sunlight can cause feathers and driftwood to fade over time. To preserve the vibrancy and integrity of your driftwood feather art, avoid displaying it in areas where it will be exposed to prolonged sunlight. If your artwork is situated near windows or in a sunny room, consider adding UV protection film or using curtains or blinds to limit the amount of sunlight reaching the piece. This precaution will help extend the longevity of your artwork.

Display and Care

Hanging Options

When it comes to displaying your driftwood feather art, numerous hanging options are available. Depending on the size and weight of your artwork, you can choose traditional picture hooks, nails, or wall anchors. For mobiles or sculptures, consider using ceiling hooks or hanging systems specifically designed for suspending artworks. Take care to ensure that your chosen hanging method is secure and appropriate for the weight and size of your piece.

Cleaning and Dusting

Regular cleaning and dusting are essential to maintain the beauty of your driftwood feather art. Use a soft-bristled brush or a feather duster to gently remove dust from the surface of the driftwood and feathers. Be cautious not to apply excessive pressure that could damage or displace any feathers. Avoid using water or cleaning solutions, as they can cause damage to the feathers or alter the appearance of the driftwood.

Avoiding Direct Sunlight

As mentioned earlier, direct sunlight can cause fading and deterioration of feathers and driftwood over time. To protect your artwork, avoid placing it in areas that receive direct sunlight for extended periods. If you wish to display your piece near a window or in a sunny room, consider using curtains or blinds to filter the sunlight. This will help preserve the colors and textures of your driftwood feather art for years to come.

Creating Your Own Driftwood Feather Art

Gathering Materials

To create your own driftwood feather art, you will need to gather the necessary materials. Start by collecting driftwood from beaches, natural areas, or online stores. Make sure to choose feathers from reputable sources, ensuring they have been responsibly sourced. Consider the color, size, and texture of the feathers to complement your chosen driftwood. Additionally, gather any other materials you wish to incorporate, such as beads, shells, or crystals.

Planning Your Design

Before starting your project, take some time to plan your design. Consider the type of art piece you want to create, such as a wall hanging, mobile, or sculpture. Sketch out your design, taking into account the size and shape of your driftwood. Experiment with different feather arrangements and consider any embellishments you wish to include. Planning your design in advance will help ensure a smooth and enjoyable creative process.

Step-by-Step Instructions

  1. Clean the driftwood by removing any loose debris and washing it with mild soap and water. Rinse thoroughly and allow it to dry completely.

  2. Sort and select the driftwood pieces that best fit your design. Consider the size, shape, and color of the driftwood.

  3. Clean and prepare the feathers by gently brushing off any dust. Ensure that the feathers are fully dried and ready for use.

  4. Choose the technique for attaching the feathers to the driftwood: drilling holes, gluing, or wire wrapping. Select the method that best suits your design and desired outcome.

  5. Begin attaching the feathers to the driftwood, following your planned design. Take your time and ensure that each feather is securely attached.

  6. If desired, add embellishments such as beads, shells, or crystals, either by attaching them to the driftwood or incorporating them into the wire wrapping.

  7. Once your artwork is complete, consider sealing and protecting it with varnish or wax. Apply the chosen protective coating following the manufacturer’s instructions.

  8. Decide on the display method that suits your artwork: wall hanging, mobile, or sculpture. Ensure that the hanging method is secure and appropriate for the weight and size of your piece.

  9. Regularly clean and dust your driftwood feather art using a soft brush or feather duster. Avoid using water or cleaning solutions.

  10. Keep your artwork away from direct sunlight to prevent fading and deterioration. Consider using curtains or blinds to filter the sunlight if necessary.

By following these steps and embracing your creativity, you can enjoy the process of creating your own unique driftwood feather art. Bring a touch of nature’s beauty and artistic expression into your living space with these stunning and captivating artworks.

Filed Under: Driftwood Ideas Tagged With: craft, Driftwood, Feather

Driftwood Sailboat Craft

March 8, 2024 by admin

Have you ever wondered how to transform a simple piece of driftwood into a charming sailboat craft? Look no further! In this article, we will guide you through the steps to create your very own driftwood sailboat, perfect for adding a touch of nautical whimsy to your home decor or as a delightful handmade gift. So, gather your supplies and let’s set sail on this creative adventure together!

Driftwood Sailboat Craft

This image is property of images.unsplash.com.

Materials Needed

To create your own driftwood sailboat, you will need a few key materials. Make sure you have the following items on hand before you begin:

Driftwood

The star of the show, driftwood will serve as the main component of your sailboat. Look for smooth and sturdy pieces that are suitable for crafting. Avoid any driftwood that shows signs of rot or damage.

Hot glue gun

To assemble your sailboat, you will need a hot glue gun. This handy tool will help you securely attach the different pieces of driftwood together.

Jute twine

Jute twine will be used to add a rustic touch to your sailboat. It can be wrapped around the driftwood to enhance the overall look and provide extra stability.

Small cloth sails

No sailboat is complete without sails! You will need small cloth sails to give your driftwood sailboat that authentic look and feel. Choose a fabric that suits your style and desired aesthetic.

Small dowels or bamboo sticks

To raise the sails on your driftwood sailboat, you will need small dowels or bamboo sticks. These will serve as the mast of your sailboat and hold the sails in place.

Now that you know what materials you will need, let’s dive into the steps to create your very own driftwood sailboat!

Choosing the Right Driftwood

When selecting driftwood for your sailboat craft, there are a few key factors to consider. Follow these guidelines to find the perfect pieces:

Look for smooth and sturdy pieces

Choose driftwood that is smooth to the touch and shows no signs of weakness. You want your sailboat to be able to withstand some handling and display without falling apart.

Consider the size and shape

Think about the size of the sailboat you want to create and look for driftwood pieces that will fit your vision. Consider the shape of the driftwood as well, as it can add character to your sailboat.

Inspect for any signs of rot or damage

Before bringing the driftwood home, inspect it for any signs of rot or damage. Weak or damaged driftwood may not be stable enough for the sailboat craft. It’s best to choose pieces that are in good condition.

Preparing the Driftwood

Before you start assembling your driftwood sailboat, it’s important to prepare the driftwood itself. Follow these steps to ensure your driftwood is ready for crafting:

Clean the driftwood

Give your driftwood a good cleaning to remove any dirt, sand, or debris. A simple rinse with water should do the trick. Allow the driftwood to dry completely before moving on to the next step.

Sand any rough edges or splinters

If you notice any rough edges or splinters on the driftwood, use sandpaper to smooth them out. This will not only make the sailboat safer for handling, but it will also give it a more polished look.

Remove any loose bark

If there is any loose bark on the driftwood, gently remove it. This will help ensure a smooth surface for attaching the different pieces together.

Now that your driftwood is prepped and ready, it’s time to move on to designing your sailboat!

Designing the Sailboat

Designing your driftwood sailboat is where your creativity can truly shine. Follow these steps to create a sailboat design that suits your style and preferences:

Determine the size and shape of the boat

Decide on the overall size and shape of your sailboat. Consider the size of the driftwood pieces you have and how they can be arranged to create the desired shape of your sailboat.

Arrange and position the driftwood pieces

Lay out your driftwood pieces and experiment with different arrangements. Play around with the angles and positions of the driftwood to find a design that you love.

Experiment with different configurations

Don’t be afraid to try different configurations and variations of your sailboat design. You might discover a new and unique sailboat shape that stands out from the traditional designs.

Take your time during this step to ensure you are happy with your sailboat design. Once you have settled on a design, it’s time to assemble the sailboat.

Driftwood Sailboat Craft

This image is property of images.unsplash.com.

Assembling the Sailboat

Now that you have your driftwood pieces arranged in your desired design, it’s time to assemble the sailboat. Follow these steps to securely attach the driftwood pieces together:

Use a hot glue gun to secure the pieces together

Using a hot glue gun, apply glue along the points where the driftwood pieces meet. Press the pieces together firmly to create a strong bond. Be mindful of the hot glue and take caution to avoid burns.

Allow the glue to dry completely

After applying the hot glue, allow it to dry completely. This may take a few minutes, so be patient. The glue should form a solid bond and hold the driftwood pieces firmly in place.

Ensure all the joints are sturdy

Once the glue has dried, check that all the joints and connections are sturdy. Gently wiggle the sailboat to ensure nothing comes loose. If any parts feel insecure, add more glue and allow it to dry again.

With the sailboat assembled, it’s time to add the sails!

Adding the Sails

The sails are an essential element of any sailboat, and your driftwood sailboat is no exception. Follow these steps to add the sails to your craft:

Cut small cloth sails in the desired shape

Using scissors, cut your small cloth sails in the desired shape. Triangular sails are a classic choice, but feel free to experiment with different shapes and sizes to add your personal touch.

Attach the sails to small dowels or bamboo sticks

Once you have your sails ready, attach them to small dowels or bamboo sticks. Use hot glue or fabric glue to secure the sails to the dowels. Make sure the sails are securely attached and won’t easily come off.

Insert the dowels or bamboo sticks into the driftwood

Carefully insert the dowels or bamboo sticks into the driftwood to raise the sails. Find a stable position for the dowels or sticks, ensuring they fit securely and won’t wobble or come loose.

Now that your sailboat has sails, it’s time to add some personal touches and make it truly your own!

Driftwood Sailboat Craft

This image is property of images.unsplash.com.

Decorating the Sailboat

To give your driftwood sailboat some extra charm, consider decorating it with paint, embellishments, or personal touches. Here are a few ideas to spruce up your sailboat:

Paint the driftwood or sails

Add a pop of color and personality to your sailboat by painting the driftwood or sails. Choose colors that complement your home decor or your personal style. Consider painting stripes or other nautical motifs to enhance the coastal feel.

Add additional embellishments like seashells or beads

For a more whimsical touch, glue on seashells, beads, or other small decorations. These embellishments can add texture and visual interest to your sailboat. Get creative and use items that remind you of the beach or the ocean.

Personalize with a name or message

If you are gifting the sailboat or want to make it truly unique, consider personalizing it with a name or message. Use paint or small wooden letters to spell out a name or create a delightful message for the recipient.

Once you are satisfied with the decorations, it’s time to add the finishing touches to your driftwood sailboat!

Finishing Touches

To ensure your driftwood sailboat is in perfect condition for display or use, follow these steps for the finishing touches:

Trim any excess twine

If you used jute twine to enhance the stability of your driftwood sailboat, trim any excess twine. This will give your sailboat a neat and tidy appearance.

Touch up any final details or paint

Take a close look at your sailboat and touch up any final details or paint. Ensure that everything is clean and polished, and fix any imperfections before moving on to the final step.

Allow the sailboat to fully dry and set

To prevent any damage that could result from handling or moving the sailboat prematurely, allow it to fully dry and set. This will ensure that all the paint, glue, and other materials have cured and set properly.

Now that your driftwood sailboat is complete, it’s time to decide how to display or use it!

Driftwood Sailboat Craft

Displaying or Using the Driftwood Sailboat

Your driftwood sailboat is a beautiful piece of coastal decor, and there are multiple ways to showcase it. Here are some ideas for displaying or using your sailboat:

Place the sailboat on a shelf or mantel

Find a prominent spot on a shelf or mantel where your sailboat can be admired. Its natural beauty and rustic charm will add a touch of coastal flair to any room.

Use it as a centerpiece for a beach-themed event

If you are hosting a beach-themed party or event, use your driftwood sailboat as a stunning centerpiece. Surround it with seashells, sand, or other beach-inspired elements to create a captivating display.

Gift it to someone who loves nautical decor

If you know someone who adores nautical decor or has a passion for sailboats, consider gifting them your beautifully crafted driftwood sailboat. It will make a unique and heartfelt present that they can cherish.

No matter how you choose to display or use your sailboat, make sure to show it the love and care it deserves!

Maintenance and Care

To keep your driftwood sailboat looking its best and prolong its lifespan, follow these maintenance and care tips:

Avoid exposing the sailboat to excessive moisture

Driftwood is sensitive to moisture, so it’s important to avoid exposing your sailboat to excessive moisture. Keep it away from humid areas or places prone to splashes of water.

Clean the driftwood and sails periodically

Dust and dirt can accumulate on the driftwood and sails over time. Periodically clean the sailboat with a soft cloth or duster to remove any buildup. If necessary, you can also wipe it down with a damp cloth.

Store in a cool and dry place when not in use

When your driftwood sailboat is not being displayed, store it in a cool and dry place. This will help prevent any damage that could result from exposure to extreme temperatures or high humidity.

By following these maintenance and care tips, your driftwood sailboat will continue to bring joy and enhance your decor for years to come.

With these steps and tips in mind, you are now ready to embark on your driftwood sailboat craft adventure. Gather your materials, let your creativity flow, and enjoy the process of creating a unique and beautiful piece of coastal decor. Happy crafting!

Driftwood Sailboat Craft

Filed Under: Driftwood Ideas Tagged With: craft, DIY, Driftwood, Nautical, sailboat

Shell Driftwood Craft

March 8, 2024 by admin

Imagine being able to create beautiful pieces of art using items you find on the beach. That’s exactly what Shell Driftwood Craft allows you to do. With an assortment of shells and driftwood as your materials, you can let your creativity run wild and design unique crafts that bring a touch of the seaside into your home. Whether it’s a stunning shell wall hanging or a charming driftwood sculpture, this craft is not only a fun activity but also a way to turn natural treasures into captivating works of art. Get ready to embark on a creative journey with Shell Driftwood Craft!

Shell Driftwood Craft

Are you looking for a fun and creative way to bring the beach vibes into your home? Look no further than shell driftwood craft! This delightful craft project combines the natural beauty of driftwood with the elegance of seashells to create stunning coastal-themed pieces. Whether you’re a seasoned crafter or just starting out, this article will guide you through the step-by-step process of creating your very own shell driftwood masterpiece.

Shell Driftwood Craft

This image is property of images.pexels.com.

Materials Needed

Before diving into the craft, it’s important to gather all the necessary materials. Here’s what you’ll need:

  1. Driftwood: Look for pieces of driftwood with interesting shapes and textures. You can find them washed up on beaches or purchase them from craft stores.

  2. Shells: Collect a variety of seashells in different sizes and shapes. These can also be found on beaches or bought at craft stores.

  3. Glue: Use a strong adhesive, such as hot glue or E6000, to securely attach the shells to the driftwood.

  4. Paint and Brushes: Acrylic paints in various colors will allow you to personalize your creation. Have different brush sizes handy for painting and adding details.

  5. Decorative Elements: Optional additions like beads, glass gems, or ribbon can enhance the overall look of your shell driftwood craft.

Preparation

Before you start assembling your shell driftwood craft, make sure to clean and dry the driftwood and shells. This will ensure that the adhesive sticks properly and the final piece remains intact for years to come. Remove any debris from the driftwood and gently rinse the shells in cool water to remove any sand or residue. Let everything dry completely before moving on to the next step.

Creating the Base

The first step in creating your shell driftwood craft is to establish a sturdy base. Look for a flat and stable piece of driftwood that will serve as the foundation for your design. This will determine the overall shape and size of your masterpiece. Feel free to experiment with different driftwood pieces until you find the perfect base that speaks to you.

Choosing and Preparing the Shells

Now comes the fun part – choosing the shells for your project! Look for shells that vary in size, shape, and color. This will add visual interest to your design. Take a moment to sort through your collection and envision how the shells will fit together on the driftwood. Once you have a rough idea, clean the shells as mentioned earlier.

Shell Driftwood Craft

This image is property of images.pexels.com.

Arranging the Shells

With the base and shells ready, it’s time to arrange them on the driftwood. Start by placing the larger shells as focal points, creating a visual anchor for your design. Then, experiment with different arrangements and positions for the smaller shells, ensuring a balanced and harmonious composition. Don’t be afraid to play around and rearrange the shells until you’re satisfied with the overall appearance.

Securing the Shells

Once you’ve settled on your desired arrangement, it’s time to secure the shells to the driftwood. Using a strong adhesive like hot glue or E6000, carefully attach each shell to the driftwood, pressing firmly to ensure proper adhesion. Take your time and work your way through the design, ensuring that each shell is securely attached before moving on to the next.

Shell Driftwood Craft

This image is property of images.pexels.com.

Painting and Decorating

Now that the shells are securely in place, it’s time to add your personal touch through painting and decorating. Acrylic paints are a fantastic choice for this step, as they provide vibrant colors and adhere well to the shells. Use your brushes to apply colors, patterns, or even intricate designs to the shells, allowing your creativity to flow. If desired, you can also add additional decorative elements, such as beads or glass gems, to further enhance the piece.

Adding Additional Elements

If you want to take your shell driftwood craft to the next level, consider adding other elements to complement the design. You could attach small pieces of sea glass or bits of dried seaweed to evoke the feeling of a beachside treasure. Alternatively, consider incorporating a small sand dollar or a starfish for an added touch of coastal charm. The possibilities are endless, so feel free to experiment and let your imagination guide you.

Shell Driftwood Craft

Display and Maintenance

Once your shell driftwood craft is complete, it’s time to showcase your creation in your home. Choose a prominent location where it can be admired, such as a mantelpiece or a shelf. Ensure the piece is kept away from direct sunlight and excessive moisture, as this could damage the shells or cause the paint to fade. Regularly dust the craft to keep it looking its best.

Alternative Ideas

If you’re looking to explore different variations of shell driftwood craft, consider these alternative ideas:

  1. Mobile: Create a hanging mobile by suspending pieces of driftwood with attached shells at varying lengths. Hang it near a window or in a garden for a delightful coastal touch.

  2. Wall Art: Arrange multiple driftwood pieces with shells into a visually striking design on a canvas or wooden panel. Display it as a statement piece on your wall.

  3. Candle Holder: Attach shells to a larger piece of driftwood, leaving a space in the middle to hold a candle. This creates a unique and charming centerpiece for a dining table or outdoor gathering.

With this comprehensive guide, you’re now equipped to embark on your shell driftwood craft journey. So gather your materials, get creative, and let the relaxing coastal vibes fill your home with these beautiful creations!

Shell Driftwood Craft

Filed Under: Driftwood Ideas Tagged With: craft, Driftwood, shell

  • « Previous Page
  • Page 1
  • Page 2
  • Page 3
  • Page 4
  • Page 5
  • Next Page »

Primary Sidebar

Driftwood4us.com, is a participant in the Amazon Services LLC Associates Program, an affiliate advertising program designed to provide a means for sites to earn advertising fees by advertising and linking to amazon.com.