• Skip to main content
  • Skip to primary sidebar
  • Terms and Conditions
  • Privacy Policy
  • Contact

Driftwood 4 Us

Just About Driftwood

crafting

Driftwood Keys

February 21, 2025 by admin

Have you ever found yourself wandering along a desolate beach, with the salty breeze whispering secrets as you stumble upon pieces of driftwood scattered along the shore? It’s curious how these bits of wood, worn and weathered by the sea, can hold such captivating stories. Let’s embark on a journey to unlock the mysteries of “Driftwood Keys”—an enchanting blend of nature’s craftsmanship and the ocean’s art.

Understanding Driftwood

What is Driftwood?

Driftwood is essentially pieces of wood that have been washed ashore by the action of tides, winds, and waves. This wood can originate from trees, lumber, or other wooden objects that become waterlogged and are eventually carried by currents to coastal areas. Driftwood is found in different shapes and sizes, each telling its own story of its journey across the waters.

How Driftwood is Formed

The formation of driftwood begins when trees or wooden objects fall into rivers, oceans, or seas. These pieces may travel vast distances, shaped by the elements they encounter. As they drift, they are stripped of their bark and nails by the continuous motion of the water, becoming some of nature’s most intriguing pieces.

The Significance of Driftwood in the Ecosystem

Driftwood plays a critical role in coastal ecosystems. It serves as a habitat for various marine and terrestrial species. Birds, fish, and insects can use driftwood as shelter or as a site for laying eggs. Additionally, when it decomposes, it provides nutrients back to the environment, supporting plant growth along the shorelines.

The Beauty of Driftwood

Artistic Inspiration

Artists and craftspeople have long been inspired by the raw, organic beauty of driftwood. The natural curves and textures make it an ideal medium for creating sculptures, furniture, and decorative pieces. Each piece of driftwood is unique, offering a singular artistic expression that is impossible to duplicate.

Driftwood in Home Décor

Incorporating driftwood into home décor is an increasingly popular trend. It can be used to create everything from simple frames and shelving to elaborate chandeliers. Its rustic, nautical appearance adds a touch of the ocean to any living space, connecting homes with the great outdoors.

The Spiritual and Symbolic Aspects of Driftwood

Many cultures view driftwood as a symbol of strength and resilience. Having weathered the elements and survived an arduous journey, it embodies endurance and adaptability. Some people believe that displaying driftwood in their homes can bring good luck and positive energy, while others use it in spiritual practices to channel the mystical power of the ocean.

Driftwood Keys

Discovering Driftwood Keys

What are Driftwood Keys?

Driftwood Keys are an intriguing concept combining the idea of driftwood with the symbolic nature of keys. In literature and art, keys often represent unlocking potential, secrets, or mysteries. Driftwood Keys may signify unlocking the stories and hidden realities within and around us, connecting us more profoundly to the natural world.

Historical Context of Driftwood Keys

Over time, the symbolism of Driftwood Keys has developed in various cultures. In ancient maritime communities, finding unusual or rare driftwood could be seen as a sign of a message from the sea, potentially holding divine instructions or insights. Today, it can still symbolize the wisdom and lessons gained from nature and the sea.

Collecting Driftwood

Where to Find Driftwood

Driftwood can be found along shores and beaches worldwide. Ideal locations include rugged coastlines, riverbanks, and estuaries where water often deposits debris. When searching for driftwood, timing is everything—the period after high tides or storms often brings more driftwood to shores.

Tips for Responsible Driftwood Collection

It is essential to collect driftwood responsibly to prevent disruption of local ecosystems. Before collecting, check if permits are needed in your area. Avoid taking driftwood from habitats where it is serving a vital ecological role, such as providing shelter for animals. Always remember to collect sustainably, leaving plenty behind for wildlife and natural processes.

Preserving and Cleaning Driftwood

Once you’ve collected your driftwood, cleaning and preserving it ensures its longevity. Rinse it with fresh water to remove salt and sand. Soak it in a bleach solution to eliminate any pests or bacteria, then leave it to dry thoroughly in the sun. Sand any rough spots to make it suitable for crafting or display.

Driftwood Keys

Creative Uses of Driftwood

Craft Projects with Driftwood

Driftwood can be transformed into stunning craft projects. Consider making wreaths, candle holders, mirrors, or wall art. The wood’s organic shape lends a natural elegance to any creation. Combine it with shells, rope, or other natural materials for a distinctly coastal aesthetic.

DIY Driftwood Furniture

For the ambitious DIY enthusiast, driftwood can be crafted into unique furniture pieces. Tables, lamps, and headboards are just a few examples of functional art you can create. Remember to check the stability of your wood and reinforce where necessary to ensure your furniture is both stylish and safe.

Garden and Outdoor Décor

Driftwood is perfect for outdoor projects as it withstands weather conditions better than other wood. Use driftwood to design garden pathways, build small structures, or create focal points in a landscape design. Its natural form complements plants and flowers beautifully, bringing an organic touch to any garden.

The Driftwood Community

Join Driftwood Enthusiasts

If you’re captivated by driftwood, consider joining communities dedicated to this unique material. These groups can be found online and offline, offering discussions, workshops, and events where enthusiasts share techniques and inspiration. It’s a fantastic way to connect with like-minded individuals and appreciate driftwood artistry together.

Ethical Driftwood Trade

With the rise of driftwood popularity, ethical sourcing and trade are crucial. Supporting artisans and businesses that collect driftwood responsibly helps preserve our coastal ecosystems. Look for sellers who prioritize sustainability, ensuring your driftwood pieces are both beautiful and environmentally friendly.

Sharing Your Driftwood Creations

The joy of driftwood crafting is something worth sharing. Whether on social media, in local art shows, or through your community, showcasing your creations can inspire others. Sharing techniques, stories, and insights helps preserve the art of working with driftwood and passes it on to future generations.

Driftwood in Culture and Legend

Driftwood in Folklore

In many cultures, driftwood holds a legendary place in folklore. It was often seen as a source of wisdom, carrying messages from the gods or supernatural beings. Some legends speak of driftwood being used to construct magical objects or communicating with distant spirits.

Literature and Media

Driftwood appears in literature and media as a powerful symbol. Its depiction can evoke themes of survival, transformation, and mystery. Authors and filmmakers use driftwood to add depth and nuance to stories, illustrating characters’ connections to the natural world.

Driftwood Symbolism in Art

Throughout art history, driftwood has been used symbolically to represent change and the passage of time. Each line and curve tells a different part of its journey, making it a compelling subject for artists who want to explore themes of nature, time, and transience.

Conclusion

As you stand at the edge of the shore, watching the steady rhythm of the waves, consider the driftwood pieces strewn about. They are magnificent relics of nature’s tempo, each worn piece a reflection of the beauty and power of the ocean. “Driftwood Keys” invite you to unlock and appreciate the secrets of your world, explore unseen depths, and create new paths with the stories the ocean offers. As you embrace these pieces of nature, you’re humbled and inspired, realizing that in driftwood, we find not only art, but lessons in resilience, adaptation, and the journey of life.
Filed Under: Driftwood Ideas Tagged With: crafting, DIY Projects, driftwood art, home decor

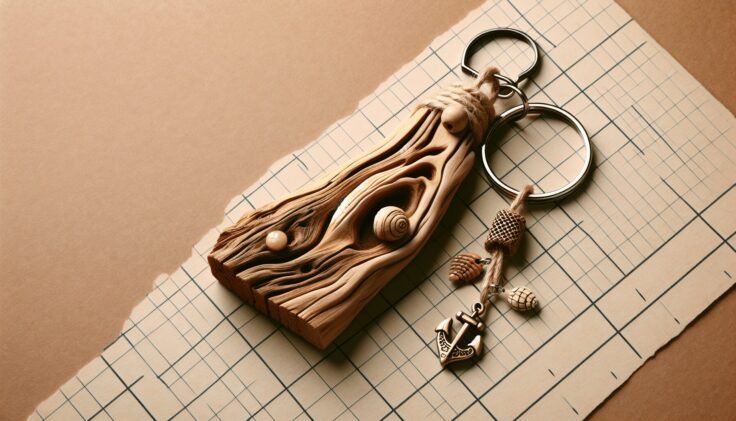
Driftwood Keychain Diy

February 19, 2025 by admin

Have you ever admired the charm of driftwood when you visit a beach or a lakeside? There’s something magical about the way pieces of wood are weathered by the untamed forces of nature, crafting unique textures and forms. Driftwood carries a story, molded by the waves and elements over time. What if you could transform these beautiful relics into something both artistic and functional? Making a driftwood keychain is not only a great way to preserve a piece of your favorite shoreline, but also to carry a memory with you wherever you go. Let’s embark on this enjoyable and rewarding DIY journey together.

Understanding Driftwood

Driftwood is wood that has been washed onto a shore or beach by the action of winds, tides, or waves. It is often smoothed and worn into interesting and intriguing shapes. Driftwood is prized not only for its unique appearance but also for its sustainable and organic qualities. Before starting your keychain project, it’s essential to know a bit about this lovely material.

The Origins of Driftwood

Driftwood can originate from various sources. It might come from trees or shrubs that live by the water’s edge, carried away by floods or tides. Many pieces of driftwood begin as parts of larger logs or branches that get washed away by rivers. Over time, ocean currents carry this wood, breaking it down into smaller pieces with unique shapes.

The Fascination with Driftwood

The appeal of driftwood lies in its individuality and natural beauty. Each piece has its own texture and form, shaped by the elements over time. This individuality lets you create keychains that are as unique as the driftwood itself. Plus, using an eco-friendly material like driftwood aligns with a sustainable lifestyle, making it an ethical choice for DIY projects.

Gathering Driftwood

Now that you appreciate the beauty of driftwood, it’s time to gather some pieces for your project. The best places to find driftwood are beaches, lakesides, and riverbeds. Let’s walk through a few steps on how to collect the ideal pieces.

Locating Your Treasures

Whether you’re walking along a sandy beach or a rocky lakeside, look for pieces that appeal to you. Consider their size, shape, and texture. Remember, you’re looking for small pieces that would work well as keychain accents. It’s helpful to note that some beaches might have restrictions on collecting natural objects, so always be mindful of local regulations.

Choosing the Right Pieces

For a keychain, you would want small, lightweight pieces. Look for pieces that fit comfortably in your hand and have enough thickness to withstand day-to-day wear as a keychain. Aim for those that have interesting shapes or textures. Don’t forget, each piece you choose tells a unique story through its form and pattern.

Driftwood Keychain Diy

Preparing Your Driftwood

Once you’ve gathered your chosen pieces, it’s crucial to prepare them for use. Preparing driftwood adequately ensures they are clean, preserved, and ready for conversion into a keychain.

Cleaning Driftwood

Driftwood may be covered in dirt, sand, or salt due to its time spent in the wild. Start by rinsing your collection with fresh water, scrubbing them with a brush to remove any debris. You can soak them for a few hours in fresh water to eliminate salts and other impurities. Once clean, allow them to dry thoroughly.

Sanitizing the Pieces

To sanitize the driftwood, consider boiling them for an hour. This process will remove any bacteria or organisms lingering in the wood. Once boiled, let them dry completely, preferably in a sunny spot. The drying process might take up to a few days, depending on the size and thickness of the wood.

Designing Your Keychain

With clean and sanitized driftwood, you are now ready to start designing your keychain. Designing your keychain involves creativity and a personal touch, adding charm to your everyday carry.

Choosing Your Design

The design process is all about personal preference. Would you like a simple piece of driftwood pierced through with a keychain ring? Or do you envision a cluster of smaller pieces adorned with beads? Think about the look and feel you want to achieve. Sketching out your ideas may help visualize the final product.

Embellishing Driftwood

You can enhance the natural beauty of driftwood by adding embellishments. Consider using paints, varnishes, or even metal leaf for a touch of glamour. If you’d like to incorporate additional materials like beads or charms, plan how they will attach. Use strong adhesives or creative knotting techniques to bring together these elements.

Assembling Your Keychain

Now that you have a design in mind, it’s time to assemble your keychain. Assembling requires a few tools and materials which are easy to find and use.

Tools and Materials Needed

Here is what you will need to assemble your driftwood keychain:

Tool/MaterialPurpose
Keychain ringsTo attach your driftwood piece to your keys.
Drill with a small drill bitFor creating holes if needed.
Sandpaper (fine grit)To smooth any rough edges.
Strong adhesive (e.g., epoxy)For attaching embellishments.
Paint, beads, charms (optional)For decoration.

Step-by-Step Assembly

  1. Prepare the Driftwood: Ensure your driftwood piece is clean, dry, and any rough edges are sanded down for smooth handling.

  2. Drill Holes: Use the drill to make a small hole at the top of the driftwood piece if you plan to string it directly onto a keychain ring.

  3. Add Embellishments: If using paints or other decorative items, apply them now. Allow any adhesives or paint to dry as per the instructions on their packaging.

  4. Attach to Keychain: Thread the driftwood onto the keychain ring through the drilled hole or attach using your chosen method (e.g., adhesive with additional décor elements).

  5. Finishing Touches: Once all pieces are assembled and dried, ensure everything is secure and the keychain looks as you imagined.

Tips for Success

Creating a driftwood keychain is a rewarding process, but there are some tips and tricks to ensure everything goes smoothly.

Playing with Proportions

When designing your keychain, consider the proportion relative to your keys and other objects you carry. A bulky or oversized keychain might not be practical for daily use.

Sealing Driftwood

To maintain the beauty of your driftwood and protect it against daily wear, consider sealing it with a clear wood sealant. This step adds durability while enhancing its natural shine.

Personalization Ideas

Personalize your keychain for yourself or as a gift. Carve initials into the wood or add charms representing a favorite hobby or memory. Personal touches make your keychain truly unique.

Cherishing Your Creation

Congratulations on creating your unique driftwood keychain! This project not only results in something stylish and practical for yourself but can also be a memorable gift for loved ones. Driftwood keychains carry both a personal and natural narrative, encouraging you and others to appreciate the artistry found in nature and the joy of crafting with your own hands.

Your driftwood keychain is now more than an accessory; it’s a testament to creativity and the timeless beauty of nature. Enjoy the satisfaction of carrying your little piece of nature with you wherever you go, always reminding you of the power and wonder of the natural world.

Filed Under: Driftwood Ideas Tagged With: crafting, DIY Project, Driftwood, Handmade, Keychain

Diy Driftwood

February 18, 2025 by admin

Have you ever strolled along a beach and spotted driftwood, those weathered chunks of wood that bring a mysterious charm to the shoreline? Driftwood might seem like just another natural element of beaches, but it carries a unique potential to be transformed into stunning DIY projects. If you’ve been curious about giving your home or garden a touch of rustic elegance, then using driftwood could be your answer. Let’s explore how you can turn this organic resource into various creative projects.

What is Driftwood?

Driftwood is a piece of wood that has been washed onto the shores of oceans, seas, or rivers due to the natural action of tides. Over time, this wood gets weathered by the elements, giving it a smooth texture and a distinctive appearance. Driftwood is celebrated for its naturally aged look, varying from pale grays to rich browns, with unique shapes that make each piece special. The natural beauty of driftwood makes it perfect for crafting unique and aesthetically pleasing items.

Origins and Formation

The journey of driftwood begins as a tree somewhere, perhaps hundreds of miles away from where you find it. Over time, this wood can become detached due to natural events like storms, land erosion, or human activities. Once in the water, the wood is carved and polished by waves, sand, and sun, resulting in its characteristic smooth appearance and irregular shapes. This journey not only gives driftwood its aesthetic appeal but also makes each piece one-of-a-kind.

Ecological Importance

Beyond its beauty, driftwood plays a crucial ecological role. It serves as a habitat for many organisms, both in aquatic environments and on land. Small fish and marine invertebrates find shelter in it, while birds and insects may use it for nesting or food. Thus, when collecting driftwood, it’s essential to remember to take only what you need and ensure you’re not disturbing local ecosystems.

Preparing Driftwood for Crafting

Before you start crafting, you’ll need to prepare the driftwood to ensure it’s clean and safe for use in your home.

Cleaning Driftwood

Begin by rinsing the driftwood with fresh water to remove any sand, dirt, or salt. If necessary, use a soft brush to scrub off stubborn debris. Once cleaned, soak the wood in a mixture of water and a little bleach—about one cup of bleach per gallon of water. This helps to kill any mold, mildew, or pests that may be residing in the wood. Let the wood soak for a day or two, then rinse it thoroughly.

Drying and Preserving

After cleaning, it’s crucial to dry the driftwood completely before using it in any projects. Leave it in a sunny area with good air circulation. Depending on the size and thickness of the wood, it can take a few days to a week to dry. You can also bake smaller pieces in an oven at a low temperature (about 200°F or 93°C) for a few hours to ensure thorough drying. Once dried, consider applying a sealer if you want to enhance its durability, especially for indoor projects.

Diy Driftwood

Creative DIY Driftwood Projects

With the driftwood prepared, it’s time to unleash your creativity. There are numerous ways to incorporate driftwood into your décor. Here are a few inspiring projects to get you started.

Driftwood Wall Art

One of the simplest yet most striking uses of driftwood is creating wall art. By arranging multiple pieces into a pattern or abstract design, you can produce a captivating piece of art. You might choose to glue smaller pieces together or securely nail larger pieces onto a backing board. This kind of focal piece can add a natural touch to any room, bringing the outdoors inside.

Driftwood Mirrors

A driftwood mirror frame is a stunning way to elevate a simple mirror. Gather various pieces of driftwood and arrange them around the frame. You can use a combination of hot glue and nails to secure the pieces in place. The natural, asymmetrical look of the driftwood adds a unique texture that catches the eye every time you pass by.

Driftwood Planters

Integrate driftwood into your garden by creating planters. You can carve out sections of larger pieces or fasten smaller ones together to form a container. These planters not only look beautiful but also provide excellent drainage for plants. They’ll add a rustic, natural charm to your garden or patio.

Driftwood Furniture

For those more ambitious and with some carpentry skills, driftwood can be transformed into furniture. Imagine a coffee table or a stool made from smoothly sanded pieces of driftwood. Each furniture piece will tell its own story, reflecting the journey of the wood through nature. Though more challenging, driftwood furniture is extremely rewarding to create and can be a stunning centerpiece in your home.

Tools and Materials Needed

Here’s a simple table summarizing the tools and materials you might need for these projects:

Tool/MaterialPurpose
Soft BrushFor scrubbing off dirt and debris
BleachTo disinfect and clean the driftwood
SawFor cutting driftwood to desired sizes
SandpaperTo smooth out rough edges
Wood GlueFor sticking pieces together
Nails and HammerTo secure pieces or create structures
SealerTo preserve the wood after crafting
OvenFor drying smaller pieces thoroughly

Safety Precautions

When working with driftwood, remember to take safety precautions. Always wear protective gloves and goggles when sawing or sanding wood. If you’re using chemicals like bleach, work in a well-ventilated area and consider wearing a mask to avoid inhaling fumes.

Diy Driftwood

Sourcing Driftwood Responsibly

While driftwood can be found in many coastal regions, it’s important to collect it responsibly. Avoid taking wood from protected areas or disrupting habitats that rely on it.

Legal Considerations

In some areas, collecting driftwood may be restricted or require a permit. Check local regulations before gathering driftwood to ensure you’re not inadvertently breaking any laws. If in doubt, you can contact local authorities or environmental organizations for guidance.

Ethical Collection

When collecting driftwood, take only what you need and consider leaving some for wildlife. Driftwood is not only a crafting material; it’s part of the coastal ecosystem. Plus, by being selective, you ensure that your projects are made with the most interesting and unique pieces.

Driftwood: A Sustainable Crafting Material

Driftwood is a fantastic choice for those looking to incorporate sustainable materials into their crafting. It’s a natural resource that doesn’t require the felling of living trees and often exists in abundance.

Environmental Impact

Using driftwood reduces waste and the demand for newly manufactured materials. By opting for driftwood, you help decrease deforestation and the carbon footprint associated with producing and transporting new wood products.

Crafting with a Conscience

Embracing driftwood for your DIY projects is not only environmentally friendly, but it also supports a recycling mindset. Each driftwood project tells a story of sustainability, reminding us to consider the impact our choices have on the planet.

Bringing Driftwood into Your Home

Driftwood projects are a beautiful way to bring a natural element into any space. Whether you prefer minimalist designs or more intricate creations, driftwood can be tailored to fit your style. Its natural allure pairs well with various décor themes, from coastal and rustic to modern and bohemian.

Decorating Tips

Consider combining driftwood with other natural materials, like stones, shells, or sea glass, to complement its organic texture. Furthermore, driftwood’s neutral colors can be accented with subtle hints of color through paint or accessories, allowing your projects to blend seamlessly with existing décor or stand out as statement pieces.

Maintenance and Care

To maintain the beauty of your driftwood creations, occasionally dust or wipe them down with a damp cloth. If they’re kept indoors, avoid placing them in areas with high humidity to prevent mold or mildew. For outdoor pieces, consider applying a fresh coat of sealer yearly to protect them from the elements.

Conclusion

Crafting with driftwood not only allows you to create beautiful, unique items but also reconnects you with nature in a deeply satisfying way. Each piece of driftwood you gather holds a story, shaped by the elements over countless miles. As you work with it, you become part of that story, adding your creativity and craftsmanship to the mix.

So, the next time you’re at the beach, take a moment to appreciate the simple, rugged elegance of driftwood. Who knows, you might just find the perfect piece for your next DIY venture. Embrace your creativity, practice sustainability, and bring a touch of the wild into your life with DIY driftwood projects.

Filed Under: Driftwood Ideas Tagged With: crafting, DIY, Driftwood, home decor, natural materials

Cutting Driftwood

February 8, 2025 by admin

Have you ever strolled along the beach, admiring the unique and captivating pieces of driftwood scattered along the shore? Driftwood comes in various shapes and sizes, each piece telling a different story about its journey through water and time. For those with a creative spirit, these seemingly random pieces of wood offer a world of possibilities. Whether crafting furniture, creating art, or simply adding a rustic touch to your décor, learning how to cut and work with driftwood can open a world of creative potential.

Understanding Driftwood

Understanding the nature of driftwood is the first step in mastering the art of cutting and crafting with it. This unique material is wood that has been washed onto the shore by the sea, rivers, or lakes. Its distinct characteristics come from the journey it undertakes, exposed to water, sand, and weathering elements.

The Formation of Driftwood

Driftwood originates from trees or branches that have been separated from their original position. Over time, exposure to the elements such as water currents, sand erosion, and sun bleaching transforms it into the distinctive pieces you find along the beach. Its ragged edges and worn appearance add to its charm, making each piece truly unique.

Types of Driftwood

Driftwood can come from a variety of tree species, each imparting its own texture and color. Common sources of driftwood include:

  1. Hardwoods: Such as oak and cherry, which are robust and often feature intricate grains.
  2. Softwoods: Like pine and cedar, known for their light weight and softness, making them easier to work with.
  3. Exotic Woods: Occasionally, you might find pieces from tropical palms or unusual species that add a unique aesthetic.

Understanding the type of driftwood you are dealing with is essential, as it influences both the cutting process and how you might use it.

Preparing to Cut Driftwood

Before you start cutting, preparation is crucial. The right tools and techniques will ensure that your driftwood cutting process is both safe and effective.

Selecting the Right Driftwood

Choosing the right driftwood is an art in itself. Look for pieces that are:

  • Free of rot: Avoid wood that feels spongy or has a musty smell, as it’s likely unusable.
  • Interesting shape: Choose pieces with natural curves or unusual shapes that match your intended project.
  • Appropriate size: Ensure the piece is manageable for your cutting capabilities and the tools you have.

Cleaning Driftwood

Driftwood often carries remnants of its ocean journey, such as salt, sand, and debris. Clean it properly to preserve its quality and make cutting easier:

  1. Soak: Immerse the driftwood in fresh water for several days, changing the water daily to remove salt and debris.
  2. Scrub: Use a stiff brush to scrub off dirt and loose particles.
  3. Dry: Let the driftwood dry completely in a shaded area to prevent cracking under direct sunlight.

Tools You’ll Need

The right tools make all the difference:

  • Hand saw: For precise cutting of smaller pieces.
  • Power saw: A jigsaw or band saw for larger, more intricate cuts.
  • Chisel: For detailed shaping.
  • Sanding tools: To smooth rough edges.
  • Protective gear: Such as gloves and goggles to ensure safety during cutting.

Cutting Driftwood

Techniques for Cutting Driftwood

Once you’re prepared, it’s time to start cutting. Selecting the right technique can help you achieve the shape and size you desire while maintaining the driftwood’s natural aesthetics.

Cutting Techniques

  • Straight Cuts: Use a hand saw or power saw to make simple, straight cuts. Perfect for creating basic shapes or adjusting length.

  • Curved Cuts: A jigsaw is ideal for following the natural curves and shapes of the wood, allowing you to maintain its organic look.

  • Detail Work: Use chisels for precision work and to carve intricate designs or patterns.

Safety Tips for Cutting

Safety should always be your top priority. Here are some essential tips:

  1. Secure the wood: Make sure the driftwood is stable while cutting to avoid accidents.
  2. Protective gear: Always wear gloves and goggles.
  3. Cut slowly: Take your time, especially with power tools, to maintain control and precision.
  4. Check tool conditions: Ensure all tools are in good working order to prevent mishaps.

Utilizing Driftwood in Creative Projects

With your driftwood pieces ready, the possibilities for creative use are endless. From simple home décor to complex furniture pieces, driftwood can enhance any living space with its natural charm.

Crafting Home Décor

Driftwood is perfect for adding a rustic touch to home décor:

  • Wall Art: Arrange smaller pieces into patterns or designs.
  • Table Centerpieces: Use longer, flat pieces to create eye-catching centerpieces.
  • Mirrors and Frames: Frame existing mirrors or pictures with driftwood for a natural look.

Making Furniture

For the more ambitious, driftwood can be transformed into unique pieces of furniture:

  • Tables: Large, sturdy pieces can serve as tabletops or table legs.
  • Chairs and Benches: Use robust driftwood to build seating with a natural aesthetic.
  • Shelves: Attach driftwood to walls for rustic shelving.

Artistic Creations

For artists, driftwood is a versatile medium:

  • Sculptures: Carve or assemble pieces into unique sculptures.
  • Jewelry: Smaller pieces can be polished and turned into pendants or earrings.
  • Ornaments: Create seasonal decorations with a natural twist.

Cutting Driftwood

Caring for Driftwood Creations

Once you’ve created your driftwood masterpiece, proper maintenance will ensure its longevity and beauty.

Preserving Driftwood

To protect your driftwood project:

  • Sealants: Use a water-based sealant to protect from moisture and dirt.
  • Regular Cleaning: Dust regularly to keep surfaces clean and bright.
  • Avoid Excessive Sunlight: Prolonged exposure can cause fading and cracking.

Repair and Restoration

Driftwood, like any wood, can wear over time. For repairs:

  • Fill Cracks: Small cracks can be filled with wood filler and sanded smoothly.
  • Resealing: Periodically reseal to protect and refresh the wood.
  • Mildew Management: Keep in a dry, well-ventilated space to prevent mildew.

Conclusion

Your journey with driftwood doesn’t just end at cutting. It’s about appreciating the uniqueness of each piece, understanding how to work with it, and imaginatively transforming it into something new and extraordinary. Each crafted item has the opportunity to speak to its personal history, marked by the ebb and flow of water, wind, and time, much like the people who transform it. So, as you step onto the shore next time, look at the driftwood with new eyes, recognizing both what it has been and what it could become with a few creative touches.

Filed Under: Driftwood Ideas Tagged With: crafting, Driftwood, home decor, Woodworking

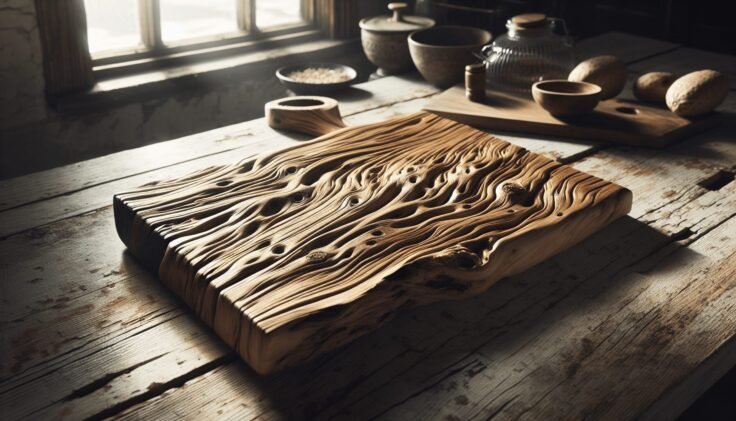
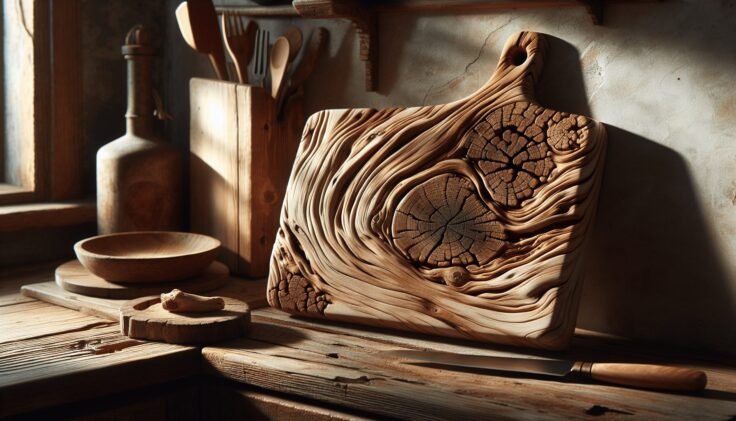
Driftwood Cutting Board

February 5, 2025 by admin

Have you ever wondered if your kitchen could be both eco-friendly and stylish? Enter the driftwood cutting board, an exceptional addition to any kitchen that combines functionality with a rustic but elegant aesthetic. In today’s culinary landscape, more individuals are opting for sustainable and environmentally conscious choices when it comes to their kitchenware, and a driftwood cutting board fits this trend perfectly.

What is a Driftwood Cutting Board?

Definition and Origin

A driftwood cutting board is crafted from pieces of driftwood, which are wood logs or timber carried by currents to the shorelines. Naturally weathered by the sun, sea, and sand, driftwood offers a unique texture and appearance that is both charming and resilient. Collectors often harvest driftwood from coastal areas, giving each piece its unique story and character.

Unique Characteristics

Each driftwood cutting board is one-of-a-kind, owing to its natural grain patterns, weathering effects, and color variations. The natural process of tumbling through the sea smooths out sharp edges and gives each board its distinctive look. Not only are these cutting boards fascinating to look at, but they also bring a piece of nature directly to your home.

Benefits of Using a Driftwood Cutting Board

Aside from their aesthetic appeal, driftwood cutting boards offer a variety of benefits to those who use them regularly. These benefits range from environmental advantages to practical kitchen applications.

Eco-Friendly Choice

Choosing a driftwood cutting board helps reduce the demand for freshly cut timber. By repurposing wood that has naturally fallen and washed up on shores, you contribute to sustainability efforts and help minimize deforestation.

Durable and Long-Lasting

Driftwood is known for its enduring durability. The natural seasoning that occurs through its exposure to the elements makes it particularly resilient, often lasting longer than boards made from freshly-cut wood.

Naturally Antimicrobial

Driftwood naturally possesses antimicrobial properties because of the tannins present in the wood, which help to inhibit bacterial growth. This means you can prepare food with peace of mind, knowing your board is working to keep your cooking surfaces clean.

Aesthetically Pleasing

The different tones and elements of driftwood cutting boards can complement a broad range of kitchen decor styles, from rustic to modern. Their unique textures and patterns add an organic touch to any setting, making them as much a decorative piece as they are functional.

Driftwood Cutting Board

How to Choose the Right Driftwood Cutting Board

Selecting the perfect driftwood cutting board for your kitchen involves considering several factors. Here, we’ll break down how to choose a board that’s right for you.

Consider the Size

Choose a size that suits your kitchen space and the types of tasks you frequently perform. A smaller board is great for quick-cutting jobs and conserving kitchen space, while a larger board is more suitable for elaborate cooking projects.

Check the Thickness

Thicker boards tend to be more durable and robust, capable of withstanding intensive kitchen tasks without warping or splintering. However, they can be heavier, so think about how you’ll need to move and store them.

Inspect the Grain

Consider whether you prefer the fine grain of a sleek appearance or the more pronounced open grain that showcases the wood’s natural beauty. Keep in mind that a tighter grain pattern is often smoother, which might be preferable for some kitchen tasks.

Verify the Source

Ensure that your driftwood board comes from a reputable source to guarantee it is collected sustainably. It’s worth asking manufacturers or sellers about their sourcing practices to ensure ethical considerations are met.

Caring for Your Driftwood Cutting Board

Proper maintenance of your driftwood cutting board will ensure it remains a functional and beautiful kitchen tool for years to come.

Cleaning

Clean your driftwood cutting board using warm soapy water after each use. Avoid soaking it in water, as this can lead to warping or cracking. Rinse and dry thoroughly to maintain its condition.

Oiling

Applying a food-safe oil, such as mineral oil, monthly or as needed can help to preserve the wood’s moisture and prevent it from drying out. Oiling also enhances the board’s natural color and pattern, showcasing its unique beauty.

Avoid Harsh Chemicals

Do not use bleach or harsh cleaning agents on your driftwood cutting board, as these can damage the wood’s surface and taint food. Instead, use a mixture of vinegar and water for additional sanitization, if needed.

Regular Inspection

Check regularly for any signs of wear such as cracks, deep cuts, or splintering. Address these as they occur to prevent bacteria from nesting in the grooves. Sanding lightly and re-oiling can fix many minor imperfections.

Driftwood Cutting Board

Environmental Impact and Driftwood Cutting Boards

The environmental implications of using driftwood resources are a significant factor. Being informed about these allows consumers to make better choices.

Sustainable Practices

Sourcing driftwood responsibly ensures minimal disruption to coastal ecosystems. These practices include collecting only dried and washed-up wood and ensuring that the wood isn’t home to live marine organisms.

Carbon Footprint

Using driftwood eliminates the need for logging, which reduces carbon emissions associated with wood processing and transport. This means that choosing a driftwood cutting board can lower your overall carbon footprint, contributing to a more sustainable environment.

Promoting Awareness

Driftwood products bring attention to the importance of recycling and the beauty that can be found in repurposing materials. Supporting these items sends a message about your commitment to environmental responsibility.

Driftwood Cutting Board vs. Other Cutting Boards

When setting out to choose a cutting board, it can be useful to understand how driftwood compares to other popular materials.

FeatureDriftwoodBambooPlasticEnd Grain Wood
DurabilityHighMediumLow-MediumHigh
Eco-FriendlinessVery HighHighLowMedium
Maintenance RequiredMediumLowLowHigh
Aesthetic ValueVery HighMediumLowVery High
CostModerate-HighLowLowHigh

This table highlights how various materials stack up against driftwood in terms of key factors. The driftwood cutting board excels in durability, aesthetic value, and eco-friendliness, making it a compelling choice for those prioritizing sustainability and style.

Common Concerns and Misconceptions

It’s natural to have doubts or misconceptions about new kitchen items, so let’s address some of the frequent concerns surrounding driftwood cutting boards.

Is Driftwood Safe for Food Prep?

Yes, driftwood is safe for food preparation. When treated and finished correctly, the wood itself provides a hygienic surface. Look for boards treated with food-safe finishes for peace of mind.

Will Driftwood Warp Over Time?

Due to the natural seasoning and treatment, driftwood cutting boards are less prone to warping compared to other types of wood. Proper care, such as oiling and avoiding prolonged water exposure, can prevent warping entirely.

Are They Just a Passing Trend?

While they may seem trendy due to the current interest in eco-conscious products, driftwood cutting boards have enduring appeal because of their unique beauty, durability, and sustainable nature. They’re more than just a fad—they’re part of an ongoing shift toward environmentally-friendly living.

Conclusion

As you’ve discovered, a driftwood cutting board is more than a simple kitchen tool. It embodies a philosophy of sustainability and an appreciation for the natural world, offering both beauty and practicality. Choosing a driftwood cutting board means investing in an eco-friendly lifestyle without compromising on style or function. Whether you’re an avid home cook or someone keen on making environmentally-conscious choices, this cutting board is bound to enhance your culinary experience while advocating for a more sustainable future.

Filed Under: Driftwood Ideas Tagged With: crafting, DIY, Driftwood, Kitchenware

Driftwood Mason Jar

February 2, 2025 by admin

Have you ever imagined transforming something as simple as a mason jar into a stunning piece of decor using driftwood? Adding driftwood to a mason jar combines natural beauty with everyday utility, creating a piece that can elevate any room’s aesthetic. This article will guide you through the process of understanding and creating a driftwood mason jar, ensuring a cozy, rustic charm for your home. Let’s embark on this creative journey together, where you’ll learn not only how to create a driftwood mason jar but also explore its uses and benefits.

Driftwood Mason Jar

What is Driftwood?

Driftwood, as the name suggests, is wood that has been washed ashore. Over time, as it is exposed to the elements like wind, sun, and water, it takes on a unique shape and texture. As a result, driftwood is often celebrated for its organic beauty and the natural character it adds to decor.

The Journey of Driftwood

Driftwood can start as branches or logs from trees that fall into rivers or oceans. Over time, these pieces of wood can travel long distances, softened and smoothed by water currents. This natural aging gives driftwood its distinguished pale color and weathered look, making it a favored choice for home decor, crafts, and art.

Collecting Driftwood

If you’re planning to collect driftwood for your mason jar project, there are some things to keep in mind:

  • Locations: Look for driftwood along beaches, riverbanks, or lakesides. Always ensure that collecting driftwood is permitted in the area, as some places have conservation rules.
  • Size and Shape: Choose pieces that are suitable for your project. Small, thin pieces work best for wrapping around a mason jar.
  • Condition: Ensure the pieces are dry and free from mold or rot.

Why Choose a Driftwood Mason Jar?

When it comes to home decor, driftwood mason jars offer a blend of practicality and aesthetics. Not only do they look fantastic, but they also serve multiple purposes, making them a versatile addition to your living spaces.

Aesthetic Appeal

Driftwood’s organic texture and colors enable you to bring an element of nature into your home. When combined with the simplicity and transparency of a mason jar, it creates an attractive centerpiece or accent that speaks of subtle elegance.

Functional Uses

Beyond their beauty, driftwood mason jars are also extremely functional:

  1. Vases: Perfect for holding flowers, adding a touch of nature both inside and out.
  2. Candle Holders: Driftwood adds a rustic charm when used to encase a candle within a mason jar, creating a warm, inviting glow.
  3. Storage: Ideal for storing small items like pens, brushes, or utensils, they help keep essentials within reach while looking stylish.

Environmental Benefits

Using driftwood as a decor element is environmentally friendly. It involves repurposing natural materials, reducing the demand for manufactured goods, and minimizing waste. It’s a great way to incorporate sustainable practices into your home decor.

Materials Needed for a Driftwood Mason Jar

To create your driftwood mason jar, you’ll need a few basic materials. These can be sourced from craft stores, online, or even found items.

Basic Materials

  1. Mason Jars: These jars come in various sizes. Depending on your needs, you might choose a regular-sized jar for a vase or a smaller one for a candle holder.
  2. Driftwood: Small pieces that can be easily glued around the jar. They should be dry and clean.
  3. Adhesive: A strong craft glue or a hot glue gun to attach the driftwood to the jar.

Decorative Additions

For added creativity, you might consider:

  • Twine or Rope: To wrap around the neck of the jar for additional rustic charm.
  • Paint or Wood Stain: If you want to give driftwood a distinct color or finish.
  • Beads or Shells: Small embellishments that can be attached for an extra touch of decoration.

Step-by-Step Guide to Creating a Driftwood Mason Jar

Embarking on this project can be a fulfilling experience as you transform ordinary items into beautiful decor pieces.

Step 1: Clean Your Materials

Before diving into the creative process, clean all your materials. Wash the mason jar with soap and water to remove any residues. Driftwood should be brushed off and, if necessary, soaked in a mild bleach solution to kill any remaining hidden organisms or bacteria. Once cleaned, let it dry completely in the sun.

Step 2: Plan Your Design

Arrange your driftwood pieces around the jar before applying any glue. Experiment with different arrangements to see which configuration you like best. You can decide on a tightly packed look or a looser design where some glass can peek through.

Step 3: Attach the Driftwood

Using your chosen adhesive, begin gluing the driftwood pieces one by one around your jar. Apply a small amount of glue to each piece and press it firmly onto the jar, holding it in place for a few seconds until it sets. Continue this process until the desired part of the jar is covered.

Step 4: Add Decorative Touches

Once the driftwood is secure, wrap twine or rope around the jar’s neck. Do you want to commemorate a special day or event? You can add other embellishments like beads, shells, or paint to personalize your jar further.

Step 5: Seal the Jar

For a more polished look, you might want to apply a thin coat of sealant over the driftwood. This will protect the wood from moisture and enhance its natural color.

How to Use Your Driftwood Mason Jar

Now that you have your finished driftwood mason jar, it’s time to explore how you can incorporate it into your space.

Centerpiece Display

Place your driftwood mason jar on a dining table or mantle. Fill it with seasonal flowers or fairy lights to create a centerpiece that draws attention and complements the surroundings.

Candle Holder

Use your jar to hold small pillar candles or tea lights. The driftwood will add a cozy ambience to any room as the candlelight flickers through the gaps between the wood.

Organizing Tool

For a functional and appealing organization tool, use the jar in your office or kitchen to corral utensils, brushes, or pens. This keeps your work area tidy while maintaining a stylish look.

Caring for Your Driftwood Mason Jar

To keep your driftwood mason jar looking as beautiful as the day you made it, follow a few maintenance tips.

Routine Cleaning

Dust your jar regularly using a soft cloth or a gentle brush. If needed, use a slightly damp cloth to wipe the glass portion of the jar and any smooth driftwood surfaces.

Handling Moisture

Driftwood can be sensitive to prolonged moisture exposure. If using your jar as a vase, ensure there are no water spills onto the driftwood, which can cause warping or mold over time.

Storage Considerations

If storing the jar for an extended period, consider wrapping it in bubble wrap or tissue paper to prevent dust accumulation and ensure it remains chip-free.

Troubleshooting Common Issues

Sometimes, despite our best efforts, things don’t go as planned. Here are solutions to a few common driftwood mason jar issues:

Problem: Driftwood Doesn’t Stick

  • Solution: If driftwood doesn’t adhere well, ensure both the jar and wood are completely dry before attempting to glue. Apply sufficient pressure when gluing to allow the adhesive to set effectively.

Problem: Driftwood Warps or Cracks

  • Solution: Avoid exposing the jar to excess heat or moisture. If cracks appear, consider reinforcing it with additional adhesive or replacing the affected piece entirely.

Problem: Uneven Arrangement

  • Solution: If pieces are unevenly spaced, use smaller driftwood fragments to fill gaps, or reposition larger pieces to even out spacing and create a consistent appearance.

DIY Driftwood Mason Jar Inspiration

Looking for more ideas? Consider the following creative projects where you can use your newfound skills.

Festive Jars

For holidays or special events, customize your driftwood mason jars to match the theme. Adding seasonal decorations like autumn leaves or holiday ribbons can make your jars a festive focal point.

Driftwood Jar Lanterns

Create lanterns by attaching handles made from twine or wire. Inside, place a battery-operated tea light to safely illuminate your space, indoors or out.

Gift Jars

A handmade driftwood mason jar makes for a unique and heartfelt gift. Personalize it by adding the recipient’s name or meaningful objects that symbolize your connection.

Conclusion

Crafting a driftwood mason jar is a delightful blend of creativity and nature. This DIY project invites you to create a personalized, functional piece of art that reflects your style and enhances your living environment. As you use and care for your driftwood mason jar, remember that each piece of driftwood carries a history, adding a layer of story and character to your decor. Embrace the natural beauty of driftwood and enjoy the satisfaction of transforming the humble mason jar into something truly special.

Filed Under: Driftwood Ideas Tagged With: crafting, Driftwood, home decor, Mason Jar, Upcycling

Driftwood Cleaning Drift Wood

January 29, 2025 by admin

Do you ever look at a piece of driftwood and wonder how you could restore its natural beauty? Driftwood, with its unique textures and shapes, can be a stunning addition to your home decor or garden. However, before you can use it, you often need to clean it. Cleaning driftwood isn’t just about removing dirt and debris; it’s about preserving its character and ensuring it remains a focal point in your space.

Understanding Driftwood

What is Driftwood?

Driftwood is wood that has been washed ashore by tides, winds, or waves. Not only is driftwood a beautiful material to work with due to its natural patterns and weathered appearance, but it also tells a story of the journey it has undertaken across bodies of water.

Types of Driftwood

While driftwood is often seen as a singular category, it can vary based on the type of wood and where it has been found. Common trees that contribute to driftwood include cedar, pine, and hardwoods like oak and maple. Each type of wood has its own characteristics in terms of density, color, and texture. As you plan to clean and use driftwood, consider these traits to maintain its unique essence.

Why Clean Driftwood?

Remove Natural Debris

Before you incorporate driftwood into your home, it must be cleaned to remove natural debris like sand, insects, and salt from the ocean. These elements can affect its appearance and longevity if not properly addressed.

Enhance Its Appearance

Cleaning driftwood enhances its natural beauty and prepares it for any finishing you might choose to apply. Whether you’ll be leaving it bare or applying oils, proper cleaning is the first step towards a beautiful result.

Preserve the Wood

Driftwood can deteriorate quickly if not cared for correctly. By cleaning and treating it, you can extend its life and keep its appearance intact for years to come. Preservation methods can include sealing and varnishing, which protect against moisture and environmental damage.

Driftwood Cleaning Drift Wood

Materials Needed for Cleaning Driftwood

When it comes to cleaning driftwood, having the right materials on hand is crucial for achieving the best results. Here are some essentials you’ll need:

  • Soft Brush: Useful for gentle scrubbing to remove surface debris.
  • Stiff Brush: Helps with more rigid dirt or growths like algae.
  • Sandpaper: For smoothing any rough spots.
  • Buckets: For soaking and rinsing.
  • Bleach or Vinegar: To disinfect and eliminate odors.
  • Gloves: Protect your hands during the process.
  • Towel: For drying the driftwood.
  • Sealer or Varnish: For preservation after cleaning.

Cleaning Driftwood: Step-by-Step Guide

Step 1: Initial Rinse

Begin by rinsing the driftwood with clean water to remove loose debris. You can do this with a garden hose or by submerging the wood in a bucket of water. The goal here is to eliminate surface dirt.

Step 2: Scrubbing the Surface

Using a soft or stiff brush, scrub the surface of the driftwood. If there are stubborn spots of dirt or algae, don’t hesitate to use some elbow grease. This step is crucial for ensuring that the wood’s natural texture shines through.

Step 3: Soaking

Once you’ve scrubbed the wood, soak it to help remove any salt or minerals embedded within it. You can create a soaking solution of water mixed with either bleach or vinegar. If using bleach, aim for a ratio of about 1/4 cup bleach to one gallon of water. This will help sanitize the wood. If you prefer vinegar, a similar ratio works well, especially if you’re concerned about using harsher chemicals. Allow the driftwood to soak for at least 24 to 48 hours.

Step 4: Final Rinse

After soaking, rinse the driftwood thoroughly to remove any bleach or vinegar residue. This step is essential as it ensures the wood is neutralized and safe for handling or use in any interior space.

Step 5: Drying

Place the cleaned driftwood in a dry, warm area to allow it to dry completely. Depending on the size and density of the wood, this could take several days. Ensure it is turned periodically so all sides dry evenly.

Step 6: Sanding

Once the driftwood is dry, use sandpaper to smooth any rough edges or surfaces. This will make the wood safer to handle and help prepare it for any finishes you might apply.

Step 7: Sealing (Optional)

If you plan to use the driftwood indoors or want to enhance its durability, consider applying a sealer or varnish. This will protect the wood from moisture and bring out its natural colors.

Driftwood Cleaning Drift Wood

Tips for Successful Driftwood Cleaning

Be Gentle

Driftwood can be fragile, so take care not to scrub too hard or apply excessive force. This will help maintain the wood’s unique patterns and prevent cracking.

Test Your Solutions

Before soaking the entire piece, test your bleach or vinegar solution on a small, inconspicuous area to ensure it does not negatively impact the driftwood’s appearance.

Time Your Soak

Longer soaking times can lead to wood swelling or warping, so be mindful of how long you leave your driftwood submerged in the cleaning solution.

Common Issues When Cleaning Driftwood

Warping

Sometimes, driftwood can warp during the drying process. If you notice warping, ensure it’s drying in a stable position and try to weigh it down with small objects to retain its shape.

Residual Smell

If a smell persists after cleaning, it may not have been soaked long enough or thoroughly rinsed. Consider repeating the soaking process until the driftwood is odor-free.

Creative Uses for Cleaned Driftwood

Home Décor

Driftwood can be used to create unique pieces such as table centerpieces, candle holders, or wall hangings. Its organic look adds warmth and character to any room.

Craft Projects

For the more artistically inclined, driftwood can be transformed into sculptures, mobiles, or even rustic frames. Each piece can become a canvas for your creativity.

Aquarium Use

Once properly cleaned, driftwood can also be used in aquariums to create a natural environment for fish and other aquatic creatures. Ensure it is entirely free of chemicals which might harm your aquarium residents.

Maintaining Your Driftwood

Regular Dusting

For indoor pieces, a regular dusting with a dry cloth will help maintain its appearance without needing to re-clean it entirely.

Annual Check-ups

Consider checking over your driftwood annually for any signs of deterioration or wear. Small touch-ups with a sealer can prolong its lifespan.

Conclusion

Cleaning driftwood might seem daunting at first, but with the right approach and materials, you can easily restore this unique gift from nature. By understanding the process, you protect the driftwood’s inherent beauty and ensure it remains a treasured part of your space for years to come. Whether you incorporate it into home decor or use it as a creative project, your cleaned driftwood will undoubtedly be a conversation starter and a testament to the wonders of natural artistry.

Filed Under: Driftwood Ideas Tagged With: cleaning, crafting, DIY, Driftwood, home decor

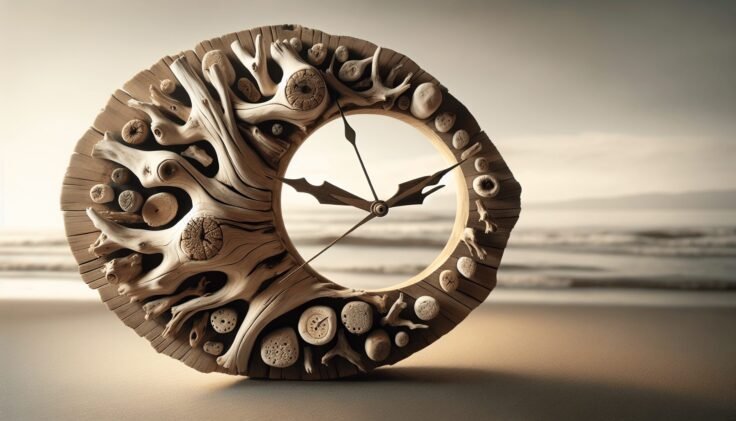
Driftwood Clocks Diy

January 28, 2025 by admin

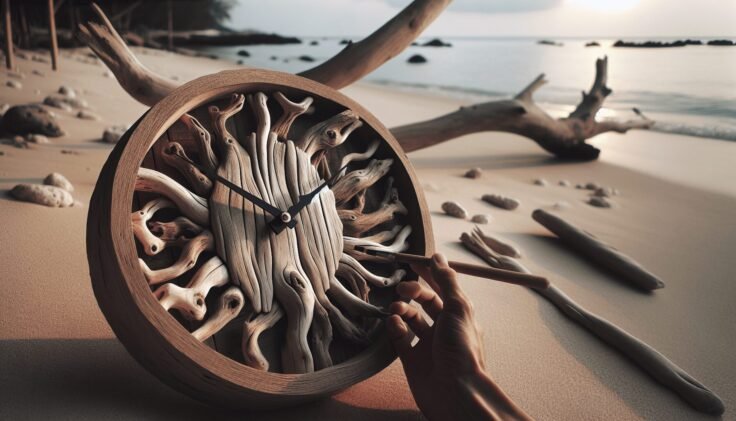
Have you ever considered using driftwood to create something beautiful and functional for your home? Driftwood, with its unique and rustic appearance, can be an extraordinary material to work with. Imagine having a piece of nature on your wall telling time! Not only is creating a driftwood clock a fun and fulfilling project, but it also adds a touch of coastal charm to any space. Let’s delve into the world of driftwood clocks and uncover how you can create your very own masterpiece.

Driftwood Clocks Diy

Understanding Driftwood

Before you jump into the DIY project, it’s important to know what driftwood is and where it comes from. Driftwood is wood that has been washed onto the shore by rivers, lakes, or the ocean, often after traveling far from its original location. Its journey through water, sun, and sand gives it a weathered appearance and smooth texture, making it ideal for various crafts and home decor.

Why Choose Driftwood?

Driftwood’s appeal lies in its natural beauty and uniqueness. Each piece tells a story of its journey, shaped by nature into interesting textures and forms. It’s a sustainable crafting material, as you’re repurposing wood that would otherwise be left to the elements. Plus, incorporating driftwood into your home adds an organic and eco-friendly touch to your decor.

Gathering and Preparing Driftwood

To begin your driftwood clock project, you need to gather and prepare your materials. The preparation phase is crucial for ensuring your project looks great and lasts a long time.

Where to Find Driftwood

You can find driftwood on beaches, riverbanks, and lakeshores. It’s a fun opportunity for a leisurely walk while hunting for the perfect pieces. When collecting, be mindful of local regulations regarding removing natural materials from certain areas. Always prioritize sustainable and respectful practices.

Cleaning Driftwood

Once you’ve gathered your driftwood, it’s essential to clean it. Driftwood may have algae, dirt, or small creatures on it. Here’s a simple cleaning process:

  1. Soak and Scrub: Submerge the driftwood in a mixture of water and mild detergent. Use a brush to scrub off any debris.
  2. Rinse Thoroughly: Rinse the pieces under running water to remove soap residues.
  3. Dry: Let the driftwood air dry, ideally in the sun, which helps to kill any remaining bacteria.

Designing Your Driftwood Clock

Here’s where your creativity can truly shine. Designing your clock involves considering size, shape, and the clock mechanism you wish to use.

Choosing the Design

Think about what style resonates with you and your living space. Do you prefer something minimalist, or perhaps a dramatic piece with multiple branches? Deciding on your clock’s style will help guide your choice of driftwood pieces and additional materials.

Selecting Clock Mechanism and Components

Choose a clock mechanism suitable for your driftwood. You’ll need clock hands, a movement mechanism (the motor), and potentially clock numbers or markers. Materials can range from traditional black or gold to something more rustic, like metal or wood.

Tools and Other Materials

Here’s a list of tools and materials you might need:

MaterialPurpose
DrillFor mounting the clock mechanism
SandpaperSmoothing rough edges
Wood glueAttaching driftwood pieces
Clock numbers/markersOptional decor
Varnish or sealantFinishing touch to protect the wood

Assembling Your Driftwood Clock

Armed with your design plan and materials, it’s time to assemble the clock. This step requires care and attention, ensuring your clock is both sturdy and aesthetically pleasing.

Building the Base

Decide on the arrangement of your driftwood pieces, either laying them out as a flat back for the clock or assembling them to create a frame. If using multiple pieces, secure them together with wood glue or a small screw from the back, taking care to maintain the natural pattern and flow of the wood.

Installing the Clock Mechanism

  1. Drill a Hole: Determine the central point and drill a hole for the clock mechanism.
  2. Mount the Motor: Follow the instructions that come with the clock kit to insert and secure the motor through the driftwood.
  3. Attach Hands: Carefully attach the clock hands according to the manufacturer’s instructions.

Adding Finishing Touches

Once your clock is assembled, consider sealing it with a varnish or sealant. This step can enhance the wood’s appearance and protect it from dust and deterioration. You might also want to add decorative numbers or leave it with just the hands to maintain its natural beauty.

Driftwood Clocks Diy

Maintaining Your Driftwood Clock

Like any handmade creation, your driftwood clock will require some care to keep it in excellent condition.

Regular Upkeep

Dust your clock intermittently to maintain its appearance using a soft, dry cloth. Avoid using water or cleaning solvents as they may damage the wood or interfere with the clock mechanism.

Seasonal Checks

Since driftwood is a natural material, it can react to changes in temperature and humidity. Occasionally check the clock’s components and the integrity of the wood, especially if you notice significant environmental shifts in your home.

Troubleshooting Common Issues

It’s possible to encounter a few hiccups during your project. Here are some solutions to common challenges.

Issues with Clock Movement

If your clock isn’t working properly, check:

  • Battery Connection: Ensure the battery is fresh and properly installed.
  • Alignment of Hands: Verify the hands aren’t touching each other or the wood.

Wood Cracking or Warping

Changes in humidity may cause driftwood to warp or crack. If this occurs, adjust the placement settings in your home, opting for a space that maintains consistent conditions. Applying another layer of sealant can also help stabilize the wood.

Conclusion

Creating a driftwood clock is a wonderful way to bring the outside in, allowing you to craft a story filled with natural history and personal creativity. As you hang it on your wall, you’ll have not just a functional timepiece but also a conversation starter and a glimpse of the natural world in your everyday life.

Whether completed as a solo project or a family activity, making a driftwood clock is both an eco-friendly and fulfilling experience that leaves you with a tangible piece of art, uniquely yours. So, gather those driftwood pieces and let your imagination run wild. Happy crafting!

Filed Under: Driftwood Ideas Tagged With: Clocks, crafting, Driftwood, Handmade, home decor

Driftwood Chimes Diy

January 24, 2025 by admin

Have you ever considered turning your beachcombing treasures into something beautiful and musical for your home or garden? Driftwood chimes could be just the exciting project you need. As you stroll along the shoreline, you might imagine how those pieces of driftwood, worn smooth by the waves, can transform into an enchanting set of wind chimes. Creating your very own driftwood chimes is a delightful, rewarding process that lets you bring a slice of nature into your living space. Plus, it’s a fun project that doesn’t require any extraordinary skills or expensive tools.

Driftwood Chimes Diy

Why Driftwood?

Driftwood is not only visually appealing with its unique forms and textures, but it’s also an eco-friendly choice. By using driftwood, you are recycling natural materials that have already been discarded by the ocean. The rustic charm of driftwood adds a coastal, organic feel to any decorative item, making it a favored choice among DIY enthusiasts.

Characteristics of Driftwood

Driftwood is characterized by its unique shapes and textures, sculpted by natural elements like water, sun, and wind. These features make each piece one-of-a-kind, meaning your finished chime will be unique as well. The lightweight nature of driftwood is particularly advantageous when creating wind chimes, as it will move easily in the wind.

Environmental Significance

By using driftwood, you’re participating in an environmentally friendly crafting process. Driftwood is already a discarded piece of nature, so utilizing it in art helps reduce the demand for newly harvested wood, aiding in forest preservation. This practice helps to promote sustainability and an eco-conscious mindset.

Tools and Materials You Need

Before embarking on your driftwood chimes DIY project, you need to gather some essential tools and materials. Having these ready will streamline your crafting experience and prevent any unnecessary interruptions.

Materials

  • Driftwood Pieces: Select various pieces in different lengths and textures to create an interesting visual contrast.
  • Fishing Line or Cord: You’ll use this to tie everything together. Fishing line is ideal due to its strength and invisibility.
  • Metal or Ceramic Chimes: These can be purchased or you could use recycled items like old silverware or keys for added charm and sound variety.
  • Rust-Proof Hooks or Eye Screws: Useful in suspending your driftwood from a base or for hanging embellishments.
  • Embellishments: Beads, shells, or small stones can add personal flair to your creation.

Tools

  • Drill: A small hand drill suitable for creating holes in the driftwood and any other components that require it.
  • Scissors: For cutting the fishing line or cord.
  • Measuring Tape: To keep proportions consistent.
  • Sandpaper: For smoothing any rough edges on the driftwood that could cause splinters.

Choosing Driftwood for Your Chime

Selecting the right pieces of driftwood is an essential part of the process. Your choices will impact both the aesthetics and the musicality of your chimes.

Shape and Size

Choose driftwood that resonates with your aesthetic sensibilities. Different shapes and sizes will not only alter the visual appeal but also affect how the pieces move and collide, creating sound.

  • Long Pieces: Ideal for the central, stable piece from which other parts hang.
  • Short, Rounded Pieces: Can be used as the moving parts to strike chimes or other elements.

Texture and Surface

The texture of your driftwood pieces can add to their decorative appeal. Meanwhile, smooth surfaces might facilitate a more pleasing sound when they touch.

  • Smooth Surface: Easier to work with and gives a clean, finished look to the project.
  • Textured Surface: Provides a more natural and rustic look.

Collecting Driftwood

When collecting driftwood, make sure you have permission to remove items from beaches or local areas. Always check the local regulations to ensure you’re crafting in an environmentally responsible way.

Designing Your Driftwood Chimes

Once you have your materials, it’s time to plan and design your driftwood chimes. This stage is crucial, as it will determine the ultimate look and sound of your chimes.

Sketch Your Design

Take some time to sketch your ideas. Consider how each piece will hang and how they will interact with one another.

  • Base Structure: Decide on a base configuration. For example, one large piece of driftwood at the top with smaller pieces hanging down can be a simple but effective design.
  • Layering: Consider multiple layers for a more complex, intricate design.
  • Symmetry vs. Asymmetry: Decide whether you prefer a balanced look or something more organic and asymmetric.

Incorporating Chimes and Accessories

Determine how you will incorporate the chimes and any other decorative elements into your design.

  • Positioning Chimes: Place chimes where they can catch the wind effectively and produce sound by hitting either other chimes or the driftwood itself.
  • Decorative Elements: Plan where embellishments like beads or shells could be included for extra charm.

Driftwood Chimes Diy

Assembling Your Driftwood Chimes

Assembly can be seen as the most exciting part, where your design begins to take physical form. Follow these steps to pull everything together smoothly.

Preparing the Driftwood

Before you begin the assembly, it’s crucial to prepare your driftwood pieces.

  • Cleaning: Wash the driftwood with fresh water and allow it to dry thoroughly in the sun. This will prevent mold and enhance the wood’s color.
  • Sanding: Use sandpaper to smooth any sharp edges or splinters. This makes your chimes safer to touch and handle.

Drilling Holes

It’s advisable to start by drilling holes in your driftwood pieces before assembly. This makes threading the cord or line much easier.

  1. Mark Drill Points: Use a pencil to mark where you want to drill. Consider spacing for even hanging.
  2. Drill with Care: Use a hand drill to create holes, being cautious not to split the wood.

Assembling the Chimes

Now, it’s time to piece everything together based on your design.

  1. Thread the Line or Cord: Tie your base driftwood piece to a hook or eye screw, then continue threading line through the drilled holes.
  2. Secure Knots: Tie secure knots at the base of each hanging piece to hold them in place. Double-check the strength of these knots as you proceed.
  3. Attach Chimes and Embellishments: Tie in your selected chimes and any decorative elements. Ensure spacing is correct to allow for them to softly collide in the wind.

Balancing the Chimes

It’s essential for your chimes to be balanced both visually and mechanically.

  • Testing Movement: Hang your chimes and make sure all pieces can swing freely and produce sound.
  • Adjustments: Tweak the lengths of your cords and the spacing to achieve the desired balance, both aesthetically and aurally.

Finishing Touches and Placement

Once your chimes are assembled, it’s time for the finishing touches and to decide where they’ll reside.

Protective Coating

Consider applying a protective sealant to your driftwood chimes to prolong their life, especially if they will be displayed outdoors.

  • Sealants: Look for a UV-resistant wood finish to protect against weathering.
  • Application: Apply as per the product instructions, ensuring that it is evenly spread over all wooden parts.

Optimal Placement

Choose a location where your chimes can really shine and sing.

  • Windy Spot: Select a place that experiences a gentle breeze to allow your chimes to resonate.
  • Height: Ensure the chimes are hung at a height where the sound can travel but they are still accessible for maintenance.
  • Visibility: Hang them where they can be appreciated visually as well as aurally.

Maintaining Your Driftwood Chimes

Like any outdoor feature, your driftwood chimes will require some care to keep them looking and sounding their best.

Regular Cleaning

  • Dusting and Washing: Use a soft cloth for regular dusting. Occasionally, wipe the chimes with a damp cloth to remove any dirt or salt deposits.
  • Reapplying Sealant: Every few months, check if your chimes need a fresh coat of sealant to maintain their resilience against the elements.

Checking for Wear and Tear

  • Inspecting Line and Knots: Look out for fraying lines or loose knots, which should be repaired promptly to avoid any elements falling apart.
  • Replacing Components: If any component is damaged or missing, replace it with a similar item to maintain the harmony of your chime’s design.

Personalizing Your Driftwood Wind Chimes

Now that you understand the basics of creating driftwood wind chimes, let’s dive into personalizing your masterpiece. The potential for creativity is limitless, allowing you to make each project entirely unique.

Adding Color

While driftwood has a beautiful natural palette, you might want to add some color to make your chimes pop.

  • Paint and Stain: Use non-toxic paints and stains if you plan to hang your chimes outdoors.
  • Dyeing Beads and Cords: Choose bright, contrasting colors for your beads or cords to make your chimes more eye-catching.

Theme-Based Chimes

You can design your chimes around a particular theme that speaks to your interests or personal style.

  • Nautical Theme: Incorporate seashells, anchor shapes, or maritime knots for a sailor’s charm.
  • Fairy Tale Theme: Use delicate elements like crystals, tiny bells, or flowers carved into the wood.

Seasonal Variations

Your driftwood chimes can also be adapted to reflect different seasons or holidays.

  • Spring Blooms: Add pastel-colored beads and floral patterns.
  • Winter Festivities: Integrate mini snowflakes or stars, and use a metallic, silver theme.

Conclusion

Crafting driftwood chimes can be both a meditative process and a creative outlet, allowing you to express your unique style while bringing tranquil and soothing sounds into your environment. Each chime is a testament to the power of nature and art when combined, serving not just as a decorative piece but a functional art form that tells a story. With patience, imagination, and respect for materials, creating driftwood chimes can become a cherished pastime, offering ongoing rewards of beauty and serenity. Remember to approach each step with intention, enjoyment, and creativity — allowing your chimes to sing your story through every gentle breeze.

Filed Under: Driftwood Ideas Tagged With: Chimes, crafting, Driftwood, home decor

Driftwood Christmas Ornaments

January 22, 2025 by admin

Have you ever wondered how you can bring a touch of nature into your holiday decorations? If traditional Christmas ornaments are feeling a bit too predictable this year, why not consider crafting your own driftwood Christmas ornaments? This unique approach combines the rustic beauty of the beach with the festive spirit of the season, creating decorations that are both meaningful and beautiful.

Driftwood Christmas Ornaments

What is Driftwood?

Driftwood refers to the remnants of trees that have been washed onto the shore by the action of winds, tides, or waves. Over time, the abrasive action of water smooths and softens these pieces, providing a beautiful, weathered appearance that appeals to many. This type of wood can range from small sticks to large branches, each offering a unique shape and texture that makes it perfect for crafting.

Where to Find Driftwood

Locating driftwood can be an enjoyable and relaxing part of the crafting process. Typically, it’s found along beaches, riverbanks, or lakeshores. You might plan a day to visit a nearby beach or nature walk to gather your supplies, making sure to respect local guidelines regarding collection. As you gather, pay attention to the variety of shapes and sizes, as each piece could inspire a different creative idea.

Preparing Your Driftwood

Before you begin creating ornaments, it’s important to prepare your driftwood properly. Preparation ensures the wood is clean, pest-free, and ready for artistic use. Start by removing any debris, dirt, or seaweed clinging to the wood. Next, soak the pieces in a mixture of bleach and water for a few hours to disinfect and sanitize. Rinse them off thoroughly and allow them to dry completely, which might take a few days depending on their size and density.

Getting Started with Driftwood Christmas Ornaments

Crafting these ornaments doesn’t require extensive experience, making it a perfect holiday project for individuals, families, or groups of friends. The rustic charm of driftwood complements any decor style, from modern minimalism to cozy rustic themes.

Tools and Materials You’ll Need

To create driftwood ornaments, gather a few basic tools and materials. Here’s a quick list to get you prepared:

ToolsMaterials
Glue gun and glue sticksAssortment of driftwood pieces
Drill with small drill bitTwine, string, or thin wire
SandpaperShells, beads, or small embellishments
Paint or wood stain (optional)Hooks or loops for hanging

These materials can often be found in crafting stores or around your home, ensuring you don’t need to invest much to begin your project.

Combining Driftwood with Other Elements

For a more dynamic ornament design, consider combining driftwood with other natural materials. Shells, pebbles, twine, and beads add diversity in texture and style. You can also incorporate seasonal touches like pinecones or holly berries to enhance the holiday feel.

Crafting Your Driftwood Christmas Ornaments

Now that your wood is clean and your materials are gathered, it’s time to begin crafting. Start with basic designs and gradually experiment with more complex shapes and embellishments as your confidence grows.

Simple Tree Ornaments

One of the simplest designs to create is a driftwood Christmas tree ornament. Start by selecting natural pieces of varying lengths. Assemble them from smallest to largest in a triangular tree shape. Use a glue gun to secure the pieces as you stack them. Finally, attach a loop of string or wire to the top to hang your tree on the Christmas tree.

Driftwood Stars

Stars symbolize hope and cheer during the festive season, making them the perfect subject for ornaments. To craft a star, select five strong, straight pieces of similar length. Arrange them into a star shape and secure each intersection with glue. Allow the glue to dry thoroughly. You can leave the wood natural or paint it for a pop of color.

Driftwood and Shell Angels

A combination of driftwood and shells can create an elegant angel ornament. Use a larger piece of driftwood for the body and attach two symmetrical shells as wings. Use smaller beads or stones to symbolize the head or halo. This blend of materials results in a beautifully delicate ornament sure to stand out among more traditional decorations.

Adding Personal Touches

To make your driftwood ornaments truly unique, consider adding personal touches. Vinegar-stained or painted wood can add a pop of color, while carving initials or seasonal phrases into the wood gives them a personal touch. The inclusion of family photos, miniature seasonal symbols, or even handwritten messages on small papers or tags offers a personal connection that both you and your family can cherish for years to come.

Personalization with Paint

If you’re looking to add color or pattern to your driftwood ornaments, acrylic paints are an excellent choice. Consider soft whites, golds, or silvers to keep a festive palette. Geometric shapes, polka dots, or stripes can create a modern touch, while vintage motifs provide a timeless feel.

Adding Names or Dates

Engraving or writing names, initials, or the year can make each ornament a cherished keepsake. Tools for wood engraving can be precise and easy to use, offering a professional finish. Alternatively, small tags or labels can be securely tied to the ornaments for a more relaxed approach.

Driftwood Christmas Ornaments

Displaying Your Driftwood Ornaments

Once your ornaments are complete, it’s time to display them! Their natural beauty stands out on a traditional Christmas tree, but there are many creative ways to incorporate them into your home decor. Use them as centerpiece decorations, incorporate them into wreaths, or hang them along stair banisters for a touch of rustic charm throughout your living spaces.

Non-Traditional Displays

Instead of only hanging them on your Christmas tree, why not add a bit of charm to your table settings or gift packages? Tying an ornament to a wrapped gift can provide a unique, reusable decoration that serves a dual purpose. Placing a small cluster in a decorative bowl can also create a table centerpiece that draws on natural elements.

Why Choose Driftwood Ornaments?

There are many excellent reasons to choose driftwood ornaments for your holiday decor. For one, they bring the outdoors inside, evoking the calming, natural beauty of the beach, even in winter. They are also eco-friendly, utilizing pieces of wood that would otherwise be discarded, and reimagining them into beautiful, festive decorations.

Environmental Impact

Using driftwood reduces waste and contributes to lessening the impact on the environment. Every piece repurposed is one less item heading to the landfill or adding to pollution, making it a sustainable crafting choice. For environmentally conscious consumers, creating driftwood ornaments is a way to celebrate holidays without compromising on green values.

Emotional Significance

Each piece of driftwood tells a story and forms a unique, tactile link to the natural world. As you collect and craft with these pieces, you create more than just decor; you’re crafting memories. Whether for your own tree or as a thoughtful gift, driftwood ornaments carry a personal touch that store-bought items simply can’t replicate.

Troubleshooting Common Issues

Like any crafting project, you might encounter some challenges along the way. From glue issues to drilling mishaps, it’s good to know potential solutions to common problems when crafting with driftwood.

Glue Not Sticking Well

If your glue isn’t adhering properly, consider using a stronger adhesive. Ensure the pieces are dry and free of debris before applying glue, as moisture or dirt can affect adhesion. Epoxy resin can offer a strong, durable bond, particularly for heavier pieces.

Driftwood Breaking or Splintering

Soft driftwood can sometimes break or splinter when worked on. To avoid this, handle pieces with care, especially when drilling. If you need to drill into fragile pieces, start with a small drill bit and increase size gradually to minimize stress on the wood.

Conclusion

Driftwood Christmas ornaments are a unique, beautiful, and eco-friendly way to celebrate the holiday season. With a bit of creativity and a few gathered materials, you can make personalized decorations that capture the spirit of the season. Each ornament not only decorates your home but also carries the memories of crafting and gathering with loved ones. As you enjoy your handcrafted creations, take pride in knowing they embody the harmony of nature and festive cheer. While simple in appearance, these ornaments offer a depth of beauty that resonates well beyond their physical form.

Filed Under: Driftwood Ideas Tagged With: christmas, crafting, DIY, Driftwood, Ornaments

  • « Previous Page
  • Page 1
  • Page 2
  • Page 3
  • Page 4
  • …
  • Page 7
  • Next Page »

Primary Sidebar

Driftwood4us.com, is a participant in the Amazon Services LLC Associates Program, an affiliate advertising program designed to provide a means for sites to earn advertising fees by advertising and linking to amazon.com.