• Skip to main content
  • Skip to primary sidebar
  • Terms and Conditions
  • Privacy Policy
  • Contact

Driftwood 4 Us

Just About Driftwood

crafting

Driftwood Ideas Diy

December 9, 2024 by admin

Have you ever wandered along the beach and wondered what to do with the pieces of driftwood scattered along the shore? Driftwood has a unique charm and character, which makes it a perfect material for creative DIY projects. Its naturally weathered texture and variations in shape can add a touch of rustic elegance to your home decor or serve as one-of-a-kind functional art.

Driftwood Ideas Diy

What is Driftwood?

Driftwood is wood that has been washed onto a shore or beach by the action of winds, tides, or waves. Originating from various sources—such as trees, bushes, or man-made structures—driftwood undergoes natural processes that give it a distinctive look. This makes it highly appealing for many DIY enthusiasts and artists seeking to bring a bit of nature into their creations.

Characteristics of Driftwood

Driftwood’s characteristics make it appealing for various projects. Its natural texture, varied shapes, and the presence of knots and knots can become the centerpiece of a creative piece. Depending on where it’s found, driftwood can be bleached by the sun or darker in tone due to water exposure. Its lightweight yet sturdy structure makes it an excellent choice for constructing decorative items.

Preparing Driftwood for DIY Projects

Before starting your project, it’s crucial to prepare your driftwood properly. This ensures it’s safe and durable for whatever you plan to create.

Cleaning Driftwood

To clean driftwood, first, give it a good rinse with fresh water to remove any sand, salt, or debris. Based on its size, you might soak the wood in a solution of one-part vinegar to nine parts water for a day or two, which will help eliminate any bacteria or insects. After soaking, rinse again and allow it to dry completely, which may take a couple of weeks, depending on your climate.

Optional: Bleaching Driftwood

If you prefer a lighter look, you can bleach your driftwood. Mix a bleach solution (one part bleach to ten parts water) and soak the driftwood overnight. However, bleaching can weaken the wood, so ensure it’s only lightly submerged, or just brush the solution onto the surface.

Drilling and Cutting Driftwood

Driftwood is generally easy to cut and drill. Use a fine-toothed saw to make cuts, should you need to shape the driftwood. For drilling, use a drill bit suitable for wood, and proceed slowly to avoid cracking or splitting. Dulled bits are perfect for this task as they reduce the risk of breaking fragile sections.

Driftwood DIY Project Ideas

Driftwood’s adaptability means it can be used for a wide variety of DIY projects. Here are some ideas to get you started:

Driftwood Wall Art

Create stunning wall art by assembling smaller pieces of driftwood into a pattern or design on a canvas or a plywood backing. This could be an abstract piece, or you could create specific shapes, like a heart or a landscape scene. Use a strong adhesive to secure each piece in place.

Driftwood Candle Holders

Magnify the natural beauty of driftwood by creating unique candle holders. You can drill holes into larger pieces that match the circumference of tealight candles, or affix smaller branches together to cradle glass votives.

Driftwood Mirrors

Use driftwood pieces to frame a mirror. Arrange the wood around the edges, overlapping for an organic feel. This provides a unique and rustic touch to a bathroom or hallway. Ensure the mirror is securely fastened before attaching the driftwood around it.

Driftwood Mobiles

Create a driftwood mobile by hanging various sizes of driftwood pieces with fishing line or thin wire. Add seashells, stones, or other natural elements to enhance its beauty. Suspend it near a window or in an outdoor area to enjoy the subtle movements as it catches the breeze.

Driftwood Plant Hangers

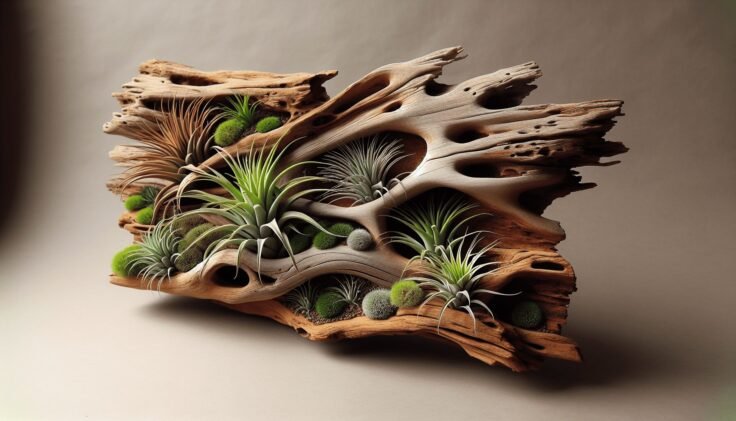
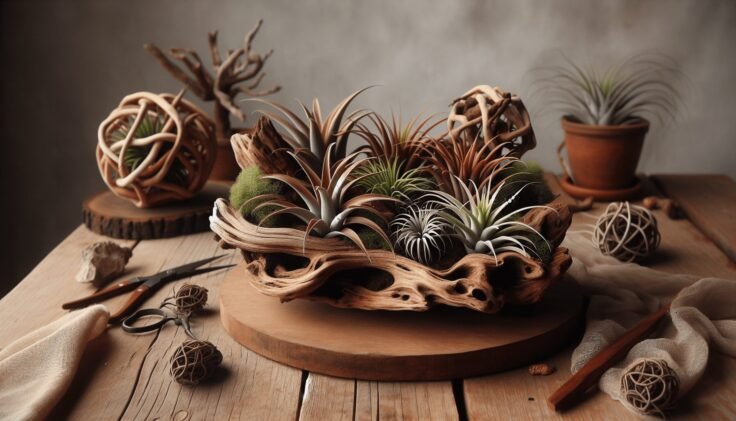
For a novel way to display air plants, use small pieces of driftwood. Affix a clear fishing line or wire to driftwood and hang it from the ceiling or ceiling hook. Alternatively, drill small indentations to hold tiny air plants directly.

Driftwood Furniture

For the more adventurous DIYer, consider crafting driftwood into functional furniture pieces like coffee tables or stools. You’ll need to select sturdy pieces for the legs and supports, and you can use a glass tabletop to showcase the intricate design of the wood.

Driftwood Lamps

Construct a base for a lamp using a larger piece of driftwood. There are lamp kits available which make it easier to affix lightbulbs and shades, resulting in stunning, conversation-starting home lighting.

Driftwood Shelves

Use longer, flat pieces of driftwood as unique shelves. Secure them to the wall using brackets. Enhance the rustic feel by using antiqued metal fixtures.

Driftwood Garland

Create a garland out of small to medium driftwood pieces, strung together using a strong cord or twine. Use your driftwood garland as decoration for a mantel, around a doorframe, or for outdoor events.

Tips for Successful Driftwood Projects

While driftwood is pleasingly adaptable for projects, there are some essential tips you should follow for the best results.

Choosing the Right Driftwood

Look for pieces that are dry and free of large fissures or cracks. Smaller, knot-filled pieces offer interesting character and might work well for art projects, whereas larger, sturdier pieces are more suited for furniture.

Tools and Safety

Always protect yourself when using tools to cut or sand driftwood. Wear safety goggles and a mask to avoid splinters or inhaling dust. Always cut in a well-ventilated area.

Preserve Your Creation

To make your driftwood project last, consider treating it with a sealant or clear wood finish. This will help protect it from wear and environmental factors, particularly if you plan to use it outdoors.

Driftwood Ideas Diy

Benefits of Using Driftwood in DIY

Using driftwood in DIY projects is beneficial beyond its naturally appealing look. Its versatility means you can tailor projects to fit your space, style, and skills. It’s also an eco-friendly choice; by using driftwood, you’re repurposing natural material that might otherwise be discarded. Plus, crafting with driftwood can be a relaxing way to bring a piece of the beach into your home and showcase your creativity. So why not see what treasures your next beach trip could lead to?

Filed Under: Driftwood Ideas Tagged With: crafting, Driftwood, Handmade, home decor, Upcycling

Driftwood Apoxy

November 30, 2024 by admin

Have you ever considered the beauty and potential in something as simple as driftwood? Driftwood itself holds an organic, rustic charm, but have you wondered how adding a bit of creativity and innovation could take it to the next level? Enter the world of driftwood epoxy — a fascinating blend of nature and craftsmanship that you can explore to create stunning art pieces and functional items.

Driftwood Apoxy

What is Driftwood Epoxy?

When you hear the term “driftwood epoxy,” it essentially refers to the union of driftwood — those wonderfully weathered wood pieces found ashore or floating along a body of water — with epoxy resin. Epoxy itself is a versatile thermosetting polymer known for its strong adhesive properties and crystal-clear finish once set. By combining the two, you can create everything from gorgeous tables and art pieces to smaller decorative items that highlight the unique texture and form of the driftwood.

A Natural and Creative Medium

Driftwood epoxy combines natural materials with artistic expression. By using epoxy resin with driftwood, you preserve the organic aesthetic of the wood while enhancing it with the resin’s durability and gloss. The result can be a creation that is both eye-catching and timeless, capturing the rustic beauty of the wood while protected and accentuated by the resin.

Why Choose Driftwood Epoxy?

There are several reasons you might choose to work with driftwood epoxy. For one, it allows you to recycle and repurpose materials that nature has already crafted into unique shapes. By using driftwood, you’re contributing to sustainable practices, giving new life to what might otherwise be discarded. Furthermore, the combination of driftwood and epoxy resin often results in pieces that are sturdy and long-lasting, ensuring they can be enjoyed for years to come.

The Basics of Working with Driftwood and Epoxy

Before you dive into creating your masterpiece, it’s important to understand the fundamentals of working with driftwood and epoxy. This will ensure your project is successful and satisfying.

Selecting Your Driftwood

Choosing the right piece of wood is a crucial first step. Driftwood comes in various shapes, sizes, and textures, depending on its origin and journey. Look for pieces that inspire you — whether due to their shape, the intricacy of their grain, or the story they seem to hold.

  • Size and Shape: Consider the project you’re planning and select wood that fits your intended use.
  • Texture and Color: Each piece of driftwood is unique in terms of its surface texture and coloration. Select a texture that complements your vision.
  • Condition: The driftwood should be relatively free from rot. Too much decay can compromise the structure and integrity of your final product.

Preparing the Driftwood

Once you’ve selected the driftwood you’ll work with, it’s important to prepare it properly. Start by cleaning the wood thoroughly to remove any dirt, salt, or organisms it may have picked up in its travels. Soak it in freshwater for several days, changing the water regularly. After cleaning, allow the driftwood to dry completely, which may take several days.

Selecting and Mixing Epoxy

The epoxy resin you choose will influence the outcome of your project. Epoxy resins vary in terms of thickness, clarity, and setting time. Opt for a clear, marine-grade epoxy for durability and optimal aesthetic results.

Once you’ve selected your resin, you’ll need to prepare it according to the manufacturer’s instructions.

  • Measurements: Mix resin and hardener in the correct ratios. Improper measurements can prevent the mixture from curing properly.
  • Mixing: Stir the mixture slowly and thoroughly to avoid air bubbles and ensure uniformity.

Crafting with Driftwood Epoxy

With your prepared driftwood and mixed epoxy resin, you’re ready to begin crafting. Here’s how you can create various items with driftwood epoxy.

Creating Driftwood Epoxy Art

Driftwood epoxy can be used to create beautiful, nature-inspired art pieces. Whether it’s a wall hanging or a standalone sculpture, the process allows you to highlight the organic textures and forms of driftwood.

  1. Design Concept: Plan a design before you begin. You can sketch your ideas or visualize the final piece in your mind.
  2. Construct a Mold: You may need to construct a mold or frame to support the structure while the epoxy cures.
  3. Pouring Epoxy: Carefully pour or apply the epoxy over your driftwood, covering edges and beneath crevices to ensure comprehensive coverage.
  4. Curing Process: Allow the epoxy to cure as per the instructions. Curing time can vary based on the environment and resin.

Making Functional Items

Beyond aesthetic art, driftwood epoxy offers potential for creating functional items such as lamps, furniture, or even kitchen utensils.

  • Unique Tables: Use driftwood as a base or accent within a resin river table design.
  • Decorative Bowls and Trays: Form practical yet decorative items that exhibit the character of the driftwood.
  • Lamp and Light Fixtures: Incorporate driftwood with epoxy resin to create lighting that adds warmth and character to a room.

Coating and Finishing

Regardless of your project, finishing touches are key to a polished result. Sand the cured epoxy to eliminate imperfections or bubbles, followed by a final polish or varnish to enhance the lustrous shine.

Caring for Driftwood Epoxy Creations

Once you’ve completed your driftwood epoxy project, proper care and maintenance will ensure it remains in excellent condition for years to come.

Cleaning and Dusting

  • Use a gentle cloth for regular dusting.
  • Avoid harsh chemicals; a damp cloth with mild soap is preferable for cleaning.

Environmental Considerations

  • Keep your items away from direct sunlight and extreme temperatures to prevent expansion or warping.

Driftwood Apoxy

Challenges and Solutions in Driftwood Epoxy Projects

Like any creative project, working with driftwood epoxy comes with its own set of challenges. Here are some common ones and solutions to overcome them.

Air Bubbles

Air bubbles can occur when mixing or pouring epoxy. Stir slowly to minimize air introduction, and use a heat gun to eliminate bubbles after pouring.

Uneven Surfaces

Driftwood can be irregular, creating challenges for leveling your project. Consider using clamps or weights to hold the epoxy even during curing.

Inspirational Ideas for Driftwood Epoxy

Embarking on your driftwood epoxy journey can be a rewarding experience with endless possibilities. To help spark your creativity, here are some inspirational ideas you might consider:

Driftwood Epoxy Jewelry

Transform small, unique pieces of driftwood into exquisite pendants or earrings by encasing them in vibrant or translucent epoxy. Not only do they serve as conversation pieces, but they also allow you to wear a piece of art wherever you go.

Outdoor Furniture

Craft rustic yet elegant outdoor seating or tables using larger pieces of driftwood set in resin. Their natural resilience against weather makes them durable, and they bring a touch of natural elegance to any garden or patio.

Decorative Wall Panels

Create stunning, large-scale wall art by embedding driftwood into resin panels. This can serve as a dramatic focal point in both home and office environments, bringing a slice of nature indoors.

Conclusion

Driftwood epoxy is a remarkable medium that invites you to combine creativity with nature’s artistry. By blending the organic allure of driftwood with the versatility of epoxy resin, you can create pieces that are both visually captivating and sustainably sourced. Whether your goal is to craft a beautiful art piece or a functional item imbued with personality, driftwood epoxy offers limitless possibilities. So why not embrace the natural beauty and embark on a creative journey that’s as rewarding as it is environmentally conscious?

Filed Under: Driftwood Ideas Tagged With: crafting, Driftwood, Epoxy, home decor, Woodworking

Driftwood Alphabet

November 22, 2024 by admin

Have you ever wandered along a beach, with the gentle waves lapping at your feet, and wondered about the stories hidden in the pieces of driftwood washed ashore? These weathered and worn fragments of wood carry a history, shaped by the ocean and adorned with the serenity of nature. In this article, we’ll journey through the fascinating world of the “Driftwood Alphabet”—a unique and creative way to perceive these timeless natural artifacts.

The Beauty in Driftwood

Driftwood, with its sun-bleached hues and uniquely curved shapes, presents a charm unlike any other natural material. Its transformation from a living part of a tree to an artistic piece tossed by the ocean symbolizes resilience and the beauty found in imperfection. The journey of driftwood often intrigues and inspires those who encounter it.

Driftwood’s Journey and Transformation

Driftwood originates from trees, whether through natural causes like storms or human involvement like construction, which eventually finds its way into water bodies. Once in the water, driftwood embarks on a journey of transformation. The wood is weathered by wind, water, and sun, evolving into a smooth, sculptural form after years of exposure to the natural elements. Each piece reflects the unique path it has traveled, presenting a narrative written by nature’s hand.

Symbolic Meanings and Uses

In many cultures, driftwood symbolizes resilience and adaptability. Its origins and process of transformation encourage thoughtfulness and reflection about life’s unpredictable currents. Driftwood often becomes a centerpiece in decorations, art, and landscaping, prized for its rustic beauty and natural texture. Artisans and nature lovers alike find creative uses for these timeless pieces.

The Concept of the Driftwood Alphabet

The “Driftwood Alphabet” is more than a whimsical collection of letters; it’s a creative endeavor that challenges you to see beyond the usual and recognize letters of the alphabet in the diverse forms of driftwood. Much like finding faces in clouds, spotting these natural “letters” calls for a playful imagination and a keen eye.

Finding Letters in Nature

The concept revolves around discovering natural shapes in driftwood that resemble letters from the alphabet. Each piece, whether it’s a twisted branch resembling an “S” or a broken stump echoing an “E,” offers a unique representation formed by natural forces. It’s a wonderful way to engage with nature, encouraging you to look closer and appreciate the uniqueness of each piece.

Collecting and Documenting the Alphabet

Creating your own driftwood alphabet is a fun and rewarding experience. As you find and collect various pieces, you can document your findings through photographs or sketches. Each letter represents a part of nature’s artistry, compiled into a personal collection that tells its own story. It’s akin to a scavenger hunt, fostering creativity and patience.

Driftwood Alphabet

Crafting with Driftwood

Driftwood’s appealing texture and form make it an excellent material for crafts. Whether you’re an experienced artisan or a beginner eager to create, driftwood offers endless possibilities for artistic expression.

Simple Driftwood Projects

For those new to driftwood crafting, starting with simple projects is a great way to get accustomed to the material. Consider crafting picture frames, coasters, or small sculptures. These projects allow you to familiarize yourself with handling driftwood, discovering how its natural form can enhance your creations.

Advanced Driftwood Creations

If you’re more experienced or feeling adventurous, driftwood can be used to create larger, intricate projects. Constructing furniture like tables or headboards can transform your living space, adding a touch of natural elegance. Alternatively, consider making large art pieces or installations that showcase the diversity and beauty of driftwood.

Essential Tools and Techniques

Working with driftwood requires some basic tools: a hand saw for cutting, sandpaper for smoothing edges, and a drill if your project necessitates joining pieces together. Additionally, sealants or varnishes can protect the wood and enhance its natural color and texture. As you gain confidence, you’ll discover which tools and techniques best suit your vision and style.

Environmental Considerations

While driftwood is a naturally occurring material, it’s important to consider the environmental impact of collecting it. Some ecosystems rely on driftwood as a habitat for marine life, and excessive removal can disrupt these environments.

Sustainable Collection Practices

Practicing sustainable collection methods ensures that you’re leaving a positive impact on the environment. Stick to collecting from areas where it’s allowed and avoid removing driftwood from protected or sensitive locations. Always check local regulations before gathering driftwood to ensure you’re abiding by any restrictions.

Balancing Art and Nature

Balancing personal creativity with environmental responsibility highlights an important aspect of driftwood collection. As you engage with nature through your artistic practices, maintaining a respectful approach ensures that the natural world continues to thrive while you enjoy its gifts.

Driftwood Alphabet

Connecting with the Community

Driftwood enthusiasts often find a sense of community among those who share a passion for these unique pieces of nature. Whether through online forums, local clubs, or workshops, connecting with like-minded individuals can enrich your experience and inspire your projects.

Sharing Knowledge and Inspiration

Joining driftwood art communities allows you to exchange knowledge and inspiration with others. Sharing experiences, tips, and ideas not only improves your skills but also fosters friendships and connections with people from diverse backgrounds who share a common interest.

Community Projects and Exhibitions

Participating in community projects or exhibitions can give your creations a broader audience. Collaborating with others on large-scale installations or displaying your work in local galleries can offer valuable exposure and feedback. These events often generate awareness about sustainable practices and the beauty of nature-inspired art.

Driftwood in Design and Architecture

The appeal of driftwood extends beyond individual crafts, finding a place in interior design and architecture. It’s increasingly popular in spaces seeking to incorporate natural elements to create a calming and inviting atmosphere.

Interior Décor Applications

Incorporating driftwood into interior design can add character and warmth to any space. Driftwood’s organic form and color palette complement various styles, such as rustic, coastal, or bohemian. From decorative wall hangings to furniture and shelving, it offers versatile uses that enhance the aesthetic of rooms.

Architectural Innovations

Architects and designers are increasingly using driftwood in innovative ways. Structural elements like pillars or beams constructed from driftwood provide a unique, eco-friendly alternative to traditional materials. It’s a testament to the material’s strength and aesthetic appeal, showcasing the potential for driftwood beyond small-scale crafts.

Educational Aspects of Driftwood

Driftwood serves as an excellent educational tool, providing opportunities to learn about ecology, geography, and art. It’s an engaging way to teach children and adults alike about the interconnectedness of natural systems and the importance of environmental conservation.

Learning Through Exploration

Using driftwood in educational settings encourages exploration and discovery. Students can engage in hands-on learning, collecting driftwood and identifying its origins and journey. These activities can enhance understanding of ecosystems and inspire curiosity about nature.

Creating Educational Programs

Creating programs or workshops centered around driftwood can educate communities about environmental stewardship and artistic expression. These initiatives encourage participants to appreciate driftwood’s beauty while fostering a sense of responsibility toward natural habitats.

Conclusion

The Driftwood Alphabet is more than an artistic concept—it’s a celebration of nature’s creativity, showcasing how simple, forgotten pieces of wood can transform into objects of beauty and wonder. By engaging with driftwood intentionally and sustainably, you connect with the world around you, combining creativity with environmental consciousness.

Embrace the opportunity to explore the Driftwood Alphabet through your lens. Each piece you find, craft, or share contributes to an ongoing narrative that bridges nature, art, and community. As you continue this journey, may you find inspiration and joy in the organic beauty around you, shaping your own alphabet of stories and memories told through the silent eloquence of driftwood.

Filed Under: Driftwood Ideas Tagged With: Alphabet, crafting, DIY, Driftwood, home decor

Driftwood Air Plant Diy

November 18, 2024 by admin

Have you ever come across a piece of driftwood and wondered how you could incorporate it into your home décor? Driftwood, with its unique and organic shapes, combined with air plants, can make for a striking piece of natural art in your home. Driftwood air plant designs are not only visually stunning but also easy to maintain, making them a great choice for gardeners and non-gardeners alike. Let’s walk you through the process of creating your own driftwood air plant masterpiece, step by step.

Understanding Driftwood and Air Plants

Before diving into the nitty-gritty of the project, it’s important to understand the raw materials you’ll be working with—driftwood and air plants. Each one comes with its own charm and considerations.

What is Driftwood?

Driftwood refers to pieces of wood that have been washed onto the shore by tides, winds, or waves. The journey across water and exposure to the elements gives it a weathered appearance and a smooth texture. This natural process results in driftwood’s unique aesthetic, which is loved by artists and decorators. When selecting driftwood for your air plant project, look for pieces that are interesting in shape and have plenty of grooves or holes where plants can nestle.

A Closer Look at Air Plants

Air plants, or Tillandsias, are a variety of epiphytes that do not require soil to grow. They absorb moisture and nutrients through their leaves directly from the air. Air plants are relatively easy to care for, require minimal watering, and can thrive in various lighting conditions. Their adaptability makes them ideal companions for driftwood in creating a sustainable art piece.

Materials You’ll Need

Now that you’re acquainted with driftwood and air plants, let’s gather the materials needed for your DIY project. Having everything at your fingertips will make the creation process smooth and enjoyable.

Essential Materials

  • Driftwood: Choose a piece that fits the space you have in mind, and ensure it’s dry and free of pests.
  • Air Plants: Select a variety of air plants in different sizes and shapes for visual interest.
  • Adhesive: A non-toxic glue or adhesive putty suitable for securing plants to wood.
  • Wire/Cord: For those who prefer not to use glue, wire or natural cord can be used to secure the plants.
  • Scissors/Craft Knife: Handy for cutting cord or trimming plants if necessary.

Optional Enhancements

  • Decorative Stones or Moss: To add extra character and cover adhesive sites.
  • Spray Bottle: Use for gently misting the plants with water.
  • Varnish or Sealant: Apply to driftwood if you want to enhance its color and durability.

Driftwood Air Plant Diy

Preparing Your Driftwood

Once you have your materials, the next step is preparation. Proper preparation ensures your final piece is sturdy and visually appealing.

Cleaning and Drying the Driftwood

First, ensure your driftwood is clean. If you’ve collected it from a beach, rinse off any sand and debris. You may need to soak larger pieces in fresh water to remove salt. After cleaning, let it dry thoroughly to prevent anything from contaminating your air plants.

Treating and Sealing

For a more finished look and to prolong the life of your driftwood, consider applying a wood sealant. This will enhance its color and protect it from moisture damage. Use a paintbrush to apply a thin layer of sealant, and allow it to dry completely before proceeding.

Selecting and Preparing Air Plants

Choosing the right air plants can transform your driftwood into an eye-catching display. Here’s how to get it right.

Identifying the Best Air Plants

Pick air plants that are vibrant and healthy. A few popular choices for driftwood displays include Tillandsia ionantha, Tillandsia xerographica, and Tillandsia caput-medusae. Their diverse textures and shapes can add various dimensions to your piece.

Preparing Your Plants

Before you start attaching the plants, give them a good soak. Submerge them in water for about 20 to 30 minutes to ensure they are well-hydrated as soon as they’re placed. Shake off excess water gently, and allow them to dry for a few hours.

Driftwood Air Plant Diy

Assembling Your Driftwood and Air Plant Design

Now comes the exciting part! Assembling your driftwood air plant piece requires creativity and patience.

Arranging Your Materials

Lay your driftwood on a flat surface and experiment with placement of your air plants. Consider the natural flow and angles of the wood to enhance the overall look. Place larger plants in prominent positions and smaller plants in clusters for variety.

Attaching Air Plants

Use small dots of adhesive to secure the plants to the driftwood lightly. If you prefer not to use glue, gently tie the plants using a thin wire or natural cord to keep them in place. Make sure not to damage the plants while securing them.

Caring for Your Driftwood Air Plant Display

Maintaining your driftwood air plant display is quite simple, but it requires regular care to keep it looking vibrant.

Watering and Light Requirements

  • Watering: Lightly mist your air plants 2-3 times a week, or more often if you live in a dry climate. Ensure water does not pool in the base as it might rot the plant.
  • Light: Place your display in bright but indirect sunlight. Air plants enjoy filtered light similar to their natural habitat under tree canopies.

Routine Checks

Regularly check your plants for signs of distress like browning tips or wilting. Remove dead leaves to keep plants looking fresh. Monitor the driftwood for any signs of mold or pest activity and address them promptly.

Additional Styling Tips

To elevate the appeal of your DIY project, incorporate a few styling techniques.

Using Natural Elements

Enhance your driftwood piece by adding natural elements like small stones, pieces of bark, or shells to complement the look. These can be glued or placed strategically around the air plants.

Create a Stunning Display

Consider hanging your driftwood air plant piece using fishing line or clear hooks. This gives the illusion that it’s floating, adding a whimsical touch to your décor. Alternatively, set it on a mantel or shelf where it can be a focal point.

Potential Challenges and Solutions

Every DIY project can come with its set of challenges. Here’s how to troubleshoot common issues.

Securing Difficult Plants

Some air plants are stubborn and refuse to stay in place. In such cases, try using a slightly different approach with looped wire, which can provide better support.

Driftwood Stability

If your driftwood doesn’t naturally sit well, create a base using small wooden blocks or heavy stones to support it and prevent tipping.

Benefits of Driftwood Air Plant Displays

Finally, let’s explore why creating and displaying driftwood air plants can be a delightful addition to your home.

Eco-Friendly Art

Using natural materials like driftwood and air plants is environmentally friendly, as it repurposes natural resources without introducing harmful substances.

A Unique Decor Element

Each piece of driftwood is different, ensuring that your creation is one-of-a-kind. The rugged beauty of driftwood combined with the exotic appearance of air plants creates a conversation starter.

Low Maintenance

Driftwood air plant displays require minimal upkeep, making them perfect for busy lifestyles or for people who might not have the greenest of thumbs.

Creating a driftwood air plant design is a fun and rewarding project that brings a touch of nature into your living space. With a little creativity and some basic care, your living artwork will flourish and become a point of pride in your home. The marriage of weathered wood with lively air plants captures nature’s beauty in a unique way, perfect for those who embrace a rustic yet sophisticated aesthetic.

Filed Under: Driftwood Ideas Tagged With: Air Plants, crafting, Driftwood, home decor, Indoor Gardening

Acrylic Pour On Driftwood

November 3, 2024 by admin

Have you ever admired the captivating beauty of acrylic pours and wondered if it could be applied to unconventional surfaces like driftwood? The enchanting combination of colors flowing and mingling on such a unique canvas can create a one-of-a-kind masterpiece. Acrylic pour on driftwood is a perfect way to blend the raw elegance of nature with the vibrant expressiveness of art. This artistic technique can produce stunningly organic results, making each piece as unique as a fingerprint.

Understanding Acrylic Pouring

Acrylic pouring is a fascinating painting technique that involves pouring liquid paint onto a surface, resulting in dynamic, abstract designs. Unlike traditional brush painting, acrylic pouring emphasizes the flow and movement of paint. It’s an exciting, unpredictable process where colors mix and blend in spontaneous and often mesmerizing ways. With the right materials and methods, you can harness this spontaneity to create beautiful works of art.

The Basics of Acrylic Pouring

In acrylic pouring, you start with fluid acrylic paints. To achieve the right consistency, these paints are mixed with a pouring medium. This blend allows the paints to spread smoothly across your chosen surface without losing their vibrancy or cracking as they dry. Pouring mediums are crucial because they ensure that paints dry evenly and retain their glossy finish. Once you have your paints mixed, it’s all about experimenting with different techniques like puddle pours, dirty pours, or flip cups to create varied effects.

The Appeal of Acrylic Pour on Driftwood

Driftwood, with its weathered and textured surface, offers a unique canvas for your acrylic pour creations. Each piece of driftwood is naturally distinct—with its own size, shape, grain, and texture, enhancing the originality of your artwork. Using driftwood as a canvas adds an organic and rustic charm, providing a beautiful contrast to the rich, vibrant colors of acrylic paint. The natural form and texture of driftwood can influence the flow of paint, often resulting in unexpected and delightful designs.

Preparing for Your Project

Before you begin, it’s essential to gather all necessary materials and prepare your workspace. This preparation will help ensure a smooth process and enhance your final results.

Essential Materials

Below is a list of the basic supplies you’ll need to get started:

MaterialDescription
Acrylic PaintsChoose a variety of colors to achieve your desired effects. High-quality paints will produce better results.
Pouring MediumEssential for diluting your paint to the right consistency.
DriftwoodSelect pieces that appeal to you in terms of size, shape, and texture.
Cups and Stir SticksFor mixing paints and pouring medium.
Protective GearGloves and aprons protect your hands and clothes from spills.
Workspace CoveringPlastic sheets or old newspapers to protect your surface from paint splatters.
Level SurfaceEnsure your driftwood is placed on a level surface for even drying.

Selecting the Right Driftwood

Finding the perfect piece of driftwood is a personal and creative process. Look for pieces that are clean and free of significant debris or moisture. While the shape and size depend on your artistic vision, a smooth surface will work best for beginners as it facilitates the flow of paint. However, don’t shy away from using driftwood with different contours—these can create interesting patterns as the paint moves and settles.

Preparing Your Driftwood

Once you’ve selected your driftwood, it’s crucial to prepare it properly to ensure the best outcome for your project. Clean your driftwood thoroughly to remove dirt, sand, or small debris. Depending on where you sourced it, this might involve rinsing it and letting it dry completely. Sanding your driftwood lightly can smooth rough surfaces, making it easier to apply paint uniformly. Remember that preparation serves as the foundation for creating a striking piece of art.

Acrylic Pour On Driftwood

The Process of Acrylic Pouring on Driftwood

Now comes the exciting part: bringing your artistic vision to life with paint on driftwood. This process allows you to experiment and embrace the unexpected, as you never know exactly how the paint will flow and interact.

Mixing Your Paints

Begin by mixing your acrylic paints with a pouring medium in separate cups. The goal is to achieve a smooth, liquid consistency, similar to that of warm honey. Start with a 1:1 ratio of paint to pouring medium, and adjust based on how the paint behaves. Make sure to mix enough of each color for your project—you’d rather have extra than run out halfway through!

Choosing Your Technique

There are several techniques to choose from, depending on your desired effect:

  • Dirty Pour: Layer multiple paint colors in a single cup and pour them onto the driftwood. As the colors flow, they’ll mix and create beautiful swirls and marbled effects.

  • Flip Cup: Fill a cup with layered paint, place it on the driftwood surface, and then quickly flip the cup upside down. Lift the cup slowly to let paint spread across the driftwood naturally.

  • Puddle Pour: Pour individual colors directly onto the driftwood, allowing each color to interact as they spread and cover the wood’s surface.

Pouring and Distributing Paint

Once you’ve selected a technique, it’s time to pour your paint onto the driftwood. Begin by positioning the piece level. Slowly and carefully apply the paint, allowing it to spread across the surface. You can gently tilt the driftwood to help guide the paint where you’d like it to go, but be mindful of letting the colors mix too much or muddy.

Creating Texture and Movement

To add texture or additional interest, you can incorporate tools such as sticks, combs, or even your fingers (with gloves on) to manipulate the paint. These tools can be used to create lines, swirls, or other patterns that add depth to your artwork. Use these techniques sparingly, as part of what makes acrylic pouring so beautiful is the natural flow of paint.

Drying and Sealing

Patience is essential as your creation dries. It can take up to 24-72 hours for the paint to completely set, depending on factors like humidity and the thickness of your paint layers. Once the paint is dry, sealing your artwork is recommended to protect it from moisture and dust. A clear acrylic sealer applied evenly over the surface will preserve your masterpiece, giving it a lasting sheen.

Troubleshooting Common Issues

Even with preparation, challenges can arise when working with acrylic pours. Here are some common issues and tips on how to address them:

Muddy Colors

If your colors are blending into a muddy mess, consider using less paint, allowing more time for layers to move naturally, or selecting colors that complement each other better. Experimenting with color ratios can help you find the perfect combination.

Cracking or Crazing

Cracking occurs when paint dries unevenly. This can often be avoided by ensuring your paint consistency is correct before pouring and by drying your piece on a level surface. Additional factors like too much water or drying in an environment that is too dry or humid can contribute to this issue.

Uneven Drying

If parts of your paint dry gray or patchy, it could be due to excess water in your mix or your workspace not being level. Ensure your workspace and the driftwood piece are level and avoid diluting your paint too much.

Acrylic Pour On Driftwood

Tips for Success

For an enjoyable experience and satisfying results, consider these helpful tips:

Practice and Patience

Like any artistic endeavor, practice makes perfect. Don’t be discouraged if your first attempts don’t turn out as you imagined. Use these moments as learning opportunities. Experiment with different techniques and color combinations to discover what works best for you.

Keep It Fun and Relaxed

Remember, acrylic pouring is meant to be an exciting and stress-free form of art. Embrace its fluid nature, and invite imperfections as part of the process. By doing so, you’ll find that your creative freedom grows, reflecting a style that’s uniquely yours.

Stay Safe

Art is fun, but safety should always come first. Use protective gear like gloves and aprons to prevent exposure to chemicals and messy clean-up. Also, ensure your workspace is well-ventilated when using any additional sealing products.

By following these guidelines, you can start your journey into acrylic pouring on driftwood and create visually stunning pieces that blend the natural world with artistic flair. Every creation will be a testament to the beauty of unpredictability, capturing the stunning dynamics of color and form on driftwood’s unique canvas.

Filed Under: Driftwood Ideas Tagged With: Acrylic Pouring, crafting, DIY Art, driftwood art, Fluid Art

Driftwood Headboard Diy

October 19, 2024 by admin

Have you ever thought about adding a touch of nature and artistry to your bedroom decor with your own DIY project? Creating a driftwood headboard could be the perfect solution to add a coastal and rustic vibe to your space while expressing your creativity and craftsmanship. Even if you don’t live near a beach and are wondering how to source the materials and craft such a headboard, this guide is designed to walk you through each step of the process in a friendly and accessible way.

Driftwood Headboard Diy

Understanding the Appeal of Driftwood

Driftwood offers a unique aesthetic that blends rustic charm with natural elegance. Each piece of driftwood is distinct, shaped, and weathered by the elements over time, giving it its character and charm. Incorporating driftwood into your decor provides an organic and calming effect, reminiscent of tranquil beaches and seaside breezes. The beauty of driftwood lies in its imperfection and natural textures, making every creation truly one-of-a-kind.

Why Driftwood for a Headboard?

Using driftwood for a headboard is an excellent way to bring the outdoors into your bedroom. It not only serves as a functional piece of furniture but also as an art installation, elevating your space’s aesthetic. A driftwood headboard can act as a focal point, adding warmth and an earthy texture that balances well with both modern and traditional decor styles. Plus, creating your own driftwood headboard allows you to personalize your space and showcase your unique taste.

Sourcing Your Driftwood

Finding the right driftwood for your headboard is the first critical step. Whether you live by the coast or inland, there are ways to collect or purchase driftwood that meets your needs.

Collecting Driftwood from Nature

If you are lucky enough to live near a beach, collecting your driftwood can be an enjoyable and rewarding experience. Here are a few tips to ensure your collecting process is both safe and environmentally conscious:

  1. Check Local Regulations: Before gathering driftwood, research any local regulations or restrictions. Some areas protect driftwood for ecological reasons, and collecting without permission could harm the environment.

  2. Select the Right Pieces: Look for pieces that are stable, free of rot, and have smooth edges. Consider the size and shape according to your design vision.

  3. Be Eco-Friendly: Avoid taking more than you need and consider other natural options like sticks or fallen branches that have already began weathering naturally.

Purchasing Driftwood

If you don’t live near a coastline or collecting isn’t feasible, purchasing driftwood is another viable option. Many craft stores, lumber yards, and online retailers offer driftwood for crafting purposes. When purchasing, pay attention to the size, texture, and color of the wood to ensure it fits your aesthetic.

Preparing Your Driftwood

Once you’ve sourced your driftwood, it’s crucial to prepare it properly. This step involves cleaning, drying, and treating the wood to make it suitable for indoor use.

Cleaning Your Driftwood

Proper cleaning ensures that your newly acquired driftwood is free of sand, salt, and potential pests. Here’s how to clean your driftwood effectively:

  1. Rinse Thoroughly: Use a hose to rinse away debris and salt. This may require several rinses to ensure all surfaces are clean.

  2. Soak the Wood: Fill a large tub or container with fresh water and allow the driftwood to soak for at least 24 hours. For larger pieces, consider soaking them in a kiddie pool or a bathtub.

  3. Scrub Gently: Use a soft brush to scrub away any remaining dirt. Be gentle to maintain the wood’s natural texture.

Drying and Treating the Wood

After cleaning, it’s important to dry and treat your driftwood:

  1. Drying: Place your driftwood in a dry, sunny spot. This helps eliminate moisture, which can lead to mold or decay if left untreated. Make sure the pieces are thoroughly dry before moving forward.

  2. Sanding for Smoothness: Sand the wood lightly to smoothen any rough edges. Take care not to over-sand, as much of the driftwood’s charm lies in its natural imperfections.

  3. Sealing: Apply a clear wood sealant to protect the driftwood from moisture and preserve its color. Choose a sealant appropriate for interior use and follow the manufacturer’s instructions.

Design Considerations

With your driftwood clean and ready, it’s time to consider the design of your headboard. Driftwood can be crafted into various designs, accommodating a variety of styles from minimalist to more intricate compositions.

Sketching Your Design

Creating a sketch of your headboard design can help solidify your vision. Consider the following elements:

  • Size and Dimensions: Decide how large you want your headboard to be. Measure your bed and wall space to ensure a perfect fit.

  • Pattern and Layout: Consider a simple linear arrangement or an organic, staggered design. Balance is key, so play with different configurations.

  • Incorporation of Other Materials: Think about integrating other materials such as metal or textiles for added texture and complexity.

Choosing Your Tools

Selecting the right tools for your project is crucial to ensure both efficiency and safety. Here is a basic list of tools you may need:

ToolPurpose
Measuring TapeTo ensure accurate sizing and fit.
SawTo cut pieces of driftwood to your desired length.
DrillTo attach pieces together or to the wall.
SandpaperFor smoothing rough edges.
Sealer BrushTo apply finish to your driftwood.
Protective GearSafety glasses and gloves to protect yourself while working.

Driftwood Headboard Diy

Assembling Your Driftwood Headboard

Now that you have prepared your materials and designed your headboard, the exciting task of assembly begins. Follow these steps to put together your beautiful driftwood headboard:

Creating a Support Structure

A solid support structure is essential for your driftwood pieces. Consider these tips:

  1. Base Structure: Use a plywood board as a base to which you will attach the driftwood pieces. This ensures stability and eases the installation process.

  2. Framework: If not using a full base board, create a frame using wooden beams to form the outline of your headboard.

Assembling the Driftwood

With your support structure in place, you can start applying your driftwood pieces:

  1. Lay Out Your Pieces: Arrange your driftwood on the floor in the desired pattern before attaching. This allows for adjustments before making permanent decisions.

  2. Attachment Method: Use wood glue for small, lightweight pieces, or screws for larger, heavier ones. Ensure that each piece is securely fastened to the base or the framework.

  3. Check Alignment: Continuously check your pattern for alignment and balance, adjusting the pieces as necessary to achieve the desired look.

Finishing Touches

Your headboard is nearly complete, and now it’s time to add those finishing touches to ensure it looks polished and fits perfectly within your bedroom decor.

Sand and Smooth

Perform a final round of sanding to ensure all surfaces are smooth and safe, removing any splinters or overly sharp edges that might cause harm.

Final Sealing

Apply one last coat of sealer to protect your driftwood from dust and maintain its appearance. This step will enhance durability and visually unify the different pieces.

Installing Your Headboard

With your driftwood headboard complete, the final step is installation. Here’s how to ensure it’s securely mounted and aesthetically integrated:

Attachment to Wall or Bed

Decide whether you will attach your headboard directly to the wall or the bed frame:

  • Wall Mounting: Use sturdy wall brackets or a French cleat system for support. This method offers a clean, floating appearance.
  • Bed Frame Attachment: Use bolts to secure the headboard directly to your bed frame, providing a strong and seamless connection.

Positioning

Hang your headboard at the desired height, ensuring it is centered and level. Consider the headboard’s impact on your room’s overall design and how it complements other furniture pieces.

Caring for Your Driftwood Headboard

To ensure your new headboard remains a stunning part of your decor for years to come, it’s important to care for it properly. Here are tips for maintaining its condition:

Regular Dusting

Dust your headboard regularly to keep it clean. Use a soft cloth or microfiber duster to avoid scratching the surface.

Avoid Excess Moisture

Since wood is susceptible to water damage, avoid placing your headboard in areas of high humidity or splashing. Consider using a humidifier or dehumidifier to maintain optimal air quality.

Refresh the Sealer

Periodically reapply a wood sealer to maintain the protective layer and enhance the driftwood’s natural beauty. This is especially important if your headboard is near a window or heat source.

DIY Challenges and Solutions

Embarking on a DIY project like a driftwood headboard may come with challenges. Anticipating some common obstacles and their solutions can help ease the process:

Finding Uniform Driftwood

Creating a uniform look with varied driftwood pieces can be challenging. Mix sizes and shapes creatively to achieve balance, or cut larger pieces to desired proportions.

Secure Fastening

Ensuring each piece of driftwood is securely fastened is crucial. Using the right adhesive and hardware will offer stability. If a piece seems insecure, consider reworking or reinforcing its attachment.

Balancing Design Elements

Maintaining visual balance in your headboard design is key to its overall success. Step back periodically during assembly to assess alignment and symmetry. Don’t hesitate to rearrange pieces if the layout looks off balance.

Delight in Your Creation

Constructing a driftwood headboard is more than just a project; it’s a personal journey that involves creativity, patience, and craftsmanship. By embracing rustic elegance with the imperfections of nature, you have crafted a piece that speaks to your individuality and appreciation for the earth’s raw beauty. Enjoy the earthy ambiance it brings to your space, and take pride in the work and passion you brought to life through your artistry. Let your headboard be a testament to your dedication, a piece that not only transforms your bedroom but enriches your soul.

Filed Under: Driftwood Ideas Tagged With: Bedroom Decor, crafting, DIY, Driftwood, Headboard

Make Your Own Driftwood

October 1, 2024 by admin

Have you ever wondered how to create your own driftwood? Maybe you love the natural, weathered look of driftwood and want to use it for home décor or art projects. Driftwood has an enchanting quality that makes it highly desirable for various decorative uses. The good news is that you can make your own driftwood at home, and it’s easier than you might think.

Make Your Own Driftwood

Introduction to Driftwood

Driftwood is often found along shorelines, where it has been naturally weathered by water, wind, and the sun. This natural process can take years, but with a few simple steps, you can accelerate the aging process and create your own driftwood in a matter of days or weeks.

Why Create Your Own Driftwood?

There are ample reasons why you might choose to make your own driftwood:

  1. Sustainability: You don’t have to disrupt natural habitats by collecting driftwood from beaches or rivers.
  2. Customization: Control the size, shape, and type of wood you start with.
  3. Accessibility: No need to live near a body of water.

Materials You’ll Need

To create driftwood, you’ll need the following materials:

  • Raw wood pieces (branches, logs, etc.)
  • Plastic or metal containers
  • Bleach (optional)
  • Baking soda (optional)
  • A stiff brush
  • Sandpaper
  • A protective mask and gloves
  • Water source

Step-by-Step Guide to Making Driftwood

Step 1: Selecting the Wood

Choose raw wood pieces that you would like to turn into driftwood. These can be sourced from your backyard, a nature trail, or even purchased from a local store. Opt for hardwoods like oak or cedar for the best results.

Step 2: Preparing the Wood

Before starting the treatment process, you’ll need to prep the wood:

  • Remove Bark: Use a sharp knife or a chisel to remove excess bark. The wood shouldn’t be too green or fresh. Older, drier wood works best.
  • Cut to Size: Trim the wood to your desired sizes and shapes.

Step 3: Cleaning the Wood

Wash the wood thoroughly to remove any dirt and debris. Use a stiff brush and water to scrub the surface clean.

Step 4: Bleaching the Wood

To accelerate the weathering process, you can bleach the wood. This will not only lighten the wood but also help remove any pests or bacteria.

Bleaching Solution:

IngredientQuantity
Bleach1 part
Water10 parts
  1. Mix the bleach and water in a container large enough to submerge the wood pieces.
  2. Soak the wood in the bleach solution for 24 hours.
  3. After 24 hours, remove the wood and rinse it thoroughly with water.

Note: Use gloves and a mask when handling bleach.

Step 5: Sun-drying the Wood

Place the wood in a sunny spot to dry. This can take a few days to a week, depending on the thickness and type of wood. The sun will help to naturally weather the wood, giving it a more authentic driftwood appearance.

Step 6: Baking Soda Method (Optional)

For a more weathered look, you can use baking soda:

  • Make a baking soda paste by mixing baking soda with water.
  • Apply the paste to the wood and let it sit for 24 hours.
  • Rinse the wood and let it dry in the sun.

Step 7: Sanding and Finishing

Once the wood is dry, sand it down to smooth out rough patches. You can use varying grits of sandpaper, starting with a coarse grit and finishing with a finer grit.

Tips for Achieving Different Driftwood Looks

Light Driftwood

To achieve a lighter driftwood appearance, increase the soaking time in the bleach solution. This will help to bleach the wood more thoroughly and give it that worn, sun-bleached look.

Weathered and Textured Driftwood

For a more rustic, textured look, you can use multiple bleaching and sun-drying cycles. This method layers the effects, giving the wood a naturally aged appearance.

Natural-Looking Driftwood

Skip the bleach and use only natural elements like sun, wind, and water to age the wood. This will take longer but provides the most authentic driftwood appearance.

Make Your Own Driftwood

Common Mistakes and How to Avoid Them

Over-Bleaching

Too much bleach can weaken the wood fibers, making it brittle. Always start with less bleach and increase the concentration gradually if required.

Not Rinsing Properly

Failing to rinse the wood thoroughly after bleaching can leave behind chemical residues that could be harmful.

Inadequate Drying

Make sure the wood is completely dry before sanding or using it for projects to prevent mold and mildew growth.

Creative Uses for DIY Driftwood

Home Décor

Use your driftwood to create stunning pieces of home décor. From mirror frames to shelves, the possibilities are endless.

Craft Projects

Create unique driftwood crafts such as candle holders, table centerpieces, and jewelry stands.

Outdoor Projects

Driftwood can be used in gardens for edging, garden fences, or even as part of a water feature.

Benefits of Making Your Own Driftwood

Cost-Effective

Making your own driftwood is much cheaper than buying it from stores or online retailers.

Eco-Friendly

By creating your own driftwood, you help reduce the demand for naturally sourced driftwood, preserving natural habitats and ecosystems.

Personalized Touch

You have complete control over the look and feel of the driftwood, ensuring it matches your specific style and project needs.

Additional Tips for Working with Driftwood

Sealing the Wood

To preserve your driftwood projects, consider sealing them with a clear wood sealant. This will protect the wood from further weathering and keep it looking fresh.

Safety Precautions

Always wear protective gear such as gloves and masks when handling bleach or other chemicals. Work in a well-ventilated area to avoid inhaling fumes.

Experimenting with Different Woods

Different types of wood will react differently to the bleaching and weathering process. Experiment with various types of wood to see which ones yield the best results.

Frequently Asked Questions

How Long Does it Take to Make Driftwood?

The time required can vary based on the method used and the type of wood. Generally, you can create decent driftwood in about one to two weeks.

Can Driftwood be Used Indoors?

Absolutely! Driftwood is versatile and can be used for both indoor and outdoor projects.

Is it Safe to Use Bleach?

Yes, but take proper precautions to ensure your safety. Use gloves, masks, and work in a ventilated area.

Conclusion

Creating your own driftwood at home is a fun, rewarding project. Not only is it cost-effective and eco-friendly, but it also allows you to craft unique, personalized pieces for your home or garden. With the right materials and a bit of patience, you can transform ordinary wood into beautiful, weathered driftwood that adds a touch of nature and rustic charm to any setting. So why not give it a try?

Filed Under: Driftwood Ideas Tagged With: crafting, Driftwood, Handmade, home decor, nature projects

Driftwood Yarn

September 30, 2024 by admin

Have you ever wondered how something as simple as driftwood can become a unique and fascinating type of yarn? Driftwood yarn is a remarkable blend that combines the natural beauty of driftwood with the craft of knitting and crocheting. This blend of two arts brings together the raw elegance of nature and the refined skill of textile creation.

Driftwood Yarn

What is Driftwood Yarn?

Driftwood yarn isn’t literally yarn made out of driftwood, but rather, it’s a unique type of yarn inspired by the colors, textures, and patterns found in driftwood. It often features earthy tones, including shades of brown, beige, grey, and sometimes muted blues and greens.

Characteristics of Driftwood Yarn

The primary features of driftwood yarn include:

  • Colors: Earthy and natural tones that reflect the muted palette of driftwood.
  • Texture: Depending on the material, it can range from a smooth finish to a more rustic, uneven texture, reminiscent of the varied surface of driftwood.
  • Material: Usually natural fibers such as wool, cotton, or blends that seek to emulate the softness and ruggedness of driftwood.

Types of Driftwood Yarn

There are multiple types of driftwood yarn, each with its own unique characteristics. Below is a table summarizing some common types:

TypeDescriptionBest Use Cases
Wool BlendSoft, warm, and slightly heavySweaters, scarves, hats
Cotton BlendLight, breathable, and slightly rough textureSummer garments, market bags
Silk BlendSmooth, shiny, with a luxurious feelShawls, special occasion garments
Acrylic BlendVersatile, affordable, and easy to care forEveryday wear, children’s clothing

The Origin of Driftwood Yarn

Natural Inspiration

The idea of driftwood yarn draws from the natural artistry of the coastlines where driftwood is found. There’s something inherently beautiful about the weathered and aged appearance of driftwood, shaped and polished by the sea. This aesthetic is captured in the fibers and colors of driftwood yarn.

Influence of Coastal Culture

Coastal cultures have long had a special relationship with the sea and its gifts. Driftwood has often been used in art and craft, from sculpture to home décor. The concept of driftwood yarn is a contemporary extension of these traditions, adapting the natural charm of driftwood into the textile arts.

How Driftwood Yarn is Made

Creating driftwood yarn involves a meticulous process to ensure that the final product embodies the essence of actual driftwood. Let’s look at the step-by-step process:

1. Material Selection

The first critical step is choosing the right materials. Natural fibers like wool, cotton, and sometimes silk are preferred. These materials must be of high quality to create a durable and aesthetically pleasing yarn.

2. Dyeing Process

To replicate the colors of driftwood, the yarn goes through a specialized dyeing process. This involves using natural dyes to achieve the earthy tones of driftwood. Each batch is carefully monitored to ensure consistency in color.

3. Spinning

Once dyed, the fibers are spun into yarn. The spinning process may be adjusted to give the yarn an uneven texture, mimicking the rough, rustic feel of driftwood. This step is crucial to ensure the yarn has the right balance of softness and texture.

4. Quality Control

Finally, the yarn undergoes quality control to check for any inconsistencies in texture, color, or strength. Only the best quality yarn is packaged and sold under the label of driftwood yarn.

Uses of Driftwood Yarn

Driftwood yarn can be used in a variety of knitting and crocheting projects. Its unique appearance and texture make it suitable for a range of creations from wearable items to home décor.

Clothing

Due to its natural colors and comfortable texture, driftwood yarn is perfect for creating cozy and stylish clothing. This includes:

  • Sweaters: Provides warmth and a rustic look.
  • Scarves and Shawls: Adds a touch of elegance with a natural vibe.
  • Hats: Keeps you warm while maintaining a chic aesthetic.

Home Decor

The earthy tones of driftwood yarn complement various home décor styles:

  • Blankets and Throws: Adds a cozy, natural element to any room.
  • Cushions: Enhances the texture and comfort of living space.
  • Wall Hangings: Brings in a coastal, boho style.

Accessories

Driftwood yarn is also excellent for making unique accessories:

  • Bags: Perfect for market totes or stylish handbags.
  • Socks: Comfortable and uniquely patterned to keep your feet warm.
  • Jewelry: Bracelets, necklaces, and more using knit or crochet techniques.

Driftwood Yarn

Caring for Driftwood Yarn Creations

Caring for items made from driftwood yarn is essential to maintain their beauty and longevity. Here are some tips to help you ensure your handmade creations last:

Washing

The first rule is to always follow the care instructions provided by the yarn manufacturer. Generally, items made from natural fibers should be hand-washed with mild detergent and lukewarm water. Avoid wringing them out, as this can distort the shape and texture of the yarn.

Drying

Lay your driftwood yarn creations flat to dry, preferably on a clean towel. This helps retain their shape and prevents stretching.

Storing

Store your items in a cool, dry place away from direct sunlight to avoid fading and weakening of fibers. Moth repellents such as lavender sachets can help keep your yarn and creations safe from pests.

Patterns and Projects

If you’re eager to start a project with driftwood yarn but are unsure where to begin, here are a few pattern ideas to spark your creativity:

Driftwood Sweater

A cozy sweater that mirrors the weathered look of driftwood would be an excellent project for intermediate knitters. Look for patterns that feature a mix of stitches to highlight the yarn’s texture.

Driftwood Shawl

Using a lace or openwork pattern can make a beautiful shawl that reflects the delicate, yet rugged aesthetic of driftwood. This could be a perfect accessory for an evening beach walk.

Driftwood Cushion Covers

These can be a simple but rewarding project. Use driftwood yarn to create cushion covers with a tactile surface, incorporating cable knits or moss stitch to add a touch of elegance to your living space.

Driftwood Tote Bag

For those who love to crochet, a driftwood yarn tote bag can be both stylish and practical. Use a sturdy pattern that shows off the yarn’s natural beauty while providing durability.

Finding Driftwood Yarn

When it comes to finding authentic driftwood yarn, local crafts stores or online marketplaces might be your first stop. Here’s a quick guide to help you find and choose the best driftwood yarn:

Local Fiber Stores

Visiting a local fiber or yarn store allows you to touch and feel the yarn, giving you a better sense of its texture and quality.

Online Marketplaces

Websites like Etsy, Amazon, and specialized yarn retailers often carry driftwood yarn. Reading reviews and checking product descriptions can help you find high-quality options.

Yarn Festivals

Yarn and fiber festivals are excellent places to find unique yarns, including driftwood yarn. These events also provide opportunities to meet artisans and learn more about the product.

Conclusion

Driftwood yarn introduces a blend of natural beauty and textile art that can transform your knitting and crocheting projects into unique, rustic pieces. Whether you’re creating a cozy sweater, an elegant shawl, or charming home décor, this type of yarn adds a touch of nature’s elegance in every stitch. Happy crafting as you explore the endless possibilities of driftwood yarn!

Filed Under: Driftwood Ideas Tagged With: crafting, Driftwood, home decor, Yarn

How To Make Driftwood Xmas Tree

September 28, 2024 by admin

Have you ever thought about creating your own unique holiday decorations this year? One fun and creative project is making a driftwood Christmas tree. This charming, rustic decoration not only brings a bit of the beach to your winter home but also allows you to get crafty and spend less on store-bought items.

How To Make Driftwood Xmas Tree

Understanding Driftwood Xmas Trees

Driftwood Christmas trees are created using pieces of weathered wood that have been shaped and smoothed by water. These trees can range from small, tabletop versions to large, statement-making pieces. They’re perfect for anyone looking to add a natural, minimalist touch to their holiday décor.

Why Choose Driftwood for Your Christmas Tree?

Driftwood offers a multitude of benefits for crafting. It is sustainable, eco-friendly, and full of character. Every piece of driftwood is unique, adding a distinctive touch to your decorations. Plus, the neutral color palette of the wood makes it easy to match with your existing holiday decorations.

Gathering Your Materials

Before starting your project, it’s essential to gather all the necessary materials. Here’s a list of what you’ll need:

ItemDescription
DriftwoodVarious sizes for branches and the trunk
Wood or metal rodTo serve as the tree’s backbone
BaseA sturdy piece of wood or driftwood to support the tree
Drill and drill bitsTo make holes for the rod and branches
SawFor cutting the driftwood to size
SandpaperTo smooth any rough edges
Wood glue or screwsTo attach the driftwood branches to the rod
DecorationsLights, ornaments, ribbons, or any personal touches you’d like

Choosing the Right Driftwood

Selecting the right pieces of driftwood is critical. You’ll want a variety of lengths and diameters to create a balanced look. It’s often best to have a vision of your desired tree size before you search for driftwood, so you can collect the proper pieces accordingly.

Preparing Your Driftwood

Once you’ve gathered your driftwood, it’s essential to clean and prepare it. Driftwood found on beaches can have sand, salt, and other debris. Here’s how to get it ready:

Cleaning the Driftwood

  1. Rinse Thoroughly: Use water to rinse off sand and surface debris.
  2. Scrub: With a stiff brush, scrub the wood to remove remaining particles.
  3. Soak: Soak the driftwood in a mixture of water and bleach (1 part bleach to 9 parts water) for 24 hours to remove any remaining dirt and kill mold or bacteria.
  4. Dry: Let the pieces dry completely, which can take several days.

Sanding

Sanding helps smooth rough areas and prepares the wood for assembly. Use different grits of sandpaper, starting with a coarser grit and moving to a finer one to get a smooth finish.

Assembling the Tree

The assembly of your driftwood Christmas tree requires a bit of planning and patience. However, the result is well worth the effort!

Creating the Base and Rod

  1. Base: Choose a sturdy piece of driftwood or other wood for the base. It should be heavy enough to support the entire tree.
  2. Drill: Drill a hole in the center of the base to accommodate the rod.
  3. Insert Rod: Securely fix the rod into the hole with wood glue or screws.

Drilling Holes for the Branches

  1. Measure and Mark: Measure and mark where each driftwood branch will go on the rod. Start larger at the bottom and gradually decrease the size toward the top.
  2. Drill Holes: Use a drill to create holes in the rod at each marked spot.

Attaching the Branches

  1. Size and Cut: Cut your driftwood to the desired lengths.
  2. Drill Holes: Drill holes in the driftwood pieces to slide onto the rod.
  3. Slide on Branches: Slide each driftwood piece onto the rod, angling them as you go to create a balanced tree shape.

How To Make Driftwood Xmas Tree

Decorating Your Driftwood Xmas Tree

The beauty of a driftwood Christmas tree is in its natural simplicity, but adding decorations can make it even more festive.

Lights and Ornaments

  • Lights: String LED fairy lights around the tree for a warm glow.
  • Ornaments: Use lightweight ornaments to avoid tipping over the branches. Seashells, small stars, or other beach-themed decorations work well.
  • Ribbons: Add ribbons for a pop of color and texture.

Topping the Tree

Choose a tree topper that complements the rustic look. Consider using a starfish, small driftwood star, or even a simple bow made from natural fibers.

Tips for Customization

Your driftwood Christmas tree can be customized in countless ways to fit your personal style and home décor.

Painted Driftwood

Some prefer the natural look of driftwood, while others may enjoy adding a splash of color. Paint your driftwood branches with white for a snowy effect or choose various colors for a more vibrant tree.

Adding Textures

Incorporate different textures by tying on pieces of fabric, lace, or burlap. These added textures can give your tree a unique and cozy feel.

Maintaining Your Driftwood Xmas Tree

Taking care of your driftwood Christmas tree ensures it lasts for many seasons. Here’s how:

Storing

When the holiday season is over, carefully disassemble your tree. Wrap the driftwood pieces individually in paper or bubble wrap to prevent them from chipping or breaking. Store in a dry place to avoid moisture damage.

Handling

Handle your tree with care, especially when moving it. Driftwood can be brittle and might snap if it is handled too roughly.

Conclusion

Crafting a driftwood Christmas tree is a rewarding project that offers endless possibilities for customization. It combines the beauty of nature with festive joy, making it a standout piece in your holiday décor. Whether you decide to leave it natural or add colorful ornaments, this unique tree is sure to become a cherished part of your seasonal celebrations. So gather your materials, tap into your creativity, and enjoy the process of bringing a bit of the beach into your winter wonderland. Happy crafting!

Filed Under: Driftwood Ideas Tagged With: christmas tree, crafting, DIY, Driftwood, Holiday decor

The Art of Creating a Driftwood Vase

September 18, 2024 by admin

Have you ever marveled at the beauty of driftwood and thought about transforming this natural treasure into a unique piece of home décor? In this article, you’ll discover the art of creating a driftwood vase, a project that combines creativity, patience, and a touch of craftsmanship.

What is Driftwood?

Driftwood is wood that has been washed onto the shore by the action of tides, winds, and waves. Each piece is unique, weathered by nature, and often has an intriguing texture and shape that lends itself to wonderful artistic creations. Understanding the characteristics of driftwood is key to utilizing it effectively in your projects.

Types of Driftwood

Driftwood can come from various types of trees, each offering different textures, colors, and strengths. Here’s a basic table to help you identify some common varieties:

Type of DriftwoodCharacteristics
CedarLight, aromatic, and resistant to decay
OakHard, heavy, and dense with a distinct grain
PineSoft, lightweight, and often with a smooth texture
MapleDense, with a fine texture and often pale in color

Understanding these differences helps in selecting the best type of wood for your project.

Preparing Your Driftwood

Before you start creating your driftwood vase, it’s crucial to properly prepare the wood. This preparation ensures your final product is both aesthetically pleasing and long-lasting.

Collecting Driftwood

The first step is to find driftwood. Beaches, riverbanks, and lakesides are great places to search. When selecting pieces, look for those that are relatively dry, free of excessive cracks, and of manageable size.

Cleaning Driftwood

Cleaning your driftwood is vital for both aesthetic and hygienic reasons.

  1. Remove Debris: Begin by scrubbing off any loose dirt, sand, or seaweed with a stiff brush.
  2. Soak in Water: Soak the wood in water for 24-48 hours to remove any remaining salt and organic material.
  3. Disinfect: Use a mixture of water and bleach (1:10 ratio) to disinfect the driftwood. Submerge it in this solution for at least 24 hours.
  4. Rinse and Dry: Finally, rinse the wood thoroughly with fresh water and allow it to dry completely.

Sanding the Driftwood

Sanding smoothes out the rough edges and highlights the wood’s natural grain. Use medium-grit sandpaper (around 120-grit) to begin with and finish with fine-grit (220-grit) for a smooth finish. Be careful not to over-sand, as this can alter the character of the driftwood.

The Art of Creating a Driftwood Vase

Designing Your Vase

Design is a critical step in creating a driftwood vase, as it allows you to visualize the final product and plan how to piece everything together.

Sketching Your Design

Start by sketching a simple design of what you want your vase to look like. Consider the shapes and sizes of your driftwood pieces and how they’ll fit together.

Measurement and Cutting

Measure the height and diameter you want your vase to be. Use a saw to cut the driftwood pieces to the necessary lengths. Generally, you’ll want a variety of lengths to create visual interest.

Arranging the Pieces

Lay out the driftwood pieces to see how they will fit together. You might need to cut or sand some pieces further to achieve the desired look. This step is crucial for ensuring your vase has a balanced, cohesive appearance.

Assembling Your Driftwood Vase

Now that your pieces are prepared and arranged, it’s time to assemble your driftwood vase. This process involves careful gluing and sometimes additional support methods to ensure the vase is sturdy and functional.

Choosing the Right Adhesive

Selecting the correct adhesive is key to a durable vase.

Recommended Adhesives:

Adhesive TypeProsCons
Wood GlueStrong bond, dries clearRequires clamping
EpoxyVery strong, can fill gapsLonger curing time, expensive
Hot GlueFast drying, easy to useLess durable over time

Gluing the Pieces

  1. Base First: Start with the base of the vase. Arrange the wood pieces in a circular pattern and glue them together. Allow this foundation to dry completely.
  2. Layer by Layer: Attach each piece of driftwood layer by layer. Use clamps or weights to secure pieces while the glue dries.
  3. Check Alignment: Regularly check that the pieces are aligned correctly and adjust as needed before the glue sets.

Adding Structural Support

For larger vases, or if your driftwood pieces are particularly heavy, adding extra structural support may be necessary. You can use nails, screws, or even internal wire frames to add stability.

The Art of Creating a Driftwood Vase

Finishing Touches

Once your vase is fully assembled, add the finishing touches that will enhance its beauty and ensure its longevity.

Sealing the Wood

Sealing your driftwood vase protects it from moisture and enhances its natural grain. Use a clear wood sealant or polyurethane.

Steps to Seal Your Vase:

  1. Apply a thin, even coat of sealant with a brush.
  2. Allow it to dry completely as per the manufacturer’s instructions.
  3. Lightly sand the surface with fine-grit paper.
  4. Apply additional coats as necessary, sanding between each.

Adding Decorative Elements

You can embellish your driftwood vase with additional decorative elements:

  • Paint or Stain: Add color while still letting the natural grain show.
  • Beads or Shells: Glue small beads or shells to enhance the natural theme.
  • Natural Accents: Incorporate other natural elements like stones or moss.

Caring for Your Driftwood Vase

Proper care will extend the life of your driftwood vase and keep it looking beautiful for years to come.

Regular Cleaning

Dust your vase regularly with a soft cloth. Avoid using harsh chemicals or abrasive cleaners as they can damage the wood.

Handling with Care

Driftwood can be delicate, especially if your vase has thin or protruding pieces. Handle it gently to avoid breakage.

Avoiding Excess Moisture

While a sealed vase is protected from moisture, it’s still best to avoid placing it in overly humid areas or filling it with water. Use a separate container for fresh flowers or plants that require water.

Periodic Inspection

Check your vase periodically for any signs of wear or damage. If you notice any loose pieces or cracks, apply a small amount of wood glue to reinforce it.

Showcase Your Creation

Your driftwood vase is not just a functional item but a piece of art. Here are some ideas for showcasing it in your home:

Centerpiece

Place your vase as a centerpiece on your dining table. Fill it with dried flowers, reeds, or even unique branches to highlight its natural charm.

Shelf Display

Position your vase on a prominent shelf or mantelpiece. Surround it with complementary items like stone sculptures, candles, or other natural elements.

Gift Idea

A hand-crafted driftwood vase makes a thoughtful and personalized gift. Consider creating one for a friend or family member who appreciates natural beauty and unique home décor.

Frequently Asked Questions

Can I use driftwood that is freshly collected?

Yes, but freshly collected driftwood needs to be thoroughly cleaned and dried before use. This ensures that any salt, organic material, and moisture are removed, which is crucial for the longevity and appearance of your vase.

How do I ensure my vase is watertight?

To use your driftwood vase for fresh flowers, you need an internal waterproof container. A glass or plastic insert can fit inside the vase, ensuring that no water seeps into the driftwood.

What if the driftwood has signs of pests like termites?

If you suspect your driftwood has pests, it needs to be treated. Freezing the wood for a few days or using pest control solutions can help eliminate any unwanted insects.

Can I paint my driftwood vase?

Yes, painting or staining your driftwood vase can enhance its appearance. Use wood-safe paints or stains and apply a sealant after the paint has dried to protect the finish.

How long will a driftwood vase last?

With proper care and handling, a driftwood vase can last many years. Regular maintenance like cleaning and occasional re-sealing will keep it looking its best.

Conclusion

Creating a driftwood vase is a rewarding project that brings nature’s artistry into your home. With careful selection, preparation, and assembly, you can craft a beautiful, one-of-a-kind piece that showcases the timeless beauty of driftwood. This blend of functionality and natural elegance will not only enhance your living space but also offer a unique conversation piece, a testament to your creativity and craftsmanship. Enjoy the process and the stunning result!

Filed Under: Driftwood Ideas Tagged With: Art Projects, crafting, Driftwood, Handmade, home decor, vase

  • « Previous Page
  • Page 1
  • Page 2
  • Page 3
  • Page 4
  • Page 5
  • Page 6
  • Page 7
  • Next Page »

Primary Sidebar

Driftwood4us.com, is a participant in the Amazon Services LLC Associates Program, an affiliate advertising program designed to provide a means for sites to earn advertising fees by advertising and linking to amazon.com.