• Skip to main content
  • Skip to primary sidebar
  • Terms and Conditions
  • Privacy Policy
  • Contact

Driftwood 4 Us

Just About Driftwood

crafts

Driftwood Look With Paint

May 14, 2025 by admin

Have you ever gazed at a piece of driftwood and admired its rustic charm and natural elegance? The good news is that you don’t need to live near an ocean or spend countless hours scouring beaches to bring that driftwood look into your home. With a little bit of paint, you can recreate the weathered, sun-bleached appearance of driftwood on any wooden surface. In this article, we’ll explore how you can achieve that driftwood look with paint, offering you a budget-friendly way to infuse natural beauty into your space.

Driftwood Look With Paint

Understanding the Driftwood Look

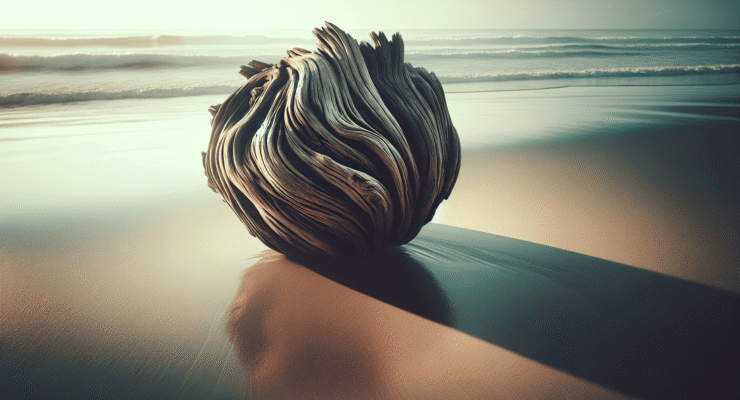
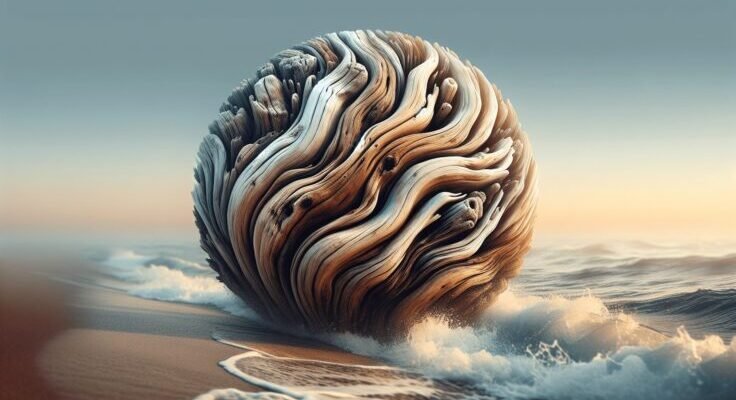
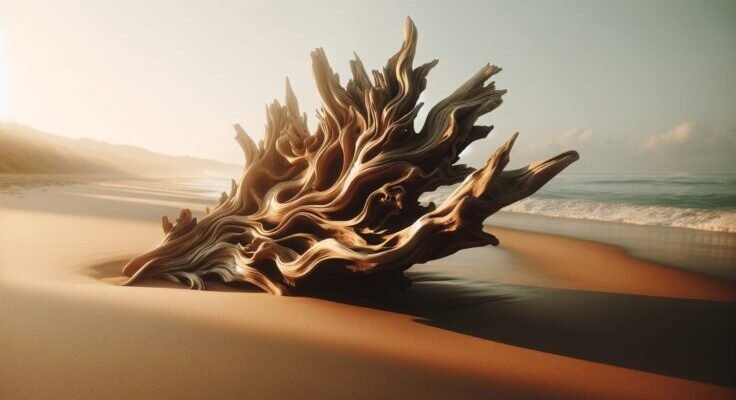
The driftwood look is characterized by its weathered and aged effect, with colors that often include muted grays, soft browns, and bleached whites. This appearance is the result of wood being polished over time by water, sun, and sand, which create a unique texture and color palette.

What Makes Driftwood Unique?

Driftwood is distinctive due to its soft, bleached colors and smooth, often polished texture. As wood floats in the ocean or rivers, it undergoes natural processes that strip it of its bark and pigmentation, leaving behind a skeletal beauty. The look reflects a balance between raw nature and refined elegance, making it a popular choice in home décor for a rustic yet sophisticated vibe.

Why Imitate Driftwood with Paint?

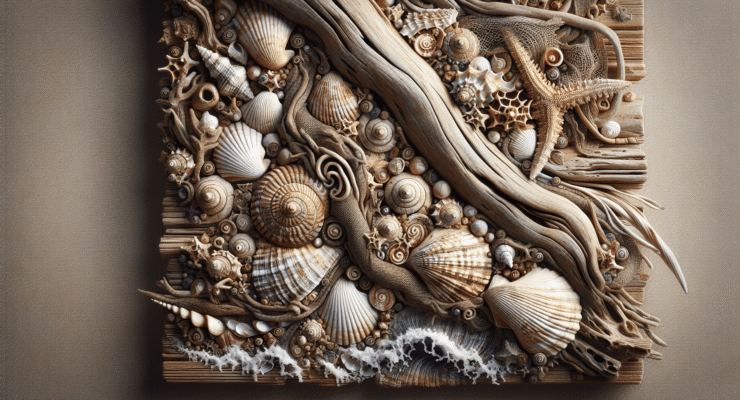
Imitating driftwood with paint allows you to bring that same beauty and character into your home without the need for natural driftwood. It gives you the flexibility to choose any wooden item in your home and transform it into a piece of coastal chic décor. It’s a perfect solution if you’re looking to revamp old furniture or add texture to new pieces.

Preparing Your Surface

Before you start painting, proper preparation is essential to ensure the paint adheres well and the finish lasts. Here are the steps to prepare your wooden surface for painting.

Cleaning the Surface

Begin by cleaning the wooden surface to remove dust, dirt, or grease. A mixture of mild soap and water usually does the trick. After cleaning, make sure the surface is completely dry before moving on to the next step.

Sanding the Wood

Sanding is arguably the most crucial step because it helps the paint adhere better. Use medium-grain sandpaper to lightly sand the wood surface. Remember to sand with the grain and not against it. Once finished, wipe away any dust with a clean cloth.

Priming the Wood

Applying a primer creates a smooth base and helps the paint colors to stand out. Use a quick-dry primer suitable for wood and apply it evenly over the surface using a paintbrush or roller. Let it dry completely according to the manufacturer’s instructions.

Selecting the Right Paint Colors

Choosing the right colors will define how successful your driftwood look will be. The key is to mimic the shades naturally found in driftwood.

Recommended Color Palette

  • Base Color: Light Gray or Soft Blue
  • Secondary Colors: Warm Beige or Taupe
  • Highlight Colors: White or Cream

You can mix and match these shades depending on the look you’re trying to achieve. Using different wood tones as a base color can slightly alter the finished appearance, offering a custom look that’s uniquely yours.

Test Before You Commit

Before painting a large surface, test your chosen colors on a small inconspicuous area. This helps you see how they’ll look in different lighting conditions and ensures the final product meets your expectations.

Techniques to Achieve the Driftwood Look

Now comes the fun part—painting! Several techniques can help you achieve the driftwood look, each offering a distinct texture and finish.

Dry Brushing Technique

The dry brushing method involves removing excess paint from your brush before application. Here’s how:

  1. Dip your brush into the paint, then wipe most of it off onto a paper towel.
  2. With the almost-dry brush, paint using long, smooth strokes following the wood grain.
  3. Allow the base coat to peek through, creating a layered effect.

Layering and Blending

Layering different colors can add depth to your driftwood look. You may want to layer one or more of your secondary or highlight colors over your base.

  1. Start with your base color and allow it to dry.
  2. Apply your secondary color using the dry brushing technique.
  3. Finish with a highlight in white or cream to mimic the sun-bleached effect.

Diluting Paint for a Washed Look

This method gives a more subtle effect, allowing the natural wood grain to show through:

  1. Mix your paint with water to create a thin, translucent wash.
  2. Apply the wash using a paintbrush and let it soak in.
  3. Wipe away excess with a clean cloth to achieve the desired lightness.

Driftwood Look With Paint

Finalizing the Finish

Once you’re satisfied with your driftwood paint effect, there are a few finishing touches that will ensure durability and enhance the appearance.

Sealing the Surface

Applying a sealant will protect your painted surface from wear and tear. Choose a water-based, non-yellowing sealant to maintain the delicate colors and natural texture.

Distressing for Authenticity

For an even more authentic look, consider lightly distressing the edges of your furniture or wood piece. Sand down certain areas more than others to create a natural, worn effect. Be cautious not to overdo it; subtlety is key.

Mixing Gloss Levels

Experiment with different gloss levels to create contrast. A matte finish adds a more rustic appearance, while slight satin or semi-gloss elements can highlight certain features, providing visual interest.

Caring for Your Driftwood Look

Once you’ve achieved the perfect driftwood finish, proper care will keep it looking beautiful for years to come.

Regular Maintenance

Regular dusting with a soft cloth will prevent buildup without scratching the surface. Avoid harsh cleaning products that might strip away the paint or sealant.

Touch-ups

Every once in a while, inspect your piece for any chips or scratches that may have occurred over time. Having a small amount of leftover paint available makes touch-ups seamless and ensures that your driftwood piece remains consistent in appearance.

Conclusion

Creating a driftwood look with paint is not only an enjoyable project but also a rewarding way to add a coastal or rustic element to your home. By selecting the right colors and using a variety of painting techniques, you can transform any wooden surface into something uniquely beautiful, imitating the essence of nature’s handiwork. Whether you’re updating a piece of furniture or adding character to a new one, the driftwood finish offers an endlessly adaptable style that complements a wide range of home décor themes. Embrace the creative process, and you’ll find yourself with a stunning piece that captures the seaside spirit and its timeless beauty.

Filed Under: Driftwood Ideas Tagged With: crafts, DIY, Driftwood, Home Improvement, Painting

Driftwood Log Ideas

May 13, 2025 by admin

What could you possibly create with a piece of driftwood that washed up on the shore? If you love the charm of natural materials and have a knack for turning ordinary objects into something splendid, driftwood can be a canvas for your creativity. Among nature’s offerings, driftwood is both fascinating and versatile. It not only carries the aesthetic beauty of being shaped by water and time, but it also comes with an intriguing sense of mystery from its journey across waters. Let’s explore some fantastic ideas that will help you transform driftwood into stunning pieces of functional and decorative art.

What is Driftwood?

Once a solid part of trees or branches and now smoothed by the rhythm of the waves, driftwood is wood that has been washed onto a shore or beach by the action of winds, tides, or waves. This process can take months or even years, during which the wood is naturally aged, weathered, and stripped of bark, lending it a unique character and texture.

The Journey of Driftwood

Driftwood embarks on an unpredictable voyage from its original location, tumbling through rocky, watery pathways. During this journey, it’s smoothed and bleached by exposure to the sun and water. This natural treatment gives driftwood its distinctive weathered appearance and makes it an attractive material for decorative purposes.

The Splendor of Driftwood in Home Décor

Incorporating driftwood into your home can add an element of rustic charm. Its natural appeal casts a warm, timeless vibe, making it a favorite for coastal, rustic, and bohemian-inspired spaces. Driftwood can be utilized in various ways, ranging from centerpiece décor to functional furniture pieces.

Wall Art with a Natural Twist

Why not craft an artistic wall piece using driftwood? You can create a stunning focal point in your living room or hallway by fastening pieces together to form unique shapes or patterns. Such artworks can range from simple abstracts to elaborate designs, each carrying its own story told through the textures of the wood.

Transformative Driftwood Shelving

Consider building beautiful shelves from driftwood pieces. Whether you choose simple straight designs or more adventurous, asymmetrical shapes, driftwood shelving offers a perfect blend of functionality and aesthetics. By mounting them onto your walls, you add a touch of nature to your home’s interior while providing an ideal spot for showcasing small plants, picture frames, or coastal-themed trinkets.

Driftwood Log Ideas

Crafting Functional Driftwood Furniture

Driftwood is not just for decorative items; it can also be used to craft unique furniture pieces. From tables to benches and beyond, the strength and beauty of driftwood can be harnessed to create one-of-a-kind items.

Driftwood Coffee Tables

A coffee table made from driftwood is a great way to feature this natural element as a centerpiece in your living room. Pairing it with glass elements can highlight the driftwood’s texture and color, creating a functional art piece that elicits admiration.

Rustic Driftwood Benches

Bring the outdoors inside by crafting a bench from larger driftwood logs. With minimalistic design and maximum impact, these benches can either adorn your entryway or serve as a practical seating solution in your garden, marrying form and function seamlessly.

Driftwood Headboards

For a nautical or rustic bedroom vibe, a driftwood headboard can serve as an eye-catching feature. Its unique texture and structure can add character to your bedroom, making it a centerpiece that dictates the theme and ambiance of your sleeping space.

Enchanting Outdoor Ideas with Driftwood

Beyond indoor décor, driftwood is an excellent material for enhancing your outdoor spaces. Its natural resistance to water makes it suitable for garden decor and backyard creations.

Illuminating with Driftwood Lanterns

Illuminate your patio or garden pathways with driftwood lanterns. Their rustic charm captures the essence of the outdoors and creates a warm, welcoming glow. String lights can be wrapped around driftwood frames or housed inside glass containers adorned with driftwood to bring those creative ideas to light.

Creating a Driftwood Arbor

Imagine welcoming guests to your garden with a beautiful, organic driftwood arbor. This striking feature can infuse your outdoor space with a sense of wonder and serenity, offering a passageway that bursts with natural beauty.

Driftwood Planters

Use driftwood logs to create unique planters for succulents or air plants. These planters can sit beautifully on your porch or act as a centerpiece for your garden table. The earthy texture of driftwood pairs elegantly with green foliage, creating a harmonious balance between nature’s elements.

Driftwood Log Ideas

Benefits of Using Driftwood in Design

Driftwood isn’t just aesthetically pleasing; it also offers several practical benefits, from sustainability to creativity.

Eco-Friendly Material

Using driftwood is an excellent way to incorporate sustainable practices into your design. By utilizing wood that has naturally followed a course to renew itself, you reduce the demand for freshly processed materials, promoting a more eco-friendly living environment.

Cost-Effectiveness

Often sourced from nature itself, driftwood can be an affordable option for those looking to spruce up their home without spending a fortune. With a little creativity and some basic tools, you can transform driftwood into personalized and stylish home accessories.

Endless Customization

Driftwood pieces are as diverse as the environments they come from. This diversity allows for endless possibilities in terms of customization. Whether painting, carving, or keeping the wood in its natural state, the personal touches you add can reflect your unique style and preferences.

Promoting Creativity and Relaxation

Crafting with driftwood can be a relaxing and rewarding hobby. As you sift through unique shapes and structures in your creative process, you engage your mind in a form of art therapy that encourages relaxation and boosts creativity—making your crafting experience soothing and satisfying.

Tips for Working with Driftwood

To make the most of your driftwood projects, it’s essential to follow some best practices when preparing and working with this material.

Cleaning and Prepping the Wood

Before turning driftwood into a cherished piece, you’ll want to make sure it’s clean and free of any pests. Start by brushing off any loose debris and giving it a good rinse. For deeper cleaning, soaking the driftwood in a solution of water and bleach can help eliminate bacteria and bugs. Rinse thoroughly and allow it to dry completely before use.

Tools for the Task

Having the right tools on hand will make your driftwood projects easier and more efficient. A saw, hammer, chisel, and sandpaper are basic essentials for shaping and smoothing your pieces. Electric tools, such as a drill, can be helpful for joining or mounting driftwood.

Preserving the Authenticity

Remember, driftwood’s appeal lies in its natural appearance. Aim to preserve this rustic beauty by sanding only what’s necessary and not over-treating the wood. Keeping knots, cracks, and original shapes can enhance the authenticity of your project.

Conclusion

Driftwood is nature’s art, full of history and character, just waiting to be uncovered and appreciated. With a little vision and creativity, you can transform driftwood to reflect your style, add beauty to your home, and infuse your surroundings with a piece of the sea. Whether you’re crafting an intricate sculpture, a practical piece of furniture, or a decorative item, driftwood presents incredible opportunities to connect with nature artistically. As you embark on this creative journey, remember that every piece of driftwood tells a story yet to be completed—a story you can be a part of, narrating through each artistic endeavor.

Filed Under: Driftwood Ideas Tagged With: crafts, DIY, Driftwood, Interior Design, Natural Decor

Driftwood She’ll Art

May 12, 2025 by admin

Have you ever gazed at a piece of driftwood, washed ashore by the tides, and wondered about the stories it could tell? Driftwood shell art is a captivating craft that combines the beauty of nature with the creativity of human imagination. It’s about taking those weathered pieces of wood and transforming them into stunning works of art, often incorporating shells and other natural elements. Let’s journey into this fascinating world, where sea meets art, and discover how you can create your own masterpiece.

Driftwood She’ll Art

Understanding Driftwood Shell Art

Driftwood shell art is a delightful form of artistic expression that celebrates the natural beauty of the sea. It involves using pieces of driftwood, which are often plentiful along beaches, and pairing them with seashells and other found objects to create unique sculptures, wall hangings, and other decorative items. This form of art is not only a creative outlet but also a sustainable practice, as it makes use of natural materials that have already been discarded by nature.

Origins of Driftwood Shell Art

Though it’s hard to pinpoint exactly when driftwood shell art began, it’s safe to say that it has long been a part of coastal cultures around the world. The pieces of wood that you find on the shore have traveled great distances, shaped and smoothed by the ocean. This form of art pays homage to that journey, turning what’s often seen as waste into treasures.

Why Choose Driftwood Shell Art?

The charm of driftwood shell art lies in its inherent uniqueness. Each piece of driftwood is one-of-a-kind, with its own texture, size, and shape. When you couple that with shells, each with their distinct colors and forms, the possibilities for creativity are endless. This art form allows you to bring a piece of the sea into your home, offering a rustic and natural decoration that can’t be replicated exactly.

Getting Started with Driftwood Shell Art

Embarking on the journey to creating driftwood shell art can seem daunting, but with a few basic steps and some creativity, you’ll be well on your way to making beautiful art. Before you begin, it’s essential to gather your materials and understand the basics of handling them.

Selecting Your Driftwood

The first step is to find the perfect pieces of driftwood for your project. Keep in mind that driftwood comes in all shapes and sizes, from tiny sticks to large branches. When selecting driftwood, consider the size and shape that will fit your envisioned piece. Look for pieces that have interesting textures or shapes, as these can add character to your artwork.

Tips for Finding Driftwood

  • Location: Visit beaches, riverbanks, or lakeshores, where driftwood is commonly found.
  • Seasonal Collection: Driftwood is often more abundant after storms, as turbulent waters wash more wood ashore.
  • Sustainability: Be mindful not to collect driftwood from protected areas or disturb wildlife habitats.

Cleaning and Preparing Driftwood

Once you’ve gathered your driftwood, cleaning it is crucial to remove any salt, sand, dirt, or small organisms that may be present. Here’s how:

  1. Rinse Thoroughly: Use fresh water to rinse your driftwood and remove surface debris.
  2. Soak in a Solution: Soak the driftwood in a mixture of water and bleach (a 9:1 water to bleach ratio) for a day or two to kill any bacteria and lighten the wood, if desired.
  3. Dry Completely: Allow the driftwood to dry completely in the sun. This helps maintain its shape and prevents mold or mildew growth.

Choosing and Preparing Shells

Just like driftwood, shells are a key component of this art form. When selecting shells, look for various sizes and colors that can complement each other and the driftwood you’ve chosen. Clean the shells by soaking them in a solution of water and vinegar to remove any residue.

Tools and Supplies You’ll Need

Before you start crafting, gather the essential tools and supplies needed for driftwood shell art:

  • Adhesives: A strong adhesive or glue gun is necessary to secure the shells to driftwood.
  • Sealant: To preserve your art, consider using a sealant that protects the materials from dust and fading.
  • Additional Decor: Consider embellishments like beads, feathers, or small stones to enhance your creation.
  • Protective Gear: Gloves and a dust mask to protect your skin and lungs while working with natural materials.

Techniques for Creating Driftwood Shell Art

Now that you have your materials, it’s time to explore various techniques that can be employed to bring your driftwood shell art to life. Your creativity is your most powerful tool, but some tested methods can guide you to stunning results.

Basic Driftwood Shell Crafting Techniques

  • Arranging: Lay out all your materials in front of you, and try different configurations before settling on one that feels right.
  • Layering: Experiment with layering shells on top of each other or on the driftwood to add depth to your work.
  • Combining Elements: Use additional elements like rope or twine to tie pieces together or create hanging art.

Tips for Securing Pieces

Properly securing your shells and driftwood is essential for durability. Always ensure the surfaces are clean and dry before applying adhesive. Glue guns are excellent for smaller projects, while stronger epoxy adhesives work well for heavier or outdoor pieces. Be generous with adhesive application but careful not to overdo it, as excess glue can seep out and affect the aesthetics of your piece.

Creating Specific Projects

To guide you further, here are some ideas and step-by-step processes for creating specific driftwood shell art projects:

Driftwood Shell Wind Chime

Materials Needed:

  • Several pieces of small driftwood
  • Variety of shells
  • String or fishing line
  • Drill
  • Hook for hanging

Steps:

  1. Arrange Driftwood: Lay your driftwood in a line and drill small holes where you’d like to connect them.
  2. Connect with String: Use string to tie the driftwood together, creating a cascading effect.
  3. Attach Shells: Drill tiny holes in the shells and hang them from the wood using fishing line.
  4. Add a Hook: Secure a hook at the top for easy hanging.

Driftwood Shell Wall Art

Materials Needed:

  • Large piece of flat driftwood
  • Assorted shells
  • Strong adhesive
  • Optional: Decorative extras (beads, small stones)

Steps:

  1. Prepare the Surface: Ensure the driftwood surface is clean and dry.
  2. Design Layout: Place your shells on the driftwood without glue, experimenting with different arrangements.
  3. Secure Shells: Once satisfied, use adhesive to secure the shells in place.
  4. Seal and Protect: Apply a clear sealant to protect your art.

Tips for Mastering Driftwood Shell Art

As you continue to explore driftwood shell art, there are a few tips and tricks that can help enhance your creations and ensure your artworks are both beautiful and durable.

Embrace Imperfections

One of the most attractive aspects of driftwood shell art is its natural and rustic appearance. Don’t be afraid to leave pieces slightly imperfect. These imperfections add to the charm and authenticity of the piece.

Experiment with Colors and Textures

Nature offers a rich palette of colors and textures, so take advantage of this in your art. Mix and match different types of shells and driftwood. Adding subtle hues with paints or stains can also customize your piece further while maintaining a natural look.

Sustainability and Ethical Consideration

While creating art, it’s essential to be mindful of the environment. Collect materials responsibly, without disturbing ecosystems or overharvesting. Reuse and recycle materials whenever possible to create meaningful art without contributing to waste.

Caring for Your Driftwood Shell Art

Your art should last for years with proper care, even though it’s made from natural materials. Here’s how to maintain it:

  • Keep out of direct sunlight to prevent fading.
  • Dust regularly with a soft cloth.
  • Avoid high humidity areas to prevent mold.

Driftwood She’ll Art

Connecting with the Driftwood Shell Art Community

Engaging with others who share your passion for driftwood shell art can be rewarding. Whether you seek inspiration, guidance, or camaraderie, connecting with a community of like-minded individuals can elevate your craft.

Finding Inspiration Online

Social media platforms and crafting websites offer a multitude of resources and ideas. Platforms like Pinterest and Instagram are great for discovering creative ideas and tutorials, while forums and groups on platforms like Facebook can connect you with others who share your passion.

Joining Workshops and Exhibitions

Participating in workshops can refine your techniques and expose you to new methods and ideas. Similarly, exhibiting your work in local art fairs or exhibitions can share your creations with a broader audience, offering feedback and recognition.

Sharing Your Craft

Document your progress and share your creations with your community through blogs, vlogs, or social media. Sharing encourages others to pick up the craft and can inspire them to participate in sustainable art practices.

Conclusion

Driftwood shell art allows you to transform naturally discarded beach treasures into remarkable pieces of art. As you embark on this creative journey, remember that each piece you create carries a part of the sea’s story. By practicing sustainability and embracing your artistic instincts, you can craft works that are not only beautiful but also meaningful. Now it’s your turn to let the ocean’s call inspire your next masterpiece in driftwood shell art. Your artistic adventure awaits!

Filed Under: Driftwood Ideas Tagged With: crafts, DIY, Driftwood, home decor, Shell Art

Driftwood Leaf

May 8, 2025 by admin

Have you ever stumbled upon a piece of driftwood and wondered about the stories it could tell? Driftwood, especially one shaped like a leaf, holds an intriguing charm that can spark curiosity and creativity. In this article, we will embark on a journey to discover the beauty, significance, and multifaceted uses of the “Driftwood Leaf.” You might be surprised by how much you can learn from a seemingly simple piece of nature’s art.

Driftwood Leaf

What is Driftwood?

Driftwood is any piece of wood that has been washed onto a shore or beach of a sea, lake, or river by the action of winds, tides, or waves. This naturally sculpted wood carries with it a rich history, often journeying from forests, down rivers, out to sea, and finally onto our beaches. The interaction with various elements during this journey gives driftwood its unique appearance and texture.

Formation of Driftwood

The journey begins when trees and branches fall into rivers and streams. From there, the current takes them on a path often filled with twists and turns. These pieces of wood can be submerged for long periods, which contributes to the smoothing of their surface. Over time, they get washed ashore, to be discovered by beachcombers and nature enthusiasts.

Characteristics of Driftwood

Understanding the characteristics of driftwood can make your next beach discovery even more fascinating. Driftwood comes in various shapes and sizes, each piece telling a unique story. Yet, they share common features that make them distinct:

  1. Color: Driftwood often has a weathered appearance with varied hues from silver to grey, depending on the exposure to sunlight and water.

  2. Texture: The surface of driftwood is usually smooth due to the friction with sand and pebbles. However, some pieces may retain rough patches as reminders of their rugged journey.

  3. Density: Having been waterlogged, driftwood can vary significantly in density. Some pieces are light and airy, while others are surprisingly heavy.

Specific Appeal of Driftwood Shaped Like a Leaf

When driftwood takes the shape of a leaf, it becomes a piece of natural art that captures our imagination. There’s something about this particular form that resonates with the beauty of nature’s design, providing a perfect example of biomimicry and adding aesthetic value to our environment.

Symbolism of the Leaf Shape

In many cultures, leaves symbolize growth, renewal, and the cyclical nature of life. A leaf-shaped piece of driftwood can remind you of these themes, acting as a prompt for reflection. It signifies life’s enduring capacity for renewal and the ongoing cycle of birth, death, and rebirth that is central to the natural world.

Natural Art and Decor

Incorporating a driftwood leaf into your living spaces can bring a touch of nature indoors. It’s an embodiment of the outdoors, perfect for those who appreciate organic and natural design elements. Whether used in artwork, as a decorative centerpiece, or even in garden landscapes, the driftwood leaf adds character and charm.

The Journey of a Driftwood Leaf

Tracing the path driftwood takes can enhance your appreciation for its beauty. Each phase of its journey contributes to the final form you see washed up on the shore.

From Forest to Sea

The first stage of the journey often begins deep within a forest where a branch breaks free. It might be due to heavy winds, storms, or natural degradation. This piece of wood, possibly resembling the skeleton of a leaf in its intricate branch pattern, finds its way into a stream or river, thus beginning its watery sojourn.

Transformative Phases

As driftwood courses through different water bodies, it undergoes numerous transformations:

  • Waterlogging: Absorbs water, which can lead to growing softer over time.
  • Erosion: Sand, rocks, and currents sculpt and refine its shape.
  • Sunlight Exposure: Prolonged sun exposure leads to the bleaching and lightening of wood color.

Destination: The Shoreline

Eventually, the journey converges on the shoreline, where the driftwood dries, hardens, and matures into the art piece or natural artifact many seek out.

Significance of Driftwood Leaf

A driftwood leaf is not just a piece of dead wood. It holds ecological, cultural, and artistic significance worth exploring.

Ecological Importance

Driftwood plays a crucial role in coastal and freshwater ecosystems. It provides a habitat for many organisms:

  • Shelter for Wildlife: Birds perch on it, insects live in it, and fish hide beneath it.
  • Nutrient Provider: Decomposing driftwood releases nutrients back into the environment, supporting other plant life.

Cultural and Historical Use

Cultures across the world have used driftwood for various purposes:

  • Storytelling Medium: Many coastal cultures use driftwood in ritualistic contexts, seeing it as a messenger of distant events and places.
  • Craft and Construction: Historically, driftwood has been used for building structures or crafting tools.

Artistic Medium

The allure of driftwood has inspired countless artists and crafters. The natural patterns found in driftwood, especially the leaf forms, serve as a canvas for creative expression:

  • Sculptures and Installations: Driftwood is a favored medium for outdoor and environmental sculptures because of its durability and organic appearance.
  • Functional Art: From furniture to picture frames, the uses for driftwood in art are numerous and varied.

Driftwood Leaf

Uses of Driftwood Leaf

The versatility of the driftwood leaf extends beyond its aesthetic appeal. Its uses are as diverse as they are creative.

Interior Decoration

Bringing a driftwood leaf into your home can add a rustic or coastal touch to your space. Here are a few ideas:

  • Wall Art: Mount a driftwood leaf on the wall as a piece of natural art.
  • Centerpieces: Use it as the focal point of a table display.
  • Shelving: With some creativity, driftwood can be transformed into unique wall shelves.

Craft Projects

If you enjoy hands-on projects, the driftwood leaf offers a perfect material:

  • Mobile Art: Create a hanging mobile by assembling several leaf-shaped pieces together.
  • Gardening Decor: Use as markers or ornaments in gardens or planters.

Environmental and Educational Uses

Driftwood can serve as an educational tool in classrooms or educational programs:

  • Lesson on Ecosystems: Explain the journey and significance of driftwood to students.
  • Ecological Study: Use samples in the study of ecosystems and environmental science.

Preserving Driftwood Leaves

If you want your driftwood leaf to last, proper preservation and care are essential. Here are some tips:

Cleaning and Preparing

To begin, ensure your driftwood is clean of any organisms or debris. Scrub it gently with a brush under running water. If necessary, soak it in a mixture of water and bleach to sterilize.

Sealing and Protecting

To protect it, consider applying a sealant:

  • Linseed Oil: Apply to enhance color and durability.
  • Varnish or Polyurethane: Useful for protecting against further environmental wear.

Display Considerations

Position driftwood pieces away from direct sunlight to prevent further bleaching — a moderate, stable temperature will help preserve their shape and structure.

Personal Connection and Inspiration

A driftwood leaf can be more than just a decorative object. It can serve as a poignant reminder of life’s intricate beauty and adaptability. Whether it inspires a new creative project or simply provides a moment of peace, your driftwood leaf can be a source of personal inspiration.

Each piece you find has a story yet untold, a secret to share if only you can uncover it. So, next time you stroll along the beach, keep your eyes peeled for this small piece of nature’s artistry. It might just have a special message for you.

Filed Under: Driftwood Ideas Tagged With: crafts, Driftwood, Handmade, Nature Art, Sculpture

Driftwood Knobs

March 6, 2025 by admin

Have you ever come across the term “driftwood knobs” and found yourself wondering what they are and how they can enhance your home or projects? You’re not alone! Driftwood knobs are not only beautiful and unique in appearance, but they also carry a slice of nature’s artistry into your living spaces. Let’s embark on this captivating journey to explore the world of driftwood knobs, from their formation to their diverse uses in your daily life.

Driftwood Knobs

What Are Driftwood Knobs?

Driftwood knobs are naturally shaped or manually crafted pieces derived from driftwood. Driftwood is wood that has been washed onto the shore by the effects of tides, winds, or waves. Within this process, nature transforms ordinary wood into artistic pieces worthy of admiration.

The Formation of Driftwood

Understanding the formation of driftwood can enhance your appreciation for these knobs. When trees or branches fall into a river, lake, or ocean, they become part of an unprecedented journey. As water moves them along, their surfaces are smoothed, and their shapes are altered. Saltwater, sun exposure, and the rubbing against rocks and sand contribute to their unique textures and hues. This natural process often takes years, endowing each piece with a distinct story and character.

The Unique Appeal of Driftwood Knobs

Driftwood knobs are extraordinarily unique. No two pieces are alike, thanks to the variables in their formation. The variation in shape, size, color, and texture provides a plethora of design possibilities, making them especially appealing for those who value individuality in their decorative elements.

Why Choose Driftwood Knobs?

Choosing driftwood knobs over traditional options provides several benefits. These include their aesthetic appeal, environmental impact, and the warm, rustic charm they imbue to any setting.

Aesthetic Appeal

Driftwood knobs bring a natural beauty into your space, each piece an organic work of art. Their rustic textures and natural tones can complement various styles, from coastal and cottage to modern and industrial.

Environmental Friendliness

By utilizing driftwood, you’re engaging in an eco-friendly practice. Driftwood is a renewable resource collected without felling trees or disturbing forests. Its use helps reduce waste and promotes sustainable living.

The Rustic Charm

Whether you’re outfitting a kitchen, bathroom, or living room, driftwood knobs add a charming rustic touch. Their natural finish and unique shapes can transform mundane furniture into statement pieces.

Driftwood Knobs in Home Decor

There are countless ways to incorporate driftwood knobs into your home decor. Their adaptability means they fit seamlessly into a variety of settings and work well with multiple design philosophies.

Furniture Accents

Driftwood knobs can replace standard knobs on cabinets, dressers, and side tables, providing an instant upgrade. They create a point of interest and conversation, drawing the eye and enhancing the overall look of your furniture.

Kitchen and Bathroom Applications

In kitchens and bathrooms, driftwood knobs on cabinetry provide a coastal feel, perfect for homes near the ocean or for those who simply want to bring a splash of seaside serenity into their homes. Their rustic appearance also complements natural stone countertops and traditional-style tiles.

Artistic Uses

Apart from practical applications, driftwood knobs can also be used in art installations. Whether included in a wall hanging, sculpture, or unique piece of garden decor, they contribute a natural element that is both intriguing and beautiful.

Choosing the Right Driftwood Knobs

When selecting driftwood knobs for your projects, there are a few considerations to keep in mind to ensure they meet your expectations and needs.

Size and Shape

Driftwood knobs come in various sizes and shapes. Consider the scale of the furniture or project you are working with to ensure the driftwood knobs you choose fit naturally and proportionately.

Color and Finish

The color of driftwood ranges from light sandy hues to rich, deep grays, depending on its origin and exposure to elements. Decide on tones that will best complement your existing decor. Additionally, many driftwood knobs are left natural, though some may be lightly polished or finished for a more refined look.

Attachment and Durability

Ensure the knobs are easy to attach and sturdy enough for their intended use. Some driftwood knobs may come with a standard screw attachment, while others might need additional fixing methods due to their irregular shapes.

Driftwood Knobs

DIY Driftwood Knobs

For the creative at heart, making your own driftwood knobs can be a rewarding endeavor. Crafting them yourself allows for customization and a personal touch, adding even more value to the finished product.

Gathering Materials

Start by gathering your driftwood pieces, a saw for shaping, sandpaper for smoothing, and a drill and screws for attachments. You might also consider a non-toxic sealant if you prefer a glossy finish or extra protection.

Crafting Process

  1. Selection: Choose pieces of driftwood with interesting shapes or surfaces.

  2. Cutting and Shaping: Use your saw to cut the driftwood to the desired size. Sand the edges to prevent splinters and achieve a smooth finish.

  3. Drilling and Attachment: Drill a hole in the center of your knob to accommodate the screw. Be sure not to crack the wood by using the correct drill bit size.

  4. Finishing Touches: Sealant can be applied for a glossy finish or to protect the wood from further wear.

Caring for Your Driftwood Knobs

Maintaining the beauty of your driftwood knobs requires a bit of care, but the process is relatively straightforward.

Regular Cleaning

Regularly dusting your driftwood knobs will help maintain their appearance. Use a soft, dry cloth to remove any surface dirt without scratching or damaging the wood.

Preservation Techniques

Occasionally, you may need to apply a light coat of wood oil or wax to keep the wood from drying out. This will help maintain the color and integrity of the driftwood, ensuring it lasts for years.

Where to Source Driftwood Knobs

Whether you prefer ready-made or custom-crafted knobs, knowing where to source quality driftwood knobs is essential.

Specialty Stores

Home decor and specialty woodwork stores frequently carry driftwood knobs. These stores offer a curated selection, often featuring the work of local artisans.

Online Marketplaces

Online platforms such as Etsy provide a wide variety of handcrafted driftwood knobs, allowing you to support artisans worldwide and finding pieces that fit your style and budget.

Craft Shows and Artisans

Attending local craft shows can connect you with artisans who specialize in driftwood work. This approach also provides the opportunity to see and feel the knobs in person before making a decision.

Inspiring Ideas with Driftwood Knobs

Driftwood knobs can be more than just functional; they offer opportunities for creativity and innovation in home design and personal projects.

Upgraded Furniture Design

Consider updating an old piece of furniture with driftwood knobs to give it new life. An antique dresser or vintage wardrobe can become the focal point of a room with these natural accents.

Unique Hooks and Handles

Experiment with using driftwood knobs as hooks for hanging coats, towels, or hats. Their sturdy nature makes them ideal for these practical uses, while their unique appearance turns them into decorative elements.

DIY Art Projects

Incorporate driftwood knobs into your art projects. Use them as unique elements in mixed media artwork, or create a textured wall hanging using varied sizes and shapes.

The Journey with Driftwood Knobs

Embracing driftwood knobs in your home is a journey into appreciating natural beauty and creativity. Each piece tells a story, a testament to the power and influence of nature on art. By including them in your decor, you bring a piece of this story into your home, bridging the gap between earthly elements and cozy interiors. Whether you choose to craft them yourself or find the perfect artisanal pieces, driftwood knobs offer a personal touch that your home will cherish.

Filed Under: Driftwood Ideas Tagged With: crafts, DIY, Driftwood, Interior Design, Knobs

Driftwood Easter Decor

March 2, 2025 by admin

Have you ever wondered how you can bring the natural beauty of driftwood into your Easter decorations? Combining the rustic charm of driftwood with the vibrant themes of Easter can create a unique and inviting atmosphere in your home. Driftwood, with its weathered textures and organic shapes, can be transformed into stunning decor pieces that celebrate the season in a fresh and eco-friendly way.

The Allure of Driftwood

Driftwood is more than just wood washed ashore; it’s a canvas shaped by the elements. Each piece tells a story of time spent in the water and exposure to the sun, sea, and wind. The unique patterns and textures make driftwood a favorite among decorators and DIY enthusiasts, offering endless possibilities for creativity.

Why Choose Driftwood for Easter Decor?

You might be asking, why driftwood for Easter? The answer lies in its versatility and natural beauty. Driftwood provides a neutral, earthy base that complements the pastel colors typically associated with Easter. It offers a minimalist backdrop that can highlight the bright hues of Easter eggs, flowers, and other elements. Plus, it connects your decor to nature, grounding seasonal celebrations with a touch of authenticity.

Getting Started with Driftwood

Before you begin crafting your Easter decor, you’ll want to gather the right materials and tools. Choosing the right driftwood is essential for creating elegant pieces that enhance your holiday environment.

Finding and Preparing Driftwood

The first step is to find driftwood that suits your project. Look for pieces on local beaches, rivers, or lakeshores. Choose wood that is sturdy, free from rot, and has visually interesting shapes or textures. Once you’ve gathered your driftwood, cleaning it is crucial. You should scrub the pieces with a mixture of water and mild soap to remove any dirt or salt. Let them dry thoroughly before use, to ensure they are clean and ready for crafting.

Tools and Supplies You’ll Need

To create your decor, you’ll need the right tools. Here’s a list of essential supplies:

Tool/SupplyPurpose
SandpaperSmooth rough edges of driftwood
DrillCreate holes for assembly
Hot glue gunBond pieces of wood and other elements
Twine or natural ropeAdd rustic flair or hang decorations
Paint or wood stainCustomize with colors if desired
Floral wireAttach flowers or decorations securely

With these tools in hand, you’re ready to embark on various DIY projects that bring driftwood and Easter together in enchanting ways.

Driftwood Easter Decor

DIY Driftwood Easter Projects

Creating your own Easter decorations with driftwood can be a rewarding endeavor, filled with opportunities for personalization. Here are some ideas to inspire your creativity:

Driftwood Easter Bunnies

Imagine having adorable driftwood bunnies gracing your mantel or coffee table. These can be crafted by assembling smaller pieces of driftwood into the shape of a rabbit. Use twine for whiskers and small branches for ears. For a whimsical touch, you might paint on a nose or eyes.

Driftwood Easter Egg Display

Fashion a stunning display by attaching colorful Easter eggs to a driftwood branch. You can paint real eggs or use plastic ones, securing them with floral wire. The juxtaposition of sleek, colorful eggs with rustic wood creates a striking contrast, perfect for a tabletop centerpiece.

Driftwood Crosses

The Easter holiday is synonymous with the symbol of the cross. Craft a beautiful driftwood cross by binding together two pieces of wood with twine. You might embellish it further with flowers or greenery to add a springtime freshness.

Driftwood and Floral Arrangements

Pairing driftwood with fresh or dried flowers can transform a room. Use driftwood pieces as a base or holder for floral arrangements. The organic lines of the wood guide the eye and amplify the natural beauty of the petals, bringing a touch of the outdoors inside.

Creating a Driftwood Easter Wreath

Wreaths are a classic element of holiday decor, and a driftwood wreath can make a statement on your door or wall. Here’s a step-by-step guide to crafting your own:

  1. Gather Your Materials: You’ll need pieces of driftwood, floral wire, a wire wreath frame, scissors, and optional additions like flowers or ribbon.
  2. Arrange Driftwood: Plan your design by laying the wood around the frame to see how it fits together.
  3. Attach Wood to Frame: Use floral wire to secure each piece of driftwood to the wreath frame. Ensure that each piece is tightly fastened.
  4. Add Decorative Elements: Incorporate flowers, leaves, eggs, or other embellishments to add color and texture.
  5. Hang and Enjoy: Use a hook or ribbon to hang your wreath and admire your handiwork.

This project not only enhances the entryway but also sets a welcoming tone for guests.

Driftwood Easter Decor

Supporting Sustainability with Driftwood Decor

Choosing driftwood for your Easter decorations aligns with eco-friendly principles. It encourages the use of recycled materials and supports a sustainable approach to celebrating holidays.

Eco-Friendly Benefits

Using driftwood is a way to repurpose natural materials, preventing them from contributing to waste. Many DIY enthusiasts appreciate the sustainability aspect, as it reduces the need for manufactured goods and encourages creativity with existing resources.

Ethical Sourcing and Collecting

If collecting driftwood yourself, do so responsibly. Ensure you leave enough for natural environments to thrive, and check local regulations about collecting driftwood from certain areas. Some regions may have restrictions aimed at preserving natural habitats.

Personalizing Your Driftwood Decor

Your driftwood Easter decor can be as unique as you are. Whether you prefer a rustic, minimalist look or something vibrant and eye-catching, there are endless possibilities for personalization.

Adding Personality with Colors

You might opt to paint some driftwood pieces to match your Easter color scheme. Soft pastels, vibrant yellows, or serene greens can all be added with paint or stain to suit your aesthetic.

Incorporating Different Materials

Consider blending fabric, metal, or glass with driftwood. For example, you might wrap fabric around certain parts of the wood to add a softness or include glass beads for a touch of sophistication.

Seasonal Adornments

Think about including seasonal elements such as Easter lilies, faux nests, or themed figurines. These additions can be attached with glue or wire to enhance the seasonal appeal of your decor.

Tips for Displaying Your Driftwood Easter Creations

Once you’ve completed your decor pieces, displaying them effectively can enhance their impact.

Strategic Placement

Consider the flow of a room and how the decor fits within it. A driftwood centerpiece can anchor a dining table, while smaller pieces placed on side tables or shelves can unify a room’s theme.

Lighting Effects

Light plays a crucial role in showcasing the textures and colors of your creations. Use natural light or strategically placed lamps to highlight the unique features of your driftwood decor.

Layering and Grouping

Create visual interest by layering or grouping different pieces together. Grouping can intensify the thematic elements and offer varied visual focal points within a space.

Conclusion

By combining driftwood and Easter themes, you embark on a creative journey that celebrates both natural beauty and the festive spirit of the season. Whether you’re crafting a delicate wreath, a lively egg display, or a serene centerpiece, driftwood provides a versatile foundation rich with possibilities. As you create, you’ll not only decorate but also contribute to an environmentally sustainable way of celebrating Easter. Embrace your creativity, personalize your space, and enjoy the beauty of driftwood Easter decor as it enlivens your home.

Filed Under: Driftwood Ideas Tagged With: crafts, DIY, Driftwood, Easter, Seasonal Decor

Dyi Driftwood Christmas Tree

March 1, 2025 by admin

Have you ever thought of bringing a piece of the coastline into your home for the holidays? Crafting your own driftwood Christmas tree can be a wonderful, sustainable way to add a unique and personal touch to your festive decor. This guide will walk you through the process of creating a DIY driftwood Christmas tree, offering tips and suggestions along the way to make it a fun and rewarding experience.

Understanding the Charm of Driftwood

Driftwood possesses a unique beauty, shaped and weathered by nature. Each piece is different, having floated in the ocean and washed ashore, carrying with it stories of the sea. Using driftwood in your Christmas tree project brings a rustic, coastal vibe into your home, perfect for those who cherish the sea or live by the coastline. It’s also an excellent way to recycle what nature provides, making your holiday season a bit more sustainable.

Why Choose a Driftwood Christmas Tree?

Choosing a driftwood Christmas tree over a traditional one can have numerous benefits. Not only does it give a twist to conventional decor, but it also allows you to create something truly unique. A driftwood tree can fit into any interior design style, from minimalistic to bohemian, and serves as a wonderful conversation starter. Plus, it’s a perfect project for those who enjoy crafting.

Materials You’ll Need

Before starting your project, gather the essential materials. The success of your driftwood Christmas tree depends on your preparation and tools.

  1. Driftwood Pieces: Collect pieces in varying sizes; the more varied, the more interesting your tree will be.
  2. Base Stand: Use a sturdy base, such as a tree disc, to anchor your masterpiece.
  3. Drill and Drill Bits: These will help create holes for securing the driftwood.
  4. Metal Rod or Wooden Dowel: Essential for stacking the driftwood pieces.
  5. Sandpaper: Necessary for smoothing any rough edges.
  6. Optional – Lights and Ornaments: To add a festive finish to your tree.

Gathering and Preparing Driftwood

Crafting a driftwood Christmas tree starts with gathering the wood itself. It’s a pleasurable process that can be an adventure on its own.

Where to Find Driftwood

You can find driftwood along coastlines and riverbanks. If you’re near a beach, spend a day combing the shore. Look for pieces that capture your attention—those with interesting shapes, textures, or colors. Make sure to follow local regulations regarding collecting driftwood.

Cleaning and Preparing Your Driftwood

Once you’ve gathered your driftwood, it’s time to prepare it for use. Cleaning is crucial as it removes sand, salt, and any creatures that may have hitchhiked along.

  • Rinse Thoroughly: Use water to rinse off debris and sand.
  • Soak in Freshwater: Soak the pieces for a few days in fresh water to remove salt.
  • Drying: Lay the driftwood out in the sun, ensuring it’s completely dry before use.
  • Sanding: Use sandpaper to smooth any rough spots and edges.

Dyi Driftwood Christmas Tree

Constructing Your Driftwood Tree

Now that your driftwood is ready, you can begin constructing your tree. This process allows for creativity, so there’s no strict right or wrong way to do it.

Assembling the Base

First, prepare your tree’s foundation. Your base should be sturdy enough to support the weight of the driftwood without tipping.

  1. Select Your Base Stand: A thick tree disc or a pre-made wooden stand works well.
  2. Drill a Hole: Drill a center hole in your base for the rod or dowel.

Building the Tree Structure

Building the tree involves stringing your driftwood pieces along a central rod or dowel.

  1. Drill Holes through Driftwood: Each piece of driftwood should have a hole drilled through its center.
  2. Arrange by Size: Lay out your driftwood from largest to smallest so you can easily stack from bottom to top.
  3. Thread the Driftwood: Start threading pieces onto the rod, beginning with the largest. Rotate each piece slightly to mimic a natural, tree-like appearance.

Adding the Finishing Touches

Once your tree structure is complete, it’s time to add festive touches. This is the part where you can truly personalize your creation.

  • Lighting: Wrap strands of fairy lights around your tree to illuminate and highlight the natural beauty of the driftwood.
  • Ornaments: Keep it simple with a few choice ornaments that complement the rustic, airy feel of the driftwood.
  • Star Topper: Consider crowning your tree with a star, made perhaps from intertwined pieces of driftwood or repurposed beach finds.

Caring for Your Driftwood Tree

After the holidays, taking care of your driftwood tree ensures it lasts for many seasons.

Maintenance Tips

  • Storage: Store your tree in a dry, cool place to prevent moisture damage or mold.
  • Regular Checks: Each year, check for wear and tear, re-sanding rough spots if necessary.
  • Re-sealing: Consider using a natural sealant every few years to preserve the wood’s beauty.

Dyi Driftwood Christmas Tree

The Eco-Friendly Charm

Crafting a driftwood Christmas tree not only adds aesthetic value but also embraces eco-friendly practices. By using materials offered by nature, you’re reducing reliance on traditional holiday decorations which often use non-recyclable materials.

Environmental Impact

  • Sustainable Material Use: Driftwood is a sustainable resource, taking nothing new from the environment.
  • Recycling: By creating a tree that can be reused year after year, you’re minimizing waste during the holiday season.
  • Reduction in Carbon Footprint: Transport and manufacture of artificial trees contribute significantly to carbon emissions, something you can help reduce with a driftwood alternative.

Getting Creative

Your driftwood Christmas tree project can extend beyond this primary endeavor. Consider crafting additional decor to complement your new creation.

Additional Decor Ideas

  1. Driftwood Garlands: String smaller pieces together to create a garland with twine.
  2. Driftwood Wreaths: Form a circular wreath to hang as part of your holiday decorations.
  3. Beach-themed Ornaments: Create ornaments using shells and small pieces of driftwood.

Expanding Your Crafting Skills

This project can be the start of a newfound love for crafting with natural materials. Challenge yourself to work with other beach finds, perhaps incorporating sea glass, shells, or pebbles into your decor projects.

With a little creativity and some basic tools, you can transform everyday elements from nature into beautiful, unique holiday decorations. Crafting a DIY driftwood Christmas tree is not just about holiday decor but embracing the beauty and sustainability of what the natural world offers. Enjoy every step of the process, from gathering your materials to seeing your final creation take pride of place in your festive celebrations.

Filed Under: Driftwood Ideas Tagged With: christmas tree, crafts, Driftwood, Handmade, Holiday decor

Driftwood Dyi

March 1, 2025 by admin

Have you ever stumbled upon a piece of driftwood and wondered how you might transform this natural beauty into a DIY masterpiece? Driftwood, with its unique textures and shapes, offers a wealth of creative opportunities to infuse your space with a touch of nature’s artistry. Whether you’re new to DIY projects or an experienced crafter, working with driftwood can be an enjoyable and rewarding experience.

This article will guide you through the fascinating world of driftwood DIY projects. You’ll discover everything from sourcing and preparing driftwood to crafting inventive pieces for your home. This journey will unveil various creative possibilities, allowing your imagination to run wild and helping you create something truly extraordinary.

Driftwood Dyi

Introduction to Driftwood

Driftwood is not just a piece of wood you find washed ashore on a beach; it is a remnant of a tree that has weathered the elements, traveling through water bodies, and acquiring unique features along the way. Its weathered appearance, smoothed edges, and interesting colors make it a favorite medium for artistic and decorative projects.

What is Driftwood?

Driftwood refers to any wood that has been washed ashore by rivers, lakes, or oceans. It often travels great distances, occasionally carrying entire ecosystems of plants and animals. This journey, coupled with the continuous wear from water and sand, gives driftwood its distinctive appearance.

Why Use Driftwood for DIY Projects?

Driftwood is an incredibly versatile material, cherished by artists and craftspeople for its unique beauty and texture. Its practicality and aesthetics make it an excellent choice for adding a natural, rustic touch to your decor. Additionally, using driftwood promotes sustainability as it’s a way of reusing a naturally-occurring material that might otherwise go to waste.

Aesthetic Appeal

One of the primary reasons driftwood is popular among DIY enthusiasts is its inherent beauty. Each piece is unique, with twisted forms and weathered looks that bring a sense of nature indoors. Whether as a centerpiece or a subtle accent, driftwood can add warmth and charm to any setting.

Eco-friendly and Sustainable

Incorporating driftwood into your projects is an eco-friendly choice. It’s a form of recycling and repurposing, reducing the demand for new wood and helping to minimize deforestation. Embracing driftwood means supporting the natural cycle and promoting environmental stewardship.

Sourcing Driftwood

Once you’re convinced of the beauty and sustainability of driftwood, the next step involves sourcing it. Driftwood can be found in various environments, and there are a few considerations to keep in mind when collecting it.

Where to Find Driftwood

Driftwood can be found along beaches, riverbanks, and lakeshores. Before collecting, ensure you are allowed to do so, as there may be regulations in place to protect natural habitats.

  • Beaches: Coastal beaches are great places to find saltwater driftwood. Keep an eye out for restrictions or protected areas.

  • Rivers and Lakes: Freshwater driftwood tends to have a slightly different texture and may be found along banks or sandbars.

Legal and Ethical Considerations

Before you start collecting driftwood, it’s important to understand the legal and ethical considerations. Always respect local regulations and guidelines concerning natural resource collection. Some areas have restrictions in place to protect ecological systems, and taking wood from these places may result in fines.

Choosing the Right Pieces

When selecting driftwood, look for pieces that inspire you. Whether it’s the shape, size, or texture, ensure the wood is free from rot or excessive splintering. Consider the project you have in mind and select accordingly.

Preparing Driftwood for Use

Once you’ve gathered your driftwood, the preparation phase is crucial. Proper preparation ensures your pieces are clean, preserved, and ready to be transformed into beautiful DIY creations.

Cleaning Driftwood

Cleaning is the first step. Driftwood often carries salt, sand, and sometimes critters. Washing your pieces thoroughly will help preserve them and make them ready for crafting.

  1. Remove Debris: Start by brushing off as much loose debris as possible.

  2. Soak and Scrub: Soak your driftwood in freshwater for a few hours or overnight. Use a stiff brush to scrub away sand, salt, or algae.

  3. Rinse Thoroughly: After scrubbing, rinse the driftwood with clean water to remove any remaining residue.

Drying the Driftwood

Once cleaned, drying the driftwood is essential to prevent mold and decay. Allow the wood to dry naturally in a warm, dry place. This process can take a few days to weeks, depending on the size and moisture content of the wood.

Preserving Driftwood

While not always necessary, preserving driftwood can add durability and longevity to your projects. This process might involve sealing or bleaching, depending on your preferences.

  • Bleaching: If you wish to lighten the driftwood, you can apply a diluted bleach solution. Rinse thoroughly after bleaching and allow to dry completely.

  • Sealing: Applying a wood sealant can prevent moisture absorption and enhance the wood’s natural appearance. Ensure that any product you use is safe for indoor use if your project will be inside.

Driftwood DIY Project Ideas

With your driftwood clean and prepped, it’s time for the fun part: creating! The possibilities with driftwood are almost limitless. Here are some project ideas to spark your creativity.

Driftwood Wall Art

Driftwood wall art is a fantastic way to bring a piece of nature into your home. Wall hangings, mirrors, and even sculptures can add character and depth to any room.

Tools and Materials:

  • Driftwood pieces
  • Adhesive or frame
  • Hooks or wire for hanging

Steps:

  1. Arrange your driftwood pieces on a flat surface until you’re satisfied with the design.

  2. Secure the pieces to a backing using strong adhesive or nails.

  3. Attach hooks or wire for easy hanging.

Driftwood Shelves

Creating shelves with driftwood is not only practical but can also add a rustic touch to your home decor. The natural, uneven surface of driftwood offers a unique aesthetic.

Tools and Materials:

  • Long, flat driftwood pieces
  • Wall brackets
  • Screws and drill

Steps:

  1. Select driftwood pieces that will serve as sturdy shelves.

  2. Secure brackets to the wall and attach the driftwood using screws.

  3. Ensure the shelves are level and can support the weight of items you wish to display.

Driftwood Candle Holders

Another simple yet elegant project is fashioning candle holders from driftwood. These can create a cozy, calming atmosphere.

Tools and Materials:

  • Various sizes of driftwood
  • Drill and drill bits
  • Tea light candles or votives

Steps:

  1. Choose pieces of driftwood that have a flat, stable base.

  2. Drill shallow holes into the wood to fit the candles snugly.

  3. Place the candles and enjoy the warm glow they emit.

Driftwood Furniture

For those feeling particularly ambitious, driftwood can be used to create furniture pieces like tables, chairs, or headboards. Crafting furniture from driftwood will require some woodworking skills, but the results can be truly remarkable.

Tools and Materials:

  • Large pieces of driftwood
  • Wood screws
  • Sandpaper
  • Wood glue

Steps:

  1. Design your furniture piece, keeping in mind the shapes and sizes of the driftwood.

  2. Use wood screws and glue to attach the pieces together, ensuring stability.

  3. Sand any rough edges to prevent splinters, and seal the wood to protect it from wear.

Driftwood Dyi

Safety Tips for Working with Driftwood

When embarking on your driftwood DIY projects, safety should always be a priority. Working with natural materials and tools can pose risks, so it’s essential to take precautions.

Using Tools Safely

  • Always use the appropriate tools for the job and handle them with care.
  • Wear protective gear such as gloves, goggles, and masks when cutting or sanding driftwood.

Handling Chemicals

  • If you choose to bleach or seal your driftwood, ensure you are in a well-ventilated area.
  • Follow all safety instructions on chemical products and use them sparingly.

Lifting and Transporting Driftwood

  • Be mindful of the weight and size of the driftwood you choose. Lifting heavy materials can cause injury if not done properly.
  • Use a cart or enlist help for transporting large pieces to avoid strain.

Benefits of Driftwood Projects

Delving into DIY driftwood projects comes with a myriad of benefits. Not only do you get the gratification of creating something beautiful, but you also enrich your environment and personal wellbeing.

Boosting Creativity and Skills

Working with driftwood can enhance your creativity and problem-solving skills. Every project presents unique challenges, encouraging you to think outside the box and adapt.

Adding Unique Home Decor

Driftwood projects infuse your home with a unique, personal touch that store-bought items cannot match. Each piece you create is a one-of-a-kind work of art.

Fostering a Connection with Nature

DIY driftwood projects are a wonderful reminder of the natural world. Surrounding yourself with elements from nature can have a grounding effect, promoting relaxation and mindfulness.

Common Challenges and Solutions

Like any DIY venture, working with driftwood can present challenges. Understanding potential issues and their solutions will ensure a smooth crafting experience.

Dealing with Unstable Pieces

Driftwood can have unusual shapes and may not always sit flat. Use sandpaper to level bases or attach felt pads to stabilize your pieces.

Preventing Cracks and Splits

Driftwood can be prone to cracking as it dries. To minimize this, dry the wood slowly and naturally. If splits occur, you can use wood glue to mend cracks discreetly.

Ensuring Durability

Projects meant for functional use, like furniture, need to be especially durable. Reinforce joints with screws and ensure all attachments are secure.

Conclusion

Embracing driftwood for DIY projects allows you to combine creativity, sustainability, and functionality. As you embark on your driftwood journey, remember that each piece you create carries the spirit of nature’s artistry. These projects not only elevate your decor but also nurture a peaceful, natural state in your living environment. Whether you’re crafting a simple candle holder or an elaborate piece of furniture, the world of driftwood invites you to explore and express your creativity with open arms.

Filed Under: Driftwood Ideas Tagged With: crafts, Driftwood, Handmade, home decor, Upcycling

Driftwood Door Hanging

February 23, 2025 by admin

Have you ever considered adding a touch of rustic charm to your home decor with natural elements? One way to achieve this aesthetic is through a driftwood door hanging. This unique decoration bridges the outdoors and indoors, creating a welcoming vibe for anyone entering your home. Let’s explore the fascinating world of driftwood and the creative opportunities it offers for home decor.

What is Driftwood?

Driftwood refers to the pieces of wood that have been washed onto the shore by the action of winds, tides, or waves. It’s quite literally nature’s artwork, shaped and reshaped by the elements over time. The randomness of its journey across the water ensures that no two pieces of driftwood are alike, providing a wide range of shapes, textures, and sizes.

The Charm of Driftwood

Driftwood carries an organic beauty that manufactured decor items simply can’t replicate. Each piece has a story, marked by the elements it endured and the path it traveled. This makes driftwood a popular choice for those who appreciate the uniqueness and unpredictability of nature’s designs.

Benefits of Using Driftwood in Home Decor

Incorporating driftwood into your home has more benefits than just its visual appeal. Here are a few reasons you might want to consider using driftwood:

Eco-Friendly Choice

Driftwood is a naturally sourced material, making it an eco-friendly choice compared to mass-produced decorative items. By reusing driftwood, you are helping to minimize waste and reduce your carbon footprint.

Versatile and Adaptable

Driftwood can be crafted into various decorative items such as furniture, picture frames, and even lighting fixtures. Its neutral color and organic texture easily blend with different design styles, from coastal and rustic to modern and minimalist.

Unique and Personal

No two pieces of driftwood are identical, ensuring that any item you create will be one-of-a-kind. This helps you infuse your space with personality and make your decor truly yours.

Driftwood Door Hanging

Creating a Driftwood Door Hanging

Making a driftwood door hanging is an exciting DIY project that allows you to craft a personalized decor piece. Here’s a step-by-step guide to help you create your own driftwood masterpiece.

Materials Needed

Before you begin, collect the following materials:

  • Assorted pieces of driftwood: Try to gather pieces of various sizes for visual interest.
  • Twine or strong string: This will be used to connect your driftwood pieces.
  • Drill with a small bit: Useful for making holes in the wood.
  • Hooks or nails: These will help you secure your hanging.
  • Sandpaper: To smooth any rough edges on the driftwood.

Steps to Create Your Driftwood Door Hanging

  1. Gather and Clean Driftwood: Begin by collecting driftwood from a beach or riverbank. Once collected, clean each piece thoroughly to remove any sand, dirt, or salt residue. Let them dry completely in the sun.

  2. Select a Design: Lay out your driftwood pieces to envision the design of your door hanging. Arrange them by size, shape, or color, depending on the aesthetic you’re aiming to achieve.

  3. Drill Holes: Use a drill to carefully make small holes in the driftwood pieces. Be cautious not to split the wood, especially if the pieces are delicate.

  4. Assemble the Hanging: Thread the twine through the holes, tying knots to secure each piece in place. Continue adding wood pieces until your hanging reaches the desired length.

  5. Smooth the Edges: Use sandpaper to smooth any rough or jagged edges to prevent splinters and enhance the driftwood’s appearance.

  6. Install Hooks or Nails: Attach hooks or nails to your desired door or wall, ensuring they can support the weight of your hanging.

  7. Display: Hang your driftwood creation, stepping back to make any adjustments if necessary.

Enhancing the Driftwood Door Hanging

While a basic driftwood hanging is beautiful in its simplicity, you can add elements to enhance its appeal further. Here are a few ideas:

Incorporate Natural Elements

Consider adding seashells, small stones, or pieces of colored sea glass to complement the natural look. These additions bring more color and texture and tie back to the driftwood’s seaside origins.

Add Lighting

Integrate small LED lights or fairy lights to illuminate your driftwood at night. This addition creates a soft, magical glow and highlights the intricacies of your design.

Paint or Stain

While driftwood’s natural color is beautiful, painting or staining parts of your hanging can help it stand out. Consider soft, muted tones that won’t overpower the wood’s natural beauty.

Driftwood Door Hanging

Caring for Your Driftwood Door Hanging

To ensure your driftwood door hanging remains beautiful for years to come, follow these care and maintenance tips:

Regular Dusting

Dust your driftwood hanging regularly with a soft microfiber cloth to prevent buildup. This keeps the wood looking fresh and prevents dirt from accumulating.

Avoid Excessive Moisture

Driftwood can absorb moisture, which may lead to swelling or mold development. Keep your hanging in a dry, well-ventilated area, and avoid displaying it outdoors unless it’s been specially treated for weather resistance.

Protective Coating

Consider applying a clear sealant to protect the wood from damage and discoloration. Choose a non-toxic finish that won’t alter the driftwood’s appearance.

The Beauty of Nature in Your Home

Incorporating a driftwood door hanging into your home decor is not just about aesthetics; it’s about bringing a piece of nature into your living space. This craft allows you to express creativity, pay homage to natural beauty, and create an inviting atmosphere. By choosing driftwood, you embrace the uniqueness and history of each piece, weaving together stories of nature and environment into your home’s fabric. So why not add a touch of natural charm to your entrance and let nature’s art speak for itself?

Whether you choose a simple design or an intricate pattern, your driftwood door hanging becomes more than decor—it becomes a statement piece that reflects your appreciation for nature’s understated elegance.

Filed Under: Driftwood Ideas Tagged With: crafts, DIY, Door Hanging, Driftwood, Rustic Decor

Driftwood Diy Projects

February 19, 2025 by admin

Have you ever strolled along a beach, felt the sand beneath your feet, and stumbled upon a piece of driftwood? Its unique, weathered character tells a story of time spent navigating the waves, and it might have caught your creative eye with its rustic charm. Now, imagine turning those pieces of driftwood into beautiful, handcrafted items for your home. This article will guide you through a friendly journey into the world of driftwood DIY projects, where nature meets creativity.

Understanding Driftwood

Driftwood is not merely wood washed up on the shore; it’s nature’s artwork. Over time, it transforms from a piece of timber into a unique material filled with character. Understanding driftwood’s journey helps appreciate the beauty and potential it offers for DIY projects.

The Journey of Driftwood

Driftwood begins its journey in forests, where trees are felled and transported by streams and rivers. These pieces of wood then end up in the ocean or a lake, where they are shaped by wind, water, and time. This natural process can take years, during which the wood is sculpted by the elements. When it finally rests on a shoreline, it carries with it stories of a long and dynamic journey.

Characteristics of Driftwood

Each piece of driftwood is unique, with its own texture, color, and form. You might notice how the water and sun have bleached it, giving it a soft, muted color palette. Its porous surface often reveals the grain of the wood, and the irregular shapes can inspire creative uses in design. This uniqueness makes driftwood a favorite among artists and DIY enthusiasts alike.

Preparing Driftwood for Projects

Before you start working on your driftwood projects, there are essential steps to prepare the wood to ensure it’s clean, safe, and ready for your creative touch.

Cleaning Driftwood

Once you’ve gathered your driftwood pieces, the first step is to clean them thoroughly. Salt, sand, and other residues need to be removed. Start by washing the driftwood with fresh water and a stiff brush. This scrubbing will help release any surface debris.

Disinfecting and Drying

After cleaning, it’s crucial to disinfect the driftwood. Soak the wood in a solution of water and bleach (a ratio of about 9:1 water to bleach) for a few hours. This will kill any bacteria and sterilize the wood. After soaking, rinse thoroughly and let it dry completely. Place the pieces in the sun for several days or use an indoor space with good ventilation to dry them.

Selecting the Right Pieces

Choosing the right pieces of driftwood depends on the project you’re planning. Look for pieces with interesting shapes, textures, and sizes that fit your vision. The character of each piece can influence the final outcome, so take your time selecting your treasures.

Driftwood Diy Projects

Driftwood Diy Project Ideas

Now that you have a batch of clean, dry driftwood, let’s explore some exciting DIY project ideas that you can start right away. These projects range from simple to slightly more complex but are all rewarding in their own right.

Driftwood Wall Art

Creating wall art is one of the most popular uses for driftwood. You can craft anything from abstract pieces to structured designs, all of which add a natural elegance to any room.

Abstract Designs

For abstract art, choose several pieces of driftwood with unique shapes and textures. Arrange them on a canvas or directly on the wall, playing with the lines and forms they create. Use a hot glue gun to attach the wood to your chosen base securely. This project is all about creativity—let the pieces guide your design.

Structured Pieces

Alternatively, you can create more structured designs like waves or geometric shapes. Use a template to arrange your driftwood pieces, then glue them in place. This type of project can give you a beautiful, nature-inspired pattern that becomes a conversation starter in your home.

Driftwood Furniture

Driftwood can also be turned into beautiful, rustic furniture pieces. Though this might require more tools and skills, the results are well worth the effort.

Driftwood Coffee Table

To create a driftwood coffee table, gather larger pieces of driftwood for the legs and a flat piece or a glass top for the surface. Sand the edges of the wood for a smooth finish. Assemble the pieces using wood glue and screws, ensuring everything is stable and secure. The natural form of the driftwood adds a rustic charm and elegance to your living space.

Driftwood Shelves

For a simpler project, consider making shelves. Select a few flat driftwood pieces of similar size. Attach brackets to the underside of each piece and mount them to the wall. These shelves can hold books, plants, or other decorative items, bringing a natural touch to your home.

Driftwood Mirrors

A driftwood mirror can beautifully combine functionality with nature-inspired design. Start with a simple frameless mirror and gather driftwood pieces to create an intricate frame.

Creating the Frame

Lay the mirror flat and arrange pieces of driftwood around its edge. Once satisfied with your arrangement, use a strong adhesive to attach each piece to the mirror. Let it dry thoroughly before hanging. This project can turn a plain mirror into a stunning focal point.

Driftwood Candle Holders

Candle holders made with driftwood can add warmth and ambiance to your space. The natural texture of driftwood pairs beautifully with the soft glow of candlelight.

Crafting Candle Holders

Select pieces of driftwood that have flat, stable bases. Drill holes into the wood, sized to fit tea lights or votive candles. Ensure the holes are not too deep to prevent the candle from being submerged. The result is a cozy and inviting piece perfect for dinner tables or living areas.

Driftwood Picture Frames

Why not frame your cherished memories with something equally unique? Driftwood picture frames are a simple yet striking way to display photos.

Assembling Picture Frames

Select pieces of driftwood that, when arranged, create a rectangular or square shape the size of your desired frame. Use strong adhesive or small screws to connect the pieces at each corner. Once assembled, attach a backing board and your chosen picture. This handcrafted frame emphasizes the personal touch of the memories it holds.

Driftwood Plant Holders

Driftwood plant holders offer a way to bring both earthy materials and lush greenery into your home, creating a soothing and natural environment.

Building Plant Holders

Look for driftwood pieces that can naturally support a small pot or plant. Securely attach the plant to the driftwood using twine or a decorative holder. For hanging planters, choose lightweight plants and driftwood to easily hang them from the ceiling or a wall. These holders can add a touch of nature to any room.

Driftwood Sculptures

For those who enjoy more artistic endeavors, creating sculptures from driftwood can be both challenging and rewarding. Your sculptures can take any form, like animals, abstract shapes, or thematic expressions.

Crafting Sculptures

Select a mix of driftwood sizes and shapes that inspire you. Use tools such as a saw, chisel, and sandpaper to shape your sculpture. Bond the pieces with glue or screws, experimenting as you go. Each sculpture is as unique as the materials, allowing your creativity to lead the way.

Tips for Success

Undertaking driftwood DIY projects can be immensely fulfilling, but there are a few tips to keep in mind to ensure success.

Safety First

Always prioritize safety. Use gloves when handling driftwood to avoid splinters, and wear protective eyewear when cutting or drilling. Be cautious with tools and materials to prevent injuries.

The Right Tools

Ensure you have the right tools on hand for your project. Basic tools like a saw, drill, sandpaper, and adhesive are often essential. For more complex projects, additional power tools might be necessary.

Patience and Creativity

Patience is key when working with natural materials like driftwood. Plans might need to change as you adapt to the material’s quirks. Embrace the unique characteristics of each piece, allowing them to guide your creative process.

Driftwood Diy Projects

Caring for Driftwood Creations

Proper care of your driftwood creations extends their life and keeps them looking their best. As these natural materials can be susceptible to elements, a few simple maintenance steps can ensure their longevity.

Regular Cleaning

Dust your driftwood pieces regularly using a soft cloth. For more intricate projects, a gentle vacuum or compressed air can help reach small crevices. Avoid wetting the wood too often, as moisture can cause damage over time.

Sealant Protection

Applying a protective sealant can help preserve your driftwood creations, especially if they are placed outdoors. A clear, matte sealant maintains their natural appearance while providing a barrier against moisture and pests.

Indoor vs. Outdoor

Consider the conditions your driftwood projects will be exposed to. Indoor settings prolong their life, while outdoor displays might need more frequent maintenance. Be mindful of extreme weathers, which can affect driftwood’s integrity over time.

Driftwood DIY projects offer an opportunity to blend nature and creativity in truly unique ways. Whether you’re crafting something simple or embarking on a complex creation, these projects allow you to bring a piece of the natural world into your home. So next time you find yourself on a beach, remember to collect a few pieces of driftwood—they might just become a part of your next artistic journey. Let each piece tell its story and allow your imagination to bring it new life.

Filed Under: Driftwood Ideas Tagged With: crafts, Driftwood, Handmade, home decor, Upcycling

  • « Previous Page
  • Page 1
  • Page 2
  • Page 3
  • Page 4
  • …
  • Page 10
  • Next Page »

Primary Sidebar

Driftwood4us.com, is a participant in the Amazon Services LLC Associates Program, an affiliate advertising program designed to provide a means for sites to earn advertising fees by advertising and linking to amazon.com.