• Skip to main content
  • Skip to primary sidebar
  • Terms and Conditions
  • Privacy Policy
  • Contact

Driftwood 4 Us

Just About Driftwood

DIY Crafts

Embellished Driftwood

March 31, 2025 by admin

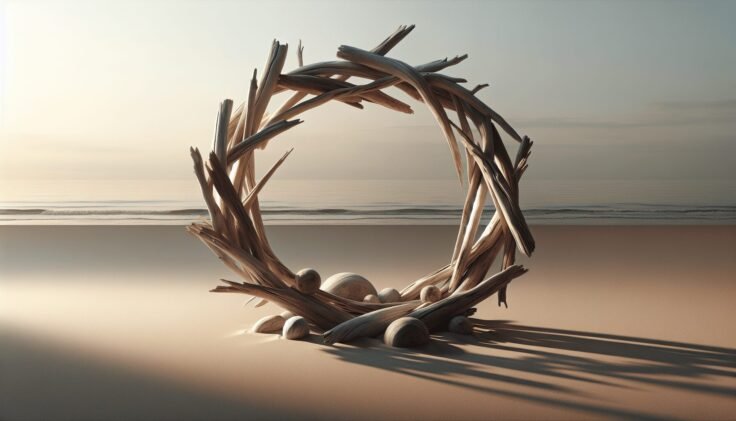
Have you ever strolled along a beach and stumbled upon a piece of driftwood that seemed to tell a story all its own? Driftwood holds a unique, rustic beauty, shaped and crafted by the powers of nature, each piece a testament to the currents that carried it and the shores that shaped it. Yet, with a bit of creativity, you can take these natural works of art to another level by transforming them into embellished masterpieces. In this article, you’ll discover the joys of working with embellished driftwood, from gathering to decorating, and learn how to create your own stunning art pieces that reflect both nature’s wisdom and your imagination.

Embellished Driftwood

Understanding Driftwood

What is Driftwood?

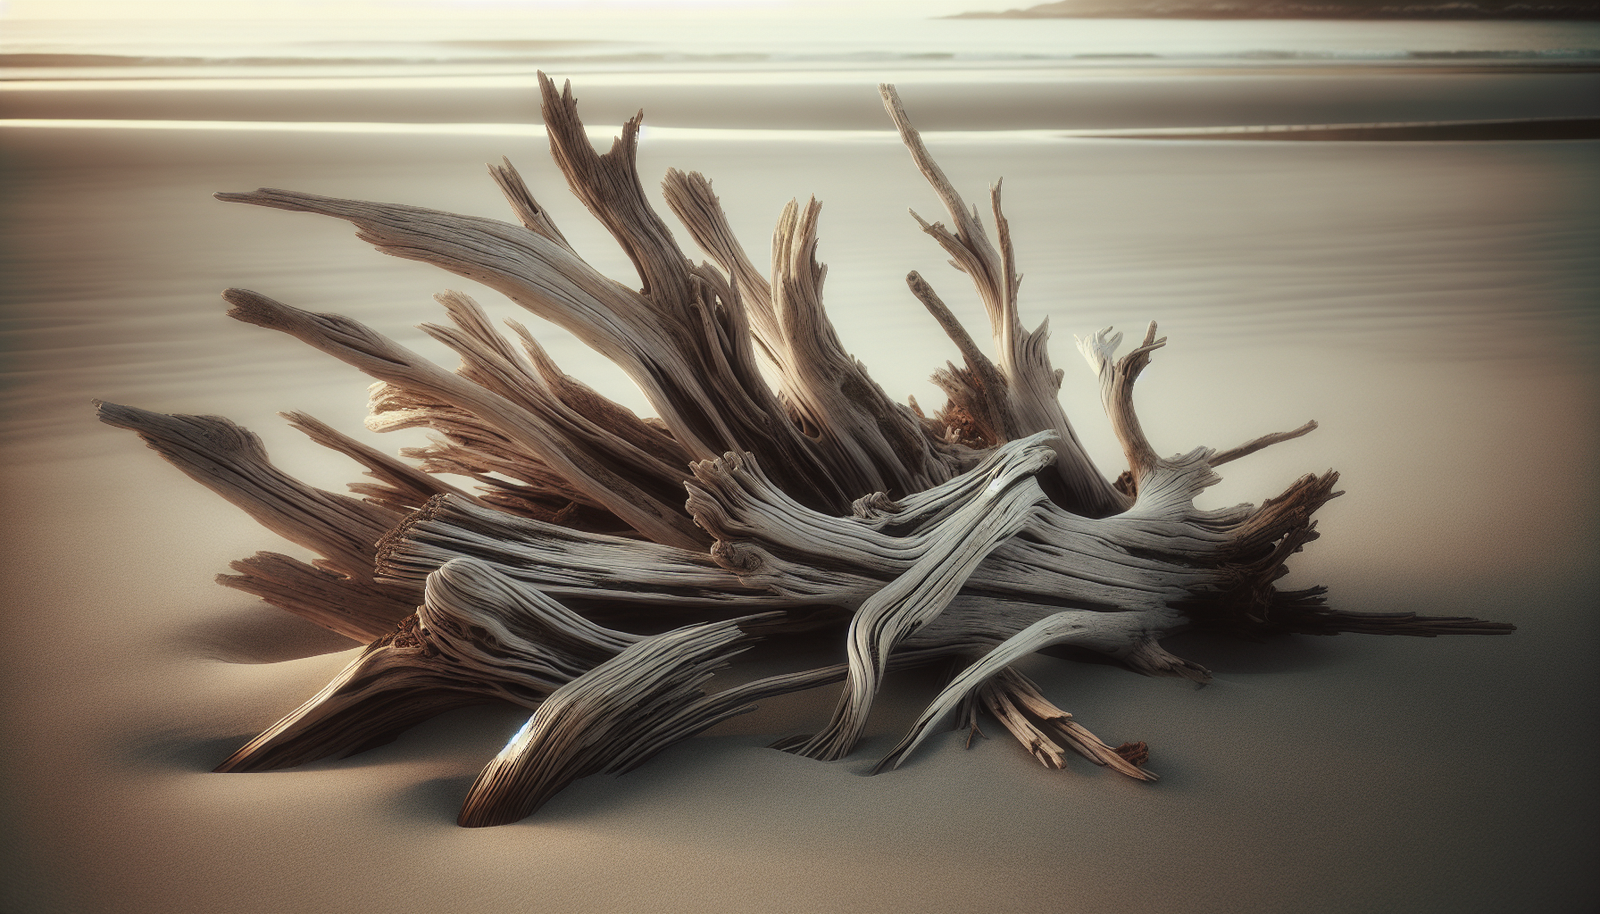
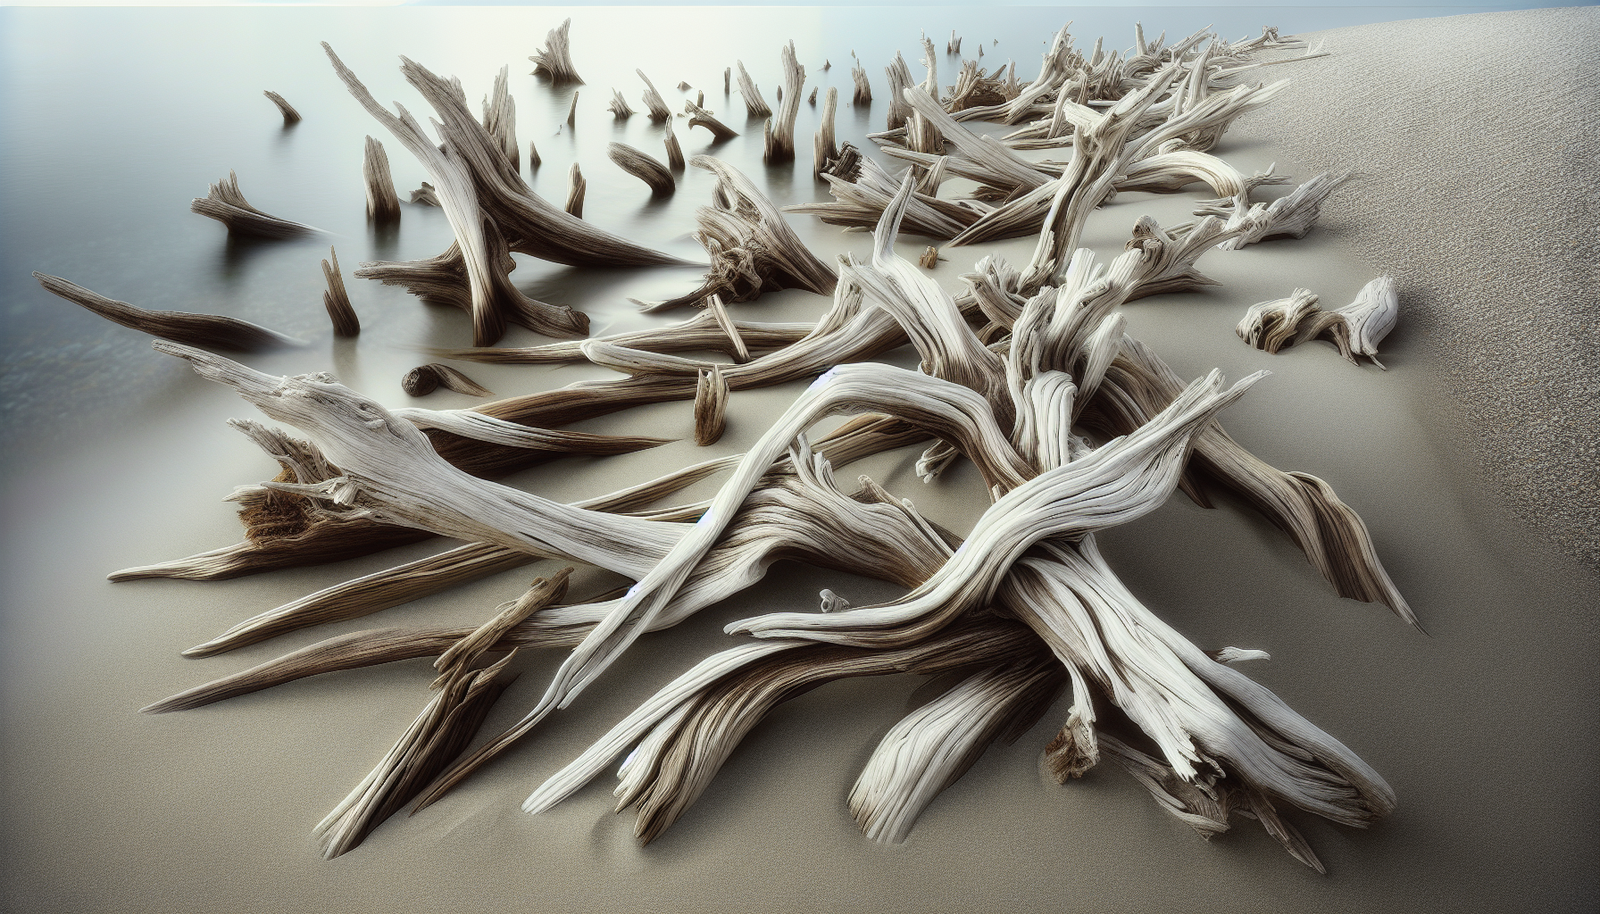
Driftwood refers to wood that has been washed onto a shore or beach by the action of winds, tides, or waves. Over time, these pieces of wood develop a weathered appearance as they are bleached and smoothed by the sun, sand, and water. This natural process gives driftwood its distinct texture and color, making it an attractive material for various types of artistic expressions.

Why Use Driftwood?

Driftwood is not only abundant and eco-friendly but also deeply versatile. It embodies a natural elegance that enhances any artistic or decorative endeavor. Its weathered quality makes it ideal for adding a rustic or nautical element to homes and gardens. Moreover, working with driftwood promotes sustainability, as it repurposes materials that would otherwise remain as natural debris.

Embellishing Driftwood

Gathering the Right Pieces

The first step in creating embellished driftwood art is to collect suitable pieces. Not every piece will be ideal for embellishment, so take your time while gathering. Look for pieces that have interesting shapes, textures, and sizes that speak to you. While searching, remember to adhere to local laws or guidelines as some beaches protect natural materials.

Preparing Driftwood for Embellishment

Once you’ve gathered your pieces, a little preparation is necessary. Start by cleaning the driftwood to remove any dirt or salt that may have accumulated. This can be done by rinsing with fresh water and scrubbing gently with a soft brush. After cleaning, allow the wood to dry completely, which may take a few days depending on the humidity of your environment.

Creative Embellishments

Now comes the exciting part—embellishing your driftwood. There are endless possibilities, so feel free to let your creativity flow.

Painting and Staining

You can choose to paint directly onto the driftwood, applying designs that complement its natural form. Alternatively, staining can be used to enhance the wood’s natural grain without hiding its unique patterns.

Adding Textures

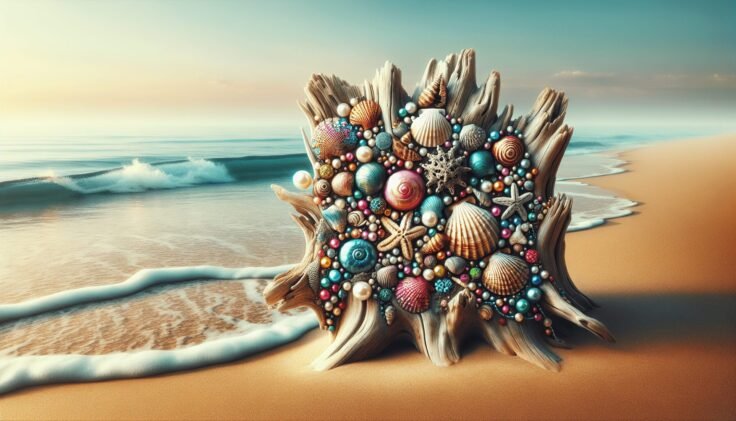
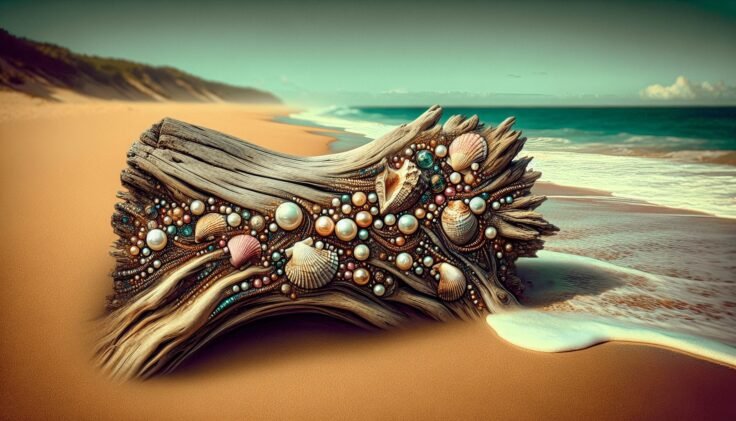
Consider affixing beads, shells, or even small pieces of mosaic glass to your driftwood. These elements add a tactile dimension to your art, inviting onlookers to engage both visually and through touch.

Incorporating Other Natural Elements

For a cohesive natural look, integrate other elements from the shore such as stones, sand, or seaweed. These can be attached using natural adhesives that ensure the piece remains as eco-friendly as possible.

Embellished Driftwood

Crafting Driftwood Art

Wall Art

Create stunning wall hangings by arranging driftwood pieces into artful patterns or thematic designs. Try incorporating symbols or words to personalize your artwork.

Example Table: Materials for Driftwood Wall Art

MaterialPurpose
Driftwood PiecesBase material for construction
Paints and StainsFor adding color and protective coatings
Adhesive GlueTo attach additional embellishments
Hanging HardwareSecure the art onto walls
Shells, BeadsAdd decorative flair and texture

Sculptures

Crafting sculptures from driftwood is both challenging and rewarding. Choose pieces that naturally fit together and secure them using dowels or natural twine. These sculptures can range from abstract to lifelike representations of animals or figures.

Functional Art

Driftwood can also be transformed into functional art pieces. Create items such as candle holders, planters, or coat racks that highlight the wood’s natural beauty while serving a practical purpose.

Driftwood Care and Maintenance

Protecting Your Art

To ensure your driftwood creations last, consider applying a protective finish. This can be in the form of a clear varnish or sealant which helps prevent the wood from deteriorating over time.

Cleaning

Regular dusting will keep your artwork looking fresh. If it requires more thorough cleaning, a lightly damp cloth can be used. Avoid using harsh chemicals or soaking the wood, as this can lead to damage.

Inspiring Ideas

Themed Creations

Draw inspiration from the seasons or nature to create themed driftwood art. For instance, make a spring-themed piece using pastel colors and floral elements, or a nautical piece with blues and whites.

Personalized Gifts

Consider making personalized driftwood gifts for friends or family. By incorporating elements that reflect the recipient’s personality or hobbies, your gifts can be both beautiful and meaningful.

Collaborative Art

Turn driftwood embellishing into a social activity by collaborating with others. Organize small gatherings where everyone can create, share techniques, and inspire each other.

Conclusion

Embarking on the journey of creating embellished driftwood art is not just about crafting. It’s a way to connect with nature, expressing your creativity while respecting and preserving environmental resources. Each piece of driftwood holds a story shaped by nature’s forces, and with your touch, it becomes a tangible reminder of both artistic expression and the planet’s beauty. Whether you create for your own pleasure or share your pieces with others, embellished driftwood art holds the potential to inspire and delight.

Through this exploration of driftwood art, may you find endless inspiration and joy in transforming nature’s offerings into meaningful creations.

Filed Under: Driftwood Ideas Tagged With: DIY Crafts, driftwood art, home decor

Kirsty Elson Driftwood Little Houses

March 25, 2025 by admin

Have you ever stumbled upon a tiny sculpture crafted from materials once discarded by the sea and wondered about the stories they tell or the love poured into creating them? If so, you’re likely to find the enchanting world of Kirsty Elson’s driftwood little houses utterly captivating. In this article, you’ll learn all about Kirsty Elson, the creative genius behind these charming driftwood sculptures, and explore the magic she instills in every piece she crafts.

Kirsty Elson Driftwood Little Houses

Who is Kirsty Elson?

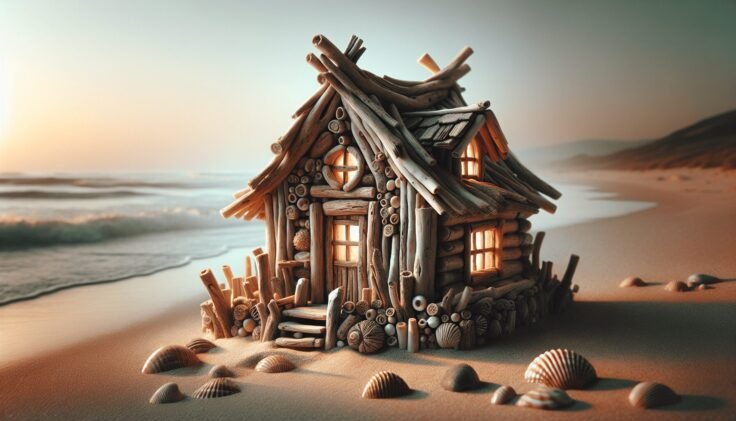
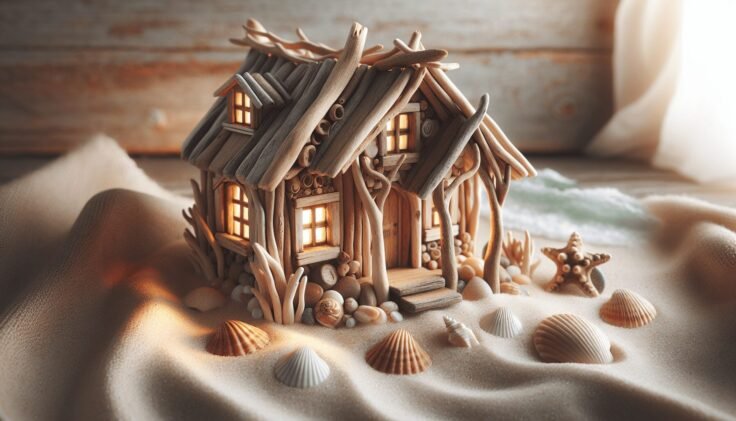
Kirsty Elson is an artist renowned for her unique ability to transform driftwood and other beachcombed materials into delightful miniature houses and scenes. Based in Cornwall, England, Kirsty has honed her craft over the years and is celebrated for her ingenuity and eco-friendly approach. Her work not only embodies creativity but also reflects an appreciation for nature and sustainability.

The Journey to Artistic Recognition

Kirsty’s path to becoming a recognized artist is as fascinating as her creations. With a Fine Art degree under her belt, Kirsty initially tried her hand at various artistic endeavors, seeking an outlet for her creativity. However, it wasn’t until she began experimenting with driftwood that her unique artistic voice began to emerge. This combination of natural materials and artistic prowess quickly gained her recognition and a dedicated following.

Bringing Nature’s Castaways to Life

What makes Kirsty’s work stand out is not just her eye for detail, but her ability to see potential in what others might view as mere debris. By turning driftwood, sea glass, and other beachcombed elements into miniature homes, each piece tells a story of transformation and renewal. This approach not only breathes new life into forgotten materials but also encourages viewers to see beauty in imperfection.

The Art of Driftwood Sculptures

Creating art from driftwood is a delicate balance of creativity, technique, and a deep understanding of the material. Kirsty’s driftwood sculptures capture the imagination and speak to the heart, making them truly timeless pieces of art.

Selecting the Perfect Driftwood

The process begins with selecting the right pieces of driftwood. Kirsty often scours the beaches of Cornwall, looking for unique shapes and textures that inspire her artistic vision. Each piece of driftwood seems to have its own character, shaped by time, tide, and weather, and it’s this character that Kirsty seeks to highlight in her work.

Crafting with Care and Precision

Once the materials are gathered, Kirsty begins the intricate process of assembling her little houses. Each piece of driftwood is carefully cleaned and prepared, preserving its natural texture and color. Kirsty often uses simple tools, relying on her keen eye and steady hand to craft each element with precision.

Adding the Finishing Touches

The final step in creating these little houses involves adding tiny details that bring the pieces to life. Whether it’s a miniature chimney made from a broken twig or a tiny window framed with a bit of reclaimed metal, these details add depth and personality to every piece. Kirsty’s choice of materials and her meticulous attention to detail ensure that each sculpture is unique, with its own story to tell.

Kirsty Elson Driftwood Little Houses

The Ideal Ambiance: Setting Your Driftwood Creations

Owning a piece of Kirsty Elson’s driftwood art is akin to holding a piece of the shore in your hands, complete with stories of distant tides and whispered sea breezes. To truly appreciate these artworks, consider how they can be displayed to enhance the ambiance of your home or space.

Choosing the Right Space

These driftwood sculptures lend themselves beautifully to both indoor and outdoor settings. Placing them in a space where they catch natural light can enhance their rustic charm and the subtle textures of the wood. A windowsill, mantelpiece, or garden nook can all make wonderful display areas.

Complementary Decor

The beauty of driftwood art is its versatility. Pairing Kirsty’s little houses with other natural elements such as stones, shells, or plants can create a cohesive, nature-inspired theme. For a minimalist look, a solitary piece on a simple shelf can make a striking statement.

Creating a Narrative

One of the joys of owning driftwood art is crafting a narrative around it. You might choose to collect multiple pieces to form a miniature village scene, or integrate the artwork into a personal vignette with other cherished items. This approach not only enhances the visual appeal but creates a personal connection to the art.

Sustainability and the Artistic Process

In a world increasingly focused on sustainability, Kirsty’s work stands out as a model of eco-friendly art. Her commitment to using reclaimed materials not only reduces waste but also promotes a deeper respect for our natural resources.

Beachcombing with a Conscious Mind

Collecting materials for her art involves a mindful approach to beachcombing. Kirsty ensures that her practice does not disrupt the local ecosystem, taking only what the sea has already relinquished. This respect for nature aligns with a broader environmental ethos, encouraging others to think sustainably.

Inspiration and Innovation in Upcycling

By transforming discarded materials into art, Kirsty inspires others to consider the potential in everyday objects. Her work is not only about creating beauty but also about redefining resource use. This innovative approach demonstrates that sustainable practices can go hand in hand with creativity and artistic excellence.

A Conversation with Community

The impact of Kirsty Elson’s art extends beyond her creations, fostering a connection with the community of art enthusiasts and fellow beachcombers. This dialogue enriches both the artist and those who admire her work, building a shared appreciation for art and nature alike.

Workshops and Exhibitions

Kirsty often holds workshops and participates in exhibitions, providing opportunities for others to engage with her process and philosophy. These events allow participants to explore their own creativity while learning about sustainable art practices firsthand. Through these interactions, Kirsty nurtures a community that values innovation, resilience, and sustainability.

Engaging with Supporters

Through her active presence on social media, Kirsty connects with a global audience who appreciate her work and her message. By sharing insights into her creative process, she invites followers into her world, building a sense of camaraderie and shared passion for preserving the beauty of nature through art.

Inspiring Future Generations

Kirsty’s dedication to her craft and environmental principles is particularly inspiring for younger generations. She demonstrates that it’s possible to pursue artistic passions while making a positive impact on the world, encouraging aspiring artists to think critically about their materials and processes.

Making Driftwood Art Accessible

Kirsty Elson’s little houses have captured the hearts of many, and their accessibility is a significant aspect of their charm. She ensures that her art remains available to a wide audience, allowing more individuals to experience the joy of owning a piece of handmade, sustainable art.

Purchasing an Original Piece

Those interested in purchasing one of Kirsty’s creations can usually find her work displayed in various galleries and shops throughout the UK. Additionally, her online presence allows international fans to acquire her driftwood sculptures, expanding the reach of her art to global admirers.

Custom Creations and Commissions

For those seeking a more personalized touch, Kirsty often accepts commissions to create custom pieces. Whether it’s a specific scene or a personal memento captured in driftwood, commissioned works provide the opportunity to own a sculpture that’s meaningful and unique.

Engaging with the Creative Process

For individuals interested in trying their hand at similar art forms, Kirsty’s approachable manner and offers of guidance via workshops or tutorials make the art form accessible. Embracing creativity in this way allows for a deeper appreciation of the materials and techniques involved.

Concluding Thoughts

Kirsty Elson’s driftwood little houses are more than simply captivating works of art; they are a testament to the beauty of nature, the joy of creativity, and the importance of sustainability. As you consider incorporating such pieces into your own life, you too participate in a dialogue with art and environment, celebrating what can be achieved when creativity meets conscientiousness.

With each carefully crafted sculpture, Kirsty invites you to see the world in a new light—to find beauty in the weathered and the worn, and to recognize the potential for renewal and inspiration all around you. Whether viewed as an artistic statement, a piece of home decor, or an inspiration to live more sustainably, Kirsty’s driftwood little houses offer an engaging, enduring charm that resonates with all who encounter them.

Filed Under: Driftwood Ideas Tagged With: DIY Crafts, driftwood art, Eco-friendly, Handmade, home decor

Driftwood Dolphin

February 22, 2025 by admin

Have you ever stumbled upon a piece of driftwood on the shore and imagined the stories it could tell? Each fragment smoothed by the ocean’s embrace, carries with it a unique narrative. Perhaps in your coastal wanderings, you’ve envisioned shapes or creatures emerging from these weathered pieces. One such imaginative possibility is a “driftwood dolphin.” While they may not leap through real waves, these artistic creations capture the essence of nature’s graceful marine mammal. Let’s embark on a creative journey to uncover what makes these driftwood sculptures so enchanting.

The Mystique of Driftwood

Driftwood is more than just part of the natural debris washed ashore. Originating from trees that have succumbed to the sea’s pull, it evolves from branches or trunks into something smooth and sculptural. The process of transformation can span years as the wood is bleached by the sun and polished by water, giving it an organic, timeless quality.

From Tree to Treasure

Before it reaches the beach, driftwood begins its life as part of a tree. Over time, parts of these trees may break off due to natural causes like storms or the slow wearing down by natural elements. These wooden remnants then enter rivers or directly into the ocean, setting off on a long voyage.

The Sculpting Hand of Nature

As driftwood is drawn into the ocean, it’s subject to constant motion. Water and sand smooth its edges, while saltwater alters its color and texture. This natural process results in a range of shapes and sizes, each piece with its own distinct personality and story to tell.

The Allure of Dolphins

Dolphins have fascinated humans for centuries with their intelligence, grace, and playful nature. There’s something universally appealing about these creatures. Perhaps it’s their curious nature or the way they seem to dance across ocean waves that captivates the imagination.

A Symbol of Joy and Freedom

In many cultures, dolphins represent joy, freedom, and the connection between humans and the marine world. Their presence in art and literature often symbolizes intelligence, grace, and benevolence. This makes them perfect subjects for artistic creations, including driftwood sculptures.

Dolphins as a Part of Oceanic Ecosystems

Dolphins play an essential role in maintaining the balance of marine ecosystems. As predators, they help control fish populations, and their well-being is an indicator of ocean health. Understanding their place in the ecosystem enhances our appreciation of their artistic representations.

Driftwood Dolphin

Crafting Driftwood Dolphins

Creating driftwood dolphins is a unique way to combine the beauty of natural materials with human creativity. While it might seem daunting at first, the process can be both rewarding and therapeutic.

Gathering the Right Materials

The first step in crafting a driftwood dolphin is collecting driftwood. Stroll along your nearest beach or riverbank and keep an eye out for pieces that spark your imagination. Look for varying sizes and shapes that might naturally suggest the fluid forms of a dolphin.

Tools for the Craft

To bring your driftwood dolphin to life, you’ll need a few basic tools. A handsaw for trimming pieces, sandpaper for smoothing edges, non-toxic wood glue, and possibly a small drill if you plan to join pieces with dowels. Remember, safety first: wear protective gloves and goggles as you work.

Design and Assembly

Designing your driftwood dolphin can start with a simple sketch. Consider the natural flow and movement of a dolphin, how its body arcs and twists. Arrange your driftwood pieces on the ground or a flat surface until you find a configuration that fulfills your vision. Once satisfied, begin assembling your sculpture using glue or dowels.

The Art of Interpretation

Interpreting the dolphin’s form in driftwood is as much about feeling as it is about precision. No two pieces will ever be the same, and part of the charm lies in embracing these imperfections.

Embracing Natural Asymmetry

Nature rarely adheres to perfect symmetry, and neither should your sculpture. Allow the unique characteristics of each driftwood piece to guide your creativity. A knot might suggest an eye, while a curve could beautifully mimic a dorsal fin.

Adding Personal Touches

While the natural beauty of driftwood is captivating in its own right, adding personal touches can make your piece even more special. Consider subtle carvings or the inclusion of other natural materials, like shells or stones, to fashion eyes or embellishments.

Driftwood Dolphin

Displaying Your Driftwood Dolphin

Once completed, displaying your driftwood dolphin thoughtfully can enhance its impact and ensure it captures attention.

Choosing the Right Space

Decide whether your creation will live indoors or outdoors. Indoors, it might complement a nautical-themed room or become a statement piece above a doorway. If outdoors, it could join a garden setting, positioned where sunlight highlights its texture.

Maintenance and Care

Driftwood is durable but not indestructible. If left outside, it’s wise to occasionally check for signs of wear. Applying a natural sealant can protect against weather damage while preserving its organic look.

Environmental and Cultural Significance

Crafting driftwood dolphins is more than an artistic endeavor; it’s a statement about sustainability and reverence for nature.

Upcycling Nature’s Offerings

By using driftwood, you’re participating in the concept of upcycling—transforming discarded natural materials into art. This process not only beautifies your space but fosters awareness about recycling and the environment.

Honoring Coastal Traditions

Many coastal communities have a long tradition of using driftwood in art, celebrating the connection between land and sea. This practice honors cultural heritage and promotes a deeper understanding of human interactions with the natural world.

Workshops and Community

For those new to crafting or seeking inspiration, joining a workshop or community can provide valuable insights and camaraderie.

Benefits of Collaboration

Being part of a community offers the chance to exchange techniques, gather feedback, and celebrate collective artistic achievements. Workshops provide structured guidance and expose you to different styles and methodologies.

Networking and Sharing

Social media and online groups can help you connect with other driftwood enthusiasts. Sharing your creations not only builds community but also allows for a richer exchange of ideas and innovations in crafting.

Inspiring Creativity in Others

Your driftwood dolphin, though a personal project, carries the potential to spark creativity in others. By sharing your journey, you can inspire both young and seasoned artists to see the potential in natural materials.

Teaching the Next Generation

Consider hosting small workshops for children or engaging with local schools. Teaching the craft fosters environmental consciousness and nurtures a love for artistic expression in young minds.

Showcasing at Local Events

Displaying your work at local fairs or art events can reach a wider audience. Such venues allow for an exchange of not only skills but stories, fostering a sense of connection and shared appreciation for both art and nature.

Conclusion

The allure of the driftwood dolphin lies in its unique blend of natural beauty, cultural significance, and creative expression. By crafting one, you not only develop artistic skill but also form a deeper connection with the environment. As you reflect on the stories embedded in each piece of driftwood, remember that these creations are more than sculptures; they are narratives of nature’s journey, beautifully reimagined through your hands. Embrace the inspiration and let your creativity take flight on the wings of a driftwood dolphin.

Filed Under: Driftwood Ideas Tagged With: DIY Crafts, Dolphin Sculpture, driftwood art, Nature Art

Driftwood Circle

January 25, 2025 by admin

Have you ever stumbled across a driftwood circle on a walk along the beach and wondered about its story? These intriguing formations have captivated the imagination of beach-goers for generations. They are often seen as places of serenity and mystery, combining the natural beauty of the sea with a touch of human creativity. In this article, we’ll explore the origins, meanings, and artistic inspiration behind driftwood circles, giving you a deeper appreciation for these unique seaside structures.

What is a Driftwood Circle?

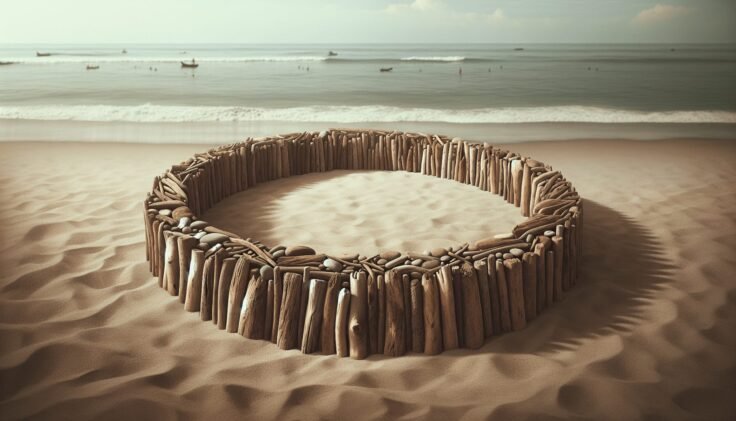
A driftwood circle is a formation created using pieces of driftwood arranged in a circular shape. These structures are usually found on beaches, crafted by individuals or groups who are inspired by the natural elements they encounter. The circle can vary greatly in size, from a small personal installation to a large, collective art project that encourages the participation of passersby.

Characteristics of Driftwood

Before discussing the circle itself, it’s important to understand the main material—driftwood. Driftwood refers to wood that has been washed ashore by the action of winds, tides, or waves. Over time, the wood becomes weathered and smooth, acquiring a distinctive, bleached appearance. Driftwood can come from various sources, such as fallen trees, broken branches, or even lumber that has been discarded.

The Artistic Aspect

The artistic appeal of driftwood circles lies in their use of natural materials and their temporary, ever-changing nature. The pieces of wood are typically found rather than bought, lending the projects a spontaneous air and ensuring each circle is unique. Many artists and nature enthusiasts are drawn to driftwood circles for their capacity to merge art and nature, offering an opportunity to reflect on the beauty of the landscape while engaging creatively with it.

Historical Origins and Cultural Significance

Driftwood circles are not merely modern artistic creations; they hold historical significance and have been used by various cultures across the world. Understanding these cultural roots can provide a richer context for appreciating these formations.

Indigenous Practices

Some indigenous cultures have used driftwood circles as ceremonial sites or gathering places. In these traditions, the circle often represents infinity, the cycle of life, or the unity of a community. The use of driftwood adds another layer, symbolizing resilience and adaptability, as the wood has traveled and persevered to reach the shore.

Spiritual and Ritualistic Uses

Driftwood circles sometimes serve a spiritual purpose. They can be places for meditation, reflection, or rituals, offering a space that feels both connected to the Earth and protected from the distractions of daily life. The act of building or sitting within a driftwood circle can facilitate a sense of peace and connection with nature.

Driftwood Circle

Building a Driftwood Circle

Creating your own driftwood circle can be a rewarding project, allowing you to engage directly with the environment while expressing your creativity.

Locating the Right Spot

Choosing the right location is crucial for your driftwood circle. A spot that is serene and receives a steady supply of driftwood is ideal. Ensure you respect local guidelines about the use of natural materials and the creation of structures on public land.

Collecting Driftwood

Only collect pieces of driftwood that have naturally washed ashore, ensuring your activity is environmentally friendly. Look for pieces that have interesting shapes or textures, as these will add character to your circle.

Designing Your Circle

You can arrange the driftwood in various ways to reflect your personal vision. Whether you prefer a tightly arranged circle or a more loosely defined pattern, take your time to experiment with different layouts. Remember that this is a transient installation, subject to the whims of the weather, and enjoy the process of creation.

Driftwood Circles in Art and Literature

Throughout history, driftwood circles have made their mark not only physically but also culturally, inspiring numerous works of art and literature.

Inspirations and Representations

Many artists take inspiration from driftwood circles to explore themes of nature, time, and human interaction with the environment. Painters, photographers, and sculptors have all sought to capture the essence of these formations in their work.

Example: Artists might use driftwood circles to symbolize the impermanence of nature or to highlight the beauty found in random, natural arrangements.

Literary Mentions

In literature, driftwood circles often appear as metaphors for life’s cycles and the interconnectedness of all living things. Writers may use them to set a scene of contemplation, where characters grapple with personal or existential dilemmas.

Table of References

FieldNotable Works/Inspiration
ArtInstallations by environmental artists
PhotographySeaside collections capturing transient beauty
LiteratureNovels and poetry focusing on nature’s cycles

Driftwood Circle

Environmental Considerations

While driftwood circles are a beautiful form of expression, it’s important to consider their impact on the environment.

Sustainable Practices

To ensure that your appreciation of driftwood circles remains environmentally conscientious, follow best practices such as collecting only naturally washed-up wood and dismantling your circle after a certain period, so that the wood can return to its natural cycle.

Impact of Removal

Removing too much driftwood from a single location can disrupt local ecosystems, as it serves important roles such as providing habitat and preventing erosion. Be mindful and take only what you need for your project.

The Community Connection

Driftwood circles often become focal points for community interaction. People are naturally drawn to these formations, sparking conversations and encouraging cooperative creativity.

Group Projects

Organizing a community driftwood circle-building event can foster collaboration and environmental awareness. Participants can share ideas, discuss the symbolism of the circle, and enjoy a shared experience in nature.

Social Media Influence

The rise of social media has amplified the visibility of driftwood circles, with people sharing photos and their experiences of these unique structures. Platforms like Instagram and Pinterest are filled with beautiful imagery, which in turn inspires others to create their own versions.

Symbolism and Personal Reflection

Driftwood circles offer a rich tapestry of symbolic meaning, which can be deeply personal and emotionally resonant.

Themes of Connection

The circle shape itself has universal interpretations such as eternity, inclusiveness, and unity. When combined with driftwood—each piece with its own history and journey—the circle becomes a powerful symbol of interconnected life paths.

A Personal Space

For many, a driftwood circle can act as a personal sanctuary, a place to sit in peace and reflect on life’s broader questions or simply enjoy a moment of mindfulness. The meditative act of arranging the driftwood, or just observing its form, can be a profoundly grounding experience.

Conclusion

To walk upon a driftwood circle is to encounter the intersection of nature, art, and human expression. Whether you are inspired to create your own, explore the cultural and spiritual histories, or simply admire their fleeting beauty, driftwood circles offer a unique opportunity to connect with the world around you. Next time you find yourself on a beach, consider the stories told by these elegant formations—they are a humble yet powerful reminder of the harmony we can find in nature.

Filed Under: Driftwood Ideas Tagged With: DIY Crafts, driftwood art, home decor

Driftwood In Vase

December 31, 2024 by admin

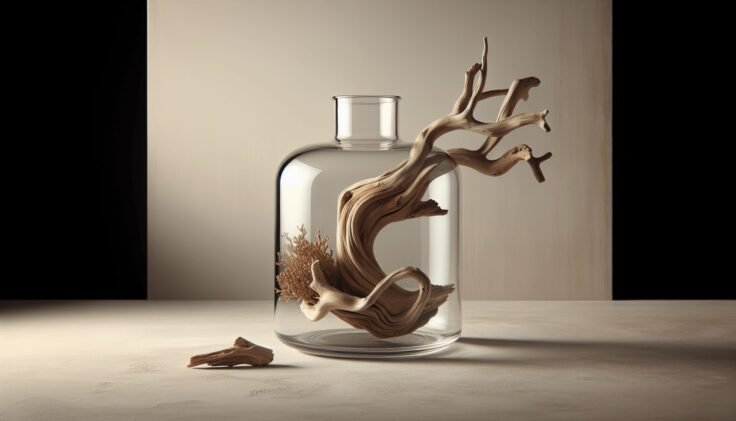
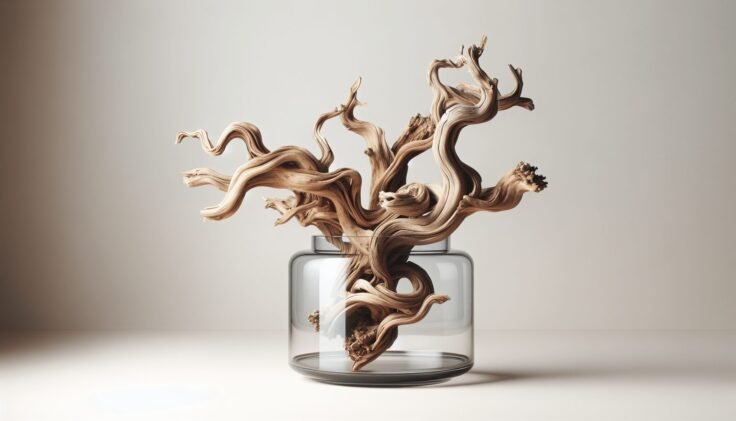
Have you ever wondered how a simple item like driftwood can transform your home decor into something truly special? Driftwood is not only a fascinating natural element but also a versatile decor piece that can add a touch of serenity and elegance to your living space. When placed in a vase, driftwood becomes the centerpiece of a room, exuding a rustic yet modern charm that captivates and calms the senses.

Understanding Driftwood

Driftwood is wood that has been washed onto shore by the elements—wind, water, and tides. These pieces of wood, often battered by the waves and smoothed by sand, tell stories of their journey through the sea. Their natural beauty and uniqueness make them highly coveted for various decor applications.

The Journey of Driftwood

Driftwood embarks on a journey unlike any other. Traditionally, it is part of a tree branch or trunk that breaks off and ends up in bodies of water like rivers, lakes, or oceans. Carried by currents, it is gradually stripped of bark and pruned of any twigs or foliage. Over time, the wood becomes weathered and smooth, its colors ranging from pale to darker hues, depending on species and age.

Types of Driftwood

Several types of wood can turn into driftwood, each with its own unique characteristics. Common types include:

  • Cypress: Known for its decay resistance and intricate textures.
  • Oak: Offers resilience and long-lasting beauty.
  • Cedar: Lightweight and aromatic, adding a distinct scent to spaces.

Each type possesses a unique texture and color, which can influence the overall aesthetic when used in decoration.

Benefits of Using Driftwood in Decor

Driftwood, when used ingeniously, offers a plethora of benefits. Here’s why you might consider incorporating driftwood into your home decor:

Natural Aesthetic Appeal

The organic appearance of driftwood can harmonize with various design styles, from coastal beach themes to modern minimalist decor. Its neutral tones and natural form provide a universally compatible aesthetic that complements a wide range of colors and textures in any room.

Versatility and Flexibility

One of the greatest advantages of driftwood is its versatility. It can be left as it is for an authentic rustic touch, or treated and polished for a more refined look. Whether for small table vases or large floor-standing arrangements, driftwood can be adapted to fit all spaces and themes.

Eco-Friendly Choice

Using driftwood is an environmentally conscious choice. It’s recycled naturally, requiring no additional resources for processing, and contributes to sustainable decor practices by repurposing natural materials.

Driftwood In Vase

Choosing the Right Vase for Driftwood

The selection of the right vase is crucial to showcasing your driftwood effectively. Factors such as size, material, and style all come into play when creating a cohesive and attractive display.

Size and Shape Considerations

The size and shape of the vase are essential in determining how well your driftwood will be displayed.

  • Height: Ensure the vase is tall enough to support the driftwood without overshadowing it.
  • Width: A broader vase accommodates more pieces or allows for creative positioning.
  • Shape: Experiment with various shapes—cylindrical, hourglass, or geometric forms—to find the one that complements your driftwood’s natural curves.

Material Varieties

The material of the vase can affect the overall look and feel of your display. Common materials include:

  • Glass: Offers a clean, transparent view and emphasizes the intricacies of the driftwood.
  • Ceramic: Adds a textured, artistic touch with endless color and pattern possibilities.
  • Metal: Provides a modern, industrial edge to the setup.

Stylistic Choices

The style of the vase should align with your overall room design. Driftwood’s neutral aesthetic means it pairs well with various styles:

  • Rustic: Choose earthy-toned, textured vases to complement the natural quality of driftwood.
  • Contemporary: Opt for sleek, minimalist designs that highlight the structural beauty of the wood.
  • Eclectic: Mix and match unique vases to add character and personality to your space.

Arranging Driftwood in a Vase

Arranging driftwood creatively in a vase is an art form. While there are no strict rules, the following guidelines can help you achieve an aesthetically pleasing result.

Positioning and Balance

Balance and harmony are key when arranging driftwood. Consider the following:

  • Asymmetrical Balance: An arrangement that is uneven yet harmonious, providing visual interest.
  • Symmetrical Balance: Equal weight and design on both sides of the arrangement offer formality and order.

Mixing Textures and Sizes

Experimenting with textures and sizes can create dynamic visual appeal:

  • Textures: Combine rough, textured pieces with smoother ones to add dimension.
  • Sizes: Use varying lengths and thicknesses to make the arrangement visually engaging.

Incorporating Complementary Elements

Enhance your driftwood display by adding complementary natural elements:

  • Pebbles: Fill the base of the vase to provide stability and a decorative touch.
  • Moss: Adds an element of greenery and softness to the arrangement.
  • Twigs and Branches: Layering various natural materials can enhance the overall aesthetic.

Driftwood In Vase

Caring for Your Driftwood Display

Once your driftwood is arranged beautifully, it’s essential to ensure it remains in good condition. Here are several tips on maintaining its beauty:

Cleaning Driftwood

To prevent dirt and buildup, gently clean driftwood:

  1. Dust Regularly: Use a soft cloth or brush to remove dust.
  2. Mild Cleaning: Wipe with a damp cloth if necessary, avoiding excessive water to prevent decay.
  3. Polishing: Occasionally polish with beeswax or natural oils for added protection and shine.

Avoiding Direct Sunlight

Direct sunlight can cause your driftwood to fade over time. Position the vase away from strong sunlight to maintain its natural color and luster.

Monitoring Humidity Levels

Excessive moisture can lead to deterioration. Keep your driftwood in well-ventilated areas and monitor humidity levels to avoid mold or mildew growth.

Inspiring Driftwood Vase Display Ideas

For those in search of inspiration, here are a few creative driftwood vase display ideas that can elevate your home decor:

Nautical Themed Arrangement

Invoke the spirit of the sea by pairing driftwood with seashells, starfish, and sand. Place these elements in a clear glass vase for a coastal vibe.

Minimalist Elegance

Create a sleek, minimalist look with a single piece of long, elegantly curved driftwood in a geometric vase. This simple yet striking arrangement fits perfectly in modern spaces.

Bohemian Chic

Combine driftwood with colorful feathers, dried flowers, and beads to bring a bohemian touch to your decor. Select a ceramic vase with an artisanal finish for added texture.

Rustic Woodland

Embrace a forest-inspired theme by complementing driftwood with moss, pine cones, and small twigs. Use a natural wood or stone vessel to enhance the earthy feel.

Conclusion

Incorporating driftwood in a vase into your home decor can add a unique blend of beauty, history, and sustainability. Its versatile nature allows it to fit seamlessly into various interior styles, while its historical journey compels and captivates. With a deeper understanding of its properties, benefits, and display opportunities, you’re empowered to create arrangements that transform your space into a personal oasis. Whether embracing minimalism, rustic charm, or an eclectic mix, driftwood offers a timeless elegance that invites nature into your home in a sustainable and stylish way.

Filed Under: Driftwood Ideas Tagged With: DIY Crafts, Driftwood Decor, Interior Design, Natural Decor, Vase Arrangement

Valentines Day Driftwood Creations

September 20, 2024 by admin

Have you ever wondered how to create unique and heartfelt Valentine’s Day gifts using driftwood?

Why Driftwood for Valentine’s Day?

Driftwood holds a certain charm that can transform ordinary crafts into extraordinary works of art. Its natural, weathered look fits perfectly with rustic or beach-themed décor, making it an excellent material for heartfelt gifts. Plus, creating driftwood crafts can be a relaxing and enjoyable way to spend your time.

The Beauty Behind Driftwood

Driftwood is wood that has been washed onto the shore by tides or waves. This journey leaves it with a unique, weathered appearance that can’t be replicated artificially. Each piece of driftwood has its own story and character, making your creations one-of-a-kind.

Benefits of Using Driftwood

  • Eco-Friendly: Using driftwood is a sustainable craft option, as it involves recycling natural materials.
  • Inexpensive: Driftwood can be collected for free from beaches, making it a cost-effective crafting material.
  • Versatile: Driftwood comes in various shapes and sizes, suitable for a wide range of projects.
  • Aesthetic Appeal: Its natural look adds a rustic, charming quality to any craft.

Preparing Driftwood

Before you can begin crafting, it’s important to prepare your driftwood. Proper preparation ensures your creations are clean, safe, and long-lasting.

Cleaning Driftwood

  1. Rinse: Start by rinsing the driftwood with fresh water to remove sand, salt, and debris.
  2. Soak: Soak the driftwood in a tub of water. You may add a cup of bleach for every gallon of water to disinfect it.
  3. Scrub: Use a brush to remove any stubborn debris or barnacles.
  4. Sun-Dry: Leave the driftwood to dry in the sun for several days. Ensure it’s thoroughly dried to prevent mold growth.

Tools and Materials

Make sure you have the right tools and materials ready:

ToolsMaterials
SandpaperDriftwood pieces
Hot glue gunPaints and brushes
DrillShells, beads, and other decorative items
SawClear sealant or varnish

Valentines Day Driftwood Creations

Driftwood Creations for Valentine’s Day

With your driftwood prepared, you can start creating unique, personalized gifts. Here are several inspiring ideas to ignite your creativity.

Driftwood Hearts

Driftwood hearts are a classic and charming option for a Valentine’s Day gift.

Steps to Create Driftwood Hearts

  1. Gather Materials: Collect several small, flat pieces of driftwood.
  2. Shape the Heart: Arrange the driftwood pieces into the shape of a heart on a flat surface.
  3. Adhere Pieces: Secure the pieces together using a hot glue gun.
  4. Finish: Optionally, add a coat of clear sealant to give your heart a polished look.

Driftwood Love Letters

Making driftwood love letters adds a personalized touch to your Valentine’s Day gift.

Steps to Create Driftwood Love Letters

  1. Create a Template: Draw or print out the letters you want to create, like “L-O-V-E”.
  2. Selecting Driftwood Pieces: Find pieces that fit each part of the letters. You might need to cut them to size.
  3. Assembling: Lay out the letters on a flat surface first, and then glue them together using a strong adhesive.
  4. Decorate: Use paint, shells, or small flowers to decorate the letters for a personalized touch.

Driftwood Picture Frames

Driftwood picture frames make beautiful, rustic displays for cherished photographs.

Steps to Create Driftwood Picture Frames

  1. Measure and Cut: Measure the dimensions of the frame. Cut driftwood to match those dimensions.
  2. Assemble: Use a hot glue gun or nails to assemble the frame.
  3. Insert Photo: Place your photo within the frame and secure it with backing.
  4. Optional Finish: Apply a clear varnish to the driftwood frame for added shine and durability.

Driftwood Mobiles

Driftwood mobiles offer a whimsical touch and can be adorned with various Valentine-themed decorations.

Steps to Create Driftwood Mobiles

  1. Select Driftwood: Choose a large driftwood piece for the top and smaller pieces for hanging.
  2. Drill Holes: Drill evenly spaced holes in the smaller pieces for threading the string.
  3. String and Decorate: Thread the string through the holes, attaching decorative items like shells, beads, or heart cut-outs.
  4. Assemble: Hang the smaller pieces from the larger piece to complete the mobile.

Driftwood Candle Holders

Driftwood candle holders add a warm, cozy ambiance that’s perfect for a romantic Valentine’s Day.

Steps to Create Driftwood Candle Holders

  1. Select Driftwood: Choose driftwood pieces that have a flat surface suitable for holding a candle.
  2. Drill Holes: Use a drill bit that matches the size of your candles to drill holes where the candles will sit.
  3. Clean and Dry: Ensure the holes are clean and dry.
  4. Finishing Touch: Optionally, apply a clear varnish to the driftwood for a finished look.

Personal Touches

Each driftwood creation becomes even more special with personal touches. Adding initials, dates, or small handwritten notes can make your gift even more memorable. Consider these ideas:

Engraving Driftwood

You can engrave initials or special dates onto the driftwood using a wood burner or a simple carving tool. This adds a personal and enduring touch to your creation.

Adding Photographs

Incorporate small photos by hanging them from driftwood mobiles or inserting them into driftwood picture frames. This makes your gift more personal and meaningful.

Decorative Elements

Enhance your driftwood creations by adding elements like:

  • Paint: Use paint to add designs or patterns.
  • Shells: Adhere small seashells for a beachy vibe.
  • Twine: Wrap twine around driftwood pieces for a rustic look.
  • Beads: String beads onto mobiles for added color and charm.

Valentines Day Driftwood Creations

Sustainability and Ethical Considerations

When collecting driftwood, it’s important to do so sustainably and ethically. Ensure you’re not disturbing protected areas or marine life. Always adhere to local guidelines and regulations regarding the collection of natural materials.

Tips for Sustainable Collection

  1. Check Regulations: Make sure you’re allowed to collect driftwood in your chosen area.
  2. Collect Sparingly: Only take what you need and leave behind pieces that are still part of the natural ecosystem.
  3. Avoid Disturbance: Steer clear of areas where collecting is not permitted or where it might disturb wildlife habitats.

Alternatives to Natural Driftwood

If you’re unable to collect driftwood ethically, consider buying it from reputable sources or using driftwood alternatives like reclaimed wood. Many craft stores sell ethically sourced driftwood pieces.

Final Thoughts

Creating Valentine’s Day gifts from driftwood combines creativity, personalization, and sustainability. These thoughtful and unique gifts can carry significant meaning, making your loved one’s day even more special. Whether you’re crafting a driftwood heart, a personalized love letter, or a beautiful picture frame, your customized creations will undoubtedly bring joy and warmth.

Remember, the time and effort you invest in these crafts make them even more valuable. Your creativity and thoughtfulness will shine through, making this Valentine’s Day memorable for both you and your loved ones.

Filed Under: Driftwood Ideas Tagged With: DIY Crafts, driftwood art, Handmade Gifts, Romantic Decor, Valentine's Day

Driftwood Plant Hanger

August 25, 2024 by admin

Have you ever found a piece of driftwood on a beach and wondered what you could create with it? Driftwood has a rustic, natural charm that’s perfect for adding a touch of the outdoors to your home decor. One fantastic way to use driftwood is by making a driftwood plant hanger. This project not only repurposes an intriguing piece of natural wood but also provides an elegant way to display your favorite plants.

Driftwood Plant Hanger

Why Choose Driftwood for a Plant Hanger?

Driftwood possesses unique qualities that make it ideally suited for artistic and functional creations. Over time, the elements erode the wood, smoothing its surface and creating interesting shapes and textures. Additionally, no two pieces of driftwood are alike, guaranteeing a one-of-a-kind creation every time. Its lightweight yet sturdy nature makes it perfect for hanging applications.

The Aesthetic Appeal

Driftwood adds a touch of coastal serenity to any space. Its natural, weathered look complements a variety of decor styles, from boho chic to modern minimalist. When integrated into your living space, it brings a piece of nature inside, creating a calming and inviting environment.

Environmental Benefits

Using driftwood for crafting projects like plant hangers is also an eco-friendly choice. Driftwood is essentially recycled wood, which means you’re repurposing materials that would otherwise go to waste. This helps reduce the demand for newly harvested wood and contributes to a more sustainable lifestyle.

Materials Needed for a Driftwood Plant Hanger

Gathering the right materials is essential for the success of your project. Here’s a list of items you will need:

MaterialQuantityDescription
Driftwood1 pieceChoose a sturdy piece around 18-24 inches long.
Rope or Cord1-2 yardsNatural jute or cotton looks best. Adjust length based on hanger size.
Hooks2-4Small, screw-in hooks for hanging the plants.
Plant Pots2-3Ensure they are lightweight to avoid overburdening the driftwood.
Drill1For making holes in the driftwood.
Scissors1To cut the rope or cord.
Sandpaper (optional)1 sheetFor smoothing any rough areas on the driftwood.

Selecting Your Driftwood

Choosing the right piece of driftwood is crucial. While walking along the shoreline, keep an eye out for pieces that are both aesthetically pleasing and functional. Look for wood that is free from rot and pest infestations. The ideal piece should have some natural holes or indentations that can help when attaching the rope or plants.

Choosing the Rope or Cord

Natural fibers like jute, hemp, or cotton blend well with the rustic appearance of driftwood and offer good strength. Synthetic ropes can also work, but they may not provide the same visual appeal. Generally, using a rope diameter of about 1/4 to 1/2 inch will ensure sturdiness without overwhelming the driftwood.

Step-by-Step Instructions

Creating a driftwood plant hanger involves several straightforward steps. Follow this guide to bring your driftwood plant hanger to life.

Step 1: Prepare Your Driftwood

Before you start, ensure your driftwood is clean and dry. If needed, wash it with soapy water and let it air dry thoroughly. Use sandpaper to smooth any rough or jagged edges. This makes the wood safer to handle and helps it look polished.

Step 2: Plan Your Design

Think about how you want your driftwood plant hanger to look. Determine the number and placement of plant pots, and decide where you’ll attach the rope or cord. Make light pencil marks on the driftwood to mark these spots.

Step 3: Drill Holes

Using a drill, create small holes at the marked spots where you’ll attach the rope or hooks. Ensure the holes are not too close to the edge to avoid cracking the wood. If you don’t have a drill, you can use a hammer and a nail to make small indentations where the screws will go.

Step 4: Attach hooks

Screw in the hooks at the drilled spots. Make sure they are secure and at even intervals to evenly distribute the weight of the plant pots.

Step 5: Cut the Rope

Measure and cut your rope or cord into manageable lengths. The number of ropes you need will depend on how many pots you plan to hang and how it balances on the driftwood.

Step 6: Attach the Rope

Thread the rope through the holes and tie secure knots. You can also use macrame knots for added decorative appeal. Ensure the knots are tight to prevent slipping.

Step 7: Hang the Plant Pots

Place your plant pots in the hooks or rope holders. Double-check that everything is secure and balanced. Adjust as necessary.

Tips for a Stunning and Functional Driftwood Plant Hanger

A well-made driftwood plant hanger is not just about functionality but also visual appeal. Here are some tips to elevate your project:

Choose the Right Plants

Selecting the right plants is crucial for the longevity and appearance of your plant hanger. Opt for lightweight plants that do well in hanging pots. Here are some excellent choices:

Plant TypeDescription
SucculentsRequire minimal watering and are lightweight.
Spider PlantEasy to care for and visually appealing.
PothosHardy and great for indoor settings.
IvyIdeal for cascading over the sides of the pot.

Ensure the plants you choose are compatible with the indoor environment, considering factors like light and humidity.

Safety Considerations

Your driftwood plant hanger needs to be safely installed to prevent accidents. Make sure you:

  • Securely attach hooks: Ensure that your hooks are tightly screwed in and can support the weight.
  • Appropriate weight: Be mindful of the combined weight of the driftwood, pots, and plants. It’s best to stay within a manageable limit.
  • Solid ceiling fixture: If you’re hanging the driftwood plant hanger from the ceiling, use a strong ceiling anchor to prevent it from falling.

Maintenance

Keeping your driftwood plant hanger looking its best involves regular maintenance. Here are some routines to follow:

  • Dusting: Use a soft brush to dust the driftwood regularly.
  • Plant care: Water and trim your plants as needed. Be cautious when watering to avoid spillages that may affect the driftwood.
  • Check for wear and tear: Periodically inspect the ropes and hooks for signs of wear. Replace them if they show significant degradation.

Driftwood Plant Hanger

Creative Variations

Once you’ve mastered the basic driftwood plant hanger, there are numerous ways to get creative:

Different Hanging Designs

Experiment with various hanging designs and patterns. For instance, you could create a multi-tiered hanger by attaching several smaller pieces of driftwood vertically.

Incorporate Other Natural Elements

Add additional natural elements such as seashells, stones, or small pieces of reclaimed wood. These can be glued or wired onto the driftwood for added visual interest.

Paint and Stain

While driftwood’s natural appearance is beautiful on its own, you can also paint or stain it to match your decor. Use non-toxic, plant-safe paints to ensure there’s no harm to your plants.

Conclusion

Creating a driftwood plant hanger is a rewarding and eco-friendly project that adds natural beauty to your home. With its unique aesthetic appeal and environmental benefits, it’s a wonderful way to display your favorite plants. By following these steps and incorporating some creative variations, you can craft a stunning, one-of-a-kind piece that perfectly suits your space. Enjoy the process of blending nature and creativity to craft your perfect driftwood plant hanger.

Filed Under: Driftwood Ideas Tagged With: DIY Crafts, Driftwood, Eco-friendly, Plant Hanger

Driftwood Jewelry Display Ideas

June 29, 2024 by admin

Welcome to “Driftwood Jewelry Display Ideas”! If you’re a creative soul looking to present your beautiful jewelry creations in a unique and rustic way, this guide is made for you. Imagine transforming humble pieces of driftwood into charming and eye-catching displays that not only showcase your treasures but also bring a touch of nature into your space. With just a few simple steps, you can elevate your jewelry presentation and create a stunning visual impact that will leave everyone in awe. Let’s dive into the world of driftwood and discover endless possibilities for displaying your jewelry with style and grace! Have you ever found yourself marveling at the beauty of driftwood on a stroll along the beach? Its organic shapes and weathered texture are pieces of natural art in their own right. But did you know that driftwood can also serve as a fantastic material for displaying your jewelry? If you’re looking for innovative and aesthetically pleasing ways to showcase your treasured accessories, you’ve come to the right place. Let’s dive into some captivating driftwood jewelry display ideas that will add a rustic charm to your space and elevate your collection.

Driftwood Jewelry Display Ideas

Why Choose Driftwood for Jewelry Displays?

Driftwood isn’t just random wood washed ashore; it’s a stunning material filled with character. Using driftwood for jewelry displays offers numerous benefits:

  • Natural Beauty: Driftwood’s unique shapes and textures make each piece one-of-a-kind.
  • Sustainability: Reusing driftwood helps recycle natural materials, reducing environmental impact.
  • Versatility: Driftwood can complement various decor styles, from coastal and bohemian to rustic and minimalist.

Understanding these benefits is the first step toward embracing driftwood displays. Now, let’s explore some specific ideas to transform your driftwood into eye-catching jewelry displays.

Basic Driftwood Hanger

Sometimes, simplicity is key. A basic driftwood hanger can be a straightforward yet elegant way to organize your jewelry.

Materials Needed

  • A piece of driftwood
  • Hooks or small nails
  • Twine or rope (optional for hanging)

Instructions

  1. Choose the Right Piece: Find a piece of driftwood that fits the space where you intend to hang it.
  2. Attach Hooks: Evenly space small hooks or nails along the driftwood.
  3. Hang the Driftwood: If you’d like, use twine or rope to hang the driftwood on a wall.

This basic design can be customized to display necklaces, bracelets, or even earrings. Its simple charm can bring a bit of the beach into your home while keeping your jewelry organized.

Driftwood Jewelry Stand

For a more substantial piece, consider creating a driftwood jewelry stand. This can be the centerpiece of your vanity or dresser.

Materials Needed

  • A sturdy piece of driftwood
  • Sandpaper
  • Drill
  • Wooden or metal dowels
  • Wood glue
  • Base stand (optional)

Instructions

  1. Prepare the Driftwood: Sand any rough edges to prevent snags.
  2. Drill Holes: Drill evenly spaced holes where you want to insert dowels.
  3. Insert Dowels: Apply wood glue to the ends of the dowels and insert them into the drilled holes.
  4. Add a Base (Optional): Attach the driftwood to a base for added stability.

This stand can hold multiple pieces of jewelry and adds a dynamic, artistic element to your decor.

Driftwood Jewelry Holder with String

For a DIY project that’s a bit more intricate but still accessible, try a driftwood jewelry holder with string.

Materials Needed

  • Driftwood
  • Strong string or fishing line
  • Small hooks or nails
  • Beads (optional)

Instructions

  1. Prepare Your Driftwood: Clean and smooth the driftwood.
  2. Attach Hooks: Evenly space hooks or nails along the driftwood.
  3. String Assembly: Cut pieces of string or fishing line and tie to the hooks.
  4. Enhance with Beads (Optional): Thread beads onto the string for added flair and secure with knots.

This method allows for a varied display, accommodating both lightweight and heavier jewelry pieces.

Driftwood Branch Display

If you have access to larger pieces of driftwood, a branch display can be an eye-catching way to exhibit your jewelry.

Materials Needed

  • Driftwood branch
  • Sand and sealant (optional)
  • Stable base or wall mount
  • Additional hooks or nails for hanging

Instructions

  1. Select a Branch: Choose a robust, appealing branch that can support multiple pieces.
  2. Prepare the Branch: Sand and seal the branch if needed.
  3. Secure the Branch: Attach the branch to a stable base or mount it on the wall.
  4. Add Hooks/Nails: Evenly distribute hooks or nails on the branch.

This design offers a natural, sprawling display that’s perfect for various jewelry items.

Driftwood and Sea Glass Combination

Combining driftwood with other beach finds like sea glass adds a personal touch to your display.

Materials Needed

  • Driftwood
  • Sea glass pieces
  • Strong adhesive
  • Hooks or nails

Instructions

  1. Collect Materials: Gather different shapes and sizes of sea glass and a suitable piece of driftwood.
  2. Design Layout: Arrange the sea glass on the driftwood to your liking.
  3. Attach Sea Glass: Use a strong adhesive to glue the sea glass onto the driftwood.
  4. Add Hooks: Attach hooks or nails for hanging jewelry.

This combination produces a multi-dimensional, beautiful display that’s as unique as your jewelry.

Driftwood Jewelry Display Ideas

Creating a Driftwood Necklace Display

Necklaces often present a challenge for organization, but a dedicated driftwood necklace display can solve this issue.

Materials Needed

  • Long, flat piece of driftwood
  • Small hooks or nails
  • Twine for hanging

Instructions

  1. Select Driftwood: Choose a piece with sufficient length to accommodate your necklace collection.
  2. Attach Hooks: Evenly space hooks along the driftwood.
  3. Mount the Driftwood: Use twine to create a hanging system for your display.

This dedicated necklace display keeps your pieces tangle-free and easily accessible.

Tiered Driftwood Earring Holder

For earring enthusiasts, a tiered driftwood holder offers both functionality and style.

Materials Needed

  • Several pieces of driftwood with flat surfaces
  • Strong twine or thin rope
  • Small hooks

Instructions

  1. Select Driftwood: Find multiple pieces that can be stacked or tiered.
  2. Drill Holes: Drill holes for the twine to connect the tiers.
  3. Assemble the Holder: Thread the twine through the drilled holes to connect the driftwood pieces.
  4. Add Hooks: Attach hooks specifically for hanging earrings.

This tiered design is perfect for showcasing a large earring collection and can be a beautiful focal point in any room.

Mounted Driftwood Ring Display

A mounted driftwood ring display can be a charming way to keep your rings organized.

Materials Needed

  • Flat piece of driftwood
  • Hooks, small nails, or flat-headed nails
  • Wall mount or base

Instructions

  1. Prepare Your Driftwood: Select and clean your piece.
  2. Attach Nails/Hooks: Evenly place nails or hooks for rings.
  3. Mount on Wall/Base: Securely attach the driftwood to a wall or a stable base.

This display keeps your rings easily accessible and adds a rustic element to your decor.

Driftwood Jewelry Organizer Board

Creating a driftwood jewelry organizer board combines utility with aesthetic appeal.

Materials Needed

  • Large flat piece of driftwood or driftwood panel
  • Hooks, nails, knitting needles
  • Paint or wood stain (optional)
  • Wall mount fixtures

Instructions

  1. Prepare the Driftwood: Sand, paint, or stain your driftwood if desired.
  2. Attach Hooks/Nails: Create a layout for your jewelry and attach hooks or nails accordingly.
  3. Wall Mount: Securely mount the organizer board onto your chosen wall.

This organizer board can accommodate various types of jewelry and keeps everything within easy reach.

Driftwood Jewelry Tree

For an artistic and sculptural option, create a driftwood jewelry tree.

Materials Needed

  • Large driftwood piece with branches
  • Sandpaper
  • Strong base (like a wooden board)
  • Strong adhesive or screws

Instructions

  1. Prepare the Driftwood: Sand down rough areas and make sure the branches are sturdy.
  2. Attach to Base: Securely attach the driftwood to your base.
  3. Hang Jewelry: Use the natural branches to hang necklaces, bracelets, and rings.

A driftwood jewelry tree can serve as a striking statement piece on your vanity or dresser.

Customized Driftwood Display for Specific Jewelry Types

Tailoring your driftwood display to specific jewelry types ensures optimal organization and visual appeal.

Materials Needed

  • Driftwood
  • Specific hooks, nails, or dowels
  • Paint, string, or additional decorations (optional)

Instructions

  1. Select Appropriate Driftwood: Choose pieces that best suit the form of jewelry you’re displaying.
  2. Attach the Suitable Fixtures: Use the appropriate hooks, nails, or dowels to cater to different jewelry forms like rings, necklaces, or earrings.
  3. Personalize: Customize with paint or additional decorations to align with your decor style.

This tailored approach makes your jewelry easily accessible and highly organized.

Care for Your Driftwood Jewelry Displays

Maintaining the beauty and functionality of your driftwood displays is essential for long-term use. Here are some care tips:

Cleaning Driftwood

Regularly dust and wipe down the driftwood with a damp cloth to keep it looking fresh.

Securing Hooks and Fixtures

Periodically check that all hooks and fixtures are secure to prevent damage to your jewelry.

Preventing Overcrowding

Avoid overloading your driftwood display to maintain its aesthetic and functional integrity.

By following these maintenance tips, your driftwood displays will remain beautiful and practical additions to your home.

Conclusion

Driftwood jewelry displays offer a unique and charming way to organize and showcase your accessories. From simple hangers and stands to intricate holders and organizers, there is a driftwood display idea to suit every need and style. Embracing the natural beauty of driftwood not only enhances your personal space but also supports sustainable practices. Whether you’re a DIY enthusiast or someone looking for creative solutions, these driftwood jewelry display ideas can transform how you store and admire your jewelry collection.

So, the next time you find a piece of driftwood on the beach, remember its potential beyond just a seaside souvenir. Pick it up, bring it home, and let it add a touch of natural elegance to your world.

Filed Under: Driftwood Ideas Tagged With: craft ideas, DIY Crafts, Driftwood, home decor, Jewelry Display

Driftwood Wall Art Mountain

June 24, 2024 by admin

Picture this: a serene mountain scene meticulously crafted from pieces of driftwood, capturing the rugged beauty of nature right on your wall. “Driftwood Wall Art Mountain” transforms simple, weathered wood into a stunning masterpiece that evokes the tranquility of the great outdoors. Whether you’re a nature lover or an art enthusiast, this unique wall art adds a touch of rustic elegance to any space. Dive into the artistry and creativity that goes into making each panel, and discover how these pieces of driftwood can bring a breath of mountain air into your home. Have you ever found yourself captivated by the beauty of a piece of driftwood? There’s an undeniable allure to this natural material, shaped by the elements and time itself. Imagine capturing that essence and using it to craft stunning wall art that brings the majesty of mountains into your home. Today, let’s explore the world of driftwood wall art mountain creations and how you can bring these natural sculptures into your own living space.

Driftwood Wall Art Mountain

Why Driftwood?

Let’s start with the basics: why is driftwood such a popular material for wall art? Driftwood is essentially pieces of wood that have been washed ashore by the ocean, rivers, or lakes. Each piece is unique, having been shaped and weathered by the elements, making it a work of art by nature itself.

Natural Beauty

There’s something inherently beautiful about driftwood. Its natural, weathered look adds a rustic and timeless charm to any piece of art. The variations in color, texture, and shape of driftwood pieces ensure that each creation is one-of-a-kind.

Sustainability

Using driftwood for art is also an eco-friendly choice. It repurposes natural materials that would otherwise go to waste, reducing the need for new resources. This sustainable approach is perfect for those looking to minimize their environmental impact while creating stunning decor.

Versatility

Driftwood is incredibly versatile. It can be used in various forms, from entire logs to small fragments. This flexibility allows for creativity, enabling you to craft intricate designs or simple, minimalist pieces depending on your artistic vision.

Driftwood Wall Art Mountain: The Concept

Creating a driftwood wall art mountain involves assembling pieces of driftwood to form a representation of mountainous landscapes. The result is a captivating piece that blends the natural elegance of driftwood with the grandeur of mountain scenery.

Inspiration

Mountains have long been a source of inspiration for artists due to their majestic presence and the sense of adventure they embody. When combined with the organic beauty of driftwood, the result is a piece of art that evokes a sense of wonder and tranquility.

Design Elements

When creating driftwood wall art depicting mountains, consider the following design elements:

  • Silhouette: The overall shape or outline of the mountains is crucial. Using driftwood pieces to outline jagged peaks and slopes can create a recognizable silhouette.
  • Texture: Driftwood naturally brings texture to the piece. Use this to your advantage by selecting pieces with varied textures to represent different elements of the mountains.
  • Depth: Layering driftwood pieces can add depth to your art, making it more dynamic and lifelike.
  • Color: While driftwood is often in shades of gray and brown, you can incorporate pieces with different hues to add dimension and personality to your mountain art.

Tools and Materials

To get started on your driftwood wall art mountain, you’ll need a few tools and materials. Here’s a basic list:

ToolsMaterials
Hot glue gun or wood glueVarious pieces of driftwood
Saw or cutting toolBacking board or frame
SandpaperOptional: paint and varnish
Protective glovesHanging hardware

Step-by-Step Guide to Creating Driftwood Wall Art Mountain

  1. Gather Your Driftwood: Begin by collecting driftwood. Visit local beaches, rivers, or lakes to find pieces that suit your vision. Ensure they are clean and dry before use.
  2. Plan Your Design: Sketch out your design on paper. This will help you visualize the final product and serve as a guide while assembling your driftwood.
  3. Prepare Your Backing Board: Cut and sand your backing board to the desired size. This will serve as the canvas for your art.
  4. Arrange Your Driftwood: Lay out your driftwood pieces according to your sketch. Play around with the placement until you are satisfied with the composition.
  5. Attach the Driftwood: Use a hot glue gun or wood glue to attach the driftwood pieces to the backing board. Hold each piece in place until the glue sets.
  6. Add Layers for Depth: If desired, add additional layers of driftwood to create depth and dimension.
  7. Finish the Piece: Optionally, you can paint or varnish the driftwood to protect it and enhance its appearance.
  8. Add Hanging Hardware: Attach hanging hardware to the back of the board so your art is ready to display.

Creative Variations

While the basic concept remains the same, there are numerous creative variations you can explore to make your driftwood wall art mountain truly unique.

Minimalist Approach

For those who prefer a simpler look, a minimalist approach might be ideal. Use fewer pieces of driftwood and focus on the clean lines and natural beauty of each piece. This can create a striking and elegant piece of art that complements modern decor.

Mixed Media

Combine driftwood with other materials to add interest and contrast. Metals, stones, or even shells can be incorporated to enhance the texture and visual appeal of your mountain art.

Color Accents

While driftwood’s natural colors are beautiful, some artists choose to add color accents. This can be done using paint or stains to highlight specific features or add a pop of color to the overall piece.

Themed Mountains

Create mountain art pieces inspired by specific mountain ranges or landscapes. For example, you could craft a piece based on the Rockies, the Swiss Alps, or any mountain range that holds personal significance to you. This adds an element of personalization and storytelling to your art.

Tips for Success

Achieving a stunning piece of driftwood wall art mountain is a rewarding process, but there are a few tips to keep in mind to ensure success.

Selecting the Right Driftwood

  • Look for Variety: Pieces with different shapes, sizes, and textures can add a lot of character to your art.
  • Check for Stability: Ensure the driftwood is dry and free from rot, mold, or insects.
  • Clean Thoroughly: Use a brush to remove debris and rinse the pieces in fresh water. Allow them to dry completely before use.

Working with Driftwood

  • Safety First: Driftwood can have sharp or rough edges, so wear protective gloves while handling it.
  • Be Patient: Assembling driftwood art can take time. Don’t rush the process; take your time to get the composition right.
  • Trial and Error: Don’t be afraid to rearrange pieces multiple times until you achieve the desired look. The flexibility to experiment is part of the creative process.

Driftwood Wall Art Mountain

Displaying Your Driftwood Wall Art Mountain

Once your art is complete, it’s time to display it! Consider these factors to ensure your piece shines:

Placement

  • Focus Point: Ideally, place your driftwood wall art mountain in an area where it can be a focal point, such as above a fireplace, in a hallway, or as the centerpiece of a gallery wall.
  • Lighting: Good lighting can enhance the natural textures and details of your driftwood art. Natural light or strategically placed lamps can make a big difference.

Maintenance

  • Dusting: Regularly dust your driftwood art with a soft brush or cloth to keep it looking its best.
  • Avoid Moisture: While driftwood is weathered, it’s still best to avoid placing it in overly humid areas to prevent further deterioration.

Conclusion

Creating a driftwood wall art mountain is not only a fun and rewarding project but also a way to bring the beauty and tranquility of nature into your home. Whether you’re an experienced artist or a beginner looking for a new hobby, working with driftwood allows for endless creativity and the opportunity to produce a truly unique piece of art.

So, next time you find yourself strolling along the beach or a lake, keep an eye out for interesting pieces of driftwood. With a little imagination and some effort, you can transform these natural treasures into stunning mountain art that will captivate and inspire anyone who sees it. Happy crafting!

Filed Under: Driftwood Ideas Tagged With: DIY Crafts, driftwood art, Mountain Art, Rustic Decor, Wall Decor

Driftwood Crafts Wall Hangings Art

June 19, 2024 by admin

You’ve stumbled upon a treasure trove of creativity with “Driftwood Crafts Wall Hangings Art.” In this article, you’ll explore the captivating world of turning humble driftwood into stunning wall art. Each piece of driftwood, weathered and shaped by the sea, holds its own unique charm, ready to be transformed into a beautiful hanging for your home. Discover DIY tips, design ideas, and the joy of bringing a bit of nature indoors with these handmade creations. Dive into this artistic adventure and let your imagination set sail! Have you ever come across a piece of driftwood and thought about its journey through the elements to arrive in its current state? This natural treasure, shaped by water and time, presents an ideal medium for creating beautiful, rustic wall hangings. Driftwood crafts wall hangings art allows you to bring a piece of nature’s artistry into your home, merging the organic with your creative expression. Let’s dive into the world of driftwood wall hangings and explore how you can turn simple pieces of wood into striking art.

The Beauty of Driftwood

Driftwood Crafts Wall Hangings Art

When you look at a piece of driftwood, you’re seeing the result of a long, transformative journey. Its unique texture and shape come from the relentless work of water, wind, and sun. Driftwood boasts an array of earthy tones and intricate patterns – each piece distinct from the next. This individuality makes driftwood an excellent material for crafting one-of-a-kind wall hangings.

Why Driftwood?

Driftwood has many appealing qualities:

  • Natural Aesthetic: Its organic look blends seamlessly into various decorating styles.
  • Sustainability: Using driftwood for crafts is an environmentally-friendly practice, as it repurposes natural elements.
  • Texture and Shape: Every piece has a unique story, offering a natural element that mass-produced items can’t match.

Table of Driftwood Properties and Benefits

PropertyBenefit
Unique ShapeOne-of-a-kind art pieces
Natural TonesComplement various interior designs
Eco-FriendlySustainable and repurposed material
Textured SurfaceAdds depth and interest to art

Gathering Driftwood

Finding the perfect piece of driftwood is an adventure in itself. Whether you’re strolling along a beach, riverbank, or lake, keep an eye out for pieces with interesting shapes and textures.

Where to Find Driftwood

Driftwood can be found in various natural settings, especially:

  • Beaches: Coastal areas are hotspots for driftwood, with plenty of variety.
  • Rivers and Lakes: Inland bodies of water can also have driftwood, often with a different character compared to coastal wood.
  • Local Stores: Some crafting stores or online marketplaces sell driftwood if you’re not near a natural source.

Driftwood Crafts Wall Hangings Art

Preparing Your Driftwood

Before you start your craft, it’s crucial to clean and prepare your driftwood. This process ensures that your art will be both beautiful and durable.

Cleaning Driftwood

You can follow these steps to clean your driftwood:

  1. Rinse Thoroughly: Wash the driftwood with fresh water to remove any debris or salt.
  2. Soak: Submerge the driftwood in a mixture of water and a mild bleach solution (1 part bleach to 9 parts water) for 1-2 days to kill any organisms or bacteria.
  3. Scrub: Use a brush to scrub off any remaining dirt.
  4. Dry: Let the driftwood dry completely in the sun to ensure it is free of moisture.

Designing Your Wall Hanging

The design phase is where your creativity truly shines. Consider the overall theme and style you want to achieve with your wall hanging.

Concept and Inspiration

Where do you find inspiration for your driftwood art? Nature itself is often the best muse:

  • Floral Motifs: Use driftwood to create the forms of flowers or trees.
  • Geometric Designs: Combine several pieces of driftwood to form geometric shapes.
  • Abstract Art: Embrace the natural irregularity and texture of the wood for a more abstract design.

Tools and Materials

Here are the basic tools and materials needed for most driftwood wall hanging projects:

  • Glue or Epoxy: For attaching pieces of wood together.
  • String or Wire: For hanging or embellishing pieces.
  • Drill or Dremel Tool: To create holes for hanging or stringing pieces.
  • Screws or Nails: For secure attachments.
  • Sealer: To protect the wood and enhance its natural hues.

Table of Tools and Materials

Tool/MaterialPurpose
Glue/EpoxyAttaching wood pieces securely
String/WireHanging and embellishing
Drill/Dremel ToolCreating precise holes for hanging
Screws/NailsSecure attachments
SealerProtecting and enhancing the wood

Driftwood Crafts Wall Hangings Art

Creating Your Driftwood Wall Hanging

Now that you have your materials and design in mind, it’s time to bring your vision to life.

Step-by-Step Process

Here’s a step-by-step guide to creating a simple driftwood wall hanging:

  1. Plan Your Layout: Arrange your driftwood pieces on a flat surface. Play around with the arrangement until you find a composition you like.
  2. Cut and Shape: If needed, cut the driftwood into desired shapes. Sand any rough edges to ensure they’re smooth.
  3. Drill Holes: Drill small holes where you plan to thread the string or wire.
  4. Attach Pieces: Use glue or epoxy to attach pieces together. Be sure to let it cure fully.
  5. Seal the Wood: Apply a coat of sealer to protect the driftwood and bring out its natural color.
  6. Hang: Thread string or wire through the drilled holes and securely tie off the ends. Attach a hook or loop for wall hanging.

Personalize Your Wall Hanging

Adding personal touches to your driftwood wall hanging makes it even more special. Consider these ideas for customization:

Adding Color

Incorporating color can make your wall hanging pop. Options include:

  • Paint: Use acrylic paint to add accents or fully color some of the wood pieces.
  • Stains: Apply wood stains to enhance the natural grain and provide a more uniform appearance.

Embellishments

Consider adding different elements to your artwork, such as:

  • Shells and Stones: Glue small shells or polished stones to the driftwood.
  • Textiles: Weave in fabric or thread to add texture and color.
  • Personal Mementos: Attach small keepsakes for a more personal touch.

Maintaining Your Driftwood Art

Proper maintenance ensures that your driftwood wall hanging remains beautiful for years to come. Here are some tips for keeping your art in great shape:

Indoor Care

  • Dust Regularly: Use a soft brush or cloth to gently remove dust.
  • Avoid Direct Sunlight: Prolonged exposure to direct sunlight can cause the wood to fade or crack.

Outdoor Care

If you plan to display your driftwood art outdoors:

  • Use Outdoor Sealer: Apply a sealant designed for outdoor use to protect against the elements.
  • Shield from Extreme Weather: Try to place your artwork in a sheltered area to avoid direct rain or snow exposure.

Driftwood Art: Beyond Wall Hangings

While wall hangings are a wonderful way to display driftwood, this versatile material can be used for numerous other types of art and crafts. Consider expanding your driftwood creations with these ideas:

Furniture

Driftwood can create unique, rustic furniture pieces such as:

  • Tables: Use larger driftwood pieces for table legs combined with a glass or wooden top.
  • Shelves: Mount driftwood on the wall as natural shelving.

Home Decor

Add driftwood elements throughout your home:

  • Centerpieces: Combine driftwood with candles or flowers as a stunning table centerpiece.
  • Mirrors and Frames: Frame mirrors or photos with driftwood for a coastal, chic look.

Jewelry

Smaller pieces of driftwood can be crafted into:

  • Necklaces: Carve or attach charms to driftwood pieces.
  • Bracelets: Shape driftwood into smooth, wearable pieces.

Sharing Your Art

Creating driftwood art is not only about personal enjoyment but can also be a fulfilling way to connect with others. Here’s how you can share your driftwood creations:

Gifting

Handmade driftwood wall hangings make thoughtful, personalized gifts for:

  • Housewarmings: A unique piece of driftwood art can be a charming addition to a new home.
  • Birthdays: Customized art that reflects the recipient’s personality is always appreciated.
  • Weddings: Driftwood art can serve as a meaningful, handcrafted wedding gift.

Selling Your Art

If you find yourself with a surplus of driftwood art, consider selling your pieces. Platforms like Etsy provide a marketplace for handmade crafts. Be sure to:

  • Take Quality Photos: Good lighting and clear images make a big difference in online sales.
  • Write Detailed Descriptions: Include the size, materials, and any special care instructions for your art.

Hosting Workshops

Share your skills and passion for driftwood art by hosting workshops. This can be a fun way to teach others and build a community of craft enthusiasts:

  • Local Craft Stores: Partner with craft stores or community centers to host in-person workshops.
  • Online Tutorials: Create video tutorials or live online classes to reach a wider audience.

Conclusion

Driftwood crafts wall hangings art bring the beauty of nature into your home, allowing you to create personal and unique pieces that tell a story. Whether you’re a seasoned crafter or just starting, the possibilities are endless. From sourcing and preparing your driftwood to designing and creating a stunning wall hanging, each step is an opportunity to unleash your creativity and connect with the natural world. So next time you come across a piece of driftwood, don’t just walk past it – pick it up, take it home, and let your imagination turn this simple yet extraordinary material into a beautiful work of art. Happy crafting!

Filed Under: Driftwood Ideas Tagged With: DIY Crafts, Driftwood, Handmade Art, home decor, Wall Hangings

  • Page 1
  • Page 2
  • Next Page »

Primary Sidebar

Driftwood4us.com, is a participant in the Amazon Services LLC Associates Program, an affiliate advertising program designed to provide a means for sites to earn advertising fees by advertising and linking to amazon.com.