• Skip to main content
  • Skip to primary sidebar
  • Terms and Conditions
  • Privacy Policy
  • Contact

Driftwood 4 Us

Just About Driftwood

DIY Project

Driftwood Mobile Diy

May 29, 2025 by admin

Have you ever wandered along a sunlit beach and stumbled upon a uniquely shaped piece of driftwood, its weathered texture telling a story of time and tide? If so, you’re not alone! Driftwood’s natural beauty and rustic charm make it a popular choice for home decor, especially when it comes to creating stunning mobiles. Making a driftwood mobile can be a delightful and creative way to bring a piece of nature into your home. Not only is it an enjoyable project, but it also offers a wonderful opportunity to express your creativity.

Driftwood Mobile Diy

What is Driftwood?

Driftwood is essentially any piece of wood that has been washed ashore by the action of tides, winds, or currents. Over time, the continuous motion of the sea smooths its surface, creating an organic, natural texture that is both visually appealing and tactile. These pieces can vary greatly in size, shape, and color, making each piece unique.

Where to Find Driftwood

Finding the right piece of driftwood is the first step in creating your mobile. Often, you’ll find driftwood on beaches along lakes, rivers, and oceans. It’s important to check local regulations before collecting driftwood, as some areas consider it a protected resource. Plan your collection during low tide when the shoreline is more exposed.

Why Choose Driftwood for a Mobile?

Driftwood is not only visually appealing but also highly durable. Its natural resilience to water makes it a lasting part of any decor feature. Moreover, using driftwood supports a sustainable lifestyle by repurposing natural materials rather than relying on manufactured products. A driftwood mobile can effortlessly blend with various interior design themes, whether you prefer modern minimalistic, rustic, or coastal.

Materials You’ll Need

Getting started on your driftwood mobile DIY project is exciting. Let’s prepare by gathering the materials and tools necessary for this craft. Ensure you have the following items ready before you start:

Material/ToolPurpose
Driftwood piecesThe main component of your mobile.
Fishing line or twineFor suspending the driftwood pieces.
Hooks or eye screwsTo attach pieces of driftwood to each other.
Beads and seashellsOptional decorations to add visual interest.
ScissorsTo cut the line or twine to the desired length.
Drill or screwdriverFor making holes in driftwood, if needed.
SandpaperTo smooth any rough edges or surfaces on the driftwood.

Tips on Selecting Your Materials

Choose driftwood pieces of varying lengths and widths for an attractive, layered effect. It’s essential to ensure that the twine or fishing line is durable enough to support the weight of each piece. Lightly sanding the driftwood can help ensure a safer handling experience and improve the longevity of your mobile.

Preparing Your Driftwood

Once you’ve collected your driftwood and gathered necessary materials, the next step is preparation. Preparing the driftwood is a straightforward process that ensures your creation is both a lasting and beautiful one.

Cleaning and Drying

Cleaning your driftwood before use is important to remove any residual sea salt, sand, or potential pests that might inhabit the wood. Here’s a simple cleaning process:

  1. Rinse the driftwood pieces thoroughly with fresh water to wash away salt and sand.
  2. Soak them in a mixture of water and mild bleach for a few hours. This step helps in disinfecting them.
  3. Rinse again and let them dry completely in a sunny spot. This could take a few days, depending on the size and thickness of the wood.

Inspecting and Sanding

After your pieces are cleaned and dried, inspect them for any sharp edges or splintering. Using sandpaper, smooth out any rough areas to prevent injury and to ensure the pieces look polished once they’re assembled.

Designing Your Mobile

The design phase is where your creativity truly gets to shine. Consider the final location of your mobile and how it might complement or contrast with existing decor.

Determining the Arrangement

A balanced design starts with experimentation. Lay out your driftwood pieces on a large flat surface and try several configurations until you find one that pleases you. Consider varying the distance between pieces and testing different combinations of long and short pieces.

Adding Additional Elements

Adding beads, seashells, or other natural elements can enhance your mobile’s aesthetic. Incorporate these elements by threading them onto the fishing line or twine, placing them between each driftwood piece for added visual interest.

Driftwood Mobile Diy

Assembling Your Driftwood Mobile

With a design in mind and supplies ready, it’s time to bring your mobile to life. The assembly process requires a bit of patience and precision to ensure each piece hangs correctly.

Drilling and Connecting

For large or heavy pieces, drilling small holes for hooks or eye screws is the first step. Ensure the holes are centered to maintain balance. For lighter pieces, a simple knot may suffice.

  1. Drill holes where necessary on each piece of driftwood.
  2. Attach the eye screws or hooks.
  3. Tie the fishing line or twine to each piece, leaving enough length for it to dangle at your desired height.

Balancing Your Mobile

Achieving balance is crucial to ensure that your mobile hangs freely and doesn’t tip. Make adjustments as necessary by shortening or lengthening the line between pieces or shifting the position of the line along the driftwood. This process might need some trial and error, so don’t hesitate to rearrange until you’re satisfied with the balance.

Displaying Your Driftwood Mobile

Your mobile is now assembled and ready to display! Consider where it will have the most visual impact and be sure it’s safe from playful pets or areas of high traffic that could cause it to swing aggressively.

Best Places to Hang a Mobile

Driftwood mobiles look stunning in a variety of settings:

  • Living rooms: An ideal space, especially near a window where natural light accentuates the wood texture.
  • Bedrooms: Above the bed or in a reading nook as a comforting, calming piece.
  • Outdoor spaces: Hang it on a porch or patio, but ensure it’s protected from extreme weather when necessary.

Proper Hanging Techniques

When hanging your mobile, ensure that the overhead support can handle the weight of the mobile. Using a strong ceiling hook is essential. If hanging near a window, confirm that the mobile won’t be obstructed by curtains or blinds.

Maintenance and Care

To keep your driftwood mobile looking pristine, periodic maintenance is necessary. This involves gentle cleaning and inspection to ensure the safety and aesthetic integrity of the mobile.

Cleaning Your Mobile

Over time, dust accumulation is expected. Use a soft cloth or feather duster to gently remove dust from the driftwood and additional elements. If your mobile includes easily removable decorations, you might want to clean them separately.

Long-Term Tips

Avoid exposing your mobile to excessive moisture, which could lead to mold or mildew growth. Consider occasionally inspecting the twine or fishing line for wear, which can weaken over time and potentially cause your mobile to fall.

Conclusion

Creating a driftwood mobile is an enriching experience that combines collecting, crafting, and decorating. It not only adds a personal touch to your home decor but also reminds you of the serene beauty of nature. Whether placed in your living room, bedroom, or outdoor patio, a driftwood mobile captures attention and resonates with calm. With the right tools, creativity, and a bit of patience, you can craft a piece that is distinctly yours.

If you haven’t already tried making your own driftwood mobile, maybe it’s time to plan a beach trip or visit your local lakefront for some inspiration. Remember to enjoy the process—it’s just as beautiful as the result!


Filed Under: Driftwood Ideas Tagged With: craft, DIY Project, Driftwood, home decor, Mobile

Driftwood Lamp Diy How To Make

May 5, 2025 by admin

Have you ever found yourself strolling along a beach or riverbank, captivated by the unique, organic beauty of driftwood? What if you could transform those intriguing pieces of nature into a beautiful, functional item for your home? Creating a driftwood lamp is not only a creative project but also a way to bring a touch of nature’s artistry into your living space. If you’ve ever been curious about how to make a driftwood lamp yourself, you’re in the right place!

Driftwood Lamp Diy How To Make

Understanding Driftwood and Its Appeal

Driftwood is essentially wood that has been washed onto a shore or riverbank after being at sea or in the water. Over time, it becomes smoothed and uniquely shaped due to the effects of weathering, making each piece one of a kind. The process of selecting the right driftwood is vital for creating a visually appealing lamp.

Why Driftwood?

Driftwood embodies the notion of wabi-sabi, the Japanese aesthetic centered around accepting the imperfect and transient nature of things. Its natural variability and distinctive appearance make it an intriguing choice for home decor. Crafting with driftwood allows you to create something that is both useful and aesthetic while repurposing mother nature’s handiwork into something of personal significance.

Selecting the Perfect Driftwood

Your journey begins with selecting the right piece of driftwood. Look for wood that is dry and free from excessive moisture. The texture, shape, and size of the driftwood will influence the final design of your lamp. It’s important to choose pieces that not only appeal to you visually but also conform to practical requirements such as stability and size.

Preparing the Driftwood

Before starting the project, it’s necessary to clean the driftwood thoroughly. This involves removing sand, salt, and any small organisms that may have made a home on your chosen piece. You can do this by soaking the driftwood in a mixture of water and bleach, which will help to sanitize it. Rinse it thoroughly and let it dry completely before proceeding.

Planning Your Driftwood Lamp

Creating a driftwood lamp requires a few materials and tools. Proper planning and gathering of supplies will save you time and effort as you progress.

Gathering Supplies

Here’s a simple table summarizing the materials and tools you’ll need:

MaterialsTools
DriftwoodPower Drill
Lamp kit (including cord, socket, harp, and switch)Sandpaper
Lamp base (optional)Screwdriver
LampshadeHot glue gun or wood glue
ScrewsClamps (optional for stability)

Designing the Lamp

This is where your creativity can shine. Visualize how you want your lamp to look. Consider whether you’d like your lamp to be tall and slender or more compact and robust. Will you use one large piece of driftwood or several smaller ones? Sketch your ideas to serve as a roadmap for assembly. Keep in mind the stability and the balance of the lamp when designing, as well as the placement of the electrical components.

Step-by-Step Guide to Making Your Driftwood Lamp

Now that you have your driftwood and your supplies, let’s proceed with making your driftwood lamp. Below, you’ll find detailed steps that guide you from start to finish.

Step 1: Assemble the Lamp Kit

The lamp kit is the core of your lamp’s functionality. Begin by assembling the kit components. This typically includes a cord, socket, and switch. Follow the instructions provided with the kit to ensure proper setup. Test the lamp kit separately to ensure it works properly before integrating it with your driftwood.

Step 2: Drill Holes into the Driftwood

Carefully decide where and how you will route the lamp’s cord through the driftwood. Based on your design, drill holes accordingly. A power drill fitted with a long drill bit will be necessary to bore through the wood. Take your time with this step to prevent cracking or splintering your driftwood.

Step 3: Secure the Driftwood Pieces

If you are using multiple pieces of driftwood to construct your lamp, you will need to secure them together. Use a hot glue gun or wood glue to bond the pieces. Clamps can be helpful to hold the pieces securely until the glue dries completely.

Step 4: Attach the Lamp Kit

Once the driftwood structure is stable, integrate the lamp kit. Feed the cord through the pre-drilled holes and attach it to the socket setup. Secure the socket firmly in place at the top of the driftwood, where the light bulb will be positioned.

Step 5: Affix a Lamp Base (If Necessary)

Depending on your driftwood design, you may require a base to balance the lamp securely. A base can be crafted from a flat, sturdy piece of wood or purchased pre-made. Securely attach the driftwood to the base using screws or strong adhesive.

Step 6: Finishing Touches

Once assembled, smooth the surface of the driftwood using sandpaper to eliminate rough edges and achieve a polished finish. You may choose to treat the wood with a clear, protective finish that will enhance its natural color and preserve it.

Step 7: Install a Lampshade

Choose a lampshade that complements the natural beauty of the driftwood. Play around with different colors and materials to see what suits your space best. Secure the lampshade to the socket, following the instructions provided with your lamp kit.

Caring for Your Driftwood Lamp

To ensure your driftwood lamp continues to brighten your space beautifully, a bit of maintenance is required. Keep it away from high-moisture areas and dust it regularly. The lamp, being an organic piece, should not be exposed to excessive humidity which can degrade the wood over time.

Enhancing Environmental and Aesthetic Appeal

This project isn’t just about creating a lamp; it’s a way to bring a piece of the natural world into your home while reusing found materials in a creative manner. Each time you look at your lamp, you’ll be reminded of the hands-on craftsmanship and the unique patterns nature has crafted for you.

Driftwood Lamp Diy How To Make

Conclusion

By following these steps, you’ll have crafted a driftwood lamp that is not just functional but also a conversation piece, making it a wonderful addition to your home decor. This project not only turns beachcombing finds into a work of art but also provides you with a sense of accomplishment as you transform natural beauty into an everyday essential.

Filed Under: Driftwood Ideas Tagged With: crafting, DIY Project, Driftwood, home decor, Lamp

Driftwood Key Rack

February 20, 2025 by admin

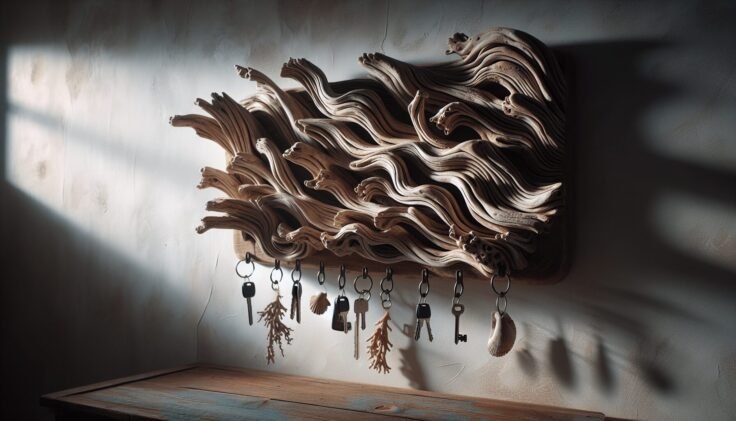
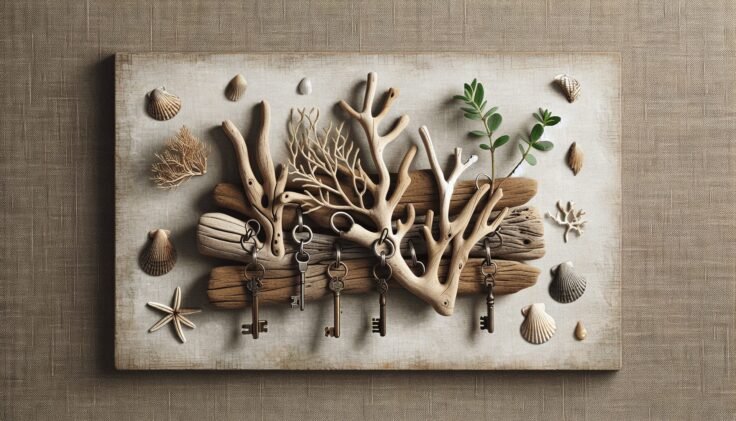
Have you ever wondered how you could add a touch of rustic charm to your home’s decor while also organizing your keys in a stylish manner? The driftwood key rack might just be the perfect solution for you. This unique and visually appealing piece not only serves a functional purpose but also adds an element of natural beauty to any space. In this guide, you’ll discover everything you need to know about driftwood key racks, from their natural allure to how you can make one yourself.

The Allure of Driftwood

Driftwood has captivated the human imagination for centuries with its distinctive textures and organic shapes. Washed ashore by the gentle embrace of the tides, each piece of driftwood tells a story of its journey through the water. This history imbues the wood with a unique character that makes it a popular choice for home decor enthusiasts looking to bring an element of nature into their living spaces.

Why Driftwood?

So, why choose driftwood for a key rack? The appeal of driftwood lies not just in its aesthetic beauty, but also in its sustainable and eco-friendly nature. By using driftwood, you’re repurposing a natural material that would otherwise go unnoticed on a beach. It’s an excellent way to incorporate beachcombing finds into your home, blending sustainability with style.

A Touch of Nature

A driftwood key rack serves as more than just a practical solution for corralling your keys. Its natural appearance can subtly shift the ambiance of your room. Whether your decor is modern, rustic, or coastal, the organic lines and soft hues of driftwood create a harmonious balance with various design schemes.

Essential Qualities of a Driftwood Key Rack

When considering a driftwood key rack for your home, there are several qualities that enhance both its function and its role as a decorative piece. Taking these into account will help you select the perfect piece or guide you in creating your own.

Functionality

At its core, a key rack needs to hold keys effectively. This involves ensuring that your rack has an adequate number of hooks or pegs and that they are spaced appropriately to accommodate your key collection. Opt for sturdy metal hooks that can support the weight and variety of keys you intend to hang.

Aesthetic Value

The uniqueness of each piece of driftwood means that no two key racks are exactly alike. Some people are drawn to smoother, paler pieces, reminiscent of bleached sand, while others may prefer darker, rugged pieces with interesting contours. Consider what aesthetic will best fit into your existing decor.

Size Considerations

The size of your driftwood key rack depends on where you plan to place it and how many keys you need it to hold. Ideally, your key rack should fit comfortably on the wall or surface you’ve chosen without appearing overwhelming or underwhelming in the space.

Driftwood Key Rack

DIY Driftwood Key Rack

Creating your own driftwood key rack can be an incredibly satisfying project that results in a personalized piece of functional art.

Gathering Materials

Here’s a checklist of what you might need:

  • Driftwood: Choose a piece of wood that fits your aesthetic preference and the available space.
  • Hooks or Pegs: You can find various styles in home improvement stores.
  • Screws and Screwdriver: For attaching the hooks to the driftwood.
  • Sandpaper: To smooth out any rough edges.
  • Sealant: To preserve the driftwood and protect it from moisture.
  • Mounting Hardware: To secure your rack to the wall.

Steps to Build Your Own Key Rack

  1. Prepare the Driftwood: Wash and dry your piece of driftwood thoroughly. This ensures that it is clean and ready for use. Sand down any sharp edges to prevent injury.

  2. Design Layout: Plan where the hooks will be attached. Ensure they are evenly spaced and not too close to the edges.

  3. Attach Hooks: Use screws to secure the hooks to the driftwood. Ensure they are firmly in place to support the weight of the keys.

  4. Seal the Wood: Apply a protective sealant to the driftwood. This step protects the wood from moisture and helps maintain its appearance over time.

  5. Mount the Rack: Use appropriate hardware to mount your new key rack securely to the wall. Ensure it is level and sturdy.

Personalizing Your Key Rack

Consider adding personal touches to your key rack to make it truly yours. You might paint or stencil designs, attach small ornaments like seashells, or use different colored hooks for added visual interest.

Benefits of a Driftwood Key Rack

A driftwood key rack offers several appealing benefits that go beyond mere functionality.

Organization

A key rack is a simple yet effective way to keep your keys organized and easily accessible. You’ll no longer need to waste time searching for misplaced keys in the morning rush.

Eco-Friendly Decor

Creating or purchasing a driftwood key rack contributes to an eco-friendly lifestyle. By using materials that are already part of the natural environment, you make a smaller carbon footprint and support sustainable living practices.

Unique Aesthetic

The natural variability of driftwood ensures that your key rack is a unique piece with its texture, shape, and color. It stands as a testament to the beauty of nature’s handiwork.

Conversation Starter

A stunning piece of driftwood hanging on your wall is bound to catch the eye of visitors. It not only adds character to your home but also often becomes a conversation starter, inviting stories of coastal adventures and sustainable choices.

Driftwood Key Rack

The Versatility of Driftwood Key Racks

Driftwood’s flexibility in design allows it to seamlessly integrate into a variety of home styles, making it an essential addition for those looking to enhance their interior decor.

Coastal Homes

For homes with an oceanic or nautical theme, a driftwood key rack is a natural fit. It complements the relaxed, beachy atmosphere, and can be further decorated with small marine elements like starfish or anchors.

Rustic Interiors

Driftwood, with its naturally weathered look, aligns perfectly with rustic homes. Complement a farmhouse style kitchen or a cozy living room with this earthy, raw material that complements metal and weathered wood accents.

Modern Spaces

Believe it or not, driftwood can even work in minimalist and modern interiors. When paired with sleek metal hooks and clean lines, its organic texture offers just the right amount of contrast to soften a modern space.

Bohemian Vibes

If your home leans towards a more eclectic, bohemian style, a driftwood key rack can add an organic element that works well with global-inspired textiles and earthy tones. It’s an excellent addition to a space rich in textures and patterns.

Purchasing a Driftwood Key Rack

While making your own driftwood key rack can be a rewarding endeavor, not everyone has the time or resources to do so. Thankfully, there are plenty of retailers and artisans that offer ready-made driftwood key racks.

Online Marketplaces

Platforms like Etsy and Amazon have a wide variety of handmade driftwood key racks, allowing you to support small businesses while finding a piece that suits your taste. You can often contact the creators directly for custom designs.

Local Makers

Consider visiting local craft fairs or artisan markets. Many craftsmen and women specialize in using reclaimed natural materials, including driftwood, to create beautiful home decor pieces.

Specialty Stores

Boutiques or home decor stores located in coastal areas tend to carry driftwood products. Visiting these stores can give you new ideas or inspiration, even if you don’t purchase anything right away.

Caring for Your Driftwood Key Rack

To ensure that your driftwood key rack retains its beauty and functionality, you need to care for it properly. Driftwood is relatively low maintenance, but some simple steps will keep it looking its best.

Regular Dusting

Dust your key rack regularly with a soft cloth or duster. Doing so keeps it clean and maintains its natural luster.

Avoid Moisture

If your driftwood hasn’t been sealed, avoid exposing it to moisture. Humidity can compromise its integrity over time. If you notice the wood becoming excessively dry or brittle, consider applying a sealant to protect it.

Occasional Re-Sealing

If your driftwood key rack is located in a humid environment, you might want to reapply a sealant occasionally to prolong its lifespan and maintain its appearance.

Preventing Damage

Ensure that the rack is not overloaded with keys or heavy items, which might stress the attachments and wood. Regularly check that hooks are secure and perform any needed maintenance.

Conclusion

Incorporating a driftwood key rack into your home is a simple and stylish way to organize your keys while infusing your space with the natural beauty of the sea. Whether you choose to craft one yourself or purchase one from a skilled artisan, the unique qualities of driftwood make it an attractive and functional addition to any home. So, why not consider inviting this piece of nature’s artistry into your space today? Embrace the charm of driftwood and enjoy the elegance and practicality it brings to your everyday life.

Filed Under: Driftwood Ideas Tagged With: DIY Project, Driftwood, Handmade, home decor, Key Rack

Driftwood Keychain Diy

February 19, 2025 by admin

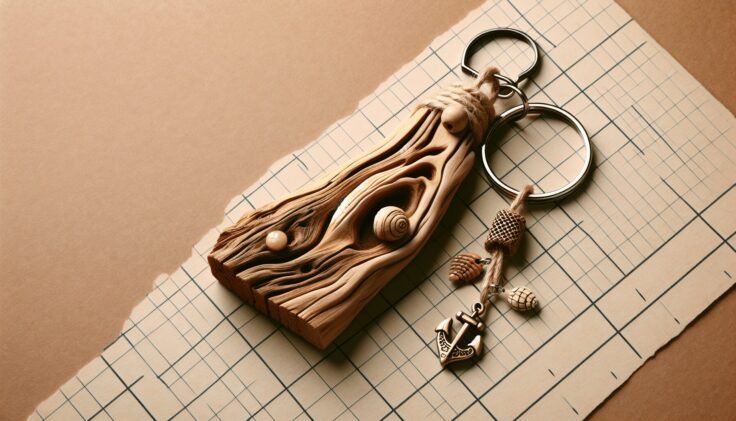
Have you ever admired the charm of driftwood when you visit a beach or a lakeside? There’s something magical about the way pieces of wood are weathered by the untamed forces of nature, crafting unique textures and forms. Driftwood carries a story, molded by the waves and elements over time. What if you could transform these beautiful relics into something both artistic and functional? Making a driftwood keychain is not only a great way to preserve a piece of your favorite shoreline, but also to carry a memory with you wherever you go. Let’s embark on this enjoyable and rewarding DIY journey together.

Understanding Driftwood

Driftwood is wood that has been washed onto a shore or beach by the action of winds, tides, or waves. It is often smoothed and worn into interesting and intriguing shapes. Driftwood is prized not only for its unique appearance but also for its sustainable and organic qualities. Before starting your keychain project, it’s essential to know a bit about this lovely material.

The Origins of Driftwood

Driftwood can originate from various sources. It might come from trees or shrubs that live by the water’s edge, carried away by floods or tides. Many pieces of driftwood begin as parts of larger logs or branches that get washed away by rivers. Over time, ocean currents carry this wood, breaking it down into smaller pieces with unique shapes.

The Fascination with Driftwood

The appeal of driftwood lies in its individuality and natural beauty. Each piece has its own texture and form, shaped by the elements over time. This individuality lets you create keychains that are as unique as the driftwood itself. Plus, using an eco-friendly material like driftwood aligns with a sustainable lifestyle, making it an ethical choice for DIY projects.

Gathering Driftwood

Now that you appreciate the beauty of driftwood, it’s time to gather some pieces for your project. The best places to find driftwood are beaches, lakesides, and riverbeds. Let’s walk through a few steps on how to collect the ideal pieces.

Locating Your Treasures

Whether you’re walking along a sandy beach or a rocky lakeside, look for pieces that appeal to you. Consider their size, shape, and texture. Remember, you’re looking for small pieces that would work well as keychain accents. It’s helpful to note that some beaches might have restrictions on collecting natural objects, so always be mindful of local regulations.

Choosing the Right Pieces

For a keychain, you would want small, lightweight pieces. Look for pieces that fit comfortably in your hand and have enough thickness to withstand day-to-day wear as a keychain. Aim for those that have interesting shapes or textures. Don’t forget, each piece you choose tells a unique story through its form and pattern.

Driftwood Keychain Diy

Preparing Your Driftwood

Once you’ve gathered your chosen pieces, it’s crucial to prepare them for use. Preparing driftwood adequately ensures they are clean, preserved, and ready for conversion into a keychain.

Cleaning Driftwood

Driftwood may be covered in dirt, sand, or salt due to its time spent in the wild. Start by rinsing your collection with fresh water, scrubbing them with a brush to remove any debris. You can soak them for a few hours in fresh water to eliminate salts and other impurities. Once clean, allow them to dry thoroughly.

Sanitizing the Pieces

To sanitize the driftwood, consider boiling them for an hour. This process will remove any bacteria or organisms lingering in the wood. Once boiled, let them dry completely, preferably in a sunny spot. The drying process might take up to a few days, depending on the size and thickness of the wood.

Designing Your Keychain

With clean and sanitized driftwood, you are now ready to start designing your keychain. Designing your keychain involves creativity and a personal touch, adding charm to your everyday carry.

Choosing Your Design

The design process is all about personal preference. Would you like a simple piece of driftwood pierced through with a keychain ring? Or do you envision a cluster of smaller pieces adorned with beads? Think about the look and feel you want to achieve. Sketching out your ideas may help visualize the final product.

Embellishing Driftwood

You can enhance the natural beauty of driftwood by adding embellishments. Consider using paints, varnishes, or even metal leaf for a touch of glamour. If you’d like to incorporate additional materials like beads or charms, plan how they will attach. Use strong adhesives or creative knotting techniques to bring together these elements.

Assembling Your Keychain

Now that you have a design in mind, it’s time to assemble your keychain. Assembling requires a few tools and materials which are easy to find and use.

Tools and Materials Needed

Here is what you will need to assemble your driftwood keychain:

Tool/MaterialPurpose
Keychain ringsTo attach your driftwood piece to your keys.
Drill with a small drill bitFor creating holes if needed.
Sandpaper (fine grit)To smooth any rough edges.
Strong adhesive (e.g., epoxy)For attaching embellishments.
Paint, beads, charms (optional)For decoration.

Step-by-Step Assembly

  1. Prepare the Driftwood: Ensure your driftwood piece is clean, dry, and any rough edges are sanded down for smooth handling.

  2. Drill Holes: Use the drill to make a small hole at the top of the driftwood piece if you plan to string it directly onto a keychain ring.

  3. Add Embellishments: If using paints or other decorative items, apply them now. Allow any adhesives or paint to dry as per the instructions on their packaging.

  4. Attach to Keychain: Thread the driftwood onto the keychain ring through the drilled hole or attach using your chosen method (e.g., adhesive with additional décor elements).

  5. Finishing Touches: Once all pieces are assembled and dried, ensure everything is secure and the keychain looks as you imagined.

Tips for Success

Creating a driftwood keychain is a rewarding process, but there are some tips and tricks to ensure everything goes smoothly.

Playing with Proportions

When designing your keychain, consider the proportion relative to your keys and other objects you carry. A bulky or oversized keychain might not be practical for daily use.

Sealing Driftwood

To maintain the beauty of your driftwood and protect it against daily wear, consider sealing it with a clear wood sealant. This step adds durability while enhancing its natural shine.

Personalization Ideas

Personalize your keychain for yourself or as a gift. Carve initials into the wood or add charms representing a favorite hobby or memory. Personal touches make your keychain truly unique.

Cherishing Your Creation

Congratulations on creating your unique driftwood keychain! This project not only results in something stylish and practical for yourself but can also be a memorable gift for loved ones. Driftwood keychains carry both a personal and natural narrative, encouraging you and others to appreciate the artistry found in nature and the joy of crafting with your own hands.

Your driftwood keychain is now more than an accessory; it’s a testament to creativity and the timeless beauty of nature. Enjoy the satisfaction of carrying your little piece of nature with you wherever you go, always reminding you of the power and wonder of the natural world.

Filed Under: Driftwood Ideas Tagged With: crafting, DIY Project, Driftwood, Handmade, Keychain

Driftwood Address Sign

November 4, 2024 by admin

Have you ever thought about how a simple piece of driftwood can transform into a charming address sign that perfectly accents your home’s entrance? If creating unique and artistic home décor ideas excites you, then driftwood might be the perfect medium to express your creative flair. Adding a driftwood address sign to your home not only emphasizes a natural aesthetic but also presents a unique and personalized touch. Let’s take a closer look at how you can turn pieces of driftwood into a distinctive address sign that stands out.

What is Driftwood?

Driftwood is essentially wood that has been washed onto the shore by oceans, seas, or rivers. Its journey through nature’s elements gives it a distinct weathered appearance that many find visually appealing. As a naturally sculpted material, driftwood carries an organic beauty that can be both rustic and elegant.

Where to Find Driftwood

Finding the perfect piece of driftwood can be like a treasure hunt. Generally found along beaches and riverbanks, different types of driftwood offer various textures and shapes. Ensure you respect local regulations about collecting driftwood from natural habitats as some areas may have protective laws against this activity.

The Allure of Driftwood in Home Décor

Driftwood has a warm, organic appeal that integrates easily into different design styles. Its natural variations in texture and color make each piece unique, offering a different personality that complements rustic, coastal, or even modern themes in home decor.

Why Choose a Driftwood Address Sign?

There are plenty of reasons why a driftwood address sign can be the perfect addition to your home. Apart from being visually pleasing, it brings a sense of nature and personalization to your abode.

Aesthetic Appeal

Driftwood’s natural beauty provides a distinctive aesthetic that blends seamlessly with garden or yard landscapes. Its earthy tones and textures draw attention, providing an eye-catching aspect to your home’s exterior.

Personalization

Why settle for generic when you can have bespoke? A driftwood sign allows you to choose the exact pieces and design elements that reflect your style. Whether it’s the shape of the wood, type of lettering, or additional decorative elements, your options are limitless.

Sustainability

Driftwood is a sustainable material, as it utilizes wood that’s been naturally discarded. By creating an address sign from driftwood, you help recycle and repurpose material that might otherwise go unused, making a small but meaningful contribution to environmental efforts.

Driftwood Address Sign

Getting Started with Your Driftwood Address Sign

Creating a driftwood address sign may seem daunting at first, but with the right approach, it can be an enjoyable and rewarding project. Preparing your materials and planning your design are the first steps.

Tools and Materials You Will Need

Before you dive into crafting, gather all the tools and materials that will help streamline your project. Here is a list of essentials you may need:

Tool/MaterialPurpose
DriftwoodBase material for the sign
SawCutting the driftwood to desired shapes
SandpaperSmoothing out the wood surface
Wood stain/paintFor finishing or coloring the wood
Lettering toolsPaintbrushes or stencils for text
SealantProtecting the wood from elements
Mounting hardwareScrews, brackets, or hooks for hanging

Preparing the Driftwood

Before you can begin crafting, ensure your driftwood is properly prepared. This includes cleaning, cutting, and potentially treating the wood to ensure longevity and durability.

Cleaning the Driftwood

The first step is thoroughly cleaning your driftwood. Remove any dirt, salt, or organic debris by scrubbing it with a brush and mild soap. Rinse well and let it dry under the sun, taking care to preserve its natural look.

Shaping and Sanding

Once your driftwood is clean and dry, determine if you need to cut or sand it further. Use a saw to cut the driftwood into your desired shape. Sand it to smooth out any rough edges; this ensures that the paint or stain applies smoothly and the final product is safe to handle.

Designing Your Driftwood Address Sign

Design might be the most exciting part of your project. This is where you get to express your creativity and decide how your sign will look.

Choosing the Layout

Decide on the layout that best suits your space. Consider the arrangement of numbers, choice of font, and any additional decorative elements, such as embellishments like seashells or metal elements.

Selecting the Right Lettering

The type and style of lettering will significantly impact your sign’s overall look. Whether you prefer a rustic, vintage font or a modern, sleek design, make sure it complements both the driftwood and the aesthetic of your home.

Adding Finishing Touches

Once your design is laid out, add finishing touches like color or sealant. If you wish to paint or stain your driftwood, consider colors that offer high contrast with your lettering to ensure visibility.

Driftwood Address Sign

Assembling and Installing Your Driftwood Address Sign

With preparation and design complete, it’s time to bring your driftwood address sign to life by assembling and installing it.

Assembling the Sign

Carefully apply your chosen letters and numbers to the wood. Use adhesives suitable for outdoor use if necessary, ensuring that each element is securely attached, and check that your hardware is weatherproof to withstand outdoor conditions.

Installing the Sign

Choose a prominent location where your address sign can be easily viewed from the street. Use robust mounting hardware and ensure your installation method is durable enough to handle environmental exposure.

Maintaining Your Driftwood Address Sign

To keep your driftwood address sign looking its best, regular maintenance is important. Here’s how you can protect it from the elements:

Periodic Cleaning

While driftwood has a naturally worn look, cleaning it every few months can prolong its aesthetic appeal. Wipe it with a damp cloth to remove dust or dirt and avoid harsh detergents that can strip its natural essence.

Reapplying Sealant

Outdoor elements like rain, sun, and wind can wear down your sign over time. Inspect your sign periodically and reapply a weatherproof sealant as necessary to help preserve its longevity.

Conclusion

Turning driftwood into an address sign is a creative way to personalize your home’s exterior with nature’s own artistry. The entire process, from finding your perfect driftwood piece to installing your final product, can be a fulfilling journey that showcases your impeccable taste and environmental consciousness. Whether your style is rustic or modern, a driftwood address sign promises to add a touch of organic elegance that captures attention and charm. Now that you are familiar with the steps and creative possibilities, you are ready to start your project and let your creativity shine like the piece of driftwood you’ll transform.

Filed Under: Driftwood Ideas Tagged With: Address Sign, DIY Project, Driftwood, Woodworking

Driftwood Yarn Wall Hanging

September 28, 2024 by admin

Have you ever thought about adding a unique touch of nature and artistry to your home decor? If you are looking for a project that’s both aesthetically pleasing and easy to create, a Driftwood Yarn Wall Hanging might just be the perfect addition to your living space. Whether you’re a seasoned crafter or new to DIY projects, this rustic and elegant craft combines natural elements with colorful yarn in a way that’s sure to captivate anyone who sees it.

What is a Driftwood Yarn Wall Hanging?

A driftwood yarn wall hanging is an art piece made using naturally weathered driftwood and various types of yarn. This unique wall decor item blends the softness of yarn with the rugged beauty of driftwood, creating an eye-catching centerpiece. These hangings can be as simple or as intricate as you desire, offering endless possibilities for personalization.

The Appeal of Driftwood

Driftwood has a unique charm that comes from its natural, weathered look. Found on shores around the world, these wooden pieces have been sculpted by water and wind, resulting in an organic and rustic appearance. Using driftwood in crafts adds a touch of nature to your decor, making each piece truly one-of-a-kind.

The Versatility of Yarn

Yarn offers a vast array of colors, textures, and types, making it an incredibly versatile material. Whether you prefer chunky wool, delicate cotton, or shimmering metallic fibers, you can mix and match to create various patterns and designs. This versatility allows you to tailor your wall hanging to your personal aesthetic.

Materials You’ll Need

Before you get started, gather all the necessary materials. Here’s a list to keep things simple:

MaterialPurpose
DriftwoodBase for the hanging
Yarn of various colors and texturesDecorative elements
ScissorsCutting yarn
Measuring tapeEnsuring even lengths
Glue (optional)Securing knots
Comb or brushFor fringe ends
Clear fishing line or strong threadFor hanging the driftwood

You can find driftwood at a local beach, purchase it online, or even use a branch if driftwood is hard to come by.

Driftwood Yarn Wall Hanging

Choosing Your Driftwood

Selecting the right piece of driftwood is crucial for the overall look of your wall hanging. Look for a piece that is approximately 12-24 inches long, straight but naturally textured, and free from cracks that might weaken it.

Sourcing Driftwood

If you live near a coastline, take a walk along the beach and look for driftwood pieces that catch your eye. Ensure that collecting driftwood is allowed in your area. Alternatively, online craft stores and artisans often sell pre-cleaned driftwood.

Preparing Driftwood

Once you’ve selected your driftwood, clean it thoroughly. Rinse it with water to remove any sand, salt, and debris, then let it dry completely. If desired, you can seal the driftwood with a clear varnish to preserve its color and texture. This step is optional but recommended if you want to ensure longevity.

Selecting Yarn

Choosing the right yarn can elevate your wall hanging from simple to stunning. Consider different textures and colors that will complement each other and your existing decor.

Types of Yarn

  • Wool: Adds a cozy, warm touch
  • Cotton: Lightweight and versatile
  • Acrylic: Budget-friendly and comes in numerous colors
  • Metallic: Adds a touch of glamour

Colors and Patterns

Stick to a color palette that complements your decor. Neutral tones give a minimalist feel, while bold colors can make your wall hanging a statement piece. Play with patterns such as ombre effects, stripes, or even random placements for a more eclectic look.

Driftwood Yarn Wall Hanging

Creating Your Driftwood Yarn Wall Hanging

Now that you have all your materials, it’s time to create your wall hanging. Below are the steps broken down for easy understanding.

Step 1: Cut Your Yarn

Decide the length you want your yarn to hang. For a standard project, each piece of yarn can be cut to about 36-48 inches. Fold each piece in half before attaching it to the driftwood, so it hangs in two strands.

Step 2: Attach the Yarn to the Driftwood

Attach each cut piece of yarn to the driftwood with a lark’s head knot. To do this, fold the yarn in half, place the loop over the driftwood, and pull the two loose ends through the loop. Pull tight to secure.

StepDescription
Fold YarnFold the yarn piece in half
Loop Over DriftwoodPlace the looped end over the driftwood
Pull Ends ThroughPull the loose ends through the loop and tighten

Step 3: Pattern and Design

Work from the center of the driftwood outward, deciding on your pattern as you go. You can alternate colors, create blocks of color, or even mix various textures for added depth.

Step 4: Trim and Finish

Once all the yarn is attached, trim the ends to your desired length and shape. You can create a straight cut, a V-shape, or even a fringe effect by separating the yarn strands with a comb or brush.

Step 5: Secure Knots (Optional)

If you’re worried about the knots coming loose, a small dot of glue can be applied to each knot to ensure they stay in place.

Step 6: Hang Your Work

Attach a piece of clear fishing line or thread to the ends of the driftwood for hanging. Ensure that it is balanced and straight when hanging on the wall.

Creative Variations

Feel free to experiment with different materials and techniques to make your driftwood yarn wall hanging uniquely yours.

Beads and Charms

Adding beads, charms, or small tassels can give your wall hanging an extra touch of personality. Simply string these onto the yarn before attaching it to the driftwood.

Mixed Media

Incorporate other elements like feathers, fabric strips, or lace to add variety and texture to your piece. Mixing media can make your wall hanging even more intriguing.

Dyeing Yarn

Custom dye your yarn for a personalized color palette. Natural dyes can be made from plants, fruits, and vegetables, offering a unique, eco-friendly way to add color.

Maintaining Your Wall Hanging

Although driftwood yarn wall hangings are generally low maintenance, a little care can go a long way in preserving their beauty.

Cleaning

To clean your wall hanging, gently dust it with a feather duster or a gentle vacuum attachment. Avoid using water or cleaning solutions as they might damage the yarn and wood.

Preventing Damage

Keep your wall hanging out of direct sunlight to prevent the yarn colors from fading. Avoid humid areas like bathrooms as well, as excess moisture can affect both the driftwood and yarn.

Conclusion

Creating a driftwood yarn wall hanging is a rewarding project that brings natural beauty and a personalized touch to your home decor. With a bit of creativity and a few basic materials, you can design a piece that reflects your style and complements any room. This project not only provides a creative outlet but also results in a stunning piece of art that you can be proud of.

By following the steps and tips outlined in this article, you’ll be well on your way to crafting a breathtaking driftwood yarn wall hanging that’s sure to be a conversation starter in any home. Happy crafting!

Filed Under: Driftwood Ideas Tagged With: DIY Project, Driftwood, home decor, Wall Hanging, Yarn Art

Driftwood Gnome Home

August 30, 2024 by admin

Have you ever dreamed of creating a whimsical retreat filled with magic and charm right in your backyard? A Driftwood Gnome Home might just be the perfect project for you! This enchanting DIY endeavor lets you tap into your creativity, providing a cozy abode for those mischievous little gnomes that capture our imaginations.

What is a Driftwood Gnome Home?

A Driftwood Gnome Home is essentially a small, decorative house made from collected driftwood and other natural materials. These charming structures can be used to adorn your garden, add a whimsical touch to your living space, or even as part of a larger fairy garden setup. The unique aspect of using driftwood is that each piece is inherently distinctive, shaped by the elements, bringing a piece of nature’s artistry to your project.

The Appeal of Driftwood

Driftwood has a rustic, weathered look that adds character and uniqueness to any creation. Each piece tells its own story, having traveled through rivers, lakes, or oceans before finally coming to rest on a shore. This natural material is inevitably varied in size, shape, and texture, making every gnome home completely unique.

Gnome Lore and Magic

Gnomes are mythical creatures steeped in rich folklore, often depicted as guardians of the earth, treasures, and hidden knowledge. They are commonly believed to bring good luck and protection. Building a gnome home in your garden is more than just an art project; it’s an invitation for these magical little creatures to visit and maybe share some of their good fortune with you.

Materials Needed

Building your very own Driftwood Gnome Home doesn’t require a long list of materials, but it does call for some creativity and resourcefulness.

MaterialPurpose
Driftwood PiecesMain building material for structure and aesthetics
Hot Glue GunTo securely attach driftwood pieces
Small RocksFor additional decoration and foundation support
Moss and LichenAdds a natural and lived-in look
Twigs and SticksUsed for structural components like ladders or fences
Shells and StonesDecorative elements to add to the whimsical charm
SandpaperTo smooth any rough edges
Mini FurnitureOptional, for those who want to furnish the interior

Driftwood Gnome Home

Finding and Preparing Your Driftwood

Where to Collect Driftwood

Collecting driftwood can be an adventure in itself. Ideal places to find driftwood include:

  • Beaches
  • Riverbanks
  • Lakeshores

Remember to check regulations in your area to ensure that collecting driftwood is permitted. Always take care not to disturb natural habitats or wildlife during your collection efforts.

Cleaning and Treating Driftwood

Once you’ve gathered your driftwood, it’s crucial to clean and treat it to ensure that it’s free from pests and rot. Here’s a simple guide:

  1. Rinse: Thoroughly rinse the driftwood pieces with water to remove sand, salt, and debris.
  2. Soak: Soak the pieces in a solution of water and white vinegar (1:1 ratio) for at least 24 hours. This helps to kill any pests or bacteria.
  3. Air Dry: Allow the driftwood to completely dry out in a sunny spot. This might take several days depending on the size and thickness of the wood.
  4. Sand: Use sandpaper to smooth out any rough spots and splinters.

Planning Your Driftwood Gnome Home

Selecting a Location

Choosing a suitable location for your Driftwood Gnome Home is crucial. Consider a place that’s visible but also somewhat sheltered to protect it from harsh weather conditions. Popular choices include the base of a tree, a garden bed, or even on a balcony or patio.

Designing Your Structure

Before starting the construction, sketch a simple design of how you want your gnome home to look. Think about the shape of the house, the placement of windows and doors, and any additional features you want to include.

Driftwood Gnome Home

Construction Process

Building the Foundation

A sturdy foundation is the key to a stable gnome home. Start by arranging the larger pieces of driftwood to form the base. Securely glue them together with a hot glue gun, ensuring there are no significant gaps. Small rocks can be used to fill any spaces and add stability.

Creating Walls and Roof

Once the foundation is set, start building the walls by layering driftwood pieces vertically or horizontally, depending on your design. Use the hot glue gun liberally to attach each piece securely.

For the roof, you can arrange smaller, flat pieces of driftwood or even incorporate other natural materials like bark or large leaves to create a rustic look. Ensure the roof’s pitch allows for proper water drainage if your gnome home will be outside.

Adding Doors and Windows

Cut smaller pieces of driftwood to form doors and window frames. Attach these to the main structure using the hot glue gun. You can make the windows and doors functional by adding hinges made from thin wire or simply keep them as fixed decorative elements. Adding small trinkets like tiny knobs or buttons can also enhance the door’s appearance.

Decorating Your Gnome Home

This is where your creativity can truly shine. Use moss, lichen, and small rocks to give your gnome home a natural, aged appearance. Shells and colorful stones can be added to create pathways or gardens around the structure.

Twigs can be used to make tiny fences, ladders, or bridges, and small pieces of fabric can be used as curtains or rugs. The goal is to add as many whimsical touches as possible, making the home inviting for your imaginary gnome guests.

Maintenance and Longevity

Ensuring Durability

Given that your Driftwood Gnome Home will be exposed to the elements (if placed outside), it’s essential to take steps to protect it. A clear, matte wood sealant can be sprayed over the entire structure to provide some protection against moisture. Regularly check your gnome home for any loose pieces and re-glue them as necessary.

Seasonal Care

As the seasons change, so might the condition of your gnome home. In harsh weather conditions, consider moving your Driftwood Gnome Home to a more sheltered location. You can also add seasonal decorations, such as tiny pumpkins for fall or miniature wreaths for winter, to keep the gnome home festive all year round.

Additional Projects and Ideas

Creating a Gnome Village

Why stop at just one gnome home? Consider building an entire gnome village! This project can grow over time, with each new addition bringing more charm and creativity to your garden space. Each new home can have different architectural styles or themes, creating a diverse and enchanting environment.

Incorporating Lighting

Adding tiny LED lights or fairy lights can give your gnome home a magical glow, especially at night. Solar-powered mini lights are a sustainable and easy option to keep your gnome home illuminated without having to worry about changing batteries.

Building Accessories

Enhance the charm of your gnome home with tiny furniture and accessories. This includes miniature tables and chairs, tiny garden benches, or even a tiny fire pit. Creating these small items can be an enjoyable extension of your initial project and further personalize your gnome home.

Troubleshooting Common Issues

Even with the best planning and execution, you might face some hurdles while creating your Driftwood Gnome Home. Here are some common issues and how to address them:

IssueSolution
Driftwood Pieces Not StickingUse a stronger adhesive like epoxy resin or re-sand the surfaces to ensure better adherence.
Structure UnstableReinforce with additional support pieces or add weight at the base using stones or heavier wood.
Deterioration from WeatherApply a fresh coat of sealant each year and consider moving to a more protected location during extreme weather.
Animal InterferencePlace small deterrents around the gnome home or elevate it to avoid curious pets or wildlife.

Benefits of Building a Driftwood Gnome Home

Creating a Driftwood Gnome Home is more than just a fun project. It carries numerous benefits:

  • Creativity Boost: Engaging with natural materials and envisioning a miniature world enhances your creative thinking and problem-solving skills.
  • Stress Relief: Working on a hands-on project like crafting a gnome home can be very therapeutic and a great way to reduce stress.
  • Connection with Nature: Collecting materials and spending time outdoors fosters a deeper connection with the natural world.
  • Family Activity: This can be a fantastic project to do with children, offering quality family time and educational opportunities about nature and crafting.

Conclusion

Crafting your very own Driftwood Gnome Home is a delightful project that brings imaginative charm and a touch of magic to any space. With a bit of time, creativity, and the right materials, you can create a miniature haven that celebrates the beauty of driftwood and the whimsical world of gnomes. Whether placed in a garden, on a porch, or even as a unique indoor decoration, your Driftwood Gnome Home will be a testament to your creativity and a welcoming retreat for those who still believe in a touch of magic.

So, grab your collected driftwood, fire up that hot glue gun, and let your imagination run wild! Your enchanting Driftwood Gnome Home awaits its creation and the delight it will surely bring.

Filed Under: Driftwood Ideas Tagged With: crafting, DIY Project, Driftwood, fairy garden, gnome home

Driftwood Planters Diy

August 27, 2024 by admin

Have you ever considered bringing a piece of nature’s artistry into your home as a centerpiece or a charming outdoor feature? Crafting a DIY driftwood planter could be the perfect project for you. Driftwood, with its weathered look and unique shapes, can turn a simple plant holder into a rustic, eye-catching display. This guide will show you how to create your own driftwood planters, offering step-by-step instructions and helpful tips along the way. Let’s get started!

Driftwood Planters Diy

What You’ll Need

Before diving into the process, it’s essential to gather all the necessary materials and tools. Here’s a comprehensive list to ensure you have everything at your fingertips:

Materials

  • Driftwood pieces
  • Planter or pot to fit inside the driftwood
  • Soil suitable for the type of plant you wish to grow
  • Plants or seeds

Tools

  • Hot glue gun and glue sticks or wood adhesive
  • Small saw or cutting tool
  • Hammer and nails or screws (optional)
  • Sandpaper
  • Protective gloves

Having all these items on hand will make your project easier and more enjoyable.

Selecting Your Driftwood

Driftwood can be found along beaches, riverbanks, and lakesides. When selecting driftwood, consider the following:

Size and Shape

Choose pieces that fit the dimensions of the planter you have in mind. Larger pieces work well as bases, while smaller pieces can be used for detailing.

Condition

Look for driftwood that isn’t too brittle or decayed. Sturdy pieces are essential for the structural integrity of your planter.

Unique Features

Select pieces with interesting textures or shapes to give your planter more character.

Preparing the Driftwood

Preparation is key to ensuring your planter lasts and is safe for plants. Here’s how you can prep your driftwood:

Cleaning and Sanitizing

  1. Remove Debris: Scrape off any algae, dirt, or loose particles.
  2. Soak in Water: Soak the driftwood in a solution of 9 parts water to 1 part bleach for 24 hours to kill any bacteria or insects.
  3. Rinse and Dry: Rinse thoroughly with fresh water and allow it to dry completely in the sun for a few days.

Sanding

Using sandpaper, smooth out any rough edges. This step will make the handling of driftwood safer and more aesthetically pleasing.

Building the Planter

Now comes the creative part! Designing and assembling your driftwood planter involves several steps.

Designing the Layout

Visualize how you want the planter to look. Arrange the driftwood pieces around the planter pot before attaching them to get a sense of the final product.

Cutting and Attaching

  1. Measure and Cut: Use a small saw to cut driftwood pieces to the desired size.
  2. Attach: Use a hot glue gun or wood adhesive to affix the driftwood pieces around the planter pot securely.

Optional Reinforcement

For added stability, you can use small nails or screws. Just ensure that they are not visible and do not damage the aesthetic appeal of your planter.

Driftwood Planters Diy

Planting Your Greenery

Choosing the right plants and planting them correctly will ensure your driftwood planter thrives.

Selecting Plants

When choosing plants, consider their size, water needs, and growth habits. Here are some great options for driftwood planters:

Plant TypeIdeal ConditionsExample Plants
SucculentsLow water, bright sunlightAloe Vera, Echeveria
FernsHumidity, indirect lightBoston Fern, Maidenhair
Flowering plantsModerate water, partial sunMarigolds, Pansies

Planting Process

  1. Fill with Soil: Add a layer of soil suitable for your chosen plants into the planter.
  2. Position the Plants: Gently place the plants into the soil, ensuring their roots are well-covered.
  3. Watering: Give the plants a good initial watering.

Maintenance Tips

Maintaining your driftwood planter isn’t difficult, but it does need some attention to ensure the plants continue to flourish.

Watering

Be mindful of overwatering, especially with succulents. Water according to the needs of the specific plants you have chosen.

Light

Place the planter in an area where it will receive the appropriate amount of sunlight for the plants you’ve selected.

Periodic Cleaning

Occasionally wipe down the driftwood and remove any dead leaves or debris to keep the planter looking fresh.

Frequently Asked Questions

Can I Use Driftwood from Anywhere?

Yes, but be sure to follow the sanitization process to remove any harmful organisms.

What If My Driftwood is Too Large?

You can cut larger pieces into smaller sections that fit your design needs using a small saw or cutting tool.

Can I Use Artificial Plants?

Absolutely! If maintaining live plants isn’t for you, artificial plants can provide the same aesthetic appeal without the upkeep.

Conclusion

Creating a DIY driftwood planter is a wonderful way to bring a touch of rustic charm into your home or garden. By choosing the right materials, carefully crafting your planter, and selecting suitable plants, you can create a unique and beautiful display. Enjoy the process and the natural beauty that driftwood planters can bring to your space. Happy crafting!

Filed Under: Driftwood Ideas Tagged With: DIY Project, Driftwood, gardening, home decor, Planters

Driftwood Picture Frame

August 27, 2024 by admin

Have you ever gazed upon a picture frame and wondered how you could infuse a touch of nature into its design? Crafting your own driftwood picture frame is an exciting and rewarding project that lets you bring the beauty of the coast into your home. Whether you’re framing a family photo, a cherished piece of artwork, or a scenic shot from a memorable vacation, a driftwood picture frame is the perfect way to add a captivating, rustic charm to your decor.

Driftwood Picture Frame

What is a Driftwood Picture Frame?

A driftwood picture frame is a picture frame that incorporates pieces of driftwood into its design. Driftwood, as the name suggests, consists of wood that has been washed ashore by the waves. Over time, the wood is smoothed and weathered by the elements, giving it a unique, rustic appearance. This makes driftwood an excellent material for a variety of DIY projects, including picture frames.

Benefits of Using Driftwood

Driftwood comes with several appealing attributes:

  • Natural Aesthetic: Its weathered, rustic look brings a piece of nature indoors.
  • Sustainability: Utilizing driftwood is eco-friendly as it repurposes natural materials.
  • Unique Design: Every piece of driftwood is unique, ensuring that no two frames are exactly alike.

Materials You Will Need

Before you get started, it’s crucial to gather all the necessary materials. This will make the process smoother and more enjoyable.

List of Required Materials

MaterialDescription
Driftwood piecesVarious sizes and shapes, washed and dried
Picture frameBasic frame to use as a base
Hot glue gun & glue sticksFor attaching driftwood pieces to the frame
SandpaperTo smooth any rough edges on the driftwood
SawTo trim driftwood pieces to fit the frame
Sealer or varnishTo protect and finish the driftwood
Protective glovesTo protect your hands while working with wood and glue
Craft knife or utility knifeFor finer adjustments and trimming

Optional Materials

MaterialDescription
PaintFor adding a touch of color to your driftwood
Rope or twineFor additional decorative elements
Small nautical decorShells, starfish, or anchors for added embellishments

Step-by-Step Guide to Creating a Driftwood Picture Frame

Creating a driftwood picture frame involves several steps, but don’t worry! We will break it down into simple, manageable parts.

Step 1: Choosing the Driftwood

The first step is selecting the driftwood you’ll use. Look for pieces that are weathered but still sturdy. The goal is to find a variety of shapes and sizes to create an interesting and eye-catching design. Driftwood can sometimes be found along the shoreline, but if you don’t live near a beach, many craft stores and online retailers sell driftwood for crafting purposes.

Step 2: Preparing the Driftwood

Once you’ve collected the driftwood, you need to prepare it:

  • Wash and Dry: Thoroughly wash the driftwood pieces to remove any dirt, salt, or sand. Allow them to dry completely.
  • Sand: Use sandpaper to smooth out any rough edges or splinters. You want the driftwood to be pleasant to touch and handle.
  • Trim: If necessary, use a saw to trim the pieces to the desired length. Ensure that you have a good mix of sizes to create a balanced look.

Step 3: Preparing the Frame

Select a basic picture frame as your base. This can be an old frame you already own or an inexpensive one purchased specifically for this project. The frame should be sturdy enough to support the added weight of the driftwood.

Step 4: Arranging the Driftwood

Before you start gluing, lay out your driftwood pieces on the frame to decide on the arrangement. Play around with different configurations until you’re satisfied with the design. This step is crucial for achieving a balanced and aesthetically pleasing result.

Step 5: Gluing the Driftwood

Now that you have your layout planned:

  1. Heat the Glue Gun: Allow the glue gun to heat up completely.
  2. Start Gluing: Begin attaching the driftwood pieces to the frame. Apply a generous amount of glue to the back of each piece, then press it firmly onto the frame.
  3. Work in Sections: Work in small sections to ensure that the glue doesn’t cool and harden before you attach the driftwood.
  4. Hold Until Set: Hold each piece in place for a few seconds to ensure a strong bond.

Step 6: Adding Finishing Touches

Once all the driftwood pieces are attached and the glue has dried, you may want to:

  • Seal the Wood: Apply a sealer or varnish to protect the driftwood and give it a finished look. Make sure to choose a product that preserves the rustic appearance.
  • Decorate: Add any additional decorative elements, such as rope, twine, or nautical decor. These can be attached using the hot glue gun as well.

Step 7: Inserting the Picture

Finally, insert your chosen picture into the frame. Make sure it is well-secured and that any clasps or tabs are firmly in place.

Tips and Tricks

Creating a driftwood picture frame can be a straightforward process, but these tips can help make it easier and more enjoyable.

Choosing the Right Driftwood

TipExplanation
Variety is KeySelect pieces of various shapes and sizes for an interesting arrangement
Check for Soft SpotsAvoid pieces that feel soft or brittle as they may not hold up over time
Consider TextureLook for pieces with interesting textures or patterns for added visual interest

Gluing Techniques

TipExplanation
Test the GlueTest your glue on a small area first to ensure it adheres well
Work QuicklyHot glue sets quickly, so work with small sections at a time
Reinforce if NeededFor larger pieces, consider reinforcing with small nails or screws

Enhancing Durability

TipExplanation
Seal ProperlyApply sealer or varnish to protect the wood from moisture and wear
Use Sturdy FrameEnsure your base frame is strong enough to support the added weight
Secure Hanging MethodMake sure the hanging mechanism is robust to handle the combined weight of the frame and driftwood

Driftwood Picture Frame

Alternative Designs

If you want to put a unique spin on your driftwood picture frame, consider some of these alternative designs.

Rustic Chic

Paint portions of the driftwood in soft, pastel colors for a shabby chic look. This can add a vintage feel while retaining the natural element.

Minimalistic

Use fewer, larger pieces of driftwood to create a more modern and minimalist design. This can make a bold statement without overwhelming the picture inside.

Multi-Texture

Combine driftwood with other natural materials like stones or shells. This adds different textures and can make your frame even more distinctive.

Enhanced Nautical Theme

Add elements such as small, decorative anchors, ropes, or seashells to enhance the nautical theme further. These can be glued onto the frame in the same manner as the driftwood.

Inspiration and Uses

A driftwood picture frame isn’t just a craft project; it’s a piece of art that can:

  • Frame Memories: Showcase your cherished memories in a frame that’s as unique as the moments they capture.
  • Gift Idea: Make a beautiful, handcrafted gift for friends and family.
  • Home Decor: Add a rustic, coastal touch to your interior decor.
  • Themed Events: Use for weddings, beach-themed parties, or special events to tie in with the theme.

Maintenance and Care

Keeping your driftwood picture frame in pristine condition involves a few simple steps.

Cleaning

Dust the frame regularly with a soft cloth to keep it clean. If it becomes particularly dirty, a slightly damp cloth can be used to wipe it down.

Handling with Care

Be gentle when handling the frame to prevent any pieces from breaking or coming loose. Always hold it by the frame rather than by the driftwood pieces.

Avoiding Moisture

Avoid placing the frame in areas with high humidity or direct sunlight, as this can cause the wood to warp or the glue to weaken over time.

Conclusion

Creating a driftwood picture frame is a fantastic way to bring a touch of nature into your home while showcasing your creativity. With its natural beauty and rustic charm, a driftwood frame can turn any picture into a stunning work of art. By following these steps and tips, you can craft a frame that is uniquely yours, reflecting both your personal style and the timeless beauty of the coast. So, get your materials ready and start crafting a masterpiece that you’ll be proud to display!

Filed Under: Driftwood Ideas Tagged With: crafts, DIY Project, Driftwood, home decor, Picture Frame

Driftwood Earring Holder

July 22, 2024 by admin

You’ve always wanted a unique way to organize and display your favorite earrings. The Driftwood Earring Holder offers you a charming and functional solution, transforming a piece of nature into an elegant accessory for your home. In this guide, you’ll discover the simple steps required to create your own driftwood earring holder, adding a touch of rustic beauty to your jewelry collection while keeping everything within easy reach. Have you ever been frustrated trying to find the perfect pair of earrings in a jumbled jewelry box? Organizing earrings can be quite a task, but imagine having a unique and beautiful way to display them! The solution could be simpler than you think—how about making your own driftwood earring holder?

Below, we’ll talk you through everything you need to know about creating a driftwood earring holder. This eco-friendly, visually appealing solution not only helps you organize your jewelry but also adds a rustic charm to your room decor.

What is a Driftwood Earring Holder?

A driftwood earring holder is a jewelry display made from a piece of driftwood, which is wood that has been washed onto shore by rivers, lakes, or oceans. The natural texture and shape of driftwood make it a stunning decorative item, and its rugged beauty can be transformed into a practical, beautiful way to organize and display your earrings.

Why Choose Driftwood?

Choosing driftwood for your earring holder comes with numerous benefits:

  • Aesthetic Appeal: Its natural, weathered look adds a unique touch to any room decor.
  • Sustainability: Using driftwood recycles a natural resource, making it an eco-friendly option.
  • Customization: Every piece of driftwood is different, allowing you to create a one-of-a-kind earring holder.

Gathering the Materials

Before you start your project, you’ll need to gather a few materials. Don’t worry, the items you need are relatively inexpensive and easy to find.

Materials List

ItemDescription
DriftwoodChoose a piece sturdy enough to hold multiple pairs of earrings.
Hooks or Eye ScrewsSmall hooks for hanging earrings—ideal if you have stud earrings.
SandpaperTo smooth out rough edges on the driftwood.
Optional: Wood StainFor a polished look, if you want to enhance the color of the driftwood.
DrillWith a small bit for making holes for the hooks or eye screws.
Twine or WireFor hanging the driftwood earring holder on the wall.
Paint and BrushesOptional—if you want to decorate your driftwood further.
SealantTo preserve the driftwood and prevent it from flaking.

Gather these materials so you’re prepared to dive into the creative process.

Driftwood Earring Holder

Preparing the Driftwood

Once you have your materials, the next step is preparing the driftwood for transformation into an earring holder.

Cleaning the Driftwood

The first step is cleaning the driftwood.

  1. Rinse it off: Use fresh water to rinse off any sand or dirt.
  2. Soak it: Submerge the wood in a solution of water and bleach (a ratio of 9:1) for 24 hours to kill any organisms and remove bacteria.
  3. Dry thoroughly: Once it’s clean, let it sit in the sun to dry completely, which may take another 24-48 hours depending on the size and thickness of the wood.

Sanding

Once the driftwood is dry, use sandpaper to smooth out any rough edges or splinters. Sanding will give it an immaculate finish, making it safer to handle and better for holding your earrings.

Optional: Staining the Driftwood

If you desire a more polished and refined look, consider staining the driftwood. Use a wood stain of your choice, applying a single or multiple coats, depending on the desired darkness. Always let each coat dry before applying the next.

Sealing the Driftwood

Once your driftwood is prepped and optionally stained, use a wood sealant to protect it. A good sealant will preserve the natural beauty of the wood and keep it from deteriorating over time.

Assembling the Earring Holder

With your driftwood smooth and ready, it’s time to start assembling your earring holder.

Drilling Holes

Using a drill with a small bit, create evenly spaced holes along the length of the driftwood. These holes will be where you insert the hooks or eye screws.

Installing Hooks or Eye Screws

Screw the hooks or eye screws into the pre-drilled holes. Make sure they are secure and evenly spaced to give a balanced and organized look. This makes it easy to hang earrings of various types.

Adding Hanging Hardware

Now that you have your hooks in place, add twine, wire, or decorative string to both ends of the driftwood, creating a loop for hanging. Secure these tightly to ensure they can bear the weight of the driftwood and your earrings.

Driftwood Earring Holder

Decorating Your Driftwood Earring Holder

If you wish to add a personal touch to your earring holder, you can decorate the driftwood further.

Painting

Consider painting designs onto the driftwood. This could be as simple as adding a few stripes or dots with acrylic paints, or going more elaborate with flowers, geometrical shapes, or other patterns that reflect your style.

Adding Ornaments

You could also add small embellishments like beads, shells, or stones, gluing them around your hooks or at the ends of the driftwood for a more artistic look.

Using Your Driftwood Earring Holder

Now that your earring holder is ready, it’s time to put it to good use and hang it on your wall. Here’s how to organize and use it effectively.

Organizing by Earring Type

Designate specific hooks for different types of earrings. For instance:

Earring TypeHook Position
Stud EarringsTop row for easy accessibility
Dangle EarringsMiddle row for visual balance
Hoop EarringsBottom row to utilize length

Rotating Your Collection

If you have a large collection of earrings, consider rotating them seasonally. This not only keeps your display fresh but also puts less strain on your earring holder.

Maintenance Tips

To maintain your driftwood earring holder:

  1. Dust it regularly: Use a dry cloth to remove dust from the holder and the earrings.
  2. Avoid moisture: Keep it away from humid areas, as the moisture can cause the wood to warp or the hooks to rust.
  3. Check hardware: Ensure the hooks and screws are secure and tighten them if needed.

Benefits of Using a Driftwood Earring Holder

Now that your earring holder is set up, let’s talk about the benefits it brings to your daily life.

Improved Organization

No more digging around in jewelry boxes. Having an earring holder keeps your collection organized and makes finding the perfect pair easy and quick.

Artistic Display

Your driftwood earring holder doubles as a piece of wall art. Its natural beauty and the customized embellishments will make it a conversation piece in your home.

Sustainability

By using driftwood, you’re recycling a natural material that would otherwise be waste. It’s an eco-friendly way to manage your jewelry.

Personal Satisfaction

Creating something with your own hands brings immense satisfaction. Not only will you have an organizational tool, but you’ll also have a personalized item that reflects your creativity.

Common Issues and Solutions

While creating and using a driftwood earring holder is generally straightforward, you might encounter a few hiccups. Here’s how to handle them.

Rough Texture

Problem: The driftwood is still too rough even after sanding.

Solution: Use a thicker grit sandpaper and apply more pressure. If you still find rough patches, consider using a wood filler before the final sanding.

Hooks Coming Loose

Problem: The hooks or eye screws are loosening over time.

Solution: Ensure you drill the right-sized pilot holes before screwing in the hooks. You could also use a drop of strong glue for additional hold.

Uneven Driftwood

Problem: The driftwood is too uneven, making it difficult to hang multiple earrings.

Solution: Use a piece of wood that is as even as possible. If the unevenness is mild, adjusting how you place the hooks can help balance the look.

Advanced Customization Ideas

If you’re feeling particularly crafty, there are advanced customization ideas you can try to make your driftwood earring holder even more unique.

Adding Shelves

Attach small pieces of wood or floating shelves to the driftwood for holding other accessories like rings or bracelets.

Integrated Lighting

Install small LED lights around the driftwood to illuminate your earring display, adding a touch of elegance particularly in the evening.

Themed Displays

Customize the holder according to different themes. For example, a seaside theme with tiny seashells and starfish might be appealing if you love the ocean.

Frequently Asked Questions

1. Can I use any type of wood for this project?

While driftwood is preferred due to its natural aesthetic and availability, you can use any other type of reclaimed wood if driftwood is hard to find.

2. How do I know how many hooks to install?

The number of hooks will depend on the size of your driftwood and the number of earrings you plan to hang. A general rule is to ensure that there is enough space between each hook so that earrings do not overlap and are easily accessible.

3. Is there a way to prevent the driftwood from deteriorating over time?

Yes, applying a good quality wood sealant will greatly enhance the longevity of the driftwood. Ensure you follow the manufacturer’s instructions for the best results.

4. How can I ensure the driftwood is sterile?

Soaking the driftwood in a bleach solution followed by thorough drying is generally effective for sterilizing the wood.

5. Can I make a portable version of this earring holder?

Certainly! You can create a smaller version of this earring holder that can be placed on a dresser or vanity. Using a wooden stand or base can make it portable.

Conclusion

Making a driftwood earring holder is not only a wonderfully creative project, but it’s also a functional and eco-friendly way to organize your jewelry. With its easy preparation and assembly, along with vast customization options, your driftwood earring holder will become a cherished item in your home. Plus, the personal satisfaction you’ll get from creating it yourself will be unmatched.

So why not gather your materials and start crafting today? You’ll soon have a beautiful, personalized, and sustainable solution for your earring collection. Happy crafting!

Filed Under: Driftwood Ideas Tagged With: DIY Project, Driftwood, Earring Holder, home decor, Jewelry Organizer

Primary Sidebar

Driftwood4us.com, is a participant in the Amazon Services LLC Associates Program, an affiliate advertising program designed to provide a means for sites to earn advertising fees by advertising and linking to amazon.com.