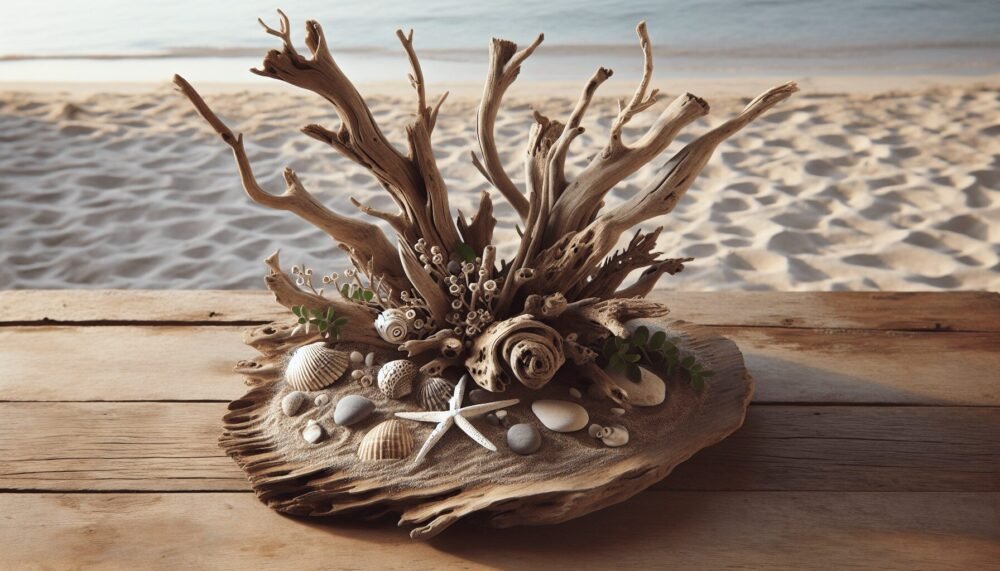
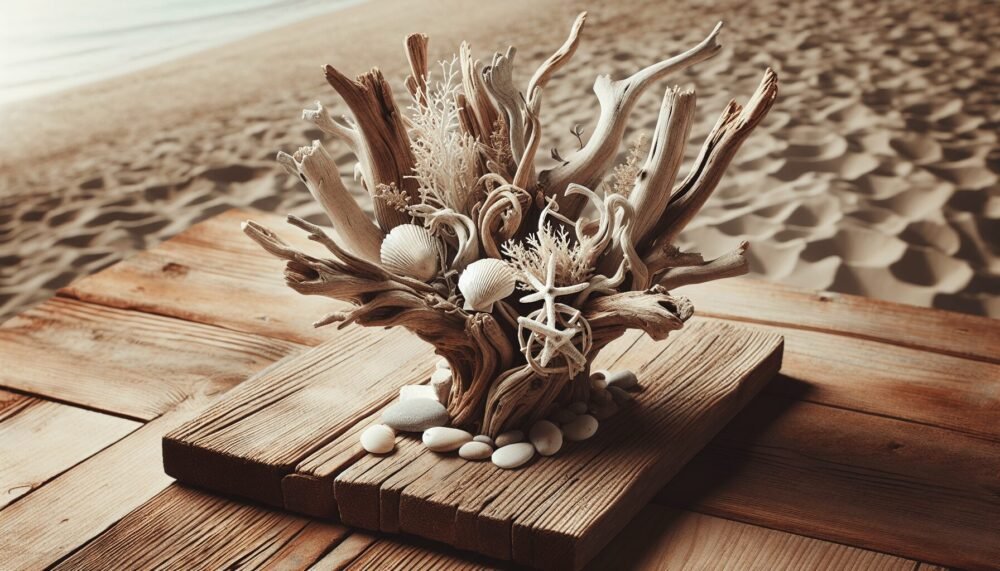
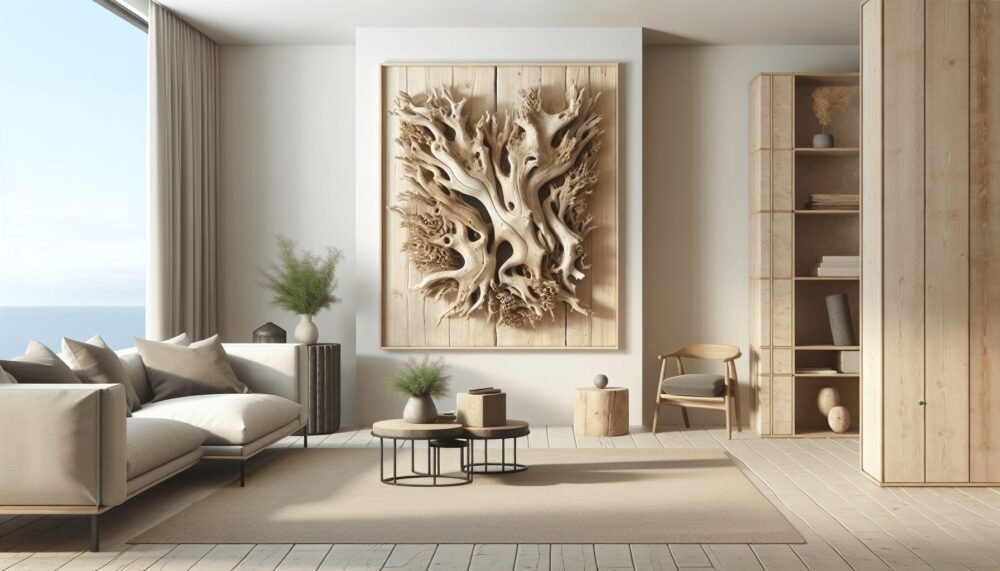
• Skip to main content
  • Skip to primary sidebar
  • Terms and Conditions
  • Privacy Policy
  • Contact

Driftwood 4 Us

Just About Driftwood

DIY Projects

Driftwood Projects Unique Mirrors

May 31, 2024 by admin

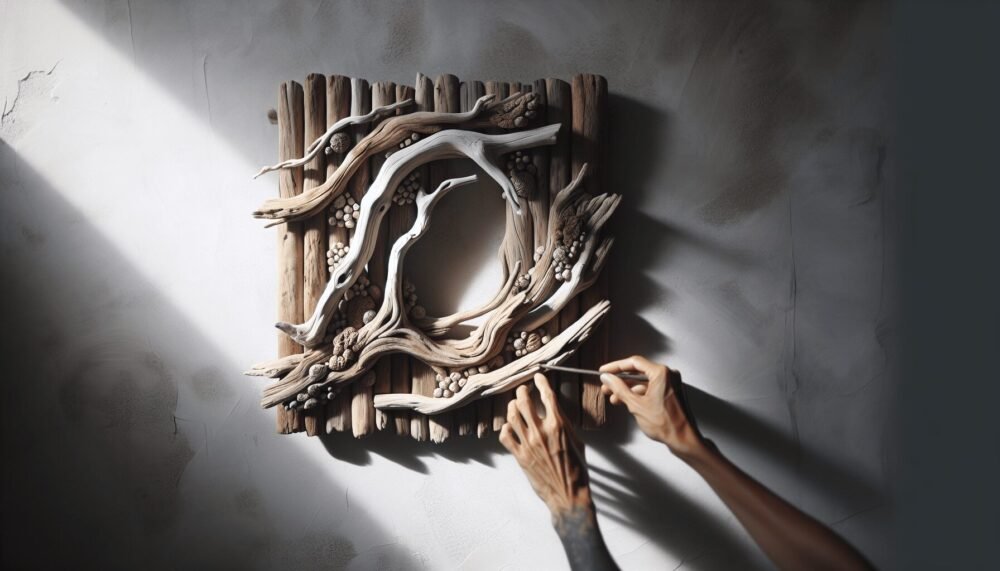
Driftwood Projects will take your home decor to a whole new level by offering unique mirrors crafted from beautiful, naturally weathered wood. Each mirror is a one-of-a-kind masterpiece, capturing the rustic charm of driftwood while adding a touch of elegance to any room. Perfect for those who appreciate the beauty of nature combined with practical design, these mirrors are sure to become a focal point in your living space. Discover how these unique pieces can transform your home and reflect your personal style. Have you ever thought about how enchanting a piece of driftwood can become when crafted into a unique mirror? The beauty of driftwood, with its natural, weathered appearance, brings a touch of nature’s charm into your living spaces. If you love getting creative with projects and you’re looking for a way to add a special piece to your home decor, driftwood mirrors might just be the perfect activity for you.
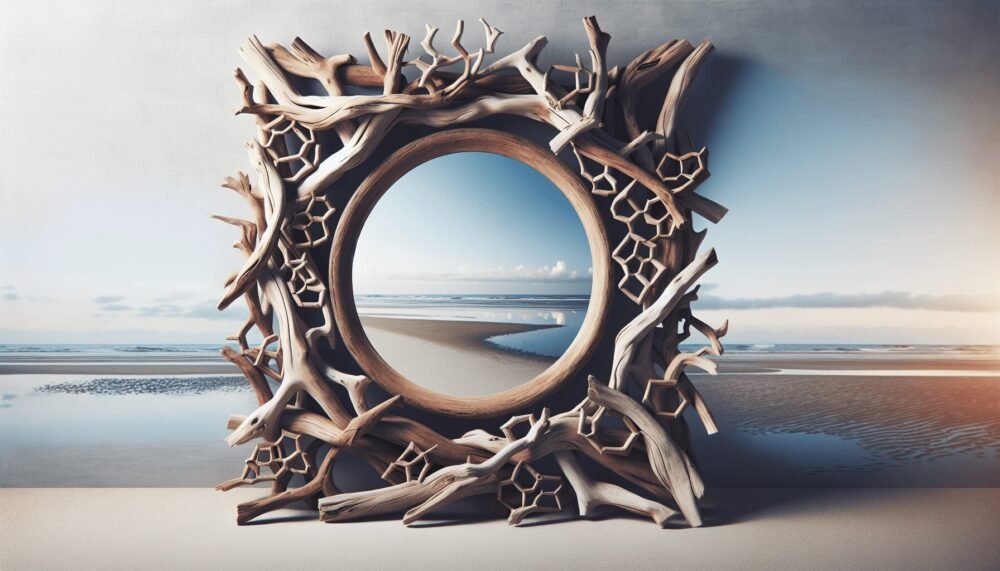
Driftwood Projects Unique Mirrors

Understanding Driftwood: Nature’s Masterpiece

Driftwood is wood that has been washed onto shore by the tides, winds, or waves. The natural processes of erosion and the elements give it a uniquely rugged and weathered appearance that can’t be replicated artificially. Each piece of driftwood is a treasure trove of history, having spent years being shaped by nature.

Why Choose Driftwood for Mirrors?

Driftwood isn’t just appealing because of its looks. Driftwood mirrors are environmentally friendly since they repurpose natural materials that would otherwise be left on the shore. On top of that, each driftwood mirror is entirely unique, just like each piece of driftwood is different.

The Aesthetic Appeal

The rustic texture and the organic lines of driftwood bring a sense of tranquility into any room. The colors usually range from soft whites and greys to dark browns and even black, providing earthy tones that complement various home decor styles.

Preparing for Your Driftwood Mirror Project

Before starting your project, you need a game plan. Gathering your materials and safety gear will ensure a smooth crafting experience.

Collecting Your Driftwood

Firstly, you need to collect driftwood. Visit local beaches, lakesides, or rivers where driftwood can typically be found. Be mindful of local regulations and only collect driftwood from areas where it is permitted.

Essential Materials

Here’s what you’ll need for your driftwood mirror project:

MaterialPurpose
Driftwood piecesThe main element for framing the mirror
MirrorBase of your project
Adhesive (e.g., wood glue)To attach driftwood to the mirror
SandpaperTo smooth out rough edges
SawFor cutting driftwood to desired sizes
Measuring tapeTo measure dimensions accurately
Protective gear (gloves, goggles)For safety during crafting

Selecting Your Mirror

Choose a mirror that suits the space where you intend to hang it. It could be square, rectangular, oval, or circular—each shape offers a different aesthetic.

Designing Your Driftwood Mirror Frame

Designing your driftwood frame requires some creativity. The layout will center around how you want the driftwood pieces to fit around the mirror.

Arrangement Styles

  1. Symmetrical: Arrange the driftwood pieces in a consistent pattern.
  2. Asymmetrical: Place driftwood pieces in varying sizes and shapes for a rugged look.
  3. Layered: Stack driftwood pieces for a 3D effect.

Consider laying out your driftwood around the mirror before attaching them to get a feel for your design.

Measuring and Cutting

Measure the perimeter or circumference of your mirror. Cut the driftwood pieces to fit around the mirror accurately. Utilize a saw for precise cuts and sandpaper to smooth any rough edges.

Attaching Driftwood to the Mirror

Once you’ve designed the layout, it’s time to attach the driftwood. Use a strong adhesive. Apply the glue to the back of each driftwood piece and press it firmly onto the mirror. Allow it to dry according to the adhesive’s instructions.

Finishing Touches for Your Driftwood Mirror

The final steps involve ensuring your mirror is ready to hang and adding any additional decorative elements.

Sealing the Driftwood

To preserve the natural beauty of the driftwood and protect it from further wear, apply a wood sealant. This will also enhance the colors and give a slight sheen to your frame.

Adding Hooks or Hangers

Attach appropriate hooks or hangers to the back of your mirror to ensure it can be hung securely. Make sure they are strong enough to hold the weight of the mirror and the driftwood.

Optional Enhancements

You can add other decor elements to your driftwood mirror, such as shells, stones, or even fairy lights. These can further personalize your creation.
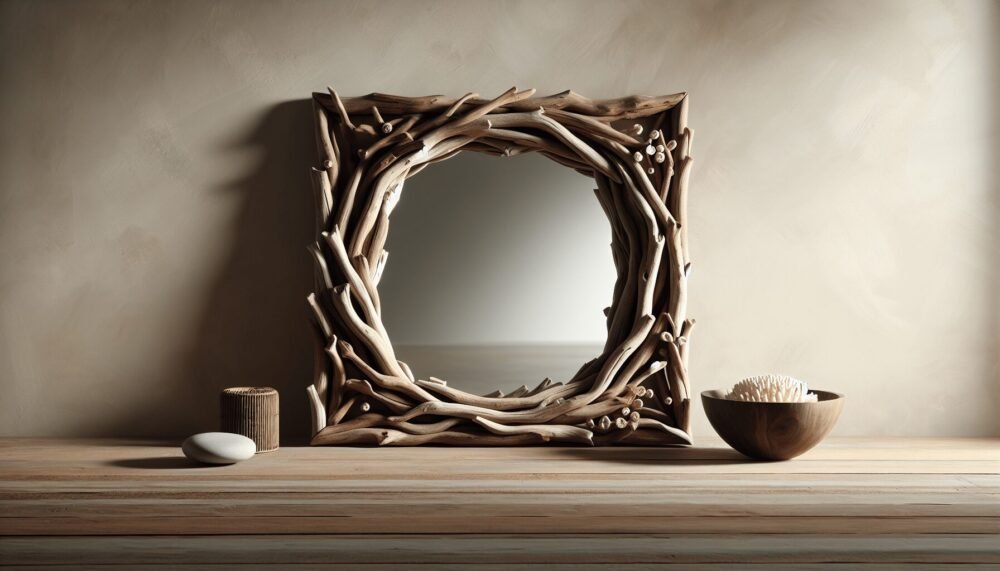
Driftwood Projects Unique Mirrors

Displaying and Caring for Your Driftwood Mirror

Now that your mirror is complete, consider the best spot to display it and how to care for it.

Ideal Places to Display

  1. Living Room: Above a fireplace or a sofa.
  2. Bedroom: Over a dresser or by the bedside.
  3. Bathroom: Perfect for a coastal-themed bathroom.
  4. Entryway: Makes a statement as soon as guests enter.

Maintenance Tips

To keep your driftwood mirror looking pristine, gently dust it regularly. Avoid using harsh chemicals, as they can damage the wood. If the driftwood appears to dry out, a light coat of sealant or natural oil can restore its luster.

The Joy of Crafting with Driftwood

Creating a driftwood mirror is not just about the final product but also the joy of making something with your hands. Assembling these natural elements allows you to connect with nature while crafting a unique piece of decor for your home.

Share Your Creation

Engage with the community of DIY enthusiasts. Share your driftwood mirror creation on social media, DIY forums, or local craft fairs. You’ll find that many others appreciate the art and effort that goes into creating driftwood projects.

Exploring Other Driftwood Projects

Once you’ve mastered the driftwood mirror, there are myriad other projects you can explore:

  1. Driftwood Shelves: Use larger pieces to create rustic floating shelves.
  2. Driftwood Wall Art: Arrange driftwood pieces on a canvas or frame for unique art.
  3. Driftwood Furniture: For the more advanced crafters, driftwood can be used to create tables or chairs.

Conclusion

Crafting a driftwood mirror is a rewarding project that combines the beauty of nature with your creative touch. Not only will you end up with a stunning, unique piece of decor, but you’ll also have the satisfaction of having made it yourself. So, gather your materials, set up your workspace, and start crafting your very own driftwood mirror. Enjoy the process and the beautiful addition it will make to your home!
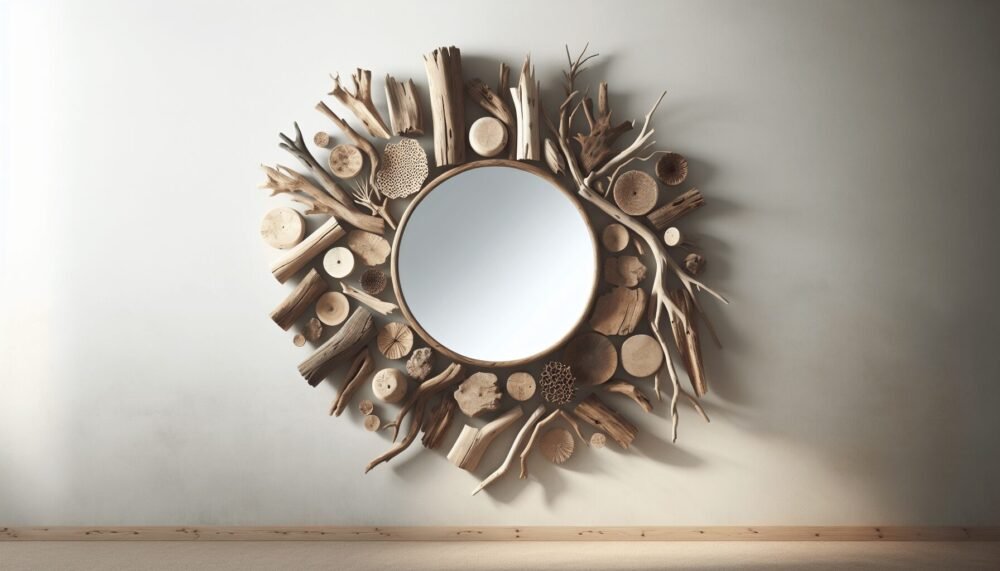
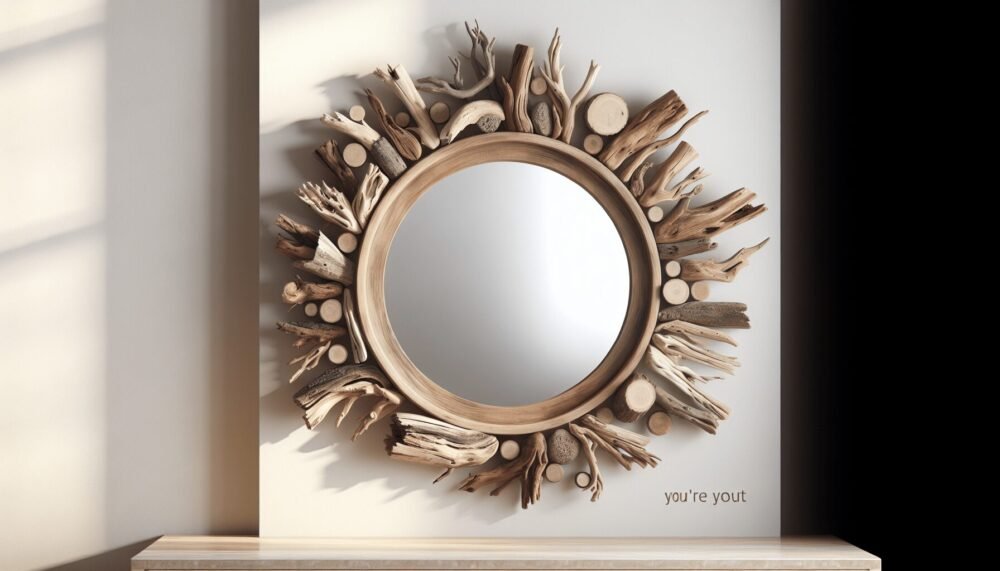
Filed Under: Driftwood Ideas Tagged With: crafts, DIY Projects, Driftwood, home decor, Unique Mirrors

Diy Driftwood Projects Mirrors

May 31, 2024 by admin

Imagine transforming simple pieces of driftwood into stunning mirrors that bring a touch of the beach to your home decor. In “DIY Driftwood Projects Mirrors,” you’ll discover step-by-step methods to create unique, rustic mirrors using collected driftwood. You’ll gain insights on selecting the right materials, preparing the wood, and assembling your pieces into striking, one-of-a-kind decor items. Get ready to unleash your creativity and add a bit of coastal charm to any room with these easy-to-follow, delightful projects. Have you ever strolled along the beach and come across pieces of driftwood washed up on the shore, wondering how you could bring such natural beauty into your home decor? You’re not alone! Driftwood, with its unique shapes and natural texture, can add a touch of organic charm and elegance to your living space, especially when transformed into stunning DIY driftwood mirrors.

Why Choose Driftwood for Your DIY Projects?

Driftwood isn’t just any wood. It’s lovingly shaped by nature, having traveled through rivers and oceans, basked in the sun, and tumbled over rocks. Each piece is unique, carrying stories of its journey. This makes driftwood an exceptional material for home decor projects, adding character and a natural element that artificial materials often lack.

Sustainability and Environmental Impact

Using driftwood for your DIY projects is a fantastic way to contribute to environmental sustainability. By repurposing wood that has already been processed by nature, you reduce the demand for newly cut timber. This minimizes deforestation and helps maintain natural habitats.

Aesthetic and Versatility

Driftwood fits seamlessly into various decor styles—from coastal and rustic to modern and bohemian. It’s versatile enough to be the focal point of a room or a subtle accent piece, making it a fantastic addition to any home.

Gather Your Materials

Before you dive into your DIY driftwood mirror project, you’ll need to gather some materials. Here’s a handy table to help you keep track of what you’ll need:

MaterialDescription
Driftwood piecesCollect various shapes and sizes to frame your mirror.
MirrorChoose a mirror in the size and shape you prefer.
Wooden or cardboard backingProvides a sturdy structure for mounting the mirror and driftwood.
Hot glue gun and glue sticksSecures the driftwood pieces to the mirror backing.
Hooks or hangersFor hanging your finished mirror on the wall.
SandpaperTo smooth any rough edges on the driftwood.
Sealant (optional)A clear protective coat to preserve the driftwood’s natural beauty and durability.

Where to Find Driftwood

You can collect driftwood yourself if you live near a beach, river, or lake. It’s a fantastic way to get some fresh air while finding pieces that personally resonate with you. If that’s not an option, many craft stores and online marketplaces sell driftwood.

Diy Driftwood Projects Mirrors

Preparing Your Driftwood

Before you start assembling your mirror, it’s crucial to prepare your driftwood. Proper preparation ensures your project will be sturdy and long-lasting.

Cleaning the Driftwood

Once you’ve gathered your driftwood, you’ll need to clean it to remove any dirt, sand, or salt. Here’s how you can do it:

  1. Rinse the driftwood with fresh water.
  2. Soak in a bleach solution (four parts water to one part bleach) for a few hours to kill any remaining bacteria or insects.
  3. Rinse again thoroughly with clean water.
  4. Allow the driftwood to dry completely, preferably in the sun to help it dry faster and kill any remaining bacteria.

Sanding and Smoothing

Driftwood can have rough edges or splinters that you’ll want to smooth out. Use sandpaper to gently sand the edges and surfaces of the wood. This not only makes it safer to handle but also helps the pieces adhere better to the backing.

Creating the Mirror Frame

Now that your driftwood is prepared, it’s time to start creating your mirror frame. Here’s a step-by-step guide to help you through the process:

Step 1: Arrange the Driftwood

Lay out your mirror on a flat surface and arrange the driftwood pieces around it. This helps you visualize the final look and allows you to experiment with different configurations. Don’t worry about making it perfect yet—this step is all about getting a feel for the design.

Step 2: Attach the Driftwood to the Backing

Once you’re happy with your arrangement, start attaching the pieces to the wooden or cardboard backing using a hot glue gun. Apply glue to the back of each driftwood piece and press it firmly onto the backing. Hold each piece in place for a few seconds to ensure it sticks well.

Step 3: Secure the Mirror

Now that your driftwood frame is set, place the mirror in the center. You can use additional glue or mounting adhesive strips to secure it to the backing. Make sure it’s centered and level before pressing it firmly in place.

Step 4: Add Hooks or Hangers

Attach hooks or hangers to the back of your mirror so you can easily mount it on the wall. Ensure they are securely fastened and capable of supporting the weight of your completed mirror.

Optional Step: Apply Sealant

If you want to protect your driftwood frame and enhance its natural beauty, apply a clear wood sealant. This step is optional but recommended, especially if your mirror will be in a humid area like a bathroom.

Diy Driftwood Projects Mirrors

Creative Variations

The beauty of DIY projects is that you can tailor them to your personal style. Here are a few creative variations to inspire you:

Adding Decorative Elements

Incorporate other natural elements like seashells, pebbles, or even small plants to complement the driftwood. You can glue these decorations to the frame for an added touch of personality.

Using Different Shapes and Sizes

Don’t feel limited to a rectangular or square mirror. Driftwood frames look stunning on round, oval, or even abstract-shaped mirrors. Use your imagination and create a design that speaks to you.

Combining Driftwood with Other Materials

Mix and match materials to create a unique look. For example, combine driftwood with metal or glass accents. This adds texture and interest to your mirror while still highlighting the natural beauty of the wood.

Maintaining Your Driftwood Mirror

Once you’ve completed your driftwood mirror, you’ll want to ensure it stays beautiful and durable for years to come. Here are some maintenance tips to keep it in top condition:

Regular Dusting

Dust your mirror regularly to keep it looking fresh. Use a soft cloth or a feather duster to gently remove dust from both the mirror surface and the driftwood frame.

Avoiding Excess Moisture

While driftwood is generally resilient, it’s a good idea to avoid exposing it to excessive moisture. If your mirror is in a humid environment, consider applying a sealant to protect the wood from absorbing too much moisture.

Gentle Cleaning

For occasional deep cleaning, use a damp cloth to wipe down the driftwood frame. Avoid harsh chemicals, as they can damage the natural finish of the wood.

Inspiration from the DIY Community

If you’re looking for more ideas or just some visual inspiration, there are plenty of resources available. Here are a few places to find inspiration for your next driftwood mirror project:

Social Media Platforms

Websites like Pinterest and Instagram are treasure troves of DIY ideas. Search for “driftwood mirror” and you’ll find countless examples of beautiful projects by other DIY enthusiasts.

DIY Blogs and Websites

Many DIY bloggers share detailed tutorials and tips on their websites. These can be incredibly helpful if you’re looking for step-by-step guidance or want to learn from someone else’s experience.

Online Forums

Join online forums and communities dedicated to DIY projects and home decor. These platforms allow you to ask questions, share your progress, and get feedback from like-minded individuals.

Troubleshooting Common Issues

Even the best-laid plans can encounter hiccups. Here are some common issues you might face during your driftwood mirror project and how to solve them:

Driftwood Not Sticking Properly

If your driftwood pieces are not adhering well to the backing, ensure both surfaces are clean and free of dust. Use a stronger adhesive if necessary, and hold each piece in place for a longer time while the glue sets.

Mirror Not Being Centered

It can be tricky to get the mirror perfectly centered within the driftwood frame. Use a measuring tape or ruler to double-check the placement before securing the mirror to the backing.

Uneven Driftwood Edges

Uneven edges can add to the rustic charm of your driftwood mirror, but if they bother you, try rearranging the pieces or sanding them down further to create a more uniform look.

DIY Driftwood Projects Beyond Mirrors

Creating driftwood mirrors is just the beginning! Once you’ve mastered this project, you’ll find that driftwood can be used in many other DIY projects. Here are a few ideas to inspire your next creation:

Driftwood Shelves

Add a touch of rustic elegance to your walls with simple yet beautiful driftwood shelves. Pair them with iron brackets for a functional and stylish storage solution.

Driftwood Candle Holders

Create unique candle holders by attaching driftwood pieces to a base. This project is perfect for adding ambiance and warmth to any room in your home.

Driftwood Wall Art

Use driftwood to create stunning wall art. Arrange the pieces in a pattern or shape that speaks to you and secure them to a backing for a one-of-a-kind piece of wall decor.

Driftwood Furniture

For the truly ambitious, try your hand at driftwood furniture. From coffee tables to headboards, driftwood can be transformed into functional and artistic furniture pieces.

Conclusion

Transforming driftwood into a beautiful mirror frame is a rewarding DIY project that combines creativity, sustainability, and craftsmanship. Each piece of driftwood carries its unique history, making your mirror a truly one-of-a-kind creation.

By following the steps and tips outlined in this article, you’ll be well on your way to creating a driftwood mirror that adds a touch of nature and elegance to your home decor. Remember to have fun with the process and let your creativity shine. Whether you stick to a simple frame or experiment with more elaborate designs, your driftwood mirror will be a stunning addition to any room.

Happy crafting! Enjoy bringing a piece of the great outdoors into your home with your very own DIY driftwood mirror.

Filed Under: Driftwood Ideas Tagged With: crafts, DIY Projects, Driftwood, home decor, Mirrors

Driftwood Projects Mirrors

May 30, 2024 by admin

Discover the magical world of driftwood projects and how you can transform ordinary mirrors into stunning, rustic centerpieces for your home. This guide on “Driftwood Projects Mirrors” will inspire you to embrace nature’s beauty while showcasing your creative flair. Learn tips and techniques to craft your unique driftwood mirrors, adding charm and character to any room. Get ready to dive into a fun and rewarding DIY adventure that combines the timeless appeal of driftwood with the functionality of mirrors. Have you ever strolled along a beach, feeling the sand between your toes and wondered what beautiful object you could create using the pieces of driftwood scattered around? Driftwood has a unique charm and character that makes it ideal for various DIY projects, especially when creating mirrors. In this article titled “Driftwood Projects Mirrors,” you’ll discover loads of inspiration, tips, and step-by-step guides to craft your own stunning driftwood mirrors.

Driftwood Projects Mirrors

What is Driftwood?

Before diving deeply into projects, understanding what driftwood is will be helpful. Driftwood is essentially wood that has been washed ashore by waves, typically after floating in the sea or river for an extended period. This wood boasts a rustic appearance and a weathered texture, lending itself perfectly to artistic and natural-themed decor.

Why Use Driftwood for DIY Projects?

You might be wondering why driftwood is so popular for DIY projects, especially mirrors. Here are some compelling reasons:

  1. Unique Aesthetic: Each piece of driftwood is unique, boasting different shapes, sizes, and textures.
  2. Environmental Impact: Using driftwood is an eco-friendly way to upcycle wood that might otherwise go to waste.
  3. Versatile: Driftwood can be used for multiple projects, from minimalist mirrors to intricate designs.

Essential Tools and Materials

Creating a beautiful driftwood mirror is easier than you might think, especially if you have the right tools and materials. Here’s a checklist of what you’ll need:

ToolsMaterials
Hot glue gunDriftwood pieces
Miter sawMirror base
SandpaperWood glue
PaintbrushOptional: Paint or stain
Measuring tapeMounting hardware
ClampsProtective finish

Where to Find Driftwood

Natural driftwood can be found along coastlines, riverbanks, and lakeshores. If you don’t live near these areas, don’t worry! You can find driftwood at craft stores or purchase them online.

Preparing Your Driftwood

Before you start attaching driftwood to your mirror, you will need to prepare the pieces. This involves cleaning, drying, and sometimes sanding the wood to ensure it’s ready for use.

Cleaning Driftwood

  1. Rinse thoroughly: Remove sand, dirt, and grime by rinsing the driftwood under running water.
  2. Soak: Soak the wood in a mixture of water and mild bleach for 24 hours to kill any mold or pests.
  3. Dry: Allow the wood to dry completely in a sunny spot for at least a week.

Sanding and Shaping

Once dry, inspect the driftwood. Use sandpaper to smooth any rough edges. If needed, use your miter saw to cut pieces into your desired shapes and lengths.

Basic Driftwood Mirror Project

Let’s start with a simple, straightforward driftwood mirror project. This project involves creating a border made from driftwood around a round or rectangular mirror base.

Step-by-Step Guide

  1. Measure and Cut: Measure the mirror base to determine how much driftwood you’ll need. Cut the pieces accordingly.
  2. Arrange Pieces: Lay out your driftwood pieces around the mirror to get an idea of the final look. Feel free to mix up lengths and shapes for a natural vibe.
  3. Attach Driftwood: Use a hot glue gun to attach each piece of driftwood to the mirror base. Work your way around until the entire frame is covered.
  4. Secure and Dry: Once all pieces are glued, use clamps to secure the driftwood while the glue dries.
  5. Finishing Touches: Apply a protective finish with a paintbrush, letting it dry completely before mounting your mirror.

Optional: Staining or Painting

If you prefer, you can stain or paint the driftwood to match your decor. Use a paintbrush to apply the stain or paint, and then allow it to dry thoroughly. This step is optional but adds a personalized touch to your project.

Driftwood Projects Mirrors

Advanced Driftwood Mirror Projects

Once you’re comfortable with the basics, you can move on to more intricate designs. These projects may require additional tools and materials, but the results are worth the extra effort.

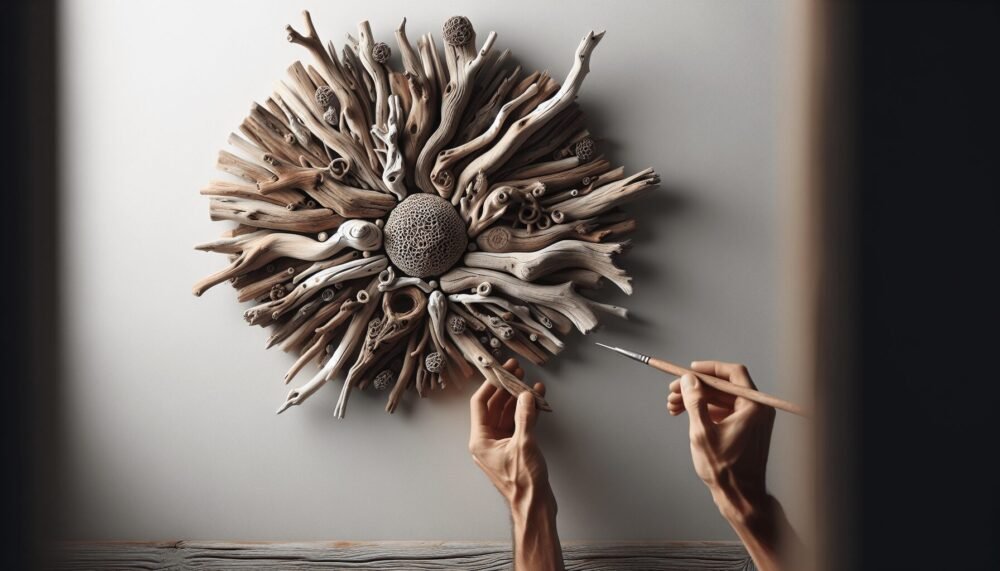
Driftwood Sunburst Mirror

A sunburst mirror radiates elegance and is an impressive addition to any room. Here’s how to create one using driftwood:

  1. Materials Needed:

    • Small circular mirror base
    • Driftwood pieces in various lengths
    • Hot glue gun
    • Wood glue
    • Measuring tape
    • Compasses for drawing circles
    • Mounting hardware
  2. Instructions:

    • Draw Circles: Place the small circular mirror base at the center of a larger piece of wood or cardboard. Draw concentric circles around it, marking where the driftwood pieces will go.
    • Arrange Driftwood: Lay out your driftwood pieces from the center to the outer edges, resembling the rays of the sun. Make sure the pieces vary in length for a more natural look.
    • Glue Pieces: Use wood glue to attach each driftwood piece to the frame. Apply a bead of glue along the edge of the mirror base and press each piece firmly.
    • Final Touches: Allow the glue to dry, then attach mounting hardware to the back of your mirror. Hang it and enjoy your stunning creation.

Driftwood Mosaic Mirror

For a more artistic and contemporary design, try creating a driftwood mosaic mirror. This project requires smaller pieces and allows for a lot of creativity in the arrangement.

  1. Materials Needed:

    • Mirror base (any shape)
    • Small driftwood pieces and chips
    • Hot glue gun
    • Wood glue
    • Measuring tape
    • Sandpaper
    • Optional: Paint or stain
  2. Instructions:

    • Prepare Pieces: Sand the small driftwood pieces to remove any rough edges. If you wish, paint or stain the pieces before assembly.
    • Layout Design: Arrange the pieces around the mirror in a mosaic pattern, leaving slight gaps between each piece.
    • Attach Driftwood: Use a hot glue gun to attach the driftwood pieces to the mirror base one by one. Ensure they stick firmly without shifting.
    • Finish: Let the mirror dry completely. Apply a protective finish if desired.

Maintenance and Care for Driftwood Mirrors

Driftwood mirrors are relatively low-maintenance, but keeping them clean and ensuring they remain beautiful for years to come is essential.

Cleaning Tips

  1. Dust Regularly: Use a soft, dry cloth to dust the driftwood frame regularly. This prevents buildup and keeps the wood looking fresh.
  2. Avoid Water: Keep water away from the driftwood as much as possible. If it must be cleaned, use a damp cloth lightly and dry it immediately.
  3. Protective Finish: Applying a protective finish when you first create the mirror can make it easier to clean and protect it from wear and tear.

Rehydrating Driftwood

Over time, driftwood can appear dry and brittle. To keep it looking its best:

  1. Apply Oil: Use a natural wood oil, like linseed or teak oil, to rehydrate the wood. Apply a small amount with a cloth, rubbing it into the wood, and allow it to absorb.
  2. Wipe Off Excess: After letting the oil soak in, use a clean cloth to wipe off any lingering oil.

Inspiration From Professional Driftwood Artists

Feeling inspired yet? If you’d like to take your projects to the next level, looking at professional driftwood artists’ work can spark new ideas.

Artist Profiles

  1. Debra Bernier: Known for her intricate driftwood sculptures that often include faces and figures, Debra’s work combines the natural beauty of driftwood with human artistic expression.
  2. Jeffro Uitto: Specializing in elaborate furniture and art pieces made from driftwood, Jeffro’s work showcases what’s possible with dedication and craftsmanship.

Steal These Ideas

  1. Mixed Media: Combine driftwood with other natural materials like shells, stones, or even metal pieces to create a truly eclectic mirror frame.
  2. Layered Depths: Experiment with layering multiple pieces of driftwood to add depth and texture to your design.

Selling Your Driftwood Mirrors

If you find yourself particularly skilled at creating driftwood mirrors, why not turn it into a small business or side hustle?

Setting Up Shop

  1. Online Marketplaces: Websites like Etsy, eBay, and local classifieds are excellent platforms for selling handmade driftwood mirrors.
  2. Local Craft Fairs: Participating in craft fairs and local markets can help you build a local customer base and get direct feedback on your art.

Pricing Your Work

Pricing handmade items can be tricky. Here are some pointers to get you started:

  1. Cost of Materials: Calculate the total cost of your materials and tools.
  2. Labor: Consider the time and effort you put into each piece. A good rule of thumb is to pay yourself an hourly wage.
  3. Market Demand: Look at what similar driftwood mirrors are being sold for and adjust your prices accordingly.

Conclusion

Creating driftwood mirrors is not only a fulfilling DIY project but also an excellent way to add a touch of nature to your home decor. From basic designs to more advanced projects, the possibilities are endless with driftwood. You now have all the knowledge and inspiration needed to embark on your own driftwood mirror projects. So, go gather some driftwood, roll up your sleeves, and start creating something beautiful today!

Filed Under: Driftwood Ideas Tagged With: DIY Projects, Driftwood, home decor, Mirrors

Driftwood Diy Projects How To Make

May 28, 2024 by admin

Welcome to “Driftwood DIY Projects: How to Make.” In this article, you’ll discover a treasure trove of creative ways to transform driftwood into stunning, personalized decor that will bring a touch of nature into your home. From rustic picture frames to unique candle holders, you’ll learn simple, step-by-step processes to turn your beachcombing finds into beautiful, functional pieces. Embrace your inner craftsperson and let your imagination soar as you explore the endless possibilities of working with driftwood!

Driftwood DIY Projects: How to Make

Have you ever strolled along the beach, marveled at pieces of driftwood, and thought about what beautiful creations you could make with them? Driftwood has a unique charm, with its weathered look and natural textures. The good news is you don’t have to be a professional artist or craftsman to transform these pieces of nature into beautiful DIY projects. This comprehensive guide will walk you through various exciting driftwood DIY projects and how to make them. Let’s get started!

Why Choose Driftwood for DIY Projects?

Choosing driftwood for your DIY projects connects you with nature while adding a coastal charm to your home decor. Driftwood is not just beautiful; it’s also versatile and eco-friendly, as you’re recycling natural materials. The unique shapes and textures of each piece make every project one-of-a-kind.

The Aesthetic Appeal

Driftwood’s natural, rustic look can complement almost any style of home decor—from coastal to modern and even rustic farmhouse. The shades range from silvery-gray to deep brown, providing a variety of tones that can fit seamlessly into your existing decor.

Environmental Benefits

By using driftwood, you’re not contributing to deforestation or massive resource extraction. It’s an environmentally conscious choice that helps in cleaning up beaches while giving you a medium full of character and history.

Preparing Your Driftwood

Before diving into your project, it’s essential to clean and prepare your driftwood properly. This process ensures that your creations are safe and long-lasting.

Collecting Driftwood

While collecting driftwood, ensure you’re doing so legally and ethically. Some beaches and protected areas have regulations against removing natural materials. Look for pieces that are already dry and free from visible signs of rot.

Cleaning Driftwood

  1. Rinse: Initially rinse your driftwood in fresh water to remove sand, salt, and algae.
  2. Soak: Soak the driftwood in a mixture of water and a small amount of bleach (1:10 ratio) for a few days to kill any bacteria, mold, or insects.
  3. Rinse Again: After soaking, rinse the driftwood thoroughly.
  4. Dry: Let it dry completely, which might take several days or even weeks depending on the size and density of the pieces.

Tools and Materials Needed

Here is a list of common tools and materials you might need for various driftwood projects:

Tool/MaterialPurpose
Sanding PaperFor smoothing rough surfaces
SawTo cut driftwood into desired sizes
GlueFor assembling pieces
Nails/ScrewsFor securing parts
DrillFor making holes
Paint/StainFor finishing touches
SealerTo protect and preserve the wood

Driftwood Diy Projects How To Make

Driftwood DIY Projects: Step-by-Step

Now, let’s dive into some exciting driftwood DIY projects that you can try at home. Each project will include step-by-step instructions to make the process easy and fun.

Driftwood Wall Art

Wall art made from driftwood can serve as a stunning focal point in any room. You can create abstract designs or assemble pieces to resemble landscapes or seascapes.

Materials Needed

  • Various pieces of driftwood
  • A strong adhesive like epoxy
  • Backing board or canvas
  • Picture hanging hardware

Steps to Make Driftwood Wall Art

  1. Design: Lay out the pieces of driftwood on your canvas or backing board to plan your design.
  2. Trim: Use a saw to cut the driftwood pieces to your preferred lengths and angles.
  3. Glue: Secure the pieces onto the canvas or board with a strong adhesive.
  4. Dry: Allow sufficient drying time as indicated by the adhesive’s instructions.
  5. Hang: Attach hanging hardware to the back and display your masterpiece on the wall.

Driftwood Picture Frame

A driftwood picture frame adds a natural, rustic look to your favorite memories. It’s simple to make yet looks professionally crafted.

Materials Needed

  • Small pieces of smooth driftwood
  • A basic picture frame
  • Hot glue gun
  • Sealer

Steps to Make a Driftwood Picture Frame

  1. Choose Frame: Select a simple, sturdy picture frame as your base.
  2. Arrange: Arrange your driftwood around the frame, creating a design that you find appealing.
  3. Glue: Use a hot glue gun to attach the driftwood pieces securely to the frame.
  4. Seal: Apply a sealer to protect the driftwood and give it a finished look.
  5. Insert Photo: Once everything is dry and set, insert your photo.

Driftwood Candle Holders

Driftwood candle holders can bring a cozy and natural ambiance to your living space. They are also perfect for outdoor settings like patios and gardens.

Materials Needed

  • Medium-sized driftwood pieces
  • Small candles or tea lights
  • Drill with a spade bit

Steps to Make Driftwood Candle Holders

  1. Select Wood: Pick driftwood pieces that can sit flat or can be easily balanced.
  2. Drill Holes: Using a spade bit, drill holes where the candles will sit. Ensure the holes are deep and wide enough to hold the candles securely.
  3. Sand: Sand down any rough edges around the holes to ensure safety.
  4. Insert Candles: Place your candles in the holes and your driftwood candle holder is ready to use.

Driftwood Mirror

A driftwood mirror can enhance the aesthetic appeal of any room. Its rustic charm makes it a great addition to living rooms, bedrooms, or hallways.

Materials Needed

  • A round or rectangular mirror
  • Various sizes of driftwood pieces
  • Strong adhesive like epoxy
  • Hanging hardware

Steps to Make a Driftwood Mirror

  1. Prepare Mirror: Clean the mirror and make sure it’s free from dust and grease.
  2. Lay Out Design: Arrange your driftwood pieces around the mirror to plan your design.
  3. Cut Wood: Trim pieces as needed using a saw.
  4. Glue It Down: Use a strong adhesive to attach the driftwood pieces around the mirror’s edge.
  5. Dry: Allow the adhesive to dry completely.
  6. Hang: Attach hanging hardware to the back and display your beautiful driftwood mirror.

Driftwood Jewelry Hanger

A driftwood jewelry hanger is an elegant and practical way to organize your accessories. Plus, it adds a natural decorative element to your room.

Materials Needed

  • A long piece of driftwood
  • Small hooks or nails
  • Drill and drill bits
  • Hanging hardware

Steps to Make a Driftwood Jewelry Hanger

  1. Choose Wood: Pick a piece of driftwood that is long and sturdy.
  2. Attach Hooks: Drill small holes and screw in hooks or nails along the length of the wood.
  3. Add Hanging Hardware: Attach hanging hardware to the back of the driftwood.
  4. Mount: Secure your jewelry hanger on the wall and organize your accessories.

Driftwood Plant Hanger

If you’re a plant enthusiast looking for a unique way to display your greenery, a driftwood plant hanger is just what you need.

Materials Needed

  • A sizeable piece of driftwood
  • Plant pots or small baskets
  • Strong cord or wire
  • Hooks for hanging

Steps to Make a Driftwood Plant Hanger

  1. Select Driftwood: Choose a piece that can support the weight of your plants.
  2. Attach Cord: Securely tie cord or wire around the driftwood and attach plant pots or baskets.
  3. Hang Plants: Place your plants in the pots or baskets.
  4. Install Hooks: Install hooks in the ceiling and hang your driftwood plant hanger.

Creative Ideas for Driftwood Projects

If you’re feeling inspired, there are countless other creative ways to use driftwood in your DIY projects. Here are some ideas:

Driftwood Sculptures

Create abstract sculptures or figures by assembling various pieces of driftwood. Use wire, glue, or nails to hold them together.

Driftwood Shelves

Construct shelves using larger, sturdy pieces of driftwood. Secure them to the wall with brackets for a functional and artistic display.

Driftwood Table Centerpieces

Use smaller pieces to craft table centerpieces for weddings, parties, or daily decor. Combine them with candles, flowers, or seashells for a beachy touch.

Driftwood Diy Projects How To Make

Pro Tips for Working with Driftwood

Safety First

Always wear safety gear such as gloves and goggles while cutting or sanding driftwood. Ensure your workstation is well-ventilated.

Finishing Touches

Use a sealer to protect your driftwood projects from moisture and wear. This helps in maintaining their appearance over time.

Experiment with Finishes

Don’t be afraid to experiment with different finishes like paint, stain, or varnish. These can either enhance the natural beauty of the wood or give it a completely new look.

Conclusion

Driftwood DIY projects offer endless possibilities for creativity and practical applications. From wall art and picture frames to candle holders and plant hangers, each project adds a touch of nature and rustic charm to your home. By following these detailed steps and tips, you can create your unique driftwood masterpieces. Not only will you end up with beautiful decor, but you’ll also enjoy the rewarding experience of crafting with natural materials.

Ready to embark on your driftwood DIY journey? Pick a project, gather your materials, and let your creativity flow! Whether you’re a seasoned crafter or a beginner, the beauty and versatility of driftwood will surely inspire you. Enjoy the process, and happy crafting!

Filed Under: Driftwood Ideas Tagged With: DIY Projects, Driftwood, home decor, How To

Driftwood Projects Garden

May 26, 2024 by admin

Welcome to Driftwood Projects Garden, where your creativity flourishes as much as your greenery! Imagine transforming unexpected pieces of driftwood into unique, eye-catching garden accents. With a bit of imagination, you will see how driftwood goes from being simple, weathered remains to becoming beautiful and functional additions to your outdoor paradise. From rustic plant holders to artistic garden sculptures, you’ll discover endless ways to enhance your garden’s charm with your own personalized driftwood projects. So grab your tools, tap into your artistic side, and let’s create a garden that shows off both your green thumb and your creative spirit!

Driftwood Projects Garden

Driftwood Projects Garden

Have You Ever Imagined Creating Stunning Garden Art with Driftwood?

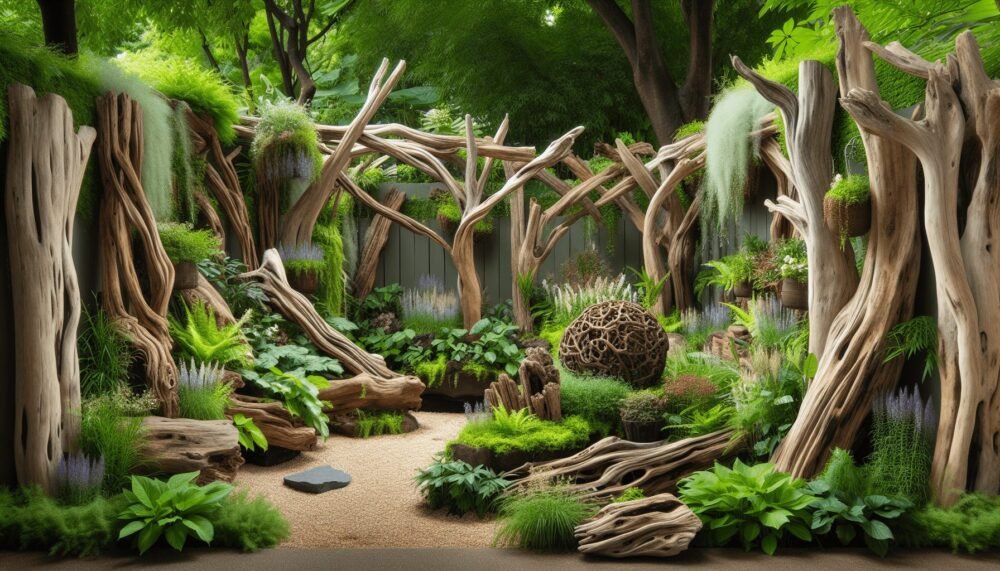
Welcome to your ultimate guide for creating a mesmerizing garden filled with unique driftwood projects! Driftwood can transform your garden into an enchanting space with its aged beauty and rustic charm. Whether you are a seasoned gardener or a newbie, incorporating driftwood into your garden projects can be both rewarding and fun. So, let’s dive into the wonderful world of driftwood and discover how you can elevate your garden to new heights.

Why Choose Driftwood for Your Garden?

Driftwood is not only aesthetically pleasing but also environmentally friendly. It is naturally weathered wood that has been washed ashore by oceans, rivers, and lakes. The result? A one-of-a-kind material that adds character and history to your garden. Additionally, driftwood is durable, versatile, and often free for the taking!

Benefits of Using Driftwood in Your Garden

  1. Unique Appearance: No two pieces of driftwood are alike, making your garden truly one-of-a-kind.
  2. Eco-Friendly: Driftwood is a recycled material, helping you contribute to sustainable gardening.
  3. Durability: Naturally weathered, driftwood is resistant to the elements and can last for years.
  4. Versatile: Suitable for various garden projects, from planters to sculptures.

Finding and Selecting the Perfect Driftwood

Before you get started, you need to find the right driftwood pieces. Here’s how:

Where to Find Driftwood

  • Beaches and Shorelines: Oceans, lakes, and rivers often have an abundant supply of driftwood.
  • Forests and Parks: Occasionally, you can find weathered wood in forests or parks.
  • Online: Websites like Etsy or local classifieds often have driftwood for sale.

Selecting the Right Pieces

When choosing driftwood, consider the following:

  • Size: Ensure the piece fits the dimensions of your project.
  • Shape: Look for interesting shapes or natural curves that can add visual appeal.
  • Condition: Avoid pieces that are overly decayed, as they may not last as long.

Preparing Driftwood for Use

Raw driftwood needs some preparation before you can use it in your garden projects.

Cleaning Driftwood

  1. Rinse: Rinse the driftwood with fresh water to remove sand and debris.
  2. Scrub: Use a brush to scrub off any remaining dirt or algae.
  3. Soak: Soak the driftwood in a mixture of bleach and water (1:9 ratio) for 24 hours to disinfect and kill any pests.
  4. Rinse and Dry: Rinse thoroughly and let the driftwood dry completely in the sun.

Sealing Driftwood

Sealing driftwood helps protect it from further decay. Use an outdoor wood sealer and apply according to the manufacturer’s instructions. This step is optional but recommended for projects exposed to the elements.

Driftwood Projects Garden

Driftwood Project Ideas for Your Garden

Now comes the fun part! Let’s explore some inspiring driftwood projects that can transform your garden into a captivating oasis.

Driftwood Planters

Driftwood planters add a rustic charm to your garden, providing an excellent home for succulents and small plants.

Materials Needed:

  • Driftwood piece
  • Potting soil
  • Plants (Succulents recommended)
  • Drill
  • Moss for decoration (optional)

Steps:

  1. Choose Your Driftwood: Select a piece that has a natural cavity or hollow.
  2. Drill: Use a drill to create drainage holes if there aren’t any.
  3. Soil: Fill the cavity with potting soil.
  4. Plant: Arrange your plants in the soil and press them firmly.
  5. Decorate: Optionally, use moss or decorative pebbles to cover the soil surface.

Driftwood Garden Sculptures

Create stunning artistic sculptures that become the focal point of your garden.

Materials Needed:

  • Multiple pieces of driftwood
  • Wood glue or outdoor-safe adhesive
  • Screws and a screwdriver
  • Sandpaper
  • Sealer

Steps:

  1. Plan Your Design: Sketch a rough idea of the sculpture you want to create. Think about shapes and proportions.
  2. Sand and Seal: Sand the pieces to remove rough edges and seal them for protection.
  3. Assemble: Begin assembling the driftwood pieces using wood glue and screws for added stability.
  4. Finalize: Once dry, place your sculpture in a prominent garden spot.

Driftwood Pathways

Make your garden walkways more enchanting with driftwood pathways.

Materials Needed:

  • Multiple pieces of flat driftwood
  • Gravel or sand
  • Weed barrier fabric

Steps:

  1. Prepare the Area: Lay down a weed barrier fabric to prevent unwanted growth.
  2. Gravel Base: Spread a layer of gravel or sand over the fabric.
  3. Lay Driftwood: Arrange flat pieces of driftwood in a pattern or randomly for a natural look.
  4. Secure: Press the driftwood firmly into the gravel and add more gravel around it for stability.

Driftwood Birdhouses

Attract avian friends with charming driftwood birdhouses.

Materials Needed:

  • Driftwood pieces
  • Birdhouse template (optional)
  • Wood glue or outdoor-safe adhesive
  • Drill and screws
  • Saw (if cutting is required)

Steps:

  1. Design: Decide on the size and shape of your birdhouse.
  2. Cut and Sand: Cut driftwood to the required lengths and sand edges smooth.
  3. Assemble: Use wood glue and screws to assemble the pieces, ensuring an entrance hole and perch.
  4. Mount: Securely mount the birdhouse on a tree or post in your garden.

Driftwood Garden Furniture

Create unique and functional garden furniture, such as benches, tables, or even swings.

Materials Needed:

  • Large, sturdy pieces of driftwood
  • Screws and bolts
  • Outdoor wood sealant
  • Timber for seat or tabletop (optional)

Steps:

  1. Design: Sketch your furniture, considering the size and shape of your driftwood.
  2. Prepare: Sand and seal all driftwood pieces.
  3. Assemble: Use screws and bolts to join the driftwood, adding timber for seats or tables as needed.
  4. Place: Position your new furniture in a comfortable spot in your garden.

Maintaining Your Driftwood Projects

Driftwood projects are relatively low-maintenance, but a little care can go a long way in preserving their beauty.

Regular Cleaning

Cleaning helps remove dirt and prevent mold growth. Gently scrub the surfaces with a soft brush and rinse with water.

Re-Sealing

For projects exposed to the elements, apply a new coat of wood sealer annually to maintain protection.

Inspiring Driftwood Garden Themes

Combining multiple driftwood projects can create themed garden areas that are truly magical.

Coastal Garden

Transform your garden into a seaside retreat with driftwood planters, sculptures, and pathways. Add shells, beach stones, and coastal plants like grasses and lavender.

Woodland Garden

Create a mystical woodland garden by incorporating driftwood birdhouses, benches, and natural sculptures. Add ferns, moss, and shade-loving plants to complete the look.

Zen Garden

For a tranquil and meditative space, use driftwood to build minimalist sculptures and water features. Pair with smooth stones, sand, and bamboo plants to enhance the serenity.

Frequently Asked Questions

Is Driftwood Safe for Plants?

Yes, driftwood is safe for most plants once it has been properly cleaned and disinfected. It can even provide additional nutrients as it breaks down over time.

Can I Use Driftwood Found in Freshwater?

Absolutely! Driftwood from lakes and rivers can be just as beautiful and durable as ocean driftwood. Just make sure to clean and disinfect it thoroughly.

How Do I Stop Driftwood from Rotting?

Sealing driftwood with an outdoor wood sealant helps prevent rot by protecting it from moisture and pests. Additionally, ensuring proper drainage in planters and avoiding prolonged soil contact can prolong its life.

Can I Construct Large Structures with Driftwood?

Yes, large pieces of driftwood can be used to create impressive garden structures like trellises or arbors. Just ensure proper stability and secure joins with heavy-duty screws and bolts.

Conclusion

Incorporating driftwood into your garden projects is a fantastic way to bring natural beauty and unique charm to your outdoor space. From simple planters to intricate sculptures, the possibilities are endless. By following the steps outlined in this guide and letting your creativity flow, you can craft a garden that is not only visually stunning but also deeply personal.

So, gather some driftwood and start designing your dream garden today. Embrace the natural, rustic appeal of driftwood and create a serene sanctuary that’s bound to impress all who visit. Happy gardening!

Filed Under: Driftwood Ideas Tagged With: DIY Projects, Driftwood, garden decor, Landscaping, Outdoor Craft

Driftwood Projects For Kids

May 25, 2024 by admin

Sure! Here’s your friendly introduction:

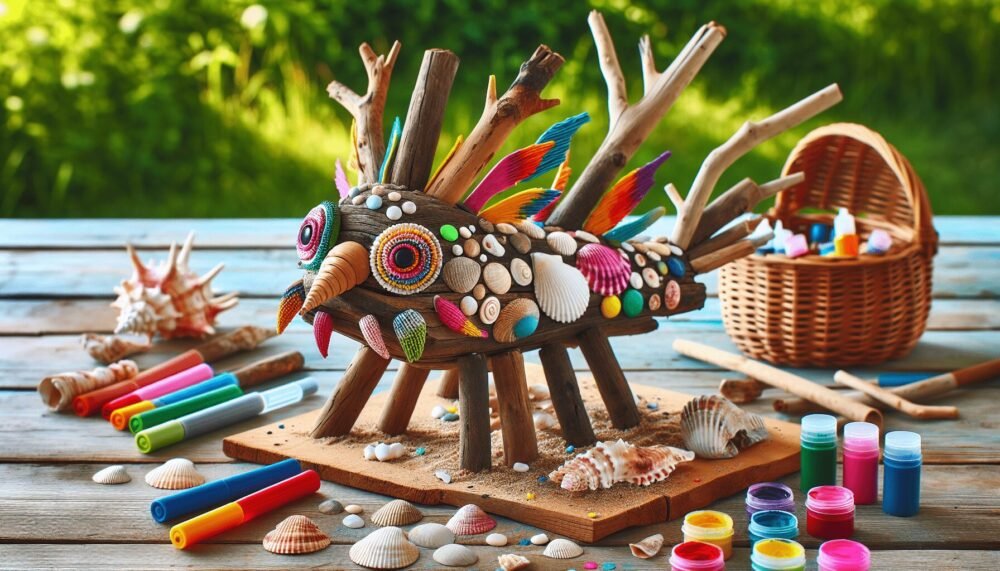
“Driftwood Projects For Kids” is your go-to guide for sparking creativity and adventure in young minds. In this article, you’ll discover an array of fun, easy, and imaginative projects using nothing more than simple driftwood. Perfect for both sunny days at the beach and rainy days indoors, these activities are designed to keep kids entertained while teaching them about nature’s beauty. Dive into our collection of ideas that turn ordinary pieces of driftwood into extraordinary treasures, creating cherished memories along the way.

Driftwood Projects For Kids

Have you ever stumbled upon a beautiful piece of driftwood while on a beach walk and wondered how to make something fun out of it with your kids? Driftwood projects are not only a marvelous way to spend quality time together, but they can also inspire creativity and introduce your children to the joys of upcycling natural materials. Plus, driftwood crafts can serve as unique decor items, making your home feel cozy and full of memories.

Driftwood Projects For Kids

Why Driftwood Is Perfect For Crafting

Driftwood, with its naturally worn appearance and unique shapes, is a wonderful material for crafting. Beach-worn and smoothed from water, it’s safe for little hands and easy to work with. It’s also versatile, providing endless opportunities for children to turn their imaginative ideas into tangible creations.

Benefits of Using Driftwood in Kids’ Projects

Using driftwood in your child’s crafting adventures can have numerous benefits. Here are just a few reasons why you should consider it:

  • Eco-friendly: Driftwood is an excellent way to recycle natural materials.
  • Educational: Kids learn about natural processes and the environment.
  • Creative Development: Encourages creativity and problem-solving skills.
  • Cost-effective: Beachcombing is free, making it an affordable crafting option.

Getting Started With Driftwood Projects

Before diving into specific projects, let’s cover some basics to make sure you’re prepared!

Safety First

Even though driftwood is generally safe, there are some precautions you should take to ensure your kids have a safe crafting experience:

  1. Inspect the Wood: Check for sharp edges or splinters.
  2. Clean the Wood: Rinse the driftwood in warm water to remove sand and debris. Soak it if necessary.
  3. Dry Completely: Make sure the driftwood is entirely dry before starting any project.

Essential Supplies

Depending on what you decide to create, you might need some additional supplies. Here’s a basic list to get you started:

  • Non-toxic paint and brushes
  • Hot glue gun or strong craft glue
  • String, yarn, or twine
  • Scissors
  • Small nails or tacks (if needed)
  • Beads, shells, or other decorative elements

Fun Driftwood Projects For Kids

Now that you’re ready, here are some fun and easy driftwood projects perfect for kids of all ages.

Driftwood Mobile

A driftwood mobile is an enchanting craft that adds a whimsical touch to any room.

Materials Needed:

MaterialQuantity
Small Driftwood Sticks5-10 pieces
String or YarnAs per requirement
Beads and ShellsOptional, for decor
Hot Glue Gun1

Steps:

  1. Gather Materials: Collect small pieces of driftwood, along with any decorative items like beads or shells.
  2. Prepare Your Driftwood: Ensure the pieces are clean and dry.
  3. Design Your Mobile: Arrange the driftwood in a pleasing pattern on a flat surface.
  4. Tie the Driftwood: Use string or yarn to tie the driftwood together. Make sure to leave some string at the top for hanging.
  5. Decorate: Add beads, shells, or other decorations as desired.
  6. Hang It Up: Find a suitable spot to hang your new mobile!

Driftwood Picture Frame

Creating a driftwood picture frame can be a memorable way to display family photos.

Materials Needed:

MaterialQuantity
Medium-sized Driftwood4-6 pieces
Cardboard Frame1
Hot Glue Gun1
Paint (Optional)As per requirement

Steps:

  1. Select Your Driftwood: Choose pieces that are relatively straight and flat.
  2. Prepare the Frame: Start with an inexpensive cardboard frame.
  3. Attach the Driftwood: Use a hot glue gun to attach the driftwood pieces to the frame, covering as much of the cardboard as possible.
  4. Optional Painting: You can paint the driftwood or leave it natural.
  5. Display Your Photos: Insert a favorite photo and display your handcrafted frame.

Driftwood Wind Chime

A driftwood wind chime is a straightforward yet delightful project.

Materials Needed:

MaterialQuantity
Driftwood Pieces5-7
String or YarnAs per requirement
Small Nails/Tacks5-10 (Optional)
Beads (Optional)As per requirement

Steps:

  1. Collect Driftwood: Gather driftwood pieces of various sizes.
  2. Prepare and Clean: Make sure the driftwood is dry and clean.
  3. Assemble the Chime: Tie each piece of driftwood to a longer vertical piece using string or yarn.
  4. Decorate: Add beads to the string for an extra flourish.
  5. Hang: Find a windy spot outdoors and hang your wind chime.

Driftwood Planter

A driftwood planter can be a beautiful addition to any home garden.

Materials Needed:

MaterialQuantity
Large Driftwood Piece1
Small Plants or SucculentsAs per preference
SoilAs per requirement
Utility Knife1

Steps:

  1. Select Your Driftwood: Choose a driftwood piece that has some indents or hollows.
  2. Carve Out Space: Use a utility knife to carve out a small area for the plants.
  3. Add Soil: Fill the carved-out space with soil.
  4. Plant: Insert small plants or succulents.
  5. Display: Place your new driftwood planter in a suitable location.

Advanced Driftwood Projects

Once you’ve mastered the simpler projects, you and your kids might want to try some more advanced creations.

Driftwood Birdhouse

Building a driftwood birdhouse can be an exciting and educational project.

Materials Needed:

MaterialQuantity
Assorted Driftwood PiecesEnough to build a small house
Non-toxic PaintAs per requirement
Hot Glue Gun1
Small Wood Saw1
Nails or ScrewsAs per requirement
Hammer or Screwdriver1

Steps:

  1. Plan Your Design: Sketch out the design for your birdhouse.
  2. Build the Frame: Use larger pieces of driftwood to create the base and walls.
  3. Attach Walls and Roof: Use nails or hot glue to attach all pieces securely.
  4. Decorate: Paint or add additional decorations if desired.
  5. Mount: Find a safe spot outdoors to mount your new birdhouse.

Driftwood Sculpture

Creating a driftwood sculpture will turn your collected pieces into a work of art.

Materials Needed:

MaterialQuantity
Various Driftwood PiecesA variety
Hot Glue Gun1
Base for Sculpture1 (such as a wooden board)

Steps:

  1. Select Driftwood Pieces: Choose an assortment of shapes and sizes.
  2. Design Your Sculpture: Experiment with arrangements until you find a visually appealing design.
  3. Attach to Base: Use a hot glue gun to affix the driftwood to your base.
  4. Add Detailing: Paint or add other decorative elements if desired.
  5. Display: Place your finished sculpture indoors or in a sheltered outdoor spot.

Driftwood Projects For Kids

Tips For Success

To help make your driftwood projects as enjoyable and successful as possible, consider these additional tips:

Incorporate Nature

Use other natural materials like shells, stones, and sea glass to enhance your driftwood projects.

Be Patient

Crafting takes time and patience. Encourage your kids to take their time and enjoy the process.

Encourage Creativity

Let your kids lead the way with their ideas. It’s a fantastic opportunity to let them express their creativity and original thinking.

Document Your Projects

Take photos of the different steps and the final product to build a memory album of your crafting journey.

Conclusion

Driftwood projects for kids are an incredible way to nurture creativity, learn about nature, and create lasting memories. From simple mobiles to intricate sculptures, there’s a driftwood project suitable for every age and skill level. The key is to have fun, be patient, and let the beauty of nature inspire you and your children.

Next time you’re on a beach walk, remember to collect some driftwood. You never know what amazing creations are waiting just around the corner to become a treasured part of your home. Happy crafting!

Filed Under: Driftwood Ideas Tagged With: crafts, DIY Projects, Driftwood, Kids Activities, Nature Crafts

Easy Driftwood Projects

May 25, 2024 by admin

Looking for a creative way to bring a touch of nature into your home decor? “Easy Driftwood Projects” is your go-to guide! This article showcases simple yet stunning projects that transform ordinary pieces of driftwood into beautiful, rustic decorations. You’ll learn how to make charming candle holders, unique wall art, and stylish coat racks, all with easy-to-follow steps. Whether you’re a crafting novice or a DIY enthusiast, you’ll find plenty of inspiration to get started and bring the outdoors inside with these delightful driftwood creations.

Easy Driftwood Projects

Have you ever found yourself wandering along a beach, picking up intriguing pieces of driftwood, and wondered what you could create out of them? Driftwood, with its naturally weathered appearance, can add a rustic touch to your home decor or garden. The best part is that driftwood projects are often simple and can be completed with minimal tools and materials.

In this article, we’ll dive into some fun, easy, and inspirational driftwood projects that anyone can tackle. Whether you’re a seasoned DIYer or a beginner looking to experiment, you’ll find ideas that suit your skills and creativity.

What is Driftwood?

Before we dive into the projects, it’s helpful to understand what driftwood is. Driftwood is wood that has been washed onto the shore by the action of winds, tides, or waves. It is often found along beaches, riverbanks, or other bodies of water. The process of being carried by water gives driftwood its unique, weathered appearance, which can include smoothed edges, intricate textures, and even a grayish hue due to prolonged exposure to sunlight and water.

Getting Started with Driftwood

Finding Driftwood

Your first step is to collect driftwood. You can find driftwood in various sizes and shapes on beaches, lakesides, and riversides. It’s ideal to pick pieces that inspire you with their natural form. While collecting, be mindful of the environment and consider any local regulations about taking natural materials.

Cleaning Driftwood

Once you’ve gathered your driftwood, it’s a good idea to clean it. This helps remove any salt, grime, or critters that may be hiding in the wood. Here’s a simple way to clean driftwood:

  1. Rinse the driftwood thoroughly with fresh water.
  2. Soak it in a mixture of warm water and dish soap for a few hours.
  3. Scrub the pieces with a brush to remove any debris.
  4. Rinse again and let them dry completely in the sun.

Tools and Supplies Needed

For most driftwood projects, you will need a few basic tools and supplies. Here’s a quick list:

ToolsSupplies
SawGlue (wood glue or hot glue)
SandpaperNails and screws
DrillHooks and hangers
Measuring tapePaint and varnish (optional)
PaintbrushesString, rope, or wire
ScissorsSealant (for outdoor projects)

Easy Driftwood Projects

Project Ideas

Driftwood Candle Holders

Creating candle holders out of driftwood can add a cozy ambiance to your home. Here’s how you can do it:

Materials Needed:

  • Small pieces of driftwood
  • Tea light candles
  • Drill with a spade bit (to fit the size of your tea light candles)
  • Sandpaper

Instructions:

  1. Select pieces of driftwood that are relatively flat and stable.
  2. Sand the pieces to remove any rough edges.
  3. Use the drill with the spade bit to carefully create holes in the wood where the tea light candles will sit.
  4. Place the tea light candles into the holes you’ve drilled.

This simple yet elegant project can be customized by painting or staining the driftwood, or adding decorative elements like shells or beads.

Driftwood Mirrors

A driftwood mirror makes a stunning focal point in any room. You don’t need to be an expert to make one, either!

Materials Needed:

  • A plain mirror with a basic frame
  • Various pieces of driftwood
  • Wood glue or hot glue
  • Scissors or small saw (to trim pieces if needed)

Instructions:

  1. Arrange the driftwood pieces around the frame of the mirror to get an idea of how you want them positioned.
  2. Once you’re happy with your design, start gluing the pieces onto the frame. Use a strong adhesive to ensure they stay secure.
  3. Let the glue dry completely.

Voila! You have a unique and eye-catching driftwood mirror that’s sure to draw compliments.

Driftwood Wall Art

Turn your driftwood collection into a piece of art to hang on your wall. Whether you prefer an abstract design or a more structured pattern, the possibilities are endless.

Materials Needed:

  • Driftwood pieces of various shapes and sizes
  • Wooden board or canvas (as a base)
  • Nails and a hammer (or glue)
  • Paint (optional)

Instructions:

  1. Arrange the driftwood on the board or canvas in your desired pattern.
  2. Once you’re satisfied with the arrangement, either nail or glue the pieces to the base.
  3. Allow the adhesive to dry completely if you used glue.
  4. You can leave the driftwood natural or paint it to match your decor.

This project allows lots of creative freedom, so let your imagination run wild!

Driftwood Wind Chime

A driftwood wind chime adds a soothing sound of clinking wood to your outdoor space. It’s also a wonderful way to display your favorite pieces of driftwood.

Materials Needed:

  • Driftwood pieces
  • String, wire, or fishing line
  • Metal or glass chimes (optional)
  • A strong stick or piece of driftwood (for the top)

Instructions:

  1. Drill small holes into your driftwood pieces if they don’t already have natural holes.
  2. Attach your string or wire through the holes to connect the pieces.
  3. Tie the strings to your top piece of driftwood, making sure each piece hangs freely.
  4. Add metal or glass chimes if you wish to enhance the sound.

Hang your wind chime where it will catch the breeze, and enjoy the natural music it creates!

Driftwood Shelves

Driftwood shelves are a practical and stylish way to bring the beach into your home.

Materials Needed:

  • Long pieces of driftwood (for the shelf itself)
  • L-brackets
  • Screws
  • Drill
  • Stud finder
  • Level

Instructions:

  1. Find the studs in the wall where you want to install the shelf.
  2. Use a level to mark where the brackets will go.
  3. Attach the L-brackets to the wall using screws and a drill.
  4. Place your driftwood pieces on the brackets to create the shelf.
  5. Secure the driftwood to the brackets with screws if necessary.

This project not only looks great but also provides additional storage space in your home.

Driftwood Planters

If you love gardening, driftwood planters can add a rustic charm to your indoor or outdoor garden.

Materials Needed:

  • Hollow pieces of driftwood or large pieces you can hollow out
  • Soil
  • Small plants or succulents

Instructions:

  1. If using solid pieces, hollow out the driftwood to create space for the plants.
  2. Fill the hollowed spaces with soil.
  3. Plant your chosen plants or succulents into the soil.

Driftwood planters make unique centerpieces for tables or lovely accents for your garden.

Driftwood Jewelry Hanger

Organize your jewelry with a functional and decorative driftwood hanger.

Materials Needed:

  • Long, thin piece of driftwood
  • Small hooks or nails
  • Drill
  • String or wire (for hanging)

Instructions:

  1. Drill small holes into the driftwood where you want to place the hooks or nails.
  2. Screw in your hooks or drill in the nails.
  3. Attach string or wire to the ends of the driftwood for hanging.

Hang your jewelry hanger on your wall and neatly organize your necklaces, bracelets, and earrings.

Driftwood Picture Frame

A driftwood picture frame can add a coastal vibe to your photographs and art.

Materials Needed:

  • Basic picture frame
  • Driftwood pieces
  • Wood glue or hot glue

Instructions:

  1. Arrange the driftwood pieces around the frame in a design you like.
  2. Glue the pieces onto the frame.
  3. Let the glue dry completely.

Your driftwood picture frame is now ready to showcase your favorite memories!

Driftwood Mobiles

Driftwood mobiles are a beautiful and whimsical way to decorate. They’re perfect for nurseries or any space that could use a touch of natural charm.

Materials Needed:

  • Driftwood pieces
  • String or fishing line
  • Drill
  • A strong branch or piece of driftwood for the top

Instructions:

  1. Drill holes in the driftwood pieces if they don’t have natural holes.
  2. Attach the pieces to each other with string or fishing line, varying the lengths to create an interesting design.
  3. Tie the strings to the top branch, ensuring each piece hangs freely.
  4. Hang the mobile where it can sway gently in the breeze.

Driftwood Coat Rack

A driftwood coat rack is a practical and lovely addition to any entryway.

Materials Needed:

  • A long, sturdy piece of driftwood
  • Hooks or pegs
  • Screws
  • Drill

Instructions:

  1. Attach the hooks or pegs to the driftwood, spacing them evenly.
  2. Mount the driftwood to the wall using screws and a drill, ensuring it is level and securely attached to the studs.

Now you have a stylish and functional coat rack that brings a piece of the beach into your home.

Tips for Working with Driftwood

Safety First

When working with any type of wood, including driftwood, it’s essential to prioritize safety. Wear gloves to protect your hands from splinters and use eye protection when cutting or drilling.

Selecting the Right Pieces

Choose pieces of driftwood that are sturdy and free from rot or excessive cracks. The better the quality of your driftwood, the more durable and long-lasting your projects will be.

Preserving Your Projects

If your driftwood project will be exposed to the elements, consider applying a sealant to protect the wood from moisture and UV damage. This will help preserve the beauty and longevity of your creations.

Experiment and Have Fun

Don’t be afraid to experiment with different shapes, sizes, and types of driftwood. Part of the charm of driftwood projects is their unique, natural look, so embrace the imperfections and let your creativity shine.

Easy Driftwood Projects

Conclusion

Creating with driftwood is a delightful way to incorporate the natural beauty of the outdoors into your home. Whether you’re making candle holders, mirrors, wall art, or any of the other projects we’ve explored, you’re sure to end up with something unique and handmade that brings joy and character to your space.

So next time you find yourself at a beach, take a moment to gather some driftwood. Roll up your sleeves, grab your tools, and let your imagination take the lead. Happy crafting!

Filed Under: Driftwood Ideas Tagged With: craft ideas, DIY Projects, Driftwood, home decor, Rustic Design

Diy Driftwood Projects Wall Hangings

May 25, 2024 by admin

Dive into the world of DIY driftwood projects and transform your walls into coastal masterpieces. “DIY Driftwood Projects Wall Hangings” brings you easy-to-follow instructions and inspirational ideas to create stunning, nature-inspired home decor. You’ll discover the beauty and versatility of driftwood, as well as tips for sourcing, preparing, and arranging pieces that reflect your unique style. Whether you’re a seasoned crafter or a beginner, this guide will help you bring a touch of the seaside into your home with charming and creative wall hangings.

DIY Driftwood Projects: Wall Hangings

Have you ever found a unique piece of driftwood on the beach and wondered what to do with it? Driftwood can add a natural, rustic touch to your home decor, transforming plain walls into artistic statements. This article will guide you through various DIY driftwood wall hanging projects. You’ll learn how to prepare your driftwood, gather the necessary materials, and create beautiful wall hangings. By the end, you’ll have a treasure of ideas and tips to get you started on your own driftwood adventure.

Why Choose Driftwood for Wall Hangings?

Driftwood is not just a piece of wood; it’s nature’s art. Each piece has its own story, shaped and weathered by time and the elements. It’s eco-friendly and sustainable, making it a great choice for crafters who care about the environment.

Benefits of Using Driftwood

  1. Uniqueness: Every piece of driftwood is different, providing a one-of-a-kind look.
  2. Eco-Friendly: Reusing natural materials helps to reduce waste.
  3. Versatility: Driftwood can be used in various crafts beyond wall hangings.
  4. Ease of Use: With basic tools, you can easily transform driftwood into art.

Gathering Your Driftwood

Before diving into your project, you need to gather some driftwood. This is usually the fun part!

Where to Find Driftwood

  1. Beaches: Coastal areas are the best places to find driftwood.
  2. Riverbanks: Rivers can also wash up interesting pieces.
  3. Lakes: Edges of lakes can sometimes have smaller bits of driftwood.

Choosing the Right Pieces

When selecting driftwood, look for pieces that are:

  • Sturdy and not rotting.
  • Free from pests or excessive barnacles.
  • Visually appealing in terms of shape and texture.

Safety Precautions

Always wear gloves and sturdy shoes when scavenging for driftwood. Be mindful of your surroundings and respect local regulations about removing natural items from beaches and rivers.

Diy Driftwood Projects Wall Hangings

Preparing Your Driftwood

Once you’ve collected your driftwood, it’s essential to prepare it before turning it into a wall hanging.

Cleaning the Driftwood

  1. Rinsing: Use a hose to rinse off any sand, dirt, or salt.
  2. Scrubbing: Use a stiff brush to remove any remaining debris.
  3. Soaking: Soak your driftwood in fresh water for 1-2 weeks to remove any remaining salt and to kill any pests. Change the water every few days.

Drying the Driftwood

After cleaning, place the driftwood in a sunny spot to dry thoroughly. This can take a few days to a couple of weeks, depending on the size of the wood. Ensure the driftwood is entirely dry before starting your project to prevent mold growth.

Materials and Tools You’ll Need

For most driftwood wall hanging projects, you’ll need a few basic materials and tools.

Basic Tools

ToolPurpose
SandpaperTo smooth rough edges and surfaces
SawTo cut driftwood to the desired length
DrillTo make holes for hanging or connecting pieces
Screws/NailsTo secure pieces together
GlueTo bond pieces, especially for lighter items

Additional Materials

MaterialPurpose
Twine/WireFor hanging or connecting pieces
HooksFor hanging the final piece on the wall
Paint/StainOptional, for adding color or protecting wood
Beads/OrnamentsOptional, for additional decoration

Diy Driftwood Projects Wall Hangings

Driftwood Wall Hanging Project Ideas

Now that you have your materials ready, let’s explore some creative ideas for making driftwood wall hangings. These projects range from simple to a bit more complex, so there’s something here for everyone.

Driftwood Wall Art

Driftwood wall art can be as simple or intricate as you like. You can arrange pieces of driftwood in a pattern or shape that appeals to you and secure them with glue or nails.

Steps to Create Driftwood Wall Art

  1. Plan Your Design: Lay out your driftwood pieces on the ground to decide on a pattern.
  2. Cut and Sand: Cut pieces to size if needed and sand any rough edges.
  3. Assemble: Use glue, nails, or screws to attach the driftwood pieces together.
  4. Add Hanging Hardware: Attach hooks or loops to the back for hanging on the wall.

Driftwood Mirror Frame

A driftwood mirror frame can add a coastal vibe to any room. This project requires a bit more precision and planning but is entirely achievable.

Steps to Create a Driftwood Mirror Frame

  1. Choose a Mirror: Select a mirror with a flat edge.
  2. Plan Your Layout: Lay out driftwood pieces around the mirror to decide on the arrangement.
  3. Cut and Sand: Trim pieces to fit and sand the edges.
  4. Attach Wood to Mirror: Use strong glue or screws to attach the driftwood to the edge of the mirror.
  5. Final Touches: Allow adequate drying time and then secure any loose pieces.

Driftwood Mobile

Driftwood mobiles are elegant and can be hung in various places, from nurseries to living rooms.

Steps to Create a Driftwood Mobile

  1. Select Pieces: Choose a mixture of long and short pieces.
  2. Drill Holes: Drill small holes through the center of each piece.
  3. Thread Twine or Wire: Thread twine or wire through the holes, tying knots beneath each piece to keep them spaced apart.
  4. Create Balance: Adjust the lengths of the twine or wire to ensure the mobile hangs evenly.
  5. Hang the Mobile: Secure a larger piece of driftwood to use as the top and hang the threaded pieces from it.

Driftwood Shelf

A driftwood shelf can serve both functional and decorative purposes. It’s perfect for displaying small items or plants.

Steps to Create a Driftwood Shelf

  1. Select Wood: Choose a sturdy piece of driftwood for the shelf and two shorter pieces for supports.
  2. Cut and Sand: Cut the supports to size and sand all pieces.
  3. Assemble the Shelf: Secure the support pieces to the wall using screws, ensuring they are level. Place the main piece of driftwood on top and secure it in place.
  4. Add Final Touches: Check stability and adjust as needed.

Driftwood Sign

A driftwood sign can add a personal touch to your home, whether it’s a welcome sign, a name plaque, or an inspirational quote.

Steps to Create a Driftwood Sign

  1. Choose Your Driftwood: Select a flat piece of driftwood.
  2. Clean and Sand: Ensure it is clean and smooth.
  3. Stenciling or Freehand: Use stencils or freehand your design or text onto the driftwood.
  4. Painting or Engraving: Paint the lettering or use a wood-burning tool for a carved effect.
  5. Seal it: Apply a clear sealant to protect your sign.

Driftwood Planter

A driftwood planter is an excellent project for bringing a touch of nature indoors.

Steps to Create a Driftwood Planter

  1. Choose Wood: Select a piece suitable for holding a small pot or soil arrangement.
  2. Cut and Shape: Hollow out a section if necessary.
  3. Place Plants: Secure small pots in place or fill the hollowed section with soil and plant directly.
  4. Waterproofing: Ensure any added soil is in a waterproof container to prevent damage to the driftwood.

Maintenance of Driftwood Wall Hangings

Once you’ve created your driftwood masterpiece, you’ll want to ensure it stays beautiful for years to come. Here are some tips for maintaining driftwood wall hangings.

Regular Dusting

Dust your driftwood wall hangings regularly using a soft cloth or duster. This will keep them looking fresh and prevent the buildup of dust in the crevices.

Occasional Cleaning

Every few months, you can clean your driftwood pieces with a damp cloth. Avoid soaking the wood, as it may weaken the piece over time.

Inspect for Pests

Keep an eye out for any signs of pests. While soaking the driftwood should have eliminated any initial contaminants, it’s always good to be vigilant.

Sealing Driftwood

To protect your driftwood projects further, consider applying a wood sealant. This can help prevent moisture damage and ensure the longevity of your art.

Tips for Success

Learning from others’ experiences can be incredibly helpful. Here are some tips to help you succeed in your driftwood wall hanging projects.

Choose High-Quality Materials

Invest in good-quality glue, screws, and tools. These can make a significant difference in the durability and appearance of your final piece.

Start Simple

If you’re new to driftwood projects, start with a simple project. Build your confidence and skills before tackling more complex designs.

Practice Safety

Always use appropriate safety gear, such as gloves, eye protection, and a mask when cutting or sanding driftwood.

Keep it Balanced

When creating wall hangings, ensure your piece is balanced and securely fastened. This will prevent it from falling and causing damage or injury.

Personalize Your Projects

Add your unique touch to each project. Whether it’s a splash of color, a bit of decor, or a personalized engraving, make your driftwood wall hangings a true reflection of your style.

Conclusion

Driftwood wall hangings are a delightful and rewarding DIY project. They bring a piece of nature into your home, adding warmth and character to your space. Whether you’re a seasoned crafter or a beginner, there’s a driftwood project for you. With a bit of creativity and effort, you can turn these natural treasures into stunning pieces of art.

Now that you have all the information and inspiration you need, why not start your driftwood wall hanging project today? Who knows, your next beach walk might be the beginning of an exciting crafting journey!

Filed Under: Driftwood Ideas Tagged With: crafts, DIY Projects, Driftwood, home decor, Wall Hangings

Drift Wood Crafts Ideas Driftwood Projects

May 22, 2024 by admin

Welcome to the world of Drift Wood Crafts Ideas and Driftwood Projects! In this creative journey, you will discover the magic of turning ordinary driftwood into extraordinary pieces of art. Whether you’re a seasoned crafter or just looking for a new hobby, these unique ideas will inspire you to transform seaside treasures into beautiful home decor, charming accessories, and thoughtful gifts. Embrace the beauty of nature and let your imagination run wild with countless possibilities that driftwood can offer. Let’s get started on making your own Drift Wood Crafts!

Driftwood Crafts Ideas: Driftwood Projects

Drift Wood Crafts Ideas Driftwood Projects

Have You Ever Thought About Driftwood Crafts?

If you’ve ever wandered along a beach and come across pieces of driftwood, you might have wondered what you could do with them. Driftwood isn’t just a piece of wood washed ashore; it’s a piece of nature’s art waiting to be transformed into something beautiful. Whether you’re a crafty person looking for a new project or someone seeking to bring a touch of the outdoors into your home, driftwood crafts offer endless possibilities.

Why Choose Driftwood for Crafts?

Driftwood is not only beautiful and unique; it’s also eco-friendly. As a natural material that has already been weathered and softened by the elements, it requires minimal preparation before use, making it a fantastic medium for various projects. Plus, every piece of driftwood is unique, ensuring that no two creations will ever be exactly the same.

Where Can You Find Driftwood?

Before diving into craft projects, you’ll need to gather some driftwood. Typically, you can find driftwood at beaches, lakesides, and riverbanks. However, ensure you’re not disturbing local ecosystems, and check local regulations about collecting driftwood, as some areas have restrictions.

Preparing Driftwood for Crafts

Once you’ve gathered your pieces, you’ll need to prepare them properly for crafting to ensure they are clean and free from pests or mold.

Cleaning Driftwood

  1. Rinse and Soak: Rinse your driftwood to remove sand and debris. Then, soak it in a bucket of fresh water for at least 24 hours, changing the water periodically.
  2. Scrub: After soaking, scrub the driftwood with a stiff brush to remove any remaining dirt or algae.
  3. Disinfect: Disinfect by soaking it in a water and bleach solution (1 part bleach to 10 parts water) for 30-45 minutes. Rinse thoroughly afterward.

Drying Driftwood

  1. Sun Dry: Place the cleaned driftwood in direct sunlight for drying. This can take anywhere from a few days to a couple of weeks, depending on the size and thickness.
  2. Oven Dry: For quicker results, you can dry driftwood in an oven at a low temperature (around 200°F) for a few hours. Regularly check to avoid burning.

Driftwood Craft Ideas

Now that your driftwood is ready, let’s explore some creative projects you can undertake. Driftwood crafting allows for a wide variety of unique and stunning items, perfect for home decor or even as gifts.

Driftwood Wall Art

Driftwood wall art can add a rustic and natural vibe to any room. You can create anything from simple arrangements of small pieces to more complex designs.

Materials Needed:

  • Driftwood pieces
  • Strong adhesive or nails
  • Backing board (optional)
  • Saw for cutting (optional)

Steps:

  1. Design: Lay out your driftwood pieces on the floor to design your art. Arrange and rearrange until you’re happy with the design.
  2. Secure: Attach the driftwood to a backing board using strong adhesive or nails. This can help make your piece sturdier and easier to hang.
  3. Finish: You can leave the wood natural for a rustic look or apply a wood sealer.

Driftwood Shelves

Create eye-catching shelves using driftwood. They can be both functional and decorative, adding a coastal touch to your home.

Materials Needed:

  • Driftwood
  • Brackets or L-brackets
  • Screws and anchors
  • Drill

Steps:

  1. Select Wood: Choose driftwood pieces that are relatively flat and sturdy.
  2. Attach Brackets: Secure the brackets to the driftwood. Ensure they are evenly spaced for balanced support.
  3. Mount: Drill holes in the wall where you want the shelves to go. Use anchors if you’re mounting into drywall.
  4. Hang: Attach the assembled shelf to the wall.

Driftwood Mirrors

A driftwood mirror serves as a stunning focal point in any room. It combines the practicality of a mirror with the aesthetic appeal of driftwood.

Materials Needed:

  • Mirror
  • Driftwood pieces
  • Strong adhesive
  • Mounting hardware

Steps:

  1. Cut and Arrange: Cut the driftwood into pieces that will form a frame around the mirror. Arrange them around the mirror until you’re happy with the layout.
  2. Adhere: Use strong adhesive to attach the driftwood to the edges of the mirror.
  3. Dry: Allow the adhesive to dry completely.
  4. Mount: Install mounting hardware and hang your new mirror on the wall.

Driftwood Candle Holders

Driftwood candle holders can bring a touch of nature to your home decor. You can make simple single-candle holders or more elaborate designs to hold multiple candles.

Materials Needed:

  • Driftwood
  • Candle cups or small metal inserts
  • Drill with a matching bit size
  • Sandpaper

Steps:

  1. Mark Spots: Identify where you want to place the candles on the driftwood and mark these spots.
  2. Drill: Drill holes that match the size of your candle cups or inserts.
  3. Insert: Place the candle cups or inserts into the drilled holes.
  4. Sand: Sand the edges to ensure there are no rough spots.

Driftwood Picture Frames

You can create charming picture frames with driftwood, perfect for seaside photographs or any cherished memories.

Materials Needed:

  • Driftwood pieces
  • Existing picture frame (optional)
  • Strong adhesive
  • Backing board (if not using an existing frame)
  • Glass/plexiglass for the front

Steps:

  1. Design Frame: Arrange your driftwood pieces around the edges of an existing frame or create a new frame by attaching pieces to a backing board.
  2. Attach: Use a strong adhesive to secure the driftwood to the frame structure.
  3. Insert Picture: Place your chosen picture inside the frame and secure with glass or plexiglass.

Driftwood Lamps

Driftwood lamps make unique and beautiful lighting options for homes. They can range from simple table lamps to more intricate floor lamps.

Materials Needed:

  • Driftwood
  • Lamp kit (available at hardware stores)
  • Drill
  • Screws and mounting hardware
  • Lampshade

Steps:

  1. Design: Decide on the shape and structure of your lamp. Ensure it can stand upright securely.
  2. Drill Holes: Drill holes through the driftwood for the lamp wiring.
  3. Assemble: Insert the lamp kit pieces following the instructions, running the wire through the drilled holes.
  4. Secure: Use screws or additional driftwood pieces to stabilize the structure.
  5. Attach Lampshade: Finish off by attaching a suitable lampshade.

Driftwood Coat Rack

A driftwood coat rack is both functional and decorative, perfect for entryways or mudrooms.

Materials Needed:

  • Driftwood
  • Coat hooks
  • Screws
  • Drill

Steps:

  1. Choose Wood: Select a sturdy piece of driftwood that can bear the weight of coats and bags.
  2. Mount Hooks: Screw in the coat hooks at spaced intervals along the driftwood.
  3. Mount Rack: Drill holes in the wall and use anchors to secure the driftwood coat rack.

Advanced Driftwood Projects

Once you’ve mastered the basics, you may want to try some more advanced driftwood projects. These can be more time-consuming and may require additional tools or skills but offer rewarding and stunning results.

Driftwood Furniture

Creating driftwood furniture can be a phenomenal way to showcase your craftsmanship and create unique, functional pieces for your home.

Driftwood Coffee Table

Materials Needed:

  • Large driftwood pieces for legs and support
  • Glass tabletop
  • Strong adhesive or screws
  • Drill

Steps:

  1. Select Pieces: Choose sturdy driftwood pieces that can support the weight of a glass tabletop.
  2. Assemble Base: Attach the driftwood pieces together to form a stable base.
  3. Secure Top: Place the glass tabletop on the driftwood base, securing it with adhesive if needed.

Driftwood Headboard

A driftwood headboard can transform a bedroom into a rustic retreat.

Materials Needed:

  • Large driftwood pieces
  • Backing board (optional)
  • Screws and brackets
  • Drill

Steps:

  1. Design Layout: Lay out your driftwood pieces to create a cohesive pattern.
  2. Attach to Backing: Secure the pieces to a backing board using screws and brackets.
  3. Mount: Attach the headboard to the wall or bed frame.

Driftwood Garden Decor

Driftwood can also be used to create beautiful garden decorations.

Driftwood Planters

Materials Needed:

  • Driftwood
  • Plant pots or liners
  • Strong adhesive

Steps:

  1. Build Frame: Arrange driftwood pieces around a plant pot or liner to form the shape of a planter.
  2. Secure: Use strong adhesive to attach the driftwood pieces to the frame.
  3. Plant: Once the adhesive is dry, add soil and plants to your new planter.

Drift Wood Crafts Ideas Driftwood Projects

Tips for Working with Driftwood

Safety First

Always wear gloves and a mask when cutting and sanding driftwood to protect yourself from dust and splinters.

Proper Tools

Having the right tools can make your projects easier and safer. Basic tools like a saw, drill, sandpaper, and strong adhesive are essential for most driftwood projects.

Preserve the Natural Look

To maintain the natural beauty of driftwood, avoid over-sanding or using too many artificial finishes. A simple wood sealer can enhance the driftwood’s appearance without compromising its rustic charm.

Experiment and Be Creative

Don’t be afraid to experiment with different shapes, sizes, and arrangements. Each piece of driftwood has its own character, and your creativity can turn it into something extraordinary.

Conclusion

Driftwood crafts offer endless opportunities to create beautiful, unique pieces that bring a touch of nature into your home. From simple projects like candle holders to more advanced endeavors like furniture, driftwood can be transformed into a variety of decor items that are both functional and aesthetically pleasing. By following these ideas and tips, you can start your own driftwood crafting journey and enjoy the process of turning nature’s leftovers into cherished pieces of art.

So next time you find yourself at the beach, consider picking up a few pieces of driftwood and seeing where your creativity can take you. Happy crafting!

Filed Under: Driftwood Ideas Tagged With: craft ideas, DIY Projects, Driftwood, home decor, natural materials

Driftwood Projects Unique Apartment

May 20, 2024 by admin

Imagine walking into a home unlike any other—crafted with creativity, and bursting with character. “Driftwood Projects Unique Apartment” explores an innovative living space where nature meets modernity. Utilizing driftwood as the cornerstone, this apartment radiates a whimsical charm through its design. You’ll find yourself enchanted by the craftsmanship and thoughtful details that make this dwelling not just a place to live, but a cozy retreat that genuinely feels extraordinary.

Driftwood Projects: Unique Apartment

Driftwood Projects Unique Apartment

Have You Ever Wondered How to Transform Your Living Space Into a Unique Oasis?

If you have, you’re in the right place. In this article, we’re going to dive deep into the world of driftwood projects and how they can transform your apartment into a one-of-a-kind living space. Driftwood is an underappreciated material that holds the potential to add a rustic, natural charm to any room. We’ll walk you through the benefits, project ideas, and practical tips to make the most out of driftwood in your apartment.

What is Driftwood?

Before we jump into the exciting projects, it’s vital to understand what driftwood is. Driftwood is wood that has been washed onto the shore by the tides, winds, or waves. Over time, it undergoes a natural weathering process, which gives it its unique texture and appearance.

Benefits of Using Driftwood

Using driftwood in your apartment offers a myriad of benefits:

  • Sustainability: It’s an environmentally friendly option since it involves recycling natural materials.
  • Aesthetic Appeal: Driftwood’s unique look adds a touch of nature and rustic charm.
  • Versatility: Driftwood can be used for various DIY projects, from furniture to decorative items.
  • Cost-Effective: Often found freely on beaches, it’s a budget-friendly material.

Preparing Driftwood for Your Projects

To make sure your driftwood projects stand the test of time, it’s essential to properly prepare the wood. Preparation involves cleaning, drying, and sometimes treating the wood to prevent any insect infestations or further decay.

Cleaning Driftwood

Before using driftwood in any project, you need to clean it thoroughly. Here’s a step-by-step guide:

  1. Rinse: Wash off any sand, dirt, or salt with fresh water.
  2. Soak: Submerge the driftwood in a large container filled with water for a couple of days to leach out any remaining salts.
  3. Scrub: Use a brush to scrub off any moss, algae, or other debris.
  4. Rinse Again: Give the wood a final rinse with clean water.

Drying Driftwood

Once your driftwood is thoroughly cleaned, it’s crucial to dry it out completely. You can simply air-dry the wood in a well-ventilated area, or for faster results, bake it in an oven at a low temperature (200°F) for a few hours.

Treating Driftwood

For added protection, consider treating the wood:

  • Pest-Control: Spray with a mild insecticide if you suspect insect infestation.
  • Sealant: Apply a wood sealant to preserve the wood and enhance its appearance.

Unique Driftwood Projects for Your Apartment

Now that your driftwood is ready, let’s explore some exciting project ideas that will bring a unique touch to your apartment.

Driftwood Furniture

Driftwood furniture can be the cornerstone of your apartment’s décor, providing both functionality and style.

Driftwood Coffee Table

A driftwood coffee table can become a focal point in your living room. Use large driftwood pieces as the base and top it with a glass surface to combine rustic charm with modern aesthetics.

Driftwood Shelves

Create floating shelves using flat pieces of driftwood. They’re perfect for displaying books, plants, or other decorative items.

Driftwood Headboard

Transform your bedroom by creating a driftwood headboard. Arrange different pieces of driftwood in varying sizes and attach them to a wooden frame for a stunning backdrop to your bed.

Driftwood Lighting

Lighting is crucial in setting the ambiance of a room, and driftwood can create unique lighting fixtures.

Driftwood Lamp

Create a stunning driftwood lamp by attaching a lamp kit to a large driftwood piece. The irregular shape will cast interesting shadows, creating a cozy atmosphere.

Driftwood Chandelier

For a more ambitious project, consider a driftwood chandelier. Assemble various driftwood pieces into a frame and attach light bulbs for a breathtaking centerpiece.

Decorative Driftwood Items

Add smaller, decorative items to bring a touch of driftwood into various parts of your apartment.

Driftwood Mirror

Frame a mirror with pieces of driftwood for a coastal-inspired look. This can be a great addition to your bathroom or hallway.

Driftwood Art

Create wall art by arranging driftwood pieces into a design or shape of your choice. You can make anything from abstract patterns to specific shapes like hearts or stars.

Driftwood Candle Holders

Use small pieces of driftwood to create unique candle holders. They add a rustic touch and are perfect for cozy evenings.

Combining Driftwood with Other Elements

While driftwood is stunning on its own, combining it with other materials can take your projects to the next level. Here are some ideas:

Driftwood and Glass

The combination of driftwood and glass offers a compelling contrast between natural and refined elements. Consider using glass tops for driftwood tables or glass jars for driftwood candle holders.

Driftwood and Metal

For an industrial chic vibe, combine driftwood with metal. Use metal brackets for driftwood shelves or metal frames for driftwood art.

Driftwood and Fabric

Integrate soft fabrics with the rugged texture of driftwood. Fabric cushions can be added to driftwood benches or stools for added comfort and style.

Maintenance Tips for Driftwood Projects

Maintaining your driftwood projects ensures they remain beautiful and functional for years to come.

Regular Dusting

Dust your driftwood items regularly with a soft cloth to keep them looking fresh.

Avoid Excess Moisture

Keep driftwood items away from excessive moisture to prevent decay. If a piece gets wet, dry it immediately.

Re-Sealing

Over time, the sealant may wear off. Reapply a wood sealant periodically to maintain the wood’s appearance and durability.

Driftwood Projects Unique Apartment

Where to Find Driftwood

Finding driftwood can be an adventure in itself. Here are some tips on where and how to gather driftwood:

Local Beaches and Rivers

The most common places to find driftwood are beaches and riverbanks. Take a walk, enjoy the scenery, and collect pieces that catch your eye.

Online Marketplaces

If you’re unable to find driftwood locally, online marketplaces like eBay and Etsy offer various pieces for sale.

Local Crafts Stores

Some craft stores also carry driftwood suitable for small projects.

Safety Considerations

When working with driftwood, it’s essential to keep safety in mind:

Avoid Treated Wood

Ensure that the driftwood you collect hasn’t been chemically treated, as this can be harmful.

Wear Protective Gear

When cutting or sanding driftwood, wear protective gear like gloves and a mask to avoid inhaling dust or getting splinters.

Use Safe Sealants

Opt for non-toxic sealants if you’re using driftwood in food-related projects or items that children may handle.

Driftwood Projects for Different Rooms

Driftwood can enhance various parts of your apartment. Here are some room-specific project ideas:

Living Room

  • Media Console: Use large pieces of driftwood as a base for your TV stand.
  • Wall Art: Display a large piece of driftwood art as a statement piece.

Bedroom

  • Bedside Table: Create a small driftwood table to place next to your bed.
  • Wardrobe Handles: Replace standard wardrobe handles with driftwood pieces for a unique touch.

Kitchen

  • Utensil Holder: Use a hollow piece of driftwood to store kitchen utensils.
  • Fruit Bowl: Create a driftwood bowl to keep fresh fruits and vegetables.

Bathroom

  • Towel Rack: Use a long piece of driftwood with hooks to hang towels.
  • Soap Dish: Craft a small driftwood dish for holding soap.

Driftwood for Seasonal Decor

Driftwood can also be repurposed for seasonal decorations.

Spring and Summer

  • Planters: Create driftwood planters for your indoor plants.
  • Beach-Themed Decor: Make driftwood ornaments like boats and anchors to celebrate the warm season.

Fall and Winter

  • Autumn Centerpiece: Combine driftwood with autumn leaves and candles for a stunning centerpiece.
  • Christmas Decor: Craft driftwood Christmas trees and ornaments for a rustic holiday vibe.

Inspiring Stories from Driftwood Enthusiasts

Let’s take a moment to explore some inspiring stories from people who have transformed their apartments with driftwood projects.

Sarah’s Beach-Themed Living Room

Sarah lives in a small apartment near the coast. She collected driftwood over several months and used it to create a stunning beach-themed living room. From a driftwood coffee table to wall art and shelves, her living space is a testament to what’s possible with a bit of creativity and effort.

John’s Rustic Bedroom

John wanted to add a rustic touch to his bedroom. He used large pieces of driftwood to create a unique headboard and bedside tables. His room now serves as a cozy retreat that feels like a cabin getaway.

Emma’s Artistic Apartment

Emma is an artist who loves to bring natural elements into her work. Her apartment is filled with driftwood art pieces, including sculptures and wall hangings. She even created a driftwood gallery wall that showcases smaller pieces she has curated over the years.

Why You Should Try Driftwood Projects

By now, you may be wondering if driftwood projects are right for you. Here’s why you should give them a try:

  • Personalization: Driftwood projects allow you to create personalized items that reflect your style and taste.
  • Sustainability: It’s a great way to use natural materials and contribute to environmental sustainability.
  • Cost-Effective: Many driftwood projects can be done on a budget, making it an affordable way to decorate your home.
  • Creative Outlet: Working with driftwood can be a fulfilling and relaxing hobby that taps into your creative side.

Conclusion

Transforming your apartment with driftwood projects can be a rewarding, creative, and highly personalized endeavor. From furniture to small decorative items, driftwood adds a unique charm that is both timeless and versatile. Whether you’re looking to make a grand statement or add small touches, driftwood offers endless possibilities for your living space.

So, the next time you find yourself wandering along a beach or riverbank, keep an eye out for pieces of driftwood. Who knows? Your next artistic masterpiece or unique apartment décor might be just waiting to be discovered.

Now it’s your turn. What driftwood project will you start with? Don’t hesitate to dive in and create something truly unique for your apartment!

Filed Under: Driftwood Ideas Tagged With: Apartment Decor, DIY Projects, Driftwood Crafts, Unique Home Ideas

  • « Previous Page
  • Page 1
  • Page 2
  • Page 3
  • Page 4

Primary Sidebar

Driftwood4us.com, is a participant in the Amazon Services LLC Associates Program, an affiliate advertising program designed to provide a means for sites to earn advertising fees by advertising and linking to amazon.com.