• Skip to main content
  • Skip to primary sidebar
  • Terms and Conditions
  • Privacy Policy
  • Contact

Driftwood 4 Us

Just About Driftwood

DIY

Driftwood Clock

January 27, 2025 by admin

Have you ever found yourself drawn to the natural elegance and unique aesthetic appeal of driftwood? If you have, you may already appreciate its tranquil allure and the gentle story each piece can tell. But have you imagined transforming it into something both beautiful and functional, like a driftwood clock? In this journey, you’ll uncover the charm and versatility of driftwood, learn about the compelling craft of creating clocks out of this remarkable material, and perhaps find inspiration to start a project of your own.

Driftwood Clock

What is Driftwood?

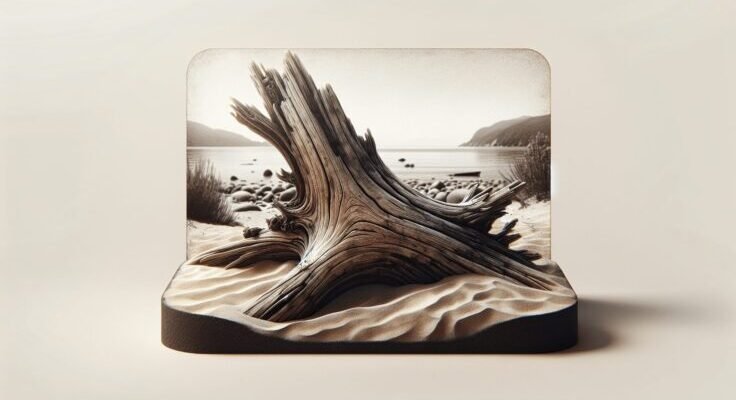
Driftwood is essentially a piece of wood that has been washed onto the shore by the actions of winds, tides, or waves. It is wood that’s no longer attached to trees, usually carried from its origin by rivers and then released into larger bodies of water. Over time, the sun, sand, and salty waters polish the wood, stripping away bark and smoothing out sharp edges. This natural process leaves behind beautifully weathered and unique pieces of wood.

Characteristics of Driftwood

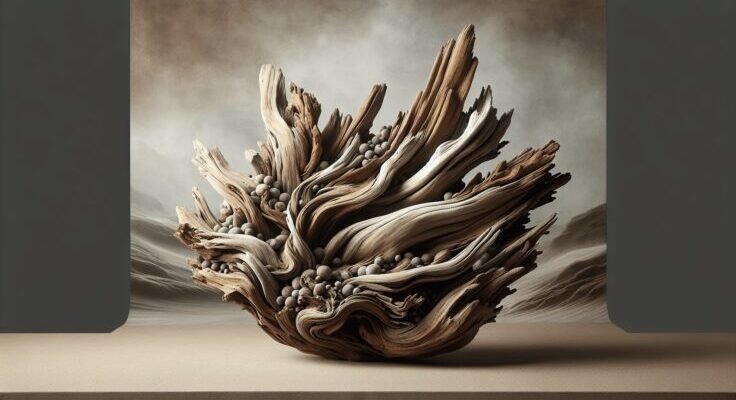
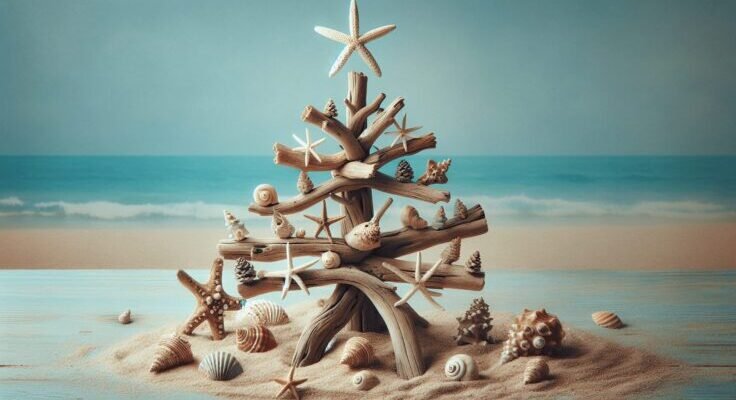
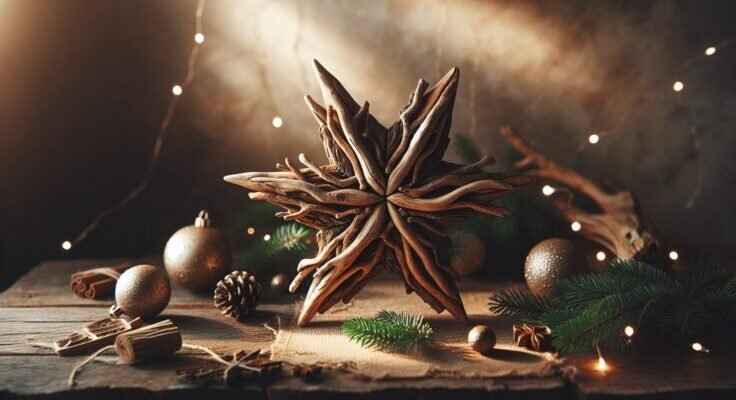
Driftwood comes in many shapes and sizes, each piece marked by its distinct journey. While some pieces might be gnarled and twisted, others may be smooth and sculptural, offering an array of creative possibilities. The colors vary too, ranging from light, soft hues of beige and gray to deep, rich browns. This variety adds a unique aesthetic quality to any project, and its uniqueness is perhaps why it has become a cherished element in home decor.

Environmental Impact of Using Driftwood

By choosing driftwood for your crafts, such as clock-making, you’re not only embracing a distinctive visual material but also engaging in an environmentally friendly practice. Repurposing driftwood means no trees are harmed. Instead, you’re giving a new life and purpose to wood that has already completed one cycle and is ready to tell a new story. Plus, driftwood crafts can spark awareness about the environment, encouraging more sustainable artistic endeavors.

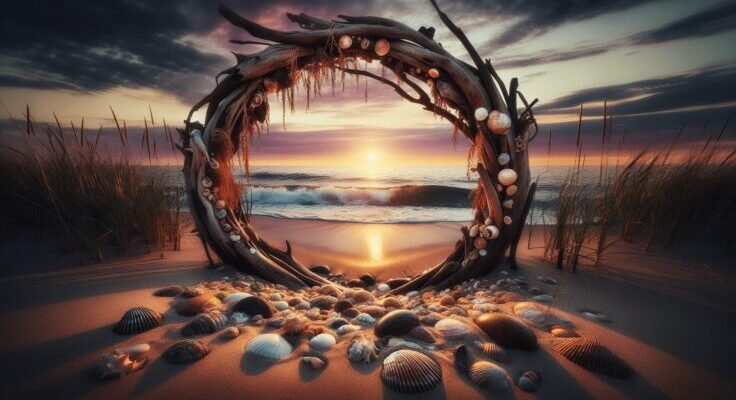
The Allure of Driftwood Decor

Driftwood has been embraced in interior design for its rustic charm and eco-friendly appeal. As a versatile material, it fits seamlessly into various decor styles, from coastal and rustic to modern and minimalist. Driftwood decor brings a touch of nature inside, infusing spaces with a sense of tranquility and organic beauty.

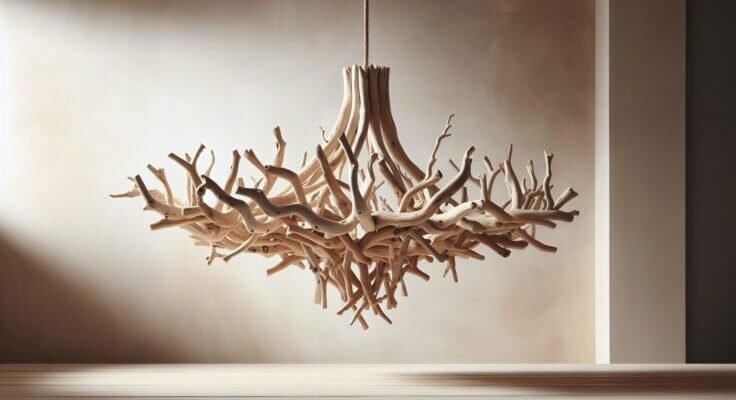
Integrating Driftwood in Home Decor

Whether you’re enhancing a shelf with sculptures, creating furniture, or crafting a unique timepiece like a driftwood clock, this material offers endless opportunities to elevate your home’s aesthetic. A driftwood piece can serve as a centerpiece, a statement piece that draws eyes and invites conversation. It tells a story of the sea and embodies the natural cycle of life, decay, and rebirth.

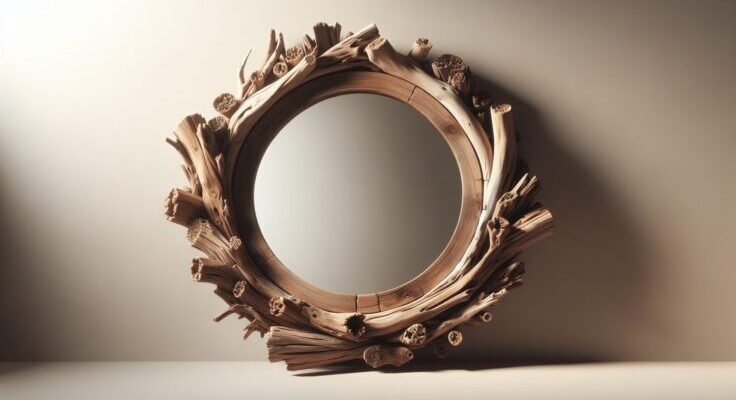
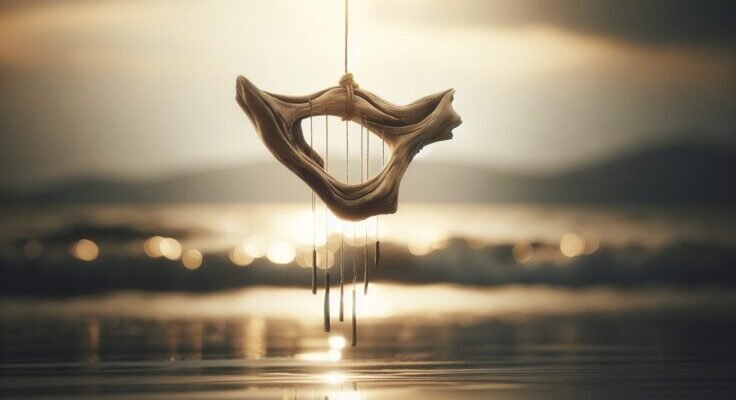
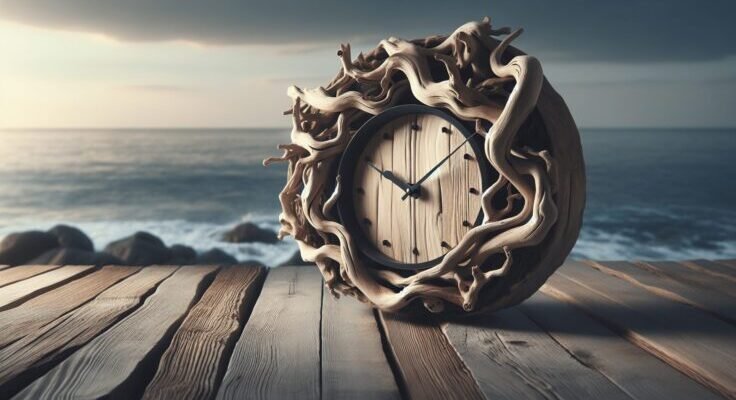
Driftwood Clocks: A Functional Art Piece

Driftwood clocks add a gorgeous, rustic element to your decor, while also serving a practical function. They embody a harmony of form and function, merging the timelessness of wood with the continuous movement of time. These clocks not only add visual interest—each telling its own unique story—but they also serve a daily purpose, enhancing both your decor and your ability to complete day-to-day tasks more efficiently.

Crafting Your Driftwood Clock

Undertaking a driftwood clock project might sound daunting at first, but with some patience and creativity, you can create a stunning piece that resonates with the natural world and your personal style. Here’s how you can get started:

Gathering Driftwood

Your adventure into crafting begins with sourcing driftwood. If you’re near a beach or river, consider taking a long walk and scavenging for potential pieces. Remember, the best driftwood comes from areas with minimal human interference. Look for pieces that are dry, light, and free from pests or mold. City craft stores or online marketplaces often offer driftwood if you don’t live near a water source.

Characteristics to Consider in Choosing Your Driftwood

CharacteristicConsideration
SizeFits the desired clock dimensions and design
ShapeEnhances aesthetic appeal and is workable
TextureMatches your desired feel – smooth or rugged
ColorComplements your room’s color palette

Preparing Your Wood

Before you start assembling your clock, the driftwood needs preparation. Begin by washing the pieces thoroughly to remove any dirt or salt. Following this, dry them completely to avoid any moisture-related issues later on. Sanding may be necessary if smooth surfaces are desired or to prepare areas for the next steps in construction.

Designing Your Clock

Before assembling your clock, envision how you want it to look. Consider the placement of clock mechanisms and the desired layout. Drafting rough sketches can help you arrange the driftwood pieces visually before committing to a final design. Don’t be afraid to experiment with different configurations to find what speaks to you.

Assembling Your Creation

With a design in mind, start assembling your clock. Use wood adhesive or nails to hold the pieces together securely. Make sure the back is flat and sturdy for mounting the clock mechanism. Cut a hole or opening at the center for the clock kit to fit in seamlessly, ensuring it works properly.

Choosing the Right Clock Mechanism

AspectRecommendation
SizeEnsure the mechanism fits within your design
StyleMatch with the overall aesthetic of your clock
Power SourceConsider battery-operated for easier maintenance

Finishing Touches

Adding finishing touches will help elevate your creation. You might choose to leave the wood raw for a natural look or apply a sealant to preserve its appearance. Attaching clock hands and numbers—or opting for a numberless design—are your final tasks. Each decision contributes to the overall effect and personal touch of your clock.

Caring for Your Driftwood Clock

Once your driftwood clock is complete and hung in its intended place, maintenance becomes key to keeping it in pristine condition. Regular dusting and occasional checks on the clock mechanism will ensure it remains both beautiful and functional.

Regular Maintenance

When taking care of driftwood projects, remember that wood breathes and reacts to environmental changes. Ensure you’re displaying it in a location away from direct sunlight or extreme humidity to prevent warping or discoloration. A gentle dusting regularly with a dry cloth will help maintain its appearance without damaging the wood’s natural patina.

Clock Mechanism Tips

Keep an eye on battery levels if you’ve chosen a battery-operated clock him. Replacing them promptly will prevent corrosion. Additionally, ensure the clock hands remain aligned and free-moving, gently adjusting as necessary.

Driftwood Clock

Benefits of Having a Driftwood Clock

Incorporating a driftwood clock into your home not only serves a functional purpose but brings several added benefits, enriching your living space’s aesthetic and energy.

Aesthetically Pleasing

Driftwood clocks present beauty that can enhance any room. Their unassuming elegance adds a natural, calming appeal to interiors, making them standout pieces whether hung in a living room, bedroom, or office space.

Personalized Craftsmanship

The clock’s unique creation allows you to express personal craftsmanship. Whether using pieces gathered from a family trip or crafting one from carefully sourced materials, these clocks tell a personal story, connecting your environment with your personal history and creativity.

Emotional and Environmental Benefits

Creating and living with driftwood decor has additional emotional benefits—peaceful, mindful engagement with your craft, and the satisfaction of sustainably sourced materials. With an eco-friendly approach to decorating, you’re actively contributing to environmental mindfulness.

Conclusion

Creating a driftwood clock is both an artistic and rewarding endeavor that provides a unique and personal touch to your home. This craft allows you to express creativity while engaging with natural materials responsibly, resulting in a timeless piece that reflects both individuality and environmental consciousness. As you sit and watch the hours pass, you’ll be reminded of your connection to nature and the aesthetic pleasure derived from it. Now, with insights and inspiration at hand, perhaps it’s time for you to start gathering some driftwood and shaping your own story, one sunny afternoon at a time.

Filed Under: Driftwood Ideas Tagged With: Clock, DIY, Driftwood, Rustic, Timepiece

Driftwood Circle Mirror

January 26, 2025 by admin

Have you ever wondered how you can bring a touch of the natural world into your home decor? One way you might not have considered is by incorporating a driftwood circle mirror into your space. This unique piece of decor not only adds character and charm but also elevates the aesthetics of your home in a surprisingly simple way.

Understanding Driftwood and Its Appeal

What is Driftwood?

Driftwood is essentially any type of wood that has been washed ashore by winds, tides, or waves. It is typically found along beaches, riverbanks, or lakeshores. Over time, this wood becomes smoothed and weathered, often taking on interesting shapes and textures. Its natural beauty, with its twists, turns, and silver-gray coloration, makes it highly coveted for artistic and decorative purposes.

Why Driftwood is a Popular Choice for Home Decor

The organic and rustic appeal of driftwood makes it a favored material for decor. It brings a sense of the outdoors inside, providing a serene and natural vibe. Each piece of driftwood is unique, reflecting the journey it has been on, which adds a personalized touch to your decor. People often choose it for its eco-friendly nature, as it is a reclaimed material that doesn’t require further processing or use of fresh resources.

The Charm of a Driftwood Circle Mirror

Aesthetic Appeals of a Circular Design

Circular mirrors have a compelling charm. Unlike square or rectangular mirrors, circles are often seen as having a softer, more inviting presence. A circle has no beginning and no end, representing infinity and continuity, which can add to the harmonious feel of your space. A driftwood frame around a circular mirror adds a rustic, natural touch that complements both modern and traditional decor styles.

Versatility in Various Interior Styles

The driftwood circle mirror’s versatility allows it to seamlessly fit into a variety of interior design styles. Whether your home is decorated in a coastal, bohemian, rustic, or even a minimalist style, a driftwood mirror can unify the various elements within your space, acting as a focal point or a complementary piece.

Driftwood Circle Mirror

Choosing the Perfect Driftwood Circle Mirror

Size and Scale Considerations

When selecting a driftwood circle mirror, it’s essential to consider the size and scale relative to the space where it will be placed. A larger mirror may serve as a statement piece, enhancing small spaces by reflecting light and making the area appear larger. Conversely, a smaller mirror works well in cozy nooks or as part of a grouping of decor items.

Quality and Craftsmanship

Ensure the mirror’s craftsmanship is high-quality. Check how the driftwood pieces are attached to the frame, and make sure the glass is of good quality without any distortions. Handmade mirrors can vary greatly in quality, so take your time to assess these details.

Eco-Friendly and Sustainable Options

Many people prefer driftwood mirrors for their sustainable nature. Ensure that your driftwood circle mirror is made from reclaimed wood to maintain an eco-friendly household. Ask about the sourcing of the wood to confirm that it adheres to environmental friendly practices.

Incorporating a Driftwood Circle Mirror into Your Decor

Placement Ideas in Different Rooms

The placement of your driftwood circle mirror can greatly impact your home’s decor. Here are some ideas for different rooms:

  • Living Room: Hang it above the fireplace or a console table for a sophisticated focal point.
  • Bathroom: Use it as the main mirror over the sink to add elegance to a functional space.
  • Bedroom: Position it above the dresser to serve both practical and decorative purposes.
  • Entryway: Welcome guests with an attractive piece that leaves a memorable first impression.

Complementary Decor Elements

To accentuate your driftwood mirror, consider complementary decor elements. Pair it with other natural materials such as stone or terracotta. Utilize botanicals and greenery to enhance the connection to nature. Metals, like iron or brass, can provide a contrasting element that highlights the rustic feel of the driftwood.

Driftwood Circle Mirror

Maintaining Your Driftwood Circle Mirror

Cleaning and Care Tips

Proper care and maintenance ensure the longevity and appearance of your driftwood circle mirror. Use a damp cloth to wipe the driftwood frame, avoiding harsh chemicals that could damage the wood. For the glass, a gentle glass cleaner sprayed on a cloth will prevent streaking. Regular cleaning will keep it looking fresh and vibrant.

Preservation Techniques

If your driftwood appears dry or dull, consider applying a light coat of wood oil to restore its luster. Be sure to use a product that is safe for use in enclosed spaces. Additionally, keep the mirror away from direct sunlight or extreme humidity, which can cause the wood to warp or fade over time.

Driftwood Circle Mirror DIY Projects

Creating Your Own Driftwood Circle Mirror

If you enjoy DIY projects, creating your own driftwood circle mirror can be a rewarding experience. Begin by sourcing driftwood pieces, either by collecting them during your beach outings or purchasing them from a craft store. Here’s a simple guide:

  1. Materials Needed:

    • Mirror (choose your desired size)
    • Driftwood pieces
    • Strong adhesive or glue
    • Circular plywood backing
    • Mounting hardware
  2. Instructions:

    • Attach the mirror to the center of the plywood backing.
    • Arrange the driftwood pieces around the mirror, experimenting with different placements.
    • Once satisfied with the design, glue the driftwood pieces in place.
    • Allow the adhesive to dry completely before mounting.

Personalizing Your Design

Personalize your design by painting or staining the driftwood, or adding embellishments such as shells, small stones, or twine to reflect your personality and tastes. The possibilities are endless, and the result is a one-of-a-kind piece that represents your creativity.

The Benefits of Owning a Driftwood Circle Mirror

Enhancing Room Ambiance

Driftwood circle mirrors can dramatically enhance the ambiance of any room. Their reflective properties help to brighten spaces by distributing natural and artificial light, making rooms appear more inviting and warm.

Adding Depth and Dimension

A well-placed mirror can add a sense of depth and dimension to a room, making smaller spaces appear larger and more open. The driftwood frame adds textural interest, catching the eye and drawing attention to the unique characteristics of each piece of wood.

Emotional and Psychological Benefits

Integrating natural elements like driftwood into your home can have emotional and psychological benefits. These touches of nature are known to reduce stress and promote a sense of calm and well-being. The naturally soothing textures and colors of driftwood have therapeutic effects that can enhance your living environment.

Conclusion

You’ve discovered how a driftwood circle mirror isn’t just a functional piece of decor, but a statement of style that brings nature’s beauty into your home. Whether you choose to purchase a ready-made piece or embark on a DIY journey, the charm and benefits of a driftwood mirror are undeniable. They serve to reflect both the physical room and your unique personality, while also bringing a calming influence of nature into your surroundings. With thoughtful placement and care, this decorative element can truly transform and elevate your living space, offering a blend of beauty, practicality, and sustainability that resonates with modern decor trends.

Filed Under: Driftwood Ideas Tagged With: DIY, Driftwood, Interior Design, Mirror, Rustic

Driftwood Circle Arch

January 26, 2025 by admin

Have you ever wondered how a simple piece of driftwood could be transformed into something truly enchanting like a Driftwood Circle Arch? Imagine a structure that’s not only a stunning piece of natural art but also a versatile addition to your garden or event. The beauty of driftwood lies in its unique character, shaped by the sea, sun, and time. This article guides you through understanding the allure of a Driftwood Circle Arch, its applications, and how it can resonate with your personal style and environment.

What Is a Driftwood Circle Arch?

A Driftwood Circle Arch is a captivating natural structure formed by arranging pieces of driftwood into a circular arch-like shape. Each piece of driftwood used is unique, marked by the forces of nature from which it originates. This type of art piece can serve as a decorative element or a functional structure, suitable for both indoor and outdoor settings.

The Beauty of Driftwood

Driftwood is essentially wood that has been washed ashore by the action of tides, winds, and waves. The beauty of driftwood lies in its weathered appearance, showcasing a natural patina that’s often difficult to replicate artificially. Every piece is distinct, with unique textures, shapes, and shades, adding character and depth to whatever space it adorns.

Circular Design Significance

The circle shape of the arch is not random. Circles are often symbolic of eternity, unity, and wholeness. In the context of the Driftwood Circle Arch, the shape can represent a harmonious blend with nature, bringing a sense of completeness and tranquility to the space it occupies.

Why Choose a Driftwood Circle Arch?

Opting for a Driftwood Circle Arch can bring several benefits and add a unique flair to your environment. Let’s explore some reasons why you might consider incorporating this structure into your space.

Connection with Nature

Using driftwood allows you to bring a piece of the natural world into your own space. The rough texture and organic shape of driftwood connect you to the raw, untouched aspects of nature, creating a sense of calm and serenity.

Versatility

A Driftwood Circle Arch is versatile in its applications. Whether you want to create a focal point in your garden, adorn your wedding with a natural backdrop, or make a statement piece in your living room, this arch serves multiple purposes.

Environmental Considerations

Incorporating driftwood instead of other materials can also be an environmentally conscious decision. Since driftwood is naturally sourced and often reclaimed from the shore, using it means repurposing materials instead of relying on newly manufactured products.

Driftwood Circle Arch

Integrating a Driftwood Circle Arch into Various Settings

The beauty and appeal of a Driftwood Circle Arch can enhance a wide variety of environments. Below are some ideas on how to integrate this stunning piece into different settings.

Garden Decoration

In a garden, a Driftwood Circle Arch can serve as a gateway, leading you through various sections of your green haven. It can frame a particular view, lead to a specific plant section, or simply stand as an ornamental piece elevating the overall aesthetic.

Wedding and Events

For weddings and special events, a Driftwood Circle Arch can act as a stunning alterpiece or backdrop. It’s perfect for outdoor or beach weddings, as it complements the natural scenery and provides a boho-chic element to the decor.

Indoor Space Enhancement

Indoors, the Driftwood Circle Arch can become a statement art piece. Placed in a living room or entryway, it can draw the eye and spark conversations. It can also serve as a unique way to display other natural elements like plants or soft lighting.

Constructing Your Driftwood Circle Arch

Creating a Driftwood Circle Arch yourself can be a rewarding endeavor. Let’s walk through some basic steps and considerations to get you started on this creative project.

Materials Needed

Before you begin, gather all necessary materials and tools. Here’s a table summarizing what you might need:

Material/ToolPurpose
Driftwood PiecesMain component for the arch
Adhesive/GlueFor securing pieces together
Support FrameTo hold the structure, if necessary
Saw or CutterFor shaping or trimming driftwood
SandpaperTo smooth rough edges
Sealant (Optional)To protect and preserve driftwood

Finding Driftwood

Collecting driftwood can be an exciting adventure. Drifting along shorelines, lakes, or rivers, you’ll find various pieces. Ensure you’re allowed to collect driftwood in your area, as some places have regulations to preserve their natural landscapes.

Designing Your Arch

Before you start assembling, visualize or sketch out your design. Consider the size, height, and shape of your arch, adapting it based on the driftwood you have available.

Assembly Tips

  • Foundation First: Start with a solid base to support the circle structure.
  • Balance and Symmetry: Aim for balance, even if your pieces are irregular. This creates an aesthetically pleasing structure.
  • Securing Pieces: Use adhesives or screws to firmly attach pieces. If outdoors, consider weather-resistant fixatives to ensure longevity.

Driftwood Circle Arch

Maintaining Your Driftwood Circle Arch

Like any decorative element, especially those outdoors, maintenance is key to ensuring your Driftwood Circle Arch remains beautiful and intact over time.

Regular Inspections

Periodically check the arch for any loose pieces or signs of wear. Nature and weather can affect the driftwood, so addressing minor issues early prevents more significant problems.

Cleaning Tips

Driftwood can accumulate dust and debris. Cleaning it gently with a soft brush or cloth can maintain its appearance. If located outdoors, a light misting with water can help without oversaturating the wood.

Protection Against Elements

If your arch is outdoors, consider applying a sealant. This protects the wood from water damage and extends its longevity. Be cautious about the type of sealant used to avoid altering the natural look of the driftwood.

Personalizing Your Driftwood Circle Arch

A Driftwood Circle Arch provides a wonderful canvas for personalization. Let’s look at some ways to make your arch unique to you and your style.

Incorporating Other Natural Elements

Enhance the arch by weaving in other natural materials. Consider adding vines, moss, or air plants. These elements can blend seamlessly with driftwood, creating a lush, organic look.

Lighting for Ambiance

Lighting can transform your arch into a magical evening feature. String lights, lanterns, or even solar-powered LEDs can add a gentle glow and enhance its natural beauty.

Adding Personalized Decorations

You can also hang small personal items or themed decorations to match specific seasons or holidays. These could be small ornaments, ribbons, or handmade crafts that reflect your personal taste.

Conclusion

The Driftwood Circle Arch is a remarkable fusion of natural beauty and creative expression. It embodies the timeless charm of the ocean and the endless possibilities of artistic ingenuity. Whether you are looking to create a serene garden retreat, an unforgettable event backdrop, or a distinctive indoor art piece, this archway has much to offer. Remember, it’s not just about the wood or the structure, but the connection you create between nature’s artistry and your personal space. Wouldn’t you agree that such a blend could add a touch of enchantment to any setting?

Filed Under: Driftwood Ideas Tagged With: DIY, Driftwood, home decor, Ocean Art, Sculpture

Driftwood Jar

January 25, 2025 by admin

Have you ever stumbled upon a piece of driftwood on a beach and wondered how it got there or what stories it might tell? Driftwood has a natural allure, with its weathered texture and unique shapes. But have you thought about bringing that natural beauty into your home in a creative way, perhaps by crafting a driftwood jar? A driftwood jar combines the rustic charm of driftwood with the practical utility of a container, offering a lovely piece of decor for your living space.

Driftwood Jar

What is a Driftwood Jar?

A driftwood jar is essentially a container, often glass or ceramic, that is adorned or wrapped with pieces of driftwood. This can be achieved through various techniques, but the end result is always a stunning and natural piece of art that brings the essence of the sea and nature into your home. These jars can serve multiple purposes, from decorative items to functional storage solutions.

The Allure of Driftwood

Driftwood is wood that has been washed onto shore by the action of winds, tides, or waves. The journey that each piece of driftwood takes imbues it with a story, featuring elements like erosion, salt, and sun that give it its characteristic weathered and unique appearance. By using driftwood in home decor, you bring part of that story into your home, creating a connection between you and the natural world.

Why Create a Driftwood Jar?

Creating a driftwood jar allows you to merge creativity with nature. It’s an opportunity to craft something that is both beautiful and functional. You can place your driftwood jar as an accent piece on a shelf, use it on your dining table as a centerpiece, or employ it as a storage container for small items. It’s not only a conversation starter but also a way to upcycle and bring nature’s artistry inside.

Materials Needed for a Driftwood Jar

Before you embark on crafting your driftwood jar, you need to gather some materials. Let’s break down what you’ll need:

  1. Driftwood Pieces: Of course, the star of the show. Collect pieces from the beach or purchase them if you don’t live near a coastline.
  2. A Jar: This can be any jar you have on hand or an upcycled glass jar from your pantry.
  3. Strong Adhesive: You’ll need a durable glue to ensure the driftwood sticks to the jar securely.
  4. Sandpaper: Optional, for smoothing any rough edges on the driftwood.
  5. Paint or Stain: Optional, if you wish to color the driftwood or the jar.
  6. Sealant: To protect the wood and enhance its natural look.

Choosing Your Driftwood

Select pieces that are interesting in shape and texture, and try to ensure a variety of sizes. Pieces that are too large or heavy might not adhere well to the jar. If you’re collecting driftwood yourself, ensure it’s thoroughly dry before beginning the project.

Selecting the Right Jar

The jar can be any shape or size, depending on what you plan to use it for. A wider jar might be ideal for a centerpiece, whereas a taller jar could serve as a striking vase for more extended items like kitchen utensils or fresh flowers.

How to Assemble a Driftwood Jar

Now, let’s walk through the assembly process. You’ll find that this craft allows for a lot of personalization and creativity.

Step 1: Cleaning the Driftwood

Before assembly, ensure your driftwood is clean. You can rinse it with water and let it dry thoroughly. If needed, sand down any rough edges or splinters carefully.

Step 2: Preparing the Jar

Clean and dry your jar. If you plan to paint or stain the jar or driftwood, now’s the time to do it. Ensure everything is dry before proceeding to the next step.

Step 3: Arranging the Driftwood

Lay out your driftwood bits to see how they may fit best around your jar. Don’t be afraid to get creative; this step is about playing with the textures and shapes to form an attractive layout.

Step 4: Gluing the Driftwood to the Jar

Use your adhesive to affix each piece of driftwood to the jar, starting from the base and working your way up. Hold pieces in place until the glue sets. Take care to ensure a snug fit between adjacent pieces.

Step 5: Sealing Your Work

After the wood is securely attached and any paint or stain is dry, apply a sealant to protect your creation from moisture and wear. This step will also bring out the wood’s natural grain and color.

Decorating Ideas for Driftwood Jars

Once you’ve made your driftwood jar, there are myriad ways to use it. Here are some ideas:

  • Vase for Flowers: Let your jar burst to life with fresh or dried flowers.
  • Candle Holder: Place a pillar or tea light candle inside for a cozy ambiance.
  • Storage Solution: Use it in the kitchen or bathroom to store utensils or supplies.
  • Beach Vibes: Fill it with shells or sea glass for a complete ocean-inspired display.

Driftwood Jar

Caring for Your Driftwood Jar

Proper care ensures the longevity of your driftwood jar while keeping it beautiful.

Cleaning Tips

To clean, dust gently with a duster or a soft, dry cloth. Do not submerge the jar in water, as excessive moisture may damage the driftwood or dissolve the adhesive.

Maintenance Advice

Over time, the sealant may need reapplication to maintain the wood’s appearance and protection. Reapply according to the sealant manufacturer’s instructions.

Driftwood Jar as a Gift

A driftwood jar can be a thoughtful and personalized gift. By paying attention to the recipient’s taste and home decor style, you can create a piece that they’ll treasure. Adding items inside the jar, such as homemade bath salts or handmade candles, turns it into a personalized gift basket.

Conclusion

Bringing nature into your home with a driftwood jar is not just about creating art; it’s about capturing the stories of nature and making them a part of your life. This project allows you to express creativity while respecting the unique beauty of driftwood. Whether it’s for personal use or as a heartfelt gift, a driftwood jar is something you can be proud to share with others. What bit of the ocean’s story will your driftwood jar tell?

Filed Under: Driftwood Ideas Tagged With: crafts, DIY, Driftwood, Handcrafted, home decor

Driftwood Christmas Tree Ornaments

January 24, 2025 by admin

Have you ever thought about how you can bring a touch of nature into your home during the holiday season with something as simple and beautiful as driftwood? Driftwood Christmas tree ornaments can transform your festive decorations into something uniquely charming and environmentally friendly. If you’re on the lookout for an idea that merges creativity with nature, then driftwood might just be the perfect material to use.

The Charm of Driftwood Ornaments

Driftwood carries with it a natural elegance that speaks of nature’s beauty and resilience. This wood, having been weathered by the elements, is uniquely smooth and often displays an array of intriguing colors and textures. Adding driftwood ornaments to your Christmas tree not only introduces a rustic charm but also tells a story of nature’s journey from afar.

Why Choose Driftwood?

Incorporating driftwood into your holiday decorations is both stylish and sustainable. This often-overlooked natural material is eco-friendly, as it’s typically collected from storm-ridden shores or riverbanks, where it would otherwise be considered debris. By using driftwood, you can be more sustainable in your decoration choices and reduce unnecessary waste.

The Aesthetic Appeal

Imagine handcrafted ornaments gracing your tree, each piece of driftwood offering its own signature shape and color. The grayish to sun-bleached hues create a coastal or rustic vibe, which can complement a variety of holiday themes. Driftwood’s natural origins and distinct appearance allow it to blend seamlessly with other decorations such as metallics, neutrals, or even vibrant holiday colors.

How to Source Driftwood

Before you begin creating your ornaments, finding the right pieces is essential. Driftwood can be sourced from a variety of locations, each offering unique types that may vary in size, shape, and texture.

Collecting from Nature

The most authentic way to obtain driftwood is by collecting it yourself. Visit local beaches, riversides, or lakeshores where driftwood is likely to accumulate. Take the time to select pieces that are clean, dry, and free from mold or moss. Always remember to respect local regulations regarding the collection of natural materials.

Purchasing Driftwood

If you’re not near a body of water, or prefer the convenience, driftwood can also be purchased. Many craft stores, online retailers, or specialty shops sell pre-cleaned and pre-sorted driftwood pieces. Buying driftwood can save you time and ensure you have the right selection for your projects.

Driftwood Christmas Tree Ornaments

Preparing Driftwood for Crafting

Once you’ve sourced your driftwood, the next step is to prepare it for crafting. This involves proper cleaning, drying, and sometimes even cutting to fit your desired designs.

Cleaning Driftwood

Cleaning is an important first step to ensure your ornaments are ready for decoration. This process typically involves soaking the driftwood in a solution of water and bleach to remove any salt, dirt, or parasites it may have collected. After soaking, rinse thoroughly with fresh water.

Drying Your Pieces

After cleaning, allow your driftwood to dry completely. This can take anywhere from a few days to a couple of weeks depending on the size and moisture content of the wood. Proper drying will prevent mold growth and warping.

Cutting and Sanding

Depending on the style of ornaments you wish to create, you might need to cut or sand certain pieces. A hand saw or another small cutting tool can shape your driftwood, while sandpaper can smooth rough edges. Always wear safety glasses and gloves during this step to protect yourself.

Creative Ideas for Driftwood Ornaments

The creative potential of driftwood Christmas tree ornaments is limitless. From simple designs to more intricate art pieces, you can transform driftwood into a wide array of stunning decorations.

Driftwood Stars

Stars represent a classic Christmas motif, and crafting them from driftwood can add a rustic charm to your tree. To make driftwood stars, select similarly sized pieces and hot glue them into a star shape. You can further embellish by tying a ribbon at one of the points for hanging.

Miniature Trees

As a nod to the holiday season itself, miniature driftwood trees can grace your larger Christmas tree or serve as standalone ornaments. Stack pieces of driftwood in decreasing lengths to form a tree shape. Secure each piece with wood glue and incorporate a bit of twine or string to hang.

Personalized Name Tags

Personalized decorations make your tree uniquely yours. Use small, flat pieces of driftwood as canvases for painting or etching the names of family members. These personalized tags can also double as place cards for holiday dinners or gifts.

Driftwood Angels

For a touch of ethereal beauty, fashion angels from driftwood. Use smaller pieces for the body and wings, and accent with additional natural elements like feathers or stones for a celestial look.

Garland Creations

Driftwood pieces can be strung together to form a garland. Alternate different sizes and shapes of driftwood, securing with twine or wire. Hang your garland on the tree, mantle, or as a doorway decoration for a natural and effortless look.

Driftwood Christmas Tree Ornaments

Assembling and Decorating Your Ornaments

Turning your pieces of driftwood into exquisite Christmas ornaments generally involves a few straightforward steps. These processes can be quite rewarding as you see your crafts come to life.

Using Natural Accents

Complement driftwood’s raw look by pairing it with other natural materials. Twine, burlap, pinecones, and dried berries can enhance the organic aesthetic of your ornaments beautifully. The key is to maintain a balance and let the driftwood’s features remain the star of your creation.

Adding Color

While driftwood’s natural hues are stunning, you might want to add a pop of color to your decorations. Consider using water-based paints or natural dyes for a gentle touch of color. A whitewash can provide a wintry feel, while metallic paints add a festive shine.

Securing the Design

To ensure your ornaments last through the holiday season and beyond, use strong adhesives like hot glue or wood glue. When creating hanging elements, drill small holes or use hooks to avoid splitting the wood.

Enjoyment and Storage

Once your driftwood ornaments are crafted, it’s time to enjoy them on your Christmas tree. After the holiday season, proper storage will keep them in good condition.

Display and Enjoyment

Adorning your tree with driftwood ornaments is a pleasure, observing how the natural tones complement the holiday lights and other decors. It brings a tactile and visual warmth to the festive setting.

Proper Storage

After the season ends, carefully pack your driftwood ornaments in a dry, cool location. Use tissue paper or bubble wrap to protect them from damage. Avoid storing in areas prone to moisture to prevent deterioration.

The Environmental Impact and Benefits

Opting for driftwood as part of your Christmas decorations extends beyond aesthetics, offering environmental advantages.

Eco-Friendly Choice

Using driftwood is an environmentally conscious decision. By repurposing wood that would otherwise wash up as waste, you help minimize environmental impact. The need for less manufactured decorations translates to fewer resources extracted from nature.

Supporting Natural Ecosystems

While collecting driftwood, be mindful of the natural habitats. Take only what you need and avoid disturbing wildlife or plant life. Following these principles ensures that you contribute to the preservation of the ecosystems you enjoy.

Conclusion

Creating driftwood Christmas tree ornaments is a delightful blend of artistry and nature. It offers you a chance to engage with the natural world and express creativity in a way that aligns with sustainable practices. By following the steps we’ve outlined, you can infuse your holiday decor with unique flair and make environmentally conscious choices that bring out the best in the festive season. May your tree be graced by the beauty of the natural world, embodied in each handcrafted piece of driftwood adorning it.

Filed Under: Driftwood Ideas Tagged With: christmas, DIY, Driftwood, Holiday decor, Ornaments

Driftwood Christmas Crafts

January 24, 2025 by admin

Have you ever thought about using driftwood to add a rustic charm to your Christmas decorations? Driftwood is not only naturally beautiful, with its unique shapes and textures, but it also offers a sustainable way to enjoy crafting. This holiday season, why not try your hand at creating some delightful driftwood Christmas crafts? You’ll find that with a little creativity and a touch of patience, you can transform simple pieces of driftwood into stunning seasonal decor. Here’s how you can embark on this creative journey with driftwood, and perhaps make a few memorable gifts and decorations in the process.

Driftwood Christmas Crafts

Understanding Driftwood: Nature’s Art

Driftwood is more than just weathered wood found on beaches. It’s a testament to the power of nature’s sculpting forces. This wood, shaped by the sea and time, carries an organic aesthetic that complements any Christmas setting beautifully. By understanding what driftwood is and how it can be used, you’re setting the stage for an inspired crafting experience.

What is Driftwood?

Driftwood is wood that has been washed ashore by the action of winds, tides, or waves. Over time, the water smoothens and polishes the wood, creating interesting, unique shapes. This natural beauty makes driftwood a popular material in crafting and home decor.

Sustainability of Driftwood Crafting

Choosing driftwood as a crafting material not only benefits your aesthetic goals but also supports sustainability. By using driftwood, you’re repurposing what nature has already provided, reducing the need for newly sourced materials. This sustainable choice helps in preserving forests and reducing carbon footprint, making your holiday season even more eco-friendly.

Tools and Materials Needed for Driftwood Crafts

Before you begin creating with driftwood, it’s essential to gather the necessary tools and materials. Having everything ready will streamline the crafting process and enhance your experience. Let’s take a look at what you’ll need.

Basic Tools for Crafting

To start with driftwood crafts, you’ll need some basic tools. Here’s a quick table to help you gather what’s necessary:

ToolsDescription
Glue GunFor adhering pieces of driftwood together securely.
SandpaperTo smoothen any rough edges of the driftwood.
SawFor cutting driftwood to desired sizes and shapes.
DrillUseful for creating holes for hanging ornaments.
Wire CuttersTo trim and shape wire for construction and embellishment.
Paint BrushesFor painting and adding details to your driftwood.

Additional Materials

Apart from the tools, several other materials can enhance the driftwood crafts:

  • Rope and Twine: For hanging or tying parts together.
  • Natural Decor: Such as pine cones, shells, or dried flowers.
  • Paint and Finish: Optional, for those who wish to add color or protect their creations.
  • Embellishments: Beads or ribbons to add a festive touch.

Driftwood Christmas Ornaments

Creating Christmas ornaments from driftwood is an excellent way to start your crafting. These ornaments are not only easy to make but also add a distinctive flair to your Christmas tree. Let’s explore some ideas.

Driftwood Stars

Driftwood stars are a classic craft that radiates charm and simplicity. To make one, gather several small, similar-sized pieces of driftwood. Arrange and glue them in a star shape, using a glue gun for precision. You can embellish it with small beads or keep it natural for a rustic look.

Mini Driftwood Christmas Trees

Creating miniature driftwood Christmas trees can offer a beautiful accent to your holiday decor. Start by stacking driftwood pieces from largest to smallest, creating a tree shape. Secure them with a central dowel or glue. You can add tiny ornaments or paint part of the wood to represent a decorated tree.

Larger Driftwood Decor

Once you’re comfortable with ornaments, you might want to venture into larger driftwood decorations. These pieces can make stunning centerpieces or be featured on your mantle.

Driftwood Christmas Tree

A driftwood Christmas tree is a timeless decoration that brings an earthy elegance to your home. Begin by selecting a sturdy base like a wooden block. Drill a hole in the base and insert a wooden dowel. Then, attach driftwood pieces, starting with the largest at the bottom. Securely stack them, using progressively smaller pieces as you move up. Decorate the finished tree with fairy lights and natural elements like pine cones for an added festive charm.

Driftwood Wreath

For a naturally beautiful Christmas wreath, use pieces of driftwood glued in a circular pattern. Start with the larger pieces as the base, then fill in gaps with smaller ones. Add greenery, berries, and ribbons to spruce it up. Hang the wreath on your front door to immediately add a welcoming and rustic appeal to your holiday décor.

Driftwood Christmas Crafts

Personalizing Your Driftwood Crafts

Adding personal touches can transform your driftwood creations from simple decorations into meaningful keepsakes. Here are some ways to personalize your crafts.

Adding Paint and Color

Though driftwood is beautiful in its natural state, adding a splash of color can make your pieces uniquely yours. Consider using white, silver, or gold to keep it festive and subtle. Paint can be applied fully, or just on the tips and edges, to create different effects.

Using Personalized Embellishments

Incorporating items like initials, family names, or meaningful symbols can make your driftwood crafts even more special. You could carve into the wood, attach letters, or even paint these elements onto the surface to reflect the uniqueness of your piece.

Caring for and Maintaining Driftwood

One of the joys of driftwood is its inherent rustic appeal, but caring for your crafts will help them last for many Christmases to come.

Cleaning and Preserving Driftwood

Before crafting, ensure your driftwood is clean and free from pests. Soak it in freshwater for a few days, changing the water regularly. Once clean, let it dry completely. To preserve driftwood, you might want to apply a sealant for longevity while maintaining its natural beauty.

Storing Driftwood Crafts

Proper storage over the years will keep your crafts in good shape. Consider wrapping them in tissue paper or bubble wrap and placing them in a sturdy box. Store them in a dry environment to prevent any moisture damage.

Giving Driftwood Crafts as Gifts

Driftwood crafts make thoughtful, personalized gifts that are perfect for the holiday season. By gifting handmade items, you share not just a present but a piece of your creativity and care.

Personalizing for the Recipient

Consider the interests and style of the gift recipient. If they love coastal decor, stick with more natural pieces. For someone with a modern aesthetic, perhaps a painted or embellished piece will suit their taste.

Packaging and Presentation

Presentation is key when giving handmade gifts. Wrap your driftwood crafts in natural paper or a fabric bag, tied with jute twine or ribbon. Adding a handwritten note detailing the thought behind the gift can enhance its sentimental value.

Conclusion

Driftwood Christmas crafts offer a wonderful opportunity to engage in sustainable crafting, providing unique, personalized items that can decorate your home or be shared as gifts. The journey from collecting driftwood to transforming it into delightful crafts can be as satisfying as the end result. Whether you’re adding a rustic wreath to your front door or creating small ornaments for your tree, you’re capturing a piece of nature and creativity that embodies the spirit of Christmas. Embrace this time of year to craft something truly special, using the unexpected yet remarkable beauty of driftwood. Happy crafting, and may your holiday season be both creative and joyful!

Filed Under: Driftwood Ideas Tagged With: christmas, DIY, Driftwood, Handmade

Driftwood Chimes

January 23, 2025 by admin

Have you ever thought about combining the soothing rhythm of nature with the harmony of music in your own backyard? Driftwood chimes are a wonderful way to bring that calming experience to life. Imagine the natural aesthetic of driftwood pieces swaying in the breeze and creating gentle, melodic sounds that can transform any outdoor space into a peaceful retreat.

Driftwood Chimes

What Are Driftwood Chimes?

Driftwood chimes are a type of wind chime made from pieces of driftwood. These chimes not only add a unique visual element to your space but also produce a variety of soft, soothing sounds. Unlike metal or glass chimes, driftwood offers a more subtle auditory experience, perfect for those who appreciate the gentle melodies of nature.

The Unique Characteristics of Driftwood

Driftwood is wood that has been worn smooth by the sea or lake water, waves, and elements over time. Each piece is unique, carrying the earth tones of its environment and often showing interesting textures. This weathered appearance gives driftwood chimes their distinctive look, appealing to those who cherish rustic or natural decor elements.

Where Does Driftwood Come From?

Driftwood often starts as fallen branches or trees near bodies of water. Oceanside beaches or lake shores are common places to find driftwood. Over time, the wood gets bleached by the sun and sculpted by wind and water, naturally turning into works of art. Each piece of driftwood tells its own story — from fallen tree to a beautifully polished ornament.

The Art of Making Driftwood Chimes

Creating your own driftwood chime can be a rewarding and meditative process. It allows you to harness the serene energy of driftwood, turning it into a personalized symphony of sounds. Let’s talk about making your own driftwood chimes, from gathering materials to assembling your musical masterpiece.

Gathering Materials

Start by collecting pieces of driftwood with varying lengths and thicknesses. This gives your chime variety in both appearance and sound. You will also need some strong string or fishing line, a drill to create small holes in the wood, and metal or ceramic discs (optional) to add different sound textures.

Assembling the Chime

Begin by drilling small holes in the top center of each piece of driftwood. Then, thread the fishing line or string through the holes and tie it securely. If you’re incorporating other materials like metal discs, attach them to the string at intervals that complement the driftwood.

Balance and Harmony

Creating a balanced mobile requires careful consideration of weight and distribution. Hang your driftwood chime from a branch or structure, and ensure that the pieces are spaced evenly so they can swing freely in the wind. Test the chime to see if its arrangement produces the melodies you desire, adjusting the placement as needed.

Benefits of Driftwood Chimes in Your Space

It’s not just their beauty that makes driftwood chimes appealing; they offer various benefits that enrich your living space.

Aesthetic Appeal

With their natural allure and organic shapes, driftwood chimes enhance gardens, patios, or even interior spaces. Their rustic charm blends seamlessly with both modern and traditional decor styles, providing a versatile decorative element.

Soothing Sound

Unlike the sometimes jarring clamor of metal chimes, driftwood chimes produce a gentle sound that soothes the senses. This calmness can help reduce stress and bring tranquility to your environment.

Eco-Friendly Decoration

Using driftwood for chimes is an eco-friendly choice. By repurposing natural materials, you reduce waste and honor the beauty nature has to offer. It’s a wonderful way to bring sustainability into your design principles.

Choosing the Right Driftwood Chime for Your Space

When it comes to selecting or creating driftwood chimes, consider how they’ll fit into your environment and personal tastes.

Size and Space

Consider the size of the area where you plan to hang your chime. Larger spaces might benefit from a grander, more elaborate chime, while smaller areas may be complemented by a simpler, more delicate arrangement. Ensure there’s enough room for it to sway and sing without obstruction.

Color and Style

The natural coloring of driftwood tends to be neutral, making it adaptable to various color schemes. However, if you’re artistically inclined, you might want to add colorful cords or paint accents to your driftwood for a splash of color.

Sound Preferences

Think about the sound you want your driftwood chimes to produce. Longer pieces and additional materials like shells or stones will create deeper tones, while shorter driftwood segments produce lighter, more delicate sounds.

Caring for Your Driftwood Chimes

To ensure that your driftwood chimes remain a delightful part of your space, some routine care is beneficial.

Regular Cleaning

Driftwood can collect dust and dirt over time. Gently wipe them with a damp cloth to maintain their appearance. Be cautious around any knots or unique features to preserve their natural aesthetics.

Maintenance Check

Occasionally check the strings or lines holding the driftwood to ensure they’re still strong and intact. Replace any worn or frayed elements to prevent your chime from falling.

Weather Considerations

Although driftwood chimes are fairly weather resistant, extreme conditions can impact them. Move them indoors during heavy storms or severe weather to extend their life and preserve their sound quality.

Incorporating Driftwood Chimes in Various Settings

Driftwood chimes can find a place in many different settings, each adding its own charm and character.

Gardens and Patios

Hang driftwood chimes in your garden or patio to enhance the natural ambiance. The chimes can act as gentle guides to relaxation as you sip tea or meditate, surrounded by their soothing sounds.

Balconies and Terraces

Even if you live in an apartment, you can incorporate driftwood chimes to make your balcony a personal haven. Let them catch the gentle breeze on a warm day, resonating with tranquility.

Indoors and Near Windows

Don’t think driftwood chimes are only for outdoor use. They can be an intriguing addition indoors, particularly near windows where breezes can still reach them. This arrangement brings nature’s melody inside, harmonizing daily life with natural sounds.

The Cultural and Historical Significance of Wind Chimes

Throughout history, wind chimes, including those made from driftwood, have held cultural significance in various societies around the world.

Ancient Origins

Wind chimes date back thousands of years, being used in ancient Rome, Egypt, and India as decorative pieces and tools for warding off evil spirits. They were often believed to attract prosperity and good luck, hung in strategic places around homes and gardens.

Feng Shui Practices

In the practice of Feng Shui, wind chimes are employed to disrupt negative energy flows and harmonize environments. Driftwood chimes, with their grounding elements, are particularly fitting for balancing energies.

Contemporary Uses

Today, wind chimes continue to be popular for their aesthetic and acoustic qualities. Driftwood chimes resonate well with contemporary movements focused on mindfulness, sustainability, and nature appreciation.

Inspiring Ideas for Driftwood Chime Designs

If you’re considering crafting or buying driftwood chimes, here are some creative ideas to inspire you.

Incorporating Shells and Stones

Enhance your driftwood chimes by adding shells or stones. These elements can be found during beach walks, making your chime a reminder of treasured adventures.

Adding Artistic Flair

Consider painting designs or inspirational quotes on the pieces of driftwood to personalize your chime. This can be a great DIY project that adds a meaningful touch.

Layered Arrangements

Experiment with multi-tier chimes that create a cascading effect. Layering different lengths and types of materials can produce complex, harmonic sounds and a striking visual statement.

Reflect on the Tranquility

Incorporating driftwood chimes into your living space invites both art and nature into your life. These elements enrich experiences by enhancing ambiance, fostering calm, and connecting you with the environment. Whether you choose to craft them yourself or find the perfect pre-made set, driftwood chimes have a unique ability to turn any space into an oasis of sound and beauty. Embrace the tranquility they offer, and let the melodies remind you of the natural rhythms that surround us every day.

Filed Under: Driftwood Ideas Tagged With: Chimes, DIY, Driftwood, Handmade, Outdoor Decor

Driftwood Chandelier Diy

January 23, 2025 by admin

Have you ever imagined lighting up your space with a unique and eco-friendly chandelier? Crafting a driftwood chandelier not only transforms your home into a coastal haven but also adds a personal touch to your decor. Designing your own chandelier can be a delightful project, especially if you love the idea of incorporating natural elements into your interior design. Let’s embark on this creative journey and explore how you can bring a piece of nature indoors with a DIY driftwood chandelier.

Understanding Driftwood: Nature’s Art

Driftwood is simply wood that has been washed onto a shore or a beach by the action of winds, tides, or waves. It can be sourced from various types of wood and is often characterized by its smooth surface and unique shapes, courtesy of its journey through bodies of water. Using driftwood in your chandelier adds a natural and rustic charm to any room, celebrating the beauty of weathered wood.

The Appeal of Driftwood in Home Decor

Driftwood’s weathered appearance gives it a distinct charm that is sought after in interior design. It resonates with earthy, coastal vibes and offers a neutral base that complements various decor styles. Whether your home is modern, vintage, or rustic, driftwood can seamlessly blend in, offering a natural warmth.

Gathering Driftwood for Your Chandelier

The first step in creating your driftwood chandelier is sourcing the right pieces of wood. You might find this to be an engaging part of the project, as it involves a bit of exploration and connection with nature.

Where to Find Driftwood

Beachcombing is the most common method of gathering driftwood. Consider visiting local beaches, lakeshores, or riverbanks where driftwood is abundant. Remember to check local regulations or permission requirements for collecting natural materials from these areas. If you lack access to natural sources, driftwood can also be purchased from craft stores or online marketplaces.

Selecting the Right Pieces

When choosing driftwood, look for pieces that have interesting shapes and are free from decay. The size and shape of your driftwood will significantly influence the design of your chandelier. Aim for a variety of sizes to create depth and dimension in your final piece. Ensure that your driftwood is clean, dry, and free from pests before bringing them into your living space.

Driftwood Chandelier Diy

Designing Your Driftwood Chandelier

Envision your final piece before beginning assembly. Do you want a sprawling sculptural display, or something minimalistic? Planning ahead will make the construction process smoother.

Styles and Configurations

Driftwood chandeliers can vary widely in style. You might opt for a simple design with a few hanging pieces of driftwood or create elaborate constructions with multiple branches interwoven. Sketch out your ideas or browse online for inspiration to get a clearer idea of your preferred style.

Materials and Tools Needed

Creating a driftwood chandelier involves more than just wood. You’ll need a variety of materials and tools to bring your vision to life. Here’s a checklist to get you started:

MaterialsTools
Driftwood piecesDrill
Light fixturesSaw
Electrical wiringSandpaper
Hooks or hanging hardwarePliers
Chain or ropeScrewdriver
Wood glue or epoxyMeasuring tape

Steps to Assemble Your Driftwood Chandelier

Let’s break down the process into easy-to-follow steps. Crafting your chandelier involves a balance of creativity and technique. Below are some essential steps to guide you through.

Preparing Your Driftwood

Before you start assembling, it’s crucial to prepare your pieces. Sand the driftwood to remove any rough edges and decide on a cleaning method to ensure they’re free of salt and debris. Some recommend washing with fresh water and allowing the wood to dry completely in the sun.

Assembling the Frame

  1. Plan the Structure: Use the designs you’ve drawn or found online. Start formulating the main frame by identifying the largest and strongest pieces of driftwood to create a stable base.

  2. Secure the Frame: Use wood glue or epoxy to attach your driftwood pieces. Allow it to dry before you proceed to the next step.

  3. Drill Support Holes: Ensure your drill has the correct bit size for the screws or hooks you will use. Create holes where you want to attach other pieces or hanging fixtures.

Installing Electrical Components

Integrating the electrical elements into your chandelier is a crucial step. It involves attaching the light fixtures and running the wiring through or alongside your driftwood.

  1. Positioning the Lighting: Decide where each light will be placed. You might choose several small bulbs or a single large one depending on your design.

  2. Running the Wiring: Carefully thread the electrical wires through or alongside your driftwood. Ensure connections are secure and insulated.

  3. Safety First: Before you connect the electricity, test your chandelier wiring with a multimeter to ensure there are no shorts or open circuits.

Adding Finishing Touches

Finishing touches can make a significant difference in the final appearance of your chandelier.

  • Sealing the Wood: Consider applying a matte sealant to protect the driftwood from moisture and enhance its natural color.
  • Adjustments and Balance: Balance the chandelier by adjusting the hanging chains or ropes. Ensure it hangs straight and stable.
  • Final Assembly: Attach any additional decorative elements you wish, such as shells or crystals.

Driftwood Chandelier Diy

Installing Your Driftwood Chandelier

Once assembled, carefully hang your chandelier in its designated location. Given its weight, ensure the ceiling’s structural support is adequate. Installing a chandelier may require a second pair of hands or professional assistance.

Balancing and Securing

As you hang the chandelier, constantly check and adjust its balance. Use a spirit level to ensure it is even. Secure the fixture with sturdy hooks or anchors adequate for its weight.

Testing the Lighting

Turn on the light to test your work. This is an exciting moment where you see your creation in action. Ensure that the lighting is even and not obstructed by any wood pieces.

Caring for Your Driftwood Chandelier

A driftwood chandelier, like any piece of art, requires care to maintain its beauty over time.

Regular Cleaning

Dust your chandelier regularly to prevent buildup. Use a soft brush or cloth to lightly clean the surfaces. Avoid using any water-based cleaning products, as moisture could damage the wood.

Periodic Maintenance

Check the electrical connections periodically to ensure everything is functioning safely. Tighten any loose nuts, bolts, or screws to maintain structural integrity. If needed, make slight adjustments to the balance or orientation.

Conclusion: Enjoy Your Creation

Creating a driftwood chandelier is not just about the end product but the journey of creativity and craftsmanship it involves. Each piece of driftwood tells a story of its own, merging into a collective tale within your home. Let your chandelier be a centerpiece of conversation and a testament to your creativity and environmental consciousness. As you enjoy the ambient glow of your handcrafted masterpiece, you’ll not only appreciate its uniqueness but also the sustainable choices involved in its creation. Whether you’ve crafted it for detailed design or simplicity, the natural elegance of driftwood will radiate warmth and character across your living space.

Filed Under: Driftwood Ideas Tagged With: chandelier, craft, DIY, Driftwood, Lighting

Driftwood Christmas Ornaments

January 22, 2025 by admin

Have you ever wondered how you can bring a touch of nature into your holiday decorations? If traditional Christmas ornaments are feeling a bit too predictable this year, why not consider crafting your own driftwood Christmas ornaments? This unique approach combines the rustic beauty of the beach with the festive spirit of the season, creating decorations that are both meaningful and beautiful.

Driftwood Christmas Ornaments

What is Driftwood?

Driftwood refers to the remnants of trees that have been washed onto the shore by the action of winds, tides, or waves. Over time, the abrasive action of water smooths and softens these pieces, providing a beautiful, weathered appearance that appeals to many. This type of wood can range from small sticks to large branches, each offering a unique shape and texture that makes it perfect for crafting.

Where to Find Driftwood

Locating driftwood can be an enjoyable and relaxing part of the crafting process. Typically, it’s found along beaches, riverbanks, or lakeshores. You might plan a day to visit a nearby beach or nature walk to gather your supplies, making sure to respect local guidelines regarding collection. As you gather, pay attention to the variety of shapes and sizes, as each piece could inspire a different creative idea.

Preparing Your Driftwood

Before you begin creating ornaments, it’s important to prepare your driftwood properly. Preparation ensures the wood is clean, pest-free, and ready for artistic use. Start by removing any debris, dirt, or seaweed clinging to the wood. Next, soak the pieces in a mixture of bleach and water for a few hours to disinfect and sanitize. Rinse them off thoroughly and allow them to dry completely, which might take a few days depending on their size and density.

Getting Started with Driftwood Christmas Ornaments

Crafting these ornaments doesn’t require extensive experience, making it a perfect holiday project for individuals, families, or groups of friends. The rustic charm of driftwood complements any decor style, from modern minimalism to cozy rustic themes.

Tools and Materials You’ll Need

To create driftwood ornaments, gather a few basic tools and materials. Here’s a quick list to get you prepared:

ToolsMaterials
Glue gun and glue sticksAssortment of driftwood pieces
Drill with small drill bitTwine, string, or thin wire
SandpaperShells, beads, or small embellishments
Paint or wood stain (optional)Hooks or loops for hanging

These materials can often be found in crafting stores or around your home, ensuring you don’t need to invest much to begin your project.

Combining Driftwood with Other Elements

For a more dynamic ornament design, consider combining driftwood with other natural materials. Shells, pebbles, twine, and beads add diversity in texture and style. You can also incorporate seasonal touches like pinecones or holly berries to enhance the holiday feel.

Crafting Your Driftwood Christmas Ornaments

Now that your wood is clean and your materials are gathered, it’s time to begin crafting. Start with basic designs and gradually experiment with more complex shapes and embellishments as your confidence grows.

Simple Tree Ornaments

One of the simplest designs to create is a driftwood Christmas tree ornament. Start by selecting natural pieces of varying lengths. Assemble them from smallest to largest in a triangular tree shape. Use a glue gun to secure the pieces as you stack them. Finally, attach a loop of string or wire to the top to hang your tree on the Christmas tree.

Driftwood Stars

Stars symbolize hope and cheer during the festive season, making them the perfect subject for ornaments. To craft a star, select five strong, straight pieces of similar length. Arrange them into a star shape and secure each intersection with glue. Allow the glue to dry thoroughly. You can leave the wood natural or paint it for a pop of color.

Driftwood and Shell Angels

A combination of driftwood and shells can create an elegant angel ornament. Use a larger piece of driftwood for the body and attach two symmetrical shells as wings. Use smaller beads or stones to symbolize the head or halo. This blend of materials results in a beautifully delicate ornament sure to stand out among more traditional decorations.

Adding Personal Touches

To make your driftwood ornaments truly unique, consider adding personal touches. Vinegar-stained or painted wood can add a pop of color, while carving initials or seasonal phrases into the wood gives them a personal touch. The inclusion of family photos, miniature seasonal symbols, or even handwritten messages on small papers or tags offers a personal connection that both you and your family can cherish for years to come.

Personalization with Paint

If you’re looking to add color or pattern to your driftwood ornaments, acrylic paints are an excellent choice. Consider soft whites, golds, or silvers to keep a festive palette. Geometric shapes, polka dots, or stripes can create a modern touch, while vintage motifs provide a timeless feel.

Adding Names or Dates

Engraving or writing names, initials, or the year can make each ornament a cherished keepsake. Tools for wood engraving can be precise and easy to use, offering a professional finish. Alternatively, small tags or labels can be securely tied to the ornaments for a more relaxed approach.

Driftwood Christmas Ornaments

Displaying Your Driftwood Ornaments

Once your ornaments are complete, it’s time to display them! Their natural beauty stands out on a traditional Christmas tree, but there are many creative ways to incorporate them into your home decor. Use them as centerpiece decorations, incorporate them into wreaths, or hang them along stair banisters for a touch of rustic charm throughout your living spaces.

Non-Traditional Displays

Instead of only hanging them on your Christmas tree, why not add a bit of charm to your table settings or gift packages? Tying an ornament to a wrapped gift can provide a unique, reusable decoration that serves a dual purpose. Placing a small cluster in a decorative bowl can also create a table centerpiece that draws on natural elements.

Why Choose Driftwood Ornaments?

There are many excellent reasons to choose driftwood ornaments for your holiday decor. For one, they bring the outdoors inside, evoking the calming, natural beauty of the beach, even in winter. They are also eco-friendly, utilizing pieces of wood that would otherwise be discarded, and reimagining them into beautiful, festive decorations.

Environmental Impact

Using driftwood reduces waste and contributes to lessening the impact on the environment. Every piece repurposed is one less item heading to the landfill or adding to pollution, making it a sustainable crafting choice. For environmentally conscious consumers, creating driftwood ornaments is a way to celebrate holidays without compromising on green values.

Emotional Significance

Each piece of driftwood tells a story and forms a unique, tactile link to the natural world. As you collect and craft with these pieces, you create more than just decor; you’re crafting memories. Whether for your own tree or as a thoughtful gift, driftwood ornaments carry a personal touch that store-bought items simply can’t replicate.

Troubleshooting Common Issues

Like any crafting project, you might encounter some challenges along the way. From glue issues to drilling mishaps, it’s good to know potential solutions to common problems when crafting with driftwood.

Glue Not Sticking Well

If your glue isn’t adhering properly, consider using a stronger adhesive. Ensure the pieces are dry and free of debris before applying glue, as moisture or dirt can affect adhesion. Epoxy resin can offer a strong, durable bond, particularly for heavier pieces.

Driftwood Breaking or Splintering

Soft driftwood can sometimes break or splinter when worked on. To avoid this, handle pieces with care, especially when drilling. If you need to drill into fragile pieces, start with a small drill bit and increase size gradually to minimize stress on the wood.

Conclusion

Driftwood Christmas ornaments are a unique, beautiful, and eco-friendly way to celebrate the holiday season. With a bit of creativity and a few gathered materials, you can make personalized decorations that capture the spirit of the season. Each ornament not only decorates your home but also carries the memories of crafting and gathering with loved ones. As you enjoy your handcrafted creations, take pride in knowing they embody the harmony of nature and festive cheer. While simple in appearance, these ornaments offer a depth of beauty that resonates well beyond their physical form.

Filed Under: Driftwood Ideas Tagged With: christmas, crafting, DIY, Driftwood, Ornaments

Retique It Driftwood

January 22, 2025 by admin

Have you ever found yourself standing in front of a piece of furniture, paintbrush in hand, dreaming of giving it a new life with a rustic, weathered look but unsure where to begin? If you have, you’re not alone. There’s something undeniably charming about furniture that carries a driftwood finish. It evokes feelings of relaxation, nature, and timeless beauty. Today, we’re going to explore the wonderful world of giving your furniture a driftwood finish using Retique It Driftwood—a hassle-free solution for transforming your home décor.

Retique It Driftwood

What is Retique It Driftwood?

Retique It Driftwood is a uniquely formulated paint product that empowers you to achieve the much-coveted driftwood look without the need to scour the beaches for the perfect piece or undergo intensive stripping and sanding. Retique It products are water-based, non-toxic, and safe for indoor use, making them a perfect choice for DIY enthusiasts looking to embrace a creative project.

The Driftwood Aesthetic

Driftwood aesthetics bring about a sense of tranquility and a touch of nature into living spaces. These finishes are characterized by their weathered, grayish hues and textured appearance. They mimic wood that has been smoothed by the oceans and wind—an ideal fit for those aiming to create a coastal or farmhouse ambiance in their homes.

Why Choose Retique It?

There are myriad reasons to choose Retique It Driftwood over other methods or products:

  • Simplicity: Retique It is designed to be easy to use, even if you’re relatively new to the DIY scene.
  • Versatility: It works on various surfaces including wood, metal, and even laminate without the need for extensive preparatory work.
  • Eco-friendly: Retique It prides itself on being environmentally safe, which means you can work safely indoors without breathing in harmful chemicals.

Preparing Your Project

Before you begin painting, proper preparation will ensure your final product looks professional and lasts for years to come. Here, we’ll guide you through the necessary steps to set you up for success.

Selecting Your Furniture Piece

First things first, identify the piece you wish to transform. Whether it’s a tired wooden bench, a set of chairs, or an outdated dresser, Retique It Driftwood can rejuvenate its appearance. Consider the furniture’s structure and sturdiness, as your efforts will be best spent on pieces that are worth the makeover.

Gathering Supplies

Once you have your project piece in mind, gather the following supplies:

  • Retique It Driftwood kit
  • Paintbrushes (various sizes)
  • Sandpaper or sanding block
  • Damp cloth
  • Drop cloth or newspapers
  • Painter’s tape

Having all your supplies at the ready will make the process enjoyable and seamless.

Preparing the Surface

Start by cleaning the surface of your furniture. Remove any dust, dirt, or grease using a damp cloth. If the piece has a high gloss finish, lightly sand it to help the paint adhere better and to create a more porous surface. Wipe away any dust with a clean cloth after sanding.

Applying the Driftwood Finish

Here comes the exciting part! Applying Retique It Driftwood is straightforward, and with a few tips, you’ll become a pro in no time.

Step-by-Step Application

  1. Priming (Optional): If your furniture is extremely dark or stained, you might want to apply a base coat or primer to ensure the Driftwood color stands out. Retique It’s Ultra White color can serve well as a primer.

  2. Painting: Using your paintbrush, begin applying the Retique It Driftwood in even strokes. Start at one end of your piece and work your way across, ensuring smooth, consistent coverage.

  3. First Coat Drying: Allow the first coat to dry. This process can take 30 minutes to an hour, depending on weather conditions and humidity.

  4. Second Coat (If Needed): Assess whether you need a second coat to achieve your desired opacity and depth. Apply it using the same technique as the first.

  5. Adding Texture: To enhance the driftwood effect, you may lightly sand certain areas or use a brush to create wood grain textures before the paint fully cures.

Final Sealing

Once you are satisfied with the look and have allowed the paint to dry completely, consider applying a sealant to protect your retique and ensure longevity. A water-based polyurethane will lock in color and enhance durability without compromising the finish.

Decorating with Driftwood-Touched Pieces

Showcasing your newly refreshed piece is all about celebrating the natural, calming vibes that driftwood elements bring into your space. Here are a few tips for integrating your creation into your décor.

Ideal Settings for Driftwood Accents

  • Coastal Theme: Embrace other soft blues, whites, and sea life décor elements for an easy coastal vibe.
  • Farmhouse Chic: Pair with shiplap, sparse greenery, and simple textiles like burlap or linen for that modern farmhouse feel.
  • Minimalistic Paradise: Allow your driftwood piece to be the focal point in a minimalist room devoid of clutter.

Complementary Color Schemes

Driftwood tones naturally complement neutral palettes. Shades of gray, cream, and pastel hues can further highlight the finish’s unique characteristics. Textiles such as cozy throws or pillows can add layers of texture without overpowering your piece.

Retique It Driftwood

Caring for Your Driftwood Finish

Ensuring your project retains its charm involves taking simple steps to maintain and protect the finish.

Cleaning

Regularly dust your piece with a soft, dry cloth. Avoid using harsh chemicals or cleansers that could strip or dull the paint.

Repair

Driftwood finishes thoroughly disguise minor imperfections, but if significant wear occurs, touch-up paint can be applied sparingly to affected areas.

Seasonal Care

Wood tends to expand and contract with changes in humidity. Consider using a humidifier during dry months and protecting your piece from direct sunlight to preserve the paint.

FAQs and Troubleshooting

Let’s address some common questions and potential hiccups you might encounter on your journey to driftwood mastery.

Can I Use Retique It Driftwood on Outdoor Furniture?

While Retique It Driftwood is versatile, it’s primarily formulated for indoor use. If you want to use it on outdoor furniture, ensure you apply a robust, outdoor-grade sealant to protect against weather conditions.

What if My Paint Peels?

Peeling may occur if the surface wasn’t adequately prepared. Always ensure your piece is clean and slightly sanded before applying the paint. You can also revisit sections that peel by lightly sanding the area and repainting.

How Long Should I Wait Before Using Sealed Pieces?

Allow the sealant to cure for at least 24 hours before using your furniture. This helps to harden the surface and prevent scratches or marks.

Embrace the Transformation

Working with Retique It Driftwood can redefine the way you think about furniture and interior décor. No longer do old, outdated pieces need to end up in the dumpster. By investing a bit of time and creativity, you can bring new life into your home with beautiful, enigmatic furniture that tells a story of timeless, driftwood elegance. Now, imagine the new conversations that will spark when guests admire your handiwork.

Your journey into the world of home transformation starts here—with a brush, a little vision, and the incredible versatility of Retique It Driftwood. Remember, each piece is unique; as you uncover the best techniques and styles, let your personality and creativity shine through each stroke and finished project.

Filed Under: Driftwood Ideas Tagged With: Chalk Paint, DIY, Driftwood, Furniture Paint, Retique It

  • « Previous Page
  • Page 1
  • …
  • Page 9
  • Page 10
  • Page 11
  • Page 12
  • Page 13
  • …
  • Page 41
  • Next Page »

Primary Sidebar

Driftwood4us.com, is a participant in the Amazon Services LLC Associates Program, an affiliate advertising program designed to provide a means for sites to earn advertising fees by advertising and linking to amazon.com.