• Skip to main content
  • Skip to primary sidebar
  • Terms and Conditions
  • Privacy Policy
  • Contact

Driftwood 4 Us

Just About Driftwood

DIY

Driftwood Crafts For Adults

November 7, 2024 by admin

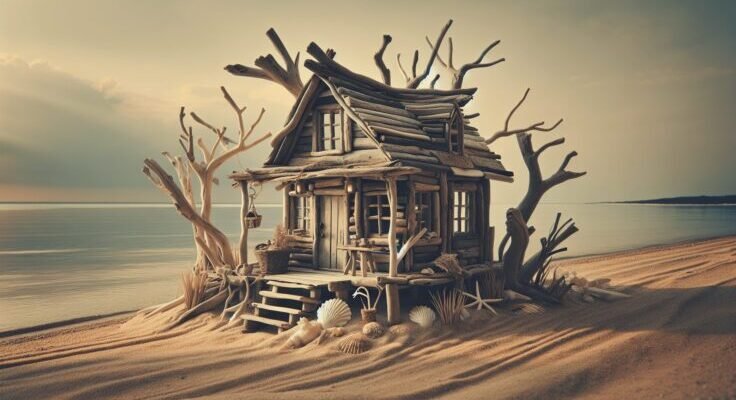
Have you ever wondered how you might bring a piece of the serene shoreline into your home through artistic expression? If so, driftwood crafts may be the creative outlet you’ve been seeking. Utilizing driftwood—nature’s own sculptural art—can enhance your living space with rustic beauty and a personal touch, making each piece as unique as the wood itself.

Driftwood Crafts For Adults

Why Choose Driftwood for Crafting?

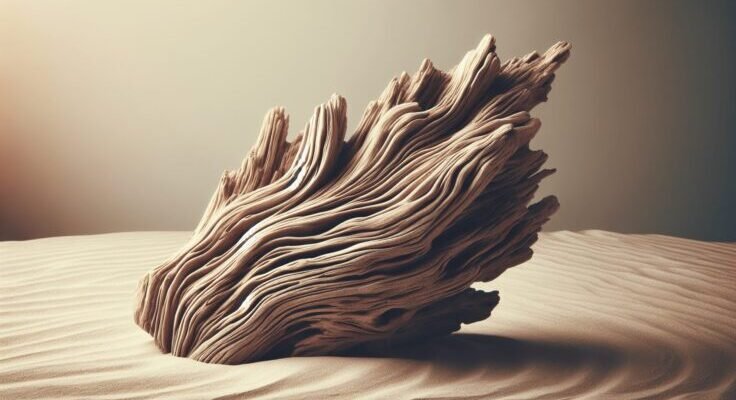
Driftwood’s natural charm lies in its journey through nature’s elements, giving each piece its distinctive look and feel. When you pick up a piece of driftwood, you are essentially holding a piece of history shaped by the waters, winds, and sands. Crafting with driftwood allows you to harness its raw, organic beauty into something new and exciting, providing a deeply personal connection to nature wherever it’s displayed.

Environmental Considerations

One of the benefits of using driftwood in your crafts is its eco-friendly nature. Driftwood is essentially recycled wood, naturally weathered and aged, making it a sustainable choice for those looking to reduce their environmental footprint. By crafting with driftwood, you make use of existing resources rather than creating demand for new materials, contributing to positive environmental practices.

Versatility and Aesthetic Appeal

Driftwood’s varied shapes and textures offer endless possibilities for creative projects. Whether you’re aiming for a simple and minimalist design or something more intricate, driftwood can adapt to suit your aesthetic preferences. Its neutral colors blend easily into any home decor style, offering you flexibility and the freedom to experiment with different looks.

Tools and Materials for Driftwood Crafts

Before starting on your driftwood crafting journey, it’s important to gather the right tools and materials. Depending on the complexity of your project, you might need some specialized equipment. Here’s a basic rundown to get you started.

Essential Tools

ToolPurpose
Saw or JigsawFor cutting pieces to size
Sandpaper or SanderTo smooth the surface of the wood
DrillFor making holes or prepping for attachments
Paint BrushesFor applying finishes or paint
Hot Glue Gun or Wood GlueFor assembling pieces

Additional Materials

  • Varnish or Sealant: To protect and enhance the wood’s natural color.
  • Paint: If you wish to add some color.
  • Wire and Hooks: Helpful for wall hangings or creating connections between pieces.
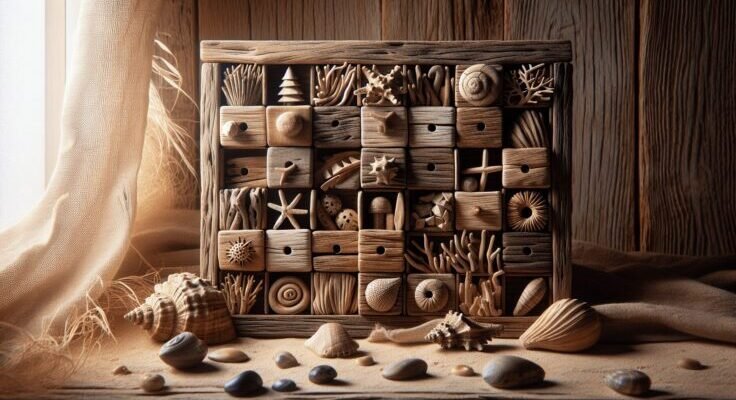
  • Beads, Shells, and Stones: Optional decorations to complement the driftwood.

Preparing Driftwood for Crafting

Before you start crafting, it’s crucial to prepare your driftwood properly. This step ensures your project is not only beautiful but also long-lasting.

Cleaning

Begin by removing any debris, sand, or salt that might be on the wood. A simple rinse with water and a scrub with a brush can do wonders. If the wood is particularly dirty, soaking it in a bleach solution (1 part bleach to 9 parts water) for a few minutes can help remove any remaining particles or microorganisms.

Drying

After cleaning, ensure your driftwood is completely dry. Allow it to air dry in a warm and sunny spot, which can take several days depending on the wood’s thickness and moisture level. Drying is crucial to prevent mold growth and ensure the wood is ready for crafting.

Sanding

Finally, sand your driftwood to smooth any rough edges and surfaces. You’re aiming to maintain its natural character while removing potentially hazardous splinters. This preparation step results in a polished and safe piece of wood ready for creative transformation.

Driftwood Craft Ideas for Adults

With your driftwood prepared and your tools at the ready, you can begin creating stunning art pieces. Here are just a few ideas to inspire your creativity.
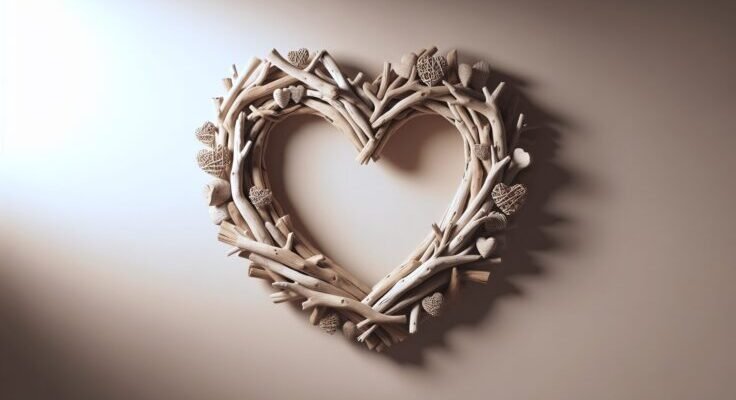
Driftwood Wall Art

Wall art made from driftwood can be a striking addition to any room. Consider assembling various pieces to form an abstract design or a more structured form like a tree or a specific shape. You can enhance the piece with paint for added color or leave it natural for a more earthy vibe.

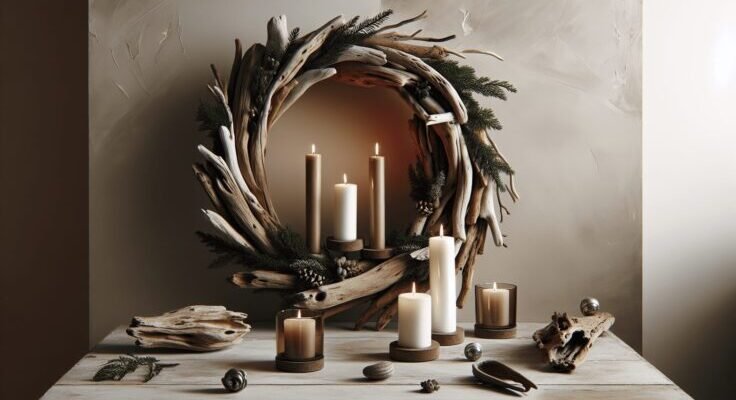
Driftwood Candle Holders

Fashioning candle holders from driftwood creates a warm, ambient lighting element. Use small pieces with natural grooves to securely hold candles or carve small hollows. This project can add a touch of nautical elegance to any dinner party or cozy evening at home.

Driftwood Mirrors

By framing a mirror with driftwood, you create a statement piece that combines functionality with aesthetic appeal. Use pieces of similar size for a uniform look or varying lengths for a more dynamic appearance. The rustic frame of driftwood will contrast beautifully with the reflective surface of the mirror, offering a stylish focal point.

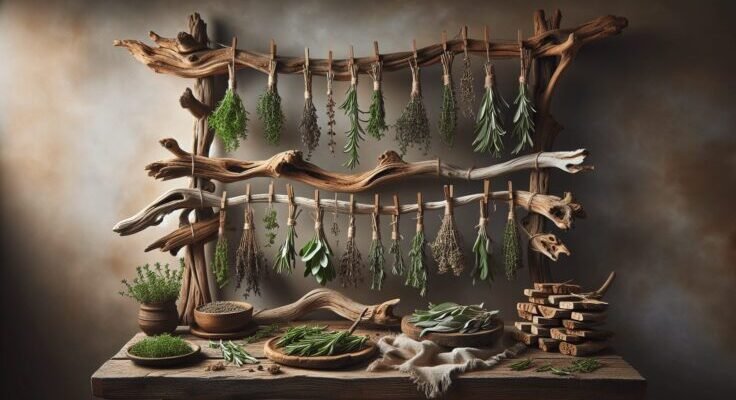
Driftwood Mobiles and Wind Chimes

Driftwood mobiles and wind chimes add an element of playfulness and soothing sound to your home or garden. Hang pieces of driftwood together with beads and shells to create a tranquil symphony when the wind blows. This can be a particularly fun project, allowing you to personalize by choosing accents that match your personal style.

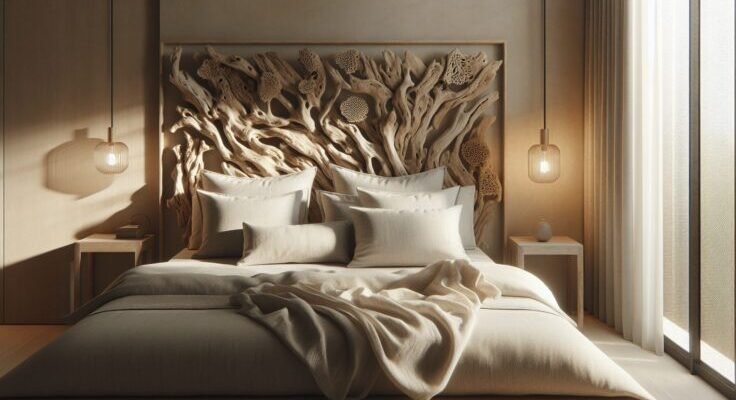
Driftwood Furniture Accents

For a larger, more challenging project, consider using driftwood to embellish furniture pieces, like tables or chairs. Driftwood legs or accent pieces can turn an ordinary piece of furniture into a conversation starter. This project requires more skill and planning but produces a breathtaking result that integrates nature into your living space.

Driftwood Crafts For Adults

Tips for Crafting with Driftwood

Creating with driftwood is a gratifying experience, and a few tips can make the process smoother and more enjoyable.

Selecting the Right Pieces

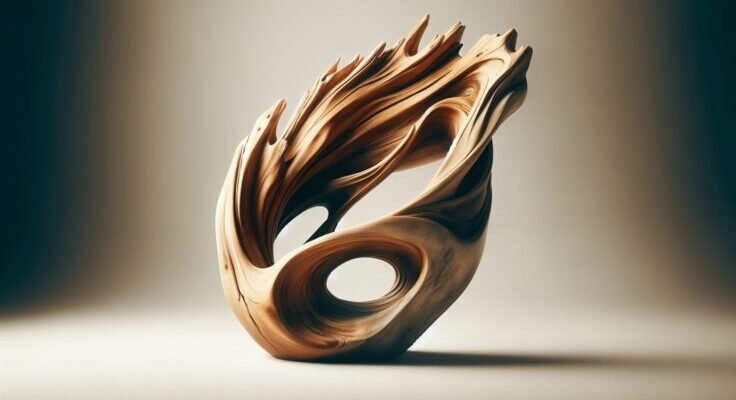
Choosing the right piece of driftwood is fundamental to your project’s success. Look for wood that is sturdy yet not too dense, allowing for easy manipulation. The right piece should inspire you and evoke ideas just by its natural form and texture.

Experiment with Techniques

Don’t hesitate to experiment with different techniques and combinations of materials. Driftwood offers immense versatility, so try mixing it with other natural elements like stones, glass, or metals. The beauty of crafting lies in exploration and seeing what unique masterpiece emerges from your creativity.

Safety First

Always prioritize safety by wearing protective gear, especially when using tools like saws, drills, or sanders. Injuries can easily be avoided by taking the necessary precautions.

Finishing Touches

Once your driftwood craft piece is complete, adding a finishing touch can really make it stand out.

Sealing and Preserving

Applying a sealant can enhance and protect the natural beauty of your driftwood. Choose from various finishes—from matte to high gloss—depending on your desired look. Sealing your piece not only enhances its aesthetics but also prolongs its life by preventing moisture absorption and potential damage.

Personalization

Consider adding personal elements such as carved initials or painted designs to make your driftwood piece truly one-of-a-kind. Small additions like this transform your work into a keepsake that holds personal significance or a special memory.

Sharing Your Driftwood Creations

Once you’ve completed a driftwood craft project, sharing it with others can be just as rewarding as the creative process itself.

Showcasing at Home

Displaying your crafted pieces throughout your home can enhance your living space and spark joy daily. Whether it’s a wall art piece in the living room or a charming driftwood candle holder on the dining table, these crafts can continually brighten your environment.

Gifts and Community Involvement

Driftwood crafts make thoughtful gifts that are both personal and sustainable. Sharing your creations with friends and family can spread the joy of handmade items and inspire others to start crafting as well. Additionally, participating in local craft fairs or workshops can connect you with a community of like-minded creators, expanding your knowledge and enjoyment of crafting.

Embracing the Crafting Journey

Incorporating driftwood crafts into your life is more than just a hobby; it’s a journey of creativity, sustainability, and connection with nature. Every project allows you to hone your skills, discover new techniques, and create beautiful art from nature’s bounty. As you continue exploring this art form, let your creativity and curiosity guide you toward endless crafting possibilities.

Filed Under: Driftwood Ideas Tagged With: Adult Crafts, DIY, Driftwood, Handmade, home decor

Driftwood Houses Diy

November 6, 2024 by admin

Have you ever considered the charm and uniqueness that a piece of nature can bring to your home decor? Driftwood is one such element, often found washed up on the shores, shaped and smoothed by water and time. Why not try your hand at creating something wonderful with it, like driftwood houses? These tiny, artistic representations of cottages or whimsical houses made from driftwood can bring a coastal vibe to your living space. They are perfect for both serious decorators and hobbyists alike. If you’re intrigued, let’s explore how you can start creating your very own driftwood houses.

Understanding Driftwood

Driftwood is more than just a piece of wood; it’s a story told by the sea. Each fragment has a unique texture, shape, and color, making it a fantastic material for DIY projects. It’s the journey of the wood that gives it character—from trees falling near rivers or the sea, to its transformation by water currents and tides. Using driftwood allows you to incorporate a bit of nature’s art into your home.

Why Driftwood?

Driftwood is not just aesthetically pleasing but also eco-friendly. By using driftwood, you’re essentially recycling what nature provides and giving it a new life. Its natural weather-worn look adds a rustic charm to any project you undertake.

Preparing to Create Driftwood Houses

Before you start building your driftwood house, it’s essential to gather all the necessary supplies and clean your driftwood properly. This preparation stage lays the groundwork for an enjoyable and successful DIY experience.

Gathering Materials

For making driftwood houses, you’ll need a few key supplies in addition to driftwood pieces. Here’s a list to guide you:

ItemPurpose
Driftwood PiecesFor constructing the house
Glue (Wood/Hot)To bind the driftwood pieces together
Small Saw or KnifeFor cutting or trimming driftwood to desired sizes
SandpaperTo smooth any rough edges of the driftwood
Paint and BrushesOptional, for adding color and details to your houses
Small DecorationsItems like sea glass, shells, or miniature elements
Protective FinishTo seal and protect the completed driftwood house

These items will help you bring your driftwood house to life. Be sure to select driftwood pieces that fit the scale you want for your house.

Cleaning Driftwood

Cleaning is a crucial step when working with driftwood. Since driftwood is often found in natural settings, it may have salt, sand, or even insects. Here’s a simple method for cleaning your driftwood:

  1. Rinse Thoroughly: Use fresh water to rinse off any loose dirt or debris.
  2. Soak in a Salt Solution: Submerge your driftwood in a solution of water and salt to help eliminate any bacteria or insects. Let it soak for several hours.
  3. Air Dry: Place the driftwood in a warm, dry area to dry completely. This process could take a few days depending on the size and thickness of the wood.
  4. Sand if Necessary: Use sandpaper to smooth any sharp edges or rough surfaces.

By properly cleaning your driftwood, you’re preparing a safe and clean material for your DIY project.

Driftwood Houses Diy

Designing Your Driftwood House

Designing and planning your driftwood house can be one of the most exciting parts of this project. Whether you’re aiming for a simple design or an elaborate house with multiple features, planning is key.

Planning the Structure

Consider what type of house you want to create. Is it a simple cottage style or a more complex structure with multiple levels and rooms? Sketch out your design on paper to visualize the end product. Think about how you can use the natural shape of the driftwood pieces to fit your design.

Selecting Driftwood Pieces

Select pieces of driftwood that fit your planned design. Look for pieces that naturally resemble the parts of a house, such as walls, roofs, and chimneys. This is where creativity and imagination come into play, as you see potential in each piece of wood.

Building Your Driftwood House

With your design in hand and materials ready, it’s time to start the building process. This is the stage where your driftwood pieces start to come together, transforming into a charming, miniature house.

Assembly Process

  1. Create the Base: Start by assembling the base structure of the house. Use strong wood glue to attach your main walls together. Allow it to dry and set before proceeding.
  2. Add Roof and Details: Once the base is stable, start adding the roof. Depending on your design, you might use flat pieces of driftwood or assemble a more angled roof design.
  3. Incorporate Windows and Doors: For added detail, use small pieces to form windows and doors. This is where you can get creative with the positioning and style.
  4. Stable Foundation: Ensure that your house sits stably on your chosen platform or surface. This might require the addition of support pieces or a flat base.

Remember to look at your house from all angles to ensure it’s balanced and aesthetically pleasing.

Securing the Structure

While building, make sure each part is securely attached. Using a hot glue gun can provide a quick bond, but for long-lasting durability, stronger wood glue is recommended. Allow ample drying time to prevent any pieces from shifting.

Driftwood Houses Diy

Adding Personal Touches

Personalization is what makes your driftwood house truly special. Adding little details and decorations can bring your design to life and reflect your personal style.

Painting and Decorating

Optional painting can transform your driftwood house. Some people prefer the natural look of the wood, while others enjoy adding a splash of color. Use non-toxic, water-based paints for any detailing. You can paint doors, windows, or even add a small chimney or garden.

Including Natural Elements

To enhance the coastal theme, consider adding natural elements, such as shells, small stones, or sea glass. These can be used as decorations around your house or incorporated into the structure itself.

Enjoying and Displaying Your Creation

Once your driftwood house is complete, it’s time to find the perfect spot to display it in your home. These pieces can add charm and a story, reflecting both your creativity and the natural world.

Display Ideas

  • Shelves or Mantels: Driftwood houses look lovely perched on a living room shelf or mantelpiece.
  • Garden Feature: If sealed with weatherproof finish, your driftwood house can be a charming addition to your garden.
  • Wall Display: Mounted strategically on a wall, they can create a quirky gallery effect.

Preserving Your Driftwood House

To ensure your driftwood house lasts, consider applying a protective finish. A clear wood sealant can help preserve the driftwood’s color and integrity. If your house is placed outdoors, this step is particularly important to protect against weather elements.

Conclusion

Creating a driftwood house is not only a fun and fulfilling activity but also allows you to bring a piece of the natural world into your home. These tiny, picturesque houses can transport you to coastal shores, telling a story of nature’s relentless artistry. Furthermore, each piece you create is distinct and personal, showcasing your creativity and the unique character of driftwood. Whether you’re crafting for yourself or giving a handcrafted gift to someone special, driftwood houses are a delightful way to express creativity and appreciate nature’s beauty. So, next time you’re near a beach, gather some driftwood and see where your imagination takes you.

Filed Under: Driftwood Ideas Tagged With: crafts, DIY, Driftwood, Handmade, home decor

Driftwood Advent Wreath

November 5, 2024 by admin

Have you ever thought about adding a unique, natural touch to your holiday decorations? If you’re looking for something rustic yet sophisticated, consider creating a driftwood advent wreath. This blend of raw nature and festive tradition not only elevates your decor but also tells a story of time and tide, connecting you to the earth and sea in a beautiful way. In this guide, you’ll discover how to craft your very own driftwood advent wreath, turning a simple collection of wood into a meaningful centerpiece for your holiday celebrations.

Understanding the Advent Wreath Tradition

The advent wreath is steeped in rich tradition and symbolism, spanning across cultures and centuries. Traditionally, an advent wreath is used during the advent season, a time of expectant waiting and preparation for both the celebration of the Nativity of Christ at Christmas and the return of Christ in the Second Coming.

The Symbolism of the Wreath

A typical advent wreath is circular, symbolizing God’s infinite love and the eternal life we receive through Christ. The circle has no beginning or end, which mirrors the concept of eternity. Furthermore, the use of evergreens in the wreath signifies everlasting life, resilience, and the hope of renewal in the dark winter months.

The Candles and Their Meaning

An advent wreath traditionally includes four candles, each representing one week of the advent season. They are often three purple candles and one pink candle. The purple symbolizes penance, preparation, and sacrifice, while the pink candle is lit on the third week, symbolizing joy. A fifth white candle, often placed in the center, is lit on Christmas Eve or Christmas Day and represents the purity and light brought to the world through the birth of Jesus.

Embracing Driftwood in Your Advent Wreath

Driftwood is wood that has been washed onto the shore by the ocean’s currents. It is shaped by nature, beaten smooth by waves, and dried over time. Incorporating driftwood into your advent wreath brings a natural, earthy elegance into your home.

Why Driftwood?

Driftwood carries an air of mystery and artistic grace. Its organic shapes and textures add a rustic charm to any setting. By using driftwood, you not only incorporate natural beauty into your decor but also engage in sustainable crafting. Driftwood is often readily available in coastal areas, and its use can evoke personal memories of nature’s beauty and tranquility.

Choosing the Right Pieces

To create a driftwood advent wreath, you’ll need to select pieces that can form a circular frame. Look for pieces that are varied in size and shape to add interest and dimension to your wreath. Smaller, slender pieces will be easier to form into a circle, while larger, more sculptural pieces can be used as focal points.

Driftwood Advent Wreath

Crafting Your Driftwood Advent Wreath

Creating a driftwood advent wreath is a rewarding project that allows for personal expression and creativity. Here’s a step-by-step guide to help you through the process.

Materials You’ll Need

Gathering the right materials is crucial for a successful craft project. Here’s a handy checklist:

  • Assorted pieces of driftwood
  • A metal or wooden wreath frame
  • Hot glue gun and glue sticks
  • Floral wire
  • Four candle holders
  • Four candles (preferably in the traditional colors: three purple and one pink)
  • Optional: fifth candle holder and white candle
  • Decorative elements (e.g., berries, pine cones, greenery)
  • Sandpaper (optional, for smoothing rough edges)

Constructing the Wreath Base

The base of your wreath will determine its stability and ease of assembly.

  1. Prepare the Frame: Start with a sturdy wreath frame. Metal frames are often more durable, but wooden ones can blend seamlessly with the driftwood.

  2. Weave the Driftwood: Begin by arranging the driftwood pieces around the frame. Use floral wire to secure them, weaving the wire through the frame and around the wood to hold them in place. Ensure that you maintain a circular shape as you build.

  3. Secure the Form: Use hot glue to secure any wobbly pieces. Allow time for the glue to cool and harden for a stable base.

Attaching the Candle Holders

Candles are central to the advent wreath, so their placement is key.

  1. Position the Holders: Space the candle holders evenly around the wreath. If you’ve opted for a center candle, ensure there’s room and stability for it.

  2. Secure the Holders: Use hot glue and wire as needed to secure each holder to the driftwood. The candles should stand straight and firm.

Adding Personal Touches

Decorating the wreath is where you can truly make it your own.

  1. Include Natural Elements: Enhance the driftwood with natural elements. Consider adding clusters of berries, sprigs of evergreen, or small pine cones to fill in any gaps and add color.

  2. Incorporate Personal Items: Add items that hold personal significance, such as small ornaments or shells collected from family beach trips.

  3. Balance the Design: Step back occasionally to view your wreath from different angles. Ensure that it’s balanced in terms of color and structure.

Displaying and Caring for Your Wreath

Once assembled, your driftwood advent wreath will not only be a centerpiece of holiday tradition but also a work of art. Here’s how to best display and maintain it.

Ideal Placement

Select a prominent location where your wreath will be safe from drafts and accidents. A dining table, fireplace mantel, or entryway console are classic choices. Make sure the surface is flat and sturdy to prevent tipping.

Maintenance Tips

While driftwood is durable, it requires care to maintain its appearance.

  • Keep away from excessive heat sources, which could ignite the driftwood or cause the glue to melt.
  • If using real candles, never leave them unattended. Consider using LED candles as a safer alternative.
  • Dust the wreath gently to maintain its aesthetic appeal. A soft brush can help gently remove any dust that settles on the wood.

Longevity and Reusability

One of the benefits of using driftwood is its lasting quality. After the advent season, you can disassemble the wreath and reuse the driftwood pieces in new crafts or save them for next year.

Driftwood Advent Wreath

The Beauty of Handcrafted Traditions

Creating a driftwood advent wreath isn’t just about following a design; it’s about embracing tradition with a personal touch. Each twist and turn of the wood shares a bit of yours, a mix of past experiences, faith, and future hopes.

Why Make Your Own?

Crafting your own advent wreath, especially with elements from nature, offers a rewarding creative outlet. It also allows you to make decorations that suits your personal style and home decor. This hands-on approach enables you to take part in an age-old tradition in a way that is uniquely yours.

Sharing the Experience

Invite friends or family to join you in making the wreath, turning the process into a cherished holiday activity. Sharing stories and creating together fosters deeper connections and adds meaning to the finished piece.

Reflecting on the Process

As you craft, take a moment to reflect on the season and its significance. The slow assembly of natural pieces can serve as a meditative exercise, grounding you in the present while honoring cherished traditions.

Your driftwood advent wreath becomes more than just a decoration – it’s a symbol of natural beauty, personal creativity, and timeless tradition. What story will your wreath tell this season?

Filed Under: Driftwood Ideas Tagged With: Advent, DIY, Driftwood, Handmade, Wreath

Driftwood Advent Calendar

November 4, 2024 by admin

Have you ever wondered how to bring a touch of nature into your holiday festivities with something as simple as driftwood? A driftwood advent calendar might be the perfect way to combine the rustic beauty of nature with the joy of counting down to the holidays. Let’s discover how you can create your own driftwood advent calendar, transforming ordinary pieces of driftwood into a charming holiday display.

Driftwood Advent Calendar

What is a Driftwood Advent Calendar?

A driftwood advent calendar is a creative and sustainable way to celebrate the days leading up to the holidays using natural materials. Instead of the traditional cardboard or fabric advent calendars, this version uses pieces of driftwood to mark each day. By hanging items or numbering the driftwood, you can set up a unique countdown that offers surprises or simple decorations for every day.

The Allure of Driftwood

Driftwood is wood that has been washed onto shore by the elements of the sea. Its weathered look and unique shapes make it a popular choice for home decor. Incorporating it into an advent calendar brings a coastal vibe into your home, making it both an eco-friendly and artistic decoration. Every piece of driftwood tells its story, adding character and charm to your calendar.

Why Choose a Driftwood Advent Calendar?

Creating a driftwood advent calendar allows you to personalize your holiday decor while staying environmentally conscious. This DIY project encourages creativity and can be tailored to fit any home style. Whether you prefer a minimalistic approach or a more elaborate design, driftwood offers versatility and natural beauty.

Building Your Own Driftwood Advent Calendar

Building a driftwood advent calendar is an enjoyable project that you can complete with your family or friends. Here’s a step-by-step guide to help you create your own.

Step 1: Collecting Driftwood

Start by collecting pieces of driftwood. You can find driftwood at local beaches, lakeshores, or even riverbanks. Choose a variety of sizes and shapes that inspire you. Remember to only take what you need and ensure that collecting driftwood is permitted in your area.

Step 2: Cleaning the Driftwood

Once you have your pieces, it’s important to clean them. Rinse the driftwood under running water to remove any dirt or debris. You can use a brush to scrub away any stubborn bits. Allow the driftwood to dry completely before using it in your project. This might take a couple of days, so plan accordingly.

Step 3: Designing Your Calendar

Before assembling, plan the design of your driftwood advent calendar. Consider how you want to display the driftwood. Will you hang them on the wall, or create a tabletop arrangement? Sketching out your design can be helpful to visualize the end result.

Step 4: Numbering the Days

Decide how you want to number the days. You can use small tags, paint, or even wood-burning tools to add numbers to each piece of driftwood. If you prefer a subtle look, you might use small stickers or engrave the numbers. Make sure the numbers are clear and easy to read.

Step 5: Assembling the Calendar

Start assembling your advent calendar according to your chosen design. You might want to string the driftwood pieces together, or attach them to a frame or board. Secure each piece in place, making sure it holds steadily. Think about adding a hook or loop for each piece, especially if you plan to hang small gifts or ornaments.

Step 6: Decorating and Personalizing

Now comes the fun part! Personalize your driftwood advent calendar with small decorations or themes. You might want to add twine, ribbons, small baubles, or natural elements like pinecones and holly. Consider what each day might reveal—a small message, a treat, or a tiny ornament.

Inspirations and Ideas

The possibilities for your driftwood advent calendar are endless. Here are some creative ideas to inspire you.

Minimalist Approach

Embrace simplicity by keeping your driftwood advent calendar minimalistic. Use natural colors and materials to stay true to the driftwood’s rustic look. A monochromatic color scheme or subtle metallic touches can add elegance without overshadowing the driftwood’s beauty.

Nautical Theme

Highlight the marine origins of driftwood with a nautical-themed calendar. Incorporate elements like seashells, small anchors, or miniature lighthouses. Use ocean colors such as blues, whites, and sandy hues to enhance the coastal feel.

Rustic Charm

Go for a rustic charm that ties into a cozy, country-style decor. Use burlap ribbons, small wooden ornaments, and natural fibers. Add tiny woven baskets or fabric pouches to hold small gifts.

Eco-Friendly Decorations

Promote sustainability by using recycled or repurposed materials as decorations. Look for small objects around your home that can be given new life as part of the calendar. This approach encourages recycling and waste reduction, making it perfect for eco-conscious individuals.

Caring for Your Driftwood Advent Calendar

To ensure your driftwood advent calendar remains beautiful for many seasons, you’ll need to care for it properly.

Protecting the Wood

Consider applying a sealant to protect the wood from dust and moisture. This is particularly important if you plan to display your calendar in a place prone to spills or moisture, like a kitchen or near houseplants.

Storing Between Seasons

After the holiday season, store your advent calendar in a dry place. Wrap it in fabric or bubble wrap to prevent dust accumulation and damage. Storing it properly will ensure the driftwood and decorations remain intact for future use.

Reusing Driftwood

Think about reusing the pieces of driftwood for other projects throughout the year. Whether it’s for garden decor, a new DIY project, or simply as natural home accents, driftwood has multiple uses that can be explored beyond the advent calendar.

Driftwood Advent Calendar

A Meaningful Holiday Tradition

Creating a driftwood advent calendar can become a meaningful holiday tradition for you and your loved ones. This activity not only fosters creativity but also encourages spending time together. As you build, decorate, and unveil each day’s surprise, you cultivate valuable memories that add joy to the holiday season.

Family Involvement

Involve your family in the creation process. Assign tasks to each member according to their abilities and interests. Young children can help with collecting driftwood or choosing decorations, while older ones can handle more intricate tasks like numbering or assembling.

Sharing the Experience

Consider making multiple driftwood advent calendars and gifting them to friends or family. Personalized and handmade, these calendars make thoughtful and memorable gifts. Sharing this creative experience strengthens bonds and spreads holiday cheer.

In conclusion, a driftwood advent calendar offers not only a unique and beautiful addition to your holiday decor but also an opportunity to engage in a fun and rewarding DIY project. By embracing nature and creativity, you create a memorable, meaningful way to celebrate the countdown to the holidays.

Filed Under: Driftwood Ideas Tagged With: Advent Calendar, DIY, Driftwood, Handmade, Holiday decor

Driftwood Accent Wall Bedroom

November 2, 2024 by admin

Have you ever walked into a room and felt an immediate sense of calm, like the gentle ocean waves lapping on a peaceful shore? If so, you might have noticed the use of driftwood as an accent, bringing the serene beauty of the beach into your home. Driftwood has a timeless, natural aesthetic that can transform any space into a tranquil retreat. In particular, incorporating a driftwood accent wall in your bedroom can create a stunning focal point and evoke a sense of rustic elegance intertwined with a coastal vibe.

Driftwood Accent Wall Bedroom

What Is a Driftwood Accent Wall?

An accent wall is a wall that is different in design from the other walls in the room, often used to create a visual focal point. A driftwood accent wall specifically involves the use of driftwood—wood naturally weathered by the elements from the sea—to create a textured, nature-inspired feature. This type of wall works exceptionally well in a bedroom, where the comforting, organic feel of driftwood can enhance the space’s overall ambiance.

Why Choose Driftwood for Your Accent Wall?

Driftwood brings a certain versatility in style and texture that other materials cannot quite replicate. It’s beautifully imperfect, with each piece having its own character and story. Driftwood adds a touch of authenticity and can fit seamlessly into various décor styles, from rustic to modern, and even minimalist designs. Moreover, its natural color palette offers gentle tones ideal for creating a restful atmosphere, making it perfect for a bedroom setting.

How to Source Driftwood

The allure of driftwood partly lies in its unique origin. Collected from beaches, riverbanks, and lakeshores, each piece is shaped by nature. However, sourcing driftwood ethically is important. You should ensure that you have the necessary permissions, as some places have regulations against collecting natural materials. Additionally, you can purchase driftwood from credible suppliers who source ethically, ensuring sustainable practices are in place.

Cleaning and Preparing Driftwood

Before using driftwood in your bedroom, it’s crucial to clean and prepare it properly to ensure that it’s free of pests and splinters. Start by thoroughly scrubbing the wood with a brush to remove dirt and debris. Then soak it in a mixture of water and bleach to kill any bacteria or insects. After soaking, rinse it well and let it dry completely, preferably in the sun, which helps preserve its natural color and prevent mold growth.

Designing Your Driftwood Accent Wall

The design and layout of your driftwood accent wall should complement the overall theme of your bedroom. Consider the following steps to achieve the perfect design:

Choose Your Layout

The layout of your driftwood pieces will significantly affect the wall’s final look. You can opt for a random arrangement for a more natural, untamed feel or align the pieces horizontally or vertically for a more structured appearance. The choice ultimately depends on whether you prefer a rustic, boho-chic look, or a sleek, contemporary design.

Select Complementary Colors

While driftwood brings its own natural hues to the room, you might want to complement it with colors that harmonize or contrast subtly. Soft earth tones and muted blues or greens work wonderfully to enhance the beachy vibe. Alternatively, you might prefer to maintain a minimalist tone by using whites or grays to highlight the driftwood’s natural texture.

Incorporate Lighting

Lighting plays a crucial role in emphasizing the texture and color of your driftwood accent wall. Consider adding soft lighting, such as wall sconces or string lights, to create a warm glow that highlights the intricacies of the wood. This not only illuminates the space but also adds a cozy, inviting feel to the room.

Installation Process of Driftwood Accent Wall

Installing a driftwood accent wall can seem like a daunting task, but with the right tools and methods, you can achieve professional results.

Gather Your Tools and Materials

Before you start, make sure you have all the necessary materials and tools. Here’s a basic list:

Tools and MaterialsPurpose
Driftwood piecesAccent material
SawCutting wood to fit
SandpaperSmoothing surfaces
Nails or wood glueSecuring driftwood to the wall
Hammer or drillFor attaching the pieces
LevelEnsuring straight installation

Prepare the Wall Surface

Ensure that the wall you’re using is clean and free of debris. You may need to sand the surface lightly or apply a primer depending on the wall’s condition. A smooth, clean wall will help the driftwood adhere better, whether using nails or glue.

Arrange the Driftwood

Start by arranging your driftwood pieces on the floor to experiment with the layout. This helps you envision the final look and allows you to adjust the arrangement until you’re satisfied. Make sure to measure each piece accurately, adjusting as necessary, to fit your chosen design on the wall.

Secure the Driftwood

Once you’re happy with the layout, begin attaching the pieces to the wall. If you’re using nails, start from one side and work across, using a level to ensure each piece is straight. For more delicate wood pieces, wood glue can be an alternative to avoid splitting the wood with nails.

Driftwood Accent Wall Bedroom

Caring for Your Driftwood Accent Wall

While driftwood is sturdy, it needs a bit of care to maintain its beauty and integrity. Here are some tips for keeping your wall looking its best:

Regular Dusting

Driftwood’s texture can easily collect dust, so it’s important to incorporate regular dusting into your cleaning routine. Use a soft brush or a cloth to gently dust off the surfaces, ensuring the unique character of the driftwood remains visible and clean.

Dealing with Moisture

Humidity can affect driftwood, causing it to expand or contract. If your bedroom has high humidity levels, consider using a dehumidifier to maintain a stable environment. Additionally, avoid exposing the wood to direct moisture and keep an eye out for any signs of mold or mildew.

Enhancing Your Bedroom’s Aesthetic with Accessories

Complement your driftwood accent wall with accessories that enhance the overall décor of your bedroom. Here are some ideas:

Bedding and Textiles

Select bedding and textiles that tie in the driftwood theme. Linen, cotton, or woven blankets in neutral tones or pastel shades can harmoniously blend with the natural color of driftwood, creating a cohesive look.

Coastal or Rustic Décor

Incorporate décor elements like seashells, nautical artifacts, or rustic picture frames to reinforce the coastal or rustic theme. These touches will unify the room’s design and accentuate the driftwood’s charm.

Greenery

Plants can pair beautifully with driftwood, breathing life into the room. Opt for indoor plants that are easy to care for, such as succulents or ferns, to add a splash of freshness and color, echoing the natural feel of the driftwood.

Personalizing Your Driftwood Accent Wall

Your space should reflect your personality and style. Personalizing your driftwood accent wall ensures that it not only enhances the room but also holds personal significance.

Add a Personal Touch

Consider adding framed photos, artistic prints, or small shelves to display personal items. This turns your wall into a canvas, allowing you to showcase memories and treasures that hold personal value.

Experiment with Different Shapes and Sizes

Don’t be afraid to incorporate driftwood pieces of varying shapes and sizes. This adds depth and visual interest, ensuring your wall is a unique representation of your taste and style.

Conclusion

Incorporating a driftwood accent wall into your bedroom design is about more than just aesthetics. It’s a way to bring a piece of nature into your intimate space, creating an atmosphere that is calm, relaxing, and uniquely tailored to your personal style. Whether you lean towards a rustic charm or a minimalist vibe, driftwood’s versatile nature can adapt to enhance any space. With thoughtful planning and a touch of creativity, your driftwood accent wall can become the defining feature that transforms your bedroom into a stylish haven. So why not embark on this journey and discover how driftwood can bring a sense of serenity and style into your home?

Filed Under: Driftwood Ideas Tagged With: Accent Wall, Bedroom, DIY, Driftwood, home decor

Driftwood Stain On Hickory

October 31, 2024 by admin

Have you ever wondered how to achieve that perfect coastal or rustic look in your home? One way to get that warm, welcoming vibe is by applying a driftwood stain on hickory wood. Whether you’re updating your furniture or enhancing your interior design, using driftwood stain can bring a touch of elegance without losing the natural essence of wood. Let’s embark on this journey to understand more about the beauty and techniques of applying driftwood stain on hickory wood.

Understanding Driftwood Stain

Driftwood stain is famed for its ability to transform ordinary wood surfaces into pieces that mimic the beautiful, weathered appearance of wood found along the shorelines. This stain contains a unique blend of grays, browns, and subtle blues, offering an illusion of wood gracefully aged by wind, water, and time.

Characteristics of Driftwood Stain

This stain is known for creating an understated and elegant look. It typically results in a soft blend of earthy tones that can complement both modern and traditional home décors. The stains vary in intensity and can highlight the wood grain beautifully, allowing you to maintain the natural charm of the wood beneath.

Application on Different Wood Types

Driftwood stain can be versatile and looks different on various wood types. However, its success depends on the wood’s natural grain and color. Hickory wood, with its exquisite grain patterns and sturdiness, is a fantastic candidate for this process. When applied to hickory, the driftwood stain can bring out its character without overpowering its natural beauty.

Hickory Wood: An Overview

If you’ve chosen hickory as your base, you’re already on the right path to achieving a stunning finish. Hickory is known for its strength and durability, commonly used in furniture, cabinetry, and flooring.

Characteristics of Hickory Wood

Hickory wood offers a distinctive grain pattern, combined with a natural color palette that ranges from light cream to reddish-brown. Its dense and robust nature makes it well-suited for high-traffic areas, while its elegant appearance makes it a favorite for various decorative projects.

Why Choose Hickory for Driftwood Staining?

Hickory’s similarities to driftwood in color and texture make it an ideal choice for this type of staining. The wood’s inherent qualities, such as its density and hardness, ensure the stain is absorbed evenly, creating a lasting finish. Moreover, the unique grain patterns in hickory help to highlight the subtle hues in the driftwood stain.

Driftwood Stain On Hickory

Preparing Hickory for Staining

Preparation is paramount for a successful staining experience. Before applying driftwood stain, hickory must be properly prepped to ensure the stain adheres and showcases the wood’s natural beauty.

Cleaning and Sanding

Start by thoroughly cleaning the hickory surface to remove any dust, dirt, or oils that might interfere with the stain absorption. Once clean, sand the wood with fine-grit sandpaper to smooth out any imperfections and open up the wood pores. This step allows the stain to penetrate more deeply and evenly.

Testing the Stain

Before proceeding with a full application, it’s wise to test the stain on a small, inconspicuous area. This allows you to see how the wood reacts to the stain and whether you’ve achieved the desired color. Adjustments can be made in terms of stain concentration or application technique based on this test.

Necessary Supplies

Having the right tools and materials makes the process smoother and more efficient. Here’s a quick checklist for your reference:

Supplies NeededDescription
Driftwood stainChoose your preferred brand and color intensity.
SandpaperUse a variety from coarse to fine for sanding.
Clean rags or brushFor applying the stain evenly.
Protective gearGloves and mask to protect skin and lungs.

Applying the Driftwood Stain

Once your hickory surface is prepped, you can move on to the actual application of the driftwood stain. Here’s where the transformation begins!

Step-by-Step Staining Process

  1. Thorough Mixing: Ensure your stain is well-mixed. Pigments can settle over time, so mixing it thoroughly will ensure even application.
  2. Even Application: Using a clean rag or brush, apply the stain evenly along the direction of the grain. This technique helps highlight the wood’s natural lines and patterns.
  3. Wipe Excess: Allow the stain to sit on the surface for a few minutes before wiping away any excess. This prevents blotching and lets the wood’s natural beauty shine through.
  4. Multiple Coats if Needed: Depending on your desired finish, you may apply additional coats. Always ensure that each coat is dry before applying another, following the manufacturer’s instructions for drying times.

Troubleshooting Common Issues

Occasionally, you might face challenges such as uneven coloring or blotching. If blotching occurs, applying a pre-stain wood conditioner can help, especially if your hickory is particularly dense. For color problems, adjust the time the stain sits or consider experimenting with different application techniques.

Driftwood Stain On Hickory

Enhancing and Protecting the Finish

Once the driftwood stain has perfectly colored your hickory, it’s essential to protect your work of art.

Applying a Topcoat

A clear topcoat can protect your stained surface from wear and tear while enhancing its appearance. Polyurethane is a common choice for durability, but ensure it’s clear to not alter the beautiful driftwood effect you’ve achieved.

Maintenance Tips

To maintain the look, periodically clean the surface with a soft, damp cloth. Avoid using harsh chemicals that can wear away the finish or stain over time. If you notice areas of wear, lightly sand them and reapply the stain and protective coat as needed.

Incorporating Driftwood Stained Hickory in Your Decor

With your hickory now treated with a driftwood stain, it’s time to consider how best to incorporate this beautiful piece into your home decor.

Furniture Ideas

Hickory furniture stained with driftwood hues can serve as a stunning centrepiece in your living room or bedroom. Consider side tables, bed frames, or even dining tables that highlight the cosy, coastal aesthetic driftwood brings.

Floor and Ceiling Applications

If you’ve stained hickory flooring or ceiling panels, be prepared for these areas to become focal points in your home. The natural beauty paired with the modern driftwood finish can make any room feel more expansive and inviting.

Match with Other Decor Elements

Pair your driftwood-stained hickory with soft fabrics in neutral tones, or complement them with blues and greens for a truly nautical theme. Incorporate textures such as jute or rattan to enhance the natural look and feel.

Conclusion

The process of applying driftwood stain to hickory wood is both an art and a science. It requires patience, care, and a keen eye for detail. By following proper preparation and application techniques, you can create stunning wood pieces that evoke a sense of place and time. These pieces not only enhance your living space but also bring a touch of timeless beauty and warmth into your home. Now that you’ve learned the ropes, why not consider giving your next project a driftwood twist?

Filed Under: Driftwood Ideas Tagged With: DIY, Driftwood Stain, hickory, Wood Finishing, Woodworking

Driftwood Accent Wall

October 31, 2024 by admin

Have you ever walked into a room and immediately felt a sense of calm and connection with nature? An exquisite driftwood accent wall can create just that atmosphere, transforming your space into a coastal-inspired sanctuary. This rustic and stylish addition to your decor makes a statement, capturing the essence of the shoreline right within your home. Whether you’re aiming for a beachy vibe or just looking for a unique architectural feature, driftwood provides a natural elegance that’s hard to match.

What is a Driftwood Accent Wall?

A driftwood accent wall is a feature wall adorned with driftwood pieces. It taps into the natural beauty of weathered wood that has been smoothed and shaped by the ocean. This type of wall can add texture, color, and a distinctive focal point to any room, making it a popular choice for those wanting to incorporate earthy materials and coastal charm in their interiors. Driftwood not only exudes a raw aesthetic but also brings a sense of history, as each piece has been uniquely molded by the elements.

Why Choose Driftwood for Your Accent Wall?

Natural Beauty

Driftwood possesses a certain rugged charm that comes from its natural origins. Its unique patterns and textures are impossible to replicate with synthetic materials. This individuality guarantees that your accent wall will be one-of-a-kind.

Eco-Friendly Choice

By choosing driftwood, you are often utilizing wood that has been naturally discarded by nature. This makes it an environmentally friendly option compared to newly cut timber. Driftwood requires minimal processing, offering a way to repurpose what might otherwise be considered waste.

Versatility and Function

Driftwood can integrate seamlessly into various design styles, from coastal and rustic to shabby chic and Scandinavian minimalism. It’s a versatile material that pairs well with stone, metal, or glass, enhancing the overall aesthetics of your home.

Driftwood Accent Wall

How to Create a Driftwood Accent Wall

Gathering Materials

To create a driftwood accent wall, you’ll need the following materials:

  • Driftwood pieces: Gathered responsibly from beaches or bought from reputable suppliers.
  • Adhesive or nails: Depending on your wall type and design preference.
  • Measuring tape: To ensure precise alignment.
  • Saw (optional): For cutting driftwood to fit your design.
  • Sandpaper: To smooth out any rough edges.

Preparing Your Space

Before starting your project, ensure your wall is prepared. Clean the surface thoroughly to remove dust and grime, which will help with adhesion. If your wall isn’t already primed or painted, consider applying a base coat to enhance the overall look.

Designing Your Pattern

Deciding on a pattern or layout is a crucial step. You might opt for horizontal or vertical lines for a more structured appearance, or arrange pieces randomly for a natural, organic look. Take the time to practice your design on the floor before adhering to the wall, adjusting to achieve the desired aesthetic.

Installation Process

  1. Start with a Base Layer: Begin at one corner of the wall and secure the first piece of driftwood with adhesive or nails.
  2. Build Gradually: Work your way outwards and upwards, continuing to secure each piece based on your pattern.
  3. Ensure Stability: Apply consistent pressure if using adhesive, and ensure that each piece is firmly set to avoid future movement.
  4. Finish the Edges: Add smaller pieces or cut driftwood to fit any remaining spaces or edges for a polished look.

Maintaining Your Driftwood Accent Wall

Cleaning

Regular dusting is essential to maintain the appearance of your driftwood wall. Use a soft, dry cloth or a gentle vacuum attachment to remove dust and debris.

Sealing

Consider applying a wood sealer to protect your driftwood from moisture and environmental damage, ensuring its longevity. Choose a clear sealant to maintain the natural look of the wood.

Driftwood Accent Wall

Driftwood Accent Wall Design Ideas

Minimalist Approach

For a minimalist aesthetic, consider spacing out larger pieces of driftwood with gaps to allow the wall’s original color to peek through. This approach highlights the qualities of each individual piece, focusing on simplicity and elegance.

Gallery Wall Addition

Incorporate your driftwood accent wall into an existing gallery wall. The natural texture lends a backdrop that enhances the visual impact of artwork or photography.

Complement with Plants

Pair your driftwood wall with greenery such as ferns or succulents. The natural elements complement each other beautifully, bringing a fresh and inviting vibe to your interior space.

Common Mistakes to Avoid

Overcrowding

Avoid placing too many pieces of driftwood close together, as it can create a cluttered look. Strive for balance, allowing each piece to shine on its own.

Ignoring Wall Condition

Neglecting to prepare the wall surface can lead to poor adhesion and might even damage the paint or drywall. Always start with a clean and ready surface.

Budgeting for Your Driftwood Accent Wall

Here’s a simple breakdown of potential costs involved in creating a driftwood accent wall:

ItemEstimated Cost
Driftwood$0 – $10 per piece
Adhesive/Nails$10 – $30
Paint/Primer$20 – $50
Wood Sealer$15 – $40
Tools (Saw, Sandpaper)Variable

Total costs can vary based on wall size, material availability, and design complexity. Consider sourcing driftwood locally to minimize expense.

Conclusion

Creating a driftwood accent wall brings the tranquility and beauty of the natural world into your home. It’s a sustainable design choice that adds character and warmth to any room. Whether you’re a seasoned DIY enthusiast or a novice looking to try your hand at a creative project, crafting a driftwood feature wall offers an enriching experience. Rediscover the art of storytelling through decor by embracing the unique history of each piece of driftwood and allow it to adorn your personal space with timeless allure.

Filed Under: Driftwood Ideas Tagged With: Accent Wall, DIY, Driftwood, Interior Design, Rustic style

Driftwood Herb Drying Rack

October 25, 2024 by admin

Have you ever found yourself with an abundance of fresh herbs and wondered how to preserve their flavors and aromas effectively? If so, you might be intrigued by the idea of creating a driftwood herb drying rack. Not only does it serve a practical purpose, but it also adds a touch of rustic charm to your kitchen or garden space. With some creativity, you can transform simple driftwood into a functional tool that ensures your herbs maintain their essence for culinary dishes or medicinal use.

Understanding the Benefits of an Herb Drying Rack

Herbs can enhance any recipe, but their short shelf life can be a limiting factor. By drying herbs, you can prolong their usability without compromising flavor. An herb drying rack allows natural air circulation, preventing mold and preserving essential oils within the herbs. Additionally, drying herbs instead of freezing them retains more of their nutritional value and taste.

Why Choose Driftwood?

Aesthetic Appeal

Driftwood is celebrated for its natural beauty. Each piece is uniquely shaped by the elements, giving your drying rack a one-of-a-kind appearance. Its rustic look can complement various home décor styles, from coastal to bohemian.

Eco-Friendly Option

Using driftwood is a sustainable practice. It involves repurposing fallen and washed-up wood, preventing the need for newly harvested timber. By choosing driftwood, you help reduce waste and make eco-conscious decisions.

Driftwood Herb Drying Rack

Selecting the Right Driftwood

Sourcing Driftwood

Finding driftwood can be an exciting adventure. Coastal areas, lakes, and rivers often have driftwood pieces that you can collect. Ensure that collecting driftwood is permitted in the area you’re in, as some regions have restrictions to protect natural habitats.

Characteristics of Suitable Driftwood

When choosing driftwood for your herb drying rack, consider the size, shape, and sturdiness of each piece. You want wood that is strong enough to hold herbs without breaking, while also being manageable to handle and hang.

Preparing Driftwood for Use

Cleaning the Driftwood

Once you’ve selected your pieces, clean them thoroughly. Soak the driftwood in a mixture of water and vinegar to remove salt deposits, dirt, and any potential micro-organisms. After soaking, scrub the wood with a brush, rinse well, and let it dry completely.

Sealing the Wood

Consider applying a sealant to your driftwood. This step isn’t mandatory, but it can provide added protection against moisture and insects. Use a natural sealant to maintain the non-toxic nature of your drying rack.

Driftwood Herb Drying Rack

Designing Your Herb Drying Rack

Determining the Structure

Think about the configuration that best suits your space and herb-drying needs. Common designs include a linear horizontal rack or a tiered vertical rack. The design choice will influence how you’ll arrange your driftwood.

Materials and Tools Needed

To assemble your driftwood herb drying rack, gather the following materials and tools:

MaterialsTools
Driftwood piecesDrill
Twine or stringSaw (if resizing)
Hooks or pegsSandpaper
Eye screwsMeasuring tape
Sealing agent (optional)Scissors

Assembly Guide

  1. Plan Your Layout: Arrange your driftwood in a structure that reflects your chosen design. Use measuring tape to ensure even spacing between pieces.

  2. Drill Holes: Drill holes in the wood where needed, either to connect pieces with twine or to insert eye screws for hanging.

  3. Connect Pieces: Use twine to tie the driftwood pieces together if creating a multi-tiered rack. Ensure knots are tight to prevent slippage.

  4. Attach Hooks: Screw hooks or pegs into the wood, spaced evenly for drying herbs. Hooks can accommodate herb bundles, while pegs work for smaller, lightweight herbs.

  5. Hanging the Rack: Once assembled, securely hang your rack using sturdy ropes or chains from a ceiling beam, allowing for ample airflow around your herbs.

Best Practices for Drying Herbs

Harvesting Herbs

For the best results, harvest herbs mid-morning after the dew has evaporated, but before the sun is strongest. This timing helps capture the oils in the leaves without causing wilting from the heat.

Preparing Herbs for Drying

Remove any damaged or yellow leaves, and shake off excess soil. For larger leaves, consider removing the stems. Group delicate herbs like dill or basil in smaller bunches to prevent overcrowding and promote air circulation.

Drying Techniques

Hang herb bundles upside down to allow gravity to aid in drawing moisture out. Herbs should not be exposed to direct sunlight during the drying process, as this can degrade their color and potency. Aim for a cool, dark, and dry area.

Monitoring the Drying Process

Herbs generally take one to two weeks to dry completely. Check them periodically by crumbling a leaf between your fingers. If it crumbles easily, it’s ready for storage. Keep drying as needed for consistent texture among all pieces.

Storing Dried Herbs

Proper Storage Containers

Once dried, store herbs in airtight containers to preserve their freshness. Glass jars with tight seals are ideal, as plastic can sometimes impart unwanted flavors.

Labeling and Organizing

Label your containers with the herb name and date of drying. Proper labeling helps you keep track of shelf-life and ensures you use herbs at their peak of flavor.

Storage Conditions

Store your herbs in a cool, dark place to maximize their longevity. Direct sunlight and heat can cause herbs to lose their potency and flavor more quickly.

Creative Additions to Your Rack

Personalizing Your Rack

Consider adding decorative elements to your herb drying rack. Incorporate shells, beads, or small trinkets tied onto the strings for a personal touch that reflects your style.

Multi-Purpose Functionality

Beyond herbs, use your driftwood rack for drying flowers or displaying lightweight ornamental items. Its versatility makes it a functional art piece in your living space.

Conclusion

Incorporating a driftwood herb drying rack into your kitchen or garden space offers a mix of beauty, sustainability, and practicality. The process of creating and utilizing such a rack encourages you to value the natural world and its resources. By taking the time to dry and preserve your herbs properly, you ensure that your culinary creations are always enhanced with fresh, aromatic flavors straight from your personal herb collection. So embrace your creativity, respect nature, and enjoy the benefits of having home-grown herbs at your fingertips all year round.

Filed Under: Driftwood Ideas Tagged With: crafts, DIY, gardening, Herbs, home decor

Driftwood Headboard Bedroom

October 24, 2024 by admin

Have you ever considered how a seemingly simple, natural material like driftwood can completely transform the ambiance of your bedroom? In its naturally sculpted form, driftwood carries a certain rustic charm, evoking memories of beaches and the gentle tides that shaped each piece. It’s no wonder that driftwood has become a popular choice in home decor, especially for the creation of unique and inviting headboards. This article will guide you through everything you need to know about integrating a driftwood headboard into your bedroom, from choosing the right piece to pairing it with the perfect decor.

What is Driftwood?

Driftwood refers to wood that has been naturally shaped and weathered by the elements, typically washing up on shorelines after spending time floating through oceans, rivers, or lakes. It is prized for its rustic, raw aesthetic that brings a piece of nature into indoor spaces. What makes driftwood unique is its journey — the exposure to water and sun bleaches the wood, giving it various shades and textures that make each piece distinct.

The Unique Appeal of Driftwood

Driftwood is celebrated for its sustainability and natural beauty. No two pieces are alike, bringing a truly one-of-a-kind element into your home. Its appeal lies in its imperfections and organic shapes that tell a story about its origins. Driftwood often inspires creativity and offers versatility; you can leave it raw or enhance its texture with a finish.

Integrating Driftwood into Your Bedroom

The bedroom is a personal sanctuary where comfort and style converge. By using driftwood as a headboard, you introduce a natural element that can set the tone for the rest of the room’s decor. Here, we’ll explore how driftwood can be seamlessly integrated into your bedroom’s design.

Benefits of a Driftwood Headboard

Opting for a driftwood headboard brings several benefits beyond its aesthetic appeal. It’s an environmentally friendly choice, as driftwood is a naturally recycled material. It also offers a neutral foundation that complements various color palettes and styles, from coastal to bohemian or rustic.

Choosing the Right Driftwood for Your Headboard

When selecting driftwood for your headboard, consider the size, color, and texture. The wood should be large enough to create a focal point without overpowering the space. The color should harmonize with your existing decor, be it the natural grayish tones of driftwood or a washed-out white finish. Texture can vary greatly; smoother driftwood provides a sleek look, while rugged pieces may add tactile interest.

DIY vs. Pre-Made Driftwood Headboards

You might be deciding whether to craft your driftwood headboard as a DIY project or to purchase a pre-made piece. Creating your own allows for personalization and the satisfaction of a handmade item, but requires time and patience. On the other hand, pre-made driftwood headboards are crafted by professionals, ensuring durability and a refined finish, but they may come with a higher price tag.

Driftwood Headboard Bedroom

Designing Your Driftwood Headboard Bedroom

Designing a driftwood headboard bedroom involves thoughtful planning and coordination of various decor elements. This section will guide you through the process of creating a cohesive and inviting space around your driftwood centerpiece.

Color Schemes to Complement Driftwood

Driftwood’s natural tones work beautifully with a variety of color schemes. Neutrals like white, beige, or soft gray enhance its natural beauty, creating a calm and serene space. For a more vibrant look, you can pair driftwood with muted blues or greens, reminiscent of a coastal landscape. The table below presents a few color schemes perfect for a driftwood-inspired bedroom.

Color SchemeDescription
Neutral EleganceWhites, beiges, and soft grays for a calm and balanced look
Coastal BluesMuted blues and greens that bring a beachy vibe
Earthy TonesBrowns and olives for a rustic, nature-inspired atmosphere
Pastel AccentsSoft pinks, yellows, or lavender for a subtle, artistic flair

Furniture and Accessories

To enhance your driftwood headboard, choose furniture that aligns with your room’s overall style. Weathered woods or distressed finishes can echo the rustic nature of driftwood. For a more modern contrast, opt for sleek metal or glass elements. Accessories such as throw pillows, blankets, and area rugs can add texture and warmth, with natural fibers like linen or wool complementing the driftwood’s organic feel.

Lighting Choices

Lighting plays a crucial role in showcasing the texture and tone of your driftwood headboard. Soft, ambient lighting like wall sconces or string lights can highlight the headboard’s details. Consider using fixtures with a natural or industrial finish to maintain harmony with the headboard’s aesthetic.

Bringing It All Together

Creating a driftwood headboard bedroom isn’t just about the headboard itself, but how every element in the room works together to create a cohesive design. Balance is key — the driftwood should be the focal point, but it must also harmonize with the rest of your decor.

Creating a Focal Point

A headboard usually becomes the center of attention in a bedroom. With a driftwood headboard, it’s about showcasing its natural beauty without overwhelming the space. Arrange your bed and furniture so the headboard is positioned against a plain wall where its textures can stand out.

Personalizing Your Space

Personalization is what makes a space truly yours. Use photographs, artwork, and personal mementos to add character and warmth to your room. Incorporating plants can further enhance the natural theme, with greenery providing a refreshing contrast against the wood.

Driftwood Headboard Bedroom

Caring for Your Driftwood Headboard

To keep your driftwood headboard in excellent condition, regular maintenance is essential. Driftwood, by nature, is porous and may require occasional care to ensure its longevity and appeal.

Cleaning and Maintenance Tips

Dust your driftwood headboard regularly using a soft cloth to keep it clean. Avoid harsh chemicals that can damage its natural finish. If necessary, use a slightly damp cloth for spot cleaning followed by drying the wood to prevent moisture absorption.

Preserving the Driftwood

To preserve the driftwood’s color and texture, consider applying a clear wood sealant or finishing wax. This can protect the wood from stains and discoloration, helping maintain its natural charm over time.

Conclusion

Incorporating a driftwood headboard into your bedroom can completely transform the space into a tranquil and inviting sanctuary. With careful selection, thoughtful design, and minimal maintenance, driftwood offers both aesthetic beauty and environmental benefits. Whether you choose to DIY or shop for professionally crafted pieces, the charm brought by driftwood is undeniably worth the effort. Through balance and harmony in your decor, you can create a bedroom that feels not only connected to the natural world but also to you at a personal level. Let the driftwood headboard be a symbol of tranquility and nature’s elegance in your private haven.

Filed Under: Driftwood Ideas Tagged With: Bedroom, DIY, Driftwood, Headboard, Interior Design

Driftwood Heart Wreath

October 23, 2024 by admin

Have you ever thought about how you can bring a piece of nature into your home with a personal touch? Driftwood heart wreaths might be the perfect answer. These beautiful creations not only add a rustic charm to your living space but also carry with them a unique story shaped by nature’s elements. Today, you’re about to embark on a journey where you’ll learn everything there is to know about crafting your own driftwood heart wreath.

Driftwood Heart Wreath

Understanding Driftwood

Before jumping into the creation process, it’s essential to understand what driftwood is and why it’s so special. Driftwood refers to the pieces of wood that have been washed onto the shore by the action of winds, tides, or waves. Each piece of driftwood is thoroughly sculpted by water, offering a smooth and unique texture that is perfect for crafting.

The Appeal of Driftwood

Why is driftwood so cherished in art and decor? You might wonder. Driftwood presents an organic and rustic aesthetic. Its naturally weathered appearance adds a sense of tranquility and natural beauty. By incorporating driftwood into your homemade wreath, you’re introducing elements of the earth, water, and time into your personal space.

Where to Find Driftwood

Locating driftwood for your project can be part of the adventure. Generally, beaches along the coastlines are the primary source. Look for secluded beaches with minimal human activity to maximize your chances of finding high-quality pieces. Do remember to check regional regulations, as collecting driftwood might be restricted in some areas.

Essential Tools and Materials

Before beginning your project, you’ll need some essential supplies and tools. This section will guide you through everything you need to create a driftwood heart wreath.

Materials Needed

To craft your wreath, gather the following materials:

  • Assorted pieces of driftwood
  • A heart-shaped wreath frame
  • Strong adhesive or wood glue
  • Hemp or jute twine
  • Optional: Seashells, sea glass, or other coastal embellishments

Tools You’ll Use

Equally important are the right tools which will help streamline the crafting process:

  • A glue gun
  • Scissors
  • Sandpaper
  • A small saw (for trimming driftwood pieces)
  • Wire cutters

Preparing Your Driftwood

Preparation is key in ensuring your wreath not only looks beautiful but is also sturdy and long-lasting. Follow these steps to prepare your driftwood effectively.

Cleaning Your Driftwood

Begin by giving each piece of driftwood a thorough cleanse. Soak the pieces in clean water to remove salt and debris. After soaking, scrub them with a brush to eliminate any remaining dirt or algae.

Drying Driftwood

Once washed, allow your driftwood to dry completely. Place them in a sunny spot for at least a week. This drying process helps in preventing mildew and ensures they bond well with glue.

Shaping and Sanding

With your driftwood clean and dry, it’s time for some minor shaping. Use sandpaper to smooth out any rough edges and a small saw to trim pieces to the desired size. Ensure that the driftwood is manageable in size and complements the heart-shaped frame.

Crafting the Driftwood Heart Wreath

Now, it’s time to bring the vision to life. Follow these steps to put together your wreath effortlessly.

Building the Base

Start by laying out your heart-shaped frame. First, pick one piece of driftwood and decide where it will sit on the frame. Secure it with hot glue, pressing firmly to ensure a strong bond. Continue to attach the remaining pieces until you see the outline of a heart shape.

Layering and Designing

Next, layer additional driftwood pieces to build depth and texture. Think of them as the intricate details that make your wreath unique. Use a small amount of wood glue or hot glue to adhere these pieces, careful not to overlap excessively.

Adding Personal Touches

This is the fun part where your personality shines through. Embellish your wreath with items like seashells or sea glass. Secure these using glue, ensuring they complement rather than overpower the driftwood’s natural beauty.

Driftwood Heart Wreath

Caring for Your Driftwood Heart Wreath

A little regular maintenance will keep your wreath looking fresh for years to come. Here’s how you can care for your creation.

Protection from the Elements

If you plan to hang your wreath outdoors, consider applying a sealant to protect against weather changes. This will help preserve its color and texture against sun and rain.

Dusting and Cleaning

For indoor display, occasionally dust your wreath using a duster or soft cloth. Should it require deeper cleaning, a gentle wipe with a slightly damp cloth should suffice.

Creative Variations and Themes

Flex your creative muscles by exploring different themes and variations for your driftwood heart wreath.

Theme Ideas

Think of different themes such as a beach getaway, nautical journey, or a serene forest retreat. You can incorporate elements like fishing nets for a nautical style or pinecones for a woodland look.

Seasonal Wreaths

Why not tailor your wreath to suit different seasons? Adding dried flowers for spring, vibrant leaves for autumn, or small ornaments for a festive touch can keep your wreath evolving with time.

Inspiration and Community

Remember that you are not alone on this creative journey. There is a vibrant community enthusiastic about driftwood crafts that you can join.

Online Communities and Forums

Consider joining online crafting groups and forums. These platforms are excellent for exchanging ideas, getting feedback, and finding new inspiration.

Crafting Workshops

Seek out local workshops and classes focusing on driftwood art. Not only will you refine your skills, but you’ll also meet like-minded individuals who share your passion.

The Joy of Crafting

In making a driftwood heart wreath, you’re doing more than just assembling pieces of wood. You’re shaping memories, creating a piece of decor with personal significance, and maybe even discovering a new passion. Enjoy the process as much as the end product, and you’ll find great satisfaction in the world of crafting.

Driftwood heart wreaths are beautiful, simple to make, and can become your next favorite hobby! These projects are a wonderful blend of creativity and nature, using materials that hold the stories of the winds and waves that brought them to you. Now it’s your turn to transform these natural treasures into something memorable and uniquely yours.

Filed Under: Driftwood Ideas Tagged With: Beach decor, craft, DIY, Driftwood, Heart Wreath

  • « Previous Page
  • Page 1
  • …
  • Page 16
  • Page 17
  • Page 18
  • Page 19
  • Page 20
  • …
  • Page 41
  • Next Page »

Primary Sidebar

Driftwood4us.com, is a participant in the Amazon Services LLC Associates Program, an affiliate advertising program designed to provide a means for sites to earn advertising fees by advertising and linking to amazon.com.