• Skip to main content
  • Skip to primary sidebar
  • Terms and Conditions
  • Privacy Policy
  • Contact

Driftwood 4 Us

Just About Driftwood

DIY

Driftwood Mug Rack

June 2, 2025 by admin

Have you ever found yourself lacking counter space and an artful touch for your kitchen? A driftwood mug rack could be the perfect solution. Not only does it bring an eco-friendly option to your decor, but it also adds a unique, rustic charm to your home. This article will guide you through everything you need to know about driftwood mug racks, including the benefits, types, and how to make one yourself.

Driftwood Mug Rack

Understanding Driftwood Mug Racks

Driftwood mug racks serve a dual purpose in your kitchen. They provide a practical means of organizing your mugs while also adding a unique decorative touch. Created from pieces of driftwood collected from shorelines, these racks emphasize the beauty found in nature’s own designs and imperfections. With their natural appeal, driftwood mug racks can transform an ordinary kitchen space into something extraordinary.

What is Driftwood?

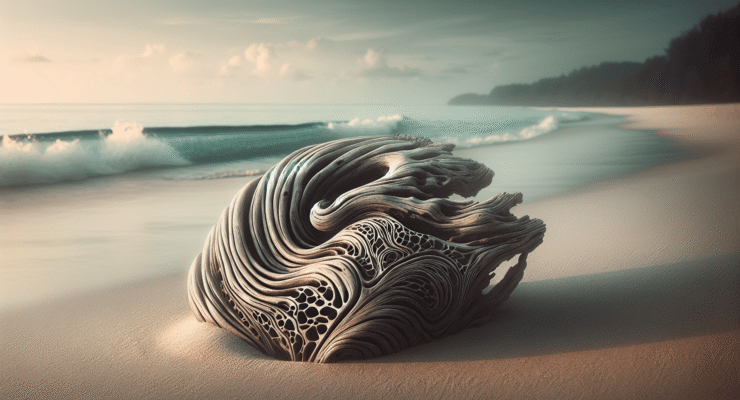
Before jumping into the details about the mug racks, let’s clarify what driftwood actually is. Driftwood refers to wood pieces that have washed ashore after floating in the water. The water and sand play a vital role in transferring these remnants from the forest to the ocean and eventually to the shore. During this journey, the wood often becomes beautifully worn and smoothed, which is part of what makes driftwood so appealing in home decor.

Why Choose Driftwood for Your Mug Rack?

There are several reasons why driftwood is a fantastic choice for creating a mug rack. Its highly distinctive look adds character and depth to any space. Each piece of driftwood is unique, offering natural shapes and textures that can’t be reproduced artificially. Plus, using driftwood means recycling materials the ocean has already shaped into a work of art. It’s a sustainable option for those concerned with eco-friendliness.

Benefits of Owning a Driftwood Mug Rack

Beyond aesthetics, driftwood mug racks bring several practical benefits into your home. From space conservation to customization, these racks offer a host of advantages.

Space Efficiency

In many kitchens, counter space is limited and precious. By hanging your mugs, driftwood mug racks free up that coveted counter and cabinet space. This allows for more room to display appliances or prepare meals. A well-designed driftwood rack can accommodate several mugs, keeping them easily accessible and out of the way.

Customization Options

When you choose or create a driftwood mug rack, you have the ability to tailor it perfectly to your taste and the decor of your home. From the color of the wood to the style of the hooks, the customization options are virtually endless. You can keep the driftwood raw for a rustic look or finish it with varnish for more sheen. Hooks can vary from simple stainless steel to antique bronze.

Eco-Friendly Home Decor

In a world increasingly conscious of the environment, opting for a driftwood mug rack is a sustainable choice. By reusing driftwood, you’re reducing waste and minimizing carbon footprints. It’s decor with a positive impact, allowing you to indulge in aesthetic pleasures with a clean conscience.

Different Styles of Driftwood Mug Racks

Given the uniqueness of driftwood, no two racks will be exactly alike. However, they can generally be categorized into a few different styles based on their construction and design.
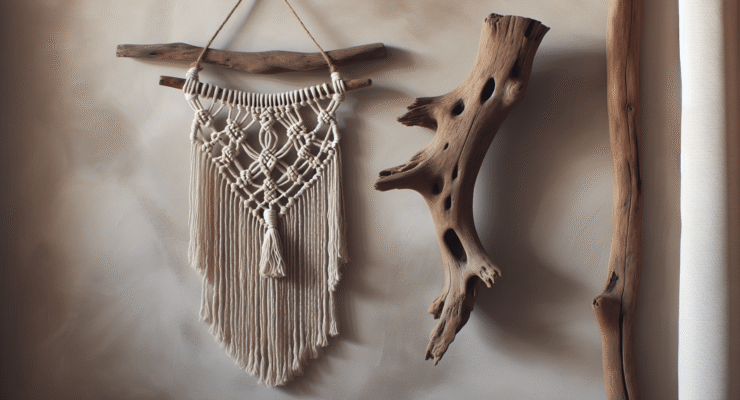
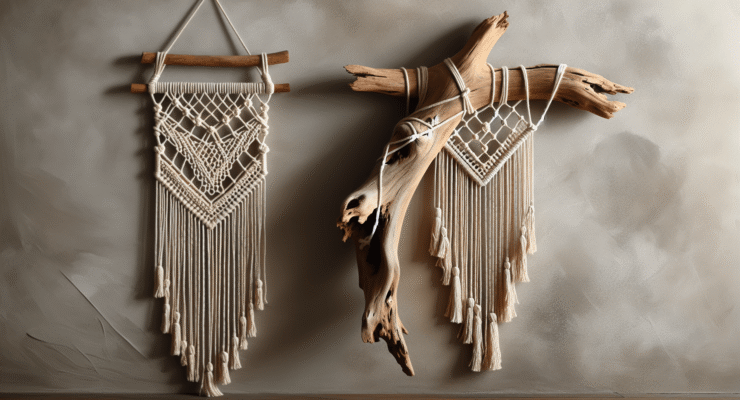
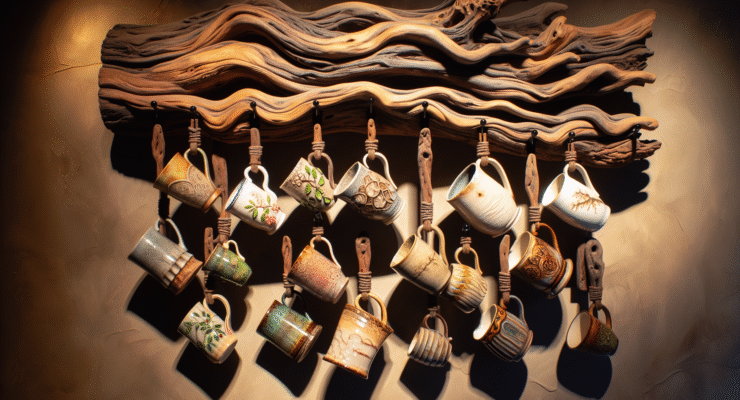
Wall-Mounted Racks

One of the most common styles is the wall-mounted driftwood mug rack. This design is perfect for those aiming to maximize space efficiency. It involves attaching hooks or pegs to a piece of driftwood, which is then mounted on a kitchen wall. Wall-mounted racks can be as small or as large as you need, depending on the driftwood piece and the number of mugs you wish to hang.
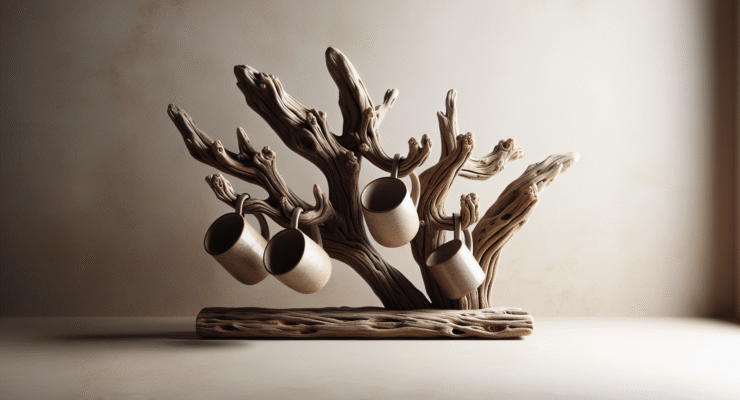
Freestanding Racks

Freestanding driftwood mug racks are another popular option. These often resemble small trees or branches on a base, allowing mugs to be suspended from the different offshoots. They are moveable, providing more flexibility if you like to rearrange your kitchen or if you’re looking for decor that can transition from kitchen to table easily.

Multi-Purpose Racks

Some driftwood designs incorporate other features beyond mug storage, such as incorporating shelves or wine glass holders. These versatile racks can hold everything from cups and kitchen towels to utensils and keys. They’re a great fit for smaller kitchens where maximizing space is key.

How to Make Your Own Driftwood Mug Rack

Feeling inspired to create your own? Making a driftwood mug rack is a satisfying project that allows you to show off your creativity while adding a personalized touch to your kitchen.

Gathering Materials

To begin, you’ll need to gather the materials. Here’s a simple list to get you started:

ItemPurpose
Driftwood pieceThe base for your rack; choose one that matches the desired size
Hooks or pegsThese will hold the mugs; you can find them at hardware stores
ScrewsFor securing hooks and mounting the rack
DrillFor making holes for the hooks and mounting
SandpaperTo smooth any rough edges on the driftwood
Wood finish (optional)To treat and preserve the wood if desired

Steps to Build

  1. Select Your Driftwood: Pick a piece of driftwood that suits the size and look you want. Consider how many mugs you plan to hang in determining the length and sturdiness required.

  2. Prepare the Wood: Use sandpaper to smooth out any uneven parts or sharp edges. If desired, apply a wood finish or sealant to protect the wood and enhance its color.

  3. Install the Hooks: Decide on how many mugs you want the rack to hold and measure equal distances for installing the hooks or pegs. Use a drill to make pilot holes for the screws, then attach your hooks firmly.

  4. Mount the Rack: If you’re creating a wall-mounted rack, identify the ideal placement on your wall and use appropriate screws and wall anchors to mount your driftwood securely.

  5. Test Stability: Ensure that all hooks are secure and the driftwood is firmly mounted to prevent accidents or instability.

Customizing Your Rack

The beauty of making your own driftwood mug rack is in customization. You can paint the driftwood in bold colors for a vibrant touch, or distress it for a shabby chic appearance. The hooks can also be adorned with little elements like beads or small charms for added flair.

Driftwood Mug Rack

Caring for Your Driftwood Mug Rack

Proper maintenance can extend the life and preserve the beauty of your driftwood mug rack.

Cleaning

Cleaning your driftwood mug rack is straightforward. Simply dust it regularly using a soft cloth. If it becomes grimy, a damp cloth with some mild soap can be used to gently clean the surface. Avoid heavy soaking or scrubbing, as this can wear down the natural finish of the wood.

Protecting

If the driftwood is in a kitchen environment where spills are common, you might consider applying a coat of polyurethane or another sealing agent to protect it from moisture and stains.

Incorporating Driftwood Mug Racks into Your Kitchen Decor

With their natural beauty, driftwood mug racks offer a rustic or coastal flare to any kitchen design. However, they can be surprisingly adaptable to various decor styles.

Coastal or Nautical Theme

If you’re aiming for a beachy or nautical theme, a driftwood mug rack blends in seamlessly. Pair it with ocean-blue accents, seashell ornaments, or paintings of marine landscapes for a cohesive look.

Rustic or Farmhouse Style

For a more rustic or farmhouse-inspired setup, your driftwood rack can be complemented by other wood elements. Think wooden shelves, a butcher-block countertop, or a country-style kitchen table.

Modern Minimalist

In a modern, minimalist kitchen, a driftwood mug rack can serve as a natural focal point that breaks up the clean lines and solid colors. Opt for sleek, simple hooks that maintain the minimalist aesthetic.

Frequently Asked Questions About Driftwood Mug Racks

Can I use any piece of driftwood?

While you can technically use any driftwood to make a mug rack, you’ll want to choose a piece that’s sturdy and free from damage. Check for rot or excessive softness, as these can compromise the structural integrity needed to hold weight.

Are there any safety concerns?

Ensure that the driftwood is properly secured to the wall or its base. The hooks or pegs should be tightly fastened, and the wood must be strong enough to hold the weight of your mugs. Weight distribution is essential to prevent tipping over or the rack coming off the wall.

How can I be sure my driftwood is clean and safe to use?

Before using any piece of driftwood, it’s advisable to give it a thorough cleaning. Soak it in a vinegar solution to remove any impurities or pests, and let it dry completely before beginning your project.

Conclusion

Adding a driftwood mug rack to your home is a simple yet striking way to blend practicality with nature-inspired artistry. Whether you opt to purchase one or make your own, this eco-friendly option will enhance your kitchen space by providing a unique touch that reflects both personal style and sustainable living. Enjoy the beauty of nature right in your home, and let every cup bear the imprint of its individuality with this charming addition.

Filed Under: Driftwood Ideas Tagged With: DIY, Driftwood, Kitchen Organization, Mug Rack, Rustic

Driftwood Mug Rack

June 2, 2025 by admin

Have you ever thought about the beauty and practicality that driftwood can bring to your home? In this article, we’ll explore how something as simple as a “Driftwood Mug Rack” can add both charm and functionality to your kitchen, creating a unique aesthetic that speaks to nature lovers and design enthusiasts alike.

What is a Driftwood Mug Rack?

A driftwood mug rack is a creative and ecological way to display and store your mugs using driftwood, which is wood that has been washed onto a shore or beach of a sea, lake, or river by the action of winds, tides, or waves. This type of mug rack not only serves a functional purpose by organizing your mugs but also adds a rustic and natural element to your kitchen or dining area.

The Charm of Driftwood

Driftwood pieces are naturally weathered, which means each piece is unique in shape, size, and texture, lending individuality to each mug rack creation. The natural beauty of driftwood lies in its imperfections and distinctive characteristics, such as its smooth surfaces and varied tones, which are results of years of exposure to water and sand. This uniqueness is part of what makes driftwood so appealing in home decor.

Benefits of Using a Driftwood Mug Rack

Choosing a driftwood mug rack over conventional organizational solutions offers several advantages.

Aesthetic Appeal

Driftwood’s inherent character adds a rustic, coastal flair to your space. The natural texture and color of driftwood can complement various interior design styles, from bohemian and shabby chic to modern rustic. The visual interest it creates can act as a focal point in your kitchen, sparking conversation among guests.

Eco-Friendly and Sustainable

Driftwood is one of the most sustainable materials. Repurposing wood that has naturally been weathered by nature reduces waste and environmental impact. Moreover, utilizing driftwood means that you are not contributing to the demand for newly harvested wood products, which supports conservation efforts.

Emotional Connection

Creating or acquiring a driftwood mug rack can foster a deeper emotional connection to your home environment due to the unique history each piece of driftwood carries. There’s something sentimental and nostalgic about using natural materials that have been touched by the earth’s elements over time.

Practical Functionality

Apart from its decorative value, a driftwood mug rack efficiently organizes and displays mugs, keeping them accessible and visible. It cuts down on clutter, optimizes counter space, and protects mugs from chipping in crowded cabinets.

Driftwood Mug Rack

How to Choose the Right Driftwood for Your Mug Rack

Before you construct or purchase a driftwood mug rack, consider a few factors to ensure that you make a selection that fits your needs and style.

Size and Shape

The size and shape of your driftwood piece should correspond to the amount of space available and the number of mugs you plan to store. You might opt for a smaller piece if you have limited wall space, or a larger, more intricate design if space allows. Keep in mind the shape of the driftwood itself; pieces with branches can naturally accommodate multiple hooks.

Stability and Strength

It’s crucial that the driftwood is sturdy enough to bear the weight of the mugs. Check for any visible weaknesses such as cracks or overly thin sections, which might compromise the structural integrity. Natural driftwood may need to be treated or reinforced to ensure it can safely support your mugs.

Aesthetic Cohesion

Select driftwood that complements your existing décor. Consider the wood’s color and finish: lighter wood might blend well with airy, coastal themes, while darker woods may suit more traditional or industrial styles. Ultimately, choose a piece that feels in harmony with your personal taste and home atmosphere.

DIY Driftwood Mug Rack: A Guide

If you enjoy crafting and personalizing your home decor, making your own driftwood mug rack can be a rewarding project.

Materials Needed

To get started, gather the following materials:

  • Driftwood piece
  • Mug hooks or pegs (number depends on capacity desired)
  • Drill
  • Screws
  • Measuring tape
  • Sandpaper
  • Wood sealant (optional for preservation)
  • Wall mounting hardware

Step-by-Step Instructions

  1. Prepare the Driftwood: Clean the driftwood thoroughly, removing any dirt or debris. Sand any rough areas to prevent splinters and create a smooth surface for handling.

  2. Plan Mug Placement: Use your measuring tape to estimate where each hook will go, ensuring even spacing between mugs. Mark these spots with a pencil.

  3. Drill Holes for Hooks: Using a drill with an appropriate bit size, create holes where you marked for each hook. Ensure the depth is acceptable for secure installation.

  4. Attach Hooks: Screw the mug hooks or pegs into place. Test each one for stability.

  5. Finish the Driftwood: Optionally, apply a coat of wood sealant to preserve the wood and enhance its natural colors.

  6. Mounting: Decide on the placement of your mug rack. Use the wall mounting hardware to secure the driftwood to your wall safely.

  7. Hang Your Mugs: Admire your work by hanging your favorite mugs!

Driftwood Mug Rack

Creative Ideas for Driftwood Mug Rack Designs

A driftwood mug rack can range from simple and functional to elaborate and decorative. Here are some creative design ideas to inspire you:

Modern Minimalist

Stick to a sleek and simple design. Choose a single, straight piece of driftwood and attach uniform hooks in a linear fashion. This minimalist approach pairs well with contemporary spaces.

Bohemian Charm

Consider a more elaborate structure with multiple branches or layers. Add bohemian accents such as macramé cords or colorful yarn wrapped around the driftwood for a relaxed and artistic vibe.

Nautical Theme

Integrate nautical elements like small buoys, ropes, or seashells. This theme can transform your mug rack into a statement piece, perfect for coastal homes or cottages.

Rustic Barnyard

Opt for driftwood with a rougher texture and complement it with wrought iron hooks. This style embraces imperfection, highlighting the natural weathering of the wood.

Driftwood Mug Rack Maintenance Tips

Proper care will ensure your driftwood mug rack remains beautiful and functional over time.

Dust Regularly

Driftwood can collect dust, just like any other decorative item. Regularly dusting with a soft cloth keeps it clean and maintains its natural appearance.

Avoid Excess Moisture

While driftwood is naturally weathered, it’s best to avoid exposing your mug rack to continuous moisture to prevent mold and deterioration.

Inspect for Wear

Occasionally inspect the hooks and the driftwood for signs of wear or damage. Tighten or replace hardware as necessary to maintain safety and functionality.

Where to Find Driftwood for Your Projects

Finding quality driftwood can be part of the adventure. Here are some ideas on where to source driftwood:

Natural Collection

Consider taking a trip to nearby beaches, lakes, or rivers to collect driftwood naturally. Remember to check local regulations regarding the removal of natural resources.

Local Artisan Markets

Many artisan markets or craft shops sell driftwood or driftwood products. These pieces are often hand-selected and can provide a higher quality option if you prefer not to gather your own.

Online Retailers

Various online platforms offer driftwood, ranging from small pieces to large structures. Ensure that the seller is reputable and offers sustainably sourced products.

Conclusion

Incorporating a driftwood mug rack into your home not only provides a practical storage solution for your mugs but also adds a touch of nature-inspired beauty. Whether you’re drawn to its rustic allure or its eco-friendly origins, driftwood offers an opportunity to bring the serenity and rugged charm of the outdoors inside. So, are you ready to add a little piece of nature to your kitchen?

Filed Under: Driftwood Ideas Tagged With: DIY, Driftwood, Home Organization, Mug Rack, Rustic Decor

Driftwood Mosaic

May 30, 2025 by admin

Have you ever wandered along a beach, pausing to admire the scattered pieces of driftwood washed ashore by the tides? This natural artistry, created by the sea and sand, begs the question: How can these seemingly random pieces be transformed into a stunning masterpiece like a driftwood mosaic?

What is a Driftwood Mosaic?

A driftwood mosaic is an artistic assembly of driftwood pieces arranged to form a coherent pattern or image. It’s a unique art form that combines the natural beauty of driftwood with the skill and creativity of the artist. Like traditional mosaics that use small pieces of glass or tiles, driftwood mosaics employ wood pieces of varied shapes, sizes, and textures to create captivating works.

The Origin of Driftwood

Driftwood begins its journey as a part of a tree. It becomes adrift when it’s washed into the ocean, often due to storms, floods, or erosion. Across potentially long distances, these wood pieces are weathered by saltwater and sand, giving them a smooth and textured appearance. This transformation is nature’s way of crafting art, as the sea’s relentless erosive power and the journey through the ocean shape each piece uniquely.

Cultural and Aesthetic Significance

Driftwood has long held a place of importance in various cultures. Beyond its natural charm, it has been used in crafting tools, creating sculptures, and even in spiritual or ritualistic practices. Each piece carries its history and character, adding depth to any artwork it becomes part of. The aesthetic appeal lies in its texture and color, with tones ranging from light blond to deep brown, enhancing the visual interest in any mosaic setting.

The Craft of Creating Driftwood Mosaics

Creating a driftwood mosaic involves several steps, skill, and creativity. It’s about selecting the right pieces, conceptualizing a design, and carefully assembling them into a coherent image or pattern.

Collecting Driftwood

The first step in creating a driftwood mosaic is gathering the raw material. Searching for driftwood can be a therapeutic activity, giving you a chance to connect with nature. Look for pieces of varying shapes and sizes, as this will provide more options when piecing together your mosaic.

Consider these tips when collecting driftwood:

  • Check local regulations: Ensure collecting driftwood is permitted in your area.
  • Look for distinct shapes and textures: Interesting textures can add depth to your mosaic.
  • Ensure it’s dry: Wet driftwood can be heavy and might not hold up well when used in art pieces.

Preparing Driftwood for Use

Before you can start creating your mosaic, you need to prepare the driftwood to ensure it is clean and suitable for artwork.

  1. Cleaning: Remove any dirt, algae, or salt deposits by soaking the wood in freshwater. Scrubbing gently can help in cleaning stubborn dirt.

  2. Drying: It’s crucial to let the driftwood dry completely to avoid mold or decay. Place it in a sunny spot or a well-ventilated area for several days.

  3. Sanding: Use sandpaper to smoothen any rough edges. This not only makes handling the wood easier but also enhances its natural beauty.

Planning Your Design

Planning is crucial to achieving a harmonious and aesthetically pleasing mosaic. Begin with an idea or sketch of the design you want to create. This could be abstract, like a pattern or form, or something representational, like an animal or landscape.

Consider these design elements:

  • Color Harmony: Utilize the natural color variations in driftwood to add depth.
  • Contrast and Texture: Different textures can make sections stand out, capturing attention.
  • Scale and Proportion: Varying the size of the wood pieces can add dynamism to the artwork.

Assembling the Mosaic

Once your pieces are collected and the design is planned, the assembly begins. This is where creativity meets patience, as arranging the wood pieces can be compared to solving a complex puzzle.

Tools Required

You may need several tools to aid in the process:

  • Adhesives: Strong wood glue will ensure pieces stay in place.
  • Clamps: Helpful to hold pieces together while they dry.
  • Saw: A small saw might be needed to trim larger pieces.
  • Brushes: For applying adhesives uniformly.

Start with the larger pieces and gradually fill in with smaller ones. This method gives you a robust framework to build upon and ensures stability. Take time to assess the fit of each piece; it should seamlessly fit with its neighbor, much like puzzle pieces.

Securing the Mosaic

Once your mosaic is complete, securing it properly will ensure it lasts for a long time. Check all the joins and ensure the adhesive has bonded firmly. You might also want to apply a sealant or varnish to protect the wood and enhance its color and texture.

Driftwood Mosaic

The Benefits of Creating Driftwood Mosaics

Aside from producing a beautiful piece of art, creating driftwood mosaics offers numerous benefits. It’s not just about the finished product but also the experience and satisfaction of the journey.

Therapeutic Experience

Working with driftwood can be incredibly soothing. It allows for a meditative escape as you connect with natural elements. Being immersed in this creative process can reduce stress and induce a state of calm.

Eco-Friendly Art

Driftwood mosaics utilize natural materials, making it a sustainable form of art. By re-using nature’s leftovers, you contribute to positive environmental practices. Instead of letting driftwood waste away, you’re transforming it into something beautiful and lasting.

Boosting Creativity

Engaging in driftwood mosaic art can significantly enhance your creativity. Each piece of driftwood presents a unique challenge; arranging them into a cohesive artwork nurtures problem-solving skills and innovative thinking.

Unique Decor

Adding a driftwood mosaic to your home or garden introduces a unique decor element. Each mosaic is distinct due to the multitude of available wood types and configurations, ensuring a personalized touch that other forms of art may lack.

Driftwood Mosaics in Modern Art

Driftwood art isn’t just a pastime; it’s gaining recognition in contemporary art galleries and shows. Artists around the world are beginning to explore the potential of driftwood as a medium, showcasing its versatility and aesthetic appeal.

Influences in Interior Design

Interior designers have started incorporating driftwood pieces in their projects, especially in spaces intended to invoke a natural or coastal theme. These artworks offer a balance between sophistication and rustic charm, making them a popular choice for various settings.

Public and Outdoor Installations

Some artists take driftwood mosaics into larger scales, creating public installations that capture the imagination of many. Such pieces often act as focal points, drawing attention and encouraging viewers to perceive their surroundings in new ways.

Driftwood Mosaic

Tips for Beginners

If you’re new to creating driftwood mosaics, here are some helpful tips to get you started:

  1. Start Small: Begin with a small project. This way, you can get the hang of the process without becoming overwhelmed.

  2. Gather Abundantly: When collecting driftwood, gather more than you think you’ll need. Having options allows for more creativity when assembling.

  3. Patience is Key: Take your time arranging and rearranging pieces until you’re satisfied with the design.

  4. Experiment: Don’t be afraid to try different patterns, textures, or shapes. Driftwood art is all about creativity and personal expression.

  5. Learn from Others: Join online forums or local art classes to gather inspiration and get feedback on your work.

Inspiring Driftwood Artists

Several artists have made significant contributions to the driftwood mosaic art form, garnering attention worldwide. Their work can be a source of inspiration as you start your driftwood journey:

Debra Bernier

Known for her hypnotic driftwood sculptures, Debra Bernier incorporates natural elements seamlessly within her mosaics, often highlighting feminine and organic forms.

James Doran-Webb

Specializing in large-scale driftwood sculptures, James creates lifelike animal figures. His work demonstrates the structural capabilities and expressive potential of driftwood.

Danielle Creenaune

Danielle explores the intersection of nature and human narrative, using driftwood to tell intricate stories through her detailed mosaics and installations.

Conclusion

Creating driftwood mosaics is a rewarding artistic endeavor that blends the natural world with personal creativity. With each piece of driftwood carrying its own history, you have the opportunity to craft a unique artwork that tells your story. Whether practiced as a hobby or presented in an art gallery, driftwood mosaics offer endless possibilities for exploration and expression. By understanding the process and tapping into your creativity, you can craft pieces that not only represent personal achievement but also serve as tributes to the beauty and resilience of nature’s cycles.

Filed Under: Driftwood Ideas Tagged With: Art, DIY, Driftwood, Handmade, Mosaic

Driftwood Mobile Diy Drift Wood

May 30, 2025 by admin

Have you ever stumbled upon a piece of driftwood along the shore and wondered about all the creative possibilities it holds? Driftwood, with its unique shapes and weathered textures, can be a magical find for a do-it-yourself (DIY) enthusiast. Creating a driftwood mobile is not only a fantastic way to use these natural treasures but also an excellent way to bring a piece of nature into your home. Let’s begin this crafty journey together, exploring everything you need to know to make your very own driftwood mobile.

Driftwood Mobile Diy Drift Wood

Understanding Driftwood

Before diving into the DIY project, it’s essential to gain a better understanding of driftwood — its origins, characteristics, and varieties. This helps you appreciate your materials and make informed decisions when selecting pieces for your mobile.

What is Driftwood?

Driftwood is essentially any type of wood that has been washed onto the shore by winds, tides, or waves. Over time, pieces of wood that come from various sources such as tree branches, logs, or even man-made sources are sculpted by water and sand into beautiful, smooth forms. Driftwood is unique and full of character due to the countless hours nature has spent perfecting it.

Characteristics of Driftwood

Driftwood typically displays colors ranging from pale beige to brown and even gray, depending on its exposure to sun, salt, and other elements. It’s often lightweight due to the natural drying process. The pieces might have holes, knots, and other features formed by marine life or the natural erosion process, offering a rustic charm.

Sourcing Driftwood

You might be wondering where to find driftwood for your project. Fortunately, there are a few ways to source it. You can collect driftwood during walks along lakeshores, rivers, and beaches. Remember to check local regulations on collecting natural materials. If that’s not an option, craft stores, online marketplaces, or specialized decor shops often sell driftwood for crafting purposes.

Preparing Your Driftwood

Before you start crafting, some preparation is necessary. Preparing your driftwood ensures you have clean, sturdy pieces that will make a gorgeous and durable mobile.

Cleaning Your Driftwood

Start by removing sand, dirt, and any potential critters from the wood. A simple but effective cleaning method involves rinsing the driftwood under tap water. If there are hard-to-remove debris, an old toothbrush can be handy for scrubbing. For added disinfection and to kill bacteria or mold, let your driftwood soak in a mixture of water and a small amount of bleach (1 part bleach to 9 parts water) for about 24 hours. After soaking, rinse them thoroughly.

Drying the Driftwood

Once cleaned, allow the driftwood to dry completely. Place it in a well-ventilated, sunny location. Depending on the size and density of the wood, drying can take anywhere from a couple of days to a week. Proper drying prevents future mold growth and helps retain the driftwood’s wonderful texture.

Designing Your Driftwood Mobile

Now comes the exciting phase of designing your mobile. This process involves deciding on the style, layout, and overall appearance of your mobile.

Choosing a Style

The style of your driftwood mobile can range from simple and minimalist to intricate and decorative. Here are a few style ideas to consider:

  • Natural and Organic: Focus on showcasing the rustic beauty of the wood.
  • Seaside-inspired: Incorporate shells, miniature buoys, or other marine-themed items.
  • Bohemian/Eclectic: Use colorful threads, beads, or crystals to enhance the driftwood’s natural appeal.

Deciding on a Layout

Consider how you want the pieces to hang and move in space. A balanced and visually harmonious layout often uses symmetry or asymmetry to create interest. You might want a central piece of driftwood with others suspended around it or a cascading design, where pieces of decreasing size hang below one another.

Sketching Your Design

Before threading and assembling your mobile, sketch out your design on paper. This plan will guide you during the assembly process and help you determine the number and size of pieces you need. Be flexible; inspiration might strike as you physically work with your materials.

Gathering Materials and Tools

Beyond the pieces of driftwood you’ve collected, you’ll need additional materials and tools to create your mobile.

Essential Materials

MaterialFunction
DriftwoodThe main focus and structure of your mobile
Strong twine or threadFor hanging the driftwood pieces
Hooks or screwsFor attaching pieces or hanging the mobile
Decorative accentsOptional: shells, beads, feathers
Drill or screwdriverFor making holes (optional)

Tools You May Need

  • Scissors: For cutting twine or thread
  • Tape measure or ruler: To ensure even spacing and length
  • Hot glue gun or strong adhesive: To secure decorative elements or joints

By ensuring you’ve gathered all necessary materials before starting, you can streamline your crafting process and focus on the creative aspects.

Driftwood Mobile Diy Drift Wood

Creating Your Driftwood Mobile

With preparation complete, you’re ready to start assembling your driftwood mobile. This hands-on part of the process is where your creativity truly comes to life.

Drilling Holes (if necessary)

If your design requires, use a small drill bit to carefully make holes in your pieces of driftwood. Drilling should be done with care to avoid splitting the wood. This is often required only if your assembly involves threading driftwood onto a central support wire or if you want to precisely thread your twine through each piece.

Threading and Knotting

Take your chosen thread or twine and begin assembling your mobile by threading it through or around each piece of driftwood following your design. Use secure knots to ensure the pieces stay in place. Here are some knot types you can consider:

  • Overhand Knot: Simple and effective for securing ends.
  • Square Knot: Ideal for joining two strings together.
  • Lark’s Head Knot: Good for attaching items like beads or feathers.

Balancing Your Mobile

Achieving balance is crucial to ensuring your mobile hangs properly. Check the balance by hanging the mobile temporarily and observing how it settles. Adjust by trimming twine, moving pieces, or adding additional weight where necessary.

Adding Decorative Elements

If you opted for a more eclectic or themed mobile, now is the time to attach decorative accents like beads, feathers, or crystals. Use your hot glue gun or adhesive to secure them. Just remember to maintain balance and don’t overload any section.

Displaying Your Driftwood Mobile

Finally, it’s time to hang and display your creation where it can be fully appreciated. Consider locations such as:

  • Near a sunny window to highlight shadows and movement
  • In a breezy spot for gentle motion
  • As a focal point in a room to enhance natural or coastal decor

Secure your mobile with appropriate fixtures to ensure it is safely mounted.

Caring for Your Driftwood Mobile

To keep your mobile looking fresh and beautiful:

  • Dust it regularly with a dry cloth.
  • Occasionally check knots and connections for security.
  • Avoid overly humid areas to prevent potential wood warping.

Dive into the Creative Process

Crafting a driftwood mobile is more than a mere DIY project; it’s an exploration of creativity and nature. As you place each piece on your mobile, you’re not just connecting elements of wood; you’re connecting stories, memories, and personal touches into a beautiful, harmonious display. Enjoy every step of crafting and remember that every imperfection adds character and uniqueness to your creation. Let your artistic instincts guide you, and have fun bringing a piece of the outdoors into your heart and home.

Filed Under: Driftwood Ideas Tagged With: crafts, DIY, Driftwood, home decor

Driftwood Mirror Diy How To Make

May 28, 2025 by admin

Have you ever admired the rustic charm and natural beauty of driftwood mirrors in coastal or bohemian interiors and thought to yourself, “Could I create something like that?” The good news is that not only is it possible, but making a driftwood mirror is an enjoyable and satisfying project you can tackle on your own! In this guide, I will walk you through everything you need to know to create your own stunning driftwood mirror. From sourcing your driftwood to putting the final touches on your masterpiece, you’ll learn all the steps necessary to craft a mirror that will be the envy of anyone who steps into your home.

Understanding Driftwood

What is Driftwood?

Before you begin collecting materials for your DIY project, it helps to understand what driftwood is. Driftwood refers to pieces of wood that have been washed onto shores by the action of tides, winds, or waves. Over time, these pieces of wood are naturally weathered, giving them their unique appearance. The natural sculpting process creates interesting shapes and textures, making each piece one-of-a-kind.

Why Use Driftwood?

Driftwood is not only beautiful; it is sustainable and eco-friendly. By using driftwood, you repurpose materials already in existence, minimizing environmental impact. This makes driftwood an excellent choice for those who want to incorporate more environmentally responsible pieces into their home decor.

Finding Driftwood

Driftwood can often be found along beaches, riverbanks, or lakeshores. Each location offers unique characteristics to the driftwood, whether it’s the type of wood or the way it’s been shaped by nature. When collecting driftwood, always ensure it’s legal to do so in your chosen location and that you’re not disrupting any natural habitats.

Gathering Materials for Your Driftwood Mirror

Before you roll up your sleeves and get started, you’ll need to gather all your materials. Here’s what you’ll need to craft your driftwood mirror:

Materials Needed

  • Driftwood Pieces: Gather a variety of pieces in different sizes and shapes.
  • Mirror: Choose a base mirror of your desired size and shape.
  • Strong Adhesive: Opt for industrial-strength adhesives like Epoxy or a hot glue gun for bonding the driftwood to the mirror.
  • Backing Board: This could be plywood or MDF to provide extra stability, especially if your mirror will be large.
  • Sandpaper: To smooth any rough edges on the driftwood.
  • Saw: For trimming driftwood as needed.
  • Cloth and Water: For cleaning the driftwood pieces.
  • Hangers: To mount the finished mirror on a wall.

Optional Materials

  • Wood Finish: For those who want to give the driftwood a polished or stained look.
  • Tapestry Needles: Useful if you are threading smaller pieces together before attaching them to the mirror.
  • Protective Gear: Gloves and goggles to keep you safe while working with tools and adhesives.

Driftwood Mirror Diy How To Make

Preparing Your Driftwood

Cleaning Driftwood

Once you have your driftwood, it’s important to clean it thoroughly. Given that driftwood comes from natural bodies of water, it might be covered in algae, salt, sand, or even insects. Here’s how you can clean your driftwood:

  1. Rinse Thoroughly: Use water and a sturdy brush to clean off any debris or dirt.
  2. Soak in Water: Submerge your driftwood in water for several hours to dissolve any ocean salt or trapped sand.
  3. Use Mild Soap: For particularly stubborn dirt, consider using a mild soap to help lift it away.
  4. Dry Completely: After cleaning, let the driftwood pieces dry completely. Place them in a well-ventilated area for several days to ensure they are fully dried.

Treating Driftwood

For additional preservation and to avoid any potential pests:

  • Boil the Driftwood: If your pieces fit into a pot, boiling them for an hour can help eliminate pests.
  • Freeze Method: Alternatively, placing driftwood in the freezer for a week can also help kill any insects.

Optional Sanding

Using sandpaper, gently sand any edges or surfaces you prefer to be smoother. This can make handling the driftwood easier and may enhance the final appearance by giving a more finished look.

Designing Your Driftwood Mirror

Plan Your Design

The first step in designing your mirror is to plan how you want your driftwood to be laid out around it. Here’s how you can approach this:

  • Arrange Without Glue: Place your driftwood pieces around your mirror to get an idea of how you want them arranged.
  • Mix Sizes and Shapes: Use a variety of shapes and sizes to create an appealing and natural look. Sporadically placing larger and smaller pieces can give a balanced aesthetic.
  • Consider Depth and Layers: Think about layering some pieces on top of others for added depth.

Finalizing the Design

Once you’re satisfied with your layout, take a photograph or sketch it out. This will help you remember the placement when it’s time to attach the pieces.

Driftwood Mirror Diy How To Make

Assembling Your Driftwood Mirror

Attaching Driftwood to a Backing Board

For larger mirrors, using a backing board can add stability. Here’s how you can do it:

  1. Cut the Backing Board: Ensure it matches the dimensions of your mirror. You can extend it slightly if desired for a ‘floating’ look.
  2. Attach the Mirror to the Board: Use your strong adhesive to attach the mirror securely onto the backing board’s center.

Gluing the Driftwood

With your arrangement in mind, begin attaching the driftwood pieces:

  • Apply Adhesive: Generously apply adhesive to the driftwood and press it onto the mirror’s border or the backing board.
  • Press Firmly: Hold each piece for a few seconds to ensure it adheres securely.
  • Work in Sections: Attach one section at a time, referring back to your photo or sketch for accuracy.

Let it Set

Allow the adhesive to cure according to its instructions. This can take anywhere from a few hours to a full day. Patience during this step is crucial for ensuring your mirror is sturdy and safe for hanging.

Finishing Touches

Sealing the Wood

If you opted to use a wood finish, now is the time to apply it. Sealing the wood can enhance the color, give it a uniform appearance, and provide a layer of protection.

Attach Hanging Hardware

Once your mirror is fully assembled and the glue has dried:

  • Choose Hanging Hardware: D-rings and picture wire, or sawtooth hangers, are popular choices.
  • Align to the Backing Board: Ensure the hardware is aligned so the mirror will hang straight and securely.

Positioning Your Mirror

Find the ideal spot on your wall to hang your mirror. Consider factors like lighting, visibility, and what it will reflect back into your space.

Troubleshooting Tips

Problematic Adhesion

If your driftwood pieces do not stick well:

  • Check Adhesive Use: Make sure you’re using enough adhesive and pressing firmly.
  • Surface Prepping: Lightly scuff the back of the wood or the adhesive area to give a better grip.

Warping Over Time

If any driftwood pieces warp:

  • Secure Reinforcement: You may need to remove and reattach these pieces or reinforce them with additional adhesive or a small wood nail.

Caring for Your Driftwood Mirror

Regular Maintenance

Maintaining your driftwood mirror will keep it looking beautiful for years to come:

  • Dust Regularly: Use a soft cloth or duster to keep the mirror and wood clean.
  • Avoid Moisture: Keep it away from high-moisture environments unless treated to handle humidity.

Restoring Luster

If the driftwood’s color fades over time:

  • Reapply Wood Finish: Refresh the driftwood by applying a wood finish or wax to restore its appearance.

Congratulations! You’ve now created your own driftwood mirror. Your handmade piece isn’t just a safe guarder of reflection; it’s a story of sustainability, creativity, and natural beauty. Hopefully, this driftwood mirror instills in your home a touch of nature’s coastline charm. If you have any thoughts or additional tips to share about making driftwood mirrors, feel free to contribute. Your experiences will surely inspire and aid other aspiring DIY enthusiasts.

Filed Under: Driftwood Ideas Tagged With: crafts, DIY, Driftwood, Home Projects, Mirror

Driftwood Mirror Bathroom

May 27, 2025 by admin

Have you ever considered how the right mirror can transform your bathroom into a sanctuary? A thoughtfully chosen mirror not only serves a functional purpose but can also become a statement piece. Specifically, have you thought about a driftwood mirror for your bathroom? With its natural appeal and rustic charm, a driftwood mirror is more than just a reflective surface—it’s an art piece that enhances your space with character and warmth.

Driftwood Mirror Bathroom

Understanding Driftwood Mirrors

What is Driftwood?

Driftwood is wood that has been washed onto a shore or beach by the action of winds, tides, or waves. It is often weathered by saltwater and offers unique textures and shapes as a result of natural wear over time. This weathering process gives driftwood its distinctive, rustic appearance that many people find appealing.

The Appeal of Driftwood Mirrors

Driftwood mirrors capture the essence of nature’s raw beauty. Each piece of driftwood is unique, carrying with it the story of its journey—a narrative that’s etched into its grooves and curves. These mirrors add a warm, organic feel to any space and can complement a variety of design styles, from coastal and rustic to modern and eclectic.

Why Choose Driftwood Mirrors for Your Bathroom?

Unique Aesthetic

The allure of a driftwood mirror lies in its uniqueness. No two pieces of driftwood are the same, meaning every mirror crafted with it is one-of-a-kind. This singular quality can turn an ordinary bathroom into a personal retreat that reflects your individual taste and style.

Versatility in Design

Driftwood mirrors fit seamlessly into numerous design themes. Whether your bathroom embodies a sleek modern look or a cozy rustic vibe, a driftwood mirror can enhance the space. Its natural texture pairs beautifully with both neutral tones and bold colors, bridging various design elements effortlessly.

Eco-Friendly Choice

By choosing driftwood, you’re selecting a sustainable and environmentally friendly option. Driftwood is a natural, biodegradable, and often reclaimed material that doesn’t require additional resources to produce. Incorporating it into your home is a responsible choice that supports environmental conservation efforts.

How to Integrate Driftwood Mirrors in Your Bathroom

Finding the Perfect Spot

Placement is key when adding a driftwood mirror to your bathroom. Consider the lighting in your space; placing the mirror where it can reflect natural light enhances its beauty and brightens the room. Positioning it above the sink is a common choice, but feel free to get creative!

Complementing Existing Decor

While a driftwood mirror is versatile, it’s beneficial to consider how it will harmonize with your existing decor. If your bathroom has wooden elements, a driftwood mirror can tie these features together. Similarly, if your fixtures are modern and sleek, the contrast with the organic texture of driftwood can create an exciting design dynamic.

Size and Scale

Selecting the right size is crucial. A large mirror can serve as a focal point, making your bathroom feel more spacious and open. However, if your bathroom is on the smaller side, a medium-sized or even compact mirror can add charm without overwhelming the space.

Maintaining Driftwood Mirrors

Cleaning and Care

Keeping your driftwood mirror looking its best involves regular maintenance. Clean the surface with a soft, damp cloth to avoid scratches. For the driftwood frame, avoid using harsh chemicals; a gentle dusting should suffice. Occasionally, you can apply a light coat of beeswax or mineral oil to the wood to preserve its natural luster.

Handling Humidity

Bathrooms are inherently humid environments, which can affect the durability of driftwood. To mitigate any potential damage, ensure your bathroom is well-ventilated. Installing an exhaust fan can help regulate moisture levels and preserve the condition of your driftwood mirror.

Driftwood Mirror Bathroom

Driftwood Mirrors: A Craft Project?

D.I.Y. Enthusiasts

If you’re a D.I.Y. enthusiast, crafting your own driftwood mirror might be an exciting project. Gathering pieces of driftwood during a walk on the beach can be a fulfilling experience—and assembling your custom mirror adds a personal touch to your bathroom decor.

Crafting Your Own

Start by collecting driftwood pieces that appeal to you. Consider their shapes and sizes to envision a cohesive final look. Next, you’ll need a basic mirror and a strong adhesive suitable for wood. Arrange the driftwood around the mirror’s edge, experimenting until you find the perfect configuration. Once satisfied, secure the driftwood in place and let it dry thoroughly before hanging your masterpiece.

Choosing the Right Driftwood Mirror for Your Bathroom

Shopping Tips

When purchasing a driftwood mirror, consider the quality and craftsmanship. Look for mirrors made with authentic driftwood rather than synthetic alternatives. Examine the construction to ensure it’s sturdy and well-assembled—quality materials and good craftsmanship mean your mirror will last for years to come.

Budget Considerations

Driftwood mirrors can range extensively in price. If budget is a concern, shop around for the best deals, or consider secondhand options that may offer the desired look at a fraction of the price. Sometimes, local artisans or craft markets can be great places to find unique and affordable driftwood mirrors.

The Broader Impact: Driftwood’s Environmental Role

Shoreline Ecosystems

Driftwood plays a vital role in shoreline ecosystems. It provides habitat for wildlife, from small invertebrates to birds. As it decomposes, it contributes nutrients to surrounding soil and plants. By collecting driftwood responsibly or purchasing from ethical sources, you help preserve its ecological roles.

Balancing Aesthetics and Ecology

While driftwood is beautiful in home decor, balancing its use with environmental considerations is crucial. Ensure that any driftwood you use is collected sustainably, without disrupting coastal ecosystems. Purchasing driftwood from reputable suppliers who practice ethical sourcing is one way to enjoy its beauty responsibly.

Conclusion

By choosing a driftwood mirror for your bathroom, you’re embracing a piece of nature that offers both aesthetic appeal and ecological consciousness. Its unique charm transforms your space, making it more than just a functional room but a reflection of nature’s beauty infused into your daily life. With thoughtful care and integration into your decor, a driftwood mirror can become a cherished aspect of your home, offering both utility and a touch of seaside serenity. Appreciate the narratives told by each ripple and curve of the wood, and let it inspire a deeper connection to the natural world within your sanctuary.

So, are you ready to let a driftwood mirror enhance your bathroom’s charm and functionality?

Filed Under: Driftwood Ideas Tagged With: Bathroom, DIY, Driftwood, Mirror, Rustic

Driftwood Mermaid

May 23, 2025 by admin

Have you ever walked along the beach and found a piece of driftwood shaped like something magical, like a mermaid? Driftwood is more than just another piece of debris that washes ashore; it bears the marks of its journey through the sea, having been shaped by water, time, and nature. In the mysterious art of creating or discovering a “Driftwood Mermaid,” you can uncover a story of transformation, creativity, and connection with nature. Let’s wander through the world of driftwood, exploring how you can encounter, appreciate, and even craft your very own driftwood mermaid, blending artistry and the serene call of the ocean.

What is Driftwood?

Driftwood begins its life as a piece of timber that has been washed out to sea. Over time, this wood journeys through the ocean’s currents, getting eroded and smoothed by the sand, saltwater, and marine life before eventually finding its way to shore. Each piece carries the unique signature of its voyage, an embodiment of natural art crafted by the elements. Driftwood’s intriguing shapes and stories have long enchanted beachcombers and artists alike.

The Enchantment of the Driftwood Mermaid

Symbolism of the Mermaid

Mermaids have captured human imagination for centuries, symbolizing mystery, beauty, and the untamable wild of the ocean. In some cultures, they are seen as mystical beings with the power to bring fortune or misfortune. Driftwood mermaids blend this mythological elegance with the rugged beauty of nature, creating an object that is both a tactile piece of art and a spiritual artifact.

Connection With Nature

A driftwood mermaid is more than a decoration; it represents a profound connection to nature’s ebb and flow. Creating or discovering one invites you to pause and appreciate the craftsmanship of natural forces that shape our world, marrying the earth’s solid, enduring materials with the ever-changing waters.

Driftwood Mermaid

Discovering and Collecting Driftwood

Choosing the Right Location

The journey of finding driftwood involves visiting beaches, particularly those known for strong currents and tides. Coastal areas with active tidal movements deposit plenty of driftwood, enhancing your chances of discovering interesting shapes or potential mermaid forms.

Ethical Beachcombing

Respect for nature is crucial when collecting driftwood. Always ensure you’re not disrupting the local ecosystem. It’s vital to research local laws and guidelines regarding driftwood collection, as some areas protect driftwood for environmental reasons. This ensures you enjoy your hobby without harming nature.

Tools for Beachcombing

Having the right tools can make a world of difference in your driftwood treasure hunts. Simple tools such as a small shovel, a good pair of gloves, a weather-resistant tote or backpack, and maybe even a camera to document your finds can enhance your beachcombing experience.

Crafting Your Driftwood Mermaid

Tools and Materials You’ll Need

Creating a driftwood mermaid is a joyous mix of artistry and craftsmanship. Here is a table of essential tools and materials:

ToolsMaterials
HandsawDriftwood pieces
SandpaperRope or twine
Hammer and nailsWood glue
Hand drill (optional)Varnish or sealant
Paint brushesPaint (optional)

Design Tips and Techniques

  1. Visualize the Mermaid: Start by laying out your driftwood pieces to form the mermaid’s shape. Allow the natural lines of the wood to guide the design.

  2. Combine Different Textures: Use various driftwood textures to create depth. Smooth pieces can signify skin, making rougher textures excellent for fins or tails.

  3. Assemble with Care: Use sandpaper to smooth any harsh edges. Secure the pieces with nails, glue, or rope, ensuring they are tightly bound for stability.

  4. Finish for Preservation: A good coat of varnish not only highlights the wood’s beauty but protects it against further decay. If desired, subtle paints can enhance certain features without overpowering the natural aesthetics.

Driftwood Mermaid

Displaying Your Driftwood Mermaid

Indoor Versus Outdoor Display

A driftwood mermaid can enhance both outdoor and indoor spaces. Consider where the aesthetic and environmental conditions will best suit your creation. Indoor displays benefit from a stable environment, while outdoor displays need protection from excessive moisture and sunlight.

Creative Display Ideas

  1. Wall Art: Hang the mermaid on a wall as a standalone art piece, bringing a calm, beachy vibe to any room.
  2. Garden Decoration: Place it amongst flowers or shrubs; let it naturally blend, becoming a whimsical garden guardian.
  3. Centerpiece: Use the driftwood mermaid as a table centerpiece to spark conversation during gatherings.

Inspiration from Driftwood Art

Famous Driftwood Artists

Many artists are renowned for their driftwood creations, adding depth to the world of driftwood mermaids. Artists like Heather Jansch, known for her lifelike horse sculptures, and Jeffery Michael Samudosky, who crafts intricate works from giant driftwood pieces, showcase the incredible potential of this art form.

Personalizing Your Creation

Each piece of driftwood tells a part of a story only you can complete. Personalizing your mermaid can relate to your journey or dreams. Paint will allow you to add that unique signature or story, be it through colors, patterns, or even the addition of other natural elements like seashells or sea glass.

Caring for Your Driftwood Mermaid

Maintenance Tips

  1. Seal Regularly: Apply a fresh coat of sealant annually, especially for outdoor pieces.

  2. Avoid Moisture: Too much water can lead to rot. Ensure indoor humidity is balanced and your outdoor mermaid is not frequently soaked.

  3. Gentle Cleaning: Dust with a soft, dry cloth to keep the piece fresh without harming the wood.

Repairs and Restoration

If your driftwood mermaid becomes damaged, repairs can preempt further deterioration. Use wooden putty to fill any gaps and sand smooth. For more significant structural issues, consider reinforcement with additional driftwood or structural components.

The Personal and Emotional Value of Driftwood

A Sustainable Hobby

Creating art from driftwood is an environmentally friendly pursuit. It promotes recycling and the appreciation of natural materials, aligning well with values of sustainability and conservation.

A Therapeutic Process

The process of finding, shaping, and creating with driftwood offers emotional rewards. It grounds you, providing a serene experience akin to meditation. Crafting allows you to express creativity while engaging in a calming, purposeful activity—a perfect antidote to modern life’s relentless pace.

Conclusion

In the end, the journey to discovering or crafting a driftwood mermaid is as enchanting as the mermaid itself. It’s a chance to connect deeply with nature, to embrace the raw beauty of the elements, and to engage in a practice that’s as fulfilling as it is creative. Whatever your approach, whether you choose to collect, craft, or simply appreciate driftwood mermaids, you’ll form a unique bond with the art forged by nature’s own hand. Carry this connection with you, and let it enrich your understanding of the natural world and your place within it.

Filed Under: Driftwood Ideas Tagged With: Coastal Decor, DIY, Driftwood, Mermaid, Sculpture

Driftwood Magnets

May 22, 2025 by admin

Have you ever strolled along the beach, only to find yourself enchanted by the unique shapes and patinas of driftwood? These pieces, sculpted by nature’s own hands, hold both beauty and mystery that can draw you in effortlessly. Driftwood has a timeless appeal, whispering stories of the sea and its journeys. But there’s more you can do with these weathered treasures than merely admire them. How about turning them into functional art—like driftwood magnets?

Discovering the Magic of Driftwood

What is Driftwood?

Driftwood comes from trees or shrubs and is washed onto shorelines by winds, waves, or tides. Once vibrant and lush, these remnants are transformed by water, time, and nature. Their gnarled forms and smoothed edges speak of travel over great distances. Driftwood can vary vastly in size, shape, and texture depending on the origin and the journey it has taken.

Why Driftwood Attracts Our Attention

The allure of driftwood lies in its individuality. No two pieces are alike, each possessing a history that invites the imagination. The natural curves and variable colors can mimic abstract art or become the centerpiece of home décor. Moreover, driftwood is eco-friendly and sustainable, encouraging creativity without compromising nature.

Environmental Impact and Sustainability

By utilizing driftwood, you contribute to an eco-friendly practice. This renewable resource reduces the need to cut down new trees for creative purposes. Collecting driftwood also encourages awareness of beach conservation and the importance of maintaining clean shorelines.

Transforming Driftwood into Magnets

Why Craft Driftwood Magnets?

Making driftwood magnets is a creative way to bring a bit of the ocean’s charm into your home. They’re not only practical in holding up papers and photos but also serve as a gentle reminder of nature’s artistry. Driftwood magnets can be gifts infused with personal touch and stories of their creation.

What You’ll Need

To transform pieces of driftwood into magnets, you’ll need a few simple materials. Here’s a handy list to get you started:

Materials RequiredSuggested Sources/Tools
DriftwoodBeaches or craft stores
Magnets (small)Craft stores or online
Strong adhesiveEpoxy or hot glue gun
Saw or hand toolHardware store
Sandpaper120 grit
Optional: Paint or wood stainDIY shops

Step-by-Step Guide to Crafting Driftwood Magnets

Step 1: Selecting the Driftwood

First, wander under the sunlit or perhaps cloudy skies of your favorite beach to find driftwood. Look for pieces that catch your eye—unusual shapes, sizes that fit comfortably in hand, or textures that stand out.

Step 2: Preparing Your Pieces

Once you’ve gathered your driftwood, it’s time to prepare them. Saw larger pieces to your desired size. Use sandpaper to smooth any rough edges, ensuring they feel pleasant to touch.

Step 3: Personalization

You can opt to leave your driftwood pieces natural or add a personal touch with paint or wood stain. Think about designs or initials that might make these magnets uniquely yours.

Step 4: Attaching the Magnet

Heat your glue gun or prepare your epoxy. Carefully apply a generous spot of adhesive to one side of the dried driftwood piece. Firmly press your magnet to the adhesive and allow it to cure as per the product’s instructions.

Step 5: Enjoy Your Artwork

Once everything is secured and any adhesives have dried, test your driftwood magnets. Place them on a magnetic surface and see how beautifully they display.

Driftwood Magnets

Creative Inspiration and Ideas

Artistic Variations

Driftwood magnets can be more than functional; they can also be miniature works of art. Consider incorporating elements like sea glass, small shells, or pebbles into the design. Adding these elements can maintain the coastal feel and introduce additional colors and textures.

Themed Magnet Sets

Creating themed sets of driftwood magnets can be another engaging project. Imagine a collection based on sea creatures, lighthouses, or seaside scenes, using paint or even attached materials to convey the theme. These can add a coastal flair to any refrigerator or workspace.

Ongoing Projects

As you hone your skills, consider expanding your magnet-making into a more extensive hobby. You could explore creating wall art using a collection of driftwood magnets, or even start an online shop, spreading your love for the ocean and creativity.

The Benefits of Crafting Driftwood Magnets

For Personal Use

Driftwood magnets crafted by your hands carry unique sentimental value. They serve as daily reminders of calm beach walks and seaside vacations. Each glance at these creations can transport you back to moments of peace and nature.

As Gifts

Handmade driftwood magnets make thoughtful, personal gifts. Sharing these handmade items with friends and family can let them take a piece of your experiences with them. They also make excellent souvenirs from trips, highlighting local beaches’ charm and appeal.

For the Community

Engaging in driftwood magnet crafting can have wider community benefits. Consider hosting workshops inviting others to join you in learning this art. Not only does this create community bonds, but it also promotes crafting as an eco-friendly alternative to buying factory-produced magnets.

Driftwood Magnets

Care and Maintenance

Keeping Driftwood Magnets Clean

Keeping your driftwood magnets clean is straightforward. Since they’re usually placed in kitchens, gently dust them regularly with a soft, damp cloth to remove any kitchen debris or dust. Avoid using excessive water or harsh cleaners that might wear away the wood.

Ensuring Longevity

To ensure the longevity of your creations, avoid placing them in direct sunlight for extended periods, which can cause fading. Also, keep them away from areas prone to high moisture to prevent mold or deterioration, particularly if you have used less treated or raw wood.

Conclusion

The journey of transforming driftwood into magnets is marked by creativity and personal touch. You don’t just make an object; you craft a conversation starter, a daily joy, and perhaps even a cherished family tradition. Driftwood magnets embody the perfect blend of aesthetic charm and practical application, bringing the serenity of the coast directly into your home.

Whether you’re new to crafting or a seasoned artisan, creating driftwood magnets offers a delightful way to connect with nature and express your unique style. So next time you find yourself at the beach, keep an eye out for that perfect piece of driftwood, waiting for a second life as a cherished magnet in your own world.

Filed Under: Driftwood Ideas Tagged With: crafts, DIY, Driftwood, Home Projects, Magnets

Driftwood Macrame Wall Hanging Tutorial

May 21, 2025 by admin

Have you ever found yourself captivated by a piece of beachy, bohemian decor and wanted to recreate the charm at home? Creating your own driftwood macrame wall hanging can be a deeply rewarding process—and a beautiful way to bring some coastal style into your space! In this tutorial, you’ll learn how to put together a stunning piece using just driftwood and macrame techniques. Whether you’re a beginner or have some experience with macrame, you’ll find this guide informative and easy to follow. So, let’s embark on this creative journey!

Driftwood Macrame Wall Hanging Tutorial

Understanding the Basics

Before you jump in, let’s talk a little about what macrame is and what materials you’ll need. Familiarizing yourself with the basic concepts and tools will make the crafting process smoother and more enjoyable.

What is Macrame?

Macrame is a form of textile-making that uses knotting rather than weaving or knitting. Its hands-on craft style allows for a wide variety of designs and styles, from intricate and detailed to simple and rustic. Macrame has been around for centuries, dating back to 13th-century Arabic weavers, and has seen a resurgence in popularity in recent decades as a favored technique for home decor.

Materials You Will Need

The materials for a driftwood macrame wall hanging are relatively simple and can be found at most craft stores or easily ordered online. Here’s a quick list:

MaterialDescription
DriftwoodChoose a piece that is sturdy, about 18-30 inches long, and suits your aesthetic.
Macrame CordTypically, cotton cords are used, but there are synthetic options as well.
ScissorsA good pair of sharp scissors will make cutting cord smooth and precise.
Measuring TapeEssential for ensuring your cords are cut to the correct lengths.
Optional: Beads or FeathersThese can be woven into your design for added flair.

Choosing the Right Driftwood

Selecting the perfect piece of driftwood is a crucial step. It should not only fit the aesthetic you’re aiming for but also be robust enough to support the weight of your macrame design. Driftwood pieces can often be found near bodies of water, or you may choose to purchase them from craft suppliers.

Preparing Your Workspace

Setting up a dedicated workspace will help keep your project organized and enjoyable. You don’t need a large area, but having a well-lit and clutter-free zone makes a big difference in your crafting experience.

Clearing and Arranging Your Area

Find a flat surface, like a table or desk, where you can easily lay out your materials. Make sure you have good lighting to minimize eye strain. It helps to cover your workspace with a fabric or mat to catch any small pieces of cord or dust.

Organizing Your Materials

Organize all your materials before beginning. Lay them out in the order of use, or keep them neatly compartmentalized. Having everything readily accessible keeps the process smooth and glitch-free.

Measuring and Cutting the Cord

The next step is to measure and cut your macrame cord. This is an important part of the method since your entire piece relies on consistent measurements and having enough cord on hand.

How to Measure Correctly

Determine the desired finished length of your wall hanging, doubling that measurement or more, depending on the complexity of your knots. It’s better to have a little extra cord than to run short halfway through your project. Use your measuring tape to accurately gauge the lengths and note how many cords you’ll need.

Tips for Cutting

Using sharp scissors, cut each strand carefully. You don’t want to fray the ends or make angled cuts which can happen if you use dull blades. Arrange the cut cords neatly in a pile, preferably in the order they’ll be used, to keep everything tidy.

Basic Macrame Knots

Learning about the basic knots is essential for creating your macrame wall hanging. These fundamental techniques will serve as the foundation for your entire design.

Square Knot

The square knot is a staple in macrame projects. It’s comprised of two cords and is relatively simple to master.

  1. Start with two cords. Let’s call them cords A and B.
  2. Cross cord A over cord B.
  3. Pull the end of cord A under cord B.
  4. Cross cord A over the working cord.
  5. Pull through and tighten.

Half Hitch Knot

The half hitch knot is perfect for adding texture to your piece.

  1. Start with two cords. Call them cords A and B.
  2. Pull cord A over cord B.
  3. Bring cord A back through the loop you created.
  4. Pull tight to secure.

Gathering Knot

This knot is often used to bring cords together at the bottom or to create loops for hanging.

  1. Gather all your cords together.
  2. Wrap a separate cord around them several times.
  3. Pull the end of the wrapping cord through the loop.
  4. Tighten it so it stays snug.

Driftwood Macrame Wall Hanging Tutorial

Designing Your Wall Hanging

Now for the creative part—designing your wall hanging. Let your imagination guide you while using the knots and elements that you’ve learned.

Plan Your Design

Having a sketch or plan removes much guesswork and helps you visualize the outcome. You can base your design on existing patterns or come up with a custom design that suits your personal style.

Start Knotting

Begin your knotting at the top of the driftwood. Work your way down as you complete each section, making use of the knots you’ve practiced. Tension control is key; keeping your knots consistent in tightness ensures a professional look.

Incorporating Different Elements

Don’t shy away from experimenting with additional materials. Beads and feathers can be easily added to the cords between knots to provide a pop of color or texture.

Finishing Touches

As you reach the end of your piece, you’ll want to focus on finishing touches. This phase adds personality and polish to your wall hanging.

Trimming Pending Cord Ends

After you’ve completed your design, trim the end cords to your desired length. This enhances the neatness of your piece and allows you to customize the look.

Adding Optional Elements

If you want to add extra details such as fringes or other decorative elements, now is the time. Carefully incorporate them, ensuring that they complement rather than detract from your walls.

Displaying Your Creation

After all the hard work, it’s finally time to display your wall hanging. Where and how you display it can make a huge difference in how it’s perceived.

Finding the Perfect Spot

Consider where the wall hanging will look best. Locations with natural light can illuminate the intricate designs and give life to your project.

Mounting Your Driftwood

Secure your work using nails, hooks, or adhesive that can bear the weight of the driftwood and cord. Make sure it’s at a suitable height, ensuring it becomes the focal point of the room.

Troubleshooting Common Issues

Even with meticulous planning, some challenges can arise while creating macrame wall hangings. Here’s how you can tackle common problems.

Uneven Knotting

If your knots appear uneven or your cords are curling, try loosening the knots slightly or using a steamer to help the strands relax. Recommence with careful attention to tension on each knot.

Running Out of Cord

In case you run out of macrame cord, you can attach additional lengths discreetly. Overlap the new and old cords with a square knot to maintain integrity and disguise the transition.

Driftwood Slippage

If your driftwood moves when knots are applied, placing rubber or felt pieces between your driftwood and the wall can stabilize your hanging.

Tips for Perfecting Your Technique

Perfecting your macrame skills takes time and practice. Here are some additional tips to elevate your craft:

  1. Practice Knots Consistently: Repetition will make complex knotting techniques second nature.
  2. Experiment with Cord Varieties: Different cord textures and colors can alter the finish drastically.
  3. Embrace Mistakes: Consider mishaps as opportunities to innovate your design.

By now, you should be well on your way to crafting a charming driftwood macrame wall hanging. With a mix of creativity, patience, and a little trial and error, you’re fully equipped to create something that is not only aesthetically pleasing but uniquely yours. Enjoy this engaging activity and watch your skills grow with each piece you create!

Filed Under: Driftwood Ideas Tagged With: DIY, Driftwood, home decor, Macrame, Wall Hanging

Driftwood Macrame Wall Hanging Diy

May 21, 2025 by admin

Have you ever wandered along a beach, come across an intriguing piece of driftwood, and wondered how you could incorporate it into your home decor? Driftwood has a natural beauty and unique character that makes it a fantastic base for creative projects. Macrame, an art form that uses knotting techniques to create intricate designs, has soared in popularity for its ability to bring an organic, artistic touch to interior spaces. What if you could combine the rustic charm of driftwood with the elegant artistry of macrame to make a stunning wall hanging?

Driftwood Macrame Wall Hanging Diy

The Allure of Driftwood and Macrame

Driftwood and macrame both carry a sense of warmth and individuality that can transform any room. Driftwood is not only a product of nature but also a symbol of resilience, having been shaped and smoothed by the tides over time. Similarly, macrame’s history of knotting and weaving is steeped in tradition, yet remains deeply personal: your hands, your knots, your creation.

Why Driftwood?

Driftwood adds a natural, earthy element to decor that is both versatile and environmentally conscious. Each piece of driftwood is unique, ensuring that no two projects are the same. Its soft tones and textures complement the delicate patterns of macrame, creating an organic piece of art.

The Macrame Revival

Macrame has made a significant comeback in modern decor thanks to its bohemian appeal and customization options. With macrame, you can experiment with various patterns and styles, allowing your creativity to shine while making a piece that fits perfectly with your aesthetic.

Getting Started with Your Driftwood Macrame Project

Creating a driftwood macrame wall hanging can seem daunting if you’re new to the craft, but breaking the process down into manageable steps makes it approachable and rewarding.

Preparing Your Driftwood

The first task is to select and prepare the driftwood that will serve as the base of your wall hanging. Look for a piece that is smooth and free of significant cracks that might weaken your design. Once you’ve selected the perfect driftwood, it’s important to clean and dry it thoroughly.

  1. Cleaning: Rinse the driftwood to remove any sand or salt deposits. Use a soft brush to gently scrub the surface.
  2. Drying: Leave the driftwood outside in a dry, sunny spot for a couple of days. This ensures it is free from moisture, making it sturdy enough to support your macrame project.

Choosing the Right Macrame Cord

The next step is choosing the macrame cord. The type and thickness of the cord will impact the overall look and style of your wall hanging. Cotton cord is a popular choice because it is soft, easy to work with, and comes in a range of colors.

  • Thickness: A medium thickness (around 3-5mm) is generally best for beginners. It balances ease of knotting with a visually appealing finish.
  • Color: Natural tones keep things earthy and organic, though colored cords can add a whimsical or modern touch, depending on your style.

Essential Macrame Knots

Before diving into your project, familiarize yourself with a few foundational macrame knots. Understanding these techniques will enable you to create intricate designs and customize patterns to your liking.

  • Lark’s Head Knot: Used to attach the cords to the driftwood.
  • Square Knot: A versatile knot that can form rows and patterns.
  • Half Hitch Knot: Ideal for creating spirals and waves.
  • Double Half Hitch Knot: Useful for crafting intricate designs and borders.

Step-by-Step Guide to Creating Your Driftwood Macrame Wall Hanging

Now that you have your supplies ready and knots memorized, it’s time to create your masterpiece. Here’s a step-by-step guide to help you through the process:

Step 1: Setup

Begin by attaching your driftwood to a flat, stable work surface. You can use clamps or weights to hold it in place. This stability ensures that your knots will be even and consistent.

Step 2: Attach the Cords

Using the Lark’s Head Knot, attach multiple cords to your driftwood. The number of cords depends on how wide you want your project to be, but starting with 8-12 cords is a good range for most projects.

Step 3: Creating Your Design

This is where the fun begins! Use the Square Knot to create the base rows of your macrame. Alternate cords as needed to create visual interest and texture. Allow your artistic intuition to guide the placement of Half Hitch and Double Half Hitch knots, intertwining them to form spirals or waves.

Step 4: Adding Depth and Layers

To add dimension, experiment with varying the lengths of dangled cords by trimming some to different lengths. You can create fringe by unraveling and combing out the ends of the cords for a fuller look.

Step 5: Finishing Touches

Once you’re satisfied with your design, it’s time to secure the loose ends. Knot the bottom of the cords securely to prevent unraveling. Trim them to your desired length, and comb them out to add a soft finish.

Personalizing Your Driftwood Macrame Wall Hanging

The beauty of DIY projects lies in personalization. With macrame, there are countless ways to let your personal style shine.

Color Variations

Color can drastically change the overall feel of your wall hanging. Try incorporating different colors of cord in your design for an ombre effect or introduce a pop of color with painted driftwood.

Beads and Natural Elements

Incorporate beads, shells, or small stones into your macrame for added texture and individuality. The inclusion of these elements can add an even further natural vibe to your creation, blending seamlessly with the driftwood theme.

Custom Patterns

Experiment with and develop your own macrame patterns. Allow your wall hanging to tell a story or simply reflect a personal meaning. Charting out designs on paper first can help to visualize the end result.

Driftwood Macrame Wall Hanging Diy

Maintaining Your Driftwood Macrame Wall Hanging

Maintaining your wall hanging ensures its longevity and continued beauty. Here are a few tips to keep it looking its best:

Regular Dusting

Dust your wall hanging regularly using a soft brush or cloth. This prevents the buildup of dirt and helps the cords retain their color and texture.

Avoid Moisture

Keep your wall hanging in a dry environment to prevent the driftwood and cords from absorbing moisture, which can lead to mold or warping.

Handling with Care

When moving or repositioning your macrame piece, handle it with care. Support the driftwood and knots to avoid strain on the macrame and risk of breakage.

Conclusion

Creating a driftwood macrame wall hanging is a fulfilling project that adds a unique, personal touch to your home. The combination of natural and crafted elements harmonizes beautifully to enhance any space. By following these steps and infusing your own creativity, you can design a piece that is truly one-of-a-kind. Whether you’re a seasoned maker or a novice, this project offers endless opportunities for artistic expression and satisfaction.

Filed Under: Driftwood Ideas Tagged With: DIY, Driftwood, home decor, Macrame, Wall Hanging

  • « Previous Page
  • Page 1
  • Page 2
  • Page 3
  • Page 4
  • …
  • Page 41
  • Next Page »

Primary Sidebar

Driftwood4us.com, is a participant in the Amazon Services LLC Associates Program, an affiliate advertising program designed to provide a means for sites to earn advertising fees by advertising and linking to amazon.com.