• Skip to main content
  • Skip to primary sidebar
  • Terms and Conditions
  • Privacy Policy
  • Contact

Driftwood 4 Us

Just About Driftwood

DIY

Driftwood Glass Bowl Decor

August 26, 2024 by admin

Have you ever wondered how to bring a touch of nature’s elegance into your home decor? If you’re intrigued by the beauty of natural elements and love the fusion of organic forms and modern design, then driftwood glass bowl decor might just be the perfect addition to your living space.

Driftwood Glass Bowl Decor

What is Driftwood Glass Bowl Decor?

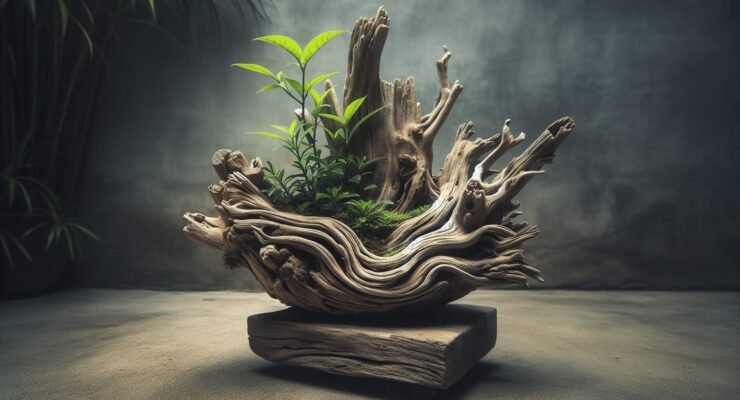
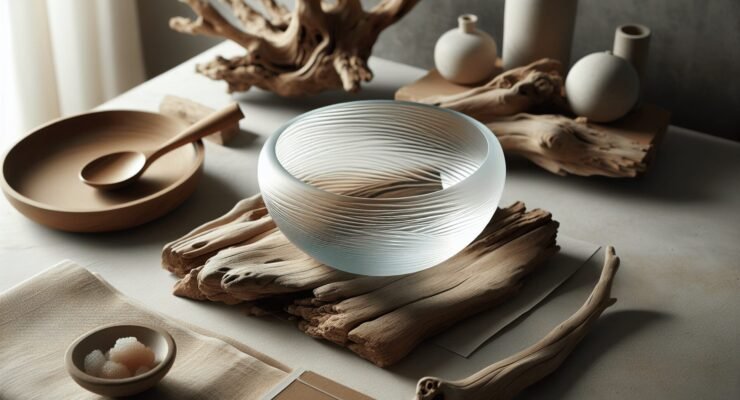
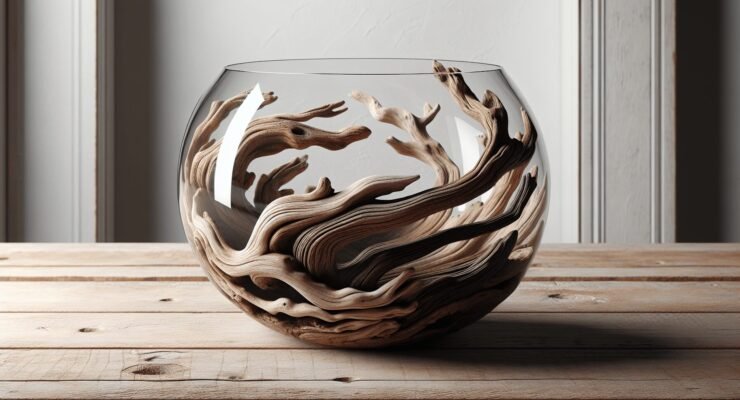
In essence, driftwood glass bowl decor is a unique and captivating home accessory that combines the rough, natural beauty of driftwood with the smooth, refined look of glass. Picture a glass bowl that appears to organically emerge from the intricate patterns of weathered driftwood. The combination is striking, making it a centerpiece that commands attention and sparks conversation.

Origins and Craftsmanship

Driftwood glass bowl decor is not just a random pairing of materials but a carefully crafted piece of art. Artisans typically gather driftwood from rivers, beaches, and lakes, where it has been naturally weathered by water and wind. This weathering process gives each piece of driftwood its own unique character, with patterns and textures that can’t be replicated.

The glass bowls are often made from molten glass, which is hand-blown and then shaped to fit the contours of the driftwood. This process ensures that no two driftwood glass bowl decors are the same, making each piece a one-of-a-kind creation.

Why Choose Driftwood Glass Bowl Decor?

Incorporating driftwood glass bowl decor into your home isn’t just about aesthetic appeal; it offers several other benefits.

Natural and Sustainable Material

One of the standout features is its natural and eco-friendly roots. Driftwood is a renewable resource, collected without harming the environment. Pairing it with hand-blown glass, often made from recycled materials, makes it an excellent choice for those committed to sustainable living.

Versatility in Interior Design

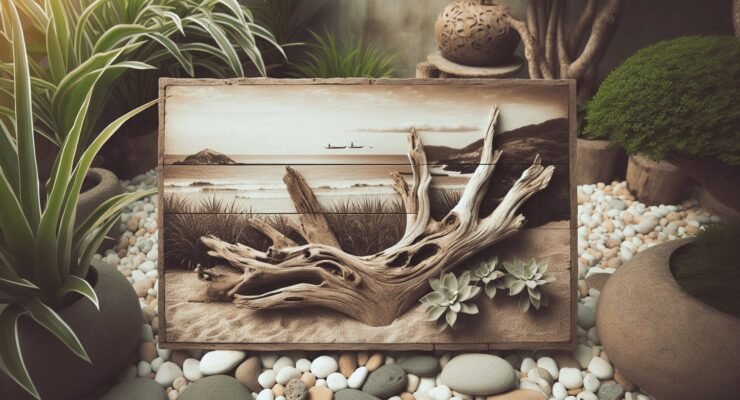
Whether your home is styled in a modern, rustic, coastal, or eclectic theme, driftwood glass bowl decor can fit seamlessly. The organic lines of driftwood contrast beautifully with the sleek surfaces of contemporary designs while complementing the laid-back feel of more rustic or beach-themed interiors.

Aesthetic Appeal

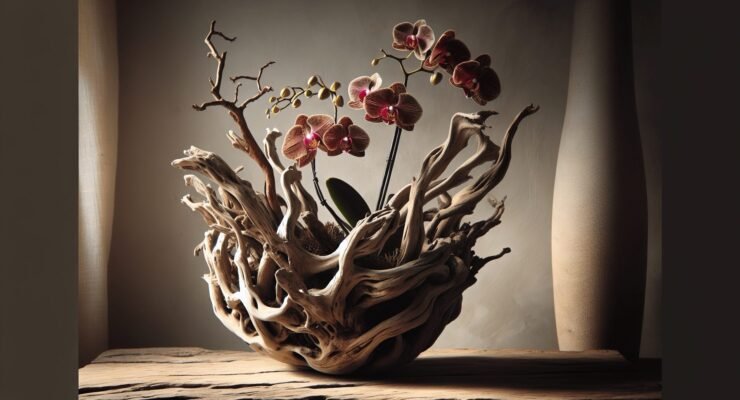
There’s something spellbinding about the raw beauty of driftwood and the clarity of glass. The intricate grain patterns and textures of the driftwood catch the eye, while the glass bowl adds an element of sophistication and elegance. Together, they create a balanced, harmonious piece that stands as a natural focal point in any room.

Types of Driftwood Glass Bowls

Driftwood glass bowl decor comes in various styles, sizes, and shapes. Each type brings its own charm and functionality. Understanding these types can help you choose the perfect piece for your setting.

Coffee Table Centerpieces

Larger driftwood glass bowls often serve as dramatic coffee table centerpieces. These pieces usually have a broad base of driftwood, supporting a sizeable glass bowl. The bowl can be used to hold decorative stones, seashells, or be left empty to highlight its unique form.

Wall-Mounted Displays

Some designs allow for wall mounting, creating a stunning vertical display. The driftwood serves as a natural frame, while the glass bowl acts as an eye-catching focal point. These pieces are perfect for adding a touch of nature to your walls, serving both functional and decorative purposes.

Small Accent Pieces

For those looking for subtler touches, smaller driftwood glass bowls can be placed on shelves, countertops, or even as part of a table setting. These smaller pieces might serve as candle holders, succulent planters, or simple decorative objects.

How to Incorporate Driftwood Glass Bowls in Your Decor

Once you’ve chosen your driftwood glass bowl, the next step is to seamlessly integrate it into your home decor. Here are some tips to help you make the most of this beautiful piece.

Living Room

Place a larger driftwood glass bowl on your coffee table to draw immediate attention. Complement it with items like books, candles, or other natural elements like stones and shells. This setup creates a balanced and engaging centerpiece.

Dining Room

Use a driftwood glass bowl as a unique table centerpiece for your dining room. Fill it with seasonal decorations such as pine cones for winter, fresh flowers for spring, or colorful pumpkins for fall. This makes your dining table feel inviting and constantly fresh.

Bathroom

Small driftwood glass bowls can add a touch of luxury to your bathroom. Use them to hold bath salts, small soaps, or decorative stones. The natural elements create a peaceful, spa-like atmosphere that enhances relaxation.

Outdoor Spaces

Don’t limit these bowls to indoor settings. They can also add a unique charm to outdoor areas. Use them as centerpieces on your patio table or place several smaller bowls around your garden for an enchanting effect.

Driftwood Glass Bowl Decor

Maintenance and Care

Proper maintenance ensures that your driftwood glass bowl remains beautiful for years to come. Here are some care tips to keep in mind:

Dust Regularly

Dust the wooden and glass parts regularly to prevent buildup. A soft cloth can be used on the driftwood, while a microfiber cloth is ideal for the glass surface.

Avoid Direct Sunlight

Prolonged exposure to direct sunlight can cause the wood to dry out and crack and the glass to become brittle. Place your decor in a location with indirect natural light to maintain its integrity.

Clean with Mild Solutions

For a deeper clean, use a mild soap solution. Dampen a cloth with soapy water and gently wipe down the driftwood and glass. Avoid using harsh chemicals, which can damage both materials.

DIY Driftwood Glass Bowl Projects

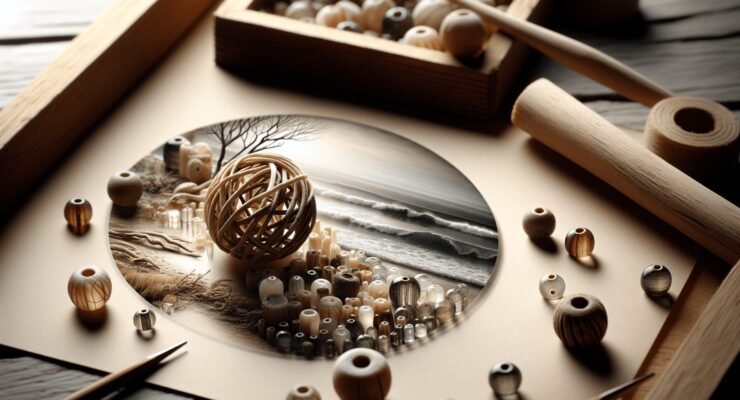
For the more hands-on enthusiasts, creating your own driftwood glass bowl can be a rewarding project. Here’s a simple guide to get you started:

Materials Needed

  • A piece of driftwood
  • A glass bowl (you could even use reclaimed glass)
  • Sandpaper
  • Wood sealant
  • Adhesive suitable for glass and wood

Step-by-Step Instructions

  1. Select your driftwood: Choose a piece with interesting patterns and a base that can support a glass bowl.
  2. Prepare the driftwood: Sand any rough edges and clean the piece thoroughly.
  3. Seal the wood: Apply a wood sealant to protect the driftwood from moisture and damage.
  4. Attach the glass bowl: Use an adhesive designed for glass and wood to attach the bowl to the driftwood. Ensure it’s centered and stable.
  5. Let it dry: Allow the adhesive to cure fully before using your new decor piece.

Creating your own driftwood glass bowl allows you to personalize it to your taste and adds a sense of accomplishment to your decor.

Driftwood Glass Bowls as Gifts

Driftwood glass bowls make exceptional gifts. Whether it’s for a housewarming, wedding, birthday, or just because, these unique decor pieces are sure to be appreciated.

Personalization

Consider personalizing the gift by adding elements that reflect the recipient’s tastes. You can place their favorite flowers in the bowl, add decorative stones in colors they love, or even find driftwood with a shape that has special meaning.

Presentation

Presentation matters. Wrap your driftwood glass bowl in eco-friendly packaging, perhaps incorporating nature-based materials like brown kraft paper, twine, and pressed leaves. This enhances the natural theme and shows thoughtfulness in your gift-giving.

Where to Buy

You can find driftwood glass bowls at various places, both online and in physical stores. Here are some options:

Store TypeExamples
Online RetailersAmazon, Etsy, Wayfair
Specialty StoresHome decor boutiques, eco-friendly shops
Craft FairsLocal artisan markets, craft fairs
GalleriesArt galleries that feature home decor items

Each option has its own benefits. Online retailers offer the convenience of shopping from home and often have a wider selection. Specialty stores and craft fairs give you access to unique, handcrafted pieces and the opportunity to support local artisans.

Conclusion

Driftwood glass bowl decor is more than just an object; it’s a piece of nature captured in your home. The blend of sturdy driftwood and delicate glass offers a unique aesthetic that can elevate any interior space. Whether you’re buying it as a focal point for your living room, a subtle accent for your bathroom, or a unique gift, you’ll find that these pieces always add a conversation-worthy element to your decor.

So, why not bring a piece of nature into your home today? The beauty of driftwood glass bowl decor lies in its ability to bring the outdoors in, providing a constant reminder of the natural world’s beauty and craftsmanship. Happy decorating!

Filed Under: Driftwood Ideas Tagged With: Coastal Decor, DIY, Driftwood, Glass Bowl, Rustic Decor

Driftwood Planters

August 26, 2024 by admin

Have you ever thought about combining your love for plants with a touch of natural artistry? Driftwood planters might be just the twist you need to add a unique, rustic charm to your green spaces. This natural decor not only appeals to nature lovers but also fits into various interior design styles, from bohemian to coastal themes.

Driftwood Planters

What Is Driftwood?

Driftwood refers to wood that has been washed onto a shore, often enriched by long exposure to the mineral-laden waters and weathering effects of the environments. It embodies a rugged, worn beauty that tells its own story. As it drifts to the shore, it often picks up interesting shapes and textures, making each piece unique.

How Driftwood Forms

Driftwood starts its journey as regular wood from trees. It enters bodies of water through natural processes like falling during a storm, or human activities such as logging. Once in the water, the wood gets weathered and smoothed by natural forces. Salt, sun, wind, and currents work in tandem to create the varied and fascinating textures you’ll find.

Types of Driftwood

While exploring driftwood planters, you may come across driftwood of different woods like pine, cypress, and cedar. Each type offers different characteristics, which may influence your choice depending on the aesthetics and durability you’re after.

Type of WoodCharacteristics
PineLight color, soft
CypressDecay-resistant, cool tones
CedarAromatic, rich color variations

Why Choose Driftwood Planters?

Integrating driftwood into your indoor or outdoor garden space has several benefits. From environmental friendliness to aesthetic appeal, there’s a lot to appreciate in these natural creations.

Environmental Benefits

By opting for driftwood planters, you’re making an eco-friendly choice. Driftwood planters utilize wood that has already fallen, thereby minimizing the need for new timber and promoting the repurposing of natural materials. Additionally, driftwood is biodegradable, making it a sustainable option.

Aesthetic Appeal

The rustic and weathered appearance of driftwood creates a unique, artistic look that can complement any setting. Whether you’re aiming for a coastal vibe or an earthy atmosphere, driftwood planters add a touch of nature that is hard to replicate with other materials.

Customizable

Another benefit is that driftwood pieces are highly customizable. You can shape them, carve them, or let their natural form dictate the design. The possibilities are endless, enabling you to create planters that are truly one-of-a-kind.

Types of Driftwood Planters

There are numerous ways to transform driftwood into plant holders, each with its style and complexity. Here we will look into a few popular types that you can consider for your home or garden.

Simple Driftwood Holders

Simple driftwood holders are among the easiest to make and require minimal modification to the driftwood. These can often be used as stands for potted plants or as hangers for air plants.

Driftwood Succulent Planters

For succulent lovers, driftwood can serve as a unique planter that complements the natural aesthetics of these low-maintenance plants. The texture and shape of the driftwood make it particularly suitable for succulents as it mimics their natural environment.

Driftwood Mounted Air Plants

Air plants are incredibly easy to maintain as they don’t require soil. By mounting them onto driftwood, you can create an artistic, floating effect that’s both visually stunning and easy to care for.

Driftwood Terrariums

If you want to create a miniature ecosystem, incorporating driftwood into a glass terrarium can be incredibly rewarding. The driftwood adds a natural, earthy element that balances the lush, green environment within the container.

DIY Driftwood Planter Projects

Creating your own driftwood planters can be a fulfilling and creative endeavor. Below are some step-by-step guides for various types of driftwood planters, enabling you to craft your own pieces right at home.

Materials Needed

Before diving into any project, it’s important to gather all necessary materials. Here is a basic list that can vary depending on the type of planter you’re making:

  • Driftwood pieces
  • Plant pots
  • Screws and nails
  • Power drill
  • Sandpaper
  • Protective finish (if desired)
  • Plants (succulents, air plants, etc.)

Simple Driftwood Holder

  1. Select Your Driftwood: Choose a piece of driftwood that has a flat base and is sturdy enough to hold a plant pot or an air plant.
  2. Clean the Driftwood: Use a brush to remove any loose bark or dirt.
  3. Sand Rough Edges: Sand down any rough edges to prevent any injuries while handling.
  4. Place the Plant: Depending on your choice, you can either place a potted plant on top or securely attach air plants to the driftwood using a non-toxic adhesive.

Driftwood Succulent Planter

  1. Choose a Driftwood Piece: Look for one with natural crevices or holes.
  2. Cleaning and Sanding: Clean the driftwood thoroughly and sand it down.
  3. Create Planting Holes: Use a drill to make shallow holes for the succulents if the driftwood lacks natural spaces.
  4. Add Soil and Plants: Fill the holes with succulent soil and place the succulent plants in them.
  5. Water Sparingly: Remember, succulents require minimal watering.

Driftwood Mounted Air Plants

  1. Pick Your Driftwood: Select a piece that offers good spots to attach air plants.
  2. Clean the Driftwood: The usual brush and sandpaper clean-up routine apply here as well.
  3. Attach Air Plants: Use a non-toxic adhesive to attach the air plants to the driftwood. Make sure they have good air circulation.
  4. Spritz with Water: Since air plants absorb water through their leaves, you’ll need to mist them occasionally.

Driftwood Terrarium

  1. Select a Container: Choose a glass container that suits your aesthetic. It could be a bowl, a vase, or even a jar.
  2. Clean the Driftwood: Clean and sand your driftwood as usual.
  3. Arrange the Elements: Place a layer of gravel for drainage, followed by soil for your plants. Then artistically arrange the driftwood and your plants within the container.
  4. Add Moss or Decorative Stones: This step is optional but can add an extra layer of beauty to your terrarium.

Driftwood Planters

Maintenance and Care

Keeping your driftwood planters in pristine condition requires some regular maintenance. Each type of planter and the plants it houses may need different care steps, but here are some general guidelines.

Regular Cleaning

Dust tends to settle on driftwood; therefore, regular dry brushing can go a long way to maintaining its aesthetic appeal. For deeper cleaning, a damp cloth can be useful, but avoid soaking the wood as it may degrade over time.

Plant Care

Each type of plant has its requirements. Succulents generally need minimal watering, and air plants only require a spritz of water. Follow the specific care instructions for the plants you choose to ensure they flourish.

Protective Coating

While driftwood is naturally resilient, applying a protective coat can help prolong its lifespan, especially if the planter is kept outside. Use a non-toxic sealant to preserve the wood’s natural look and protect it from the elements.

Creative Inspirations

The beauty of driftwood planters lies in the endless creative possibilities. You can let your imagination run wild, blending the rustic charm of driftwood with the vibrant life of plants. Here are some ideas to inspire you further.

Mini Driftwood Gardens

Imagine creating a miniature garden with succulent arrangements on a large piece of driftwood. This can become a centerpiece in your home, bringing together art and nature seamlessly.

Hanging Driftwood Planters

Using twine or durable rope, you can convert a piece of driftwood into a hanging planter, adding a unique vertical element to your garden space. This works particularly well with air plants and small potted plants.

Driftwood and Candle Hybrids

For a touch of romance, combine candles with driftwood. Carefully carve out places for small candles while ensuring it’s well away from the plants to avoid any mishap. This combination can create a magical ambiance during the evenings.

Driftwood Tabletop Planters

Use driftwood pieces to create intricate tabletop centerpieces, which can house an assortment of small plants or succulents. This is an excellent way to bring nature to your indoor spaces without taking up too much room.

Benefits of Using Driftwood Beyond Planters

While we’re focusing on planters, it’s worth mentioning that driftwood can also be used for various other creative and practical purposes around your home.

Unique Furniture Pieces

Driftwood can be used to design unique pieces of furniture like coffee tables or lamp stands. These items can serve as conversation starters and add a rustic element to your home decor.

Artistic Sculptures

Driftwood’s natural form and texture make it ideal for creating artistic sculptures, ranging from abstract forms to representational art that can adorn your garden or living room.

Eco-Friendly Decor

Apart from planters, smaller pieces of driftwood can be used for decorative items like photo frames, mirrors, and wall hangings, adding that touch of nature to every corner of your home.

Final Thoughts

Integrating driftwood planters into your home or garden decor not only brings a touch of nature into your spaces but also promotes sustainable and eco-friendly practices. The rustic yet elegant appeal of driftwood, combined with the natural beauty of plants, creates an ambiance that is both soothing and visually enriching. Whether you are a seasoned gardener or a novice plant enthusiast, driftwood planters offer a unique and rewarding way to enjoy the fusion of art and nature.

Feel encouraged to experiment and let your creativity guide you. With driftwood, each piece is unique, offering endless possibilities for customization and personal expression. Happy planting and enjoy the tranquility and beauty that driftwood planters can bring to your space!

Filed Under: Driftwood Ideas Tagged With: DIY, Driftwood, gardening, home decor, Planters

Driftwood Orchid Planter

August 24, 2024 by admin

Have you ever thought about combining the natural beauty of driftwood with the elegance of orchids? If you’re nodding your head, you’re in for a treat. Let’s discuss how you can transform a piece of driftwood into a stunning orchid planter. This unique gardening project doesn’t just elevate your home decor but also helps create a nurturing environment for your orchids to thrive.

Understanding Driftwood and Its Characteristics

What is Driftwood?

Driftwood refers to wood that has been washed onto a shore or beach of a sea, lake, or river by the action of winds, tides, or waves. It often carries a naturally weathered look, making it a favorite among artisans and gardeners.

Why Use Driftwood for Orchid Planters?

Driftwood offers a rustic, natural aesthetic that perfectly complements the exotic beauty of orchids. Additionally, its porous texture and irregular shape create ideal growing conditions for many orchid species.

Selecting the Right Driftwood

Where to Find Driftwood?

Driftwood can often be found along beaches, lakeshores, and riverbanks. You can also purchase it from craft stores or online marketplaces if you don’t live near a natural source.

Qualities to Look For

When selecting driftwood for an orchid planter, you’ll want to ensure it’s not too brittle and is free from harmful residues. Here are some crucial aspects to consider:

QualityDescription
SizeChoose a piece that fits the space you have in mind for your planter.
SturdinessEnsure the wood is sturdy enough to hold the orchid and its roots.
ShapeOpt for pieces with crevices or hollows, which are ideal for planting.
CleanlinessLook for wood that’s relatively free from algae, salt, and other residues.

Driftwood Orchid Planter

Preparing Driftwood for Planting

Cleaning the Driftwood

Before using driftwood for planting, it’s essential to clean it to remove any potential toxins or pests.

  1. Rinse the Driftwood: Use a high-pressure hose to rinse off any debris or salt.
  2. Soak the Wood: Submerge the driftwood in freshwater for at least a week, changing the water daily to ensure all salt and residues are removed.
  3. Dry the Driftwood: Let it dry thoroughly in a ventilated area, preferably outdoors, but shaded from direct sunlight.

Sterilizing the Driftwood

Sterilization helps to kill any remaining bacteria or fungi.

  1. Bleach Solution: Soak the driftwood in a bleach solution (1 part bleach to 9 parts water) for 24-48 hours.
  2. Thoroughly Rinse: After bleaching, rinse the driftwood multiple times to ensure no bleach residue remains.
  3. Final Soak: Soak the wood in freshwater for another 24 hours to remove any remaining bleach.

Choosing the Right Orchid

Types of Orchids Suitable for Driftwood Planters

Some orchids are better suited to driftwood planters than others. Here are a few species ideal for this setup:

Orchid SpeciesDescription
PhalaenopsisKnown as the moth orchid, Phalaenopsis are easy to grow and adapt well to mounting.
DendrobiumThese orchids can thrive on driftwood and produce stunning, long-lasting flowers.
OncidiumAlso known as dancing lady orchids, they enjoy the airy environment driftwood provides.
CattleyaThese orchids have thick roots that grip well onto rough surfaces like driftwood.

Driftwood Orchid Planter

Mounting Your Orchid onto Driftwood

Materials Needed

Before you start, gather these materials:

  • Driftwood
  • Orchid plant
  • Fishing line or floral wire
  • Sphagnum moss
  • Scissors
  • Spray bottle

Step-by-Step Guide

  1. Dampen the Moss: Wet the sphagnum moss to make it easier to work with.
  2. Prepare the Orchid: Remove the orchid from its pot, gently shaking off any loose soil from its roots.
  3. Apply Moss to the Roots: Wrap the orchid roots in the damp sphagnum moss to help retain moisture.
  4. Position the Orchid: Find a crevice or hollow in the driftwood and position your orchid there.
  5. Secure the Orchid: Using fishing line or floral wire, securely fasten the orchid to the driftwood. Make sure to tie it firmly but not too tight to avoid damaging the roots.
  6. Spray Water: Once mounted, spray the orchid and moss with water to keep the environment moist.

Maintaining Your Driftwood Orchid Planter

Watering

The frequency of watering will vary based on the type of orchid, the humidity in your environment, and the dryness of the driftwood. Generally:

  • Watering Frequency: You should mist the orchid and moss every day or every other day.
  • Deep Watering: Once a week, soak the entire driftwood piece in water for 30 minutes to ensure thorough hydration.

Lighting

Orchids need bright, indirect light to thrive. Placing your driftwood orchid planter near an east or west-facing window usually provides the perfect light conditions.

Fertilizing

Regular fertilizing can enhance the growth and flowering of your orchid.

  • Type of Fertilizer: Use a balanced orchid fertilizer, usually diluted to half strength.
  • Frequency: Fertilize every two weeks during the growing season and cut back to monthly during the dormant period.

Benefits of Driftwood Orchid Planters

Aesthetic Appeal

Driftwood orchid planters are living works of art. They add a unique, organic focal point to any room or outdoor space.

Encourages Healthy Root Growth

The rough, porous texture of driftwood provides an excellent environment for the orchid roots to attach and grow, mimicking their natural habitat.

Eco-friendly

Using driftwood is a great way to repurpose a natural resource. It often promotes a sense of tranquility and connection with nature.

Challenges You Might Face

Maintaining Moisture Levels

Driftwood can sometimes dry out quickly, requiring frequent watering or misting. You might need to experiment to find the right balance.

Pests

Keeping the driftwood orchid planter indoors can deter pests, but outdoor settings might attract insects. Regularly checking your plant and treating any issues promptly can mitigate this.

Root Attachment

Initially, the roots might take some time to attach firmly to the driftwood. Be patient and continue to provide the right conditions, and the orchid will eventually secure itself.

Frequently Asked Questions

How Long Does It Take for Orchids to Attach to Driftwood?

This can vary, but you can generally expect the roots to start attaching within a couple of weeks to a few months.

Can I Use Any Type of Driftwood?

It’s best to use hardwood driftwoods like oak, mahogany, or teak. Softer woods tend to deteriorate faster and may not provide the longevity you desire.

Is Driftwood Harmful to Orchids?

When properly cleaned and sterilized, driftwood is safe for orchids and can actually support healthier growth compared to other planting mediums.

Conclusion

Creating a driftwood orchid planter is not only a rewarding hobby but also adds a touch of natural elegance to your space. With the right materials, a little patience, and proper care, you can enjoy a thriving, beautiful orchid that looks like it came straight from an exotic forest.

Taking the time to select and prepare the driftwood, choose the right orchid, and maintain the setup will ensure that your planter remains a stunning focal point in your home for years to come. This combination of driftwood and orchid is truly a match made in botanical heaven. So, why not give it a try? Your indoor garden will thank you!

Filed Under: Driftwood Ideas Tagged With: DIY, Driftwood, home decor, Orchids, Planters

Driftwood Outdoor Decor

August 24, 2024 by admin

Have you ever wandered along a beach and stumbled upon a piece of driftwood, wondering about its journey and the stories it could tell? Driftwood has a unique charm and a natural aesthetic that can transform your outdoor space into a serene and inviting retreat. Whether you’re a seasoned DIY enthusiast or just beginning to dabble in outdoor decor, using driftwood offers endless possibilities for creativity and personalization.

Driftwood Outdoor Decor

What is Driftwood?

Driftwood refers to pieces of wood that have been washed onto shorelines, rivers, or beaches by winds, tides, or waves. These pieces of wood have often traveled long distances in water, resulting in their distinct, weathered appearance. This natural process of aging and tumbling gives driftwood its unique character, making it a sought-after material for various decor projects.

Why Use Driftwood in Outdoor Decor?

You might be wondering why driftwood is a popular choice for outdoor decor. Here are a few reasons why it’s favored by many:

  1. Natural Aesthetics: Driftwood retains a natural, weathered look that adds an earthy touch to any decor.
  2. Sustainability: Using driftwood is an eco-friendly choice, as it repurposes natural materials.
  3. Versatility: There are countless ways to incorporate driftwood into your outdoor spaces, from simple accents to intricate installations.
  4. Durability: Driftwood can withstand various weather conditions, making it a durable choice for outdoor settings.

Sourcing Driftwood

Before you can start your projects, you’ll need to gather some driftwood. You have two options: collecting your own driftwood or purchasing it.

Collecting Your Own Driftwood

If you live near a beach, river, or lake, you can collect your own driftwood. Here are a few tips to help you:

  • Safety First: Wear gloves to protect your hands from sharp edges or splinters.
  • Check Local Regulations: Some areas have rules about collecting natural materials. Make sure you’re compliant.
  • Choose Wisely: Look for pieces that are free of pests and have an interesting shape and texture.

Purchasing Driftwood

If you don’t have access to natural driftwood, you can purchase it from craft stores, online retailers, or specialty shops. These pieces are often pre-cleaned and sanitized, saving you time and effort.

Preparing Driftwood for Projects

Once you have your driftwood, it’s important to clean and treat it before using it in your decor projects. This will ensure that it’s free of pests and bacteria and will last longer in your outdoor settings.

Cleaning Driftwood

  1. Rinse It Thoroughly: Use a hose to rinse off any dirt, sand, or debris.
  2. Scrub: Use a stiff-bristle brush to scrub the wood. This helps to remove any remaining dirt and moss.
  3. Soak: Soak the driftwood in a solution of water and bleach (10:1 ratio) for 24 hours. This will kill any bacteria and pests.

Drying and Sealing Driftwood

After cleaning, let the driftwood dry completely. This can take anywhere from a few days to a couple of weeks, depending on the size and thickness of the wood. Once dry, you might want to seal the wood to protect it from the elements.

  • Sealers: Use a clear wood sealer to preserve the natural look of the driftwood.
  • Application: Apply the sealer with a brush or spray, making sure to cover all surfaces. Allow it to dry according to the manufacturer’s instructions.

Driftwood Outdoor Decor Ideas

Now that your driftwood is clean and ready to use, let’s explore some creative ways to incorporate it into your outdoor decor.

Driftwood Furniture

Driftwood can be used to create stunning furniture pieces that are both functional and artistic.

  • Tables: Use large, sturdy pieces of driftwood as the base for an outdoor coffee table or side table. Simply attach a glass top for a polished look.
  • Benches: Combining driftwood with other natural materials like stone or reclaimed wood can create unique and comfortable seating options.

Garden Accents

Driftwood can add an organic touch to your garden without much effort.

  • Pathway Edging: Lay pieces of driftwood along garden pathways to create rustic edging.
  • Planters: Use driftwood to create planters. Attach smaller pieces to a planter box or use a large driftwood log as a hollowed-out planter.

Driftwood Sculptures

If you enjoy more artistic projects, you can create driftwood sculptures that serve as focal points in your garden.

  • Abstract Art: Combine different shapes and sizes of driftwood to create abstract sculptures. Secure them with waterproof glue or nails.
  • Animal Figures: Challenge yourself to create driftwood sculptures resembling animals, such as birds, fish, or even dragons.

Functional Decor

Driftwood can also be used to create functional outdoor decor that is both beautiful and useful.

  • Wind Chimes: Attach small pieces of driftwood to strings and hang them to create natural wind chimes.
  • Hooks and Hangers: Mount driftwood pieces on your porch or fence to use as hooks for hanging tools, lanterns, or garden hoses.

Driftwood Outdoor Decor

How to Maintain Driftwood Decor

While driftwood is durable, taking a few steps to maintain it will ensure your decor lasts for years to come.

Regular Cleaning

Clean your driftwood decor periodically to remove dirt and grime. A simple hose-down or a wipe with a damp cloth should suffice for most pieces.

Reapply Sealant

Depending on the exposure to weather, you might need to reapply a wood sealer every year or two. This will protect the wood from moisture and UV rays.

Check for Damage

Inspect your driftwood decor regularly for signs of wear or damage. Repair or replace pieces as needed to maintain the overall integrity of your decor.

DIY Driftwood Projects

Engaging in DIY projects can be a fun and rewarding way to personalize your outdoor space. Here are a few step-by-step projects that you can try.

Driftwood Candle Holder

Create a rustic candle holder using driftwood.

Materials Needed:

  • Small pieces of driftwood
  • Wood glue
  • Tea light candles
  • Sandpaper

Instructions:

  1. Choose Pieces: Select driftwood pieces that are flat enough to hold a tea light candle.
  2. Smooth Surfaces: Sand the top surfaces where the candles will sit.
  3. Assemble: Arrange the pieces in a layout you like and glue them together.
  4. Dry and Finish: Allow the glue to dry completely. Place the tea light candles on top and enjoy your new candle holder.

Driftwood Wall Hanging

Create a beautiful wall hanging to display in your outdoor space.

Materials Needed:

  • Assorted pieces of driftwood
  • Twine or wire
  • Hooks or nails
  • Scissors

Instructions:

  1. Arrange Driftwood: Lay out your pieces of driftwood in a desired pattern – either vertically or horizontally.
  2. Attach Twine: Securely tie twine or wire around each piece, ensuring they are evenly spaced.
  3. Hang the Decor: Use hooks or nails to mount the ends of the twine or wire on a wall or fence.

Driftwood Birdhouse

Enhance your garden with a charming driftwood birdhouse.

Materials Needed:

  • Driftwood pieces
  • Screws or nails
  • Hammer or screwdriver
  • Drill
  • Wood glue

Instructions:

  1. Build the Frame: Use sturdy pieces of driftwood to create the base and sides of the birdhouse.
  2. Drill the Entrance: Drill a small hole in one of the front pieces for the bird entrance.
  3. Assemble: Attach all sides using screws or nails. Add a roof by gluing or nailing additional driftwood pieces on top.
  4. Mount the Birdhouse: Find a suitable spot in your garden and mount the birdhouse securely.

Conclusion

Creating driftwood outdoor decor offers a wonderful opportunity to blend your love for nature with your creative flair. By choosing driftwood, you’re incorporating a sustainable, durable, and incredibly versatile material into your design, allowing for endless possibilities in transforming your outdoor spaces.

As you embark on your driftwood decor journey, remember to have fun and let your creativity flow. Each piece of driftwood carries a story, and through your projects, you give it a new life and purpose. Your outdoor space will not only look more beautiful and inviting but also tell a unique, personal story that resonates with you and your guests.

Filed Under: Driftwood Ideas Tagged With: crafting, DIY, Driftwood, Nature-Inspired, Outdoor Decor

Driftwood Glass Beads

August 23, 2024 by admin

Have you ever stumbled upon beautifully crafted glass beads and wondered about their origin story? If you have, you’ve come to the right place. Driftwood glass beads are enchanting little gems, each holding its own tale of craftsmanship and natural beauty. These unique pieces can elevate any jewelry design and bring a touch of nature’s elegance to your collection.

Driftwood Glass Beads

What are Driftwood Glass Beads?

Driftwood glass beads are a type of artisanal bead crafted primarily from materials found in nature, specifically driftwood and glass. Combining the rustic charm of weathered driftwood and the iridescent beauty of glass, these beads create a perfect balance between natural elements and human ingenuity.

The Origins

Driftwood glass beads trace their origins back to coastal regions where driftwood is plentiful. As driftwood washes ashore, it undergoes a transformation—sun, sea, and sand perfect it over time. Artisans then collect this driftwood and pair it with glass to create beads that are each unique pieces of art.

Creation Process

The creation of driftwood glass beads is quite the meticulous task. It involves several steps to ensure each bead is unique and high quality:

  1. Collection of Materials:

    • Driftwood is collected from beaches and coastal areas.
    • Glass is often selected or recycled from various sources to pair with the driftwood.
  2. Preparation:

    • Driftwood is cleaned and cut into small, uniform pieces.
    • Glass is melted and sometimes colored or infused with other materials.
  3. Combination:

    • Pieces of driftwood and glass are combined in specialized molds.
    • High temperatures are used to fuse the materials together.
  4. Finishing Touches:

    • Beads are polished and sometimes engraved.
    • Additional treatments like coating or painting may be applied.

Why Choose Driftwood Glass Beads?

Driftwood glass beads bring a unique aesthetic that is difficult to replicate with conventional beads. The combination of natural textures and shimmering glass elements can add a sophisticated yet earthy vibe to your designs.

Unique Aesthetics

Each bead is one-of-a-kind, thanks to the natural variations in driftwood and the artisan’s technique in combining it with glass. These differences create a broad range of textures, colors, and patterns, making it easy to find beads that match your specific vision.

Sustainability

Using driftwood and recycled glass makes these beads environmentally friendly. You’re not only creating beautiful pieces but also contributing to sustainable crafting practices.

How to Use Driftwood Glass Beads

Now that you know what driftwood glass beads are and why they are special, let’s explore how to use them to make your creations stand out.

Jewelry Design

Driftwood glass beads are perfect for various types of jewelry, such as necklaces, bracelets, and earrings. When paired with metal findings or other natural elements like shells and stones, they can look both casual and elegant.

Necklace Design Ideas

  • Single Strand Necklace: A simple strand entirely made up of driftwood glass beads can be strikingly beautiful.
  • Multi-Strand Necklace: Combining driftwood glass beads with other materials in multi-strand designs can add layers of interest.
  • Pendant Necklace: Use a larger driftwood glass bead as a focal point pendant, and complement it with smaller beads.

Bracelet Design Ideas

  • Charm Bracelet: Add driftwood glass beads as charms to create movement and texture.
  • Cuff Bracelet: Incorporate them into cuff designs for a bold statement piece.
Design TypeDescriptionSuitable Bead Size
Single StrandSimple, elegant strand of beadsSmall to Medium
Multi-StrandComplex, layered lookSmall to Medium
Charm BraceletAdds movement with dangling beadsSmall to Large
Pendant NecklaceFocuses on one or few main beadsMedium to Large
Cuff BraceletBig and bold statement pieceMedium to Large

Caring for Driftwood Glass Beads

Proper care is essential to maintain the appearance and longevity of your driftwood glass beads.

Cleaning

Clean them gently using a soft cloth. If necessary, a mild soap solution can be used. Avoid harsh chemicals as they can damage both the driftwood and the glass.

Storage

Store in a cool, dry place. Keep them away from direct sunlight for extended periods to prevent the driftwood from becoming brittle and the colors of the glass from fading.

Maintenance

Regularly check your jewelry for loose beads or frayed cords, especially if you wear them frequently, to ensure they remain secure and in good condition.

Driftwood Glass Beads

Where to Buy Driftwood Glass Beads

Finding high-quality driftwood glass beads can be a fulfilling adventure. Here are some places where you might find them:

Local Artisans and Craft Fairs

One of the best ways to purchase driftwood glass beads is from local artisans at craft fairs. Not only do you support local craftsmen, but you can also often learn the story behind each bead.

Online Marketplaces

Various online marketplaces, such as Etsy and eBay, offer a wide range of driftwood glass beads. Look for shops with high ratings and positive reviews to ensure quality and authenticity.

Source TypeAdvantagesConsiderations
Local ArtisansUnique pieces, supports local economyMay be more expensive
Craft FairsDirect interaction with artistsLimited to specific locations and events
Online MarketplacesWide selection, convenient shoppingRequires careful checking of seller’s credibility

Conclusion

Driftwood glass beads are extraordinary pieces of art that fuse the natural beauty of driftwood with the alluring charm of glass. Perfect for various jewelry designs and committed to sustainable practices, these beads can enhance your crafting projects in a myriad of ways. By understanding their origin, the meticulous process of creation, and how to properly care for them, you are well on your way to making these unique beads a part of your artistic journey.

Filed Under: Driftwood Ideas Tagged With: Beach Crafts, DIY, Driftwood, glass beads, Handmade, Jewelry

Driftwood Owl

August 22, 2024 by admin

Have you ever come across a piece of driftwood and wondered what kinds of art you could create with it? Driftwood is a versatile material that can be shaped and transformed into various forms of artistic expression. One such unique and captivating creation is the Driftwood Owl. It’s fascinating how bits of wood that have been naturally smoothed and shaped by water can be assembled to resemble the wise and majestic owl, an animal known for its mysticism and symbolism.

What is a Driftwood Owl?

A Driftwood Owl is an artistic representation of an owl made entirely out of driftwood pieces. These pieces are collected from beaches, lakes, and rivers where the wood has been worn down by water and time. Artists then use the naturally smooth and uniquely shaped pieces to craft an owl, paying close attention to details like the eyes, feathers, and posture to make the piece as lifelike as possible.

Why Choose Driftwood?

Driftwood offers a unique texture and natural beauty that other materials cannot replicate. Its aged appearance creates a rustic and weathered look, making each piece distinctive. The process of selecting pieces of driftwood and envisioning how they can come together to form a cohesive artwork is itself a form of artistic expression. Plus, using driftwood is eco-friendly, as it repurposes nature’s discarded items into something beautiful and meaningful.

Materials Needed for Creating a Driftwood Owl

Before you begin your project, you’ll need to gather some materials. Here’s a basic list to help you get started:

MaterialDescription
Driftwood PiecesVarious sizes, shapes, and textures. Ensure they are clean and dry.
GlueStrong adhesive like wood glue or epoxy is recommended.
Base PlatformFor stability, you might want a wooden board or another sturdy surface.
ToolsScissors, a small saw, sandpaper, and tweezers.
Paint and BrushesOptional, for additional detail and coloration.

Collecting Driftwood

One of the main components of creating a Driftwood Owl is, of course, the driftwood itself. You can find driftwood at your local beach, lake, or river. When collecting driftwood, consider the following:

  • Shape and Size: Look for pieces that resemble different parts of an owl’s body, like wings, beak, and feet.
  • Smoothness: Ensure the pieces are smooth and free from sharp edges.
  • Dryness: The wood should be completely dry before using it to avoid any mold growth.

Choosing the Right Glue

The choice of glue is crucial for making sure your Driftwood Owl stays intact. Here are some options:

  • Wood Glue: Strong and durable, great for indoor pieces.
  • Epoxy Glue: Waterproof and very strong, ideal for outdoor displays.

Driftwood Owl

Step-by-Step Guide to Making Your Driftwood Owl

Creating a Driftwood Owl can be an enriching and fulfilling project. Here’s a step-by-step guide to help you through the process:

Step 1: Plan Your Design

Start by envisioning your finished owl. You might want to sketch a rough design to help guide you in selecting the driftwood pieces.

Step 2: Select Your Driftwood Pieces

Lay out your collected driftwood pieces and choose the ones that will best represent different parts of the owl:

  • Body: A large, broad piece of wood.
  • Wings: Longer, flatter pieces.
  • Beak: A pointed piece.
  • Eyes: Circular or rounded pieces.

Step 3: Prepare the Base

Select a sturdy base platform for your owl. This could be a plank of wood or any other solid surface. Ensure it is stable enough to hold the weight of the driftwood.

Step 4: Assemble the Body

Start by gluing the largest piece of driftwood to the base. This will serve as the body of your owl. Allow it to dry completely before adding more pieces.

Step 5: Attach the Wings and Head

Next, attach the wing pieces to either side of the body. Then, find a suitable piece for the head and glue it on top of the body.

Step 6: Add Details

  • Eyes: Use rounded pieces or even a small circular object and paint it to resemble eyes. Attach them to the head.
  • Beak: Glue a pointed piece to the center of the face.
  • Feet: You can use smaller pieces of wood to create feet and attach them to the base.

Step 7: Finishing Touches

Once everything is in place, look for areas that need sandpapering to smooth rough edges. Optionally, you can paint your owl to add more character and detail.

Creative Ideas and Variations

While the basic concept of a Driftwood Owl remains the same, the possibilities for creativity are endless. Here are some variations you can try:

Adding Other Natural Elements

Incorporate other materials like stones, shells, or leaves to enhance your owl’s appearance. These elements can be used to add texture or additional details like eyebrows or feathering.

Themed Driftwood Owls

Why not create a Driftwood Owl that aligns with a particular theme? For example, you could create a winter owl with fake snow and frost or a Halloween owl with a spooky face and cobwebs.

Scale and Size

Experiment with different scales and sizes. Create a family of Driftwood Owls in varying heights for a more dynamic display. Small owls could serve as adorable indoor decorations, while larger ones might impress as outdoor statues.

Driftwood Owl

The Symbolism of the Owl

The owl has been a significant symbol in many cultures throughout history. Understanding this symbolism can add depth and meaning to your Driftwood Owl.

Wisdom and Knowledge

Owls are often seen as symbols of wisdom and knowledge. In Greek mythology, the owl is associated with Athena, the goddess of wisdom. By creating a Driftwood Owl, you might be channeling that same energy of intelligence and insight.

Protection and Guardianship

Some cultures believe that owls offer protection and ward off negative forces. Having a Driftwood Owl in your home or garden could serve as a protective charm.

Mystery and Magic

Owls are often seen as mysterious creatures, primarily because of their nocturnal nature. Including driftwood owls in your art collection might evoke a sense of wonder and magic.

Caring for Your Driftwood Owl

Taking care of your Driftwood Owl ensures it stays in good condition for years to come.

Indoor Care

If keeping your Driftwood Owl indoors, ensure it’s not exposed to direct sunlight for prolonged periods, as this can cause the wood to fade or crack. Dust it regularly and check for any loose pieces that might need re-gluing.

Outdoor Care

For outdoor Driftwood Owls, consider applying a sealant to protect it from the elements. Position it in an area where it won’t be continuously exposed to harsh weather conditions.

Conclusion

Creating a Driftwood Owl is a delightful way to channel your creativity while making use of natural materials. From collecting the driftwood to assembling and detailing your owl, each step of the process is filled with opportunities for imagination and expression. Plus, you’ll end up with a unique piece of art that carries the timeless symbolism of the owl—wisdom, protection, and mystery. Whether you display it indoors or outdoors, your Driftwood Owl is sure to be an enchanting centerpiece that sparks conversation and admiration. So, why not give it a try and see where your creativity takes you?

Filed Under: Driftwood Ideas Tagged With: DIY, driftwood art, Nature Crafts, Owl Sculpture

Driftwood Ornaments Diy

August 22, 2024 by admin

Have you ever strolled along the beach and stumbled upon pieces of driftwood, marveling at their unique shapes and worn textures? Turning these treasures into beautiful decorations isn’t just a creative endeavor; it’s an enjoyable way to bring the serenity of the sea into your home. Let’s embark on a journey to craft distinctive and charming driftwood ornaments.

Why Choose Driftwood for Your Crafts?

Choosing driftwood for your DIY projects is not only a way to recycle natural materials but also brings the tranquility and aesthetics of the ocean indoors. Each piece of driftwood has a unique pattern and history, giving your crafts a personalized touch.

Environmental Benefits

Using driftwood is an eco-friendly choice, as it repurposes natural materials that have been washed ashore. By collecting driftwood, you’re aiding in the cleanup of beaches and reducing waste.

Aesthetic Charm

Driftwood’s weathered look adds rustic charm to any décor. Its natural variations in color and texture can perfectly complement coastal, farmhouse, or shabby chic interior designs.

Collecting Driftwood

Collecting your driftwood is the first step of this enjoyable process. But there’s more to gathering these treasures than merely picking up sticks from the beach.

Where to Find Driftwood

Beaches, riverbanks, lakesides, and creek beds are excellent places to find driftwood. Early morning or after a storm often brings new pieces ashore.

Legal and Ethical Considerations

Before you start gathering driftwood, check local regulations. In some places, removing driftwood is prohibited to protect the ecosystem. Always make sure you are not disturbing wildlife or fragile environments.

The Ideal Pieces

Look for pieces that are smooth and free of too much decay. The wood should be dry and not crumbly, ensuring it’s sturdy enough for crafting purposes.

Driftwood Ornaments Diy

Preparing Driftwood for Crafting

Before turning your driftwood into ornaments, it needs to be properly cleaned and treated.

Cleaning Your Driftwood

  1. Rinse Thoroughly: Wash the pieces with fresh water to remove sand, dirt, and salt.
  2. Scrub with a Brush: Use a stiff brush to get rid of any algae or barnacles.
  3. Soak in a Bleach Solution: Submerge the wood in a solution of 1 part bleach to 10 parts water for 24 hours to kill any remaining bacteria and remove odors.

Drying the Driftwood

After cleaning, let the driftwood dry thoroughly. This can take several days or even weeks, depending on the size of the pieces and your local climate. Ensure it’s fully dry to prevent mold or decay later on.

Basic Tools and Materials

Now that your driftwood is ready, let’s gather the essential tools and materials you’ll need for crafting.

Tool/MaterialPurpose
DriftwoodMain material for your ornaments
Hot Glue GunFor securing pieces together
Small SawCutting driftwood to desired sizes
SandpaperSmoothing rough edges
Paints and BrushesAdding color and details
Twine or WireFor hanging ornaments
Small DrillMaking holes for hanging
Varnish or SealantProtecting and finishing the wood

Driftwood Ornaments Diy

Simple Driftwood Ornament Ideas

Now, let’s explore a few charming and simple DIY projects to get you started with driftwood ornaments.

Driftwood Hanging Stars

  1. Materials Needed:

    • Five pieces of driftwood (similar length)
    • Hot glue gun
    • Twine or wire
    • Small drill (optional)
  2. Instructions:

    • Arrange the driftwood pieces into a star shape, overlapping them at the ends.
    • Secure the joints with a hot glue gun.
    • Drill a small hole at the top for hanging or wrap twine around the top point to create a loop.

Driftwood Christmas Trees

  1. Materials Needed:

    • Several pieces of varying lengths
    • Hot glue gun
    • Small wooden dowel or branch for the trunk
    • Twine or wire
  2. Instructions:

    • Arrange the pieces into a tree shape, with the longest at the bottom and the shortest at the top.
    • Glue each piece to the dowel or branch trunk.
    • Attach a loop of twine at the top for hanging.

Driftwood Mobiles

  1. Materials Needed:

    • Multiple pieces of driftwood
    • Twine or fishing line
    • Hot glue gun
  2. Instructions:

    • Drill small holes in one end of each piece of driftwood.
    • Thread twine or fishing line through the holes.
    • Tie the pieces to a horizontal driftwood piece, spacing them as desired.
    • Ensure the lengths vary for an attractive mobile design.

Advanced Driftwood Ornaments

Once you’re comfortable with basic projects, you might want to try more intricate designs.

Driftwood Mirror Frame

  1. Materials Needed:

    • Small mirror
    • Several identical pieces of driftwood
    • Hot glue gun
  2. Instructions:

    • Arrange driftwood pieces around the mirror to form a frame.
    • Secure each piece with a hot glue gun.
    • Consider adding a backing for extra stability.

Driftwood Candle Holders

  1. Materials Needed:

    • Thick pieces of driftwood
    • Tea light candles
    • Small drill or chisel
  2. Instructions:

    • Measure the diameter of the tea light candles.
    • Drill or chisel out holes in the driftwood to fit the candles.
    • Smooth the edges with sandpaper if necessary.

Driftwood Wall Art

  1. Materials Needed:

    • Multiple driftwood pieces
    • Canvas or wooden backing
    • Hot glue gun
  2. Instructions:

    • Arrange the driftwood pieces in a pattern or abstract shape.
    • Glue them onto the canvas or wooden backing.
    • Experiment with geometric designs or recreate scenes.

Customizing Your Driftwood Ornaments

To make your ornaments uniquely yours, consider adding personal touches. Let’s discuss some customization techniques.

Painting and Decorating

  1. Acrylic Paints: Add patterns, designs, or color blocks to make your ornaments stand out.
  2. Decoupage: Use mod podge to adhere decorative paper or fabric to the driftwood.
  3. Beadwork: Incorporate beads or small adornments using twine or wire.

Personal Messages

Engrave or paint your favorite quotes, names, or special dates onto the driftwood to add a sentimental touch.

Maintenance and Preservation

It’s essential to maintain your driftwood ornaments to ensure they last for years.

Sealing

Apply a varnish or sealant to protect the wood from moisture and damage. This can be especially important if the ornaments are displayed outdoors.

Cleaning

Regularly dust your ornaments and wipe them with a damp cloth when necessary. Avoid using harsh chemicals, as they can damage the wood.

Inspiration and Ideas

Sometimes, a bit of inspiration can spark your creativity. Here are some ideas to consider.

Seasonal Ornaments

  • Autumn: Incorporate dried leaves, pine cones, and other seasonal elements.
  • Winter: Add faux snow, glitter, or small Christmas decorations.
  • Spring: Use pastel paints and embellishments like flowers or butterflies.

Thematic Ornaments

  • Nautical: Add seashells, anchors, and other marine-themed items.
  • Rustic: Use neutral tones and natural fibers such as jute or burlap.
  • Modern: Incorporate metallic paints or geometric shapes for a contemporary look.

Sharing and Gifting Driftwood Ornaments

Your handmade driftwood ornaments make fantastic gifts and can also be shared in various ways.

Gifting

Wrap your ornaments in rustic paper or burlap for a beautiful, eco-friendly presentation. Personalized messages or tags can make the gift even more special.

Selling

If you’re particularly proud of your creations, consider selling them online or at local craft fairs. Handmade items are always in demand, especially those with a unique, natural aesthetic.

Troubleshooting and Tips

Even the most experienced crafters encounter challenges. Here are some common issues and how to solve them.

Uneven Pieces

If your driftwood pieces are uneven, use a small saw to trim them. Sandpaper can smooth rough edges and make pieces more uniform.

Glue Not Holding

Ensure the surfaces are clean and dry before gluing. Sometimes, using a stronger adhesive like epoxy can help for more durable bonds.

Pieces Not Aligning

Lay out your design before gluing to see how the pieces fit together. You can also use clamps to hold pieces in place while the glue dries.

Conclusion

Creating driftwood ornaments is a fulfilling and relaxing way to bring a piece of the beach into your home. Each project is a unique masterpiece, reflecting the natural beauty and tranquility of the sea. From simple stars to intricate wall art, the possibilities are endless. Grab your tools, collect some driftwood, and let your creativity flow.

Filed Under: Driftwood Ideas Tagged With: crafts, DIY, Handmade, home decor, Ornaments

Driftwood Ornaments

August 22, 2024 by admin

Have you ever found yourself walking along the beach and marveling at the beautiful pieces of driftwood washed ashore? These natural treasures, smoothed by the ocean, carry a sense of timeless beauty and mystique. Creating driftwood ornaments is not only a wonderful way to repurpose these pieces but also an opportunity to add a bit of coastal charm to your living space. Let’s embark on a journey to transform simple driftwood into stunning decor items that will captivate anyone who sees them.

Driftwood Ornaments

What is Driftwood?

Driftwood refers to the pieces of wood that have been washed ashore by the action of tides, waves, or winds. These wooden fragments can come from various sources, be it broken tree branches, roots, or entire tree trunks. Over time, the constant abrasion from sand and water smooths the wood, giving it a weathered and rustic appearance. This natural process makes each piece of driftwood unique, boasting different textures, shapes, and hues.

Where to Find Driftwood

Driftwood can be commonly found along coastlines, riverbanks, and lakeshores. Beaches are particularly abundant with these woody gems, especially after storms or high tides. While collecting driftwood, it’s essential to be mindful of local regulations, as some areas may have restrictions to protect natural habitats. Always ensure you gather responsibly to preserve the environment.

The Appeal of Driftwood

The allure of driftwood lies in its organic, weathered look, which brings a touch of nature and a story of its journey to your home. Its versatility allows for a wide range of crafting possibilities, from small ornaments to larger pieces of furniture. Driftwood can complement various decor styles, including coastal, rustic, and even modern settings, making it a popular choice for creative projects.

Materials Needed for Driftwood Ornaments

To begin your adventure in creating driftwood ornaments, you’ll need a few basic materials and tools. These essentials make the crafting process smooth and enjoyable, allowing you to focus on your creativity.

Material/ToolPurpose
Driftwood PiecesPrimary material for ornament creation
SandpaperSmoothing rough edges and surfaces
Glue (wood glue/E-6000)Strong adhesive for attaching pieces
Drill and Drill BitsCreating holes for hanging or joining pieces
Twine or Fishing LineFor hanging ornaments
Wood Sealer (optional)Preserving the wood, adding shine
Assorted Beads, ShellsDecorative elements for embellishment
Paints and Brushes (optional)Adding color or designs to your pieces

Preparing Driftwood

Before you start crafting, it’s important to prepare your driftwood properly. Begin by cleaning the wood to remove any debris, algae, or salt. You can soak the pieces in a mixture of water and bleach (ratio of 9:1) for 24 hours, then rinse thoroughly and let them dry completely. Sanding the driftwood is the next step; this will help you achieve a smooth surface and eliminate any rough edges.

Crafting Driftwood Ornaments

Now that your materials are ready, let’s dive into a few delightful driftwood ornament projects. These crafts are simple and suitable for all skill levels, making them a great way to spend a creative afternoon.

Driftwood Christmas Tree

A driftwood Christmas tree is a charming and rustic addition to your holiday decor. It’s easy to make and can be customized to your liking.

  1. Materials Needed:

    • Several pieces of driftwood (varying lengths)
    • Wood glue
    • Small wooden base or a sturdy piece of driftwood as a base
    • Drill and drill bits
    • Twine or fishing line
  2. Steps:

    1. Start by selecting a piece of driftwood that will serve as the trunk.
    2. Arrange smaller pieces horizontally on both sides of the trunk, forming a triangular tree shape.
    3. Drill small holes where the branches (horizontal driftwood) will be attached to the trunk and glue them into place.
    4. Attach your tree to the base using strong glue or screws for stability.
    5. Add twine or fishing line at the top to hang if desired.

Driftwood Garland

A driftwood garland is a versatile and stylish decor item that you can hang on your mantle, window, or wall.

  1. Materials Needed:

    • Multiple small pieces of driftwood
    • Twine or durable string
    • Drill and drill bits
  2. Steps:

    1. Drill small holes in each piece of driftwood.
    2. Thread the twine through the holes, spacing the driftwood pieces evenly apart.
    3. Continue until you have achieved your desired length.
    4. Tie knots on either end of the garland to secure the pieces in place.

Driftwood Mobile

A driftwood mobile is perfect for adding a whimsical touch to any room. It’s especially lovely when hung near a window where it can catch the breeze.

  1. Materials Needed:

    • Long, slender pieces of driftwood
    • Twine or fishing line
    • Glue (wood glue or E-6000)
    • Decorative elements like beads, shells
  2. Steps:

    1. Arrange your driftwood pieces in a balanced manner, considering the overall design.
    2. Attach twine or fishing line to each piece.
    3. Consider adding decorative elements like beads or shells to the lines.
    4. Connect all lines to a central piece of driftwood, ensuring it hangs evenly.
    5. Hang your mobile from the ceiling or a hook.

Advanced Driftwood Crafts

Once you feel comfortable with basic driftwood ornaments, you might want to explore more complex projects. These advanced crafts require a bit more skill but yield beautiful results that are sure to impress.

Driftwood Mirror Frame

Creating a driftwood frame for a mirror adds a coastal or rustic touch to your home. It’s a gorgeous way to bring natural elements into your interior design.

  1. Materials Needed:

    • Driftwood pieces
    • Mirror
    • Wood glue or strong adhesive like E-6000
    • Hacksaw (optional for cutting driftwood to size)
  2. Steps:

    1. Choose a variety of driftwood pieces that complement each other in terms of size and shape.
    2. Lay out your mirror on a flat surface.
    3. Arrange the driftwood pieces around the mirror to form a frame. You may need to cut some pieces to fit perfectly.
    4. Once satisfied with the layout, glue the driftwood pieces to the mirror’s edges.
    5. Let the glue dry completely before hanging your new mirror.

Driftwood Lamp

A driftwood lamp is not just functional but also an artistic statement piece in any room.

  1. Materials Needed:

    • Large, sturdy piece of driftwood
    • Lamp kit (available at craft or hardware stores)
    • Drill and drill bits
    • Lampshade
    • Glue or screws (for additional stability)
  2. Steps:

    1. Select a solid piece of driftwood to serve as the base of the lamp.
    2. Follow the instructions on the lamp kit to attach the electrical components to the driftwood. This may involve drilling a hole to run the wire through.
    3. Secure the lampshade holder and screw in a light bulb.
    4. Plug in your lamp to ensure it works properly.
    5. Add any finishing touches, like additional driftwood pieces or decorative elements.

Driftwood Wall Art

An eye-catching piece of driftwood wall art can serve as a focal point in any room.

  1. Materials Needed:

    • Multiple pieces of driftwood
    • Canvas or wooden backing
    • Wood glue or strong adhesive
    • Paint (optional)
  2. Steps:

    1. Choose a canvas or wooden backing for your wall art.
    2. Arrange your driftwood pieces in a visually pleasing design. This could be abstract or a specific shape, like a heart or tree.
    3. Glue the driftwood pieces to the backing, pressing firmly to ensure they adhere properly.
    4. Allow the glue to dry thoroughly.
    5. Consider adding paint or other decorative elements to enhance your artwork.

Driftwood Ornaments

Tips for Working with Driftwood

Crafting with driftwood is a rewarding experience, but it can come with its own set of challenges. Here are a few tips to help you as you work with this unique material.

Safety First

Always prioritize safety when working with tools like drills and saws. Wear safety goggles and gloves to protect your eyes and hands. If you use any sort of adhesive, ensure you are in a well-ventilated area to avoid inhaling fumes.

Choosing Quality Driftwood

When selecting driftwood, look for pieces that are sturdy and free of rot. Soft or decaying wood can be challenging to work with and may not hold together well.

Preserving Driftwood

To ensure your driftwood projects last, you might want to seal the wood. This can prevent further deterioration and add a nice finish. Clear polyurethane or wood sealers work well for this purpose.

Experiment with Designs

Don’t be afraid to experiment with different arrangements and designs. Driftwood is incredibly versatile, and there are endless possibilities for creativity. Whether you’re making a small ornament or a large art piece, let your imagination guide you.

Driftwood Ornament Ideas

If you’re looking for more inspiration, consider these additional driftwood ornament ideas that can add charm to your home:

Driftwood Jewelry Holder

Create an elegant holder for your necklaces and earrings using a piece of driftwood. Drill small holes or attach hooks to the wood to hang your jewelry.

Driftwood Coasters

Slice a thicker piece of driftwood into neat rounds to make rustic coasters. Sand the edges to make them smooth, and consider sealing them to protect the wood.

Driftwood Picture Frame

A driftwood picture frame can be a wonderful way to display your favorite photos. Use small pieces of driftwood to decorate a plain picture frame, adhering them with glue.

Driftwood Candle Holder

Driftwood can make a beautiful base for candles. Secure small candles onto a piece of driftwood, ensuring they are stable and won’t tip over.

Driftwood Key Holder

Attach small hooks to a piece of driftwood and mount it near your door. This makes for a practical and charming place to hang your keys.

Driftwood Dreamcatcher

Incorporate driftwood into a dreamcatcher design for a unique twist. Use the driftwood as the base, attaching feathers, beads, and other materials to create a beautiful and symbolic piece of art.

Enhancing Your Driftwood Ornaments

To make your driftwood ornaments even more special, consider adding personal touches. Here are some ideas to enhance your creations:

Adding Color

While the natural look of driftwood is beautiful, adding a splash of color can create a striking contrast. Use acrylic paints to add designs or patterns to your driftwood pieces. You can paint them entirely or add subtle details.

Incorporating Textiles

Combine driftwood with textiles like fabric, rope, or yarn for added texture and interest. Wrapping sections of the wood with these materials can introduce a new dimension to your ornaments.

Using Natural Elements

Enhance the organic feel of your driftwood ornaments by incorporating other natural elements such as seashells, stones, or dried flowers. These additions can complement the driftwood and create a cohesive, nature-inspired look.

Benefits of Crafting with Driftwood

Engaging in driftwood crafts offers several benefits beyond just creating beautiful ornaments. Here’s why you might want to consider taking up this hobby:

Eco-Friendly

Using driftwood for crafting is a sustainable way to repurpose natural materials that have washed up on shore. By giving these pieces of wood a new life, you are contributing to reducing waste and taking advantage of what nature provides.

Therapeutic

Crafting can be highly therapeutic, offering a chance to unwind and focus on a creative task. Working with your hands and creating something beautiful can provide a sense of accomplishment and relaxation.

Personalization

Crafting with driftwood allows you to create unique, personalized items for your home or gifts for loved ones. Each piece you make is one of a kind, reflecting your personal style and creativity.

Community Engagement

Sharing your passion for driftwood crafts can lead to community engagement. Join local craft groups, participate in beach clean-up events, or even start a small business selling your creations at markets and craft fairs.

Conclusion

Driftwood ornaments offer a beautiful way to bring a piece of nature into your home. From simple projects like garlands and mobiles to more advanced crafts like lamps and mirror frames, the possibilities are endless. Each piece of driftwood tells a story, and through your creativity, you can give it a new life and purpose.

Remember to gather your materials responsibly, prioritize safety, and have fun experimenting with different designs and techniques. Whether you’re a seasoned crafter or a beginner, working with driftwood will surely bring joy and a sense of connection to the natural world. Happy crafting!

Filed Under: Driftwood Ideas Tagged With: Coastal Decor, crafts, DIY, Driftwood, Ornaments

Driftwood Nursery Decor

August 21, 2024 by admin

Have you ever considered using driftwood to create a serene and natural-themed nursery? Driftwood, with its earthy tones and unique textures, can bring an element of calm and a touch of nature into your baby’s room. Whether you live by the coast or in the city, incorporating driftwood into your nursery decor can be both charming and functional.

What is Driftwood and Why Use It?

Driftwood refers to pieces of wood that have been washed ashore by the sea or another body of water. Over time, the water weathers and smoothens the wood, giving it a distinctive look that is both rustic and beautiful. Using it in nursery decor adds an organic feel to the space, which can be soothing for your baby. Plus, it’s a wonderful way to bring a slice of the natural world indoors.

The Benefits of Driftwood in Nursery Decor

Driftwood brings numerous benefits when used in nursery decor:

  • Eco-Friendly: Driftwood is a sustainable material because it’s naturally reclaimed from water bodies.
  • Aesthetic Appeal: It offers a unique, timeless look that can easily blend with various design styles.
  • Versatility: From furniture to decorative accents, driftwood can be incorporated in many ways.
  • Soothing Ambiance: The natural hues and textures can create a peaceful environment, ideal for a nursery.

Choosing the Right Driftwood Pieces

Selecting the right driftwood pieces is essential to ensure they fit seamlessly into your nursery’s theme. You want to look for wood that’s not only aesthetically pleasing but also safe and functional.

Size and Shape

Consider the scale of your nursery when choosing driftwood. Larger pieces can serve as statement items, while smaller pieces can be used for subtle accents.

TypeIdeal Use
Large LogsFurniture, Shelves
Small BranchesWall Art, Mobiles

Condition and Safety

Ensure the driftwood is clean and free from sharp edges. Sanding down the rough spots can make the wood safer for a nursery setting. Always seal the driftwood to protect it from pests and maintain its longevity.

Driftwood Nursery Decor

Ideas for Driftwood Nursery Decor

There are countless creative ways to incorporate driftwood into your nursery decor. Here are some ideas to get you started.

Driftwood Furniture

Furniture made from driftwood can offer both form and function. Imagine a baby cot that combines rustic driftwood with modern safety features, or a changing table with driftwood accents.

Driftwood Shelving

Driftwood shelves can be both decorative and practical.

Shelving StyleDescription
Floating ShelfMinimalist look, perfect for books or toys.
Bracket ShelfDriftwood with metal brackets for stability.
Corner ShelfUtilizing room corners, great for decor.

Driftwood Wall Art and Decor

Wall art and decor pieces can significantly influence the room’s ambiance. Driftwood wall hangings can be customized to suit your style, and they pair beautifully with other natural elements.

  • Mobiles: Create a baby mobile with driftwood and hanging elements like seashells or soft toys.
  • Frames: Use driftwood to frame mirrors, photos, or artwork.
  • Hooks: Driftwood hooks can be both decorative and functional for hanging clothes or accessories.

Lighting with Driftwood

Lighting plays a crucial role in setting the mood of a nursery. Driftwood lamps or chandeliers can add a warm, earthy glow to the room.

Lighting TypeDescription
Table LampDriftwood base with fabric or glass shade.
Wall SconceMounted driftwood pieces with LED lights.
ChandelierA statement piece with driftwood and pendant lights.

DIY Driftwood Projects

Creating your own driftwood decor can be a fulfilling project. It allows you to personalize your nursery while also being budget-friendly.

Simple Driftwood Crafts

Driftwood Garland

A driftwood garland is an easy yet charming addition.

  1. Collect small, similar-sized driftwood pieces.
  2. Drill small holes through each piece.
  3. String them together using jute or hemp rope.

Driftwood Mobile

A mobile made from driftwood can be a soothing visual for your baby.

  1. Select a sturdy piece of driftwood as the main bar.
  2. Attach strings of different lengths to the driftwood.
  3. Add lightweight items like feathers or crafted shapes to the ends of the strings.

Advanced Driftwood Projects

If you’re up for more complex projects, you can create larger driftwood pieces that serve functional roles in the nursery.

Driftwood Rocking Chair

A driftwood rocking chair can be a beautiful but challenging project. Ensure you have the right tools and materials, such as sturdy driftwood, screws, and a comfortable cushion. The end result is a unique, one-of-a-kind chair that adds character to your nursery.

Driftwood Nursery Decor

Maintaining Driftwood Decor

Proper maintenance is essential to keep your driftwood pieces looking great and lasting long. Here are some tips for caring for your driftwood decor.

Cleaning and Dusting

Regular cleaning and dusting can help maintain the aesthetic appeal of your driftwood.

  • Dusting: Use a soft, dry cloth to dust off the driftwood pieces.
  • Cleaning: A mixture of mild soap and water can be used for deeper cleaning. Ensure the wood is completely dry afterward.

Sealing Driftwood

Sealing is crucial for protecting driftwood from the elements and pests.

  • Types of Sealants: Tung oil, linseed oil, or polyurethane can be used to seal driftwood.
  • Application: Apply the sealant with a brush, ensuring an even coat. Reapply as needed to maintain the wood’s protective layer.

Conclusion

Incorporating driftwood into your nursery decor can create a beautiful, calming environment for both you and your baby. From furniture to small decorative accents, driftwood offers a versatile, eco-friendly option that’s sure to enhance any nursery theme. Whether you choose to purchase ready-made items or embark on DIY projects, your nursery will undoubtedly benefit from the natural charm and serenity that driftwood provides.

Filed Under: Driftwood Ideas Tagged With: Baby Room, Decor, DIY, Driftwood, Nursery

Driftwood Glass Bowl Ideas

August 21, 2024 by admin

Have you ever stumbled upon a piece of driftwood on a beach and imagined the creative possibilities it holds? If so, this article is for you. Driftwood, combined with glass bowls, can transform into stunning home decor pieces that reflect your unique style and connection to nature. Let’s explore various driftwood glass bowl ideas to inspire your creativity and add a rustic yet elegant touch to your living space.

Understanding Driftwood

Driftwood is more than just washed-up wood on the beach; it’s nature’s artwork. Distinct in shape and texture, each piece is a one-of-a-kind creation, shaped by the forces of water and time. Before getting into DIY projects and decorative ideas, it’s essential to understand what driftwood is and how to properly prepare it for use.

What is Driftwood?

Driftwood refers to pieces of wood that have been washed ashore by waves, winds, and tides. Over time, these wooden pieces are smoothed and seasoned by saltwater, giving them a unique texture and appearance.

Preparing Driftwood for Use

Before using driftwood in any project, it’s important to clean and preserve it to avoid introducing harmful elements into your home. Here’s a simple step-by-step guide:

  1. Cleaning: Start by scrubbing the driftwood with a brush to remove sand, dirt, and algae.
  2. Soaking: Soak the driftwood in a water and bleach solution (1 part bleach to 10 parts water) for 24 hours to kill any bacteria and remove odors.
  3. Rinsing: Rinse the driftwood thoroughly with fresh water to remove any bleach residue.
  4. Drying: Let the driftwood dry completely in the sun for a few days to ensure it’s ready for use.

Understanding these basics will ensure your driftwood projects are not only beautiful but also safe and long-lasting.

Driftwood Glass Bowl Ideas

Now that you know how to prepare your driftwood, let’s move on to some inspiring project ideas. These ideas range from simple decorative pieces to more elaborate functional items.

Centerpiece Driftwood Glass Bowl

One of the most eye-catching ways to use driftwood and glass bowls together is by creating a centerpiece for your dining or coffee table. This project is straightforward but delivers a significant impact.

Materials Needed:

  • A large piece of driftwood
  • A glass bowl (preferably rounded or oval)
  • Strong adhesive glue

Instructions:

  1. Position your driftwood: Find a stable position where your driftwood naturally balances.
  2. Attach the glass bowl: Using strong adhesive, attach the base of the glass bowl to a flat section of the driftwood.
  3. Let it set: Allow the adhesive to fully cure.
  4. Style it: Fill your glass bowl with decorative stones, shells, or even a small plant for added charm.

Driftwood Candleholder with Glass Bowl

Combine the rustic charm of driftwood with the elegance of candlelight to create a driftwood candleholder with a glass bowl. This is perfect for a mantelpiece or as a table accent.

Materials Needed:

  • Driftwood (long and flat pieces work best)
  • Small glass bowls or votive candle holders
  • Tea light candles
  • Epoxy glue

Instructions:

  1. Arrange the driftwood: Position the pieces of driftwood in a way that they form a stable base.
  2. Attach the bowls: Use epoxy glue to attach the small glass bowls or votive holders to the driftwood.
  3. Allow to dry: Let the glue dry completely before placing the candles in the holders.
  4. Light it up: Place tea light candles in the glass holders and light them for a cozy glow.

Driftwood Hanging Planter with Glass Bowl

For a unique way to display your plants, consider creating a hanging planter using driftwood and a glass bowl.

Materials Needed:

  • A sturdy piece of driftwood
  • A glass bowl with an edge for hanging
  • Durable rope or twine
  • Small plants or succulents
  • Potting soil

Instructions:

  1. Drill holes in the driftwood: Make two holes on opposite ends of the driftwood for hanging.
  2. Attach the glass bowl: If your glass bowl has an edge, you can tie the rope or twine around it securely.
  3. Hanging: Thread the rope or twine through the holes in the driftwood.
  4. Pot the plants: Fill the glass bowl with potting soil and plant your succulents.
  5. Hang it up: Find a suitable place to hang your new planter, ensuring it’s secure and balanced.

Driftwood and Glass Bowl Aquarium

Create a miniature aquatic ecosystem by converting your driftwood and glass bowl into an aquarium. This project adds a serene touch to any room and is enjoyable for both children and adults.

Materials Needed:

  • A large, clear glass bowl
  • Driftwood pieces
  • Small aquatic plants
  • Fish (such as Betta fish or small tetras)
  • Aquarium gravel

Instructions:

  1. Clean the materials: Ensure the glass bowl and driftwood are clean and free of contaminants.
  2. Arrange the driftwood: Place the driftwood inside the glass bowl in a visually appealing manner.
  3. Add gravel: Pour a layer of aquarium gravel into the bowl.
  4. Plant the aquatic plants: Insert small aquatic plants into the gravel.
  5. Fill with water: Slowly fill the bowl with water, being careful not to displace the gravel and plants.
  6. Introduce the fish: Once the water has settled, introduce your fish to their new home.

Driftwood Glass Bowl Terrarium

A terrarium is a fantastic way to bring a piece of nature indoors. Create a miniature landscape using driftwood, a glass bowl, and various terrarium plants.

Materials Needed:

  • Driftwood
  • Glass bowl with a wide opening
  • Small ferns, mosses, and other terrarium plants
  • Activated charcoal
  • Potting soil

Instructions:

  1. Prepare the bowl: Place a layer of activated charcoal at the bottom of the bowl to prevent odors and mold.
  2. Add driftwood: Position the driftwood within the bowl as a focal point.
  3. Layer soil: Add a layer of potting soil atop the charcoal.
  4. Plant your greens: Carefully plant the ferns, mosses, and other small plants around the driftwood.
  5. Maintain it: Water sparingly and keep the terrarium in indirect sunlight.

Driftwood and Glass Bowl Chandelier

For a more advanced project, consider creating a driftwood and glass bowl chandelier. This stunning piece can become the highlight of any room, offering both light and a natural element.

Materials Needed:

  • Multiple small glass bowls
  • Driftwood branches
  • Light bulbs and wiring kit
  • Chains or sturdy rope for hanging

Instructions:

  1. Design your chandelier: Sketch your design to determine how the bowls and driftwood will be arranged.
  2. Drill holes for wiring: Carefully drill holes through the driftwood to run the wiring.
  3. Attach the bowls: Secure the glass bowls to the driftwood using epoxy.
  4. Install the wiring: Run the wiring through the holes and attach the light bulbs.
  5. Hang the chandelier: Securely hang the chandelier using chains or sturdy rope from a ceiling mount.

Driftwood Glass Bowl Ideas

Maintenance Tips for Driftwood Glass Bowl Projects

Once you’ve completed your driftwood glass bowl project, you’ll want to keep it looking beautiful and pristine. Here are some maintenance tips to ensure longevity and safety.

Regular Cleaning

Dust and dirt can accumulate on your driftwood and glass bowl, diminishing its aesthetic appeal. Regularly dust and clean your piece using a microfiber cloth. For the glass bowl, you can use a glass cleaner and a lint-free cloth to keep it sparkling.

Dealing with Moisture

If your project involves water, such as an aquarium or a planter, monitor the driftwood for signs of mold or algae. Regular water changes in aquariums and appropriate drainage in planters will keep your item fresh and clean.

Refreshing the Driftwood

Over time, driftwood might lose its luster. To refresh it, you can lightly sand the surface and apply a coat of clear matte varnish to revive its natural beauty without changing its texture.

Maintaining Plants and Fish

For projects involving living elements like plants or fish, ensure you’re providing the proper care. Keep plants trimmed and healthy, and follow established guidelines for feeding and caring for any aquatic life.

Concluding Thoughts

Incorporating driftwood and glass bowls into your home decor opens up a world of creative possibilities. Whether you’re crafting a simple centerpiece or an elaborate chandelier, these projects offer a way to bring the beauty of nature indoors. Each piece you create will not only be unique but also a testament to your creativity and appreciation for natural elements. So go ahead, gather your materials, and let your imagination guide you in creating stunning driftwood glass bowl creations.

Driftwood Glass Bowl Ideas

Filed Under: Driftwood Ideas Tagged With: crafts, DIY, Driftwood, Glass Bowl, home decoration

  • « Previous Page
  • Page 1
  • …
  • Page 22
  • Page 23
  • Page 24
  • Page 25
  • Page 26
  • …
  • Page 41
  • Next Page »

Primary Sidebar

Driftwood4us.com, is a participant in the Amazon Services LLC Associates Program, an affiliate advertising program designed to provide a means for sites to earn advertising fees by advertising and linking to amazon.com.