• Skip to main content
  • Skip to primary sidebar
  • Terms and Conditions
  • Privacy Policy
  • Contact

Driftwood 4 Us

Just About Driftwood

DIY

Driftwood Macrame Plant Hanger

May 21, 2025 by admin

Have you ever gazed upon the intriguing charm of driftwood and wondered how you could incorporate it into your home décor? Driftwood is more than just a relic from the beach; it’s a unique, natural element that can elevate your interior design in ways that are both rustic and elegant. In this guide, you’ll learn how to create a beautiful and functional driftwood macrame plant hanger that will not only spruce up your space but also bring a bit of the outdoors inside.

Driftwood Macrame Plant Hanger

Understanding Driftwood and Its Appeal

Driftwood, swept by waves and polished by time, carries with it a story of journey and resilience. Its coarse texture and unique shapes offer a glimpse into nature’s raw beauty. Integrating driftwood into home décor has gained popularity due to its sustainable nature and aesthetic value.

Why Choose Driftwood for a Macrame Project?

Driftwood serves as an excellent medium for macrame projects because of its strength and visual appeal. Each piece is unique, granting a one-of-a-kind outcome to your creations like plant hangers. Its irregular shapes provide an interesting contrast to the uniformity of macrame knots, creating a fascinating visual dynamic.

Benefits of Using Driftwood in Home Decor

Utilizing driftwood in your decor can infuse your home with a sense of calm and earthiness. It’s a sustainable choice as it repurposes elements already present in nature. Moreover, its neutral tones make it versatile, blending seamlessly with various color schemes and styles from modern to coastal.

The Art of Macrame: A Brief Overview

Macrame is the art of knotting cords or strings in patterns to make decorative and functional objects. With roots tracing back centuries, it has evolved from traditional textiles to a modern craft form that’s perfect for home decor.

Key Macrame Knots for Beginners

To begin your macrame journey, you need to familiarize yourself with a few basic knots. Here’s a quick overview:

  • Square Knot: This is the cornerstone of many macrame projects. It involves four strands: the outer two are working cords, and the inner two are filler cords.
  • Half Hitch Knot: By knotting around a central cord, you create a chain that can form spirals.
  • Lark’s Head Knot: Commonly used to attach cords to a piece of driftwood, it’s simple and sturdy.
Knot NameDescription
Square KnotCreates a flat, wide knot.
Half HitchUsed for making rows or spirals.
Lark’s HeadSecures cords to driftwood.

The Appeal of Combining Driftwood and Macrame

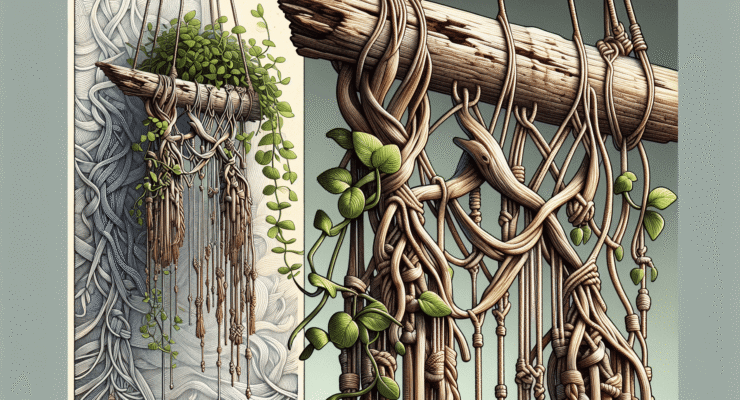
When you combine driftwood and macrame, you get the best of both worlds: the rugged, natural beauty of driftwood and the intricate patterns and textures of macrame. This pairing is particularly enchanting for plant hangers as it not only cradles your green friends but also adds an artistic touch to any room.

Creating Your Driftwood Macrame Plant Hanger

Let’s now venture into the step-by-step creation of your own driftwood macrame plant hanger. Gather your tools and materials and prepare to transform them into art.

Materials Needed

To embark on this project, you’ll need the following materials:

  • Driftwood piece of your choice
  • Macrame cord (3-4mm thickness recommended)
  • Scissors
  • Tape measure
  • Plant pot
  • Hooks or ceiling mounts for hanging

Choosing the Right Driftwood

Select a piece of driftwood that’s sturdy, not brittle, and appropriately sized for the hanging space. Its shape should balance aesthetics with functionality, providing places for your cords to attach securely.

Preparing the Materials

Before you start knotting, measure and cut your macrame cords into lengths that fit your specific project. An average plant hanger typically requires cords that are about four to five times the desired finished length. You may want to start longer and trim down later to ensure you have enough material.

Step-by-Step Guide to Crafting a Driftwood Macrame Plant Hanger

Now that your materials are ready, let’s dive into the creation process. Each step below will guide you through making a simple yet beautiful driftwood macrame plant hanger.

Step 1: Attach Cords to Driftwood

Using the Lark’s Head Knot, attach your macrame cords to the driftwood. This will act as the foundation for your design. Ensure the cords are secured evenly along the driftwood to distribute weight properly.

Step 2: Form the Main Pattern

Create your main pattern using square knots. You can get creative here: form a tightly knit section at the top and then gradually loosen the pattern as you move down, or mix it up with different knot styles for varied textures.

Step 3: Create the Plant Holder

Use a series of square knots and spiral patterns to form a basket or cradle where the plant pot will sit. Ensure this section is snug enough to hold the pot securely but loose enough to insert or remove the pot easily.

Step 4: Finishing and Trimming

Once your main structure is complete, trim excess cords to your desired length, creating a tassel effect if you wish. Ensure everything is even and robust enough to hold the weight of your plant.

Step 5: Final Assembly and Hanging

Attach your finished macrame piece to hooks or ceiling mounts in your desired location. Ensure the space receives adequate light if you’re planning to hang living plants.

Driftwood Macrame Plant Hanger

Maintenance and Care for Your Plant Hanger

Maintaining your driftwood macrame hanger ensures it stays beautiful and functional for years to come. Here are some quick tips.

Caring for Driftwood

While driftwood is durable, it benefits from occasional cleaning to remove dust and buildup. Gently wipe it with a damp cloth, being careful not to disturb the macrame knots.

Macrame Cord Maintenance

Macrame cords can collect dust, especially in high-traffic areas. Light vacuuming or gentle shaking can help keep them clean. If necessary, spot clean using mild soap and water.

Tips for Plant Care in a Hanger

When watering the plant, ensure water doesn’t spill excessively onto the macrame cords as this may lead to discoloration. Opt for plants that thrive in hanging environments, such as trailing ivy or spider plants, which can cascade beautifully from the hanger.

Creative Variations and Personalization

Once you’ve mastered the basics, consider experimenting with different types of driftwood or macrame patterns. This customization can reflect your personal style or blend seamlessly with existing decor.

Exploring Different Macrame Patterns

Dive into more advanced macrame patterns such as the Josephine knot or clove hitch for an added challenge. These sophisticated designs can significantly enhance the visual appeal of your plant hangers.

Incorporating Different Materials

While driftwood is a fantastic choice, you can also incorporate other materials like copper pipes or metal hoops for a modern twist. Mixing different textures and materials can create a truly unique and striking piece.

Adding Decorative Elements

You can also embellish your macrame hanger with beads, feathers, or painted accents on the driftwood. These additions offer a playful touch, allowing for seasonal or thematic decorations.

The Environmental Impact and Sustainability

Driftwood macrame hangers are not just stylish; they’re a nod to sustainability. Embracing this form of decor supports eco-friendly practices and conscious living.

Sourcing Sustainable Driftwood

Ensure your driftwood is sourced responsibly. Collect pieces found naturally washed ashore without disturbing local wildlife habitats or removing too much from delicate ecosystems.

Reducing Waste with DIY Projects

Creating your own home decor reduces the demand for mass-produced items, often made with non-renewable materials. Crafting with driftwood and natural fibers promotes creativity while minimizing waste and overproduction.

Conclusion: Bringing It All Together

Creating a driftwood macrame plant hanger is more than just a project; it’s a journey into the appreciation of nature’s beauty and the joy of crafting. This timeless piece will not only adorn your space but also serve as a gentle reminder of the harmony between aesthetic appeal and sustainable living. Whether you’re a seasoned crafter or a beginner, the art of combining driftwood and macrame offers endless possibilities, accentuating your living space with rustic charm and personal flair.

Filed Under: Driftwood Ideas Tagged With: crafts, DIY, Driftwood, Macrame, Plant Hanger

Driftwood Fishing Lures

May 18, 2025 by admin

Have you ever considered what treasures might wash up on the shore, shaped by the sea and sculpted by time? What about the idea of turning these treasures into something functional and creative, like driftwood fishing lures? With a dash of innovation and creativity, you can transform pieces of driftwood into effective tools for fishing. Below, you’ll find a comprehensive guide to crafting your own driftwood fishing lures, perfect for adding a personal touch to your fishing activities.

Driftwood Fishing Lures

Understanding Driftwood

Before diving into the process of creating fishing lures, it’s important to understand what driftwood is. Driftwood refers to pieces of wood that have been washed onto the shore by the action of wind, waves, or tides. This wood often has a unique appearance, having been weathered and worn, which can give it a fascinating texture and form. Its distinctive look and feel make it an ideal material for crafting unique fishing lures that blend art with functionality.

The Appeal of Driftwood for Crafting

Driftwood holds a certain allure, its earlier life as part of a tree giving it a backstory that evokes curiosity. Each piece is unique, shaped by its journey through waterways and shaped further by the elements. When used in crafting, this uniqueness translates into handmade items that are often one-of-a-kind. For fishing enthusiasts, using such materials to create functional items like lures not only provides a conversation starter but also connects them more deeply with nature.

Why Choose Driftwood for Fishing Lures?

Why consider making fishing lures from driftwood, you might ask? There are several compelling reasons.

Unique Characteristics

Each piece of driftwood has its own story. Its distinctive shapes and textures can mimic the natural movements seen in aquatic environments, which can prove attractive to fish. The irregularities and organic nature of driftwood can simulate small fish or insects, making it an effective lure material.

Eco-friendly Material

In a world increasingly conscious of environmental impact, using materials that have naturally found their way to the shore is a sustainable choice. Driftwood is biodegradable, minimizing your ecological footprint compared to some synthetic lures that contribute to pollution.

Resourcefulness and Creativity

Crafting with driftwood allows for unparalleled creativity. It also fosters resourcefulness because it requires you to work with the shapes and sizes naturally presented to you. Being able to create custom lures can also lead to better success rates because you can design them to cater to the specific types of fish you are aiming to catch.

Collecting Driftwood

Now, where do you begin the journey of creating your driftwood fishing lures? It all starts with collecting the driftwood itself. Here’s how you can ensure you gather the best pieces for your crafting project.

Where to Find Driftwood

Coastlines, riverbanks, and lakeshores are great places to start looking for driftwood. These environments frequently offer varied selections of driftwood pieces washed ashore by the wind and waves.

Selecting Quality Driftwood

When selecting driftwood, look for pieces that are solid without being too thick, as you’ll want something easy to work with. Check for any signs of brittleness or rot. You want your lures to have longevity, so ensuring the wood is sturdy is crucial. Additionally, consider the shape of the wood; pieces with natural contours can aid in creating lures that mimic aquatic life, potentially improving your fishing experience.

Legal and Ethical Considerations

Before collecting driftwood, make sure to check the legal guidelines in your area. Some regions protect driftwood due to its ecological benefits, such as providing habitats for small organisms and stabilizing sand dunes. Always respect nature and only collect what is allowed.

Tools and Materials Needed

Before jumping into the creation process, acquaint yourself with the tools and materials you’ll need. This will streamline your crafting process and help bring your lure to life efficiently.

Essential Tools

  • Saw or Pocketknife: For cutting and shaping the driftwood.
  • Sandpaper or Files: To smooth and form the wood into appealing lure shapes.
  • Drill: A small hand drill is ideal for making holes for hooks and weights.
  • Paints and Sealants: Used for finishing touches, paint can mimic the appearance of different aquatic creatures, while sealants will protect the wood.

Additional Materials

  • Hooks: Essential for any lure, hooks come in various sizes. Select the appropriate size based on the type of fish you aim to catch.
  • Screw Eyes: These are necessary for attaching the hook to the lure.
  • Wire and Clips: For creating attachments and ensuring your lure is functional.
  • Weights and Beads: These can be used to adjust the buoyancy and attractiveness of your lure.

Driftwood Fishing Lures

Crafting Driftwood Fishing Lures: A Step-by-Step Guide

Here’s how you can transform your gathered materials into effective fishing lures.

Step 1: Design Your Lure

Begin by conceptualizing your lure’s design. Consider the type of fish you’re targeting and how that influences the size and appearance of your lure. Sketch different ideas, focusing on the driftwood pieces you’ve collected.

Step 2: Shape the Driftwood

Using a saw or pocketknife, trim your driftwood pieces to match your design. Apply sandpaper or files to smooth the edges and shape the wood into a form that can mimic natural fish movements. Be patient; mastering the art of shaping takes time and practice.

Step 3: Drill the Holes

Use a drill to create holes for the attachment of hooks and screw eyes. Ensure holes are slightly smaller than the hooks and screws so they fit securely.

Step 4: Attach the Hardware

Insert the screw eyes and attach the hooks. Secure them properly; a loose attachment can lead to losing not only a catch but also your custom-made lure.

Step 5: Add Weights and Enhancements

Depending on your design, attach any weights or beads. These additions help control the buoyancy and movement of the lure in the water, potentially increasing its effectiveness.

Step 6: Paint and Seal

Paint your lure to resemble local baitfish or any natural prey that your target fish might be attracted to. After painting, apply a sealant to protect the paint and the wood from moisture and wear.

Step 7: Test Your Lure

Before heading to your favorite fishing spot, test your handmade lures in a controlled environment, like a pool or bathtub, to see how they move in the water. Adjust your weights or reattach hooks if needed to perfect the motion.

Types of Driftwood Lures You Can Create

The possibilities for crafting driftwood lures are nearly endless.

Topwater Lures

Designed to float and create a commotion on the surface of the water, topwater lures can attract fish by simulating the movement of insects or small animals struggling at the water’s surface.

Crankbait Lures

Capable of diving underwater, crankbait lures mimic the motion of small, swimming fish. They are ideal for catching predatory fish like bass, which are often hunting for similar prey.

Jerkbait Lures

These can be crafted to suspend at a certain depth, moving in sharp, jerking motions that resemble an injured fish, a tempting target for hungry gamefish.

Tips for Crafting Perfect Driftwood Fishing Lures

As you start crafting, consider these expert tips to enhance your lure-making process.

Embrace Imperfections

The natural appeal of driftwood lies in its imperfections. Don’t stress too much about creating perfectly symmetrical or uniformly shaped lures. Instead, embrace the uniqueness of each piece.

Test and Adapt

Fishing conditions and fish behavior can change, so test your lures under various conditions and adapt your designs accordingly. A successful lure in one situation may not work as well in another.

Keep Learning

Stay curious and open to learning from other crafters or fishermen. Sharing insights and experiences can lead to discovering new techniques or ideas that can enhance your own creations.

The Impact of Driftwood Lures on Fishing

What impact do these unique creations have on the fishing scene?

Increasing Connection with Nature

Using driftwood lures ties your fishing experience more closely to nature. Knowing that the lure was shaped by natural forces can lead to more mindful and fulfilling fishing trips.

Enabling Sustainable Practices

Every driftwood lure you make and use represents a step towards sustainable fishing practices. This approach aligns with efforts to minimize environmental impact and promote eco-friendly habits.

Fostering a Sense of Accomplishment

Crafting effective lures from driftwood can enhance your sense of accomplishment. Catching fish with something you have made with your hands from a piece of wood washed up on the shore feels incredibly rewarding.

Conclusion

Driftwood fishing lures are much more than tools; they’re a means to connect with nature, embrace sustainability, and express creativity. By transforming driftwood into functional lures, you’re contributing to an eco-friendly practice while exploring your resourcefulness. Each piece of driftwood carries a story, and crafting it into a lure means you’re adding your chapter. So next time you wander along a shoreline and spot a piece of driftwood, think about the possibilities it holds not just as a remnant of the past but as a key component for your next great fishing adventure.

Filed Under: Driftwood Ideas Tagged With: Angling, DIY, Driftwood, Fishing Lures, Handmade

Driftwood Lumber

May 16, 2025 by admin

Have you ever wondered about the journey of a piece of driftwood before it becomes a unique piece of lumber? Driftwood lumber is not just any type of wood; it’s a fascinating material that has traveled across bodies of water and undergone significant natural transformations. There’s something magical about the way driftwood can be both an art piece and a functional piece of material in your home or outdoor setting. Curious to learn more about how this wood makes its journey from waterways to your living room? Let’s explore the world of driftwood lumber!

What is Driftwood Lumber?

Driftwood lumber refers to the timber that has been washed onto shores, rivers, or beaches by the action of winds, tides, or waves. This wood is typically found on banks, beaches, or along riverbeds, having traveled various distances. Once it reaches a destination, whether a sandy beach or a rocky shore, driftwood takes on a new life, transformed by the elements and time.

Origins of Driftwood

Driftwood originates from a variety of sources. Some pieces may come from trees that have fallen into rivers during storms, while others may be remnants of old structures or trees washed into the sea. Regardless of its origin, each piece of driftwood has a unique story, as individual as its shape and size.

Types of Wood

The types of wood that become driftwood are as varied as the regions they come from. Common tree species include oak, cedar, and pine, although any tree that grows near a waterway could potentially become driftwood. The type of wood can affect the color, texture, and hardness of the driftwood lumber.

Natural Transformation Process

The transformation of fresh wood into driftwood involves several natural elements. Over time, the constant motion of the water polishes the wood, smoothing rough edges and creating unique textures. Moreover, exposure to sunlight bleaches the wood, giving it that characteristic faded appearance. This natural weathering process not only contributes to the aesthetic appeal of driftwood but also improves its durability and resistance to decay.

The Driftwood Lumber Journey

Understanding the journey of driftwood offers insight into why it is such a sought-after resource. From forests to waterways and ultimately to beaches, each driftwood piece travels a unique path.

The Journey Begins

The journey often starts in a forest. Trees located near waterways are susceptible to becoming driftwood, especially during heavy rains or floods. Once in the water, wood usually takes a floating journey, carried by currents over potentially vast distances.

Across Bodies of Water

As driftwood travels, it encounters numerous environments: riversides, ocean waves, bays, or streams. During this time, it can often get stuck temporarily, accumulating minerals and encrusted with barnacles or other marine life.

Finding a Resting Place

Finally, driftwood is carried to its resting place on beaches, lake shores, or riverbanks. It’s here that you may discover it on a leisurely walk, noticing unique shapes and intriguing designs that capture your imagination.

Driftwood Lumber

Collecting Driftwood

When you decide to incorporate driftwood into your home or garden, it’s crucial to understand the guidelines for collecting this natural resource.

Legal Considerations

Before you collect driftwood, be aware of any regulations governing its collection. Regulations can vary by country, state or even specific local areas. It’s a good idea to check with local authorities about the legalities of collecting driftwood to ensure you’re not violating any laws.

Ethical Collection Practices

As with any natural resource, it’s crucial to collect driftwood responsibly. Focus on taking only what you need and avoid disturbing wildlife habitats. Driftwood provides shelter and nutrients for a wide range of ecosystems; thus, harvesting should be done mindfully.

Uses of Driftwood Lumber

Driftwood lumber is not confined merely to aesthetic purposes; it has practical applications as well. From furniture to art projects, the possibilities are abundant.

Artistic Creations

Artists love working with driftwood due to its naturally sculpted shapes and textures. Whether it’s creating sculptures, wall hangings, or centerpieces, driftwood serves as a versatile medium for artistic expression.

Home Décor

Bring a touch of nature into your home by incorporating driftwood into your décor. Imagine a rustic driftwood coffee table or a stylish driftwood mirror frame. Its unique appearance and natural charm make it an ideal material for various home accessories.

Functional Furniture

Driftwood is also used to create stunning furniture pieces. Tables, chairs, and benches crafted from driftwood offer both durability and aesthetic appeal. Each piece of furniture is unique, with grain patterns and natural imperfections that add character.

Gardens and Landscaping

In gardens and outdoor spaces, driftwood serves multiple purposes. It can be used for creating garden borders, winding pathways, or as part of a naturalistic water feature. Its ability to withstand weather conditions makes it ideal for outdoor use.

Driftwood Lumber

The Craft of Working with Driftwood

Crafting with driftwood is both an art and a science. It involves understanding the wood’s characteristics and working skillfully with its shapes and textures.

Selecting Driftwood

The first step involves selecting the right pieces of driftwood for your project. Consider the size, shape, and condition of the pieces. Think about how they will fit together and complement the overall design you have in mind.

Preparing the Wood

Before you begin crafting, it’s important to prepare the driftwood properly. This process typically involves cleaning, drying, and sometimes bleaching the wood. Cleaning removes any dirt and residual seawater, while drying ensures the wood is ready for crafting.

Tools and Techniques

Working with driftwood may require specific tools such as saws, drills, and sanders. Additionally, certain techniques like joining, sawing, and finishing are essential for crafting functional or decorative pieces. Emphasizing safety is also crucial, as tools can be hazardous if not used properly.

The Aesthetic Appeal of Driftwood

One of the most striking aspects of driftwood is its aesthetic appeal. Its unique textures, colors, and shapes make it a favored choice for design.

Texture and Color

The texture and color of driftwood are direct results of its exposure to the natural elements. The water polishes the surface, while the sun creates varying shades of white, grey, or tan. This natural look is challenging to replicate with treated or commercial lumber.

Unique Shapes

No two pieces of driftwood are identical. Each one has a story etched into its curves and branches, giving it an organic feel that is hard to duplicate. The natural bends and twists can create stunning visual interest in any piece of art or furniture.

Versatility in Design

The versatility of driftwood allows it to complement a wide range of design styles, from rustic to contemporary. Its natural beauty can enhance modern interiors or add an authentic touch to traditional spaces.

Considerations and Challenges

Working with driftwood also comes with certain considerations and challenges. It’s essential to be aware of these to successfully incorporate driftwood into your projects.

Durability and Preservation

While naturally resistant to decay, without proper preservation techniques, driftwood may degrade over time. Applying sealers or finishes can help prolong the life of driftwood projects, especially for outdoor applications.

Sustainable Sourcing

With increasing demand for driftwood, sustainable sourcing becomes crucial. It’s important to consider where and how the driftwood is obtained to protect natural environments and maintain this resource for future generations.

Driftwood in Popular Culture

Driftwood has also made appearances in popular culture and has inspired countless works of art. Its natural beauty has graced television, film sets, and exhibitions worldwide.

Television and Film

Driftwood often appears in films and shows that portray natural or rustic settings. Its aesthetic qualities make it an ideal choice for set designers looking to create warm and earthy atmospheres.

Exhibitions and Installations

Many artists showcase driftwood in exhibitions or as large-scale installations. The unique characteristics of driftwood allow artists to explore themes related to nature, time, and transformation.

Literature and Art

Driftwood frequently symbolizes cycles, change, and nature in literature and art. Its journey depicts the endless cycles of creation and transformation, resonating deeply with artists and writers.

Conclusion

Driftwood lumber truly represents the beauty of nature’s art. Every piece carries with it a history shaped by the elements, making it both a material and storyteller. Whether used for creating art, functional furniture, or stunning home décor, driftwood provides a unique and timeless appeal that can enhance any space. Understanding its journey, uses, and the importance of sustainable sourcing can help you appreciate and enjoy this wonderful natural resource. As you consider incorporating driftwood into your home or projects, you may also begin to see it not just as wood, but as a connection to the earth’s maritime mysteries.

By now, you may feel inspired to find your own piece of driftwood or perhaps to repurpose a piece you already own. Embrace the uniqueness and let your creativity run wild!

Filed Under: Driftwood Ideas Tagged With: DIY, Driftwood, Lumber, Rustic Decor, Woodworking

Driftwood Log Decor

May 15, 2025 by admin

Do you ever find yourself mesmerized by the rustic charm of driftwood? Its weathered appearance and unique shapes tell a story of time spent in nature, which adds warmth and character to any space. Transforming driftwood logs into decor is a wonderful way to bring a touch of the outdoors into your home, while also embracing sustainability. Read on to discover how you can use driftwood logs to create stunning and practical decor pieces.

Driftwood Log Decor

Understanding Driftwood

Driftwood is essentially wood that has been washed onto the shore by the action of winds, tides, or waves. It often originates from trees that have fallen into rivers or the ocean and have floated for long periods, becoming debarked and smoothed by water and sand. The beauty of driftwood lies in its natural texture, forms, and hues, which make each piece uniquely eye-catching.

The Origin and Journey of Driftwood

Driftwood’s journey begins when wood is broken away from trees due to storms, floods, or natural tree fall. Carried by rivers to the open sea, this wood can travel vast distances, being shaped and aged by the elements. Contact with saline water and constant motion strips bark, smooths edges, and sometimes imparts a distinct sun-bleached look.

Ecological Importance

Driftwood plays a crucial ecological role, providing habitat for wildlife and contributing to the formation of complex ecosystems. Log jams create diverse natural structures, fostering aquatic and riparian habitats for various species. While collecting driftwood for decor can be rewarding, it’s important to do so responsibly, ensuring that the environment remains undisturbed.

Driftwood Log Decor Ideas

Crafting with driftwood logs allows you to incorporate a piece of nature’s artistry into your home decor. Whether you prefer minimalist designs or intricate creations, driftwood is versatile enough to suit any style. Let’s explore some creative and easy-to-make driftwood log decor options.

Driftwood Centerpiece

A driftwood centerpiece can serve as a striking focal point on your dining table or mantelpiece. Choose a single large log or arrange several smaller pieces together for a more complex display. You can enhance this natural art piece by adding candles, succulents, or seasonal decorations.

Driftwood Candle Holders

Utilize driftwood logs as candle holders to add an earthy element to a room. Depending on the size and shape of your driftwood piece, you can drill holes to fit tea lights or taper candles. Ensure the wood is stable and doesn’t pose a fire risk when used as a candle holder.

Driftwood Wall Art

Wall art made from driftwood adds texture and depth to your living or working space. You can attach smaller pieces in artistic patterns to create a natural wood mosaic or hang a single large piece as a statement art installation. To personalize your wall art, consider incorporating shells, stones, or other beach-found items alongside the driftwood.

Driftwood Coat Rack

Transform a large piece of driftwood into a stylish coat rack. Attach hooks or pegs along the length of the log, then secure the piece to your wall. This piece serves both a practical purpose and an aesthetic one, offering a convenient spot for hanging coats, scarves, and hats while adding a rustic appeal.

Benefits of Using Driftwood in Decor

Integrating driftwood into your decor not only enhances the visual appeal of your home but also carries several benefits. Its rustic charm can complement various design styles, from coastal to farmhouse to contemporary.

Sustainability

Decorating with driftwood is a sustainable choice, as you’re repurposing natural material that would otherwise go to waste. Using driftwood helps reduce reliance on newly manufactured decor items, which often come with a larger environmental footprint.

Artistic Versatility

Driftwood’s distinctive shapes and colors allow for a wide range of artistic expressions. Whether your style is more natural and minimalistic or you prefer bold and quirky elements, driftwood can be crafted to match your vision.

Eco-Friendliness

Driftwood is an inherently eco-friendly material, given that it requires no industrial processing. By incorporating driftwood into your home, you reduce the demand for processed timber and contribute to a more sustainable home environment.

Tips for Collecting and Preparing Driftwood

Collecting driftwood involves more than just picking up any piece of wood you find along the shoreline. It requires careful selection and preparation to ensure that the final product is both beautiful and durable.

Responsible Collection Practices

Always collect driftwood from beaches where gathering is permitted, and ensure you’re not disrupting local wildlife or ecosystems. It’s important to take only what you need and leave larger logs or structured pieces that serve as important habitats.

Cleaning and Sanitizing Driftwood

Before using driftwood in your home, it’s essential to clean and sanitize it to remove any dirt, salt, or potential pests. Soaking the wood in a mild bleach solution (1 part bleach to 9 parts water) for 24 hours, followed by thorough rinsing and drying, can help purify it.

Drying and Finishing

Once cleaned, allow the driftwood to fully dry over several days or weeks, depending on its size. You can expedite the process by placing it in a well-ventilated or sunny area. Optionally, you can apply a wood finish to enhance its natural grain and protect it from further wear.

Driftwood Log Decor

Creating a Driftwood Decor Plan

When considering driftwood for your home, it’s beneficial to plan your decor approach ahead of time. Think about which areas of your home could benefit from a touch of natural elegance and which types of decor would complement your existing style.

Complementing Your Interior

Driftwood is versatile enough to complement a wide array of interior styles. For a beachy, coastal effect, combine driftwood with breezy blues, whites, and natural fibers. For a more rustic look, pair driftwood with deep earth tones and weathered metals.

Placement and Flow

Consider the flow and balance of your space when incorporating driftwood decor. Driftwood pieces can provide focal points and direct attention, so placement should be intentional to create a harmonious atmosphere.

Mixing with Other Elements

Combine driftwood with other natural materials like stone, metal, or textiles for a multi-dimensional approach. Mixing elements can lend a cozy, curated feel, making rooms appear more inviting and thoughtfully arranged.

DIY Driftwood Decor Projects

Venturing into DIY driftwood projects is a fun and fulfilling way to personalize your home decor. Let’s delve deeper into some intriguing project ideas that you can try.

Driftwood Mirror Frame

A driftwood mirror frame can add character and a unique twist to a functional home item. Collect smaller, irregularly-shaped pieces of driftwood and attach them around the edges of a plain mirror for a custom and artisanal touch.

Driftwood Chandelier

Craft a unique lighting fixture by combining driftwood and a standard chandelier frame. Arrange the pieces creatively around the chandelier to diffuse light and create stunning shadow patterns. Ensure that all parts are securely fastened and safe before use.

Driftwood Garden Planters

Smaller driftwood logs can make charming garden planters for succulents or herbs. Hollow out sections of the log as needed and fill them with soil. The natural look of driftwood complements the greenery, creating a harmonious outdoor or indoor display.

Driftwood Photo Display

A driftwood photo display can be a heartwarming addition to your decor. Use a sturdy branch or log as the base and attach strings or wire to suspend your favorite photos. This project is perfect for personalizing your space with cherished memories.

Maintaining Driftwood Decorations

Like any decorative element, driftwood requires some care to maintain its appearance and structural integrity over time. Keeping your driftwood pieces looking great is crucial to preserving that touch of nature indoors.

Dusting and Cleaning

Regularly dust your driftwood items with a soft cloth or brush to maintain their natural charm. For deeper cleaning, gently wipe them down with a damp cloth, avoiding saturating the wood.

Protecting from Humidity

Since driftwood is natural wood, it can be sensitive to fluctuations in humidity. To prevent cracking or warping, keep driftwood decor in spaces that maintain stable humidity levels.

Enhancing Longevity

To protect your driftwood pieces over time, consider applying a light finish like beeswax or a wood sealant. This can help safeguard against damage and maintain the wood’s color and texture.

Conclusion

Bringing driftwood log decor into your home is an engaging way to capture the beauty and tranquility of nature within your walls. Whether you are drawn to its rugged texture, sustainable nature, or the stories each piece tells, incorporating driftwood into your interior design can transform your living space into a warm, inviting sanctuary. With a little creativity and care, you can craft stunning decor that reflects both your style and a dedication to environmentally friendly practices.

Filed Under: Driftwood Ideas Tagged With: DIY, Driftwood, Home Design, Natural Decor, Rustic style

Driftwood Look Paint

May 15, 2025 by admin

Have you ever admired the weathered, rustic charm of driftwood and wished you could bring that look into your home? Incorporating the look of driftwood into your décor can add a natural and serene vibe to your living space. By using driftwood look paint, you can achieve this aesthetic on furniture, walls, and various home accessories. This guide will walk you through everything you need to know about this popular painting technique.

What is Driftwood Look Paint?

Driftwood look paint is a unique paint finish designed to mimic the natural appearance of driftwood. The aged, sun-bleached look of driftwood can add an organic, coastal, and vintage charm to your projects. This finish is typically characterized by a muted, soft-gray and brown tone with occasional washes of blue or white to echo the appearance of timber worn down by sea and sand.

Why Choose Driftwood Look Paint?

There are several reasons why incorporating a driftwood look into your home can be appealing. Not only does it offer a coastal charm that can make your space feel tranquil and rejuvenating, but it also complements various interior design styles such as shabby chic, farmhouse, rustic, and even some contemporary themes. Plus, using paint is an affordable and versatile way to achieve this aesthetic without needing real driftwood, which can be difficult to source and work with.

Tools and Materials Needed

Before diving into your project, make sure you have the right tools and materials on hand. Here’s a list to get you started:

ToolsMaterials
Paintbrushes of various sizesDriftwood look paint (often a combination of gray, brown, and white)
Sanding block or sandpaperBase coat paint
Paint stirrerSealer (optional)
Clean cloths for cleanupPrimer

Having these supplies ready will streamline your painting process and ensure a professional finish.

Driftwood Look Paint

How to Achieve the Driftwood Look

Creating a driftwood effect is a fun and creative process that requires some basic steps. Let’s break it down:

Preparing Your Surface

Start by ensuring that the surface you plan to paint is clean and dry. If you’re painting over a previously finished item, sanding it lightly will help the new paint adhere better. If the item is raw wood, a quick sanding will smooth out any rough areas. Apply a primer if needed, allowing it to dry completely before moving on to painting.

Applying the Base Coat

Apply a base color coat, usually a lighter shade such as off-white or light beige. This will serve as the foundation for the driftwood effect. Let the base coat dry completely, which might take a few hours depending on the paint type and environmental conditions.

Blending Multiple Paint Colors

The secret to a convincing driftwood look lies in layering and blending different hues. Start with your primary driftwood paint color—typically a grayish-brown tone. Use a larger brush to apply it unevenly over the surface, allowing some areas to show more base coat than others. This adds depth and a natural look.

Then, using a combination of dry brushing with a lighter color like white, you highlight the natural wood grain’s imperfections, giving it a sun-bleached effect.

Distressing for Authenticity

For added authenticity, you might want to distress your piece. Use a sanding block to gently sand away parts of the paint on edges and corners. Distressing helps to mimic the natural wear and tear that real driftwood undergoes.

Sealing Your Work

Once you’re satisfied with the look, you can apply a clear sealer to protect your work and enhance its durability, especially if it’s a piece that will receive heavy use. Choose a matte or satin finish to maintain the rustic appeal.

Different Applications of Driftwood Look Paint

Driftwood look paint isn’t restricted to just wood surfaces; its versatility can transform a variety of home elements:

Furniture

Transform old tables, chairs, or even kitchen cabinets with this style. The rustic look can make your furniture appear vintage and well-loved.

Walls

A feature wall designed to look like driftwood can add striking visual interest and is perfect for a coastal-themed or beach-inspired room.

Decor Accessories

Smaller items such as picture frames, vases, or lamp bases can be painted to match and bring unity to your décor theme.

Driftwood Look Paint

Tips and Tricks for Getting It Right

While driftwood look paint is generally straightforward, these tips can help enhance the outcome:

  • Experiment on Scrap Pieces: Before tackling your main piece, try out your technique on a scrap piece of wood to get comfortable with the process.
  • Mix and Match Paints: You don’t need to be a paint manufacturer to create the perfect hues. Mixing small amounts of different paints can help you find the right shade.
  • Work in Natural Light: This will allow you to see the true colors of your work and ensure that you’re happy with the color and texture.

Common Mistakes to Avoid

Every DIY project comes with a learning curve. Here are some pitfalls to watch out for:

  • Rushing the Drying Process: Patience is key. Ensure each layer of paint is thoroughly dry before applying the next, preventing smudging and unwanted blending.
  • Using Only One Color: Real driftwood has a variety of hues, so restricting yourself to a single color may lead to a flat and unrealistic look.
  • Over-distressing: While distressing is crucial, too much can remove more paint than intended and may detract from the overall look.

Maintaining Your Driftwood Painted Items

Once you’ve achieved the desired look, you’ll want to extend its lifespan as much as possible. Here are some maintenance tips:

  • Regular Dusting and Cleaning: A simple wipe-down with a damp cloth will keep your pieces free from dust and grime without damaging the finish.
  • Avoid Direct Sunlight Exposure: As with many painted surfaces, prolonged exposure to direct sunlight can cause fading, so arrange your pieces accordingly.
  • Humidity Control: In areas with high humidity, ensure good airflow to avoid moisture buildup, which can affect the paint integrity.

Driftwood Look Paint: Inspiration Ideas

Looking for some inspiration to get started on your driftwood painting project? Here are a few ideas:

  • Coastal Bedroom: Use driftwood look paint on your headboard or create a DIY nightstand for a serene sleeping space.
  • Country Kitchen: Transform kitchen cabinets for a cozy, lived-in feel that complements rustic kitchenware and sinks.
  • Garden Accents: Paint planters or outdoor patio furniture for a cohesive garden space that resonates with natural surroundings.

Conclusion

Driftwood look paint offers a fantastic way to incorporate natural beauty into your living space without the sand and salt. With a bit of creativity and patience, you can achieve stunning, faux-driftwood furniture and décor that will enhance any home. By following these guidelines and tips, your projects will bring the calming, soothing essence of oceanside retreats right into your home, perfect for relaxing and unwinding in style.

Filed Under: Driftwood Ideas Tagged With: DIY, Driftwood, Home Improvement, Interior Design, Painting

Driftwood Look With Paint

May 14, 2025 by admin

Have you ever gazed at a piece of driftwood and admired its rustic charm and natural elegance? The good news is that you don’t need to live near an ocean or spend countless hours scouring beaches to bring that driftwood look into your home. With a little bit of paint, you can recreate the weathered, sun-bleached appearance of driftwood on any wooden surface. In this article, we’ll explore how you can achieve that driftwood look with paint, offering you a budget-friendly way to infuse natural beauty into your space.

Driftwood Look With Paint

Understanding the Driftwood Look

The driftwood look is characterized by its weathered and aged effect, with colors that often include muted grays, soft browns, and bleached whites. This appearance is the result of wood being polished over time by water, sun, and sand, which create a unique texture and color palette.

What Makes Driftwood Unique?

Driftwood is distinctive due to its soft, bleached colors and smooth, often polished texture. As wood floats in the ocean or rivers, it undergoes natural processes that strip it of its bark and pigmentation, leaving behind a skeletal beauty. The look reflects a balance between raw nature and refined elegance, making it a popular choice in home décor for a rustic yet sophisticated vibe.

Why Imitate Driftwood with Paint?

Imitating driftwood with paint allows you to bring that same beauty and character into your home without the need for natural driftwood. It gives you the flexibility to choose any wooden item in your home and transform it into a piece of coastal chic décor. It’s a perfect solution if you’re looking to revamp old furniture or add texture to new pieces.

Preparing Your Surface

Before you start painting, proper preparation is essential to ensure the paint adheres well and the finish lasts. Here are the steps to prepare your wooden surface for painting.

Cleaning the Surface

Begin by cleaning the wooden surface to remove dust, dirt, or grease. A mixture of mild soap and water usually does the trick. After cleaning, make sure the surface is completely dry before moving on to the next step.

Sanding the Wood

Sanding is arguably the most crucial step because it helps the paint adhere better. Use medium-grain sandpaper to lightly sand the wood surface. Remember to sand with the grain and not against it. Once finished, wipe away any dust with a clean cloth.

Priming the Wood

Applying a primer creates a smooth base and helps the paint colors to stand out. Use a quick-dry primer suitable for wood and apply it evenly over the surface using a paintbrush or roller. Let it dry completely according to the manufacturer’s instructions.

Selecting the Right Paint Colors

Choosing the right colors will define how successful your driftwood look will be. The key is to mimic the shades naturally found in driftwood.

Recommended Color Palette

  • Base Color: Light Gray or Soft Blue
  • Secondary Colors: Warm Beige or Taupe
  • Highlight Colors: White or Cream

You can mix and match these shades depending on the look you’re trying to achieve. Using different wood tones as a base color can slightly alter the finished appearance, offering a custom look that’s uniquely yours.

Test Before You Commit

Before painting a large surface, test your chosen colors on a small inconspicuous area. This helps you see how they’ll look in different lighting conditions and ensures the final product meets your expectations.

Techniques to Achieve the Driftwood Look

Now comes the fun part—painting! Several techniques can help you achieve the driftwood look, each offering a distinct texture and finish.

Dry Brushing Technique

The dry brushing method involves removing excess paint from your brush before application. Here’s how:

  1. Dip your brush into the paint, then wipe most of it off onto a paper towel.
  2. With the almost-dry brush, paint using long, smooth strokes following the wood grain.
  3. Allow the base coat to peek through, creating a layered effect.

Layering and Blending

Layering different colors can add depth to your driftwood look. You may want to layer one or more of your secondary or highlight colors over your base.

  1. Start with your base color and allow it to dry.
  2. Apply your secondary color using the dry brushing technique.
  3. Finish with a highlight in white or cream to mimic the sun-bleached effect.

Diluting Paint for a Washed Look

This method gives a more subtle effect, allowing the natural wood grain to show through:

  1. Mix your paint with water to create a thin, translucent wash.
  2. Apply the wash using a paintbrush and let it soak in.
  3. Wipe away excess with a clean cloth to achieve the desired lightness.

Driftwood Look With Paint

Finalizing the Finish

Once you’re satisfied with your driftwood paint effect, there are a few finishing touches that will ensure durability and enhance the appearance.

Sealing the Surface

Applying a sealant will protect your painted surface from wear and tear. Choose a water-based, non-yellowing sealant to maintain the delicate colors and natural texture.

Distressing for Authenticity

For an even more authentic look, consider lightly distressing the edges of your furniture or wood piece. Sand down certain areas more than others to create a natural, worn effect. Be cautious not to overdo it; subtlety is key.

Mixing Gloss Levels

Experiment with different gloss levels to create contrast. A matte finish adds a more rustic appearance, while slight satin or semi-gloss elements can highlight certain features, providing visual interest.

Caring for Your Driftwood Look

Once you’ve achieved the perfect driftwood finish, proper care will keep it looking beautiful for years to come.

Regular Maintenance

Regular dusting with a soft cloth will prevent buildup without scratching the surface. Avoid harsh cleaning products that might strip away the paint or sealant.

Touch-ups

Every once in a while, inspect your piece for any chips or scratches that may have occurred over time. Having a small amount of leftover paint available makes touch-ups seamless and ensures that your driftwood piece remains consistent in appearance.

Conclusion

Creating a driftwood look with paint is not only an enjoyable project but also a rewarding way to add a coastal or rustic element to your home. By selecting the right colors and using a variety of painting techniques, you can transform any wooden surface into something uniquely beautiful, imitating the essence of nature’s handiwork. Whether you’re updating a piece of furniture or adding character to a new one, the driftwood finish offers an endlessly adaptable style that complements a wide range of home décor themes. Embrace the creative process, and you’ll find yourself with a stunning piece that captures the seaside spirit and its timeless beauty.

Filed Under: Driftwood Ideas Tagged With: crafts, DIY, Driftwood, Home Improvement, Painting

Driftwood Look With Chalk Paint

May 13, 2025 by admin

Have you ever stumbled upon a piece of furniture and thought about giving it a fresh, coastal-inspired look? Imagine turning your ordinary pieces into charming, driftwood-like treasures with the magic of chalk paint. Chalk paint has rapidly gained popularity due to its versatility and ease of use, providing an effortless way to transform your furniture without the need for extensive sanding or priming. If you’re aiming for that breezy, beachy vibe in your home, adopting a driftwood look can be an excellent choice. Let’s explore how you can achieve this stunning effect.

Driftwood Look With Chalk Paint

Understanding the Driftwood Aesthetic

Before diving into the technique itself, it’s helpful to understand the aesthetic we’re aiming for. Driftwood is known for its weathered, sun-bleached appearance, often sporting shades of gray, brown, and white. It’s loved for its natural texture and the subtle blending of colors that give it an aged, rustic charm.

What is Driftwood?

Driftwood is wood that has been washed onto a shore or beach of a sea or river by the action of winds, tides, or waves. Its appearance is characterized by a smooth surface, muted colors, and an almost sculptural form, gained from enduring the elements over time. The appeal lies in its uniquely rustic and natural look, making it a favored choice for coastal or shabby-chic interior designs.

Why Use Chalk Paint for a Driftwood Look?

Chalk paint is superb for creating a driftwood impression because of its matte, chalky finish and its ease in distressing to mimic vintage wear-and-tear effortlessly. The paint adheres well without primer and creates textures that can easily be sanded or layered for depth and character.

Choosing the Right Supplies

Getting the right supplies is the first step in any successful furniture makeover.

Essential Materials

To recreate a driftwood look with chalk paint, here’s what you’ll need:

MaterialPurpose
Chalk PaintUse multiple shades (white, gray, beige, etc.) to layer and achieve a weathered effect.
Paint BrushesOpt for both regular and finer-bristled brushes for detailing.
SandpaperHelps with distressing and achieving that aged appearance.
Wax or Matte SealerTo protect the finish and add durability.
Lint-Free ClothsPerfect for wiping excess paint or wax.
Drop ClothTo protect your working area from paint spills.

Choosing Your Colors

For an authentic driftwood look, you’ll want a palette that includes muted, earthy tones. Shades of gray, beige, off-white, or even soft blues can layer effectively to mimic the natural variations seen in weathered wood.

Preparing Your Furniture

Preparation is key to achieving a long-lasting and professional-looking finish.

Cleaning and Repairing

Start by thoroughly cleaning your piece of furniture. Remove any dust, grime, or residue using a damp cloth and mild detergent. If needed, repair any deep scratches or dents with wood filler. Remember, even though chalk paint is forgiving when it comes to imperfections, a smoother starting point tends to result in a more polished outcome.

Sanding (Optional)

One of the benefits of using chalk paint is that sanding is typically optional. However, lightly sanding the surface can help remove leftover finish or stubborn dirt and ensure that the paint adheres better.

Applying Chalk Paint

Once your furniture is prepared, you’re ready to start painting. This is where the transformation begins!

Base Coat Application

Begin with your base color. Typically, this would be the lightest shade you wish to incorporate, often a light gray or beige, which will act as a foundation for other colors to layer over.

  • Apply Thin Layers: Use a wide, flat brush to apply the base coat in thin layers, ensuring even coverage.
  • Dry Time: Allow the paint to dry completely before proceeding, which can take about 1-2 hours depending on humidity and temperature.

Creating a Weathered Look with Layers

This step involves building up layers with different colors to mimic the multifaceted appeal of driftwood.

Wash Technique

A wash is a technique where paint is diluted with water to create a semi-transparent finish.

  1. Mix and Apply: Mix water with your chosen color (typically white or a slightly darker gray with 50% paint and 50% water), then apply it over the base coat with a brush.
  2. Wipe Away Excess: Using a lint-free cloth, wipe off the excess wash to allow the underlying paint to peek through delicately.

Dry Brushing

Dry brushing gives your project a rustic, textured look:

  1. Minimal Paint on Brush: Dip your brush lightly in paint and remove excess on a cloth.
  2. Light Strokes: Lightly drag the brush across the surface, allowing the paint to deposit unevenly.

Blending with Additional Colors

Introduce additional colors to add depth:

  1. Select Colors: Choose a couple of complementary shades to add variety to your project.
  2. Layer and Blend: Apply using the dry brush or wash technique. Blending multiple colors will enhance the wood-like texture and natural hues typically seen in driftwood.

Driftwood Look With Chalk Paint

Distressing for Authenticity

Once the layers are applied and dry, you can distress parts of the furniture to add an authentic aged look.

Sandpaper Technique

Focus on areas that would naturally experience wear over time, such as edges or corners.

  • Gently Sand: Take a medium-grit sandpaper and distress these areas, being gentle to avoid overdoing it.
  • Target Specific Areas: For example, drawer pulls or the tops of table legs can be excellent spots to highlight through distressing.

Steel Wool or Scraper

For a more detailed distressing effect, using steel wool or a scraper can add fine lines or worn spots that enhance the overall appearance.

Finishing Touches

After achieving the perfect look, it’s important to seal and protect your work.

Applying Wax or Sealer

Finish the project by sealing the paint:

  • Wax or Matte Sealer: Choose health-safe wax or a matte polyurethane sealer to preserve the paint’s appearance and provide protection.
  • Application: Use a cloth to apply wax in small sections, buffing gently as you go. If using a sealer, a brush can apply the product evenly.

Final Buffing for Sheen

If using wax, after setting for 24 hours, buff the surface with a clean lint-free cloth to enhance the subtle glow of the finish.

Styling Your Driftwood Piece

Once your furniture boasts its new look, it’s time to integrate it into your decor.

Setting the Scene

Here are some ways to enhance your newly transformed piece:

  • Pair with Soft Textures: Soft textiles like cotton or linen complement the rustic visuals and provide comfortable style.
  • Natural Elements: Incorporate plants, woven baskets, and pottery to enhance the natural look.
  • Neutral and Coastal Accessories: Use decorations that match the beach-inspired aesthetic, like shells or muted color palettes.

Complementing with Other Furniture

Balance your room by coordinating with other driftwood-toned furniture or keeping a consistent color palette throughout the space.

Troubleshooting and Tips

Every DIY project comes with its quirks. Let’s cover a few common issues and how to resolve them.

Uneven Paint

If you notice any patchiness once your paint dries, try adding another layer using the wash or dry brush technique to even it out.

Overly Distressed

If you feel you’ve distressed too much, simply apply another layer of paint over the sanded area and start again lightly.

Sticky Wax

In the case of leftover wax stickiness, polish over these areas with a clean cloth to remove excess wax or gently reapply more wax to even it out.

Fast Fixes for Mistakes

Remember, with chalk paint, mistakes are usually easy to fix. Additional layers or light sanding can often resolve most issues.

Conclusion

Transforming a piece of furniture with the driftwood look using chalk paint is a satisfying project that rewards you with a unique, personalized addition to your home. Whether you’re aiming to bring in a touch of the beach or simply love the rustic, weathered style, this DIY project offers endless possibilities for creativity and personalization. Embrace the process, and enjoy the charming atmosphere your new driftwood-inspired piece will bring to your home.

Filed Under: Driftwood Ideas Tagged With: Chalk Paint, DIY, Interior Design, Painting techniques

Driftwood Log Ideas

May 13, 2025 by admin

What could you possibly create with a piece of driftwood that washed up on the shore? If you love the charm of natural materials and have a knack for turning ordinary objects into something splendid, driftwood can be a canvas for your creativity. Among nature’s offerings, driftwood is both fascinating and versatile. It not only carries the aesthetic beauty of being shaped by water and time, but it also comes with an intriguing sense of mystery from its journey across waters. Let’s explore some fantastic ideas that will help you transform driftwood into stunning pieces of functional and decorative art.

What is Driftwood?

Once a solid part of trees or branches and now smoothed by the rhythm of the waves, driftwood is wood that has been washed onto a shore or beach by the action of winds, tides, or waves. This process can take months or even years, during which the wood is naturally aged, weathered, and stripped of bark, lending it a unique character and texture.

The Journey of Driftwood

Driftwood embarks on an unpredictable voyage from its original location, tumbling through rocky, watery pathways. During this journey, it’s smoothed and bleached by exposure to the sun and water. This natural treatment gives driftwood its distinctive weathered appearance and makes it an attractive material for decorative purposes.

The Splendor of Driftwood in Home Décor

Incorporating driftwood into your home can add an element of rustic charm. Its natural appeal casts a warm, timeless vibe, making it a favorite for coastal, rustic, and bohemian-inspired spaces. Driftwood can be utilized in various ways, ranging from centerpiece décor to functional furniture pieces.

Wall Art with a Natural Twist

Why not craft an artistic wall piece using driftwood? You can create a stunning focal point in your living room or hallway by fastening pieces together to form unique shapes or patterns. Such artworks can range from simple abstracts to elaborate designs, each carrying its own story told through the textures of the wood.

Transformative Driftwood Shelving

Consider building beautiful shelves from driftwood pieces. Whether you choose simple straight designs or more adventurous, asymmetrical shapes, driftwood shelving offers a perfect blend of functionality and aesthetics. By mounting them onto your walls, you add a touch of nature to your home’s interior while providing an ideal spot for showcasing small plants, picture frames, or coastal-themed trinkets.

Driftwood Log Ideas

Crafting Functional Driftwood Furniture

Driftwood is not just for decorative items; it can also be used to craft unique furniture pieces. From tables to benches and beyond, the strength and beauty of driftwood can be harnessed to create one-of-a-kind items.

Driftwood Coffee Tables

A coffee table made from driftwood is a great way to feature this natural element as a centerpiece in your living room. Pairing it with glass elements can highlight the driftwood’s texture and color, creating a functional art piece that elicits admiration.

Rustic Driftwood Benches

Bring the outdoors inside by crafting a bench from larger driftwood logs. With minimalistic design and maximum impact, these benches can either adorn your entryway or serve as a practical seating solution in your garden, marrying form and function seamlessly.

Driftwood Headboards

For a nautical or rustic bedroom vibe, a driftwood headboard can serve as an eye-catching feature. Its unique texture and structure can add character to your bedroom, making it a centerpiece that dictates the theme and ambiance of your sleeping space.

Enchanting Outdoor Ideas with Driftwood

Beyond indoor décor, driftwood is an excellent material for enhancing your outdoor spaces. Its natural resistance to water makes it suitable for garden decor and backyard creations.

Illuminating with Driftwood Lanterns

Illuminate your patio or garden pathways with driftwood lanterns. Their rustic charm captures the essence of the outdoors and creates a warm, welcoming glow. String lights can be wrapped around driftwood frames or housed inside glass containers adorned with driftwood to bring those creative ideas to light.

Creating a Driftwood Arbor

Imagine welcoming guests to your garden with a beautiful, organic driftwood arbor. This striking feature can infuse your outdoor space with a sense of wonder and serenity, offering a passageway that bursts with natural beauty.

Driftwood Planters

Use driftwood logs to create unique planters for succulents or air plants. These planters can sit beautifully on your porch or act as a centerpiece for your garden table. The earthy texture of driftwood pairs elegantly with green foliage, creating a harmonious balance between nature’s elements.

Driftwood Log Ideas

Benefits of Using Driftwood in Design

Driftwood isn’t just aesthetically pleasing; it also offers several practical benefits, from sustainability to creativity.

Eco-Friendly Material

Using driftwood is an excellent way to incorporate sustainable practices into your design. By utilizing wood that has naturally followed a course to renew itself, you reduce the demand for freshly processed materials, promoting a more eco-friendly living environment.

Cost-Effectiveness

Often sourced from nature itself, driftwood can be an affordable option for those looking to spruce up their home without spending a fortune. With a little creativity and some basic tools, you can transform driftwood into personalized and stylish home accessories.

Endless Customization

Driftwood pieces are as diverse as the environments they come from. This diversity allows for endless possibilities in terms of customization. Whether painting, carving, or keeping the wood in its natural state, the personal touches you add can reflect your unique style and preferences.

Promoting Creativity and Relaxation

Crafting with driftwood can be a relaxing and rewarding hobby. As you sift through unique shapes and structures in your creative process, you engage your mind in a form of art therapy that encourages relaxation and boosts creativity—making your crafting experience soothing and satisfying.

Tips for Working with Driftwood

To make the most of your driftwood projects, it’s essential to follow some best practices when preparing and working with this material.

Cleaning and Prepping the Wood

Before turning driftwood into a cherished piece, you’ll want to make sure it’s clean and free of any pests. Start by brushing off any loose debris and giving it a good rinse. For deeper cleaning, soaking the driftwood in a solution of water and bleach can help eliminate bacteria and bugs. Rinse thoroughly and allow it to dry completely before use.

Tools for the Task

Having the right tools on hand will make your driftwood projects easier and more efficient. A saw, hammer, chisel, and sandpaper are basic essentials for shaping and smoothing your pieces. Electric tools, such as a drill, can be helpful for joining or mounting driftwood.

Preserving the Authenticity

Remember, driftwood’s appeal lies in its natural appearance. Aim to preserve this rustic beauty by sanding only what’s necessary and not over-treating the wood. Keeping knots, cracks, and original shapes can enhance the authenticity of your project.

Conclusion

Driftwood is nature’s art, full of history and character, just waiting to be uncovered and appreciated. With a little vision and creativity, you can transform driftwood to reflect your style, add beauty to your home, and infuse your surroundings with a piece of the sea. Whether you’re crafting an intricate sculpture, a practical piece of furniture, or a decorative item, driftwood presents incredible opportunities to connect with nature artistically. As you embark on this creative journey, remember that every piece of driftwood tells a story yet to be completed—a story you can be a part of, narrating through each artistic endeavor.

Filed Under: Driftwood Ideas Tagged With: crafts, DIY, Driftwood, Interior Design, Natural Decor

Driftwood She’ll Art

May 12, 2025 by admin

Have you ever gazed at a piece of driftwood, washed ashore by the tides, and wondered about the stories it could tell? Driftwood shell art is a captivating craft that combines the beauty of nature with the creativity of human imagination. It’s about taking those weathered pieces of wood and transforming them into stunning works of art, often incorporating shells and other natural elements. Let’s journey into this fascinating world, where sea meets art, and discover how you can create your own masterpiece.

Driftwood She’ll Art

Understanding Driftwood Shell Art

Driftwood shell art is a delightful form of artistic expression that celebrates the natural beauty of the sea. It involves using pieces of driftwood, which are often plentiful along beaches, and pairing them with seashells and other found objects to create unique sculptures, wall hangings, and other decorative items. This form of art is not only a creative outlet but also a sustainable practice, as it makes use of natural materials that have already been discarded by nature.

Origins of Driftwood Shell Art

Though it’s hard to pinpoint exactly when driftwood shell art began, it’s safe to say that it has long been a part of coastal cultures around the world. The pieces of wood that you find on the shore have traveled great distances, shaped and smoothed by the ocean. This form of art pays homage to that journey, turning what’s often seen as waste into treasures.

Why Choose Driftwood Shell Art?

The charm of driftwood shell art lies in its inherent uniqueness. Each piece of driftwood is one-of-a-kind, with its own texture, size, and shape. When you couple that with shells, each with their distinct colors and forms, the possibilities for creativity are endless. This art form allows you to bring a piece of the sea into your home, offering a rustic and natural decoration that can’t be replicated exactly.

Getting Started with Driftwood Shell Art

Embarking on the journey to creating driftwood shell art can seem daunting, but with a few basic steps and some creativity, you’ll be well on your way to making beautiful art. Before you begin, it’s essential to gather your materials and understand the basics of handling them.

Selecting Your Driftwood

The first step is to find the perfect pieces of driftwood for your project. Keep in mind that driftwood comes in all shapes and sizes, from tiny sticks to large branches. When selecting driftwood, consider the size and shape that will fit your envisioned piece. Look for pieces that have interesting textures or shapes, as these can add character to your artwork.

Tips for Finding Driftwood

  • Location: Visit beaches, riverbanks, or lakeshores, where driftwood is commonly found.
  • Seasonal Collection: Driftwood is often more abundant after storms, as turbulent waters wash more wood ashore.
  • Sustainability: Be mindful not to collect driftwood from protected areas or disturb wildlife habitats.

Cleaning and Preparing Driftwood

Once you’ve gathered your driftwood, cleaning it is crucial to remove any salt, sand, dirt, or small organisms that may be present. Here’s how:

  1. Rinse Thoroughly: Use fresh water to rinse your driftwood and remove surface debris.
  2. Soak in a Solution: Soak the driftwood in a mixture of water and bleach (a 9:1 water to bleach ratio) for a day or two to kill any bacteria and lighten the wood, if desired.
  3. Dry Completely: Allow the driftwood to dry completely in the sun. This helps maintain its shape and prevents mold or mildew growth.

Choosing and Preparing Shells

Just like driftwood, shells are a key component of this art form. When selecting shells, look for various sizes and colors that can complement each other and the driftwood you’ve chosen. Clean the shells by soaking them in a solution of water and vinegar to remove any residue.

Tools and Supplies You’ll Need

Before you start crafting, gather the essential tools and supplies needed for driftwood shell art:

  • Adhesives: A strong adhesive or glue gun is necessary to secure the shells to driftwood.
  • Sealant: To preserve your art, consider using a sealant that protects the materials from dust and fading.
  • Additional Decor: Consider embellishments like beads, feathers, or small stones to enhance your creation.
  • Protective Gear: Gloves and a dust mask to protect your skin and lungs while working with natural materials.

Techniques for Creating Driftwood Shell Art

Now that you have your materials, it’s time to explore various techniques that can be employed to bring your driftwood shell art to life. Your creativity is your most powerful tool, but some tested methods can guide you to stunning results.

Basic Driftwood Shell Crafting Techniques

  • Arranging: Lay out all your materials in front of you, and try different configurations before settling on one that feels right.
  • Layering: Experiment with layering shells on top of each other or on the driftwood to add depth to your work.
  • Combining Elements: Use additional elements like rope or twine to tie pieces together or create hanging art.

Tips for Securing Pieces

Properly securing your shells and driftwood is essential for durability. Always ensure the surfaces are clean and dry before applying adhesive. Glue guns are excellent for smaller projects, while stronger epoxy adhesives work well for heavier or outdoor pieces. Be generous with adhesive application but careful not to overdo it, as excess glue can seep out and affect the aesthetics of your piece.

Creating Specific Projects

To guide you further, here are some ideas and step-by-step processes for creating specific driftwood shell art projects:

Driftwood Shell Wind Chime

Materials Needed:

  • Several pieces of small driftwood
  • Variety of shells
  • String or fishing line
  • Drill
  • Hook for hanging

Steps:

  1. Arrange Driftwood: Lay your driftwood in a line and drill small holes where you’d like to connect them.
  2. Connect with String: Use string to tie the driftwood together, creating a cascading effect.
  3. Attach Shells: Drill tiny holes in the shells and hang them from the wood using fishing line.
  4. Add a Hook: Secure a hook at the top for easy hanging.

Driftwood Shell Wall Art

Materials Needed:

  • Large piece of flat driftwood
  • Assorted shells
  • Strong adhesive
  • Optional: Decorative extras (beads, small stones)

Steps:

  1. Prepare the Surface: Ensure the driftwood surface is clean and dry.
  2. Design Layout: Place your shells on the driftwood without glue, experimenting with different arrangements.
  3. Secure Shells: Once satisfied, use adhesive to secure the shells in place.
  4. Seal and Protect: Apply a clear sealant to protect your art.

Tips for Mastering Driftwood Shell Art

As you continue to explore driftwood shell art, there are a few tips and tricks that can help enhance your creations and ensure your artworks are both beautiful and durable.

Embrace Imperfections

One of the most attractive aspects of driftwood shell art is its natural and rustic appearance. Don’t be afraid to leave pieces slightly imperfect. These imperfections add to the charm and authenticity of the piece.

Experiment with Colors and Textures

Nature offers a rich palette of colors and textures, so take advantage of this in your art. Mix and match different types of shells and driftwood. Adding subtle hues with paints or stains can also customize your piece further while maintaining a natural look.

Sustainability and Ethical Consideration

While creating art, it’s essential to be mindful of the environment. Collect materials responsibly, without disturbing ecosystems or overharvesting. Reuse and recycle materials whenever possible to create meaningful art without contributing to waste.

Caring for Your Driftwood Shell Art

Your art should last for years with proper care, even though it’s made from natural materials. Here’s how to maintain it:

  • Keep out of direct sunlight to prevent fading.
  • Dust regularly with a soft cloth.
  • Avoid high humidity areas to prevent mold.

Driftwood She’ll Art

Connecting with the Driftwood Shell Art Community

Engaging with others who share your passion for driftwood shell art can be rewarding. Whether you seek inspiration, guidance, or camaraderie, connecting with a community of like-minded individuals can elevate your craft.

Finding Inspiration Online

Social media platforms and crafting websites offer a multitude of resources and ideas. Platforms like Pinterest and Instagram are great for discovering creative ideas and tutorials, while forums and groups on platforms like Facebook can connect you with others who share your passion.

Joining Workshops and Exhibitions

Participating in workshops can refine your techniques and expose you to new methods and ideas. Similarly, exhibiting your work in local art fairs or exhibitions can share your creations with a broader audience, offering feedback and recognition.

Sharing Your Craft

Document your progress and share your creations with your community through blogs, vlogs, or social media. Sharing encourages others to pick up the craft and can inspire them to participate in sustainable art practices.

Conclusion

Driftwood shell art allows you to transform naturally discarded beach treasures into remarkable pieces of art. As you embark on this creative journey, remember that each piece you create carries a part of the sea’s story. By practicing sustainability and embracing your artistic instincts, you can craft works that are not only beautiful but also meaningful. Now it’s your turn to let the ocean’s call inspire your next masterpiece in driftwood shell art. Your artistic adventure awaits!

Filed Under: Driftwood Ideas Tagged With: crafts, DIY, Driftwood, home decor, Shell Art

Driftwood Lighting Ideas

May 11, 2025 by admin

Have you ever considered how the distinct beauty of driftwood could transform your home into a warm and inviting sanctuary? Driftwood, with its unique textures and natural forms, makes an enchanting material for crafting lighting fixtures. By incorporating driftwood into your home decor, you can enjoy personalized design pieces that speak to a love of nature and artistry.

Driftwood Lighting Ideas

What is Driftwood?

Driftwood is wood that has been washed onto a shore or beach by the action of winds, tides, or waves. Its mysterious journey through water shapes each piece uniquely, giving you a one-of-a-kind material to work with. Many people appreciate driftwood in the crafting and design realms because of its distinctive weathered and rustic look.

Benefits of Using Driftwood for Lighting

Using driftwood for lighting goes beyond aesthetic appeal. It also adds a personal and natural touch to your home, reminding you and your guests of the beauty found in nature. Additionally, driftwood is often discarded as waste, so incorporating it into home decor is an eco-friendly choice. You’ll be adding warmth and originality to your living space while promoting sustainable practices.

Types of Driftwood Suitable for Lighting

Before you begin crafting or shopping for driftwood lighting, it’s essential to understand which types of driftwood work best for lighting purposes. Here are a few:

Branch Driftwood

Branch driftwood is valued for its structural solidity and variety of shapes. This type is great for creating chandeliers or hanging light fixtures. Its natural branching offers many possibilities for arranging light bulbs creatively.

Root Driftwood

The intricate and gnarled formations of root driftwood can transform simple lights into stunning focal points. Ideal for creating table lamps or decorative wall lighting, root driftwood provides a sturdy base with a complex texture.

Smooth Driftwood

Resulting from years of erosion by water, smooth driftwood has a refined appearance. It works well in interiors that aim for a minimalist or sleek design, offering a subtle elegance without overpowering other elements of your decor.

Simple Driftwood Lighting Ideas

If you’re new to the concept of creating or purchasing driftwood lighting, starting with simple ideas can be the key. This will give you a feel for how driftwood fits and functions in various spaces.

Driftwood Table Lamp

A driftwood table lamp is an excellent starting point for incorporating this material into your lighting design. By using branch or root driftwood as the lamp’s base, you achieve natural elegance with minimal effort. Pair it with a neutral lampshade that allows the wood to be the star of the show.

Driftwood Candle Holders

Consider using small pieces of driftwood to craft rustic candle holders. You can cluster together several pieces and arrange pillars or tea lights around them. This uncomplicated yet effective method provides a beachy ambiance to any room.

Intermediate Driftwood Lighting Projects

Once you’re comfortable with simpler pieces, why not challenge yourself with intermediate driftwood lighting projects?

Driftwood Chandelier

Imagine combining multiple branches of driftwood to create a stunning chandelier. By arranging the pieces in a concentric pattern, you can form a truly unique lighting fixture. A driftwood chandelier complements both dining areas and living spaces, providing a magical touch reminiscent of seashore serenity.

Driftwood Wall Sconce

For wall lighting, use slender driftwood pieces that are balanced in length and width. You can fix them against the wall with a mounted fixture to hold a bulb. Driftwood wall sconces are perfect for adding depth and character to any hallway or living room.

Driftwood Pendant Lights

Pendant lights made using driftwood bring an eye-catching design element overhead. Use smooth driftwood to add a chic, contemporary twist. Hang these over kitchen islands or dining tables for a coastal nod.

Advanced Driftwood Lighting Concepts

If you have honed your skills and want to create a more ambitious project, these ideas might inspire you.

Large Driftwood Floor Lamps

Utilize a tall and substantial piece of driftwood to make a floor lamp that stands proudly at the corner of a room. You can place a soft bulb inside a glass cover at the top, or wind lights along its length for a subtle glow.

Driftwood Sculpture Lighting

Incorporate driftwood into complex sculptures that house multiple lights. This involves arranging several driftwood pieces artistically and embedding LED strip lights. These are ideal for making a bold statement in any room you choose to display this artwork.

Driftwood Lighting Ideas

How to Source Driftwood

Successfully integrating driftwood into lighting depends on sourcing the right pieces. You don’t always have to scour beaches to find driftwood, although it is the most direct way to obtain it.

Local Beaches and Rivers

Scout your local beaches and rivers for driftwood. Ensure you are following local laws and regulations regarding the collection of natural resources. This method gives you direct access to the natural curve and intricacies of the wood.

Specialty Stores and Online Markets

If venturing into nature isn’t feasible, consider checking with specialty stores that sell driftwood. Online platforms like Etsy often have sellers offering unique pieces sourced from beaches across the globe.

Techniques for Preparing and Treating Driftwood

Bringing out the best in driftwood for your lighting project requires some preparation.

Cleaning Driftwood

Start by soaking the driftwood in a bleach and water solution to remove any bacteria or salt that may be embedded. After soaking, rinse thoroughly with clean water. Allow the wood to dry completely before proceeding to design.

Preserving Driftwood

Apply a protective finish like a water-based polyurethane to lock in the beauty of the driftwood. This helps to protect the wood from moisture, insects, and general wear and tear.

Combining Driftwood with Other Materials

Integrating driftwood with other materials can enhance or complement the final design of your lighting fixtures.

Driftwood and Metal

The combination of driftwood with metal frames or accents adds an industrial flair and modern twist to your decor. Consider a driftwood and metal chandelier where the contrasting textures make a sophisticated impression.

Driftwood and Glass

Glass elements paired with driftwood create an elegant, balanced look. You could use glass globes as a cover for bulbs or integrate glass within the driftwood structure itself, creating a fusion of transparency and natural form.

Incorporating Driftwood Lighting into Different Home Styles

Driftwood lighting is versatile and can adapt to various interior design styles.

Coastal Theme

An obvious choice, adding driftwood lighting brilliantly complements a coastal theme. Paired with white or blue accents, it accentuates the airy, laid-back atmosphere of a beach house.

Rustic and Country

Driftwood’s inherent rustic appeal lends itself well to country or farmhouse decor. The organic lines and natural finish sit harmoniously among other wooden elements typical of this style.

Modern Minimalist

Even in a minimalist home, driftwood can serve as a perfect statement piece. Its natural shape and neutral tones contribute to the simplistic aesthetics, emphasizing clean lines and function.

Eclectic Style

For those who embrace an eclectic style, driftwood lighting offers a unique opportunity. Pair it with bold colors, varied textures, and other artistic decorations to create an inviting and expressive atmosphere.

Caring for Your Driftwood Lighting

Maintaining the charm and functionality of your driftwood lighting ensures it remains a beautiful part of your home.

Dusting and Cleaning

Regular dusting will keep your driftwood lighting looking its best. Use a soft cloth to gently wipe the wood, avoiding any harsh chemicals that might damage the finish.

Checking Electrical Components

Ensure any electrical elements remain in good condition. This includes double-checking the integrity of lamp wiring or bulb placements as driftwood can sometimes shift or settle post-installation.

Building a Community of Driftwood Enthusiasts

You don’t have to take on this creative journey alone. Across the globe, many enthusiasts share a passion for driftwood and its decorative potential. Engaging with these communities can enhance your appreciation and skill in working with driftwood.

Online Forums and Social Media Groups

Join forums and groups that focus on driftwood crafting and home decor. Platforms like Facebook, Pinterest, and Reddit offer spaces where people share ideas, projects, and sources of inspiration.

Local Craft Workshops

See if local craft stores or community centers offer workshops on using driftwood in decor. It’s an excellent way to meet like-minded crafters and pick up new techniques.

Conclusion

Driftwood lighting offers a wonderful blend of natural beauty and innovative design. Whether you’re starting with a straightforward table lamp or venturing into creating grand chandeliers, driftwood can become an integral part of your home decor. Not only does it provide unique aesthetics, but it also carries with it the spirit of nature, adding a unique character to your living space. Remember, creativity knows no bounds, and sometimes the best design ideas come from experimenting and looking at things through the prism of your imagination.

Filed Under: Driftwood Ideas Tagged With: DIY, Driftwood, Interior Design, Lighting, Rustic

  • « Previous Page
  • Page 1
  • Page 2
  • Page 3
  • Page 4
  • Page 5
  • …
  • Page 41
  • Next Page »

Primary Sidebar

Driftwood4us.com, is a participant in the Amazon Services LLC Associates Program, an affiliate advertising program designed to provide a means for sites to earn advertising fees by advertising and linking to amazon.com.