• Skip to main content
  • Skip to primary sidebar
  • Terms and Conditions
  • Privacy Policy
  • Contact

Driftwood 4 Us

Just About Driftwood

DIY

Driftwood Furniture Decor

July 1, 2024 by admin

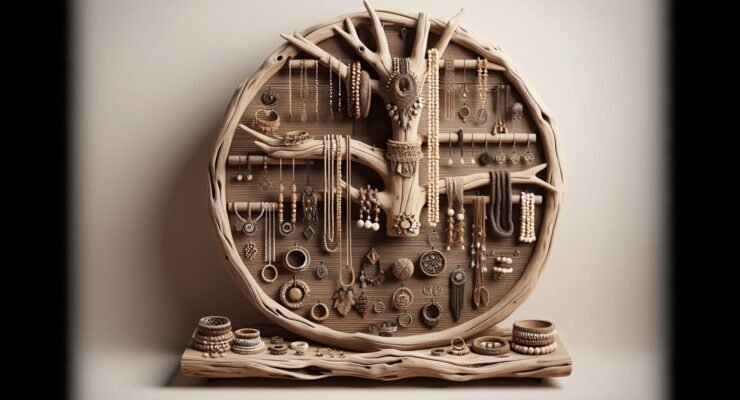
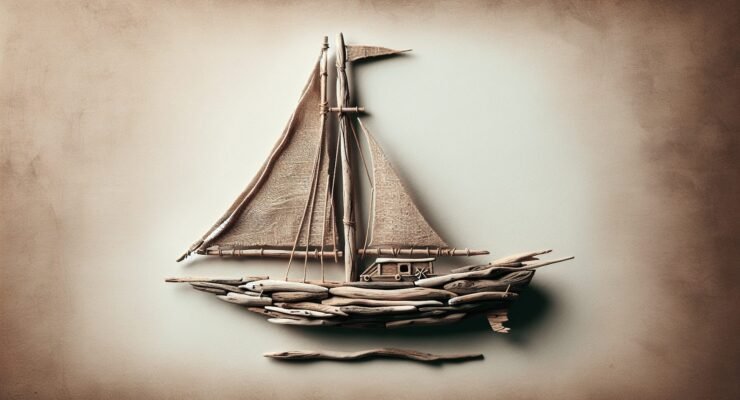
Imagine transforming your living space into a coastal retreat with pieces that tell a story of their journey through the ocean. “Driftwood Furniture Decor” explores the beauty and charm of incorporating natural driftwood into your home. You’ll discover how each unique, weathered piece can bring a touch of nature’s artistry to your furniture and decor, creating a warm, inviting atmosphere that feels both rustic and refined. Dive into the world of driftwood and see how you can infuse your home with the timeless elegance of the sea. Have you ever considered bringing a touch of nature to your home decor? Driftwood furniture decor might be just what you’re looking for! This unique style merges rustic charm with coastal elegance, creating a laid-back yet sophisticated ambiance in any room. Plus, it’s environmentally friendly since it repurposes wood that’s already been discarded by nature.

What is Driftwood Furniture?

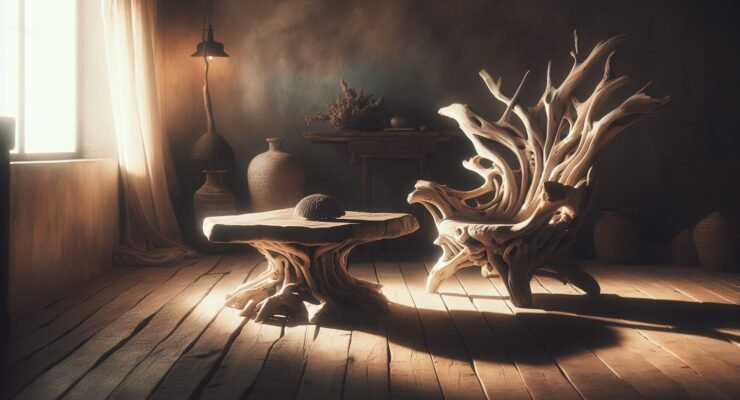
Driftwood furniture is crafted from wood that has been washed ashore by rivers, lakes, or oceans. This wood undergoes a natural transformation as it’s weathered by the elements, giving it a distinct look and feel that’s hard to replicate with other materials. The irregular shapes, textures, and colors of driftwood make each piece of furniture one-of-a-kind.

Origins and Types of Driftwood

Driftwood can originate from different kinds of wood including oak, pine, maple, and even exotic woods like teak. The type of wood affects its hardness, grain, and color, making each piece unique.

Table: Common Types of Driftwood

Type of WoodCharacteristicsCommon Uses
OakHard, dense, dark colorTables, chairs, bed frames
PineSoft, light colorShelves, wall decorations
MapleMedium hardness, smooth textureCabinets, coffee tables
TeakVery hard, resistant to moistureOutdoor furniture, garden accessories

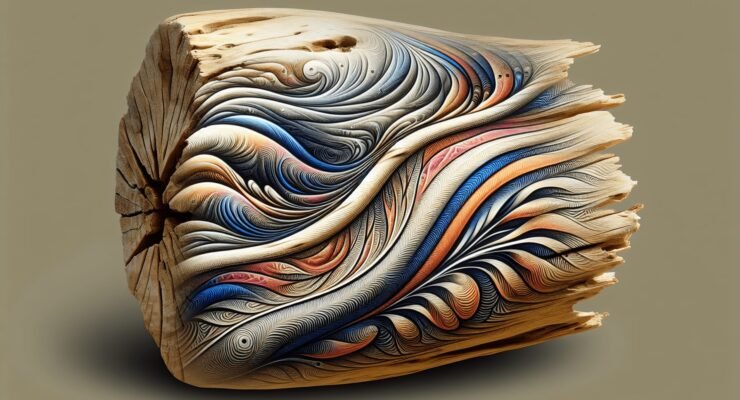
Aesthetic Appeal of Driftwood Furniture

One of the most compelling reasons to incorporate driftwood furniture into your home is its aesthetic appeal. Driftwood has a natural, organic look that brings a sense of tranquility and timeless beauty to any space.

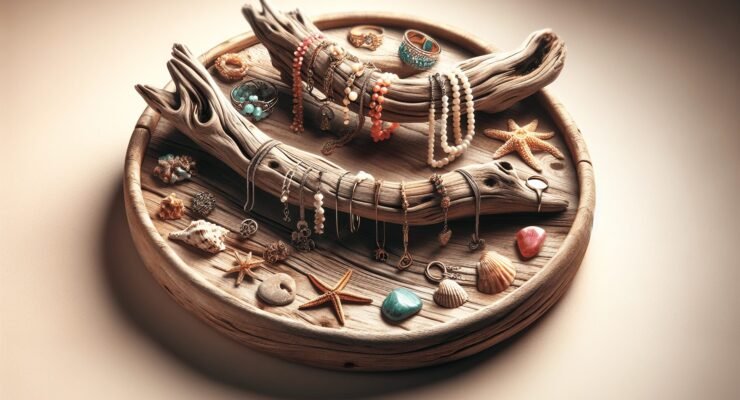
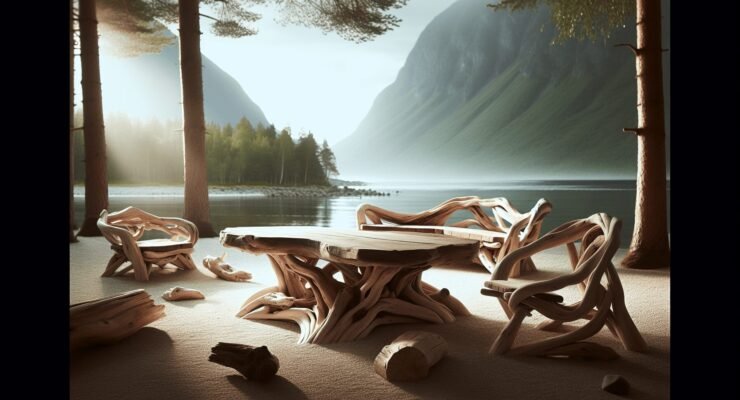
Scandinavian and Coastal Styles

Driftwood fits well into both Scandinavian and coastal design styles. Its natural hues and textures blend seamlessly with the minimalist and functional aspects of Scandinavian decor, while its oceanic origins make it a perfect match for coastal settings.

Versatility in Design

Driftwood furniture isn’t just confined to one type of aesthetic. Whether you’re going for a bohemian, rustic, or even industrial look, driftwood can be incorporated effectively.

Table: Driftwood in Different Design Styles

Design StyleHow Driftwood Fits
ScandinavianProvides natural textures to minimalist decor
CoastalEnhances beachy, nautical vibes
BohemianAdds an earthy, eclectic touch
RusticComplements woodsy, homestead elements
IndustrialOffers a soft contrast to metal and concrete

Driftwood Furniture Decor

Benefits of Driftwood Furniture

Using driftwood furniture isn’t just about aesthetics; there are multiple benefits, both environmental and practical.

Environmental Sustainability

Driftwood furniture is an excellent choice for the environmentally conscious. Since it’s made from wood that would otherwise go to waste, you’re helping to reduce deforestation and minimizing your carbon footprint.

Unique and Handcrafted

Each piece of driftwood is unique, and thus every item of furniture made from driftwood has its own character and history. This gives you a one-of-a-kind piece that can’t be found anywhere else.

Durability

Many types of driftwood, especially hardwoods like oak and teak, are incredibly durable. They’ve already stood the test of time and elements, making them a robust choice for furniture.

How to Choose Driftwood Furniture

So, you’re convinced on the driftwood decor, but how do you go about choosing the right pieces? Here are some tips.

Consider the Space

First and foremost, think about where you want to place the driftwood furniture. Is it for your living room, bedroom, or maybe the patio? Driftwood pieces come in various sizes and shapes, so make sure it fits well within your space.

Match with Existing Decor

You don’t need to revamp your entire room to incorporate driftwood furniture. Look for pieces that complement your existing decor.

Quality and Craftsmanship

Always check the quality and craftsmanship of the driftwood furniture. Well-crafted pieces will have smooth finishes and sturdy constructions. Don’t hesitate to ask the seller about the origin of the driftwood and the craftsmanship involved.

Driftwood Furniture Decor

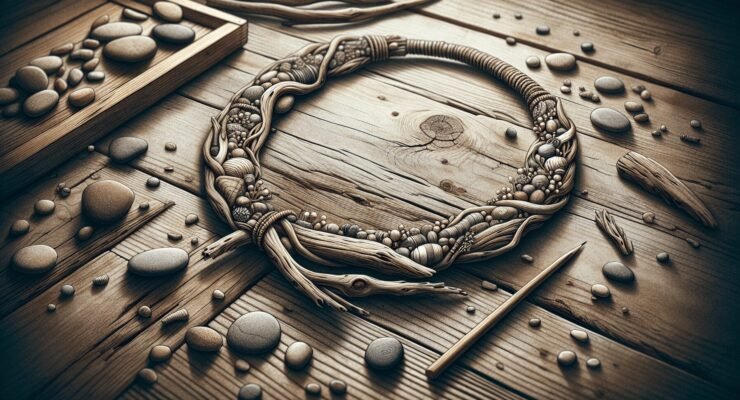
DIY Driftwood Projects

Feeling creative? You can also take on some DIY driftwood projects. Driftwood can be relatively easy to work with if you have some basic woodworking skills.
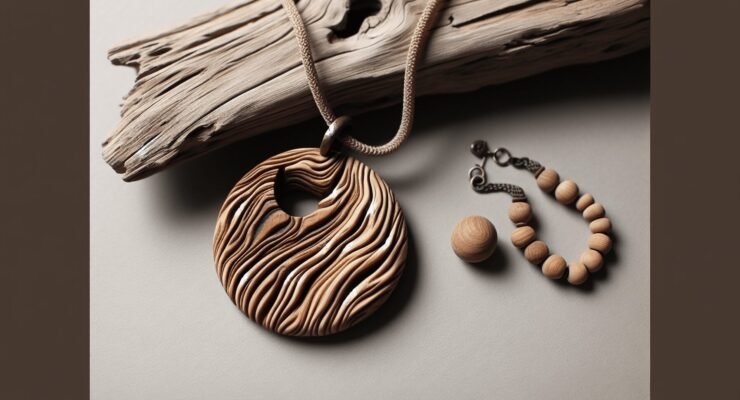
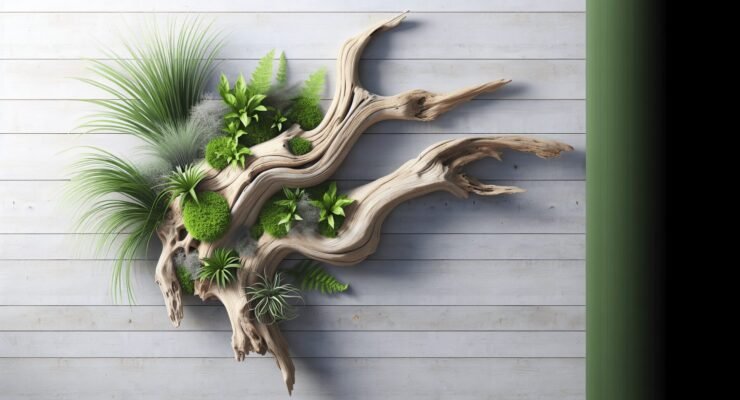
Simple DIY Ideas

  1. Driftwood Shelves: Attach a piece of driftwood to your wall using sturdy brackets to create a natural, rustic shelf.
  2. Candle Holders: Use smaller pieces of driftwood as unique candle holders.
  3. Picture Frames: Create a rustic frame by assembling small driftwood pieces around your pictures.

Maintenance and Care

To keep your driftwood furniture looking its best, a little maintenance is required. Here’s how to care for it.

Cleaning

Dust your driftwood furniture regularly with a soft cloth. For deeper cleaning, use a mild soap and water solution, but make sure to dry it thoroughly to prevent moisture damage.

Sealing and Finishing

Driftwood can be left in its natural state or finished with a clear sealant to protect it from wear and tear. If you do choose to seal it, be sure to use an eco-friendly product.

Repairing

Minor cracks and chips can add to the character of driftwood furniture, but if you need to repair a piece, wood glue and clamps can be used. For larger repairs, consult a professional.

Where to Buy Driftwood Furniture

You have several options when it comes to purchasing driftwood furniture, from online marketplaces to local artisans.

Online Marketplaces

Websites like Etsy, Wayfair, and Amazon have a wide selection of driftwood furniture. Here, you can read reviews, compare prices, and find something that fits your style and budget.

Local Artisans

Often, the best driftwood furniture comes from local artisans. Supporting local businesses not only means you get a unique piece but also helps the community.

Specialized Stores

Some stores specialize in driftwood and reclaimed wood furniture. Visit these for higher quality, hand-crafted pieces.

Conclusion

Driftwood furniture decor offers a unique, eco-friendly way to bring the beauty of nature into your home. Its aesthetic appeal, coupled with the benefits of sustainability and durability, make it an excellent choice for a wide variety of interior design styles. Whether you opt to purchase ready-made pieces or take on a DIY project, driftwood furniture is sure to add a touch of rustic elegance to any space.

By incorporating driftwood furniture into your home, you’re not just making a design statement; you’re also contributing to environmental sustainability. So why not give it a try and enjoy the timeless beauty and charm that driftwood has to offer?

Feel free to explore different types, match with your existing decor, and even try your hand at some DIY projects. Trust us, you won’t regret it!

Filed Under: Driftwood Ideas Tagged With: DIY, Driftwood, furniture, Interior Design, Rustic

Driftwood Jewelry Display Stand

July 1, 2024 by admin

Welcome to the delightful world of the Driftwood Jewelry Display Stand, your perfect solution for showcasing your treasured accessories in a unique and charming way. Crafted from authentic driftwood, this natural and rustic display stand adds a touch of coastal elegance to any room. You’ll love how the organic textures and irregular shapes of the driftwood lend an artistic flair to your jewelry collection, making it not just a storage solution, but a piece of decor that stands out. Get ready to elevate your jewelry display game with this one-of-a-kind piece that merges nature’s beauty with your personal style. Have you ever thought about creating your very own jewelry display stand? One that not only showcases your beautiful pieces but also adds a touch of rustic charm to your decor? If so, you’re in the right place! A driftwood jewelry display stand is not just a functional piece; it’s also a work of art that brings the beauty of nature into your home. Let’s dive into how you can make this unique stand on your own.

Driftwood Jewelry Display Stand

What is Driftwood?

Driftwood is wood that has washed onto shores, riverbanks, or beaches. Due to the natural weathering process, driftwood pieces have a unique, rustic appearance that makes them particularly appealing for arts and crafts. This natural art material can serve as the perfect base for creating a jewelry display stand that is as unique as the jewelry it holds.

Benefits of Using Driftwood

One of the best things about driftwood is its sustainability. By using reclaimed wood from nature, you’re not contributing to deforestation. Moreover, driftwood has a hearty, weathered appearance that can’t be easily replicated. This makes it a fantastic option for creating a statement piece that’s both eco-friendly and aesthetically pleasing.

Tools and Materials You’ll Need

Before diving into your driftwood jewelry display stand project, gather the necessary materials and tools. Here’s a handy table to help you keep track:

ToolsMaterials
Hand sawDriftwood pieces
SandpaperScrew hooks/pegs
DrillWood sealant/finish
Screws and NailsBase (could be a wooden slab or a block)

Choosing the Right Driftwood

When selecting your driftwood pieces, make sure they are sturdy and free from rot or pests. Look for interesting shapes that will provide functional hanging points for jewelry.

Preparing the Wood

Before you start assembling, you need to prep your driftwood:

  1. Clean It: Scrub the wood thoroughly to remove any debris, dirt, or salt deposits.
  2. Dry It Out: Let the driftwood dry completely in the sun for a few days.
  3. Sand It: Use sandpaper to smooth out any rough edges or splinters.

Planning Your Design

Once you have your materials ready, sketch a rough design. Consider the height and width of the stand and how you intend to arrange the hooks and pegs. The layout should be both visually appealing and functional for holding the jewelry you have.

Different Design Styles

There are various design styles you can explore:

  • Minimalist: A simple stand with a few hooks, ideal for necklaces and bracelets.
  • Complex: Multiple levels and sections for rings, earrings, and different types of jewelry.
  • Wall Mounted: If you have limited space, a wall-mounted driftwood stand could be a great option.

Building the Stand

Now comes the fun part – assembling your driftwood jewelry display stand!

Constructing the Base

Your base should be sturdy enough to support the driftwood and the jewelry it will hold.

  1. Cut the Base: Cut a piece of wood or use a pre-existing block that complements your driftwood.
  2. Attach the Driftwood: Secure the largest, most stable piece of driftwood to the base using screws or nails. Make sure it’s anchored firmly as this will be the main support.

Adding Hooks and Pegs

Now, decide where you want to place your hooks and pegs.

  1. Drill Pilot Holes: Mark the spots and drill small pilot holes where you plan to insert the hooks or pegs.
  2. Insert Hooks/Pegs: Screw in the hooks or tap in the pegs. Ensure they’re secure and capable of holding the weight of your jewelry.

Finishing Touches

Apply a coat of wood sealant or finish to bring out the natural beauty of the driftwood and protect it from further wear and tear.

Driftwood Jewelry Display Stand

Using Your Driftwood Jewelry Display Stand

Once completed, your new stand is ready to show off your jewelry in style. You can place it on a vanity, in a bathroom, or even hang it on the wall, depending on your design.

Organizing Tips

Arrange your jewelry in a way that’s both functional and aesthetically pleasing. Group similar items together, and make sure that frequently used pieces are easily accessible.

Maintaining Your Stand

To keep your stand looking great:

  • Dust Regularly: Wipe it down with a dry cloth to remove dust.
  • Repair as Needed: If any hooks or pegs become loose, re-secure them promptly.

Creative Ideas to Customize Your Stand

Why stop at a standard design? Here are some creative ideas to make your stand truly one-of-a-kind:

Add Personal Touches

Incorporate small decor elements like tiny seashells or pebbles to enhance the coastal vibe. You can glue these onto the base or around the stand for added flair.

Use Paint or Stain

While driftwood has a unique look on its own, you can also paint or stain parts of it to add color or an antiqued effect. Remember to use non-toxic paints if you’ll be storing jewelry on your stand.

Integrate Lighting

For an extra special touch, try integrating LED string lights into your design. This can help highlight your jewelry and add a magical glow to your room.

Conclusion

Creating a driftwood jewelry display stand is an enjoyable DIY project that serves both functional and decorative purposes. With a little creativity and effort, you can craft a beautiful and unique piece that showcases your jewelry while adding natural charm to your space. Why not gather some driftwood and try it out for yourself? Happy crafting!

Filed Under: Driftwood Ideas Tagged With: crafts, DIY, Driftwood, Handmade, Jewelry Display

Driftwood Jewelry Ideas

June 30, 2024 by admin

Welcome to the creative world of “Driftwood Jewelry Ideas,” where you’ll discover an array of inspiring ways to transform humble pieces of driftwood into stunning, wearable art. You will learn how to blend natural textures and handcrafted designs to create one-of-a-kind jewelry that tells a story of the sea. By diving into different techniques and styles, you’ll find unique ways to celebrate nature’s beauty through your own personal touch. Whether you’re new to crafting or a seasoned artisan, this article is bursting with ideas to fuel your creativity and make your next project truly special. Have you ever strolled along the shore, collected pieces of driftwood, and wondered how you could transform them into something truly unique and beautiful? Driftwood jewelry might be the creative outlet you’ve been looking for. In this friendly guide, we’re going to dive into a sea of inspiration and practical ideas for making your own driftwood jewelry. Whether you’re an experienced jewelry maker or an enthusiastic beginner, there’s something here for you.

What is Driftwood Jewelry?

Driftwood jewelry is exactly what it sounds like—pieces of jewelry that incorporate bits of wood washed up on the shore by tides and waves. This wood has been naturally weathered and smoothed by the elements, giving it a unique character and beauty that’s hard to replicate.

Why Use Driftwood?

Using driftwood in your jewelry not only gives you a chance to recycle and upcycle natural materials but also adds a rustic, earthy charm to your creations. Each piece is unique, carrying the story of its journey across the waves.

Tools and Materials You’ll Need

Before you start creating your driftwood jewelry, it’s important to gather all the necessary tools and materials.

ToolsMaterials
PliersDriftwood pieces
SandpaperBeads and charms
Drill with small bitJump rings and clasps
Jewelry wireChain or cord
Wire cuttersGlue (optional)
Needle filesVarnish (optional)

Selecting Driftwood

When selecting driftwood pieces for your jewelry, look for wood that is lightweight, smooth, and unique in shape. Smaller pieces are typically better for jewelry, especially for earrings and pendants.

Preparing Driftwood

Wash and dry your driftwood thoroughly before use. Sand any rough edges and, if desired, apply a light coat of varnish to protect the wood and enhance its natural beauty.

Driftwood Jewelry Ideas

Simple Driftwood Necklace

Creating a driftwood necklace is an excellent starting point. It’s simple, yet the results can be stunning!

Materials for Driftwood Necklace

  • Small piece of driftwood
  • Jump rings
  • Necklace chain
  • Beads (optional)
  • Small drill bit and drill

Steps to Create a Driftwood Necklace

  1. Drill a Hole: Carefully drill a small hole at each end of the driftwood piece or just one if you’re going for a simple pendant style.
  2. Attach Jump Rings: Open the jump rings with pliers, thread them through the holes, and close them securely.
  3. Add to Chain: Slide the driftwood piece onto the necklace chain via the jump rings.
  4. Add Beads or Charms (Optional): For added flair, you can include beads or charms on either side of the driftwood.

And there you go! You’ve just created a driftwood necklace with minimal effort but maximum impact.

Driftwood Earrings

If you love a bit of a challenge and want to add more pieces to your collection, driftwood earrings are an excellent project.

Materials for Driftwood Earrings

  • Small, lightweight driftwood pieces
  • Earring hooks
  • Jump rings
  • Small drill bit and drill
  • Beads and charms (optional)
  • Pliers
  • Sandpaper

Steps to Create Driftwood Earrings

  1. Choose Matching Pieces: Find two pieces of driftwood that are similar in size and shape.
  2. Sand and Prepare: Smooth out any rough edges with sandpaper.
  3. Drill Holes: Carefully drill a small hole near the top of each piece.
  4. Attach Jump Rings and Hooks: Thread a jump ring through each hole, then attach the earring hooks to the jump rings.
  5. Add Beads or Charms (Optional): You might want to add small beads or charms to enhance the look.

With these steps, you’ve crafted a beautiful pair of driftwood earrings that are ready to wear or gift.

Driftwood Jewelry Ideas

Driftwood Bracelets

Bracelets are another exciting way to incorporate driftwood into your jewelry collection.

Materials for Driftwood Bracelets

  • Small, flat pieces of driftwood
  • Jewelry wire or elastic cord
  • Beads
  • Jump rings
  • Clasp (if using wire)
  • Pliers
  • Sandpaper

Steps to Create a Driftwood Bracelet

  1. Prepare Driftwood: Select small, flat driftwood pieces and smooth out rough edges with sandpaper.
  2. Drill Holes: Drill tiny holes in each piece, making sure they align properly for threading.
  3. Thread the Pieces: Use jewelry wire or elastic cord to thread driftwood and beads in a pattern.
  4. Secure the Ends: If using wire, attach jump rings and a clasp at the ends. For elastic, tie a secure knot.

This simple bracelet project gives you a piece that’s both rustic and elegant.

Embellishing Driftwood Jewelry

Basic driftwood pieces are beautiful in their own right, but why not elevate your designs with some unique embellishments?

Adding Beads

Beads can add color, texture, and dimension to your driftwood pieces. Use contrasting or complementary colors to match the natural tones of the wood.

Using Charms

Charms are a wonderful way to personalize your jewelry. Select charms that reflect your personality or tell a story. Ocean-themed charms like shells or starfish can be particularly fitting.

Painting

A splash of paint can transform a simple piece of driftwood into a vibrant statement. Consider using non-toxic paints and sealing the piece with varnish afterward.

Caring for Your Driftwood Jewelry

Driftwood is naturally durable, but it’s still important to care for your driftwood jewelry to keep it looking its best.

Cleaning

Simply wipe your driftwood jewelry with a damp cloth. Avoid soaking it in water, as this can weaken the wood over time.

Storing

Store your driftwood pieces in a dry place away from direct sunlight to prevent fading and cracking.

Repairing

If a piece becomes damaged, it’s usually easy to repair with a bit of glue or by replacing jump rings and clasps.

Inspiration and Advanced Ideas

Ready to take your driftwood jewelry to the next level? Here are some advanced ideas to inspire you.

Driftwood Statement Necklace

Create a statement piece by combining multiple driftwood pieces with various embellishments. Use larger pieces and connect them with jewelry wire, adding beads or stones between the wood.

Driftwood and Metal Fusion

Incorporate metal elements like silver or copper wires wrapping around the driftwood for a modern and distinctive look.

Driftwood and Resin

Encasing small pieces of driftwood in resin can create a striking effect, combining the rustic look of wood with the sleekness of resin.

Driftwood Rings

Crafting rings from driftwood requires a bit more skill, but the result is an incredibly unique piece of jewelry. Carve and sand the driftwood to the desired shape, then add a protective finish.

Selling Your Driftwood Jewelry

Have you considered turning your hobby into a small business? Driftwood jewelry can be a hit at craft fairs, online marketplaces, and boutique shops.

Creating a Brand

Develop a recognizable brand that reflects the nature-inspired, eco-friendly essence of your jewelry. Unique packaging and branding can set you apart from competitors.

Pricing

Consider the cost of materials, time spent, and market competition when pricing your products. Driftwood jewelry often appeals to niche markets, where customers are willing to pay for unique, handcrafted items.

Marketing

Utilize social media platforms like Instagram and Pinterest to showcase your creations. Engage with your audience by sharing behind-the-scenes glimpses of your crafting process.

Conclusion

Driftwood jewelry is not only a way to create beautiful and unique accessories but also a chance to connect with nature creatively. Whether you’re making necklaces, earrings, bracelets, or more complex pieces, there’s a world of possibilities to explore with this versatile material.

So, next time you find yourself walking along the beach, keep an eye out for those perfect pieces of driftwood. With a bit of creativity and care, you can transform them into stunning pieces of jewelry that tell a story of their own.

Happy crafting!

Filed Under: Driftwood Ideas Tagged With: craft ideas, DIY, Driftwood, Handmade, Jewelry

Driftwood Fusion Stain

June 29, 2024 by admin

Discover the magic of Driftwood Fusion Stain—a versatile product that effortlessly transforms your DIY projects into stunning works of art. With its unique blend of earthy tones, Driftwood Fusion Stain brings an authentic, weathered look to any piece of wood, imbuing it with character and depth. Whether you want to refresh an old furniture item or bring a rustic charm to your new creation, this stain is your perfect ally. Dive into the easy application process and enjoy the frustration-free experience of bringing your vision to life with Driftwood Fusion Stain. Have you ever found yourself captivated by the rustic charm of driftwood furniture, wishing you could capture that weathered elegance in your home? If so, you’re in good company. Driftwood adds a unique, coastal ambiance to any space, but achieving that perfect look can be a challenge. That’s where Driftwood Fusion Stain comes in! Let’s dive into the world of Driftwood Fusion Stain, and explore how you can master this technique to bring a touch of the seaside into your living area.

Understanding Driftwood Fusion Stain

Driftwood Fusion Stain is a specialized staining technique that aims to replicate the natural, weathered look of driftwood. This stain is a game-changer for anyone interested in DIY projects, as it allows you to transform ordinary wood into a piece that evokes the beauty of naturally aged driftwood.

What is Driftwood Fusion Stain?

Driftwood Fusion Stain is a type of wood stain formulated with a blend of colors and pigments that mimic the variegated tones and textures of driftwood. Unlike traditional stains, this fusion stain tackles both the aesthetic and protective needs of the wood.

Benefits of Using Driftwood Fusion Stain

  • Natural Aesthetic: The stain provides a gorgeous, natural driftwood appearance without the hassle of finding and preparing actual driftwood.
  • Easy Application: Designed for ease of use, even beginners can achieve stunning results.
  • Durability: It offers not just beauty but also protection, making your furniture last longer.

Why Opt for Driftwood Fusion Stain?

Selecting Driftwood Fusion Stain brings numerous benefits to your woodworking projects. This stain type is not just about color; it’s about creating an atmosphere. Whether it’s for a coffee table, a bookshelf, or even kitchen cabinets, Driftwood Fusion Stain can imbue your furniture with a rustic, coastal vibe that is hard to beat.

Preparation

Before embarking on your Driftwood Fusion Stain project, you need to prepare adequately. Preparation is key to achieving a professional-looking finish. Let’s go over some essential steps:

Choosing the Right Wood

Not all types of wood are created equal. While Driftwood Fusion Stain can work on most types, some woods take stain better than others. Softwoods like pine or poplar are generally good choices.

Wood TypeStain AbsorptionRecommended for Beginners
PineHighYes
PoplarModerateYes
OakLowNo
CherryLowNo

Preparing Your Workspace

A clean, well-ventilated workspace is crucial. The stain can emit strong fumes, so make sure you’re working in an area with good airflow. Lay down some newspapers or drop cloths to protect your surfaces from accidental spills.

Tools and Materials You’ll Need

Before you begin, gather all the necessary tools and materials:

  • Driftwood Fusion Stain
  • Sandpaper (various grits)
  • Brushes or staining pads
  • Gloves
  • Stir sticks
  • Tack cloth
  • Protective finish (optional but recommended)

Driftwood Fusion Stain

Application Techniques

Understanding the proper techniques for applying Driftwood Fusion Stain will significantly enhance the outcome of your project. Let’s break down the steps involved.

Step-by-Step Guide

  1. Sand the Wood: Start by sanding your wood surface. Begin with a rough grit (around 80-grit) to remove any existing finish, then move to a finer grit (220-grit) for a smooth finish.
  2. Clean the Surface: Use a tack cloth to wipe away any dust and debris from sanding.
  3. Stir the Stain: Stir your Driftwood Fusion Stain thoroughly to ensure an even consistency.
  4. Apply the Stain: Use a brush or a staining pad to apply the stain. Always go in the direction of the wood grain for a natural look.
  5. Wipe Off Excess: Allow the stain to sit for 5-15 minutes, then wipe off any excess using a clean cloth.
  6. Let It Dry: Allow the stained piece to dry for at least 24 hours before applying a protective finish.

Tips for a Professional Finish

  • Do a Test Spot: Always test the stain on a small, inconspicuous area to see how it reacts with your wood.
  • Multiple Coats: Apply additional coats if you desire a darker, more textured look.
  • Sand Between Coats: Lightly sanding between coats can help achieve a smoother finish.

Maintenance and Care

Once your project has been stained and completed, taking care of it will ensure it remains beautiful for years to come.

Routine Cleaning

  • Dust Regularly: Use a microfiber cloth to dust your stained furniture regularly.
  • Avoid Excess Moisture: Wipe up any spills immediately to prevent water damage or staining.

Protective Finish

Applying a protective finish like polyurethane or a simple wax coating can extend the life of your stained furniture. It’s an optional step, but highly recommended for pieces that will see frequent use.

Finish TypeDurabilityGloss LevelReapplication Frequency
PolyurethaneHighHighEvery few years
WaxMediumLowAnnually
Linseed OilLowLowEvery six months

Driftwood Fusion Stain

Advanced Techniques and Troubleshooting

Even with the best preparation and application, sometimes things don’t go as planned. Let’s look into advanced techniques and common issues you might encounter.

Creating Texture

To add a more authentic driftwood feel, you can create texture by using methods such as:

  • Wire Brush: Scrape the surface gently with a wire brush to add grain texture.
  • Dry Brushing: Use a dry brush technique with a lighter or darker shade to add depth and variation.

Common Issues and Solutions

  • Blotchy Finish: If your stain appears blotchy, it might be because of uneven staining. Sanding the wood more thoroughly and reapplying a second coat can help.
  • Color Too Dark/Light: Lighten the color by wiping the wood with a damp cloth. If too light, add additional coats of stain until desired color is achieved.

Environmental and Health Considerations

While creating beautiful furniture is exciting, it’s crucial to consider the environmental and health aspects of using stains.

Eco-Friendly Options

Look for Driftwood Fusion Stain brands that focus on low VOC (volatile organic compounds) to reduce your footprint. Water-based stains are typically more environmentally friendly than their oil-based counterparts.

Safety Precautions

  • Ventilation: Ensure you are working in a well-ventilated area.
  • Protective Gear: Wear gloves, masks, and safety glasses to protect yourself from fumes and accidental spills.

Driftwood Fusion Stain Projects and Inspiration

Feeling inspired? Here are some projects you can tackle with Driftwood Fusion Stain to add that coastal charm to your home.

Driftwood-Stained Coffee Table

A coffee table is often the centerpiece of a living room. A Driftwood Fusion Stain can transform a simple wooden table into a rustic focal point.

Bookshelf Makeover

Give your tired old bookshelf a new lease on life with a driftwood feel. It’s a simple project that can dramatically change the look of your space.

Kitchen Cabinets

For those feeling a bit more adventurous, try using Driftwood Fusion Stain on your kitchen cabinets. It creates a coastal vibe that’s perfect for a beach-themed or rustic kitchen.

Conclusion

Driftwood Fusion Stain opens up a world of possibilities for DIY enthusiasts and professional woodworkers alike. It’s an accessible and rewarding way to bring a touch of the sea into your home, offering a blend of natural beauty and durability. From choosing the right wood to mastering the application techniques, we hope this guide sets you on the right path to creating stunning driftwood-stained pieces. Happy staining!

Filed Under: Driftwood Ideas Tagged With: DIY, Driftwood, furniture, home decor, Wood Stain

Driftwood Jewelry Diy

June 28, 2024 by admin

If you love the idea of bringing a touch of nature into your personal style, “Driftwood Jewelry DIY” is the perfect guide for you. This engaging piece takes you through the enchanting process of transforming found driftwood into unique, wearable art. You’ll discover creative techniques, essential tools, and inspiring tips that will help you craft beautiful jewelry pieces. Whether you’re a seasoned crafter or a curious beginner, this guide will spark your imagination and leave you excited to start your next DIY adventure. Let’s dive in and create something truly special! Have you ever found yourself strolling along the beach, marveling at all the unique pieces of driftwood washed ashore, and wondered how you can transform these natural treasures into beautiful jewelry? Well, you’re in the right place! Driftwood jewelry is a splendid way to capture a piece of the ocean’s charm and carry it with you wherever you go. Plus, it’s an eco-friendly way to make use of natural resources.

What Is Driftwood?

Driftwood is essentially wood that has been washed onto shore by the action of winds, tides, or waves. This natural polishing process results in beautifully smooth and unique pieces that are perfect for creating one-of-a-kind jewelry. Each piece tells a story and carries with it the essence of the sea.

Why Choose Driftwood Jewelry?

Driftwood jewelry isn’t just another fashion trend; it’s a meaningful way to incorporate nature into your daily life. By wearing a piece of driftwood, you’re embracing sustainability and expressing a connection to the earth and sea.

Benefits:

BenefitExplanation
Unique and PersonalizedEach piece of driftwood is unique, making your jewelry one-of-a-kind.
Eco-friendlyUsing naturally sourced materials is a more sustainable choice.
Cost-effectiveDriftwood is freely available on many beaches, unlike expensive gemstones.
Creative ExpressionCustomize designs according to your personality and style.

Driftwood Jewelry Diy

Gathering Your Materials

Before you dive into creating your driftwood jewelry, you’ll need to gather some essential materials. Don’t worry; most of these can be found at your local craft store or even online.

Basic Materials

  1. Driftwood: Different sizes and shapes for variety.
  2. Jewelry Wire: For wrapping and attaching pieces.
  3. Cord or Chain: For necklaces or bracelets.
  4. Jewelry Findings: Clasps, jump rings, and earring hooks.
  5. Beads and Charms: Additional decorative elements.
  6. Glue: Strong adhesive like E6000 for adding embellishments.

Tools You’ll Need

  1. Wire Cutters: For trimming jewelry wire.
  2. Pliers: Round nose and flat nose pliers for manipulating wire and findings.
  3. Drill: For making holes in the driftwood.
  4. Sandpaper: To smooth any rough edges.

Preparing Your Driftwood

Before you start, you’ll need to prepare your driftwood pieces. This involves a few steps to ensure that they are clean and durable.

Cleaning

Rinse the driftwood pieces to remove any sand and dirt. You can use a soft brush to scrub off stubborn debris. Let the wood dry thoroughly in the sun for several days.

Sanding

Use sandpaper to smooth out any rough edges or surfaces. Driftwood is usually naturally smooth, but a little extra sanding can eliminate sharp points and make your jewelry more comfortable to wear.

Sealing

Applying a sealant is optional but recommended to protect your jewelry from moisture and wear. A clear, matte wood sealer will maintain the natural look of the driftwood.

Driftwood Jewelry Diy

Designing Your Jewelry

Now comes the fun part—designing your driftwood jewelry! The possibilities are endless, and you can let your creativity run wild.

Driftwood Necklaces

Necklaces are a great way to showcase larger pieces of driftwood. You can create a simple pendant or something more elaborate.

  1. Select Your Driftwood Piece: Choose one that catches your eye.
  2. Drill a Hole: For attaching the cord or chain.
  3. Add Decorations: Beads, charms, or even paint designs.
  4. Attach the Cord/Chain: Thread through the hole and secure with knots or clasps.

Driftwood Bracelets

Smaller pieces of driftwood work great for bracelets.

  1. Select Small Driftwood Pieces: Pieces that fit comfortably on your wrist.
  2. Drill Holes: On either side of the pieces.
  3. Connect with Jewelry Wire: Thread the wire through the holes, adding beads in between for decoration.
  4. Finish with a Clasp: Attach the jewelry clasp to complete the bracelet.

Driftwood Earrings

Earrings can be a delicate and stunning use of driftwood.

  1. Select Two Matching Pieces: Similar in size and shape for a symmetrical look.
  2. Drill Small Holes: At the top for hooks.
  3. Add Embellishments: Beads, charms, or wire wrapping for extra flair.
  4. Attach Hooks: Using jump rings.

Tips and Tricks

  • Keep It Simple: Sometimes less is more. Let the natural beauty of the driftwood shine.
  • Balance: When adding decorations, ensure they don’t overpower the driftwood.
  • Mix Materials: Combining driftwood with other elements like shells, stones, or metal can create a more dynamic piece.
  • Quality over Quantity: Invest time in finishing each piece properly rather than rushing through multiple pieces.

Troubleshooting Common Problems

Driftwood is Too Soft

If your driftwood is too soft, it might not hold up well in jewelry. Try using harder pieces, or reinforce them with a sealant.

Holes Not Drilling Cleanly

If your drill isn’t making clean holes, it could be dull. Use a sharp bit and go slowly to avoid splintering.

Jewelry Wire Breaking

This can happen if the wire is too thin. Use a thicker gauge wire for more durability.

Finding Materials

If you’re having trouble finding specific materials, online stores like Etsy or Amazon have extensive jewelry-making supplies.

Preserving Your Driftwood Jewelry

Once you’ve created your driftwood jewelry, you’ll want to ensure it lasts for years to come.

Cleaning

Gently wipe with a damp cloth and avoid immersing in water.

Storing

Store in a dry place, preferably in a jewelry box or pouch to prevent damage.

Wearing

Avoid wearing your driftwood jewelry in water or while doing activities that could cause damage.

Conclusion

Congratulations! You’ve now learned how to transform simple pieces of driftwood into beautiful, eco-friendly jewelry. By following these steps, you can create stunning necklaces, bracelets, and earrings that reflect both your creativity and love for nature. So, next time you find yourself on a beach walk, keep an eye out for those perfect pieces of driftwood. Happy crafting!

Filed Under: Driftwood Ideas Tagged With: crafts, DIY, Driftwood, Handmade, Jewelry

Driftwood Jewelry Holder

June 28, 2024 by admin

Welcome to your next favorite DIY project: the Driftwood Jewelry Holder! Imagine a delightful piece of nature serving not just as decor, but also as a practical organizer for your cherished accessories. With just a bit of creativity and a touch of patience, you can transform a simple piece of driftwood into an elegant and functional display. This article will guide you through the steps to create a personalized jewelry holder that adds a coastal charm to your space while keeping your jewelry neatly arranged. Let’s dive into this fun and easy craft to bring a hint of the seaside into your home! Have you ever found yourself tangled in a mess of necklaces or searching for a lost earring in your jewelry box? If so, it’s time to think about a stylish and functional way to store your favorite pieces. Enter the Driftwood Jewelry Holder: a charming, rustic way to organize your jewelry that adds a natural flair to your home décor.

Driftwood Jewelry Holder

What is a Driftwood Jewelry Holder?

A Driftwood Jewelry Holder is a creative storage solution crafted from pieces of driftwood collected from rivers, beaches, or lakes. Each piece of driftwood brings its own unique history and character, making every jewelry holder a one-of-a-kind piece of art. These holders can have hooks, knobs, or strings to hold your rings, bracelets, necklaces, and earrings.

Why Choose a Driftwood Jewelry Holder?

Choosing a Driftwood Jewelry Holder has numerous benefits beyond its obvious aesthetic appeal. Here’s why you might want one:

  1. Unique Design: No two pieces of driftwood are alike, giving you a unique, personalized touch to your décor.
  2. Eco-Friendly: Using found driftwood is an environmentally friendly option. It repurposes natural materials that would otherwise go to waste.
  3. Versatile Storage: Perfect for hanging a variety of jewelry items, from earrings to necklaces.
  4. Stylish Décor: Adds a natural, rustic touch to any room’s interior design.

How To Find Driftwood

Finding quality driftwood is the first step in creating your very own Driftwood Jewelry Holder. Here are some tips on where and how to collect it:

Local Beaches and Rivers

The most common places to find driftwood are along beaches and riverbanks. You might need to go for a few walks to collect enough pieces for your project.

Quality Check

Ensure the wood is dry and free from pests or decay. Driftwood that has been aged in water for a long time will generally be more durable and attractive.

Legal and Environmental Considerations

Check local laws and regulations before collecting driftwood. Some areas protect their shoreline ecosystems and restrict the removal of natural materials.

Tools and Materials Needed

Creating a Driftwood Jewelry Holder is a hands-on project that requires some basic tools and materials. Here’s a list to get you started:

Tool/MaterialPurpose
DriftwoodMain structure of the holder
SandpaperSmoothing the driftwood surface
Hooks/KnobsFor hanging jewelry
Drill and ScrewsAttaching hooks or knobs
Hanging HardwareFor wall mounting
Paint/Stain (optional)Customize the look (if desired)

Recommended Items

While some materials are optional, certain tools like a drill and sandpaper are essential for preparing and customizing your driftwood.

Step-by-Step Guide to Making Your Driftwood Jewelry Holder

Here’s a detailed guide on how to transform your found driftwood into a stunning jewelry holder.

Step 1: Clean the Driftwood

Start by thoroughly cleaning the driftwood. Soak it in a mixture of water and a small amount of bleach to kill any bacteria or pests. Rinse well and let it dry completely.

Step 2: Sand the Surface

Using fine-grit sandpaper, smooth the surface of the driftwood. This will help remove any rough spots or splinters, making it safer for handling and more attractive.

Step 3: Plan Your Design

Think about how you want to arrange your hooks or knobs. Lay out your jewelry to visualize the spacing and placement.

Step 4: Drill Holes

Carefully drill holes for the hooks or knobs where you marked your placements. Ensure the holes are evenly spaced and deep enough to hold the hooks securely.

Step 5: Attach Hooks and Knobs

Screw in the hooks or knobs, making sure they are secure. Double-check that everything is sturdy and placed where you want it.

Step 6: Add Hanging Hardware

Attach hanging hardware to the back of your driftwood jewelry holder. This will allow you to mount it on the wall. Choose a spot that is easily accessible but also showcases your beautiful holder.

Optional: Paint or Stain

If you want to match your holder to your home décor, you can paint or stain the driftwood. This step is entirely optional but can add a personalized touch.

Driftwood Jewelry Holder

Using and Maintaining Your Driftwood Jewelry Holder

Now that you’ve created your jewelry holder, it’s time to put it to use and keep it looking great. Here are some tips:

Organize Your Jewelry

Start by hanging your jewelry in an organized way. Use the hooks for necklaces and bracelets, and knobs for rings. Smaller hooks can be used for earrings.

Regular Cleaning

To keep your driftwood jewelry holder in pristine condition, dust it regularly. Wipe it down with a soft, damp cloth to remove any buildup without damaging the wood.

Inspect for Wear and Tear

Periodically check the hooks and knobs to ensure they are still secure. Tighten any loose screws and replace any worn-out hooks as needed.

Creative Variations and Upgrades

If you love DIY projects, consider these creative variations and upgrades to personalize your driftwood jewelry holder even further.

Incorporate Shelves

Add small shelves to your driftwood for additional storage. This can be a great place for keeping small jewelry boxes or decorative items.

Use Decorative Hooks

Instead of plain hooks, use decorative ones that complement your home’s style. Look for vintage knobs or colorful hooks to add an extra element of design.

Add a Mirror

Incorporate a small mirror into your driftwood piece for a convenient way to check your appearance while accessorizing.

Conclusion

Creating a Driftwood Jewelry Holder is not only a fun and rewarding DIY project but also a way to add a unique and eco-friendly piece of décor to your home. By following the steps outlined here, you can design a holder that fits your personal style and helps keep your jewelry organized. Plus, every time you glance at your handmade creation, you’ll be reminded of the joy and satisfaction of making something both beautiful and functional.

So next time you find yourself on a beach or near a river, keep an eye out for that perfect piece of driftwood. With a little creativity and effort, you can turn it into something truly special. Happy crafting!

Filed Under: Driftwood Ideas Tagged With: crafts, DIY, Driftwood, home decor, Jewelry Holder

Driftwood Sailboat Wall Art

June 27, 2024 by admin

Imagine transforming your living space with a touch of coastal charm, breathing life into your home with a piece of nature. Driftwood Sailboat Wall Art brings the serene beauty of the ocean right to your walls, capturing the essence of a seaside escape. Each piece is meticulously crafted, featuring rustic driftwood collected from the shore, artistically assembled into a captivating sailboat design. This unique art effortlessly blends with your décor, adding a whimsical yet sophisticated flair that will have guests admiring your impeccable taste. Indulge in the tranquil vibes and let your walls tell a story of the sea. Ever look at a blank wall and wonder how you could transform it into a stunning focal point? Perhaps you’ve considered painting it a different color or hanging some photographs, but have you ever thought about driftwood sailboat wall art? In this guide, you’ll discover the charm and uniqueness of driftwood sailboat wall art, from why it’s a great choice to how you can make your own. Let’s set sail on this creative journey!

Driftwood Sailboat Wall Art

Why Driftwood Sailboat Wall Art?

Natural Aesthetics

One of the biggest draws of driftwood sailboat wall art is its natural beauty. Driftwood, by its very nature, carries a rustic charm that other materials just can’t replicate. Its weathered texture and unique patterns make each piece one-of-a-kind, adding an organic element to your decor.

Eco-Friendly

If you aim to make eco-friendly choices in your home decor, driftwood is a fantastic option. Since driftwood is naturally sourced, it doesn’t contribute to deforestation. Additionally, repurposing driftwood can help in cleaning up shorelines, making it a win-win situation.

Versatility

Driftwood sailboat wall art can fit into a range of interior styles, from coastal themes to minimalist designs. The neutral tones of the wood pair well with almost any color scheme, making it easy to incorporate into your existing home decor.

Choosing the Perfect Driftwood

Types of Driftwood

There are several types of driftwood you can use for your sailboat wall art. Here are some common types:

TypeDescription
SaltwaterTypically smoother due to constant motion in the ocean.
FreshwaterOften has more texture because it doesn’t undergo as much wear from tides.
RiverGenerally lighter in color and may have unique knots and bends.

Size and Shape

When choosing driftwood, size and shape matter a lot. Larger pieces can serve as the hull of your sailboat, while smaller, thinner pieces are perfect for the sails and masts. Ensure that the pieces you pick have interesting textures and are long enough to bring your vision to life.

Preparing the Wood

Once you’ve selected your driftwood, it’s essential to prepare it before crafting. Here’s how you can do it:

  1. Clean the Wood: Use a brush and soapy water to scrub off any dirt or algae.
  2. Dry it Out: Allow the wood to dry completely in the sun.
  3. Sand Rough Edges: Use sandpaper to smooth out any splinters or rough spots.
  4. Seal the Wood: Optionally, you can apply a wood sealant to preserve its texture and color.

Designing Your Driftwood Sailboat Wall Art

Basic Components

To create a driftwood sailboat, you need to gather the following materials:

  • Driftwood (various sizes)
  • Twine or thin rope
  • Glue (wood glue or hot glue works best)
  • Paint (optional)
  • Hooks or mounting hardware

Planning Your Design

It’s always a good idea to sketch your design beforehand. Here’s a simple layout for a sailboat:

  1. Hull: A large, sturdy piece of driftwood.
  2. Mast: A longer, thinner piece.
  3. Sails: Smaller, flat pieces arranged like sails.
  4. Rigging: Twine or thin rope to mimic the boat’s rigging.

Assembling the Sailboat

Once you have your design, follow these easy steps to assemble your driftwood sailboat:

  1. Create the Hull: Place the largest piece of driftwood at the base.
  2. Attach the Mast: Secure a longer piece vertically using glue. Allow it to dry thoroughly.
  3. Add the Sails: Arrange smaller pieces to resemble sails and glue them onto the mast and hull.
  4. Add Rigging: Use twine or thin rope to create the appearance of rigging lines.

Customizing with Paint

If you want to add a splash of color to your driftwood sailboat, consider painting some sections. Soft whites, blues, or even bright colors can make your piece pop while still maintaining its rustic charm.

Hanging Your Sailboat Wall Art

Choosing the Placement

Deciding where to hang your driftwood sailboat wall art is almost as crucial as the art itself. Here are some prime spots:

  • Above the fireplace
  • In the hallway or entryway
  • In the living room behind the sofa
  • In a nautical-themed bathroom

Mounting Tips

To securely mount your driftwood sailboat:

  1. Use Proper Hooks: Heavy-duty hooks or wall anchors ensure that your masterpiece stays put.
  2. Balanced Weight: Make sure the weight of your driftwood is evenly distributed to avoid it tipping to one side.
  3. Secure with Twine: If your piece is large and heavy, consider using twine to attach extra mounting points to evenly distribute the weight.

Driftwood Sailboat Wall Art

Maintenance and Care

Dusting

Driftwood can collect dust over time, just like any other decorative piece. Use a soft brush or a dust cloth to keep your artwork looking pristine.

Avoiding Moisture

Since driftwood is naturally porous, it can absorb moisture, which could potentially damage it. Try to avoid hanging your artwork in overly humid locations. If you’ve used a sealant, this will also help protect against moisture.

Seasonal Updates

Feel free to refresh your driftwood sailboat with the seasons. Add some winter-themed decor during the holidays or summer accents when the weather warms up. This way, your wall art stays dynamic and engaging all year round.

Inspiring Ideas and Variations

Adding Personal Touches

Personalizing your driftwood sailboat can make it even more special. Consider adding:

  • Family Photos: Attach small photos to the sails or hull for a personal touch.
  • Names or Dates: Paint names or special dates onto the driftwood.
  • Decorative Elements: Add seashells, anchors, or other nautical elements to complement your sailboat.

Advanced Designs

If you want to challenge yourself, try more intricate designs. Here are some ideas:

IdeaDescription
Multi-SailboatsCreate a series of smaller sailboats instead of one large piece.
Background ScenePaint a backdrop of the ocean and sky on your wall and mount the sailboat in front of it.
Lighted SailboatIncorporate small LED lights to make your sailboat glow.

FAQs About Driftwood Sailboat Wall Art

Can I Use Any Driftwood?

Essentially, yes, as long as it’s dry and clean. Different types of driftwood will give you different textures and looks, so feel free to experiment.

What Tools Do I Need?

Basic tools like sandpaper, a hot glue gun, and scissors for cutting twine should suffice for most projects.

Is Driftwood Sailboat Wall Art Heavy?

This can vary, but typically it’s not too heavy. Just ensure you use proper mounting hardware to secure it safely to your wall.

Can I Buy Ready-Made Driftwood Sailboat Wall Art?

Absolutely! There are plenty of artisans who sell beautiful driftwood sailboat wall art. Check out local craft stores, online marketplaces like Etsy, or even art fairs.

How Long Does it Take to Make?

This largely depends on the complexity of your design and the drying times for glue and paint. A simple project can be completed in a few hours, while more intricate designs may take a bit longer.

Conclusion

Creating driftwood sailboat wall art is not just a rewarding DIY project but a chance to bring a piece of the ocean’s magic into your home. Each creation will be as unique as the driftwood pieces you choose, making your decor truly one-of-a-kind. Whether you want a rustic, beachy feel or a modern nautical theme, driftwood sailboat wall art offers endless possibilities. Ready to make your walls come to life? Time to embark on this artistic adventure!

Filed Under: Driftwood Ideas Tagged With: craft, DIY, Driftwood, sailboat, Wall Art

Driftwood Furniture Diy

June 27, 2024 by admin

Driftwood Furniture DIY

Imagine transforming found treasures from nature into stunning pieces that adorn your home. In this article, you’ll discover the art of crafting bespoke furniture using driftwood, combining rustic charm with unique character. From gathering the perfect pieces along your favorite beach to sanding and assembling them into coffee tables, shelves, or statement decor, this guide walks you through each step with easy-to-follow instructions. You’ll not only learn the practical aspects of working with driftwood but also gain inspiration to infuse your space with a touch of coastal beauty, all created by your own hands. Have you ever strolled along a beach and found yourself captivated by the artistry of nature-worn driftwood? If so, you’re not alone! This natural treasure has a unique charm, making it a perfect candidate for DIY furniture projects. Whether you’re a seasoned DIY enthusiast or just getting started, creating driftwood furniture can be both rewarding and enjoyable. In this guide, we’ll walk you through everything you need to know to get started with your own driftwood furniture DIY projects.

What is Driftwood?

Driftwood is wood that has been washed ashore by the forces of tides, currents, and waves. This type of wood usually originates from trees that have been uprooted and carried into bodies of water. Over time, the water and elements smooth the wood, giving it a beautiful, rustic appearance that’s perfect for furniture making.

The Appeal of Driftwood

Driftwood’s natural weathering process results in unique shapes, textures, and colors. Each piece is a one-of-a-kind find, adding character and charm to your furniture. Plus, using driftwood in your projects contributes to sustainable practices by recycling nature’s bounty into functional art.

Where to Find Driftwood

Before you can start creating, you’ll need to gather materials. Driftwood can be found along beaches, riverbanks, and lakeshores. Always be sure to check local regulations regarding the collection of driftwood to ensure you’re in compliance. Some areas have restrictions to protect natural habitats.

Planning Your Project

Before diving into your DIY driftwood project, it’s crucial to plan properly. This includes selecting the right kind of furniture to make, sourcing materials, and deciding on a design.

Choosing Your Project

Begin by deciding what type of furniture you want to create. Here are some ideas to get your creative juices flowing:

  • Coffee Tables: Use driftwood pieces as legs or a base.
  • Shelves: Create rustic shelves with pieces of driftwood as supports.
  • Headboards: Construct a unique driftwood headboard to give your bedroom a coastal feel.
  • Chairs and Benches: Make a statement piece for your patio or living room.

Sketch Your Design

Having a plan on paper helps visualize the project and serves as a useful guide during construction. Sketch a simple drawing of your desired furniture piece, noting the dimensions and where each piece of driftwood will go.

Driftwood Furniture Diy

Gathering Your Materials

Aside from your driftwood, you’ll need a variety of tools and materials to bring your project to life. Here are some essentials:

Basic Tools and Materials

Tool/MaterialPurpose
SandpaperSmoothes rough edges
SawCuts driftwood to the desired length
DrillCreates holes for screws or dowels
ScrewsSecures pieces together
Wood GlueProvides additional hold
Finishing OilEnhances the wood’s natural beauty
ClampsHolds pieces together while drying

Safety Gear

It’s important to prioritize safety. Here’s what you’ll need:

  • Gloves: To protect your hands from splinters.
  • Goggles: To shield your eyes from dust and debris.
  • Mask: To avoid inhaling dust particles.

Preparing the Driftwood

Once you have gathered your materials and tools, the next step is preparing the driftwood. Proper preparation ensures that your furniture will be both beautiful and durable.

Cleaning the Driftwood

Begin by thoroughly cleaning your driftwood pieces. Use a stiff brush to remove sand, dirt, and any loose bark. If the driftwood is still dirty, soak it in a mixture of water and mild detergent for a few hours, then rinse and let it dry completely.

Sanding and Cutting

Once the driftwood is clean, use sandpaper to smooth out any rough edges. This will make the wood safer to handle and give it a finished look. If you need to cut the driftwood to specific lengths or shapes, use a saw at this point. Carefully measure and cut as required by your design.

Driftwood Furniture Diy

Constructing Your Furniture

With your materials prepped and your design in hand, it’s time to start building. This is the most exciting part of any DIY project!

Assembling Pieces

Follow your sketched design as you begin assembling the pieces of your furniture. Use a combination of screws and wood glue to secure the driftwood. Clamps can be incredibly helpful to hold pieces together as the glue dries.

Drilling and Dowel Pins

For added stability, you may want to use dowel pins in addition to screws. Drill holes where the pieces will connect and insert wooden dowels, securing them with glue. This will provide extra strength to your furniture.

Checking for Stability

Before moving on to finishing touches, ensure that your furniture is stable and all parts are securely fastened. Give it a few shakes and make any necessary adjustments.

Finishing Your Driftwood Furniture

The finishing touches will enhance the natural beauty of the driftwood and help protect your furniture.

Cleaning Up

Before applying any finish, make sure your furniture is clean and free of dust. A tack cloth or a damp rag can be used to wipe away any remaining particles.

Applying Finishing Oil

Using a good quality finishing oil will bring out the natural colors and textures of the driftwood. Apply the oil with a clean cloth, following the grain of the wood. Allow it to soak in and then buff away any excess with a dry cloth. This will leave a smooth, polished surface.

Adding Protective Coatings

For extra protection, especially for outdoor furniture, consider adding a clear sealant. This will protect the wood from moisture and UV rays, prolonging the life of your furniture.

Tips and Tricks

Every DIY project comes with its own set of challenges. Here are some tips to help you along the way:

Selecting the Right Driftwood

  • Size and Shape: Look for pieces that match the dimensions you need.
  • Condition: Avoid driftwood that is rotten or has extensive damage.
  • Texture: The more unique the texture, the more character your furniture will have.

Making Adjustments

  • Flexibility: Be prepared to adjust your design based on the pieces you find.
  • Extra Material: Always collect more driftwood than you think you’ll need. This gives you more options during construction.

Enhancing Natural Beauty

Use natural oils and minimal coatings to maintain the rustic look of the driftwood. Too many layers of finish can take away from the wood’s natural charm.

Budget Considerations

DIY projects can be quite cost-effective, especially when using materials like driftwood that you gather yourself. However, there are still costs to consider.

Budget Breakdown

ItemEstimated Cost
DriftwoodFree (if collected yourself)
Basic Tools$50 – $100
Screws and Dowels$10 – $20
Wood Glue$5 – $10
Finishing Oil$10 – $20
Safety Gear$20 – $40

Saving Money

  • Thrift Stores: Check for second-hand tools and materials.
  • Sales and Discounts: Look for sales at hardware stores.
  • Borrow or Rent: If you don’t plan on making furniture often, consider borrowing or renting tools.

Inspiration and Ideas

Sometimes, seeing what others have created can spark your own creativity. Look for inspiration online or in coastal living magazines. Here are a few ideas to get you started:

Driftwood Picture Frames

A driftwood picture frame adds a touch of coastal charm to any room. Simply collect smaller pieces of driftwood, cut them to size, and attach them around a basic frame.

Driftwood Mirrors

Similar to picture frames, driftwood mirrors are visually stunning and can become a focal point in your home. Attach driftwood pieces around the perimeter of a mirror for a rustic appeal.

Driftwood Candleholders

Create simple candleholders by attaching a few pieces of driftwood together with glue and placing a small candle on top. These can be used as table centerpieces or decorative accents.

Troubleshooting Common Issues

Even with meticulous planning, issues can arise. Here are some common problems and how to address them:

Uneven Surfaces

Driftwood often has uneven surfaces that can make assembly challenging. Use a sander or planer to even out the areas where the pieces will connect.

Structural Weakness

If you find that your furniture is wobbly or unstable, reinforce the joints with additional screws or dowels. Ensure that all connections are tight and secure.

Finish Issues

If your finish isn’t coming out as expected, it might be due to residual dust or dirt. Clean the wood thoroughly before applying the finish, and always follow the manufacturer’s instructions.

Conclusion

Creating your own driftwood furniture can be an incredibly rewarding experience. Not only do you end up with a unique, eye-catching piece, but you also gain the satisfaction of crafting something with your own hands. With careful planning, the right materials, and a bit of patience, you’ll have beautiful driftwood furniture that brings a touch of nature into your home.

So what are you waiting for? Grab your tools, head to the beach, and start collecting that driftwood. Your next DIY project awaits, and who knows – it might just be your best one yet!

Filed Under: Driftwood Ideas Tagged With: crafting, DIY, Driftwood, furniture, home decor

Driftwood Wall Art With Plants

June 26, 2024 by admin

Driftwood Wall Art With Plants” invites you into a creative journey where nature meets rustic charm. Imagine adorning your walls with beautiful pieces of driftwood, each uniquely shaped and weathered by the elements. You carefully arrange succulents and air plants, adding vibrant greens that bring life and freshness to the natural wood. This delightful blend creates an organic, yet sophisticated, wall art that not only enhances your living space but also reflects your love for nature and sustainable decor. Get ready to transform any room into a serene haven with this simple and beautiful DIY project. Have you ever thought about bringing a touch of nature into your home with something unique and timeless? If so, then driftwood wall art with plants might be just what you need. Imagine combining the rustic charm of driftwood with the fresh beauty of live plants. It’s like having a piece of nature’s art right on your wall.

Driftwood Wall Art With Plants

Driftwood: Nature’s Art

What Is Driftwood?

Driftwood refers to wood that has been washed onto the shore by the action of winds, tides, or waves. Over time, this wood is smoothed and shaped by the elements, creating unique pieces with individual characteristics. No two pieces of driftwood are ever identical, making each sculpture one-of-a-kind.

Why Choose Driftwood?

Driftwood brings a rustic, organic element into any decor. It has a natural, weathered look that adds character and a sense of history to your home. Additionally, it’s an eco-friendly option; by using driftwood, you’re recycling and giving a new purpose to what might otherwise be considered waste.

Plants: A Breath of Fresh Air

Benefits of Indoor Plants

Plants offer numerous benefits when integrated into your home. They purify the air, reduce stress, and enhance the overall aesthetics of any space. Adding plants to your driftwood wall art creates a living piece that changes and grows, adding a dynamic element to your decor.

Best Plants for Driftwood Art

Not all plants will thrive on driftwood art, but many are perfectly suited for this type of display. Consider the following:

Plant TypeDescription
SucculentsLow-maintenance and drought-tolerant, great for indoor displays.
Air Plants (Tillandsia)Require no soil, easy to mount directly on driftwood.
MossesAdd a lush, green appearance and are easy to grow.
FernsProvide a delicate, leafy green touch.

Combining Driftwood and Plants

Choosing Your Driftwood

When selecting driftwood, consider its size, shape, and texture. Look for pieces that have interesting shapes and natural niches where plants can be easily attached or fitted. The driftwood should be sturdy enough to support your plants and any additional hardware needed for mounting.

Prepping the Driftwood

Before you start arranging your plants, it’s essential to prep the driftwood. Start by cleaning it thoroughly to remove any sand, salt, or debris. Soaking the driftwood in freshwater for a few days can help remove any remaining salt. Once clean, let it dry completely.

Attaching the Plants

Attaching plants to driftwood can be done in several ways, depending on the type of plant.

  • For air plants, you can use a non-toxic glue or fishing line.
  • For succulents, secure them using inconspicuous wires or specially designed plant clips.
  • For mosses and ferns, you can use moisture-retaining materials like sphagnum moss as a base and tie them with fishing line or plant wire.

Design Ideas

Minimalist Approach

If you prefer a minimalist look, consider using a single stalk of an air plant or a small cluster of succulents. This approach highlights the natural beauty of the driftwood while adding just a touch of greenery.

Lush and Green

For a more vibrant display, create a lush arrangement with multiple types of plants. Combine different textures and shades of green to create a visually appealing and varied piece.

Seasonal Themes

You can also theme your driftwood art according to the seasons. Use blooming succulents in the spring and summer, and perhaps opt for mosses or ferns in the fall and winter.

Driftwood Wall Art With Plants

Mounting and Displaying

Choosing the Right Location

The location you choose will affect both the driftwood and the plants. Look for a spot that gets plenty of indirect sunlight. Avoid direct sunlight, which can be too harsh for many plants and can fade the driftwood over time.

Installing Securely

Driftwood wall art should be securely mounted to ensure it can hold the weight of both the driftwood and the plants. Use sturdy hooks, brackets, or wall anchors that are appropriate for the weight of your piece.

Maintenance

Maintaining your driftwood wall art with plants involves regular watering and occasional pruning. The watering frequency will depend on the type of plants you’ve chosen. Mist air plants regularly, and water succulents sparingly.

DIY Driftwood Wall Art Project

Materials You’ll Need

Here is a list of basic materials you may need for a DIY project:

MaterialsPurpose
DriftwoodBase material for the art piece.
Plants (Succulents, Air Plants, Mosses)Living elements for the art.
Non-toxic GlueTo attach plants.
Fishing LineFor securing plants or additional driftwood pieces.
Plant Wires/ClipsTo secure heavier plants or those requiring more support.
Wall Hooks/BracketsFor mounting the driftwood art on the wall.

Step-by-Step Guide

  1. Select Your Driftwood: Find a piece that suits your style and space requirements.
  2. Clean and Prep: Clean the driftwood thoroughly and let it dry.
  3. Plan Your Design: Arrange your plants and other elements on the driftwood before attaching them.
  4. Attach Plants: Use glue, wires, or fishing line to secure the plants to the driftwood.
  5. Mount on Wall: Use appropriate hooks or brackets to securely mount your driftwood art on the wall.
  6. Care and Maintenance: Regularly water and inspect the plants to ensure they remain healthy and vibrant.

Inspiration and Personal Touch

Handmade Variations

Creating driftwood wall art is as much about creativity as it is about craftsmanship. Everyone’s art piece will be unique, reflecting personal tastes and styles. You might want to incorporate small decorative elements such as stones, shells, or even small trinkets that hold sentimental value.

Professional Pieces

If DIY isn’t your style, consider purchasing from artists who specialize in driftwood and plant art. Many artisans sell unique, ready-made driftwood art that can be customized to match your home decor.

Community Workshops

Look for local workshops that teach you how to create driftwood art. These community gatherings are a fun way to learn new skills and meet people with similar interests.

Environmental Considerations

Responsible Sourcing

Always ensure you are collecting driftwood responsibly. Some areas may have regulations or restrictions on collecting natural materials. Choose sources that don’t harm the environment, and avoid over-collecting from any one location.

Sustainable Practices

Use organic materials and non-toxic glues to maintain an eco-friendly approach. Recycle and reuse whenever possible to minimize waste.

Conclusion

Driftwood wall art with plants is more than just a decor trend; it’s a way to bring the beauty and tranquility of nature into your home. Whether you decide to make your own or buy a professionally crafted piece, you’re adding something unique and vibrant to your living space. It’s a functional, beautiful, and environmentally conscious way to enhance your home’s style.

So, why wait? Dive into the world of driftwood and plants, and create your very own piece of nature-inspired art. You’ll cherish the serene beauty and natural elegance it brings to your home.

Filed Under: Driftwood Ideas Tagged With: DIY, Driftwood, Indoor Plants, Sustainable decor, Wall Art

Painted Driftwood Wall Art

June 25, 2024 by admin

Creating charming and rustic decor for your home can be simple and fun with Painted Driftwood Wall Art. In this guide, you’ll learn how to transform ordinary driftwood into beautiful, unique pieces that bring a touch of nature’s elegance to any space. With a bit of paint and creativity, you can craft stunning wall art that reflects your personal style and adds a warm, organic feel to your interior. Discover the joy of making one-of-a-kind artwork from the treasures you find along the shore, and let the beauty of nature inspire your creativity. Have you ever walked along a beach, picked up a piece of driftwood, and wondered about its journey and how you could turn it into a piece of art? Driftwood, with its weathered beauty, embodies the serene spirit of the sea and can be a unique addition to your home décor. With a little bit of creativity, patience, and paint, you can transform that humble piece of wood into stunning painted driftwood wall art.

What is Driftwood?

Driftwood is wood that has been washed onto shore by the winds, tides, or waves. Over time, it becomes naturally weathered, giving it a smooth texture and unique appearance. The journey taken by each piece of driftwood often adds a sense of mystery and charm.

Driftwood can be found in various shapes and sizes, making each piece unique. It’s this individuality that makes using driftwood in art so special, as no two pieces are exactly the same.

The Appeal of Painted Driftwood Wall Art

Painted driftwood wall art is more than just an art piece; it’s a way to connect with nature and bring a bit of the outdoors into your home. Here’s why you might find it appealing:

Eco-friendly and Sustainable

Using driftwood is an environmentally friendly choice. It’s essentially recycling nature’s debris and turning it into something beautiful and valuable instead of letting it go to waste.

Unique and Customizable

Each piece of driftwood is unique, and with a little creativity, you can customize it to suit your personal style or match your home’s décor. Whether you prefer abstract art, floral designs, or geometric patterns, the possibilities are endless.

Conversations Starter

A piece of painted driftwood wall art can be a real conversation starter. Your guests will likely be intrigued by the rustic charm and the story behind each piece. Plus, it gives you an opportunity to share your creative process and perhaps even inspire others to create their own art.

Painted Driftwood Wall Art

Selecting the Right Driftwood

Choosing the right driftwood is a crucial step in creating your art. Here are some tips to help you select the perfect piece:

Size and Shape

Consider the space where you plan to display your art. Do you want a long, narrow piece to hang vertically or a wide, flat piece for a more horizontal display? The size and shape of the driftwood will affect the overall look of your art.

ShapeBest for
Long and narrowVertical hanging pieces
Wide and flatHorizontal wall displays
Small and unevenClustered or mosaic designs

Texture and Color

Driftwood comes in a variety of textures and colors, influenced by the type of wood and its exposure to the elements. Some pieces may have a smooth, polished look, while others are more rough and rugged. The natural color of driftwood can also vary from light sandy shades to darker browns and grays.

Stability and Durability

Ensure the driftwood piece you choose is sturdy and free from rot or excessive cracking. It should be able to withstand the painting process and hold up well once displayed.

Preparing Driftwood for Painting

Before you dive into painting, it’s essential to properly prepare your driftwood. This ensures that your artwork will look polished and last for a long time.

Cleaning the Driftwood

First, thoroughly clean your driftwood to remove any dirt, sand, and salt. You can do this by soaking the wood in water and then scrubbing it with a brush. Afterward, rinse it well and allow it to dry completely, which can take a few days depending on the size of the wood.

Sanding

Once clean, lightly sand the driftwood to smooth out any rough areas. This will make painting easier and give a more finished look to your art. Be careful not to over-sand, as you don’t want to lose the natural texture and character of the wood.

Sealing

Although optional, sealing your driftwood with a clear sealer can help to lock out moisture and preserve the wood. This step is especially recommended if the driftwood will be hung in a humid environment. Simply apply a coat of wood sealer and let it dry thoroughly.

Painted Driftwood Wall Art

Choosing the Right Paint and Supplies

The type of paint and supplies you use will significantly impact the final look of your driftwood art.

Types of Paint

  • Acrylic Paint: Versatile and quick-drying, acrylic paint is a popular choice. It comes in a wide variety of colors and can easily be layered for added texture.
  • Spray Paint: Useful for covering larger areas quickly, spray paint can give a smooth, even finish. It’s best used for base coats or background colors.
  • Oil Paint: Known for its rich texture and blending capabilities, oil paint takes longer to dry but can create detailed, professional-looking art.

Brushes and Tools

Different brushes and tools can create various effects on your driftwood:

Brush/ToolBest for
Fine-tip brushDetailed designs, thin lines
Flat brushBroad strokes, filling larger areas
Sponge brushCreating textures, blending colors
Palette knifeImpasto technique, texture creation

Additional Supplies

Apart from paint and brushes, you may need:

  • Painter’s Tape: To create clean lines and patterns.
  • Stencils: For consistent shapes and designs.
  • Sealant: A final layer to protect your art.

Techniques for Painting Driftwood

The way you apply paint can completely change the final look of your art piece. Here are some popular techniques to consider:

Layering

Layering paint can add depth and dimension to your driftwood art. Start with a base coat and gradually add layers of colors, allowing each layer to dry before adding the next.

Stenciling

Using stencils can help you create precise, repeatable patterns and designs. Secure the stencil to the driftwood with painter’s tape and apply the paint with a sponge brush or stencil brush.

Freehand Painting

Freehand painting allows for the most creativity and personal expression. Use fine-tip brushes to add intricate details, or larger brushes for more abstract designs.

Ombre Effect

The ombre effect involves blending two or more colors to create a gradient. Start with the lightest color and gradually blend into the darker color, or vice versa.

Ideas for Driftwood Designs

No two pieces of driftwood art need to look the same. Here are some design ideas to get your creative juices flowing:

Coastal Themes

  • Seashells and Starfish: Incorporate marine life elements for a beachy vibe.
  • Lighthouses and Sailboats: Perfect for adding a nautical touch.
  • Waves and Ocean Scenery: Capture the movement and colors of the sea.

Rustic Nature

  • Trees and Forests: Use earthy tones to create a woodland scene.
  • Animals and Birds: Paint whimsical creatures like deer, owls, or birds perched on branches.
  • Floral Patterns: Add a splash of color with vibrant flowers and leaves.

Abstract Art

  • Geometric Patterns: Use shapes and lines for a modern, abstract look.
  • Dots and Splatters: Create a playful design using dots, splatters, or swirls.
  • Quotes and Words: Add meaningful quotes or words that inspire you.

Personalized Designs

  • Family Names: Create a wall art piece with your family name or initials.
  • Important Dates: Commemorate significant dates like birthdays or anniversaries.
  • Custom Symbols: Choose symbols that hold personal meaning to you, such as hearts, infinity signs, or zodiac symbols.

Assembling and Displaying Your Art

Once you’ve finished painting your driftwood, it’s time to prepare it for display.

Attaching Hanging Hardware

Depending on the size and weight of your driftwood, you may need different types of hardware:

HardwareSuitable for
Sawtooth hangersSmall to medium-sized driftwood
D-ring hangersLarger, heavier pieces
Wire and hooksFor adjustable length and hanging flexibility

Secure the hardware to the back of your driftwood, ensuring it’s sturdy enough to support the weight. You might need a drill and screws to properly attach the hangers.

Arranging Multiple Pieces

If you’ve created multiple pieces of driftwood art, consider how they’ll be arranged on the wall. Plan your layout by arranging the pieces on the floor first:

  • Symmetrical Arrangements: Balanced and orderly, great for creating a cohesive look.
  • Asymmetrical Arrangements: More dynamic and interesting, perfect for eclectic styles.
  • Cluster Arrangements: Group smaller pieces together to form a larger, unified display.

Lighting and Placement

Good lighting can make a big difference in how your art is perceived. Natural light can enhance the colors, while spotlighting can create dramatic effects. Consider the room’s lighting and choose a spot where your art will be well-lit but not exposed to direct sunlight for prolonged periods, which can cause fading.

Caring for Your Driftwood Art

Maintaining your driftwood art will help ensure it stays beautiful for years to come.

Dusting

Regularly dust your driftwood art to keep it looking fresh. Use a soft-bristle brush or a microfiber cloth for best results.

Avoiding Moisture

Keep your driftwood art away from damp areas to prevent mold or rot. If you must hang it in a humid room, make sure it’s sealed properly.

Touch-ups

Over time, you might notice some areas of your paint fading or chipping. Keep some of your original paint colors on hand for easy touch-ups.

Conclusion

Creating painted driftwood wall art is a rewarding and enjoyable process that allows you to bring a piece of nature into your home. It’s a perfect way to use materials that you might otherwise overlook and transform them into something beautiful and meaningful. With the right driftwood, a bit of preparation, and your artistic touch, you can create a unique piece of art that reflects your personal style and creativity. So next time you find yourself walking along the beach, pick up that piece of driftwood and imagine the possibilities. Happy creating!

Filed Under: Driftwood Ideas Tagged With: DIY, driftwood art, Handmade Art, Painted Driftwood, Wall Decor

  • « Previous Page
  • Page 1
  • …
  • Page 29
  • Page 30
  • Page 31
  • Page 32
  • Page 33
  • …
  • Page 41
  • Next Page »

Primary Sidebar

Driftwood4us.com, is a participant in the Amazon Services LLC Associates Program, an affiliate advertising program designed to provide a means for sites to earn advertising fees by advertising and linking to amazon.com.