• Skip to main content
  • Skip to primary sidebar
  • Terms and Conditions
  • Privacy Policy
  • Contact

Driftwood 4 Us

Just About Driftwood

DIY

Driftwood Furniture Diy Projects

May 26, 2024 by admin

Discover the joy of creating with “Driftwood Furniture DIY Projects,” your go-to guide for transforming nature’s treasures into stunning home decor. As you delve into this unique world of craftsmanship, you’ll find easy-to-follow instructions and inspiring ideas that will ignite your creativity. This article shares everything you need to know, from sourcing the perfect driftwood to assembling one-of-a-kind pieces that add a touch of rustic charm to your living space. Get ready to bring the serene beauty of the shoreline into your home with your very own handmade driftwood furniture!

Driftwood Furniture DIY Projects

Have you ever wandered along a beach, collected a piece of driftwood, and wondered what to do with it? Well, you’re not alone. Many people find the beauty and uniqueness of driftwood irresistible, but aren’t quite sure how to turn it into something useful or decorative. That’s where this guide comes in handy!

In this article, you’ll learn how to transform those lovely pieces of driftwood into stunning pieces of furniture. By the end of your read, you’ll be ready to embark on your own driftwood DIY projects.

Driftwood Furniture Diy Projects

Why Choose Driftwood for DIY Projects?

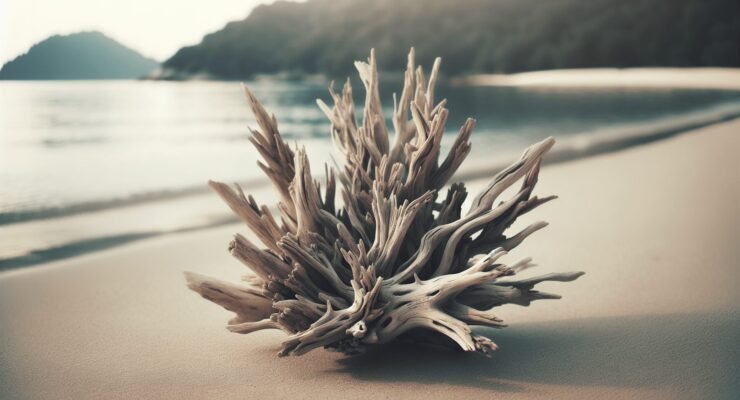
Before diving into the projects, let’s explore why driftwood is such an excellent material for DIY furniture. Driftwood, as the name suggests, is wood that has been carried by the water to the shore. The natural weathering process gives it a distinctive look that you can’t find with other types of wood.

Unique Aesthetic

One of the main reasons to use driftwood is its unique aesthetic. Each piece is different, shaped by the tides, sun, and time. It’s like bringing a piece of nature into your home with all its imperfections and beauty.

Eco-Friendly

Driftwood is essentially recycled wood, which makes it an eco-friendly option for DIY enthusiasts. When you use driftwood, you’re repurposing a material that would otherwise potentially go to waste.

Durability

Driftwood is naturally durable. The process of being weather-beaten and sun-bleached makes this type of wood robust. It’s perfect for creating furniture that will stand the test of time.

Things to Consider Before Starting

There are a few key points you should consider before diving into your DIY projects.

Safety Measures

While working with driftwood is generally safe, certain precautions should be taken. Driftwood may have splinters, nails, or other sharp objects embedded in it. Always wear gloves when handling driftwood and safety glasses when cutting or sanding it.
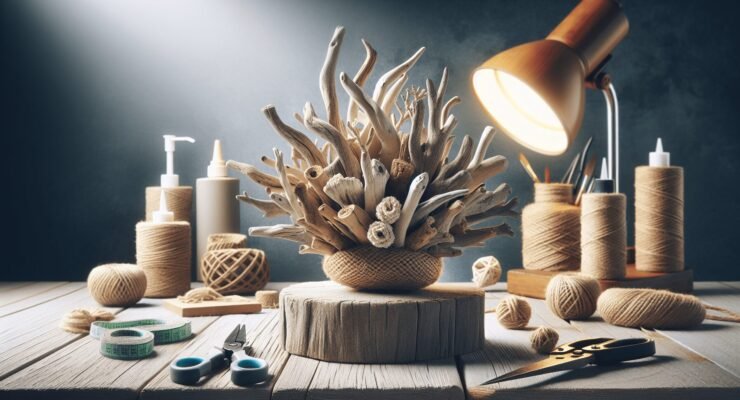
Tools You’ll Need

Having the right tools is crucial. Here’s a basic list:

ToolPurpose
SawFor cutting pieces of driftwood
Sandpaper/ SanderTo smooth surfaces and edges
DrillFor making holes and attaching screws
Screws and NailsFor joining pieces together
Paint/ Wood VarnishTo finish and protect your final piece
Measuring TapeFor accurate measurements

Surface Preparation

Before using driftwood in any project, you’ll need to clean it and remove any salt, sand, or dirt. Soak the driftwood in a solution of water and bleach for 24 hours. Rinse it well and let it dry thoroughly before use.

Driftwood DIY Furniture Project Ideas

Now that you’ve prepared and gathered your materials, let’s explore some DIY projects you can embark on.

Driftwood Coffee Table

Creating a driftwood coffee table is a fantastic first project and offers a great combination of function and style.

Materials Needed:

  • Several pieces of driftwood
  • Glass tabletop (optional)
  • Screws and nails
  • Wood glue
  • Sandpaper

Steps to Follow:

  1. Design your table: Lay out your pieces of driftwood and try various arrangements until you find a design that you like.
  2. Cut and sand: Cut the driftwood to the desired length and sand down any rough edges.
  3. Assemble the base: Use screws and wood glue to assemble the base of your table. Ensure it is stable.
  4. Add the tabletop: If you’re using a glass top, simply place it on top of your base. For a wooden top, attach it using screws or nails.

Driftwood Lamp

A driftwood lamp can add a rustic yet elegant touch to any room. It’s also a relatively simple project if you’re just starting out.

Materials Needed:

  • Driftwood piece (suitable for a lamp base)
  • Lamp kit (available at most hardware stores)
  • Sandpaper
  • Drill

Steps to Follow:

  1. Select your driftwood: Choose a piece of driftwood that has a flat bottom stable enough to stand on its own.
  2. Bore a hole: Drill a hole through the selected driftwood to run the lamp cord through.
  3. Assemble the lamp kit: Follow the manufacturer’s instructions for the rest of the setup.
  4. Finishing touches: Sand the driftwood to smooth out any rough areas and apply a finish if desired.

Driftwood Shelves

Adding shelves made of driftwood can elevate your home decor by introducing a natural, rustic element.

Materials Needed:

  • Pieces of driftwood (straight for shelving)
  • Brackets for wall mounting
  • Screws and anchors
  • Sandpaper

Steps to Follow:

  1. Measure and cut: Measure the space where you want to place the shelves and cut the driftwood pieces to the desired length.
  2. Sand the wood: Smooth out any rough areas with sandpaper.
  3. Install brackets: Use screws and wall anchors to attach the brackets to the wall.
  4. Place the driftwood: Securely place the driftwood on the brackets, making sure everything is level.

Driftwood Headboard

A driftwood headboard can become the focal point of your bedroom, giving it a cozy and earthy feel.

Materials Needed:

  • Long pieces of driftwood (similar in length)
  • Wood screws
  • Sandpaper
  • Drill

Steps to Follow:

  1. Design layout: Arrange the pieces of driftwood on the floor to determine the design of your headboard.
  2. Sand and cut: Sand the pieces and cut them to the same height.
  3. Assemble the headboard: Attach the driftwood pieces to a wooden frame using wood screws. Ensure it’s stable and secure.
  4. Mount or place: Attach the headboard to your bed frame or mount it on the wall behind your bed.
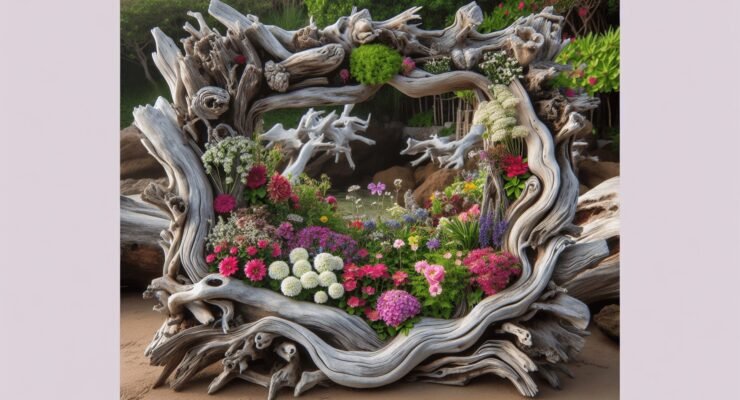
Driftwood Planters

Driftwood planters are an excellent way to bring greenery into your home while maintaining a natural aesthetic.

Materials Needed:

  • Small pieces of driftwood
  • Wood screws or nails
  • Small pots or plastic liners
  • Sandpaper

Steps to Follow:

  1. Design your planter: Arrange the driftwood pieces to form the sides of a box.
  2. Sand the wood: Smooth out any rough edges with sandpaper.
  3. Assemble the planter: Attach the pieces together using wood screws or nails.
  4. Finish: Place the small pots or liners inside the wooden box, and add your plants.

Tips for Success

Here are some valuable tips that will help you succeed in your driftwood furniture projects:

Working with Imperfections

Driftwood is naturally imperfect, and that’s part of its charm. Embrace the unique shapes and textures. Work with the wood, not against it.

Patience Pays Off

Working with driftwood can sometimes be time-consuming. Whether it’s waiting for the wood to dry or sanding it down, be patient. The results will be worth the effort.

Experiment and Innovate

Don’t be afraid to try something new. Experiment with different finishes, stains, or even combining driftwood with other materials like metal or glass.

Driftwood Furniture Diy Projects

Finishing Touches

Once your furniture is assembled, you’ll want to put some finishing touches on it to enhance its look and durability.

Sanding and Sealing

Sanding your driftwood furniture will remove any rough spots and give it a smooth finish. After sanding, consider sealing the driftwood to protect it from future wear and tear.

Sealing Tips:

  • Use a clear wood sealer if you want to maintain the natural look.
  • For a different aesthetic, consider staining the wood before sealing.

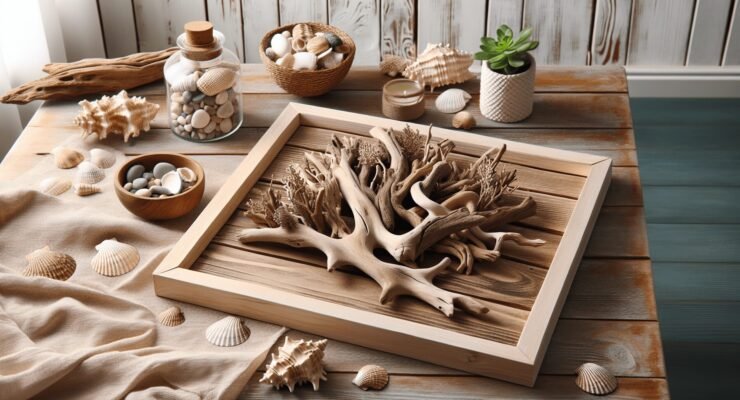
Adding Cushions or Decorative Elements

For pieces like benches or chairs, adding cushions can increase comfort. Look for materials that complement the natural look of driftwood. Decorative elements like rope, shells, or even lights can enhance the rustic charm of your driftwood furniture.

Driftwood Furniture in Different Rooms

Let’s explore how you can incorporate driftwood furniture into various rooms in your home.

Living Room

  • Coffee Table: As mentioned earlier, a driftwood coffee table can be a centerpiece in your living room.
  • Shelves: Small driftwood shelves can hold books, plants, or decorative items.

Bedroom

  • Headboard: A driftwood headboard adds a rustic touch and can be crafted to fit any size bed.
  • Lamp: Bedside driftwood lamps create a cozy atmosphere.

Kitchen and Dining Area

  • Dining Table: A larger project, a driftwood dining table can be a breathtaking piece for your dining area.
  • Bar Stools: Driftwood bar stools are a quirky, natural addition to your kitchen island or bar area.
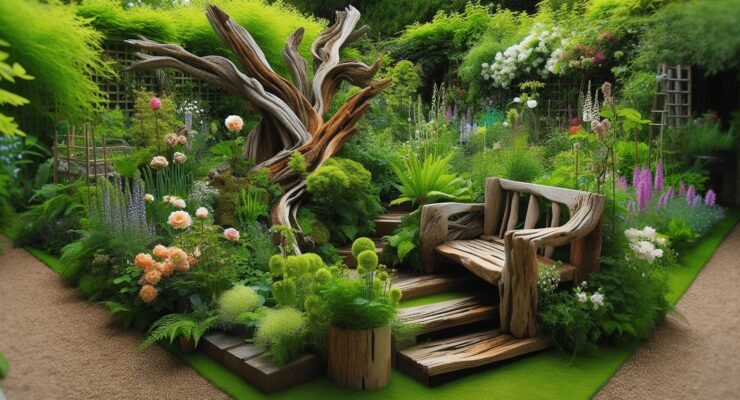
Outdoor Space

  • Benches: Create comfy seating for your garden or deck.
  • Planters: Use driftwood planters to house flowers, herbs, or small shrubs.

Cleaning and Maintenance

Driftwood furniture, like any other type of furniture, requires care and maintenance to keep it looking its best.

Regular Cleaning

Regular dusting with a soft cloth will keep your furniture looking fresh. For deeper cleaning, use a damp cloth but avoid soaking the wood.

Maintenance Tips

  • Inspect Regularly: Periodically check for loose screws or nails and tighten them as needed.
  • Reapply Sealant: Depending on the environment, you may need to reapply a sealant every few years to protect the wood.

Driftwood Furniture: A Sustainable Choice

Choosing driftwood for your DIY furniture projects isn’t just a creative choice, but a sustainable one as well. Here’s why:

Less Waste

Driftwood is often considered “waste” by the natural environment. Repurposing it means less waste overall.

Eco-Friendly Materials

Using natural materials like driftwood reduces the demand for new, commercially produced wood, which often involves harmful deforestation practices.

Conclusion

Turning driftwood into beautiful, functional pieces of furniture is not only rewarding but also eco-friendly. Whether you’re making a coffee table, lamp, or shelves, each project allows you to bring a unique piece of nature into your home. With a bit of patience, creativity, and effort, you can create stunning driftwood furniture that showcases the beauty of the natural world.

So, next time you find yourself on the beach, pick up a piece of driftwood and envision the endless possibilities for your next DIY project. Happy crafting!

Filed Under: Driftwood Ideas Tagged With: crafts, DIY, Driftwood, furniture, home decor

Driftwood Projects For The Garden

May 26, 2024 by admin

In “Driftwood Projects For The Garden,” you’ll discover a world of creativity that turns weathered, fallen wood into enchanting garden decor. This guide is brimming with inspirational ideas and practical tips for repurposing driftwood, transforming it into everything from rustic planters to whimsical garden sculptures. Ideal for both seasoned and novice gardeners, these projects are a perfect way to add a touch of natural beauty and personal flair to your outdoor space. Let your imagination flow and watch your garden come alive with the unique charm of driftwood accents.

Driftwood Projects For The Garden

Have you ever found yourself wandering along the beach, coming across unique and beautifully weathered pieces of driftwood and wondering how they could be used to enhance your garden? The natural beauty and rustic charm of driftwood can add a quaint and personal touch to your outdoor space. Whether you’re a seasoned DIY enthusiast or new to garden crafts, driftwood offers endless possibilities to get creative.

In this article, we’ll dive into a variety of driftwood projects for the garden that you can easily recreate. From simple decorations to functional garden features, you’ll discover how to turn those beach treasures into something spectacular for your garden.

Why Use Driftwood in Your Garden?

Before diving into specific projects, it’s important to understand why driftwood is such an excellent material for garden crafts. Driftwood is more than just old wood; it has several qualities that make it an ideal choice for outdoor projects.

Unique and Accessible

Driftwood is essentially free material, often found scattered along shorelines. Each piece is unique, shaped by the elements, making every project distinct. If you live near a coast, you’re in for a handy resource.

Environmentally Friendly

Using driftwood is a form of recycling. By repurposing wood that nature has provided, you’re contributing to sustainable living practices. Plus, due to its natural aging process, driftwood is typically quite durable.

Versatile

Driftwood can be used in many different garden projects, ranging from practical objects like planters and garden furniture to decorative elements such as sculptures and wind chimes. The versatility of driftwood can fit into any garden aesthetic, whether it’s modern, rustic, or something in between.

Tools and Supplies You’ll Need

Before you start your driftwood projects, gather some essential tools and supplies. Here’s a table of what you might need:

Tool/SupplyPurpose
Crowbar or HammerTo remove nails or anything stuck in wood
SandpaperTo smooth rough edges
DrillTo make holes for screws or twine
Screws/NailsFor assembly
Twine/WireFor binding pieces together
Wood SealantTo protect the wood from elements
GlovesFor hand protection
Measuring TapeFor accurate measurements
SawFor cutting wood to size
Hot Glue GunFor quick adhesion of pieces

Having these tools on hand will make your driftwood crafting experience much smoother and efficient.

Driftwood Plant Hangers

One of the simplest yet most effective driftwood garden projects is creating plant hangers. Driftwood plant hangers can emphasize both the beauty of the plants and the rustic appeal of the wood.

Steps to Create Driftwood Plant Hangers

  1. Choose Your Piece: Select a piece of driftwood that is long enough to support the plants you want to hang.
  2. Prepare the Wood: Clean the driftwood to remove any dirt or debris, and sand down any rough edges.
  3. Drill Holes: Drill evenly spaced holes into the driftwood. These holes will hold the twine or wire for hanging your pots.
  4. Attach Twine or Wire: Cut lengths of twine or wire to the size you want your plants to hang. Loop the twine or wire through the holes and tie securely.
  5. Secure Your Pots: Attach small pots or other planters to the twine or wire. If needed, add a bit of hot glue to keep the pots from shifting.
  6. Hang Your Creation: Find a suitable place in your garden, patio, or balcony to hang your new driftwood plant hanger.

Tips for Success

  • Use lightweight pots to avoid putting too much strain on the driftwood.
  • Opt for trailing plants like ivy or pothos to create a cascading effect.

Driftwood Projects For The Garden

Driftwood Garden Markers

Garden markers help you keep track of what you’re growing, and driftwood makes for an excellent base material.

Steps to Create Driftwood Garden Markers

  1. Select Smaller Pieces: Choose smaller, flat pieces of driftwood suitable for writing or engraving.
  2. Clean and Sand: Clean the driftwood thoroughly and sand any rough edges.
  3. Write or Engrave Names: Use a paint pen or engraver to write the names of the plants on the driftwood pieces.
  4. Seal the Wood: Apply a wood sealant to protect the markers from the elements.
  5. Place in Garden: Stake the markers into the ground near the corresponding plants.

Tips for Success

  • Use different sizes for different kinds of plants to make it easier to identify them.
  • Customize with colors or patterns to add a whimsical touch to your garden beds.

Driftwood Pathways

Driftwood pathways can add an enchanting element to your garden, guiding visitors through various areas while blending seamlessly with natural surroundings.

Steps to Create Driftwood Pathways

  1. Gather Larger Pieces: Look for larger, flatter pieces of driftwood that can serve as stepping “stones.”
  2. Plan Your Path: Lay out the path in your garden to see how the driftwood pieces will fit together.
  3. Prepare the Ground: Level the ground where each piece of driftwood will be placed.
  4. Place the Driftwood: Arrange the driftwood pieces in the desired pattern, ensuring they are stable and level.
  5. Secure in Place: If necessary, secure the driftwood segments with stakes or by burying parts slightly into the ground.

Tips for Success

  • Combine different shapes and sizes for a more natural look.
  • Consider adding some gravel or small stones between the driftwood pieces for added stability and aesthetic appeal.

Driftwood Garden Sculpture

A driftwood garden sculpture can become a stunning focal point in any garden. With its organic forms and natural beauty, driftwood lends itself well to artistic creations.

Steps to Create Driftwood Garden Sculpture

  1. Design: Start by deciding what type of sculpture you want to create—an abstract piece, an animal figure, or even something more elaborate like a driftwood tree.
  2. Gather Pieces: Collect various sizes and shapes of driftwood that will fit your design.
  3. Clean and Prepare: Clean each piece and sand down rough edges.
  4. Assemble the Base: Construct a stable base or core for your sculpture. This may require some trial and error to find the best fit.
  5. Secure Pieces Together: Use screws, nails, wire, or adhesive to connect the driftwood pieces according to your design.
  6. Finishing Touches: Make sure all connections are secure and add any finishing touches, such as small decorative elements, to complete the sculpture.
  7. Placement: Choose a prominent spot in your garden to display your masterpiece.

Tips for Success

  • Make sure the base is stable enough to withstand wind or garden activity.
  • Use a variety of driftwood pieces to add texture and interest to your sculpture.

Driftwood Projects For The Garden

Driftwood Birdhouses

Birdhouses made from driftwood can provide a charming home for local wildlife while adding character to your garden.

Steps to Create Driftwood Birdhouses

  1. Select the Wood: Choose pieces of driftwood that have a natural hollow or are suitable for creating a birdhouse structure.
  2. Design the Birdhouse: Sketch out your birdhouse design. Decide if you’re making an open birdhouse or one with a roof and walls.
  3. Cut and Shape: Use a saw to cut the wood to the required dimensions.
  4. Assemble: Use nails, screws, or strong adhesive to assemble the birdhouse. Ensure there are no sharp edges or points inside the birdhouse that could harm birds.
  5. Drill Entry Hole: Drill an entry hole suitable for the type of birds you want to attract.
  6. Finish and Mount: Apply a wood sealant to protect the birdhouse and mount it on a tree or pole.

Tips for Success

  • Make sure to research the dimensions needed for the specific bird species you want to attract.
  • Clean the birdhouse occasionally to ensure it’s safe and welcoming for its occupants.

Driftwood Arbors and Trellises

Driftwood can be used to create gorgeous arbors and trellises, offering support for climbing plants and adding vertical interest to your garden.

Steps to Create Driftwood Arbors and Trellises

  1. Collect Long Pieces: Gather long, sturdy pieces of driftwood that can act as the main structure.
  2. Design Your Structure: Plan out the design based on the space in your garden and the type of plants you will be supporting.
  3. Construct Framework: Begin by constructing the vertical posts and horizontal beams. Secure them into the ground or use a cement base if needed for stability.
  4. Add Cross Supports: Attach smaller driftwood pieces as cross supports, spacing them according to the climbing plants’ needs.
  5. Finishing and Installation: Ensure all pieces are securely attached and place the structure in your garden, ready for your climbing plants.

Tips for Success

  • Be sure your structure is strong enough to support the weight of the climbing plants.
  • Use additional ties or fasteners to help young plants start climbing more easily.

Driftwood Wind Chimes

A driftwood wind chime can add a soothing sound and a rustic look to your garden. Here’s how to make one.

Steps to Create Driftwood Wind Chimes

  1. Select Pieces: Choose various sizes and shapes of small driftwood pieces, as well as other materials like sea glass or shells.
  2. Clean and Drill: Clean the pieces and drill small holes near the top for stringing.
  3. Prepare the Base: Select a larger piece of driftwood to act as the base for your chime.
  4. Attach Strings: Cut lengths of twine or fishing line and tie one end through the holes in the smaller driftwood pieces.
  5. Assemble the Chime: Tie the other end of the twine to the larger piece of driftwood, spacing and adjusting for balance.
  6. Finish and Hang: Ensure all pieces are securely fastened and find a spot with a gentle breeze to hang your wind chime.

Tips for Success

  • Experiment with different materials to add color and varied sounds to your wind chime.
  • Make sure your knots are tight and check periodically for any wear and tear.

Driftwood Furniture

For those looking for a more ambitious project, creating furniture such as benches, tables, or even chairs from driftwood can yield impressive results.

Steps to Create Driftwood Furniture

  1. Gather Large Pieces: Look for robust, larger pieces of driftwood that can act as legs, supports, or surfaces.
  2. Design Plan: Sketch out your furniture design, keeping in mind the natural forms of the driftwood pieces.
  3. Clean and Prep: Clean all driftwood pieces thoroughly and sand any rough edges.
  4. Cut and Shape: Use a saw to cut wind pieces to your design specifications.
  5. Assemble: Use screws, nails, or strong wood adhesive to assemble the pieces according to your design.
  6. Finish: Apply wood sealant to protect your new furniture from the elements.

Tips for Success

  • Think about ergonomics to ensure your furniture is comfortable to use.
  • Be prepared to make some adjustments on the fly as you adapt to the natural shapes of the driftwood.

Driftwood Water Features

Incorporating a water feature made from driftwood can add a serene ambiance to your garden. Whether it’s a standalone piece or part of a larger installation, driftwood’s natural textures make it a perfect complement to water.

Steps to Create Driftwood Water Features

  1. Choose a Location: Decide where in your garden you want to place your water feature.
  2. Design Your Feature: Sketch out your design, whether a small fountain or a larger integrated stream or pond.
  3. Gather Driftwood Pieces: Look for large, stable pieces that can direct or contain water flow.
  4. Construct Base: Build a base for your water feature that will hold and channel water. This may include a pump if desired.
  5. Arrange Driftwood: Position your driftwood pieces to guide and enhance the water flow while securing them to your base structure.
  6. Install Pump: If using a pump, ensure it’s properly installed and concealed among the driftwood.
  7. Finish and Test: Fill with water and test the flow, making adjustments as needed.

Tips for Success

  • Use waterproof sealant to ensure no water leakage.
  • Regularly clean your water feature to avoid clogging with debris.

Maintenance Tips for Driftwood Projects

Ensuring the longevity of your driftwood garden projects involves some basic maintenance steps.

Regular Cleaning

Periodically clean your driftwood projects to control mildew and mold. A mild soap solution and soft brush should do the trick.

Check for Stability

Regularly check that all pieces (especially those that are structural, like trellises and furniture) are still secure.

Reapply Sealant

Driftwood retains its beauty best when protected from elements. Reapply wood sealant annually to keep it in good condition.

Inspect for Pests

Keep an eye out for wood-boring insects and address any issues promptly to prevent damage.

Conclusion

Driftwood is a fascinating medium for creating a wide range of interesting and useful garden projects. Its natural beauty and unique character can enhance any outdoor space, providing a rustic charm that’s hard to replicate with other materials. From simple plant hangers to complex sculptures and furniture, there’s a driftwood project for every skill level and garden style.

So next time you’re at the beach, think twice before walking past that next piece of driftwood. With a little creativity and some basic tools, you can transform it into something truly special for your garden. Happy crafting!

Filed Under: Driftwood Ideas Tagged With: crafts, DIY, Driftwood, garden decor, Outdoor Projects

Driftwood Floor Stain

May 24, 2024 by admin

Imagine transforming your home with the gentle, rustic charm of the sea. In “Driftwood Floor Stain,” you’ll discover how this unique, grayish hue can enhance the natural beauty of your floors, providing a weathered, yet elegant look. This article guides you through the application process, benefits, and maintenance tips, ensuring that your floors capture that serene, coastal vibe effortlessly. Whether you’re aiming for a chic, contemporary design or a cozy, beach-inspired retreat, driftwood floor stain offers the perfect touch of tranquility and style to your living space.

Driftwood Floor Stain

Have you ever strolled along a beach and admired the weathered look of driftwood? That timeless, rustic appeal has found its way into home interiors, giving floors a unique and charming look. If you’re considering a driftwood floor stain for your home, you’re in for a treat. This guide will walk you through everything you need to know about this exquisite floor stain, from its benefits to the application process and maintenance.

Driftwood Floor Stain

Why Choose Driftwood Floor Stain?

When you think about updating your floors, several options pop up: tiling, carpeting, or even a simple varnish. But what makes driftwood floor stain stand out?

Aesthetic Appeal

Driftwood stain gives your floors a natural, aged look that can bring a coastal, rustic, or even a modern chic vibe to your home. The grayish-brown tones create a unique depth and warmth that other stains often can’t match.

Versatility

Whether you have a cozy cottage or a sleek urban apartment, driftwood floor stain can match various decor styles. It blends well with numerous color schemes and furniture types, making it a versatile choice.

Durability

Staining your floors with a driftwood-inspired hue does more than enhance their aesthetics; it also offers a layer of protection against spills, stains, and daily wear and tear. Driftwood floor stain is durable and easy to maintain, thus extending the lifespan of your floors.

Understanding Driftwood Floor Stain

Before diving into the application process, it’s essential to understand what driftwood floor stain is made of and how it works.

Components of Driftwood Floor Stain

Driftwood floor stain is typically composed of a mix of pigments, solvents, and resins. The pigments give it its characteristic color, while solvents help the pigments penetrate the wood. Resins bind the mixture to the wood, enhancing its durability and resistance against external elements.

Types of Driftwood Floor Stain

  1. Water-Based Stains: These are easier to clean, quicker to dry, and have a lower odor. They are perfect if you’re looking for an eco-friendly option.

  2. Oil-Based Stains: These penetrate deeper into the wood, offering a richer color and higher durability. However, they take longer to dry and have a stronger odor.

Here’s a quick comparison to help you decide:

FeatureWater-Based StainsOil-Based Stains
Drying TimeFaster (1-2 hours)Slower (6-24 hours)
OdorLowHigh
CleanupEasier (water)Requires solvents
Eco-FriendlinessHighModerate
Depth of ColorModerateRicher

Pros and Cons

Knowing the pros and cons of driftwood floor stain can help you make an informed decision.

Pros:

  • Aesthetic Versatility: Complements various interior designs.
  • Durability: Offers a protective layer against wear and tear.
  • Easy Maintenance: Simple to clean and maintain.
  • Eco-Friendly Options: Available in water-based formulations.

Cons:

  • Application Time: Requires multiple coats and drying time.
  • Odor: Oil-based stains can have a strong odor.
  • Cost: Might be more expensive than some other floor finishes.

Preparing for the Application

Before you jump into staining your floors, proper preparation is crucial for achieving the best results.

Selecting the Right Driftwood Stain

Evaluate your needs, preferences, and the conditions of your floors. Are you looking for something quick and easy or something more durable and long-lasting?

Gathering Materials

To successfully apply a driftwood floor stain, you’ll need a few essential materials:

  1. Driftwood stain (water-based or oil-based)
  2. Sandpaper (various grits)
  3. Floor buffer
  4. Vacuum or broom
  5. Clean cloths
  6. Brushes or rollers
  7. Protective gear (gloves, mask)

Surface Preparation

  1. Sanding: Start by sanding the floor to remove any previous finish. Use coarse sandpaper for the initial sanding and gradually move to finer grits.
  2. Cleaning: Once sanded, thoroughly clean the floor to remove dust and debris. A vacuum or broom works best for this step.

Staining Process

Now that your floor is prepped, you’re ready to apply the stain. This part involves multiple steps and a bit of patience, but the results will be worth it.

Test the Stain

Before applying the stain to the entire floor, test it on a small, inconspicuous area. This step ensures that you’re happy with the color and that it reacts well with your wood type.

Applying the First Coat

  1. Mix the Stain: Thoroughly mix the stain to ensure uniform color.
  2. Apply Evenly: Using a brush or roller, apply the stain in the direction of the wood grain. Work in small sections to avoid uneven drying.
  3. Wipe Excess: After a few minutes, wipe off any excess stain with a clean cloth to prevent blotches.

Drying Time

Allow the floor to dry completely according to the manufacturer’s instructions. This usually ranges from a few hours to overnight.

Applying Additional Coats

For a richer and more durable finish, multiple coats might be necessary. Follow the same application and drying process for each additional coat.

Sealing the Floor

Once you’re satisfied with the color, apply a sealant to protect the stain and give your floor a polished look. This step is especially important for high-traffic areas.

Driftwood Floor Stain

Maintenance Tips

Keeping your driftwood stained floors looking fresh and beautiful requires regular maintenance.

Cleaning

  • Sweeping/Vacuuming: Regularly sweep or vacuum to remove dirt and debris.
  • Damp Mopping: Use a damp mop for deeper cleaning. Avoid excessive water, as it can damage the wood and the stain.

Preventative Measures

  • Furniture Pads: Place felt pads under furniture legs to prevent scratches.
  • Rugs and Mats: Use rugs or mats in high-traffic areas to reduce wear and tear.
  • Immediate Spill Cleanup: Wipe up spills immediately to prevent staining and damage.

Regular Inspections

Periodically inspect your floors for any signs of wear or damage. Early intervention can save you from more extensive repairs down the line.

Troubleshooting Common Issues

Even with the best preparation and application, you might encounter some challenges. Here’s how to address them:

Blotchy Stain

Blotchy stains are often the result of uneven application or improper surface preparation. To fix this, you may need to re-sand the affected areas and reapply the stain.

Streaks

Streaks can occur if the stain dries too quickly or if it’s applied unevenly. Ensure you work in small sections and maintain a wet edge during application.

Color Variations

Different wood types can absorb stain differently, leading to color variations. Testing the stain beforehand can help mitigate this issue.

DIY vs. Professional Help

Staining your floors can be a rewarding DIY project, but it’s not without its challenges.

DIY Pros and Cons

Pros:

  • Cost Savings: Doing it yourself can save money.
  • Flexibility: Work on your own schedule.
  • Satisfaction: Completing a project yourself can be highly rewarding.

Cons:

  • Time-Consuming: The process requires time and patience.
  • Skill Level: Requires some level of skill and experience.
  • Risk of Mistakes: Mistakes can be costly to fix.

When to Call a Professional

If you’re short on time, lack the necessary skills, or want a guaranteed perfect finish, hiring a professional might be the best option. They have the expertise and equipment to deliver flawless results.

Frequently Asked Questions

How long does the whole process take?

The time varies depending on the size of your space and the number of coats applied. Generally, you should set aside a few days for preparation, staining, and drying.

Can I change the color later?

Yes, but it will require sanding off the existing stain and reapplying the new color. Consult a professional if you’re unsure.

Is driftwood floor stain suitable for all wood types?

While driftwood floor stain works well on many wood types, it’s always a good idea to test it on a small area first to ensure compatibility.

Final Thoughts

Choosing to apply a driftwood floor stain can transform your home into a stunning, warm, and inviting space. While the process requires some effort and attention to detail, the result is a beautiful and durable floor that you’ll be proud to show off. So, if you’re ready to bring a touch of rustic elegance to your home, this guide has provided you the know-how to make it happen. Enjoy your beautifully stained floors!

Filed Under: Driftwood Ideas Tagged With: DIY, Driftwood, flooring, home decor, Wood Stain

Driftwood Projects Diy

May 24, 2024 by admin

You’re going to love diving into the world of “Driftwood Projects DIY.” Imagine transforming simple pieces of driftwood into stunning home decor with your unique touch. This article guides you through various creative DIY projects, from beautiful wall art to charming candle holders, all using driftwood. Whether you’re an experienced craft enthusiast or just starting out, these straightforward and fun ideas will inspire you to bring a bit of nature’s elegance into your home. So, gather your driftwood pieces and let’s unleash your creativity!

Driftwood Projects DIY

Do you love the idea of bringing a little piece of nature into your home but aren’t sure where to start? Driftwood projects might just be the perfect DIY endeavor for you. Driftwood, with its organic shapes and unique textures, is a versatile material that you can use to create stunning home decor. In this article, we’ll explore various driftwood projects you can easily tackle yourself. From small, intricate crafts to eye-catching furniture pieces, there’s something for everyone.

Driftwood Projects Diy

Understanding Driftwood

Before you dive into your next driftwood project, it’s helpful to understand exactly what makes driftwood so special.

What is Driftwood?

Driftwood is wood that has been washed onto the shore of rivers, lakes, or oceans by the action of winds, tides, or waves. This weathered wood often has a worn, smooth texture and a unique appearance due to its exposure to the elements over time.

Why Use Driftwood?

One of the main appeals of using driftwood is its natural beauty. Every piece is unique, shaped by the water and weather it has been exposed to. Incorporating driftwood into your home decor can bring a rustic, beachy vibe and a touch of nature indoors.

Sourcing Driftwood

Knowing where and how to collect driftwood is crucial to ensuring you have the best materials for your DIY projects.

Where to Find Driftwood

The best places to find driftwood are beaches, riverbanks, and lakeshores. After a storm, these locations are likely to have an abundance of driftwood pieces. Just remember to respect the local ecosystem and any regulations regarding driftwood collection.

Choosing the Right Pieces

When selecting driftwood for your projects, look for pieces that are dry, sturdy, and free of rot. The size and shape of the wood will depend on the specific project you’re planning.

Preparing Driftwood

Before you start crafting, there are a few steps to take to ensure your driftwood is ready to use.

Cleaning Driftwood

Soak the driftwood in a mixture of water and bleach for 24 hours to eliminate any remaining salt, algae, or microorganisms. After soaking, rinse the wood thoroughly with fresh water and let it dry completely.

Sanding and Cutting

Depending on your project, you may need to sand or cut the driftwood. Use fine-grit sandpaper to smooth out any rough edges, and a saw to cut the wood into the desired shapes or sizes.

Driftwood Projects to Try

Now that your driftwood is ready to go, let’s dive into some fun and creative DIY projects.

Driftwood Wall Art

Driftwood wall art can be as simple or intricate as you like. Here’s a basic project to get you started:

  1. Materials Needed:
  • Several pieces of driftwood
  • Hot glue gun
  • Backing board or canvas (optional)
  • Hooks or hanging wire
  1. Instructions:
  • Arrange the driftwood pieces into a pattern or design on a flat surface.
  • Once you’re happy with the arrangement, use a hot glue gun to attach the pieces together.
  • If you prefer, attach the driftwood to a backing board or canvas for extra support.
  • Add hooks or a hanging wire to the back for wall mounting.

Driftwood Candle Holders

A driftwood candle holder is a charming addition to any home and makes for a great gift.

  1. Materials Needed:
  • A sturdy piece of driftwood
  • Drill and spade bit (size to match your candles)
  • Sandpaper
  • Tea light candles or small pillar candles
  1. Instructions:
  • Decide where you want the candles to sit on the driftwood.
  • Use a drill with a spade bit to create holes in the driftwood that are slightly larger than the base of your candles.
  • Sand the edges of the holes to remove any rough spots.
  • Insert the candles into the holes and enjoy your new candle holder.

Driftwood Mirrors

A driftwood mirror is a striking, nature-inspired piece that can elevate any room.

  1. Materials Needed:
  • A round or square mirror
  • Several pieces of driftwood
  • Hot glue gun
  • Saw (if trimming the driftwood)
  1. Instructions:
  • Lay the mirror flat and arrange the driftwood pieces around the frame until you’re satisfied with the look.
  • Trim the driftwood if needed for a better fit.
  • Use a hot glue gun to attach the driftwood pieces to the mirror frame.
  • Ensure all pieces are secure before hanging the mirror on the wall.

Driftwood Coasters

Driftwood coasters are an easy and practical project that requires minimal supplies and effort.

  1. Materials Needed:
  • Several small, flat pieces of driftwood
  • Sandpaper
  • Clear varnish or sealant (optional)
  1. Instructions:
  • Choose flat pieces of driftwood that are roughly similar in size.
  • Sand the surfaces of the driftwood to create a smooth finish.
  • Apply a clear varnish or sealant to protect the wood from moisture (optional).
  • Let dry completely before using your new driftwood coasters.

Driftwood Shelves

Driftwood shelves not only look great but are also functional additions to your living space.

  1. Materials Needed:
  • Long pieces of driftwood (for the shelf surfaces)
  • Brackets
  • Screws and wall anchors
  • Drill and screwdriver
  1. Instructions:
  • Measure and cut the driftwood to your desired shelf length.
  • Attach the brackets to the wall using screws and wall anchors.
  • Place the driftwood on the brackets and secure it with screws.
  • Decorate your new shelves with plants, books, or other decor items.

Driftwood Projects Diy

Tips for Working with Driftwood

Creating driftwood projects can be hugely rewarding, but it can also present unique challenges.

Safety First

Always wear protective gear such as gloves and goggles when cutting, sanding, or drilling driftwood. Some pieces may have sharp edges or harbor small insects, so it’s important to handle them with care.

Experiment with Different Finishes

Depending on the look you’re going for, you might want to paint, stain, or seal your driftwood. Testing out different finishes on small scrap pieces can help you decide what works best for your project.

Combine Driftwood with Other Materials

Don’t be afraid to get creative! Combining driftwood with other natural materials like shells, stones, or plants can lead to stunning results. You can also mix it with more modern elements like metal or glass to create a striking contrast.

Common Questions About Driftwood Projects

Is It Safe to Use Driftwood?

Yes, driftwood is generally safe to use in DIY projects, especially if it’s been properly cleaned and dried. However, be cautious of pieces that appear to be rotten or have a strong odor, as these may indicate the presence of harmful bacteria or fungi.

Can I Use Driftwood from Any Body of Water?

While you can use driftwood from various bodies of water, ocean driftwood is often preferred due to its unique texture and smoother edges. River and lake driftwood can be just as beautiful, but it may require more cleaning.

How Do I Preserve Driftwood?

To preserve driftwood, you can apply a clear wood sealant or varnish. This will protect the wood from moisture and pests, helping it to last longer. Make sure to let the sealant dry completely before using your driftwood piece.

Advanced Driftwood Projects

Once you’ve mastered the basics, consider tackling more complex driftwood projects. These might require additional tools and expertise but can result in truly impressive pieces.

Driftwood Furniture

Creating furniture from driftwood can range from coffee tables and benches to headboards and shelving units. Here’s a simple guide to building a driftwood coffee table:

  1. Materials Needed:
  • Several large pieces of driftwood
  • Glass tabletop
  • Sandpaper
  • Wood glue or epoxy
  • Screws and brackets (optional)
  1. Instructions:
  • Arrange the large driftwood pieces into a sturdy base or frame.
  • Sand any rough edges and surfaces.
  • Use wood glue or epoxy to join the pieces together, ensuring they’re securely attached.
  • Allow the glue or epoxy to dry completely.
  • Place the glass tabletop on the driftwood base. Use screws and brackets if additional support is needed.

Driftwood Lamps

A driftwood lamp is an eye-catching and functional decor piece that can bring warmth and style to any room.

  1. Materials Needed:
  • A suitable piece of driftwood
  • Lamp kit (including socket, wiring, and bulb)
  • Drill
  • Sandpaper
  • Lamp shade (optional)
  1. Instructions:
  • Choose a piece of driftwood with a solid base and an appealing shape.
  • Drill a hole through the driftwood for the lamp wiring.
  • Sand any rough edges and surfaces.
  • Install the lamp kit according to the manufacturer’s instructions.
  • Attach a lampshade if desired.
  • Plug in your new driftwood lamp and admire your handiwork.

Conclusion

Working with driftwood can open up a world of creativity and endless possibilities for DIY projects. From simple coasters and wall art to more complex furniture and lighting, there’s an array of ways you can incorporate this natural material into your home. By understanding how to source, prepare, and work with driftwood, you’ll be well on your way to creating stunning pieces that showcase the beauty of nature.

So, are you ready to start your next driftwood project? Go out and find that perfect piece of driftwood and get crafting. You’ll have a unique and beautiful addition to your home in no time. Happy DIY-ing!

Filed Under: Driftwood Ideas Tagged With: crafts, DIY, Driftwood, home decor

Driftwood Crafts Diy Driftwood Projects

May 23, 2024 by admin

Imagine turning your seaside treasures into beautiful, rustic home decor. In “Driftwood Crafts: DIY Driftwood Projects,” you’ll explore a variety of creative ideas to transform weathered wood into stunning, one-of-a-kind pieces. Whether you’re a seasoned crafter or just getting started, this guide is packed with step-by-step instructions, inspiring visuals, and practical tips to help you create everything from driftwood frames to elegant centerpieces. Dive in and discover how to bring the calming essence of the beach right into your home.

Driftwood Crafts: DIY Driftwood Projects

Have you ever stumbled upon a piece of driftwood and wondered, “What can I create with this?” Driftwood, with its smooth texture and unique shapes, offers a versatile medium for crafting. Let me guide you through some delightful DIY driftwood projects that will not only beautify your space but will also provide a fulfilling creative experience.

Driftwood Crafts Diy Driftwood Projects

What is Driftwood?

Driftwood is wood that has been washed ashore by tides, waves, or the wind. Its journey through water gives it a distinct, weathered look that is both rustic and charming. Driftwood can be found on beaches, riverbanks, and lakesides, each piece uniquely shaped by nature.

Benefits of Using Driftwood for Crafts

Sustainable and Eco-Friendly

Using driftwood in your projects promotes environmental sustainability. It’s a great way to repurpose natural materials that have washed ashore rather than adding to the waste stream.

Unique and Natural Aesthetic

Every piece of driftwood is unique, which brings a natural and organic feel to your creations. Whether you’re making home decor or furniture, driftwood adds a touch of nature’s artistry to your space.

Cost-Effective

Driftwood is often free if you collect it yourself. Even if purchased, it typically costs much less than other crafting materials. This makes it an affordable option for those looking to spruce up their homes without breaking the bank.

Getting Started with Driftwood Crafts

Collecting Driftwood

Before diving into your projects, the first step is gathering your materials. Spend some time at your local beach, riverside, or lakeshore. Look for pieces that are dry, free of mold, and reasonably sturdy.

Checklist for Collecting Driftwood:

CriteriaDescription
DrynessEnsure the wood is dry to avoid mold and mildew.
Size and ShapeConsider the project’s requirements regarding size and shape.
DurabilityAvoid pieces that crumble or break easily.
WeightChoose pieces that are lightweight but strong.

Cleaning Driftwood

Once you have collected your driftwood, clean it thoroughly to remove any debris, bacteria, or salt. Here’s a simple cleaning process:

  1. Rinse: Wash the driftwood with fresh water to remove loose dirt and sand.
  2. Soak: Soak the wood in a mixture of water and bleach (1 part bleach to 9 parts water) for a few hours to disinfect it.
  3. Scrub: Use a brush to scrub away any remaining dirt.
  4. Dry: Leave the driftwood to dry completely in the sun for a few days.

Tools and Materials

Before starting, ensure you have the basic tools and materials needed for driftwood crafting:

  • Hot glue gun and glue sticks
  • Sandpaper
  • Nails and screws
  • Wood glue
  • Paint and brushes (if you plan to paint)
  • Saw (if you need to cut the driftwood)

DIY Driftwood Projects

Now that you have your driftwood ready, it’s time to get crafting! Here are some inspiring DIY driftwood projects to get you started.

Driftwood Candle Holders

Driftwood candle holders can add a cozy, rustic touch to your home. They are simple to make and perfect for beginners.

Materials Needed:

  • A piece of driftwood
  • Drill with a hole saw bit that matches your candle size
  • Sandpaper
  • Tea lights or small candles

Steps:

  1. Select Driftwood: Choose a piece that’s flat and stable.
  2. Mark Position: Mark where you want the candles to sit.
  3. Drill Holes: Use the drill to create holes for the candles.
  4. Sand Edges: Smooth the edges with sandpaper.
  5. Insert Candles: Place the candles into the holes and enjoy your new candle holder!

Driftwood Wall Art

Create a stunning piece of wall art to be the focal point of any room. The organic shapes and textures of driftwood can create a visually appealing design.

Materials Needed:

  • Various pieces of driftwood
  • Wood backing panel
  • Wood glue or a hot glue gun
  • Nails (optional)

Steps:

  1. Arrange Driftwood: Lay out your driftwood pieces on the wood panel until you achieve your desired design.
  2. Attach Wood: Glue each piece to the panel. For added security, you can nail larger pieces.
  3. Dry and Mount: Allow the glue to dry thoroughly before hanging your new driftwood wall art.

Driftwood Mirror Frame

Transform an ordinary mirror with a driftwood frame for a beachy, rustic look.

Materials Needed:

  • Mirror
  • Driftwood pieces of various sizes
  • Wood glue
  • Sandpaper
  • Hanging hardware

Steps:

  1. Prepare the Mirror: Clean the mirror’s edges and ensure it’s dust-free.
  2. Arrange Driftwood: Lay out the driftwood around the mirror’s edges.
  3. Attach: Use wood glue to attach the driftwood pieces to the mirror’s frame.
  4. Dry and Hang: Allow the glue to dry completely, attach hanging hardware, and display your new mirror.

Driftwood Coat Rack

A driftwood coat rack is both a functional and decorative piece for any entryway.

Materials Needed:

  • Long piece of driftwood
  • Hooks
  • Screws and screwdriver
  • Wall anchors (if necessary)

Steps:

  1. Choose Driftwood: Select a piece long enough to hold several hooks.
  2. Attach Hooks: Screw the hooks into the driftwood at even intervals.
  3. Mount on Wall: Use screws and wall anchors to mount your new coat rack securely.

Driftwood Shelves

Driftwood shelves can bring a natural element to any room and are great for storing or displaying items.

Materials Needed:

  • Driftwood pieces
  • Brackets
  • Screws and screwdriver
  • Level

Steps:

  1. Select Driftwood: Choose sturdy, flat pieces of driftwood.
  2. Attach Brackets: Screw the brackets into each end of the driftwood.
  3. Mount: Securely attach the shelves to the wall, ensuring they are level before fully securing.

Driftwood Mobiles

A driftwood mobile can be a delightful addition to any space, particularly for a child’s room or outdoor patio.

Materials Needed:

  • Several pieces of driftwood
  • String or fishing line
  • Scissors
  • Hook for hanging

Steps:

  1. Drill Holes: Drill small holes in each piece of driftwood.
  2. Assemble: Thread a string through each hole, tying knots to secure the driftwood at intervals.
  3. Hang: Attach the top of the mobile to a hook and hang it where it can catch a gentle breeze.

Driftwood Crafts Diy Driftwood Projects

Tips for Working with Driftwood

Selecting the Right Pieces

Choosing the right pieces of driftwood is essential for the success of your projects. Look for wood that is:

  • Structurally sound and not too brittle.
  • Attractive in texture and shape.
  • Of appropriate size and weight for your project.

Safety First

Always prioritize safety while crafting. Use gloves to protect your hands from splinters, and wear goggles when drilling or sawing. Ensure good ventilation if you’re using strong adhesives or paints.

Finishing Touches

For a polished look, consider sanding your driftwood smooth. If you prefer a more natural appearance, leave it as is. Adding a wood finish or sealant can help preserve your creation and give it a slight sheen.

Personalization

Feel free to personalize your driftwood projects by adding paint, stencils, or other decorative elements. This can help make your creation uniquely yours and better suited to your home’s aesthetic.

Advanced Driftwood Projects

If you’re ready to take your driftwood crafting to the next level, here are some more intricate projects that require a bit more skill and patience.

Driftwood Furniture

Creating furniture from driftwood can result in stunning, functional art pieces. Chairs, tables, and headboards can all be fashioned from carefully selected and prepared driftwood.

Materials Needed:

  • Larger pieces of driftwood
  • Saw and chisel
  • Screws, nails, and wood glue
  • Sandpaper
  • Finish or sealant

Steps:

  1. Design: Sketch your design and plan the dimensions.
  2. Cut and Shape: Use a saw and chisel to shape your driftwood pieces.
  3. Assemble: Use screws, nails, and wood glue to assemble the furniture. Ensure stability and strength.
  4. Finish: Sand the surfaces and apply a finish or sealant to protect your furniture.

Driftwood Lighting

Crafting a driftwood lamp or chandelier can be a fantastic statement piece for your home.

Materials Needed:

  • Various pieces of driftwood
  • Lamp kit or light sockets and bulbs
  • Drilling tools
  • Electrical wiring (if needed)
  • Wood glue or screws for assembly

Steps:

  1. Plan Your Design: Decide whether you want a table lamp, floor lamp, or chandelier. Sketch a design.
  2. Drill and Assemble: Drill holes as necessary to thread the wiring through the driftwood. Secure the driftwood pieces together using wood glue or screws.
  3. Install Electrical Components: Follow the lamp kit instructions or carefully wire the light sockets. Ensure all electrical components are safely and securely installed.
  4. Finish and Test: Secure the light bulb and test the lamp. Make any necessary adjustments to ensure stability and functionality.

Driftwood Garden Decor

Enhance your garden’s charm with driftwood planters, sculptures, and garden signs.

Materials Needed:

  • Driftwood pieces
  • Potting soil and plants (for planters)
  • Paint and markers (for signs)
  • Screws, nails, or wood glue for assembly

Steps:

  1. Driftwood Planters:

    • Select larger, hollow pieces of driftwood.
    • Fill with potting soil and plant succulents or other small plants.
    • Ensure proper drainage by drilling a few small holes in the bottom.
  2. Driftwood Sculptures:

    • Arrange and assemble driftwood pieces into artistic sculptures.
    • Use nails, screws, or glue to secure the pieces.
    • Place the sculpture in a prominent spot in your garden.
  3. Garden Signs:

    • Choose flat pieces of driftwood.
    • Paint or write your desired messages.
    • Attach the signs to stakes and place them in your garden beds or along pathways.

Selling Your Driftwood Creations

If you find yourself particularly skilled or passionate about driftwood crafts, consider selling your creations. Here are a few tips to get you started:

Setting Up an Online Store

Create an online storefront on platforms like Etsy, eBay, or your own website. Showcase high-quality photos and detailed descriptions of your items.

Pricing Your Crafts

Consider the cost of materials, the time invested, and the uniqueness of each piece when setting your prices. Research similar items to ensure your prices are competitive.

Marketing Your Products

Utilize social media platforms, craft fairs, and local markets to promote your products. Engaging with your customers and sharing your crafting process can help build a loyal customer base.

Final Thoughts

Driftwood crafts not only allow you to create beautiful, unique pieces, but they also offer a way to connect with nature and promote sustainability. Whether you’re making a simple candle holder or complex furniture, each piece can be a personal expression of your creativity.

Remember, the most important part of any DIY project is to have fun and enjoy the process. So, gather your driftwood, grab your tools, and let your imagination guide you in creating your next masterpiece!

Happy crafting!

Filed Under: Driftwood Ideas Tagged With: crafts, DIY, Driftwood, home decor, projects

Driftwood Crafts Ideas Projects

May 23, 2024 by admin

If you’re looking to infuse a touch of nature into your home decor, venture into the imaginative and rewarding world of driftwood crafts. “Driftwood Crafts Ideas Projects” provides a wealth of inspiration and easy-to-follow projects that allow you to transform simple pieces of driftwood into stunning creations. Through this guide, you’ll discover a variety of project ideas suited for all skill levels, giving you the confidence to create unique, rustic home accessories. Each craft idea is designed to celebrate the natural beauty of driftwood, helping you add a personal and environmentally conscious touch to your living space.

Driftwood Crafts Ideas Projects

Have you ever strolled along the beach and spotted those beautifully weathered pieces of driftwood, wondering what you could create with them? Driftwood has a natural charm and rustic appeal that makes it the perfect material for a wide variety of crafts. Whether you’re an experienced crafter or a beginner looking for a new project, there’s something special you can make with driftwood. Let’s dive into a world of creativity and explore an array of driftwood craft ideas and projects that will inspire you.

Why Driftwood?

Driftwood is wood that has been washed onto the shore by tides, rivers, or winds. Its naturally aged appearance and textured surface make it an attractive element for creative projects. Driftwood has several benefits:

  • Eco-Friendly: Using driftwood means upcycling a natural resource that has already fallen and been shaped by nature.
  • Unique Pieces: Each piece of driftwood has its own shape and character, ensuring that your crafts are one-of-a-kind.
  • Versatility: Driftwood can be used in a wide range of projects, from home decor to jewelry.

Preparing Driftwood

Before you start crafting, it’s essential to prepare the driftwood properly. Proper preparation will ensure your pieces are clean, sanitized, and ready for your creative touch.

Cleaning Driftwood

  1. Rinse Thoroughly: Rinse the driftwood under fresh water to remove sand, salt, and debris.
  2. Soak in Water: Soak the driftwood in a large container filled with water and a bit of bleach (1 cup of bleach per gallon of water) to kill any bacteria or pests. Leave it for 24 hours.
  3. Rinse Again: After soaking, rinse the driftwood thoroughly to remove any bleach residue.
  4. Dry Completely: Let the driftwood dry completely; this can take several days. Make sure it’s placed in a well-ventilated area.

Driftwood Crafts Ideas Projects

Driftwood Home Decor Projects

Driftwood can add a coastal or rustic touch to your home. Here are some home decor project ideas to consider:

Driftwood Wall Art

Creating wall art with driftwood is a fantastic way to add a focal point to any room.

  • Materials Needed: Several pieces of driftwood, strong adhesive or nails, a backing board (optional), and hanging hardware.
  • Steps:
    1. Design: Arrange your driftwood pieces on a flat surface until you’re happy with your design.
    2. Attach: Using adhesive or nails, attach the driftwood to a backing board or directly to each other.
    3. Hang: Attach hanging hardware to the back and hang your new artwork on the wall.

Driftwood Coat Rack

A driftwood coat rack is a practical and stylish addition to your entryway.

  • Materials Needed: Large piece of driftwood, hooks, screws, drill.
  • Steps:
    1. Select Wood: Choose a sturdy, sizable piece of driftwood.
    2. Attach Hooks: Drill holes where you want the hooks to go and screw them in securely.
    3. Mount: Attach hanging hardware to the back of the driftwood and mount it on your wall.

Driftwood Shelves

Driftwood shelves can be both decorative and functional.

  • Materials Needed: Flat pieces of driftwood, brackets, screws, drill.
  • Steps:
    1. Select Pieces: Choose driftwood pieces that are flat and sturdy.
    2. Attach Brackets: Drill holes in the driftwood to attach the brackets.
    3. Mount: Secure the brackets to your wall and place the driftwood shelf on top.

Driftwood Lighting

Adding lighting elements to driftwood can create beautiful ambiance.

Driftwood Table Lamp

A driftwood table lamp can bring a cozy and natural vibe to any room.

  • Materials Needed: Driftwood pieces, lamp kit, lamp shade, strong adhesive or screws.
  • Steps:
    1. Base and Stand: Create the base and stand of the lamp using the driftwood pieces.
    2. Lamp Kit: Assemble the lamp kit and attach it to the driftwood stand.
    3. Shade: Add a lamp shade to complete the look.

Driftwood Candle Holders

Simple yet elegant, driftwood candle holders can give a rustic touch to your decor.

  • Materials Needed: Driftwood, tea light candles, drill.
  • Steps:
    1. Choose Wood: Select pieces of driftwood that are stable and balanced.
    2. Drill Holes: Drill holes that are the size of your tea light candles.
    3. Insert Candles: Place the candles in the drilled holes.

Driftwood Crafts Ideas Projects

Driftwood Furniture

For the more ambitious crafter, driftwood can be used to create stunning pieces of furniture.

Driftwood Coffee Table

A driftwood coffee table can be a statement piece in your living room.

  • Materials Needed: Large driftwood pieces, glass tabletop, strong adhesive.
  • Steps:
    1. Design Base: Arrange the driftwood pieces to create a stable base.
    2. Secure: Use strong adhesive to secure the driftwood together.
    3. Tabletop: Place the glass tabletop on the driftwood base.

Driftwood Chair

Creating a driftwood chair requires some woodworking skills but the result is worth the effort.

  • Materials Needed: Driftwood, screws, saw, drill.
  • Steps:
    1. Design: Plan the design and measure the pieces needed.
    2. Cut and Assemble: Cut the driftwood to size and assemble using screws.
    3. Finish: Sand any rough edges and ensure the chair is stable.

Driftwood Garden Projects

Driftwood can integrate beautifully into your garden landscape.

Driftwood Plant Hangers

A driftwood plant hanger is a charming way to display your plants.

  • Materials Needed: Driftwood, rope or twine, plant pots.
  • Steps:
    1. Attach Rope: Tie or attach rope to the driftwood.
    2. Hang Pots: Securely hang plant pots from the driftwood using the rope.
    3. Hang: Find a suitable place to hang your driftwood plant hanger.

Driftwood Garden Borders

Using driftwood to create garden borders can add a natural touch to your garden.

  • Materials Needed: Driftwood pieces, garden stakes, twine.
  • Steps:
    1. Arrange Wood: Place driftwood pieces along the garden border.
    2. Secure: Use garden stakes and twine to secure the driftwood in place.

Driftwood Jewelry

For those who love to make jewelry, driftwood can be a unique and stylish material.

Driftwood Pendant

A driftwood pendant can be a simple yet beautiful piece of jewelry.

  • Materials Needed: Small driftwood pieces, drill, necklace chain.
  • Steps:
    1. Select Wood: Choose small, lightweight pieces of driftwood.
    2. Drill Hole: Drill a small hole in the driftwood for the chain.
    3. Attach Chain: Thread the chain through the hole and secure it.

Driftwood Earrings

Driftwood earrings can be a lovely addition to your jewelry collection.

  • Materials Needed: Small driftwood pieces, earring hooks, drill.
  • Steps:
    1. Choose Wood: Select small, even pieces of driftwood.
    2. Drill Holes: Drill small holes in the driftwood for the hooks.
    3. Attach Hooks: Attach the earring hooks to the driftwood.

Driftwood Seasonal Crafts

Driftwood crafts can also be themed for different seasons and holidays.

Driftwood Christmas Tree

A driftwood Christmas tree can be a unique and rustic holiday decoration.

  • Materials Needed: Various sizes of driftwood, nails or screws, base piece.
  • Steps:
    1. Design: Lay out the driftwood pieces in the shape of a tree.
    2. Assemble: Attach the driftwood pieces together using nails or screws.
    3. Decorate: Add your favorite holiday decorations to the tree.

Driftwood Easter Bunny

Create an adorable driftwood Easter bunny as part of your Easter decor.

  • Materials Needed: Driftwood pieces, strong adhesive, paint (optional).
  • Steps:
    1. Shape Bunny: Arrange driftwood to form the shape of a bunny.
    2. Attach: Use strong adhesive to secure the pieces together.
    3. Decorate: Paint or add decorations to your bunny as desired.

Tips for Driftwood Crafting

  1. Safety First: Always wear protective gear like gloves and goggles when cutting or drilling wood.
  2. Choose Wisely: Select driftwood pieces that are free from mold and are structurally sound.
  3. Experiment with Finishes: Experiment with different finishes like wood stains or clear polyurethane to achieve different looks.
  4. Know Your Tools: Familiarize yourself with the tools you’ll be using to ensure precision and safety.

Conclusion

Driftwood offers endless possibilities for creative projects. Whether you’re making home decor, jewelry, furniture, or seasonal crafts, each piece of driftwood you use will bring its own unique character to your craft. Remember to take the time to prepare your driftwood properly and let your imagination guide you in creating something truly special. So next time you find yourself walking along the beach, pick up some driftwood and start a new crafting adventure. Happy crafting!

Filed Under: Driftwood Ideas Tagged With: Craft Projects, DIY, Driftwood, Eco-friendly, Handmade, home decor, Rustic Decor

Driftwood Flower Bed

May 23, 2024 by admin

Imagine stepping into your garden and being greeted by the enchanting sight of a Driftwood Flower Bed, where nature’s raw beauty meets your creative touch. This delightful garden piece utilizes the rustic elegance of driftwood to frame vibrant blossoms, creating a harmonious blend of textures and colors. It’s an eco-friendly project that repurposes naturally weathered wood, giving it a second life as a stunning focal point in your outdoor space. In this article, you’ll discover how to design and assemble your own driftwood flower bed, transforming ordinary gardening into an artful expression of nature’s charm.

Driftwood Flower Bed

Have you ever found yourself mesmerized by a piece of driftwood, pondering the journey it must have taken to land in your hands? If you’re someone who’s captivated by the natural beauty and curious history of driftwood, you might be thrilled to discover a creative way to bring this charm into your garden. Imagine transforming weathered pieces of wood into a stunning flower bed that not only nourishes your favorite plants but also adds a rustic, coastal aesthetic to your outdoor space. Sounds fascinating, right?

What is Driftwood?

Driftwood forms when wood from trees and plants gets washed out to sea or into rivers, lakes, or other bodies of water. Over time, the water and sand wear the wood down, giving it a smooth, sculptural quality. The unpredictable shapes and sizes of driftwood pieces make each one a unique, artistic element capable of transforming any garden area.

Benefits of Using Driftwood in Your Garden

Using driftwood in your garden has more benefits than just its aesthetic appeal. Here are a few compelling reasons to incorporate this natural material into your outdoor design:

  1. Sustainability: Driftwood is eco-friendly and repurposes fallen trees.
  2. Durability: Naturally treated by water, driftwood is often more resilient than fresh wood.
  3. Versatility: From rustic to modern styles, driftwood complements any garden theme.

Planning Your Driftwood Flower Bed

Before diving into creating your driftwood flower bed, it’s imperative to plan carefully. Proper planning ensures that your project is successful and meets your expectations.

Choosing the Right Location

Deciding where to place your driftwood flower bed is essential. Look for a spot that receives the right amount of light for the type of plants you intend to grow. Here are some questions to consider:

  • How much sunlight does the area get?
  • Is the area sheltered from strong winds?
  • Are there existing plants or architectural features nearby?

Selecting Your Driftwood Pieces

Next up is selecting the driftwood pieces you’ll use. The beauty of driftwood lies in its natural variation, so no two pieces are the same. When choosing your driftwood, keep the following in mind:

  • Size and shape: Consider the dimensions and the overall shape to ensure they fit well together.
  • Condition: Look for well-weathered, non-rotting pieces.
  • Texture and color: Choose pieces that complement your garden’s color palette.

Gathering Tools and Materials

Creating a driftwood flower bed requires some essential tools and materials. Here’s a list to get you started:

ToolPurpose
ShovelDigging and planting
Garden glovesProtection for your hands
WheelbarrowTransporting materials
Drill and screwsSecuring driftwood pieces
Soil and compostPlanting medium

Driftwood Flower Bed

Building Your Driftwood Flower Bed

Once you’ve planned, chosen your location, and gathered your materials, it’s time for the exciting part: building your driftwood flower bed. Below are detailed steps to guide you through the process.

Preparing the Ground

Start by prepping the area where you plan to build your flower bed. Clear any grass, weeds, or debris. Use your shovel to break up and turn over the soil. If the soil quality is poor, consider adding compost or a soil conditioner to improve its fertility.

Laying Out the Driftwood

Position your driftwood pieces on the ground to outline the perimeter of your flower bed. Arrange them to fit together in a way that is both secure and aesthetically pleasing. You can create geometric shapes like squares or rectangles, or go for a more organic, freeform design.

Securing the Driftwood

Once you’re satisfied with the layout, start securing the driftwood pieces together. Use a drill and screws to fasten pieces where necessary, especially at the corners and joints. This step ensures that your constructed border stays in place and withstands weather conditions.

Filling the Bed with Soil

With the structure in place, fill the flower bed with a mix of topsoil and compost. This mixture provides the necessary nutrients for your plants to thrive. Make sure the soil is evenly distributed and at the right level within the driftwood border.

Choosing Plants for Your Driftwood Flower Bed

The success of your flower bed hinges significantly on the types of plants you select. Here are some popular choices that work wonderfully in driftwood flower beds:

Native Plants

Opting for native plants can enhance the sustainability of your garden. Native plants are well-adapted to your local climate and soil conditions, requiring less maintenance. Additionally, they attract beneficial wildlife like pollinators.

Perennials

Perennials are plants that return year after year, making them a cost-effective choice for your flower bed. Examples include:

  • Echinacea (Coneflowers)
  • Hostas
  • Lavender

Annuals

Annuals offer vibrant blooms and can be changed every year to refresh your garden’s appearance. Some favorites are:

  • Petunias
  • Marigolds
  • Zinnias

Driftwood Flower Bed

Maintaining Your Driftwood Flower Bed

Creating your driftwood flower bed is just the beginning. Maintaining it ensures that it remains a stunning focal point in your garden. Here’s how to keep it in top shape:

Watering

Different plants have different watering needs. Some require daily watering, while others thrive on less frequent moisture. Familiarize yourself with the needs of your selected plants. Generally, it’s best to water in the early morning or late afternoon to reduce evaporation.

Feeding

Even the best soil loses nutrients over time. Feeding your plants with fertilizers helps them grow robustly. Organic options like compost or worm castings are excellent choices for an eco-friendly garden.

Pruning and Deadheading

Regular pruning and deadheading (removing spent flowers) encourage healthier plants and more blooms. Deadheading prevents plants from going to seed and redirects their energy into growth and flowering.

Extending the Aesthetic: Complementary Garden Features

A driftwood flower bed can stand alone as a beautiful garden feature, but combining it with other elements can elevate your outdoor space even further.

Pathways

Stone or gravel pathways can guide visitors through your garden, complementing the natural look of driftwood. Consider soft curves to keep the design fluid and organic.

Water Features

A small pond or fountain can add tranquility and an auditory dimension to your garden. Driftwood pieces can be integrated into the water feature, creating a seamless flow between different aspects of your garden design.

Seating Areas

Incorporating a seating area allows you to enjoy your driftwood flower bed up close. A rustic bench or a set of weather-resistant chairs can provide a perfect vantage point.

Common Challenges and Solutions

Even the most thoughtfully planned driftwood flower bed can present challenges. Here’s how to deal with some common issues:

Pest Infestation

Pests can wreak havoc on your garden. Regularly inspect plants for signs of insect damage or disease. Organic pest control methods like neem oil or insecticidal soap can be very effective. Introducing beneficial insects like ladybugs can also help keep pests under control.

Weed Control

Weeds compete with your plants for nutrients and water. Mulching is an effective way to suppress weeds while retaining moisture in the soil. Hand-pulling weeds regularly is a traditional but effective method.

Soil Erosion

In areas with heavy rainfall, soil erosion can become a problem. Adding mulch, ground cover plants, or even installing small retaining features made from driftwood can help keep soil in place.

Personalizing Your Driftwood Flower Bed

A driftwood flower bed doesn’t just add beauty to your garden; it can also reflect your personal style and creativity. Consider incorporating some personalized touches to make the space truly yours.

Decorative Elements

Incorporate small garden statues, shells, or decorative stones to enhance the look of your flower bed. These elements can add a whimsical touch or serve as conversation starters.

Seasonal Changes

Change up the look of your flower bed with the seasons. Plant seasonal flowers or add holiday-themed decorations to keep the space fresh and engaging all year long.

Lighting

Garden lighting can make your driftwood flower bed a focal point even at night. Solar-powered lights are an environmentally friendly option that can highlight the beauty of your garden while consuming minimal energy.

Conclusion

Creating a driftwood flower bed is a rewarding project that brings the beauty of the coast into your garden. It combines the rugged, natural aesthetics of driftwood with the vibrant life of a blooming garden. By planning carefully, choosing the right plants, and maintaining your bed, you can create a space that not only looks stunning but also provides a serene place to relax and enjoy nature.

Remember, every piece of driftwood tells a story, and now you have the chance to write the next chapter in your garden. Happy gardening!

This article aimed to give you a comprehensive guide to creating and maintaining a driftwood flower bed. The steps provided are detailed yet straightforward, ensuring that by the end of this project, you’ll have crafted a unique and beautiful addition to your garden. Whether you’re a seasoned gardener or a newbie, the adventure of building a driftwood flower bed is sure to be a memorable and enriching experience. Enjoy the journey and the countless blooms that lie ahead!

Filed Under: Driftwood Ideas Tagged With: DIY, Flower Bed, Garden Design, Outdoor Decor

Easy Driftwood Crafts Diy Projects

May 23, 2024 by admin

Welcome to “Easy Driftwood Crafts DIY Projects,” where you’ll uncover creative and simple ways to transform those charming pieces of driftwood into stunning homemade décor. In this article, you’ll explore a variety of delightful projects that blend natural beauty with your personal touch, perfect for both beginners and seasoned crafters alike. From unique centerpieces to whimsical wall hangings, you’ll be inspired to bring the calming essence of the beach into your home with each easy-to-follow project. Dive in and discover how fun and fulfilling driftwood crafting can be.

Easy Driftwood Crafts DIY Projects

Have you ever found yourself walking along the beach, mesmerized by the unique and rugged pieces of driftwood scattered along the shore? If so, you’re not alone! Driftwood is not only a testament to the power of nature but also a fantastic material for creating stunning DIY projects. Whether you’re a seasoned crafter or just looking for a new hobby, driftwood offers endless possibilities for artistic expression and home decor.

Why Use Driftwood for DIY Projects?

Using driftwood in your DIY projects is not only eco-friendly but also allows you to bring a piece of nature into your home. Driftwood’s weathered and organic appearance makes it a versatile material that can be used in a variety of artistic endeavors. Plus, since it’s often free for the taking, it’s a budget-friendly option for crafting.

Benefits of Driftwood

  1. Eco-Friendly: Reused sustainable material.
  2. Unique: Each piece tells its own story.
  3. Versatile: Suitable for a range of projects from rustic to modern.
  4. Inexpensive: Often found for free on beaches and shores.

How to Prepare Driftwood for Crafting

Before you begin your DIY journey, it’s essential to prepare your driftwood properly. This step ensures that your crafts are clean, safe, and long-lasting.

Cleaning Driftwood

  1. Rinse and Soak: Rinse the driftwood under fresh water to remove sand and debris. Then soak it in a large tub filled with water and a bit of bleach for at least 24 hours. This process disinfects the wood.
  2. Scrub: After soaking, use a brush to scrub off any remaining dirt or algae.
  3. Drying: Lay the wood out in a sunny spot to dry thoroughly. This could take a few days, depending on the size and thickness of your pieces.

Easy Driftwood Crafts Diy Projects

Easy Driftwood Crafts for Beginners

Ready to dive into some easy projects? Here are a few that are perfect for beginners and will add a touch of rustic charm to your home.

Driftwood Picture Frame

A driftwood picture frame is a simple yet elegant way to showcase your favorite photographs.

Materials Needed:

  • Driftwood pieces
  • A plain picture frame
  • Hot glue gun
  • Saw (optional)

Instructions:

  1. Measure and Cut: Measure the driftwood pieces to fit the sides of the frame. Cut them to size if necessary.
  2. Glue: Use the hot glue gun to attach the driftwood pieces to the frame, covering the entire surface.
  3. Dry: Allow the glue to dry completely before displaying your frame.

Driftwood Wall Art

Creating wall art with driftwood is an excellent way to make use of various sizes and shapes of driftwood.

Materials Needed:

  • Assorted driftwood pieces
  • A canvas or wooden board
  • Wood glue or nails
  • Paint (optional)

Instructions:

  1. Arrange: Lay out your driftwood pieces on the canvas or board in a design you find appealing.
  2. Attach: Use wood glue or nails to secure the pieces in place.
  3. Optional: You can paint your pieces before attaching them for a more colorful design.
  4. Display: Hang your new piece of art in your desired location.

Intermediate Driftwood Projects

Once you’ve got the hang of basic projects, you might want to try something a bit more challenging. These intermediate projects require a bit more skill but are still manageable for most DIY enthusiasts.

Driftwood Coat Rack

A driftwood coat rack not only looks great but also serves a practical purpose.

Materials Needed:

  • Long piece of driftwood
  • Hooks
  • Screws and screwdriver
  • Sandpaper

Instructions:

  1. Smooth: Sand the driftwood to remove any rough edges.
  2. Attach Hooks: Screw the hooks into the driftwood at equal intervals.
  3. Mount: Secure the driftwood coat rack to the wall using screws.

Driftwood Candle Holders

Driftwood candle holders can create a magical ambiance in your home.

Materials Needed:

  • Small driftwood pieces
  • Tea light candle holders
  • Wood glue
  • Drill

Instructions:

  1. Drill Holes: Use the drill to make small indentations in the driftwood where the tea light holders will sit.
  2. Glue Holders: Secure the tea light holders into the holes with wood glue.
  3. Dry: Allow the glue to dry completely before use.

Easy Driftwood Crafts Diy Projects

Advanced Driftwood Projects

Ready to take things to the next level? These advanced projects might require more tools and time but are well worth the effort.

Driftwood Furniture

Creating furniture from driftwood is a rewarding project that results in one-of-a-kind pieces.

Materials Needed:

  • Large driftwood logs or branches
  • Saw
  • Screws and screwdriver
  • Sandpaper
  • Varnish (optional)

Instructions:

  1. Design: Plan your design based on the driftwood you have available.
  2. Cut and Sand: Cut the driftwood to size and sand the edges smooth.
  3. Assemble: Securely screw the pieces together to form your furniture piece.
  4. Finish: Apply a coat of varnish for a polished look, if desired.

Driftwood Sculpture

Driftwood sculptures can be a wonderful way to showcase your creativity.

Materials Needed:

  • Various driftwood pieces
  • Wood glue or epoxy
  • Base for sculpture (e.g., a wooden plank)
  • Drill (optional)

Instructions:

  1. Plan: Sketch out your sculpture design before beginning.
  2. Assemble: Use wood glue or epoxy to attach the driftwood pieces together and to the base.
  3. Secure: For larger pieces, you may need to drill and screw them together.
  4. Dry: Allow the sculpture to dry completely before displaying.

Tips for Working with Driftwood

Working with driftwood can be immensely rewarding, but it’s essential to keep a few tips in mind:

Tool Recommendations

  1. Saws: For cutting driftwood to your desired size.
  2. Drill: Perfect for making holes or securing pieces together.
  3. Sander: Helps smooth out rough edges.

Safety Precautions

  1. Wear Gloves: To protect your hands from splinters.
  2. Use Proper Ventilation: When using glue or varnish, ensure you are in a well-ventilated area.
  3. Safety Goggles: When cutting or sanding, protect your eyes from debris.

Design Ideas

  1. Natural Shapes: Let the unique shapes of driftwood guide your designs.
  2. Combine Materials: Mix driftwood with other natural elements like stones or shells.
  3. Themes: Create themed projects such as coastal, rustic, or even modern chic.

Where to Find Driftwood

Locating the perfect pieces of driftwood can be a fun part of the crafting process. Here are some places to consider:

Locations

  • Beaches: The most common and abundant source.
  • Riverbanks: Freshwater driftwood often has different textures.
  • Lakeshores: Can provide unique shapes and sizes.

Legal Considerations

  1. Check Local Laws: Some areas have restrictions on collecting natural materials.
  2. Protected Areas: Avoid taking driftwood from protected natural reserves.

Conclusion

Driftwood crafting is an enjoyable and environmentally friendly hobby that can add a unique touch to your home decor. From simple picture frames to complex furniture, the possibilities are endless. With a bit of creativity and the right tools, you can transform ordinary pieces of driftwood into extraordinary works of art.

So why not take a stroll along the beach and see what treasures you can find? Your next crafting project might just be waiting for you in the sand.

Happy crafting!

Filed Under: Driftwood Ideas Tagged With: crafts, DIY, Driftwood, home decor, projects

Driftwood Crafts Christmas Diy Projects

May 22, 2024 by admin

Are you ready to add a touch of coastal charm to your holiday decor? “Driftwood Crafts Christmas DIY Projects” is filled with creative inspirations and easy-to-follow guides to make your festive season truly unique. You’ll discover how simple pieces of driftwood can be transformed into stunning decorations, from wreaths to tree ornaments, bringing a rustic yet elegant feel to your home. Rolled up your sleeves and let’s start crafting beautiful Christmas memories together!

Driftwood Crafts Christmas DIY Projects

Have you ever found yourself walking along a beach, picking up pieces of driftwood, and wondering how you could turn them into something magical for the holidays? Well, you’re in luck! Driftwood crafts are not only beautiful and unique, but they also have a rustic charm that’s perfect for Christmas decorations.

In this guide, we’ll take you through some fun and easy DIY projects you can try at home. From elegant driftwood Christmas trees to whimsical ornaments, there’s something here for everyone. So, grab your hot glue gun and let your creativity flow!

Driftwood Crafts Christmas Diy Projects

Why Choose Driftwood?

Driftwood is not only free (if you live near a beach), but it’s also an eco-friendly choice for crafting. Each piece of driftwood is unique, shaped by the natural elements, making your creations one-of-a-kind. Plus, driftwood projects often require minimal additional materials, saving you money and reducing waste.

Sustainability and Driftwood

Creating crafts from driftwood is a sustainable practice. By repurposing driftwood, you are actually recycling natural materials that might otherwise be disregarded. You’re reducing the need for manufactured decorations, which often involve plastics and other non-biodegradable elements.

The Unique Beauty of Driftwood

Every piece of driftwood has its own story, sculpted by water, sand, and time. This adds a unique, organic touch to your Christmas decorations, making your holiday setup stand out.

Getting Started: Gather Your Materials

Before diving into these Christmas projects, you’ll need to gather a few materials. While the primary material is driftwood, there are a few other essentials that will help you create stunning holiday crafts.

Materials Checklist

  • Driftwood: Choose pieces that are dry, clean, and free of mold.
  • Hot Glue Gun: Essential for assembling your pieces.
  • Twine or Jute: For hanging ornaments or adding rustic details.
  • Paints and Brushes: Optional, for adding color to your projects.
  • Miniature Christmas Decorations: Small baubles, stars, or glitter can add a festive touch.
  • Sandpaper: To smooth rough edges.
  • Drill: Optional, for creating holes if needed.
  • Sealant: A clear spray sealant can protect your creations if you plan to display them outside.

Project Inspirations

Driftwood Christmas Tree

One of the most popular and versatile projects is the driftwood Christmas tree. It can be simple or elaborate, large or small, depending on your preference and materials available.

Step-by-Step Instructions

  1. Select Your Driftwood: Choose pieces of various lengths. The longest piece will be the base.
  2. Arrange the Pieces: Lay them out in a tree shape, starting with the longest at the bottom and arranging shorter pieces progressively towards the top.
  3. Attach the Pieces: Use your hot glue gun to stick the pieces together. You might want to reinforce with small nails or screws if the pieces are heavy.
  4. Decorate: Add miniature baubles, glitter, or paint your tree. You can also attach a small star or an angel at the top.
  5. Display: Prop it up in a corner or hang it on the wall.

Tips for Success

  • Ensure your driftwood pieces are flat on one side to make gluing easier.
  • If you’re planning to hang your tree, consider attaching a backing, like a piece of cardboard, for added stability.

Driftwood Ornaments

Driftwood ornaments add a rustic, beachy charm to your Christmas tree. They’re easy to make and can be customized in countless ways.

Simple Driftwood Ornament

  1. Select Small Pieces of Driftwood: Choose small, lightweight pieces that are easy to hang.
  2. Drill a Hole: If you have a drill, create a small hole at the top of each piece.
  3. Thread Twine Through the Hole: Cut a piece of twine or jute, thread it through the hole, and tie a loop for hanging.
  4. Decorate: Paint the driftwood, add glitter, or write festive messages on them.

Driftwood Ornament Variations

Type of OrnamentInstructions
Star OrnamentsArrange small pieces of driftwood in a star shape and glue them together. Thread twine through one tip for hanging.
Miniature TreesStack small pieces of driftwood from longest to shortest, glue them in place, and add a tiny star on top.
Animal ShapesUse small pieces to form animals like reindeer or birds. Glue them together and add twine for hanging.

Driftwood Garland

Garlands are a versatile decoration that can grace your mantel, banister, or wall. A driftwood garland adds an earthy, natural touch to your holiday decor.

Creating Your Garland

  1. Collect Driftwood: Gather many small to medium-sized pieces.
  2. Drill Holes: Create holes near the ends of each piece.
  3. Thread onto Twine: Thread a long piece of twine through all the holes, alternating driftwood pieces with other decorations if desired (like pinecones or mini ornaments).
  4. Secure the Ends: Tie knots at both ends to keep the pieces from sliding off.
  5. Hang Your Garland: Drape it wherever you need a festive touch.

Decorations for Your Garland

For added charm, consider tying small ribbons, holly, or sprigs of evergreen between the pieces of driftwood. You can also incorporate fairy lights for a magical glow.

Driftwood Candle Holders

Driftwood candle holders bring a cozy, warm atmosphere to your Christmas decor. They make beautiful centerpieces for holiday dinners or mantle displays.

Making Driftwood Candle Holders

  1. Choose Your Driftwood: Look for pieces that are flat and stable.
  2. Create Recesses for Candles: Use a drill with a spade bit to create candle-sized recesses in the driftwood. Alternatively, you can glue small candle holders onto the driftwood.
  3. Decorate: Paint or embellish your candle holder as desired.
  4. Insert Candles: Place candles in the recesses and light them to enjoy the warm glow.

Safety Tips

  • Ensure your driftwood is stable and won’t tip over.
  • Never leave burning candles unattended.

Driftwood Nativity Scene

Crafting a nativity scene out of driftwood is a beautiful way to bring the story of Christmas to life with a natural, rustic aesthetic.

Step-by-Step Nativity Scene

  1. Gather Driftwood: Collect enough pieces to create the figures in the nativity scene (Mary, Joseph, Baby Jesus, animals, etc.).
  2. Shape the Figures: Use small pieces to represent each figure. For example, larger pieces for the adults and smaller ones for Baby Jesus and the animals.
  3. Assemble the Scene: Glue the pieces together to form each figure. Set them up to create the nativity scene.
  4. Decorate: Paint or add fabric to the figures for details like clothing.
  5. Create the Manger: Use a small piece of driftwood with a flat top as the manger.

Driftwood Wreath

A driftwood wreath is a stunning decoration for your front door. It offers a serene, beachy touch to welcome guests into your holiday home.

Crafting a Driftwood Wreath

  1. Form the Base: Use a wire wreath frame or create a circular base with sturdy driftwood pieces.
  2. Attach Driftwood: Glue smaller driftwood pieces onto the base, layering them to create a full wreath.
  3. Decorate: Add shells, ribbons, or miniature ornaments for a festive look.
  4. Hang It Up: Use a strong ribbon or twine to hang your wreath on the door.

Tips for Crafting

  • Ensure your pieces are securely attached to the base to avoid any falling off.
  • Consider adding a few drops of essential oils like pine or cinnamon for an added festive scent.

Troubleshooting and FAQs

Common Issues and Fixes

Driftwood Not Sticking

If your driftwood pieces are not sticking together well, try the following:

  • Clean the Surfaces: Ensure the surfaces are clean and dry before applying glue.
  • Use Stronger Glue: Consider using a stronger adhesive like epoxy if the hot glue isn’t strong enough.
  • Reinforce with Nails: Small nails or screws can provide additional support.

Pieces Breaking

Driftwood can be fragile. Be gentle when handling it, and reinforce weak spots with glue or small screws if necessary.

Paint Not Sticking

If paint isn’t adhering to your driftwood:

  • Sand the Surface: Lightly sand the surface to create a better texture for the paint to adhere to.
  • Prime First: Apply a coat of primer before painting.

Frequently Asked Questions

Can I Use Driftwood I Find Myself?

Yes, but make sure to clean and dry it properly. Soak it in a solution of one-part bleach to ten parts water for an hour to disinfect, then rinse well and allow to dry completely.

Can Driftwood Crafts Be Displayed Outside?

Yes, but use a weatherproof sealant to protect your crafts from the elements.

What Kind of Paint Works Best on Driftwood?

Acrylic paint is ideal for driftwood. It adheres well and comes in a variety of colors.

Driftwood Crafts Christmas Diy Projects

Conclusion

Driftwood crafts bring a touch of nature’s beauty to your Christmas decor. They’re not only eco-friendly but also provide a unique charm that store-bought decorations often lack. Whether you’re creating a stunning driftwood Christmas tree, whimsical ornaments, or a rustic wreath, these projects can be as simple or as elaborate as you wish.

You don’t have to be a seasoned crafter to enjoy making these beautiful decorations. With a bit of creativity and some basic materials, you can transform pieces of driftwood into cherished holiday decorations. So head to the beach, gather some driftwood, and start crafting your way to a merry and unique Christmas!

Filed Under: Driftwood Ideas Tagged With: christmas, crafts, DIY, Driftwood, projects

Driftwood Flowers

May 22, 2024 by admin

Discover the enchanting world of Driftwood Flowers, a captivating blend of nature’s beauty and artistic craftsmanship. In this charming little journey, you’ll explore how ordinary pieces of driftwood are transformed into stunning floral creations. Whether you’re a seasoned artisan or a curious nature lover, Driftwood Flowers will inspire you to see the hidden potential in the simplest of materials and perhaps ignite a passion for creating your own unique masterpieces. Dive in and let the organic elegance of driftwood flowers brighten your day!

Driftwood Flowers

Driftwood Flowers

Have You Discovered the Beauty of Driftwood Flowers?

Have you ever walked along a beach, stumbled upon a piece of driftwood, and wondered how you could transform it into something beautiful? Imagine turning those weathered wood pieces into stunning works of art—driftwood flowers! In this article, you’ll explore the fascinating world of driftwood flowers, learning about how to make them, the types of driftwood to use, and creative ways to incorporate these natural wonders into your home decor.

What Are Driftwood Flowers?

Driftwood flowers are a creative and eco-friendly craft that involves using pieces of driftwood to create flower-like decorations. These creations can vary from simple designs to intricate art pieces, and they offer a unique way to bring nature into your living space.

The Appeal of Driftwood Flowers

Driftwood flowers are appealing for several reasons:

  • Eco-friendly: They repurpose natural materials, giving them a new life.
  • Unique: Each piece of driftwood is different, resulting in one-of-a-kind creations.
  • Aesthetic: They bring a rustic, beachy charm to any room.
  • Versatile: Driftwood flowers can be used in various home decor settings, from wall art to table centerpieces.

Types of Driftwood

Before diving into the creation process, it’s essential to understand the types of driftwood you might encounter. Not all driftwood is created equal, and some types are better suited for specific projects.

Softwood vs. Hardwood

Driftwood can generally be classified into two main categories:

  • Softwood: Typically from conifers like pines and cedars, these pieces tend to be lighter and easier to shape.
  • Hardwood: Usually from deciduous trees like oak and maple, hardwood driftwood is denser and more durable.

Shapes and Sizes

Driftwood comes in various shapes and sizes, each offering unique possibilities for your flower creations:

  • Flat pieces: Ideal for petal formations.
  • Branches and twigs: Great for stems and intricate flower designs.
  • Bulky pieces: Can be carved or whittled into various shapes.

Finding and Selecting Driftwood

Finding the right pieces of driftwood requires a keen eye and a bit of exploration. Here are some tips to help you gather your materials:

  • Check local beaches: Driftwood is often found along shorelines, especially after storms or high tides.
  • Lakes and rivers: Freshwater bodies can also be rich sources of driftwood.
  • Avoid protected areas: Be mindful of local regulations and avoid collecting driftwood from protected or restricted areas.

Materials and Tools You’ll Need

Creating driftwood flowers requires a few basic materials and tools. Here’s a handy table to help you gather everything you need:

ItemDescription
Driftwood PiecesVarious shapes and sizes, cleaned and dried
Hot Glue GunEssential for securely attaching pieces together
Glue SticksCompatible with your hot glue gun
SandpaperTo smooth rough edges and surfaces
Wire CuttersFor trimming and shaping thin wire stems
Paint and BrushesOptional, for added color and detail
PliersUseful for shaping and bending wire
Natural ElementsOptional, such as seashells or small stones for embellishments

Driftwood Flowers

How to Make Driftwood Flowers

Now that you have your materials, it’s time to dive into the process of making driftwood flowers. Follow these step-by-step instructions to create your own beautiful driftwood blooms.

Step 1: Clean Your Driftwood

Before you start crafting, it’s important to clean your driftwood to remove any dirt, sand, or contaminants. Here’s how:

  • Rinse thoroughly: Use fresh water to rinse off salt, sand, and debris.
  • Soak: Submerge the driftwood in a mixture of water and a mild bleach solution (1 part bleach to 9 parts water) for a few hours to kill any potential mold or bacteria.
  • Dry: Allow the driftwood pieces to dry completely, preferably in the sun. This may take a few days.

Step 2: Plan Your Design

Think about the flower you want to create. Sketching out a rough design can be helpful. Consider these elements:

  • Petal Arrangement: How many petals will your flower have? What shape will they be?
  • Stem: Will your flower have a stem? If so, how long?
  • Center: What will you use for the flower’s center? Consider small pieces of driftwood, seashells, or stones.

Step 3: Shape Your Pieces

Using sandpaper, smooth out any rough edges on your driftwood pieces. If necessary, break or cut larger pieces into smaller shapes that resemble petals, leaves, or other parts of a flower.

Step 4: Assemble Your Flower

Start assembling your driftwood flower using the hot glue gun:

  1. Attach Petals: Beginning with the outer petals, glue each piece in place, working your way towards the center. Hold each piece in place for a few seconds to ensure a secure bond.
  2. Add the Stem: If your design includes a stem, attach a sturdy piece of driftwood to the flower using glue. Additional support can be provided by wrapping the joint with wire.
  3. Mount the Flower Center: Finally, add your chosen center piece, whether it’s another piece of driftwood, a seashell, or a small stone.

Step 5: Finishing Touches

Once your flower is assembled, you can add some finishing touches:

  • Paint: Add subtle or vibrant colors to enhance your flower’s appearance.
  • Embellishments: Attach small shells, stones, or other natural elements to give your flower extra detail and personality.

Creative Uses for Driftwood Flowers

Now that you’ve created your driftwood flowers, it’s time to put them to good use! Here are some creative ideas for incorporating driftwood flowers into your home decor.

Wall Art

Create a stunning piece of wall art by arranging multiple driftwood flowers on a canvas or wooden board. This can serve as a focal point in a room, bringing a touch of nature indoors.

Table Centerpieces

Driftwood flowers make beautiful and unique table centerpieces. Pair them with candles, seashells, and other natural elements to create a serene, beach-inspired display.

Garden Decor

Enhance your garden’s natural beauty by placing driftwood flowers among your plants. They add an artistic element and can be a delightful surprise for guests.

Gift Ideas

Driftwood flowers make wonderful, handcrafted gifts. Personalized and unique, these creations are perfect for birthdays, holidays, or housewarming presents.

Preserving Your Driftwood Flowers

To ensure your driftwood flowers last, it’s important to take steps to preserve them. Here’s how you can keep your creations looking their best:

  • Avoid Moisture: Keep your driftwood flowers dry to prevent mold and deterioration.
  • Seal the Wood: Consider applying a clear wood sealer to protect against humidity and wear.
  • Dust Regularly: Gently dust your driftwood flowers to keep them clean and fresh.

Inspirational Driftwood Flower Projects

Let’s dive into some project ideas that can further inspire your creativity. These examples showcase the versatility and beauty of driftwood flowers in various settings.

Driftwood Flower Wreath

A driftwood flower wreath can add a rustic charm to your front door or any wall in your home. Combine driftwood flowers of various sizes with additional elements like small seashells and dried leaves.

Driftwood Flower Mobile

Create a serene and eye-catching mobile by suspending driftwood flowers from a piece of driftwood or a wooden hoop. This can be a beautiful addition to a nursery or outdoor patio.

Driftwood Flower Sculpture

For a more ambitious project, construct a driftwood flower sculpture. Use larger pieces of driftwood and combine multiple flowers for a striking, three-dimensional art piece.

Hosting a Driftwood Flower Workshop

Sharing your newfound passion can be rewarding. Why not host a workshop where friends and family can create their own driftwood flowers? Here’s how to get started:

Planning Your Workshop

  • Choose a Venue: Your home, a community center, or an outdoor space can be a great choice.
  • Gather Supplies: Ensure you have enough driftwood, glue guns, and other materials for all participants.
  • Prepare Examples: Show examples of completed driftwood flowers and steps for creating them.

During the Workshop

  • Demonstrate: Begin with a demonstration, explaining each step clearly.
  • Assist Participants: Offer guidance and assistance as needed.
  • Encourage Creativity: Allow participants to express their creativity and come up with unique designs.

Conclusion

Driftwood flowers are a beautiful, eco-friendly way to transform ordinary pieces of driftwood into extraordinary works of art. By following the steps outlined in this article, you can create stunning driftwood flower decorations and incorporate them into your home decor in numerous creative ways. Whether you’re making a gift for a loved one or looking to bring a touch of nature inside, driftwood flowers offer endless possibilities for artistic expression.

So next time you find yourself walking along the beach or near a body of water, be inspired to collect those unique pieces of driftwood and start crafting your own driftwood flowers. Happy crafting!

Filed Under: Driftwood Ideas Tagged With: DIY, Driftwood, Flower Craft, home decor

  • « Previous Page
  • Page 1
  • …
  • Page 34
  • Page 35
  • Page 36
  • Page 37
  • Page 38
  • …
  • Page 41
  • Next Page »

Primary Sidebar

Driftwood4us.com, is a participant in the Amazon Services LLC Associates Program, an affiliate advertising program designed to provide a means for sites to earn advertising fees by advertising and linking to amazon.com.