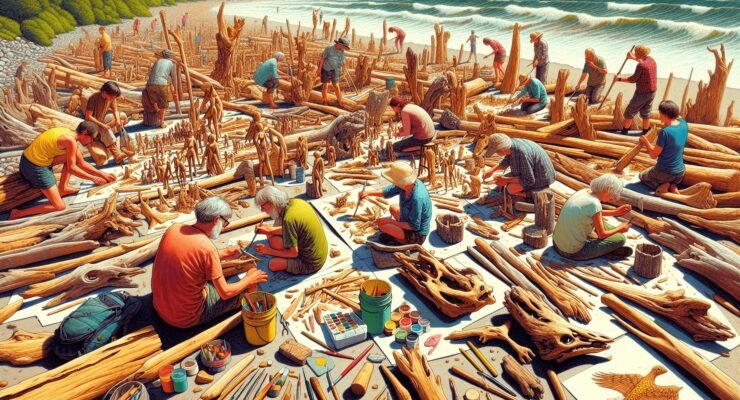
If you are looking for a unique and eco-friendly way to bring a touch of nature into your home, then driftwood art may be just what you need. This article will introduce you to a variety of creative DIY projects that can be done using driftwood. From stunning wall hangings to sculptural-style furniture, these ideas will inspire you to get crafty and turn this natural material into beautiful works of art.

Driftwood Mobiles
Materials needed for driftwood mobiles
To create a beautiful driftwood mobile, you will need the following materials:
- Pieces of driftwood in various shapes and sizes
- Fishing line or clear nylon thread
- Small eye hooks
- Beads or other decorative elements
- A metal hoop or wooden dowel for hanging
Steps to create a driftwood mobile
Creating a driftwood mobile is a fun and creative project. Follow these steps to make your own:
- Start by gathering your driftwood pieces. Look for unique shapes and interesting textures.
- Clean the driftwood by gently rinsing it with water and allowing it to dry completely.
- Once the driftwood is dry, arrange the pieces in a pleasing composition. Play around with different arrangements until you find one you love.
- Using a small drill or awl, create holes in the driftwood where you want to attach the fishing line.
- Cut lengths of fishing line or clear nylon thread and thread them through the holes in the driftwood.
- Attach eye hooks to the metal hoop or wooden dowel, evenly spaced apart.
- Tie the other end of the fishing line to the eye hooks, making sure the driftwood pieces are at different heights.
- Add beads or other decorative elements to the fishing line for extra flair.
- Hang your driftwood mobile in a sunny window or from a tree branch, and enjoy the natural beauty it brings to your space.
Ideas for different styles and designs of driftwood mobiles
There are endless possibilities when it comes to designing driftwood mobiles. Here are a few ideas to spark your creativity:
- Beach-inspired: Use seashells, starfish, and other ocean-themed decorations alongside the driftwood for a coastal vibe.
- Bohemian: Incorporate colorful feathers, macrame accents, and vibrant beads to create a whimsical and boho-inspired mobile.
- Minimalist: Keep it simple with just the driftwood and monochromatic thread for a sleek and modern look.
- Nature-inspired: Add small pinecones, dried flowers, or moss to your driftwood mobile to bring a touch of the outdoors inside.
- Personalized: Use small picture frames or miniature photographs to personalize your driftwood mobile and showcase cherished memories.
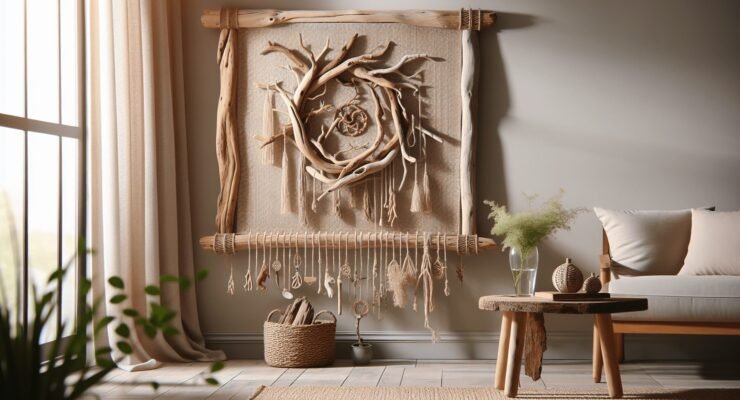
Driftwood Wall Art
Materials needed for driftwood wall art
To create stunning driftwood wall art, gather the following materials:
- Large piece of driftwood
- Saw or pruning shears
- Sandpaper
- Picture hanging kit or sawtooth hangers
- Optional: Paint or wood stain
Steps to create driftwood wall art
Creating your own driftwood wall art is a great way to add a touch of rustic elegance to your space. Follow these steps to make your own:
- Begin by choosing a large piece of driftwood that speaks to you. Look for interesting shapes and textures.
- If necessary, trim the driftwood using a saw or pruning shears to achieve your desired shape and size.
- Use sandpaper to smooth out any rough edges or splintered areas on the driftwood.
- Decide if you want to paint or stain the driftwood. This step is optional but can add a pop of color or enhance the natural beauty of the wood. Allow the paint or stain to dry completely before moving on to the next step.
- Attach a picture hanging kit or sawtooth hangers to the back of the driftwood for easy hanging.
- Choose a prominent spot on your wall to display your driftwood art, and use nails or wall hooks to secure it in place.
- Step back and admire your handiwork – you now have a stunning piece of driftwood wall art that adds character and charm to your home.
Inspiring designs for driftwood wall art
Driftwood wall art can take on many forms, depending on your personal style and preferences. Here are a few design ideas to inspire you:
- Geometric patterns: Arrange smaller pieces of driftwood in geometric shapes, such as triangles or hexagons, for a modern and visually striking wall art piece.
- Nautical themes: Incorporate seashells, starfish, or rope into your driftwood wall art to create a coastal-inspired masterpiece.
- Textured accents: Attach pieces of fabric, feathers, or even dried flowers to the driftwood to add texture and visual interest.
- Boho-chic: Add macrame accents, tassels, or dreamcatcher elements to the driftwood for a bohemian-inspired wall art piece.
- Personalized touches: Use woodburning tools to carve names, dates, or meaningful quotes into the driftwood for a one-of-a-kind piece with sentimental value.
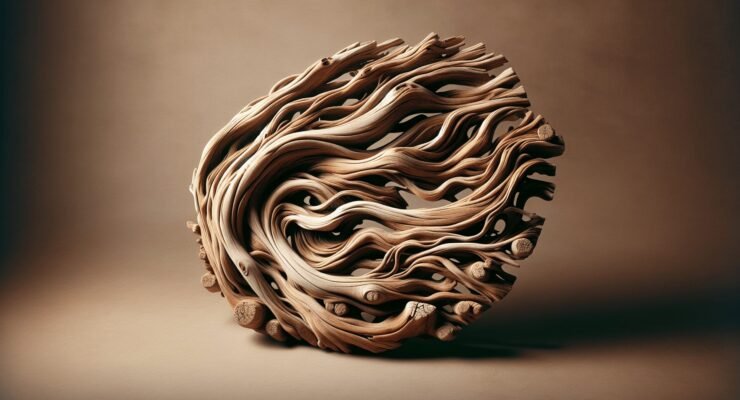
Driftwood Sculptures
Materials needed for driftwood sculptures
To create stunning driftwood sculptures, gather the following materials:
- Assorted pieces of driftwood in various shapes and sizes
- Wood glue or epoxy resin
- Sandpaper
- Optional: Wood carving tools or a Dremel tool for shaping and detailing
Techniques to shape and assemble driftwood for sculptures
Driftwood sculptures allow you to unleash your creativity and transform raw materials into captivating works of art. Follow these techniques to shape and assemble your driftwood:
- Begin by selecting driftwood pieces that you find visually appealing. Look for interesting shapes, textures, and sizes.
- Use sandpaper to smooth out any rough edges or splintered areas on the driftwood.
- Determine the design or concept for your driftwood sculpture. Sketch out your ideas beforehand, or simply let the driftwood guide you as you work.
- If desired, use wood carving tools or a Dremel tool to shape and detail the driftwood. This step allows you to add your personal touch and bring out the natural beauty of each piece.
- Assemble the driftwood pieces by applying wood glue or epoxy resin to the areas where they will connect. Press the pieces together firmly and hold them in place until the adhesive dries.
- Take your time and experiment with different arrangements and angles to achieve the desired look for your driftwood sculpture.
- Allow the adhesive to fully cure before moving or displaying your sculpture. Follow the instructions on the adhesive product for the recommended drying time.
Examples of unique driftwood sculpture ideas
The possibilities for driftwood sculptures are limited only by your imagination. Here are some unique ideas to inspire your creativity:
- Animal-inspired: Create driftwood sculptures that resemble animals, such as birds, fish, or even mythical creatures like dragons or unicorns.
- Abstract forms: Let the shapes and textures of the driftwood dictate the design, and create abstract sculptures that evoke emotion and intrigue.
- Functional art: Incorporate other elements, such as glass or metal, into your driftwood sculpture to create functional pieces, like lamps or side tables.
- Wall-mounted sculptures: Attach driftwood pieces to a wooden backing or acrylic panel to create captivating wall-mounted sculptures that add depth and visual interest to a space.
- Kinetic sculptures: Use hinges or other movable components to create driftwood sculptures that can be interacted with and set in motion.
Driftwood Candle Holders
Materials needed for driftwood candle holders
To create beautiful driftwood candle holders, gather the following materials:
- Large pieces of driftwood
- Saw or pruning shears
- Tea light candles or votive candles
- Drill with a paddle or spade bit (matching the diameter of the candle)
- Sandpaper
- Wood glue or epoxy resin (optional)
Step-by-step guide to making driftwood candle holders
Driftwood candle holders add a touch of rustic charm to any space. Follow these steps to create your own:
- Begin by selecting pieces of driftwood that are large enough to hold a candle securely. Look for sturdy and interesting-shaped pieces.
- Using a saw or pruning shears, trim the driftwood to your desired length, making sure the tops are flat and level.
- If necessary, use sandpaper to smooth out any rough edges or splintered areas on the driftwood.
- Determine where you want to place the candles on the driftwood. Mark these spots with a pencil or tape.
- Using a drill with a paddle or spade bit, create holes in the driftwood at the marked spots. The diameter of the holes should match the size of your candles.
- Test the fit of the candles in the holes. If they are too loose, apply a small amount of wood glue or epoxy resin to the inside of the holes to secure the candles in place.
- Allow the adhesive to dry completely before using the driftwood candle holders.
- Insert the tea light or votive candles into the holes, making sure they are level and secure.
- Place your driftwood candle holders on a heat-resistant surface, light the candles, and enjoy the cozy and enchanting ambiance they create.
Creative variations of driftwood candle holder designs
Driftwood candle holders offer endless possibilities for customization. Here are some creative variations you can try:
- Clustered arrangement: Instead of creating individual candle holders, gather several small driftwood pieces and attach them together in an interesting cluster. This creates a visually striking display that can hold multiple candles.
- Driftwood log: Find a larger, more substantial piece of driftwood and drill holes along the top surface to create a row of candle holders. This design resembles a log and makes a beautiful centerpiece for a dining table or mantel.
- Hanging candle holders: Attach eye hooks to longer, slender pieces of driftwood and suspend them from the ceiling or a sturdy branch. Hang tea light or votive candles from the hooks for a mesmerizing display that adds a touch of whimsy to your space.
- Driftwood and glass: Combine the natural beauty of driftwood with the elegance of glass by attaching glass votive holders or small glass jars to the driftwood. This creates a stunning juxtaposition of textures and materials, with the glowing candlelight casting a warm and inviting glow.
Driftwood Picture Frames
Materials needed for driftwood picture frames
To create unique and rustic driftwood picture frames, gather the following materials:
- Small to medium-sized pieces of driftwood
- Thin wooden frame or foam core board cut to desired size
- Wood glue or epoxy resin
- Picture or photograph to frame
- Optional: Sandpaper and wood stain or paint
Steps to create a driftwood picture frame
Transform your favorite memories into works of art by framing them in driftwood. Follow these steps to create a driftwood picture frame:
- Begin by selecting small to medium-sized pieces of driftwood that will fit around the edges of your picture or photograph.
- If the driftwood is rough or splintered, use sandpaper to smooth out any imperfections.
- Lay out the pieces of driftwood around the edges of the wooden frame or foam core board to determine the desired arrangement.
- Apply wood glue or epoxy resin to the back of each piece of driftwood and press them firmly onto the frame or board. Make sure they are evenly spaced and align with the edges of the picture or photograph.
- Allow the adhesive to dry completely. Follow the instructions on the adhesive product for the recommended drying time.
- If desired, stain or paint the driftwood to enhance its natural beauty or add a pop of color.

- Attach the picture or photograph to the back of the frame or board using tape or adhesive.
- Display your driftwood picture frame on a tabletop or hang it on the wall, and admire the unique and rustic charm it adds to your space.

Ideas for embellishing driftwood picture frames
Add a personalized touch to your driftwood picture frames by incorporating additional elements. Here are some ideas for embellishing them:
- Seashells and starfish: Glue small seashells or starfish to the driftwood frame to enhance the coastal theme and add texture.
- Twine or rope: Wrap twine or thin rope around a portion of the driftwood frame for a rustic and bohemian touch.
- Dried flowers or foliage: Attach dried flowers or foliage to the driftwood frame for a whimsical and natural look. Consider using flowers or leaves from a special occasion or meaningful location.
- Personal mementos: Incorporate small trinkets, charms, or vintage buttons into the driftwood frame to personalize it and add sentimental value.
- Woodburning or carving: Use woodburning tools or small carving tools to add designs, names, or dates to the driftwood frame. This creates a truly one-of-a-kind piece that tells a story.
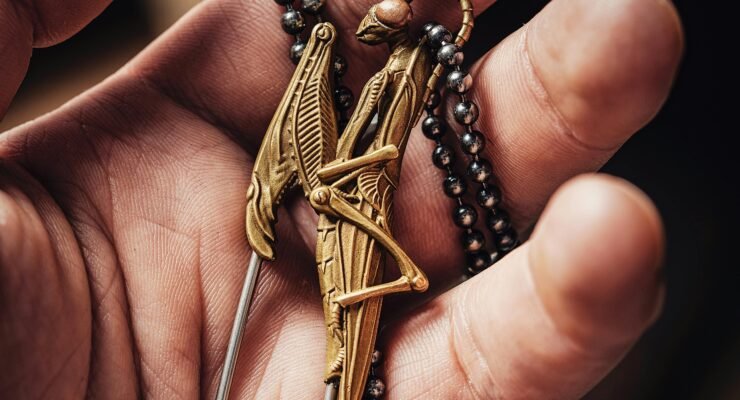
Driftwood Jewelry Hooks
Materials needed for driftwood jewelry hooks
Creating driftwood jewelry hooks allows you to showcase your favorite accessories while adding a touch of natural beauty to your space. Gather the following materials:
- Long and sturdy driftwood branches or pieces
- Hooks in various sizes and shapes
- Sandpaper
- Screwdriver or drill
- Picture hanging wire or S-hooks
- Nails or wall hooks for hanging
Techniques to attach hooks to the driftwood
Attaching hooks to your driftwood branches requires just a few simple techniques. Follow these steps to create your own driftwood jewelry hooks:
- Begin by selecting long and sturdy driftwood branches or pieces that are large enough to hold the hooks securely. Look for interesting shapes and textures.
- If necessary, use sandpaper to smooth out any rough edges or splintered areas on the driftwood.
- Determine where you want to place the hooks on the driftwood. Mark these spots lightly with a pencil.
- Using a screwdriver or drill, carefully create pilot holes at the marked spots on the driftwood. The size of the pilot holes should match the size of the hooks you are using.
- Attach the hooks to the driftwood by screwing them into the pilot holes. Make sure they are securely fastened.
- Attach picture hanging wire or S-hooks to the back of the driftwood, evenly spaced apart, to hang the jewelry hooks.
- Choose a prominent spot on your wall to display your driftwood jewelry hooks, and use nails or wall hooks to secure the hanging wire or S-hooks in place.
- Hang your favorite necklaces, bracelets, and earrings from the hooks, and enjoy the functional and decorative nature of your driftwood jewelry hooks.
Unique and decorative ways to arrange driftwood jewelry hooks
Driftwood jewelry hooks can be arranged in various ways to suit your personal style and storage needs. Here are some unique and decorative ideas to consider:
- Branching arrangement: Choose a longer driftwood branch and attach multiple hooks along its length, creating a tree-like shape. This allows for abundant storage and adds visual interest to your wall.
- Clustered design: Gather several smaller driftwood pieces and attach hooks to each one. Arrange the driftwood pieces in a clustered formation on the wall, creating an eye-catching and artistic display for your jewelry.
- Cascading effect: Attach hooks of varying lengths to a large driftwood piece, allowing them to cascade down the wall. This creates a dynamic and visually striking arrangement that adds depth to your space.
- Mixed media: Combine driftwood with other materials, such as copper or brass pipes, to create a unique and eclectic jewelry display. Attach the hooks to the driftwood and incorporate the pipes as additional hanging spaces for necklaces and bracelets.
- Dual functionality: Use longer driftwood branches as both jewelry hooks and decorative shelving. Attach hooks to the driftwood, and place small trinkets or decorative items on top, creating a multi-functional and visually interesting display.
Driftwood Coasters
Materials needed for driftwood coasters
To create unique and eye-catching coasters using driftwood, gather the following materials:
- Small to medium-sized driftwood pieces
- Saw or pruning shears
- Sandpaper
- Cork or felt sheet
- Scissors or utility knife
- Wood glue or epoxy resin
Step-by-step instructions for making driftwood coasters
Driftwood coasters not only protect your surfaces, but they also bring a touch of nature into your home. Follow these steps to make your own driftwood coasters:
- Begin by selecting small to medium-sized driftwood pieces that are flat and even on one side. Look for interesting shapes and textures.
- If necessary, trim the driftwood pieces using a saw or pruning shears to achieve a more uniform shape or size.
- Use sandpaper to smooth out any rough edges or splintered areas on the driftwood.
- Cut or trace circles or squares from your cork or felt sheet, slightly smaller than the size of your driftwood pieces. These will serve as the backing for the coasters, protecting your surfaces.
- Apply wood glue or epoxy resin to the flat side of the driftwood pieces, and press them firmly onto the cork or felt cutouts. Make sure they are centered and align with the edges of the backing material.
- Allow the adhesive to dry completely. Follow the instructions on the adhesive product for the recommended drying time.
- Trim any excess cork or felt from the edges of the coaster, using scissors or a utility knife.
- Your driftwood coasters are now ready to use. Place them on your coffee table, dining table, or any other surface that needs protection and enjoy the natural beauty they bring to your space.
Inspiring designs and embellishments for driftwood coasters
Driftwood coasters can be customized and embellished to match your style and preferences. Here are some inspiring designs and embellishments to consider:
- Painted edges: Use acrylic or wood paint to add a pop of color to the edges of your driftwood coasters. Choose shades that complement your decor or make a bold statement.
- Woodburning or etching: Use woodburning tools or etching techniques to add designs, patterns, or personalized messages to the driftwood surface. This creates a truly unique and personalized coaster set.
- Marbled effect: Use a technique called alcohol ink marbling to create a stunning and abstract effect on your driftwood coasters. Simply apply alcohol ink to the surface of the driftwood, and gently blow on it or manipulate it to create swirling patterns and colors.
- Natural finishes: Enhance the natural beauty of the driftwood by applying a sealant or wood wax that brings out the unique grain and tones of the wood. This allows the coasters to blend seamlessly with any decor style.
- Geometric patterns: Use masking tape or stencils to create geometric patterns on the driftwood surface. Paint over the tape or stencil, and remove it once the paint is dry to reveal clean and crisp lines.
- Seashells and beads: Glue small seashells, beads, or other small decorative elements to the driftwood surface, adding a touch of whimsy and texture. Choose colors and shapes that complement your space and personal taste.
Driftwood Planters
Materials needed for driftwood planters
Gather the following materials to create unique and natural driftwood planters:
- Large and sturdy driftwood pieces
- Drill with a paddle or spade bit (matching the diameter of the plant container)
- Sandpaper
- Plant container or pot
- Potting soil
- Plants or succulents of your choice
Techniques to create a planter using driftwood
Driftwood planters bring a natural and organic element to your indoor or outdoor space. Follow these techniques to create your own driftwood planters:
- Begin by selecting large and sturdy driftwood pieces that can support the weight of your plant containers. Look for interesting shapes and textures.
- If necessary, use sandpaper to smooth out any rough edges or splintered areas on the driftwood.
- Determine where you want to place the plant container on the driftwood. Mark this spot lightly with a pencil.
- Using a drill with a paddle or spade bit, carefully create a hole in the driftwood at the marked spot. The diameter of the hole should match the size of your plant container.
- Test the fit of the plant container in the hole. It should fit snugly and securely.
- Fill the plant container with potting soil, leaving enough space for the plants or succulents.
- Plant your desired greenery in the container, making sure they are properly spaced and positioned.
- Place the plant container into the driftwood hole, ensuring it is level and secure.
- Display your driftwood planter in a sunny spot indoors or in a protected outdoor area, and enjoy the natural beauty it brings to your space.
Ideas for incorporating plants into driftwood planters
Driftwood planters provide a stunning backdrop for a wide variety of plants and succulents. Here are some ideas to consider when selecting plants for your driftwood planters:
- Air plants: These low-maintenance plants are perfect for driftwood planters, as they require no soil and can attach themselves to the driftwood naturally.
- Succulents: Choose a variety of small succulents that thrive in well-draining soil. Their colorful foliage and unique textures complement the rustic charm of driftwood.
- Foliage plants: Select houseplants with broad leaves or interesting textures, such as pothos, ferns, or snake plants. These plants add lushness and bring a touch of the outdoors inside.
- Herbs: Create a small herb garden by planting culinary herbs, such as basil, rosemary, or thyme, in your driftwood planter. Not only do they add fragrance and beauty, but they also provide fresh herbs for cooking.
- Miniature flowers: Choose small flowering plants, like daisies or pansies, to add a pop of color and whimsy to your driftwood planter. These plants bring a garden-like feel to your space in a compact size.
- Ornamental grasses: Incorporating ornamental grasses, such as feather grass or bunny tails, adds movement and a playful element to your driftwood planter. Their graceful, swaying nature complements the organic shape of the driftwood.
Driftwood Wind Chimes
Materials needed for driftwood wind chimes
Create whimsical and melodic driftwood wind chimes using the following materials:
- Medium-sized driftwood pieces
- Fishing line or clear nylon thread
- Small eye hooks
- Decorative beads or shells
- Metal or wooden chime tubes or hollow bamboo segments
- Optional: Paint or wood stain
Steps to assemble a driftwood wind chime
Assembling a driftwood wind chime allows you to bring soothing sounds and natural aesthetics to your outdoor space. Follow these steps to create your own:
- Begin by selecting medium-sized driftwood pieces that are interestingly shaped, with natural holes or crevices that can be threaded.
- If desired, paint or stain the driftwood pieces to enhance their natural beauty or add a pop of color. Allow the paint or stain to dry completely before moving on to the next step.
- Determine the arrangement of your driftwood pieces. Consider the size, shape, and thickness of each piece, as well as how they will hang and interact with each other when caught by the wind.
- Attach eye hooks to the driftwood pieces, making sure they are evenly spaced and positioned for optimal movement. It may be necessary to drill small pilot holes before screwing in the eye hooks.
- Cut lengths of fishing line or clear nylon thread, and secure them to each driftwood piece using the eye hooks. Make sure they are long enough to dangle freely and reach the desired chime tubes or bamboo segments.
- Attach your chosen chime tubes or hollow bamboo segments to the fishing line or clear nylon thread using knots or beads to keep them in place. Experiment with different lengths and combinations to achieve the desired sound and visual effect.
- Add decorative beads, shells, or other trinkets among the driftwood pieces and chime tubes to add extra flair and visual interest.
- Hang your driftwood wind chime from a tree branch or pergola where it can catch the wind, and let the soothing sounds fill your outdoor space.
Creative ideas for personalized driftwood wind chimes
Driftwood wind chimes can be personalized and customized to reflect your style and preferences. Here are some creative ideas to consider:
- Coastal-inspired: Incorporate seashells, sand dollars, and pieces of coral or sea glass into your driftwood wind chime to create a beachy and coastal-inspired design.
- Musical notes: Attach small metal chime tubes or metal keys to the fishing line or clear nylon thread, creating a wind chime that plays actual musical notes when the breeze passes through.
- Colorful accents: Paint the driftwood pieces in vibrant colors or use multi-colored beads and trinkets to create a whimsical and colorful wind chime that adds a playful touch to your space.
- Natural elements: Integrate feathers, pinecones, acorns, or small potted plants into your driftwood wind chime to bring a touch of nature and organic beauty to your outdoor environment.
- Seasonal themes: Adapt your driftwood wind chime to reflect different seasons. Attach small ornaments, leaves, or flowers that are relevant to the current season, changing them out as the seasons transition.
- Spiritual or symbolic: Incorporate meaningful charms, symbols, or gemstone beads into your driftwood wind chime, representing qualities or beliefs that are important to you. This adds a personal and spiritual touch to your outdoor space.
Driftwood Mirrors
Materials needed for driftwood mirrors
Create stunning and unique driftwood mirrors with the following materials:
- Large and sturdy driftwood branches or pieces
- Circular or rectangular mirror with a beveled edge
- Wood glue or epoxy resin
- Sandpaper
- Picture hanging wire or D-rings
- Nails or wall hooks for hanging
Step-by-step guide to making a driftwood mirror
Transform an ordinary mirror into a statement piece with a driftwood frame. Follow these steps to create your own driftwood mirror:
- Begin by selecting large and sturdy driftwood branches or pieces that are interestingly shaped and sized to accommodate your mirror.
- If necessary, use sandpaper to smooth out any rough edges or splintered areas on the driftwood.
- Determine the arrangement of the driftwood pieces around the mirror. Play around with different configurations until you find one that is visually appealing.
- Apply wood glue or epoxy resin to the back of each driftwood piece, and press them firmly onto the outer edge of the mirror.
- Allow the adhesive to dry completely. Follow the instructions on the adhesive product for the recommended drying time.
- Attach picture hanging wire or D-rings to the back of the mirror, evenly spaced apart, for easy hanging.
- Choose a prominent spot on your wall to display your driftwood mirror, and use nails or wall hooks to secure it in place.
- Step back and admire your handiwork – you now have a stunning driftwood mirror that adds rustic elegance and a captivating focal point to your space.

Different styles and designs to enhance driftwood mirrors
Driftwood mirrors can be customized to suit various design styles and preferences. Here are some different styles and designs to enhance your driftwood mirror:
- Sunburst design: Arrange the driftwood pieces in a sunburst pattern around the mirror for a dramatic and eye-catching effect.
- Coastal-inspired: Attach small seashells, starfish, or pieces of coral to the driftwood frame to enhance the coastal theme and bring the beach indoors.
- Layered effect: Use smaller driftwood pieces to create layers of texture and dimension around the mirror. Experiment with different lengths and thicknesses for a visually interesting and dynamic frame.
- Minimalist design: Keep the driftwood frame simple and sleek, with clean lines and minimal embellishments. This style is perfect for modern and minimalist interiors, allowing the natural beauty of the driftwood to shine through.
- Ornate and eclectic: Attach intricate wood carvings, vintage buttons, or other unique elements from your collection to the driftwood frame, creating an ornate and eclectic mirror that tells a story.
- Geometric patterns: Arrange the driftwood pieces in geometric patterns, such as squares, triangles, or diamonds, for a contemporary and visually striking mirror frame.
- Mixed media: Combine other materials, such as metal or stained glass, with the driftwood to create a mixed media mirror frame that adds depth and texture. This eclectic style allows you to experiment and create truly unique and dynamic mirrors.