• Skip to main content
  • Skip to primary sidebar
  • Terms and Conditions
  • Privacy Policy
  • Contact

Driftwood 4 Us

Just About Driftwood

DIY

Driftwood Effect Chalk Paint

March 9, 2025 by admin

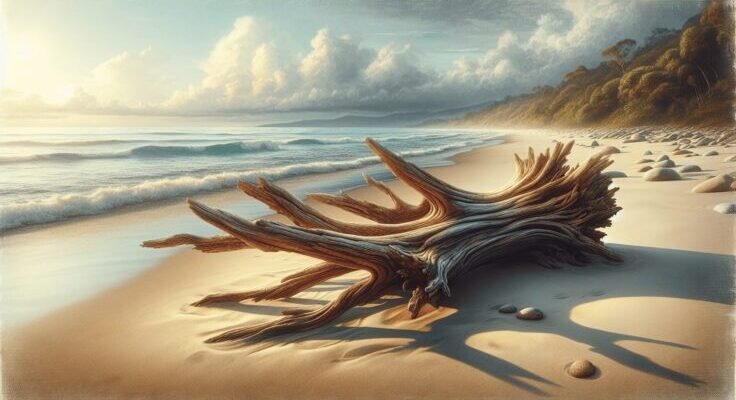
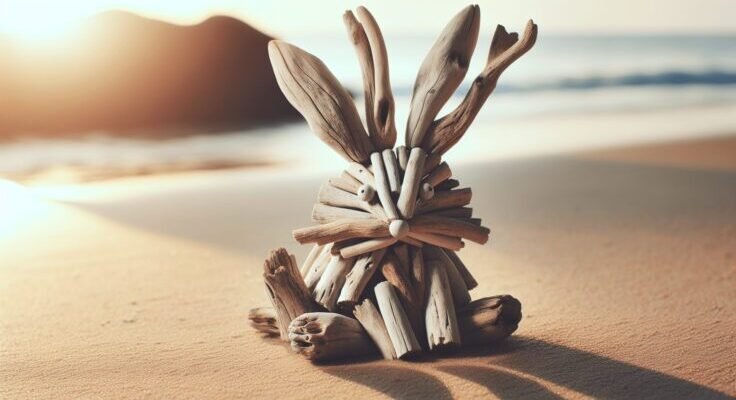
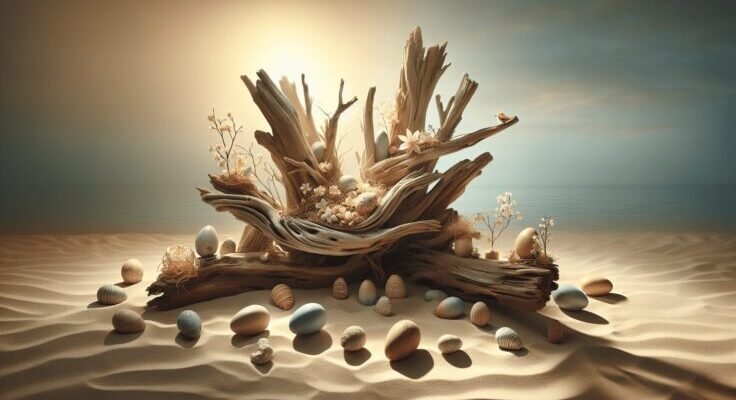
Have you ever admired the muted, weathered charm of driftwood and wished you could capture that rustic elegance in your home decor? The driftwood effect using chalk paint is a fantastic way to do just that. This technique can transform the simplest piece of furniture into a stunning centerpiece, boasting the natural beauty and subtle sophistication of driftwood. By using chalk paint, known for its versatility and lovely matte finish, you can achieve this look with ease. In this guide, you’ll explore how to create that driftwood effect using chalk paint, discuss its nuances, and get inspired to apply it to your own projects.

What is Driftwood Effect in Chalk Paint?

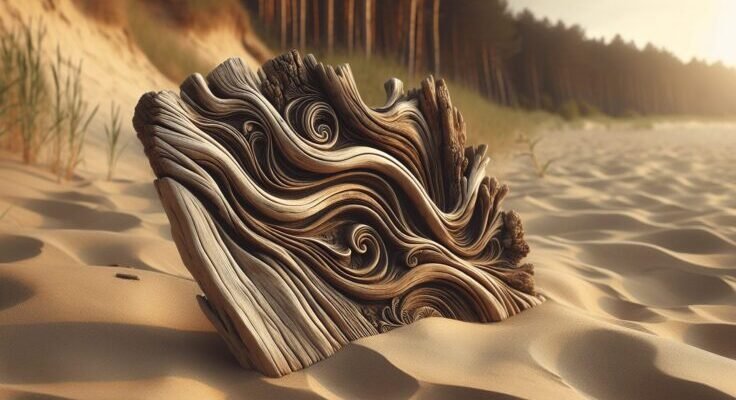
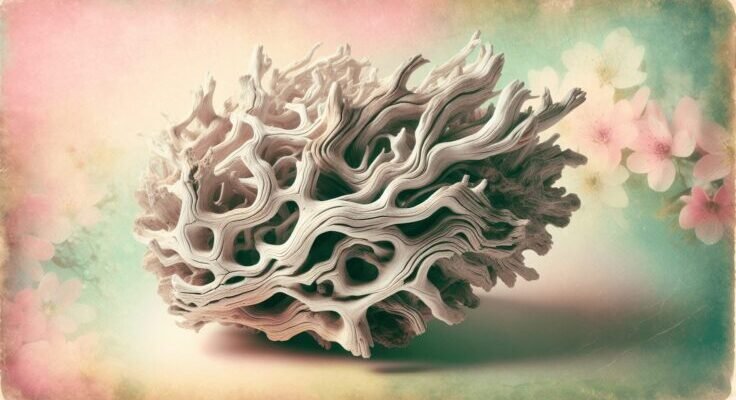
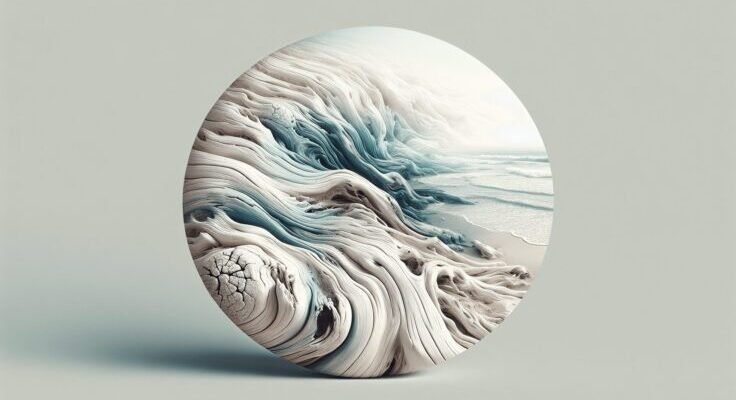
The driftwood effect in chalk paint refers to a painting technique designed to mimic the natural, aged appearance of driftwood. This look can add a touch of rustic elegance to any room. Achieving this effect means using a series of painting and distressing techniques to get that naturally weathered look.

Why Use Chalk Paint?

Chalk paint is a popular choice for achieving the driftwood effect because it’s easy to use and requires minimal preparation. It adheres to almost any surface without needing primer or sanding. Chalk paint’s matte finish and ability to layer and blend colors make it ideal for creating the nuanced textures seen in driftwood.

Materials You’ll Need

Before you start your driftwood effect project, gather the following materials:

  1. Chalk Paint: Choose at least two complementary colors. A light base color and a darker ‘driftwood’ hue work well.
  2. Brushes: A good quality paintbrush or two for application, and a smaller one for details.
  3. Sandpaper: Medium and fine grit for distressing.
  4. Wax or Sealant: To protect your finished piece.
  5. Cloth: For blending and removing excess paint.

Choosing the Right Colors

The colors you choose can make or break the driftwood effect. Generally, shades of gray, taupe, and white work best. You can mix these colors to create a gradient effect simulating the various tones found in natural driftwood.

Light Base ColorDarker “Driftwood” ColorSuggested Combination
Soft WhiteLight GraySubtle and airy
Light BeigeMedium GrayRustic and elegant
Pale GrayDark TaupeBold and striking

By selecting harmonious shades, you’ll be better able to mimic the natural variations in real driftwood.

Driftwood Effect Chalk Paint

Steps to Create Driftwood Effect

Let’s get into the step-by-step process of creating the driftwood effect with chalk paint.

Step 1: Prepare Your Surface

Begin by wiping down your furniture piece to ensure it’s clean and free of dust. Chalk paint adheres better on a clean surface, so a quick cleaning can make a substantial difference.

Step 2: Apply the Base Coat

Start with the lighter color as your base. Apply this coat evenly across your piece. Since chalk paint often dries quickly, work efficiently to cover the entire surface without leaving streaks.

Step 3: Layer on the ‘Driftwood’ Color

Once your base coat is dry, it’s time to add the darker ‘driftwood’ color. Use a dabbing technique with a brush or cloth to apply this color. The key is to apply it unevenly, allowing the base color to show through in some areas, creating depth and dimension.

Step 4: Blend the Colors

With a damp cloth, gently blend the painted layers to soften the transition between colors. This helps in replicating the gradual color shifts seen in real driftwood.

Step 5: Distressing

For a more authentic look, distress your furniture by lightly sanding areas where natural wear might happen, such as edges and corners. Use the medium grit sandpaper first, then smooth out with fine grit.

Step 6: Seal Your Work

Finally, protect your masterpiece with a layer of wax or sealant. This not only adds durability but also enhances the colors and texture of the finish.

Tips for Achieving a Believable Driftwood Look

  • Work with Grains: Follow the natural wood grain of your piece to ensure the finish looks organic.

  • Don’t Overthink: The beauty of the driftwood effect lies in its randomness. Don’t strive for perfection—imperfection is where the character shines.

  • Practice Makes Perfect: If you’re unsure, try the technique on a test piece or an inconspicuous area before starting your main project.

Driftwood Effect Chalk Paint

Common Mistakes to Avoid

While drifting towards greatness, it’s easy to trip up along the way. Here are a few common mistakes to steer clear of:

  • Skipping Preparation: Even though chalk paint is forgiving, a dirty or greasy surface can thwart your efforts.

  • Going Too Heavy on the Dark Tones: Excessive application of the ‘driftwood’ color can overshadow the base color and diminish the effect.

  • Rushing the Process: Each layer should be thoroughly dry before moving on to the next step to prevent smudging and to maintain clarity.

Creative Uses for Driftwood Effect Chalk Paint

The driftwood effect with chalk paint isn’t limited to just wooden furniture. You can apply this technique onto a variety of surfaces.

Upcycled Items

Turn old or unwanted items into stunning decor. An old picture frame or a bland wooden tray can become an eye-catching centerpiece when adorned with the driftwood look.

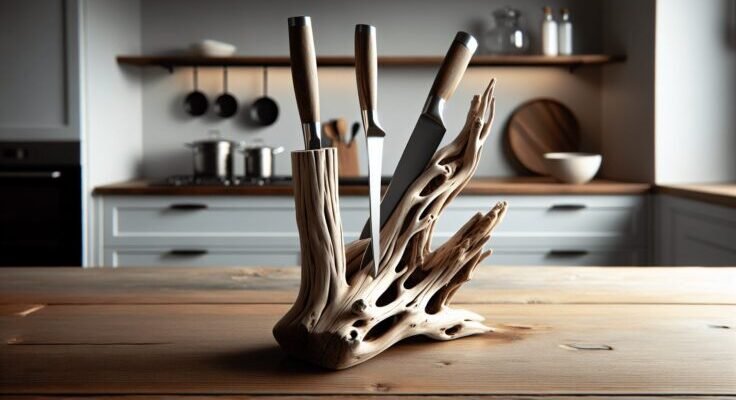
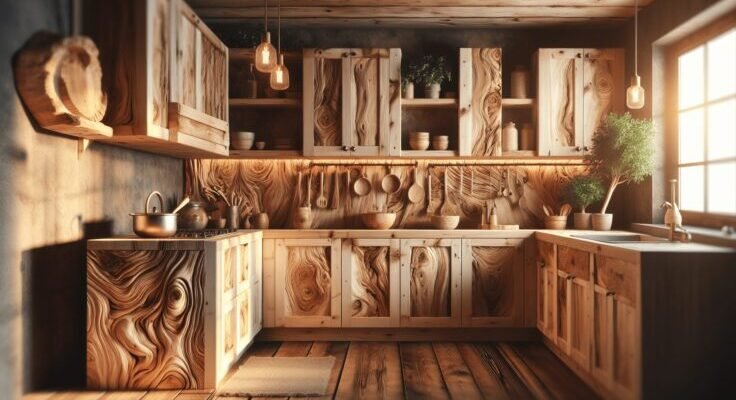
Kitchens and Bathrooms

Add a rustic vibe to frequently used spaces. Cabinets, shelves, or even mirror frames in kitchens and bathrooms can benefit from the breath of character imparted by this technique.

Outdoor Decor

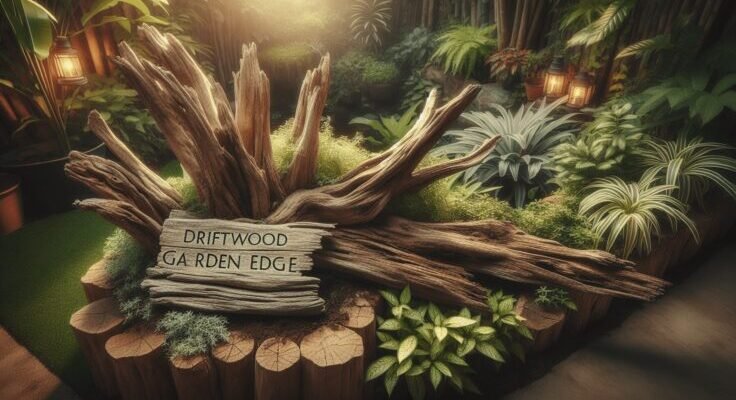
Create an outdoor oasis by sprucing up garden furniture or planters. The driftwood effect is particularly stunning in a natural, bountiful garden where the artistry of wood meets lush greenery.

Enhancing the Driftwood Paint Effect

After mastering the basic technique, consider these advanced tips to further your driftwood paint effect:

Using Multiple Colors

Adding additional layers of different hues can increase the visual interest of your project. Try incorporating a touch of blue or green to your usual gray tones to mimic the sea-aged appearance of driftwood.

Incorporating Textured Techniques

Introduce texture by using a stiff brush to create striations resembling grain patterns of weathered wood. This makes the piece not only visually engaging but also texturally dynamic.

Adding Finishing Touches

Experiment with additional finishes like copper or silver highlights to imply sun glinting off aged wood. These embellishments can take your project from rustic to elevated art.

Understanding Care and Maintenance

Once you’ve completed your driftwood effect project, knowing how to maintain it ensures its longevity and continued beauty.

Routine Cleaning

Keep your piece clean by regularly dusting it with a soft cloth. Avoid abrasive cleaners that could damage the wax or sealant layer.

Reapplying Protective Finishes

Over time, the sealant may wear thin, especially in high-use areas. Regularly inspect your piece, and apply a fresh coat of wax or sealant as needed to protect against damage and wear.

Handling Chips and Cracks

For any chips or cracks that develop, gently sand the area and apply a matching coat of chalk paint. This touch-up will blend seamlessly with the existing finish.

Bring Driftwood Charm Into Your Space

The ability to transform ordinary objects into extraordinary ones with the driftwood effect can breathe new life into your home decor. With a blend of creativity and the right techniques, you can create pieces that evoke the serene and rustic beauty of natural driftwood. Whether it’s a statement piece in your living room or a subtle touch in your study, this versatile technique in chalk paint allows you to embrace imperfection and create art that resonates with personal and aesthetic appeal.

By mastering the driftwood effect with chalk paint, you’re not just reinventing your furniture, but also adding a personal touch to your space that captures an essence of coastal charm. Are you ready to get started and see where your creativity can take you? Embrace the transformative power of driftwood effect chalk paint and bring a touch of seaside serenity home!

Filed Under: Driftwood Ideas Tagged With: Chalk Paint, DIY, Driftwood Effect, Furniture makeover, Interior Design

Driftwood Knife Holder

March 8, 2025 by admin

Have you ever thought about adding a touch of nature to your kitchen in a unique way? The art and practicality of a driftwood knife holder might be just what you’re looking for! Not only does it bring the calming, rustic vibe of the seaside indoors, but it also serves as a functional and eye-catching piece in your culinary space. By using driftwood, you’re not only upcycling nature’s discarded treasuries but also baking in a bit of storytelling history into your décor.

Driftwood Knife Holder

Understanding Driftwood

What is Driftwood?

Driftwood is wood that has been washed onto shore by the action of winds, tides, waves, or by a drogue. It often originates from trees or branches that have fallen into rivers or oceans, later settling onto beaches with the ebb and flow of the tide. Over time, harsh environmental elements smooth and tone its texture, leading to its often striking, polished, and unique shapes.

The Appeal of Driftwood

Why is driftwood so mesmerizing? Maybe it’s the weathered, bleached look that captures the eye, or perhaps it’s the thought of the journeys it might have taken through its life. Whatever it is, driftwood stirs the imagination. Its appeal lies in its history, its texture, and the one-of-a-kind uniqueness each piece brings.

Benefits of a Driftwood Knife Holder

Aesthetic Value

Incorporating driftwood in your kitchen offers a natural, coastal aesthetic that complements both modern and traditional interiors. Its organic shape and appearance can significantly uplift your kitchen’s ambiance, merging your indoor space with the serenity of nature.

Functional Benefits

Apart from its beauty, a driftwood knife holder is extremely practical. It secures your knives safely and keeps countertops clutter-free. Driftwood naturally provides numerous grooves and crevices ideal for snugly fitting knives.

Eco-Friendly Choice

Using driftwood as a material is environmentally-friendly. Instead of contributing to waste, these natural remnants are repurposed into something beautiful and functional. This minimizes the need for industrially manufactured alternatives, contributing to sustainable living.

How to Choose Driftwood for a Knife Holder

Sourcing Driftwood Responsibly

When collecting driftwood, ensure you’re allowed to do so. Some areas have restrictions to preserve local ecosystems. It’s always essential to gather sustainably, taking only what’s needed and leaving ample for wildlife that might rely on driftwood in their habitat.

Picking the Right Piece

You’ll need a piece that not only fits your aesthetic vision but is also substantial enough to support knives. Look for pieces that offer stability, have interesting shapes, and aren’t prone to breaking. An ideal piece should be solid with inherent grooves or flat areas where knives can be easily inserted or held.

Preparing Driftwood

Before using your selected driftwood piece, it needs to be thoroughly cleaned. Scrubbing and soaking it in a mild bleach solution helps remove salt, mold, and potential pests. Allow it to dry completely, ensuring it’s free of moisture to prevent wood decay.

DIY Driftwood Knife Holder: A Step-by-Step Guide

Materials and Tools Needed

To craft your driftwood knife holder, gather:

  • A suitable piece of driftwood
  • Sandpaper (medium and fine grit)
  • Protective wood finish or natural oil (like teak oil)
  • Drill with drill bits
  • Wood glue
  • Knife magnets or holders (optional, if you want a magnetic rack function)

Step 1: Sanding and Shaping

Start by sanding your driftwood thoroughly to smooth out rough edges. This not only enhances the appearance but ensures safety when handling the wood.

Step 2: Designing Knife Slots

Plan where your knives will sit. You can opt to drill holes directly into the driftwood, or affix magnet strips if you prefer a magnetic knife holder. When drilling, always choose a drill bit slightly larger than your knife blades for easy insertion and removal.

Step 3: Finishing Touches

Once shaped and drilled, apply a wood finish or natural oil to protect the driftwood and bring out its natural color. Allow the finish to fully cure before adding any knives to the holder.

Optional: Magnetic Option

If you chose to add magnets, attach them to your driftwood using wood glue. Ensure they’re securely fastened and positioned to hold knives firmly without them slipping off.

Driftwood Knife Holder

Enhancing Your Driftwood Knife Holder

Combining with Other Materials

For additional flair, consider incorporating other materials. You could integrate stone, metal, or glass elements, creating a mixed-material holder that adds another layer of texture and interest.

Personalizing Your Creation

Adding personal touches, such as engraving initials or painting designs, can make your driftwood knife holder uniquely yours. This not only elevates its appearance but makes it a memorable conversation starter.

Regular Maintenance

Keep your driftwood knife holder looking fresh with occasional maintenance. Wipe it down with a damp cloth to remove dust and apply a fresh coat of oil or polish as needed to maintain its sheen and prevent drying.

Driftwood Knife Holder vs. Traditional Knife Blocks

FeatureDriftwood Knife HolderTraditional Knife Block
AestheticUnique, rustic, naturalOften uniform, generic
Environmental ImpactEco-friendly, upcycled materialUsually mass-produced
CustomizabilityHighly customizableLimited customizability
Cleaning and MaintenanceRequires regular dusting and occasional oilingEasier to wipe clean
DurabilityDependent on the wood’s initial condition and maintenanceTypically sturdy but with limited aesthetic variation

Where to Buy Ready-Made Driftwood Knife Holders

If crafting isn’t your cup of tea, ready-made driftwood knife holders are available! Websites such as Etsy or specialty artisanal shops often carry these, each typically offering a myriad of designs that showcase different woods and styles. Think about what look you want for your kitchen, and you’re likely to find something that speaks to your aesthetic needs.

Conclusion

Embracing nature’s art into your daily life through a driftwood knife holder brings a unique blend of function and beauty. Whether you decide to embark on a DIY adventure or opt for a crafted masterpiece, this charming piece can be an exquisite and eco-friendly addition to your kitchen. Not only will it serve you well by organizing your tools, but its rustic charm will continually remind you of the beautiful, ever-changing dance between wood and sea. Embrace the driftwood allure, and let a slice of the serene shore transform your culinary space.

Filed Under: Driftwood Ideas Tagged With: DIY, Driftwood, Kitchen, Knife Holder, Rustic

Driftwood Knitting Pattern

March 7, 2025 by admin

Have you ever wondered how a simple stitch can transform into a beautiful work of art? Knitting can sometimes feel like a magical process, and one of the splendid patterns that can bring this magic to life is the Driftwood Knitting Pattern. Whether you’re new to knitting or a seasoned pro, exploring the Driftwood Knitting Pattern can open up a world of creativity and relaxation.

Driftwood Knitting Pattern

What is the Driftwood Knitting Pattern?

The Driftwood Knitting Pattern is known for its natural, organic lines and textures that mimic the appearance of driftwood found on beaches. It’s a versatile pattern that brings a sense of tranquility and earthiness to your projects. This pattern is perfect for creating items that exude warmth and comfort, making them ideal for cozy accessories and home decor.

Origin and Inspiration

Every pattern has a story, and the Driftwood Knitting Pattern is no exception. The inspiration behind this pattern comes from the serene imagery of driftwood along a shoreline. Each piece of driftwood has a unique texture shaped by the waves and winds, much like how each knitted piece will have its own unique texture when using this pattern.

Why Choose Driftwood?

Choosing the Driftwood Knitting Pattern over others is often about the aesthetic and tactile experience it offers. When you knit with this pattern, you’re not just creating an object, but you’re also inviting a bit of nature’s rustic elegance into your project. It’s also a forgiving pattern, making it a great choice for both beginners and experienced knitters.

Tools and Materials Needed

Before you start any knitting project, gathering the right tools and materials is crucial. For the Driftwood Knitting Pattern, you’ll need a few specific items to get started on your creative journey.

Yarn Selection

The choice of yarn can significantly affect the outcome of your project. For the Driftwood pattern, you might want to choose yarns with natural hues and textures. Think earthy tones such as greys, browns, and creamy whites, which can enhance the driftwood effect. Natural fibers like wool or cotton can add to the rustic feel.

Needles and Other Tools

Knitting needles are your primary tools. Depending on your project and yarn gauge, you might opt for size 6 to 8 needles, which are commonly used for general DK weight yarns. Circular needles can be handy for larger projects, ensuring that your stitches are evenly distributed and less likely to fall off.

Alongside needles, you’ll need stitch markers to keep track of your pattern repeats, a tape measure for checking dimensions, and a tapestry needle for weaving in ends once your project is complete.

Understanding the Basic Driftwood Stitch

Mastering the basic stitch for the Driftwood Knitting Pattern is the first step towards creating something beautiful. Once you comprehend the fundamentals, you can gradually take on more complex projects with confidence.

The Knit and Purl Foundation

At its core, the Driftwood Pattern relies on a combination of knit and purl stitches. These are the foundation of most knitting patterns. In the Driftwood Pattern, these stitches work together to create the distinctive ridged and smooth textures reminiscent of weathered wood.

  • Knit Stitch: This stitch is created by inserting the needle through the front of the loop on the left needle from left to right, wrapping the yarn around the right needle, and pulling the new loop through. It’s the most basic type of stitch in knitting.

  • Purl Stitch: In contrast, the purl stitch involves inserting the needle from right to left in front of the loop on the left needle, then wrapping the yarn around the right needle before pulling the loop through. The purl stitch creates a bumpier texture on the knitted fabric.

Combining Stitches for Texture

When knitting the Driftwood pattern, you’ll often switch between knit and purl stitches to create textured rows that mimic the uneven surfaces of driftwood. A typical sequence might involve several rows of knitted stitches followed by a shift to purls, creating bands of texture across the fabric.

Step-by-Step Guide to Knitting the Driftwood Pattern

Having a structured approach makes it easier to conquer any pattern. Below is a step-by-step guide to establishing the Driftwood Knitting Pattern in your project.

Casting On

Start with a simple cast-on method. The Long-Tail cast-on is a favorite among knitters for its balance between ease and stretch. Remember that the number of stitches you cast on should be a multiple of the pattern repeat for the Driftwood effect.

Establishing the Pattern

With your stitches cast on, follow a rhythm of knitting and purling. A sample row might look like:

  1. Knit three stitches.
  2. Purl two stitches.
  3. Repeat this sequence until the end of the row.

This simple repeat creates the undulating texture that gives the Driftwood pattern its unique character.

Example Repeat in Table Format:

Stitch TypeNumber of Stitches
Knit3
Purl2

Continuing the Knit

As you progress, maintain consistency in your stitching pattern. Resolve to regularly count your stitches to avoid mistakes, especially if you’re a beginner. Mistakes can alter the final look but are often part of the learning process.

Binding Off

Once your piece reaches the desired length, it’s time to bind off. To maintain elasticity in your piece, use a simple bind-off method, which involves knitting two stitches together, passing the first over the second, and continuing along the row.

Driftwood Knitting Pattern

Common Mistakes and How to Avoid Them

Even seasoned knitters encounter challenges when working on new patterns. The Driftwood Pattern, while forgiving, has its quirks.

Miscounting Stitches

Losing track of your stitch count is a common mistake. Using stitch markers can save you a lot of frustration and help you keep track of pattern repeats accurately.

Uneven Tension

Maintaining consistent tension can be challenging but is key to having an even appearance in your knitting. If you notice that your stitches vary in size, take time to adjust your knitting style until you achieve a more uniform result.

Correcting Errors

Mistakes happen to everyone. If you notice an error a few rows back, consider using a lifeline—a piece of contrasting yarn threaded through a row you’re confident with. This allows you to unravel to an earlier point without losing your pattern entirely.

Projects to Try with the Driftwood Pattern

The beauty of the Driftwood Knitting Pattern lies in its versatility. There are numerous projects you can try once you feel comfortable with the basics.

Cozy Throws and Blankets

A throw or blanket is an ideal canvas for showcasing the Driftwood Pattern. Its natural textures provide warmth and comfort, making it a perfect addition to any cozy nook or living room.

Scarves and Shawls

A scarf or shawl in the Driftwood pattern acts as both a fashion statement and a personal comfort item. The pattern’s texture can add depth to these accessories without overwhelming simplicity.

Home Decor Items

Consider using the Driftwood Knitting Pattern to create cushion covers or wall hangings. These pieces can bring a touch of nature’s calmness into indoor spaces, channeling the serenity of driftwood.

Driftwood Pattern: Customization and Personal Touches

While the basic Driftwood Knitting Pattern offers natural beauty, customization is where your creativity can truly shine. Personalized touches can make every piece unique.

Color Variations

Play with different hues of yarn to create a unique blend. Soft gradients from light to dark can emphasize the natural texture of the pattern. Additionally, alternating colors can bring a more vibrant, personalized touch to your project.

Adding Embellishments

Little details can make a big impact. Consider adding embellishments such as tassels or fringe for scarves and throws. Simple embroidery can also add unique details that enhance the overall appearance of the piece without detracting from the natural aesthetic.

Sizing and Gauge Adjustments

The Driftwood pattern is adaptable to various sizes, but understanding gauge is crucial. Your gauge—the number of stitches per inch—can affect the final size of your project. Adjust your needle size to match the intended gauge for your pattern to ensure accuracy in size.

Final Thoughts on the Driftwood Knitting Pattern

Embarking on a project with the Driftwood Knitting Pattern can be a rewarding experience. This pattern allows you to blend creativity with comfort, resulting in items that are not only beautiful but also personally satisfying. Whether you’re creating for yourself, gifting to others, or selling your crafted pieces, there’s a certain pride in crafting something unique and hand-made.

Remember, knitting is not just about the end product; it’s also about the process. The meditative rhythm of knitting can provide a soothing escape from the chaos of daily life. Embrace each stitch, each row, and each error as part of your creative journey. With the Driftwood Pattern, you’re not just knitting—you’re crafting a piece of tranquility.

Filed Under: Driftwood Ideas Tagged With: DIY, Driftwood, Handmade, Knitting, Pattern

Driftwood Knobs

March 6, 2025 by admin

Have you ever come across the term “driftwood knobs” and found yourself wondering what they are and how they can enhance your home or projects? You’re not alone! Driftwood knobs are not only beautiful and unique in appearance, but they also carry a slice of nature’s artistry into your living spaces. Let’s embark on this captivating journey to explore the world of driftwood knobs, from their formation to their diverse uses in your daily life.

Driftwood Knobs

What Are Driftwood Knobs?

Driftwood knobs are naturally shaped or manually crafted pieces derived from driftwood. Driftwood is wood that has been washed onto the shore by the effects of tides, winds, or waves. Within this process, nature transforms ordinary wood into artistic pieces worthy of admiration.

The Formation of Driftwood

Understanding the formation of driftwood can enhance your appreciation for these knobs. When trees or branches fall into a river, lake, or ocean, they become part of an unprecedented journey. As water moves them along, their surfaces are smoothed, and their shapes are altered. Saltwater, sun exposure, and the rubbing against rocks and sand contribute to their unique textures and hues. This natural process often takes years, endowing each piece with a distinct story and character.

The Unique Appeal of Driftwood Knobs

Driftwood knobs are extraordinarily unique. No two pieces are alike, thanks to the variables in their formation. The variation in shape, size, color, and texture provides a plethora of design possibilities, making them especially appealing for those who value individuality in their decorative elements.

Why Choose Driftwood Knobs?

Choosing driftwood knobs over traditional options provides several benefits. These include their aesthetic appeal, environmental impact, and the warm, rustic charm they imbue to any setting.

Aesthetic Appeal

Driftwood knobs bring a natural beauty into your space, each piece an organic work of art. Their rustic textures and natural tones can complement various styles, from coastal and cottage to modern and industrial.

Environmental Friendliness

By utilizing driftwood, you’re engaging in an eco-friendly practice. Driftwood is a renewable resource collected without felling trees or disturbing forests. Its use helps reduce waste and promotes sustainable living.

The Rustic Charm

Whether you’re outfitting a kitchen, bathroom, or living room, driftwood knobs add a charming rustic touch. Their natural finish and unique shapes can transform mundane furniture into statement pieces.

Driftwood Knobs in Home Decor

There are countless ways to incorporate driftwood knobs into your home decor. Their adaptability means they fit seamlessly into a variety of settings and work well with multiple design philosophies.

Furniture Accents

Driftwood knobs can replace standard knobs on cabinets, dressers, and side tables, providing an instant upgrade. They create a point of interest and conversation, drawing the eye and enhancing the overall look of your furniture.

Kitchen and Bathroom Applications

In kitchens and bathrooms, driftwood knobs on cabinetry provide a coastal feel, perfect for homes near the ocean or for those who simply want to bring a splash of seaside serenity into their homes. Their rustic appearance also complements natural stone countertops and traditional-style tiles.

Artistic Uses

Apart from practical applications, driftwood knobs can also be used in art installations. Whether included in a wall hanging, sculpture, or unique piece of garden decor, they contribute a natural element that is both intriguing and beautiful.

Choosing the Right Driftwood Knobs

When selecting driftwood knobs for your projects, there are a few considerations to keep in mind to ensure they meet your expectations and needs.

Size and Shape

Driftwood knobs come in various sizes and shapes. Consider the scale of the furniture or project you are working with to ensure the driftwood knobs you choose fit naturally and proportionately.

Color and Finish

The color of driftwood ranges from light sandy hues to rich, deep grays, depending on its origin and exposure to elements. Decide on tones that will best complement your existing decor. Additionally, many driftwood knobs are left natural, though some may be lightly polished or finished for a more refined look.

Attachment and Durability

Ensure the knobs are easy to attach and sturdy enough for their intended use. Some driftwood knobs may come with a standard screw attachment, while others might need additional fixing methods due to their irregular shapes.

Driftwood Knobs

DIY Driftwood Knobs

For the creative at heart, making your own driftwood knobs can be a rewarding endeavor. Crafting them yourself allows for customization and a personal touch, adding even more value to the finished product.

Gathering Materials

Start by gathering your driftwood pieces, a saw for shaping, sandpaper for smoothing, and a drill and screws for attachments. You might also consider a non-toxic sealant if you prefer a glossy finish or extra protection.

Crafting Process

  1. Selection: Choose pieces of driftwood with interesting shapes or surfaces.

  2. Cutting and Shaping: Use your saw to cut the driftwood to the desired size. Sand the edges to prevent splinters and achieve a smooth finish.

  3. Drilling and Attachment: Drill a hole in the center of your knob to accommodate the screw. Be sure not to crack the wood by using the correct drill bit size.

  4. Finishing Touches: Sealant can be applied for a glossy finish or to protect the wood from further wear.

Caring for Your Driftwood Knobs

Maintaining the beauty of your driftwood knobs requires a bit of care, but the process is relatively straightforward.

Regular Cleaning

Regularly dusting your driftwood knobs will help maintain their appearance. Use a soft, dry cloth to remove any surface dirt without scratching or damaging the wood.

Preservation Techniques

Occasionally, you may need to apply a light coat of wood oil or wax to keep the wood from drying out. This will help maintain the color and integrity of the driftwood, ensuring it lasts for years.

Where to Source Driftwood Knobs

Whether you prefer ready-made or custom-crafted knobs, knowing where to source quality driftwood knobs is essential.

Specialty Stores

Home decor and specialty woodwork stores frequently carry driftwood knobs. These stores offer a curated selection, often featuring the work of local artisans.

Online Marketplaces

Online platforms such as Etsy provide a wide variety of handcrafted driftwood knobs, allowing you to support artisans worldwide and finding pieces that fit your style and budget.

Craft Shows and Artisans

Attending local craft shows can connect you with artisans who specialize in driftwood work. This approach also provides the opportunity to see and feel the knobs in person before making a decision.

Inspiring Ideas with Driftwood Knobs

Driftwood knobs can be more than just functional; they offer opportunities for creativity and innovation in home design and personal projects.

Upgraded Furniture Design

Consider updating an old piece of furniture with driftwood knobs to give it new life. An antique dresser or vintage wardrobe can become the focal point of a room with these natural accents.

Unique Hooks and Handles

Experiment with using driftwood knobs as hooks for hanging coats, towels, or hats. Their sturdy nature makes them ideal for these practical uses, while their unique appearance turns them into decorative elements.

DIY Art Projects

Incorporate driftwood knobs into your art projects. Use them as unique elements in mixed media artwork, or create a textured wall hanging using varied sizes and shapes.

The Journey with Driftwood Knobs

Embracing driftwood knobs in your home is a journey into appreciating natural beauty and creativity. Each piece tells a story, a testament to the power and influence of nature on art. By including them in your decor, you bring a piece of this story into your home, bridging the gap between earthly elements and cozy interiors. Whether you choose to craft them yourself or find the perfect artisanal pieces, driftwood knobs offer a personal touch that your home will cherish.

Filed Under: Driftwood Ideas Tagged With: crafts, DIY, Driftwood, Interior Design, Knobs

Driftwood Garden Edge

March 5, 2025 by admin

Have you ever considered adding a touch of rustic charm and natural beauty to your garden with something as simple as driftwood? The concept of a driftwood garden edge is not only visually appealing but also environmentally friendly. This guide will take you through the benefits, the process of creating, and tips on maintaining a driftwood garden edge.

Driftwood Garden Edge

Understanding Driftwood and Its Uses

What is Driftwood?

Driftwood is wood that has been washed onto the shore of a sea, river, or lake by the action of winds, tides, or waves. Over time, it is weathered and bleached by the sun and water, giving it a unique, silvery appearance. This naturally sculpted form offers an aesthetic that aligns perfectly with the environment, making it an excellent choice for garden edges.

Why Use Driftwood in Your Garden?

Driftwood is not only aesthetically pleasing but also has several practical uses in garden design. Its natural form can help create boundaries, retain soil, or define sections of your garden. Using driftwood has environmental benefits too; by repurposing naturally fallen wood, you reduce the demand for commercially processed garden borders.

Benefits of Driftwood Garden Edging

Natural Aesthetics

There’s something innately beautiful about natural elements incorporated into a garden. Driftwood blends seamlessly with plants, soil, and other organic materials, providing an artistic flair that manufactured garden borders often lack.

Sustainable Choice

Choosing driftwood helps in conserving resources. Since driftwood is naturally occurring and requires no manufacturing, using it reduces your carbon footprint and supports sustainable garden practices.

Cost-Effective

Driftwood can often be collected for free from beaches or lakesides, provided you follow local regulations and guidelines. This makes it a cost-effective option compared to store-bought garden edging materials.

How to Create a Driftwood Garden Edge

Gathering Driftwood

Where to Find Driftwood

The first step in creating a driftwood garden edge is sourcing your driftwood. You can find it along beaches, riverbanks, or lakeshores. Make sure to adhere to any local laws or regulations about collecting natural materials.

Selecting the Right Pieces

Look for pieces that are not too decayed, as they need to withstand the outdoor environment for several years. Choose pieces of varying shapes and sizes to add visual interest and ensure good coverage.

Preparing Driftwood for Your Garden

Cleaning the Driftwood

Before using driftwood in your garden, clean it thoroughly to remove any salt, sand, or algae. You can scrub it with a stiff brush and rinse it with water. Let it dry completely before use.

Treating the Driftwood

To prolong its life, consider treating driftwood with a wood preservative. This will help protect it against the elements and potential insect infestation.

Installing the Driftwood Edge

Designing Your Layout

Start by planning how you would like your driftwood edge to look. Will it be a simple straight line, or do you want it to curve along the contours of your garden bed? Lay out the pieces on the ground before you start digging to ensure you’re happy with the design.

Positioning and Stability

Dig a shallow trench, about a few inches deep, where you wish to place the driftwood. This will ensure the wood is anchored securely. Position the pieces in the trench and pack the soil around them to stabilize.

Incorporating Driftwood into Various Garden Designs

Driftwood in Flower Beds

Driftwood can provide a beautiful contrast to the colors of flowering plants. It can be used as a border or even as a focal point amidst the flowers. It acts as a natural mulch, retaining soil moisture and keeping roots cool.

Vegetable Garden Edging

Define your vegetable patches with a driftwood border. This makes tending to plants easier and adds an element of design to a practical space. Furthermore, driftwood can help keep pests at bay, acting as a deterrent for crawling insects.

Creating Paths and Walkways

Use driftwood to edge pathways, providing visual direction and a rustic texture that invites exploration. Driftwood’s irregular shapes can create intriguing patterns that guide you through your garden journey.

Driftwood Garden Edge

Maintaining Your Driftwood Garden Edge

Regular Inspections

Check your driftwood regularly for signs of decay or insect damage. Timely intervention can save pieces and prolong the life of your garden edging.

Preservative Treatment

Reapply wood preservative every couple of years to maintain the driftwood’s integrity and appearance. This helps keep it resistant both to weather and pests.

Seasonal Care

With seasonal changes, driftwood might shift position. Re-adjust and secure the pieces, especially after heavy rain or snow, to maintain the integrity of your garden edge.

Alternatives and Complements to Driftwood Garden Edging

Using Rocks and Stones

Rocks can be mixed with driftwood to create a more diverse texture in your garden edge. Combining materials can enhance both durability and visual interest.

Plants as Edging

Consider planting low-growing, hardy plants alongside your driftwood. This can soften the edge and invite more biodiversity into your garden.

Upcycling Found Objects

Expand the natural theme by incorporating other natural or reclaimed materials like old bricks or recycled glass into your garden edges. This enables you to have a truly unique garden that reflects your personal style.

Legal and Ethical Considerations

Following Local Laws

Always check local regulations about collecting driftwood. Some areas may have restrictions to protect ecosystems or for cultural reasons.

Being Environmentally Conscious

When collecting driftwood, be mindful not to disrupt local wildlife habitats. Avoid taking pieces that provide shelter or food for local animals.

Driftwood in Broader Landscape Design

Integrating Water Features

Driftwood can be used to accentuate water features like ponds or fountains, further enhancing the natural feel. It serves as a bridge between water and land, providing continuity in your garden design.

Accent Pieces

Beyond edging, larger driftwood pieces can be used as garden sculptures or seating, offering functional and decorative value.

Bird and Wildlife Habitat

Driftwood can support local wildlife by offering shelter and nesting sites. This emphasizes the ecological benefits of incorporating natural materials into your garden.

Tips for Sourcing Driftwood Responsibly

Finding Ethical Sources

If collecting driftwood yourself isn’t feasible or allowed, consider purchasing from suppliers committed to sustainable practices. They often replace collected wood with planted saplings to balance nature’s resources.

Supporting Local Artisans

Seek out local artisans who use driftwood, as buying from them supports small businesses and ensures the wood is sourced responsibly.

Conclusion

Embracing a driftwood garden edge is a wonderful way to blend artistry with nature in your outdoor space. By using driftwood, you’re creating an inviting, sustainable, and visually pleasing environment connected to the beauty of the natural world. Whether you’re edging flower beds, vegetable patches, or pathways, driftwood brings a timeless, earthy charm to your garden. By following ethical sourcing practices and maintaining the wood, you can enjoy your driftwood garden edge for years. Give your garden the unique touch it deserves by integrating the ageless beauty of driftwood.

Filed Under: Driftwood Ideas Tagged With: DIY, Driftwood, Garden Design, Landscaping, Outdoor Decoration

Driftwood Edging

March 4, 2025 by admin

Have you ever considered how something as simple as driftwood could transform your garden or outdoor space into an inviting and unique retreat? Driftwood edging is a versatile, eco-friendly option that can add character and warmth to your landscape. Whether you’re aiming for a rustic look or a more refined feel, driftwood can be adapted to suit your style. Let’s explore the many facets of driftwood edging and how it can enhance your surroundings.

Driftwood Edging

What is Driftwood?

Driftwood is wood that has been washed ashore by the action of winds, tides, or waves. Over time, the wood is bleached by the sun and smoothed by the water, giving it a unique and appealing appearance. It is often light, soft, and textured, which makes it ideal for creative projects like garden edging.

Characteristics of Driftwood

Driftwood is celebrated for its natural beauty and unique characteristics. No two pieces are the same, making each one a distinctive addition to your outdoor space. Driftwood pieces often display soft, muted colors and smooth, weathered surfaces. The natural curves and lines contribute to a rustic aesthetic that compliments many garden designs.

Ecological Benefits

Using driftwood is an eco-friendly choice. By repurposing wood that would otherwise be left to decay, you are not only recycling but also reducing the need for manufactured materials. Driftwood collection ensures you’re making a sustainable choice, benefiting both your garden and the environment.

Why Choose Driftwood Edging?

Driftwood edging offers numerous benefits that make it an attractive option for garden enthusiasts. It’s not just about aesthetics; the practical advantages also make it an excellent choice for many different types of landscapes.

Aesthetic Advantages

The unique appearance of driftwood can transform a mundane garden into a stunning escape. Its organic shapes and natural colors can seamlessly blend into a variety of garden styles, from coastal and rustic to modern and minimalist. Driftwood creates visual interest and lends a touch of authenticity and warmth that is hard to replicate with other materials.

Practical Benefits

Beyond its aesthetic appeal, driftwood edging is incredibly durable and can withstand various weather conditions. The dense wood is naturally resistant to moisture, pests, and decay, ensuring your garden edges remain beautiful for many years. Moreover, driftwood pieces are easy to work with, often requiring minimal tools and effort to install.

How to Collect Driftwood

Before beginning your driftwood edging project, it’s essential to know how to collect driftwood responsibly. Overharvesting can disrupt local ecosystems, so ethical collection practices are crucial.

Finding Driftwood

Beaches and riverbanks are common places to find driftwood. It’s best to look after storms, as drifting pieces may be washed ashore in larger quantities. Remember to check local regulations, as some areas have specific rules regarding the collection of natural materials to protect wildlife habitats.

Ensuring Quality

When selecting driftwood for edging, look for pieces that are solid and free of rot. Choose varying sizes and shapes to create a more organic and varied design. Avoid collecting pieces with sharp edges or those that are too fragile, as they may not withstand the elements over time.

Preparing Driftwood for Use

Once you’ve collected your driftwood, some preparation is necessary to ensure it is ready for use in your garden. This step is crucial to maintaining the wood’s integrity and enhancing its longevity.

Cleaning and Sanitizing

First, rinse the driftwood thoroughly to remove salt, sand, or debris. A light scrubbing with a brush and mild detergent can help clean stubborn spots. Once clean, soaking the wood in a water and bleach solution can remove bacteria and pests. Afterward, allow it to dry completely in the sun, as this also helps in lightening the wood.

Selecting the Right Pieces

Consider the garden edge’s location and the purpose of the driftwood when choosing pieces. For more structured borders, longer, straighter pieces are ideal. If you’re aiming for a natural, flowing design, select pieces with more curves and textures.

Driftwood Edging

Designing with Driftwood Edging

Creating a cohesive design using driftwood can enhance the overall appearance of your garden or outdoor space. Thoughtful design and planning are key to achieving a well-balanced look.

Planning Your Design

Sketch a rough layout of your garden and decide where driftwood edging would be most effective. Consider aspects like visibility, function, and the layout of existing plants or structures. Decide if you want your driftwood edging to be a primary feature or a subtle complement to other elements.

Creative Ideas

  1. Natural Borders: Use driftwood to outline garden beds or pathways, allowing the natural shapes to guide the flow of your design.

  2. Tiered Layers: Stack driftwood pieces to create tiered layers, adding depth and dimension to your garden.

  3. Rock and Wood Combination: Pair driftwood with stones or boulders to enhance texture and create a dynamic contrast in your garden.

Installation Tips

Installing driftwood edging requires some forethought to ensure it is both secure and aesthetically pleasing. With the right tools and methods, you’ll be able to create a versatile and lasting design feature.

Tools You Might Need

  • Shovel or spade
  • Hammer or mallet
  • Garden stakes or rebar
  • Safety gloves

Step-by-Step Installation

  1. Outline the Perimeter: Use stakes and string to outline the area where the driftwood will be placed.

  2. Dig a Trench: Create a shallow trench along the outlined area to help position the driftwood securely.

  3. Place the Driftwood: Arrange the driftwood pieces in the trench, ensuring they are tightly secured and in contact with one another. For added stability, consider driving stakes or rebar behind larger pieces.

  4. Fill and Compact: Backfill the trench with soil or sand and compact it around the base of the driftwood to hold it firmly in place.

Maintenance Tips

To keep your driftwood edging looking its best, regular maintenance is essential. Although driftwood is durable, it benefits from occasional care.

Basic Care

Regularly inspect your driftwood edging for signs of rot, pests, or shifting. Clean the wood annually to remove dirt and debris, and reposition any pieces that may have become loose.

Weather Protection

To protect your driftwood from excessive moisture or intense sunlight, consider applying a clear outdoor wood sealant. This can help maintain the integrity and appearance of the driftwood over time.

Potential Challenges

While driftwood edging offers numerous advantages, there are potential challenges you may face. Being aware of these can help you address them promptly and prevent larger issues down the road.

Sourcing Quality Driftwood

Finding suitable pieces can be time-consuming, especially if you lack access to locations where driftwood is abundant. Consider reaching out to local suppliers or artisans who might sell pre-collected driftwood.

Ensuring Longevity

To enhance the driftwood’s durability, ensure it is thoroughly treated and cured before installation. This will help prevent decay and extend the life of your edging.

Driftwood Edging Projects for Inspiration

Need some creative inspiration? Here are a few ideas to inspire your next driftwood edging project. Each one demonstrates how this natural material can be used in unique and innovative ways.

Coastal Garden Pathway

Create a beautiful coastal-themed pathway by aligning driftwood pieces to outline the path. Use curves and varying heights to mimic the natural flow of water, and incorporate shells and small rocks for added texture.

Raised Bed Borders

Use sturdy, substantial pieces of driftwood to construct raised bed borders. This design not only helps define your garden space but also adds an artistic element through the wood’s natural forms.

Decorative Features

Integrate driftwood into your existing garden features by adding it to fences, benches, or water features. The combination of materials will enrich the texture and visual interest of your outdoor space.

Conclusion

Driftwood edging is an innovative and sustainable way to beautify your garden or outdoor area. Its natural beauty, durability, and versatility make it an ideal choice for many landscapes. Whether you’re installing it yourself or seeking inspiration for a professional project, driftwood can enhance your environment while keeping its impact on the planet light. By choosing this beautiful material, you’re not just designing a garden—you’re crafting a unique outdoor experience. So, step into the world of driftwood and let its natural elegance frame your garden in ways only nature can inspire.

Filed Under: Driftwood Ideas Tagged With: DIY, Driftwood, Garden Edging, Landscaping

Driftwood Easter Bunny

March 4, 2025 by admin

Have you ever considered bringing the charm of nature into your Easter celebrations with a whimsical twist? The idea of a Driftwood Easter Bunny might just be the delightful addition you’ve been looking for! Combining the rustic beauty of driftwood with the playful spirit of Easter creates not only a unique decoration but also a conversation starter for your home or garden. In this guide, you’ll discover how to make your own driftwood Easter bunny while learning about the significance and charm behind such a creation.

Why Driftwood?

Driftwood is not just a piece of wood washed up on the shore. It holds a unique beauty forged by nature, time, and the elements. Each piece of driftwood tells a story of its journey through water and weather. This characteristic makes it an enchanting medium for art and decorative projects. Integrating driftwood into Easter decorations brings a natural, rustic feel to your festivities, blending the spirit of the season with nature’s charm.

The Unique Characteristics of Driftwood

Driftwood boasts a weathered appearance, often smooth and light in color due to its exposure to water and sun. Its natural shapes and curves add unpredictability and uniqueness to any art piece. These organic forms inspire creativity and lend themselves beautifully to crafting projects, especially when designing something as imaginative as a driftwood Easter bunny.

The Symbolism of the Easter Bunny

The Easter Bunny is more than just a delightful character in springtime folklore. It is a symbol of new beginnings, fertility, and the blossoming of life. Rabbits, known for their energetic reproducing habits, were once associated with Eostre, a pagan goddess of fertility whose animal symbol was a rabbit. Over time, this connection merged with Christian traditions, giving rise to the Easter Bunny we recognize today. Combining this symbol with driftwood elevates the message of renewal with nature’s own craftsmanship.

Driftwood Easter Bunny

Gathering Your Materials

Creating a driftwood Easter bunny requires some basic materials and tools. This process allows you to connect with nature and express your creativity.

Essential Materials

Here is a list of essential materials you’ll need:

MaterialPurpose
Driftwood PiecesFor the structure of the bunny
Hot Glue GunTo attach driftwood pieces together
Wire (optional)For added reinforcement or flexibility
SandpaperTo smooth and prepare the driftwood
Protective FinishTo enhance and protect your creation

Collecting Driftwood

Before you can begin crafting, you’ll need to find the perfect pieces of driftwood. Explore nearby beaches, rivers, or lakes where driftwood naturally accumulates. Look for a variety of sizes and shapes to give your creation dimension. Be sure to check local regulations regarding collecting driftwood to ensure you’re abiding by the rules.

Crafting Your Driftwood Easter Bunny

Now comes the fun part – crafting your driftwood Easter bunny! This section will guide you through the process with tips and tricks to make your project a success.

Choosing the Right Driftwood Pieces

When selecting your driftwood, consider the shape and size of each piece. Long, narrow pieces are perfect for the ears, while more rounded pieces can serve as the body or head. Take your time arranging potential pieces into a bunny shape before affixing them together. This step helps you visualize the final piece and make any adjustments as needed.

Assembling the Bunny

Start with the body as the foundation of your structure. Use your hot glue gun to secure larger pieces together, building up a stable base. Continue adding pieces for the head and legs, constantly reassessing the balance and stability. If certain pieces don’t fit snugly, gently sand them down or use small pieces to fill gaps.

Adding the Ears and Tail

The ears are one of the defining features of any bunny. Choose two slender, upright pieces of driftwood to create an attentive and playful expression. Secure them firmly to the head. For the tail, consider using a small, rounded piece or even a tuft of organic material like moss or twine to mimic the fluffiness of a rabbit’s tail.

Final Touches

After the main structure is complete, observe your driftwood bunny for areas needing refinement. This might include additional pieces for balance, aesthetic detail, or further reinforcing joints for sturdiness. Treat the finished piece with a protective finish to highlight the driftwood’s natural beauty and ensure durability against elements if displayed outdoors.

Driftwood Easter Bunny

Personalized Decorative Ideas

Apart from the basic structure, you can personalize your driftwood Easter bunny to make it uniquely yours. Here’s how:

Painting and Decorating

While the natural appeal of driftwood is tempting to leave unaltered, adding subtle touches, such as painted eyes or a small bow, can bring your bunny to life. Consider using earthy tones that complement the driftwood’s hues, or pastels to reflect the Easter theme.

Functional Twist

Why not incorporate functionality into your design? Your driftwood bunny can serve as a basket holder, a planter, or even part of a larger Easter centerpiece. For instance, position your bunny holding a small planter with spring flowers or a nest filled with painted eggs.

Maintaining Your Driftwood Bunny

Proper care will ensure your driftwood bunny remains charming for many Easters to come.

Indoor vs. Outdoor Placement

Decide whether your bunny will be an indoor or outdoor decor piece. Indoor placement offers protection from weathering, while outdoor placement requires extra consideration for longevity. Position your bunny in a sheltered area, away from prolonged moisture exposure like rain or intense sun, to prevent quick deterioration.

Routine Care and Maintenance

Dust your driftwood bunny regularly and inspect for any loose pieces. If displaying outdoors, periodically reapply a suitable outdoor finish to protect it from the elements. This simple maintenance routine will keep your creation looking fresh and captivating.

Understanding the Sustainability Factor

Creating a driftwood Easter bunny not only serves as a delightful crafting project but also opens a dialogue about sustainability.

Eco-Friendly Crafting

Driftwood is a naturally occurring resource, making it an eco-friendly option for crafting enthusiasts. Using driftwood in art repurposes materials washed ashore, which might otherwise be considered waste. This practice not only mitigates environmental impact but also sparks creativity in using natural elements.

Community Connections

Collecting driftwood and engaging with the community about its use promotes awareness of local ecosystems and conservation efforts. Sharing creative projects like a driftwood Easter bunny can inspire others to consider sustainable materials and methods in their decorating and crafting endeavors.

Inspiring Future Projects

The skills and creativity gained from crafting a driftwood Easter bunny can lead to other exciting projects. Consider incorporating driftwood into more seasonal decorations or home decor items. Here’s a small table of inspiration for future driftwood ventures:

Project IdeaDescription
Driftwood Wall ArtArrange driftwood on a canvas for a rustic piece
Seasonal WreathsUse as a base for a natural, rustic wreath
Garden SculpturesCreate abstract forms to enhance outdoor spaces
Planters & HoldersTransform into unique holders for plants or items

Embracing Nature in Art

Engaging with driftwood for your Easter bunny is more than a craft—it’s the embracing of nature’s artistry. Through each distinctive piece and unexpected twist, driftwood invites you to appreciate the beauty of imperfection and the stories carried by each fragment.

A Timeless Decoration

Your driftwood Easter bunny doesn’t just serve as a festive decoration; it captures the essence of time and nature. This timeless piece will not only enhance your decor each Easter but also serve as a symbol of creativity and respect for the environment.

Celebrate your finished bunny as a testimony to your crafting skills, creativity, and an embodiment of the charm found in nature. Who knew a piece of driftwood could harbor such life and imagination?

Reflecting on the journey from shoreline to its place in your home, you are reminded of the interconnectedness of art, nature, and celebration, finding joy in simplicity and the beauty of discovery.

Filed Under: Driftwood Ideas Tagged With: Bunny, DIY, Driftwood, Easter, Handmade

Driftwood Kitchen Cabinets Diy

March 3, 2025 by admin

Have you ever looked at your kitchen cabinets and imagined giving them a unique, rustic makeover? Driftwood kitchen cabinets might just be the perfect option for adding a touch of the coast to the heart of your home. In this friendly guide, we’ll explore how to achieve this charming look on your own. Making driftwood kitchen cabinets can be a rewarding and cost-effective DIY project that enhances your space’s aesthetic appeal.

Driftwood Kitchen Cabinets Diy

Understanding the Driftwood Look

Driftwood surfaces mimic the weathered appearance of wood that has been naturally smoothed and bleached by the sun, salt, and sand. This look is characterized by soft grays and browns, giving your kitchen both a natural and tranquil vibe. By transforming your cabinets to have this driftwood finish, you can instantly bring a laid-back, beach-inspired feel to your home, even if you’re miles away from the ocean.

Why Choose Driftwood?

The driftwood aesthetic is popular not only for its beauty but also for its versatility and ability to fit into both modern and rustic decor. Its understated elegance can complement a wide array of color schemes and design choices, making it an ideal option for a variety of homes.

Preparing for the Transformation

Before embarking on your driftwood kitchen cabinet transformation, you’ll need to gather your materials and tools, prepare your workspace, and ensure that you have a clear plan. Preparation is key to making sure your project goes smoothly.

Gathering Materials

To achieve the driftwood look, you’ll need a mix of specific paints, primers, and tools. Here’s a handy list of what you’ll typically require:

Material/ToolPurpose
Sandpaper (Various Grits)For prepping surfaces and achieving a smooth finish
PrimerTo ensure the paint adheres properly
Driftwood Paint or StainTo create the authentic driftwood appearance
Clear SealerTo protect and finish the cabinets
Paintbrushes / RollersFor applying paints and stains
Rags or SpongesFor blending and detailing
ScrewdriverFor removing cabinet doors and hardware
Safety GearTo protect yourself while working

Creating a Suitable Workspace

Transforming your kitchen cabinets will likely be a bit messy, so it’s important to set up a workspace that accommodates the dimensions of your doors and drawers. Lay down a drop cloth and make sure the area is well-ventilated. If you’re working indoors, consider using a dust mask to protect yourself from sanding debris and paint fumes.

Removing Cabinet Doors and Hardware

Taking off the cabinet doors and removing all hardware will make the painting process much easier. Carefully label each door and its corresponding location to avoid confusion when it’s time to reassemble.

The Art of Achieving the Driftwood Finish

Achieving the perfect driftwood finish requires a series of steps, from proper surface preparation to the final touch of sealing the cabinets. Patience and attention to detail will go a long way in ensuring a beautiful end result.

Sanding and Priming the Surface

Begin by thoroughly sanding your cabinet doors and frames. This step is crucial to remove any existing finish or gloss that might prevent the new paint from adhering. Start with a coarser grit sandpaper and gradually move to a finer grit for a smooth surface. Once the sanding is complete, wipe away any dust with a tack cloth.

Apply a primer to ensure the paint grips securely to the cabinets. A good quality primer also helps in preventing any discoloration from bleeding through. Allow the primer to dry completely as per the manufacturer’s recommendations.

Applying the Driftwood Paint or Stain

With the surfaces prepared, it’s time to apply the driftwood paint or stain. Begin with a base coat that reflects the subtle gray tones of driftwood. Use a brush or roller for an even application. Once the base coat dries, you can start layering lighter and darker tones using a combination of paints and stains.

You can achieve variations in color depth by ragging or sponging on lighter shades, reminiscent of the natural weathering process of driftwood. Be creative with your technique—there’s no single “right” way to recreate driftwood. Ensure that the colors blend well, giving a natural and uneven texture typical of driftwood.

Sealing for Durability

Once you’re satisfied with the painted or stained finish, it’s important to protect your hard work with a clear sealer. Choose a non-yellowing, clear finish to maintain the authenticity of your driftwood look. A good sealer not only protects the wood but also makes cleaning the cabinets easier. Apply with smooth, even strokes, and let it dry thoroughly.

Reassembling and Final Touches

Once your cabinets are completely dry, it’s time to reassemble them. Here’s where your earlier organization pays off. Reattach the doors and hardware according to your labeling system.

Reattaching Doors and Hardware

Take care when reattaching the cabinet doors and hardware to avoid damaging the fresh finish. Consider updating your hardware to complement your new driftwood cabinets. Brushed nickel or weathered bronze can enhance the rustic appeal of the driftwood finish.

Adding Personal Touches

If you feel like adding a touch of personalization, this is the perfect opportunity. Think about incorporating elements like glass inserts, decorative moldings, or even open shelving to further capitalize on the new look of your kitchen.

Driftwood Kitchen Cabinets Diy

Caring for Your Driftwood Cabinets

With your gorgeous new cabinets in place, maintaining them is essential to ensure they look their best for years to come. Fortunately, a driftwood finish is low-maintenance.

Routine Cleaning

For everyday cleaning, use a damp microfiber cloth to wipe down the cabinet surfaces. Avoid harsh chemicals or abrasive sponges as they can damage the finish you worked so hard to achieve.

Periodic Maintenance

Every once in a while, check for chips or wear in the paint. Minor touches with matching paint and a detail brush can keep your cabinets looking fresh. Reapply a sealer every couple of years if you notice the finish losing its luster.

Driftwood-Inspired Kitchen Enhancement Ideas

Taking your driftwood kitchen cabinets as the centerpiece, you can extend the coastal theme throughout your kitchen more broadly. Consider these simple enhancements to integrate the driftwood aesthetic fully into your kitchen design.

Complementary Color Schemes

To accentuate your driftwood cabinets, choose kitchen wall colors and accents that harmonize with your cabinets’ soft, neutral tones. Whites, pastel blues, and sandy beiges can create a cohesive and relaxing environment.

Color Scheme OptionsDescription
Coastal Blue + WhiteEvoke a classic ocean vibe with accents of bold coastal blue contrasting with crisp white elements.
Sand + Seafoam GreenMuted seafoam greens alongside sandy beiges offer a natural and calming palette.

Textural Accents

Incorporate natural textures and materials to complement the driftwood feel. Use items like woven baskets, rattan placemats, and linen dish towels to reinforce the coastal atmosphere.

Lighting and Ambiance

Consider adding ambient lighting with driftwood elements, such as pendants or chandeliers made of reclaimed wood or subtle nautical-themed fixtures that mirror your cabinet style. Dimmable lights can enhance the cozy, serene mood of the room, especially in the evenings.

Conclusion

Embarking on a DIY driftwood kitchen cabinet project allows you to put a personal, unique twist on your kitchen decor. With patience and creativity, you can transform ordinary cabinets into the centerpiece of your dream coastal kitchen. Whether you’re by the beach or nestled inland, bringing this charming element of the coastline into your home invites a touch of serenity and natural beauty that is sure to inspire. Enjoy the process of making your kitchen a reflection of your personal style and the tranquility of the ocean’s embrace.

Filed Under: Driftwood Ideas Tagged With: DIY, Driftwood, furniture, Interior Design, kitchen cabinets

Driftwood Easter Crafts

March 3, 2025 by admin

Have you ever thought about bringing a natural, rustic charm to your Easter decorations? Driftwood, with its unique shapes and textures, offers endless possibilities for creating stunning Easter crafts. Not only does it connect you with nature, but it also provides a coastal feel that can blend effortlessly with various decor themes. In this guide, you’ll discover several creative ideas to incorporate driftwood into your Easter festivities, transforming ordinary items into extraordinary pieces.

Understanding Driftwood

What is Driftwood?

Driftwood is natural wood that has been washed onto a shore or beach by the action of winds, tides, or waves. Over time, this wood becomes smooth and uniquely textured due to its exposure to water and elements. Each piece of driftwood carries its own history and story, making it a fascinating material for crafting.

Why Use Driftwood for Crafts?

Driftwood’s versatility, coupled with its natural beauty, makes it an excellent choice for crafting. It’s ecological, as it makes use of materials that have already been deemed forgotten by nature. By utilizing driftwood, you can create sustainable art, contributing to the upcycling trend that’s both environmentally friendly and fashionable.

Crafting Basics: Preparing Your Driftwood

Gathering Driftwood

To start your crafting adventure, you’ll need to gather driftwood. Head to your local beach and look for pieces that are dry, lightweight, and have interesting shapes. Remember to collect only as much as you need to ensure you’re not disrupting the local habitat.

Cleaning and Drying Driftwood

Before starting your project, it’s necessary to clean and dry your driftwood:

  1. Rinse: Wash your collected driftwood thoroughly with water to remove sand and salt.
  2. Scrub: Use a scrub brush to clean any algae or barnacles.
  3. Soak: For a deeper clean, soak the driftwood in a mix of water and mild bleach (1:10 ratio) for 24 hours.
  4. Rinse Again: After soaking, rinse the driftwood to remove any bleach residue.
  5. Dry: Allow it to air dry completely. This could take a few days depending on the humidity levels.

Driftwood Easter Crafts

Driftwood Easter Craft Ideas

Driftwood Easter Wreath

Transform your front door into a welcoming sight with a driftwood Easter wreath. This handcrafted wreath can be adorned with pastel ribbons, faux Easter eggs, or small spring flowers to add color and vibrancy.

Materials Needed:

  • Small pieces of driftwood
  • Hot glue gun or super glue
  • Decorative elements (ribbons, faux eggs, flowers)

Steps:

  1. Arrange the driftwood pieces in a circular shape.
  2. Secure each piece using the hot glue or super glue.
  3. Decorate with your chosen materials, ensuring they are securely glued onto the wreath.

Driftwood Bunny Silhouette

Create a charming bunny silhouette using driftwood as a playful tribute to the Easter Bunny. Perfect for a wall hanging or as a centerpiece on your Easter dining table.

Materials Required:

  • Various sizes of driftwood
  • Pencil and paper for template
  • Saw if cutting is necessary
  • Glue or screws for fixing

Instructions:

  1. Sketch a bunny silhouette on paper.
  2. Lay the driftwood pieces to match your template.
  3. Cut pieces if required for a better fit.
  4. Glue or screw the driftwood pieces together to form the silhouette.

Easter Egg Driftwood Holder

Design a rustic Easter egg holder that prominently features driftwood for each egg. It’s an artistic way to display decorated Easter eggs or use them for an Easter breakfast presentation.

What You Need:

  • Driftwood with natural cavities or flat surfaces
  • Small drill bit
  • Acrylic paint (optional for added color)

How To Make:

  1. Select a piece of driftwood that has enough space to hold several eggs.
  2. Use a drill bit to create small indentations that can cradle the eggs securely.
  3. Paint natural cavities with acrylic paint for added flare if desired.

Driftwood Candle Centerpiece

You can add an intimate glow to your Easter dinner with a driftwood candle centerpiece. This craft ensures your dining table remains stylishly festive.

Supplies:

  • Long, flat pieces of driftwood
  • Votive candles or tealights
  • Drill with bit sized for candle base

Procedure:

  1. Arrange the driftwood into an appealing structure.
  2. Drill shallow holes where the candles will sit snugly.
  3. Place the candles in the holes and light them to set the mood.

Tips for Working with Driftwood

Tools and Techniques

Basic tools such as a glue gun, drill, and saws are sufficient for creating most driftwood crafts. The key is to handle the material delicately to preserve its natural texture and appearance.

Safety Considerations

Always prioritize safety by wearing protective gear when handling tools. Additionally, ensure your driftwood is well-cleaned to avoid any potential health risks associated with natural elements like mold or insects.

Driftwood Easter Crafts

Care and Maintenance of Driftwood Crafts

Driftwood, although resilient, benefits from some care to maintain its beauty. Apply a clear sealant like polyurethane to preserve its natural color and protect it from moisture. Dust your creations regularly and avoid placing them where they can be damaged by direct sunlight or water.

Conclusion

Driftwood easter crafts offer you an unprecedented opportunity to blend creativity with simplicity. Whether it’s a wreath, a candle centerpiece, or a bunny silhouette, each crafted piece carries a part of nature’s raw beauty into your home. Inviting driftwood into your Easter decor not only enhances the holiday spirit but also reminds you to celebrate nature and creativity harmoniously.

By integrating these unique pieces into your Easter celebrations, you’re not just crafting for the moment—you’re carving out memories that blend the rustic with the magical. So gather your materials, prep your driftwood, and let your creativity lead the way to a green and gorgeous Easter!

Filed Under: Driftwood Ideas Tagged With: Decor, DIY, Driftwood, Easter, Handmade

Driftwood Easter

March 2, 2025 by admin

Have you ever considered how Easter, a holiday typically celebrated with vibrant eggs and cute bunnies, could be transformed with a touch of rustic charm and natural beauty? Imagine celebrating Easter a little differently this year, bringing the outdoors inside with elements like driftwood. Driftwood—those beautiful pieces of wood sculpted by nature—adds a unique twist to traditional Easter celebrations. By the time you’ve finished reading, you’ll be brimming with ideas on how to incorporate this natural beauty into your holiday festivities. Let’s embark on this creative journey of crafting a “Driftwood Easter.”

What is Driftwood?

Driftwood often conjures images of sun-kissed beaches and serene oceans. But what exactly is it? Simply put, driftwood is wood that has been washed onto a shore or beach by tides, winds, or waves. These pieces can be remnants from trees or other wood materials that ocean currents transport. Over time, their texture and structure change due to prolonged exposure to water, sun, and sand.

The Aesthetic Appeal of Driftwood

Driftwood’s appeal lies in its varied shapes, sizes, and earthy tones. Each piece is unique, representing a one-of-a-kind artwork created by nature’s forces. Its rustic charm adds an element of warmth and continuity when used in home decor or landscaping. Using driftwood in your Easter celebration brings a touch of nature’s artistry into your home, creating a serene and inviting environment.

Sustainability and Driftwood

Incorporating driftwood into your Easter theme is not just about aesthetics; it’s also about sustainability. Driftwood is a natural and recycled material, meaning that using it helps reduce waste. By opting for driftwood decorations, you’re choosing environmentally friendly decor, aligning your celebration with principles of sustainability.

Preparing for a Driftwood Easter

To celebrate a Driftwood Easter, you need the right materials and some creativity. Let’s outline what you’ll need for your very own driftwood-inspired celebration.

Collecting or Purchasing Driftwood

You might find driftwood when strolling along the beach or visit artisan shops and online marketplaces specializing in natural decor. If you’re collecting driftwood yourself, ensure it’s responsibly gathered, and you’re aware of local regulations regarding collecting natural materials from beaches.

Cleaning and Prepping Driftwood

Once you have your driftwood, clean it thoroughly to remove any impurities. A mild solution of soap and water usually does the trick. Rinse and allow it to dry completely, preferably in the sun, to retain its natural color and prevent mold growth. This process ensures that your driftwood is safe for indoor use and ready for crafting.

Driftwood Easter

Crafting Driftwood Easter Decor

Now that your driftwood is ready, it’s time to let your creative juices flow. Below are some exciting ways to incorporate driftwood into your Easter decor.

Driftwood Easter Egg Holders

Give your Easter eggs a natural pedestal by creating driftwood egg holders. Look for pieces that naturally form small crevices or indentations. Sand down any rough spots, and voilà, you have a unique and natural base for your colorful Easter eggs.

Driftwood Centerpiece

A driftwood centerpiece can be the focal point of your Easter dining table. Arrange several pieces of driftwood artistically along the center. Consider adding elements like small flowers, moss, or candles to complement the driftwood and infuse additional texture and color.

Driftwood Easter Wreath

A wreath made from driftwood is a stunning way to welcome guests into your home. Create a circle with the driftwood pieces, securing them with a strong adhesive or wire. Decorate your wreath with pastel-colored ribbons, small eggs, or spring flowers for a festive touch.

Incorporating Driftwood into Easter Traditions

Aside from decor, there are numerous ways to weave driftwood into the fabric of your Easter traditions.

Easter Egg Hunt with Driftwood

Transform your traditional Easter egg hunt by incorporating driftwood into the clues or hiding places. You can use driftwood as markers or props for hiding spots, enhancing both the aesthetics and fun factor of the hunt. This adds an element of adventure and challenge to the game.

Creating Driftwood Story Stones

For a quieter activity, consider crafting driftwood story stones. Find smooth, flat pieces of driftwood, and draw or paint symbols that can be used to create stories. This is an engaging and collaborative way to share Easter tales or craft new ones with friends and family.

Driftwood Easter

Hosting a Driftwood Easter Gathering

If you’re inviting friends and family over for Easter, using driftwood as part of your planning adds a touch of uniqueness and character. Here’s how you can incorporate it into your gathering plans.

Themed Invitations

Let your guests know about your unique theme right from the start with driftwood-themed invitations. You can use images of driftwood or even attach small collected pieces to give a tactile preview of the event.

Driftwood Table Settings

Enhance your dining experience with driftwood table settings. Use small pieces as placeholders, securing name tags with twine. Contrary to more traditional setups, this rustic approach offers a relaxed yet elegant dining experience.

Menu with Natural Elements

In keeping with the natural theme, plan a menu that reflects this aesthetic. Consider serving dishes made with organic ingredients and presenting them in ways that highlight natural beauty—such as serving platters adorned with small pieces of driftwood.

Benefits of a Driftwood Easter

You might be wondering what makes a Driftwood Easter so special. The benefits extend beyond the charm and beauty; here’s why a Driftwood Easter is well worth considering.

Sustainability and Eco-Friendliness

By using driftwood, you’re making a statement about the importance of recycling and sustainability. It’s a tangible way to reduce waste while beautifying your surroundings with natural elements.

Fostering Creativity

Arranging a Driftwood Easter encourages you to think outside the box and experiment with new ideas. Whether crafting decorations or planning activities, you’re tapping into a reservoir of creativity that might otherwise remain unexplored.

Aesthetically Pleasing

Perhaps the most immediate benefit, though, is the sheer aesthetic pleasure a Driftwood Easter provides. The combination of natural elements and festive traditions results in a celebration that’s both beautiful and memorable.

Conclusion

Incorporating driftwood into your Easter celebration not only transforms it into an eco-friendly event but also weaves a narrative of nature into your traditions. From crafting decor to hosting uniquely themed gatherings, a Driftwood Easter offers endless opportunities to innovate and personalize your holiday. Imagine welcoming the season of renewal with textures and forms shaped by the Earth itself—a celebration that not only honors tradition but also embraces the beauty of the outdoors. As you prepare for a Driftwood Easter, may you find joy, inspiration, and perhaps even a new favorite tradition to share with those closest to you.

Filed Under: Driftwood Ideas Tagged With: Decoration, DIY, Driftwood, Easter, Handmade

  • « Previous Page
  • Page 1
  • …
  • Page 4
  • Page 5
  • Page 6
  • Page 7
  • Page 8
  • …
  • Page 41
  • Next Page »

Primary Sidebar

Driftwood4us.com, is a participant in the Amazon Services LLC Associates Program, an affiliate advertising program designed to provide a means for sites to earn advertising fees by advertising and linking to amazon.com.