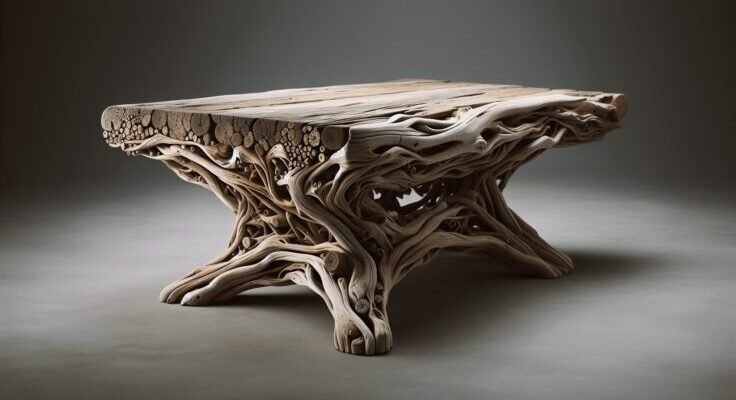
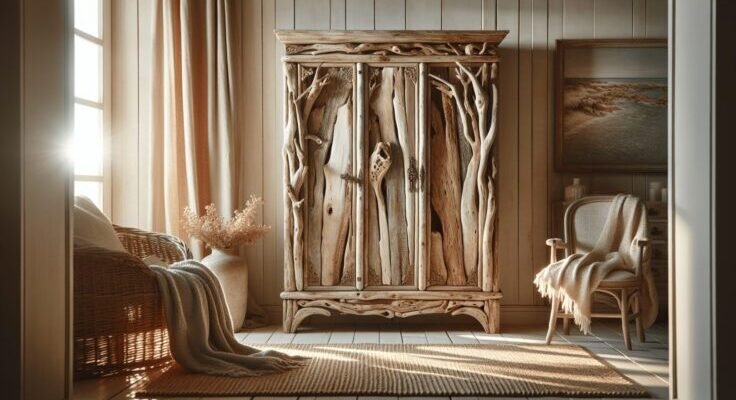
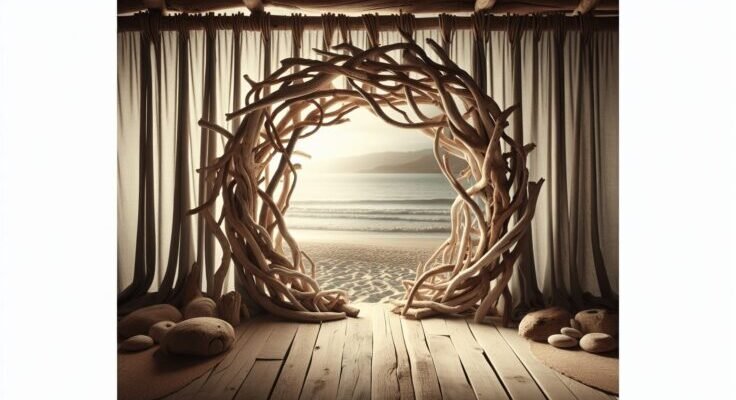
• Skip to main content
  • Skip to primary sidebar
  • Terms and Conditions
  • Privacy Policy
  • Contact

Driftwood 4 Us

Just About Driftwood

Driftwood

Driftwood Chimes Diy

January 24, 2025 by admin

Have you ever considered turning your beachcombing treasures into something beautiful and musical for your home or garden? Driftwood chimes could be just the exciting project you need. As you stroll along the shoreline, you might imagine how those pieces of driftwood, worn smooth by the waves, can transform into an enchanting set of wind chimes. Creating your very own driftwood chimes is a delightful, rewarding process that lets you bring a slice of nature into your living space. Plus, it’s a fun project that doesn’t require any extraordinary skills or expensive tools.

Driftwood Chimes Diy

Why Driftwood?

Driftwood is not only visually appealing with its unique forms and textures, but it’s also an eco-friendly choice. By using driftwood, you are recycling natural materials that have already been discarded by the ocean. The rustic charm of driftwood adds a coastal, organic feel to any decorative item, making it a favored choice among DIY enthusiasts.

Characteristics of Driftwood

Driftwood is characterized by its unique shapes and textures, sculpted by natural elements like water, sun, and wind. These features make each piece one-of-a-kind, meaning your finished chime will be unique as well. The lightweight nature of driftwood is particularly advantageous when creating wind chimes, as it will move easily in the wind.

Environmental Significance

By using driftwood, you’re participating in an environmentally friendly crafting process. Driftwood is already a discarded piece of nature, so utilizing it in art helps reduce the demand for newly harvested wood, aiding in forest preservation. This practice helps to promote sustainability and an eco-conscious mindset.

Tools and Materials You Need

Before embarking on your driftwood chimes DIY project, you need to gather some essential tools and materials. Having these ready will streamline your crafting experience and prevent any unnecessary interruptions.

Materials

  • Driftwood Pieces: Select various pieces in different lengths and textures to create an interesting visual contrast.
  • Fishing Line or Cord: You’ll use this to tie everything together. Fishing line is ideal due to its strength and invisibility.
  • Metal or Ceramic Chimes: These can be purchased or you could use recycled items like old silverware or keys for added charm and sound variety.
  • Rust-Proof Hooks or Eye Screws: Useful in suspending your driftwood from a base or for hanging embellishments.
  • Embellishments: Beads, shells, or small stones can add personal flair to your creation.

Tools

  • Drill: A small hand drill suitable for creating holes in the driftwood and any other components that require it.
  • Scissors: For cutting the fishing line or cord.
  • Measuring Tape: To keep proportions consistent.
  • Sandpaper: For smoothing any rough edges on the driftwood that could cause splinters.

Choosing Driftwood for Your Chime

Selecting the right pieces of driftwood is an essential part of the process. Your choices will impact both the aesthetics and the musicality of your chimes.

Shape and Size

Choose driftwood that resonates with your aesthetic sensibilities. Different shapes and sizes will not only alter the visual appeal but also affect how the pieces move and collide, creating sound.

  • Long Pieces: Ideal for the central, stable piece from which other parts hang.
  • Short, Rounded Pieces: Can be used as the moving parts to strike chimes or other elements.

Texture and Surface

The texture of your driftwood pieces can add to their decorative appeal. Meanwhile, smooth surfaces might facilitate a more pleasing sound when they touch.

  • Smooth Surface: Easier to work with and gives a clean, finished look to the project.
  • Textured Surface: Provides a more natural and rustic look.

Collecting Driftwood

When collecting driftwood, make sure you have permission to remove items from beaches or local areas. Always check the local regulations to ensure you’re crafting in an environmentally responsible way.

Designing Your Driftwood Chimes

Once you have your materials, it’s time to plan and design your driftwood chimes. This stage is crucial, as it will determine the ultimate look and sound of your chimes.

Sketch Your Design

Take some time to sketch your ideas. Consider how each piece will hang and how they will interact with one another.

  • Base Structure: Decide on a base configuration. For example, one large piece of driftwood at the top with smaller pieces hanging down can be a simple but effective design.
  • Layering: Consider multiple layers for a more complex, intricate design.
  • Symmetry vs. Asymmetry: Decide whether you prefer a balanced look or something more organic and asymmetric.

Incorporating Chimes and Accessories

Determine how you will incorporate the chimes and any other decorative elements into your design.

  • Positioning Chimes: Place chimes where they can catch the wind effectively and produce sound by hitting either other chimes or the driftwood itself.
  • Decorative Elements: Plan where embellishments like beads or shells could be included for extra charm.

Driftwood Chimes Diy

Assembling Your Driftwood Chimes

Assembly can be seen as the most exciting part, where your design begins to take physical form. Follow these steps to pull everything together smoothly.

Preparing the Driftwood

Before you begin the assembly, it’s crucial to prepare your driftwood pieces.

  • Cleaning: Wash the driftwood with fresh water and allow it to dry thoroughly in the sun. This will prevent mold and enhance the wood’s color.
  • Sanding: Use sandpaper to smooth any sharp edges or splinters. This makes your chimes safer to touch and handle.

Drilling Holes

It’s advisable to start by drilling holes in your driftwood pieces before assembly. This makes threading the cord or line much easier.

  1. Mark Drill Points: Use a pencil to mark where you want to drill. Consider spacing for even hanging.
  2. Drill with Care: Use a hand drill to create holes, being cautious not to split the wood.

Assembling the Chimes

Now, it’s time to piece everything together based on your design.

  1. Thread the Line or Cord: Tie your base driftwood piece to a hook or eye screw, then continue threading line through the drilled holes.
  2. Secure Knots: Tie secure knots at the base of each hanging piece to hold them in place. Double-check the strength of these knots as you proceed.
  3. Attach Chimes and Embellishments: Tie in your selected chimes and any decorative elements. Ensure spacing is correct to allow for them to softly collide in the wind.

Balancing the Chimes

It’s essential for your chimes to be balanced both visually and mechanically.

  • Testing Movement: Hang your chimes and make sure all pieces can swing freely and produce sound.
  • Adjustments: Tweak the lengths of your cords and the spacing to achieve the desired balance, both aesthetically and aurally.

Finishing Touches and Placement

Once your chimes are assembled, it’s time for the finishing touches and to decide where they’ll reside.

Protective Coating

Consider applying a protective sealant to your driftwood chimes to prolong their life, especially if they will be displayed outdoors.

  • Sealants: Look for a UV-resistant wood finish to protect against weathering.
  • Application: Apply as per the product instructions, ensuring that it is evenly spread over all wooden parts.

Optimal Placement

Choose a location where your chimes can really shine and sing.

  • Windy Spot: Select a place that experiences a gentle breeze to allow your chimes to resonate.
  • Height: Ensure the chimes are hung at a height where the sound can travel but they are still accessible for maintenance.
  • Visibility: Hang them where they can be appreciated visually as well as aurally.

Maintaining Your Driftwood Chimes

Like any outdoor feature, your driftwood chimes will require some care to keep them looking and sounding their best.

Regular Cleaning

  • Dusting and Washing: Use a soft cloth for regular dusting. Occasionally, wipe the chimes with a damp cloth to remove any dirt or salt deposits.
  • Reapplying Sealant: Every few months, check if your chimes need a fresh coat of sealant to maintain their resilience against the elements.

Checking for Wear and Tear

  • Inspecting Line and Knots: Look out for fraying lines or loose knots, which should be repaired promptly to avoid any elements falling apart.
  • Replacing Components: If any component is damaged or missing, replace it with a similar item to maintain the harmony of your chime’s design.

Personalizing Your Driftwood Wind Chimes

Now that you understand the basics of creating driftwood wind chimes, let’s dive into personalizing your masterpiece. The potential for creativity is limitless, allowing you to make each project entirely unique.

Adding Color

While driftwood has a beautiful natural palette, you might want to add some color to make your chimes pop.

  • Paint and Stain: Use non-toxic paints and stains if you plan to hang your chimes outdoors.
  • Dyeing Beads and Cords: Choose bright, contrasting colors for your beads or cords to make your chimes more eye-catching.

Theme-Based Chimes

You can design your chimes around a particular theme that speaks to your interests or personal style.

  • Nautical Theme: Incorporate seashells, anchor shapes, or maritime knots for a sailor’s charm.
  • Fairy Tale Theme: Use delicate elements like crystals, tiny bells, or flowers carved into the wood.

Seasonal Variations

Your driftwood chimes can also be adapted to reflect different seasons or holidays.

  • Spring Blooms: Add pastel-colored beads and floral patterns.
  • Winter Festivities: Integrate mini snowflakes or stars, and use a metallic, silver theme.

Conclusion

Crafting driftwood chimes can be both a meditative process and a creative outlet, allowing you to express your unique style while bringing tranquil and soothing sounds into your environment. Each chime is a testament to the power of nature and art when combined, serving not just as a decorative piece but a functional art form that tells a story. With patience, imagination, and respect for materials, creating driftwood chimes can become a cherished pastime, offering ongoing rewards of beauty and serenity. Remember to approach each step with intention, enjoyment, and creativity — allowing your chimes to sing your story through every gentle breeze.

Filed Under: Driftwood Ideas Tagged With: Chimes, crafting, Driftwood, home decor

Driftwood Christmas Tree Ornaments

January 24, 2025 by admin

Have you ever thought about how you can bring a touch of nature into your home during the holiday season with something as simple and beautiful as driftwood? Driftwood Christmas tree ornaments can transform your festive decorations into something uniquely charming and environmentally friendly. If you’re on the lookout for an idea that merges creativity with nature, then driftwood might just be the perfect material to use.

The Charm of Driftwood Ornaments

Driftwood carries with it a natural elegance that speaks of nature’s beauty and resilience. This wood, having been weathered by the elements, is uniquely smooth and often displays an array of intriguing colors and textures. Adding driftwood ornaments to your Christmas tree not only introduces a rustic charm but also tells a story of nature’s journey from afar.

Why Choose Driftwood?

Incorporating driftwood into your holiday decorations is both stylish and sustainable. This often-overlooked natural material is eco-friendly, as it’s typically collected from storm-ridden shores or riverbanks, where it would otherwise be considered debris. By using driftwood, you can be more sustainable in your decoration choices and reduce unnecessary waste.

The Aesthetic Appeal

Imagine handcrafted ornaments gracing your tree, each piece of driftwood offering its own signature shape and color. The grayish to sun-bleached hues create a coastal or rustic vibe, which can complement a variety of holiday themes. Driftwood’s natural origins and distinct appearance allow it to blend seamlessly with other decorations such as metallics, neutrals, or even vibrant holiday colors.

How to Source Driftwood

Before you begin creating your ornaments, finding the right pieces is essential. Driftwood can be sourced from a variety of locations, each offering unique types that may vary in size, shape, and texture.

Collecting from Nature

The most authentic way to obtain driftwood is by collecting it yourself. Visit local beaches, riversides, or lakeshores where driftwood is likely to accumulate. Take the time to select pieces that are clean, dry, and free from mold or moss. Always remember to respect local regulations regarding the collection of natural materials.

Purchasing Driftwood

If you’re not near a body of water, or prefer the convenience, driftwood can also be purchased. Many craft stores, online retailers, or specialty shops sell pre-cleaned and pre-sorted driftwood pieces. Buying driftwood can save you time and ensure you have the right selection for your projects.

Driftwood Christmas Tree Ornaments

Preparing Driftwood for Crafting

Once you’ve sourced your driftwood, the next step is to prepare it for crafting. This involves proper cleaning, drying, and sometimes even cutting to fit your desired designs.

Cleaning Driftwood

Cleaning is an important first step to ensure your ornaments are ready for decoration. This process typically involves soaking the driftwood in a solution of water and bleach to remove any salt, dirt, or parasites it may have collected. After soaking, rinse thoroughly with fresh water.

Drying Your Pieces

After cleaning, allow your driftwood to dry completely. This can take anywhere from a few days to a couple of weeks depending on the size and moisture content of the wood. Proper drying will prevent mold growth and warping.

Cutting and Sanding

Depending on the style of ornaments you wish to create, you might need to cut or sand certain pieces. A hand saw or another small cutting tool can shape your driftwood, while sandpaper can smooth rough edges. Always wear safety glasses and gloves during this step to protect yourself.

Creative Ideas for Driftwood Ornaments

The creative potential of driftwood Christmas tree ornaments is limitless. From simple designs to more intricate art pieces, you can transform driftwood into a wide array of stunning decorations.

Driftwood Stars

Stars represent a classic Christmas motif, and crafting them from driftwood can add a rustic charm to your tree. To make driftwood stars, select similarly sized pieces and hot glue them into a star shape. You can further embellish by tying a ribbon at one of the points for hanging.

Miniature Trees

As a nod to the holiday season itself, miniature driftwood trees can grace your larger Christmas tree or serve as standalone ornaments. Stack pieces of driftwood in decreasing lengths to form a tree shape. Secure each piece with wood glue and incorporate a bit of twine or string to hang.

Personalized Name Tags

Personalized decorations make your tree uniquely yours. Use small, flat pieces of driftwood as canvases for painting or etching the names of family members. These personalized tags can also double as place cards for holiday dinners or gifts.

Driftwood Angels

For a touch of ethereal beauty, fashion angels from driftwood. Use smaller pieces for the body and wings, and accent with additional natural elements like feathers or stones for a celestial look.

Garland Creations

Driftwood pieces can be strung together to form a garland. Alternate different sizes and shapes of driftwood, securing with twine or wire. Hang your garland on the tree, mantle, or as a doorway decoration for a natural and effortless look.

Driftwood Christmas Tree Ornaments

Assembling and Decorating Your Ornaments

Turning your pieces of driftwood into exquisite Christmas ornaments generally involves a few straightforward steps. These processes can be quite rewarding as you see your crafts come to life.

Using Natural Accents

Complement driftwood’s raw look by pairing it with other natural materials. Twine, burlap, pinecones, and dried berries can enhance the organic aesthetic of your ornaments beautifully. The key is to maintain a balance and let the driftwood’s features remain the star of your creation.

Adding Color

While driftwood’s natural hues are stunning, you might want to add a pop of color to your decorations. Consider using water-based paints or natural dyes for a gentle touch of color. A whitewash can provide a wintry feel, while metallic paints add a festive shine.

Securing the Design

To ensure your ornaments last through the holiday season and beyond, use strong adhesives like hot glue or wood glue. When creating hanging elements, drill small holes or use hooks to avoid splitting the wood.

Enjoyment and Storage

Once your driftwood ornaments are crafted, it’s time to enjoy them on your Christmas tree. After the holiday season, proper storage will keep them in good condition.

Display and Enjoyment

Adorning your tree with driftwood ornaments is a pleasure, observing how the natural tones complement the holiday lights and other decors. It brings a tactile and visual warmth to the festive setting.

Proper Storage

After the season ends, carefully pack your driftwood ornaments in a dry, cool location. Use tissue paper or bubble wrap to protect them from damage. Avoid storing in areas prone to moisture to prevent deterioration.

The Environmental Impact and Benefits

Opting for driftwood as part of your Christmas decorations extends beyond aesthetics, offering environmental advantages.

Eco-Friendly Choice

Using driftwood is an environmentally conscious decision. By repurposing wood that would otherwise wash up as waste, you help minimize environmental impact. The need for less manufactured decorations translates to fewer resources extracted from nature.

Supporting Natural Ecosystems

While collecting driftwood, be mindful of the natural habitats. Take only what you need and avoid disturbing wildlife or plant life. Following these principles ensures that you contribute to the preservation of the ecosystems you enjoy.

Conclusion

Creating driftwood Christmas tree ornaments is a delightful blend of artistry and nature. It offers you a chance to engage with the natural world and express creativity in a way that aligns with sustainable practices. By following the steps we’ve outlined, you can infuse your holiday decor with unique flair and make environmentally conscious choices that bring out the best in the festive season. May your tree be graced by the beauty of the natural world, embodied in each handcrafted piece of driftwood adorning it.

Filed Under: Driftwood Ideas Tagged With: christmas, DIY, Driftwood, Holiday decor, Ornaments

Iwagumi Driftwood

January 24, 2025 by admin

Have you ever thought about the art and science behind creating a stunning underwater landscape in an aquarium? Imagine a scene under the water that not only mimics nature but also tells a story with minimal elements. If you’re interested in aquascaping and are drawn toward the beauty of natural aesthetics, you may have heard of “Iwagumi,” a Japanese aquascaping style that emphasizes simplicity and minimalism. But what might intrigue you even more is the incorporation of driftwood into this design. Let’s explore the concept of Iwagumi Driftwood and how it can transform your aquarium into a breathtaking underwater scene.

What is Iwagumi Aquascaping?

The Philosophy of Iwagumi

Iwagumi is a celebrated aquascaping style originated in Japan, based on the principles of Zen simplicity, balance, and harmony. The word “Iwagumi” translates to “rock formation,” reflecting its signature use of rocks as the primary focus in the aquascape. Unlike more conventional aquascaping layouts that are heavily planted and densely populated, Iwagumi emphasizes minimalism, using a sparse number of plants and fish to create a serene yet dynamic layout.

Components of Traditional Iwagumi

In traditional Iwagumi setups, the main elements are rocks, substrate, plants, and a limited selection of fish. The rocks are arranged in a way that adheres to the natural laws of physics, aiming to replicate natural rock formations one might find in the wild. The aesthetic appeal lies in its asymmetrical balance; the layout is designed around a primary focal point, usually a singular large rock flanked by smaller ones, often grouped in odd numbers for a natural appearance.

Simplicity and Complexity

While the Iwagumi style seems simple at a glance, creating a successful Iwagumi aquascape requires a delicate balance of composition and meticulous planning. It aims for a blend of simplicity and complexity; though the design is minimal, it must evoke the beauty and complexity of nature. This paradox is the essence of its appeal and challenge.

Introducing Driftwood to Iwagumi

Why Use Driftwood?

Driftwood introduces an organic and rustic element to the aquascape, providing texture and depth that mere rocks may not achieve on their own. Adding driftwood to an Iwagumi setup can enhance its visual interest and provide an added dimension to the layout. It can be used to simulate the appearance of sunken branches, offering a contrast to the hard surfaces of the stones and bringing more life to the aquarium.

How Driftwood Complements Iwagumi Principles

Driftwood complements the Iwagumi’s principles by adding a natural, flowing quality to the otherwise structured rock formations. Its irregular shapes and natural lines mimic nature’s unpredictability, breaking the uniformity and adding visual intrigue. Furthermore, driftwood can create shaded areas and mimic tree roots, which can accentuate the tranquility of an Iwagumi aquascape.

Choosing the Right Driftwood

Incorporating driftwood requires selecting suitable pieces that harmonize with your rock formations. When choosing driftwood, consider the size, shape, and texture. Avoid pieces that may overpower the stones or disrupt the harmony of the design. Aim for driftwood that subtly supports or enhances the primary focal points of your layout.

Iwagumi Driftwood

Designing an Iwagumi Driftwood Layout

Balancing Rocks and Driftwood

The key to a successful Iwagumi Driftwood layout lies in achieving balance between the hard lines of rocks and the organic flow of driftwood. You need to arrange these elements in a way that maintains the Iwagumi aesthetic while taking advantage of the driftwood’s beauty. One effective approach is interweaving the driftwood among the stones to create layers and dimensions.

Plants and Substrate Selection

For Iwagumi Driftwood, plant selection is critical. Opt for low-growing, carpeting plants like Glossostigma or Hemianthus to enhance the natural look and complement the rocks and driftwood. The substrate should support plant growth while blending into the natural aesthetic. Fine gravel or sand is often preferred.

Fish and Invertebrates

While fish aren’t the main focus in Iwagumi layouts, selecting small, schooling species can contribute to the scenery’s sense of calm and motion. Consider species like Neon Tetras or White Cloud Mountain Minnows, which enhance the aquascape without dominating it. Invertebrates like shrimp can also add color and movement.

Maintenance and Care

Water Parameters

Consistency in water parameters is essential for the health of your Iwagumi Driftwood aquascape. Regular monitoring of pH, hardness, and nitrate levels will help maintain stability. Driftwood can sometimes lower the pH, so adjustments might be necessary to align with the needs of your plants and fish.

Pruning and Plant Care

Regular pruning is essential to maintaining the neat minimalism inherent to Iwagumi aesthetics. Overgrown plants can overshadow the main elements of your scape. Remove any unhealthy leaves and control plant growth to preserve the open space characteristic.

Cleaning and Algae Control

Algae can easily spoil the clean look of an Iwagumi setup. Regular cleaning and careful management of light levels can help. Consider introducing algae-eating species or deploying CO2 systems to support plant growth and reduce algae proliferation.

Iwagumi Driftwood

Challenges and Solutions

Balancing Minimalism with Detail

One common challenge is achieving the right balance between minimalist design and detailed complexity. It’s vital to avoid overcrowding while still ensuring the scene doesn’t feel sparse or incomplete. Start with a clear vision of the desired outcome and add elements incrementally.

Preventing Driftwood Issues

Driftwood can sometimes release tannins, turning the water a tea-color. Boiling the driftwood before introducing it to the aquarium or soaking it for an extended period can minimize this effect. Regular water changes can also help maintain clarity.

Maintaining Fish Health

Owing to the minimal fish stocking, Iwagumi Driftwood setups can face unique challenges regarding the health of the fish. Ensure stable water conditions and provide adequate nutrition. Regularly monitor the health of your aquatic inhabitants and adjust stocking levels if necessary.

Inspiration and Ideas

Examples of Iwagumi Driftwood Layouts

Drawing inspiration from existing aquascapes can help you visualize and plan your layout. Search for images and layouts shared by other enthusiasts to understand how different configurations of stones, driftwood, and plants work together. Take note of how others solve the challenges of balance and proportion.

Getting Started with Your Own Design

Begin planning your Iwagumi Driftwood aquascape by sketching out your initial ideas. Use a sandbox or aquarium planning app to experiment with rock and driftwood placements before committing them to your tank. This helps anticipate balance and structural concerns, allowing you to refine your layout until you’re satisfied.

Conclusion

Iwagumi Driftwood is a captivating aquascaping style that marries the structured aesthetics of traditional Iwagumi with the organic textures of driftwood. The result is a truly unique underwater landscape that captures the imagination and tranquil essence of nature. With careful planning, attention to detail, and an understanding of the principles behind this art form, you can create an aquascape that offers a serene escape and a glimpse into the natural world. Remember, this is a living work of art—designed to evolve and grow over time—making it as rewarding as it is beautiful.

Filed Under: Driftwood Ideas Tagged With: Aquarium Design, aquascape, Driftwood, Iwagumi, Nature Aquariums

Driftwood Christmas Crafts

January 24, 2025 by admin

Have you ever thought about using driftwood to add a rustic charm to your Christmas decorations? Driftwood is not only naturally beautiful, with its unique shapes and textures, but it also offers a sustainable way to enjoy crafting. This holiday season, why not try your hand at creating some delightful driftwood Christmas crafts? You’ll find that with a little creativity and a touch of patience, you can transform simple pieces of driftwood into stunning seasonal decor. Here’s how you can embark on this creative journey with driftwood, and perhaps make a few memorable gifts and decorations in the process.

Driftwood Christmas Crafts

Understanding Driftwood: Nature’s Art

Driftwood is more than just weathered wood found on beaches. It’s a testament to the power of nature’s sculpting forces. This wood, shaped by the sea and time, carries an organic aesthetic that complements any Christmas setting beautifully. By understanding what driftwood is and how it can be used, you’re setting the stage for an inspired crafting experience.

What is Driftwood?

Driftwood is wood that has been washed ashore by the action of winds, tides, or waves. Over time, the water smoothens and polishes the wood, creating interesting, unique shapes. This natural beauty makes driftwood a popular material in crafting and home decor.

Sustainability of Driftwood Crafting

Choosing driftwood as a crafting material not only benefits your aesthetic goals but also supports sustainability. By using driftwood, you’re repurposing what nature has already provided, reducing the need for newly sourced materials. This sustainable choice helps in preserving forests and reducing carbon footprint, making your holiday season even more eco-friendly.

Tools and Materials Needed for Driftwood Crafts

Before you begin creating with driftwood, it’s essential to gather the necessary tools and materials. Having everything ready will streamline the crafting process and enhance your experience. Let’s take a look at what you’ll need.

Basic Tools for Crafting

To start with driftwood crafts, you’ll need some basic tools. Here’s a quick table to help you gather what’s necessary:

ToolsDescription
Glue GunFor adhering pieces of driftwood together securely.
SandpaperTo smoothen any rough edges of the driftwood.
SawFor cutting driftwood to desired sizes and shapes.
DrillUseful for creating holes for hanging ornaments.
Wire CuttersTo trim and shape wire for construction and embellishment.
Paint BrushesFor painting and adding details to your driftwood.

Additional Materials

Apart from the tools, several other materials can enhance the driftwood crafts:

  • Rope and Twine: For hanging or tying parts together.
  • Natural Decor: Such as pine cones, shells, or dried flowers.
  • Paint and Finish: Optional, for those who wish to add color or protect their creations.
  • Embellishments: Beads or ribbons to add a festive touch.

Driftwood Christmas Ornaments

Creating Christmas ornaments from driftwood is an excellent way to start your crafting. These ornaments are not only easy to make but also add a distinctive flair to your Christmas tree. Let’s explore some ideas.

Driftwood Stars

Driftwood stars are a classic craft that radiates charm and simplicity. To make one, gather several small, similar-sized pieces of driftwood. Arrange and glue them in a star shape, using a glue gun for precision. You can embellish it with small beads or keep it natural for a rustic look.

Mini Driftwood Christmas Trees

Creating miniature driftwood Christmas trees can offer a beautiful accent to your holiday decor. Start by stacking driftwood pieces from largest to smallest, creating a tree shape. Secure them with a central dowel or glue. You can add tiny ornaments or paint part of the wood to represent a decorated tree.

Larger Driftwood Decor

Once you’re comfortable with ornaments, you might want to venture into larger driftwood decorations. These pieces can make stunning centerpieces or be featured on your mantle.

Driftwood Christmas Tree

A driftwood Christmas tree is a timeless decoration that brings an earthy elegance to your home. Begin by selecting a sturdy base like a wooden block. Drill a hole in the base and insert a wooden dowel. Then, attach driftwood pieces, starting with the largest at the bottom. Securely stack them, using progressively smaller pieces as you move up. Decorate the finished tree with fairy lights and natural elements like pine cones for an added festive charm.

Driftwood Wreath

For a naturally beautiful Christmas wreath, use pieces of driftwood glued in a circular pattern. Start with the larger pieces as the base, then fill in gaps with smaller ones. Add greenery, berries, and ribbons to spruce it up. Hang the wreath on your front door to immediately add a welcoming and rustic appeal to your holiday décor.

Driftwood Christmas Crafts

Personalizing Your Driftwood Crafts

Adding personal touches can transform your driftwood creations from simple decorations into meaningful keepsakes. Here are some ways to personalize your crafts.

Adding Paint and Color

Though driftwood is beautiful in its natural state, adding a splash of color can make your pieces uniquely yours. Consider using white, silver, or gold to keep it festive and subtle. Paint can be applied fully, or just on the tips and edges, to create different effects.

Using Personalized Embellishments

Incorporating items like initials, family names, or meaningful symbols can make your driftwood crafts even more special. You could carve into the wood, attach letters, or even paint these elements onto the surface to reflect the uniqueness of your piece.

Caring for and Maintaining Driftwood

One of the joys of driftwood is its inherent rustic appeal, but caring for your crafts will help them last for many Christmases to come.

Cleaning and Preserving Driftwood

Before crafting, ensure your driftwood is clean and free from pests. Soak it in freshwater for a few days, changing the water regularly. Once clean, let it dry completely. To preserve driftwood, you might want to apply a sealant for longevity while maintaining its natural beauty.

Storing Driftwood Crafts

Proper storage over the years will keep your crafts in good shape. Consider wrapping them in tissue paper or bubble wrap and placing them in a sturdy box. Store them in a dry environment to prevent any moisture damage.

Giving Driftwood Crafts as Gifts

Driftwood crafts make thoughtful, personalized gifts that are perfect for the holiday season. By gifting handmade items, you share not just a present but a piece of your creativity and care.

Personalizing for the Recipient

Consider the interests and style of the gift recipient. If they love coastal decor, stick with more natural pieces. For someone with a modern aesthetic, perhaps a painted or embellished piece will suit their taste.

Packaging and Presentation

Presentation is key when giving handmade gifts. Wrap your driftwood crafts in natural paper or a fabric bag, tied with jute twine or ribbon. Adding a handwritten note detailing the thought behind the gift can enhance its sentimental value.

Conclusion

Driftwood Christmas crafts offer a wonderful opportunity to engage in sustainable crafting, providing unique, personalized items that can decorate your home or be shared as gifts. The journey from collecting driftwood to transforming it into delightful crafts can be as satisfying as the end result. Whether you’re adding a rustic wreath to your front door or creating small ornaments for your tree, you’re capturing a piece of nature and creativity that embodies the spirit of Christmas. Embrace this time of year to craft something truly special, using the unexpected yet remarkable beauty of driftwood. Happy crafting, and may your holiday season be both creative and joyful!

Filed Under: Driftwood Ideas Tagged With: christmas, DIY, Driftwood, Handmade

Driftwood Chimes

January 23, 2025 by admin

Have you ever thought about combining the soothing rhythm of nature with the harmony of music in your own backyard? Driftwood chimes are a wonderful way to bring that calming experience to life. Imagine the natural aesthetic of driftwood pieces swaying in the breeze and creating gentle, melodic sounds that can transform any outdoor space into a peaceful retreat.

Driftwood Chimes

What Are Driftwood Chimes?

Driftwood chimes are a type of wind chime made from pieces of driftwood. These chimes not only add a unique visual element to your space but also produce a variety of soft, soothing sounds. Unlike metal or glass chimes, driftwood offers a more subtle auditory experience, perfect for those who appreciate the gentle melodies of nature.

The Unique Characteristics of Driftwood

Driftwood is wood that has been worn smooth by the sea or lake water, waves, and elements over time. Each piece is unique, carrying the earth tones of its environment and often showing interesting textures. This weathered appearance gives driftwood chimes their distinctive look, appealing to those who cherish rustic or natural decor elements.

Where Does Driftwood Come From?

Driftwood often starts as fallen branches or trees near bodies of water. Oceanside beaches or lake shores are common places to find driftwood. Over time, the wood gets bleached by the sun and sculpted by wind and water, naturally turning into works of art. Each piece of driftwood tells its own story — from fallen tree to a beautifully polished ornament.

The Art of Making Driftwood Chimes

Creating your own driftwood chime can be a rewarding and meditative process. It allows you to harness the serene energy of driftwood, turning it into a personalized symphony of sounds. Let’s talk about making your own driftwood chimes, from gathering materials to assembling your musical masterpiece.

Gathering Materials

Start by collecting pieces of driftwood with varying lengths and thicknesses. This gives your chime variety in both appearance and sound. You will also need some strong string or fishing line, a drill to create small holes in the wood, and metal or ceramic discs (optional) to add different sound textures.

Assembling the Chime

Begin by drilling small holes in the top center of each piece of driftwood. Then, thread the fishing line or string through the holes and tie it securely. If you’re incorporating other materials like metal discs, attach them to the string at intervals that complement the driftwood.

Balance and Harmony

Creating a balanced mobile requires careful consideration of weight and distribution. Hang your driftwood chime from a branch or structure, and ensure that the pieces are spaced evenly so they can swing freely in the wind. Test the chime to see if its arrangement produces the melodies you desire, adjusting the placement as needed.

Benefits of Driftwood Chimes in Your Space

It’s not just their beauty that makes driftwood chimes appealing; they offer various benefits that enrich your living space.

Aesthetic Appeal

With their natural allure and organic shapes, driftwood chimes enhance gardens, patios, or even interior spaces. Their rustic charm blends seamlessly with both modern and traditional decor styles, providing a versatile decorative element.

Soothing Sound

Unlike the sometimes jarring clamor of metal chimes, driftwood chimes produce a gentle sound that soothes the senses. This calmness can help reduce stress and bring tranquility to your environment.

Eco-Friendly Decoration

Using driftwood for chimes is an eco-friendly choice. By repurposing natural materials, you reduce waste and honor the beauty nature has to offer. It’s a wonderful way to bring sustainability into your design principles.

Choosing the Right Driftwood Chime for Your Space

When it comes to selecting or creating driftwood chimes, consider how they’ll fit into your environment and personal tastes.

Size and Space

Consider the size of the area where you plan to hang your chime. Larger spaces might benefit from a grander, more elaborate chime, while smaller areas may be complemented by a simpler, more delicate arrangement. Ensure there’s enough room for it to sway and sing without obstruction.

Color and Style

The natural coloring of driftwood tends to be neutral, making it adaptable to various color schemes. However, if you’re artistically inclined, you might want to add colorful cords or paint accents to your driftwood for a splash of color.

Sound Preferences

Think about the sound you want your driftwood chimes to produce. Longer pieces and additional materials like shells or stones will create deeper tones, while shorter driftwood segments produce lighter, more delicate sounds.

Caring for Your Driftwood Chimes

To ensure that your driftwood chimes remain a delightful part of your space, some routine care is beneficial.

Regular Cleaning

Driftwood can collect dust and dirt over time. Gently wipe them with a damp cloth to maintain their appearance. Be cautious around any knots or unique features to preserve their natural aesthetics.

Maintenance Check

Occasionally check the strings or lines holding the driftwood to ensure they’re still strong and intact. Replace any worn or frayed elements to prevent your chime from falling.

Weather Considerations

Although driftwood chimes are fairly weather resistant, extreme conditions can impact them. Move them indoors during heavy storms or severe weather to extend their life and preserve their sound quality.

Incorporating Driftwood Chimes in Various Settings

Driftwood chimes can find a place in many different settings, each adding its own charm and character.

Gardens and Patios

Hang driftwood chimes in your garden or patio to enhance the natural ambiance. The chimes can act as gentle guides to relaxation as you sip tea or meditate, surrounded by their soothing sounds.

Balconies and Terraces

Even if you live in an apartment, you can incorporate driftwood chimes to make your balcony a personal haven. Let them catch the gentle breeze on a warm day, resonating with tranquility.

Indoors and Near Windows

Don’t think driftwood chimes are only for outdoor use. They can be an intriguing addition indoors, particularly near windows where breezes can still reach them. This arrangement brings nature’s melody inside, harmonizing daily life with natural sounds.

The Cultural and Historical Significance of Wind Chimes

Throughout history, wind chimes, including those made from driftwood, have held cultural significance in various societies around the world.

Ancient Origins

Wind chimes date back thousands of years, being used in ancient Rome, Egypt, and India as decorative pieces and tools for warding off evil spirits. They were often believed to attract prosperity and good luck, hung in strategic places around homes and gardens.

Feng Shui Practices

In the practice of Feng Shui, wind chimes are employed to disrupt negative energy flows and harmonize environments. Driftwood chimes, with their grounding elements, are particularly fitting for balancing energies.

Contemporary Uses

Today, wind chimes continue to be popular for their aesthetic and acoustic qualities. Driftwood chimes resonate well with contemporary movements focused on mindfulness, sustainability, and nature appreciation.

Inspiring Ideas for Driftwood Chime Designs

If you’re considering crafting or buying driftwood chimes, here are some creative ideas to inspire you.

Incorporating Shells and Stones

Enhance your driftwood chimes by adding shells or stones. These elements can be found during beach walks, making your chime a reminder of treasured adventures.

Adding Artistic Flair

Consider painting designs or inspirational quotes on the pieces of driftwood to personalize your chime. This can be a great DIY project that adds a meaningful touch.

Layered Arrangements

Experiment with multi-tier chimes that create a cascading effect. Layering different lengths and types of materials can produce complex, harmonic sounds and a striking visual statement.

Reflect on the Tranquility

Incorporating driftwood chimes into your living space invites both art and nature into your life. These elements enrich experiences by enhancing ambiance, fostering calm, and connecting you with the environment. Whether you choose to craft them yourself or find the perfect pre-made set, driftwood chimes have a unique ability to turn any space into an oasis of sound and beauty. Embrace the tranquility they offer, and let the melodies remind you of the natural rhythms that surround us every day.

Filed Under: Driftwood Ideas Tagged With: Chimes, DIY, Driftwood, Handmade, Outdoor Decor

Driftwood Chair

January 23, 2025 by admin

Have you ever stumbled upon pieces of driftwood along a beach and thought about how they could be transformed into a beautiful, functional piece of art? The concept of crafting a driftwood chair is not only an eco-friendly way to repurpose what might otherwise be waste, but it’s also an opportunity to create something uniquely yours. From the serene shorelines to the cozy corners of your home, a driftwood chair can tell a story and add a rustic charm that’s hard to replicate.

What is a Driftwood Chair?

A driftwood chair is furniture constructed primarily from driftwood — wood that has washed ashore, sanded and smoothed by the sea’s waves and elements. This naturally weathered wood brings a unique aesthetic to furniture-making. Instead of discarding these forlorn wooden remnants, they are repurposed into chairs that carry the raw beauty of nature indoors.

The Appeal of Driftwood Furniture

The allure of driftwood furniture lies in its organic shapes, textures, and colors. Each piece of driftwood is unique, with patterns and hues that cannot be artificially reproduced. This makes every driftwood chair one-of-a-kind, a true reflection of the natural world’s artistry.

Environmental Benefits

Using driftwood for furniture also supports sustainable practices. Rather than cutting down new trees, it makes use of materials that would otherwise contribute to natural debris. This not only helps in reducing waste but also preserves forests and resources.

Choosing the Right Driftwood

Before embarking on your driftwood chair project, selecting the right pieces of driftwood is crucial.

Collecting Driftwood

Collecting driftwood is an adventure in itself. Walking along the coastline, you can find varied pieces of wood shaped by the waters’ motions and weather conditions. Always check local guidelines to ensure legal collection, as some areas protect driftwood as part of their ecosystem.

Characteristics to Consider

When choosing driftwood for your chair, consider pieces that are sturdy and free from rot. Look for wood with an interesting form or texture that complements the design you envision. Also, it’s important to select pieces of various sizes to provide both structural support and decorative appeal.

Driftwood Chair

Preparing Driftwood for Use

Once you’ve gathered your driftwood, it must be prepared before constructing your chair.

Cleaning and Drying

Start by cleaning the driftwood thoroughly. Use a brush and mild soap to remove any sand, salt, or dirt. Rinse with freshwater and let it dry completely, which might take a few days depending on the climate. Proper drying is essential to prevent shrinkage or warping once the chair is assembled.

Treating the Wood

To ensure longevity, consider treating your driftwood with a preservative or finish. This will protect the wood from pests and further environmental wear and tear, while also enhancing its natural beauty.

Designing Your Driftwood Chair

Design is an integral part of building a driftwood chair. It determines the aesthetics and functionality of the final product.

Crafting a Vision

Think about how you want your chair to look. Do you prefer a backrest with high arches or something minimalistic? A sketch can help materialize your concept. Look for inspiration from nature and other driftwood furniture designs.

Structural Integrity

While driftwood offers creative freedom, it’s important not to compromise on structural integrity. Ensure that the primary load-bearing components of your chair (legs, armrests) are strong enough to sustain the weight of frequent use.

Driftwood Chair

Building the Driftwood Chair

With your materials prepared and design in place, it’s time to start building.

Basic Tools and Materials

Having the right tools is vital for a smooth crafting process. You’ll need a saw, drill, screws, sandpaper, and wood glue. Sometimes, clamps may be useful for holding pieces together while you work on them.

Step-by-Step Assembly

  1. Base Construction: Start with the base of the chair. This will often involve choosing the sturdiest pieces of driftwood as the legs and cross members.

  2. Create the Frame: Attach the backrest and armrests to the base. Use screws and wood glue for reinforcement. Make sure each connection is firm to support the weight distribution.

  3. Add Finishing Details: Sand down any rough edges to smooth the surface and eliminate splinters. If desired, you can add cushions for comfort or seal the wood with a protective finish.

Safety Considerations

While crafting, ensure safety by wearing protective gear like gloves and goggles, especially when sawing and sanding the wood. Follow all instructions on tools and materials carefully to prevent any accidents.

Maintaining Your Driftwood Chair

Once your chair is complete, proper maintenance will keep it in top condition for years to come.

Regular Cleaning

Dust and clean your driftwood chair regularly with a damp cloth. Avoid using harsh chemicals that could damage the wood or compromise its finish.

Repair and Preservation

Inspect your chair periodically for any signs of wear or damage. Tighten any loose screws and reapply wood treatment as necessary to keep the wood nourished and protected.

Driftwood Chair Styles and Inspirations

Driftwood chairs can take on many forms, each with its own charm. Here are a few styles to consider:

Traditional Adirondack

With its sloping seat and broad armrests, an Adirondack driftwood chair offers comfort and relaxation, perfect for lounging in your garden or patio.

Modern Minimalist

For a cleaner and understated look, a minimalist driftwood chair can complement contemporary interiors, offering a subtle nod to nature.

Artistic Statement Pieces

If you revel in eclectic design, consider an artistic driftwood chair that combines intricate shapes and arrangements, functioning as both seating and sculpture.

Creating a Complete Driftwood Furniture Set

Why stop at just a chair? You can expand your creativity and complete the set with more driftwood furniture pieces.

Driftwood Table

Pair your chair with a driftwood coffee table or side table. Similar techniques apply, requiring careful selection and preparation of driftwood pieces to ensure a complementary aesthetic.

Driftwood Loveseat

For a more comfortable and spacious seating solution, consider building a driftwood loveseat. This can offer a cozy spot for cuddling up with a loved one or enjoying a good book.

Bringing Your Driftwood Chair to Life

Crafting a driftwood chair is more than just a furniture project; it’s a journey that connects you to nature, sustainability, and creative expression.

Personal Touches

Add personal flair to your chair by incorporating elements like engraved names or inlaid designs using smaller branches or shells. The possibilities are endless.

Share the Experience

Building a driftwood chair can be a great project to share with family or friends. Teach others the value of repurposed materials and the satisfaction of creating something with your hands.

FAQ About Driftwood Chairs

Here is a brief table of frequently asked questions to address common queries about driftwood chairs:

QuestionAnswer
Is collecting driftwood legal?It depends on the local regulations of the beach or area. Always check with the local authorities to comply with environmental protection guidelines.
How do I preserve driftwood for outdoor use?Applying a good quality sealant or wood preservative will help in protecting driftwood from the elements if used outdoors.
Can all types of wood become driftwood?Technically, any wood can become driftwood, but hardwoods are generally more durable and desirable for furniture projects.
What tools are necessary for making a driftwood chair?Basic woodworking tools such as a saw, drill, sandpaper, screws, and glue are needed. Additional tools like a clamp can be helpful for construction.

Conclusion

In reimagining ocean-tossed remnants as cherished furniture pieces, building a driftwood chair embodies an artistry that’s ecologically mindful and deeply personal. Whether adorning a coastal cottage or an urban family room, your creation will serve as a testament to craftsmanship inspired by the sea. Seize the beauty of nature, let your creativity unfold, and enjoy the singular satisfaction of giving driftwood a new narrative through a chair that is truly unique to you.

Filed Under: Driftwood Ideas Tagged With: Chair, Driftwood, Handmade, home decor, Rustic

Driftwood Ivy

January 23, 2025 by admin

Have you ever wondered how nature can create some of the most beautiful and unique art pieces? One such wonder is driftwood, and when combined with the lush growth of ivy, the result is both breathtaking and inspiring. This captivating combination is known as Driftwood Ivy, a serene blend of wood and plant that provides a touch of nature’s artistry to any space.

Driftwood Ivy

Understanding Driftwood

Before delving into how ivy and driftwood come together, let’s explore what driftwood actually is. Driftwood refers to pieces of wood that have been washed onto a shore or beach by the action of winds, tides, or waves. This natural phenomenon is not just random; it’s a process that takes years, sometimes decades.

Formation of Driftwood

The journey of driftwood begins with trees shedding branches or, on occasion, entire trees being uprooted due to natural events. These wood pieces find their way into streams and rivers, where the current takes them on a meandering journey downstream. During this journey, the wood is exposed to different environmental elements that gradually smooth its surfaces and lighten its weight.

Driftwood’s Journey

The movement along riverbeds or ocean floors, coupled with exposure to sun and saltwater, is crucial in the transformation of driftwood. As a result, the once hefty wood becomes more porous and lightweight, making it easy for the tides to carry it ashore. By the time these pieces of wood reach the shore, they have weathered, bleached, and become more unique in shape and texture.

Ivy: The Evergreen Beauty

Now, let’s talk about ivy, the other essential component of Driftwood Ivy. Known for its hardy and versatile nature, ivy thrives in various environments, adding a touch of evergreen beauty wherever it grows.

Characteristics of Ivy

Ivy is a type of climbing or creeping plant that belongs to the genus Hedera. With over 15 different species, this plant is quite adaptable and can grow on various surfaces, such as fences, trees, and even walls.

Growth Habits

What makes ivy particularly intriguing is its growth habits. It can cling to and cover vast surfaces with its dense arrangements of leaves. Ivy uses aerial rootlets to attach itself to different surfaces, and this characteristic makes it perfect for pairing with driftwood.

Driftwood Ivy: A Harmony of Nature

When you combine driftwood with the ever-reaching ivy, the result is Driftwood Ivy, an aesthetically pleasing natural arrangement that can enhance both outdoor and indoor spaces. This combination is not just visually appealing; it carries a philosophical aspect reflecting the resilience and beauty found in nature’s adaptability.

Creating Driftwood Ivy Art

Creating Driftwood Ivy involves using the driftwood as a natural support or base for the ivy plant. Over time, ivy will spread and cover the driftwood, accentuating the wood’s natural lines and textures. This process is not only artistic but also sustainable, as it uses naturally fallen wood and a plant that requires minimal maintenance once established.

Why Driftwood Ivy?

Driftwood Ivy can serve as a statement piece in your home or garden. For those with a passion for sustainable and natural decorations, it offers an ideal option. This combination also brings a sense of tranquility, embodying the harmony and balance found in nature.

How to Create Your Own Driftwood Ivy

If you’re inspired by the concept of Driftwood Ivy, here’s a simple guide on how to create your own.

Selecting Your Driftwood

Start by finding the perfect piece of driftwood. Consider the size and shape, ensuring that it will fit into the space you have in mind. The wood should have natural nooks and crannies where the ivy can root itself.

Choosing the Right Ivy Species

Not all ivy species are created equal. Depending on your climate and the location where you’ll place your driftwood ivy, choose a species that is adaptable and matches your aesthetic preferences.

Planting and Care Instructions

  1. Prepare the Driftwood: Clean your driftwood to remove any remnants of salt or debris.
  2. Attach the Ivy: Position ivy cuttings within the natural crevices of the driftwood or use biodegradable ties.
  3. Water and Light: Ivy requires moderate watering. Keep the driftwood in a location with indirect sunlight.
  4. Pruning: Regularly prune the ivy to manage growth and maintain the shape of your design.

Maintaining Driftwood Ivy

Driftwood Ivy requires minimal upkeep. Ensure that the ivy is watered adequately but avoid over-watering, which can lead to root rot. With the right care, your Driftwood Ivy can thrive and bring a touch of natural elegance to your environment year-round.

Driftwood Ivy

The Benefits of Driftwood Ivy

Beyond aesthetics, Driftwood Ivy brings several benefits that contribute to both peace of mind and environmental sustainability.

Eco-Friendly Décor

Driftwood and ivy are both natural and biodegradable, making Driftwood Ivy a great option for eco-conscious individuals. By using materials that are often considered waste, you’re giving new life to something old.

Air Purification

Ivy is known for its air-purifying properties. By incorporating Driftwood Ivy into your living or working space, you’re not only adding beauty but also improving the air quality.

Mental Well-being

Having nature-inspired décor like Driftwood Ivy can have a positive impact on your mental well-being. Plants, in particular, are known to reduce stress and foster a sense of calm and relaxation.

Creative Applications of Driftwood Ivy

Driftwood Ivy’s versatility means there are limitless ways to use it in decorating spaces or creating engaging art forms.

Interiors

In an indoor setting, Driftwood Ivy can be used as a centerpiece or mounted on walls for a vibrant, living art piece. Its organic lines and rich textures add an element of natural artistry that can effortlessly complement a variety of styles, from rustic to modern.

Gardens and Patios

For outdoor spaces, Driftwood Ivy adds a touch of elegance. It can be used as a feature in garden landscapes, entwined around trellises or garden sculptures. On patios, it offers an eye-catching display that integrates seamlessly with other plant life.

Unique Art Projects

For those who enjoy artistic projects, Driftwood Ivy can be adapted into a range of crafts. Consider creating smaller pieces for desktop decor, or larger, more intricate designs for gallery displays or unique gifts.

Taking It a Step Further: DIY Driftwood Ivy Workshops

Interested in learning more about creating Driftwood Ivy? You might consider joining a workshop. The hands-on experience provides not only the skills but also the inspiration needed to make stunning Driftwood Ivy creations.

What to Expect from a Workshop

In these workshops, you can expect to learn about different types of driftwood and ivy, proper techniques for combining the two, and how to maintain your finished piece. Such experiences often promote community and creativity, as you share ideas and passion with like-minded individuals.

Sustainable Crafting with Driftwood Ivy

By choosing to work with Driftwood Ivy, you’re embracing a sustainable crafting practice. It’s all about fostering respect for nature, utilizing available resources wisely, and reveling in the aesthetic appeal that nature effortlessly provides.

Driftwood Sourcing

When gathering driftwood, it’s important to do so responsibly. Consider sourcing from areas less impacted by large collections to maintain environmental balance. Alternatively, many craft stores offer sustainably sourced driftwood for your projects.

Propagating Ivy

Ivy is easy to propagate, allowing you to grow new plants from cuttings. This supports a sustainable cycle and ensures you have a steady supply of ivy for future projects.

Conclusion

In the world of natural art, few pieces can match the organic allure and beauty of Driftwood Ivy. It represents more than just decoration; it is a testament to nature’s unfaltering ability to merge differing elements into a cohesive and captivating creation. Through Driftwood Ivy, you have the opportunity to bring a touch of nature’s wonder into your own space, in a way that embodies sustainability, tranquility, and timeless beauty.

By understanding how driftwood and ivy uniquely complement each other, and learning how to create this union yourself, you’re not just crafting a piece of art. You’re nurturing a connection to nature, enabling its magic to thrive in your environment, whether it be the lushness of a garden, the quiet of a personal retreat, or the warmth of a family home. This is Driftwood Ivy: A celebration of nature’s serene artistry, right at your fingertips.

Filed Under: Driftwood Ideas Tagged With: DIY Projects, Driftwood, Indoor Plants, Ivy

Driftwood Chandelier Diy

January 23, 2025 by admin

Have you ever imagined lighting up your space with a unique and eco-friendly chandelier? Crafting a driftwood chandelier not only transforms your home into a coastal haven but also adds a personal touch to your decor. Designing your own chandelier can be a delightful project, especially if you love the idea of incorporating natural elements into your interior design. Let’s embark on this creative journey and explore how you can bring a piece of nature indoors with a DIY driftwood chandelier.

Understanding Driftwood: Nature’s Art

Driftwood is simply wood that has been washed onto a shore or a beach by the action of winds, tides, or waves. It can be sourced from various types of wood and is often characterized by its smooth surface and unique shapes, courtesy of its journey through bodies of water. Using driftwood in your chandelier adds a natural and rustic charm to any room, celebrating the beauty of weathered wood.

The Appeal of Driftwood in Home Decor

Driftwood’s weathered appearance gives it a distinct charm that is sought after in interior design. It resonates with earthy, coastal vibes and offers a neutral base that complements various decor styles. Whether your home is modern, vintage, or rustic, driftwood can seamlessly blend in, offering a natural warmth.

Gathering Driftwood for Your Chandelier

The first step in creating your driftwood chandelier is sourcing the right pieces of wood. You might find this to be an engaging part of the project, as it involves a bit of exploration and connection with nature.

Where to Find Driftwood

Beachcombing is the most common method of gathering driftwood. Consider visiting local beaches, lakeshores, or riverbanks where driftwood is abundant. Remember to check local regulations or permission requirements for collecting natural materials from these areas. If you lack access to natural sources, driftwood can also be purchased from craft stores or online marketplaces.

Selecting the Right Pieces

When choosing driftwood, look for pieces that have interesting shapes and are free from decay. The size and shape of your driftwood will significantly influence the design of your chandelier. Aim for a variety of sizes to create depth and dimension in your final piece. Ensure that your driftwood is clean, dry, and free from pests before bringing them into your living space.

Driftwood Chandelier Diy

Designing Your Driftwood Chandelier

Envision your final piece before beginning assembly. Do you want a sprawling sculptural display, or something minimalistic? Planning ahead will make the construction process smoother.

Styles and Configurations

Driftwood chandeliers can vary widely in style. You might opt for a simple design with a few hanging pieces of driftwood or create elaborate constructions with multiple branches interwoven. Sketch out your ideas or browse online for inspiration to get a clearer idea of your preferred style.

Materials and Tools Needed

Creating a driftwood chandelier involves more than just wood. You’ll need a variety of materials and tools to bring your vision to life. Here’s a checklist to get you started:

MaterialsTools
Driftwood piecesDrill
Light fixturesSaw
Electrical wiringSandpaper
Hooks or hanging hardwarePliers
Chain or ropeScrewdriver
Wood glue or epoxyMeasuring tape

Steps to Assemble Your Driftwood Chandelier

Let’s break down the process into easy-to-follow steps. Crafting your chandelier involves a balance of creativity and technique. Below are some essential steps to guide you through.

Preparing Your Driftwood

Before you start assembling, it’s crucial to prepare your pieces. Sand the driftwood to remove any rough edges and decide on a cleaning method to ensure they’re free of salt and debris. Some recommend washing with fresh water and allowing the wood to dry completely in the sun.

Assembling the Frame

  1. Plan the Structure: Use the designs you’ve drawn or found online. Start formulating the main frame by identifying the largest and strongest pieces of driftwood to create a stable base.

  2. Secure the Frame: Use wood glue or epoxy to attach your driftwood pieces. Allow it to dry before you proceed to the next step.

  3. Drill Support Holes: Ensure your drill has the correct bit size for the screws or hooks you will use. Create holes where you want to attach other pieces or hanging fixtures.

Installing Electrical Components

Integrating the electrical elements into your chandelier is a crucial step. It involves attaching the light fixtures and running the wiring through or alongside your driftwood.

  1. Positioning the Lighting: Decide where each light will be placed. You might choose several small bulbs or a single large one depending on your design.

  2. Running the Wiring: Carefully thread the electrical wires through or alongside your driftwood. Ensure connections are secure and insulated.

  3. Safety First: Before you connect the electricity, test your chandelier wiring with a multimeter to ensure there are no shorts or open circuits.

Adding Finishing Touches

Finishing touches can make a significant difference in the final appearance of your chandelier.

  • Sealing the Wood: Consider applying a matte sealant to protect the driftwood from moisture and enhance its natural color.
  • Adjustments and Balance: Balance the chandelier by adjusting the hanging chains or ropes. Ensure it hangs straight and stable.
  • Final Assembly: Attach any additional decorative elements you wish, such as shells or crystals.

Driftwood Chandelier Diy

Installing Your Driftwood Chandelier

Once assembled, carefully hang your chandelier in its designated location. Given its weight, ensure the ceiling’s structural support is adequate. Installing a chandelier may require a second pair of hands or professional assistance.

Balancing and Securing

As you hang the chandelier, constantly check and adjust its balance. Use a spirit level to ensure it is even. Secure the fixture with sturdy hooks or anchors adequate for its weight.

Testing the Lighting

Turn on the light to test your work. This is an exciting moment where you see your creation in action. Ensure that the lighting is even and not obstructed by any wood pieces.

Caring for Your Driftwood Chandelier

A driftwood chandelier, like any piece of art, requires care to maintain its beauty over time.

Regular Cleaning

Dust your chandelier regularly to prevent buildup. Use a soft brush or cloth to lightly clean the surfaces. Avoid using any water-based cleaning products, as moisture could damage the wood.

Periodic Maintenance

Check the electrical connections periodically to ensure everything is functioning safely. Tighten any loose nuts, bolts, or screws to maintain structural integrity. If needed, make slight adjustments to the balance or orientation.

Conclusion: Enjoy Your Creation

Creating a driftwood chandelier is not just about the end product but the journey of creativity and craftsmanship it involves. Each piece of driftwood tells a story of its own, merging into a collective tale within your home. Let your chandelier be a centerpiece of conversation and a testament to your creativity and environmental consciousness. As you enjoy the ambient glow of your handcrafted masterpiece, you’ll not only appreciate its uniqueness but also the sustainable choices involved in its creation. Whether you’ve crafted it for detailed design or simplicity, the natural elegance of driftwood will radiate warmth and character across your living space.

Filed Under: Driftwood Ideas Tagged With: chandelier, craft, DIY, Driftwood, Lighting

Driftwood Christmas Ornaments

January 22, 2025 by admin

Have you ever wondered how you can bring a touch of nature into your holiday decorations? If traditional Christmas ornaments are feeling a bit too predictable this year, why not consider crafting your own driftwood Christmas ornaments? This unique approach combines the rustic beauty of the beach with the festive spirit of the season, creating decorations that are both meaningful and beautiful.

Driftwood Christmas Ornaments

What is Driftwood?

Driftwood refers to the remnants of trees that have been washed onto the shore by the action of winds, tides, or waves. Over time, the abrasive action of water smooths and softens these pieces, providing a beautiful, weathered appearance that appeals to many. This type of wood can range from small sticks to large branches, each offering a unique shape and texture that makes it perfect for crafting.

Where to Find Driftwood

Locating driftwood can be an enjoyable and relaxing part of the crafting process. Typically, it’s found along beaches, riverbanks, or lakeshores. You might plan a day to visit a nearby beach or nature walk to gather your supplies, making sure to respect local guidelines regarding collection. As you gather, pay attention to the variety of shapes and sizes, as each piece could inspire a different creative idea.

Preparing Your Driftwood

Before you begin creating ornaments, it’s important to prepare your driftwood properly. Preparation ensures the wood is clean, pest-free, and ready for artistic use. Start by removing any debris, dirt, or seaweed clinging to the wood. Next, soak the pieces in a mixture of bleach and water for a few hours to disinfect and sanitize. Rinse them off thoroughly and allow them to dry completely, which might take a few days depending on their size and density.

Getting Started with Driftwood Christmas Ornaments

Crafting these ornaments doesn’t require extensive experience, making it a perfect holiday project for individuals, families, or groups of friends. The rustic charm of driftwood complements any decor style, from modern minimalism to cozy rustic themes.

Tools and Materials You’ll Need

To create driftwood ornaments, gather a few basic tools and materials. Here’s a quick list to get you prepared:

ToolsMaterials
Glue gun and glue sticksAssortment of driftwood pieces
Drill with small drill bitTwine, string, or thin wire
SandpaperShells, beads, or small embellishments
Paint or wood stain (optional)Hooks or loops for hanging

These materials can often be found in crafting stores or around your home, ensuring you don’t need to invest much to begin your project.

Combining Driftwood with Other Elements

For a more dynamic ornament design, consider combining driftwood with other natural materials. Shells, pebbles, twine, and beads add diversity in texture and style. You can also incorporate seasonal touches like pinecones or holly berries to enhance the holiday feel.

Crafting Your Driftwood Christmas Ornaments

Now that your wood is clean and your materials are gathered, it’s time to begin crafting. Start with basic designs and gradually experiment with more complex shapes and embellishments as your confidence grows.

Simple Tree Ornaments

One of the simplest designs to create is a driftwood Christmas tree ornament. Start by selecting natural pieces of varying lengths. Assemble them from smallest to largest in a triangular tree shape. Use a glue gun to secure the pieces as you stack them. Finally, attach a loop of string or wire to the top to hang your tree on the Christmas tree.

Driftwood Stars

Stars symbolize hope and cheer during the festive season, making them the perfect subject for ornaments. To craft a star, select five strong, straight pieces of similar length. Arrange them into a star shape and secure each intersection with glue. Allow the glue to dry thoroughly. You can leave the wood natural or paint it for a pop of color.

Driftwood and Shell Angels

A combination of driftwood and shells can create an elegant angel ornament. Use a larger piece of driftwood for the body and attach two symmetrical shells as wings. Use smaller beads or stones to symbolize the head or halo. This blend of materials results in a beautifully delicate ornament sure to stand out among more traditional decorations.

Adding Personal Touches

To make your driftwood ornaments truly unique, consider adding personal touches. Vinegar-stained or painted wood can add a pop of color, while carving initials or seasonal phrases into the wood gives them a personal touch. The inclusion of family photos, miniature seasonal symbols, or even handwritten messages on small papers or tags offers a personal connection that both you and your family can cherish for years to come.

Personalization with Paint

If you’re looking to add color or pattern to your driftwood ornaments, acrylic paints are an excellent choice. Consider soft whites, golds, or silvers to keep a festive palette. Geometric shapes, polka dots, or stripes can create a modern touch, while vintage motifs provide a timeless feel.

Adding Names or Dates

Engraving or writing names, initials, or the year can make each ornament a cherished keepsake. Tools for wood engraving can be precise and easy to use, offering a professional finish. Alternatively, small tags or labels can be securely tied to the ornaments for a more relaxed approach.

Driftwood Christmas Ornaments

Displaying Your Driftwood Ornaments

Once your ornaments are complete, it’s time to display them! Their natural beauty stands out on a traditional Christmas tree, but there are many creative ways to incorporate them into your home decor. Use them as centerpiece decorations, incorporate them into wreaths, or hang them along stair banisters for a touch of rustic charm throughout your living spaces.

Non-Traditional Displays

Instead of only hanging them on your Christmas tree, why not add a bit of charm to your table settings or gift packages? Tying an ornament to a wrapped gift can provide a unique, reusable decoration that serves a dual purpose. Placing a small cluster in a decorative bowl can also create a table centerpiece that draws on natural elements.

Why Choose Driftwood Ornaments?

There are many excellent reasons to choose driftwood ornaments for your holiday decor. For one, they bring the outdoors inside, evoking the calming, natural beauty of the beach, even in winter. They are also eco-friendly, utilizing pieces of wood that would otherwise be discarded, and reimagining them into beautiful, festive decorations.

Environmental Impact

Using driftwood reduces waste and contributes to lessening the impact on the environment. Every piece repurposed is one less item heading to the landfill or adding to pollution, making it a sustainable crafting choice. For environmentally conscious consumers, creating driftwood ornaments is a way to celebrate holidays without compromising on green values.

Emotional Significance

Each piece of driftwood tells a story and forms a unique, tactile link to the natural world. As you collect and craft with these pieces, you create more than just decor; you’re crafting memories. Whether for your own tree or as a thoughtful gift, driftwood ornaments carry a personal touch that store-bought items simply can’t replicate.

Troubleshooting Common Issues

Like any crafting project, you might encounter some challenges along the way. From glue issues to drilling mishaps, it’s good to know potential solutions to common problems when crafting with driftwood.

Glue Not Sticking Well

If your glue isn’t adhering properly, consider using a stronger adhesive. Ensure the pieces are dry and free of debris before applying glue, as moisture or dirt can affect adhesion. Epoxy resin can offer a strong, durable bond, particularly for heavier pieces.

Driftwood Breaking or Splintering

Soft driftwood can sometimes break or splinter when worked on. To avoid this, handle pieces with care, especially when drilling. If you need to drill into fragile pieces, start with a small drill bit and increase size gradually to minimize stress on the wood.

Conclusion

Driftwood Christmas ornaments are a unique, beautiful, and eco-friendly way to celebrate the holiday season. With a bit of creativity and a few gathered materials, you can make personalized decorations that capture the spirit of the season. Each ornament not only decorates your home but also carries the memories of crafting and gathering with loved ones. As you enjoy your handcrafted creations, take pride in knowing they embody the harmony of nature and festive cheer. While simple in appearance, these ornaments offer a depth of beauty that resonates well beyond their physical form.

Filed Under: Driftwood Ideas Tagged With: christmas, crafting, DIY, Driftwood, Ornaments

Retique It Driftwood

January 22, 2025 by admin

Have you ever found yourself standing in front of a piece of furniture, paintbrush in hand, dreaming of giving it a new life with a rustic, weathered look but unsure where to begin? If you have, you’re not alone. There’s something undeniably charming about furniture that carries a driftwood finish. It evokes feelings of relaxation, nature, and timeless beauty. Today, we’re going to explore the wonderful world of giving your furniture a driftwood finish using Retique It Driftwood—a hassle-free solution for transforming your home décor.

Retique It Driftwood

What is Retique It Driftwood?

Retique It Driftwood is a uniquely formulated paint product that empowers you to achieve the much-coveted driftwood look without the need to scour the beaches for the perfect piece or undergo intensive stripping and sanding. Retique It products are water-based, non-toxic, and safe for indoor use, making them a perfect choice for DIY enthusiasts looking to embrace a creative project.

The Driftwood Aesthetic

Driftwood aesthetics bring about a sense of tranquility and a touch of nature into living spaces. These finishes are characterized by their weathered, grayish hues and textured appearance. They mimic wood that has been smoothed by the oceans and wind—an ideal fit for those aiming to create a coastal or farmhouse ambiance in their homes.

Why Choose Retique It?

There are myriad reasons to choose Retique It Driftwood over other methods or products:

  • Simplicity: Retique It is designed to be easy to use, even if you’re relatively new to the DIY scene.
  • Versatility: It works on various surfaces including wood, metal, and even laminate without the need for extensive preparatory work.
  • Eco-friendly: Retique It prides itself on being environmentally safe, which means you can work safely indoors without breathing in harmful chemicals.

Preparing Your Project

Before you begin painting, proper preparation will ensure your final product looks professional and lasts for years to come. Here, we’ll guide you through the necessary steps to set you up for success.

Selecting Your Furniture Piece

First things first, identify the piece you wish to transform. Whether it’s a tired wooden bench, a set of chairs, or an outdated dresser, Retique It Driftwood can rejuvenate its appearance. Consider the furniture’s structure and sturdiness, as your efforts will be best spent on pieces that are worth the makeover.

Gathering Supplies

Once you have your project piece in mind, gather the following supplies:

  • Retique It Driftwood kit
  • Paintbrushes (various sizes)
  • Sandpaper or sanding block
  • Damp cloth
  • Drop cloth or newspapers
  • Painter’s tape

Having all your supplies at the ready will make the process enjoyable and seamless.

Preparing the Surface

Start by cleaning the surface of your furniture. Remove any dust, dirt, or grease using a damp cloth. If the piece has a high gloss finish, lightly sand it to help the paint adhere better and to create a more porous surface. Wipe away any dust with a clean cloth after sanding.

Applying the Driftwood Finish

Here comes the exciting part! Applying Retique It Driftwood is straightforward, and with a few tips, you’ll become a pro in no time.

Step-by-Step Application

  1. Priming (Optional): If your furniture is extremely dark or stained, you might want to apply a base coat or primer to ensure the Driftwood color stands out. Retique It’s Ultra White color can serve well as a primer.

  2. Painting: Using your paintbrush, begin applying the Retique It Driftwood in even strokes. Start at one end of your piece and work your way across, ensuring smooth, consistent coverage.

  3. First Coat Drying: Allow the first coat to dry. This process can take 30 minutes to an hour, depending on weather conditions and humidity.

  4. Second Coat (If Needed): Assess whether you need a second coat to achieve your desired opacity and depth. Apply it using the same technique as the first.

  5. Adding Texture: To enhance the driftwood effect, you may lightly sand certain areas or use a brush to create wood grain textures before the paint fully cures.

Final Sealing

Once you are satisfied with the look and have allowed the paint to dry completely, consider applying a sealant to protect your retique and ensure longevity. A water-based polyurethane will lock in color and enhance durability without compromising the finish.

Decorating with Driftwood-Touched Pieces

Showcasing your newly refreshed piece is all about celebrating the natural, calming vibes that driftwood elements bring into your space. Here are a few tips for integrating your creation into your décor.

Ideal Settings for Driftwood Accents

  • Coastal Theme: Embrace other soft blues, whites, and sea life décor elements for an easy coastal vibe.
  • Farmhouse Chic: Pair with shiplap, sparse greenery, and simple textiles like burlap or linen for that modern farmhouse feel.
  • Minimalistic Paradise: Allow your driftwood piece to be the focal point in a minimalist room devoid of clutter.

Complementary Color Schemes

Driftwood tones naturally complement neutral palettes. Shades of gray, cream, and pastel hues can further highlight the finish’s unique characteristics. Textiles such as cozy throws or pillows can add layers of texture without overpowering your piece.

Retique It Driftwood

Caring for Your Driftwood Finish

Ensuring your project retains its charm involves taking simple steps to maintain and protect the finish.

Cleaning

Regularly dust your piece with a soft, dry cloth. Avoid using harsh chemicals or cleansers that could strip or dull the paint.

Repair

Driftwood finishes thoroughly disguise minor imperfections, but if significant wear occurs, touch-up paint can be applied sparingly to affected areas.

Seasonal Care

Wood tends to expand and contract with changes in humidity. Consider using a humidifier during dry months and protecting your piece from direct sunlight to preserve the paint.

FAQs and Troubleshooting

Let’s address some common questions and potential hiccups you might encounter on your journey to driftwood mastery.

Can I Use Retique It Driftwood on Outdoor Furniture?

While Retique It Driftwood is versatile, it’s primarily formulated for indoor use. If you want to use it on outdoor furniture, ensure you apply a robust, outdoor-grade sealant to protect against weather conditions.

What if My Paint Peels?

Peeling may occur if the surface wasn’t adequately prepared. Always ensure your piece is clean and slightly sanded before applying the paint. You can also revisit sections that peel by lightly sanding the area and repainting.

How Long Should I Wait Before Using Sealed Pieces?

Allow the sealant to cure for at least 24 hours before using your furniture. This helps to harden the surface and prevent scratches or marks.

Embrace the Transformation

Working with Retique It Driftwood can redefine the way you think about furniture and interior décor. No longer do old, outdated pieces need to end up in the dumpster. By investing a bit of time and creativity, you can bring new life into your home with beautiful, enigmatic furniture that tells a story of timeless, driftwood elegance. Now, imagine the new conversations that will spark when guests admire your handiwork.

Your journey into the world of home transformation starts here—with a brush, a little vision, and the incredible versatility of Retique It Driftwood. Remember, each piece is unique; as you uncover the best techniques and styles, let your personality and creativity shine through each stroke and finished project.

Filed Under: Driftwood Ideas Tagged With: Chalk Paint, DIY, Driftwood, Furniture Paint, Retique It

  • « Previous Page
  • Page 1
  • …
  • Page 24
  • Page 25
  • Page 26
  • Page 27
  • Page 28
  • …
  • Page 162
  • Next Page »

Primary Sidebar

Driftwood4us.com, is a participant in the Amazon Services LLC Associates Program, an affiliate advertising program designed to provide a means for sites to earn advertising fees by advertising and linking to amazon.com.