• Skip to main content
  • Skip to primary sidebar
  • Terms and Conditions
  • Privacy Policy
  • Contact

Driftwood 4 Us

Just About Driftwood

Handmade

Driftwood Elephant

March 10, 2025 by admin

Have you ever wandered along the shoreline, marveling at the treasures the waves washed ashore? The beach is a place of fascinating discoveries, each piece of driftwood telling a unique story of its journey through the ocean. Among these are driftwood sculptures that capture the imagination, particularly those shaped like elephants. These pieces evoke a sense of wonder and curiosity, inviting you to explore their story further.

What is Driftwood?

Driftwood refers to pieces of wood that have been washed onto a shore or beach by the forces of winds, tides, or waves. This natural process transforms them, imparting a weathered and often unique appearance. Driftwood is celebrated for its artistic aesthetic and ecological role in coastal ecosystems. It serves as a habitat for various marine creatures and is a key component of shoreline stabilization.

Driftwood’s journey begins when trees or branches fall into the water. As they traverse the currents, these wood pieces are shaped and smoothed by the constant friction of water and sediments. Eventually, they find their resting place on a beach where people collect them for various uses, including art, decor, and even furniture-making.

Why Driftwood Elephants?

The allure of driftwood lies in its uniqueness and beauty—qualities that become even more charming when transformed into sculptures resembling elephants. These majestic creatures symbolize strength, wisdom, and memory in many cultures, making them an appealing subject for artistic exploration. Creating a driftwood elephant sculpture allows artists and enthusiasts to blend the organic elegance of driftwood with the grandeur of elephants.

Cultural Significance

Elephants hold significant roles in various cultures around the world. In Asia, they are seen as symbols of royalty and wisdom. In Hinduism, the elephant-headed god Ganesha is a deity of fortune and remover of obstacles. African cultures often view elephants as symbols of strength and longevity. The cultural depth associated with elephants enhances the appeal and emotional connection people have with driftwood elephant sculptures.

Artistic Expression

Making a driftwood elephant is both a creative and technical endeavor. Artists must not only capture the essence of an elephant but also respect the natural form of the driftwood. This combination of creativity and craftsmanship results in sculptures that are as varied and remarkable as the driftwood pieces from which they are made.

Driftwood Elephant

How to Create a Driftwood Elephant

Creating a driftwood elephant sculpture is a fascinating process that combines your imagination, artistic skills, and a keen eye for detail. Here is a step-by-step guide to help you create your own driftwood masterpiece.

Materials Needed

To get started, it’s essential to gather the right materials and tools. Here’s a handy table outlining what you’ll need:

Material / ToolPurpose
Driftwood piecesMain material for the sculpture
Strong adhesive or nailsFor securing pieces together
SawTo cut and shape driftwood as needed
SandpaperTo smooth rough edges
Protective glovesTo handle driftwood safely
WireFor reinforcement and structure
Paint or sealantOptional, for finishing touches

Selecting the Right Driftwood

The essence of your sculpture begins with selecting the right pieces of driftwood. Look for pieces that naturally resemble parts of an elephant such as the trunk, legs, and ears. Consider the size of each piece and how it will contribute to the overall structure and balance of your sculpture.

Sculpting Process

  1. Conceptualize Your Design: Before assembling, have a rough idea of how you want your sculpture to look. Sketching your design can be helpful.

  2. Assemble the Base: Begin by constructing the base of the elephant. Use larger driftwood pieces to form the body, as this will provide stability.

  3. Add Details: Gradually build upon the base by adding detailed features like the trunk, ears, and tusks using smaller pieces of driftwood. Secure them with adhesive or nails.

  4. Reinforce Structure: Use wire to add structural strength, especially for protruding parts like the trunk and ears. Ensure everything is balanced and stable.

  5. Finishing Touches: Use sandpaper to smooth any sharp edges. If desired, apply a paint or sealant to protect the wood and add to its aesthetic appeal, bringing out the natural colors and textures of the driftwood.

Benefits of Driftwood Art

Creating a driftwood elephant isn’t just a rewarding artistic endeavor; it’s also beneficial for your well-being and the environment.

Environmental Benefits

Using driftwood promotes recycling and repurposing natural materials, reducing the need for new resources. Driftwood’s journey from water to shore is a testament to nature’s transformative power, and utilizing this material honors that cycle by incorporating it into art.

Therapeutic Effects

Artistic activities like sculpting can have calming effects on your mind and body. Working with driftwood, especially in a serene coastal setting, can be a meditative process. The tactile nature of the wood, combined with the creative process of transforming it into art, provides a soothing and satisfying experience.

Contribution to Art and Design

Driftwood art holds a special place in modern art and interior design. Sculptures like driftwood elephants act as striking pieces of decor that bring a touch of nature into homes and galleries. They are not just conversation starters but also enhance the aesthetic appeal of a space, making your living environment more inviting and refreshing.

Driftwood Elephant

Where to Display Your Driftwood Elephant

Once your driftwood elephant is complete, finding the perfect spot to display it is the next exciting challenge. Whether intended for indoor or outdoor settings, each choice reflects your style and maximizes the sculpture’s impact.

Home Decor

In a home setting, place your driftwood elephant in a well-lit area where its texture and craftsmanship can be appreciated. Ideal locations include living rooms, entryways, or even dedicated art corners. The rustic charm of driftwood complements various interior styles, blending seamlessly with both modern and traditional designs.

Garden and Outdoor Spaces

For outdoor display, consider gardens or patios where the natural element of driftwood coincides harmoniously with the surrounding landscape. Protecting the sculpture from excessive moisture and direct sunlight ensures its longevity, though the natural weathering can also enhance its organic charm over time.

Public Spaces and Galleries

Driftwood elephants make compelling exhibits in public spaces, parks, and art galleries. They captivate viewers with their intricate details and majestic presence, offering a unique blend of natural and artistic beauty. Public displays also provide a broader audience the chance to connect with and appreciate this form of sculpture.

Caring for Your Driftwood Elephant

Ensuring the longevity and beauty of your driftwood elephant requires some simple maintenance steps.

Regular Dusting

Keeping the sculpture free of dust and debris helps maintain its appearance. Use a soft cloth or brush to gently remove surface dust, ensuring that fine details and textures remain visible and appealing.

Protection from Elements

Though driftwood is naturally weathered, continuous exposure to harsh elements can harm your sculpture. For outdoor displays, consider placing the piece under a covered area or using a protective sealant to shield it from moisture and UV rays.

Periodic Inspections

Regularly inspect your sculpture for any loose pieces or signs of damage. Address any issues promptly by re-securing joints or applying additional adhesive as needed. This precaution ensures your driftwood elephant remains stable and attractive for years.

Final Thoughts

Crafting a driftwood elephant is more than an artistic project; it’s a journey of creativity, expression, and connection with nature. This endeavor allows you to appreciate the beauty of natural materials and the endless possibilities they hold for artistic creation. Whether prominently displayed at home or in a public art space, your driftwood elephant will surely captivate the hearts and minds of those who behold its elegance and craftsmanship. So next time you find yourself by the shoreline, remember—each piece of driftwood carries the potential for majestic artistry as timeless as the ocean itself.

Filed Under: Driftwood Ideas Tagged With: driftwood art, Eco-friendly, Elephant Sculpture, Handmade, Recycled Materials

Driftwood Knife

March 9, 2025 by admin

Have you ever thought about the tales a piece of driftwood could tell, or how such a simple object could be transformed into a beautiful and unique tool like a driftwood knife? This rustic yet elegant creation can bring the stories of the sea into your home or craft collection. Let’s journey into the world of driftwood knives where artistry, craftsmanship, and nature converge.

Understanding Driftwood

Driftwood is essentially wood that has been washed onto the shore by tides or waves. Over time, the relentless motion of the ocean smoothes the wood, giving it a unique texture and appearance. Each piece of driftwood is a testament to nature’s artistry, showcasing unique shapes and the weathering of time.

Origins and Formation

Driftwood begins its journey in forests or as parts of trees lining riverbanks. When floods invade these areas, trees can break and be carried downstream. Lost to torrents, they find their way to bodies of water where, over time, they are sculpted by the sea. This process can take years, turning raw, rugged wood into something visibly softer and more aesthetic.

Nature’s Unique Touch

The natural process of erosion by water, sun, and wind adds a distinctive charm to driftwood. It isn’t just wood; it is a piece of history shaped by natural forces. Each contour and mark could narrate decades of travel across water, giving it a character no other piece of wood has.

The Concept of a Driftwood Knife

A driftwood knife combines practical utility with artistic value. Imagine wielding a tool that’s not only functional but also a conversation starter about nature and craftsmanship.

A Fusion of Craft and Nature

Creating a driftwood knife involves crafting a blade and combining it with driftwood to create a handle. This blend of man-made and nature-made objects results in a tool that is both practical and decorative. It’s both an art form and a testament to sustainability.

Uses and Appeal

While not your typical utility knife, a driftwood knife is appealing to collectors of artisanal goods, chefs, and outdoors enthusiasts alike. Its uniqueness lies in its non-uniformity; no two driftwood knives are identical. The naturally shaped handle may cater to your hands with surprising comfort, making tasks more pleasant.

Driftwood Knife

Crafting a Driftwood Knife

Creating a driftwood knife is no simple feat. It requires a deep understanding of materials and mastery of tools. This craftsmanship respects both the heritage of metalwork and the beauty found in natural objects.

Selecting the Driftwood

The journey starts with choosing the right piece of driftwood. The best wood for a knife handle is dense and has a favorable grain pattern. You also need to ensure that the wood is dry enough to be worked with. These characteristics ensure durability and a visually appealing finish.

Material Selection for the Knife Blade

Once you have the driftwood, attention turns to the blade. Stainless steel, carbon steel, or Damascus steel are popular choices. Each has its pros and cons: stainless steel is rust-resistant, carbon steel holds a sharp edge, and Damascus steel offers stunning patterns. Your choice should align with your intended use and aesthetic preference.

Creating the Knife Blade

Forging the blade is both science and art. This is where metal is heated and shaped using traditional methods. Intricate finishing touches are applied to enhance both usability and beauty. The process requires skill and patience, as every hammer strike is deliberate and every step carefully executed.

Shaping the Driftwood Handle

Step by step, the wood is cut, shaped, and sanded to fit snugly in your hand while also housing the blade securely. Attention to detail is critical, as the harmony between the blade and handle ensures a long-lasting bond. Finally, sealing and treating the wood protects it from moisture and enhances its natural patterns.

Joining Blade and Handle

This is the final but most crucial step in bringing your driftwood knife to life. Bonding materials join the blade to the handle securely. Traditional methods might involve rivets or pins, but modern adhesives can also be effective. The balance between handle and blade defines the overall functionality and aesthetics of the knife.

Driftwood Knife Maintenance

You don’t just own a driftwood knife; you also need to maintain it. Proper care is critical to retaining its beauty and functionality over time.

Cleaning and Storing

After every use, clean your knife gently with a damp cloth and dry it immediately afterward. Avoid using harsh chemicals or immersing it in water, as these can damage both metal and wood. For storage, keep it in a dry place, preferably in a protective sheath or wrapped in cloth.

Regular Maintenance Tips

Regular maintenance involves oiling the handle with natural oils like linseed or mineral oil to preserve the wood’s luster and prevent it from drying out. The blade might require sharpening using a whetstone or specialized sharpeners. Proper care not only prolongs its life but also enhances its appeal.

Driftwood Knife

The Aesthetic and Symbolic Appeal

Beyond practical uses, a driftwood knife represents a bond between nature and mankind’s craftsmanship. It symbolizes resilience, sustainability, and the elegant union of two natural elements.

Symbolism and Craftsmanship

Such a knife is more than a tool; it’s a representation of years of natural formation and hours of skilled craftsmanship. The driftwood speaks to time and history, while the blade speaks to human ingenuity and skill.

Unique Artistry

Each driftwood knife is unique, no two pieces are ever the same. This artistic individuality appeals to collectors and art enthusiasts alike. Displaying the knife in your home or office can serve as a unique focal point — encouraging dialogue and admiration.

Where to Find a Driftwood Knife

If you’re fascinated by the idea of owning a driftwood knife, several avenues can lead you to the perfect piece. Whether seeking something custom or purchasing through an established retailer, options abound.

Artisans and Custom Makers

Supporting individual artisans who specialize in driftwood knives offers a bespoke experience. They often allow customization from blade to handle and personalized engravings, offering you a truly one-of-a-kind piece.

Online Marketplaces

Driftwood knives can also be purchased from online marketplaces where artisans or larger manufacturers sell their creations. E-commerce platforms can offer detailed specifications, customer reviews, and comparisons of products, making it easier for you to find exactly what you’re looking for.

Sustainable Art: Supporting Eco-friendly Craftsmanship

When purchasing a driftwood knife, you’re supporting sustainable art, as driftwood itself is an eco-friendly material repurposed into something new.

Repurposing Nature’s Offerings

The creation of these knives involves using materials naturally cast away by nature. By transforming this discarded wood into a functional item, we’re both reducing waste and celebrating its aesthetic appeal.

The Eco-friendly Cut

By investing in a driftwood knife, you’re embracing a piece of craftsmanship that respects the environment. It’s a small but meaningful step towards more sustainable living, where functionality and beauty cleverly align with eco-consciousness.

Conclusion

Crafting and owning a driftwood knife is a journey in itself — from the selection of materials to the admiration as a finished piece. Each knife is a seamless blend of history, art, nature, and utility that tells a story far greater than initially perceived. These pieces embody the harmony of nature and human ingenuity, making them perfect gifts, collectible items, and daily tools with a difference.

So, have you imagined holding in your hand a piece of history seamlessly married with craftsmanship? With each detail contributing to its legacy, a driftwood knife is indeed a remarkable creation. Whether you decide to make your own or invest in one, it’s clear that this unique tool is much more than just a knife. It’s a conversation between the elements and human artistry.

Filed Under: Driftwood Ideas Tagged With: DIY, Driftwood, Handmade, Knife, Woodworking

Driftwood Knitting Pattern

March 7, 2025 by admin

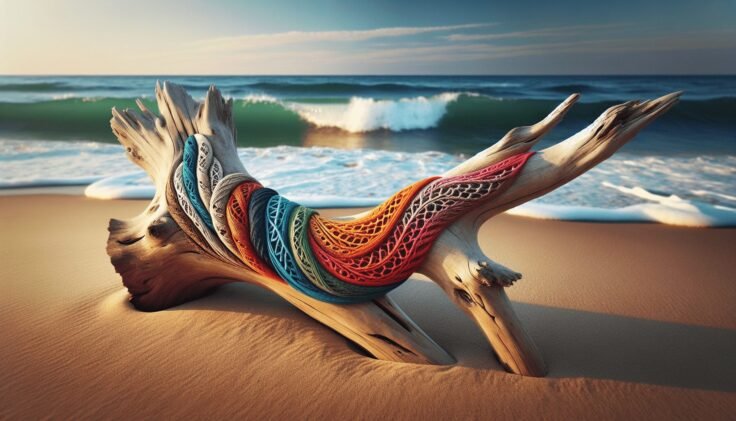
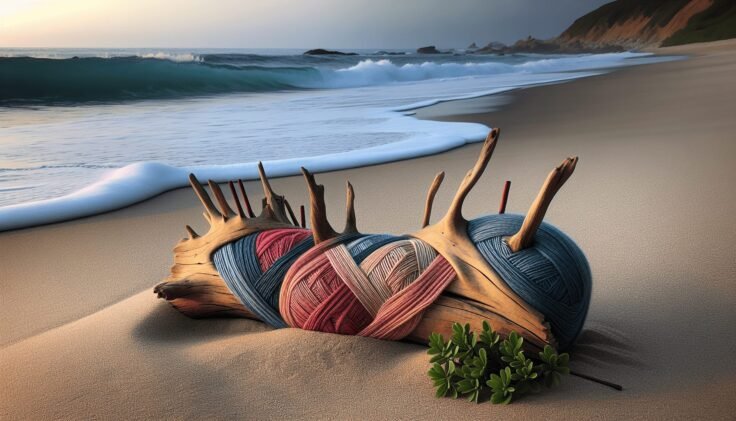
Have you ever wondered how a simple stitch can transform into a beautiful work of art? Knitting can sometimes feel like a magical process, and one of the splendid patterns that can bring this magic to life is the Driftwood Knitting Pattern. Whether you’re new to knitting or a seasoned pro, exploring the Driftwood Knitting Pattern can open up a world of creativity and relaxation.

Driftwood Knitting Pattern

What is the Driftwood Knitting Pattern?

The Driftwood Knitting Pattern is known for its natural, organic lines and textures that mimic the appearance of driftwood found on beaches. It’s a versatile pattern that brings a sense of tranquility and earthiness to your projects. This pattern is perfect for creating items that exude warmth and comfort, making them ideal for cozy accessories and home decor.

Origin and Inspiration

Every pattern has a story, and the Driftwood Knitting Pattern is no exception. The inspiration behind this pattern comes from the serene imagery of driftwood along a shoreline. Each piece of driftwood has a unique texture shaped by the waves and winds, much like how each knitted piece will have its own unique texture when using this pattern.

Why Choose Driftwood?

Choosing the Driftwood Knitting Pattern over others is often about the aesthetic and tactile experience it offers. When you knit with this pattern, you’re not just creating an object, but you’re also inviting a bit of nature’s rustic elegance into your project. It’s also a forgiving pattern, making it a great choice for both beginners and experienced knitters.

Tools and Materials Needed

Before you start any knitting project, gathering the right tools and materials is crucial. For the Driftwood Knitting Pattern, you’ll need a few specific items to get started on your creative journey.

Yarn Selection

The choice of yarn can significantly affect the outcome of your project. For the Driftwood pattern, you might want to choose yarns with natural hues and textures. Think earthy tones such as greys, browns, and creamy whites, which can enhance the driftwood effect. Natural fibers like wool or cotton can add to the rustic feel.

Needles and Other Tools

Knitting needles are your primary tools. Depending on your project and yarn gauge, you might opt for size 6 to 8 needles, which are commonly used for general DK weight yarns. Circular needles can be handy for larger projects, ensuring that your stitches are evenly distributed and less likely to fall off.

Alongside needles, you’ll need stitch markers to keep track of your pattern repeats, a tape measure for checking dimensions, and a tapestry needle for weaving in ends once your project is complete.

Understanding the Basic Driftwood Stitch

Mastering the basic stitch for the Driftwood Knitting Pattern is the first step towards creating something beautiful. Once you comprehend the fundamentals, you can gradually take on more complex projects with confidence.

The Knit and Purl Foundation

At its core, the Driftwood Pattern relies on a combination of knit and purl stitches. These are the foundation of most knitting patterns. In the Driftwood Pattern, these stitches work together to create the distinctive ridged and smooth textures reminiscent of weathered wood.

  • Knit Stitch: This stitch is created by inserting the needle through the front of the loop on the left needle from left to right, wrapping the yarn around the right needle, and pulling the new loop through. It’s the most basic type of stitch in knitting.

  • Purl Stitch: In contrast, the purl stitch involves inserting the needle from right to left in front of the loop on the left needle, then wrapping the yarn around the right needle before pulling the loop through. The purl stitch creates a bumpier texture on the knitted fabric.

Combining Stitches for Texture

When knitting the Driftwood pattern, you’ll often switch between knit and purl stitches to create textured rows that mimic the uneven surfaces of driftwood. A typical sequence might involve several rows of knitted stitches followed by a shift to purls, creating bands of texture across the fabric.

Step-by-Step Guide to Knitting the Driftwood Pattern

Having a structured approach makes it easier to conquer any pattern. Below is a step-by-step guide to establishing the Driftwood Knitting Pattern in your project.

Casting On

Start with a simple cast-on method. The Long-Tail cast-on is a favorite among knitters for its balance between ease and stretch. Remember that the number of stitches you cast on should be a multiple of the pattern repeat for the Driftwood effect.

Establishing the Pattern

With your stitches cast on, follow a rhythm of knitting and purling. A sample row might look like:

  1. Knit three stitches.
  2. Purl two stitches.
  3. Repeat this sequence until the end of the row.

This simple repeat creates the undulating texture that gives the Driftwood pattern its unique character.

Example Repeat in Table Format:

Stitch TypeNumber of Stitches
Knit3
Purl2

Continuing the Knit

As you progress, maintain consistency in your stitching pattern. Resolve to regularly count your stitches to avoid mistakes, especially if you’re a beginner. Mistakes can alter the final look but are often part of the learning process.

Binding Off

Once your piece reaches the desired length, it’s time to bind off. To maintain elasticity in your piece, use a simple bind-off method, which involves knitting two stitches together, passing the first over the second, and continuing along the row.

Driftwood Knitting Pattern

Common Mistakes and How to Avoid Them

Even seasoned knitters encounter challenges when working on new patterns. The Driftwood Pattern, while forgiving, has its quirks.

Miscounting Stitches

Losing track of your stitch count is a common mistake. Using stitch markers can save you a lot of frustration and help you keep track of pattern repeats accurately.

Uneven Tension

Maintaining consistent tension can be challenging but is key to having an even appearance in your knitting. If you notice that your stitches vary in size, take time to adjust your knitting style until you achieve a more uniform result.

Correcting Errors

Mistakes happen to everyone. If you notice an error a few rows back, consider using a lifeline—a piece of contrasting yarn threaded through a row you’re confident with. This allows you to unravel to an earlier point without losing your pattern entirely.

Projects to Try with the Driftwood Pattern

The beauty of the Driftwood Knitting Pattern lies in its versatility. There are numerous projects you can try once you feel comfortable with the basics.

Cozy Throws and Blankets

A throw or blanket is an ideal canvas for showcasing the Driftwood Pattern. Its natural textures provide warmth and comfort, making it a perfect addition to any cozy nook or living room.

Scarves and Shawls

A scarf or shawl in the Driftwood pattern acts as both a fashion statement and a personal comfort item. The pattern’s texture can add depth to these accessories without overwhelming simplicity.

Home Decor Items

Consider using the Driftwood Knitting Pattern to create cushion covers or wall hangings. These pieces can bring a touch of nature’s calmness into indoor spaces, channeling the serenity of driftwood.

Driftwood Pattern: Customization and Personal Touches

While the basic Driftwood Knitting Pattern offers natural beauty, customization is where your creativity can truly shine. Personalized touches can make every piece unique.

Color Variations

Play with different hues of yarn to create a unique blend. Soft gradients from light to dark can emphasize the natural texture of the pattern. Additionally, alternating colors can bring a more vibrant, personalized touch to your project.

Adding Embellishments

Little details can make a big impact. Consider adding embellishments such as tassels or fringe for scarves and throws. Simple embroidery can also add unique details that enhance the overall appearance of the piece without detracting from the natural aesthetic.

Sizing and Gauge Adjustments

The Driftwood pattern is adaptable to various sizes, but understanding gauge is crucial. Your gauge—the number of stitches per inch—can affect the final size of your project. Adjust your needle size to match the intended gauge for your pattern to ensure accuracy in size.

Final Thoughts on the Driftwood Knitting Pattern

Embarking on a project with the Driftwood Knitting Pattern can be a rewarding experience. This pattern allows you to blend creativity with comfort, resulting in items that are not only beautiful but also personally satisfying. Whether you’re creating for yourself, gifting to others, or selling your crafted pieces, there’s a certain pride in crafting something unique and hand-made.

Remember, knitting is not just about the end product; it’s also about the process. The meditative rhythm of knitting can provide a soothing escape from the chaos of daily life. Embrace each stitch, each row, and each error as part of your creative journey. With the Driftwood Pattern, you’re not just knitting—you’re crafting a piece of tranquility.

Filed Under: Driftwood Ideas Tagged With: DIY, Driftwood, Handmade, Knitting, Pattern

Driftwood Kids Toys

March 5, 2025 by admin

Have you ever wondered how a simple piece of driftwood can transform into a magical toy that sparks a child’s imagination? Imagine a world where each curve, knot, and grain tells a story, inviting young adventurers to embark on fantastical journeys right in their living rooms. Driftwood Kids Toys offer just that—a bridge between the natural world and a child’s limitless imagination. In this article, we’ll dive into what makes driftwood toys so special, their benefits, and why they might just be the perfect addition to your child’s toy collection.

Driftwood Kids Toys

What Are Driftwood Kids Toys?

Driftwood Kids Toys are enchanting playthings crafted from naturally occurring pieces of wood that have been shaped and smoothed by the elements. As these pieces wade through rivers and oceans, they become unique works of art polished by time, sand, and waves. These toys stand out due to their organic feel, each offering a distinctive appearance and texture that manufactured toys simply can’t replicate.

The Origins of Driftwood

Driftwood is essentially wood that has floated in bodies of water before washing ashore. It originates from trees that have been worn down and smoothed by natural forces. Each piece has its own journey, making it a story in itself. Over time, driftwood has become a favorite material for artists and artisans due to its unique qualities and natural beauty.

Why Choose Driftwood Toys?

Choosing driftwood toys for your child means opting for sustainable, environmentally friendly playthings that promote creativity and imagination. These toys encourage kids to move away from electronics and instead play with something tactile and natural, enhancing sensory experiences. The allure of driftwood toys also lies in their uniqueness—no two pieces are ever alike, which adds an element of surprise and delight to playtime.

Environmental Impact

Toy manufacturing can often be a process that takes a toll on the environment. Commonly used plastics are not biodegradable, and their production often involves harsh chemicals. In contrast, driftwood toys have minimal environmental impact as they use readily available natural resources. By choosing driftwood toys, you help reduce the demand for plastic toys and encourage the use of renewable resources, contributing to a healthier planet.

The Charm of Handcrafted Toys

Handcrafted toys have a special place in our hearts. They often evoke nostalgia and a sense of individuality. Driftwood toys are typically handmade by skilled artisans who shape and craft each piece with attention to detail. This craftsmanship not only ensures quality but also embeds the toy with a kind of warmth and personality that mass-produced items lack.

Benefits of Driftwood Toys

Aside from their environmental benefits, driftwood toys offer several other advantages that can make your child’s playtime enjoyable and enriching. From promoting sensory skills to supporting creativity, these toys can enhance your child’s development in numerous ways.

Encourages Imaginative Play

Driftwood toys act as blank canvases for your child’s imagination. Since they don’t come with predefined shapes or purposes, children must use their creativity to create their own scenarios and uses for the toys. This open-ended play develops cognitive skills and problem-solving abilities.

Develops Fine Motor Skills

Handling and manipulating driftwood toys can enhance hand-eye coordination and fine motor skills. Toys like blocks or stacking toys made of driftwood prompt children to use their hands and fingers for control, which is essential for writing and other daily tasks as they grow older.

Sensory Experience

The tactile experience of holding a piece of driftwood is unlike anything else. Its smooth surface, occasional rough spots, and natural temperature provide a sensory experience that engages touch, a crucial aspect of early development. By playing with driftwood toys, children learn to explore different textures and shapes.

Connects Children with Nature

In our increasingly digital world, driftwood toys connect children with nature. As kids play with these toys, they not only engage with a piece of the natural world, but they also learn to appreciate the beauty and diversity of the environment around them.

Types of Driftwood Kids Toys

Driftwood toys come in a variety of forms, each designed to spark a different aspect of playfulness and learning. Let’s explore some popular types.

Driftwood Blocks

Ideal for building, balancing, and stacking, driftwood blocks encourage spatial awareness and creativity. Children can use these blocks to create structures, which also enhances problem-solving skills as they figure out stability and balance.

Driftwood Figurines

Figurines crafted from driftwood can include animals, people, or imaginary creatures. These toys are perfect for role-playing and storytelling, helping children communicate ideas and emotions through play.

Driftwood Mobiles

Mobiles can serve as both decorative pieces and toys. Hung above a crib or play area, driftwood mobiles draw children’s eyes upward, stimulating visual development and tracking skills as they watch the pieces dance and swing in the air.

Driftwood Puzzles

Puzzles made from driftwood come in various complexities and shapes, challenging young minds to think strategically. Solving driftwood puzzles enhances logical thinking and provides a satisfying sense of accomplishment.

Driftwood Kids Toys

Selecting the Right Driftwood Toy

With various types of driftwood toys available, choosing the right one can feel overwhelming. Consider your child’s age, interests, and developmental stage when making a selection.

Age Appropriateness

Ensure that you choose toys that match your child’s age and developmental level. Small pieces might pose a choking hazard for younger children, while older kids might enjoy more complex puzzles and building sets.

Safety Considerations

While driftwood toys are generally safe, it’s crucial to ensure they’re well-sanded and free of splinters or sharp edges. Select toys from reputable manufacturers or artisans that prioritize safety in their designs.

Matching Interests

Consider what your child enjoys most. If they love animals, they might be drawn to driftwood figurines. For children with a knack for constructing, driftwood blocks would be a perfect match.

Caring for Your Driftwood Toys

Driftwood toys are quite durable but, like all toys, require a bit of care to keep them in good condition. Regular maintenance ensures longevity and safety.

Cleaning the Toys

Cleaning driftwood toys is simple. Wipe them with a damp cloth whenever they get dirty. If necessary, use a mild soap. Be sure to dry them thoroughly to prevent moisture damage.

Storing Properly

Store your driftwood toys in a cool, dry place away from direct sunlight. Prolonged exposure to heat and sun can lead to cracks or discoloration over time.

Inspect Regularly

Regular inspection of the toys for any signs of wear and tear is crucial. Check for splinters, chips, or any damage that could pose a hazard. Promptly fix or replace any compromised pieces to ensure safe play.

Driftwood Toys and Learning Through Play

The educational value of play is immense, and driftwood toys fit perfectly into various learning frameworks. Their open-ended nature allows for customized educational experiences.

STEM Learning

While driftwood toys may not be the first thing that comes to mind regarding STEM education, they do provide a foundation for these disciplines. Building and balancing blocks involve principles of physics and engineering, offering early exposure in a playful setting.

Language and Communication

By encouraging storytelling and role-playing with driftwood figurines and puzzles, children develop language skills and enhance their communication abilities. They learn to articulate stories and express concepts verbally.

Social Skills

Driftwood toys, particularly those that involve group play, help children develop social skills such as sharing, cooperation, and teamwork. Through interaction with peers or family members, children learn to navigate social dynamics and cultivate friendships.

Investing in Driftwood Toys

As you consider whether driftwood toys are a worthy investment for your child’s playtime and development, it’s important to weigh the costs and benefits. These toys can initially seem more expensive than traditional counterparts, but their quality and sustainable value often justify the price.

Cost Analysis

While driftwood toys might come with a higher price tag due to their handcrafted nature, the benefits far outweigh the initial investment. They are durable, meaning they won’t need replacing as often as cheaper toys that break easily.

Long-Term Value

Because driftwood toys are timeless and durable, they often hold sentimental value. They can be passed down through generations, creating a sense of continuity and history that enriches family bonds.

Making Driftwood Toys a Family Project

If you’re inclined to take a hands-on approach, consider making driftwood toys as a family project. This not only enhances the bond with your kids but also gives them a new appreciation for craftsmanship and creativity.

Finding the Wood

A fun family outing could involve a trip to a local beach or riverbank to collect potential driftwood pieces. By selecting their own pieces of wood, children become more engaged in the creation process.

Creating Together

With your guidance, children can help sand, shape, and design their own toys. This collaborative activity combines fun with practical lessons in craftsmanship and artistic expression.

Safety Precautions

If you decide to create toys at home, be mindful of safety. Ensure you have the appropriate tools and that children are supervised closely to prevent accidents.

Conclusion

Driftwood Kids Toys offer a delightful blend of nature, art, and play, making them a unique addition to any child’s toy collection. They provide a sensory-rich experience that nurtures creativity, fine motor skills, and an appreciation for the natural world. By incorporating driftwood toys into your child’s playtime, you’re not just buying a toy, but investing in a better, brighter, and more imaginative tomorrow for your little ones.

Filed Under: Driftwood Ideas Tagged With: Driftwood, Eco-friendly, Handmade, kids

Driftwood Easter Bunny

March 4, 2025 by admin

Have you ever considered bringing the charm of nature into your Easter celebrations with a whimsical twist? The idea of a Driftwood Easter Bunny might just be the delightful addition you’ve been looking for! Combining the rustic beauty of driftwood with the playful spirit of Easter creates not only a unique decoration but also a conversation starter for your home or garden. In this guide, you’ll discover how to make your own driftwood Easter bunny while learning about the significance and charm behind such a creation.

Why Driftwood?

Driftwood is not just a piece of wood washed up on the shore. It holds a unique beauty forged by nature, time, and the elements. Each piece of driftwood tells a story of its journey through water and weather. This characteristic makes it an enchanting medium for art and decorative projects. Integrating driftwood into Easter decorations brings a natural, rustic feel to your festivities, blending the spirit of the season with nature’s charm.

The Unique Characteristics of Driftwood

Driftwood boasts a weathered appearance, often smooth and light in color due to its exposure to water and sun. Its natural shapes and curves add unpredictability and uniqueness to any art piece. These organic forms inspire creativity and lend themselves beautifully to crafting projects, especially when designing something as imaginative as a driftwood Easter bunny.

The Symbolism of the Easter Bunny

The Easter Bunny is more than just a delightful character in springtime folklore. It is a symbol of new beginnings, fertility, and the blossoming of life. Rabbits, known for their energetic reproducing habits, were once associated with Eostre, a pagan goddess of fertility whose animal symbol was a rabbit. Over time, this connection merged with Christian traditions, giving rise to the Easter Bunny we recognize today. Combining this symbol with driftwood elevates the message of renewal with nature’s own craftsmanship.

Driftwood Easter Bunny

Gathering Your Materials

Creating a driftwood Easter bunny requires some basic materials and tools. This process allows you to connect with nature and express your creativity.

Essential Materials

Here is a list of essential materials you’ll need:

MaterialPurpose
Driftwood PiecesFor the structure of the bunny
Hot Glue GunTo attach driftwood pieces together
Wire (optional)For added reinforcement or flexibility
SandpaperTo smooth and prepare the driftwood
Protective FinishTo enhance and protect your creation

Collecting Driftwood

Before you can begin crafting, you’ll need to find the perfect pieces of driftwood. Explore nearby beaches, rivers, or lakes where driftwood naturally accumulates. Look for a variety of sizes and shapes to give your creation dimension. Be sure to check local regulations regarding collecting driftwood to ensure you’re abiding by the rules.

Crafting Your Driftwood Easter Bunny

Now comes the fun part – crafting your driftwood Easter bunny! This section will guide you through the process with tips and tricks to make your project a success.

Choosing the Right Driftwood Pieces

When selecting your driftwood, consider the shape and size of each piece. Long, narrow pieces are perfect for the ears, while more rounded pieces can serve as the body or head. Take your time arranging potential pieces into a bunny shape before affixing them together. This step helps you visualize the final piece and make any adjustments as needed.

Assembling the Bunny

Start with the body as the foundation of your structure. Use your hot glue gun to secure larger pieces together, building up a stable base. Continue adding pieces for the head and legs, constantly reassessing the balance and stability. If certain pieces don’t fit snugly, gently sand them down or use small pieces to fill gaps.

Adding the Ears and Tail

The ears are one of the defining features of any bunny. Choose two slender, upright pieces of driftwood to create an attentive and playful expression. Secure them firmly to the head. For the tail, consider using a small, rounded piece or even a tuft of organic material like moss or twine to mimic the fluffiness of a rabbit’s tail.

Final Touches

After the main structure is complete, observe your driftwood bunny for areas needing refinement. This might include additional pieces for balance, aesthetic detail, or further reinforcing joints for sturdiness. Treat the finished piece with a protective finish to highlight the driftwood’s natural beauty and ensure durability against elements if displayed outdoors.

Driftwood Easter Bunny

Personalized Decorative Ideas

Apart from the basic structure, you can personalize your driftwood Easter bunny to make it uniquely yours. Here’s how:

Painting and Decorating

While the natural appeal of driftwood is tempting to leave unaltered, adding subtle touches, such as painted eyes or a small bow, can bring your bunny to life. Consider using earthy tones that complement the driftwood’s hues, or pastels to reflect the Easter theme.

Functional Twist

Why not incorporate functionality into your design? Your driftwood bunny can serve as a basket holder, a planter, or even part of a larger Easter centerpiece. For instance, position your bunny holding a small planter with spring flowers or a nest filled with painted eggs.

Maintaining Your Driftwood Bunny

Proper care will ensure your driftwood bunny remains charming for many Easters to come.

Indoor vs. Outdoor Placement

Decide whether your bunny will be an indoor or outdoor decor piece. Indoor placement offers protection from weathering, while outdoor placement requires extra consideration for longevity. Position your bunny in a sheltered area, away from prolonged moisture exposure like rain or intense sun, to prevent quick deterioration.

Routine Care and Maintenance

Dust your driftwood bunny regularly and inspect for any loose pieces. If displaying outdoors, periodically reapply a suitable outdoor finish to protect it from the elements. This simple maintenance routine will keep your creation looking fresh and captivating.

Understanding the Sustainability Factor

Creating a driftwood Easter bunny not only serves as a delightful crafting project but also opens a dialogue about sustainability.

Eco-Friendly Crafting

Driftwood is a naturally occurring resource, making it an eco-friendly option for crafting enthusiasts. Using driftwood in art repurposes materials washed ashore, which might otherwise be considered waste. This practice not only mitigates environmental impact but also sparks creativity in using natural elements.

Community Connections

Collecting driftwood and engaging with the community about its use promotes awareness of local ecosystems and conservation efforts. Sharing creative projects like a driftwood Easter bunny can inspire others to consider sustainable materials and methods in their decorating and crafting endeavors.

Inspiring Future Projects

The skills and creativity gained from crafting a driftwood Easter bunny can lead to other exciting projects. Consider incorporating driftwood into more seasonal decorations or home decor items. Here’s a small table of inspiration for future driftwood ventures:

Project IdeaDescription
Driftwood Wall ArtArrange driftwood on a canvas for a rustic piece
Seasonal WreathsUse as a base for a natural, rustic wreath
Garden SculpturesCreate abstract forms to enhance outdoor spaces
Planters & HoldersTransform into unique holders for plants or items

Embracing Nature in Art

Engaging with driftwood for your Easter bunny is more than a craft—it’s the embracing of nature’s artistry. Through each distinctive piece and unexpected twist, driftwood invites you to appreciate the beauty of imperfection and the stories carried by each fragment.

A Timeless Decoration

Your driftwood Easter bunny doesn’t just serve as a festive decoration; it captures the essence of time and nature. This timeless piece will not only enhance your decor each Easter but also serve as a symbol of creativity and respect for the environment.

Celebrate your finished bunny as a testimony to your crafting skills, creativity, and an embodiment of the charm found in nature. Who knew a piece of driftwood could harbor such life and imagination?

Reflecting on the journey from shoreline to its place in your home, you are reminded of the interconnectedness of art, nature, and celebration, finding joy in simplicity and the beauty of discovery.

Filed Under: Driftwood Ideas Tagged With: Bunny, DIY, Driftwood, Easter, Handmade

Driftwood Easter Tree

March 3, 2025 by admin

Have you ever thought about combining the natural beauty of driftwood with the festive spirit of Easter? Imagine celebrating the joys of spring by crafting a unique and sustainable “Driftwood Easter Tree.” This fascinating and decorative centerpiece can add a touch of coastal charm to your seasonal decor and become a meaningful part of your holiday traditions.

Creating a driftwood Easter tree not only allows you to display creativity but also incorporates natural elements into your home. This guide will delve into what makes a driftwood Easter tree special, how you can create one yourself, and the various ways to personalize and decorate it. With this friendly and thorough step-by-step guide, you’ll be well-equipped to create a masterpiece that reflects both your love for nature and the spirit of Easter.

Driftwood Easter Tree

What is a Driftwood Easter Tree?

A driftwood Easter tree is an ornamental tree made from pieces of driftwood. Driftwood, as you may know, comprises weathered wood pieces found washed up on shores, often collected by those who enjoy the beauty of nature crafted elements. Driftwood is known for its unique shapes, textures, and shades, making it a desirable resource for crafting.

The Appeal of Driftwood

Driftwood’s appeal lies in its natural beauty and versatility. Its rustic appearance can capture the essence of the shore, imbuing any space with a sense of tranquility and connection to nature. Each piece of driftwood is distinct, offering a wide variety of creative opportunities. When used to construct an Easter tree, driftwood provides an organic, eco-friendly alternative to plastic trees or manufactured decor.

Symbolism and Tradition

Easter trees are traditionally known for their symbolic nature, representing new life and the joy of the resurrection. Incorporating driftwood elevates this symbolism by adding a layer of natural renewal and transformation, since driftwood itself represents both decay and rebirth — reminders of nature’s cyclical processes.

Gathering Driftwood

Finding the Right Pieces

To start creating your driftwood Easter tree, the first task is to find the right pieces of driftwood. Consider planning a beach trip where you can collect naturally smoothed and weathered driftwood. Look for pieces that vary in size and shape, as diversity will add character to your tree.

Best Practices for Collection

While collecting, ensure you are mindful of local regulations that may dictate how much driftwood you can take from certain areas. Choose pieces that are relatively dry and free from sharp edges. These characteristics will make it easier to handle and work with the driftwood later in your project.

Cleaning and Preparing Driftwood

Once you’ve gathered your driftwood, it’s important to clean and prepare it. Rinse each piece thoroughly with fresh water to remove salt and sand. You might also choose to scrub the driftwood with a brush to further clean any residue. Allow the wood to dry completely in a sunlit area, which can take a couple of days, depending on humidity levels.

Tools and Materials Needed

To create your driftwood Easter tree, you’ll need some basic tools and materials. Here’s a table that provides a quick overview:

Tool/MaterialPurpose
DrillFor making holes in driftwood for assembly
ScrewsTo secure driftwood pieces together
Strong adhesiveTo add additional stability between joints
Twine or wireTo connect smaller driftwood sticks
Base or standTo secure the tree upright
SandpaperTo smooth any rough edges on driftwood
Paint (optional)To add color accents or designs to the tree

Assembling Your Driftwood Easter Tree

Once you have your materials, you can move on to assembling your driftwood Easter tree. Consider sketching a simple plan or structure vision to help guide your assembly process.

Base Construction

Start by creating or selecting a base. This base could be a piece of heavier driftwood laid flat, a wooden block, or another sturdy material. It needs to be stable enough to support the weight of the tree and any hanging decorations.

Attaching the Trunk and Branches

Build your tree starting with a central trunk, a thicker and longer piece of driftwood. Drill holes and use screws to attach additional branches, working from larger to smaller pieces as you move upward. You might need to adjust branch placement to ensure the tree balances well.

Securing and Testing Stability

Before decorating, ensure all pieces are securely connected and test the tree’s stability. If necessary, add support or adjust branch positions to keep everything balanced.

Decorating Your Driftwood Easter Tree

Once your tree’s structure is complete, it’s time for the fun part — decorating! The beauty of the driftwood Easter tree lies in its customizability. Here are some ideas:

Personalizing with Paint

Some might wish to leave the driftwood in its natural state, while others may prefer adding a touch of color. Consider gentle pastel hues for a more traditional Easter look. You can paint entire branches or simply add painted designs, such as dots or stripes, to emphasize natural patterns.

Adding Easter-inspired Ornaments

Hang Easter eggs, small plush animals, or origami birds on the branches. Consider using lightweight materials or small items so as not to overwhelm or topple the tree. Twine, ribbon, or hooks can be used to secure these items.

Incorporating Natural Elements

Bring more of the outdoors in by incorporating flowers, leaves, or small branches from your garden. Fresh flowers can add a vibrant sense of life, but artificial blooms ensure longevity without the need for maintenance.

Lighting Options

String lights intertwined with the branches can create a warm glow, adding to the tree’s beauty both day and night. Choose battery-powered fairy lights to avoid cords becoming intrusive or cumbersome.

Driftwood Easter Tree

Maintaining Your Driftwood Easter Tree

A well-maintained driftwood Easter tree can be reused and enjoyed for years. After Easter, think about storing it in a dry, safe place. Regularly check for any loose sections or screws that may need tightening.

Seasonal Updates

The flexibility of a driftwood tree makes it possible to adapt the decorations seasonally. Consider redecorating it for other holidays, such as Halloween, where you can transform it into a spooky tree with themed ornaments.

Conclusion

The Driftwood Easter Tree is not merely a festive decoration but a personal statement of creativity and environmental awareness. By learning how to craft and decorate your own tree, you reconnect with nature and infuse your home with a piece of art that evolves with each holiday. As you celebrate the season of renewal, let your driftwood Easter tree stand as a unique testament to life’s transformations. Embrace its simplicity and charm, and enjoy the endless possibilities it provides for artistic expression and seasonal joy.

Filed Under: Driftwood Ideas Tagged With: Decorations, Driftwood, Easter, Handmade

Driftwood Earrings Diy

March 3, 2025 by admin

Have you ever been walking along the beach and noticed that there’s something inherently enchanting about pieces of driftwood? These unique items, shaped by the sea and wind, carry a bit of nature’s charm and hold countless stories within their grain. Imagine turning these treasures into a piece of wearable art. If you’re someone who cherishes DIY projects and eco-friendly fashion, making your own driftwood earrings is a delightful way to blend creativity with sustainability.

Understanding Driftwood: Nature’s Unique Castaway

What is Driftwood?

Driftwood refers to the pieces of wood that have washed up onto shorelines, often adrift for months or even years before reaching land. These pieces have usually broken away from trees naturally through erosion or as debris from logging and construction activities. Over time, the sea smoothens these pieces, giving them a distinct, polished appearance.

Why Driftwood for Earrings?

Choosing driftwood for crafting earrings is not just about their beauty, but also about their uniqueness and symbolism. Each piece of driftwood is one-of-a-kind, thanks to its journey and the elements it has encountered. This means your earrings will carry individuality, much like nature’s own signature on your accessory choice. Moreover, crafting with driftwood promotes sustainable use of resources by repurposing nature’s castaways into something beautiful and wearable.

Gathering Your Materials

Before you can start creating your driftwood earrings, you need to gather some supplies. Luckily, the list is short and manageable, perfect for a beginner or a seasoned crafter looking for a new project.

Essential Items for Your Driftwood Earrings

Here is a simple table to help you gather your materials:

MaterialDescription
Driftwood piecesSmall and lightweight pieces that appeal to your sense of style and aesthetics.
Earring hooksYou can find these at any jewelry supply store or online. Opt for hypoallergenic if you have sensitivities.
Jump ringsSmall metal rings used to attach your driftwood pieces to the earring hooks.
Drill or DremelUseful for making precise holes in your driftwood.
SandpaperTo smooth any rough edges and shape your driftwood a bit, if necessary.
Wood sealantOptional, for preserving the wood and preventing changes from moisture.

Optional Additions

Besides the essentials, consider adding some decorative elements such as beads, shells, or small charms to give your earrings a personal touch. These additions can help accentuate the natural beauty of the driftwood and reflect your individual style.

Driftwood Earrings Diy

Preparing Your Driftwood

Preparation is key in any craft project, and driftwood earrings are no exception. Properly preparing your driftwood will ensure your earrings are safe and durable.

Cleaning Your Driftwood

Start by thoroughly cleaning each piece of driftwood. Use a stiff brush and some mild soap to scrub them and remove sand, salt, and other residues. Rinse them well with fresh water. This not only helps in cleaning but also in understanding the texture of each piece, assisting you in seeing which will work best for your earrings.

Drying and Sanding

Let your driftwood dry completely before moving to the next step. Depending on the size of your pieces and the humidity in your area, drying can take from a day to a week. Once dried, use sandpaper to smooth any rough edges, taking care not to sand away too much of the character that the sea has imparted onto the wood. If you prefer a rustic look, you might choose to leave the wood as is; otherwise, sand more for a sleeker finish.

Sealing the Wood

Applying a clear wood sealant is an optional step but could be beneficial in preserving your earrings. This can help prevent future cracking and protect the wood from moisture changes. Simply apply a thin coat using a small brush or cloth, and allow it to dry thoroughly.

Crafting Your Driftwood Earrings

With your materials prepped, it’s time for the fun part: crafting! This is where your creativity truly gets to shine.

Drilling Holes in Your Driftwood

Using a drill or Dremel, carefully drill a small hole near the top edge of each driftwood piece. This hole will allow you to attach the jump ring, which connects the driftwood to the earring hook. Be cautious to avoid splitting the wood by supporting the piece on a hard surface and drilling slowly.

Adding Jump Rings and Earring Hooks

Utilizing the jump rings is straightforward:

  1. Open a jump ring using a pair of pliers.
  2. Thread the jump ring through the hole in your driftwood.
  3. Close the jump ring securely to prevent it from coming off during wear.

Once your jump rings are attached, slide them onto the earring hooks. Again, ensure everything is fastened tightly but comfortably to allow pleasant movement.

Customizing Your Earrings

This step is entirely up to your interpretation! If you’ve chosen to add decorative elements, now is the time to attach them. You might want to dangle small beads or shells alongside the driftwood for a nautical-themed look. Alternatively, mix in some colorful accents for a pop of contrast.

Driftwood Earrings Diy

Maintaining Your Driftwood Earrings

After completing your unique earrings, maintenance ensures they remain as lovely as the day you crafted them.

Regular Cleaning

To keep your earrings in top condition, regularly wipe them down with a soft, dry cloth. This will help remove any buildup of natural skin oils or dirt. Avoid submerging them entirely in water, as excessive moisture can affect the driftwood over time.

Storing Properly

When not in use, store your earrings in a dry, safe place away from direct sunlight or heat sources. A jewelry box, lined pouch, or similar container works well to prevent scratching and dust accumulation.

Restoring Shine

If the driftwood begins to look dull, you can lightly sand them again and reapply a thin layer of sealant. This will help maintain their natural luster and extend their longevity.

Why Create Driftwood Earrings?

The beauty of crafting your own driftwood earrings lies not only in the act of creation but also in its environmental impact, personal satisfaction, and style statement.

Eco-Friendly Fashion Statement

By using driftwood, you’re making a conscious choice to utilize recycled and natural materials. This decision supports sustainability and opens a dialogue on eco-friendly fashion — something both you and admirers of your earrings will appreciate. It can encourage conversations about the importance of repurposing materials, reflecting your commitment to the environment.

A Personal Touch

Creating something unique with your own hands carries with it a sense of accomplishment and pride. Your earrings will not only be a reflection of your individuality but also a testament to your creativity and resourcefulness. Whether you wear them yourself or gift them to a loved one, they’re sure to carry a personal significance that adds another layer to their charm.

Versatile Style

Driftwood earrings can be customized to fit any aesthetic, making them additions to anyone’s wardrobe. From beachy casual to sleek modern, these earrings can be adapted to almost any style preference. This versatility ensures they will remain a staple in your accessory collection for years to come.

Inspiration and Ideas for Further Projects

Once you’ve nailed down making driftwood earrings, you might wonder what else you can create with similar techniques or materials.

Expanding to More Accessories

Consider creating matching sets like necklaces or bracelets. By using similar designs, you can create cohesive accessories that elevate any outfit. Experiment with using larger pieces of driftwood for statement necklaces or combining multiple smaller pieces for a layered bracelet.

Incorporating Other Natural Materials

Driftwood plays beautifully with other natural elements such as stones, sea glass, or botanicals. Incorporate these into your designs for a richer narrative. Perhaps you could embed small seed pods or use pebbles collected from your favorite nature spot.

Exploring Different Styles

Feeling adventurous with your designs? Try sculpting larger driftwood pieces for home decor or blending wood types to create contrast in your designs. Driftwood’s organic shapes and textures offer ample opportunity to push creative boundaries.

This journey, from discovering a weather-worn piece of driftwood to crafting unique earrings, not only highlights artistic ingenuity but symbolizes a delightful exploration of sustainable style. By taking a small piece of nature and transforming it into an accessory, you’re engaging in a conversation about fashion’s impact and the power of do-it-yourself solutions. Now, the next time you find yourself on a sandy shore or a morning walk by the sea, a simple piece of driftwood might just catch your eye, sparking another round of inspired creativity.

Filed Under: Driftwood Ideas Tagged With: craft, Driftwood, Earrings, Handmade, Jewelry

Driftwood Easter Crafts

March 3, 2025 by admin

Have you ever thought about bringing a natural, rustic charm to your Easter decorations? Driftwood, with its unique shapes and textures, offers endless possibilities for creating stunning Easter crafts. Not only does it connect you with nature, but it also provides a coastal feel that can blend effortlessly with various decor themes. In this guide, you’ll discover several creative ideas to incorporate driftwood into your Easter festivities, transforming ordinary items into extraordinary pieces.

Understanding Driftwood

What is Driftwood?

Driftwood is natural wood that has been washed onto a shore or beach by the action of winds, tides, or waves. Over time, this wood becomes smooth and uniquely textured due to its exposure to water and elements. Each piece of driftwood carries its own history and story, making it a fascinating material for crafting.

Why Use Driftwood for Crafts?

Driftwood’s versatility, coupled with its natural beauty, makes it an excellent choice for crafting. It’s ecological, as it makes use of materials that have already been deemed forgotten by nature. By utilizing driftwood, you can create sustainable art, contributing to the upcycling trend that’s both environmentally friendly and fashionable.

Crafting Basics: Preparing Your Driftwood

Gathering Driftwood

To start your crafting adventure, you’ll need to gather driftwood. Head to your local beach and look for pieces that are dry, lightweight, and have interesting shapes. Remember to collect only as much as you need to ensure you’re not disrupting the local habitat.

Cleaning and Drying Driftwood

Before starting your project, it’s necessary to clean and dry your driftwood:

  1. Rinse: Wash your collected driftwood thoroughly with water to remove sand and salt.
  2. Scrub: Use a scrub brush to clean any algae or barnacles.
  3. Soak: For a deeper clean, soak the driftwood in a mix of water and mild bleach (1:10 ratio) for 24 hours.
  4. Rinse Again: After soaking, rinse the driftwood to remove any bleach residue.
  5. Dry: Allow it to air dry completely. This could take a few days depending on the humidity levels.

Driftwood Easter Crafts

Driftwood Easter Craft Ideas

Driftwood Easter Wreath

Transform your front door into a welcoming sight with a driftwood Easter wreath. This handcrafted wreath can be adorned with pastel ribbons, faux Easter eggs, or small spring flowers to add color and vibrancy.

Materials Needed:

  • Small pieces of driftwood
  • Hot glue gun or super glue
  • Decorative elements (ribbons, faux eggs, flowers)

Steps:

  1. Arrange the driftwood pieces in a circular shape.
  2. Secure each piece using the hot glue or super glue.
  3. Decorate with your chosen materials, ensuring they are securely glued onto the wreath.

Driftwood Bunny Silhouette

Create a charming bunny silhouette using driftwood as a playful tribute to the Easter Bunny. Perfect for a wall hanging or as a centerpiece on your Easter dining table.

Materials Required:

  • Various sizes of driftwood
  • Pencil and paper for template
  • Saw if cutting is necessary
  • Glue or screws for fixing

Instructions:

  1. Sketch a bunny silhouette on paper.
  2. Lay the driftwood pieces to match your template.
  3. Cut pieces if required for a better fit.
  4. Glue or screw the driftwood pieces together to form the silhouette.

Easter Egg Driftwood Holder

Design a rustic Easter egg holder that prominently features driftwood for each egg. It’s an artistic way to display decorated Easter eggs or use them for an Easter breakfast presentation.

What You Need:

  • Driftwood with natural cavities or flat surfaces
  • Small drill bit
  • Acrylic paint (optional for added color)

How To Make:

  1. Select a piece of driftwood that has enough space to hold several eggs.
  2. Use a drill bit to create small indentations that can cradle the eggs securely.
  3. Paint natural cavities with acrylic paint for added flare if desired.

Driftwood Candle Centerpiece

You can add an intimate glow to your Easter dinner with a driftwood candle centerpiece. This craft ensures your dining table remains stylishly festive.

Supplies:

  • Long, flat pieces of driftwood
  • Votive candles or tealights
  • Drill with bit sized for candle base

Procedure:

  1. Arrange the driftwood into an appealing structure.
  2. Drill shallow holes where the candles will sit snugly.
  3. Place the candles in the holes and light them to set the mood.

Tips for Working with Driftwood

Tools and Techniques

Basic tools such as a glue gun, drill, and saws are sufficient for creating most driftwood crafts. The key is to handle the material delicately to preserve its natural texture and appearance.

Safety Considerations

Always prioritize safety by wearing protective gear when handling tools. Additionally, ensure your driftwood is well-cleaned to avoid any potential health risks associated with natural elements like mold or insects.

Driftwood Easter Crafts

Care and Maintenance of Driftwood Crafts

Driftwood, although resilient, benefits from some care to maintain its beauty. Apply a clear sealant like polyurethane to preserve its natural color and protect it from moisture. Dust your creations regularly and avoid placing them where they can be damaged by direct sunlight or water.

Conclusion

Driftwood easter crafts offer you an unprecedented opportunity to blend creativity with simplicity. Whether it’s a wreath, a candle centerpiece, or a bunny silhouette, each crafted piece carries a part of nature’s raw beauty into your home. Inviting driftwood into your Easter decor not only enhances the holiday spirit but also reminds you to celebrate nature and creativity harmoniously.

By integrating these unique pieces into your Easter celebrations, you’re not just crafting for the moment—you’re carving out memories that blend the rustic with the magical. So gather your materials, prep your driftwood, and let your creativity lead the way to a green and gorgeous Easter!

Filed Under: Driftwood Ideas Tagged With: Decor, DIY, Driftwood, Easter, Handmade

Driftwood Easter

March 2, 2025 by admin

Have you ever considered how Easter, a holiday typically celebrated with vibrant eggs and cute bunnies, could be transformed with a touch of rustic charm and natural beauty? Imagine celebrating Easter a little differently this year, bringing the outdoors inside with elements like driftwood. Driftwood—those beautiful pieces of wood sculpted by nature—adds a unique twist to traditional Easter celebrations. By the time you’ve finished reading, you’ll be brimming with ideas on how to incorporate this natural beauty into your holiday festivities. Let’s embark on this creative journey of crafting a “Driftwood Easter.”

What is Driftwood?

Driftwood often conjures images of sun-kissed beaches and serene oceans. But what exactly is it? Simply put, driftwood is wood that has been washed onto a shore or beach by tides, winds, or waves. These pieces can be remnants from trees or other wood materials that ocean currents transport. Over time, their texture and structure change due to prolonged exposure to water, sun, and sand.

The Aesthetic Appeal of Driftwood

Driftwood’s appeal lies in its varied shapes, sizes, and earthy tones. Each piece is unique, representing a one-of-a-kind artwork created by nature’s forces. Its rustic charm adds an element of warmth and continuity when used in home decor or landscaping. Using driftwood in your Easter celebration brings a touch of nature’s artistry into your home, creating a serene and inviting environment.

Sustainability and Driftwood

Incorporating driftwood into your Easter theme is not just about aesthetics; it’s also about sustainability. Driftwood is a natural and recycled material, meaning that using it helps reduce waste. By opting for driftwood decorations, you’re choosing environmentally friendly decor, aligning your celebration with principles of sustainability.

Preparing for a Driftwood Easter

To celebrate a Driftwood Easter, you need the right materials and some creativity. Let’s outline what you’ll need for your very own driftwood-inspired celebration.

Collecting or Purchasing Driftwood

You might find driftwood when strolling along the beach or visit artisan shops and online marketplaces specializing in natural decor. If you’re collecting driftwood yourself, ensure it’s responsibly gathered, and you’re aware of local regulations regarding collecting natural materials from beaches.

Cleaning and Prepping Driftwood

Once you have your driftwood, clean it thoroughly to remove any impurities. A mild solution of soap and water usually does the trick. Rinse and allow it to dry completely, preferably in the sun, to retain its natural color and prevent mold growth. This process ensures that your driftwood is safe for indoor use and ready for crafting.

Driftwood Easter

Crafting Driftwood Easter Decor

Now that your driftwood is ready, it’s time to let your creative juices flow. Below are some exciting ways to incorporate driftwood into your Easter decor.

Driftwood Easter Egg Holders

Give your Easter eggs a natural pedestal by creating driftwood egg holders. Look for pieces that naturally form small crevices or indentations. Sand down any rough spots, and voilà, you have a unique and natural base for your colorful Easter eggs.

Driftwood Centerpiece

A driftwood centerpiece can be the focal point of your Easter dining table. Arrange several pieces of driftwood artistically along the center. Consider adding elements like small flowers, moss, or candles to complement the driftwood and infuse additional texture and color.

Driftwood Easter Wreath

A wreath made from driftwood is a stunning way to welcome guests into your home. Create a circle with the driftwood pieces, securing them with a strong adhesive or wire. Decorate your wreath with pastel-colored ribbons, small eggs, or spring flowers for a festive touch.

Incorporating Driftwood into Easter Traditions

Aside from decor, there are numerous ways to weave driftwood into the fabric of your Easter traditions.

Easter Egg Hunt with Driftwood

Transform your traditional Easter egg hunt by incorporating driftwood into the clues or hiding places. You can use driftwood as markers or props for hiding spots, enhancing both the aesthetics and fun factor of the hunt. This adds an element of adventure and challenge to the game.

Creating Driftwood Story Stones

For a quieter activity, consider crafting driftwood story stones. Find smooth, flat pieces of driftwood, and draw or paint symbols that can be used to create stories. This is an engaging and collaborative way to share Easter tales or craft new ones with friends and family.

Driftwood Easter

Hosting a Driftwood Easter Gathering

If you’re inviting friends and family over for Easter, using driftwood as part of your planning adds a touch of uniqueness and character. Here’s how you can incorporate it into your gathering plans.

Themed Invitations

Let your guests know about your unique theme right from the start with driftwood-themed invitations. You can use images of driftwood or even attach small collected pieces to give a tactile preview of the event.

Driftwood Table Settings

Enhance your dining experience with driftwood table settings. Use small pieces as placeholders, securing name tags with twine. Contrary to more traditional setups, this rustic approach offers a relaxed yet elegant dining experience.

Menu with Natural Elements

In keeping with the natural theme, plan a menu that reflects this aesthetic. Consider serving dishes made with organic ingredients and presenting them in ways that highlight natural beauty—such as serving platters adorned with small pieces of driftwood.

Benefits of a Driftwood Easter

You might be wondering what makes a Driftwood Easter so special. The benefits extend beyond the charm and beauty; here’s why a Driftwood Easter is well worth considering.

Sustainability and Eco-Friendliness

By using driftwood, you’re making a statement about the importance of recycling and sustainability. It’s a tangible way to reduce waste while beautifying your surroundings with natural elements.

Fostering Creativity

Arranging a Driftwood Easter encourages you to think outside the box and experiment with new ideas. Whether crafting decorations or planning activities, you’re tapping into a reservoir of creativity that might otherwise remain unexplored.

Aesthetically Pleasing

Perhaps the most immediate benefit, though, is the sheer aesthetic pleasure a Driftwood Easter provides. The combination of natural elements and festive traditions results in a celebration that’s both beautiful and memorable.

Conclusion

Incorporating driftwood into your Easter celebration not only transforms it into an eco-friendly event but also weaves a narrative of nature into your traditions. From crafting decor to hosting uniquely themed gatherings, a Driftwood Easter offers endless opportunities to innovate and personalize your holiday. Imagine welcoming the season of renewal with textures and forms shaped by the Earth itself—a celebration that not only honors tradition but also embraces the beauty of the outdoors. As you prepare for a Driftwood Easter, may you find joy, inspiration, and perhaps even a new favorite tradition to share with those closest to you.

Filed Under: Driftwood Ideas Tagged With: Decoration, DIY, Driftwood, Easter, Handmade

Driftwood Kids Crafts

March 2, 2025 by admin

Have you ever walked along the beach, discovering pieces of driftwood scattered along the shore, and wondered what magical creations could be made from these weathered treasures? Driftwood has a unique charm that showcases the power of natural elements like water and wind, crafting beautiful shapes and textures perfect for sparking a child’s creativity. Turn your next family beach trip into an adventure by collecting driftwood, and use this guide to transform those finds into delightful crafts that ignite imagination!

Understanding Driftwood

Before diving into crafting, it’s essential to understand what makes driftwood special. Driftwood refers to wood pieces that have washed ashore, shaped by the elements into smooth forms. They often come from trees or branches, eroded over time by saltwater, sand, and air. These natural processes make driftwood both unique and inspiring for artistic projects.

Why Driftwood Crafts?

Creating crafts from driftwood taps into the opportunity to recycle and reuse nature’s bounty while engaging your children in a learning experience. Driftwood is commonly available, making it an accessible and cost-free material. Kids will love the tactile exploration of each piece, and projects can adapt to various skill levels, offering both a challenging and rewarding pastime.

Safety First: Preparing Driftwood for Use

When working with natural materials, it’s crucial to ensure they’re safe for handling, particularly for young children. Start by cleaning the driftwood:

  • Step 1: Rinse Thoroughly – Rinse each piece under running water to remove sand, dirt, and salt residues.
  • Step 2: Soak in Vinegar – Soak the driftwood in a solution of vinegar and water (1:1 ratio) for several hours to kill bacteria and remove odors.
  • Step 3: Dry Completely – Allow the pieces to dry in the sun, ensuring all moisture is gone to prevent mold growth.

With your driftwood ready, you’re all set to begin a crafting journey filled with creativity and fun!

Driftwood Crafts for Kids

Craft 1: Driftwood Wind Chimes

Wind chimes add a musical note to breeze-filled days, and making them from driftwood provides a personal touch. Engage your kids with this simple craft that provides visual and auditory enjoyment.

Materials Needed:

  • Small pieces of driftwood
  • String or twine
  • Paint (optional)
  • Seashells, beads, or bells
  • Drill (adults can assist)

Step-by-Step Instructions:

  1. Prepare the Driftwood: Select several small driftwood pieces with holes or using a drill, carefully create holes through each piece.
  2. Customize Your Design: Paint each piece with your chosen colors and allow them to dry completely.
  3. Assemble the Chimes: Thread the string through the holes, spacing the driftwood pieces evenly. Attach additional decorative elements like beads, shells, or bells.
  4. Hang Your Creation: Find a suitable branch or larger piece of driftwood to act as the wind chime’s hanger and attach all pieces.

Craft 2: Driftwood Photo Frame

Personalize your child’s space with a frame rich in coastal charm, using driftwood to create a picture-perfect border for their favorite photos.

Materials Needed:

  • Assorted driftwood pieces
  • Strong glue or wood adhesive
  • Cardboard or plywood
  • Scissors
  • Paint (optional)

Step-by-Step Instructions:

  1. Create the Frame
    • Cut a cardboard or plywood piece to your desired frame size.
    • Arrange driftwood pieces around the edges, ensuring they fit snugly.
  2. Glue the Driftwood: Use strong adhesive to attach each piece, pressing down firmly and allowing to dry thoroughly.
  3. Add Personalized Touches: Paint or decorate further for a personal touch.
  4. Insert a Photo: Secure a photo in the center with glue or adhesive strips.

Craft 3: Driftwood Sailboats

Building driftwood sailboats allows children to harness wind power just as ancient mariners did, creating vessels that can set sail on small water bodies or serve as decorative pieces.

Materials Needed:

  • Medium-sized driftwood
  • Small sailcloth or paper
  • Twine or string
  • Scissors
  • Drill (optional)
  • Paint (optional)

Step-by-Step Instructions:

  1. Select the Hull: Choose a sturdy piece of driftwood as the boat’s hull.
  2. Create the Mast: If required, drill a small hole and insert a twine or stick firmly as the mast.
  3. Attach the Sail: Cut sailcloth into a triangle, decorate if desired, and attach it to the mast with string or glue.
  4. Set Sail: Launch your boat into a shallow water puddle or use it as playful décor.

Driftwood Kids Crafts

Learning Through Crafting

Crafting isn’t just an activity; it’s a learning experience. Encourage your children to explore creativity, problem-solving, and cooperation as they engage with each craft. You can turn driftwood crafting into educational lessons by discussing:

  • Environmental Topics: Talk about the water cycle, weathering processes, and ecosystems.
  • Art and Design: Explore balance, symmetry, and aesthetics through arranging driftwood pieces.
  • Cultural History: Introduce stories of sea voyages and historical crafting practices using natural materials.

Providing children with context enriches their crafting experience, transforming simple activities into memorable and meaningful lessons.

Adapting Crafts for Different Ages

Engagement levels will vary depending on age. Tailor each driftwood craft to suit your child’s abilities:

  • Young Children (Ages 3-5): Simplify projects with basic shaping and painting tasks, emphasizing safety.
  • School-aged Children (Ages 6-10): Engage with more intricate designs, introducing basic knot tying or assembly to develop motor skills.
  • Tweens and Teens (Ages 11+): Encourage complex crafting that combines driftwood with other materials, challenging creativity and craftsmanship.

Driftwood Kids Crafts

Tips for Successful Driftwood Crafting

Having a strategic approach makes crafting sessions smooth and enjoyable:

  • Choose the Right Driftwood: Seek pieces that are smooth and the correct size for your project.
  • Plan Your Design: Sketch ideas or brainstorm with your child about their vision for the craft.
  • Involve Everyone: Turn it into a family activity, assigning each member a role in the process.
  • Celebrate the Result: Display finished creations at home, showcasing your child’s craftsmanship and creativity.

Extending Driftwood Crafting Adventures

Want to keep the creativity flowing? Consider these extended activities inspired by driftwood crafting:

Nature Walk Scavenger Hunt

Transform beach trips into treasure hunts, seeking specific driftwood shapes or sizes. Engage your kids with a checklist of natural finds, expanding their exploration beyond driftwood to shells, stones, and seaweed.

Storytelling Through Crafts

After completing driftwood crafts, encourage children to create stories featuring their creations. A driftwood sailboat might star in tales of high seas adventure, promoting imagination and narrative skills.

Turn it into a Science Project

Introduce science concepts through driftwood, discussing buoyancy for floatable projects or erosion processes that transform raw wood into driftwood.

Conclusion

Driftwood offers a unique blend of nature and creativity, providing opportunities for children to connect with the environment in a personal and artistic way. Every beach walk yields new potential for creativity provided by nature’s handiwork. Engaging with driftwood crafts offers an endless frontier of exploration, learning, and joy—an invitation kids eagerly accept! Let these humble pieces of driftwood guide you and your young ones toward endless imaginative pursuits. Happy crafting, and may every piece of driftwood you find tell a new story!

Filed Under: Driftwood Ideas Tagged With: Art Projects, DIY, Driftwood, Handmade, Kids Crafts

  • « Previous Page
  • Page 1
  • Page 2
  • Page 3
  • Page 4
  • Page 5
  • …
  • Page 19
  • Next Page »

Primary Sidebar

Driftwood4us.com, is a participant in the Amazon Services LLC Associates Program, an affiliate advertising program designed to provide a means for sites to earn advertising fees by advertising and linking to amazon.com.