• Skip to main content
  • Skip to primary sidebar
  • Terms and Conditions
  • Privacy Policy
  • Contact

Driftwood 4 Us

Just About Driftwood

Handmade

Driftwood Diy Projects

February 19, 2025 by admin

Have you ever strolled along a beach, felt the sand beneath your feet, and stumbled upon a piece of driftwood? Its unique, weathered character tells a story of time spent navigating the waves, and it might have caught your creative eye with its rustic charm. Now, imagine turning those pieces of driftwood into beautiful, handcrafted items for your home. This article will guide you through a friendly journey into the world of driftwood DIY projects, where nature meets creativity.

Understanding Driftwood

Driftwood is not merely wood washed up on the shore; it’s nature’s artwork. Over time, it transforms from a piece of timber into a unique material filled with character. Understanding driftwood’s journey helps appreciate the beauty and potential it offers for DIY projects.

The Journey of Driftwood

Driftwood begins its journey in forests, where trees are felled and transported by streams and rivers. These pieces of wood then end up in the ocean or a lake, where they are shaped by wind, water, and time. This natural process can take years, during which the wood is sculpted by the elements. When it finally rests on a shoreline, it carries with it stories of a long and dynamic journey.

Characteristics of Driftwood

Each piece of driftwood is unique, with its own texture, color, and form. You might notice how the water and sun have bleached it, giving it a soft, muted color palette. Its porous surface often reveals the grain of the wood, and the irregular shapes can inspire creative uses in design. This uniqueness makes driftwood a favorite among artists and DIY enthusiasts alike.

Preparing Driftwood for Projects

Before you start working on your driftwood projects, there are essential steps to prepare the wood to ensure it’s clean, safe, and ready for your creative touch.

Cleaning Driftwood

Once you’ve gathered your driftwood pieces, the first step is to clean them thoroughly. Salt, sand, and other residues need to be removed. Start by washing the driftwood with fresh water and a stiff brush. This scrubbing will help release any surface debris.

Disinfecting and Drying

After cleaning, it’s crucial to disinfect the driftwood. Soak the wood in a solution of water and bleach (a ratio of about 9:1 water to bleach) for a few hours. This will kill any bacteria and sterilize the wood. After soaking, rinse thoroughly and let it dry completely. Place the pieces in the sun for several days or use an indoor space with good ventilation to dry them.

Selecting the Right Pieces

Choosing the right pieces of driftwood depends on the project you’re planning. Look for pieces with interesting shapes, textures, and sizes that fit your vision. The character of each piece can influence the final outcome, so take your time selecting your treasures.

Driftwood Diy Projects

Driftwood Diy Project Ideas

Now that you have a batch of clean, dry driftwood, let’s explore some exciting DIY project ideas that you can start right away. These projects range from simple to slightly more complex but are all rewarding in their own right.

Driftwood Wall Art

Creating wall art is one of the most popular uses for driftwood. You can craft anything from abstract pieces to structured designs, all of which add a natural elegance to any room.

Abstract Designs

For abstract art, choose several pieces of driftwood with unique shapes and textures. Arrange them on a canvas or directly on the wall, playing with the lines and forms they create. Use a hot glue gun to attach the wood to your chosen base securely. This project is all about creativity—let the pieces guide your design.

Structured Pieces

Alternatively, you can create more structured designs like waves or geometric shapes. Use a template to arrange your driftwood pieces, then glue them in place. This type of project can give you a beautiful, nature-inspired pattern that becomes a conversation starter in your home.

Driftwood Furniture

Driftwood can also be turned into beautiful, rustic furniture pieces. Though this might require more tools and skills, the results are well worth the effort.

Driftwood Coffee Table

To create a driftwood coffee table, gather larger pieces of driftwood for the legs and a flat piece or a glass top for the surface. Sand the edges of the wood for a smooth finish. Assemble the pieces using wood glue and screws, ensuring everything is stable and secure. The natural form of the driftwood adds a rustic charm and elegance to your living space.

Driftwood Shelves

For a simpler project, consider making shelves. Select a few flat driftwood pieces of similar size. Attach brackets to the underside of each piece and mount them to the wall. These shelves can hold books, plants, or other decorative items, bringing a natural touch to your home.

Driftwood Mirrors

A driftwood mirror can beautifully combine functionality with nature-inspired design. Start with a simple frameless mirror and gather driftwood pieces to create an intricate frame.

Creating the Frame

Lay the mirror flat and arrange pieces of driftwood around its edge. Once satisfied with your arrangement, use a strong adhesive to attach each piece to the mirror. Let it dry thoroughly before hanging. This project can turn a plain mirror into a stunning focal point.

Driftwood Candle Holders

Candle holders made with driftwood can add warmth and ambiance to your space. The natural texture of driftwood pairs beautifully with the soft glow of candlelight.

Crafting Candle Holders

Select pieces of driftwood that have flat, stable bases. Drill holes into the wood, sized to fit tea lights or votive candles. Ensure the holes are not too deep to prevent the candle from being submerged. The result is a cozy and inviting piece perfect for dinner tables or living areas.

Driftwood Picture Frames

Why not frame your cherished memories with something equally unique? Driftwood picture frames are a simple yet striking way to display photos.

Assembling Picture Frames

Select pieces of driftwood that, when arranged, create a rectangular or square shape the size of your desired frame. Use strong adhesive or small screws to connect the pieces at each corner. Once assembled, attach a backing board and your chosen picture. This handcrafted frame emphasizes the personal touch of the memories it holds.

Driftwood Plant Holders

Driftwood plant holders offer a way to bring both earthy materials and lush greenery into your home, creating a soothing and natural environment.

Building Plant Holders

Look for driftwood pieces that can naturally support a small pot or plant. Securely attach the plant to the driftwood using twine or a decorative holder. For hanging planters, choose lightweight plants and driftwood to easily hang them from the ceiling or a wall. These holders can add a touch of nature to any room.

Driftwood Sculptures

For those who enjoy more artistic endeavors, creating sculptures from driftwood can be both challenging and rewarding. Your sculptures can take any form, like animals, abstract shapes, or thematic expressions.

Crafting Sculptures

Select a mix of driftwood sizes and shapes that inspire you. Use tools such as a saw, chisel, and sandpaper to shape your sculpture. Bond the pieces with glue or screws, experimenting as you go. Each sculpture is as unique as the materials, allowing your creativity to lead the way.

Tips for Success

Undertaking driftwood DIY projects can be immensely fulfilling, but there are a few tips to keep in mind to ensure success.

Safety First

Always prioritize safety. Use gloves when handling driftwood to avoid splinters, and wear protective eyewear when cutting or drilling. Be cautious with tools and materials to prevent injuries.

The Right Tools

Ensure you have the right tools on hand for your project. Basic tools like a saw, drill, sandpaper, and adhesive are often essential. For more complex projects, additional power tools might be necessary.

Patience and Creativity

Patience is key when working with natural materials like driftwood. Plans might need to change as you adapt to the material’s quirks. Embrace the unique characteristics of each piece, allowing them to guide your creative process.

Driftwood Diy Projects

Caring for Driftwood Creations

Proper care of your driftwood creations extends their life and keeps them looking their best. As these natural materials can be susceptible to elements, a few simple maintenance steps can ensure their longevity.

Regular Cleaning

Dust your driftwood pieces regularly using a soft cloth. For more intricate projects, a gentle vacuum or compressed air can help reach small crevices. Avoid wetting the wood too often, as moisture can cause damage over time.

Sealant Protection

Applying a protective sealant can help preserve your driftwood creations, especially if they are placed outdoors. A clear, matte sealant maintains their natural appearance while providing a barrier against moisture and pests.

Indoor vs. Outdoor

Consider the conditions your driftwood projects will be exposed to. Indoor settings prolong their life, while outdoor displays might need more frequent maintenance. Be mindful of extreme weathers, which can affect driftwood’s integrity over time.

Driftwood DIY projects offer an opportunity to blend nature and creativity in truly unique ways. Whether you’re crafting something simple or embarking on a complex creation, these projects allow you to bring a piece of the natural world into your home. So next time you find yourself on a beach, remember to collect a few pieces of driftwood—they might just become a part of your next artistic journey. Let each piece tell its story and allow your imagination to bring it new life.

Filed Under: Driftwood Ideas Tagged With: crafts, Driftwood, Handmade, home decor, Upcycling

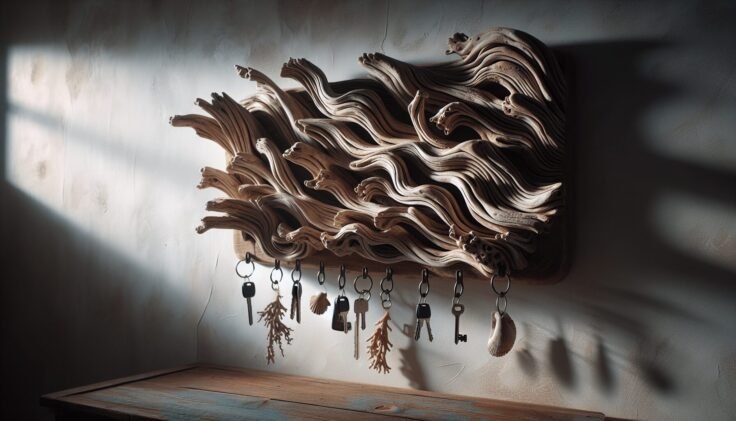
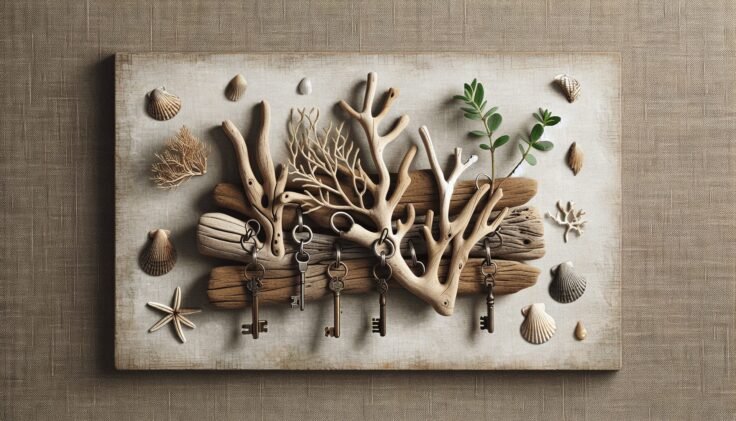
Driftwood Keychain Diy

February 19, 2025 by admin

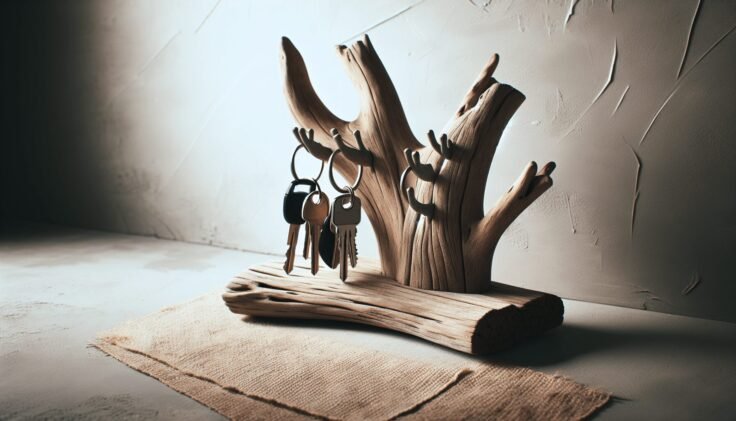
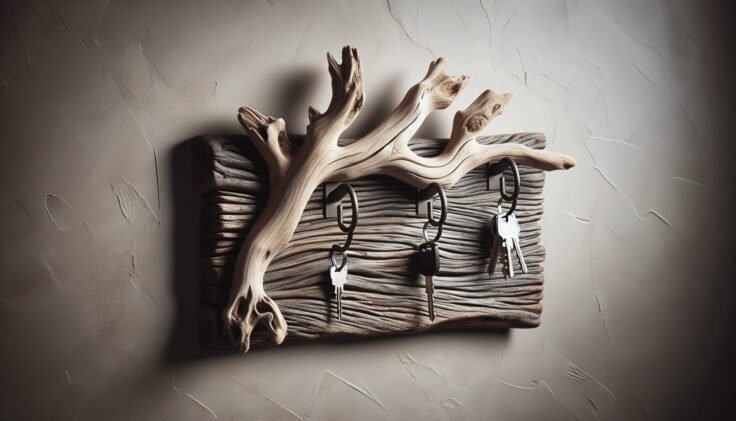
Have you ever admired the charm of driftwood when you visit a beach or a lakeside? There’s something magical about the way pieces of wood are weathered by the untamed forces of nature, crafting unique textures and forms. Driftwood carries a story, molded by the waves and elements over time. What if you could transform these beautiful relics into something both artistic and functional? Making a driftwood keychain is not only a great way to preserve a piece of your favorite shoreline, but also to carry a memory with you wherever you go. Let’s embark on this enjoyable and rewarding DIY journey together.

Understanding Driftwood

Driftwood is wood that has been washed onto a shore or beach by the action of winds, tides, or waves. It is often smoothed and worn into interesting and intriguing shapes. Driftwood is prized not only for its unique appearance but also for its sustainable and organic qualities. Before starting your keychain project, it’s essential to know a bit about this lovely material.

The Origins of Driftwood

Driftwood can originate from various sources. It might come from trees or shrubs that live by the water’s edge, carried away by floods or tides. Many pieces of driftwood begin as parts of larger logs or branches that get washed away by rivers. Over time, ocean currents carry this wood, breaking it down into smaller pieces with unique shapes.

The Fascination with Driftwood

The appeal of driftwood lies in its individuality and natural beauty. Each piece has its own texture and form, shaped by the elements over time. This individuality lets you create keychains that are as unique as the driftwood itself. Plus, using an eco-friendly material like driftwood aligns with a sustainable lifestyle, making it an ethical choice for DIY projects.

Gathering Driftwood

Now that you appreciate the beauty of driftwood, it’s time to gather some pieces for your project. The best places to find driftwood are beaches, lakesides, and riverbeds. Let’s walk through a few steps on how to collect the ideal pieces.

Locating Your Treasures

Whether you’re walking along a sandy beach or a rocky lakeside, look for pieces that appeal to you. Consider their size, shape, and texture. Remember, you’re looking for small pieces that would work well as keychain accents. It’s helpful to note that some beaches might have restrictions on collecting natural objects, so always be mindful of local regulations.

Choosing the Right Pieces

For a keychain, you would want small, lightweight pieces. Look for pieces that fit comfortably in your hand and have enough thickness to withstand day-to-day wear as a keychain. Aim for those that have interesting shapes or textures. Don’t forget, each piece you choose tells a unique story through its form and pattern.

Driftwood Keychain Diy

Preparing Your Driftwood

Once you’ve gathered your chosen pieces, it’s crucial to prepare them for use. Preparing driftwood adequately ensures they are clean, preserved, and ready for conversion into a keychain.

Cleaning Driftwood

Driftwood may be covered in dirt, sand, or salt due to its time spent in the wild. Start by rinsing your collection with fresh water, scrubbing them with a brush to remove any debris. You can soak them for a few hours in fresh water to eliminate salts and other impurities. Once clean, allow them to dry thoroughly.

Sanitizing the Pieces

To sanitize the driftwood, consider boiling them for an hour. This process will remove any bacteria or organisms lingering in the wood. Once boiled, let them dry completely, preferably in a sunny spot. The drying process might take up to a few days, depending on the size and thickness of the wood.

Designing Your Keychain

With clean and sanitized driftwood, you are now ready to start designing your keychain. Designing your keychain involves creativity and a personal touch, adding charm to your everyday carry.

Choosing Your Design

The design process is all about personal preference. Would you like a simple piece of driftwood pierced through with a keychain ring? Or do you envision a cluster of smaller pieces adorned with beads? Think about the look and feel you want to achieve. Sketching out your ideas may help visualize the final product.

Embellishing Driftwood

You can enhance the natural beauty of driftwood by adding embellishments. Consider using paints, varnishes, or even metal leaf for a touch of glamour. If you’d like to incorporate additional materials like beads or charms, plan how they will attach. Use strong adhesives or creative knotting techniques to bring together these elements.

Assembling Your Keychain

Now that you have a design in mind, it’s time to assemble your keychain. Assembling requires a few tools and materials which are easy to find and use.

Tools and Materials Needed

Here is what you will need to assemble your driftwood keychain:

Tool/MaterialPurpose
Keychain ringsTo attach your driftwood piece to your keys.
Drill with a small drill bitFor creating holes if needed.
Sandpaper (fine grit)To smooth any rough edges.
Strong adhesive (e.g., epoxy)For attaching embellishments.
Paint, beads, charms (optional)For decoration.

Step-by-Step Assembly

  1. Prepare the Driftwood: Ensure your driftwood piece is clean, dry, and any rough edges are sanded down for smooth handling.

  2. Drill Holes: Use the drill to make a small hole at the top of the driftwood piece if you plan to string it directly onto a keychain ring.

  3. Add Embellishments: If using paints or other decorative items, apply them now. Allow any adhesives or paint to dry as per the instructions on their packaging.

  4. Attach to Keychain: Thread the driftwood onto the keychain ring through the drilled hole or attach using your chosen method (e.g., adhesive with additional décor elements).

  5. Finishing Touches: Once all pieces are assembled and dried, ensure everything is secure and the keychain looks as you imagined.

Tips for Success

Creating a driftwood keychain is a rewarding process, but there are some tips and tricks to ensure everything goes smoothly.

Playing with Proportions

When designing your keychain, consider the proportion relative to your keys and other objects you carry. A bulky or oversized keychain might not be practical for daily use.

Sealing Driftwood

To maintain the beauty of your driftwood and protect it against daily wear, consider sealing it with a clear wood sealant. This step adds durability while enhancing its natural shine.

Personalization Ideas

Personalize your keychain for yourself or as a gift. Carve initials into the wood or add charms representing a favorite hobby or memory. Personal touches make your keychain truly unique.

Cherishing Your Creation

Congratulations on creating your unique driftwood keychain! This project not only results in something stylish and practical for yourself but can also be a memorable gift for loved ones. Driftwood keychains carry both a personal and natural narrative, encouraging you and others to appreciate the artistry found in nature and the joy of crafting with your own hands.

Your driftwood keychain is now more than an accessory; it’s a testament to creativity and the timeless beauty of nature. Enjoy the satisfaction of carrying your little piece of nature with you wherever you go, always reminding you of the power and wonder of the natural world.

Filed Under: Driftwood Ideas Tagged With: crafting, DIY Project, Driftwood, Handmade, Keychain

Driftwood Keychain Ideas

February 18, 2025 by admin

Have you ever thought about how a simple piece of driftwood could transform into a unique accessory, like a keychain? Driftwood, with its natural, rustic charm, carries the essence of nature and the sea, making it an ideal material for crafting. In this article, you’ll discover a variety of inventive driftwood keychain ideas that not only highlight your personal style but also make for thoughtful gifts or cherished keepsakes.

Driftwood Keychain Ideas

What Makes Driftwood Special?

Driftwood is more than just wood washed ashore. Over time, it’s shaped by the waves, wind, and sand, each piece carrying a story of its journey. This naturally weathered appearance gives it a distinct texture and color, making each piece unique. Using driftwood for crafts allows you to bring a piece of personal history and natural beauty into your everyday life.

Attributes That Enhance Keychains

Driftwood’s lightweight nature makes it perfect for keychains, keeping them from becoming cumbersome or heavy. Its durability ensures that it can withstand being jostled around in your pocket or bag. Moreover, its distinct texture adds a tactile element that goes beyond the visual, making for an accessory that’s as interesting to touch as it is to look at.

Selecting the Perfect Driftwood

Choosing the right driftwood is essential to crafting beautiful keychains. Not all driftwood pieces are suitable, so knowing how to select the right one can make all the difference.

Size and Shape Considerations

When selecting driftwood for keychains, focus on pieces that are small yet sturdy. Ideally, these pieces should not exceed a few inches in length. Look for wood that fits comfortably in your hand and has no sharp edges. Unique shapes can add character, but ensure they won’t snag or cause discomfort.

Texture and Color Variations

The texture and color of the driftwood will greatly influence the look of your keychain. Variations in grain, as well as a mix of darker and lighter tones, can add interest. Consider whether you prefer a piece with a smoother finish, indicative of longer exposure to the elements, or one with more pronounced ridges and grooves.

DIY Driftwood Keychain Ideas

With your perfect piece of driftwood in hand, it’s time to brainstorm some keychain designs. Below are several ideas to get you started, ranging from simple to slightly more complex.

Minimalist Driftwood Keychain

This is the easiest style to start with, perfect for those new to crafting. A minimalist design showcases the natural beauty of the driftwood without much embellishment.

  1. Materials Needed:

    • Small piece of driftwood
    • Keychain ring
    • Drill
  2. Steps:

    • Drill a small hole into one end of the driftwood.
    • Attach the keychain ring through the drilled hole.

This design highlights the rustic simplicity of driftwood, letting its natural texture and shape take center stage.

Engraved Driftwood Keychain

Add a personal touch by engraving the driftwood. Whether for initials, a favorite word, or a special date, the engraving can make your keychain uniquely yours.

  1. Materials Needed:

    • Small to medium driftwood piece
    • Engraving tool or wood-burning pen
    • Keychain ring
  2. Steps:

    • Smooth the area to be engraved.
    • Carefully engrave your design on the wood.
    • Drill a hole for the keychain ring.

This approach requires a bit of skill but results in a personalized keepsake you’ll treasure.

Painted Driftwood Keychain

Use paint to add a splash of color or patterns to your driftwood keychain. This style is perfect for letting your creativity shine, as you can create designs ranging from simple stripes to intricate mandalas.

  1. Materials Needed:

    • Driftwood
    • Acrylic paints and brushes
    • Sealant
    • Keychain ring
  2. Steps:

    • Paint desired designs on the driftwood.
    • Once dry, apply a sealant to protect the paint.
    • Drill a hole for the keychain ring.

The painted designs provide an opportunity to infuse bold colors and patterns onto what is traditionally a more subdued material.

Wire-Wrapped Driftwood Keychain

Incorporate wire to enhance the look of your driftwood. This design adds a rustic, yet sophisticated touch.

  1. Materials Needed:

    • Driftwood
    • Craft wire
    • Round nose pliers
    • Keychain ring
  2. Steps:

    • Wrap the wire creatively around the driftwood.
    • Secure ends with pliers to keep the wire in place.
    • Attach the keychain ring.

Wire wrapping can elevate the simple beauty of driftwood with a touch of metal, adding an industrial twist.

Driftwood and Bead Keychain

Combine beads with driftwood to create an embellishment that’s both earthy and colorful. Beads can add pops of color or additional texture, providing endless combinations for customization.

  1. Materials Needed:

    • Driftwood
    • Selection of beads
    • Strong jewelry string
    • Keychain ring
  2. Steps:

    • String beads alongside or through the driftwood.
    • Secure tightly and attach to the keychain ring.

This style allows for a myriad of arrangements with varying bead colors and materials.

Caring for Your Driftwood Keychain

Once you’ve crafted your driftwood keychain, proper care is crucial to maintain its beauty.

Maintaining Finish and Color

Driftwood, though robust, is prone to drying and cracking if not treated properly. Apply a coat of natural oil or wax to maintain its moisture balance. This can help preserve the wood’s rich, natural color over time.

Repair and Longevity Tips

If your driftwood keychain shows signs of wear or damage, a light sanding can revive its surface. Reapply coatings to protect against further wear and restore its appearance. Regular maintenance will ensure your keychain remains a lasting keepsake.

Driftwood Keychain Ideas

Where to Find Quality Driftwood

If you don’t live near a coastline, procuring driftwood might seem challenging. However, there are a few practical alternatives.

Natural Collection Sites

For those with access to beaches, natural collection is ideal. Simply walk along the shore where driftwood commonly washes up. Remember to clean the pieces thoroughly at home.

Online and Craft Stores

Many online retailers and craft stores offer preselected, quality driftwood for those unable to source it naturally. This can be a convenient option, offering a variety of sizes and shapes to choose from.

Environmental Considerations

Sustainability is key when crafting with natural materials.

Sustainable Practices

When gathering driftwood, always adhere to local regulations to ensure the ecosystem remains undisturbed. Take only what you need, and consider working with reclaimed driftwood.

Supporting Eco-friendly Businesses

If purchasing driftwood, rely on sellers who source ethically. Many businesses prioritize sustainable practices, providing pieces while seeking to protect natural resources.

Table: Comparison of Driftwood Keychain Styles

StyleSkill LevelMaterials RequiredPersonalization OptionsKey Feature
MinimalistBeginnerDriftwood, Keychain ring, DrillNatural textureHighlights driftwood’s inherent beauty
EngravedIntermediateDriftwood, Engraving tool, Keychain ringCustom engravingsOffers personalization through engraving
PaintedIntermediateDriftwood, Acrylic paints, Sealant, Keychain ringVarious paint designsAdds a splash of color
Wire-WrappedIntermediateDriftwood, Craft wire, Pliers, Keychain ringWire designsUnique combination of wood and metal
Driftwood and BeadIntermediateDriftwood, Beads, Jewelry string, Keychain ringBead choice and arrangementsAdds texture and color from beads

Conclusion

Crafting driftwood keychains is an engaging way to showcase creativity and align with nature’s beauty. Each piece tells a story, carrying with it a unique charm that speaks to the ocean’s enduring power. Whether you opt for minimalist designs or intricate embellishments, these keychains are bound to add a personal touch to everyday life. Enjoy the process of bringing your vision to life and creating something both beautiful and functional.

Filed Under: Driftwood Ideas Tagged With: craft ideas, DIY, Driftwood, Handmade, Keychain

Driftwood Daisy

February 15, 2025 by admin

What comes to mind when you hear the term “Driftwood Daisy”? Is it an enchanting flower washed ashore by the tides, or perhaps something entirely different? You’re about to unravel the mystery behind this intriguing name, immersing yourself in a world where nature, history, and art intertwine seamlessly.

Discovering the Driftwood Daisy

Driftwood Daisy is a term that resonates with both nature enthusiasts and art lovers, weaving a narrative comprised of both natural beauty and human creativity. But what exactly is a Driftwood Daisy? In essence, it is not a conventional flower. Instead, it describes artistic creations made from driftwood found along shorelines, crafted to resemble daisies or, metaphorically, beautiful and resilient entities that arise from humble beginnings.

The Natural Allure of Driftwood

To understand Driftwood Daisy, one must first appreciate driftwood. Driftwood is wood that has been washed onto a shore or beach of a sea, lake, or river by the wind, tides, or waves. With its rustic, weathered appearance, driftwood embodies the perpetual motion and power of Earth’s natural forces, showcasing how time and nature can transform ordinary objects into extraordinary pieces of artwork.

Evolution of the Concept

Interestingly, the concept of Driftwood Daisy brings together this natural element with human creativity. The name perhaps reflects the delicate balance between ruggedness and elegance. While “daisy” denotes beauty, simplicity, and purity, “driftwood” symbolizes strength and endurance. The juxtaposition creates an entity that mirrors art imitating life.

Your Guide to Creating Driftwood Daisies

Whether you want to bring a bit of coastal allure to your home décor, or you’re fascinated by the process of creating such pieces, getting hands-on with driftwood can be immensely rewarding. This section guides you through the basics of creating your own Driftwood Daisy.

Choosing the Right Driftwood

Finding the perfect driftwood is the first and crucial step. The piece should be robust enough to hold shape but malleable enough to work with. As each coastal area yields different types of driftwood, depending on indigenous trees, the challenge is in selecting pieces that resonate with your artistic vision.

  1. Look for Well-Weathered Pieces: These have spent enough time in water to gain the desired smoothness and texture.
  2. Consider the Size and Shape: For a daisy-like structure, you’ll want parts that can be easily shaped into petals and stems.
  3. Check for Durability: Ensure that the driftwood is not overly fragile or brittle.

Tools and Materials

Before you start crafting, gather the necessary tools and materials. The beauty of driftwood art is that it doesn’t require extensive resources.

  • Basic Tools: Scissors, glue, a drill, and sandpaper.
  • Art Supplies: Acrylic paints (if you wish to add color), wire (for support structures), and varnish (to preserve the finished product).

Crafting Your Driftwood Daisy

With your materials ready, it’s time to start creating. Here’s a simplified step-by-step guide:

  1. Design Your Daisy: Sketch a rough design of how you envision your driftwood daisy to look.
  2. Assembling the Petals and Stem: Using the driftwood pieces, start shaping the petals by sanding down sharp edges. Attach them to a central piece using glue or wire.
  3. Securing the Design: Ensure every piece is firmly attached. Reinforce with wire if necessary.
  4. Finishing Touches: Sand any rough edges and polish with varnish for a smooth finish.

Adding Personal Touches

Your driftwood daisy can become a personalized piece of art. Feel free to paint the tips of the petals or leave them bare to maintain the wood’s natural essence. The freedom lies in the expression, ensuring each piece reflects the creator’s unique vision.

Driftwood Daisy

Driftwood Daisy in Art and Culture

Driftwood Daisy isn’t just a creative project; it’s a motif that finds its echoes in the realms of art and culture. The symbolism extends far beyond the physical object, introducing deeper philosophical and artistic interpretations.

Symbolism in Art

In art, driftwood has long been a medium for expressing ideas about nature, transformation, and resilience. Representing the cyclical passage of time, it’s a testament to endurance and an ode to change—a narrative perfectly captured in the Driftwood Daisy.

Cultural Connections

Driftwood art holds cultural significance across various communities. In coastal societies, driftwood symbolizes a connection to the sea, representing both a livelihood and a source of inspiration. Incorporating these sentiments, Driftwood Daisies become symbols of hope and continuity.

Environmental Impact and Driftwood Sourcing

The environmental aspect of collecting driftwood shouldn’t be overlooked. Understanding how to ethically source and utilize driftwood isn’t merely a responsible practice but also a way to honor the environment providing you these resources.

Ethical Collection Practices

When collecting driftwood, it’s important to do so responsibly to maintain the balance of marine and lake ecosystems. Here are a few tips:

  • Permits: Some areas may require permits to collect driftwood, so always check local regulations.
  • Avoid Over-collecting: Driftwood serves critical ecological roles—housing wildlife and stabilizing beach and lakefront geology. Take only what you need.
  • Conservation Considerations: Be mindful of preserving local habitat, so ensure that your foraging activities do not disturb native wildlife.

Potential Alternatives

If collecting driftwood from the wild isn’t possible or permitted, consider sustainable alternatives:

  • Reclaimed Wood: Using reclaimed wood from sustainable sources provides similar aesthetic appeal without compromising environmental integrity.
  • Driftwood Markets: Purchase driftwood from reputable sources that prioritize sustainable practices.

Driftwood Daisy

Driftwood Daisy: A Sustainable Art Form

The allure of a Driftwood Daisy extends into sustainability. Creating art from driftwood supports eco-friendly practices, encourages recycling, and promotes environmental stewardship.

Promoting Sustainability

Driftwood art underscores the importance of recycling natural materials. By crafting Driftwood Daisies, you’re not simply creating art but participating in a movement that values environmental health.

Wooden Art and Modern Trends

As awareness about environmental conservation grows, driftwood creations align with a broader trend toward natural, sustainable decoration solutions. Driftwood Daisies reflect a desire for authenticity and simplicity in design, resonating with consumers seeking meaningful décor that tells a story.

Crafting Communities and Driftwood Daisies

As you delve into the world of Driftwood Daisies, you’ll find vibrant communities filled with artists and creators sharing their works and exchanging ideas.

Joining the Driftwood Art Community

Whether online or in physical spaces, these communities provide:

  • Creative Inspiration: Discover diverse styles and approaches.
  • Collaborative Projects: Engage in group endeavors to create larger installations.
  • Educational Resources: Access tutorials and workshops to refine your skills.

Social Media and Sharing

Platforms like Instagram and Pinterest are popular for exhibiting driftwood art:

  • Showcase Your Work: Share creations with others, gaining feedback and appreciation.
  • Follow Influencers: Learn from experienced artists who have mastered the art of driftwood creations.

Final Thoughts on Driftwood Daisy

The idea of Driftwood Daisy weaves a story that goes beyond simple artistic creation, emphasizing a respect for nature, an embrace of creativity, and participation in a sustainable future. Through learning about Driftwood Daisies, you’ve journeyed through a blend of natural wonder and human ingenuity. What’s more, you now have the tools and knowledge to start creating your own masterpiece, perhaps encouraging others to appreciate the limitless possibilities of nature-inspired art in the process.

Driftwood Daisies offer a profound connection to the simple yet extraordinary beauty found in nature’s weathered remnants. Embrace this art form, and let it flourish within you, combining the nostalgia of vintage aesthetics with contemporary environmental sensibilities. Perhaps, in your hands, driftwood can transform into not just a daisy, but a symbol of hope, artistry, and ecological mindfulness.

Filed Under: Driftwood Ideas Tagged With: Art, Daisy, Driftwood, Handmade, Rustic

Driftwood Creations

February 4, 2025 by admin

Have you ever stumbled upon a piece of driftwood and wondered what stories it might tell if it could speak? Driftwood, shaped by the relentless forces of water, sand, and time, carries a mysterious appeal and a world of possibilities for artistic creation. Each piece is unique, with its own texture, form, and history, making it a captivating medium for artists, hobbyists, and decorators alike. Welcome to the fascinating world of driftwood creations, where nature’s artistry meets human creativity.

What is Driftwood?

Driftwood is wood that has been washed ashore by the action of tides, waves, or wind. This natural phenomenon occurs in lakes, rivers, and oceans, where wood travels large distances and undergoes significant transformations. The constant motion of water and the gritty friction of sand and rocks gradually strip away bark and polish the wood, resulting in smooth, uniquely shaped pieces.

The Journey of Driftwood

The journey that a piece of wood undergoes to become driftwood is as varied as its final appearance. Originating from fallen branches, logs, or trees, it can travel across bodies of water for months or even years before washing ashore. This journey contributes to its worn, weathered look and makes each piece a one-of-a-kind natural artifact, perfect for creative expression.

The Appeal of Driftwood Creations

Driftwood has long been admired for its aesthetic appeal. Its organic shapes and natural textures offer an earthy, rustic charm that can’t be replicated by manufactured materials. Its neutral palette of grays and browns can complement any decor style, from modern minimalist to cozy rustic. The versatility of driftwood allows you to create anything from simple, natural-looking sculptures to intricate, complex designs.

Sustainability and Driftwood

Using driftwood for artistic purposes also contributes to environmental sustainability. Driftwood is often seen as waste in the natural environment, but repurposing it into artworks or functional pieces gives it new life. It’s a form of recycling that doesn’t require any additional resources and minimizes environmental impact, making it an eco-friendly choice for creative projects.

Driftwood Creations

Tools and Materials for Driftwood Projects

Starting a driftwood project doesn’t require a vast arsenal of tools or materials. However, a few essentials can make the process easier and more enjoyable. Let’s explore what you might need for your driftwood creations.

Basic Tools List

The tools you need may vary depending on the complexity of your project, but here’s a basic list to get you started:

ToolPurpose
SawCutting the driftwood into desired sizes.
SandpaperSmoothing rough edges and surfaces.
DrillMaking holes without splitting the wood.
Wire & GlueAssembling multiple pieces securely.
Paint & BrushesAdding color or finishing touches.

These tools are readily available and will serve you well in most driftwood projects, whether simple or intricate.

Selecting the Right Driftwood

Choosing the right piece of driftwood is crucial for the success of your project. Consider the size, shape, and condition of the wood. Larger pieces are great for substantial installations, while smaller pieces work well for detailed sculptures or ornaments. Ensure the wood is dry and free of bugs or signs of rot.

Creating Your Driftwood Artwork

With the right tools and materials, your driftwood creation is limited only by your imagination. Whether you’re looking to make a statement piece for your living room or a small gift for a friend, the process of crafting with driftwood can be incredibly rewarding and meditative.

Driftwood Sculptures

Driftwood sculptures are an excellent way to showcase the wood’s natural beauty. You can create standalone artworks or incorporate other materials, such as glass or metal, for mixed-media pieces. Start by arranging your selected pieces in a way that brings your vision to life, then use wire or glue to secure them together.

Driftwood Furniture

Driftwood furniture, such as tables, chairs, or shelves, adds character and uniqueness to any home. When building furniture, structural integrity is essential. Use sturdy pieces of driftwood for the legs or frame and ensure all joints are secure with strong adhesives or screws.

Driftwood Decor

Driftwood can also be used in smaller decorative items, such as picture frames, mirrors, or candle holders. These projects often involve combining driftwood with other elements like seashells, stones, or fabric to create appealing, personalized decor.

Finished Projects and Maintenance

Once you’ve completed your driftwood project, you may want to apply a finish to protect the wood and enhance its appearance. Natural oils, such as linseed or tung oil, add a warm glow and help preserve the wood. Regular dusting and occasional reapplication of oil will keep your driftwood pieces looking their best for years to come.

Driftwood Creations

Guided Driftwood Projects for Beginners

If you’re new to driftwood art, starting with simple projects can help you build confidence and develop skills. Here’s a step-by-step guide to creating a driftwood wall hanging and a driftwood candle holder.

Driftwood Wall Hanging

  1. Select Your Driftwood: Choose several pieces of similar size and thickness.

  2. Prepare the Wood: Clean any dirt and sand the surfaces lightly.

  3. Assemble the Pieces: Align the driftwood pieces in a pattern that pleases you, such as vertical or horizontal lines.

  4. Secure the Pieces: Use wire or strong glue to attach the pieces.

  5. Add Hanging Hooks: Attach hooks or loops to the back for easy wall mounting.

Driftwood Candle Holder

  1. Choose a Base Piece: Select a flat piece of driftwood as the base.

  2. Drill Holes: Drill small holes where you would like to place candles.

  3. Insert Candle Holders: Use small metal or glass candle holders in the holes for safety.

  4. Finishing Touches: Sand the edges and consider adding oil for a polished look.

Safety Considerations

When working with driftwood, safety should always be a top priority. Here are a few tips to ensure you work safely:

  • Wear Protective Gear: Gloves, safety glasses, and masks are essential when sawing or sanding wood.
  • Use Tools Safely: Follow the manufacturer’s instructions for all tools, and work slowly to prevent accidents.
  • Beware of Bugs: Inspect the wood for insects and either avoid infested pieces or treat them appropriately.

Conclusion

Driftwood creations present a unique opportunity to connect with nature through art. Whether you’re crafting sculptures, furniture, or simple decorations, each piece carries a story of its journey through water and time. As you explore the possibilities of driftwood, you’ll find not only a canvas for creativity but also a reminder of the beauty and resilience of the natural world. With the right tools and a bit of imagination, you can transform humble driftwood into stunning pieces, bringing a piece of nature’s artistry into your home.

Filed Under: Driftwood Ideas Tagged With: Art, DIY, Driftwood, Handmade, Sculptures

Driftwood Cross Diy

February 3, 2025 by admin

Have you ever stumbled upon a beautiful piece of driftwood while walking along the beach and wondered how you could transform it into something unique for your home? Crafting a driftwood cross can be a fulfilling project that infuses a touch of nature and spirituality into your space. With a bit of creativity and some basic materials, you can create a stunning piece that resonates with personal meaning and rustic charm.

Driftwood Cross Diy

Understanding Driftwood

Before you begin your DIY project, it’s essential to understand what driftwood is and why it’s a fantastic material for crafting. Driftwood refers to the weathered pieces of wood that wash ashore on beaches, having been shaped and smoothed by water and sand over time. Each piece tells its own story, with its unique textures and patterns.

Why Choose Driftwood for DIY?

Choosing driftwood for your DIY projects offers both aesthetic and environmental benefits. Not only does each piece serve as a unique canvas, but using driftwood repurposes natural materials that might otherwise go unused. Its rustic appeal complements various decor styles, adding a hint of coastal ambiance to your home.

Collecting the Perfect Piece of Driftwood

Finding the right driftwood pieces is both an adventure and a mindful process. While walking along the beach, look for pieces that are lightweight, relatively dry, and without rot. Remember to check local regulations, as some areas may have restrictions on collecting driftwood.

Materials and Tools You’ll Need

Gathering the right materials and tools is crucial for a smooth crafting process. Here’s what you’ll need:

  • Driftwood Pieces: Look for a selection of lengths that can be layered to form a cross.
  • Wood Glue: A strong adhesive to hold your structure together.
  • Small Drill and Drill Bits: For making holes if you decide to use screws.
  • Screws: Optional, for added stability.
  • Wood Sandpaper: To smooth any rough edges.
  • Protective Finish or Sealant: To preserve the wood.
  • Twine or Wire: For additional support or a decorative element.
  • Saw or Pruning Shears: To cut the wood down to size if needed.
  • Decorative Items: Like shells, stones, or small plants to personalize your creation.

Steps to Create Your Driftwood Cross

Creating a driftwood cross involves a few straightforward steps. Planning and organizing will ensure your project comes together beautifully.

Step 1: Design Your Cross

Start by visualizing the shape and size of your cross. Arrange your driftwood pieces on a flat surface. Play around with different configurations until you find the one that speaks to you. Don’t worry about perfection—part of the charm lies in its uniqueness.

Step 2: Prepare Your Driftwood

Once you’re satisfied with the layout, it’s time to prepare your driftwood for assembly. Use sandpaper to address any rough spots. This step ensures your final piece is smooth and safe to handle. If needed, use a saw to resize any pieces for your desired dimensions.

Step 3: Assemble the Cross

With your design settled and wood prepared, start assembling. Begin with the vertical piece and attach the horizontal one at your preferred position to form the cross. Apply wood glue at the joining point. Hold the pieces together while the glue sets. For added strength, consider drilling and using screws.

Step 4: Secure with Twine or Wire

After assembling, grab some twine or wire to wrap around the central junction. This not only strengthens the hold but adds to the rustic, natural aesthetic. Wrap firmly but not too tight to avoid breaking the wood.

Step 5: Add Finishes

When your cross structure is solid, apply a protective finish or sealant. This step will protect it from environmental factors, deepening the wood’s natural hues.

Step 6: Customize with Decorations

Personalize your driftwood cross further by adding decorations. Glue shells, small stones, or incorporate small plants for a touch of greenery. Think of colors and elements that complement your overall theme.

Troubleshooting Tips

Every DIY project comes with its challenges. Here are a few tips to help you navigate common pitfalls when crafting your driftwood cross.

Securing Loose Pieces

If you find driftwood pieces are not adhering well, assess whether more wood glue, twine, or wire is needed. Sometimes, adding additional glue and allowing extra drying time solves loose piece issues.

Dealing with Fragile Wood

Driftwood can sometimes be fragile. Avoid forceful sanding, and handle with care during assembly. If a piece seems too fragile, consider replacing it with a stronger one.

Driftwood Cross Diy

Displaying Your Driftwood Cross

Once your cross is complete, choosing where and how to display it becomes part of the creative process. Consider hanging options or standing it against a backdrop.

Hanging Your Cross

For hanging, attach discreet hooks at the back or loop a strong wire that blends with your wall color. Choose a wall that offers contrast, allowing your creation to shine.

Creating a Stand

If you prefer to have it freestanding, attach a base or weighted stand. Use wood or a heavier rock, securing with wood glue or screws, and ensure your cross can balance.

Caring for Your Driftwood Cross

Regular Dusting

Keep your cross looking fresh by dusting it regularly. Use a soft, dry cloth or a duster to remove any accumulated dirt or dust.

Resealing If Necessary

Over time, your driftwood cross may require resealing to maintain its beauty. Monitoring the sealant’s integrity and reapplying as needed ensures preservation.

The Meaning Behind the Cross

A driftwood cross holds personal significance for many. Bringing together nature and spirituality, it represents connections to both the earth and a higher power.

Spiritual Significance

For many, a cross is a symbol of faith and hope. Creating one from driftwood is an opportunity for reflection, making it meaningful for your spiritual journey.

Nature’s Touch

A driftwood cross captures the essence of nature’s beauty. It’s a reminder of the calming presence and strength found in the natural world.

How to Gift a Driftwood Cross

Driftwood crosses make thoughtful gifts. Their personal touch and handmade charm convey deep sentiment.

Presentation Ideas

Consider wrapping in recyclable materials, staying consistent with its natural theme. A simple paper wrap with a twine bow or an eco-friendly gift bag would enhance its rustic appeal.

Writing a Personal Note

Accompany your gift with a handwritten note. Share the inspiration and thoughts behind your creation, adding a personal touch that the recipient will cherish.

Exploring Further Projects

Creating a driftwood cross may inspire you to explore more DIY projects. Here are some ideas to extend your creativity using driftwood.

Driftwood Picture Frames

Design and create unique driftwood picture frames to showcase your favorite photographs. The rugged texture juxtaposed with photographs adds depth and charm.

Driftwood Wall Art

Form intricate wall patterns by assembling various driftwood pieces, creating art that speaks both subtlety and modernity.

Driftwood Furniture

For the more adventurous, crafting small furniture items like tables or stools using driftwood can be a rewarding challenge.

Conclusion

Crafting a driftwood cross is not just a project but a journey merging creativity, nature, and personal meaning. The steps outlined here guide you from concept to completion, allowing you to enjoy the crafting process while ending with a beautiful piece that resonates personally. Your driftwood cross will be more than a decorative item; it will be an emblem of craftsmanship and inspiration. Enjoy your crafting adventure, and may your new creation bring warmth and joy to your space or to those you choose to gift it.

Filed Under: Driftwood Ideas Tagged With: craft, cross, Driftwood, Handmade, home decor

Driftwood Cross

February 3, 2025 by admin

Have you ever stumbled upon a piece of driftwood on a beach and wondered about its journey? Driftwood has a way of captivating the imagination with its weathered appearance and unique shapes. Its story intertwines with nature’s elements of water, wind, and time. Among the myriad forms driftwood can take, the “Driftwood Cross” stands out, both for its simple beauty and the symbolic meanings it may convey.

Driftwood Cross

The Origin of Driftwood

Driftwood begins its journey as a vital part of forest ecosystems, playing a role in the life cycles of various species. When trees fall naturally or due to external forces like storms, parts of them enter waterways. Streams and rivers carry these logs and branches, eventually leading them to lakes, seas, or oceans. During this voyage, the wood undergoes significant transformation.

Transformation Through Time

The constant movement and exposure to elements like water, sun, and salt play a significant role in shaping driftwood. The water wears the wood smooth, removing bark and any sharp edges. Salt can bleach the driftwood, giving it a distinctive pale coloration. Over time, these factors, combined with the effects of wind and sand, create the characteristic appearance of driftwood that many find intriguing and aesthetically pleasing.

Driftwood Uses and Cultural Significance

Throughout history, driftwood has been utilized in various ways by different cultures. Its natural beauty and availability make it a versatile material for numerous applications.

Artistic and Decorative Uses

Artists and artisans have long recognized the aesthetic potential of driftwood. Its unique forms and textures lend themselves to creativity. Artists may use it to make sculptures, furniture, or even jewelry. Its organic appeal makes it a popular choice for home decor, often seen as centerpieces, wall hangings, or incorporated into larger artistic pieces.

Symbolism and Spiritual Connections

In some cultures, driftwood holds symbolic or spiritual significance. The process by which wood becomes driftwood—a journey of transformation, endurance, and resilience—is often seen as a metaphor for life’s journey. The Driftwood Cross, in particular, can symbolize hope, faith, and the interconnectedness of nature and spirituality. These symbolic meanings can add layers of personal or communal significance to the simple act of displaying or gifting a Driftwood Cross.

Creating a Driftwood Cross

If you’re in tune with nature and enjoy crafting, making a Driftwood Cross can be a rewarding experience. This project combines the natural beauty of driftwood with the symbolic meaning of the cross, creating a piece that can serve as both a decorative item and a meaningful artifact.

Gathering Materials

Begin by collecting suitable pieces of driftwood. Look for two pieces that naturally intersect or align well to form a cross. Consider their texture, color, and overall appearance. Driftwood can be found along beaches, riverbanks, or coastal areas.

Crafting Your Driftwood Cross

  1. Preparation: Clean your driftwood pieces to remove any dirt or debris. A gentle scrubbing with a brush and a rinse with water should suffice. Allow the wood to dry completely before you begin crafting.

  2. Assembly: Arrange the pieces to form a cross, with one piece overlapping the other. Decide on the orientation that feels aesthetically pleasing to you.

  3. Securing the Pieces: Use string, twine, or wire to secure the two pieces together at the intersection. Consider using natural materials to enhance the organic appearance of the cross. Additionally, glue or nails can provide extra stability if needed.

  4. Finishing Touches: Once assembled, you can leave the Driftwood Cross in its natural state or apply a light finish. This might include sanding rough edges or applying a sealant to protect the wood and preserve its appearance.

Incorporating a Driftwood Cross in Your Space

Once you’ve crafted your Driftwood Cross, there are various ways you can incorporate it into your home or garden.

Home Decor

The natural charm of a Driftwood Cross makes it an excellent addition to many decor styles, from rustic and coastal to modern and minimalist. It can be hung on a wall, placed on a mantle, or used as a centerpiece. The key is to find a spot where it complements the existing decor while allowing its uniqueness to stand out.

Outdoor Spaces

Consider using a Driftwood Cross in your garden or outdoor living space. It can serve as a focal point, adding a sense of tranquility and connection to nature. Ensure it’s placed under cover or finishes are applied to protect it from weather conditions.

Driftwood Cross

The Environmental Impact of Using Driftwood

While driftwood is a wonderful natural resource for crafts and decor, it’s essential to consider its environmental implications. Driftwood provides important habitats in aquatic ecosystems, offering shelter and supporting biodiversity. Collecting driftwood should always be approached with sensitivity to the environment.

Sustainable Practices for Driftwood Collection

  1. Research Local Regulations: Some areas may have restrictions on collecting driftwood to protect ecosystems. Always adhere to local guidelines and regulations.

  2. Collect Responsibly: Take only what you need, leaving behind ample wood for the ecosystem. Avoid removing large pieces or excessive amounts from one area.

  3. Choose Storm-Felled Wood: Opt for driftwood that has been naturally felled by storms rather than wood that is still attached to living trees.

Preserving the Beauty of Driftwood Art

Driftwood art offers a unique way to showcase nature’s beauty. However, without proper care, driftwood can deteriorate over time.

Maintenance Tips

  • Clean Gently: Regularly dust your driftwood pieces with a soft cloth. If deeper cleaning is needed, use a slightly damp cloth.

  • Avoid Direct Sunlight: Prolonged exposure to direct sunlight can bleach and weaken the wood. Place your Driftwood Cross in a location with indirect light.

  • Apply a Finish: Consider applying a protective finish to maintain the wood’s appearance and prevent decay. Natural oils or waxes can be effective options.

Driftwood Cross as a Gift

A Driftwood Cross can make a thoughtful, personalized gift. Its symbolism, combined with the time spent crafting it, adds layers of meaning, particularly for those who appreciate handmade or nature-inspired gifts.

Personalizing Your Driftwood Cross Gift

  • Add Inscribed Messages: Consider adding an inscription to the wood with a meaningful message or date.

  • Attach Complementary Elements: Incorporate other natural materials like dried flowers, shells, or stones for added personalization.

  • Wrap Creatively: Present the Driftwood Cross in a way that reflects its natural essence, such as wrapping it in recycled paper or burlap.

Reflecting on the Driftwood Cross Journey

The Driftwood Cross serves as a reminder of resilience and transformation. Each piece of driftwood has its own story, shaped by the forces of nature. By creating and sharing a Driftwood Cross, you’re not only embracing its aesthetic appeal but also honoring the natural journey that brought it to you. Whether serving as a decorative item, a symbol of personal significance, or a thoughtful gift, the Driftwood Cross carries with it a profound connection to the natural world.

In crafting and appreciating driftwood art, you are engaging with these natural narratives, bridging the gap between nature’s processes and human creativity in a manner both sustainable and soulful.

Filed Under: Driftwood Ideas Tagged With: cross, DIY, Driftwood, Handmade, Nature Art

Driftwood Clocks Diy

January 28, 2025 by admin

Have you ever considered using driftwood to create something beautiful and functional for your home? Driftwood, with its unique and rustic appearance, can be an extraordinary material to work with. Imagine having a piece of nature on your wall telling time! Not only is creating a driftwood clock a fun and fulfilling project, but it also adds a touch of coastal charm to any space. Let’s delve into the world of driftwood clocks and uncover how you can create your very own masterpiece.

Driftwood Clocks Diy

Understanding Driftwood

Before you jump into the DIY project, it’s important to know what driftwood is and where it comes from. Driftwood is wood that has been washed onto the shore by rivers, lakes, or the ocean, often after traveling far from its original location. Its journey through water, sun, and sand gives it a weathered appearance and smooth texture, making it ideal for various crafts and home decor.

Why Choose Driftwood?

Driftwood’s appeal lies in its natural beauty and uniqueness. Each piece tells a story of its journey, shaped by nature into interesting textures and forms. It’s a sustainable crafting material, as you’re repurposing wood that would otherwise be left to the elements. Plus, incorporating driftwood into your home adds an organic and eco-friendly touch to your decor.

Gathering and Preparing Driftwood

To begin your driftwood clock project, you need to gather and prepare your materials. The preparation phase is crucial for ensuring your project looks great and lasts a long time.

Where to Find Driftwood

You can find driftwood on beaches, riverbanks, and lakeshores. It’s a fun opportunity for a leisurely walk while hunting for the perfect pieces. When collecting, be mindful of local regulations regarding removing natural materials from certain areas. Always prioritize sustainable and respectful practices.

Cleaning Driftwood

Once you’ve gathered your driftwood, it’s essential to clean it. Driftwood may have algae, dirt, or small creatures on it. Here’s a simple cleaning process:

  1. Soak and Scrub: Submerge the driftwood in a mixture of water and mild detergent. Use a brush to scrub off any debris.
  2. Rinse Thoroughly: Rinse the pieces under running water to remove soap residues.
  3. Dry: Let the driftwood air dry, ideally in the sun, which helps to kill any remaining bacteria.

Designing Your Driftwood Clock

Here’s where your creativity can truly shine. Designing your clock involves considering size, shape, and the clock mechanism you wish to use.

Choosing the Design

Think about what style resonates with you and your living space. Do you prefer something minimalist, or perhaps a dramatic piece with multiple branches? Deciding on your clock’s style will help guide your choice of driftwood pieces and additional materials.

Selecting Clock Mechanism and Components

Choose a clock mechanism suitable for your driftwood. You’ll need clock hands, a movement mechanism (the motor), and potentially clock numbers or markers. Materials can range from traditional black or gold to something more rustic, like metal or wood.

Tools and Other Materials

Here’s a list of tools and materials you might need:

MaterialPurpose
DrillFor mounting the clock mechanism
SandpaperSmoothing rough edges
Wood glueAttaching driftwood pieces
Clock numbers/markersOptional decor
Varnish or sealantFinishing touch to protect the wood

Assembling Your Driftwood Clock

Armed with your design plan and materials, it’s time to assemble the clock. This step requires care and attention, ensuring your clock is both sturdy and aesthetically pleasing.

Building the Base

Decide on the arrangement of your driftwood pieces, either laying them out as a flat back for the clock or assembling them to create a frame. If using multiple pieces, secure them together with wood glue or a small screw from the back, taking care to maintain the natural pattern and flow of the wood.

Installing the Clock Mechanism

  1. Drill a Hole: Determine the central point and drill a hole for the clock mechanism.
  2. Mount the Motor: Follow the instructions that come with the clock kit to insert and secure the motor through the driftwood.
  3. Attach Hands: Carefully attach the clock hands according to the manufacturer’s instructions.

Adding Finishing Touches

Once your clock is assembled, consider sealing it with a varnish or sealant. This step can enhance the wood’s appearance and protect it from dust and deterioration. You might also want to add decorative numbers or leave it with just the hands to maintain its natural beauty.

Driftwood Clocks Diy

Maintaining Your Driftwood Clock

Like any handmade creation, your driftwood clock will require some care to keep it in excellent condition.

Regular Upkeep

Dust your clock intermittently to maintain its appearance using a soft, dry cloth. Avoid using water or cleaning solvents as they may damage the wood or interfere with the clock mechanism.

Seasonal Checks

Since driftwood is a natural material, it can react to changes in temperature and humidity. Occasionally check the clock’s components and the integrity of the wood, especially if you notice significant environmental shifts in your home.

Troubleshooting Common Issues

It’s possible to encounter a few hiccups during your project. Here are some solutions to common challenges.

Issues with Clock Movement

If your clock isn’t working properly, check:

  • Battery Connection: Ensure the battery is fresh and properly installed.
  • Alignment of Hands: Verify the hands aren’t touching each other or the wood.

Wood Cracking or Warping

Changes in humidity may cause driftwood to warp or crack. If this occurs, adjust the placement settings in your home, opting for a space that maintains consistent conditions. Applying another layer of sealant can also help stabilize the wood.

Conclusion

Creating a driftwood clock is a wonderful way to bring the outside in, allowing you to craft a story filled with natural history and personal creativity. As you hang it on your wall, you’ll have not just a functional timepiece but also a conversation starter and a glimpse of the natural world in your everyday life.

Whether completed as a solo project or a family activity, making a driftwood clock is both an eco-friendly and fulfilling experience that leaves you with a tangible piece of art, uniquely yours. So, gather those driftwood pieces and let your imagination run wild. Happy crafting!

Filed Under: Driftwood Ideas Tagged With: Clocks, crafting, Driftwood, Handmade, home decor

Driftwood Christmas Crafts

January 24, 2025 by admin

Have you ever thought about using driftwood to add a rustic charm to your Christmas decorations? Driftwood is not only naturally beautiful, with its unique shapes and textures, but it also offers a sustainable way to enjoy crafting. This holiday season, why not try your hand at creating some delightful driftwood Christmas crafts? You’ll find that with a little creativity and a touch of patience, you can transform simple pieces of driftwood into stunning seasonal decor. Here’s how you can embark on this creative journey with driftwood, and perhaps make a few memorable gifts and decorations in the process.

Driftwood Christmas Crafts

Understanding Driftwood: Nature’s Art

Driftwood is more than just weathered wood found on beaches. It’s a testament to the power of nature’s sculpting forces. This wood, shaped by the sea and time, carries an organic aesthetic that complements any Christmas setting beautifully. By understanding what driftwood is and how it can be used, you’re setting the stage for an inspired crafting experience.

What is Driftwood?

Driftwood is wood that has been washed ashore by the action of winds, tides, or waves. Over time, the water smoothens and polishes the wood, creating interesting, unique shapes. This natural beauty makes driftwood a popular material in crafting and home decor.

Sustainability of Driftwood Crafting

Choosing driftwood as a crafting material not only benefits your aesthetic goals but also supports sustainability. By using driftwood, you’re repurposing what nature has already provided, reducing the need for newly sourced materials. This sustainable choice helps in preserving forests and reducing carbon footprint, making your holiday season even more eco-friendly.

Tools and Materials Needed for Driftwood Crafts

Before you begin creating with driftwood, it’s essential to gather the necessary tools and materials. Having everything ready will streamline the crafting process and enhance your experience. Let’s take a look at what you’ll need.

Basic Tools for Crafting

To start with driftwood crafts, you’ll need some basic tools. Here’s a quick table to help you gather what’s necessary:

ToolsDescription
Glue GunFor adhering pieces of driftwood together securely.
SandpaperTo smoothen any rough edges of the driftwood.
SawFor cutting driftwood to desired sizes and shapes.
DrillUseful for creating holes for hanging ornaments.
Wire CuttersTo trim and shape wire for construction and embellishment.
Paint BrushesFor painting and adding details to your driftwood.

Additional Materials

Apart from the tools, several other materials can enhance the driftwood crafts:

  • Rope and Twine: For hanging or tying parts together.
  • Natural Decor: Such as pine cones, shells, or dried flowers.
  • Paint and Finish: Optional, for those who wish to add color or protect their creations.
  • Embellishments: Beads or ribbons to add a festive touch.

Driftwood Christmas Ornaments

Creating Christmas ornaments from driftwood is an excellent way to start your crafting. These ornaments are not only easy to make but also add a distinctive flair to your Christmas tree. Let’s explore some ideas.

Driftwood Stars

Driftwood stars are a classic craft that radiates charm and simplicity. To make one, gather several small, similar-sized pieces of driftwood. Arrange and glue them in a star shape, using a glue gun for precision. You can embellish it with small beads or keep it natural for a rustic look.

Mini Driftwood Christmas Trees

Creating miniature driftwood Christmas trees can offer a beautiful accent to your holiday decor. Start by stacking driftwood pieces from largest to smallest, creating a tree shape. Secure them with a central dowel or glue. You can add tiny ornaments or paint part of the wood to represent a decorated tree.

Larger Driftwood Decor

Once you’re comfortable with ornaments, you might want to venture into larger driftwood decorations. These pieces can make stunning centerpieces or be featured on your mantle.

Driftwood Christmas Tree

A driftwood Christmas tree is a timeless decoration that brings an earthy elegance to your home. Begin by selecting a sturdy base like a wooden block. Drill a hole in the base and insert a wooden dowel. Then, attach driftwood pieces, starting with the largest at the bottom. Securely stack them, using progressively smaller pieces as you move up. Decorate the finished tree with fairy lights and natural elements like pine cones for an added festive charm.

Driftwood Wreath

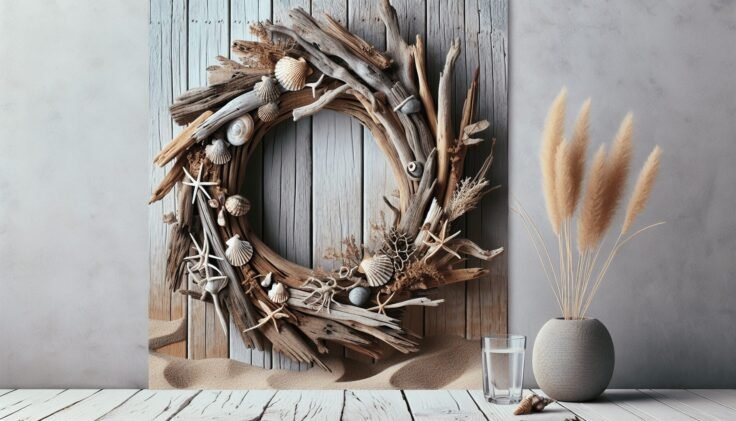
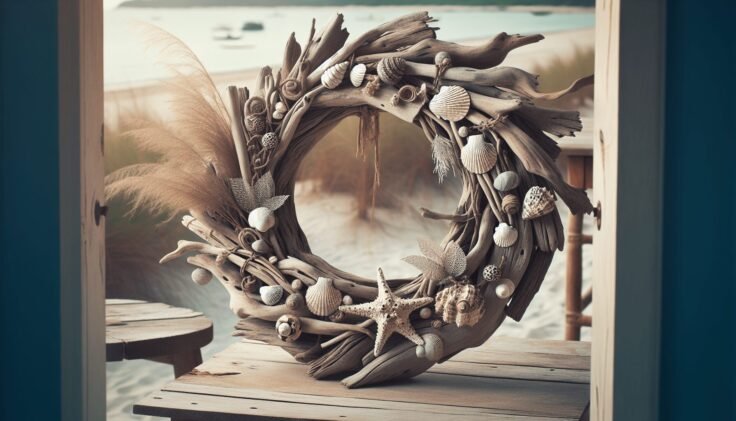
For a naturally beautiful Christmas wreath, use pieces of driftwood glued in a circular pattern. Start with the larger pieces as the base, then fill in gaps with smaller ones. Add greenery, berries, and ribbons to spruce it up. Hang the wreath on your front door to immediately add a welcoming and rustic appeal to your holiday décor.

Driftwood Christmas Crafts

Personalizing Your Driftwood Crafts

Adding personal touches can transform your driftwood creations from simple decorations into meaningful keepsakes. Here are some ways to personalize your crafts.

Adding Paint and Color

Though driftwood is beautiful in its natural state, adding a splash of color can make your pieces uniquely yours. Consider using white, silver, or gold to keep it festive and subtle. Paint can be applied fully, or just on the tips and edges, to create different effects.

Using Personalized Embellishments

Incorporating items like initials, family names, or meaningful symbols can make your driftwood crafts even more special. You could carve into the wood, attach letters, or even paint these elements onto the surface to reflect the uniqueness of your piece.

Caring for and Maintaining Driftwood

One of the joys of driftwood is its inherent rustic appeal, but caring for your crafts will help them last for many Christmases to come.

Cleaning and Preserving Driftwood

Before crafting, ensure your driftwood is clean and free from pests. Soak it in freshwater for a few days, changing the water regularly. Once clean, let it dry completely. To preserve driftwood, you might want to apply a sealant for longevity while maintaining its natural beauty.

Storing Driftwood Crafts

Proper storage over the years will keep your crafts in good shape. Consider wrapping them in tissue paper or bubble wrap and placing them in a sturdy box. Store them in a dry environment to prevent any moisture damage.

Giving Driftwood Crafts as Gifts

Driftwood crafts make thoughtful, personalized gifts that are perfect for the holiday season. By gifting handmade items, you share not just a present but a piece of your creativity and care.

Personalizing for the Recipient

Consider the interests and style of the gift recipient. If they love coastal decor, stick with more natural pieces. For someone with a modern aesthetic, perhaps a painted or embellished piece will suit their taste.

Packaging and Presentation

Presentation is key when giving handmade gifts. Wrap your driftwood crafts in natural paper or a fabric bag, tied with jute twine or ribbon. Adding a handwritten note detailing the thought behind the gift can enhance its sentimental value.

Conclusion

Driftwood Christmas crafts offer a wonderful opportunity to engage in sustainable crafting, providing unique, personalized items that can decorate your home or be shared as gifts. The journey from collecting driftwood to transforming it into delightful crafts can be as satisfying as the end result. Whether you’re adding a rustic wreath to your front door or creating small ornaments for your tree, you’re capturing a piece of nature and creativity that embodies the spirit of Christmas. Embrace this time of year to craft something truly special, using the unexpected yet remarkable beauty of driftwood. Happy crafting, and may your holiday season be both creative and joyful!

Filed Under: Driftwood Ideas Tagged With: christmas, DIY, Driftwood, Handmade

Driftwood Chimes

January 23, 2025 by admin

Have you ever thought about combining the soothing rhythm of nature with the harmony of music in your own backyard? Driftwood chimes are a wonderful way to bring that calming experience to life. Imagine the natural aesthetic of driftwood pieces swaying in the breeze and creating gentle, melodic sounds that can transform any outdoor space into a peaceful retreat.

Driftwood Chimes

What Are Driftwood Chimes?

Driftwood chimes are a type of wind chime made from pieces of driftwood. These chimes not only add a unique visual element to your space but also produce a variety of soft, soothing sounds. Unlike metal or glass chimes, driftwood offers a more subtle auditory experience, perfect for those who appreciate the gentle melodies of nature.

The Unique Characteristics of Driftwood

Driftwood is wood that has been worn smooth by the sea or lake water, waves, and elements over time. Each piece is unique, carrying the earth tones of its environment and often showing interesting textures. This weathered appearance gives driftwood chimes their distinctive look, appealing to those who cherish rustic or natural decor elements.

Where Does Driftwood Come From?

Driftwood often starts as fallen branches or trees near bodies of water. Oceanside beaches or lake shores are common places to find driftwood. Over time, the wood gets bleached by the sun and sculpted by wind and water, naturally turning into works of art. Each piece of driftwood tells its own story — from fallen tree to a beautifully polished ornament.

The Art of Making Driftwood Chimes

Creating your own driftwood chime can be a rewarding and meditative process. It allows you to harness the serene energy of driftwood, turning it into a personalized symphony of sounds. Let’s talk about making your own driftwood chimes, from gathering materials to assembling your musical masterpiece.

Gathering Materials

Start by collecting pieces of driftwood with varying lengths and thicknesses. This gives your chime variety in both appearance and sound. You will also need some strong string or fishing line, a drill to create small holes in the wood, and metal or ceramic discs (optional) to add different sound textures.

Assembling the Chime

Begin by drilling small holes in the top center of each piece of driftwood. Then, thread the fishing line or string through the holes and tie it securely. If you’re incorporating other materials like metal discs, attach them to the string at intervals that complement the driftwood.

Balance and Harmony

Creating a balanced mobile requires careful consideration of weight and distribution. Hang your driftwood chime from a branch or structure, and ensure that the pieces are spaced evenly so they can swing freely in the wind. Test the chime to see if its arrangement produces the melodies you desire, adjusting the placement as needed.

Benefits of Driftwood Chimes in Your Space

It’s not just their beauty that makes driftwood chimes appealing; they offer various benefits that enrich your living space.

Aesthetic Appeal

With their natural allure and organic shapes, driftwood chimes enhance gardens, patios, or even interior spaces. Their rustic charm blends seamlessly with both modern and traditional decor styles, providing a versatile decorative element.

Soothing Sound

Unlike the sometimes jarring clamor of metal chimes, driftwood chimes produce a gentle sound that soothes the senses. This calmness can help reduce stress and bring tranquility to your environment.

Eco-Friendly Decoration

Using driftwood for chimes is an eco-friendly choice. By repurposing natural materials, you reduce waste and honor the beauty nature has to offer. It’s a wonderful way to bring sustainability into your design principles.

Choosing the Right Driftwood Chime for Your Space

When it comes to selecting or creating driftwood chimes, consider how they’ll fit into your environment and personal tastes.

Size and Space

Consider the size of the area where you plan to hang your chime. Larger spaces might benefit from a grander, more elaborate chime, while smaller areas may be complemented by a simpler, more delicate arrangement. Ensure there’s enough room for it to sway and sing without obstruction.

Color and Style

The natural coloring of driftwood tends to be neutral, making it adaptable to various color schemes. However, if you’re artistically inclined, you might want to add colorful cords or paint accents to your driftwood for a splash of color.

Sound Preferences

Think about the sound you want your driftwood chimes to produce. Longer pieces and additional materials like shells or stones will create deeper tones, while shorter driftwood segments produce lighter, more delicate sounds.

Caring for Your Driftwood Chimes

To ensure that your driftwood chimes remain a delightful part of your space, some routine care is beneficial.

Regular Cleaning

Driftwood can collect dust and dirt over time. Gently wipe them with a damp cloth to maintain their appearance. Be cautious around any knots or unique features to preserve their natural aesthetics.

Maintenance Check

Occasionally check the strings or lines holding the driftwood to ensure they’re still strong and intact. Replace any worn or frayed elements to prevent your chime from falling.

Weather Considerations

Although driftwood chimes are fairly weather resistant, extreme conditions can impact them. Move them indoors during heavy storms or severe weather to extend their life and preserve their sound quality.

Incorporating Driftwood Chimes in Various Settings

Driftwood chimes can find a place in many different settings, each adding its own charm and character.

Gardens and Patios

Hang driftwood chimes in your garden or patio to enhance the natural ambiance. The chimes can act as gentle guides to relaxation as you sip tea or meditate, surrounded by their soothing sounds.

Balconies and Terraces

Even if you live in an apartment, you can incorporate driftwood chimes to make your balcony a personal haven. Let them catch the gentle breeze on a warm day, resonating with tranquility.

Indoors and Near Windows

Don’t think driftwood chimes are only for outdoor use. They can be an intriguing addition indoors, particularly near windows where breezes can still reach them. This arrangement brings nature’s melody inside, harmonizing daily life with natural sounds.

The Cultural and Historical Significance of Wind Chimes

Throughout history, wind chimes, including those made from driftwood, have held cultural significance in various societies around the world.

Ancient Origins

Wind chimes date back thousands of years, being used in ancient Rome, Egypt, and India as decorative pieces and tools for warding off evil spirits. They were often believed to attract prosperity and good luck, hung in strategic places around homes and gardens.

Feng Shui Practices

In the practice of Feng Shui, wind chimes are employed to disrupt negative energy flows and harmonize environments. Driftwood chimes, with their grounding elements, are particularly fitting for balancing energies.

Contemporary Uses

Today, wind chimes continue to be popular for their aesthetic and acoustic qualities. Driftwood chimes resonate well with contemporary movements focused on mindfulness, sustainability, and nature appreciation.

Inspiring Ideas for Driftwood Chime Designs

If you’re considering crafting or buying driftwood chimes, here are some creative ideas to inspire you.

Incorporating Shells and Stones

Enhance your driftwood chimes by adding shells or stones. These elements can be found during beach walks, making your chime a reminder of treasured adventures.

Adding Artistic Flair

Consider painting designs or inspirational quotes on the pieces of driftwood to personalize your chime. This can be a great DIY project that adds a meaningful touch.

Layered Arrangements

Experiment with multi-tier chimes that create a cascading effect. Layering different lengths and types of materials can produce complex, harmonic sounds and a striking visual statement.

Reflect on the Tranquility

Incorporating driftwood chimes into your living space invites both art and nature into your life. These elements enrich experiences by enhancing ambiance, fostering calm, and connecting you with the environment. Whether you choose to craft them yourself or find the perfect pre-made set, driftwood chimes have a unique ability to turn any space into an oasis of sound and beauty. Embrace the tranquility they offer, and let the melodies remind you of the natural rhythms that surround us every day.

Filed Under: Driftwood Ideas Tagged With: Chimes, DIY, Driftwood, Handmade, Outdoor Decor

  • « Previous Page
  • Page 1
  • …
  • Page 3
  • Page 4
  • Page 5
  • Page 6
  • Page 7
  • …
  • Page 19
  • Next Page »

Primary Sidebar

Driftwood4us.com, is a participant in the Amazon Services LLC Associates Program, an affiliate advertising program designed to provide a means for sites to earn advertising fees by advertising and linking to amazon.com.