• Skip to main content
  • Skip to primary sidebar
  • Terms and Conditions
  • Privacy Policy
  • Contact

Driftwood 4 Us

Just About Driftwood

home decor

Driftwood Lights Diy

May 11, 2025 by admin

Have you ever considered transforming a simple piece of driftwood into something truly spectacular for your home? Perhaps you’re looking for a unique lighting solution that reflects both your creativity and love for natural elements. If so, creating driftwood lights might be the perfect DIY project for you.

Driftwood Lights Diy

What Are Driftwood Lights?

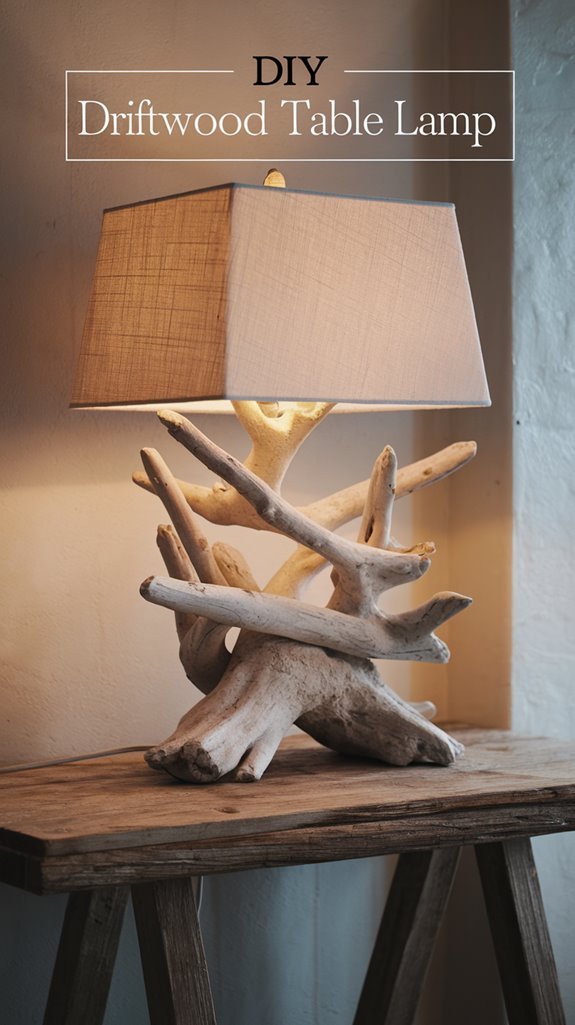
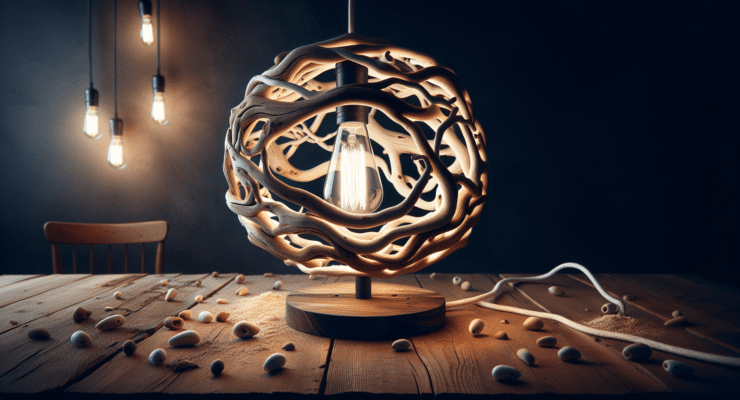
Before you embark on your DIY journey, it’s essential to understand what driftwood lights are. Driftwood lights are creative lighting fixtures made by combining pieces of driftwood with various lighting elements. They leverage the natural beauty and uniqueness of driftwood, which is shaped and smoothed by the ocean, lakes, or rivers over time. These lights can range from simple table lamps to elaborate chandeliers, each one unique depending on the pieces of driftwood you use.

Why Choose Driftwood for Your DIY Lights?

Driftwood has a multitude of benefits that make it an excellent choice for DIY lighting projects. Not only does it offer aesthetic appeal with its weathered look and natural textures, but it is also environmentally friendly as it reuses natural waste material. Using driftwood in your home helps bring a touch of nature indoors, creating a cozy and warm atmosphere. Plus, each piece of driftwood is unique, lending a one-of-a-kind charm to your light fixtures.

Benefits of DIY Driftwood Lights

Creating your own driftwood lights isn’t just about the final product; it’s also about enjoying the process. It allows you to express yourself artistically and gives you full control over the design and functionality of the lighting. Here’s why you might find DIY driftwood lights particularly rewarding:

  • Cost-Effectiveness: Crafting your own lights is often cheaper than buying ready-made fixtures, especially those designed uniquely.
  • Personalized Designs: Your creations will reflect your personal style and can perfectly fit your space’s dimensions and decor.
  • Sustainability: By using natural materials, you promote ecological responsibility.

Gathering Driftwood: The Start of Your Adventure

Once you’ve decided to embark on this artistic journey, the next step is gathering your materials. Driftwood can be found along riverbanks, lakeshores, and beaches. Look for wood that is light, dry, and free from too much rotting. Carry a bag or a cart if you plan on collecting a lot of wood.

Tips for Finding the Perfect Driftwood

While any driftwood can potentially be used for creating lights, certain types work better than others. Here are some tips to keep in mind while gathering driftwood:

  • Look for Unique Shapes: Interesting and unusual shapes can make for more dynamic and eye-catching designs.
  • Check for Stability: Ensure the wood is lightweight yet sturdy enough to hold together when you add lighting elements.
  • Avoid Waterlogged Pieces: Make sure the wood is thoroughly dry to prevent rotting and to make it easier to work with.

Preparing the Driftwood

Before you begin assembling your light, it’s essential to clean and prepare the driftwood. This process involves a few simple steps to ensure your new lighting fixture is safe and long-lasting.

Cleaning Your Driftwood

Cleaning driftwood is critical to remove any dirt, salt, or pests. You wouldn’t want any unwanted critters nesting within your masterpiece! Here’s a simple cleaning process you can follow:

  1. Brush Away Debris: Use a stiff brush or wire brush to remove any loose dirt or debris.
  2. Soak in Water: Fill a tub with fresh water and soak the driftwood for 24 to 48 hours. Change the water several times to flush out any salt.
  3. Bleach Solution: To sanitize, soak the driftwood in a solution of 1 part bleach to 9 parts water for a few hours.
  4. Rinse and Dry: Rinse thoroughly with clean water and let it dry completely in the sun, which also helps remove any remaining bacteria.

Preserving and Finishing

After cleaning, you might want to add a finish to preserve the driftwood and enhance its natural color. A clear wood sealer or a matte finish can protect the wood from future damage while maintaining its rustic charm. Apply the finish with a brush or spray and allow it to dry completely before proceeding.

Driftwood Lights Diy

Designing Your Driftwood Light

Now comes the exciting part – designing your driftwood light! This stage allows your creativity to shine. Consider what kind of light fixture you want to create. A chandelier? A table lamp? A floor lamp? The possibilities are endless.

Considering Design Aspects

When designing your driftwood light, think about the following:

  • Size and Scale: Ensure the light’s size complements the space. A large chandelier suits a grand room, while a petite table lamp might be more suitable for a cozy nook.
  • Functionality: Decide on the type of lighting effect you want. Soft ambient lighting creates a relaxing atmosphere, while directional lighting highlights specific areas.
  • Balance and Stability: Ensure the base is stable and balanced, particularly for free-standing lamps.

Assembling Your Driftwood Light

With your design in mind, it’s time to start assembling your light. For this, you’ll need a few basic tools and materials which are common in most DIY projects.

Tools and Materials Needed

Here’s a list of what you might need:

ToolsMaterials
DrillDriftwood Pieces
SawLight Bulb Socket and Cord
SandpaperLight Bulbs
ScrewdriverLamp Base (if needed)
Hot Glue GunElectrical Wire
Safety GogglesSwitch (optional)

Step-by-Step Assembly Guide

  1. Plan Your Design: Arrange the driftwood pieces to get a clear visual of your design.
  2. Drill Holes for Wiring: Depending on your design, drill holes through which the electrical wires will pass. Be careful to drill straight and avoid splitting the wood.
  3. Assemble the Light Socket: Attach the light bulb socket to your driftwood. You may use hot glue or screws, depending on the design and weight.
  4. Connect Electrical Wires: Safely connect the wires from the socket to the electrical cord. Ensure all connections are tight and secure to prevent electrical hazards.
  5. Install the Light Bulb: Screw a light bulb into the socket. Consider using energy-efficient LED bulbs for sustainability and low heat emission.
  6. Attach the Base: If your light requires a base (like a table lamp), attach it securely. Ensure stability to prevent tipping.
  7. Test Your Light: Carefully plug in your light and switch it on to ensure it’s working correctly. Make any necessary adjustments if it doesn’t work initially.

Adding Personal Touches

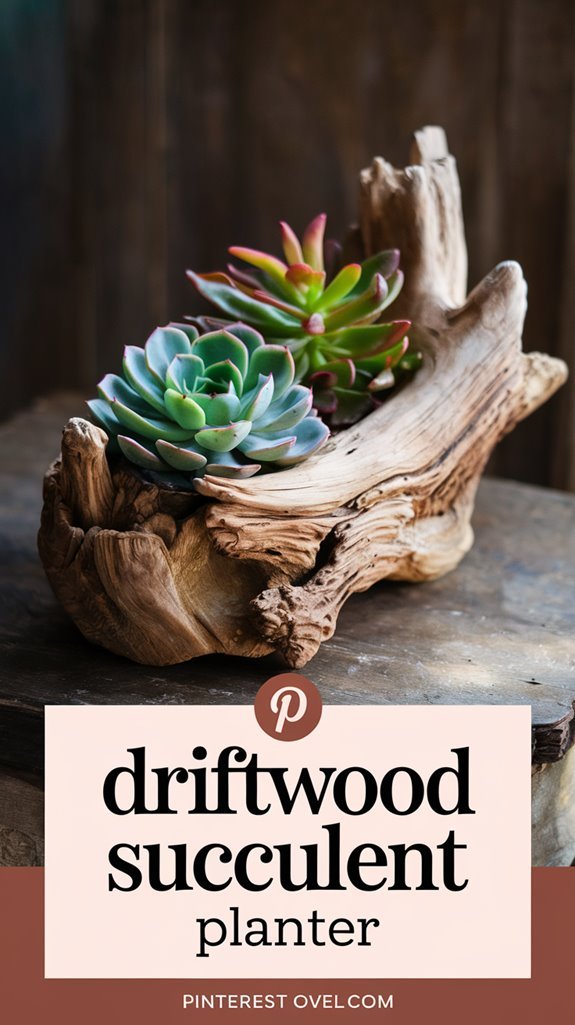
Once your basic driftwood light is assembled and functional, consider adding personal touches that reflect your style. This could include painting parts of the wood, adding seashells, or incorporating other natural elements like stones or moss.

Creative Ideas for Decoration

  • Twine or Rope Wraps: Wrapping parts of the driftwood with twine or rope can add texture and interest.
  • Paint Accents: Light washes of pastel or metallic paint can highlight the wood’s textures and add color.
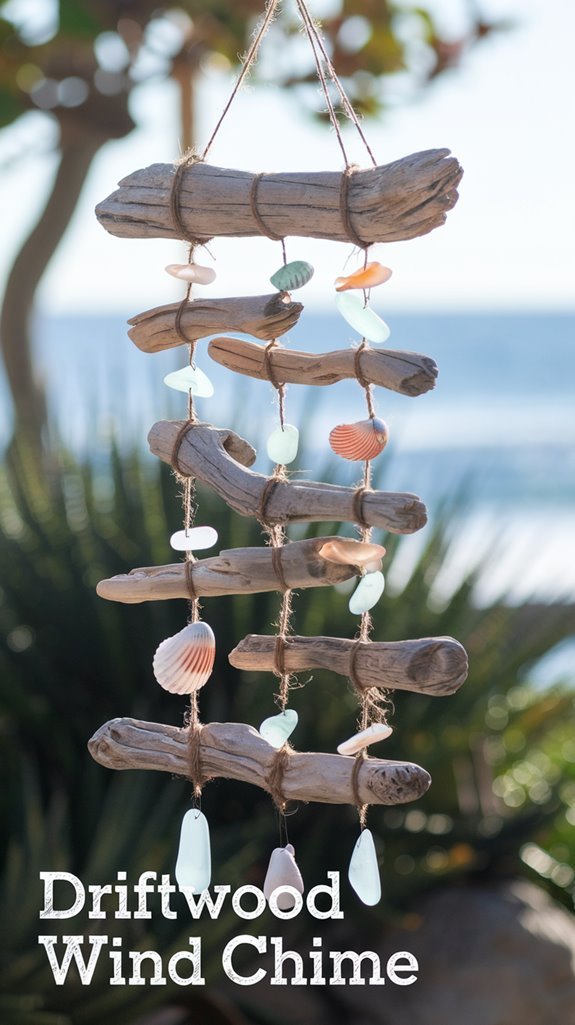
  • Incorporate Other Natural Elements: Integrate seashells, stones, or small plant life for a more nature-inspired feel.

Safety and Maintenance Tips

While creating and enjoying your new driftwood light, it’s essential to keep safety and maintenance in mind.

Safety Precautions

  • Electrical Safety: Always make sure electrical connections are secure and professionally done if you’re uncertain.
  • Stable Structures: Ensure your light fixture is balanced and securely fixed to avoid accidents.
  • Heat Consideration: Use bulbs that don’t produce excessive heat to prevent any fire hazards.

Maintaining Your Driftwood Lights

  • Regular Dusting: Keep your driftwood piece looking fresh by dusting it regularly with a soft cloth.
  • Reapply Finish: Periodically check and refresh the protective finish to keep the wood in good condition.
  • Inspect Wiring: Every few months, check the wiring for wear and tear to ensure continual safety.

Conclusion: Embrace Your Creation

Creating driftwood lights is more than just a craft; it’s a way to breathe life into pieces of nature, turning them into functional art that enriches your home. It’s an accessible project that allows you to explore your creative side while producing something special and unique. Enjoy the process, from the collection of driftwood to the final switch-on. It’s a testament to your creativity and ingenuity, a piece that naturally becomes a conversation starter. Whether it’s a calming light for your bedroom or a statement piece for your living room, your driftwood light is sure to bring a piece of the tranquil outdoors inside.

Filed Under: Driftwood Ideas Tagged With: crafting, DIY Lights, Driftwood, Handmade, home decor

Driftwood Lettering

May 9, 2025 by admin

Have you ever found yourself captivated by the natural beauty of driftwood and wondered how you might creatively incorporate it into your home or garden? Driftwood lettering could be the perfect outlet for your artistic expression and a wonderful way to add a personal touch to your surroundings. This unique form of art combines the raw allure of nature with the craftsmanship of human hands. Let’s embark on a journey to understand what driftwood lettering is and how you can create your own pieces.

Driftwood Lettering

Understanding Driftwood

Driftwood holds a special place in the world of natural materials, often discovered washed ashore along riverbanks, lakes, and oceans. Its journey through water and time shapes each piece in a unique manner, resulting in a variety of textures, sizes, and colors that make it incredibly appealing for artistic projects.

What is Driftwood?

Driftwood refers to pieces of wood that have floated in bodies of water before being cast ashore. The constant motion of water smoothens its edges, and exposure to various natural elements often changes its color and texture. Driftwood can range from short, stubby pieces to lengthy, twisted branches, each carrying its own story and character.

The Artistic Allure

The intriguing aspect of driftwood is its versatility. Its organic shapes and forms inspire creativity, often serving as a blank canvas for artists and hobbyists. Driftwood lettering taps into this potential, allowing individuals to create beautiful, personalized messages and displays. Whether you’re crafting a simple name sign or an intricate piece of wall art, driftwood’s unique properties ensure each creation is one of a kind.

Materials Needed for Driftwood Lettering

Before you begin crafting, it’s essential to gather the right materials. This ensures a smoother creative process and gives you more time to focus on the design and execution of your project.

Finding the Perfect Driftwood

The search for driftwood can be an adventure in itself. Beaches, riverbanks, and lakeshores are prime locations to find this natural treasure. While collecting, be mindful of local regulations regarding the removal of natural materials. Opt for pieces that are relatively dry, as freshly fallen driftwood can still be damp and may require additional time to dry out.

Tools and Supplies

To turn your driftwood into beautiful lettering, you’ll need a few basic tools and supplies:

  • Saw or Clippers: To cut the driftwood to your desired size and shape.
  • Sandpaper: To smooth rough edges for easier handling and a cleaner look.
  • Wood Glue: For joining pieces together or attaching additional decorative elements.
  • Paint or Wood Stain: To add color or enhance the natural beauty of the wood.
  • Sealant: To protect your finished product, especially if it will be exposed to the elements.
  • Brushes and Sponges: For applying paint, stain, and sealant.

Additional Decorative Supplies

Depending on your intended outcome, you might also want to incorporate other decorative elements such as shells, stones, or glass pieces. These additions can embellish your driftwood lettering, adding further personal touches and bursts of color.

Crafting Your Driftwood Letters

Now that you’ve gathered your materials, it’s time to bring your vision to life. Creating driftwood letters involves several steps, each offering room for customization and artistic interpretation.

Designing Your Lettering Layout

Begin by envisioning your final piece. Consider the size and scale of the letters you’ll be crafting, as well as their overall arrangement. Sketching your design can provide a helpful map as you start working with the actual wood. Keep your space limitations in mind and let the natural shapes of your driftwood influence your design.

Preparing the Driftwood

Before you start cutting and assembling, it’s crucial to prepare the driftwood pieces. Clean them thoroughly to remove sand, dirt, and any other debris. Once clean, you’ll want to dry the wood completely and possibly treat it to prevent it from attracting pests or further deteriorating over time.

Cutting and Smoothing

Use your saw or clippers to cut the driftwood into appropriate lengths based on your design. Aim for uniformity while still embracing the natural variances among the pieces. Sand down any rough or splintered edges, ensuring each piece is safe to handle and simple to work with.

Assembling the Letters

With your pieces ready, start assembling the letters. Depending on your design, this might involve attaching several smaller pieces of driftwood together or using single, well-suited pieces for each letter. Wood glue is usually sufficient for smaller projects, but you may need screws or nails for larger installations. Ensure each piece is set firmly in place, aligned according to your sketch.

Painting and Finishing Touches

Once assembled, add the finishing touches to your driftwood lettering. Painting or staining the wood can enhance its appearance, allowing you to match it to your existing decor. Consider adding highlights with colors complementing your theme or leaving the wood natural for a rustic look. Apply a sealant to protect your finished piece from moisture and other environmental factors.

Displaying Your Driftwood Letters

With your project complete, it’s time to decide how to display your driftwood letters. The natural beauty of driftwood makes it suited for both indoor and outdoor settings, offering a versatile decor option.

Indoor Displays

Indoors, driftwood lettering can serve as a striking addition to any room. Hang letters on a wall for a subtle, elegant touch, or place them on mantels and shelves. The organic aesthetic of driftwood pairs well with various styles, from coastal and nautical themes to minimalist and modern designs.

Outdoor Displays

Outdoors, driftwood lettering can enhance gardens, patios, and yards. Attach your letters to fences or garden walls, or let them stand among plants and flowers to create an inviting atmosphere. Just make sure your pieces are thoroughly sealed and, if necessary, periodically treated to withstand the elements.

Gift Ideas

Consider gifting driftwood lettering to loved ones for special occasions. Personalized names, initials, or messages make for heartfelt, one-of-a-kind presents that will be cherished as unique works of art.

Driftwood Lettering

Preserving and Maintaining Driftwood Artwork

To ensure your driftwood lettering retains its beauty, proper maintenance is key. Driftwood is naturally resilient, but taking some preventative steps can extend the life and condition of your creations.

Regular Cleaning

Keeping your driftwood pieces clean will help them remain vibrant. Dust indoor displays regularly and, if needed, wipe them with a damp cloth. For outdoor pieces, rinse with water to remove dirt or debris and allow them to dry thoroughly after.

Protective Treatments

Reapplying sealant periodically, especially for outdoor driftwood letters, ensures they remain protected from moisture and other elements. Check for any damage like cracks or warping and address these issues promptly to maintain structural integrity.

Longevity Tips

Consider rotating your displays to prevent constant exposure to sunlight, which can cause fading. Additionally, moving your driftwood indoors during extreme weather conditions can stave off more severe damage.

Diving Deeper into Driftwood Lettering

The thrill of creating driftwood lettering can encompass more than just the making process. It’s rooted in the appreciation of nature’s beauty and the satisfaction of crafting something unique.

Embellishments and Creativity

Driftwood is a blank canvas, offering opportunities for creativity and embellishment. Beyond painting and decorating, explore incorporating unexpected materials like metal fixtures or integrating small light installations to turn your artwork into a captivating focal point.

Eco-Friendliness

Crafting with driftwood is an eco-friendly endeavor, using naturally sourced materials that might otherwise go unnoticed or unappreciated. Embracing such sustainable practices not only benefits the environment but also connects you to nature in a meaningful way.

Conclusion

Driftwood lettering combines the elegant simplicity of nature with the personal touch of handcrafted artistry. Whether you’re adorning your home with personalized decor or crafting gifts for loved ones, driftwood offers endless potential for creativity and expression. From selecting and preparing the perfect pieces to displaying them proudly in your space, you engage in a rewarding, fulfilling process that continues to inspire long after your work is complete.

By embarking on this creative adventure, you’ll not only gain new skills but also find a deepened appreciation for the art of transformation. Allow the journey of driftwood lettering to inspire your inner artist and add a touch of nature’s beauty to your world.

Filed Under: Driftwood Ideas Tagged With: crafting, DIY, Driftwood, Hand Lettering, home decor

Driftwood Leg Table

May 8, 2025 by admin

Have you ever considered how nature’s artistry can enhance your living space? Driftwood, with its unique and rustic charm, offers a perfect way to bring a touch of the ocean into your home. Among the creative uses of driftwood is the crafting of tables, particularly those with driftwood legs that add character and a story to your decor. Let’s explore how you can incorporate a driftwood leg table into your home while understanding its creation, care, and benefits.

What is Driftwood?

Understanding Driftwood

Driftwood is wood that has been washed onto a shore or beach of a sea, lake, or river by the action of winds, tides, or waves. This wood undergoes a natural weathering process, giving it a worn, smooth appearance with a silvery shade. Each piece of driftwood is unique, shaped by its long journey through the water.

Origins of Driftwood

The origins of driftwood vary greatly. It can come from fallen branches, trees, or lumber lost from ships. Sometimes, it’s the remains of structures like piers or docks. Over time, this wood travels across water bodies, accumulating its distinct weathered look.

The Allure of Driftwood Leg Tables

Why Choose Driftwood Leg Tables?

A driftwood leg table is not only functional but also a piece of natural art. These tables appeal to those who love the coastal vibe or who appreciate sustainable and unique decor items. They’re versatile enough to fit in various decor styles, from rustic to contemporary, and bring a sense of history and nature inside.

The Aesthetic Appeal

The aesthetic appeal of driftwood lies in its irregular shapes and textures that suggest both strength and serenity. When crafted into table legs, driftwood provides a striking contrast or complement to a table’s surface, depending on its material and finish.

Driftwood Leg Table

Crafting a Driftwood Leg Table

Selecting the Right Driftwood

Choosing the right piece of driftwood is crucial for crafting a table. Look for sturdy pieces without cracks that could compromise the integrity of the leg. The driftwood should also be dry and free of pests, which can damage your finished table.

Designing Your Table

Designing a driftwood leg table requires creativity and vision. You can pair driftwood legs with various table tops, such as glass, reclaimed wood, or metal. Consider the balance and proportion to ensure the table is stable and aesthetically pleasing.

Building Process

Building a driftwood leg table involves securing the driftwood legs to the tabletop and ensuring the entire structure is stable. This might require trimming or sanding the driftwood to fit your design concept. Sealing or finishing the wood can protect it and enhance its color.

Benefits of Driftwood Leg Tables

Unique and Personalized Decor

Each driftwood leg table is like a fingerprint, unique, and tells its own story. No two tables are alike, providing you with a statement piece that reflects personal taste and love for natural aesthetics.

Environmentally Friendly

Using driftwood is an eco-friendly choice. It repurposes natural waste, giving new life to materials already available without further harming the environment. By choosing driftwood, you’re contributing to sustainability and promoting the use of recycled materials.

Durability and Longevity

Once properly treated, driftwood is highly durable. Its natural resistance to decay makes it particularly suitable for furniture. With proper care, a driftwood leg table can last many years, retaining its beauty and strength.

Driftwood Leg Table

Caring for Your Driftwood Leg Table

Regular Maintenance

Maintaining a driftwood table involves regular dusting and occasional cleaning with a damp cloth. It is advisable to use furniture polish or oil to maintain its luster and protect it from wear and tear.

Handling Spills and Stains

In case of spills, it’s important to wipe them up promptly to prevent staining the wood. For tougher stains, gently sanding the affected area and reapplying a wood finish may help.

Environmental Considerations

Avoid placing your driftwood leg table in direct sunlight or near heat sources, as this can cause the wood to crack or fade over time. Adequate humidity levels can help preserve the wood’s integrity.

Incorporating Driftwood Tables into Various Spaces

Living Rooms

In a living room, a driftwood leg table can serve as a coffee table or central conversation piece. Its rustic charm can enhance both traditional and modern decor settings, providing a focal point that attracts admiration.

Outdoor Spaces

Due to its natural resistance to decay, driftwood is also suitable for outdoor furniture. A driftwood leg table can transform a patio or garden setting, blending seamlessly with the natural surroundings.

Dining Areas

For a more intimate dining experience, a driftwood leg table can serve as a unique dining table. Pair it with simple dining chairs that don’t overpower the table’s unique characteristics.

Conclusion

The driftwood leg table isn’t just a piece of furniture; it’s a piece of art that brings nature indoors. Whether you’re seeking an eco-friendly option, a unique design, or simply love the idea of owning a table with a story, a driftwood leg table could be the perfect addition to your home. Its enchanting beauty and timeless appeal will ensure it remains a cherished focal point in your home for years to come. Consider the possibilities and let your imagination guide you in finding the perfect driftwood table for your space.

Filed Under: Driftwood Ideas Tagged With: Driftwood, home decor, Interior Design, Rustic, Table

Driftwood Letters

May 7, 2025 by admin

Have you ever walked along a beach and wondered about the unique pieces of driftwood scattered along the shore? Each piece is a relic of its sea voyage, shaped by water and time. But have you ever considered the creative possibilities these sun-bleached fragments hold? Imagine crafting them into letters that tell a story—yours or perhaps that of nature itself.

Driftwood Letters

The Allure of Driftwood

Driftwood is more than just waterlogged wood; it is nature’s art, created over years as it tumbles through rivers and oceans. This natural process sculpts each piece, making it unique in texture, shape, and size. Driftwood is sought by artists and nature enthusiasts alike for its rustic charm and versatile potential.

Why Driftwood?

Choosing driftwood as a medium for crafting isn’t just about environmental sustainability; it also connects you with nature in a unique way. Driftwood carries the wisdom of its journey—through saltwater seas and sandy shores. Its natural hues and rugged textures add an organic touch to your art, making each creation special.

The Origins of Driftwood

Understanding where driftwood comes from can deepen your appreciation. Typically, it originates from trees that fall into rivers or oceans due to natural causes like erosion or storms. As these logs travel over time, they are stripped down by the elements until the wood significantly changes in texture and appearance. This transformation process makes driftwood distinct and wonderfully unpredictable.

Crafting with Driftwood: A Hands-on Guide

Creating driftwood letters can be a delightful project, whether as home decor, gifts, or personal keepsakes. This section will walk you through the steps and considerations for transforming raw driftwood into artistic expressions.

Choosing Your Pieces

The process begins with selecting your driftwood. While strolling along the beach, be mindful of the size, shape, and natural curves of the pieces. Each is a potential candidate for a letter or part of one. It’s essential to envision how the natural shape of the wood can represent a letter or be modified slightly to do so.

Tips for Selection:

  • Size Matters: Consider the scale of your project. Are the letters going to be large wall hangings or small, delicate pieces?
  • Unique Features: Look for pieces with interesting knots, weathered textures, or curves that can form the backbone of a letter.

Preparing Driftwood

Once you’ve gathered your driftwood, it’s crucial to prepare it for crafting. Cleaning is the first step to remove sand, salt, and any small organisms that may have made it their home.

Cleaning Process:

  1. Rinse Thoroughly: Use water to rinse off debris. A gentle scrub with a brush will help dislodge any stubborn particles.
  2. Drying Time: Allow the wood to dry completely, which may take several days depending on the humidity levels. Sun-drying can speed up this process.
  3. Optional Treatment: If you plan to use your driftwood indoors, consider treating it with a wood preservative to ensure longevity.

Crafting Driftwood Letters

Now comes the fun part—shaping and assembling your driftwood into letters. This process requires creativity and sometimes a bit of trial and error.

Assembling Your Letters

To create letters, you can use the natural shapes of the wood or cut and sand pieces to fit your design. A handsaw and sandpaper are useful tools for this step.

Tools and Techniques:

  • Sawing: Use a small saw to cut your pieces to the desired length if necessary. Remember, safety first—always use protective eyewear.
  • Sanding: Smooth any rough edges. Sandpaper or an electric sander can help achieve a refined finish.
  • Joining Pieces: Hot glue or nails can be used to join pieces of driftwood together securely. Consider the most subtle approach to preserve the natural aesthetic.

Artistic Expression

Driftwood letters are not just about forming an A, B, or C; they’re about the artistic expression within those forms. Consider embellishing your letters with paint, carvings, or additional beach finds like shells or sea glass to add personal touches that reflect your style.

Presenting Driftwood Letters

Once your letters are complete, consider how you’ll display them. Presentation plays a vital role in enhancing the visual impact of your work.

Display Options

  1. Wall Hanging: Attach hooks or string to the back of your letters for hassle-free hanging.
  2. Free-standing: Ensure each letter has a flat base if you want them to stand on a shelf or mantelpiece.
  3. Outdoor Display: If placed outdoors, consider weatherproofing your pieces to protect them from the elements.

The Ambiance of Driftwood Decor

Driftwood letters can evoke a coastal ambiance, bringing a sense of calm and tranquility associated with the sea into your home. Placing them in a well-lit area can accentuate their textures and natural beauty.

Driftwood Letters

The Significance of Personal Projects

Creating something from driftwood is more than just a craft; it’s a way to immortalize a part of nature’s history into a tangible memory. It allows you to create something uniquely yours while preserving the art and beauty that Mother Nature has already crafted. Whether you choose to spell out a meaningful word or scatter random letters artfully, driftwood letters can bring joy to both your life and the lives of others.

Emotional Connection

Incorporating such natural elements into your spaces can help foster a deeper connection to the earth and remind you of cherished times by the water. Projects like these also provide a therapeutic way to express creativity and relieve stress.

Personalizing Your Driftwood Letters

There’s something truly special about customization, taking something beautiful and making it resonate even more personally. Whether these letters become keepsakes or gifts, personal flair will elevate your driftwood letters to the next level.

The Gift of Nature

Giving driftwood letters as a present is like offering a piece of nature wrapped in creativity. Think about inscribing or attaching a small heartfelt message to your letters to enhance their significance.

Special Techniques

Consider advanced techniques like pyrography, where you use a heated tool to burn designs or messages into the wood. This adds an indelible mark that can make your driftwood letters even more individual and meaningful.

Environmental Considerations

As someone harnessing the artistry of nature, it’s essential to respect the environment. This sustainable art form encourages repurposing what nature has already discarded, aligning with eco-friendly practices.

Eco-Ethical Crafting

When gathering driftwood, it’s crucial to adhere to local regulations and guidelines. Some areas protect their natural shorelines and prohibit the collection of driftwood. Always be sure to leave nature as undisturbed as possible, ensuring your crafting remains sustainable and respectful.

Conclusion: A Journey with Driftwood

Crafting driftwood letters is a journey that blends creativity with the wondrous unpredictability of nature. Each letter tells a story — both your own and the silent, ancient tales carried by the driftwood itself. As you place each piece, remember you’re engaging in a historical narrative, as old as the rivers and seas that shaped these remnants of wood.

Unlock your imagination with driftwood, and let each letter reflect not just words but stories of time and tide, crafted beautifully by your hands. The result is art that doesn’t just decorate your space but also enriches it with the graceful, natural legacy of driftwood’s journey. Each piece begins as a chapter of nature’s story and finds its conclusion in your artistic vision.

Filed Under: Driftwood Ideas Tagged With: Art, DIY, Driftwood, Handmade, home decor

Driftwood Lamp Diy How To Make

May 5, 2025 by admin

Have you ever found yourself strolling along a beach or riverbank, captivated by the unique, organic beauty of driftwood? What if you could transform those intriguing pieces of nature into a beautiful, functional item for your home? Creating a driftwood lamp is not only a creative project but also a way to bring a touch of nature’s artistry into your living space. If you’ve ever been curious about how to make a driftwood lamp yourself, you’re in the right place!

Driftwood Lamp Diy How To Make

Understanding Driftwood and Its Appeal

Driftwood is essentially wood that has been washed onto a shore or riverbank after being at sea or in the water. Over time, it becomes smoothed and uniquely shaped due to the effects of weathering, making each piece one of a kind. The process of selecting the right driftwood is vital for creating a visually appealing lamp.

Why Driftwood?

Driftwood embodies the notion of wabi-sabi, the Japanese aesthetic centered around accepting the imperfect and transient nature of things. Its natural variability and distinctive appearance make it an intriguing choice for home decor. Crafting with driftwood allows you to create something that is both useful and aesthetic while repurposing mother nature’s handiwork into something of personal significance.

Selecting the Perfect Driftwood

Your journey begins with selecting the right piece of driftwood. Look for wood that is dry and free from excessive moisture. The texture, shape, and size of the driftwood will influence the final design of your lamp. It’s important to choose pieces that not only appeal to you visually but also conform to practical requirements such as stability and size.

Preparing the Driftwood

Before starting the project, it’s necessary to clean the driftwood thoroughly. This involves removing sand, salt, and any small organisms that may have made a home on your chosen piece. You can do this by soaking the driftwood in a mixture of water and bleach, which will help to sanitize it. Rinse it thoroughly and let it dry completely before proceeding.

Planning Your Driftwood Lamp

Creating a driftwood lamp requires a few materials and tools. Proper planning and gathering of supplies will save you time and effort as you progress.

Gathering Supplies

Here’s a simple table summarizing the materials and tools you’ll need:

MaterialsTools
DriftwoodPower Drill
Lamp kit (including cord, socket, harp, and switch)Sandpaper
Lamp base (optional)Screwdriver
LampshadeHot glue gun or wood glue
ScrewsClamps (optional for stability)

Designing the Lamp

This is where your creativity can shine. Visualize how you want your lamp to look. Consider whether you’d like your lamp to be tall and slender or more compact and robust. Will you use one large piece of driftwood or several smaller ones? Sketch your ideas to serve as a roadmap for assembly. Keep in mind the stability and the balance of the lamp when designing, as well as the placement of the electrical components.

Step-by-Step Guide to Making Your Driftwood Lamp

Now that you have your driftwood and your supplies, let’s proceed with making your driftwood lamp. Below, you’ll find detailed steps that guide you from start to finish.

Step 1: Assemble the Lamp Kit

The lamp kit is the core of your lamp’s functionality. Begin by assembling the kit components. This typically includes a cord, socket, and switch. Follow the instructions provided with the kit to ensure proper setup. Test the lamp kit separately to ensure it works properly before integrating it with your driftwood.

Step 2: Drill Holes into the Driftwood

Carefully decide where and how you will route the lamp’s cord through the driftwood. Based on your design, drill holes accordingly. A power drill fitted with a long drill bit will be necessary to bore through the wood. Take your time with this step to prevent cracking or splintering your driftwood.

Step 3: Secure the Driftwood Pieces

If you are using multiple pieces of driftwood to construct your lamp, you will need to secure them together. Use a hot glue gun or wood glue to bond the pieces. Clamps can be helpful to hold the pieces securely until the glue dries completely.

Step 4: Attach the Lamp Kit

Once the driftwood structure is stable, integrate the lamp kit. Feed the cord through the pre-drilled holes and attach it to the socket setup. Secure the socket firmly in place at the top of the driftwood, where the light bulb will be positioned.

Step 5: Affix a Lamp Base (If Necessary)

Depending on your driftwood design, you may require a base to balance the lamp securely. A base can be crafted from a flat, sturdy piece of wood or purchased pre-made. Securely attach the driftwood to the base using screws or strong adhesive.

Step 6: Finishing Touches

Once assembled, smooth the surface of the driftwood using sandpaper to eliminate rough edges and achieve a polished finish. You may choose to treat the wood with a clear, protective finish that will enhance its natural color and preserve it.

Step 7: Install a Lampshade

Choose a lampshade that complements the natural beauty of the driftwood. Play around with different colors and materials to see what suits your space best. Secure the lampshade to the socket, following the instructions provided with your lamp kit.

Caring for Your Driftwood Lamp

To ensure your driftwood lamp continues to brighten your space beautifully, a bit of maintenance is required. Keep it away from high-moisture areas and dust it regularly. The lamp, being an organic piece, should not be exposed to excessive humidity which can degrade the wood over time.

Enhancing Environmental and Aesthetic Appeal

This project isn’t just about creating a lamp; it’s a way to bring a piece of the natural world into your home while reusing found materials in a creative manner. Each time you look at your lamp, you’ll be reminded of the hands-on craftsmanship and the unique patterns nature has crafted for you.

Driftwood Lamp Diy How To Make

Conclusion

By following these steps, you’ll have crafted a driftwood lamp that is not just functional but also a conversation piece, making it a wonderful addition to your home decor. This project not only turns beachcombing finds into a work of art but also provides you with a sense of accomplishment as you transform natural beauty into an everyday essential.

Filed Under: Driftwood Ideas Tagged With: crafting, DIY Project, Driftwood, home decor, Lamp

Kumquat/dark Driftwood/light Bone

May 4, 2025 by admin

Have you ever found yourself captivated by the beauty and subtlety of color combinations that nature offers? There’s a certain harmony when you mix earthy tones with vibrant hues that can evoke both tranquility and energy. One such unique and fascinating blend is “Kumquat/Dark Driftwood/Light Bone.” These colors not only provide visual pleasure but also create a deeper connection with nature’s palette. Let’s explore this intriguing combination and uncover its inspirations, uses, and how it can influence your space, creativity, and emotions.

Understanding the Colors

Understanding what each component of the combination offers individually will help you appreciate their collective impact.

Kumquat

Kumquat is a bright and zesty hue, reminiscent of the small citrus fruit it’s named after. It embodies energy, brightness, and a touch of exotic flair. This bold orange shade can invigorate spaces and moods, adding a spark of liveliness wherever it’s used.

Dark Driftwood

Dark Driftwood, on the other hand, offers a rich, earthy tone, often associated with stability and groundedness. This color is a deeper shade of brown, mimicking the look of aged wood that has been weathered by natural elements. It conveys a sense of warmth and reliability, providing a perfect balance to the brightness of Kumquat.

Light Bone

Light Bone serves as a contrast and complement to the other two shades with its soft, neutral appearance. A light, almost creamy off-white, this shade translates to calmness and subtlety. When paired with bold or dark colors, it enhances them without overwhelming, bringing a touch of simplicity and refinement.

The Science and Psychology Behind Colors

Colors are much more than mere visual stimuli; they have profound psychological effects on our moods, perceptions, and even decision-making processes.

The Vibrancy of Kumquat

The vibrant orange of Kumquat is often associated with excitement, enthusiasm, and warmth. This color is known to stimulate action and increase energy levels. If you’re feeling a creative block, surrounding yourself with Kumquat might ignite a spark of motivation or innovation.

The Grounding of Dark Driftwood

In contrast, Dark Driftwood invites a calming presence due to its deep, earthy nature. Associated with the reliability and resilience of nature, this color can create a sense of security and comfort. It’s a color that encourages relaxation and introspection, grounding your emotions and thoughts.

The Tranquility of Light Bone

Light Bone embodies simplicity and calm. This understated shade can help in stress reduction and promote feelings of peace and relaxation. In a world that often feels overwhelming, surrounding yourself with Light Bone can be soothing and restorative.

Kumquat/dark Driftwood/light Bone

Application in Interior Design

The blend of Kumquat, Dark Driftwood, and Light Bone offers limitless possibilities for interior design, creating spaces that are both dynamic and serene.

Living Spaces

In a living room, Kumquat can be used as an accent color, providing an invigorating splash against surfaces predominantly colored in Dark Driftwood. This combination offers warmth and vibrancy, making spaces feel inviting and lively. Light Bone can be used for larger surfaces like walls or ceilings to reflect natural light and create an open, airy atmosphere.

Kitchens and Dining Areas

In the heart of the home, you can use Kumquat for kitchen accessories, like fruit bowls or small appliances, to add cheerfulness. Dark Driftwood can dominate the cabinets or furniture pieces, while Light Bone can be a perfect choice for backsplashes or countertops, providing a clean, bright base.

Bedrooms and Restrooms

For more restful spaces, the blend can be adjusted to favor the tranquility of Light Bone and the stability of Dark Driftwood. Kumquat can be subtly introduced through textiles or wall art, just enough to maintain the color narrative without disrupting the peace expected in these rooms.

Influence on Art and Creativity

The interplay of these colors can deeply influence artistic expressions and creative endeavors.

Color Schemes in Art

For artists, using Kumquat, Dark Driftwood, and Light Bone can be a deliberate choice to convey a range of emotional narratives, from the vibrancy of human experiences represented by Kumquat’s brightness to the solidity of nature through Dark Driftwood, all balanced by Light Bone’s peace.

Encouraging Creative Flow

In workspaces or studios, these colors can stimulate creativity and focus. Kumquat sparks imagination, Dark Driftwood inspires contemplation, and Light Bone keeps the energy balanced. Choosing these colors in art supplies or furnishings can influence the creative atmosphere.

Kumquat/dark Driftwood/light Bone

Fashion and Personal Style

Personal style is another area where the mixture of these colors can be effectively showcased, offering a versatile and universally appealing aesthetic.

Clothing and Accessories

In clothing, pairing a Kumquat piece with garments or accessories in Dark Driftwood or Light Bone can create a striking yet harmonious ensemble. This mix isn’t just trendy but also classic, ensuring your fashion choices resonate with timeless appeal.

Jewelry and Footwear

For jewelry, choosing metals or stones that align with these colors can create cohesive looks. Dark Driftwood can be reflected in wooden or leather pieces, while Kumquat hues might be found in gold or colored gemstones. Light Bone is perfect for softer materials like ivory.

Implementing the Colors in Branding and Marketing

Colors play a vital role in brand identity and marketing strategies, and the combination of Kumquat, Dark Driftwood, and Light Bone can uniquely position a brand in the market.

Brand Personality and Values

A brand utilizing these colors can appeal to a wide range of emotions and values. Kumquat stands for vibrancy and innovation, Dark Driftwood exudes reliability and sophistication, while Light Bone suggests simplicity and purity. Together, they create a comprehensive brand image that resonates with diverse audiences.

Packaging and Advertising

Using this color scheme in packaging or promotional materials can draw attention and convey the desired brand message effectively. Kumquat’s eye-catching nature paired with Dark Driftwood’s elegance and Light Bone’s clean aesthetic can make products stand out.

Environmental and Cultural Significance

These colors aren’t merely about aesthetics; they carry environmental and cultural importance, reflecting both natural beauty and human experiences.

Inspired by Nature

Drawing from natural elements such as fruit, wood, and bone, this palette resonates with the authenticity and beauty of the natural world. It serves as a reminder of the earth’s inherent beauty and encourages sustainable choices in various applications.

Cultural Associations

Different cultures interpret colors uniquely. While Kumquat may signify prosperity or happiness in some contexts, Dark Driftwood can symbolize strength or wisdom, and Light Bone often denotes purity or renewal. Understanding these nuances can make the application of these colors more impactful.

Tips for Harmonizing the Colors

Successfully using Kumquat, Dark Driftwood, and Light Bone requires a thoughtful approach to achieve harmony and balance.

Balancing Bold and Neutral

When using Kumquat, start with small accents and gradually introduce it in more significant areas. Balance this bold hue with extensive use of neutral Dark Driftwood or Light Bone to prevent any color from overpowering the space.

Patterns and Textures

Incorporate different patterns or textures to create depth and interest. A fabric or wallpaper featuring all three colors can weave them together, integrating their individual strengths into a cohesive design element.

Seasonal Adaptations

Adapt the prominence of each color according to seasonality. For instance, more Kumquat in summer provides vibrancy, while Dark Driftwood in winter evokes coziness. Light Bone remains a reliable constant to ensure balance throughout.

Conclusion

The interplay of Kumquat, Dark Driftwood, and Light Bone transcends mere decor or aesthetic choices. This unique combination ties together vibrancy, stability, and serenity, offering an intricate balance that can transform spaces, influence moods, and elevate style. Whether in your living environment, personal style, artistic creations, or branding strategies, embracing this palette grants you the power to play with contrast and harmony, echoing the dynamic and multifaceted essence of life itself. Embrace the beauty of this compelling color trio and allow it to inspire and transform you in diverse and meaningful ways.

Filed Under: Driftwood Ideas Tagged With: Aesthetic, Color Palette, home decor, Interior Design

Driftwood With Epoxy

April 20, 2025 by admin

Have you ever gazed upon a piece of driftwood and wondered what beauty could be crafted if it were combined with the fluid elegance of epoxy resin? Driftwood, with its naturally sculpted forms, and epoxy, with its glossy finish, can unite to create truly stunning art and functional pieces. In this article, you’ll discover the magic of transforming driftwood with the help of epoxy, offering endless possibilities in your creative journey.

Driftwood With Epoxy

Understanding Driftwood

Driftwood is wood that has washed onto the shore, shaped and changed by the natural forces of water and weather. It’s often found along beaches, riverbanks, and lakesides. Naturally weathered and smoothed, each piece of driftwood carries its own unique character and story.

The Appeal of Driftwood

Why use driftwood in your projects? Driftwood carries a natural beauty brought on by its journey through water, which might span years or even decades. It encapsulates nature’s artistry—a unique testament to time and environment. Its organic shapes and varied textures make it an interesting and dynamic material for a wide range of creative projects.

Environmental Considerations

When collecting driftwood, it’s important to be mindful of environmental impacts. Always ensure that you’re collecting legally and ethically, respecting local restrictions and habitats. Many regions have guidelines to protect ecosystems that rely on driftwood, so research local regulations before gathering materials for your project.

The Magic of Epoxy Resin

Epoxy resin is a versatile medium used frequently in arts and crafts, as well as in industrial applications. Known for its firm, clear finish, it can combine seamlessly with other materials to enhance their natural beauty.

What is Epoxy Resin?

Epoxy resin is a polymer that begins in a liquid form but hardens to a glass-like sheen when mixed with a curing agent. This transformative process can protect surfaces, provide structural strength, and offer a variety of finishes from matte to glossy.

Why You Should Consider Epoxy

The advantages of using epoxy resin are numerous. It provides a protective and durable finish, enhances colors and textures, and adds a professional touch to any project. The resin’s clarity can also highlight the intricate details of the driftwood, making the collaboration of these two materials visually stunning.

Preparing Driftwood for Epoxy Projects

Before you can pair driftwood with epoxy, the wood must be properly prepared. Preparation ensures the durability of your final project and helps achieve the look you desire.

Cleaning Your Driftwood

Begin by cleaning the wood to remove dirt, salt, and other residues. Soak the driftwood in fresh water, changing it regularly until the water runs clear. You might also scrub the surface with a brush to remove any stubborn debris. Allow the wood to dry completely before moving on to the next step.

Stabilizing and Treating

To stabilize the driftwood, you might need to seal it to prevent interactions between the wood’s natural oils and the epoxy. You can seal the wood using a coat of clear spray varnish before applying epoxy. Ensure that the driftwood is completely dry to prevent any trapped moisture from causing issues during the epoxy curing process.

Structuring and Designing

Consider how you want to use your driftwood. Will it serve as a stand-alone piece, or is it part of a larger structure such as a table or sculpture? This step is crucial to ensuring that your design vision is practical and achievable. Draft designs and plan your epoxy application to bring your concept to fruition.

Driftwood With Epoxy

Creating Your Driftwood and Epoxy Masterpiece

After preparing your materials, the real fun begins—creating with driftwood and epoxy resin. This process can enhance the natural features of both materials while adding your personal artistic touch.

Choosing the Right Epoxy

When selecting epoxy, consider the requirements of your specific project. Different formulations cater to various needs, such as speed of curing, UV resistance, and clarity. Ensure the chosen epoxy suits the conditions in which the object will be used (e.g., indoors vs. outdoors) and the aesthetic effect you wish to achieve.

Mixing and Applying Epoxy

Follow manufacturer instructions carefully when mixing epoxy. Ensuring the precise ratio of resin to hardener is crucial for a successful cure. Once mixed, apply the epoxy evenly onto the driftwood. Depending on your design, consider whether you’ll pour it to fill crevices, coat surfaces, or encapsulate objects within your resin.

Layering for Depth and Interest

Multiple layers of epoxy can add depth and interest to your project. Allowing each layer to cure before adding the next can create a sense of dimension and complexity. You might also consider adding colorants or inclusions to layers for unique effects.

Crafting Projects with Driftwood and Epoxy

The potential projects that use driftwood and epoxy are virtually limitless. Here are a few ideas to spark your creativity:

Driftwood and Epoxy Tables

A popular use of driftwood and epoxy is in creating custom tables. Position the driftwood as the centerpiece of a table and encase it within a mold filled with epoxy to create a striking natural work of art.

Sculptures and Art Pieces

Driftwood’s natural form is perfect for creating sculptures. The combination with epoxy allows for the introduction of color and fluid movement that contrasts beautifully against the natural textures of the wood.

Jewelry and Home Decor

Even small pieces of driftwood can become extraordinary when enhanced with epoxy. Consider crafting unique jewelry pieces or home decor such as wall hangings, clocks, or candle holders.

Caring for Your Driftwood and Epoxy Creations

Proper care and maintenance will ensure that your creations are enjoyed for years to come.

Cleaning Tips

When cleaning, avoid harsh chemicals that could damage the epoxy finish. Instead, use a soft cloth and mild soap solution for regular upkeep. Wipe surfaces gently to avoid scratching or dulling the surface.

Repairing Scratches

Over time, epoxy surfaces might get scratched. You can buff out minor scratches with a polishing compound and a soft cloth. For deeper scratches, consider applying a new topcoat of epoxy after lightly sanding the affected area.

Challenges and Solutions in Working with Driftwood and Epoxy

Like any creative endeavor, working with driftwood and epoxy may present certain challenges, but most can be easily overcome with preparation and knowledge.

Common Challenges

Some potential issues include bubbles forming in the epoxy, uneven surfaces, or unsatisfactory curing. These can usually be avoided with careful preparation and attention to detail.

Overcoming Challenges

To prevent bubbles, consider using a heat gun to gently remove them after pouring. Consistent ambient temperature and humidity can help ensure even curing. Should any challenges arise, a patient and methodical approach can usually lead to successful resolution.

Your Journey with Driftwood and Epoxy

Driftwood and epoxy resin are a harmonious combination that dares you to explore the boundaries of your imagination. The blend of natural and synthetic materials results in pieces that are as functional as they are beautiful. Whether you’re crafting a small keepsake or embarking on a larger-scale project, you’ll find this medium versatile and rewarding.

Experiment and Enjoy

The most important aspect of your creative journey is to enjoy the process. Experiment with different techniques, play with colors and textures, and allow your artistic intuition to guide you. As you develop your skills, you’ll not only create stunning art but also hone a craft that is both satisfying and rewarding.

Conclusion

Transforming driftwood with epoxy resin is an exciting venture into the world of artistic creativity. By understanding how to prepare, design, and bring your unique vision to life, you can craft breathtaking pieces that meld the timeless beauty of nature with the innovative potential of modern materials. Embrace the opportunity to create art that tells a story and inspires wonder.

Filed Under: Driftwood Ideas Tagged With: DIY, Driftwood, Epoxy Resin, home decor, Woodworking

Driftwood And Epoxy

April 18, 2025 by admin

Have you ever found yourself captivated by the beauty of driftwood washed ashore, weathered by the elements and full of character, only to wonder how to incorporate such natural elegance into your home? Driftwood and epoxy work together seamlessly, crafting stunning pieces that blend the raw allure of natural materials with the glossy perfection of synthetics. This fusion not only showcases artistic flair but also respects and honors the natural beauty of the wood itself.

Driftwood And Epoxy

Understanding Driftwood

Driftwood, nature’s artwork, is a wood piece that’s been shaped and smoothed by natural forces such as water and weather. Originating from fallen trees or branches, it can travel for miles, tumbling and turning until it washes ashore, cast by the waves. Each piece is unique, bearing the marks of its journey.

Characteristics of Driftwood

When you first consider driftwood, its unique characteristics immediately stand out. Each piece is shaped by its own journey through rivers and seas, making it a canvas rich with history and texture. The colors range from soft grays to warm, earthy browns, often bleached by the sun and stained by minerals from the water.

Collecting Driftwood

If you enjoy beachcombing, collecting driftwood can be a rewarding experience. However, it’s important to respect the environment and local regulations, as some areas prohibit the removal of driftwood to preserve natural habitats. When you find driftwood you can collect, ensure it’s solid and not crumbly, as sturdier pieces are better suited for crafting.

Introducing Epoxy

Epoxy resin is a versatile material used widely in the art and crafting community for its ability to create a clear, hard surface. This synthetic compound is applied in liquid form and then hardens, making it perfect for a myriad of applications, from table coatings to intricate art pieces.

Why Use Epoxy with Driftwood?

The marriage of epoxy with driftwood enhances the natural beauty of the wood, filling crevices and cracks while preserving its organic form. Epoxy adds durability and a polished look that complements the rustic appeal of driftwood, providing both function and form. When cured, epoxy is incredibly strong and water-resistant, making it ideal for household items like tables, sculptures, and countertops.

Driftwood And Epoxy

Crafting with Driftwood and Epoxy

Blending driftwood and epoxy is not merely an art; it’s a process, one that involves patience, precision, and creativity. Here’s a closer look at how you can start crafting your own driftwood and epoxy masterpiece.

Choosing Your Driftwood

Your first step is choosing the right piece of driftwood. Consider your project’s size and purpose, whether for a small decorative piece or a larger furniture item. Ensure the wood is clean and free of debris, which might require some scrubbing or even gently sanding.

Preparing Driftwood for Epoxy

Preparation is key to a successful driftwood and epoxy piece. The wood must be completely dry, as any moisture can affect the epoxy application. You may need to dry the wood in an oven on a low setting or leave it in a dry area for several weeks. Clean the driftwood thoroughly, using a brush to remove all sand, dirt, and salt deposits.

Applying Epoxy Resin

Epoxy application requires a careful hand. Mix the epoxy resin according to the manufacturer’s instructions, usually involving combining a resin and a hardener. You must measure accurately to ensure consistency and strength. Once mixed, it can be poured or brushed onto the wood, as you desire a thin protective coating or a more substantial layer filling cracks and gaps. Use a torch or heat gun to remove any bubbles formed during application.

Curing the Epoxy

Curing time can vary based on the type and brand of epoxy used, as well as temperature and humidity levels. Ensure the resin is left undisturbed during this period to prevent defects and unevenness. Curing generally takes between 24-72 hours, but always consult the product’s instructions for specifics.

Creating Projects with Driftwood and Epoxy

Now that you’re familiar with the basics, let’s explore some projects that you can create with driftwood and epoxy. These projects highlight the versatility and beauty of combining these materials.

Driftwood and Epoxy Table

One popular project is crafting a table using driftwood and epoxy. These tables serve as stunning focal points in a room, blending natural wood patterns with a sleek, durable finish. You might choose a single large piece of driftwood or a collection of smaller ones embedded in epoxy to form the tabletop.

Driftwood Sculptures

Utilize driftwood’s organic shapes to create sculptures that capture the essence of nature. The imperfections and curvature of driftwood can be highlighted with strategic epoxy applications, allowing you to mold artistic expressions that emphasize the raw and the refined.

Decorative Driftwood and Epoxy Accessories

Small pieces of driftwood adorned with epoxy can become a variety of decorative items, such as picture frames, coasters, or candle holders. These smaller projects are perfect for beginners starting to experiment with combining these materials.

Advantages of Driftwood and Epoxy Creations

Choosing to work with driftwood and epoxy comes with several advantages. These creations are not only visually stunning but also practical and durable.

Durability and Longevity

Epoxy adds a layer of protection to driftwood, ensuring the natural material is preserved for years to come. Its water-resistant and robust surface makes driftwood and epoxy creations suitable for both indoor and outdoor settings.

Unique Aesthetics

Every piece of driftwood tells its own story, full of unique textures and shapes that are beautifully preserved and enhanced with epoxy. Your creations will stand out as one-of-a-kind, intertwining the natural world with human creativity.

Environmental Considerations

Utilizing driftwood can be a sustainable practice, as it involves repurposing a natural resource. By transforming driftwood into art, you give it a new life while respecting the environment. Always ensure that your collection practices are sustainable and permissible.

Challenges in Working with Driftwood and Epoxy

As with any crafting process, working with driftwood and epoxy does present some challenges that you may encounter.

Handling Epoxy Safely

Epoxy resin, while generally safe, does require careful handling. Always work in a well-ventilated area, wear gloves and protective eyewear, and adhere to all safety instructions. Inappropriate handling can lead to health risks and compromised project quality.

Achieving Desired Results

It might take more than one attempt to achieve the results you envision. Experimentation is a part of the creative process when working with driftwood and epoxy. Don’t be discouraged by initial failures; instead, consider each project a learning experience.

Maintaining the Finished Product

Though epoxy provides a protective layer, it might require occasional maintenance to keep the surface looking fresh. Regular cleaning with mild soap and water is usually adequate, but avoid abrasive materials that could damage the epoxy.

Tips for Success When Working with Driftwood and Epoxy

Working successfully with driftwood and epoxy requires some insight. Here are a few tips to guide you:

Selecting the Right Epoxy

Not all epoxy resins are created equal. Some are better suited for thinner applications, while others are designed for deeper pours. Consider your project’s requirements and select an epoxy that meets those needs. Look for UV-resistant varieties to prevent yellowing.

Patience is Key

Crafting with driftwood and epoxy is not a rushed process. Allow ample time for each stage, particularly drying and curing times, to achieve the best results. Rushing the process can lead to imperfections and a less durable finish.

Embrace Imperfection

One of the beautiful things about working with driftwood is its inherent imperfection. Embrace the curves, holes, and textures instead of seeing them as flaws. Epoxy’s clarity will highlight these natural characteristics, adding to the unique appeal of your work.

Conclusion

Driftwood and epoxy provide a captivating way to bring a touch of natural beauty into your home. The artistic journey of combining these materials involves a blend of patience, skill, and creativity. Whether you’re crafting a symbolic small sculpture or a statement piece of furniture, these materials offer endless possibilities. By embracing both the challenges and opportunities that come with working with driftwood and epoxy, you can create stunning pieces that reflect the harmonious blend of nature’s artistry and human ingenuity. Why not begin this creative endeavor and transform a simple piece of driftwood into a memorable work of art?

Filed Under: Driftwood Ideas Tagged With: DIY, Driftwood, Epoxy, home decor, Woodworking

Driftwood And Epoxy Resin

April 17, 2025 by admin

Have you ever marveled at the effortless beauty of nature’s artistry combined with human craftsmanship? Driftwood and epoxy resin together create stunning pieces that captivate and inspire. Let’s dive into this fascinating blend, exploring how the marriage of these two elements brings a unique allure to both artistic and functional creations.

Driftwood And Epoxy Resin

Understanding Driftwood

What is Driftwood?

Driftwood is wood that has been washed onto the shore of oceans, seas, or rivers by tides, winds, or waves. Over time, exposure to the elements shapes the wood into unique forms and textures, making each piece a testament to nature’s artistry. Its natural beauty and interesting shapes make it a popular material for artists and craftspeople.

The Origin of Driftwood

Driftwood originates from various sources, including fallen trees, pieces of branches, or man-made wooden objects that have found their way into water bodies. These woods traverse miles, sculpted naturally by water currents and sand, and bleached by the sun into soft, muted colors.

Why Use Driftwood?

Utilizing driftwood in your projects adds a touch of nature and history to your creation. Each piece tells a story of its journey, adding a unique character. It’s also an environmentally friendly option as it reuses natural materials that might otherwise be considered waste.

What is Epoxy Resin?

Understanding Epoxy Resin

Epoxy resin is a versatile synthetic thermosetting polymer known for its strong adhesive and seamless finish. It’s a combination of two components: the resin and hardener. When mixed, they trigger a chemical reaction, curing into a strong and durable material.

Properties of Epoxy Resin

Epoxy resin is prized for its high-gloss finish, durability, and strength. It’s also water-resistant, making it ideal for various applications. Its clear formulation allows it to encapsulate other elements without obscuring their natural beauty—perfect for preserving delicate textures and colors of driftwood.

Why Combine Driftwood and Epoxy Resin?

Combining driftwood’s rustic charm with the modern appeal of epoxy resin creates a harmony that elevates designs. Epoxy resin not only enhances the natural beauty of driftwood but also provides a protective coating. This combination results in pieces that are aesthetically pleasing and durable.

Driftwood And Epoxy Resin

Crafting Projects with Driftwood and Epoxy Resin

Ideas for Driftwood and Epoxy Projects

Driftwood and epoxy resin can be used to create myriad projects, from small decorative pieces to functional furniture. Here are some ideas:

  • Driftwood Tables: Use larger pieces of driftwood as distinctive table bases, pairing them with an epoxy-resin-coated tabletop.

  • Wall Art: Arrange driftwood pieces and encapsulate them in epoxy to create unique visual stories.

  • Coasters and Trays: Smaller pieces of driftwood can be embedded in epoxy resin to create practical items that also serve as conversation starters.

Materials Needed

To get started with your driftwood and epoxy project, gather these materials:

MaterialPurpose
DriftwoodBase material with character and texture
Epoxy Resin KitIncludes resin and hardener for coating
Mixing ContainersFor blending resin and hardener
Protective GearGloves, masks, and goggles for safety
SandpaperTo smooth driftwood and resin finish
BrushesFor applying epoxy resin over surfaces

Preparing Driftwood

Before combining driftwood with epoxy resin, you need to prepare it:

  1. Cleaning: Remove debris and dirt using a brush or sponge and mild soap. Rinse thoroughly and let it dry completely.

  2. Sanding: Smooth the surface to remove rough edges or splinters, enhancing both handling and the resin finish.

  3. Sealing: Apply a sealant to prevent excessive absorption of epoxy resin into the driftwood, ensuring a uniform finish.

Step-by-Step Guide to Combining Driftwood and Epoxy Resin

Step 1: Planning Your Design

Before starting, envision what you want to create. Sketch your design, deciding how much driftwood to use and where epoxy resin will enhance your piece.

Step 2: Mixing Epoxy Resin

Follow the manufacturer’s instructions for mixing epoxy resin and hardener, ensuring the right ratio. Mix slowly to avoid bubbles, which can cloud the resin.

Step 3: Applying Resin

Carefully pour or brush the mixed epoxy resin over the driftwood. Ensure an even coating, allowing the resin to seep into crevices, enhancing the driftwood’s unique features.

Step 4: Curing

Allow the resin to cure completely, keeping it in a dust-free environment to maintain a pristine finish. Curing times vary, so refer to your epoxy resin kit for specifics.

Step 5: Finishing Touches

Once cured, sand the surface for a smooth finish, if needed. Follow with a soft cloth and polish to reveal its glossy shine.

Tips for Success

Avoiding Common Mistakes

  • Bubbles in Resin: Prevent bubbles by mixing slowly; use a heat gun to help remove any remaining bubbles after application.

  • Driftwood Absorption: Minimize resin absorption by adequately sealing the driftwood with a pre-coat of epoxy or a specific sealant.

Safety Measures

Always work in a well-ventilated area. Wear protective gear, including gloves and goggles, and ensure the resin doesn’t touch your skin, as it may cause irritation.

Inspiration and Possibilities

Creating with driftwood and epoxy resin opens endless possibilities, limited only by your imagination. Each piece you craft will hold its unique story and charm, standing testament to the blend of natural beauty and human creativity.

Whether you’re creating art or functional items, the marriage of driftwood and epoxy resin will add a distinctive touch to your work, inviting admiration and curiosity.

Embark on your creative journey with confidence and excitement, and discover the rewarding experience of crafting with driftwood and epoxy resin. Celebrate the seamless connection between the raw beauty of nature and the polished brilliance of modern materials.

Filed Under: Driftwood Ideas Tagged With: DIY, Driftwood, Epoxy Resin, Handmade, home decor

You Won’T Believe What You Can Make With These 25 Driftwood DIY Projects

April 13, 2025 by admin

If you’ve ever walked along the beach and admired the unique shapes of driftwood, you might wonder how to transform them into beautiful home decor. With these 25 DIY driftwood projects, you’ll discover practical and stylish ways to repurpose these natural treasures. From rustic mirror frames to functional coat racks, each project will inspire your creativity and add charm to your space. You won’t believe what’s possible with just a piece of driftwood.

Driftwood Wall Art

driftwood decor for budget friendly elegance

Driftwood wall art adds natural charm and character to your space, transforming ordinary interiors into coastal-inspired retreats. You don’t need expensive materials to create stunning pieces—pair driftwood with affordable dollar store wood crafts for budget-friendly elegance.

For example, combine small driftwood branches with dollar store picture frames to craft unique, textured wall hangings. Explore dollar store decorating ideas like attaching driftwood pieces onto painted canvases, creating an easy yet sophisticated art display.

Arrange various driftwood lengths vertically or horizontally for striking abstract designs. Consider painting driftwood tips in soft pastels or metallic shades to enhance visual interest.

With creativity, simple driftwood collected from the beach and budget-friendly items from the dollar store can become enchanting focal points in your home.

Rustic Driftwood Mirror Frame

rustic driftwood mirror frame

If you’re looking for a creative way to refresh an old mirror, consider crafting a rustic driftwood mirror frame.

Driftwood adds charm and natural texture, easily transforming your ordinary mirror into a stunning piece of dollarama diy decor. Gather driftwood pieces of varying shapes and sizes, then arrange them around the mirror’s border, securing each piece with strong adhesive or a glue gun.

The result is a unique, organic frame that instantly enhances your space. This project is affordable, eco-friendly, and perfect if you’re seeking homemade items to sell ideas. Rustic driftwood frames often attract buyers who appreciate handmade, earthy designs.

Once you’ve completed this simple DIY, your refreshed mirror will be a standout piece, adding a coastal-inspired vibe to your décor.

Driftwood Candle Holders

driftwood candle holder diy

Another charming DIY to brighten your home décor is creating candle holders from driftwood. This project offers rustic charm and elegance, making it perfect for enhancing your living room, patio, or dining table.

Simply collect driftwood pieces in various sizes, clean them thoroughly, and arrange them securely around inexpensive glass votive holders or tea lights. Use hot glue or strong adhesive to keep everything firmly in place.

Driftwood candle holders aren’t just beautiful—they’re also inexpensive crafts for adults that you can easily customize. Plus, once you’ve perfected your technique, these unique creations make wonderful diy crafts for money.

Sell them online or at local craft fairs, turning your relaxing hobby into a profitable side hustle while sharing your creativity with others.

Driftwood Jewelry Organizer

rustic driftwood jewelry organizer

When you’re tired of tangled necklaces and misplaced earrings, creating a jewelry organizer from driftwood provides a stylish, practical solution.

Driftwood’s natural texture adds rustic charm, turning your jewelry storage into beautiful wall décor. Gather a sturdy driftwood piece, hooks, and knobs—dollar store craft organization ideas like inexpensive adhesive hooks or decorative knobs work perfectly.

Attach these securely to the driftwood using glue or screws, spacing them evenly to accommodate necklaces, bracelets, and rings. For earrings, stretch fine mesh or lace ribbon across the driftwood, securing at each end.

Hang your finished organizer easily with twine or picture hangers. Utilizing these dollar store hacks DIY projects, you’ll declutter your accessories creatively and affordably, showcasing your jewelry in style.

Driftwood Coat Rack

rustic driftwood coat rack

Driftwood isn’t just great for organizing jewelry—you can also craft a stylish coat rack that adds rustic charm to your entryway or hallway.

Start by selecting a sturdy piece of driftwood, ensuring it’s thoroughly dry and clean. Next, grab some inexpensive hooks from your local hardware store or repurpose dollar store signs by removing their hooks—this keeps costs low and boosts your creativity.

Secure each hook evenly along the driftwood using screws, then attach sturdy hardware on the back to mount it securely on your wall.

This practical driftwood coat rack provides a chic solution for hanging coats, scarves, and hats, enhancing your home’s organization. Plus, it’s one of those simple yet impressive craft ideas guests will definitely notice and admire.

DIY Driftwood Table Lamp

diy rustic driftwood lamp

Transform your living space with a DIY driftwood table lamp that combines rustic beauty with practical lighting.

First, gather driftwood pieces in varied sizes and shapes, ensuring they’re clean and dry. Choose a sturdy wooden base and drill a hole through its center for the lamp cord.

Arrange driftwood pieces vertically around a threaded lamp rod, stacking them naturally to create an appealing, balanced design. Secure the driftwood stack firmly onto the base using a washer and nut.

Next, thread a lamp cord through the rod, attach a socket safely, and finish by adding a lampshade that complements your room’s aesthetic.

This driftwood table lamp will instantly enhance your decor, providing cozy illumination while showcasing your creative flair and appreciation for natural materials.

Driftwood Succulent Planter

driftwood succulent planter creation

Another stunning way to incorporate driftwood into your home decor is by creating a driftwood succulent planter. Succulents pair perfectly with driftwood’s natural beauty, creating an eye-catching, earthy centerpiece.

First, select a sturdy piece of driftwood with natural grooves or crevices. If necessary, drill out shallow pockets to hold the succulent soil securely. Add succulent-friendly soil into each crevice, gently pressing it down.

Next, choose a variety of colorful succulents, thoughtfully arranging them to complement each other and the driftwood’s shape. Carefully plant each one, gently pressing roots into soil pockets.

Finally, lightly water the succulents, allowing excess moisture to drain through the wood naturally. Place your planter on a coffee table or shelf to instantly enhance your space with rustic charm.

Driftwood Photo Display

rustic driftwood photo display

Showcase your favorite memories with a rustic yet stylish photo display made from driftwood.

First, choose a piece of driftwood that’s the right size and shape for your wall space. Clean and sand the wood lightly to remove any rough edges, while keeping its natural charm intact.

Next, attach small clips or hooks evenly spaced along the driftwood’s length. You can use metal clips for an industrial look or wooden clothespins for something more rustic.

Then, secure a sturdy twine or rope to either end of the driftwood, allowing it to hang level on your wall.

Finally, clip your favorite photos onto the hooks or clips. This simple, personalized driftwood photo display instantly adds warmth and character to your home, letting your cherished memories shine.

Driftwood Wind Chime

handcrafted driftwood wind chime

If you’re looking for a unique, handcrafted addition to your outdoor space, a driftwood wind chime can offer soothing sounds and visual charm.

First, select several slender pieces of driftwood of varying lengths to produce different tones. Sand them lightly to smooth any rough edges but keep their natural appearance.

Next, drill small holes near the top of each driftwood piece and thread them with durable fishing line or twine. Attach these pieces at staggered heights to a larger horizontal driftwood branch, creating a pleasing arrangement.

Add beads or seashells between the driftwood pieces for extra charm. Finally, secure a sturdy loop on top for hanging. Your driftwood wind chime will sway gently in the breeze, providing peaceful melodies and rustic beauty.

Driftwood Towel Rack

coastal charm towel storage

A driftwood towel rack adds coastal charm and practical storage to any bathroom or poolside area. You can easily create one by choosing a sturdy, visually appealing piece of driftwood that matches your space.

Clean and dry it thoroughly, then sand down rough edges. Attach metal or wooden hooks spaced evenly along the wood using screws or strong adhesive. Consider sealing your rack with a clear coating to preserve its natural beauty and protect against moisture.

To mount it securely, use sturdy brackets or wall anchors appropriate for your wall type. Hang towels, robes, or swimwear neatly, keeping them organized and accessible.

Your handmade driftwood towel rack not only enhances functionality but also brings a relaxed, beach-inspired atmosphere to your home with minimal effort.

Driftwood Key Holder

driftwood key holder project

When you’re constantly misplacing keys, creating a driftwood key holder can be a stylish and practical solution.

Driftwood offers a rustic, unique charm that complements any decor, from coastal-inspired spaces to modern interiors.

First, choose a sturdy driftwood piece that’s the right size for your entryway or hallway.

Sand any rough edges to smooth the surface, preserving its natural look.

Attach evenly spaced hooks or small knobs onto the driftwood using screws or strong adhesive, ensuring they’re secure enough to hold your keys.

Next, mount your new key holder on the wall near the entrance for easy access.

You’ll have an attractive, personalized organization piece that prevents the frustration of lost keys, while also showcasing your creativity and appreciation for natural materials.

Driftwood Shelf

driftwood shelf diy project

Another practical and stylish driftwood project you can tackle is creating a driftwood shelf. Gather sturdy, weathered pieces that catch your eye, selecting those with flat surfaces suited for shelving.

First, clean each piece thoroughly and sand away sharp edges or splinters. Arrange driftwood pieces in a layout you love, combining them with metal brackets or sturdy rope, depending on the aesthetic you’re aiming for.

Mount the brackets securely to your wall or suspend the shelf with rope from sturdy hooks. Driftwood shelves add a rustic, coastal vibe to any room and offer practical storage for books, plants, or decorative knick-knacks.

With just a few simple steps, you’ll transform ordinary driftwood into a beautiful, functional, and unique shelf you’re proud to display.

Driftwood Birdhouse

driftwood birdhouse diy project

If you’re looking to attract birds to your yard while showcasing your creativity, consider building a driftwood birdhouse. Driftwood’s natural shapes and textures provide a rustic charm that complements any garden or yard.

Start by selecting pieces that are sturdy and weather-resistant. Combine various lengths and sizes to create a visually interesting, unique structure.

Assemble the birdhouse using nails or strong outdoor glue, leaving small gaps for ventilation and drainage. Make sure you drill an appropriately sized entry hole that’s suitable for the bird species you want to attract.

Position your driftwood birdhouse in a sheltered location, away from predators and harsh weather conditions. With this simple yet artistic DIY project, you’ll offer birds a safe haven while adding character and warmth to your outdoor space.

Driftwood Christmas Tree

eco friendly driftwood christmas tree

Driftwood isn’t just great for birdhouses—it also makes a charming and eco-friendly Christmas tree alternative.

To create your driftwood Christmas tree, first collect pieces in varying sizes, ensuring they’re clean and dry. Arrange them from longest at the bottom to shortest at the top, forming a tree shape.

Drill a hole through the center of each piece and thread them onto a sturdy wooden dowel or metal rod, spacing evenly. Secure the rod in a sturdy base, like a reclaimed wood block or rustic bucket filled with stones.

Add string lights or minimalist decorations like sea glass ornaments or simple white bulbs. Your driftwood Christmas tree brings coastal charm into your home, makes a meaningful conversation piece, and keeps sustainability at the heart of your holiday decor.

Driftwood Mobile

driftwood mobile crafting guide

Creating a mobile out of driftwood offers an artistic way to bring natural charm and coastal elegance into your living space. Start by gathering driftwood pieces in various lengths and shapes, choosing ones with interesting textures and smooth surfaces.

Next, lay them out, experimenting with arrangements until you find a balanced design. Drill small holes into each piece and thread sturdy twine or fishing line through them, spacing pieces evenly.

Include seashells, sea glass, or beads between driftwood segments to amplify visual appeal and add subtle pops of color. Securely tie each strand onto a larger driftwood branch to serve as your mobile’s anchor.

Hang your driftwood mobile near windows or patios, where gentle breezes create soothing movements, providing a calming atmosphere.

Driftwood Sign

coastal driftwood sign project

A charming driftwood sign adds rustic personality and coastal style to your home or garden. To create your own, start by choosing a flat, weathered piece of driftwood that fits your space.

You can paint a welcoming message, your family name, or a favorite coastal quote directly onto the wood using acrylic paints or a wood-burning tool for an authentic, rustic look.

Add decorative touches like seashells, nautical rope, or beach glass for extra charm. Seal your sign with a clear outdoor varnish to protect it from weather.

Hang it near your door, porch, or garden gate using twine, rope, or hooks. This simple DIY project not only showcases your creativity, but also brings a relaxing, beach-inspired feel right to your home.

Driftwood Wall Installation

driftwood wall installation guide

If you’re looking for an eye-catching way to elevate your coastal-inspired décor beyond signs and smaller accents, consider installing a driftwood wall feature. This bold statement piece instantly transforms your space, adding texture, warmth, and an authentic seaside charm.

Begin by collecting driftwood pieces in varying lengths and thicknesses, ensuring they’re clean and dry. Plan your design layout on the floor first, mixing smaller pieces with larger ones for a natural flow. Secure each driftwood piece directly onto the wall using sturdy nails, screws, or adhesive mounting strips.

Staggering the driftwood creates visual interest and depth. Ideal for living rooms, bedrooms, or entryways, your driftwood wall installation becomes an artistic focal point that guests will admire and you’ll enjoy every day.

Driftwood Bench

driftwood bench crafting guide

Turning driftwood into a sturdy, rustic bench adds both function and coastal charm to your home or garden.

First, gather driftwood pieces that are solid and similar in thickness to guarantee stability. Arrange them into a flat, comfortable seat, securing the wood tightly with screws or durable wood glue.

For the legs, select sturdy, thicker driftwood branches that can comfortably support weight and attach them firmly beneath the seat. Sand down any rough edges to prevent splinters and apply a clear sealant or varnish to protect the wood and enhance its natural beauty.

Place your finished bench on your patio, porch, or garden area, and enjoy relaxing moments outdoors. Your handcrafted driftwood bench will become an eye-catching statement piece you’ll cherish for years.

Driftwood Lantern

driftwood lantern coastal elegance

Complement your driftwood bench with an inviting driftwood lantern that brings warmth and coastal elegance to any space.

Gather driftwood pieces of similar length and thickness, then carefully arrange them around a glass hurricane or mason jar. Secure the driftwood with hot glue or twine, ensuring they’re snug and stable.

Place a pillar candle or battery-operated LED inside to softly illuminate your creation. For added charm, consider wrapping a nautical rope or string lights around the lantern.

Whether it’s placed outdoors on your patio or indoors on your dining table, this driftwood lantern adds a cozy, beach-inspired ambiance you’ll love. Its natural textures and rustic appearance blend perfectly with your existing décor, making it a standout centerpiece that’s both functional and uniquely beautiful.

Driftwood Coffee Table

driftwood coffee table diy

A driftwood coffee table instantly becomes the focal point of your living room, offering both practicality and coastal charm.

You can craft this stunning centerpiece by selecting sturdy driftwood pieces that fit together securely, ensuring stability. Arrange them creatively to form a solid base, carefully checking balance as you go. Attach the driftwood using strong wood glue or screws hidden underneath.

Next, add a tempered glass tabletop or reclaimed wooden surface to complete the look. Sand the driftwood lightly to remove sharp edges and apply a clear sealant to preserve its natural beauty.

You’ll find this DIY project satisfying and budget-friendly, transforming your living space into a relaxing seaside retreat. Guests will admire your creativity and the unique, rustic elegance you’ve brought indoors.

Driftwood Wreath

coastal charm driftwood wreath

Crafting your own driftwood wreath adds instant coastal charm and a warm welcome to your home’s entryway.

Begin by collecting driftwood pieces in various lengths from your favorite shoreline or local craft store. Sort them by size, and arrange them in a circular shape to visualize the final design.

Secure the driftwood pieces onto a sturdy wreath frame with hot glue, overlapping them naturally for a rustic coastal look. Consider incorporating seashells, starfish, or dried sea grass to add texture and visual interest.

Finish your wreath by attaching a burlap ribbon or nautical rope for hanging. Hang your handmade driftwood wreath on your door or entryway wall to provide a charming seaside touch that greets your guests with warmth, style, and personality.

Driftwood Garden Trellis

natural driftwood garden trellis

If you’re looking to add natural charm and functionality to your garden, consider building a driftwood trellis.

Driftwood offers a rustic, coastal appearance that instantly elevates your outdoor space. Gather various driftwood branches, choosing sturdy, weathered pieces of similar lengths.

Position longer sticks vertically into the ground, securely anchoring them. Arrange shorter horizontal branches across the vertical supports, securing each intersection tightly with weather-resistant twine or wire.

You can shape your design into a traditional rectangle, a whimsical diamond, or even an elegant fan pattern. Your driftwood trellis provides sturdy support for climbing plants like roses, cucumbers, or beans, creating a beautiful, organic focal point.

This DIY project repurposes nature’s materials, adding an eco-friendly, artistic touch to your garden landscape.

Driftwood Beach Sign

personalized driftwood beach sign

Bring coastal charm to your home or garden with a personalized driftwood beach sign. Start by selecting a flat, smooth piece of driftwood in a size that suits your space. Lightly sand it to remove rough spots without losing its natural, weathered appeal.

Next, choose beach-inspired lettering or stencils to paint your favorite coastal phrase, family name, or welcoming message directly onto the wood. Use acrylic paint in colors like soft whites, blues, or sandy tones. For added durability, apply a clear sealant once the paint dries.

Mount your completed sign on a fence, porch, or wall using sturdy hanging hardware or rustic rope. You’ll quickly create a charming statement piece that brings seaside vibes to your indoor or outdoor decor.

Driftwood Hanging Shelf

driftwood shelf crafting guide

Another practical yet stylish way to incorporate driftwood into your decor is by making a driftwood hanging shelf.

Start by choosing a sturdy, flat piece of driftwood that’s wide enough to hold small items, such as books, plants, or decorative pieces.

Sand the wood lightly to remove splinters without compromising its natural texture and rustic charm.

Drill two evenly spaced holes at each end of your driftwood, then thread strong rope or twine through them.

Adjust the rope length depending on how low or high you’d like your shelf to hang.

Securely tie the ropes together at the top to create a loop for hanging.

Place your new driftwood hanging shelf in any room to instantly add an appealing coastal-inspired focal point.

Driftwood Headboard

coastal driftwood headboard project

A driftwood headboard instantly transforms your bedroom into a cozy coastal sanctuary. Choose pieces of driftwood varying in shape and size, arranging them on a flat surface to achieve your desired pattern.

Sand each piece until smooth, preserving the unique textures and colors. Attach driftwood securely to a plywood or wooden backing using strong wood glue and screws from behind, ensuring a sturdy construction.

For added charm, leave small gaps between pieces, allowing the wall color to peek through. Mount your completed headboard directly on the wall behind your bed frame, creating a stunning focal point.

Enhance this natural look by pairing it with neutral linens and subtle beach-themed decor. With minimal effort, your driftwood headboard will evoke peaceful, seaside vibes every night.

Conclusion

With driftwood, you’re not just crafting decor—you’re blending elegance with earthiness, sophistication with simplicity. You’ve repurposed nature’s leftovers into meaningful treasures, transforming humble debris into enchanting centerpieces. Whether you choose practical shelves or whimsical wall art, rustic mirrors or refined jewelry holders, each project tells your story uniquely. So next time you stroll along the shore, gather those discarded pieces—you never know what stunning creation they could become in your hands.

Filed Under: Diy Driftwood Projects Tagged With: beach treasures, Driftwood Crafts, home decor

  • « Previous Page
  • Page 1
  • Page 2
  • Page 3
  • Page 4
  • Page 5
  • …
  • Page 30
  • Next Page »

Primary Sidebar

Driftwood4us.com, is a participant in the Amazon Services LLC Associates Program, an affiliate advertising program designed to provide a means for sites to earn advertising fees by advertising and linking to amazon.com.