Have you ever considered turning your beachcombing treasures into something beautiful and musical for your home or garden? Driftwood chimes could be just the exciting project you need. As you stroll along the shoreline, you might imagine how those pieces of driftwood, worn smooth by the waves, can transform into an enchanting set of wind chimes. Creating your very own driftwood chimes is a delightful, rewarding process that lets you bring a slice of nature into your living space. Plus, it’s a fun project that doesn’t require any extraordinary skills or expensive tools.

Why Driftwood?
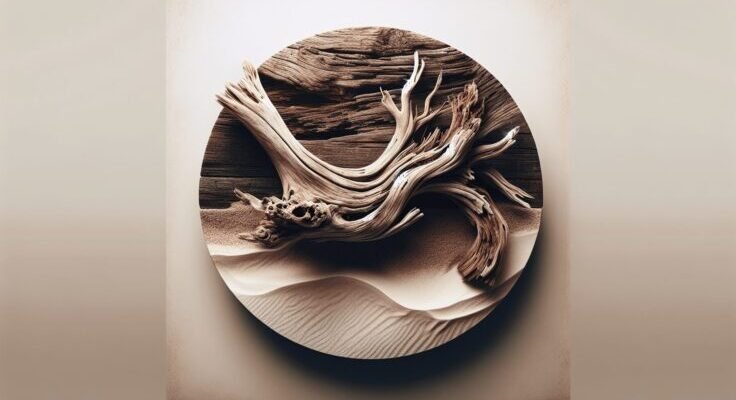
Driftwood is not only visually appealing with its unique forms and textures, but it’s also an eco-friendly choice. By using driftwood, you are recycling natural materials that have already been discarded by the ocean. The rustic charm of driftwood adds a coastal, organic feel to any decorative item, making it a favored choice among DIY enthusiasts.
Characteristics of Driftwood
Driftwood is characterized by its unique shapes and textures, sculpted by natural elements like water, sun, and wind. These features make each piece one-of-a-kind, meaning your finished chime will be unique as well. The lightweight nature of driftwood is particularly advantageous when creating wind chimes, as it will move easily in the wind.
Environmental Significance
By using driftwood, you’re participating in an environmentally friendly crafting process. Driftwood is already a discarded piece of nature, so utilizing it in art helps reduce the demand for newly harvested wood, aiding in forest preservation. This practice helps to promote sustainability and an eco-conscious mindset.
Tools and Materials You Need
Before embarking on your driftwood chimes DIY project, you need to gather some essential tools and materials. Having these ready will streamline your crafting experience and prevent any unnecessary interruptions.
Materials
- Driftwood Pieces: Select various pieces in different lengths and textures to create an interesting visual contrast.
- Fishing Line or Cord: You’ll use this to tie everything together. Fishing line is ideal due to its strength and invisibility.
- Metal or Ceramic Chimes: These can be purchased or you could use recycled items like old silverware or keys for added charm and sound variety.
- Rust-Proof Hooks or Eye Screws: Useful in suspending your driftwood from a base or for hanging embellishments.
- Embellishments: Beads, shells, or small stones can add personal flair to your creation.
Tools
- Drill: A small hand drill suitable for creating holes in the driftwood and any other components that require it.
- Scissors: For cutting the fishing line or cord.
- Measuring Tape: To keep proportions consistent.
- Sandpaper: For smoothing any rough edges on the driftwood that could cause splinters.
Choosing Driftwood for Your Chime
Selecting the right pieces of driftwood is an essential part of the process. Your choices will impact both the aesthetics and the musicality of your chimes.
Shape and Size
Choose driftwood that resonates with your aesthetic sensibilities. Different shapes and sizes will not only alter the visual appeal but also affect how the pieces move and collide, creating sound.
- Long Pieces: Ideal for the central, stable piece from which other parts hang.
- Short, Rounded Pieces: Can be used as the moving parts to strike chimes or other elements.
Texture and Surface
The texture of your driftwood pieces can add to their decorative appeal. Meanwhile, smooth surfaces might facilitate a more pleasing sound when they touch.
- Smooth Surface: Easier to work with and gives a clean, finished look to the project.
- Textured Surface: Provides a more natural and rustic look.
Collecting Driftwood
When collecting driftwood, make sure you have permission to remove items from beaches or local areas. Always check the local regulations to ensure you’re crafting in an environmentally responsible way.
Designing Your Driftwood Chimes
Once you have your materials, it’s time to plan and design your driftwood chimes. This stage is crucial, as it will determine the ultimate look and sound of your chimes.
Sketch Your Design
Take some time to sketch your ideas. Consider how each piece will hang and how they will interact with one another.
- Base Structure: Decide on a base configuration. For example, one large piece of driftwood at the top with smaller pieces hanging down can be a simple but effective design.
- Layering: Consider multiple layers for a more complex, intricate design.
- Symmetry vs. Asymmetry: Decide whether you prefer a balanced look or something more organic and asymmetric.
Incorporating Chimes and Accessories
Determine how you will incorporate the chimes and any other decorative elements into your design.
- Positioning Chimes: Place chimes where they can catch the wind effectively and produce sound by hitting either other chimes or the driftwood itself.
- Decorative Elements: Plan where embellishments like beads or shells could be included for extra charm.

Assembling Your Driftwood Chimes
Assembly can be seen as the most exciting part, where your design begins to take physical form. Follow these steps to pull everything together smoothly.
Preparing the Driftwood
Before you begin the assembly, it’s crucial to prepare your driftwood pieces.
- Cleaning: Wash the driftwood with fresh water and allow it to dry thoroughly in the sun. This will prevent mold and enhance the wood’s color.
- Sanding: Use sandpaper to smooth any sharp edges or splinters. This makes your chimes safer to touch and handle.
Drilling Holes
It’s advisable to start by drilling holes in your driftwood pieces before assembly. This makes threading the cord or line much easier.
- Mark Drill Points: Use a pencil to mark where you want to drill. Consider spacing for even hanging.
- Drill with Care: Use a hand drill to create holes, being cautious not to split the wood.
Assembling the Chimes
Now, it’s time to piece everything together based on your design.
- Thread the Line or Cord: Tie your base driftwood piece to a hook or eye screw, then continue threading line through the drilled holes.
- Secure Knots: Tie secure knots at the base of each hanging piece to hold them in place. Double-check the strength of these knots as you proceed.
- Attach Chimes and Embellishments: Tie in your selected chimes and any decorative elements. Ensure spacing is correct to allow for them to softly collide in the wind.
Balancing the Chimes
It’s essential for your chimes to be balanced both visually and mechanically.
- Testing Movement: Hang your chimes and make sure all pieces can swing freely and produce sound.
- Adjustments: Tweak the lengths of your cords and the spacing to achieve the desired balance, both aesthetically and aurally.
Finishing Touches and Placement
Once your chimes are assembled, it’s time for the finishing touches and to decide where they’ll reside.
Protective Coating
Consider applying a protective sealant to your driftwood chimes to prolong their life, especially if they will be displayed outdoors.
- Sealants: Look for a UV-resistant wood finish to protect against weathering.
- Application: Apply as per the product instructions, ensuring that it is evenly spread over all wooden parts.
Optimal Placement
Choose a location where your chimes can really shine and sing.
- Windy Spot: Select a place that experiences a gentle breeze to allow your chimes to resonate.
- Height: Ensure the chimes are hung at a height where the sound can travel but they are still accessible for maintenance.
- Visibility: Hang them where they can be appreciated visually as well as aurally.
Maintaining Your Driftwood Chimes
Like any outdoor feature, your driftwood chimes will require some care to keep them looking and sounding their best.
Regular Cleaning
- Dusting and Washing: Use a soft cloth for regular dusting. Occasionally, wipe the chimes with a damp cloth to remove any dirt or salt deposits.
- Reapplying Sealant: Every few months, check if your chimes need a fresh coat of sealant to maintain their resilience against the elements.
Checking for Wear and Tear
- Inspecting Line and Knots: Look out for fraying lines or loose knots, which should be repaired promptly to avoid any elements falling apart.
- Replacing Components: If any component is damaged or missing, replace it with a similar item to maintain the harmony of your chime’s design.
Personalizing Your Driftwood Wind Chimes
Now that you understand the basics of creating driftwood wind chimes, let’s dive into personalizing your masterpiece. The potential for creativity is limitless, allowing you to make each project entirely unique.
Adding Color
While driftwood has a beautiful natural palette, you might want to add some color to make your chimes pop.
- Paint and Stain: Use non-toxic paints and stains if you plan to hang your chimes outdoors.
- Dyeing Beads and Cords: Choose bright, contrasting colors for your beads or cords to make your chimes more eye-catching.
Theme-Based Chimes
You can design your chimes around a particular theme that speaks to your interests or personal style.
- Nautical Theme: Incorporate seashells, anchor shapes, or maritime knots for a sailor’s charm.
- Fairy Tale Theme: Use delicate elements like crystals, tiny bells, or flowers carved into the wood.
Seasonal Variations
Your driftwood chimes can also be adapted to reflect different seasons or holidays.
- Spring Blooms: Add pastel-colored beads and floral patterns.
- Winter Festivities: Integrate mini snowflakes or stars, and use a metallic, silver theme.
Conclusion
Crafting driftwood chimes can be both a meditative process and a creative outlet, allowing you to express your unique style while bringing tranquil and soothing sounds into your environment. Each chime is a testament to the power of nature and art when combined, serving not just as a decorative piece but a functional art form that tells a story. With patience, imagination, and respect for materials, creating driftwood chimes can become a cherished pastime, offering ongoing rewards of beauty and serenity. Remember to approach each step with intention, enjoyment, and creativity — allowing your chimes to sing your story through every gentle breeze.