• Skip to main content
  • Skip to primary sidebar
  • Terms and Conditions
  • Privacy Policy
  • Contact

Driftwood 4 Us

Just About Driftwood

Home Design

Driftwood On Wall

August 23, 2024 by admin

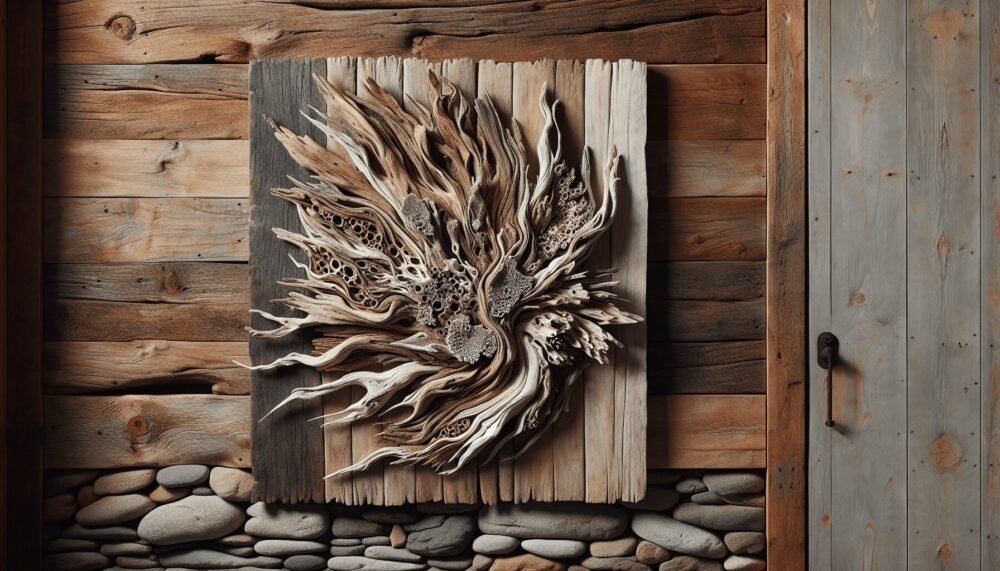
Have you ever considered the beauty of incorporating natural elements into your home decor? Driftwood, often found weathered and worn along the shores of beaches, can bring an organic and rustic charm to your interior spaces. Imagine this unique piece of nature hanging on your wall, telling its own story of the sea and sand, adding warmth and character to your living environment.

What is Driftwood?

Driftwood refers to pieces of wood that have been washed onto the shore of a sea, river, or lake by the action of winds, tides, or waves. These pieces are typically weathered and sculpted by saltwater and the elements, giving each one its own unique texture and shape.

The Journey of Driftwood

Driftwood undergoes a fascinating journey before it reaches your wall. Starting as part of a tree or log, it gets carried away by the water. Over time, it may travel many miles, enduring the wear and tear of its marine environment. This natural process not only strips the wood of its bark, leaving behind a smoother surface, but also gives it a silvery-grey appearance that is prized for aesthetic purposes.

Types of Wood Commonly Found as Driftwood

Different types of wood can become driftwood, and each type brings its own characteristics. Here are some common types:

Type of WoodCharacteristics
CedarLightweight, aromatic, resistant to decay
OakStrong, heavy, durable
PineCommon, lightweight, can have interesting knots
EucalyptusStrong, resistant to rot, often found in coastal areas

Understanding the types of wood can help you choose the best piece for your decor needs.

Why Use Driftwood in Home Decor?

Driftwood is more than just a piece of wood; it is art created by nature. Using driftwood for home decor offers numerous benefits that go beyond its aesthetic appeal.

Sustainable and Eco-Friendly

In an era where sustainability is key, using driftwood is an eco-friendly choice. It repurposes natural resources that would otherwise go to waste, thus reducing your carbon footprint.

Unique and Personalized

Each piece of driftwood is unique, making it a one-of-a-kind addition to your home. Its individual shape, texture, and color will never be replicated, offering a piece of art that’s distinctly yours.

Therapeutic and Calming

Natural elements like driftwood can bring a sense of calm and relaxation into your living space. Its organic qualities can have a grounding effect, making your home feel more peaceful and connected to nature.

Driftwood On Wall

How to Choose the Perfect Driftwood Piece

Selecting the right piece of driftwood can be both exciting and overwhelming. Here are some tips to guide you.

Size and Space Consideration

Firstly, consider the space where you plan to hang your driftwood. Measure the area to ensure that your chosen piece will fit well without overpowering the room or looking too insignificant.

Shape and Texture

Driftwood comes in many forms—smooth, rugged, straight, or twisted. Think about what shape and texture will complement your decor style. For instance, a twisted piece might add a dynamic element to a modern room, while a smooth, straight piece could bring elegance to a traditional setting.

Color and Finish

Driftwood ranges from pale ivory to dark grey shades. Choosing a color that matches or contrasts effectively with your interior can enhance the overall look. You might also consider whether you want to leave the wood in its natural state or finish it with oil or varnish to enhance its look and durability.

Preparing Driftwood for Display

Before you hang your driftwood on the wall, some preparation is necessary to ensure it looks its best and lasts longer.

Cleaning and Sanitation

Driftwood can harbor salt, sand, and microorganisms. Cleaning it properly is essential for hygiene and longevity.

  1. Rinse: Thoroughly rinse the driftwood with fresh water to remove surface dirt and salt.
  2. Soak: Soak the wood in a bleach solution (approx. 1 part bleach to 9 parts water) for a few hours to sanitize it.
  3. Dry: Let the driftwood dry completely, which may take several days. This step is crucial to prevent mold and decay.

Sanding and Smoothing

Depending on the look you desire, you may want to sand the driftwood to smooth out rough edges. Use fine-grit sandpaper to retain some of the natural texture while removing splinters and sharp points.

Sealing and Finishing

Applying a sealant or finish can protect the wood and enhance its natural colors. Options include:

  • Linseed Oil: Penetrates deeply, enhancing the wood grain.
  • Polyurethane: Provides a hard, protective surface.
  • Beeswax: Offers a natural look while providing moisture resistance.

Driftwood On Wall

Decorating Ideas with Driftwood

Driftwood’s natural beauty makes it a versatile decor element. Here are some creative ways to incorporate it into your home.

Driftwood Wall Art

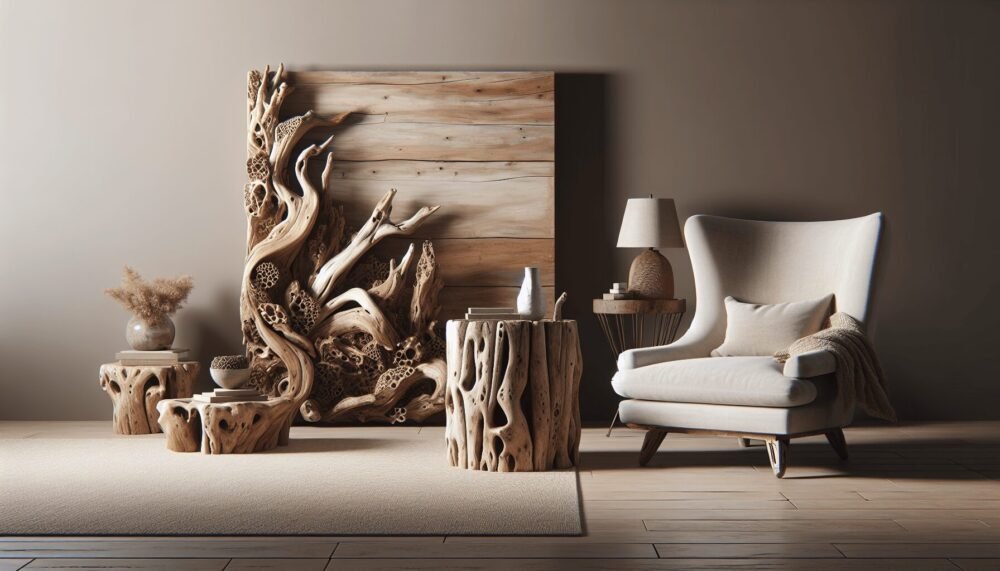
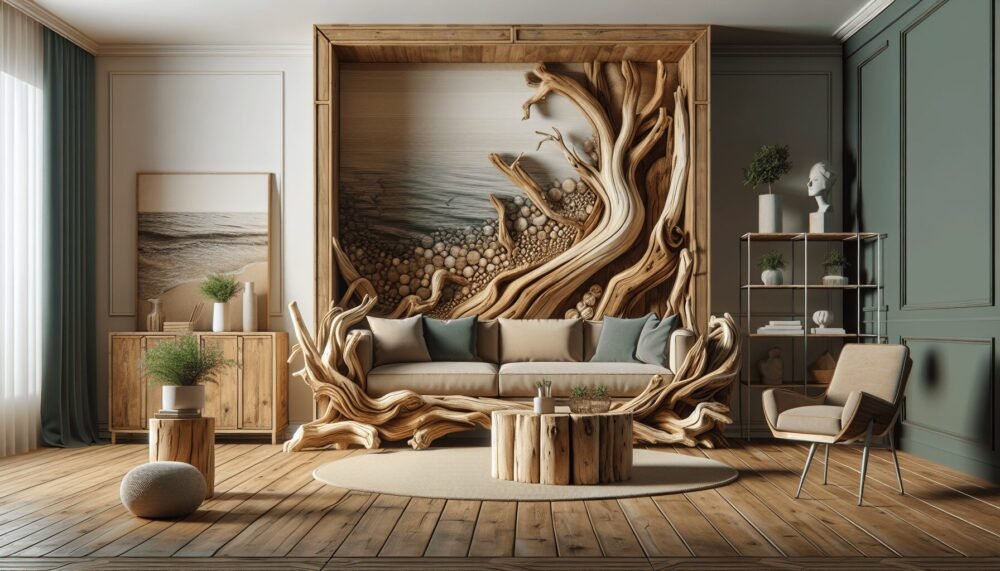
A single piece of driftwood can become a striking piece of wall art. You can hang it horizontally, vertically, or at an angle, depending on your wall space and aesthetic preference. Such an installation can serve as a focal point in your living room or hallway.

Driftwood Shelves

For a blend of function and form, consider using driftwood as shelves. Secure sturdy pieces horizontally on your wall to display books, plants, or other decorative items. This not only adds a rustic touch but also utilizes the strength of the wood effectively.

Driftwood Sculptures

If you’re artistically inclined, you might create a sculpture using multiple pieces of driftwood. Assemble and secure the pieces into a unique form that can stand freely or mount on your wall. This can add a dynamic and artistic element to your space.

Driftwood Frames and Mirrors

Driftwood can be used to frame mirrors or pictures, adding a natural and coastal touch. Arrange smaller pieces around a mirror or picture frame, securing them with glue or nails. The result is a customized and organic-looking frame that stands out.

Maintenance and Care for Driftwood Decor

Keeping your driftwood decor in good shape requires some maintenance but is generally low-effort.

Dusting

Regularly dust your driftwood with a soft, dry cloth to prevent the buildup of dust and dirt. Avoid using water or liquid cleaners as they can damage the finish and promote mold growth.

Re-Sealing

Periodically, you may need to reapply sealant or oil to maintain the wood’s appearance and protect it from moisture. Follow the manufacturer’s instructions for the best results.

Inspect for Pests

Although cleaning and sanitizing steps help, it’s wise to occasionally check for signs of pests. If you notice any, treat the wood with appropriate pest control methods.

Benefits of DIY Driftwood Projects

Creating your own driftwood decor can be a rewarding experience that offers several benefits.

Personal Connection

Crafting your driftwood project creates a personal connection to the piece, making it more meaningful and valuable in your home.

Creative Expression

Working with driftwood allows you to express your creativity. The process can be a fun and satisfying way to play with natural materials and design something unique.

Cost-Effective

Driftwood is often free or inexpensive, making it a budget-friendly option for home decor. Finding and crafting your pieces can also save you money compared to buying pre-made decorative items.

Therapeutic Activity

Engaging in a DIY project can be therapeutic and stress-relieving. It gives you a chance to unwind and focus on something productive and creative.

Where to Find Driftwood

Finding the perfect piece of driftwood can be an adventure in itself. Here are some places to consider.

Local Beaches and Rivers

Walking along the shorelines of local beaches, rivers, or lakes can be a great way to find driftwood. Make sure to check any local regulations regarding the collection of natural resources.

Online Marketplaces

If you can’t visit a beach or prefer the convenience, online marketplaces such as Etsy or eBay often have driftwood pieces for sale. This allows you to choose from a wide range of options without leaving your home.

Craft Stores

Some craft stores sell driftwood, especially those that specialize in natural and rustic decor materials. These can be a convenient source, though they might be more expensive than finding your own.

Legal and Ethical Considerations

When collecting driftwood, it’s essential to be aware of legal and ethical considerations to ensure your actions do not harm the environment.

Local Regulations

Some areas have regulations that prohibit or limit the collection of natural materials like driftwood. Always check local laws and guidelines before collecting.

Environmental Impact

Taking driftwood from beaches can sometimes disrupt local ecosystems. Ensure your collecting habits are sustainable and do not harm wildlife or the integrity of the natural environment. Consider limiting the amount you take and avoid collecting from protected areas.

Conclusion

Incorporating driftwood into your home decor fosters a connection with nature and promotes a sustainable lifestyle. Its unique and organic qualities can enhance your living space, offering both aesthetic appeal and a sense of tranquility. By selecting, preparing, and maintaining your driftwood pieces with care, you can create enduring and beautiful decor that tells a story of the sea and exemplifies the artistry of nature. So, whether you’re a seasoned DIY enthusiast or just starting out, driftwood offers endless possibilities to explore your creative side and enrich your home.
Filed Under: Driftwood Ideas Tagged With: Driftwood, Home Design, Wall Art

Driftwood Furniture Finish

July 25, 2024 by admin

Welcome to the world of unique and inviting decor with our guide, “Driftwood Furniture Finish.” Dive into the beauty of turning ordinary furniture into spectacular pieces that evoke the serene and timeless essence of driftwood. Through this article, you’ll discover simple and effective techniques to achieve that perfect weathered look, with tips ranging from preparation to the finest finishing touches. Whether you’re a seasoned DIY enthusiast or just embarking on your creative journey, this guide is here to inspire and assist you every step of the way. Happy crafting!

Driftwood Furniture Finish

Have you ever wondered how to achieve that beautiful, weathered look on your furniture? The driftwood furniture finish is a popular technique that gives your wooden pieces a unique, aged appearance. It’s not just for coastal or beach-themed decor—this finish can add a touch of rustic charm to any space. So, how can you master this technique and apply it to your own furniture projects? Let’s dive in and explore the steps, tips, and tricks to transform your furniture with a stunning driftwood finish.

Driftwood Furniture Finish

What is Driftwood Furniture Finish?

Driftwood furniture finish mimics the natural weathering process that occurs when wood is exposed to the elements over time. Driftwood often appears sun-bleached, washed out, and slightly gray, with a distinct texture. This look can be recreated using specific tools and products to give your indoor furniture an effortlessly aged and natural appeal.

Benefits of Driftwood Furniture Finish

Applying a driftwood finish to your furniture can offer several advantages. Here’s why you might want to try it:

BenefitDescription
AestheticsThe driftwood finish provides a soft, muted, and natural look that complements various decor styles.
UniquenessEach piece finished with this method will have its own distinct character and charm.
VersatilitySuitable for various types of wood and compatible with different furniture styles, from contemporary to rustic.
DIY-FriendlyIt can be a fun and fulfilling DIY project, even for beginners.

Tools and Materials Needed

Before you begin, gather the necessary tools and materials. Here’s a checklist to help you prepare:

ToolsMaterials
Sandpaper (coarse and fine grit)Wood stain in gray or weathered colors
Paintbrushes and sponge brushesWood conditioner (optional)
Lint-free clothsSealant or topcoat
Mixing cups and stir sticksDriftwood-colored paint (optional)
Drop cloth or protective coveringGloves

Preparing Your Workspace

A well-prepared workspace is crucial for achieving a successful driftwood finish. Follow these tips to ensure your space is ready:

  1. Clean and Clear: Clear the area of any clutter and lay down a drop cloth to protect your floor from spills and stains.
  2. Ventilation: Ensure your workspace is well-ventilated. If possible, work outdoors or in a garage with the door open.
  3. Lighting: Good lighting is essential to see the true colors and texture as you work.

Driftwood Furniture Finish

Preparing the Furniture

Properly preparing your furniture is the foundation of a great finish. Here’s how to get your piece ready:

Cleaning the Surface

Start by cleaning the furniture to remove any dust, dirt, or grease. Use a mild detergent and water, then let it dry completely.

Sanding

Sanding the surface helps to remove the old finish and creates a smooth surface for the new finish to adhere to. Use coarse-grit sandpaper (e.g., 80-grit) to remove the old finish, then switch to fine-grit sandpaper (e.g., 220-grit) for a smooth finish. Always sand in the direction of the wood grain.

Wiping Down

After sanding, wipe down the piece with a damp, lint-free cloth to remove any dust. This ensures the stain or paint will apply evenly.

Applying the Driftwood Furniture Finish

Now comes the fun part—applying the driftwood finish! This process usually involves staining, painting, or a combination of both to achieve the desired look.

Step 1: Apply Wood Conditioner (Optional)

A wood conditioner helps to ensure even stain absorption, especially on softwoods like pine. Apply it according to the manufacturer’s instructions and let it dry.

Step 2: Apply the Base Stain

Choose a stain color that resembles weathered wood, such as gray, taupe, or even a mix of stains to achieve the desired effect.

  1. Mix the Stain: Stir the stain thoroughly with a stir stick.
  2. Apply the Stain: Use a paintbrush or sponge brush to apply the stain evenly, following the wood grain.
  3. Wipe Off Excess: After a few minutes, use a lint-free cloth to wipe off any excess stain. This ensures an even finish and prevents blotching.
  4. Drying Time: Allow the stain to dry completely, according to the manufacturer’s instructions.

Step 3: Layering Techniques for Depth

To create a more authentic driftwood appearance, you can layer different colors and textures.

  1. Dry Brushing: Dip a dry paintbrush into a small amount of driftwood-colored paint. Remove most of the paint onto a paper towel, then lightly brush over the surface, focusing on edges and corners to add depth.
  2. Whitewashing: Mix a small amount of white or off-white paint with water to create a thin wash. Brush it over the stained wood and quickly wipe off the excess with a cloth. This gives an aged, weathered look.
  3. Spot Sanding: Lightly sand areas where natural wear would occur to reveal some of the wood underneath, enhancing the aged look.

Sealing the Finish

Once you’re happy with the driftwood effect, it’s important to seal the finish to protect it from wear and tear.

Type of SealantDescription
PolyurethaneProvides a durable, protective finish in various sheens (matte, satin, gloss).
WaxOffers a soft, velvety finish but may require more frequent reapplication.
Oil-Based SealantEnhances the wood’s natural beauty but takes longer to dry.
  1. Apply the Sealant: Using a clean brush or cloth, apply the sealant evenly according to the product’s instructions.
  2. Drying Time: Allow the sealant to dry completely. Depending on the type, this could take several hours to overnight.
  3. Optional: Lightly sand between coats for a smoother finish, applying additional layers as needed.

Troubleshooting Common Issues

Even with careful application, you might encounter some issues. Here’s how to address them:

IssueSolution
Blotchy StainEnsure proper sanding, use wood conditioner, and apply stain evenly.
Uneven Paint CoverageMix paint thoroughly and apply in thin, even coats.
Rough TextureSand between layers and wipe down to remove dust.
Sealant BubblesUse a quality brush and apply sealant in thin, even layers. Pop bubbles immediately.

Caring for Driftwood Finished Furniture

Proper care and maintenance will keep your driftwood finished furniture looking beautiful for years to come.

  1. Dust Regularly: Use a soft cloth to remove dust and prevent buildup.
  2. Clean Spills Immediately: Wipe up spills promptly to avoid staining the finish.
  3. Avoid Harsh Chemicals: Use gentle cleaning solutions to protect the finish.
  4. Reapply Sealant: Depending on wear, reapply the sealant every few years to maintain protection.

Enhancing Your Space with Driftwood Finished Furniture

Once you’ve mastered the driftwood furniture finish, you can extend this look throughout your home. Here are some ideas:

RoomFurniture PieceIdeas
Living RoomCoffee table, end tablesComplement with neutral textiles and coastal decor.
BedroomBed frame, nightstandsPair with white or light bedding for a serene atmosphere.
Dining RoomDining table, chairsAccent with natural elements like woven placemats and linen napkins.
OfficeDesk, bookshelvesCombine with industrial elements for a modern, rustic feel.

Eco-Friendly Considerations

Choosing eco-friendly products and methods can make your project more sustainable.

Eco-Friendly OptionDescription
Low-VOC Stains and SealantsReduces harmful emissions and improves indoor air quality.
Reclaimed WoodUsing reclaimed wood adds character and is environmentally friendly.
Natural Bristle BrushesMade from organic materials and biodegradable.

Conclusion

Creating a driftwood furniture finish can be a rewarding DIY project that transforms ordinary furniture into extraordinary pieces full of character and charm. With the right tools, materials, and techniques, you can achieve this beautiful, weathered look and add a touch of rustic elegance to your home. Remember, practice makes perfect, so don’t be afraid to experiment and find the perfect combination of colors and textures for your unique style. Happy crafting!

Filed Under: Driftwood Ideas Tagged With: DIY, Driftwood, finish, furniture, Home Design

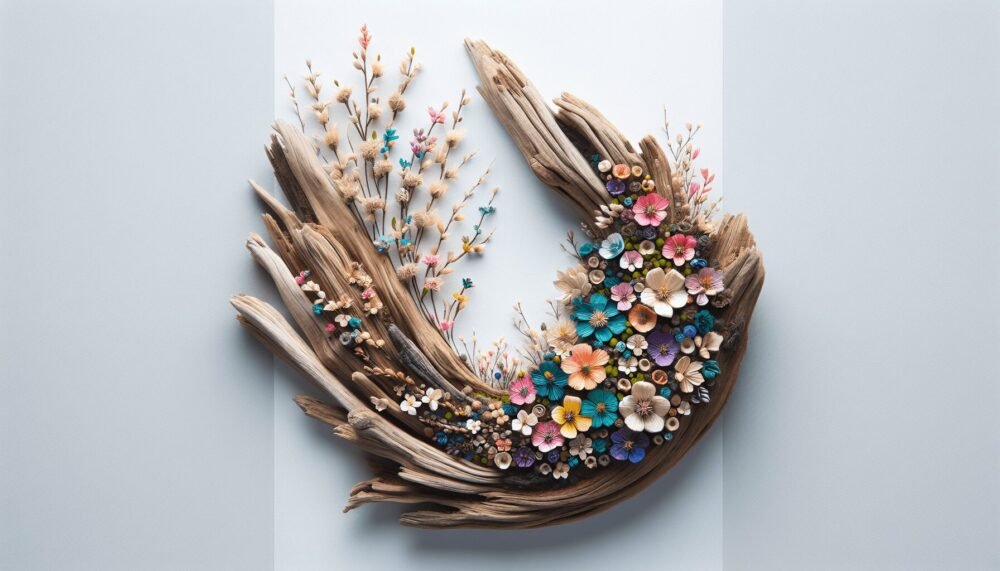
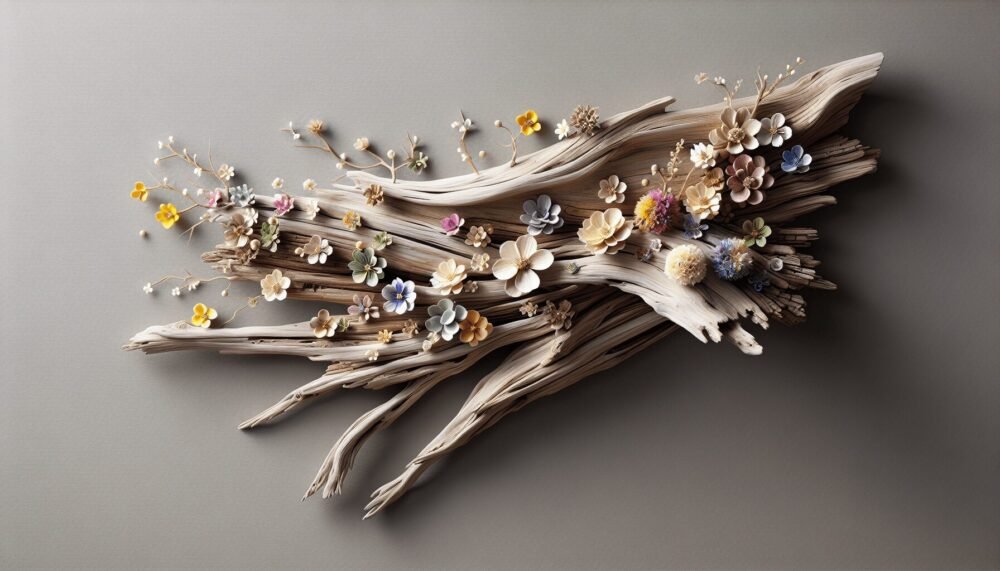
Driftwood Floral Arrangements

July 25, 2024 by admin

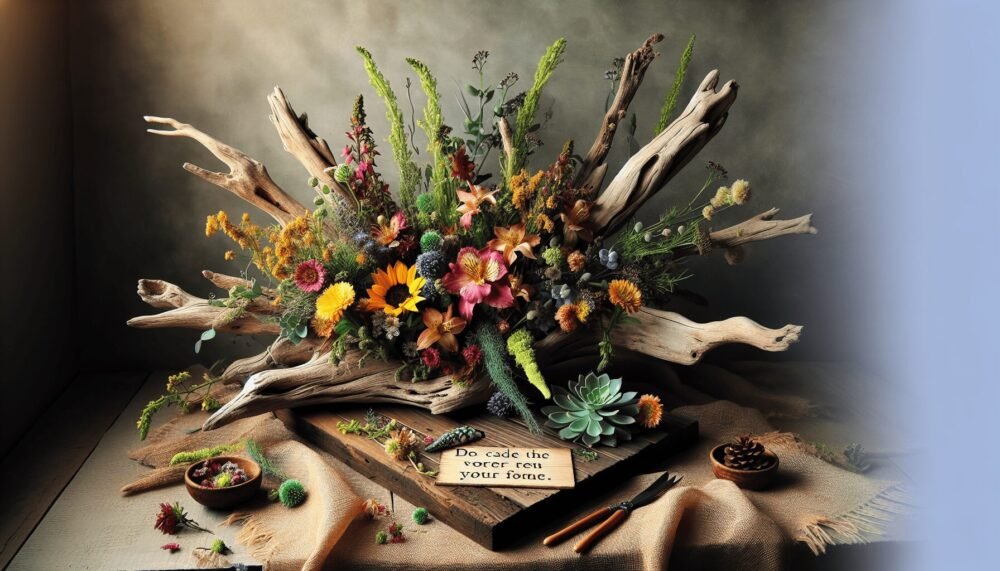
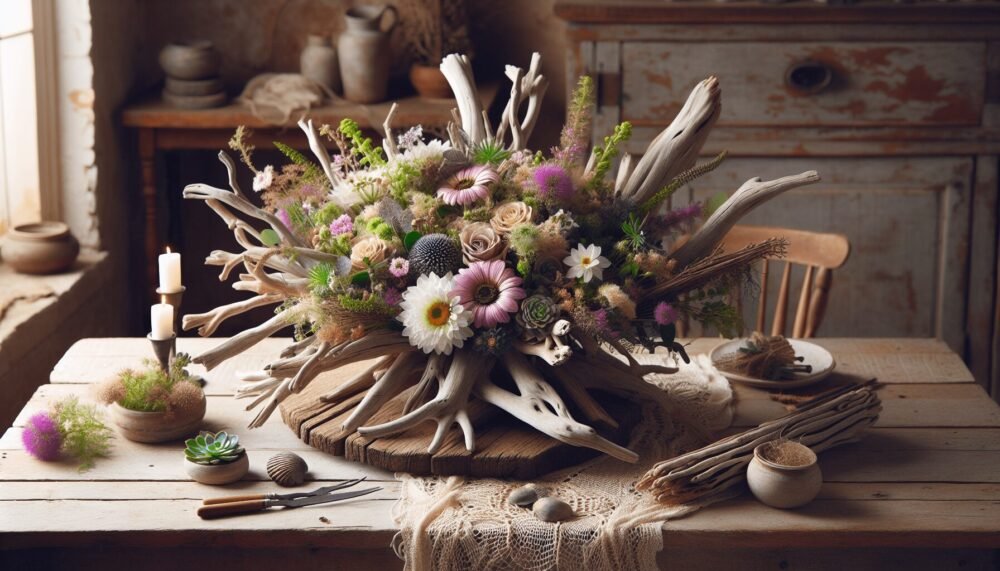
Creating “Driftwood Floral Arrangements” combines the rugged beauty of natural driftwood with the vibrant elegance of flowers to craft unique, eye-catching displays for your home. Imagine taking a walk along the beach, finding pieces of driftwood that have been polished smooth by the ocean waves, and then integrating these treasures into your floral designs. You’ll not only bring a touch of the seaside into your living space but also create stunning centerpieces that captivate attention. This approach harmonizes rustic charm with floral sophistication, resulting in artful arrangements that resonate with both nature lovers and design enthusiasts alike. Have you ever wondered how you can bring a piece of the beach into your home without lugging buckets of sand or seashells? If yes, then driftwood floral arrangements might be the perfect solution for you. They combine the natural beauty of driftwood with the vibrant elegance of flowers, offering a unique and aesthetically pleasing addition to any living space.

Driftwood Floral Arrangements

What is Driftwood?

Driftwood refers to wood that has been washed onto the shore by the action of winds, tides, or waves. Over time, seawater and the elements soften the wood, giving it a uniquely weathered appearance. Driftwood has been used in various forms of art and décor for many years, and its naturally rustic charm makes it ideal for floral arrangements.

Types of Driftwood

There are various types of driftwood, each with its unique texture and color. Here are a few common types:

TypeDescription
HardwoodDurable, heavier, and often richer in color. Oak and maple are common examples.
SoftwoodLighter and often paler in color, such as pine and cedar.
Weathered WoodCharacterized by its aged, smooth appearance and may include different types of wood that have been exposed to the elements for extended periods.

Benefits of Using Driftwood

Using driftwood in your floral arrangements has several benefits:

  • Natural Aesthetic: The wood’s natural wear and tear provide a rustic, organic look that complements various floral arrangements.
  • Eco-Friendly: Repurposing driftwood is an excellent way to recycle natural materials.
  • Versatility: Driftwood can fit into different styles, from boho chic to coastal décor.

Choosing the Right Driftwood

Not all driftwood is created equal, so it’s crucial to select pieces that will work well for your intended design.

Sourcing Driftwood

You can find driftwood along beaches, lakes, and riverbeds. Remember to check local regulations about collecting driftwood as it may be protected in certain areas. Alternatively, specialized craft stores and online marketplaces also offer pre-cleaned and polished driftwood.

Selecting the Perfect Piece

When choosing driftwood, consider the following factors:

  • Size: Ensure that the size of the driftwood matches your floral arrangement.
  • Texture: Smooth or rugged textures can add different aesthetics to your arrangement.
  • Color and Shape: Choose pieces that complement the flowers and the overall design.

Preparing Driftwood

Before using driftwood in your arrangements, it’s essential to clean and prepare it properly to ensure durability and hygiene.

Cleaning Driftwood

  1. Rinse: Wash the driftwood thoroughly to remove any dirt, sand, and salt. Use a high-pressure hose if necessary.
  2. Soak: Soak the driftwood in a mixture of water and mild bleach for several hours to kill any bacteria or parasites.
  3. Rinse Again: After soaking, rinse the driftwood thoroughly to remove any bleach residue.
  4. Dry: Let the driftwood air dry completely, which may take a few days.

Sealing Driftwood

To maintain the driftwood’s appearance and durability, consider sealing it with a clear wood sealer. This step is essential if the arrangement will be in a humid environment.

Types of Driftwood Floral Arrangements

Driftwood floral arrangements can vary widely, allowing for endless creativity. Here are a few popular styles:

Driftwood Centerpieces

A driftwood centerpiece can serve as a stunning focal point on your dining table or coffee table. Pair a striking piece of driftwood with your favorite flowers for an eye-catching effect.

Driftwood Wall Hangings

Consider attaching small flower vases or floral foam to driftwood pieces for a beautiful wall hanging. This arrangement can serve as a unique piece of wall art.

Driftwood Terrariums

Driftwood adds an extra dimension to terrariums. Combined with succulents, air plants, and small flowers, a driftwood terrarium brings a little bit of the natural world indoors.

Driftwood Planters

Using large pieces of driftwood as planters is another creative idea. Hollow out sections of the wood to create natural containers for your plants, making your garden or indoor plant area stand out.

Driftwood Floral Arrangements

Creating Your Own Driftwood Floral Arrangement

Now that you know the basics, let’s dive into a step-by-step guide to creating your own driftwood floral arrangement.

Materials Needed

  • Selected driftwood piece
  • Fresh or artificial flowers
  • Floral foam or vases
  • Floral wire and tape
  • Pruning shears
  • Wood sealer (optional)

Step-by-Step Guide

  1. Choose Your Driftwood: Start with a clean, dry piece of driftwood that suits your aesthetic needs.
  2. Prepare the Flowers: Trim the stems of your flowers and remove any unwanted leaves.
  3. Attach Floral Foam or Vases: Secure floral foam or small vases to your driftwood using floral wire and tape.
  4. Insert Flowers: Begin arranging your flowers in the floral foam or vases, starting with larger blooms and filling in with smaller flowers and greenery.
  5. Secure the Arrangement: Use floral wire to secure any loose flowers or greenery in place.
  6. Final Touches: Step back and assess your arrangement, making any necessary adjustments to ensure balance and harmony.

Tips and Tricks for Stunning Arrangements

Creating a jaw-dropping driftwood floral arrangement requires a bit of artistry. Here are some tips to help you get started:

Color Coordination

  • Contrast is Key: Pair light-colored driftwood with vibrant flowers for a striking contrast.
  • Monochromatic Harmony: Using flowers in various shades of one color can create a harmonious and elegant look.

Balance and Symmetry

  • Asymmetry for Interest: Asymmetric designs can be more visually interesting and dynamic.
  • Even Distribution: Make sure flowers are evenly distributed to avoid any lopsidedness.

Choosing the Right Flowers

  • Seasonal Blooms: Use seasonal flowers for a fresh and current look.
  • Longevity: Consider the longevity of your flowers; some blooms last longer than others.

Maintaining Your Arrangement

To ensure your arrangement stays beautiful, follow these maintenance tips:

Caring for Fresh Flowers

  • Watering: Ensure the floral foam remains moist, as it provides water to the fresh flowers.
  • Replacing Blooms: Replace any wilted flowers promptly to keep the arrangement looking fresh.
  • Location: Keep the arrangement away from direct sunlight and heat sources to prolong the life of the flowers.

Caring for Artificial Flowers

Artificial flowers require less maintenance but occasional dusting will keep them looking their best.

Inspiring Ideas and Trends

Keeping up with the latest trends can provide inspiration for your next project. Here are some trending ideas in driftwood floral arrangements:

Minimalist Designs

Minimalism is on the rise, and a simple arrangement of driftwood and a few carefully selected flowers can make a powerful statement.

Boho Chic

Combine driftwood with a variety of wildflowers and foliage to achieve a boho-chic look that’s both relaxed and stylish.

Mixed Media

Incorporate other natural elements like shells, stones, or moss for a more layered and textured arrangement.

Conclusion

Driftwood floral arrangements are a fantastic way to bring the beauty of nature into your home. They offer limitless possibilities for creativity, combining the rustic charm of driftwood with the vibrant elegance of flowers. Whether you are a seasoned florist or a beginner, these arrangements are accessible and enjoyable to create.

By following the steps and tips outlined in this guide, you will be well on your way to creating stunning driftwood floral arrangements that will impress your friends and family, and bring a touch of the shore into your living space.

Enjoy crafting your driftwood floral arrangements and let the natural world inspire your designs!

Filed Under: Driftwood Ideas Tagged With: DIY, Driftwood, Floral Arrangements, Home Design, Natural Decorations

Driftwood Centerpiece

July 19, 2024 by admin

Creating your own driftwood centerpiece is a delightful way to bring the rustic charm of nature into your home. You’ll discover how to select the perfect pieces of driftwood, prepare them, and assemble a stunning centerpiece that will leave your guests in awe. Get ready to transform a simple gathering of driftwood into a captivating focal point for your table that adds a touch of the coastal outdoors to your decor. Have you ever looked at a piece of driftwood and imagined the decorative possibilities it holds? Finding beauty in nature is an art, and transforming that beauty into a functional piece of decor is a rewarding journey. In this article, you’ll discover how to create a stunning driftwood centerpiece that can become the talking point of any room.

Driftwood Centerpiece

What is Driftwood?

Driftwood refers to wood that has been washed onto the shore of a sea, river, or lake by the winds, tides, or waves. It can be anything from small branches to large tree trunks. The natural weathering process gives it a unique, rustic appearance and an array of colors, which makes it a favorite material for home décor projects.

Why Use Driftwood for a Centerpiece?

Natural Beauty

One of the main reasons to use driftwood is its inherent beauty. The unique textures and shapes add a touch of nature to your living space. No two pieces are alike, making your centerpiece one-of-a-kind.

Eco-Friendly

Using driftwood is a great way to incorporate eco-friendly practices into your home. Instead of buying manufactured materials, you are re-purposing something from nature, reducing your carbon footprint.

Versatility

Driftwood is extremely versatile. It can be painted, stained, adorned with additional elements, or left in its natural state. Whatever your style, driftwood can be integrated seamlessly into your decor.

Gathering Your Materials

Before you get started, gather all the materials you’ll need. This way, you won’t have to interrupt your creative flow to hunt for supplies.

Essential Materials

Here’s a handy table of the essentials you’ll need for your driftwood centerpiece:

MaterialPurpose
DriftwoodThe core of your centerpiece.
SandpaperTo smooth the wood.
Hot Glue GunFor attaching elements together.
Wood Finish (optional)To treat and enhance the wood’s appearance.
Decorative ElementsItems such as shells, stones, and candles to enhance your centerpiece.
Protective GlovesTo protect your hands while handling the wood and using tools.

Optional Materials

Depending on your design, you may need some optional materials:

  • Paint or stain for color.
  • Varnish for a glossy finish.
  • Moss or small plants for added decoration.
  • Twine or rope for a rustic touch.

Preparing the Driftwood

Preparation is key to making a beautiful centerpiece. Here’s how to prepare your driftwood for the project:

Cleaning the Wood

Driftwood found on the beach can be quite dirty. Start by rinsing it thoroughly with fresh water. Scrub off any sand, algae, or remaining debris. You might also consider soaking the driftwood in a bleach solution (1 part bleach to 9 parts water) for a few hours to remove any hidden bacteria or insects.

Drying Process

Once clean, let the driftwood dry completely. This can take anywhere from a few days to a couple of weeks. Place it in a dry, well-ventilated area. Be patient; this step is crucial in preventing any potential mold or rot.

Sanding the Driftwood

Use sandpaper to smooth out any rough spots. This will not only make it safer to handle but also enhance its natural beauty. Start with a medium-grit sandpaper and finish with a fine-grit for the best results.

Driftwood Centerpiece

Designing Your Centerpiece

Choosing a Theme

Decide on the overall theme for your driftwood centerpiece. Is it coastal, rustic, minimalistic, or bohemian? Your theme will guide the decorative elements you choose and how you arrange them.

Planning Your Layout

Lay out all your materials and start planning the arrangement. Play around with different configurations until you find one that looks cohesive and balanced.

Assembling Your Driftwood Centerpiece

Building the Base

Choose one or more large, flat pieces of driftwood for the base. This foundation should be sturdy enough to support additional elements. Arrange smaller pieces around it, using a hot glue gun to secure them.

Adding Decorative Elements

Once the base is secure and stable, it’s time to add your decorative elements. Here are some ideas:

Candles

Candles are a popular choice for driftwood centerpieces. They add a warm, inviting light that complements the natural aesthetics of the wood. Use hot glue or small candle holders to keep them in place.

Shells and Stones

For a coastal theme, integrate shells and stones. Glue them in clusters or scatter them sporadically for a more natural look.

Mini Plants or Moss

Living elements like small plants or moss can add a touch of greenery and life to your centerpiece. Use small amounts of soil or just hot glue for non-rooted plants.

Final Touches

Look over your masterpiece and add any final touches. Maybe some twine around a piece of wood or a touch of paint for added color. Be sure not to overdo it; sometimes less is more.

Placing Your Centerpiece

Once your driftwood centerpiece is complete, finding the perfect spot for it is key. Here are some placement ideas:

Dining Table

A driftwood centerpiece can be a showstopper on your dining table. It adds a touch of tranquility and serves as a great conversation starter.

Coffee Table

A smaller driftwood centerpiece is perfect for a coffee table. It’s an eye-catching addition that can help create a cozy atmosphere.

Mantelpiece

For a more traditional look, place your driftwood centerpiece on the mantel. It will draw the eye upward and can anchor the room’s décor.

Outdoor Spaces

Driftwood fits seamlessly into outdoor settings as well. Use it as a centerpiece for patio or garden tables to bring a bit of the indoors out.

Maintaining Your Driftwood Centerpiece

Like any piece of decor, your driftwood centerpiece will need some maintenance to keep it looking its best.

Dusting and Cleaning

Regular dusting with a soft cloth will keep your centerpiece clean. For a deeper clean, use a damp cloth and avoid soaking the wood.

Replacing Elements

Over time, some decorative elements may need replacement or refreshment, particularly if your centerpiece includes living plants or candles.

Preventing Damage

Keep your centerpiece out of direct sunlight to prevent the wood from drying out and cracking. Also, avoid placing it in overly humid environments, as this can encourage mold growth.

Customization Ideas for Your Driftwood Centerpiece

Adding Personal Touches

Incorporate personal items like small photo frames or souvenirs to make your centerpiece uniquely yours.

Seasonal Changes

Update your driftwood centerpiece with the seasons. Add autumn leaves and mini pumpkins for fall, holly and pinecones for winter, and flowers for spring.

Light It Up

Fairy lights can add a whimsical touch to your centerpiece. Weave them through the driftwood and turn them on for a soft, magical glow.

Conclusion

Creating a driftwood centerpiece is a fulfilling and creative project that brings the beauty of nature into your home. With a bit of preparation and a dash of creativity, you’ll craft a unique piece that reflects your personal style and adds an earthy, artistic touch to any space. So why not give it a try? Your perfect centerpiece is waiting to be created.

Filed Under: Driftwood Ideas Tagged With: Centerpiece, craft, DIY, Driftwood, Home Design

Drift Wood Ideas Driftwood Art Wall Hangings

June 23, 2024 by admin

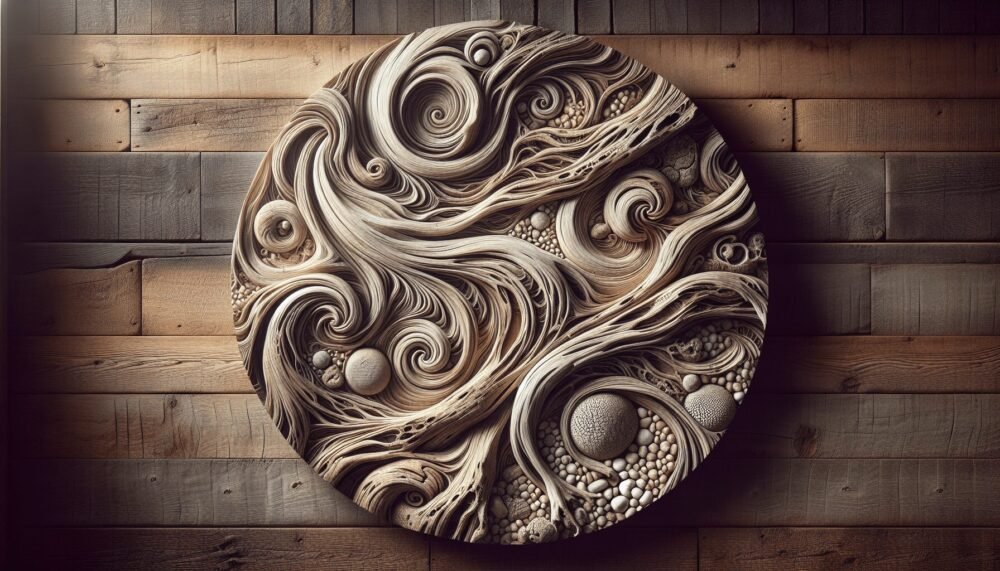
Welcome to the enchanting world of “Drift Wood Ideas: Driftwood Art Wall Hangings.” In this piece, you’ll explore creative and inspiring ways to transform simple driftwood into stunning art pieces that can adorn your walls. From rustic, nature-inspired designs to chic, modern arrangements, discover how you can bring the beauty of the beach into your home with ease. Whether you’re a seasoned DIY enthusiast or just looking to add a unique touch to your décor, this article will guide you through the endless possibilities that driftwood offers. Dive in and let your creativity flow! Have you ever strolled along the beach and stumbled upon a beautiful piece of driftwood, only to wonder how you could incorporate it into your home decor? If so, you’re not alone! Driftwood has a way of sparking creativity and evoking a sense of adventure. With its natural beauty and unique shapes, driftwood can be transformed into stunning art pieces, especially wall hangings.

What is Driftwood?

Driftwood refers to wood that has been washed onto the shore by the action of waves, tides, or wind. Over time, these pieces of wood are naturally weathered and eroded, giving them a distinctive appearance. It’s like Mother Nature’s own art, crafted from broken branches, logs, and trees.

Why Use Driftwood for Art?

There are several reasons why driftwood is a favorite material among artists and DIY enthusiasts:

  • Natural Aesthetic: Driftwood’s organic shapes and textures provide a unique, rustic charm.
  • Sustainability: Using driftwood for art is an eco-friendly way to recycle natural materials.
  • Versatility: Driftwood can be used in various forms of art, from simple wall hangings to intricate sculptures.

Getting Started with Driftwood Art

To begin your journey into the world of driftwood art, you’ll need to consider a few key points.

Collecting Driftwood

First and foremost, you’ll need to collect suitable pieces of driftwood. Here are some tips to help you find the best pieces:

  • Visit Different Beaches: Beaches with rocky shores or near river mouths tend to have more driftwood.
  • Check Tides: Low tide often reveals more driftwood that might be hidden underwater during high tide.
  • Respect the Environment: Be mindful not to disturb wildlife or the natural habitat while collecting driftwood.

Preparing Driftwood

Before you start creating, it’s essential to clean and prepare your driftwood:

  1. Clean: Remove any debris, sand, or seaweed by rinsing the driftwood with fresh water.
  2. Dry: Allow the driftwood to dry completely, either by air drying or using a kiln if available.
  3. Treat: To prevent any mold or pests, you can treat the driftwood with a mixture of water and bleach (90% water, 10% bleach).

Drift Wood Ideas Driftwood Art Wall Hangings

Driftwood Art Wall Hangings

Now that you have your driftwood ready, let’s dive into creating some beautiful wall hangings.

Basic Driftwood Wall Hanging

A basic driftwood wall hanging is a great way to start and acquaint yourself with the material.

Materials Needed:

  • Driftwood pieces
  • Jute or twine
  • Hooks or nails
  • Scissors

Instructions:

  1. Select Pieces: Choose a few pieces of driftwood with interesting shapes and textures.
  2. Arrange Layout: Lay the pieces on a flat surface to decide on the arrangement.
  3. Tie Together: Use jute or twine to tie the driftwood pieces together securely.
  4. Hang: Attach hooks or nails to the wall and hang your driftwood creation.

Driftwood Photo Display

A driftwood photo display adds a personal touch, perfect for showcasing your favorite memories.

Materials Needed:

  • Driftwood branch
  • Small picture frames with clips
  • Hooks or nails
  • Twine or fishing line

Instructions:

  1. Choose a Branch: Select a sturdy driftwood branch.
  2. Attach Frames: Use twine or fishing line to hang picture frames from the branch.
  3. Hang on Wall: Securely attach the driftwood branch to the wall using hooks or nails.
  4. Add Photos: Clip in your favorite photos to complete the display.

Driftwood Mirror Frame

For a functional yet artistic piece, consider making a driftwood mirror frame.

Materials Needed:

  • Plain mirror
  • Driftwood pieces
  • Strong adhesive (like E6000)
  • Hanging hardware

Instructions:

  1. Arrange Driftwood: Lay out the driftwood pieces around the mirror to decide on the design.
  2. Glue Pieces: Apply adhesive to the back of each driftwood piece and press firmly around the mirror.
  3. Secure Hanging: Attach the hanging hardware to the back of the mirror.
  4. Mount on Wall: Hang your new driftwood mirror frame in a place where it can catch light beautifully.

Driftwood Dreamcatcher

Driftwood makes a perfect frame for a unique, coastal-themed dreamcatcher.

Materials Needed:

  • Driftwood ring (or a curved piece of driftwood)
  • Feathers, beads, shells
  • Suede lace or string
  • Scissors
  • Glue

Instructions:

  1. Create the Frame: If you don’t have a ring, bend a curved driftwood piece into a circle and secure the ends with twine.
  2. Weave the Web: Use suede lace or string to weave an intricate web inside the frame.
  3. Add Decorations: Attach feathers, beads, and shells to the bottom of the dreamcatcher.
  4. Hang: Use a piece of string to hang your driftwood dreamcatcher from the wall.

Driftwood Shelf

A functional piece like a driftwood shelf combines practicality with artistry.

Materials Needed:

  • Sturdy driftwood pieces
  • L-brackets
  • Screws
  • Drill
  • Level

Instructions:

  1. Select Wood: Choose driftwood pieces that are sturdy and flat enough to hold objects.
  2. Attach Brackets: Secure L-brackets to the wall at the appropriate height and spacing.
  3. Mount Driftwood: Place the driftwood pieces onto the brackets and secure them in place with screws.
  4. Level and Adjust: Ensure the shelf is level and make adjustments as needed.

Advanced Driftwood Art Techniques

Once you’ve mastered the basics, you can explore more advanced driftwood art techniques.

Combining Driftwood with Other Materials

Incorporate other natural elements, like stones, shells, or sea glass, to create multifaceted art pieces.

Example: Driftwood and Stone Sculpture

  1. Arrange Stones: Select a variety of stones and arrange them alongside your driftwood pieces.
  2. Securely Attach: Use industrial-strength adhesive to attach the stones and driftwood together.
  3. Balance Shapes: Ensure the final piece is balanced and aesthetically pleasing.

Lighting with Driftwood

Adding lighting elements can transform your driftwood art into an enchanting focal point.

Example: Driftwood Lamp

  1. Drill Holes: Drill holes into a sturdy piece of driftwood to accommodate wiring.
  2. Insert Lights: Insert and secure LED string lights or a bulb socket inside the driftwood.
  3. Secure Base: Create a stable base using stones or a platform to prevent tipping.
  4. Plug In: Place your new lamp in your desired location and plug it in to illuminate the room.

Drift Wood Ideas Driftwood Art Wall Hangings

Tips for Selling Driftwood Art

If you become passionate about creating driftwood art, you might consider selling your pieces.

Where to Sell

  • Online Marketplaces: Etsy, eBay, or your own website.
  • Local Markets: Art fairs, farmer’s markets, and craft fairs.
  • Consignment: Local boutiques and home decor stores might accept your pieces on consignment.

Pricing Your Art

Consider the cost of materials, time spent, and the uniqueness of your piece when pricing. It’s important to find a balance between making a profit and offering fair prices.

Marketing

Use social media platforms like Instagram, Facebook, and Pinterest to showcase your work. High-quality photos and engaging posts can help attract potential buyers.

Conclusion

Driftwood art is not just a creative outlet but also a way to bring the beauty of nature into your home. Whether you create simple wall hangings or intricate sculptures, the possibilities are endless. So next time you find yourself on a beach, keep an eye out for those unique pieces of driftwood — they might just become your next masterpiece!

Happy crafting! If you have any unique ideas or would like to share your driftwood creations, feel free to connect. We’d love to see what you make!

Filed Under: Driftwood Ideas Tagged With: Art, DIY, Driftwood, Home Design, Wall Hangings

Rustic Driftwood Wall Art Ideas

June 22, 2024 by admin

Welcome to the world of rustic driftwood wall art! In “Rustic Driftwood Wall Art Ideas,” you’ll explore enchanting possibilities to elevate the aesthetic of your spaces with natural, reclaimed wood. Each idea brings the rugged charm of the coast into your home, offering unique and artistic ways to decorate your walls. From intricate designs to simple, organic shapes, you’ll discover how versatile and beautiful driftwood can be as a centerpiece in your decor. Embrace the rustic elegance and start crafting your perfect coastal haven today! Have you ever wondered how you can bring a slice of the beach into your home? Imagine transforming your living space with the timeless charm of rustic driftwood wall art. Driftwood, weathered and worn by the elements, brings a unique aesthetic to your decor that is both natural and sophisticated. Perfect for those who appreciate the beauty of nature and the appeal of handmade artistry, rustic driftwood wall art offers endless possibilities to express your creativity.

Why Choose Driftwood for Wall Art?

Driftwood carries a story within its grains, having been shaped and smoothed by the ocean’s waves over time. Choosing driftwood for wall art means incorporating a piece of nature into your home decor.

The Natural Aesthetic

Unlike factory-made decor, driftwood retains its natural imperfections, which add character and charm. Its organic textures and shapes make each piece unique, ensuring that your wall art is one-of-a-kind.

Versatility

Driftwood can be used in a myriad of ways, whether you’re aiming for a minimalist or a more elaborate design. Its neutral color palette pairs well with various interior styles, from coastal to rustic to even modern minimalism.

Sustainability

By repurposing driftwood for wall art, you’re embracing eco-friendly practices. You’re not only adding beauty to your home but also contributing to environmental conservation by recycling natural materials.

Basic Tools and Materials

To get started on your rustic driftwood wall art project, you’ll need some basic tools and materials. Here’s a quick rundown:

ToolsMaterials
Hot glue gunDriftwood pieces
Hammer and nailsPicture hanging hardware
SawDecorative elements (shells, beads)
SandpaperSturdy backing (wood panel)
Safety gogglesPaints or sealants (optional)

Rustic Driftwood Wall Art Ideas

Gathering Your Driftwood

Firstly, you’ll need to gather your driftwood. This can be a fun and therapeutic activity, especially if you live near a beach.

Beachcombing Tips

  • Timing: Early mornings after a high tide are the best times to find driftwood.
  • Locations: Areas with fewer visitors tend to have more untouched pieces.
  • Permissions: Always check local regulations to ensure you’re allowed to collect driftwood.

Preparing the Driftwood

Once you’ve collected your driftwood, it’s essential to clean and prepare it.

  1. Cleaning: Rinse the wood to remove sand and debris. You can use a mild detergent if necessary.
  2. Drying: Let the wood dry completely to avoid mold and mildew. This might take a few days, depending on the size and thickness of the pieces.
  3. Sanding: Lightly sand the wood to smooth any rough spots, but be sure not to overdo it, as those imperfections add character.

Easy Driftwood Wall Art Ideas

Here are some simple yet stunning ideas that you can try out at home.

Driftwood Heart

A heart-shaped driftwood art piece can be a lovely addition to any room.

  • Steps:
    1. Arrange your driftwood pieces in a heart shape.
    2. Use a hot glue gun to secure the pieces together.
    3. Attach picture-hanging hardware to the back.

Driftwood Mirror Frame

Give an old mirror a new lease of life with a driftwood frame.

  • Steps:
    1. Arrange driftwood pieces around the existing frame of the mirror.
    2. Use nails or a hot glue gun to attach the wood securely.
    3. Hang the mirror on your wall and admire your handiwork.

Driftwood Shelf

A minimalist driftwood shelf can serve as both a decorative and functional piece.

  • Steps:
    1. Select a sturdy piece of driftwood.
    2. Attach sturdy brackets to the wall where you want the shelf.
    3. Secure the driftwood onto the brackets.

Rustic Driftwood Wall Art Ideas

Advanced Driftwood Projects

If you’re up for more of a challenge, here are some advanced projects to consider.

Driftwood Wall Sculpture

Create a custom wall sculpture that can serve as a statement piece in any room.

  • Steps:
    1. Design your sculpture on paper first.
    2. Lay out the pieces on a flat surface to get a rough idea of the final look.
    3. Secure the pieces using nails or a hot glue gun.
    4. Consider using a wood frame or backing for additional support.

Driftwood Headboard

Upgrade your bedroom with a rustic driftwood headboard.

  • Steps:
    1. Measure the width of your bed to determine the size of the headboard.
    2. Arrange several pieces of driftwood vertically or horizontally, depending on your design preference.
    3. Secure the pieces onto a wooden backing.
    4. Attach the headboard to your bed frame or directly onto the wall.

Driftwood Picture Frame Collage

A collage of driftwood picture frames can make for an eye-catching wall display.

  • Steps:
    1. Collect several small to medium-sized driftwood pieces.
    2. Arrange the pieces into rectangular or square shapes to form frames.
    3. Use glue and nails to secure the frames.
    4. Insert your favorite photos and hang them on your wall.

Accentuating Your Driftwood Art

Once your driftwood creation is complete, you might want to add some finishing touches to make it stand out even more.

Adding Color

While the natural hue of driftwood is lovely, adding a splash of color can make your piece even more striking.

  • Paint: Use acrylic paint for a durable and vibrant finish. You can paint the entire piece or create intricate designs.
  • Stain: Wood stain can enhance the natural grain and color of the driftwood.

Incorporating Additional Elements

Adding other natural elements can enrich your driftwood art.

  • Shells and Stones: Glue shells, stones, or sea glass onto your piece for added texture.
  • Beads and String: Incorporate beads and strings to create a mixed media effect.

Styling Your Home with Driftwood Art

Knowing how to place and style your driftwood art can maximize its impact on your home’s decor.

Focal Points

Use larger pieces of driftwood art as focal points in a room. Place them on main walls or above significant furniture to draw the eye.

Grouping

Smaller driftwood pieces can be grouped together for a cohesive look. This can be done on a gallery wall or a shelf arrangement.

Lighting

Proper lighting can make your driftwood art shine. Use spotlights or adjustable lamps to highlight the texture and form of your pieces.

Complementary Decor

Pair your driftwood art with complementary decor items like beach-themed cushions, neutral-colored rugs, and ceramic vases to create a harmonious look.

Caring for Your Driftwood Art

To ensure your driftwood art lasts, consider these care tips:

  1. Avoid Direct Sunlight: Overexposure to sunlight can cause the wood to crack and fade.
  2. Dust Regularly: Use a soft cloth to dust your art pieces gently.
  3. Use Sealants: Applying a wood sealant can protect your driftwood from moisture and pests.

Conclusion

Incorporating rustic driftwood wall art into your home is a fantastic way to bring a touch of nature indoors. With its unique texture, sustainability, and versatility, driftwood can be molded into various forms of wall art, from simple heart shapes to elaborate headboards. Whether you’re new to DIY projects or a seasoned crafter, working with driftwood opens up endless possibilities. So next time you’re at the beach, consider collecting some driftwood and letting your creativity flow. Your home will thank you for it.

Filed Under: Driftwood Ideas Tagged With: DIY, Driftwood, Home Design, Rustic, Wall Art

Driftwood Hanger Wall Art

June 21, 2024 by admin

Imagine transforming your living space with a touch of natural elegance—Driftwood Hanger Wall Art brings just that. This unique piece combines the rustic charm of driftwood with functional artistry to create a compelling focal point for any room. You’ll appreciate how the organic textures and shapes of the driftwood seamlessly blend with various decor styles, making it a versatile addition to your home. Whether you’re hanging it in your entryway, living room, or bedroom, this wall art effortlessly adds a warm, coastal vibe that invites nature indoors. Have you ever wondered how you could bring the serenity and beauty of the beach into your home? Driftwood hanger wall art is a timeless and charming way to achieve just that. It’s an inventive and sustainable form of decoration that adds a unique, rustic touch to any room. Not only is driftwood beautiful to look at, but using it in art projects can also be a peaceful and rewarding experience.

Driftwood Hanger Wall Art

What is Driftwood Hanger Wall Art?

Driftwood hanger wall art involves creating decorative pieces using driftwood and various other materials. These pieces typically hang on the wall, adding texture and natural beauty to your space. It’s an art form that can be as simple or complex as you like, making it accessible for beginners and intriguing for seasoned DIYers.

The Beauty of Driftwood

Driftwood, the natural wood washed ashore by water bodies like rivers, lakes, or oceans, has a distinctive charm. Its weathered appearance, unique shapes, and textured surfaces tell the story of its journey through water and time. Each piece of driftwood is different, making every artwork made from it unique.

Why Choose Driftwood Hanger Wall Art?

There are so many reasons to love driftwood hanger wall art. Here are a few:

  • Eco-Friendly: Reusing driftwood reduces waste and promotes sustainability.
  • Versatile: It complements various decor styles, from rustic to coastal.
  • Creative: There’s no right or wrong way to create this art, making it a liberating and enjoyable process.

Essential Materials and Tools

Before starting your driftwood hanger wall art project, you’ll need to gather some essential materials and tools. Here’s a basic list to get you started:

MaterialPurpose
DriftwoodThe main feature of your artwork
Hooks/NailsFor hanging pieces of driftwood
Twine/stringTo connect pieces or hang the artwork
Beads/CrystalsOptional embellishments
Paints/VarnishTo protect or color the driftwood
SandpaperFor smoothing rough edges
DrillFor making holes in the driftwood

Finding Driftwood

One of the most enjoyable parts of this project is gathering your driftwood. This can be a fun day out, whether you’re walking along the beach, riverbank, or lakeside. Look for pieces that have interesting shapes, textures, and sizes. It’s essential to ensure that the driftwood is dry and free from pests.

Preparation

Once you’ve collected your driftwood, it’s time to prepare it:

  1. Clean the driftwood: Rinse it with fresh water to remove any salt, sand, or dirt.
  2. Dry thoroughly: Allow the driftwood to dry completely to prevent mold or rot.
  3. Sand the edges: Use sandpaper to smooth out any rough edges that might be hazardous.

Designing Your Driftwood Hanger Wall Art

Let your imagination run wild with the design of your driftwood hanger wall art. Here are some steps to help you organize your project:

Conceptualize Your Design

Start with a rough sketch of your idea. Decide if you want your driftwood to form a particular shape or pattern. Think about the colors and additional elements you’d like to include, such as beads, shells, or small mirrors.

Arrangement

Lay out your pieces of driftwood and arrange them in various ways until you find a composition you like. This is your chance to play around with shapes and sizes.

Connecting the Pieces

Depending on your design, you might need to connect the pieces of driftwood. You can do this using twine, string, or even wire. Drill small holes into the driftwood to thread your connecting material through, tying knots to secure it.

Adding Embellishments

Adding extra elements like beads, crystals, or paint can enhance the visual appeal of your art. Be mindful not to overdo it; sometimes, simplicity is the key to elegance.

Step-by-Step Guide to a Classic Driftwood Hanger

Creating a classic piece of driftwood hanger wall art can be a great starting point. Here’s a step-by-step guide to help you:

Step 1: Gather Materials

Collect all your materials and tools. Make sure everything is clean and dry.

Step 2: Plan Your Design

Sketch out a simple design on paper. For example, you might want to create a horizontal hanger with multiple pieces of wood hanging vertically.

Step 3: Prepare Your Driftwood

Clean, dry, and sand your driftwood pieces.

Step 4: Drill Holes

Drill small holes into the top and bottom of each piece of driftwood where you plan to string them together. Ensure the holes are evenly spaced.

Step 5: Connect the Driftwood

Thread twine or string through the holes and tie knots to secure each piece. Ensure the connections are firm but allow the driftwood to dangle.

Step 6: Add Embellishments

If you want, add beads or small shells between the pieces of driftwood for extra charm.

Step 7: Hang Your Artwork

Install hooks or nails on the wall where you wish to hang your artwork. Securely attach your driftwood piece, ensuring it’s balanced.

Driftwood Hanger Wall Art

Various Styles of Driftwood Hanger Wall Art

Driftwood hanger wall art can be adapted to suit various styles and preferences. Here are a few ideas:

Coastal Chic

Enhance the natural beauty of driftwood by embracing a coastal theme. Use light colors, shells, and nautical elements to complement your artwork.

Rustic Farmhouse

Pair driftwood with metal hooks or rustic hardware to create a farmhouse-inspired look. Sand certain parts of the driftwood more heavily to reveal lighter wood beneath, adding a distressed touch.

Bohemian Vibes

Combine driftwood with macrame, colorful beads, and feathers for a boho-chic piece of art. This style allows for a plethora of textures and colors.

Minimalist Elegance

Keep it simple by using just a few carefully chosen pieces of driftwood. Avoid additional embellishments and let the natural beauty of the wood speak for itself.

Tips for Success

Creating driftwood hanger wall art is relatively straightforward, but here are some tips to ensure your project goes smoothly:

Choose Quality Driftwood

Not all driftwood is created equal. Look for pieces that are sturdy and well-weathered, as these will be the most beautiful and durable.

Take Your Time

Allow yourself plenty of time to experiment with different designs and arrangements. This will ensure that you’re happy with the final result.

Use Quality Tools

Having the right tools on hand, like a good drill and sandpaper, can make the process much more manageable and fun.

Safety First

Always wear protective gear, such as gloves and goggles when handling tools. Ensure your workspace is well-ventilated.

Maintaining Your Driftwood Art

To ensure your driftwood wall art remains beautiful for years, a little maintenance may be required. Here are some tips:

Dust Regularly

Dust your artwork lightly with a soft cloth or feather duster to keep it clean.

Avoid Direct Sunlight

Although driftwood is naturally sun-weathered, prolonged exposure to direct sunlight can cause additional fading and wear.

Re-seal if Necessary

If you’ve used a varnish or sealant on your driftwood, you might need to reapply it occasionally to maintain protection.

Conclusion

Driftwood hanger wall art is an excellent way to bring a piece of the outdoors into your home. Whether you’re a seasoned DIY enthusiast or a beginner looking to try something new, the versatility and beauty of driftwood make it an ideal material. Remember to enjoy the process, experiment with different designs, and let your creativity flow. Whether you aim for a coastal chic, rustic farmhouse, bohemian, or minimalist style, your final piece will undoubtedly add charm and personality to any space. Happy crafting!

Filed Under: Driftwood Ideas Tagged With: craft, DIY, Driftwood, Home Design, Wall Art

Driftwood Flower Wall Art

June 20, 2024 by admin

You discover the enchanting world of Driftwood Flower Wall Art, where nature’s raw beauty meets artistic craftsmanship. Imagine pieces of driftwood, weathered by time and waves, lovingly assembled into intricate floral designs that bring a rustic yet sophisticated touch to your home decor. Each piece tells a story of ocean voyages, making it not just art, but a unique slice of nature preserved in time. As you delve deeper, you’ll find that driftwood flower wall art transforms any space into a serene, coastal haven, radiating a peaceful and calming ambiance. Have you ever wandered along a beach, marveling at the strange pieces of driftwood washed ashore and wondered how you could transform these natural remnants into something beautiful for your home? If so, you’ve come to the right place! Let’s dive into the world of Driftwood Flower Wall Art and discover how you can create stunning pieces that blend nature’s beauty with your artistic flair.

What is Driftwood Flower Wall Art?

Driftwood Flower Wall Art is an artistic creation made from driftwood pieces arranged to form floral designs. Driftwood, wood that has been washed onto shore by the action of winds, tides, or waves, has a whimsical, weathered look that can add a rustic charm to your home decor. When combined with the delicate forms of flowers, it creates a captivating and unique piece of art that is both eco-friendly and aesthetically pleasing.

The Appeal of Driftwood Art

One of the most intriguing aspects of driftwood art is its uniqueness. Every piece of driftwood has a different shape, texture, and history, which adds a distinct character to the finished product. Moreover, driftwood art is highly customizable; you can create a wide range of designs, from simple flower outlines to intricate floral arrangements.

Why Create Your Own Driftwood Flower Wall Art?

Creating your own driftwood flower wall art allows you to infuse your personal style and creativity into your home decor. It’s an engaging and fulfilling hobby that also has a positive environmental impact, as you recycle natural materials. Plus, it’s a fantastic way to bring a piece of the serene beach atmosphere into your living space.

Materials and Tools You’ll Need

Before you embark on your driftwood art journey, gather all the necessary materials and tools. Having everything on hand will make the process smoother and more enjoyable.

Driftwood Collection

First, you need driftwood. While you can purchase it online or from craft stores, collecting your own driftwood from a beach can be a fun and rewarding experience.

When collecting driftwood:

  1. Ensure it’s Legal: Check local regulations to make sure it’s permissible to collect driftwood from the beach.
  2. Select a Variety of Pieces: Look for different sizes and shapes to give your art more depth and interest.
  3. Choose Well-Weathered Pieces: Pick pieces that are thoroughly dried and naturally weathered for a rustic look.

Additional Materials

Apart from driftwood, you’ll need:

  • Strong Glue: A high-quality wood glue or epoxy to adhere the driftwood pieces together.
  • Backing Board: A sturdy board (such as plywood or canvas) to support your driftwood flower creation.
  • Paint and Brushes (Optional): To add color to your driftwood or backing board.
  • Protective Finish: A clear sealant to protect your finished art from wear and tear.

Tools

Gathering the right tools will make your crafting experience more efficient:

  • Saw: For cutting larger driftwood pieces to the desired size.
  • Sandpaper: To smooth out rough edges.
  • Wire and Pliers: For securing pieces together if glue alone isn’t sufficient.
  • Pencil and Eraser: For sketching your design on the backing board.
  • Clamps: To hold driftwood pieces in place while the glue dries.

Driftwood Flower Wall Art

Designing Your Driftwood Flower Wall Art

Now that you have your materials and tools ready, it’s time to design your artwork. This step involves planning the layout and selecting the type of flowers you want to create.

Choosing a Floral Design

When selecting a floral design, consider the following:

  1. Complexity: If you’re a beginner, start with simple flower shapes like daisies or sunflowers. More experienced crafters might try intricate roses or hibiscus flowers.
  2. Style: Decide whether you want a realistic representation or a more abstract, stylized flower.

Sketching Your Design

To visualize your final piece, sketch your design on the backing board.

  1. Draw with Light Strokes: Use a pencil to lightly mark the position and outline of each driftwood piece. This will serve as a guide during assembly.
  2. Focus on Proportions: Ensure the flower petals and other elements are proportional to make the finished artwork look balanced.

Creating the Driftwood Flower Wall Art

With the design sketched out, it’s time to bring your driftwood flower wall art to life. Follow these steps to assemble your masterpiece.

Preparing the Driftwood

Before attaching the driftwood to the backing board:

  1. Clean the Wood: Remove any dirt or debris by scrubbing the driftwood with a brush and soapy water. Rinse and let it dry completely.
  2. Cut and Sand: Trim any pieces as necessary to fit your design and lightly sand the edges to remove splinters.

Arranging the Pieces

Start by laying out the driftwood pieces on the backing board according to your sketch:

  1. Experiment with Placement: Move the pieces around until you’re satisfied with the arrangement.
  2. Layering: For a three-dimensional effect, layer thinner pieces on top of thicker ones.

Gluing and Securing

Once you’re happy with the layout, begin gluing the pieces in place:

  1. Apply Glue: Use a strong adhesive to attach each driftwood piece to the backing board. Follow the manufacturer’s instructions for the best results.
  2. Clamping: Use clamps to hold pieces in place while the glue dries. If working with intricate designs, you might need to secure the pieces with wire as well.

Adding Finishing Touches

After the glue has dried:

  1. Seal the Wood: Apply a protective finish to preserve the driftwood and add a subtle shine. This is especially important if you plan to display your art outdoors.
  2. Paint (Optional): If desired, add a splash of color to your driftwood or backing board with acrylic paints. Let the paint dry completely before sealing.

Driftwood Flower Wall Art

Displaying Your Driftwood Flower Wall Art

Now that your artwork is complete, it’s time to display it! Here are some tips to showcase your driftwood flower wall art beautifully.

Placement and Hanging

Choose a prominent spot in your home where the artwork can be appreciated:

  1. Height: Position the art at eye level for maximum impact.
  2. Lighting: Use natural or artificial lighting to highlight the texture and details of the driftwood.

To hang your artwork securely:

  1. Use Strong Hardware: Depending on the weight of your piece, use appropriate wall hooks, nails, or picture hangers.
  2. Double-Check: Ensure the hanging hardware is securely attached to both the backing board and the wall.

Grouping with Other Art

For a cohesive look, consider grouping your driftwood art with other pieces:

  1. Consistency: Match the themes, colors, or frames of different artworks.
  2. Arrangement: Create a gallery wall with various sizes and shapes for visual interest.

Caring for Your Driftwood Flower Wall Art

Proper care will ensure your driftwood art remains beautiful for years to come. Here’s how to maintain its appearance.

Cleaning

Dust your art regularly using a soft, dry cloth:

  1. Avoid Moisture: Keep your driftwood art dry to prevent moisture damage.
  2. Gentle Touch: Handle delicately to avoid dislodging any pieces.

Protecting from Elements

If displaying outdoors, consider these additional measures:

  1. Weatherproof Sealer: Apply an extra coat of weatherproof sealant to protect against rain and sun.
  2. Sheltered Location: Place the art in a sheltered area to minimize exposure to harsh elements.

Exploring Further: Advanced Techniques and Ideas

Once you’re comfortable with basic driftwood flower wall art, you might want to explore more advanced techniques and creative ideas.

Mixed Media Art

Incorporate other materials to add variety and texture:

  1. Seashells and Stones: Combine driftwood with seashells or polished stones for a coastal theme.
  2. Metals and Fabrics: Use metal wires or fabric scraps to create more complex designs.

3D and Layered Art

Create more depth by using multiple layers:

  1. Backgrounds: Paint or collage the backing board before adding driftwood for a dynamic background.
  2. Floating Frames: Mount your art in a shadow box frame for added dimension.

Large-Scale Projects

For a dramatic statement piece, consider larger projects:

  1. Wall Mural: Cover an entire wall with a driftwood and floral design.
  2. Furniture Accent: Integrate driftwood flower art into furniture pieces like headboards or tabletops.

Inspiring Creativity: Driftwood Art Competitions and Communities

Engage with a broader community of driftwood artists to gain inspiration and feedback.

Competitions

Participate in local or online art competitions:

  1. Theme-Based Challenges: Look for contests with specific themes that match your interest in driftwood art.
  2. Galleries and Art Shows: Submit your work to galleries or art shows to reach a wider audience.

Online Communities

Join forums and social media groups dedicated to driftwood art:

  1. Share Your Work: Post photos of your creations to inspire and receive feedback.
  2. Learn and Collaborate: Interact with fellow artists to learn new techniques and collaborate on projects.

Conclusion

Creating Driftwood Flower Wall Art is a rewarding project that allows you to express your creativity while reconnecting with nature. Every piece of driftwood you use brings its own story, adding depth and character to your artwork. Whether you’re crafting a single flower or an elaborate floral arrangement, the process is sure to be both meditative and inspiring.

So, next time you find yourself at the beach, pick up a piece of driftwood and let your imagination run wild. With a bit of creativity and some patience, you can transform these natural treasures into stunning works of art that bring the beauty of the shore into your home. Happy crafting!

Filed Under: Driftwood Ideas Tagged With: Driftwood, Flower Art, Handmade, Home Design, Wall Decor

  • « Previous Page
  • Page 1
  • Page 2

Primary Sidebar

Driftwood4us.com, is a participant in the Amazon Services LLC Associates Program, an affiliate advertising program designed to provide a means for sites to earn advertising fees by advertising and linking to amazon.com.