• Skip to main content
  • Skip to primary sidebar
  • Terms and Conditions
  • Privacy Policy
  • Contact

Driftwood 4 Us

Just About Driftwood

How To

Driftwood Diy Projects How To Make

May 28, 2024 by admin

Welcome to “Driftwood DIY Projects: How to Make.” In this article, you’ll discover a treasure trove of creative ways to transform driftwood into stunning, personalized decor that will bring a touch of nature into your home. From rustic picture frames to unique candle holders, you’ll learn simple, step-by-step processes to turn your beachcombing finds into beautiful, functional pieces. Embrace your inner craftsperson and let your imagination soar as you explore the endless possibilities of working with driftwood!

Driftwood DIY Projects: How to Make

Have you ever strolled along the beach, marveled at pieces of driftwood, and thought about what beautiful creations you could make with them? Driftwood has a unique charm, with its weathered look and natural textures. The good news is you don’t have to be a professional artist or craftsman to transform these pieces of nature into beautiful DIY projects. This comprehensive guide will walk you through various exciting driftwood DIY projects and how to make them. Let’s get started!

Why Choose Driftwood for DIY Projects?

Choosing driftwood for your DIY projects connects you with nature while adding a coastal charm to your home decor. Driftwood is not just beautiful; it’s also versatile and eco-friendly, as you’re recycling natural materials. The unique shapes and textures of each piece make every project one-of-a-kind.

The Aesthetic Appeal

Driftwood’s natural, rustic look can complement almost any style of home decor—from coastal to modern and even rustic farmhouse. The shades range from silvery-gray to deep brown, providing a variety of tones that can fit seamlessly into your existing decor.

Environmental Benefits

By using driftwood, you’re not contributing to deforestation or massive resource extraction. It’s an environmentally conscious choice that helps in cleaning up beaches while giving you a medium full of character and history.

Preparing Your Driftwood

Before diving into your project, it’s essential to clean and prepare your driftwood properly. This process ensures that your creations are safe and long-lasting.

Collecting Driftwood

While collecting driftwood, ensure you’re doing so legally and ethically. Some beaches and protected areas have regulations against removing natural materials. Look for pieces that are already dry and free from visible signs of rot.

Cleaning Driftwood

  1. Rinse: Initially rinse your driftwood in fresh water to remove sand, salt, and algae.
  2. Soak: Soak the driftwood in a mixture of water and a small amount of bleach (1:10 ratio) for a few days to kill any bacteria, mold, or insects.
  3. Rinse Again: After soaking, rinse the driftwood thoroughly.
  4. Dry: Let it dry completely, which might take several days or even weeks depending on the size and density of the pieces.

Tools and Materials Needed

Here is a list of common tools and materials you might need for various driftwood projects:

Tool/MaterialPurpose
Sanding PaperFor smoothing rough surfaces
SawTo cut driftwood into desired sizes
GlueFor assembling pieces
Nails/ScrewsFor securing parts
DrillFor making holes
Paint/StainFor finishing touches
SealerTo protect and preserve the wood

Driftwood Diy Projects How To Make

Driftwood DIY Projects: Step-by-Step

Now, let’s dive into some exciting driftwood DIY projects that you can try at home. Each project will include step-by-step instructions to make the process easy and fun.

Driftwood Wall Art

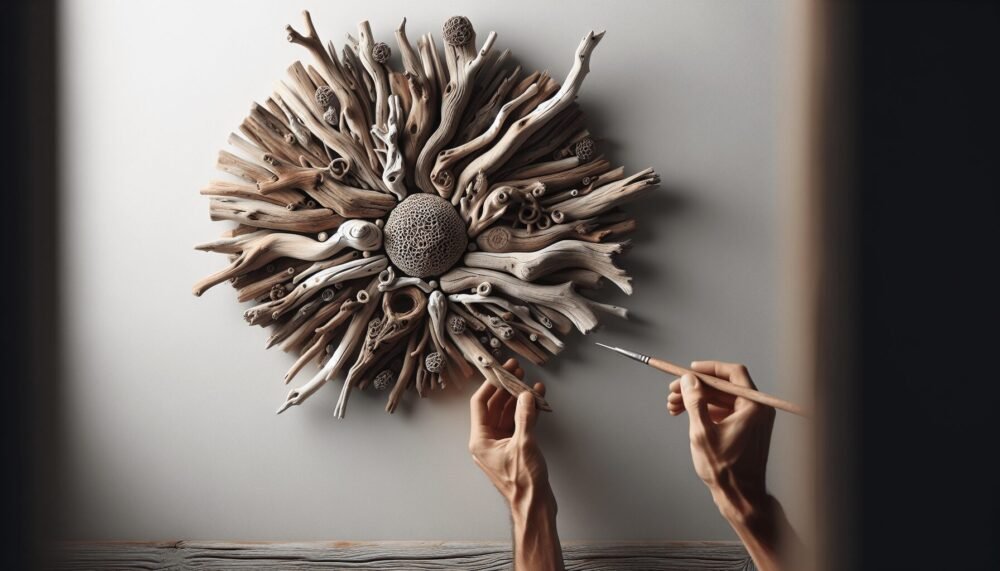
Wall art made from driftwood can serve as a stunning focal point in any room. You can create abstract designs or assemble pieces to resemble landscapes or seascapes.

Materials Needed

  • Various pieces of driftwood
  • A strong adhesive like epoxy
  • Backing board or canvas
  • Picture hanging hardware

Steps to Make Driftwood Wall Art

  1. Design: Lay out the pieces of driftwood on your canvas or backing board to plan your design.
  2. Trim: Use a saw to cut the driftwood pieces to your preferred lengths and angles.
  3. Glue: Secure the pieces onto the canvas or board with a strong adhesive.
  4. Dry: Allow sufficient drying time as indicated by the adhesive’s instructions.
  5. Hang: Attach hanging hardware to the back and display your masterpiece on the wall.

Driftwood Picture Frame

A driftwood picture frame adds a natural, rustic look to your favorite memories. It’s simple to make yet looks professionally crafted.

Materials Needed

  • Small pieces of smooth driftwood
  • A basic picture frame
  • Hot glue gun
  • Sealer

Steps to Make a Driftwood Picture Frame

  1. Choose Frame: Select a simple, sturdy picture frame as your base.
  2. Arrange: Arrange your driftwood around the frame, creating a design that you find appealing.
  3. Glue: Use a hot glue gun to attach the driftwood pieces securely to the frame.
  4. Seal: Apply a sealer to protect the driftwood and give it a finished look.
  5. Insert Photo: Once everything is dry and set, insert your photo.

Driftwood Candle Holders

Driftwood candle holders can bring a cozy and natural ambiance to your living space. They are also perfect for outdoor settings like patios and gardens.

Materials Needed

  • Medium-sized driftwood pieces
  • Small candles or tea lights
  • Drill with a spade bit

Steps to Make Driftwood Candle Holders

  1. Select Wood: Pick driftwood pieces that can sit flat or can be easily balanced.
  2. Drill Holes: Using a spade bit, drill holes where the candles will sit. Ensure the holes are deep and wide enough to hold the candles securely.
  3. Sand: Sand down any rough edges around the holes to ensure safety.
  4. Insert Candles: Place your candles in the holes and your driftwood candle holder is ready to use.

Driftwood Mirror

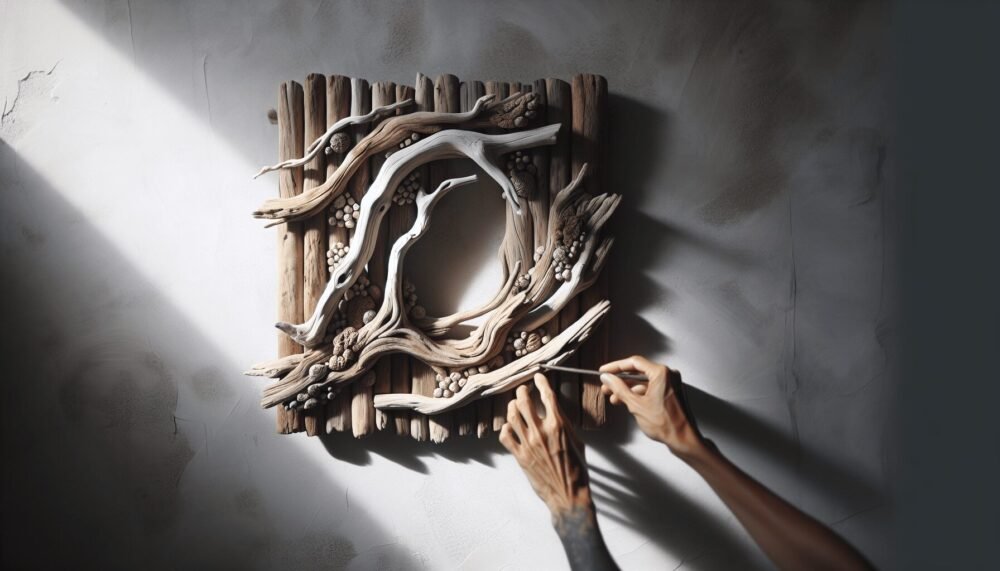
A driftwood mirror can enhance the aesthetic appeal of any room. Its rustic charm makes it a great addition to living rooms, bedrooms, or hallways.

Materials Needed

  • A round or rectangular mirror
  • Various sizes of driftwood pieces
  • Strong adhesive like epoxy
  • Hanging hardware

Steps to Make a Driftwood Mirror

  1. Prepare Mirror: Clean the mirror and make sure it’s free from dust and grease.
  2. Lay Out Design: Arrange your driftwood pieces around the mirror to plan your design.
  3. Cut Wood: Trim pieces as needed using a saw.
  4. Glue It Down: Use a strong adhesive to attach the driftwood pieces around the mirror’s edge.
  5. Dry: Allow the adhesive to dry completely.
  6. Hang: Attach hanging hardware to the back and display your beautiful driftwood mirror.

Driftwood Jewelry Hanger

A driftwood jewelry hanger is an elegant and practical way to organize your accessories. Plus, it adds a natural decorative element to your room.

Materials Needed

  • A long piece of driftwood
  • Small hooks or nails
  • Drill and drill bits
  • Hanging hardware

Steps to Make a Driftwood Jewelry Hanger

  1. Choose Wood: Pick a piece of driftwood that is long and sturdy.
  2. Attach Hooks: Drill small holes and screw in hooks or nails along the length of the wood.
  3. Add Hanging Hardware: Attach hanging hardware to the back of the driftwood.
  4. Mount: Secure your jewelry hanger on the wall and organize your accessories.

Driftwood Plant Hanger

If you’re a plant enthusiast looking for a unique way to display your greenery, a driftwood plant hanger is just what you need.

Materials Needed

  • A sizeable piece of driftwood
  • Plant pots or small baskets
  • Strong cord or wire
  • Hooks for hanging

Steps to Make a Driftwood Plant Hanger

  1. Select Driftwood: Choose a piece that can support the weight of your plants.
  2. Attach Cord: Securely tie cord or wire around the driftwood and attach plant pots or baskets.
  3. Hang Plants: Place your plants in the pots or baskets.
  4. Install Hooks: Install hooks in the ceiling and hang your driftwood plant hanger.

Creative Ideas for Driftwood Projects

If you’re feeling inspired, there are countless other creative ways to use driftwood in your DIY projects. Here are some ideas:

Driftwood Sculptures

Create abstract sculptures or figures by assembling various pieces of driftwood. Use wire, glue, or nails to hold them together.

Driftwood Shelves

Construct shelves using larger, sturdy pieces of driftwood. Secure them to the wall with brackets for a functional and artistic display.

Driftwood Table Centerpieces

Use smaller pieces to craft table centerpieces for weddings, parties, or daily decor. Combine them with candles, flowers, or seashells for a beachy touch.
Driftwood Diy Projects How To Make

Pro Tips for Working with Driftwood

Safety First

Always wear safety gear such as gloves and goggles while cutting or sanding driftwood. Ensure your workstation is well-ventilated.

Finishing Touches

Use a sealer to protect your driftwood projects from moisture and wear. This helps in maintaining their appearance over time.

Experiment with Finishes

Don’t be afraid to experiment with different finishes like paint, stain, or varnish. These can either enhance the natural beauty of the wood or give it a completely new look.

Conclusion

Driftwood DIY projects offer endless possibilities for creativity and practical applications. From wall art and picture frames to candle holders and plant hangers, each project adds a touch of nature and rustic charm to your home. By following these detailed steps and tips, you can create your unique driftwood masterpieces. Not only will you end up with beautiful decor, but you’ll also enjoy the rewarding experience of crafting with natural materials.

Ready to embark on your driftwood DIY journey? Pick a project, gather your materials, and let your creativity flow! Whether you’re a seasoned crafter or a beginner, the beauty and versatility of driftwood will surely inspire you. Enjoy the process, and happy crafting!
Filed Under: Driftwood Ideas Tagged With: DIY Projects, Driftwood, home decor, How To

How To Bonsai Driftwood?

February 25, 2024 by admin

If you’ve ever found yourself captivated by the intricate beauty of bonsai trees and the peaceful tranquility they bring to a space, you may be interested in exploring a unique twist on this ancient art form – Bonsai Driftwood. With its delicate branches and weathered appearance, Bonsai Driftwood adds a touch of natural elegance to any environment. In this article, we’ll explore the art of creating and caring for Bonsai Driftwood, sharing tips and tricks on how to cultivate your very own miniature masterpiece. So, grab your gardening gloves and let’s embark on a journey into the enchanting world of Bonsai Driftwood!

Choosing the Right Driftwood

When it comes to bonsai driftwood, the first step is to choose the right piece for your aquarium. Researching different types of driftwood is essential to ensure you select the best option for your needs. Various types of driftwood may be suitable for aquariums, including Malaysian driftwood, mopani wood, and spider wood. Each type has its own unique characteristics, such as color, texture, and shape, which can add visual interest to your aquascape.

In addition to the type of driftwood, considering the size is also crucial. You need to ensure that the driftwood you choose will fit proportionally in your aquarium. An oversized piece may dominate the tank, while one that is too small may not have the desired impact. Take measurements of your aquarium and consider the scale before making a decision.

Additionally, looking for driftwood with interesting shapes and textures can enhance the visual appeal of your aquascape. Driftwood with unique twists, bends, and curves can create a captivating focal point in your aquarium. Texture is also essential, as it can provide surfaces for beneficial bacteria to grow, increasing biological filtration.

Lastly, always ensure that the driftwood you select is safe for aquarium use. Some types of wood may release harmful substances, such as tannins or toxins, into the water, which can be detrimental to your aquatic pets. Research and choose driftwood varieties that are known to be safe or can be properly prepared to remove any potential hazards.

Preparing the Driftwood

Once you have selected the right driftwood for your aquarium, it is essential to prepare it before adding it to the tank. This process will help ensure that the driftwood is safe, free from contaminants, and ready to be incorporated into your aquascape.

Start by inspecting and cleaning the driftwood. Carefully examine the wood for any signs of mold, rot, or pests. Remove any debris or loose bark that may be present. Use a soft brush or toothbrush to gently scrub the surface of the driftwood. This step will help remove any dirt or impurities and prepare the wood for the next step.

Soaking the driftwood is a crucial step to remove tannins. Tannins are natural compounds found in driftwood that can turn the water yellow or brown. Soaking the wood for a few weeks in a separate container will help leach out the tannins. Change the water regularly to speed up the process. Once the water remains clear after several water changes, the driftwood is ready to be incorporated into your aquarium.

Alternatively, if you want to speed up the process or have stubborn tannins, boiling or baking the driftwood can be an effective method. Boiling the driftwood for several hours or baking it in the oven at a low temperature can help sterilize the wood, remove tannins, and kill any potential pests or bacteria.

How To Bonsai Driftwood?

Selecting the Bonsai Driftwood Style

The style of your bonsai driftwood can greatly influence the overall aesthetic of your aquascape. There are various styles to consider, each with its own unique characteristics and visual appeal. Choosing the right style depends on your personal preference and the desired theme or atmosphere for your aquarium.

A traditional style with upright driftwood can create a classic and serene look. This style often mimics the appearance of a miniature tree, with the driftwood standing tall and proud within the tank.

For a more dynamic and asymmetrical look, consider an asymmetrical style with slanted driftwood. This style adds a sense of movement and visual interest to your aquascape.

If you want to create a dramatic and eye-catching display, a cascade style with overhanging driftwood is the way to go. This style mimics the look of a waterfall, with the driftwood extending outwards and downwards, creating a sense of depth and dimension within the tank.

For a more whimsical and artistic feel, the windswept style with twisted driftwood can be an excellent choice. This style mimics the appearance of a tree being shaped by strong winds, with the driftwood showcasing dramatic twists and turns.

Ultimately, the choice of style depends on your personal taste and the overall theme or ambiance you want to convey in your aquascape. Consider experimenting with different styles to find the one that best suits your preferences and vision.

Attaching the Plants to the Driftwood

In addition to the driftwood itself, selecting suitable aquatic plants to attach to the bonsai driftwood is crucial for creating a beautiful and natural-looking aquascape. Consider plants that are compatible with the lighting and water parameters of your aquarium. Look for plants with flexible stems or roots that can easily be attached to the driftwood.

To attach the plants, you can use fishing line or plant ties. Gently wrap the line or tie around the plant’s stem or roots and secure it to the driftwood. Ensure that the attachment is firm enough to hold the plant in place, but not so tight that it damages the plant.

When arranging the plants, aim for a natural and aesthetic composition. Consider the growth patterns, colors, and textures of the plants to create a balanced and visually appealing arrangement. Experiment with different combinations to find the arrangement that best complements the shape and style of your bonsai driftwood.

Additionally, consider the lighting and water parameters required by the plants. Different plants have varying needs for light intensity and water conditions. Ensure that the plants attached to the driftwood are placed in appropriate areas of the aquarium where they can thrive and contribute to the overall health and beauty of your aquascape.

How To Bonsai Driftwood?

Placing the Bonsai Driftwood in the Aquarium

Proper placement of the bonsai driftwood within the aquarium is essential to create a visually pleasing and balanced aquascape. Consider the following factors when deciding where to position the driftwood:

Position the driftwood as a focal point in your aquascape. Choose a location that allows the driftwood to stand out and become the centerpiece of your tank.

Ensure proper placement for optimal flow and visibility. Arrange the driftwood in a way that allows water to flow freely around it and provides clear lines of sight within the tank.

Consider the placement of substrate and rocks around the driftwood. The surrounding elements should complement and enhance the overall composition of the aquascape. Experiment with different arrangements to find the best combination.

Avoid overcrowding the aquarium with too many decorations. The bonsai driftwood should be the main attraction, so keep other decorations to a minimum to maintain a clean and uncluttered look.

By carefully considering these factors and experimenting with different placements, you can create a visually stunning and harmonious aquascape that showcases your bonsai driftwood to its fullest potential.

Maintaining the Bonsai Driftwood

To ensure the health and longevity of your bonsai driftwood, regular maintenance is necessary. Follow these guidelines to keep your aquascape looking its best:

Regularly monitor water parameters, including temperature, pH, ammonia, and nitrate levels. Any significant fluctuations or imbalances can impact the well-being of your plants and aquatic pets. Adjust and maintain appropriate water conditions to provide the optimal environment for your bonsai driftwood.

Trim and prune the aquatic plants attached to the driftwood as needed. Regularly remove any dead or decaying plant matter to maintain a clean and aesthetically pleasing appearance. Trimming and pruning also promote healthy growth and prevent the plants from overcrowding or overshadowing the driftwood.

Monitor and remove any algae growth on the driftwood. Algae can detract from the overall look of your aquascape and compete with the plants for nutrients. Regularly inspect the driftwood and use appropriate tools, such as algae scrubbers or brushes, to remove any algae buildup.

Perform routine aquarium maintenance, including water changes, filter cleaning, and substrate vacuuming. This will help keep the water clean and clear, reducing the risk of algae growth and maintaining a healthy environment for your bonsai driftwood.

By following these maintenance practices, you can enjoy a beautiful and thriving aquascape with your bonsai driftwood as the centerpiece.

Troubleshooting and Common Issues

While bonsai driftwood can create stunning aquascapes, there may be certain challenges or issues that arise. Here are some common problems and ways to address them:

Dealing with Floating Driftwood

If your driftwood is floating instead of sinking in the aquarium, it may require some additional steps to weigh it down. You can attach lead weights or use anchor materials, such as rocks or aquarium-safe suction cups, to keep the driftwood submerged. Another option is to tie fishing line around the driftwood and attach it to stable structures, such as rocks or aquarium decorations.

Addressing Excessive Tannins in the Water

Even after soaking or boiling, some types of driftwood may continue to release tannins into the water, causing it to become tinted. To address excessive tannins, regular water changes can help dilute and remove the discolored water. Additionally, using activated carbon in your aquarium filter can help absorb tannins and reduce discoloration.

Managing Algae Growth on the Driftwood

If you notice algae growth on your bonsai driftwood, it’s important to address it promptly to maintain the aesthetics of your aquascape. Regularly clean and scrub the affected areas with an algae brush or scrubber. Additionally, ensure that there are no excessive nutrients in the water, as this can contribute to algae growth. Adjusting the lighting duration and intensity can also help control algae growth.

Preventing Plants from Detaching or Dying

Sometimes, aquatic plants may detach from the driftwood or show signs of poor growth. To prevent this, ensure that the plants are securely attached to the driftwood using fishing line or plant ties. Monitor the health of the plants regularly and provide proper lighting and water conditions to support their growth. If necessary, trim or prune the plants to promote healthier growth and prevent overcrowding.

By addressing these common issues and taking proactive measures, you can maintain the beauty and health of your bonsai driftwood aquascape.

Creating a Natural Biotope with Bonsai Driftwood

If you want to take your aquascaping to the next level, consider creating a natural biotope with your bonsai driftwood. A biotope aquarium recreates a specific natural habitat, including the water conditions, plants, and animals found in that ecosystem. Here’s how to create a natural biotope using bonsai driftwood:

Research and Design a Biotope Aquarium Theme

Select a specific aquatic ecosystem or region that inspires you. Research the water parameters, temperature, plant species, and fish/invertebrates found in that particular habitat. Use this information to design your aquascape and choose appropriate plants and animals to mimic the natural biotope accurately.

Select Fish and Invertebrates Compatible with the Biotope

Choose fish and invertebrate species that are native to the selected biotope and can thrive in the water conditions and temperature of your aquarium. Ensure that the species you select are compatible and can coexist peacefully within the ecosystem.

Choose Substrate, Rocks, and Plants to Match the Biotope

Select substrate materials, such as gravel or sand, that are similar to those found in the natural habitat. Use rocks, driftwood, and other natural decor elements that mimic the geological features present in the chosen biotope. Choose plant species that are native or commonly found in that environment to complete the natural look.

Combine Bonsai Driftwood to Create a Scenic Biotope

Incorporate your bonsai driftwood into the biotope aquascape to add beauty and visual interest. Consider the style and shape of the driftwood to ensure it complements the overall theme. Use the driftwood strategically to create natural hiding spots and visual focal points within the tank.

Creating a natural biotope with bonsai driftwood can be a rewarding and educational experience. It allows you to immerse yourself in a specific aquatic ecosystem and showcase the beauty of nature within your aquarium.

Showcasing Your Bonsai Driftwood

After putting in all the hard work to create a stunning bonsai driftwood aquascape, it’s time to showcase your creation to others. Here are some ideas to showcase and share your bonsai driftwood:

Photographing the Bonsai Driftwood for Social Media

Take high-quality photos of your bonsai driftwood aquascape to share on social media platforms, such as Instagram or Facebook. Capture different angles and lighting to showcase its unique features. Engage with other aquascaping enthusiasts and share tips and techniques to inspire and learn from each other.

Entering Competitions or Exhibitions with Your Creation

Consider participating in aquascaping competitions or exhibitions to showcase your bonsai driftwood aquascape to a wider audience. Competitions provide an opportunity to receive recognition and valuable feedback from experts in the aquascaping community. Exhibitions allow you to display your creation for others to admire and potentially inspire them to delve into the world of bonsai driftwood aquascaping.

Sharing and Exchanging Tips with Fellow Bonsai Driftwood Enthusiasts

Join aquascaping forums or online communities to connect with fellow bonsai driftwood enthusiasts. Share your experiences, tips, and challenges, and learn from others who share the same passion. Engaging in discussions and exchanging ideas can help you further enhance your skills and knowledge in the art of bonsai driftwood aquascaping.

Creating a Dedicated Aquascaping Display for the Bonsai Driftwood

Consider setting up a dedicated display area for your bonsai driftwood aquascape in your home or workplace. This can be a smaller tank or a specially designed aquascaping display. By creating a dedicated space, you can continuously enjoy and showcase your creation, as well as inspire others who see it.

By actively sharing and showcasing your bonsai driftwood aquascape, you can not only receive recognition and appreciation but also inspire others to explore the art of aquascaping and create their own beautiful displays.

Exploring Advanced Techniques and Styles

Once you have mastered the basics of bonsai driftwood aquascaping, you may be ready to explore more advanced techniques and styles. Here are some ideas to expand your creative horizons:

Experimenting with Multiple Driftwood Pieces

Instead of using a single bonsai driftwood piece, try incorporating multiple pieces into your aquascape. This technique can create a more dynamic and intricate composition, adding depth and visual interest to your tank. Play with different arrangements and combinations to find the most aesthetically pleasing and balanced look.

Incorporating Moss and Epiphytes on the Driftwood

To enhance the natural look of your bonsai driftwood, consider attaching moss or epiphytes to the wood. Mosses, such as Java moss or Christmas moss, can create a lush and vibrant carpet on the driftwood. Epiphytes, such as Anubias or Java fern, can attach themselves to the wood, adding texture and dimension. These additions can create a more natural and intricately detailed bonsai driftwood aquascape.

Trying Challenging Styles like Bonsai Driftwood Forest

If you are looking for a more challenging project, consider assembling a bonsai driftwood forest. This style involves arranging multiple driftwood pieces in a way that simulates a miniature forest scene. The key is to create a balanced and harmonious composition, similar to how multiple trees would grow in a natural forest. Experiment with different heights, shapes, and sizes of driftwood to achieve the desired effect.

Creating Artistic Effects with Fish or Shrimp Suspension

For a truly unique and artistic aquascape, experiment with fish or shrimp suspension techniques. This involves training and conditioning the aquatic pets to swim or cling to the bonsai driftwood, creating a stunning visual effect. Carefully select fish or shrimp species that are known to exhibit these behaviors and set up the aquascape accordingly. This technique can elevate your bonsai driftwood aquascape to a whole new level of artistry and creativity.

By exploring these advanced techniques and styles, you can push the boundaries of your aquascaping skills and create truly extraordinary bonsai driftwood aquascapes.

In conclusion, bonsai driftwood aquascaping offers a world of creativity and artistic expression within the confines of an aquarium. By choosing the right driftwood, preparing it properly, and selecting a suitable style, you can create breathtaking aquascapes that mimic the beauty of nature. With proper maintenance and troubleshooting, your bonsai driftwood aquascape can thrive and become a captivating focal point in your home or workplace. By sharing and showcasing your creations, you can inspire others and build a community of bonsai driftwood enthusiasts. So dive into the world of bonsai driftwood aquascaping and let your creativity flourish!

Filed Under: Driftwood Tagged With: Bonsai, Driftwood, How To

Driftwood Art How To Make?

December 30, 2023 by admin

Are you mesmerized by the intricate and captivating beauty of driftwood art? If you’ve ever wondered how to create your own stunning pieces, look no further! In this article, we will guide you through the process of making driftwood art, revealing the secrets behind turning nature’s castaways into unique and artistic masterpieces. Let your creativity drift with the waves as you unlock the techniques and inspiration behind the enchanting world of driftwood art.

Driftwood Art How To Make?

Finding Driftwood

Beachcombing

Beachcombing is a fantastic way to find unique and interesting pieces of driftwood. Take a leisurely stroll along the shoreline, keeping an eye out for weathered and worn pieces of driftwood that have been washed ashore by the waves. Look for driftwood that has distinctive textures, shapes, and colors that catch your eye. Remember, each piece of driftwood has its own story to tell, so choose the ones that speak to you.

River or Lake Explorations

If you don’t live near the coast, don’t worry! Driftwood can also be found near rivers and lakes. Embark on a peaceful journey by the water’s edge and keep a lookout for driftwood that has been carried downstream or washed up on the banks. River and lake driftwood may have a slightly different appearance compared to beach driftwood, as it has been shaped by different water currents. These unique pieces can add a touch of diversity to your art projects.

Purchase from a Supplier

If you don’t have access to natural sources of driftwood or you want specific shapes and sizes, purchasing driftwood from a supplier is a convenient option. There are many online retailers and craft stores that offer a wide variety of driftwood for sale. When buying from a supplier, you have the advantage of choosing precisely the type and size of driftwood you need for your project. Plus, you can often find driftwood that has been pre-cleaned and prepared, saving you time and effort.

Preparing Driftwood

Cleaning the Driftwood

Before you start working with driftwood, it’s essential to clean it thoroughly to remove any dirt, debris, or unwanted organisms. Begin by rinsing the driftwood with clean water to remove loose dirt. For more stubborn stains or impurities, gently scrub the surface of the wood with a soft brush. Be careful not to scrub too aggressively, as you want to preserve the natural texture and shape of the driftwood.

Removing Dirt and Debris

Sometimes, driftwood may have embedded dirt or debris that can be challenging to remove with simple rinsing alone. In such cases, you can soak the driftwood in a mixture of water and mild dish soap or vinegar for a few hours. This helps to loosen dirt and debris, making it easier to clean. After soaking, rinse the driftwood thoroughly and allow it to dry completely before moving on to the next step.

Sanding the Surface

To achieve a smooth and polished finish, it’s often necessary to sand the surface of the driftwood. Start by using coarse-grit sandpaper to remove any rough edges or splinters. Gradually move to finer grits of sandpaper to achieve a more refined surface. Sanding not only enhances the overall appearance of the driftwood but also creates a suitable canvas for various art techniques. Make sure to sand in the direction of the wood grain to avoid any unsightly scratches.

Choosing a Driftwood Art Project

Deciding on the Art Piece

With a wide range of possibilities, choosing the right driftwood art project can be both exciting and challenging. Consider your personal preferences and the style you want to achieve. You can create wall hangings, sculptures, wind chimes, or even functional pieces like candle holders or picture frames. Take your time to explore different ideas and find inspiration in nature and the unique shapes of your driftwood pieces.

Considering Size and Shape of Driftwood

When selecting driftwood for your art project, take into account the size and shape of the pieces you have available. Larger pieces can be great for creating statement pieces or serving as a base for sculptures, while smaller ones can be used for intricate details or smaller projects. Try to envision how different pieces can fit together or complement each other to bring your art piece to life.

Using Multiple Pieces for a More Complex Project

Incorporating multiple pieces of driftwood into your art project can add depth and complexity. Experiment with arranging different pieces together to create visually stunning compositions. Combine driftwood of varying lengths, shapes, and textures to add interest and contrast. Don’t be afraid to try different combinations and step back to evaluate how each piece interacts with the others. This experimentation will help you create unique and captivating art pieces.

Tools and Materials

Basic Tools Required

To embark on your driftwood art journey, you’ll need a few basic tools. These include a saw for cutting larger driftwood pieces, a drill for creating holes or securing elements, sandpaper of various grits for sanding, and wood glue for assembling your art projects. Having these tools readily available will make your creative process smoother and more enjoyable.

Additional Materials for Embellishment

While the driftwood itself holds inherent beauty, you may want to enhance your art piece with additional materials for added flair. Think of elements like seashells, beads, feathers, sea glass, or even small pieces of colored glass to bring a pop of color to your project. These materials can be attached to the driftwood using glue or incorporated into wire wrapping techniques, which we’ll discuss further.

Safety Equipment

As with any artistic endeavor, it’s essential to prioritize safety when working with driftwood. Always wear protective gear such as safety goggles and gloves when handling tools or working with adhesives. It’s also advisable to work in a well-ventilated area to minimize exposure to any fumes from glues or finishes. Taking these precautions ensures that you can enjoy your driftwood art safely and comfortably.

Driftwood Art How To Make?

Driftwood Art Techniques

Wood Carving

Wood carving is a popular technique for transforming driftwood into intricate and detailed art pieces. Before you begin carving, it’s essential to choose the right tools for the job. Carving tools such as chisels, gouges, and knives with different blade shapes and sizes can help you achieve the desired results. Start by creating basic shapes, gradually refining them, and adding intricate details to bring out the beauty of the wood.

Wire Wrapping

Wire wrapping is an excellent technique for accentuating the natural shape and contours of driftwood while adding unique embellishments. Select a suitable wire material, such as copper or silver, and choose a gauge that complements the size of your driftwood. Begin by creating wire designs that wrap around the driftwood, adding twists, loops, or coils as desired. Carefully secure the wire to the driftwood, ensuring it holds firmly but doesn’t damage the wood’s surface.

Creating a Sculpture

Sculpting with driftwood allows you to bring your artistic vision to life in three dimensions. Start by planning the design of your sculpture, visualizing how the different pieces of driftwood will fit together. Consider using multiple driftwood pieces of varying sizes and shapes to create interesting forms and textures. With the help of wood glue, secure the driftwood pieces together, creating a solid and stable structure.

Assembling a Mosaic

Mosaics are a wonderful way to showcase the unique beauty and textures of driftwood. To start, choose a suitable base for your mosaic, such as a wooden board or a piece of sturdy fabric. Then, arrange the driftwood pieces on the base, experimenting with different orientations and patterns. Once you’re satisfied with the arrangement, apply adhesive to the back of each driftwood piece and press it onto the base. After allowing the adhesive to dry, fill the gaps between the driftwood pieces with grout for a finished look.

Painting and Staining

Painting and staining can add an extra touch of creativity and personalization to your driftwood art. Choose paint colors or wood stains that complement the natural tones and textures of the driftwood. You can opt for a uniform color to enhance the shape and details of the wood or create bold patterns and designs. Experimentation is key, so don’t be afraid to let your imagination run wild.

Wood Carving

Choosing the Right Carving Tools

When delving into wood carving with driftwood, having the appropriate tools is crucial. Start with a variety of carving chisels and gouges in different sizes and shapes. This allows you to work on both larger surfaces and finer details. You may also find a carving knife handy for more delicate work. Investing in high-quality, sharp tools will make the carving process smoother and more enjoyable.

Creating Basic Shapes

Begin the wood carving process by outlining and carving basic shapes on your driftwood. Take into consideration the natural contours and curves of the wood, allowing them to guide your carving. Use a chisel or gouge to remove excess wood slowly, ensuring you maintain control and precision. As you carve, step back and evaluate the emerging shapes, making adjustments as needed to achieve your desired design.

Adding Intricate Details

Once you’ve established the basic shapes, it’s time to enhance your driftwood art piece with intricate details. Use smaller carving tools like veiners or U-gouges to create fine lines, textures, or patterns. Work with a steady hand and a gentle touch to gradually bring out the intricate beauty hidden within the wood. Remember, patience is key in this process, as it takes time and practice to master the art of adding delicate details.

Wire Wrapping

Selecting the Appropriate Wire

Choosing the right wire is crucial when it comes to wire wrapping driftwood. Opt for a wire material that is sturdy and malleable, such as copper or silver. The gauge of the wire should be determined by the size and weight of your driftwood. Thicker wires provide more stability, while thinner wires allow for intricate designs. Experiment with different wire materials and gauges to find the one that best suits your creative vision.

Creating Wire Designs

Start by planning your wire design before wrapping it around the driftwood. Consider the curves and contours of the wood, as well as the shape and size of the driftwood piece you’re working with. Experiment with different wrapping techniques, such as twists, loops, or braids, to add visual interest to your art piece. Take your time and work methodically, ensuring that the wire wraps around the driftwood smoothly and securely.

Securing the Wire to the Driftwood

To ensure the wire remains securely attached to the driftwood, be mindful of how you fasten it. Wrap the wire tightly, but not so tight that it damages the driftwood’s surface. You can use pliers to secure and tighten the wire, ensuring it holds firmly in place. If desired, you can also incorporate other embellishments, such as beads or small seashells, into your wire wrapping to further enhance the artistic appeal of your driftwood.

Creating a Sculpture

Planning the Sculpture

Creating a driftwood sculpture requires careful planning and vision. Sketch out your desired sculpture on paper, considering the scale, proportions, and overall concept. Visualize how different pieces of driftwood can come together to form a cohesive and aesthetically pleasing sculpture. As you plan, keep in mind the natural contours and textures of the driftwood and how they can contribute to the overall look and feel of your artwork.

Using Different Pieces of Driftwood

One of the beauties of driftwood sculptures is the ability to combine multiple pieces of varying sizes and shapes. Select driftwood pieces that complement one another and fit within your envisioned sculpture. Experiment with different arrangements and orientations, allowing the individual shapes to interact and create captivating forms. Remember to step back regularly and assess how each piece contributes to the overall harmony of your sculpture.

Adhering Them Together

To assemble your driftwood sculpture, you will need a reliable adhesive that can withstand the test of time. Consider using a strong wood glue that is specifically formulated for bonding wood materials. Apply the adhesive to the areas where the driftwood pieces will join, ensuring thorough coverage. Press the pieces firmly together, holding them in place until the adhesive sets. Allow sufficient drying time before moving or handling the sculpture to ensure proper bonding.

Assembling a Mosaic

Choosing a Base for the Mosaic

When assembling a driftwood mosaic, the choice of a suitable base is essential. Opt for a strong and stable material such as wood, plywood, or even a hardboard. Ensure that the base is properly prepared and smooth, ready to receive the adhesive and driftwood pieces. Consider staining or painting the base to enhance the overall aesthetic appeal of your mosaic.

Arranging the Driftwood Pieces

Before adhering the driftwood pieces to the base, arrange them in different orientations to find the most visually pleasing composition. Play with the shapes, sizes, and colors of the driftwood to create an interesting pattern or design. Once you’re satisfied with the arrangement, carefully lift each piece and apply adhesive to the back. Gently press the driftwood onto the base, ensuring it is firmly attached.

Applying Adhesive and Grout

To secure the driftwood pieces in place and achieve a polished finish, you will need adhesive and grout. Apply a suitable adhesive using a small brush or spatula, ensuring that it covers the entire back surface of each driftwood piece. Press the pieces firmly onto the base, leaving a small gap between each piece for the grout to fill. Once the adhesive is completely dry, apply grout, filling in the gaps between the driftwood. Wipe away any excess grout and allow it to cure according to the manufacturer’s instructions.

Finishing Touches

Applying a Protective Finish

To preserve the beauty and longevity of your driftwood art, it’s important to apply a protective finish. There are various options available, including polyurethane, varnish, or lacquer. These finishes not only protect the wood from moisture and UV damage but also enhance the natural colors and textures of the driftwood. Apply the protective finish evenly and allow it to dry completely before handling or displaying your artwork.

Adding Varnish or Sealant

For a more polished and refined appearance, consider adding varnish or sealant to your finished driftwood art piece. Varnish can provide a subtle sheen, highlighting the wood’s natural beauty and protecting it from scratches. Choose a varnish or sealant that is compatible with the protective finish you applied, and follow the manufacturer’s instructions for application and drying times.

Enhancing the Artwork with Additional Elements

If you wish to take your driftwood art to the next level, consider adding additional elements for visual interest and depth. Seashells, beads, feathers, or even dried flowers can complement the natural beauty of the driftwood and enhance the overall artistic appeal. Use glue or wire wrapping techniques to attach these elements to your artwork thoughtfully. Remember to find a balance, ensuring that any additional elements harmonize with the driftwood rather than overpowering it.

In conclusion, creating driftwood art is a wonderful way to express your creativity and connect with nature. Whether you find driftwood through beachcombing, river explorations, or purchasing from a supplier, the possibilities for unique and captivating art pieces are endless. By preparing the driftwood, choosing the right art project, utilizing various techniques, and adding finishing touches, you can transform ordinary pieces of driftwood into extraordinary works of art. So go ahead, let your imagination soar, and begin your driftwood art journey today!

Filed Under: Driftwood Tagged With: Art, DIY, Driftwood, How To, tutorial

Aquarium Driftwood How To?

October 7, 2023 by admin

Are you a beginner aquarist who’s fascinated by the enchanting presence of driftwood in aquariums? Look no further! In this article, we will guide you on how to incorporate aquarium driftwood into your fish tank. From selecting the right piece to preparing it for your underwater haven, we’ve got you covered. Get ready to enhance the beauty of your aquatic world with the natural charm of aquarium driftwood.

Aquarium Driftwood How To?

Choosing the Right Driftwood

Consider the Size of your Aquarium

When choosing driftwood for your aquarium, it is essential to consider the size of your tank. Driftwood comes in various shapes and sizes, so it’s crucial to select pieces that will fit well in your aquarium without overcrowding it or taking up excessive space. Make sure to measure the dimensions of your tank before purchasing driftwood to ensure a proper fit.

Selecting the Ideal Driftwood Type

There are different types of driftwood available, each with its unique characteristics. Some common types include Malaysian driftwood, Mopani driftwood, and Manzanita driftwood. Consider the aesthetics you desire for your aquarium and research the specific attributes of each driftwood type to determine which one will best suit your needs.

Choosing Driftwood That is Safe for Aquarium Use

Safety is paramount when selecting driftwood for your aquarium. Ensure that the driftwood you choose is free from any chemicals, pesticides, or toxins that could harm your aquatic pets. It is advisable to purchase driftwood specifically intended for aquarium use, as these have been treated and processed to ensure they won’t negatively impact the water chemistry or harm your aquarium inhabitants.

Checking for Quality and Condition

Before purchasing driftwood, thoroughly inspect it for any signs of rot, decay, or damage. Driftwood that is rotting or decaying can release harmful substances into the water and compromise the overall health of your aquarium. Look for pieces that are solid and sturdy, with no soft spots or noticeable blemishes. Choosing high-quality driftwood will ensure its longevity in your aquarium.

Preparing the Driftwood

Cleaning the Driftwood

Once you have chosen the right driftwood for your aquarium, it is crucial to clean it thoroughly before adding it to your tank. Start by rinsing off any visible dirt or debris by gently scrubbing the driftwood under running water. Use a soft brush to scrub away any stubborn grime or algae. You can also use a mild bleach solution to disinfect the driftwood, but be sure to rinse it thoroughly afterward.

Removing Unwanted Debris and Organisms

In addition to cleaning, it is essential to remove any unwanted debris, such as loose bark or moss, from the driftwood. Loose debris can cause water discoloration and may negatively impact the water quality in your aquarium. Use a soft brush or your hands to remove any loose particles thoroughly.

Boiling the Driftwood

Boiling driftwood is a crucial step in preparing it for your aquarium. Boiling helps to remove tannins and other organic compounds that can leach into the water. Fill a large pot with water and boil the driftwood for at least one hour. This process not only cleanses the driftwood but also helps to eliminate any harmful bacteria or parasites that may be present.

Soaking the Driftwood

After boiling, it is recommended to soak the driftwood in fresh water for a few days. Soaking helps to further leach out any remaining tannins and ensures that the driftwood is fully saturated and will not float in your aquarium. Change the water daily during the soaking process to hasten the removal of tannins.

Positioning the Driftwood in the Aquarium

Determining the Best Placement

Deciding where to position the driftwood in your aquarium is an important step in creating an appealing and natural-looking aquascape. Consider the size and shape of your driftwood, as well as the layout of your tank, to determine the most visually pleasing placement. Experiment with different positions until you find the one that enhances the overall aesthetics of your aquarium.

Creating Natural-Looking Aquascape

When positioning the driftwood in your aquarium, aim to create a natural-looking aquascape that mimics the habitat of your fish and other aquatic inhabitants. Consider the natural environments from which the driftwood originates and try to replicate similar landscapes in your tank. Strategically placing plants, rocks, and other decorations around the driftwood can help achieve a more realistic and visually appealing aquascape.

Considering the Needs of Your Aquarium Inhabitants

While designing your aquascape, it is crucial to consider the needs of your aquarium inhabitants. Some fish species prefer open swimming spaces, while others prefer hiding spots and shaded areas. Depending on the requirements of your fish, position the driftwood in a way that provides suitable hiding places and shelter for them. Additionally, ensure that the driftwood does not obstruct the flow of water or impede the movement of your aquatic pets.

Anchoring the Driftwood

Using Fishing Line or Nylon Thread

To anchor driftwood securely in your aquarium, you can use fishing line or nylon thread. Carefully wrap the line or thread around the driftwood and attach it to rocks or sturdy objects at the bottom of the tank. Be sure to hide the anchoring materials with substrate or other tank decorations to maintain a natural appearance. Make sure the fishing line or nylon thread is tight enough to hold the driftwood in place but not so tight as to cause damage.

Using Suction Cups or Clips

Another popular method of anchoring driftwood is to use suction cups or clips. Attach the suction cups or clips to the driftwood and position them against the aquarium walls or the bottom of the tank. This method is especially useful for smaller pieces of driftwood or when creating vertical structures. Ensure that the suction cups or clips are stable and firmly attached to prevent any movement or dislodging of the driftwood.

Using Natural Tank Decorations for Support

If you prefer a more natural approach, you can use other tank decorations, such as rocks or heavier pieces of driftwood, to anchor your driftwood. Position these supporting decorations strategically to hold the driftwood in place. This method not only ensures stability but also adds visual interest to your aquarium.

Aquarium Driftwood How To?

Maintaining Driftwood in the Aquarium

Preventing Algae Growth on Driftwood

Algae growth on driftwood is a common concern for aquarium owners. To prevent excessive algae growth, it is essential to maintain a balance between light, nutrients, and water conditions in your tank. Avoid placing the aquarium near direct sunlight and monitor the lighting duration. Regularly clean the driftwood to remove any algae that may accumulate. Additionally, consider adding algae-eating fish or snails to your tank, as they can help control algae growth.

Monitoring Driftwood’s Impact on Water Parameters

Driftwood can influence water parameters such as pH and water hardness. Some types of driftwood release tannins, which can lower the pH and create a slightly acidic environment. If you have sensitive or pH-dependent aquarium inhabitants, closely monitor the water parameters to ensure they remain within the acceptable range. Regular water testing and adjustments may be necessary to maintain a stable and suitable environment for your aquatic pets.

Cleaning and Maintaining Driftwood Over Time

Over time, driftwood may accumulate debris and algae, requiring regular cleaning to maintain its appearance and quality. Gently scrub the driftwood with a soft brush under running water to remove any algae or dirt. Avoid using harsh chemicals or abrasive materials that may damage the driftwood. If necessary, you can repeat the boiling process to sanitize the driftwood again, ensuring its cleanliness and longevity.

Combining Driftwood with Other Aquatic Decorations

Adding Live Aquatic Plants

One fantastic way to enhance the visual appeal of your aquarium is to combine driftwood with live aquatic plants. Choose plants that thrive in the specific water conditions and lighting levels of your tank. Attach the plants to the driftwood using fishing line or small plant weights. The combination of driftwood and live plants creates a natural and vibrant environment for your aquarium inhabitants.

Incorporating Rocks and Stones

Incorporating rocks and stones alongside driftwood can add depth and texture to your aquascape. Select rocks that complement the shape and color of the driftwood. Position them strategically to create a visually pleasing layout. Ensure that the rocks are stable and securely anchored to prevent any accidents or shifting within the tank.

Enhancing with Artificial Ornaments

If live plants are not an option or you prefer a low-maintenance approach, consider enhancing your aquarium with artificial ornaments. There are many driftwood-imitating artificial decorations available that can add a realistic touch to your tank. Combine these artificial ornaments with real driftwood to create a captivating and easy-to-maintain aquascape.

Common Mistakes to Avoid

Choosing Incorrect Driftwood Type or Size

One common mistake when working with driftwood is selecting the wrong type or size for your aquarium. Ensure that the driftwood you choose is suitable for the water conditions and habitat preferences of your fish. Avoid using excessively large pieces that may overwhelm your tank or small pieces that may get lost in the overall layout.

Neglecting to Properly Prepare Driftwood

Neglecting to properly prepare driftwood before adding it to your aquarium can lead to various issues. Failing to clean, boil, or soak the driftwood adequately can result in water discoloration, the release of harmful toxins, or the introduction of unwanted pests or diseases. Take the time to prepare the driftwood properly to ensure its safety and longevity in your aquarium.

Placing Driftwood in Unsuitable Locations

The placement of driftwood plays a significant role in the overall aesthetics and functionality of your aquarium. Placing driftwood in unsuitable locations, such as blocking the filter intake or obstructing the swimming space of your fish, can lead to poor water circulation or stress for your aquatic pets. Carefully consider the needs of your aquarium inhabitants and choose appropriate locations for the driftwood.

Failing to Anchor Driftwood Securely

One critical mistake to avoid is failing to anchor driftwood securely in your aquarium. Driftwood that is not properly anchored can float or shift, causing damage to the tank or injury to the fish. Use appropriate anchoring methods such as fishing line, suction cups, or natural tank decorations to ensure the stability of the driftwood.

Ignoring Driftwood Maintenance

Driftwood requires regular maintenance to keep it looking its best. Neglecting to clean or upkeep the driftwood may result in excessive algae growth, deterioration, or foul odors in your aquarium. Make regular cleaning and maintenance of the driftwood a part of your aquarium care routine to maintain its beauty and overall health.

Creating Unbalanced Aquascape with Driftwood

When incorporating driftwood into your aquascape, it is crucial to create a balanced and visually pleasing layout. Avoid overcrowding your tank with too many pieces of driftwood or placing them asymmetrically. Strive for a harmonious design that complements the overall appearance of your aquarium.

Benefits of Using Driftwood in Aquariums

Creating a Natural and Aesthetically Pleasing Environment

One of the primary benefits of using driftwood in aquariums is the ability to create a natural and aesthetically pleasing environment. Driftwood adds a touch of authenticity to your tank, mimicking the natural habitats of various fish species. The unique shapes and textures of driftwood bring a sense of beauty and tranquility to your aquarium.

Providing Hiding Places and Shelter for Fish and Invertebrates

Driftwood serves as an important element in providing hiding places and shelter for your fish and invertebrates. Many aquatic species seek refuge among the branches and crevices of driftwood, helping to reduce stress and promote a sense of security. Providing ample hiding spots can also encourage natural behaviors and territoriality among your tank inhabitants.

Releasing Tannins for Natural Water Conditioning

Certain types of driftwood release tannins into the water. These tannins create a slight yellowish tint to the water, which mimics the natural conditions found in many aquatic habitats. Besides adding an interesting visual effect, tannins also provide natural water conditioning. They can help create a slight acidity that benefits certain fish species, promote healthy microbial activity, and even have antibacterial properties.

Promoting Natural Behaviors and Territoriality

Driftwood can play a significant role in promoting natural behaviors and territoriality among your aquarium inhabitants. Many fish species exhibit territorial behaviors and establish their territories around driftwood structures. By providing driftwood in your tank, you are encouraging these natural behaviors and promoting a more harmonious and engaging environment for your fish.

Potential Risks and Considerations

Impact on Water Chemistry and pH

The use of driftwood in aquariums can potentially impact water chemistry and pH levels. The release of tannins and organic compounds from certain types of driftwood can lower the pH and create a slightly acidic environment. While this may be beneficial for some fish species, it may not be suitable for others. It is crucial to monitor the water parameters and ensure they remain within the acceptable range for your aquarium inhabitants.

Introduction of Unwanted Pests or Diseases

Driftwood that is not properly cleaned and prepared can introduce unwanted pests or diseases into your aquarium. Common hitchhikers include snails, worms, or even harmful parasites. To prevent such issues, thoroughly clean and boil the driftwood before adding it to your tank. Quarantining new additions to your aquarium for a period can also help prevent the introduction of any potential pests or diseases.

Effects on Aquarium Filtration and Equipment

The presence of driftwood in your aquarium can have an impact on your filtration system and equipment. The organic compounds released by the driftwood can clog filters or affect the efficiency of certain filtration media. Regularly inspect and clean your filters to prevent any blockages or malfunctions. Additionally, be mindful of placing driftwood near intake or outflow areas to avoid interference with the functioning of your equipment.

Potential Damage to Aquariums and Tank Mates

Improperly anchored or large pieces of driftwood can cause damage to your aquarium or injure your tank mates. Monitor the stability of the driftwood and ensure it does not create a hazard for your fish. Large, heavy pieces may require additional support or placement strategies to prevent any accidents. Regularly inspect your tank to identify any potential risks and take necessary precautions.

Conclusion

Choosing the right driftwood for your aquarium and properly preparing it are crucial steps in creating a beautiful and functional aquascape. Consider the size of your aquarium, select the ideal driftwood type, and ensure it is safe for aquarium use. Thoroughly clean and prepare the driftwood to remove any impurities and unwanted debris. Position the driftwood strategically in your tank, considering the needs of your aquarium inhabitants and creating a natural-looking environment.

Anchor the driftwood securely using fishing line, suction cups, or natural tank decorations. Regularly maintain and clean the driftwood to prevent algae growth and deterioration. Combine driftwood with live aquatic plants, rocks, or artificial ornaments to enhance the overall aesthetics of your aquarium.

Avoid common mistakes such as choosing the incorrect driftwood type or size, neglecting proper preparation, and placing driftwood in unsuitable locations. Be aware of the potential benefits of using driftwood, such as creating a natural environment, providing hiding places for your fish, releasing tannins for water conditioning, and promoting natural behaviors.

Consider the potential risks and considerations associated with driftwood, such as its impact on water chemistry, the introduction of unwanted pests or diseases, effects on filtration and equipment, and potential damage to aquariums and tank mates. By taking these factors into account and properly caring for your driftwood, you can enjoy a stunning and harmonious aquarium that both you and your fish will love.

Filed Under: Driftwood Tagged With: aquarium, Driftwood, How To

Primary Sidebar

Driftwood4us.com, is a participant in the Amazon Services LLC Associates Program, an affiliate advertising program designed to provide a means for sites to earn advertising fees by advertising and linking to amazon.com.