• Skip to main content
  • Skip to primary sidebar
  • Terms and Conditions
  • Privacy Policy
  • Contact

Driftwood 4 Us

Just About Driftwood

Wall Art

Driftwood On Wall

August 23, 2024 by admin

Have you ever considered the beauty of incorporating natural elements into your home decor? Driftwood, often found weathered and worn along the shores of beaches, can bring an organic and rustic charm to your interior spaces. Imagine this unique piece of nature hanging on your wall, telling its own story of the sea and sand, adding warmth and character to your living environment.

What is Driftwood?

Driftwood refers to pieces of wood that have been washed onto the shore of a sea, river, or lake by the action of winds, tides, or waves. These pieces are typically weathered and sculpted by saltwater and the elements, giving each one its own unique texture and shape.

The Journey of Driftwood

Driftwood undergoes a fascinating journey before it reaches your wall. Starting as part of a tree or log, it gets carried away by the water. Over time, it may travel many miles, enduring the wear and tear of its marine environment. This natural process not only strips the wood of its bark, leaving behind a smoother surface, but also gives it a silvery-grey appearance that is prized for aesthetic purposes.

Types of Wood Commonly Found as Driftwood

Different types of wood can become driftwood, and each type brings its own characteristics. Here are some common types:

Type of WoodCharacteristics
CedarLightweight, aromatic, resistant to decay
OakStrong, heavy, durable
PineCommon, lightweight, can have interesting knots
EucalyptusStrong, resistant to rot, often found in coastal areas

Understanding the types of wood can help you choose the best piece for your decor needs.

Why Use Driftwood in Home Decor?

Driftwood is more than just a piece of wood; it is art created by nature. Using driftwood for home decor offers numerous benefits that go beyond its aesthetic appeal.

Sustainable and Eco-Friendly

In an era where sustainability is key, using driftwood is an eco-friendly choice. It repurposes natural resources that would otherwise go to waste, thus reducing your carbon footprint.

Unique and Personalized

Each piece of driftwood is unique, making it a one-of-a-kind addition to your home. Its individual shape, texture, and color will never be replicated, offering a piece of art that’s distinctly yours.

Therapeutic and Calming

Natural elements like driftwood can bring a sense of calm and relaxation into your living space. Its organic qualities can have a grounding effect, making your home feel more peaceful and connected to nature.

Driftwood On Wall

How to Choose the Perfect Driftwood Piece

Selecting the right piece of driftwood can be both exciting and overwhelming. Here are some tips to guide you.

Size and Space Consideration

Firstly, consider the space where you plan to hang your driftwood. Measure the area to ensure that your chosen piece will fit well without overpowering the room or looking too insignificant.

Shape and Texture

Driftwood comes in many forms—smooth, rugged, straight, or twisted. Think about what shape and texture will complement your decor style. For instance, a twisted piece might add a dynamic element to a modern room, while a smooth, straight piece could bring elegance to a traditional setting.

Color and Finish

Driftwood ranges from pale ivory to dark grey shades. Choosing a color that matches or contrasts effectively with your interior can enhance the overall look. You might also consider whether you want to leave the wood in its natural state or finish it with oil or varnish to enhance its look and durability.

Preparing Driftwood for Display

Before you hang your driftwood on the wall, some preparation is necessary to ensure it looks its best and lasts longer.

Cleaning and Sanitation

Driftwood can harbor salt, sand, and microorganisms. Cleaning it properly is essential for hygiene and longevity.

  1. Rinse: Thoroughly rinse the driftwood with fresh water to remove surface dirt and salt.
  2. Soak: Soak the wood in a bleach solution (approx. 1 part bleach to 9 parts water) for a few hours to sanitize it.
  3. Dry: Let the driftwood dry completely, which may take several days. This step is crucial to prevent mold and decay.

Sanding and Smoothing

Depending on the look you desire, you may want to sand the driftwood to smooth out rough edges. Use fine-grit sandpaper to retain some of the natural texture while removing splinters and sharp points.

Sealing and Finishing

Applying a sealant or finish can protect the wood and enhance its natural colors. Options include:

  • Linseed Oil: Penetrates deeply, enhancing the wood grain.
  • Polyurethane: Provides a hard, protective surface.
  • Beeswax: Offers a natural look while providing moisture resistance.

Driftwood On Wall

Decorating Ideas with Driftwood

Driftwood’s natural beauty makes it a versatile decor element. Here are some creative ways to incorporate it into your home.

Driftwood Wall Art

A single piece of driftwood can become a striking piece of wall art. You can hang it horizontally, vertically, or at an angle, depending on your wall space and aesthetic preference. Such an installation can serve as a focal point in your living room or hallway.

Driftwood Shelves

For a blend of function and form, consider using driftwood as shelves. Secure sturdy pieces horizontally on your wall to display books, plants, or other decorative items. This not only adds a rustic touch but also utilizes the strength of the wood effectively.

Driftwood Sculptures

If you’re artistically inclined, you might create a sculpture using multiple pieces of driftwood. Assemble and secure the pieces into a unique form that can stand freely or mount on your wall. This can add a dynamic and artistic element to your space.

Driftwood Frames and Mirrors

Driftwood can be used to frame mirrors or pictures, adding a natural and coastal touch. Arrange smaller pieces around a mirror or picture frame, securing them with glue or nails. The result is a customized and organic-looking frame that stands out.

Maintenance and Care for Driftwood Decor

Keeping your driftwood decor in good shape requires some maintenance but is generally low-effort.

Dusting

Regularly dust your driftwood with a soft, dry cloth to prevent the buildup of dust and dirt. Avoid using water or liquid cleaners as they can damage the finish and promote mold growth.

Re-Sealing

Periodically, you may need to reapply sealant or oil to maintain the wood’s appearance and protect it from moisture. Follow the manufacturer’s instructions for the best results.

Inspect for Pests

Although cleaning and sanitizing steps help, it’s wise to occasionally check for signs of pests. If you notice any, treat the wood with appropriate pest control methods.

Benefits of DIY Driftwood Projects

Creating your own driftwood decor can be a rewarding experience that offers several benefits.

Personal Connection

Crafting your driftwood project creates a personal connection to the piece, making it more meaningful and valuable in your home.

Creative Expression

Working with driftwood allows you to express your creativity. The process can be a fun and satisfying way to play with natural materials and design something unique.

Cost-Effective

Driftwood is often free or inexpensive, making it a budget-friendly option for home decor. Finding and crafting your pieces can also save you money compared to buying pre-made decorative items.

Therapeutic Activity

Engaging in a DIY project can be therapeutic and stress-relieving. It gives you a chance to unwind and focus on something productive and creative.

Where to Find Driftwood

Finding the perfect piece of driftwood can be an adventure in itself. Here are some places to consider.

Local Beaches and Rivers

Walking along the shorelines of local beaches, rivers, or lakes can be a great way to find driftwood. Make sure to check any local regulations regarding the collection of natural resources.

Online Marketplaces

If you can’t visit a beach or prefer the convenience, online marketplaces such as Etsy or eBay often have driftwood pieces for sale. This allows you to choose from a wide range of options without leaving your home.

Craft Stores

Some craft stores sell driftwood, especially those that specialize in natural and rustic decor materials. These can be a convenient source, though they might be more expensive than finding your own.

Legal and Ethical Considerations

When collecting driftwood, it’s essential to be aware of legal and ethical considerations to ensure your actions do not harm the environment.

Local Regulations

Some areas have regulations that prohibit or limit the collection of natural materials like driftwood. Always check local laws and guidelines before collecting.

Environmental Impact

Taking driftwood from beaches can sometimes disrupt local ecosystems. Ensure your collecting habits are sustainable and do not harm wildlife or the integrity of the natural environment. Consider limiting the amount you take and avoid collecting from protected areas.

Conclusion

Incorporating driftwood into your home decor fosters a connection with nature and promotes a sustainable lifestyle. Its unique and organic qualities can enhance your living space, offering both aesthetic appeal and a sense of tranquility. By selecting, preparing, and maintaining your driftwood pieces with care, you can create enduring and beautiful decor that tells a story of the sea and exemplifies the artistry of nature. So, whether you’re a seasoned DIY enthusiast or just starting out, driftwood offers endless possibilities to explore your creative side and enrich your home.

Filed Under: Driftwood Ideas Tagged With: Driftwood, Home Design, Wall Art

Driftwood Hanger

July 29, 2024 by admin

Welcome to the enchanting world of the Driftwood Hanger! Imagine welcoming the rustic charm of nature right into your home with this one-of-a-kind piece. Crafted from handpicked pieces of driftwood, each hanger is unique and tells its own story of the waters it once traveled. Whether you hang your favorite jacket on it or display it as a standalone piece, the Driftwood Hanger adds a touch of natural elegance to any space. Embrace a bit of the outdoors and let your room radiate with the unique beauty only nature can provide. Have you ever stood at the shoreline, marveling at the beauty of nature, and stumbled upon a piece of driftwood that seemed to call out to you? If so, you’re not alone. There’s something uniquely alluring about driftwood—its smooth texture, interesting shapes, and the stories it seems to tell.

Driftwood Hanger

What is a Driftwood Hanger?

A driftwood hanger is more than just a functional item; it’s a piece of artwork that embodies the spirit of nature. By combining the rustic elegance of driftwood with the practicality of a hanger, you create an item that can hold anything from keys and hats to towels and scarves. Each driftwood hanger is unique, thanks to the natural variations in the wood, making it a personalized touch to your home decor.

The Appeal of Driftwood Hangers

What sets a driftwood hanger apart from your typical store-bought hanger? It’s all in the details. Driftwood has a weathered beauty that tells a story of its journey across rivers, lakes, or oceans. When you bring a driftwood hanger into your home, you’re also bringing in a piece of nature’s artwork. It’s a way to add a rustic, coastal vibe to your living space, making it cozy and one-of-a-kind.

Sustainability

In a time when environmental consciousness is more important than ever, using driftwood for your projects is a way to recycle and repurpose natural materials. Since driftwood is often found on beaches where it has washed ashore naturally, picking it up is generally an eco-friendly choice. You’re giving new life to something that might otherwise just wash back out to sea.

How to Find Driftwood

Finding quality driftwood is the first step in creating your hanger. Here are a few tips to help you safely and respectfully source good driftwood.

Ideal Locations

Beaches, riverbeds, and lakeshores are the best places to find driftwood. Ideally, you want to find pieces that have been naturally smoothed by water and sand.

Location TypeProsCons
BeachAbundance of driftwoodSalt may affect the wood’s durability
RiverbedGenerally fresher woodMay be harder to find large pieces
LakeshoreOften contains softer, easier-to-work woodLesser quantity compared to seasides

Legal and Ethical Considerations

Before you haul away a trunkful of driftwood, it’s essential to check local regulations. Some areas prohibit the collection of driftwood, especially on protected lands. Always respect nature and other beachgoers by not taking more than you need and leaving no trace of your activities.

Tips for Selecting Driftwood

When selecting driftwood, look for pieces that are robust and free from mold or heavy rot. It’s also helpful to have an idea of the kind of hanger you want to create. If you’re planning a coat hanger, you’ll need thicker, longer pieces. For a key holder, smaller, more intricate pieces would suffice.

Preparing Driftwood for DIY Projects

Once you’ve gathered your driftwood, the next step is preparation. Proper preparation ensures that your hanger is both beautiful and durable.

Cleaning the Driftwood

The first step is to clean the driftwood to remove any salt, sand, or algae. Use a brush and some mild soap to scrub away impurities. After this, soak the driftwood in a bleach solution (about 1 part bleach to 9 parts water) for 24 hours to kill any remaining bacteria or insects.

Drying the Wood

After cleaning, it’s crucial to thoroughly dry the driftwood. Lay the pieces out in a dry, well-ventilated area. Depending on the size and humidity, drying can take anywhere from a few days to a couple of weeks. Proper drying helps prevent mold and ensures the wood is easy to work with.

Sealing the Wood

Although this step is optional, sealing your driftwood will add an extra layer of protection. Use a clear wood sealer to keep the driftwood looking fresh and prevent it from absorbing moisture. Multiple coats might be necessary for a thorough seal.

Crafting Your Driftwood Hanger

Now for the fun part: putting it all together. Creating a driftwood hanger is a rewarding project that blends creativity with functionality.

Materials and Tools You’ll Need

Beyond the driftwood, you’ll need a few basic supplies:

  • Hooks or pegs (metal or wooden)
  • Screws or nails
  • Drill and bits
  • Screwdriver
  • Sandpaper
  • Measuring tape
  • Optional: Paint or stains for extra design elements

Step-by-Step Instructions

  1. Plan Your Design: Sketch out a design for your hanger. Decide where the hooks will go and how you want the final product to look.

  2. Measure and Mark: Use a measuring tape to ensure even spacing for the hooks. Mark their positions with a pencil.

  3. Sand the Driftwood: Lightly sand the driftwood to smooth any rough edges or splinters.

  4. Drill Holes: Using a drill, create holes where you marked earlier. Make sure the drill bit size matches the screw size.

  5. Attach the Hooks: Screw the hooks into the drilled holes securely.

  6. Optional Finishing Touches: If you’re inclined, add paint or stain to personalize your hanger further. Some people enjoy a splash of color or an added layer of weatherproofing.

  7. Mounting the Hanger: Decide where you want to hang it and use suitable hardware to mount your creation.

Driftwood Hanger

Unique Ideas for Driftwood Hangers

Why stop at a basic coat hanger? There are so many paths you can take with a driftwood hanger. Here are some unique ideas to inspire you:

Towel Racks

Transform your bathroom into a coastal getaway by creating a driftwood towel rack. Use larger pieces of driftwood and install multiple hooks to hang towels and bathrobes.

Jewelry Displays

For a functional yet beautiful jewelry display, use smaller, intricate pieces of driftwood. Glue or nail tiny hooks to it, and you’ve got a natural, gorgeous way to showcase necklaces and bracelets.

Key Holders

By using smaller pieces of driftwood, you can create a custom key holder for your entryway. This adds a rustic charm and ensures that you always have a place for your keys.

Kitchen Utensil Hangers

Why not bring a touch of nature into your kitchen? Use a broader, sturdier piece of driftwood to hang utensils, aprons, or even small pots and pans.

Caring for Your Driftwood Hanger

To keep your driftwood hanger looking its best, a bit of maintenance goes a long way. Here are some tips for caring for your creation:

Regular Dusting

Dust can accumulate on the driftwood over time, especially if it’s used for holding items like coats or keys. Use a dry cloth or duster to keep it clean. Try to avoid wetting the wood frequently, as it could affect its longevity.

Avoid Excess Moisture

Although driftwood comes from water, it’s best to keep your driftwood hanger in a relatively dry area. Too much humidity can lead to mold or deterioration. If you’ve sealed your driftwood, it will be more resilient, but it’s still wise to minimize moisture exposure.

Driftwood Hanger Troubleshooting

Every DIY project comes with its own set of challenges. Here are some common problems you might encounter and their solutions:

Wood Splitting

If the driftwood starts to split when you drive a screw into it, try pre-drilling a smaller guide hole to ease the way. Using screws that are too large and without proper precaution can often lead to splitting.

Hooks Coming Loose

If your hooks aren’t staying securely in place, consider using wall anchors or alternative mounting hardware. Make sure the screws are long enough to get a good grip on the wood.

A Personalized Gift Idea

Driftwood hangers make unique and thoughtful gifts. Because each piece of driftwood is unique, no two hangers will ever be the same. Customize a hanger for a friend or family member by adding their name or special dates. Whether for a birthday, housewarming, or holiday gift, a handmade driftwood hanger shows thoughtfulness and creativity.

Frequently Asked Questions

Below are some common questions that might come up as you consider making or buying a driftwood hanger.

Is it safe to use driftwood from any source?

While driftwood from beaches, lakeshores, or riverbeds is generally safe to use, it’s essential to clean and treat it properly to remove any harmful organisms or chemicals.

Do I need special tools to make a driftwood hanger?

Basic hand tools like a drill, screwdriver, and sandpaper are usually sufficient for crafting a driftwood hanger. If you want to get more intricate, you might need additional tools, but they’re not necessary for a beginner project.

How do I maintain the color of the driftwood?

The natural color of driftwood might change over time. If you want to maintain its original hue, consider applying a clear wood finish or sealant. Adding some UV protection can also help preserve the color.

Can driftwood hangers be used outdoors?

While driftwood hangers can indeed be used outdoors, it’s essential to treat the wood properly to protect it from the elements. Using a weatherproof sealant will help prolong its life. However, even with sealing, exposure to extreme conditions can degrade the wood over time.

Conclusion

Creating a driftwood hanger is not just about making something to hang your belongings on—it’s about bringing a piece of nature into your home and adding a personalized touch to your decor. From finding and preparing the perfect piece of driftwood to crafting and caring for your hanger, each step is a fulfilling experience that results in a beautiful, functional piece of art.

Next time you’re strolling along the beach or walking by a river, keep an eye out for that special piece of driftwood that might just become your next favorite decor item. Enjoy the process, and don’t be afraid to get creative!

Filed Under: Driftwood Ideas Tagged With: Driftwood, Handmade, Rustic Decor, Wall Art

Driftwood Decor Wall

July 20, 2024 by admin

If you’re looking to bring the serenity of the seaside into your home, a Driftwood Decor Wall might just be your ticket to creating a calming and unique living space. By incorporating pieces of naturally weathered wood, you’ll add an earthy, rustic charm that effortlessly ties together the beauty of nature and the comfort of coastal living. Whether it’s in your living room, bedroom, or even a cozy reading nook, a Driftwood Decor Wall can serve as a stunning focal point, sparking conversations and exuding a sense of tranquility. So, get ready to transform your walls into storytelling canvases with the timeless elegance of driftwood. Have you ever walked along the beach and marveled at the way the sand, sea, and sky blend into a picture-perfect view? What if I told you that you could bring a piece of that natural beauty into your home with a driftwood decor wall?

Driftwood Decor Wall

Driftwood Decor Wall: Bringing Nature Inside

Creating a driftwood decor wall allows you to capture the essence of the beach and incorporate it into your home. Whether you’re a fan of beach chic, rustic charm, or modern minimalism, driftwood can bring a touch of natural elegance to any interior. Let’s explore how you can craft your own driftwood decor wall and enjoy the beauty of nature every day.

What is Driftwood?

Driftwood refers to wood that has been washed onto the shore by rivers, lakes, or the ocean. Over time, exposed to the elements, the wood becomes weathered, creating unique textures and colors that make each piece one-of-a-kind.

Why Choose Driftwood for Decor?

Choosing driftwood for your decor isn’t just about aesthetics. Here are some compelling reasons why driftwood can be a fantastic addition to your home:

  • Eco-Friendly: Using driftwood helps to recycle and repurpose natural materials that would otherwise go to waste.
  • Unique Appearance: Each piece of driftwood has its own unique texture, color, and shape, ensuring your wall is a true original.
  • Versatility: Driftwood can complement a range of interior styles from modern to rustic to coastal.
  • Easy to Work With: Driftwood is relatively lightweight and easy to cut, making it suitable for DIY projects.

Getting Started: Planning Your Driftwood Decor Wall

Inspiration and Design

Before you dive in, start by gathering some inspiration. Use Pinterest, home decor magazines, or even visit a local beach to collect ideas. Think about the vibe you want to create—do you prefer a full wall covered in driftwood slats, or maybe a more subtle design with driftwood accents?

Materials You’ll Need

To create a driftwood decor wall, you’ll need the following:

MaterialPurpose/Reason
DriftwoodMain material for the wall
Wood GlueTo adhere driftwood pieces to the wall
Nails and HammerFor additional support and security
SawTo cut driftwood to the desired size
SandpaperTo smooth out rough edges
Measuring TapeTo ensure accurate measurements
LevelTo keep the driftwood pieces straight
Paint/Stain (Optional)To customize the look of your driftwood
Safety GearGloves and goggles to protect yourself

Selecting the Right Driftwood

Collecting driftwood can be an adventure in itself! When choosing pieces, look for variety in shape and texture but ensure they are sturdy enough to work with. If collecting from the wild, check local regulations to ensure it’s allowed and safe. You can also purchase driftwood from craft stores if needed.

Preparing Driftwood for Use

Cleaning the Driftwood

Driftwood often comes with salt, sand, and algae. Clean it by soaking it in a mixture of water and bleach (approximately a 1:9 ratio of bleach to water) to sanitize it. Let it soak for a day, then scrub and rinse with clean water. Allow it to dry completely for a week or so.

Cutting and Sanding

Once the driftwood is clean and dry, you can start preparing it for installation. Measure and cut the pieces to the sizes needed for your design using a saw. Sand any rough edges to avoid splinters and ensure a smooth finish.

Optional: Staining or Painting

If you want to customize the color of your driftwood, you can stain or paint it. Many prefer the natural look, but adding a stain can highlight the wood’s grain or help it match other decor elements.

Installing Your Driftwood Decor Wall

Prepping the Wall

Before attaching the driftwood, prepare your wall. Ensure it is clean and dry. If you’re covering a whole wall, you might want to paint the wall a neutral color that complements the driftwood.

Laying Out the Design

Lay out your pieces on the floor before starting installation to get a sense of the final look. This will help you visualize the placement and make adjustments easily.

Attaching the Driftwood

  1. Starting Point: Begin at the bottom and work your way up. This helps to better manage any irregularities in the driftwood.
  2. Adhesion: Apply wood glue to the back of each piece and press it against the wall. Use a level to ensure each piece is straight.
  3. Additional Support: Use nails or screws for additional support. Position nails at both ends of each driftwood piece for stability.
  4. Final Touches: Once all pieces are in place, do a final check to ensure everything is secure.

Creative Driftwood Decor Ideas

Frames and Mirrors

Incorporate driftwood into frames for pictures or mirrors. Simply glue pieces of driftwood around the edges to create a rustic, beach-inspired look.

Shelves and Mantelpieces

Create simple and functional shelves with larger pieces of driftwood. They can serve as unique mantelpieces or standalone shelves in any room.

Wall Art

Craft wall art by arranging smaller pieces of driftwood into shapes or patterns. You can use additional materials like shells or pebbles to enhance the design.

Driftwood Signage

Turn driftwood into creative signage. Use paint or wood-burning tools to write inspirational quotes, family names, or directional signs.

Maintaining Your Driftwood Decor Wall

Regular Cleaning

Driftwood is relatively easy to maintain. Dust the wall regularly with a dry cloth to keep it looking fresh. Avoid using harsh chemicals as they can damage the wood.

Addressing Wear and Tear

Over time, some pieces may loosen. Check periodically and reapply wood glue or nails as needed to maintain the integrity of the wall.

Conclusion: Embrace the Beauty of Driftwood

Creating a driftwood decor wall is an enriching project that brings a sense of tranquility and natural beauty into your home. From collecting the driftwood to designing and installing your masterpiece, each step is a chance to connect with nature and express your creativity. So, why not take the plunge? Bring the coast to your living room and enjoy the timeless elegance of a driftwood decor wall.

Filed Under: Driftwood Ideas Tagged With: Coastal Decor, DIY, Driftwood, Handmade, Wall Art

Driftwood Sailboat Wall Art

June 27, 2024 by admin

Imagine transforming your living space with a touch of coastal charm, breathing life into your home with a piece of nature. Driftwood Sailboat Wall Art brings the serene beauty of the ocean right to your walls, capturing the essence of a seaside escape. Each piece is meticulously crafted, featuring rustic driftwood collected from the shore, artistically assembled into a captivating sailboat design. This unique art effortlessly blends with your décor, adding a whimsical yet sophisticated flair that will have guests admiring your impeccable taste. Indulge in the tranquil vibes and let your walls tell a story of the sea. Ever look at a blank wall and wonder how you could transform it into a stunning focal point? Perhaps you’ve considered painting it a different color or hanging some photographs, but have you ever thought about driftwood sailboat wall art? In this guide, you’ll discover the charm and uniqueness of driftwood sailboat wall art, from why it’s a great choice to how you can make your own. Let’s set sail on this creative journey!

Driftwood Sailboat Wall Art

Why Driftwood Sailboat Wall Art?

Natural Aesthetics

One of the biggest draws of driftwood sailboat wall art is its natural beauty. Driftwood, by its very nature, carries a rustic charm that other materials just can’t replicate. Its weathered texture and unique patterns make each piece one-of-a-kind, adding an organic element to your decor.

Eco-Friendly

If you aim to make eco-friendly choices in your home decor, driftwood is a fantastic option. Since driftwood is naturally sourced, it doesn’t contribute to deforestation. Additionally, repurposing driftwood can help in cleaning up shorelines, making it a win-win situation.

Versatility

Driftwood sailboat wall art can fit into a range of interior styles, from coastal themes to minimalist designs. The neutral tones of the wood pair well with almost any color scheme, making it easy to incorporate into your existing home decor.

Choosing the Perfect Driftwood

Types of Driftwood

There are several types of driftwood you can use for your sailboat wall art. Here are some common types:

TypeDescription
SaltwaterTypically smoother due to constant motion in the ocean.
FreshwaterOften has more texture because it doesn’t undergo as much wear from tides.
RiverGenerally lighter in color and may have unique knots and bends.

Size and Shape

When choosing driftwood, size and shape matter a lot. Larger pieces can serve as the hull of your sailboat, while smaller, thinner pieces are perfect for the sails and masts. Ensure that the pieces you pick have interesting textures and are long enough to bring your vision to life.

Preparing the Wood

Once you’ve selected your driftwood, it’s essential to prepare it before crafting. Here’s how you can do it:

  1. Clean the Wood: Use a brush and soapy water to scrub off any dirt or algae.
  2. Dry it Out: Allow the wood to dry completely in the sun.
  3. Sand Rough Edges: Use sandpaper to smooth out any splinters or rough spots.
  4. Seal the Wood: Optionally, you can apply a wood sealant to preserve its texture and color.

Designing Your Driftwood Sailboat Wall Art

Basic Components

To create a driftwood sailboat, you need to gather the following materials:

  • Driftwood (various sizes)
  • Twine or thin rope
  • Glue (wood glue or hot glue works best)
  • Paint (optional)
  • Hooks or mounting hardware

Planning Your Design

It’s always a good idea to sketch your design beforehand. Here’s a simple layout for a sailboat:

  1. Hull: A large, sturdy piece of driftwood.
  2. Mast: A longer, thinner piece.
  3. Sails: Smaller, flat pieces arranged like sails.
  4. Rigging: Twine or thin rope to mimic the boat’s rigging.

Assembling the Sailboat

Once you have your design, follow these easy steps to assemble your driftwood sailboat:

  1. Create the Hull: Place the largest piece of driftwood at the base.
  2. Attach the Mast: Secure a longer piece vertically using glue. Allow it to dry thoroughly.
  3. Add the Sails: Arrange smaller pieces to resemble sails and glue them onto the mast and hull.
  4. Add Rigging: Use twine or thin rope to create the appearance of rigging lines.

Customizing with Paint

If you want to add a splash of color to your driftwood sailboat, consider painting some sections. Soft whites, blues, or even bright colors can make your piece pop while still maintaining its rustic charm.

Hanging Your Sailboat Wall Art

Choosing the Placement

Deciding where to hang your driftwood sailboat wall art is almost as crucial as the art itself. Here are some prime spots:

  • Above the fireplace
  • In the hallway or entryway
  • In the living room behind the sofa
  • In a nautical-themed bathroom

Mounting Tips

To securely mount your driftwood sailboat:

  1. Use Proper Hooks: Heavy-duty hooks or wall anchors ensure that your masterpiece stays put.
  2. Balanced Weight: Make sure the weight of your driftwood is evenly distributed to avoid it tipping to one side.
  3. Secure with Twine: If your piece is large and heavy, consider using twine to attach extra mounting points to evenly distribute the weight.

Driftwood Sailboat Wall Art

Maintenance and Care

Dusting

Driftwood can collect dust over time, just like any other decorative piece. Use a soft brush or a dust cloth to keep your artwork looking pristine.

Avoiding Moisture

Since driftwood is naturally porous, it can absorb moisture, which could potentially damage it. Try to avoid hanging your artwork in overly humid locations. If you’ve used a sealant, this will also help protect against moisture.

Seasonal Updates

Feel free to refresh your driftwood sailboat with the seasons. Add some winter-themed decor during the holidays or summer accents when the weather warms up. This way, your wall art stays dynamic and engaging all year round.

Inspiring Ideas and Variations

Adding Personal Touches

Personalizing your driftwood sailboat can make it even more special. Consider adding:

  • Family Photos: Attach small photos to the sails or hull for a personal touch.
  • Names or Dates: Paint names or special dates onto the driftwood.
  • Decorative Elements: Add seashells, anchors, or other nautical elements to complement your sailboat.

Advanced Designs

If you want to challenge yourself, try more intricate designs. Here are some ideas:

IdeaDescription
Multi-SailboatsCreate a series of smaller sailboats instead of one large piece.
Background ScenePaint a backdrop of the ocean and sky on your wall and mount the sailboat in front of it.
Lighted SailboatIncorporate small LED lights to make your sailboat glow.

FAQs About Driftwood Sailboat Wall Art

Can I Use Any Driftwood?

Essentially, yes, as long as it’s dry and clean. Different types of driftwood will give you different textures and looks, so feel free to experiment.

What Tools Do I Need?

Basic tools like sandpaper, a hot glue gun, and scissors for cutting twine should suffice for most projects.

Is Driftwood Sailboat Wall Art Heavy?

This can vary, but typically it’s not too heavy. Just ensure you use proper mounting hardware to secure it safely to your wall.

Can I Buy Ready-Made Driftwood Sailboat Wall Art?

Absolutely! There are plenty of artisans who sell beautiful driftwood sailboat wall art. Check out local craft stores, online marketplaces like Etsy, or even art fairs.

How Long Does it Take to Make?

This largely depends on the complexity of your design and the drying times for glue and paint. A simple project can be completed in a few hours, while more intricate designs may take a bit longer.

Conclusion

Creating driftwood sailboat wall art is not just a rewarding DIY project but a chance to bring a piece of the ocean’s magic into your home. Each creation will be as unique as the driftwood pieces you choose, making your decor truly one-of-a-kind. Whether you want a rustic, beachy feel or a modern nautical theme, driftwood sailboat wall art offers endless possibilities. Ready to make your walls come to life? Time to embark on this artistic adventure!

Filed Under: Driftwood Ideas Tagged With: craft, DIY, Driftwood, sailboat, Wall Art

Driftwood Shark Wall Art

June 27, 2024 by admin

Imagine transforming your living space with a piece of nature’s artistry, crafted from the shores of the sea itself. “Driftwood Shark Wall Art” brings a unique touch of coastal charm to your home, blending rustic driftwood pieces into a striking shark design. Each piece is meticulously handcrafted, ensuring that your wall art is one-of-a-kind, just like the ocean’s treasure it came from. Whether you’re a beach lover or simply someone who appreciates the beauty of natural materials, this stunning wall art will captivate and inspire, giving your home a refreshing seaside vibe. Have you ever walked along the beach and picked up a piece of driftwood, wondering what kind of story it could tell or how you could repurpose it? Driftwood has a natural beauty and history that makes it perfect for creating unique and stunning art pieces. Among the myriad creations possible, one of the most enchanting and popular is Driftwood Shark Wall Art. If you love marine life or rustic, natural decor, this kind of wall art might be just what your home needs.

In this friendly guide, we’ll explore the world of Driftwood Shark Wall Art. You’ll learn about the origins and appeal of driftwood, the steps to create your own driftwood shark masterpiece, and how to incorporate it into your home decor. Get ready to be inspired and maybe even pick up a new hobby!

Driftwood Shark Wall Art

What is Driftwood Shark Wall Art?

Driftwood Shark Wall Art is a specialized form of coastal-themed decor that uses pieces of driftwood to create the shape and form of a shark. It’s a blend of natural elements and artistic expression that results in a truly unique wall decoration. Driftwood itself is a fragment of wood that has been weathered by water and time, giving it character and a story all its own.

Why Driftwood?

The Uniqueness of Driftwood

Each piece of driftwood is distinct. Its shape, size, and texture are influenced by the journey it has taken—from tree, to sea, to shore. This uniqueness adds an extra layer of special to your art piece, making each shark sculpture one of a kind.

Environmental Impact

Using driftwood for art is eco-friendly. Instead of gathering new wood and cutting down trees, you’re giving a new life to a piece that’s been naturally weathered and discarded by the sea. It’s a great way to practice sustainability in your decor.

How to Make Your Own Driftwood Shark Wall Art

Creating your own driftwood shark wall art can be a fun and fulfilling project. Here’s a step-by-step guide to help you through the process.

Materials You’ll Need

MaterialPurpose
Driftwood piecesMain material for the shark
Paint (optional)Adding details and color
Saw and ClippersCutting the driftwood
SandpaperSmoothing rough edges
Glue (wood adhesive)Binding the pieces together
Hooks or WireFor hanging the finished piece
Template or SketchGuiding the shape of the shark

Steps to Create Your Driftwood Shark Wall Art

Step 1: Gather Your Driftwood

Collect pieces of driftwood from the beach. You can also buy driftwood from craft stores or online retailers if you’re not near a coastline. Make sure the pieces vary in size and shape to give your shark depth and character.

Step 2: Clean and Prepare the Driftwood

Clean the driftwood thoroughly to remove any salt, sand, or debris. Soak the pieces in a mixture of water and mild bleach for about an hour. Rinse them well and let them dry completely.

Step 3: Design Your Shark

Sketch out a simple shark template on a piece of paper, or download one online. This will serve as your guide. Lay out your pieces of driftwood on the template to get a sense of how you’ll arrange them.

Step 4: Cut and Shape

Use a saw and clippers to trim the pieces of driftwood so they fit together in a way that resembles a shark. Smooth any rough edges with sandpaper.

Step 5: Assemble Your Art

Start gluing the pieces of driftwood together following your template. You may need to hold pieces in place until the glue sets or use clamps if necessary.

Step 6: Add Details

If you want to add more detail to your shark, consider painting on features like the eyes and gills. Use water-resistant paint if the piece will be displayed outdoors.

Step 7: Attach Hanging Hardware

Once the glue has dried and the shark is fully assembled, attach hooks or wire to the back for easy hanging.

Incorporating Driftwood Shark Wall Art into Your Home Decor

Now that you’ve created your masterpiece, the fun part begins—deciding where to display it! Driftwood Shark Wall Art can fit into various decor styles, whether you have a modern, rustic, or coastal theme.

Living Room

A driftwood shark can be a stunning focal point above a fireplace or couch. It adds a rustic, natural element to the room, catching the eye and sparking conversations.

Bathroom

The bathroom is another ideal spot for coastal-themed decor. A driftwood shark fits in perfectly and can be a subtle nod to the ocean.

Patio or Outdoor Space

Driftwood is naturally weather-resistant, making it a perfect addition to an outdoor space. Whether it’s your patio, garden, or balcony, your driftwood shark art will bring a piece of the beach to your home.

Office

Bring a bit of nature and whimsy to your work environment. A driftwood shark can make your office space feel more relaxed and inspiring.

Driftwood Shark Wall Art

Tips for Maintaining Driftwood Shark Wall Art

Regular Dusting

Driftwood can gather dust just like any other decor item. A soft brush or cloth can help keep it looking clean and fresh.

Avoid Moisture

While driftwood is resilient, excessive moisture can degrade the glue and any painted details. If you’ve placed your art outdoors, try to keep it under a shelter or overhang to protect it from rain.

Handle with Care

Driftwood can be delicate. Handle your art piece gently, especially when moving or hanging it to avoid breaking any thin or fragile parts.

Reapply Finish

If you’ve used a finish on your driftwood shark, like a varnish or sealant, reapply as needed to keep it looking vibrant and protected. Typically, this can be done annually or biannually, depending on exposure to elements.

Driftwood Shark Wall Art: Inspiration and Ideas

If you’re feeling stuck or uninspired, looking at examples and ideas from other creators can give you a fresh perspective. Here are some innovative ideas for your driftwood shark wall art.

Mix Different Materials

Combine driftwood with other natural elements such as shells, sea glass, or pebbles to add texture and interest to your shark.

Go Multicolored

Instead of leaving the driftwood in its natural state, consider painting different pieces in various shades of blue, green, or grey to capture the oceanic feel.

Add Background Elements

Attach your driftwood shark to a background frame, either wooden or canvas, and add additional elements like sea waves, corals, or even other marine creatures to create a complete scene.

Light It Up

Consider adding a small set of L.E.D. lights to your driftwood art to give it an exciting and modern look. Soft blue or white lights can mimic the ambiance of underwater life.

Driftwood Shark Wall Art as Gifts

Driftwood Shark Wall Art can make for exceptionally personalized and thoughtful gifts. Here’s why you should consider giving one to your loved ones.

Personal Touch

Each driftwood shark wall art piece is unique, carrying a personal touch that adds a special meaning behind the gift. It shows effort, thoughtfulness, and creativity.

Perfect for Various Occasions

Whether it’s a birthday, housewarming, or anniversary, driftwood art fits a variety of occasions and is generally appreciated by people of all ages.

Customizable

You can customize the driftwood shark wall art to suit the tastes and preferences of the recipient. Add their favorite colors, themes, or even incorporate their initials into the design.

Where to Buy Driftwood or Driftwood Shark Art

If crafting is not your thing, don’t worry! There are plenty of places where you can purchase beautiful, ready-made driftwood shark wall art. Likewise, if you need materials, there are sources available.

Online Stores

Websites like Etsy, Amazon, and specialized online decor stores offer a wide variety of driftwood shark wall art. You can also find suppliers selling raw driftwood for your DIY projects.

Local Craft Shops

Many local craft stores carry driftwood and other materials you might need. They sometimes even offer classes or workshops on making driftwood art.

Beach Souvenir Shops

If you live near the coast or are visiting, beach souvenir shops often have driftwood art pieces available for sale. This is a great way to bring a little piece of your vacation back home.

Conclusion

Driftwood Shark Wall Art is more than just a decoration; it’s a unique piece of nature art that brings the story of the sea into your home. With its sustainability, unique aesthetic, and the personal touch of handcrafted art, it’s the perfect way to add a coastal charm to any space. Whether you choose to create one yourself or buy one from an artisan, driftwood shark wall art promises to add a sense of wonder and beauty to your living space.

So, the next time you’re strolling along the beach, consider picking up a few pieces of driftwood. Who knows? They might be the start of your next creative endeavor.

Filed Under: Driftwood Ideas Tagged With: Coastal Decor, Driftwood, Handmade, Shark, Wall Art

Driftwood Succulent Wall Art

June 26, 2024 by admin

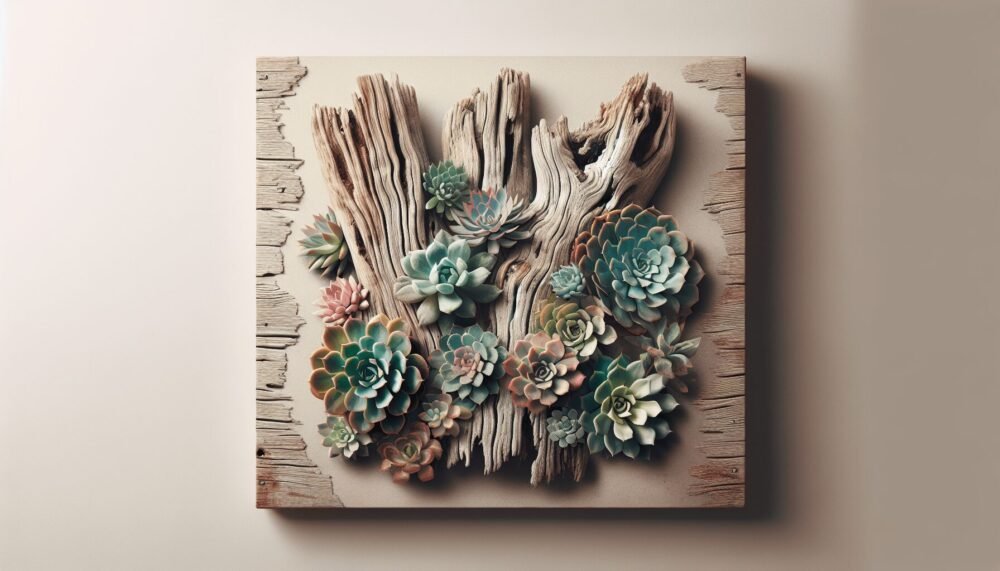
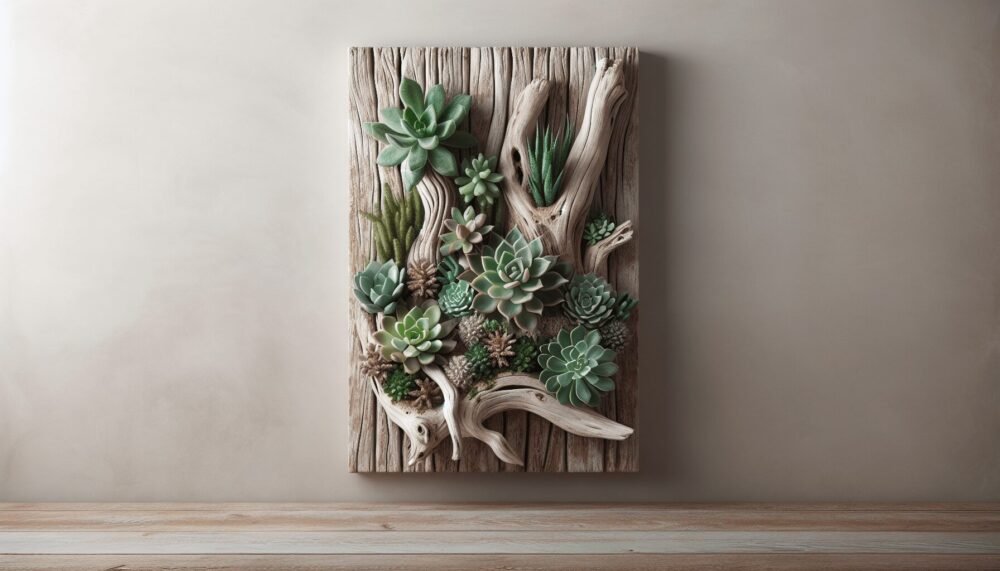
You’re about to dive into the delightful world of “Driftwood Succulent Wall Art.” This creative endeavor combines the rustic charm of driftwood with the lush vibrancy of succulents, transforming ordinary walls into living works of art. In this article, you’ll uncover simple yet stunning techniques to craft your own personalized piece, bringing a touch of natural beauty into any space. Get ready to unleash your inner artist and make something truly unique! Have you ever wondered how to bring a touch of nature and artistry into your home at the same time? Driftwood succulent wall art might be just the answer you’re looking for! Combining the raw, rugged beauty of driftwood with the lush, green allure of succulents, these fabulous pieces of art can turn any wall into a stunning, one-of-a-kind masterpiece.

Driftwood Succulent Wall Art

What is Driftwood Succulent Wall Art?

Driftwood succulent wall art is a unique and creative form of decor that incorporates pieces of driftwood and live succulents. The combination creates a living artwork that evolves over time, bringing a dynamic and natural element into your living space. Driftwood, shaped and smoothed by water, offers a perfect contrasting background to the vibrant and textured succulents, providing a harmonious blend of natural materials.

Why Choose Driftwood?

Driftwood possesses a unique aesthetic due to its smooth, weathered appearance, often with intricate shapes and textures formed by natural forces. Each piece tells a story of its journey through water, making it a perfect foundation for eco-friendly and sustainable art. Besides, driftwood is relatively easy to find and incorporate into various DIY projects, making it a popular choice among creatives and nature enthusiasts.

The Appeal of Succulents

Succulents, known for their thick, fleshy leaves that retain water, are beloved for their resilience and low maintenance. They come in various shapes, sizes, and colors, adding a visually appealing diversity to your wall art. As living plants, succulents offer numerous benefits, such as improving air quality and adding a touch of greenery that can soothe your soul.

Choosing the Perfect Driftwood

Finding the right driftwood piece is a crucial step in creating your artwork. The driftwood’s shape, size, and texture will determine the overall aesthetic of your finished piece.

Where to Find Driftwood

Driftwood can often be found along beaches, lakeshores, rivers, and estuaries. However, before collecting driftwood, it’s important to check local regulations to ensure it’s permitted. In some areas, collecting driftwood may be restricted or require a permit.

Potential sources for driftwood include:

  • Beaches: Coastal areas often have a wealth of driftwood due to ocean currents and tidal actions.
  • Rivers and Lakes: Driftwood can be found along the edges of freshwater bodies where currents have carried it ashore.
  • Online Retailers: If you’re unable to find driftwood in nature, many retailers sell unique pieces of driftwood online.

Selecting the Right Piece

When choosing driftwood, consider the following factors:

  • Size and Shape: Make sure the driftwood you select suits the space you plan to hang it in. Look for pieces with interesting shapes that can hold multiple succulents.
  • Condition: Avoid driftwood that’s heavily decayed or infested with pests. Sturdy, well-preserved pieces are ideal for wall art.
  • Texture and Color: Natural variations in the wood’s texture and color can add to the beauty of your art. Choose pieces that contrast well with the green of succulents.

Preparing Driftwood for Art

Once you’ve selected your driftwood, it’s time to prepare it for the artistic process. Proper preparation ensures the wood is clean, pest-free, and ready to support succulent life.

Cleaning the Driftwood

Cleaning driftwood removes salt, dirt, and any potential pests. Follow these steps:

  1. Rinse: Thoroughly rinse the driftwood with fresh water to remove surface debris.
  2. Soak: Soak the driftwood in distilled water for 1-2 weeks, changing the water every few days. This helps leach out any remaining salt and contaminants.
  3. Scrub: Use a soft-bristle brush to scrub the driftwood, ensuring you clean all crevices.
  4. Dry: Allow the driftwood to air dry completely in a well-ventilated area.

Treating the Driftwood

While optional, treating the driftwood can enhance durability and appearance:

  • Bleach Solution: Soaking the driftwood in a 9:1 water-to-bleach solution for a few hours can help disinfect and lighten the wood. Rinse thoroughly and let it dry.
  • Sealer or Varnish: Applying a natural sealer or varnish can protect the wood from moisture and further decay. Ensure it’s safe for plants if you choose this option.

Selecting and Preparing Succulents

The type of succulents you choose will significantly impact the overall look of your wall art. Some succulents are better adapted to vertical arrangements and tighter spaces.

Types of Succulents for Wall Art

Here are some popular succulents suited for creating driftwood wall art:

Succulent TypeCharacteristics
EcheveriaRosette-forming, colorful, and compact
SedumTrailing varieties are great for hanging art
CrassulaComes in various shapes, often small and sturdy
HaworthiaHardy and slow growing, with interesting textures
GraptopetalumBeautiful colors and forms, excellent for display

Preparing Succulents for Planting

Before planting, succulents may need some preparation:

  1. Remove Excess Soil: Gently remove any soil from the roots, being careful not to damage them.
  2. Prune Roots: Trim overly long roots to encourage new growth.
  3. Air Dry: Allow the roots to air dry for a day to prevent rot when planting.
  4. Water: Ensure the succulents are well-watered but not overly saturated.

Driftwood Succulent Wall Art

Creating Your Driftwood Succulent Wall Art

Now that you have your driftwood and succulents ready, it’s time to bring your artistic vision to life!

Tools and Materials Needed

Before you start, gather the necessary tools and materials:

  • Clean, prepared driftwood
  • Prepared succulents
  • Sphagnum moss or potting soil
  • Floral wire or glue gun (with non-toxic glue)
  • Wire cutters
  • Scissors
  • Small clamps (optional)

Arranging the Succulents

Think about the layout before planting. Consider the textures and colors of each succulent and how they complement the driftwood. Here’s how to start:

  1. Plan Arrangement: Lay out your succulents on the driftwood to visualize the arrangement.
  2. Attach Moss: Place a base layer of damp sphagnum moss in the areas where you’ll plant succulents. This helps retain moisture.
  3. Secure Succulents:
    • For small succulents, use floral wire to secure them, gently wrapping around the stem and driftwood.
    • Alternatively, use a non-toxic glue gun to attach the moss and plants to the driftwood. Ensure the glue is cool enough not to damage the plants.
  4. Create Pocket: For larger succulents, create small pockets in the moss, nestling the roots gently into them.
  5. Clamp: Use small clamps to hold the succulents in place until they adhere properly, usually for a few days.

Finishing Touches

Once all succulents are securely attached, step back and admire your work. Adjust any elements as needed. Ensure there’s a balance in texture, color, and distribution.

Maintaining Your Driftwood Succulent Wall Art

Maintenance is essential to keep your wall art thriving and beautiful.

Watering

Succulents are low maintenance but still require proper watering:

Watering MethodFrequency
SprayingLightly mist the succulents and moss weekly
DippingSubmerge the driftwood in water every 2-4 weeks

Light Requirements

Succulents thrive in bright, indirect light. Place your wall art in a location where it receives ample natural light but avoid direct sunlight to prevent scorching.

Pruning and Replacing

Regularly check for:

  • Dead or rotting leaves
  • Overgrown succulents
  • Pests or molds

Prune as necessary and replace any succulents that outgrow the artwork or show signs of decline.

Benefits of Driftwood Succulent Wall Art

Besides its aesthetic appeal, driftwood succulent wall art offers numerous benefits:

  • Improves Air Quality: Succulents can purify the air by removing toxins.
  • Promotes Relaxation: Elements of nature can reduce stress and boost your mood.
  • Eco-Friendly: Using natural materials fosters sustainability and eco-consciousness.
  • Customized Decor: Every piece is unique, reflecting personal creativity and style.

Conclusion

Creating driftwood succulent wall art is a fulfilling and creative process that combines the natural beauty of wood and plants. Not only do you end up with a piece of art that is uniquely yours, but you also bring a living, breathing corner of nature into your home. It’s a perfect blend of creativity, relaxation, and sustainable living. So, gather your materials, let your imagination run wild, and get ready to craft a striking piece of natural art that will surely be a conversation starter in any space.

Filed Under: Driftwood Ideas Tagged With: Driftwood, gardening, home decor, Succulent, Wall Art

Driftwood Wall Art Sculptures & Statues

June 26, 2024 by admin

Welcome to the world of Driftwood Wall Art Sculptures & Statues, where natural beauty and artistic creativity come together to transform your living spaces. You’ll discover how these unique pieces, crafted from driftwood collected along serene shorelines, can bring an enchanting, rustic charm to your home. With each sculpture and statue, no two pieces are alike, making your décor truly one-of-a-kind. Dive into the details and feel inspired to incorporate these stunning works of art into your surroundings, reflecting both your love for nature and sophisticated taste. Have you ever found yourself mesmerized by the intricate beauty of driftwood decorations? There’s something captivating about the natural elegance and unique forms these pieces hold. If you’re considering adding a touch of the seaside to your home decor, driftwood wall art sculptures and statues might just be the perfect fit.

Driftwood Wall Art Sculptures  Statues

What Is Driftwood?

Natural Origins

Driftwood refers to pieces of wood that have been washed ashore by the action of winds, tides, or waves. This wood comes from various sources such as trees, branches, and roots, which have spent an extended period in bodies of water like rivers, oceans, and lakes. Over time, the elements of sun, water, and salt wear away the bark and smooth out the rough edges, giving each piece its unique appearance.

Artistic Appeal

The natural beauty of driftwood lies in its weathered texture and organic shapes. No two pieces are alike, which makes driftwood an excellent medium for creating one-of-a-kind art pieces. The wood’s natural imperfections, intricate grains, and knot patterns contribute to its rustic charm.

Driftwood Wall Art

Incorporating Nature Indoors

Driftwood wall art combines nature’s raw beauty with human creativity to bring the outdoors inside your home. These art pieces can range from simple, minimalistic designs to elaborate and intricate sculptures. Whether you prefer a small, subtle piece or a large statement artwork, driftwood can cater to different tastes and styles.

Types of Driftwood Wall Art

To help you better visualize what works for your space, here is a table detailing different types of driftwood wall art:

TypeDescription
Single Piece SculpturesOne piece of driftwood shaped into an artwork, often showcasing its natural form.
Assemblage ArtMultiple pieces of driftwood arranged and joined into a cohesive design.
Functional DecorWall-mounted items with practical use, such as driftwood shelves or hooks.
Abstract ArtArtistic interpretations that may not resemble any particular object.
Themed SculpturesDriftwood crafted to resemble specific figures, like animals or trees.

Sourcing Driftwood

Sourcing driftwood for art can be an adventure in itself. You can find pieces during walks along the beach, riverbanks, or lakeshores. However, keep the following points in mind:

  • Legality: Some areas have restrictions on collecting natural materials from beaches or conservation zones.
  • Sustainability: Ensure you’re not harming the ecosystem by removing large quantities of driftwood.
  • Cleanliness: Clean and dry the wood thoroughly to remove any debris, salt, or potential pests.

Creating Driftwood Wall Art

Tools and Materials

Creating your own driftwood wall art is an excellent way to personalize your space. Here’s a list of essential tools and materials you might need:

Tool/MaterialPurpose
DriftwoodThe main element of your art piece
Sealant/PolyurethaneTo protect and preserve the wood
Heavy-duty GlueTo join pieces together securely
SawFor cutting larger pieces if necessary
SandpaperTo smooth rough edges
DrillFor making holes if hanging pieces or adding fixtures
Paint/StainOptional; for adding color or enhancing the natural grain

Step-by-Step Guide

  1. Select Your Pieces: Choose driftwood pieces that speak to you and fit the envisioned design.
  2. Plan Your Design: Arrange the pieces on the floor or a large table until you’re satisfied with the design.
  3. Prepare the Driftwood: Clean each piece thoroughly and let them dry completely. Sand any rough areas if needed.
  4. Assemble the Art: Use heavy-duty glue or screws to attach the driftwood pieces together. Ensure to let the glue cure as per instructions.
  5. Add Finishing Touches: Apply sealant to protect the wood. Optionally, enhance with stains or paint.
  6. Mounting: Install mounting hardware to hang your artwork securely on the wall.

Driftwood Sculptures & Statues

The Beauty of Driftwood Sculptures

Driftwood sculptures are three-dimensional art pieces that often serve as striking centerpieces for any room. They can be abstract forms or representational figures like animals, people, or objects. The natural twists and bends in driftwood lend themselves to dynamic and fluid sculptures that captivate the eye from every angle.

Popular Themes in Driftwood Sculptures

Here’s a rundown of common themes and motifs found in driftwood sculptures:

ThemeDescription
WildlifeBirds, fish, and other animals crafted from driftwood
Marine LifeSea creatures like dolphins, whales, and seahorses
Human FiguresRepresentations of people, often in dynamic poses or activities
Abstract FormsArtistic, non-representational sculptures that explore form and movement
FantasyImaginative creations, such as dragons or mythical beings

Displaying Sculptures

Where and how you display your driftwood sculpture can significantly impact the ambiance of a room. Place them in areas where they can be admired from multiple angles. If the sculpture is tall, putting it on the floor can work well, while smaller pieces might be better displayed on a shelf or pedestal. Ensure that the setting complements the natural aesthetic of the driftwood.

Driftwood Wall Art Sculptures  Statues

Driftwood Art in Home Decor

Complementing Interior Styles

Driftwood art fits seamlessly into various interior design styles. Here’s a look at how it can complement different decor themes:

Interior StyleHow Driftwood Fits In
CoastalThe natural oceanic origins of driftwood perfectly align with coastal decor
RusticDriftwood’s weathered texture enhances the rugged, hearty feel of rustic styles
ModernMinimalistic driftwood art adds an organic touch to modern interiors
BohemianThe unique and artistic nature of driftwood suits eclectic boho designs
ScandinavianNatural materials like driftwood are core to the simplicity of Scandinavian style

Practical Uses

Apart from being visually appealing, driftwood art pieces can also serve practical purposes. Here are some ideas:

  • Driftwood Shelves: Rustic shelves made from sturdy driftwood can add storage and display space.
  • Clothing Hooks: Driftwood pieces with natural protrusions can be used as wall-mounted hooks.
  • Table Centerpieces: A beautiful driftwood sculpture can be the focal point of a dining or coffee table.
  • Light Fixtures: Driftwood frames around mirrors or lights can create a cozy, inviting atmosphere.

Caring for Driftwood Art

Cleaning and Maintenance

Maintaining the integrity of your driftwood art is essential to ensure its longevity. Here are some tips for caring for your driftwood pieces:

  1. Regular Dusting: Use a soft brush or cloth to remove dust regularly.
  2. Avoid Moisture: Keep driftwood art away from overly humid or wet areas to prevent decay.
  3. Sealants: Periodically reapply a coat of sealant or polyurethane to protect the wood.
  4. Avoid Direct Sunlight: Prolonged exposure to direct sunlight can cause the wood to crack or fade.

Preventing Pests

Although thoroughly cleaned driftwood is typically safe, it’s wise to keep an eye out for pests:

  • Inspection: Regularly check for signs of insects or other pests.
  • Freezing: For smaller pieces, freezing the wood for several days can kill potential pests before incorporating it into art.

The Environmental Impact

Eco-Friendly Art

One of the exceptional qualities of driftwood art is its eco-friendliness. Using repurposed natural materials like driftwood minimizes the demand for new resources, making it a sustainable choice for eco-conscious consumers. Artists often also use non-toxic adhesives and finishes to ensure their work remains environmentally friendly.

Supporting Local Artists

Purchasing driftwood art from local artisans supports sustainable practices and contributes to local economies. Many artisans hand-collect driftwood responsibly, ensuring they don’t disrupt local ecosystems. By buying their creations, you’re fostering a community that values and promotes ecological art forms.

Getting Inspired

Visiting Galleries and Exhibits

If you’re interested in driftwood art but aren’t sure where to start, visiting art galleries or exhibits can offer inspiration. Many galleries feature collections dedicated to natural art forms, including driftwood. Seeing these pieces in person can be incredibly inspiring and give you a better understanding of how they might fit into your own space.

Online Resources and Communities

Online platforms such as Pinterest, Instagram, and Etsy are brimming with examples of stunning driftwood art. These platforms can provide plenty of inspiration and even connect you with artists who create custom pieces or offer workshops. Joining online forums and communities dedicated to driftwood art can also be a great way to learn new techniques and share your creations.

DIY Workshops and Classes

Participating in workshops or classes can deepen your appreciation and skills for creating driftwood art. These events, often held by local artists or community centers, provide hands-on experience and valuable instruction. Plus, they can be a fun and creative way to meet like-minded individuals.

Conclusion

Driftwood wall art sculptures and statues are more than just decor; they are timeless pieces that bring a touch of nature’s beauty into your home. Whether you’re looking to buy a unique piece or create your own, the natural elegance and unique forms of driftwood will undoubtedly add character and charm to any space. So go ahead, embrace the beauty of nature and let driftwood art transform your living spaces into serene, organic sanctuaries.

Feel free to dive into the world of driftwood, and don’t be afraid to let your creativity flow. Whether you’re curating a coastal-themed living room or adding rustic charm to your entryway, driftwood art offers endless possibilities. Happy decorating!

Filed Under: Driftwood Ideas Tagged With: Driftwood, Handmade, Rustic, Sculptures, Statues, Wall Art

Driftwood Wall Art With Plants

June 26, 2024 by admin

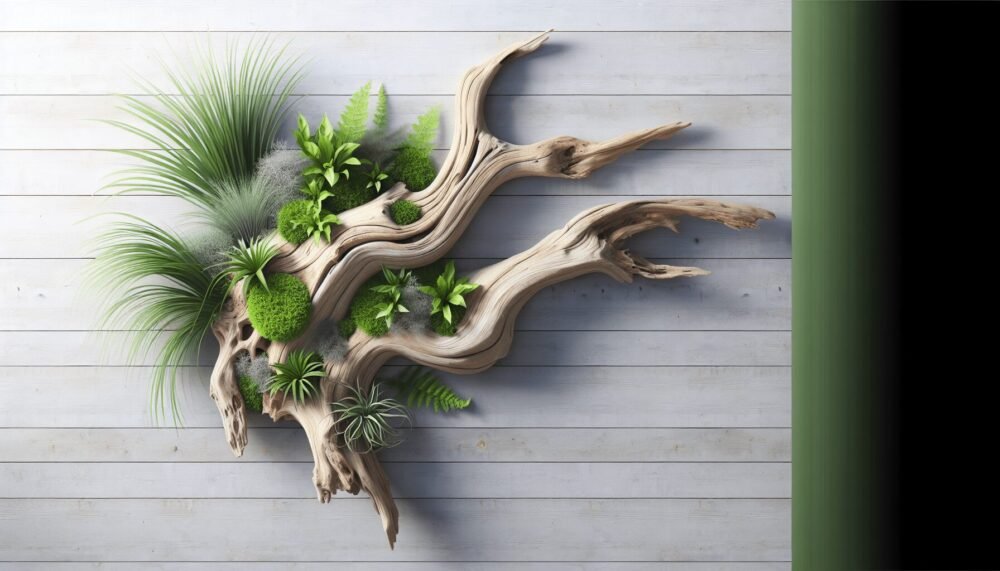
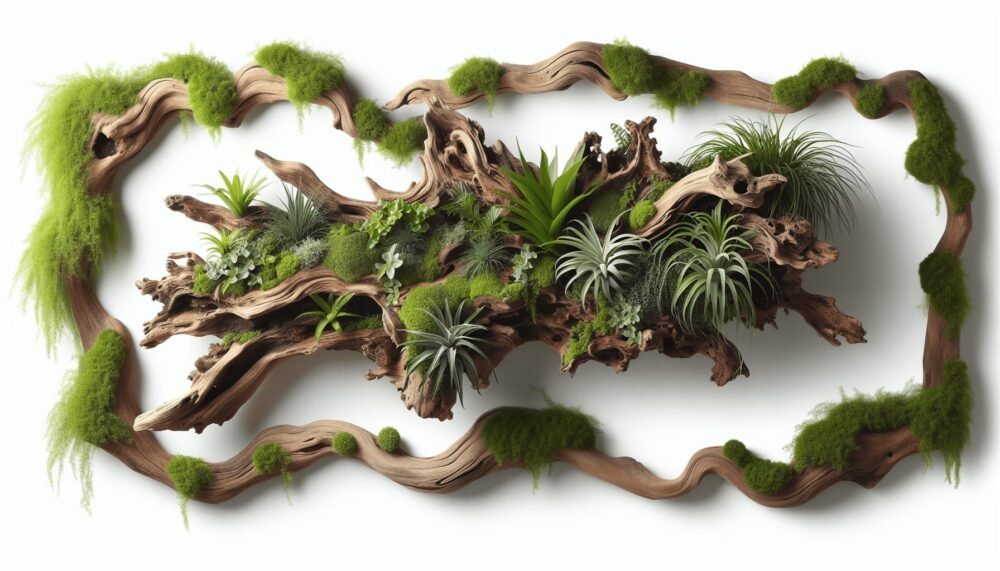
Driftwood Wall Art With Plants” invites you into a creative journey where nature meets rustic charm. Imagine adorning your walls with beautiful pieces of driftwood, each uniquely shaped and weathered by the elements. You carefully arrange succulents and air plants, adding vibrant greens that bring life and freshness to the natural wood. This delightful blend creates an organic, yet sophisticated, wall art that not only enhances your living space but also reflects your love for nature and sustainable decor. Get ready to transform any room into a serene haven with this simple and beautiful DIY project. Have you ever thought about bringing a touch of nature into your home with something unique and timeless? If so, then driftwood wall art with plants might be just what you need. Imagine combining the rustic charm of driftwood with the fresh beauty of live plants. It’s like having a piece of nature’s art right on your wall.

Driftwood Wall Art With Plants

Driftwood: Nature’s Art

What Is Driftwood?

Driftwood refers to wood that has been washed onto the shore by the action of winds, tides, or waves. Over time, this wood is smoothed and shaped by the elements, creating unique pieces with individual characteristics. No two pieces of driftwood are ever identical, making each sculpture one-of-a-kind.

Why Choose Driftwood?

Driftwood brings a rustic, organic element into any decor. It has a natural, weathered look that adds character and a sense of history to your home. Additionally, it’s an eco-friendly option; by using driftwood, you’re recycling and giving a new purpose to what might otherwise be considered waste.

Plants: A Breath of Fresh Air

Benefits of Indoor Plants

Plants offer numerous benefits when integrated into your home. They purify the air, reduce stress, and enhance the overall aesthetics of any space. Adding plants to your driftwood wall art creates a living piece that changes and grows, adding a dynamic element to your decor.

Best Plants for Driftwood Art

Not all plants will thrive on driftwood art, but many are perfectly suited for this type of display. Consider the following:

Plant TypeDescription
SucculentsLow-maintenance and drought-tolerant, great for indoor displays.
Air Plants (Tillandsia)Require no soil, easy to mount directly on driftwood.
MossesAdd a lush, green appearance and are easy to grow.
FernsProvide a delicate, leafy green touch.

Combining Driftwood and Plants

Choosing Your Driftwood

When selecting driftwood, consider its size, shape, and texture. Look for pieces that have interesting shapes and natural niches where plants can be easily attached or fitted. The driftwood should be sturdy enough to support your plants and any additional hardware needed for mounting.

Prepping the Driftwood

Before you start arranging your plants, it’s essential to prep the driftwood. Start by cleaning it thoroughly to remove any sand, salt, or debris. Soaking the driftwood in freshwater for a few days can help remove any remaining salt. Once clean, let it dry completely.

Attaching the Plants

Attaching plants to driftwood can be done in several ways, depending on the type of plant.

  • For air plants, you can use a non-toxic glue or fishing line.
  • For succulents, secure them using inconspicuous wires or specially designed plant clips.
  • For mosses and ferns, you can use moisture-retaining materials like sphagnum moss as a base and tie them with fishing line or plant wire.

Design Ideas

Minimalist Approach

If you prefer a minimalist look, consider using a single stalk of an air plant or a small cluster of succulents. This approach highlights the natural beauty of the driftwood while adding just a touch of greenery.

Lush and Green

For a more vibrant display, create a lush arrangement with multiple types of plants. Combine different textures and shades of green to create a visually appealing and varied piece.

Seasonal Themes

You can also theme your driftwood art according to the seasons. Use blooming succulents in the spring and summer, and perhaps opt for mosses or ferns in the fall and winter.

Driftwood Wall Art With Plants

Mounting and Displaying

Choosing the Right Location

The location you choose will affect both the driftwood and the plants. Look for a spot that gets plenty of indirect sunlight. Avoid direct sunlight, which can be too harsh for many plants and can fade the driftwood over time.

Installing Securely

Driftwood wall art should be securely mounted to ensure it can hold the weight of both the driftwood and the plants. Use sturdy hooks, brackets, or wall anchors that are appropriate for the weight of your piece.

Maintenance

Maintaining your driftwood wall art with plants involves regular watering and occasional pruning. The watering frequency will depend on the type of plants you’ve chosen. Mist air plants regularly, and water succulents sparingly.

DIY Driftwood Wall Art Project

Materials You’ll Need

Here is a list of basic materials you may need for a DIY project:

MaterialsPurpose
DriftwoodBase material for the art piece.
Plants (Succulents, Air Plants, Mosses)Living elements for the art.
Non-toxic GlueTo attach plants.
Fishing LineFor securing plants or additional driftwood pieces.
Plant Wires/ClipsTo secure heavier plants or those requiring more support.
Wall Hooks/BracketsFor mounting the driftwood art on the wall.

Step-by-Step Guide

  1. Select Your Driftwood: Find a piece that suits your style and space requirements.
  2. Clean and Prep: Clean the driftwood thoroughly and let it dry.
  3. Plan Your Design: Arrange your plants and other elements on the driftwood before attaching them.
  4. Attach Plants: Use glue, wires, or fishing line to secure the plants to the driftwood.
  5. Mount on Wall: Use appropriate hooks or brackets to securely mount your driftwood art on the wall.
  6. Care and Maintenance: Regularly water and inspect the plants to ensure they remain healthy and vibrant.

Inspiration and Personal Touch

Handmade Variations

Creating driftwood wall art is as much about creativity as it is about craftsmanship. Everyone’s art piece will be unique, reflecting personal tastes and styles. You might want to incorporate small decorative elements such as stones, shells, or even small trinkets that hold sentimental value.

Professional Pieces

If DIY isn’t your style, consider purchasing from artists who specialize in driftwood and plant art. Many artisans sell unique, ready-made driftwood art that can be customized to match your home decor.

Community Workshops

Look for local workshops that teach you how to create driftwood art. These community gatherings are a fun way to learn new skills and meet people with similar interests.

Environmental Considerations

Responsible Sourcing

Always ensure you are collecting driftwood responsibly. Some areas may have regulations or restrictions on collecting natural materials. Choose sources that don’t harm the environment, and avoid over-collecting from any one location.

Sustainable Practices

Use organic materials and non-toxic glues to maintain an eco-friendly approach. Recycle and reuse whenever possible to minimize waste.

Conclusion

Driftwood wall art with plants is more than just a decor trend; it’s a way to bring the beauty and tranquility of nature into your home. Whether you decide to make your own or buy a professionally crafted piece, you’re adding something unique and vibrant to your living space. It’s a functional, beautiful, and environmentally conscious way to enhance your home’s style.

So, why wait? Dive into the world of driftwood and plants, and create your very own piece of nature-inspired art. You’ll cherish the serene beauty and natural elegance it brings to your home.

Filed Under: Driftwood Ideas Tagged With: DIY, Driftwood, Indoor Plants, Sustainable decor, Wall Art

Driftwood Plank Wall Art

June 25, 2024 by admin

Are you looking to bring a touch of nature into your home with a unique and rustic twist? Driftwood Plank Wall Art could be your ideal choice. In this article, you’ll discover how to create stunning wall decorations by using weathered planks of driftwood, perfect for adding that coastal charm to any space. Whether you’re an experienced crafter or just starting out, you will find step-by-step instructions, material lists, and creative ideas to inspire your next home décor project. Get ready to transform ordinary walls into extraordinary focal points with the timeless beauty of driftwood. Have you ever thought about bringing a piece of nature into your home decor? Driftwood plank wall art might just be the perfect solution. This unique art form not only provides a rustic and natural aesthetic but also brings a sense of tranquility and history to your living space. In this article, we’ll explore the world of driftwood plank wall art and guide you through everything you need to know about creating and appreciating this beautiful form of art.

Driftwood Plank Wall Art

What is Driftwood Plank Wall Art?

Driftwood plank wall art is created using pieces of wood that have been naturally weathered and shaped by water. These pieces of driftwood are often found on beaches, riverbanks, and lakeshores. The natural process of erosion, washing, and sun exposure gives each piece of driftwood its own unique texture, shape, and color, making every piece of art one-of-a-kind.

The Appeal of Driftwood

There are several reasons why driftwood is a popular choice for wall art:

  1. Natural Beauty: No two pieces of driftwood are the same, offering unique, organic shapes and textures.
  2. Sustainability: Using driftwood is an eco-friendly way to create art since it doesn’t harm living trees.
  3. Versatility: Driftwood can be crafted into various forms and styles, fitting any interior decor from rustic to modern.

Materials Needed

Creating driftwood plank wall art requires a few basic materials:

ItemDescription
Driftwood PlanksNaturally found or purchased
AdhesiveWood glue, epoxy, or nails
Backing BoardPlywood or another sturdy surface
Finishing SuppliesSandpaper, varnish, or paint (optional)
Hanging HardwarePicture hangers, wire, or hooks
ToolsHammer, saw, or drill

Sourcing Driftwood

Finding the perfect driftwood can be an adventure on its own. Whether you choose to collect it yourself or purchase it, here’s what you need to know.

Collecting Your Own Driftwood

If you live near a body of water, collecting your own driftwood can be a fun and rewarding experience. Keep the following tips in mind:

  1. Legal Considerations: Check local regulations to ensure it’s legal to collect driftwood in your area.
  2. Safe Collection: Wear appropriate footwear and gloves to protect yourself from sharp objects or wildlife.
  3. Respect Nature: Collect only what you need and leave plenty behind for wildlife and ecological balance.

Purchasing Driftwood

If you don’t live near a suitable collection site, purchasing driftwood is a viable option. Many online retailers and craft stores offer a variety of driftwood pieces:

  1. Quality: Look for retailers that provide high-quality, naturally sourced driftwood.
  2. Variety: Choose a mix of sizes and shapes to create visually interesting art.
  3. Price: Compare prices to ensure you’re getting a fair deal.

Preparing Driftwood

Before you start creating your art, preparing the driftwood is crucial. Proper preparation ensures durability and enhances the wood’s natural beauty.

Cleaning Driftwood

Cleaning driftwood is essential for removing dirt, salt, and any live organisms:

  1. Rinse Thoroughly: Use water to rinse away loose dirt and debris.
  2. Scrub Gently: A soft brush can help remove stubborn dirt.
  3. Soak: Soaking driftwood in a mixture of water and mild bleach (10:1 ratio) for 24 hours can kill any insects or bacteria.
  4. Dry: Allow the wood to dry completely, which can take several days.

Sanding and Finishing

Depending on your desired look, you might want to sand and finish the driftwood:

  1. Sanding: Lightly sand the surface to remove rough edges without losing the wood’s natural texture.
  2. Finishing: Apply a clear varnish to protect the wood and bring out its natural color. Alternatively, you can paint or stain the wood for a specific style.

Designing Your Driftwood Wall Art

Designing driftwood plank wall art involves both creativity and planning. Here are some design considerations to help you get started:

Choosing a Layout

Decide how you’d like to arrange your driftwood. Here are a few layout ideas:

  1. Random Plank Arrangement: Arrange planks in a random but visually appealing pattern.
  2. Geometric Designs: Create shapes or patterns, such as chevrons or herringbones.
  3. Symmetrical Layouts: Arrange planks in a balanced, symmetrical pattern for a formal look.

Measuring and Cutting

Accurate measurements and cuts are essential for a professional-looking art piece:

  1. Measure Twice: Always double-check measurements before cutting.
  2. Cutting: Use a saw to cut driftwood to your desired lengths. A miter saw can be particularly useful for angled cuts.

Assembling Your Art

Once you have your design and materials prepared, it’s time to assemble your art piece:

  1. Lay Out Your Design: Arrange your driftwood planks on the backing board without adhesive to finalize your layout.
  2. Attach Planks: Use wood glue, epoxy, or nails to secure the planks to the backing board. Ensure each piece is firmly in place.
  3. Allow to Dry: Let the adhesive dry completely before moving or hanging the art.

Hanging Your Driftwood Wall Art

Proper hanging ensures your art looks great and stays secure. Here are steps for hanging your driftwood plank wall art:

Selecting Hanging Hardware

Choose the right hardware based on the size and weight of your art piece:

  1. Picture Hangers: Suitable for lighter pieces.
  2. D-Rings and Wire: Good for medium-weight pieces.
  3. French Cleat: Ideal for heavier pieces, providing strong support.

Hanging Tips

Follow these tips for a professional look:

  1. Find Studs: Use a stud finder to locate wall studs for added support.
  2. Leveling: Ensure your art is level using a bubble level or smartphone app.
  3. Secure Placement: Double-check that all hardware is secure before hanging your art.

Driftwood Plank Wall Art

Maintaining Your Driftwood Art

With proper care, your driftwood wall art can last for many years:

Cleaning

Dust your art regularly using a dry or slightly damp cloth. Avoid harsh chemicals as they can damage the wood.

Inspecting

Periodically inspect your art for any signs of wear or damage. Make any necessary repairs to keep it looking its best.

Driftwood Wall Art Ideas and Styles

Driftwood wall art is incredibly versatile and can be tailored to match various decor styles. Here are some ideas to inspire you:

Coastal Theme

Capture the essence of the beach with a coastal-themed piece. Use light, weathered driftwood and pair it with seashells, starfish, or nautical accents.

Rustic Charm

For a rustic look, use darker, more rugged pieces of driftwood. Combine them with other natural elements like burlap or metal to create depth and texture.

Modern Minimalism

Create a sleek, modern piece by using uniform, straight driftwood planks. Minimalist designs often benefit from clean lines and a neutral color palette.

Benefits of Making Your Own Driftwood Wall Art

Creating your own driftwood wall art offers several benefits:

Personalization

DIY art allows you to create a piece that perfectly matches your style and home decor. Plus, it’s a great conversation starter when you have guests.

Relaxation

The process of collecting, preparing, and assembling driftwood can be a relaxing and meditative activity. It’s an excellent way to unwind and connect with nature.

Skill Development

You’ll develop new skills in woodworking, design, and craftsmanship. These skills can be applied to other DIY projects in the future.

Driftwood Wall Art in Interior Design

Incorporating driftwood wall art into your interior design can significantly enhance your living space:

Focal Point

A large piece of driftwood wall art can serve as a stunning focal point in a room, drawing attention and adding character.

Complementing Decor

Driftwood wall art complements a variety of decor styles, from coastal and rustic to modern and industrial. It can seamlessly blend with your existing decor while adding a unique touch.

Warmth and Texture

Driftwood brings warmth and texture to a room, making it feel more inviting and cozy. The natural elements can soften the hard lines of modern furniture and add a touch of nature indoors.

Challenges and How to Overcome Them

While driftwood wall art is a rewarding project, it can come with challenges. Here’s how to overcome them:

Sourcing Driftwood

Finding the right pieces can be tricky. If local options are limited, consider purchasing driftwood online or trading with fellow crafters.

Working with Irregular Shapes

Driftwood’s natural, irregular shapes can be challenging to work with. Embrace the imperfections and use them to create a unique design. Sand or trim pieces to fit better if necessary.

Adhesion and Stability

Ensuring your driftwood planks stay securely in place can be challenging. Use high-quality adhesive and consider reinforcing with nails or screws if the wood is particularly heavy.

Expert Tips for Exceptional Driftwood Art

Here are some expert tips to elevate your driftwood wall art:

Mix Different Sizes and Shapes

Combine various sizes and shapes of driftwood for a more dynamic and interesting piece. Play with the orientation of each piece to create visual intrigue.

Use Complementary Colors

If you choose to paint or stain your driftwood, select colors that complement your room’s color scheme. Neutral tones often work well, but don’t be afraid to experiment with bolder colors.

Add Additional Elements

Incorporate other natural materials like stones, shells, or plants to enhance your driftwood art. Be mindful to avoid overcrowding, keeping a balanced and harmonious composition.

Conclusion

Driftwood plank wall art is a remarkable way to bring nature into your home. Whether you opt for a coastal, rustic, or modern style, driftwood offers endless possibilities for creativity and expression. By following the steps outlined in this article, you can create a unique, personalized piece that enhances your living space and reflects your connection to the natural world. So, grab your materials and start your driftwood wall art project today—you’ll be amazed at what you can create!

Filed Under: Driftwood Ideas Tagged With: DIY Craft, Driftwood, home decor, Plank Art, Wall Art

Outdoor Driftwood Wall Art

June 25, 2024 by admin

Welcome to the world of Outdoor Driftwood Wall Art, where the beauty of nature meets the creativity of your imagination. In this enchanting journey, you’ll discover how to transform simple pieces of driftwood into stunning, personalized wall art that adds a natural and rustic charm to your outdoor spaces. With just a few tools and a bit of inspiration, you’ll create captivating art pieces that reflect both your artistic spirit and the ever-changing beauty of the outdoors. Dive in and let your creativity flow as you bring the serene and timeless elegance of driftwood into your outdoor decor! Have you ever thought about bringing the beauty of nature into your outdoor space through art? If you have, then outdoor driftwood wall art might just be the perfect addition for you!

Driftwood, shaped by the waves, wind, and salt, can add a rustic yet unique charm to any yard, garden, patio, or deck. Imagine the organic curves and textures of driftwood combined with your creativity to make an aesthetically pleasing piece of art.

Outdoor Driftwood Wall Art

What is Driftwood?

Driftwood refers to any wood that has been washed onto the shore of a sea, river, or lake by the action of winds, tides, or waves. Over time, these pieces of wood tell a story, which is what makes each one unique and fascinating.

Types of Driftwood

The world of driftwood is diverse, and you may encounter various types based on their origin. Here are some common types of driftwood:

TypeSourceCharacteristics
Beach DriftwoodOcean ShoresSmooth and weathered
Lake DriftwoodLakesidesOften lighter and less weathered
River DriftwoodRiverbanksGnarled and intricate shapes

Knowing the type of driftwood you have can help in determining its best use in your wall art.

Why Choose Driftwood for Outdoor Art?

Driftwood is naturally beautiful and can turn any outdoor space into a captivating area. Here’s why driftwood could be an excellent choice for your wall art project:

Eco-Friendly

Using driftwood provides an eco-friendly alternative to other materials. By upcycling wood washed ashore, you’re giving it a second life and helping to clean up the environment.

Unique and Customizable

No two pieces of driftwood are the same. Each piece has its own character, ensuring that your wall art will be one-of-a-kind.

Versatile

Driftwood can be incorporated into various design styles, from rustic and bohemian to modern and minimalist. You can pair it with other materials like metal, fabric, or glass to create different looks.

Gathering Driftwood

Before you can create your driftwood wall art, you’ll need to gather some driftwood. Here’s how you can do it safely and responsibly:

Where to Find Driftwood?

You can typically find driftwood along beaches, rivers, and lakes. Here are some tips for finding high-quality pieces:

  • Tide Schedule: Check the tide schedule, as driftwood is more likely to appear after high tides.
  • Weather Conditions: Look after storms, when the waves have deposited new driftwood on the shore.
  • Remote Locations: Explore less frequented areas to find untouched pieces.

Ethical and Legal Considerations

Not all places allow you to collect driftwood freely. Always make sure to:

  • Check Local Regulations: Ensure it’s legal to collect driftwood in your area.
  • Avoid Protected Areas: Don’t collect from areas where removal is restricted to protect wildlife habitats.

Tools for Collecting Driftwood

Consider taking these items along:

  • Bag or Cart: To carry your finds.
  • Gloves: To protect your hands from splinters.
  • Waterproof Boots: For walking along wet areas.

Preparing Driftwood for Art

Once you’ve gathered your driftwood, you’ll need to prepare it for creating wall art. Here’s how:

Cleaning Driftwood

Driftwood can contain salt, sand, and tiny critters that need to be removed. Here’s a simple cleaning process:

  1. Rinse Thoroughly: Use a hose to remove loose dirt and sand.
  2. Soak: Submerge the wood in a bucket of fresh water for 1-2 weeks, changing the water regularly to remove salts.
  3. Scrub: Use a brush to scrub off any remaining debris.
  4. Dry: Let the driftwood dry completely, preferably in the sun, to prevent mold and mildew.

Sanding and Shaping

Sanding driftwood can enhance its natural beauty and make it easier to work with. You can use:

  • Sandpaper: For gentle smoothing.
  • Electric Sander: For larger pieces or more intricate work.
  • Chisel and Hammer: To shape the wood.

Always wear a mask while sanding to avoid inhaling dust.

Outdoor Driftwood Wall Art

Design Ideas for Driftwood Wall Art

Now that your driftwood is ready, it’s time to get creative. Here are some design ideas to inspire you:

Driftwood Mirrors

Create a unique mirror frame using driftwood pieces. Arrange the wood around a mirror, securing each piece with strong adhesive or nails.

Driftwood Shelves

Attach driftwood to brackets or directly into the wall to create functional yet beautiful shelves.

Driftwood Sculptures

Let your creativity run wild by assembling driftwood pieces into sculptures. Use wood glue or screws to hold the pieces together.

Driftwood Signs

Create personalized signs by painting or carving words into the driftwood. This can be a fun way to add inspirational quotes or welcome signs to your space.

Tools and Materials Needed

Creating outdoor driftwood wall art requires a few basic tools and materials. Here’s a checklist to help you get started:

Tools RequiredMaterials Needed
SawDriftwood
HammerNails or Screws
DrillAdhesive (wood glue, epoxy)
SandpaperMirror (for mirror frame)
BrushPaint (optional)

Step-by-Step Guide to Creating Driftwood Wall Art

Here’s a comprehensive step-by-step guide to help you create your own piece of driftwood art:

Step 1: Planning Your Design

Before you start drilling and nailing, plan what you want your driftwood wall art to look like. Sketch out your ideas or gather inspiration from online sources.

Step 2: Arranging the Driftwood

Lay out your driftwood pieces on the ground or a flat surface to see how they fit together. This is where you can play with composition and find an arrangement that you enjoy.

Step 3: Cutting and Shaping

Trim any pieces as needed using a saw. Shape the ends or surfaces to fit together better. Sand any rough edges to avoid splinters.

Step 4: Assembling the Art

Start assembling your driftwood art piece. Use wood glue or epoxy to adhere smaller pieces together. For larger pieces, use nails or screws to ensure stability.

Step 5: Painting and Finishing

If desired, paint your driftwood or add any finishing touches to enhance its appearance. Consider sealing the wood with a protective coat to ensure it withstands outdoor conditions.

Step 6: Mounting

Secure your finished piece of art to the wall. Use appropriate hardware that can support the weight of the driftwood and withstand outdoor elements.

Caring for Your Driftwood Art

Outdoor art pieces can be exposed to varying weather conditions, so proper care is crucial.

Regular Maintenance

  • Cleaning: Gently clean your driftwood art to remove dirt and debris.
  • Re-sealing: Reapply a protective finish every year to prolong the lifespan of the wood.
  • Inspecting: Regularly check for any signs of damage or wear and repair as needed.

Protecting Against Elements

  • Weatherproof Coating: Apply a weatherproof coating to protect against sun, rain, and humidity.
  • Sheltered Location: Place the art in a sheltered location to reduce direct exposure to harsh weather.

Benefits of Driftwood Wall Art

Creating and displaying driftwood wall art comes with several benefits:

Aesthetic Appeal

Driftwood’s natural texture and unique forms bring a beautiful, organic element to any outdoor space. It can complement garden settings, patios, or outdoor living areas.

Personal Satisfaction

There’s immense satisfaction in creating something beautiful with your own hands. Building driftwood wall art is a rewarding process that allows you to showcase your creativity and craftsmanship.

Conversation Starter

Your custom driftwood art will likely attract attention and curiosity, serving as a great conversation starter when entertaining guests.

Conclusion

Outdoor driftwood wall art combines the raw beauty of nature with artistic creativity, resulting in unique pieces that enhance any outdoor space. By responsibly collecting and preparing driftwood, planning your designs, and using the right tools and materials, you can create stunning artistic displays.

Whether you choose to make a driftwood mirror, shelf, sculpture, or sign, your creation will be a distinctive and personal addition to your outdoor decor. Plus, it’s a fantastic way to connect with nature and upcycle materials, making your art both beautiful and eco-friendly.

So, next time you’re at the beach, river, or lake, keep an eye out for those perfect pieces of driftwood. Happy crafting!

Filed Under: Driftwood Ideas Tagged With: DIY, Driftwood, home decoration, Outdoor Decor, Wall Art

  • « Previous Page
  • Page 1
  • Page 2
  • Page 3
  • Page 4
  • …
  • Page 7
  • Next Page »

Primary Sidebar

Driftwood4us.com, is a participant in the Amazon Services LLC Associates Program, an affiliate advertising program designed to provide a means for sites to earn advertising fees by advertising and linking to amazon.com.