• Skip to main content
  • Skip to primary sidebar
  • Terms and Conditions
  • Privacy Policy
  • Contact

Driftwood 4 Us

Just About Driftwood

Woodworking

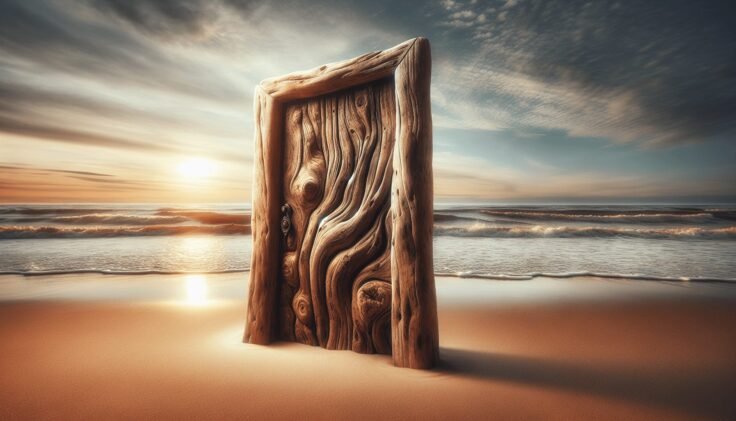
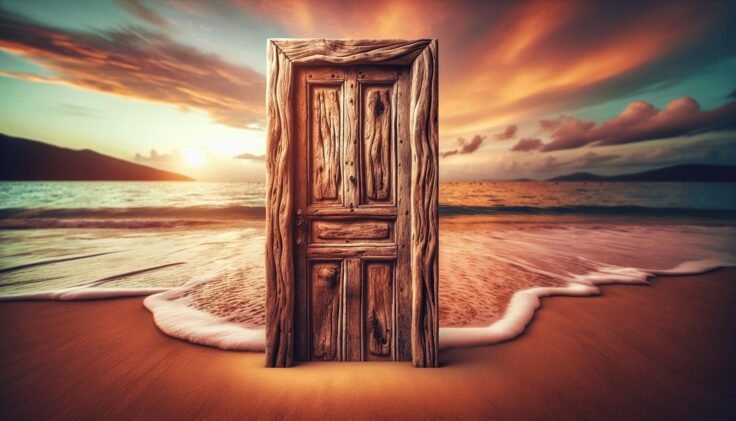
Driftwood Door

February 22, 2025 by admin

Have you ever wondered about the unique blend of art and nature that a driftwood door can bring to your space? If you’re captivated by natural beauty and are looking to incorporate elements that evoke a sense of calm and understated elegance in your home, then driftwood might just be the material you should consider. Let’s embark on a journey through the mesmerizing world of driftwood doors.

What is Driftwood?

At its core, driftwood is simply wood that has been washed onto a shore by the actions of tides or waves. But there’s more to it than meets the eye. This type of wood carries with it a history of travel and transformation. Its journey from land through water gives it a unique texture and patina, making it one of nature’s most fascinating materials.

The Origin and Journey of Driftwood

Driftwood starts its story as an ordinary piece of wood that, due to natural or human circumstances, ends up in a body of water. Over days, months, or even years, this wood follows ever-changing paths dictated by currents, tides, and weather, finally winding up on shores far from its origin. It’s during this time that the wood becomes smooth and bleached by sun, wind, and water, achieving the distinctive look that many find so appealing.

Unique Characteristics of Driftwood

What makes driftwood truly special, aside from its weathered look, are its distinct textures and colors. Each piece tells a story of the elements it has faced: the softening by water and the bleaching by the sun create patterns and shapes that are both random and harmonious. Depending on the type of wood and its journey, driftwood can range in color from pale gray to silver and sometimes even warm brown tones.

Why Choose a Driftwood Door?

Driftwood doors are not just about aesthetic appeal. They’re conversation starters, pieces of art, and functional additions to any home. When considering a driftwood door, you’re not only adding a functional element to your home; you’re embracing a piece of nature’s long history.

Aesthetic Appeal

The visual allure of driftwood is undeniable. Its unique patterns and colors can evoke feelings of warmth, tranquility, and nostalgia. Driftwood doors stand apart from traditional wooden doors due to their distinctive, natural artistry. They can seamlessly blend with coastal, rustic, or even modern home designs, making them incredibly versatile.

Environmental Impact

For those who are eco-conscious, driftwood can be an excellent choice. By using driftwood, you’re repurposing materials that would otherwise be left to degrade on a beach. Choosing these doors contributes to sustainability, as they don’t require cutting down new trees. It’s a way to bring beauty into your space while keeping your environmental footprint lower.

Durability and Maintenance

Despite its weathered look, driftwood is incredibly strong and resistant to many forms of decay thanks to its time in the water. When properly treated and maintained, driftwood doors can last for decades. Basic care usually involves periodic dusting and treating the wood with oil or wax to enhance its natural grain and protect it from drying out or becoming brittle.

Driftwood Door

How to Integrate Driftwood Doors into Your Home

Driftwood doors can be incorporated into various aspects of your home, adding character and flair that’s unlike any other material. Whether it’s an entry door or an interior piece, driftwood can transform your space.

Entry Doors

A driftwood entry door gives your home a unique focal point that’s sure to impress guests. These doors can be custom-made to fit any size and shape required, allowing you to create a first impression that reflects your personal style. The natural aesthetic can be complemented with wrought iron handles and glass panels for an added touch of elegance.

Interior Doors

Using driftwood for interior doors can create a seamless flow of natural beauty throughout your home. Whether for a bedroom, bathroom, or kitchen, these doors can blend in or stand out as desired. They work especially well in spaces that are designed to bring the outdoors in, such as sunrooms or conservatories.

Sliding Doors and Partitions

For those looking to partition spaces without the permanence of a wall, driftwood sliding doors or partitions are an excellent choice. They allow for versatile room configurations while maintaining an airy, open feel. The subtle tones of driftwood pair beautifully with glass elements, expanding light in any room.

Creating a Driftwood Door: The Process and Craftsmanship

Bringing a driftwood door to life isn’t just about aesthetics; it involves craftsmanship and a deep respect for the natural materials being used.

Collecting and Selecting Driftwood

The first step is collecting driftwood. This task requires patience and a keen eye for pieces that are structurally sound and aesthetically pleasing. The best driftwood is usually found after storms, when pieces have been freshly washed ashore.

Craftsmanship and Design

Once collected, the driftwood undergoes careful selection and preparation. A skilled craftsman combines pieces to fit specific design requirements, ensuring that each piece enhances the overall character of the door. The design process might involve arranging planks in a pattern or carving intricate designs that highlight the wood’s natural texture.

Construction and Finishing

The construction of a driftwood door involves securing pieces together with traditional woodworking techniques, preserving the wood’s integrity and natural beauty. Finally, the door is finished with a protective coating to enhance its durability while maintaining the organic look.

Driftwood Door

Maintenance Tips for Driftwood Doors

To keep your driftwood doors looking their best, a bit of maintenance is required. Fortunately, it’s minimal compared to some other wood types.

Regular Cleaning

Dust your driftwood door regularly with a soft cloth to prevent dust and dirt buildup. For deeper cleaning, use a damp cloth with mild soapy water, ensuring that the door is wiped dry afterwards to avoid water spots.

Protecting the Finish

Apply wood oil or wax once or twice a year. This not only protects the wood from drying out but also highlights its natural colors and patterns. Ensure you use products that are compatible with driftwood to prevent discoloration or damage.

Inspect for Damage

While driftwood is durable, it’s essential to inspect it periodically for any signs of damage, such as cracks or splits. Address any issues promptly to prevent them from worsening.

Driftwood Door: Beyond Residential Use

While driftwood doors can transform homes, their appeal extends beyond residential spaces, making them a perfect fit for various environments.

Commercial Spaces

In commercial settings, driftwood doors can lend an upscale, natural atmosphere, whether in restaurants, hotels, or boutiques. They can serve as memorable entryways or be used internally as stylish office partitions.

Outdoors

Driftwood is inherently suited to outdoor environments given its origin. Consider using driftwood doors for garden sheds, pool houses, or as gates. The connection between the wood and outdoor settings enhances the cohesive appearance of your property.

The Emotional Connection: Driftwood Doors and Personalization

Beyond their practical use, driftwood doors can hold deep personal meaning. The act of choosing, designing, and installing a driftwood door can be an expression of your values and aspirations.

Aesthetic Expression

A driftwood door can be an expression of your aesthetic preferences, designed to reflect personal style. Combine driftwood with other elements, like stained glass or metal embellishments, to create a piece that resonates with you and your household.

Storytelling Elements

Each driftwood door is a storybook of nature’s power and beauty, offering a tactile reminder of the ever-changing relationship between land and water. Choosing such a piece for your home or business can be a testament to your appreciation for nature.

Finding and Purchasing Driftwood Doors

If a driftwood door sounds appealing to you, the next step involves finding the right one for your space. This can be an enjoyable experience, provided you know where to look.

Local Artisans and Craftsmen

Look for local artisans or craftsmen who specialize in driftwood creations. Supporting local talent ensures a custom piece that takes regional characteristics into account and often aligns with sustainability practices.

Specialty Stores and Online Platforms

While in-person viewing isn’t always possible, many specialty stores and online platforms sell driftwood doors. When buying online, pay attention to reviews and request detailed images or samples to ensure quality.

Custom Design Services

For a truly unique door, consider working with a designer or artisan to customize your piece. Custom doors can be made to fit specific dimensions or integrate special features unique to your preferences.

Conclusion

Whether you’re drawn to driftwood doors for their beauty, sustainability, or the stories they embody, one thing is certain: they are so much more than just functional items. A driftwood door is a timeless piece of art that links the inside of your space to the grand history of the natural world. Embracing driftwood invites a unique energy into your home that’s both grounding and inspirational. As you consider adding this distinct element to your home, think of it as not just a door, but a passageway into the intertwined stories of nature, craft, and style.

Filed Under: Driftwood Ideas Tagged With: DIY, Driftwood, home decor, Rustic, Woodworking

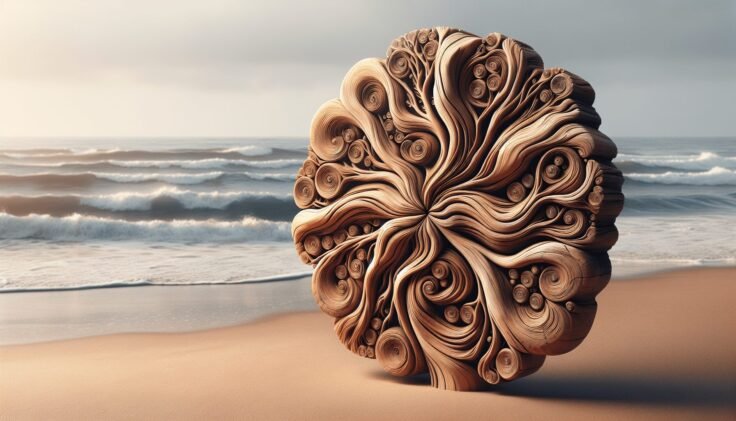
Cutting Driftwood

February 8, 2025 by admin

Have you ever strolled along the beach, admiring the unique and captivating pieces of driftwood scattered along the shore? Driftwood comes in various shapes and sizes, each piece telling a different story about its journey through water and time. For those with a creative spirit, these seemingly random pieces of wood offer a world of possibilities. Whether crafting furniture, creating art, or simply adding a rustic touch to your décor, learning how to cut and work with driftwood can open a world of creative potential.

Understanding Driftwood

Understanding the nature of driftwood is the first step in mastering the art of cutting and crafting with it. This unique material is wood that has been washed onto the shore by the sea, rivers, or lakes. Its distinct characteristics come from the journey it undertakes, exposed to water, sand, and weathering elements.

The Formation of Driftwood

Driftwood originates from trees or branches that have been separated from their original position. Over time, exposure to the elements such as water currents, sand erosion, and sun bleaching transforms it into the distinctive pieces you find along the beach. Its ragged edges and worn appearance add to its charm, making each piece truly unique.

Types of Driftwood

Driftwood can come from a variety of tree species, each imparting its own texture and color. Common sources of driftwood include:

  1. Hardwoods: Such as oak and cherry, which are robust and often feature intricate grains.
  2. Softwoods: Like pine and cedar, known for their light weight and softness, making them easier to work with.
  3. Exotic Woods: Occasionally, you might find pieces from tropical palms or unusual species that add a unique aesthetic.

Understanding the type of driftwood you are dealing with is essential, as it influences both the cutting process and how you might use it.

Preparing to Cut Driftwood

Before you start cutting, preparation is crucial. The right tools and techniques will ensure that your driftwood cutting process is both safe and effective.

Selecting the Right Driftwood

Choosing the right driftwood is an art in itself. Look for pieces that are:

  • Free of rot: Avoid wood that feels spongy or has a musty smell, as it’s likely unusable.
  • Interesting shape: Choose pieces with natural curves or unusual shapes that match your intended project.
  • Appropriate size: Ensure the piece is manageable for your cutting capabilities and the tools you have.

Cleaning Driftwood

Driftwood often carries remnants of its ocean journey, such as salt, sand, and debris. Clean it properly to preserve its quality and make cutting easier:

  1. Soak: Immerse the driftwood in fresh water for several days, changing the water daily to remove salt and debris.
  2. Scrub: Use a stiff brush to scrub off dirt and loose particles.
  3. Dry: Let the driftwood dry completely in a shaded area to prevent cracking under direct sunlight.

Tools You’ll Need

The right tools make all the difference:

  • Hand saw: For precise cutting of smaller pieces.
  • Power saw: A jigsaw or band saw for larger, more intricate cuts.
  • Chisel: For detailed shaping.
  • Sanding tools: To smooth rough edges.
  • Protective gear: Such as gloves and goggles to ensure safety during cutting.

Cutting Driftwood

Techniques for Cutting Driftwood

Once you’re prepared, it’s time to start cutting. Selecting the right technique can help you achieve the shape and size you desire while maintaining the driftwood’s natural aesthetics.

Cutting Techniques

  • Straight Cuts: Use a hand saw or power saw to make simple, straight cuts. Perfect for creating basic shapes or adjusting length.

  • Curved Cuts: A jigsaw is ideal for following the natural curves and shapes of the wood, allowing you to maintain its organic look.

  • Detail Work: Use chisels for precision work and to carve intricate designs or patterns.

Safety Tips for Cutting

Safety should always be your top priority. Here are some essential tips:

  1. Secure the wood: Make sure the driftwood is stable while cutting to avoid accidents.
  2. Protective gear: Always wear gloves and goggles.
  3. Cut slowly: Take your time, especially with power tools, to maintain control and precision.
  4. Check tool conditions: Ensure all tools are in good working order to prevent mishaps.

Utilizing Driftwood in Creative Projects

With your driftwood pieces ready, the possibilities for creative use are endless. From simple home décor to complex furniture pieces, driftwood can enhance any living space with its natural charm.

Crafting Home Décor

Driftwood is perfect for adding a rustic touch to home décor:

  • Wall Art: Arrange smaller pieces into patterns or designs.
  • Table Centerpieces: Use longer, flat pieces to create eye-catching centerpieces.
  • Mirrors and Frames: Frame existing mirrors or pictures with driftwood for a natural look.

Making Furniture

For the more ambitious, driftwood can be transformed into unique pieces of furniture:

  • Tables: Large, sturdy pieces can serve as tabletops or table legs.
  • Chairs and Benches: Use robust driftwood to build seating with a natural aesthetic.
  • Shelves: Attach driftwood to walls for rustic shelving.

Artistic Creations

For artists, driftwood is a versatile medium:

  • Sculptures: Carve or assemble pieces into unique sculptures.
  • Jewelry: Smaller pieces can be polished and turned into pendants or earrings.
  • Ornaments: Create seasonal decorations with a natural twist.

Cutting Driftwood

Caring for Driftwood Creations

Once you’ve created your driftwood masterpiece, proper maintenance will ensure its longevity and beauty.

Preserving Driftwood

To protect your driftwood project:

  • Sealants: Use a water-based sealant to protect from moisture and dirt.
  • Regular Cleaning: Dust regularly to keep surfaces clean and bright.
  • Avoid Excessive Sunlight: Prolonged exposure can cause fading and cracking.

Repair and Restoration

Driftwood, like any wood, can wear over time. For repairs:

  • Fill Cracks: Small cracks can be filled with wood filler and sanded smoothly.
  • Resealing: Periodically reseal to protect and refresh the wood.
  • Mildew Management: Keep in a dry, well-ventilated space to prevent mildew.

Conclusion

Your journey with driftwood doesn’t just end at cutting. It’s about appreciating the uniqueness of each piece, understanding how to work with it, and imaginatively transforming it into something new and extraordinary. Each crafted item has the opportunity to speak to its personal history, marked by the ebb and flow of water, wind, and time, much like the people who transform it. So, as you step onto the shore next time, look at the driftwood with new eyes, recognizing both what it has been and what it could become with a few creative touches.

Filed Under: Driftwood Ideas Tagged With: crafting, Driftwood, home decor, Woodworking

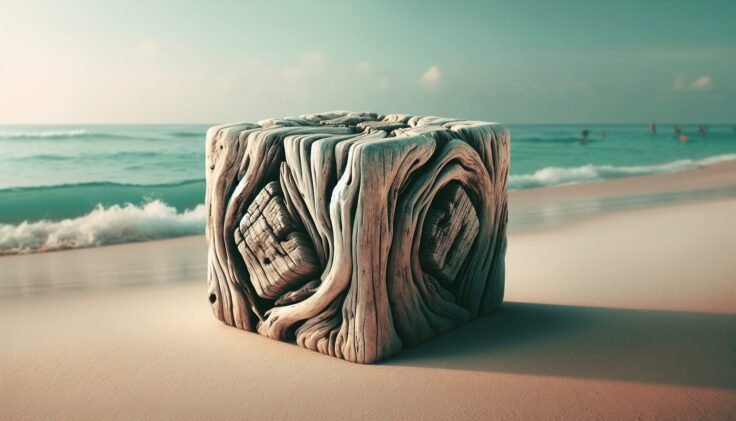
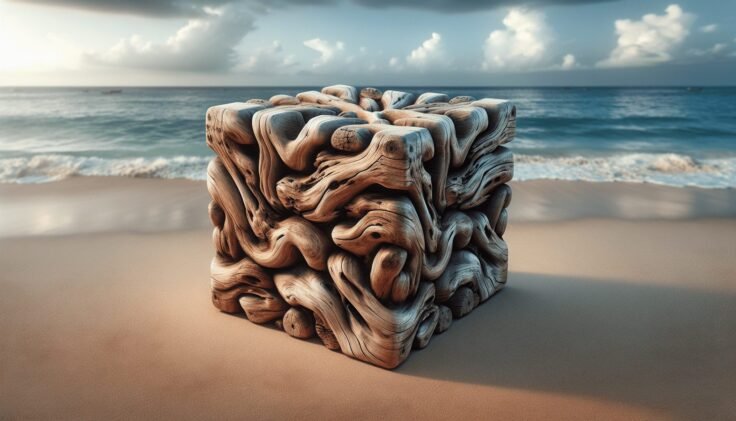
Driftwood Cube

February 6, 2025 by admin

Have you ever come across a piece of driftwood and wondered about its journey? Driftwood holds a historical narrative of its own, shaped by its travels through water and time. This article is dedicated to the fascinating concept of the “Driftwood Cube”—a unique creation crafted from driftwood that not only embodies artistry but also captures the intrigue and wonder of nature’s sculpture. Let’s journey together into the details of what makes the Driftwood Cube a captivating element in both art and design. Ready to learn more?

The Allure of Driftwood

Driftwood, with its naturally weathered appearance, brings a sense of rustic charm and mystique. When you think about driftwood, you might imagine a piece of wood washed ashore, but its appeal goes beyond that. It speaks of a natural weathering process that involves water, wind, and sun, each element contributing to its unique character.

The Natural Formation Process

Driftwood starts its journey as an ordinary piece of wood, often a fallen branch or tree. As it makes its way into water systems like rivers and oceans, the motion and elements continuously shape it. This process, which includes erosion by water and exposure to various elements, results in its smooth finish and intricate patterns.

Unique Characteristics

No two pieces of driftwood are the same, largely due to their unpredictable journey. The texture, size, and shape all contribute to its individuality. These characteristics make driftwood highly sought after for various artistic and decorative purposes, including the creation of the Driftwood Cube.

Understanding the Driftwood Cube

The Driftwood Cube is an artistic creation that merges the natural beauty of driftwood with the geometric precision of a cube. This concept combines nature-inspired aesthetics with human creativity, making it a popular choice for art enthusiasts and designers.

The Creative Process

Creating a Driftwood Cube involves selecting the right pieces of driftwood, often focusing on texture, grain, and color. These pieces are meticulously cut and fitted together to form a cube. The process emphasizes precision, ensuring that each piece fits seamlessly, yet retains its natural, rugged look.

Symbolism and Meaning

The Driftwood Cube is more than a physical object; it symbolizes the harmony between nature and manmade design. The cube shape, often representing stability and order, contrasts with the organic irregularity of driftwood, hence creating a balance between chaos and structure. This duality is what makes the Driftwood Cube so intriguing.

Driftwood Cube

Practical Uses and Aesthetic Appeal

Whether used as a decorative element in homes or as a statement piece in galleries, the Driftwood Cube serves various functional and aesthetic purposes. Its versatility makes it compatible with different styles and settings, from minimalist to coastal themes.

Home Décor

Incorporating a Driftwood Cube into your home can add a touch of nature-inspired beauty. It’s perfect for tabletops, shelves, or as a standalone piece that adds warmth and texture to any room. Its neutral tones and organic shape can complement a wide range of color schemes and themes.

Artistic Installations

In art galleries, Driftwood Cubes can be part of larger installations or standalone pieces that invite viewers to explore their textures and form. Artists often use them to evoke themes of nature, transformation, and the passage of time.

Step-by-Step Guide to Making Your Own Driftwood Cube

Creating your own Driftwood Cube can be a rewarding experience that allows you to engage with the materials and understand the nuances of driftwood.

1. Gather Your Materials

Start by collecting pieces of driftwood. Look for different sizes and shapes, ensuring they are relatively straight for easier construction. You will also need tools such as a saw, sandpaper, wood glue, and a measuring tape.

2. Prepare the Driftwood

Clean the driftwood thoroughly to remove any salt, sand, or debris. Once cleaned, dry the pieces completely.

3. Cut and Fit

Measure and cut the driftwood into uniform pieces that will form the sides of the cube. Sand the edges smoothly for a better fit.

4. Assemble the Cube

Using wood glue, attach the pieces together, forming each side of the cube. Allow the glue to dry before assembling the entire structure. Once complete, you can apply a wood finish if desired.

5. Finishing Touches

Check for any rough patches or uneven edges. Use sandpaper to smooth out any imperfections and ensure your Driftwood Cube looks polished and refined.

Driftwood Cube

Caring for Your Driftwood Cube

To maintain the beauty and integrity of your Driftwood Cube, regular care and maintenance are essential. Driftwood, being a natural material, can be sensitive to environmental changes.

Environmental Considerations

Keep your Driftwood Cube away from excessive moisture and direct sunlight to avoid warping or discoloration. Ensure it’s placed in a stable environment to preserve its condition.

Cleaning Practices

Regular dusting with a soft cloth will keep your Driftwood Cube looking its best. Avoid using water or harsh chemicals, which might damage the wood. If deeper cleaning is necessary, opt for a gentle wood cleaner.

Driftwood Cube as a Market Trend

In recent years, the Driftwood Cube has gained attention as a market trend in home décor and art. Its unique combination of natural beauty and craftsmanship makes it a desirable item for collectors and enthusiasts alike.

Growing Popularity

As more people seek sustainable and eco-friendly options in décor, driftwood-based creations, such as the Driftwood Cube, have seen increased interest. These pieces are valued for their low environmental impact and natural aesthetic.

Artisans and Designers

Many artisans and designers focus on creating unique Driftwood Cubes, often selling them in galleries, online platforms, and craft fairs. The demand for bespoke and handcrafted items continues to drive the market, offering opportunities for creative entrepreneurship.

Conclusion

The Driftwood Cube encapsulates the essence of nature and art, offering a mesmerizing blend of organic charm and geometric precision. By understanding and appreciating its formation, crafting process, and significance, you can gain a deeper appreciation for this remarkable piece. Whether you choose to create your own or acquire one from a skilled artisan, the Driftwood Cube undoubtedly adds a unique and meaningful touch to any space you choose to enhance. Have you envisioned how a piece of driftwood could transform into an artful statement in your own home or creative space?

Filed Under: Driftwood Ideas Tagged With: craft, Driftwood, home decor, Sculpture, Woodworking

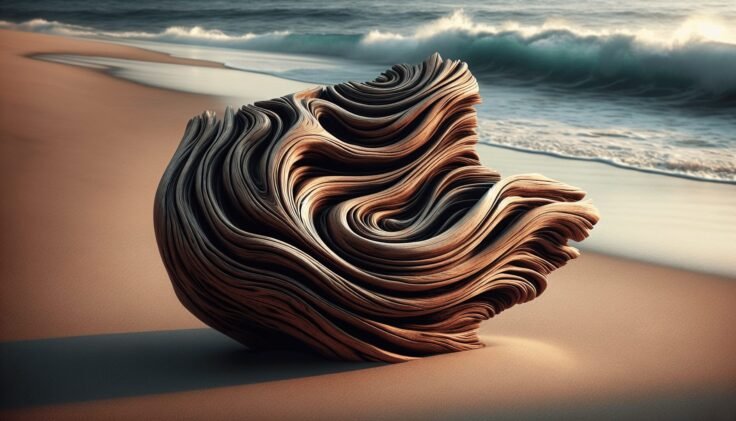
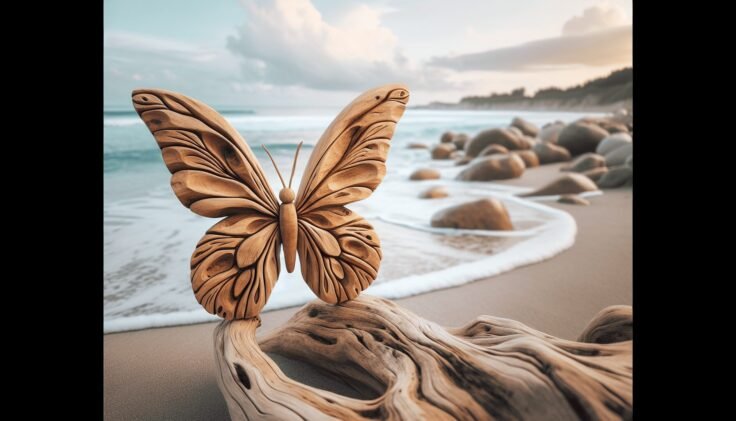
Driftwood Butterfly

January 8, 2025 by admin

Have you ever wondered about the extraordinary journey some natural elements embark upon before they find their eventual resting place? Picture a piece of driftwood, unremarkable and forgotten, slowly evolving into a figure of beauty—a driftwood butterfly. How does this transformation occur, and what makes these creations so captivating? Let’s unfold the story of driftwood butterflies, a perfect blend of nature’s artistry and human imagination.

Driftwood Butterfly

What is a Driftwood Butterfly?

Driftwood butterflies are artistic sculptures typically crafted using pieces of driftwood. Driftwood, the remains of trees and wood that have been washed ashore by the sea, serves as a raw, natural medium in creating these exquisite artworks. Artists gather these materials, sometimes adding other natural elements, to sculpt pieces resembling butterflies.

The Origin of Driftwood

Driftwood has its origins in waterways—rivers, streams, and oceans. As trees fall into rivers due to natural events like erosion or storms, they embark on a journey downstream. This journey can last years as the wood moves with the current, sometimes perching on shorelines temporarily only to be taken again by another swell of the tide. During this process, waters strip the wood of its bark and smooth its surfaces, leaving behind a piece that is unique in its form and character.

Why Butterfly?

The butterfly is a symbol often representing transformation, beauty, and life’s ephemeral nature. Much like driftwood, which undergoes continuous change throughout its journey, a butterfly also experiences metamorphosis. The connection lies in the transformation both objects undergo—a simple piece of wood turns into something meaningful and beautiful, echoing the process of a caterpillar becoming a butterfly.

Benefits of Making Driftwood Art

Creating art pieces from driftwood not only produces something visually appealing but also brings environmental and psychological benefits.

  • Environmental Impact: By using driftwood for art, you help reduce waste and promote recycling.
  • Mindfulness and Creativity: The process of creating art from driftwood is a mindful practice. It encourages you to express creativity and focus on the beautiful potential in everyday, overlooked items.
  • Connection with Nature: Working with natural materials helps enhance your connection with the environment around you and appreciate the beauty of nature’s imperfect offerings.

The Making of a Driftwood Butterfly

The creation process of a driftwood butterfly involves several fascinating steps, from gathering materials to assembling the final piece. Each driftwood butterfly is unique, as no two pieces of driftwood are identical. Here is a glance at the steps involved:

Collecting Driftwood

Finding the perfect pieces of driftwood is the first step. This requires patience and a keen eye. You’ll need to select driftwood based on size, shape, and texture, keeping in mind how these fragments will come together in your artist’s mind to create the final figure.

Tools and Materials Needed

Creating driftwood art typically requires an array of basic tools and additional materials:

Tool/MaterialPurpose
DriftwoodBase material for crafting
Saw/ChiselCutting and shaping driftwood
SandpaperSmoothing rough edges
Glue/Epoxy ResinJoining different pieces of driftwood
Varnish/OilSealing and finishing
Paints (Optional)Adding color and details to the butterfly

Assembling the Butterfly

Once you have all the necessary pieces and tools, the assembly process begins.

  • Layout and Design: Initially, you’ll organize the driftwood pieces on a flat surface, playing with the arrangement until it resembles a butterfly.

  • Shaping and Cutting: Use the saw and chisel to refine shapes, creating wings or antennae as required.

  • Joining Pieces: Use glue or epoxy resin to carefully join the elements together. Ensure stability and strength in your connections. An adjustable clamp can help hold the pieces together while the glue sets.

  • Finishing Touches: Sand down any rough edges, apply varnish or oil for protection, and add paints if desired for additional detailing.

Driftwood Butterfly Art in Decor

Driftwood butterflies bring natural charm and intrigue to home decor. They can become focal points in your living space or subtle accents that initiate conversations.

Incorporating Driftwood Butterflies in Interior Spaces

There are various ways to integrate driftwood butterflies into your home design, providing a harmonious balance between natural beauty and modern aesthetics.

  • Wall Art: Use driftwood butterflies as a standout piece on a feature wall. Their organic textures add depth and dimension.

  • Sculpture Displays: Arrange them on tabletops, shelves, or even as centerpieces on dining tables.

  • Outdoor Decor: Due to their natural resistance, treated driftwood butterflies can also be used to enhance garden spaces, patios, or balconies.

Driftwood Butterfly Art in Coastal Designs

Given their origin from sea wood, driftwood butterflies suit coastal home themes perfectly. Their natural hues and organic shapes blend well with ocean-inspired decors, enhancing a home’s light, airy feel.

Maintaining and Caring for Driftwood Art

Driftwood butterflies are generally low-maintenance. However, regular care ensures they remain beautiful for years to come.

Cleaning

Dust your driftwood art lightly using a soft cloth. Avoid harsh cleaning solutions which could damage the wood’s surface.

Preservation

Apply a fresh coat of varnish or oil annually to maintain the wood’s integrity and enhance its natural grain. This step is particularly important if your driftwood butterfly is displayed outdoors.

Repairs and Restoration

Should pieces become loose, fortify joints with adhesive. Regularly inspect your driftwood butterflies to address any signs of wear or damage promptly.

Driftwood Butterfly

Creativity and Sustainability in Driftwood Arts

Emphasizing the importance of sustainable practices, driftwood art, including the making of driftwood butterflies, plays a significant role in preserving natural resources. Using items abundantly available in nature allows artists and hobbyists to create without the need for newly-manufactured materials.

Contributing to Eco-Friendly Art Practices

In embracing nature’s bounty for artistic expression, you are promoting eco-friendly art practices. Choosing sustainable materials helps reduce consumerism and endorse recycling, making each art creation more meaningful environmentally.

Inspiring Future Generations

Crafting with driftwood and other natural materials educates and inspires future generations about the importance of sustainability and respecting natural environments. It opens a dialogue about how art can contribute positively towards environmental consciousness.

Exploring Further: Driftwood Creations Beyond Butterflies

While driftwood butterflies offer a delightful expression of creativity, driftwood itself serves as a versatile medium suitable for a wide range of artworks.

Driftwood Sculptures

Driftwood is often used to create sculptures representing various forms, from abstract shapes to lifelike animals. Its natural textures lend an artistic charm that can’t be replicated with other materials.

Functional Art with Driftwood

Furniture pieces, like mirrors, picture frames, and tables, can be crafted from driftwood, adding a rustic, natural aesthetic to functional items in your home or office.

Artistic Expressions and Installations

Increasingly popular in modern art galleries, installations using driftwood offer an immersive experience for viewers, inviting them to re-imagine nature’s offerings as opportunities for profound visual storytelling.

Conclusion

Driftwood butterflies embody the allure of transformation and the breathtaking artistry possible through nature’s creations. As you embark on crafting or appreciating these unique artworks, you’ll find both a meaningful connection with nature and the boundless creativity capable of turning the simplest natural element into a figure of profound beauty. Driftwood butterflies are not just pieces of art but are symbols of how possibilities emerge from the ephemeral, highlighting the potential in seemingly ordinary driftwood to blossom into something truly extraordinary. Truly, in every piece of driftwood, lies the possibility of flight, like that of a butterfly.

Filed Under: Driftwood Ideas Tagged With: Butterfly, Driftwood, Nature Art, Sculpture, Woodworking

Driftwood Bowl Diy

January 3, 2025 by admin

Have you ever found yourself strolling along a beach, noticing the various pieces of driftwood washed ashore, and wondered what you could create with such natural beauty? Driftwood’s unique shapes and weathered textures have made it a favorite for crafting enthusiasts and nature lovers alike. Creating a driftwood bowl is not just a DIY project; it’s an art form that allows you to bring a piece of the ocean into your home, creating a rustic yet elegant decor item.

Driftwood Bowl Diy

Understanding Driftwood: A Natural Treasure

Before you start your DIY project, it’s essential to know a bit about the material you’re working with. Driftwood is wood that has been washed onto a shore or beach of a sea, lake, or river by the action of winds, tides, or waves. Each piece of driftwood tells its own story, shaped by time and tides.

Characteristics of Driftwood

Driftwood is appreciated for its weathered appearance and unique shapes. Factors such as the type of wood, the length of time it has been in the water, and the environment in which it has been drifting contribute to its distinct character. Understanding these characteristics can help you select the best pieces for your project.

Why Use Driftwood for DIY Projects?

Using driftwood is not only cost-effective but also environmentally friendly. It allows you to repurpose an otherwise discarded material into something beautiful and functional. Its natural charm and uniqueness make it an appealing material for home decor, adding an organic, rustic touch.

Gathering Your Materials

Crafting a driftwood bowl requires some basic materials and tools. Being well-prepared will help make the process smoother and more enjoyable.

Materials Needed

Here’s what you’ll need to create your driftwood bowl:

MaterialDescription
Driftwood PiecesVarious sizes and shapes, cleaned and dried
Strong AdhesiveEpoxy or wood glue that can handle weight and moisture
Bowl MoldA template or form to shape the bowl, e.g., another bowl, aluminum foil
SandpaperMedium to fine grit for smoothing edges
Paint or Wood Finish(Optional) For sealing and adding a sheen

Tools Required

In addition to materials, having the right tools will ensure precision in your craft:

  • Scissors or Utility Knife
  • Measuring Tape
  • Paintbrush (if finishing)
  • Clamps (to hold pieces in place while drying)

Step-by-Step Guide to Creating Your Driftwood Bowl

Now that you’re ready with your materials and tools, let’s get into the crafting process. Making a driftwood bowl can be a rewarding experience, allowing you to explore your creativity while crafting something functional.

Step 1: Selecting and Preparing the Driftwood

Begin by selecting the driftwood pieces that will form the base and sides of your bowl. Look for pieces that are relatively flat or slightly curved, as these will be easier to work with.

Preparation:

  • Clean the driftwood by soaking it in a solution of water and bleach (10:1 ratio) to kill any bacteria, mold, or insects.
  • Rinse thoroughly with fresh water and allow it to dry completely, ideally in a sunny spot.

Step 2: Designing the Bowl Structure

Using another bowl as a guide, begin arranging and layering your driftwood pieces. This stage involves a lot of creative freedom, allowing you to decide the size and shape of your bowl.

  • Base Construction: Lay your choice of larger pieces to form a stable base.
  • Layering Sides: Start with smaller pieces, overlapping them slightly to create the sides of the bowl.

Step 3: Securing the Driftwood Pieces

Once you’re satisfied with your arrangement, it’s time to start adhering the pieces together using your chosen adhesive.

Adhesion Tips:

  • Apply glue at the contact points between driftwood pieces.
  • Work in sections to ensure stability, using clamps to hold pieces while the glue cures.
  • Allow the glue to dry completely, preferably overnight, before proceeding.

Step 4: Finishing Touches

After the glue has dried, it’s time to refine your driftwood bowl.

  • Sanding:
    Smooth any rough edges with sandpaper to prevent splinters and enhance the bowl’s appearance.

  • Finishing:
    Apply a wood finish or paint for added protection and visual appeal. This step will also enhance the natural colors and grain patterns of the driftwood.

Step 5: Curing and Displaying Your Piece

Allow the bowl to cure completely after finishing. Once cured, find the perfect spot in your home to display your handcrafted driftwood bowl.

Trouble Shooting Common Issues

As with any DIY project, you may encounter some challenges. Here are a few common issues and their solutions:

Driftwood Not Adhering Properly

If you find that the driftwood pieces are not sticking together:

  • Ensure both surfaces are clean and dry before applying adhesive.
  • Try roughening the surfaces slightly with sandpaper for better grip.
  • Reinforce with additional adhesive or small screws if needed.

Bowl is Unstable

If your bowl feels wobbly or unstable:

  • Check for gaps in the base or sides that could affect balance.
  • Add additional support pieces at weak points.
  • Consider using a heavier object to weigh it down while drying.

Driftwood Bowl Diy

Creative Variations

The beauty of a driftwood bowl is its adaptability. Once you’ve mastered the basics, here are some ideas to customize your design:

Mixed Media Bowls

Incorporate other natural elements, such as stones, shells, or seaglass, to add texture and interest.

Sculptural Designs

Experiment with intricate patterns or layers, creating a more ornamental piece that acts as a focal point.

Functional Additions

Consider personalizing with handles or a small lid, transforming it into a functional storage piece.

The Environmental Impact and Ethical Sourcing

Being mindful of the environment while collecting driftwood is crucial. Ensure you collect responsibly:

  • Check Regulations: Some areas have rules about collecting driftwood, particularly in protected environments.
  • Minimize Impact: Avoid taking wood that might be habitat for wildlife or plays a crucial role in the ecosystem.

Caring for Your Driftwood Bowl

To ensure your driftwood bowl lasts, some simple care instructions will keep it looking its best.

Regular Cleaning

Dust the bowl with a dry cloth regularly. Avoid using harsh chemicals, which can damage the wood’s surface.

Avoiding Moisture

Driftwood can absorb moisture, leading to mold issues. Keep your bowl in a dry place, ensuring good air circulation.

Retouching Finish

Over time, the finish may require touch-ups. Light sanding followed by a fresh coat of wood finish can revive its shine and protect the wood.

Inspirations From Nature: What Driftwood Represents

Driftwood symbolizes resilience and adaptability as it transforms through its journey in water. By crafting a driftwood bowl, you’re capturing a piece of that journey, forever commemorating nature’s artistry within your home.

Whether it serves as a centerpiece at your table, a vessel for your treasures, or a simple decorative piece, a driftwood bowl brings a touch of coastal charm into your living space, making every glance a reminder of its unique origins.

Final Thoughts: Embrace the Imperfections

Crafting a driftwood bowl is about embracing the unique imperfections and surprises that driftwood offers. Each piece is unlike any other, much like the individual style you’re bringing to your creation. The process is as rewarding as the result, and your handmade piece will reflect your creativity and connection to nature. Enjoy the art of creation, and let the beauty of driftwood inspire you.

Filed Under: Driftwood Ideas Tagged With: Craft Project, Driftwood, Handmade, home decor, Woodworking

Driftwood Boats Diy

January 3, 2025 by admin

Have you ever considered crafting something unique out of the nature around you? Driftwood, with its naturally weathered appearance, offers a fantastic medium for creating beautiful, rustic décor pieces, and boats are a fantastic project to start with. Making a driftwood boat can be a fascinating and rewarding activity, tapping into both your creativity and craftsmanship.

What is Driftwood?

Driftwood refers to wood that has been washed onto the shore by tides, winds, or waves. It often originates from trees and branches that have spent some time in the water, becoming naturally smoothed and bleached by environmental elements. This natural sanding process results in unique textures and shades, making each piece of driftwood perfect for bespoke creations. Because of its free availability along beaches and riverbanks, it’s a popular material among DIY enthusiasts.

Benefits of Using Driftwood

Creating with driftwood isn’t just about crafting; it’s also about reconnecting with nature. Driftwood is an eco-friendly material because it repurposes what otherwise might be considered waste. Using driftwood in your DIY projects can be both sustainable and economical, due to its easy availability and natural aesthetics. You’ll discover that driftwood brings a unique charm to your creations because each piece carries its own history and unique characteristics.

Tools and Materials You’ll Need

Before embarking on your driftwood boat project, it’s important to gather all the necessary tools and materials. This preparation ensures a smooth crafting process without interruptions. Here’s a list to get you started:

  • Driftwood: Various shapes and sizes for the boat body, mast, and sails.
  • Saw: To cut and shape the driftwood pieces.
  • Sandpaper: To smooth rough edges.
  • Wood Glue: For joining pieces together.
  • Drill: Useful for creating holes.
  • Nails and Screws: For securing the pieces (optional).
  • Twine or String: To add finishing details.
  • Paint or Wood Stain (optional): To enhance the appearance or preserve the wood.
  • Varnish: To protect the finished product from wear.

The option to further embellish your driftwood boat with additional materials like sea glass, shells, or pebbles also adds a personal touch, allowing you to make your craft truly one-of-a-kind.

Driftwood Boats Diy

Gathering the Perfect Driftwood

The search for driftwood can be a delightful experience, akin to treasure hunting. Here are some tips for collecting the best pieces:

  • Location: Beaches, riverbanks, and lakeshores are great places to find a variety of driftwood.
  • Weather Conditions: Visit after storms when more driftwood has been washed ashore.
  • Quality: Look for wood that is firm and without too much decay or mold.
  • Variety: Collect a range of sizes and shapes to have options as you design your boat.

Remember to only take driftwood in locations where it is permitted, as some areas have legal restrictions in place for environmental reasons.

Designing Your Driftwood Boat

The design phase is where you let your imagination run wild. Think about the kind of boat you want to create—is it a simple sailboat, a more complex ship, or something abstract? Sketch your ideas on paper, taking into account the pieces of driftwood you’ve collected. Consider the balance and proportions, as this will affect the stability and aesthetic appeal of your finished boat.

Tips for an Efficient Design Process

  • Start Simple: If this is your first driftwood project, begin with a basic design to learn the skills.
  • Incorporate Natural Forms: Use the wood’s natural shapes to your advantage, minimizing the need for excessive cutting.
  • Proportion Balance: Ensure the mast isn’t too heavy for the boat’s base, which could make it tip over.

Constructing the Hull

The hull is the main body of your boat and provides structural stability. Select broad, sturdy pieces of driftwood as the foundation. Lay out the pieces, reminiscent of the boat’s bottom, starting with larger logs that taper into smaller ones.

  • Assembling: Align your chosen pieces to form a base that resembles a canoe or flat-bottomed boat.
  • Joining: Use wood glue to bind pieces together. Reinforcement with nails or screws can add durability.
  • Smoothing: Use sandpaper to even out the edges and surfaces, preventing splinters and creating a pleasing texture.

Construction Tip

Make sure the base of your boat is level, as this ensures stability and prevents tipping when displayed.

Driftwood Boats Diy

Crafting the Sail and Rigging

The sail is a crucial component that brings your driftwood boat to life. For the mast, choose a slender and long piece of driftwood. The sail itself can be fashioned from different materials like fabric, paper, or even leaves, depending on your desired aesthetic.

Steps to Rigging Your Boat

  1. Mast Attachment: Drill a hole into the hull where you want the mast and insert your chosen piece. Secure it with glue.
  2. Sail Creation: Cut your chosen material into a triangular or rectangular shape.
  3. Attach the Sail: Use twine to fasten the fabric securely to the mast.
  4. Add Details: String additional twine around the sail and mast to mimic rigging.

Personalizing Your Driftwood Boat

One of the joys of DIY projects is the opportunity to infuse them with personal touches. Driftwood provides a versatile base for embellishment:

  • Painting: Add colors to your boat using acrylic paints or stains. Consider thematic colors like blues or nauticals.
  • Decorative Accents: Add beads, shells, or small stones for detail and charm.
  • Woodburning: Use a wood-burning tool for intricate patterns or to etch a name or date.

Considerations for Personalization

Each personal touch should reflect your style and enhance the natural beauty of the driftwood, not overwhelm it.

Preserving Your Driftwood Boat

To ensure your driftwood boat maintains its charm over time, apply a protective finish. A quality varnish seals the wood, protecting it from moisture and decay. Opt for a matte finish to maintain that natural look if you prefer, or a glossy finish for a polished appearance.

Steps for Finishing

  1. Choose the Right Varnish: Look for products designed for wooden crafts.
  2. Application: Use a brush to evenly coat the driftwood, applying multiple layers as needed.
  3. Drying Time: Allow sufficient time for each layer to dry before applying the next.

Driftwood Boat Ideas

If you’re unsure where to start or need inspiration, consider these imaginative driftwood boat designs:

Boat TypeCharacteristics
Simple SailboatMinimalist design, single piece mast, fabric sail
Viking ShipCurved hull, oars from sticks, dragon head embellishment
Modern YachtSleek, geometric forms with simple rigging and clean lines
Pirate ShipMulti-tiered, rugged construction, detailed with small skulls

Each of these ideas can be adapted depending on the driftwood you have and your skill level with crafting.

Troubleshooting Common Issues

Despite careful planning, challenges can arise. Here are common issues and how to address them:

  • Unstable Base: Reinforce with additional pieces or flatten uneven parts.
  • Loose Mast: Ensure it’s deeply set and secured with strong glue.
  • Splintered Wood: Sand thoroughly and use wood filler to seal gaps.

Sharing and Displaying Your Driftwood Boat

Once completed, your driftwood boat becomes not just a craft project, but a piece of art to share and enjoy. Here are ways to showcase your creation:

  • Indoor Display: Place on bookshelves or mantels for a cozy, natural accent.
  • Outdoor Décor: Use varnished pieces in gardens or patios, adding a nautical flair.
  • Gifting: Handmade boats make thoughtful and memorable gifts for friends and family.

Maintaining Your Creation

To keep your driftwood boat looking its best:

  • Regular Dusting: Gently wipe with a clean, dry cloth.
  • Avoid Excess Moisture: Position away from humid environments if possible.
  • Re-apply Varnish: Annually check for any signs of wear on the finish.

Concluding Thoughts

Creating driftwood boats is not just a craft; it’s an experience that combines artistry with nature. These projects provide a platform to express individuality and craftsmanship while emphasizing sustainability and creativity. Whatever your skill level, remember the joy is in the process as much as in the final product. Happy crafting!

By crafting your own driftwood boat, you embrace a unique artistry that connects you with nature, and each creation tells its story, one wave at a time. Enjoy the journey, learn from each piece of wood, and let your imagination set sail.

Filed Under: Driftwood Ideas Tagged With: Boats, crafting, DIY, Driftwood, Woodworking

Driftwood Blanket Ladder Diy

December 28, 2024 by admin

Have you ever thought about bringing a touch of the seaside into your home décor? A Driftwood Blanket Ladder can be a perfect way to blend the rustic charm of driftwood with functional design. Whether you’re a seasoned DIY enthusiast or a complete beginner, creating a driftwood blanket ladder is a project that can easily be accomplished over a relaxing weekend. In this guide, we’ll walk you through everything you need to know to craft your very own piece of coastal artistry.

Understanding Driftwood

Before you start your project, it’s essential to have a basic understanding of driftwood. Driftwood is wood that has been washed onto a shore or beach of a sea, river, or lake by the action of winds, tides, or waves. It often has a weathered, bleached appearance because of exposure to the elements. This natural erosion process makes each piece unique in texture, shape, and color.

Sourcing Driftwood

Finding the perfect driftwood for your project can be part of the fun. You can source driftwood from local beaches, riversides, or even lakes. Keep in mind, though, that some areas have restrictions on collecting driftwood, so always check local regulations. Alternatively, if it’s challenging to find natural driftwood, you can purchase driftwood logs from craft stores or online marketplaces.

Selecting the Right Pieces

When selecting driftwood for a blanket ladder, look for pieces that are straight and robust enough to bear a bit of weight. Typically, you’ll want two longer pieces for the side rails and several shorter pieces for the rungs. The character of the driftwood—such as knots or slight curves—can add to the aesthetic appeal.

Preparing Your Wood

After collecting or purchasing your driftwood, the next step is preparation. While driftwood’s naturally weathered appearance is part of its charm, it might also harbor salt, sand, or even small pests.

Cleaning the Driftwood

Start by scrubbing your driftwood with a stiff brush to remove any loose debris or sand. If the driftwood is heavily soiled, you might want to rinse it under running water. After cleaning, allow it to dry thoroughly in a well-ventilated area. This may take several days depending on the humidity and temperature.

Treating the Wood

For longevity, it’s a good idea to treat the driftwood. Soaking it in a mixture of bleach and water (one part bleach to nine parts water) can kill any insects or bacteria. Be sure to rinse it well and dry completely after soaking. Sanding the wood lightly with fine-grit sandpaper will smooth rough spots and prepare the surface for finishing.

Driftwood Blanket Ladder Diy

Planning Your Driftwood Blanket Ladder

Now that you have prepared your driftwood, it’s time to plan your ladder. Planning will involve deciding on the ladder’s dimensions, layout, and design style.

Determining Ladder Dimensions

Typically, a blanket ladder stands between five to six feet tall and has four to five rungs spaced evenly apart. Your ladder’s width will depend on the length of your shorter driftwood pieces, generally between 16 to 20 inches wide.

FeatureTypical Measurement
Height5 to 6 feet
Width16 to 20 inches
Number of rungs4 to 5

Design and Style

Think about how you want your blanket ladder to look. Driftwood has a rustic quality that can be enhanced or subdued, depending on your home décor style. Consider whether you want to leave the driftwood in its natural state for a rustic look or apply a clear sealant to give it a subtle shine. You could also stain the wood if you prefer a different color.

Assembling Your Driftwood Blanket Ladder

Once you have your pieces, dimensions, and design plan ready, you can begin assembling your blanket ladder. This part is where your blanket ladder starts taking shape.

Tools You Might Need

Here’s a list of tools and supplies that will help make the assembly process smooth:

  • A drill with a bit slightly smaller than screws
  • Wood screws (preferably rust-resistant)
  • A measuring tape
  • A screwdriver
  • A wood sealer or stain (optional)

Step-by-Step Assembly

1. Arrange Your Pieces

Lay the two longer pieces parallel to each other. Place each shorter piece (your rungs) between these, spaced evenly apart. Ensure your driftwood rungs are as level as possible.

2. Pre-Drill Holes

To avoid splitting the driftwood, pre-drill holes where you’ll be fixing the rungs to the side rails. This is a crucial step as driftwood can be quite brittle.

3. Attach the Rungs

Using wood screws, attach each rung to the side rails through the pre-drilled holes. Ensure the screws are countersunk slightly so they don’t stick out, which could damage blankets.

4. Secure the Ladder

Once all rungs are attached, gently stand the ladder up to check its stability. If needed, adjust the screws or sand certain areas to achieve a steady, balanced ladder.

Driftwood Blanket Ladder Diy

Finishing Touches

Adding a finishing touch to your driftwood blanket ladder can enhance its look and durability. This is a step that can make your project uniquely yours.

Sealing and Staining

Applying a wood sealant will protect your driftwood blanket ladder from moisture and wear. Use a clear finish to keep the natural look or a light wood stain if you prefer a different hue. Always test your chosen finish on a small, inconspicuous piece of wood first to ensure you like the result.

Adding Decorative Elements

Consider adding personal touches like hanging small ornaments or wrapping twine around the rungs for a boho-chic look. These elements can make the ladder a real statement piece in your home.

Placing Your Driftwood Blanket Ladder

Once your ladder is finished, consider where to place it. You’ll want it to be easily accessible while adding to the room’s décor.

Choosing the Right Spot

Place your blanket ladder in a living room corner or beside a sofa for easy blanket access. Bedrooms or guest rooms are also good options. Ensure it’s in a spot where it can lean securely against the wall.

Coordinating with Home Decor

Your driftwood blanket ladder will naturally complement other coastal or rustic décor pieces. Consider using earthy tones, nautical motifs, or vintage items nearby to create a cohesive look.

Troubleshooting Common Issues

Every DIY project can present challenges. Here are quick fixes for common problems you might encounter:

Uneven Rungs or Rails

If the rungs are uneven, double-check your measurements and adjust as necessary. Re-drilling might be needed, but sanding the uneven sections can also help.

Stability Problems

If the ladder isn’t stable, you may need to reposition it or trim one side slightly to balance it out. Adding non-slip pads to the bottom can also enhance stability.

Conclusion

Crafting a driftwood blanket ladder is not only a fun DIY project but also a wonderful way to introduce the laid-back elegance of coastal living into your home. By following these steps, you can create a functional and decorative piece that adds both charm and practicality to any space. Enjoy your handcrafted ladder, and the tranquil vibe it brings to your surroundings.

Filed Under: Driftwood Ideas Tagged With: Blanket Ladder, crafting, Driftwood, home decor, Woodworking

How To Attach Driftwood

December 10, 2024 by admin

How often have you admired the rustic, natural beauty of driftwood and wished you could incorporate it into your home or garden decor? Incorporating driftwood into your space can add just the right touch of nature and tranquility. Attaching driftwood properly ensures it becomes a lasting piece of art. Let’s journey through this process together, learning how to secure driftwood in the most effective way.

Understanding Driftwood: Nature’s Artist

Before we get into the nitty-gritty of attaching driftwood, it’s important to understand what driftwood is. Driftwood is usually wood that has been washed ashore by the tides, sanded by the sea, and bleached by the sun over time. It has a distinct bleached and weathered look that varies from piece to piece. Bringing driftwood into your living space is like bringing a piece of the ocean itself, offering both aesthetic and calming benefits.

Why Driftwood is Valuable

The value of driftwood goes beyond its aesthetic appeal. Each piece tells its own story of where it came from, its journey through the sea, and the transformations it underwent. Driftwood can be used in many creative ways—from sculptures to furniture to decorative accent pieces. Its neutral tones and unique texture make it adaptable to various design styles, enhancing the natural atmosphere of any setting.

Sourcing and Preparing Driftwood

Depending on where you live, you might be able to find driftwood at a nearby beach. If not, many craft and hobby stores sell driftwood for crafting purposes. In either case, once you’ve found a piece you like, it’s a good idea to prepare and clean it thoroughly. This ensures that it’s free of any unwanted organisms and ready for your project.

Preparing Driftwood for Attachment

Preparation is crucial for ensuring that your driftwood pieces stay secured in whatever arrangement you choose. Proper cleaning and treatment will also help prevent any premature degradation of the wood.

Cleaning Driftwood

Step 1: Initial Rinse
Begin by rinsing the driftwood with fresh water to remove any sand, salt, or loose debris. For smaller pieces, soak them in water for a few days, changing the water daily to leach out the salt.

Step 2: Bleaching (Optional)
To sanitize the wood, you can use a bleach solution. Mix one part bleach to ten parts water and soak the driftwood for 24 hours. This helps kill any remaining bacteria or algae. Remember to rinse the piece thoroughly afterward to eliminate any bleach residue.

Step 3: Drying
Allow the driftwood to dry completely. You can let it dry in the sun, which will also help to give it a sun-bleached look. Make sure the wood is completely dry before moving on to the next steps, as moisture can hinder adhesion and influence the integrity of your attachment.

How To Attach Driftwood

Tools and Materials for Attaching Driftwood

Having the right tools on hand will make your task easier and more efficient. Depending on the nature of your project, here’s a handy list of essentials for attaching driftwood:

Tool/MaterialPurpose
Wood GlueFor bonding glue-compatible surfaces
Epoxy ResinFor strong, durable adhesion
Drill and ScrewsFor securing driftwood to surfaces
Fishing Line or WireFor hanging driftwood pieces
L-bracketsFor mounting on walls or surfaces
SandpaperFor smoothing surfaces prior to attachment

Choosing the Right Adhesive

Not all adhesives are created equal, especially when working with nature’s own material like driftwood. Depending on the weight of your driftwood and what you’re attaching it to, different adhesives may be appropriate.

Wood Glue

Wood glue is perfect for lighter pieces of driftwood or for projects where you’ll be attaching the wood to other wooden surfaces.

Epoxy Resin

For heavier driftwood or when attaching to non-wooden surfaces such as glass or metal, epoxy resin is your best bet. It creates a durable bond and fills gaps, making it ideal for the irregular surfaces common in driftwood pieces.

Methods for Attaching Driftwood

There’s no one-size-fits-all method when it comes to attaching driftwood, largely because each piece of driftwood is unique. However, several effective methods can help you securely integrate driftwood into your decor.

Attaching with Adhesives

  1. Surface Preparation: Ensure both surfaces (the driftwood and the object to which it will attach) are clean and dry. Lightly sand both surfaces to create a rough area for better adhesion.

  2. Applying Adhesive: Apply a generous amount of your chosen adhesive to one surface. For epoxy resin, mix according to the package instructions before application.

  3. Positioning: Press the driftwood piece firmly against the surface. You may need to hold it in place for the adhesive to bond effectively; consider using clamps or weights if necessary.

  4. Drying Time: Allow ample time for the adhesive to dry and cure fully. This could range from a few hours to a full day, depending on the product used.

Screws and Drilling

For a mechanical attachment, especially for larger or load-bearing applications, screws can provide a more secure hold.

  1. Choosing Screws: Select screws that are slightly longer than the thickness of the driftwood to ensure they penetrate the surface it’s being attached to.

  2. Pre-drilling: Pre-drill holes in the driftwood to avoid splitting. Use a drill bit slightly smaller than the screw’s diameter.

  3. Securing: Use a power drill to drive the screws through the pre-drilled holes into the receiving surface. Be cautious not to over-tighten, as this can crack or split the driftwood.

Using Brackets

L-brackets can be very effective for stabilizing driftwood pieces against walls or flat surfaces.

  1. Position the Bracket: Align the bracket where you want the piece to rest, ensuring that it will hold the weight of your driftwood.

  2. Attaching the Bracket: Secure the bracket to the wall or desired surface with screws, and then place the driftwood onto the bracket. Depending on your aesthetic preference, you can either leave the bracket exposed or conceal it with decorative elements.

Hanging with Wire or Fishing Line

For hanging driftwood pieces, using wire or fishing line can be an artistic and less intrusive way to display your driftwood.

  1. Determine Length: Cut the wire or line to your desired length, ensuring it can hold the weight of the driftwood.

  2. Secure the Line: Loop the line around the driftwood, knotting it securely. For additional strength, you may use two or more strands.

  3. Hanging: Attach the other end to a stable hook or nail. Ensure the anchor point (such as in the wall or ceiling) can bear the driftwood’s weight reliably.

How To Attach Driftwood

Creative Ideas for Using Driftwood

Now that you’ve mastered the techniques for attaching driftwood, let’s look at some creative applications to inspire you.

Incorporating Driftwood into Interior Decor

  1. Wall Art: Attach smaller pieces of driftwood to form a driftwood collage or a central focal piece such as a driftwood heart or star.

  2. Furniture: Use larger pieces as bases or legs for tables and chairs, adding a unique twist to conventional furniture pieces.

  3. Shelves: Install driftwood as floating shelves. Mount the wood securely with brackets or screws for a minimalist, rustic look.

Driftwood in Garden and Outdoor Spaces

  1. Planters: Create a driftwood planter by using driftwood to encase potted plants.

  2. Garden Borders: Use driftwood as natural borders around flower beds or pathways.

  3. Birdhouses and Feeders: Construct birdhouses or feeders by attaching additional wood pieces, creating a natural feeding environment for birds.

Troubleshooting Common Problems

Even with careful preparation and maintenance, things can occasionally go awry. Here are some tips on what to do if issues arise with your driftwood projects:

Loose Attachments

If a piece of driftwood isn’t holding as securely as you’d like, consider reinforcing it with additional screws or a stronger adhesive. Double-check that the surfaces were properly cleaned and sanded before attachment.

Splintering Driftwood

Splintering can occur if driftwood is dry or too brittle. Regularly check the condition of your driftwood and be prepared to sand and retouch finishes to maintain their integrity.

Environmental Deterioration

Outdoor driftwood can degrade if exposed to extreme weather. Consider sealing the driftwood with a clear outdoor sealant to protect it from the elements while preserving its natural beauty.

Conclusion: Crafting with Driftwood

Attaching driftwood to various surfaces and incorporating it into your decor is a satisfying and rewarding endeavor. It allows you to bring the beauty of nature into your personal space, whether indoors or outdoors. By understanding the characteristics of driftwood, preparing it correctly, and using the appropriate methods and tools, you can create stunning and durable works of art. Remember, every piece of driftwood is unique, and with a little creativity and care, you can transform any piece into something that’s perfectly you.

Filed Under: Driftwood Ideas Tagged With: crafting, DIY Projects, Driftwood, home decor, Woodworking

Driftwood Apoxy

November 30, 2024 by admin

Have you ever considered the beauty and potential in something as simple as driftwood? Driftwood itself holds an organic, rustic charm, but have you wondered how adding a bit of creativity and innovation could take it to the next level? Enter the world of driftwood epoxy — a fascinating blend of nature and craftsmanship that you can explore to create stunning art pieces and functional items.

Driftwood Apoxy

What is Driftwood Epoxy?

When you hear the term “driftwood epoxy,” it essentially refers to the union of driftwood — those wonderfully weathered wood pieces found ashore or floating along a body of water — with epoxy resin. Epoxy itself is a versatile thermosetting polymer known for its strong adhesive properties and crystal-clear finish once set. By combining the two, you can create everything from gorgeous tables and art pieces to smaller decorative items that highlight the unique texture and form of the driftwood.

A Natural and Creative Medium

Driftwood epoxy combines natural materials with artistic expression. By using epoxy resin with driftwood, you preserve the organic aesthetic of the wood while enhancing it with the resin’s durability and gloss. The result can be a creation that is both eye-catching and timeless, capturing the rustic beauty of the wood while protected and accentuated by the resin.

Why Choose Driftwood Epoxy?

There are several reasons you might choose to work with driftwood epoxy. For one, it allows you to recycle and repurpose materials that nature has already crafted into unique shapes. By using driftwood, you’re contributing to sustainable practices, giving new life to what might otherwise be discarded. Furthermore, the combination of driftwood and epoxy resin often results in pieces that are sturdy and long-lasting, ensuring they can be enjoyed for years to come.

The Basics of Working with Driftwood and Epoxy

Before you dive into creating your masterpiece, it’s important to understand the fundamentals of working with driftwood and epoxy. This will ensure your project is successful and satisfying.

Selecting Your Driftwood

Choosing the right piece of wood is a crucial first step. Driftwood comes in various shapes, sizes, and textures, depending on its origin and journey. Look for pieces that inspire you — whether due to their shape, the intricacy of their grain, or the story they seem to hold.

  • Size and Shape: Consider the project you’re planning and select wood that fits your intended use.
  • Texture and Color: Each piece of driftwood is unique in terms of its surface texture and coloration. Select a texture that complements your vision.
  • Condition: The driftwood should be relatively free from rot. Too much decay can compromise the structure and integrity of your final product.

Preparing the Driftwood

Once you’ve selected the driftwood you’ll work with, it’s important to prepare it properly. Start by cleaning the wood thoroughly to remove any dirt, salt, or organisms it may have picked up in its travels. Soak it in freshwater for several days, changing the water regularly. After cleaning, allow the driftwood to dry completely, which may take several days.

Selecting and Mixing Epoxy

The epoxy resin you choose will influence the outcome of your project. Epoxy resins vary in terms of thickness, clarity, and setting time. Opt for a clear, marine-grade epoxy for durability and optimal aesthetic results.

Once you’ve selected your resin, you’ll need to prepare it according to the manufacturer’s instructions.

  • Measurements: Mix resin and hardener in the correct ratios. Improper measurements can prevent the mixture from curing properly.
  • Mixing: Stir the mixture slowly and thoroughly to avoid air bubbles and ensure uniformity.

Crafting with Driftwood Epoxy

With your prepared driftwood and mixed epoxy resin, you’re ready to begin crafting. Here’s how you can create various items with driftwood epoxy.

Creating Driftwood Epoxy Art

Driftwood epoxy can be used to create beautiful, nature-inspired art pieces. Whether it’s a wall hanging or a standalone sculpture, the process allows you to highlight the organic textures and forms of driftwood.

  1. Design Concept: Plan a design before you begin. You can sketch your ideas or visualize the final piece in your mind.
  2. Construct a Mold: You may need to construct a mold or frame to support the structure while the epoxy cures.
  3. Pouring Epoxy: Carefully pour or apply the epoxy over your driftwood, covering edges and beneath crevices to ensure comprehensive coverage.
  4. Curing Process: Allow the epoxy to cure as per the instructions. Curing time can vary based on the environment and resin.

Making Functional Items

Beyond aesthetic art, driftwood epoxy offers potential for creating functional items such as lamps, furniture, or even kitchen utensils.

  • Unique Tables: Use driftwood as a base or accent within a resin river table design.
  • Decorative Bowls and Trays: Form practical yet decorative items that exhibit the character of the driftwood.
  • Lamp and Light Fixtures: Incorporate driftwood with epoxy resin to create lighting that adds warmth and character to a room.

Coating and Finishing

Regardless of your project, finishing touches are key to a polished result. Sand the cured epoxy to eliminate imperfections or bubbles, followed by a final polish or varnish to enhance the lustrous shine.

Caring for Driftwood Epoxy Creations

Once you’ve completed your driftwood epoxy project, proper care and maintenance will ensure it remains in excellent condition for years to come.

Cleaning and Dusting

  • Use a gentle cloth for regular dusting.
  • Avoid harsh chemicals; a damp cloth with mild soap is preferable for cleaning.

Environmental Considerations

  • Keep your items away from direct sunlight and extreme temperatures to prevent expansion or warping.

Driftwood Apoxy

Challenges and Solutions in Driftwood Epoxy Projects

Like any creative project, working with driftwood epoxy comes with its own set of challenges. Here are some common ones and solutions to overcome them.

Air Bubbles

Air bubbles can occur when mixing or pouring epoxy. Stir slowly to minimize air introduction, and use a heat gun to eliminate bubbles after pouring.

Uneven Surfaces

Driftwood can be irregular, creating challenges for leveling your project. Consider using clamps or weights to hold the epoxy even during curing.

Inspirational Ideas for Driftwood Epoxy

Embarking on your driftwood epoxy journey can be a rewarding experience with endless possibilities. To help spark your creativity, here are some inspirational ideas you might consider:

Driftwood Epoxy Jewelry

Transform small, unique pieces of driftwood into exquisite pendants or earrings by encasing them in vibrant or translucent epoxy. Not only do they serve as conversation pieces, but they also allow you to wear a piece of art wherever you go.

Outdoor Furniture

Craft rustic yet elegant outdoor seating or tables using larger pieces of driftwood set in resin. Their natural resilience against weather makes them durable, and they bring a touch of natural elegance to any garden or patio.

Decorative Wall Panels

Create stunning, large-scale wall art by embedding driftwood into resin panels. This can serve as a dramatic focal point in both home and office environments, bringing a slice of nature indoors.

Conclusion

Driftwood epoxy is a remarkable medium that invites you to combine creativity with nature’s artistry. By blending the organic allure of driftwood with the versatility of epoxy resin, you can create pieces that are both visually captivating and sustainably sourced. Whether your goal is to craft a beautiful art piece or a functional item imbued with personality, driftwood epoxy offers limitless possibilities. So why not embrace the natural beauty and embark on a creative journey that’s as rewarding as it is environmentally conscious?

Filed Under: Driftwood Ideas Tagged With: crafting, Driftwood, Epoxy, home decor, Woodworking

Driftwood American Flag

November 25, 2024 by admin

Have you ever walked along a beach and stumbled upon pieces of driftwood with unique shapes and textures? These natural pieces, weathered by the sea, hold the potential to be transformed into beautiful art. One of the most creative and patriotic uses for driftwood is crafting an American flag. Imagine incorporating nature into your home decor with a piece that not only has character but also tells a story of the ocean’s journey.

What is a Driftwood American Flag?

A driftwood American flag is a decorative representation of the U.S. flag using pieces of driftwood as the canvas. This unique crafting process involves arranging and painting driftwood in a way that mimics the red, white, and blue stripes and stars of the traditional American flag. Incorporating natural elements into an iconic symbol not only celebrates patriotism but also honors the beauty of nature.

The Appeal of Driftwood

Driftwood’s charm lies in its natural and rugged appearance, with each piece offering its own history and story. Driftwood is formed when pieces of wood are washed ashore by the sea, sanded smooth by the constant motion of the waves and elements. This means that no two pieces are ever the same, making your driftwood American flag a truly unique piece of art.

Historical Context

Creating art from driftwood is not a new concept. Artists have long been inspired by the sea and its gifts, using driftwood in various forms of art for centuries. However, the use of driftwood to craft an American flag adds a layer of meaning that combines tradition with innovation.

The Symbolism of the American Flag

The American flag, with its stars and stripes, represents the history, values, and vision of the United States. It is a symbol of freedom and democracy, deeply woven into the fabric of American identity. By recreating this emblem with driftwood, you merge these powerful symbols with the ethos of natural beauty and sustainability.

Driftwood American Flag

Gathering Materials

Before you begin your project, it’s essential to gather all the necessary materials. This ensures that your crafting process is smooth and enjoyable.

Collecting Driftwood

The first step is collecting driftwood. You can find driftwood pieces on many beaches; they are typically light gray or brown and come in various shapes and sizes. Safety first—ensure that collecting driftwood is permitted in the area you’re visiting. Look for straight pieces for stripes and more irregular ones for creating stars.

Additional Supplies

For your driftwood flag, you will need:

  • Acrylic paints (red, white, and blue)
  • Paintbrushes
  • Sandpaper
  • Wood glue or nails
  • A saw for trimming wood pieces
  • Optional: Stencils for stars

Creating Your Driftwood American Flag

Let’s move on to the exciting part—creating your driftwood American flag! This section will guide you through the step-by-step process.

Preparing the Driftwood

Start by selecting and cleaning your pieces of driftwood. Remove any dirt or debris and sand them lightly to create a smooth surface for painting. If necessary, use a saw to cut the driftwood into the desired length for your flag.

Assembling the Flag

Arrange the driftwood pieces to replicate the American flag. Traditionally, the flag consists of 13 alternating red and white stripes, and a blue field with stars. You can use a combination of gluing or nailing to secure the wood pieces together.

Flag ElementDriftwood Representation
Red StripesPaint odd rows of driftwood red
White StripesLeave some pieces bare or paint white
Blue FieldSelect different shaped pieces for stars
White StarsPaint stars directly or use stencils

Painting the Driftwood

Once assembled, begin by painting the stripes. Use red and white acrylic paint, alternating colors. For the upper left corner, paint a section blue—this will represent the blue field of the flag. After the paint has dried, add the stars. You can paint them freehand or use a stencil for better precision.

Driftwood American Flag

Displaying Your Creation

After completing your driftwood American flag, it’s time to showcase your masterpiece. Consider these display and maintenance tips to ensure your art remains vibrant and secured.

Indoor vs. Outdoor Display

Your driftwood flag can be displayed indoors or outdoors, depending on your preference. For an outdoor display, ensure you apply a coat of weather-resistant sealant to protect the wood and paint from the elements.

Maintenance and Care

Regularly check your flag for any signs of wear or damage, especially if displayed outside. A quick touch-up with paint can refresh your flag’s appearance, and a new coat of sealant can prevent further weathering.

Creative Variations

If you’re feeling adventurous, there are numerous ways to personalize your driftwood flag. You might consider adding additional elements such as:

  • Including shells or sea glass for a coastal theme.
  • Using distressed or metallic paints for an antique look.
  • Incorporating lights for a glowing nighttime display.

Personal Touches

Add your unique twist by experimenting with different painting techniques or layouts. Perhaps use all natural colors, leaving some of the wood unpainted to emphasize its historic journey.

Environmental Considerations

As you engage in this artistic endeavor, it’s good to be mindful of the environment. Driftwood art aligns with the principles of sustainability by repurposing natural materials, thereby minimizing waste.

Ethical Collecting

Ensure that your driftwood collection aligns with environmental regulations and local laws. Be conscious of the ecosystem, avoiding disturbance to living organisms and habitats.

Why Create a Driftwood American Flag?

Creating a driftwood American flag combines artistry, nature, and national pride. It’s an engaging way to repurpose natural materials into something meaningful and aesthetically pleasing. Plus, it’s an opportunity to flex your creativity muscles and make something truly unique that reflects both personal style and national identity.

A Sense of Accomplishment

There’s nothing quite like the satisfaction of creating a piece of art with your own hands. Not only does this craft exercise offer a rewarding experience, but it also results in a decor piece that holds sentimental value and can be a conversation starter within your home.

Conclusion

In a world where manufactured products often dominate the market, crafting a driftwood American flag provides a refreshing alternative. It’s a chance to reconnect with nature, express creativity, and honor national history. As you stand back and admire your creation, you can take pride in the fact that it embodies uniqueness, sustainability, and the timeless symbol of freedom.

Creating a driftwood American flag is more than just an afternoon project; it’s a unique endeavor that combines the natural beauty of the sea with the enduring symbol of the United States. So next time you’re by the beach, consider picking up some driftwood and embarking on this creative journey. The result is sure to be a beautiful addition to your home and a testament to your patriotism and creativity.

Filed Under: Driftwood Ideas Tagged With: American Flag, DIY, Driftwood, home decor, Woodworking

  • « Previous Page
  • Page 1
  • Page 2
  • Page 3
  • Page 4
  • Page 5
  • Next Page »

Primary Sidebar

Driftwood4us.com, is a participant in the Amazon Services LLC Associates Program, an affiliate advertising program designed to provide a means for sites to earn advertising fees by advertising and linking to amazon.com.