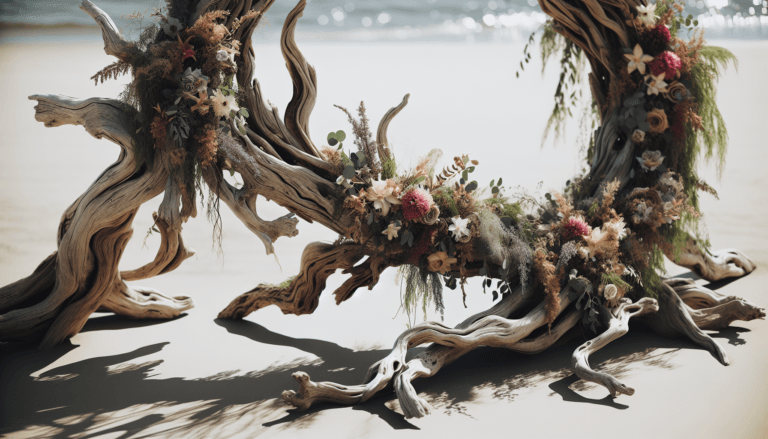
Upcycling Driftwood For Wall Art
The ‘trash’ you stepped over during your morning walk is actually the $1,200 centerpiece your living room is missing. Most people see beach debris and see a mess. The strategist sees raw material. Every piece of driftwood is a pre-sculpted component waiting to be fueled by your creativity into a high-value wall asset.
[affiai]This is not about gluing sticks together. It is about a fundamental shift in how we perceive value. When you pull a silvered, salt-cured branch from the tide line, you are harvesting years of oceanic labor. The water has already done the heavy lifting of shaping, stripping, and smoothing. Your job is to take that raw potential and refine it into a statement piece.
Whether you are looking to fill a void on a minimalist gallery wall or bring a sense of organic history into a modern apartment, driftwood offers a texture that mass-produced decor cannot replicate. It carries the weight of its journey. In this guide, we will strip away the mystery of the process and show you how to turn coastal salvage into professional-grade art.
Upcycling Driftwood For Wall Art
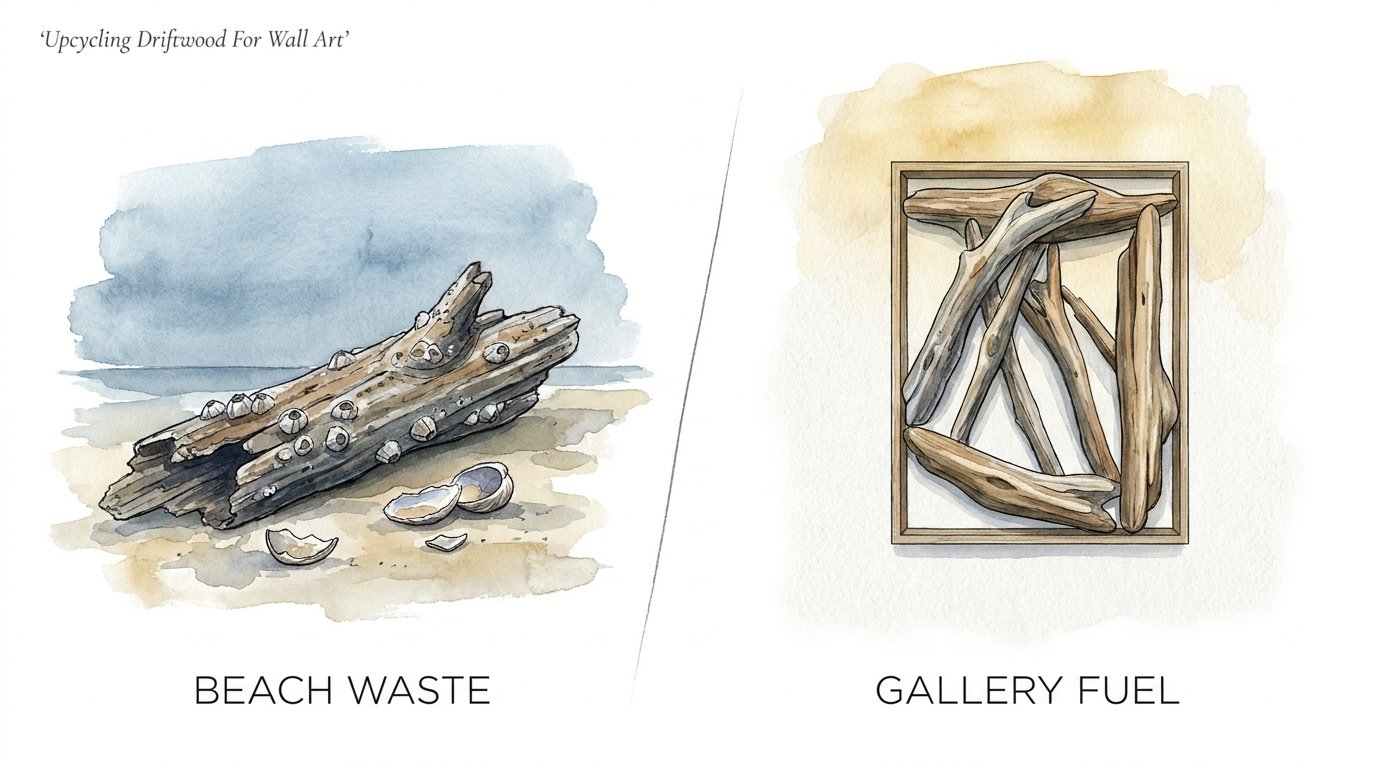
Upcycling driftwood for wall art is the practice of reclaiming wood that has been washed ashore and transforming it into decorative or functional installations. It sits at the intersection of environmental stewardship and high-end interior design. This process turns what many consider BEACH WASTE into GALLERY FUEL, utilizing the unique textures and silvered patinas created by prolonged exposure to salt water and UV rays.
In the real world, this wood is used for everything from massive lobby installations to delicate framed shadow boxes. It exists as a solution for those who want the warmth of wood without the environmental footprint of new lumber. Driftwood is essentially nature’s reclaimed timber, but with a more storied history than a barn board or a floor plank.
Think of driftwood as a collaboration between the forest and the sea. A tree falls into a river, travels to the ocean, and spends months or years being tumbled in the surf. By the time it reaches your hands, the soft sapwood is gone, leaving behind the dense, weather-beaten core. This makes it incredibly durable once properly treated. It provides a rugged, “pioneer-grit” aesthetic that feels both ancient and contemporary.
Harvesting and Legalities
Before you set foot on the sand with a burlap sack, you must understand the rules of the shoreline. The sea may give freely, but the law has its own ideas. In many regions, driftwood is considered part of the coastal ecosystem, providing habitat for small organisms and stabilizing the dunes against erosion.
In the United States, collecting driftwood is generally permitted on public beaches for personal use, but national parks and wildlife refuges often have strict “leave no trace” policies. Removing even a small twig from a protected area can result in significant fines. In the United Kingdom, the Coastal Protection Act of 1949 governs the removal of natural materials. While it often targets sand and pebbles, some local councils restrict wood collection to prevent coastal instability.
Canadian regulations are even more specific. In British Columbia, wood found below the high-tide line is often considered “log salvage” and may require a permit. Always check with local authorities—whether it is the Department of Natural Resources or a local council—to ensure your harvest is ethical and legal. A true craftsman respects the source as much as the finished product.
Curing the Raw Material
The biggest mistake a beginner makes is bringing a piece of “wet” wood directly into the house. Driftwood is a sponge for salt, microorganisms, and pests. If you skip the curing process, your art will eventually rot, smell of brine, or release wood-boring beetles into your drywall.
The Deep Clean
Start by physically removing the loose debris. Use a stiff-bristled brush—brass or heavy nylon—to scrub away sand, dried seaweed, and any remaining bark. Do not use a pressure washer on delicate pieces, as it can fur the fibers and ruin the smooth, water-worn texture.
Next, you must sanitize the wood. Submerge the pieces in a large plastic trough filled with a solution of one part bleach to nine parts water. This soak should last at least 24 hours. The bleach penetrates the pores to kill mold spores and insect larvae. For exceptionally large pieces that cannot be submerged, use a garden sprayer to saturate the wood repeatedly over several hours, keeping it wet and shaded so the chlorine doesn’t evaporate too quickly.
The Desalination Soak
Salt is hygroscopic, meaning it pulls moisture from the air. If you don’t remove the salt, your wood will “sweat” in humid weather, potentially damaging your walls or the finish on the art. After the bleach bath, soak the wood in fresh water for another 48 hours, changing the water once halfway through. This draws the salt out of the grain.
Drying and Seasoning
Patience is the tool you cannot buy. The wood must be bone-dry before you apply a finish or mount it. Air drying in a well-ventilated, shaded area is the best method. Avoid direct, scorching sunlight, which can cause the wood to check or crack. Depending on the thickness, this can take anywhere from a week to a month.
Some practitioners use a low-temperature oven (around 200°F) to speed up the process and ensure all pests are dead. However, this carries a fire risk and can make the wood brittle. If you choose this route, monitor the wood constantly and only use it for smaller, denser pieces.
Design Strategies and Techniques
Once the wood is cured, the artistic phase begins. There are three primary ways to approach driftwood wall art: the Solo Statement, the Assemblage, and the Structured Frame.
The Solo Statement
This involves finding one extraordinary piece—perhaps a gnarled root ball or a long, sweeping branch—and presenting it as a standalone sculpture. The goal here is minimal intervention. You are simply providing the hardware to make the wood appear as if it is floating on the wall. This approach relies heavily on the “find.”
The Assemblage
In an assemblage, you use multiple smaller pieces to create a larger form. Common designs include a “Starburst” pattern, where sticks radiate from a central point, or a “River Flow” where dozens of small, similar pieces are aligned to create a sense of movement. Titebond Wood Glue or a heavy-duty construction adhesive like E6000 is essential here. For 3D sculptures, a hidden plywood backing serves as the structural foundation to which you anchor the individual sticks.
The Structured Frame
This technique places the wild nature of driftwood inside the rigid confines of a frame. You might cut driftwood into uniform lengths and stack them horizontally inside a deep shadow box, or create a mosaic of cross-sections (cookies) glued to a backer board. The contrast between the straight lines of the frame and the organic curves of the wood creates a sophisticated, professional look.
Mounting and Installation
Wall art is only as good as its mounting. Driftwood is often heavy and oddly shaped, making traditional picture wire insufficient. You must account for the center of gravity, which is rarely in the middle of a natural branch.
Heavy-Duty Hardware
For large, heavy logs, French Cleats are the gold standard. You screw one half of the cleat into the back of the wood (ensuring it is level) and the other half into the wall studs. This distributes the weight evenly and keeps the piece flush against the wall.
If the wood is lighter but spindly, D-hooks or Keyhole Hangers work well. Use a drill to create a slight recess in the back of the wood so the hardware sits flush. This prevents the piece from wobbling or leaning away from the wall.
Hidden Support
To achieve a “floating” look, use Long Lag Bolts. Drill a hole into the back of the driftwood and a corresponding hole into a wall stud. Insert a headless bolt into the wall and slide the driftwood onto it. This requires precision but provides a clean, professional finish with no visible hardware.
Benefits of Driftwood Art
Choosing to work with driftwood offers several advantages over traditional medium-density fibreboard (MDF) or plastic-based decor.
* Zero Cost for Raw Materials: Aside from your time and the cost of cleaning supplies, the “lumber” is free.
* High Perceived Value: Large driftwood sculptures can retail for thousands of dollars in coastal galleries because of their uniqueness.
* Sustainable Footprint: You are removing debris from the shoreline and preventing the need for new timber harvesting.
* Durability: Salt-cured wood is naturally resistant to many types of rot and decay once it is kept in a dry indoor environment.
* Aesthetic Versatility: It fits into various design languages, from “Boho Chic” to “Industrial Modern.”
Challenges and Common Mistakes
Working with natural materials is never a straight line. Beginners often run into these hurdles:
* Incomplete Drying: Sealing wood that still has internal moisture will lead to mold growth under the finish. The wood will eventually turn black and soft.
* Using Brittle Wood: Not all wood found on a beach is good for art. If the wood crumbles when you press it with a fingernail, it is too far gone. Look for “hard” wood that rings when tapped.
* Visible Hardware: Nothing ruins the illusion of a natural artifact faster than a shiny silver screw head poking out of the front. Always hide your attachment points.
* Poor Lighting: Driftwood is all about texture and shadow. If you hang it in a spot with flat, overhead lighting, it will look like a dull grey stick. Use side-lighting or track lighting to catch the ridges and whorls.
Limitations of the Medium
While driftwood is versatile, it has realistic boundaries. It is not a structural material. You should not use it to support significant weight unless it is a very dense, thick piece.
Furthermore, environmental conditions matter. Driftwood art is generally not suited for bathrooms or high-humidity areas unless it is heavily sealed with a marine-grade varnish. The wood will continue to “breathe,” and high humidity can cause it to warp or reactivate old salts that weren’t fully washed away.
There is also the limitation of scale. Finding a 10-foot piece of driftwood that is both aesthetically pleasing and structurally sound is rare. Most wall art will be limited by the size of the “finds” available on your local shores.
Comparison: Driftwood vs. Reclaimed Barn Wood
| Factor | Driftwood | Reclaimed Barn Wood |
|---|---|---|
| Source | Coastlines, rivers, lakes. | Old structures, barns, factories. |
| Texture | Smooth, rounded, weathered by water. | Rough, linear, weathered by wind/rain. |
| Preparation | High (Bleaching, desalination, long drying). | Medium (Kiln drying, de-nailing). |
| Cost | Free to harvest. | Expensive ($5–$20 per board foot). |
| Shape | Organic, unpredictable. | Standardized planks and beams. |
Practical Tips for Success
If you want your work to look like it belongs in a high-end boutique rather than a middle-school craft fair, follow these best practices:
- Sand Selectively: Do not sand the entire piece. Focus only on the ends where the wood may have splintered or where you made a cut. Use a high-grit sandpaper (220 or higher) to maintain the silvered “skin” of the wood.
- Choose Your Finish Wisely: A glossy polyurethane will make driftwood look cheap and plastic. Opt for a Matte Acrylic Sealer or a natural Beeswax and Oil blend. This protects the wood while preserving the flat, dry look that is characteristic of beach finds.
- Composition First: Before you glue or screw anything, lay your pieces out on the floor. Take a photo from a high vantage point. Often, what looks good up close feels “busy” or unbalanced from a distance.
- Use Side-Lighting: As mentioned, driftwood is a 3D medium. Use a dedicated spotlight to create long shadows across the surface of the art. This adds depth and makes the piece pop off the wall.
Advanced Considerations: Large-Scale Installations
For those looking to move beyond small wall hangings, large-scale driftwood installations require a different mindset. When working with pieces over four feet in length, weight becomes the primary concern.
Consider Internal Steel Reinforcement. You can drill through the length of several pieces and thread them onto a steel rod. This allows you to create massive, sweeping curves that would be impossible with glue alone. It also provides a secure point to anchor the entire assembly to the wall.
If you are creating art for a commercial space, you must also consider Fire Retardants. Most building codes require decorative wood in public spaces to be treated with a fire-rated clear coat. This can change the color of the wood slightly, so always test a small area first.
Example Scenario: The “Organic Flow” Mirror
Imagine you have collected twenty pieces of driftwood, all roughly 8 to 12 inches long and slightly curved. You want to create a sunburst mirror.
First, you source a high-quality 24-inch round mirror and a 30-inch piece of half-inch Baltic birch plywood. You glue the mirror to the center of the plywood using specialized mirror mastic. This leaves a 3-inch rim of wood around the mirror.
After curing and cleaning your driftwood, you begin dry-fitting the pieces around the rim. You place the longest, most dramatic pieces at the 12, 3, 6, and 9 o’clock positions to establish the “reach.” You then fill in the gaps with the smaller pieces, overlapping them to hide the plywood backing.
Once the layout is perfect, you use a combination of wood glue and a 23-gauge pin nailer to secure each piece. The pin nails are nearly invisible but provide the “clamp” needed while the glue sets. After the glue dries, you apply a light mist of matte sealer. The result is a high-end, heavy piece of art that looks like it was plucked from a Pacific Northwest beach.
Final Thoughts
Upcycling driftwood for wall art is a testament to the idea that beauty is often hidden in plain sight. It requires a patient hand and a discerning eye, but the reward is a piece of decor that is literally one of a kind. By following the rigorous cleaning and preparation steps outlined here, you ensure that your art is as durable as it is striking.
The transition from beach waste to gallery fuel is not just a physical process—it is a creative discipline. It forces you to work within the constraints of nature, finding the balance between the wild, weathered wood and the clean lines of a modern home.
Don’t be afraid to experiment. The sea is a prolific artist, and its supply of raw material is endless. Start small, master the curing process, and soon you will be seeing every morning walk as a trip to the world’s most exclusive lumber yard.
Sources
1 homify.com.my (https://www.homify.com.my/diy/52765/preserve-driftwood-with-5-things-and-make-a-decorative-object-out-of-it) | 2 grist.org (https://grist.org/living/these-artists-turn-ocean-trash-into-really-classy-art/) | 3 medium.com (https://medium.com/@glonav.net/from-trash-to-treasure-the-rise-of-upcycling-in-a-wasteful-world-f408b0d9a90b) | 4 salishmagazine.org (https://salishmagazine.org/driftwood-and-sand/) | 5 discovertheoutdoors.co.uk (https://discovertheoutdoors.co.uk/beachcombing-uk-law/) | 6 reddit.com (https://www.reddit.com/r/VictoriaBC/comments/1nqjzgh/i_saw_a_man_filling_his_car_with_driftwood_at/) | 7 specialeditionart.com (https://specialeditionart.com/blogs/theoracle/how-to-hang-driftwood-on-your-wall-a-comprehensive-guide) | 8 lakewedoweelife.com (https://www.lakewedoweelife.com/lake-life/driftwood-art-and-treasures-by-tammy-lovvorn) | 9 instructables.com (https://www.instructables.com/Driftwood-into-art/) | 10 danslelakehouse.com (https://danslelakehouse.com/2020/12/diy-driftwood-wall-hanging.html) | 11 theroomsart.com (https://theroomsart.com/driftwood-wall-decor-guide/) | 12 quora.com (https://www.quora.com/Is-it-illegal-to-take-driftwood-from-a-beach) | 13 coohom.com (https://www.coohom.com/article/large-driftwood-wall-decor) | 14 parklanejewelry.com (https://www2.parklanejewelry.com/how-to-wash-driftwood/)