Diy Driftwood Seed Storage Boxes
Why trust your future garden to paper and plastic when the ocean has already provided a moisture-proof vault for free? Most gardeners store their most precious resource—their seeds—in paper packets designed to fail the moment humidity rises. Meanwhile, the beach is littered with salt-cured timber that has survived decades of maritime moisture. Learn how to carve your own Driftwood Seed Vault that regulates humidity and outlasts your house.
[affiai]Seed saving is an act of defiance against a disposable world. It is the practice of ancestors who knew that survival was etched into the genetics of a dried bean or a grain of corn. Yet, we often treat these living embryos with less care than a spare set of house keys, tossing them into kitchen drawers or flimsy plastic bins that sweat the moment the summer heat kicks in. To truly honor the legacy of your garden, you need a vessel that breathes with the earth but stands firm against the rot.
The ocean has a way of tempering wood, turning soft timber into iron-hard relics through a process of salt-curing and constant agitation. This driftwood is more than just a decorative piece for a mantel; it is a biological fortress. By hollowing out these sun-bleached logs, you create a micro-climate that stabilizes temperature and manages the one thing that kills seeds faster than anything else: moisture. This guide will take you through the pioneer-strength process of transforming beach-combed timber into a functional masterpiece of preservation.
Diy Driftwood Seed Storage Boxes
A Driftwood Seed Storage Box is a hand-carved vessel made from salt-saturated, sun-cured timber found along coastlines or riverbanks. Unlike mass-produced plastic organizers, these boxes leverage the natural cellular structure of wood to act as a thermal and moisture buffer. They exist at the intersection of primitive survivalism and modern botanical science, providing a dark, cool, and humidity-regulated environment for the long-term storage of heirloom seeds.
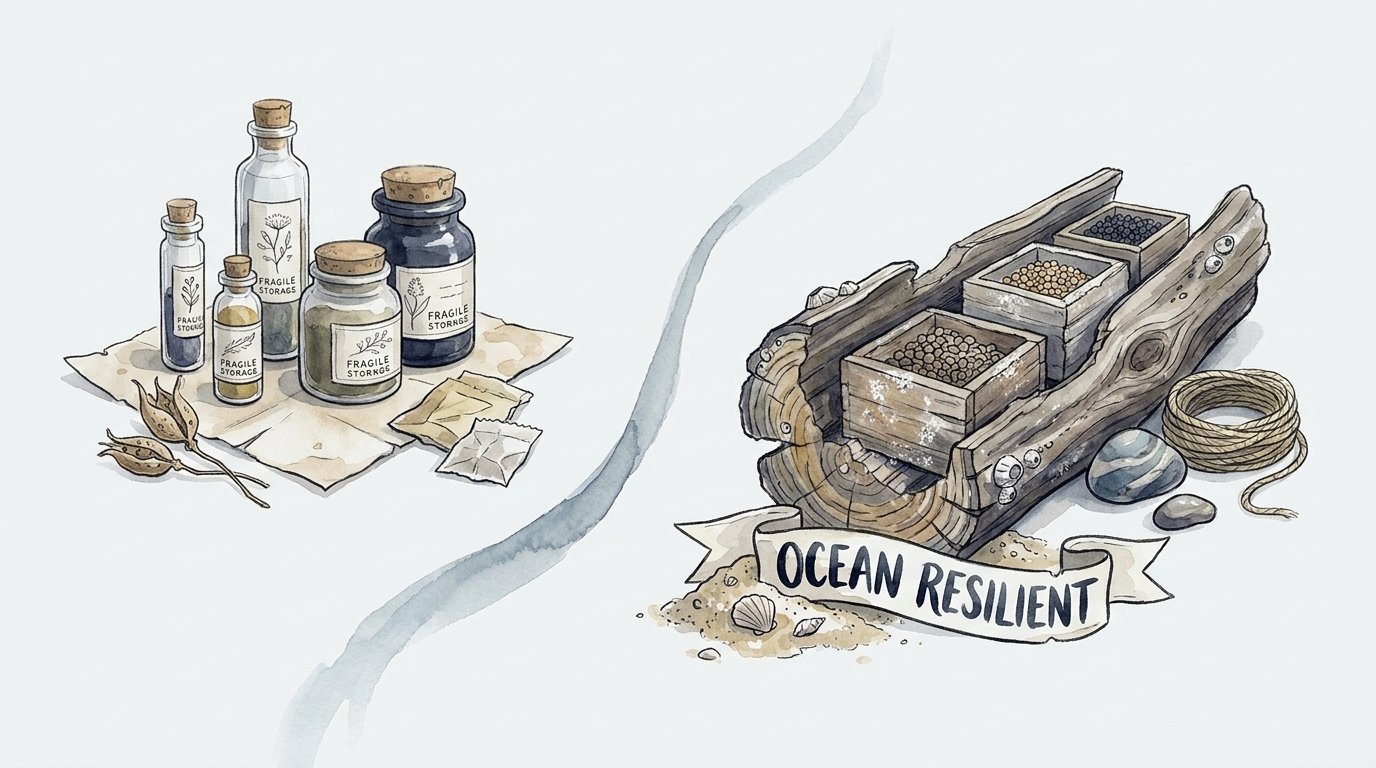
In the real world, seed viability is a race against the elements. Most gardeners lose 50% of their germination rate every few years because of fluctuating indoor humidity. A driftwood vault uses its thick, dense walls to slow down these changes. It is an “ocean resilient” solution to the problem of “fragile storage.” Think of it as a humidor for your garden’s future—a place where the wood itself does the work of protecting the life inside.
These boxes are typically used by homesteaders, heritage gardeners, and those who live in humid coastal climates where traditional paper storage fails within a single season. Because driftwood has already been “torture-tested” by the sea, it possesses a structural integrity that new-cut lumber simply cannot match. It has finished its warping and shrinking long ago; what remains is the heartwood, hardened by salt and time.
The Anatomy of a Driftwood Vault
To understand why this works, you have to look at the wood’s history. Every piece of driftwood has been leached of its softest tissues, leaving behind a skeleton of lignin and cellulose that is often naturally infused with sea salts. These salts are hygroscopic, meaning they can absorb and release moisture in a way that keeps the interior air stable. When you carve a hollow into this material, you are essentially creating a small, insulated cave that stays cooler than the room around it.
How to Construct Your Seed Vault
Building a vault from driftwood requires more patience than a standard carpentry project. You aren’t working with square, predictable boards from a big-box store; you are negotiating with the twisted, knotted history of a fallen tree. The goal is to find a piece of wood that feels heavy for its size, indicating a dense grain and low rot content.
Step 1: Selection and Ethics
Start by beachcombing for “hard” driftwood—think oak, cedar, or madrone if you are on the West Coast. Avoid “punky” wood that feels soft or light, as this indicates internal rot that will eventually contaminate your seeds. Always check local regulations regarding the removal of driftwood; in many areas, taking small pieces for personal use is permitted, but larger logs may be protected as part of the coastal ecosystem.
Step 2: The Desalting Soak
While salt is a preservative, too much of it can actually draw moisture *into* the box if the humidity gets high enough. Before you carve, scrub the wood with a stiff brush to remove sand and loose bark. Soak the piece in a large tub of fresh water for at least 48 to 72 hours. This leaches out the surface salts and kills off any lingering maritime “critters” like barnacles or wood-boring insects. Change the water daily until it stops turning a tea-colored brown from the leached tannins.
Step 3: Sun Curing
Once leached, the wood must be bone-dry. Place it in a spot with high airflow and direct sunlight for two to three weeks. This is a critical step in the “pioneer-grit” method. If you carve wet wood, it will crack as it dries, ruining the seal of your lid. You want the wood to reach its final, stable state before you ever touch it with a chisel. You’ll know it’s ready when it rings with a clear “clink” rather than a thud when tapped with a hammer.
Step 4: Hollowing the Core
This is where the manual labor begins. Secure the driftwood in a heavy-duty vice, protecting the exterior with rags to avoid marring the natural patina. Use an auger bit or a spade bit to drill a series of holes into the center of the log to the desired depth. Do not go too deep; you want at least an inch of “meat” at the bottom to provide insulation.
After drilling, use a sharp wood chisel and a mallet to “waste away” the wood between the holes. Work from the center outward to avoid splitting the outer walls. For a professional finish, a rotary tool with a sanding drum can smooth the interior walls, making it easier to slip seed packets in and out without snagging. This creates the “vault” space where your seeds will rest.
Step 5: The Friction-Fit Lid
A vault is only as good as its door. You can either slice the top off the log before hollowing to create a matching lid, or you can find a second, smaller piece of driftwood to carve into a stopper. The “pioneer” way is the friction-fit: carving the lid so precisely that it requires a firm tug to open. This creates a near-airtight seal that prevents humidity spikes from reaching the seeds. If your carving isn’t perfect, you can glue a thin strip of leather or cork around the lid’s rim to provide that necessary gasket effect.
Benefits of Driftwood Storage
Choosing driftwood over plastic or new-growth pine isn’t just an aesthetic choice; it’s a functional upgrade for any serious seed saver. The primary advantage is the material’s thermal mass. Because driftwood is dense and often thick-walled, it resists rapid temperature changes. If your shed or pantry heats up during the day, the interior of the driftwood box will remain significantly cooler, preserving the delicate oils and proteins within the seeds.
The natural tannins in the wood also play a role. Tannins are the tree’s original defense against fungus and bacteria. Even after years in the ocean, these compounds remain in the heartwood. Storing seeds in a high-tannin environment like oak or cedar driftwood provides a mild, natural antifungal barrier that helps prevent the “damp-off” mold that often ruins seeds stored in plastic bags.
- Moisture Buffering: The wood fibers absorb excess humidity before it reaches the paper seed packets.
- Light Protection: The thick, opaque walls ensure 100% darkness, preventing premature aging caused by UV exposure.
- Durability: A properly cured driftwood box is nearly indestructible and won’t shatter if dropped, unlike glass jars.
- Organization: Custom-carved slots allow you to separate varieties by year or species, preventing the “junk drawer” chaos of typical seed storage.
Challenges and Common Mistakes
The biggest mistake beginners make is failing to “kill” the wood’s past. Driftwood is a biological habitat. If you don’t boil it or sun-cure it properly, you might be introducing wood-boring beetles or dormant fungal spores into your home. This can lead to a disaster where the vault itself begins to rot from the inside out, taking your seeds with it. Always ensure the wood is sterilized and completely dry before use.
Another common pitfall is the “Wall Thickness Trap.” In an effort to maximize storage space, people often carve the walls too thin. If the walls are less than half an inch thick, you lose the thermal buffering benefits that make driftwood superior to plastic. You end up with a pretty box that has the same insulation value as a cardboard carton. Keep the walls thick; the weight is your friend.
Finally, avoid using chemical sealants on the interior. Many modern varnishes and stains off-gas Volatile Organic Compounds (VOCs) for months. In a sealed environment, these fumes can actually damage the germination capacity of sensitive seeds like lettuce or onions. If you must seal the wood, use a natural food-grade beeswax or walnut oil on the exterior only.
Limitations: When This May Not Be Ideal
While a driftwood vault is a powerhouse for long-term storage, it is not a portable solution. These boxes are heavy, bulky, and take up significant space. If you are a commercial farmer handling thousands of packets, the labor involved in carving individual vaults for every variety is likely prohibitive. For bulk storage, a dedicated root cellar or a climate-controlled room is more efficient.
Environmental conditions also dictate performance. If you live in a truly tropical environment with 90% constant humidity, wood—even salt-cured driftwood—will eventually reach an equilibrium with the air. In these extreme cases, the box serves better as a secondary protective layer for seeds that are already sealed in glass vials with silica gel. It adds an extra “fail-safe,” but it cannot replace a dehumidifier in a swamp-like climate.
Additionally, driftwood varies wildly in quality. A piece found in a stagnant river might be full of silt and freshwater rot, which doesn’t offer the same “ironwood” properties as timber pulled from the salt-spray of the Pacific. You are at the mercy of what the water provides, which means you can’t always “order” the perfect dimensions for your shelf.
Comparison: Driftwood Vault vs. Standard Methods
| Feature | Paper Envelopes | Plastic Totes | Driftwood Vault |
|---|---|---|---|
| Moisture Protection | None (absorbs) | High (can trap) | Regulated (buffers) |
| Thermal Insulation | Zero | Low | High (dense mass) |
| UV Protection | Good | Poor (if clear) | Total Opaque |
| Longevity | 1-2 Years | 5-10 Years | Lifetimes |
Practical Tips and Best Practices
To maximize the life of your seeds, follow the “Rule of 100.” This is a classic gardener’s principle which states that the sum of the temperature (in Fahrenheit) and the relative humidity (%) should be less than 100. For example, if your storage room is 60°F, the humidity inside your driftwood vault should be 40% or lower. Your vault helps achieve this by smoothing out the spikes, but you still need to place it in the coolest part of your home.
Inside the box, don’t just throw loose seeds in. Keep them in their original paper packets for identification, but place the packets inside small, resealable Mylar bags or glass vials. The driftwood vault acts as the “outer hull” of the ship, while the Mylar provides the “watertight compartments.” Together, they create an impenetrable barrier against time.
- Use Silica Packets: Drop a small 5g silica gel desiccant into the bottom of the vault to handle any moisture that enters when you open the lid.
- Label by Date: Use a wood-burning pen to scorch the year of collection onto the lid of the vault. It’s permanent and won’t fade like ink.
- Inventory Control: Keep a small notebook inside the lid with a list of the contents. Opening the box less frequently preserves the internal climate.
- Elevate: Don’t set your vault directly on a concrete floor. Even cured wood can wick moisture from concrete. Keep it on a wooden shelf or bench.
Advanced Considerations for Serious Practitioners
For those who want to take their seed preservation to the professional level, consider “Bentonite Lining.” Pioneers often used clay to seal cracks in storage vessels. By lining the interior of your driftwood vault with a thin layer of bentonite clay or a lime-based plaster, you add a secondary desiccant layer that actively pulls moisture out of the air. This turns the box into a “dry-cell” that can maintain ultra-low humidity for years without intervention.
Another advanced technique is the “Charred Interior.” Using a torch to lightly char the inside of the hollow (a Japanese technique called *Shou Sugi Ban*) creates a layer of carbon. Carbon is naturally antimicrobial and helps filter out any airborne contaminants that might enter when the box is opened. It also adds a beautiful, dark contrast to the sun-bleached exterior of the driftwood.
If you are storing high-value seeds—like rare landrace grains or medicinal herbs—you might even drill a small port for a digital hygrometer. This allows you to monitor the internal humidity without ever opening the lid. When the reading creeps above 35%, you know it’s time to recharge your silica packets or give the vault a few hours in a low-temperature oven (under 150°F) to drive out absorbed moisture.
Example Scenario: The Coastal Homesteader
Imagine a gardener on the humid coast of the Pacific Northwest. Every year, their tomato and pepper seeds fail to germinate because the salt-heavy air turns the paper packets into a soggy mess by January. They switch to a Driftwood Seed Vault carved from a massive piece of beach-found Red Cedar.
The cedar’s natural oils and the salt-cured density of the wood create a barrier. Inside the vault, they place their 2024 harvest of “Black Krim” tomato seeds. Despite a winter where outside humidity hits 90% for three months straight, the interior of the dense cedar log stays at a steady 35% humidity. Come spring, the germination rate is nearly 100%, while their neighbor’s seeds, stored in a plastic tub in the garage, are spotted with black mold and fail to sprout. The driftwood didn’t just store the seeds; it saved the season.
Final Thoughts
Building a driftwood seed vault is a commitment to the long game. It is about moving away from the “fragile storage” mindset of modern consumerism and returning to a more “ocean resilient” way of living. By using materials that have already survived the harshest environments on earth, you are building a legacy that can be passed down to the next generation of growers. These boxes aren’t just tools; they are hand-carved promises that the garden will return next year.
Take the time to walk the shoreline, find the right timber, and put in the manual labor of hollowing it out. The process of carving into salt-hardened wood connects you to the history of the land and the sea. Once you see your first tray of seedlings emerge from seeds that were kept safe in a sun-bleached vault, you’ll never go back to paper packets again. Start small, be patient with the wood, and let the ocean provide the protection your garden deserves.
The skills you learn in hollowing and curing driftwood can be applied to other areas of the homestead—from making rot-resistant tool handles to creating permanent outdoor signage. Every piece of wood you rescue from the tide is a resource waiting for a purpose. Turn that purpose into preservation, and your seeds will thank you with a bounty that outlives the box itself.
Sources
1 bulkreefsupply.com (https://fresh.bulkreefsupply.com/content/post/benefits-of-using-driftwood-in-your-aquarium) | 2 wikihow.com (https://www.wikihow.com/Hollow-Out-Wood) | 3 hikariusa.com (https://hikariusa.com/wp/know-adding-driftwood-tank)