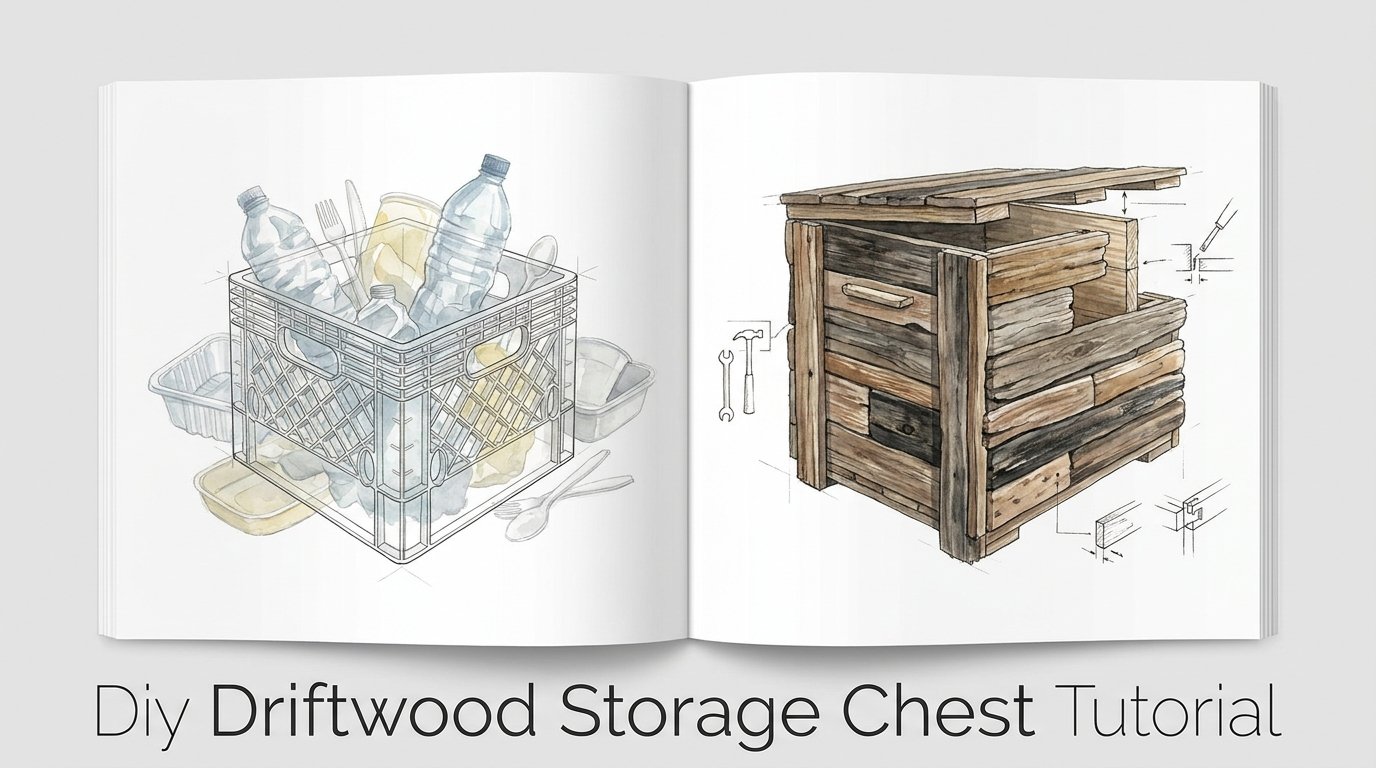
Diy Driftwood Storage Chest Tutorial
Why are we trusting our most precious textiles to material that cracks in five years when the ocean provides a legacy for free? Modern furniture is designed for the landfill. It’s made of chemicals and thin polymers that buckle under the slightest weight. But a chest built from salt-hardened driftwood? That’s a piece of history that has already survived the Atlantic and is ready to guard your home for the next three generations.
[affiai]Building a storage chest from wood scavenged from the shoreline isn’t just about furniture; it’s about reclaiming a sense of permanence. We live in an era of DISPOSABLE PLASTIC vs TIMELESS TIMBER, where most of what we buy is intended to be replaced before the decade is out. A driftwood chest stands in defiance of that trend. It carries the weight of the tides and the grit of the pioneer spirit into your living room.
This guide will walk you through the process of selecting, treating, and assembling a piece of maritime history. You don’t need a factory of high-end machinery to do this. You need a sharp eye, a bit of patience, and the willingness to work with wood that has a mind of its own. Let’s get to work.
Diy Driftwood Storage Chest Tutorial
A DIY driftwood storage chest is a functional piece of art created from timber that has been naturally weathered by saltwater, sun, and sand. Unlike the kiln-dried lumber you find at a big-box store, driftwood has been “cured” by the elements. The salt saturation acts as a natural preservative, while the constant tumbling in the surf strips away the softer sapwood, leaving behind the densest, most durable heartwood.
These chests serve as ideal heirlooms for storing heavy blankets, family records, or winter gear. Because each piece of wood is shaped by unique currents and coastal geography, no two chests will ever look the same. In a world of mass production, this project offers the rare opportunity to own something truly singular. You are essentially taking the ocean’s refuse and turning it into a fortress for your belongings.
In practical terms, a driftwood chest fits perfectly in coastal homes, rustic cabins, or even modern industrial spaces where a touch of organic texture is needed to break up sterile lines. It is a testament to the idea that the best materials aren’t always sold in a showroom; sometimes, they are waiting for you on a quiet beach after a storm.
The Anatomy of a Driftwood Chest
Before you start hammering, you must understand that driftwood furniture typically falls into two categories: structural and decorative. A structural driftwood chest uses heavy, solid pieces of timber for the frame and the panels. A decorative chest often uses a secondary frame—perhaps made of reclaimed pine or cedar—which is then clad in thinner driftwood “skins.”
For the purpose of this tutorial, we are focusing on the Structural Heritage Chest. This method requires thicker pieces of wood, but the result is a heavy-duty, solid-timber vessel that feels like it was pulled straight from a 19th-century shipwreck. It is more challenging to build but offers the greatest longevity.
How to Source and Prepare Your Timber
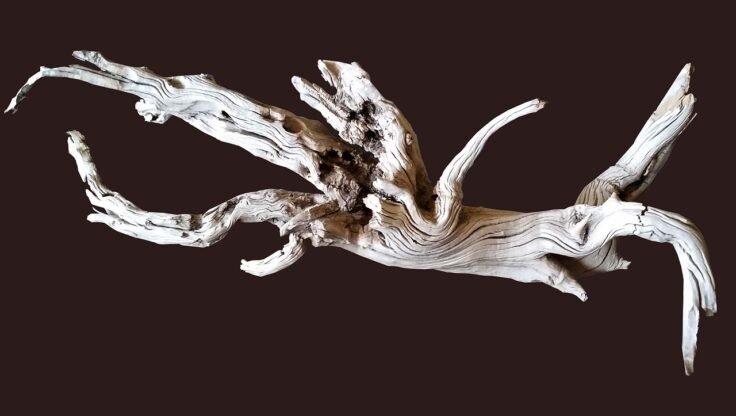
The journey of a thousand miles begins with a walk on the beach. Sourcing your wood is the most critical step. Look for pieces that are “bone dry” and feel surprisingly heavy for their size. This weight usually indicates a high density, which is what you want for a chest that needs to hold its shape over decades.
Avoid any wood that feels “spongy” or shows signs of active rot. If you can push your thumbnail into the grain and it leaves a deep, soft indentation, that piece is better left for the crabs. You want wood that rings when you tap it—a sign that the fibers are tightly knit and preserved by the salt.
Step 1: The Cleaning Phase
Once you bring your haul home, you cannot simply start building. Driftwood is a biological hotel. It can house everything from boring beetles to microscopic salt crystals that will attract moisture later. Start by dry-brushing the wood with a stiff wire brush to remove sand and loose bark. If the wood was found in saltwater, you need to neutralize the salt and kill any hitchhikers.
- The Soak: Submerge your wood in a large trough of fresh water mixed with a small amount of bleach (approximately 1-2 cups per 20 gallons). Let it soak for 24 to 48 hours. This kills mold spores and forces insects out of the crevices.
- The Rinse: Pressure wash the wood or use a high-pressure hose to blast out the softened debris from the knots and cracks.
- The Dry: This is where most people fail. Driftwood must be completely dry before you apply a finish. Place it in a shaded, well-ventilated area for at least two weeks. If you live in a humid climate, a dehumidifier in your garage can speed this up.
Step 2: Milling and Squaring
Nature doesn’t build in 90-degree angles. To make a chest that actually closes properly, you will need to create at least one flat face on your main structural pieces. Use a hand plane or a jointer to flatten the edges where the boards will meet. You don’t want to over-process the wood—the goal is to keep the “wild” look of the exterior while ensuring the joints are tight enough to keep dust out.
How to Build the Frame and Panels
Traditional joinery is your friend here. Because driftwood can be irregular, standard screws often look out of place. Instead, lean into dowel joinery or mortise and tenon connections. These methods rely on the wood itself to hold the structure together, which is essential when working with material that has spent years expanding and contracting in the water.
Constructing the Base
The base of your chest should be the sturdiest part. Use your heaviest driftwood logs for the corner posts. Drill deep holes into the top and bottom of these posts to accept the horizontal rails. Using a 1-inch oak dowel is a classic pioneer technique that ensures the frame won’t rack or wobble under the weight of a full load.
Assembling the Side Panels
Once your frame is standing, you can begin “filling in” the walls. Because driftwood planks are rarely uniform in width, you will likely need to use a “shiplap” or “tongue and groove” style of overlapping. This allows the wood to move slightly with the seasons without creating huge gaps in your chest. Glue the panels only at the center point of the rails to allow for natural expansion.
Benefits of Driftwood Furniture
Why go through all this trouble? The benefits of driftwood are both practical and psychological. First, there is the Environmental Impact. Every piece of wood you pull from the beach is carbon that isn’t being burned or left to rot into methane. It is the ultimate form of upcycling.
Second, there is the Material Resilience. Driftwood has already been stress-tested by the most brutal environment on earth. It has survived UV radiation, abrasive sand, and the crushing pressure of the surf. If it hasn’t warped or cracked yet, it likely never will in the controlled environment of your home. This wood is “settled.”
Finally, there is the Aesthetic Soul. You cannot fake the silver-grey patina of sun-bleached timber. You cannot replicate the intricate boreholes left by marine life or the smooth, sculptural curves formed by the tides. A driftwood chest brings a piece of the wilderness indoors, acting as a grounding element in a world of synthetic surfaces.
Challenges and Common Mistakes
Working with driftwood isn’t always a walk on the beach. One of the most common pitfalls is Tool Blunting. Driftwood is often impregnated with fine silica (sand). This sand acts like sandpaper on your saw blades and chisels. You will find yourself sharpening your tools far more often than when working with pine or oak from the lumber yard. Always keep a diamond stone handy.
Another frequent mistake is Under-Drying. If you build your chest while the wood is still slightly damp in the core, the joints will pull apart as it finishes drying in your climate-controlled house. This leads to the “wobble” that ruins many amateur projects. If the wood feels cold to the touch, it is likely still holding moisture.
Lastly, many builders forget about Internal Pests. Termites and carpenter ants love the soft centers of old logs. If you skip the bleaching soak, you might find a pile of sawdust under your new chest six months later. Don’t take shortcuts with the sanitation phase.
Limitations and Trade-offs
It is important to be realistic about what driftwood can and cannot do. Because of its irregular shape, driftwood chests are often incredibly heavy. This isn’t a piece of furniture you move every time you vacuum. It is a permanent fixture. If you live in an apartment and move frequently, a solid driftwood chest might be more of a burden than a benefit.
Furthermore, driftwood does not always play well with modern hardware. Standard hinges can look awkward against a rugged, knotty lid. You will often need to source—or forge—custom iron hardware to match the scale and grit of the wood. This adds cost and complexity to the project.
There is also the Legal Constraint. In many regions, particularly in National Parks or certain coastal preserves in the UK and USA, removing driftwood is strictly prohibited. It plays a vital role in coastal ecosystems, providing habitat and preventing erosion. Always check local regulations before you start loading your truck. Private beaches or areas designated for public cleanup are usually your best bet.
Optional Comparison: Driftwood vs. Conventional Lumber
To understand why this project is worth the effort, let’s look at how salt-hardened timber stacks up against the “disposable” options often found in big-box stores.
| Feature | Driftwood (Timeless Timber) | MDF/Particle Board (Disposable) | Pressure-Treated Pine |
|---|---|---|---|
| Expected Lifespan | 100+ Years | 5–10 Years | 20–30 Years |
| Cost of Material | Free (Scavenged) | Low to Moderate | Moderate |
| Workability | Difficult (Irregular/Abrasive) | Very Easy | Easy |
| Chemical Load | None (Natural Salt) | High (Glues/Formaldehyde) | High (Arsenic/Copper) |
| Moisture Resistance | High (Salt-Pre-Treated) | Very Low (Swells/Cracks) | High |
Practical Tips for a Better Build
Success in woodworking is often found in the small details. When working with driftwood, these tips can save you hours of frustration:
- The Pre-Drill Rule: Never, ever drive a screw or nail into driftwood without a pilot hole. Old beach wood is notoriously brittle. Without a pilot hole, you will split a 50-year-old plank in a heartbeat.
- Epoxy Fills: If you have a beautiful piece of wood with a deep rot hole in the center, don’t throw it away. Use a clear or “sea-glass blue” epoxy to fill the void. This preserves the structural integrity while highlighting the wood’s history.
- Beeswax and Oil: Avoid heavy polyurethanes. They look like plastic and suffocate the wood. Instead, use a 50/50 mix of linseed oil and melted beeswax. It penetrates the grain and provides a soft, matte finish that smells like the forest and the hive.
- Magnet Latches: Since driftwood lids are often uneven, traditional latches can be hard to align. Use heavy-duty rare earth magnets recessed into the wood for a “snap-shut” feel that doesn’t require perfect alignment.
Advanced Considerations for the Serious Practitioner
If you’ve mastered the basic box, it’s time to think about Live Edge Integration. This involves using the natural, un-milled edge of a driftwood log as the front lip of the chest or the handle. It requires “scribing”—a technique where you trace the irregular shape of one board onto another to create a seamless fit. It is time-consuming, but it separates the craftsmen from the hobbyists.
Consider also the Mechanical Movement. Wood expands and contracts across the grain, not along the length. Because driftwood has been “dead” for a long time, its movement is minimized, but not eliminated. Using “floating” panels in your frame—where the panel sits in a groove but isn’t glued—is the hallmark of professional furniture that won’t crack when the heater turns on in the winter.
Example Scenario: The 4-Foot Maritime Hope Chest
Imagine you’ve found a large, weathered cedar log on the Oregon coast. After three weeks of drying, you mill it into four corner posts, each 18 inches high. You source several planks of “silvered” pine for the walls. You decide to use copper boat nails for the joinery—their rose-gold color will age into a beautiful green patina that complements the grey wood.
You spend a week hand-planing the edges of the pine planks so they sit flush. For the lid, you select a single, wide slab of Douglas fir driftwood that still has the faint marks of a ship’s hull. You finish the piece with three coats of hand-rubbed walnut oil. The resulting chest weighs 120 pounds. It smells of salt and old growth. When you close the lid, the sound is a deep, solid “thud” that reminds you this piece is going nowhere. It is a bunker for your memories.
Final Thoughts
Building a DIY driftwood storage chest is a slow process, but it is a rewarding one. It forces you to slow down and listen to the material. You aren’t just following a blueprint; you are negotiating with a piece of wood that has its own story to tell. Every knot and every scar on that timber is a record of a storm it survived.
When you finish, you won’t just have a place to put your blankets. You will have a piece of TIMELESS TIMBER that stands as a silent witness to your craftsmanship. You have taken what was lost to the sea and found a home for it. That is the essence of the pioneer spirit.
Don’t be afraid to make mistakes. Wood can be sanded, holes can be filled, and joints can be recut. The only true failure is leaving that perfect piece of driftwood on the beach because you were afraid you weren’t ready. Go down to the shore, find your timber, and start your legacy today.
Sources
1 diydriftwood.com (https://diydriftwood.com/make-your-own-driftwood/) | 2 furnituremargate.co.za (https://furnituremargate.co.za/how-to-clean-driftwood/) | 3 americanrotary.com (https://www.americanrotary.com/blog/woodworking-joints/) | 4 diywoodhaven.com (https://diywoodhaven.com/wood-joinery-techniques-10-must-know-types-for-diy-projects/) | 5 jamcowoodworks.com (https://www.jamcowoodworks.com/resources/pressure-treated-vs-natural-wood-making-the-right-choice-for-your-project) | 6 octaneseating.com (https://octaneseating.com/blog/types-of-wood-for-furniture/) | 7 dksstores.com (https://dksstores.com/blog-post67) | 8 woodshopdiaries.com (https://www.woodshopdiaries.com/build-diy-storage-chest/) | 9 diydriftwood.com (https://diydriftwood.com/driftwood-refinishing-techniques/)