Heavy Duty Driftwood Shelf Installation Guide
A shelf is only as strong as the secret architecture hidden inside the wood. I watched an amateur mount a stunning piece of cedar to a drywall stud with a single screw. Three weeks later, it was on the floor in splinters. True coastal craftsmanship isn’t about what you see on the surface; it’s about the internal engineering that allows a 50-pound timber to defy gravity. Here is how the pros anchor the ocean’s heavy bones.
[affiai]Heavy Duty Driftwood Shelf Installation Guide
A heavy-duty driftwood shelf is more than a horizontal surface. It is a piece of salvaged history, often dense with salt and years of oceanic compaction. Unlike standard lumber, driftwood carries irregular weights and shapes that demand a specialized approach to mounting.
Installation involves more than just a bracket. It requires a deep understanding of structural loads and the unique properties of weathered timber. When we talk about “heavy duty,” we are referring to installations capable of supporting 50 to 300 pounds without sagging or pulling away from the wall.
In real-world applications, these shelves serve as fireplace mantels, kitchen open-shelving for cast iron, or display ledges for heavy nautical artifacts. The goal is to create a “floating” effect where the wood appears to grow out of the wall, hiding the high-tensile steel rods that actually bear the burden.
This guide focuses on the “internal engineering” mentioned earlier. We will move beyond the superficial and look at how to prep the wood, select the right hardware, and ensure your wall can actually handle the torque of a cantilevered timber.
How the Internal Engineering Works
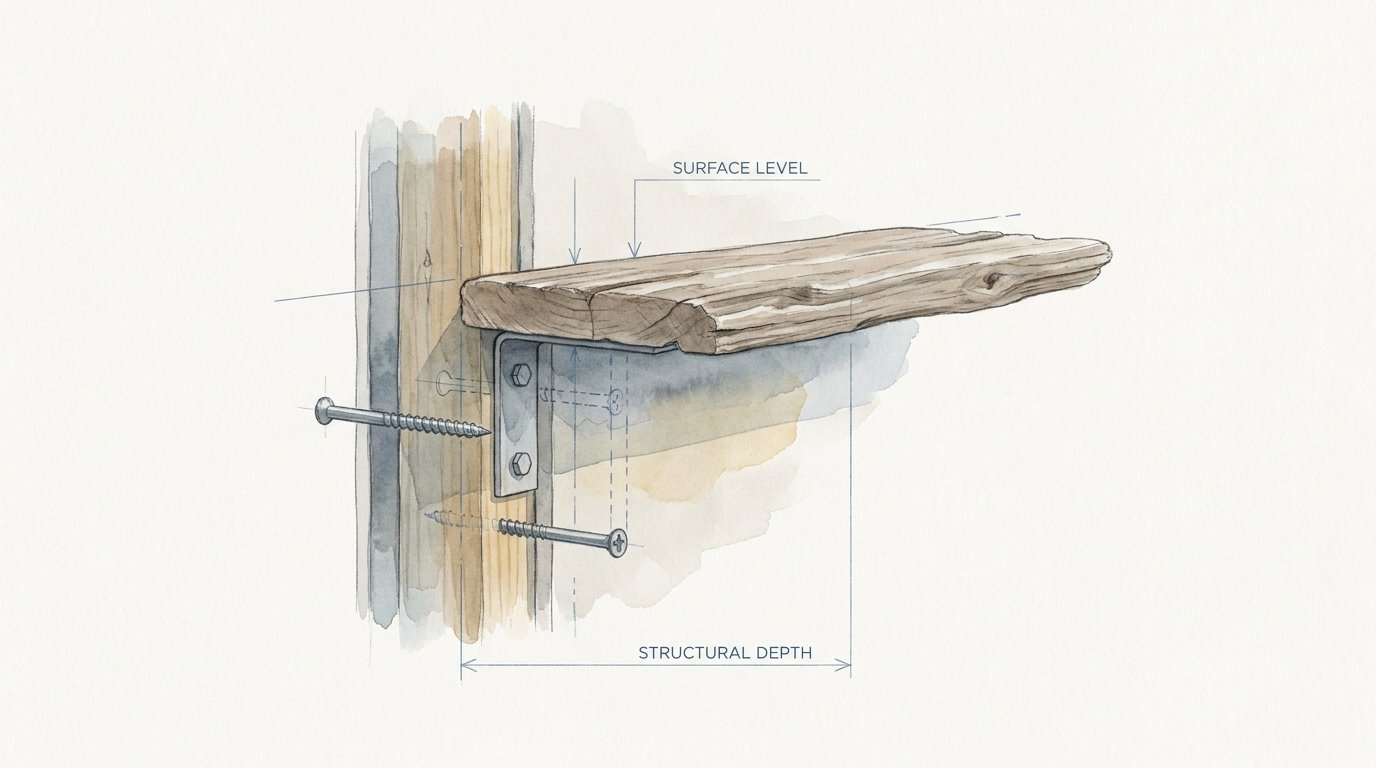
The magic of a floating heavy-duty shelf relies on the physics of a cantilever. A cantilever is a long-projecting beam fixed at only one end. In this case, the wall is the fixed point, and the shelf is the beam trying to pull the fasteners out of the studs.
Gravity constantly pulls the front edge of the shelf downward. This creates a rotational force called torque. High-quality mounting systems counteract this by using deep-seated steel rods that penetrate 60% to 70% of the shelf’s depth, distributing the weight across a larger internal surface area.
To achieve this, you must drill perfectly straight holes into the back of your driftwood. A slight 1-degree error at the wall becomes a visible 1-inch sag at the front of a deep shelf. Precision is the difference between a professional installation and a DIY disaster.
Standard drywall anchors will not suffice for true heavy-duty applications. You must engage the wall’s framing. Wall studs provide the necessary resistance to the “pull-out” force generated by the weight of the wood and the items it carries.
Preparing the Driftwood for the Wall
Driftwood is rarely ready for the wall right off the beach. It often harbors salt, moisture, and uninvited guests. Before any hardware touches the wood, the timber must be stabilized and cleaned.
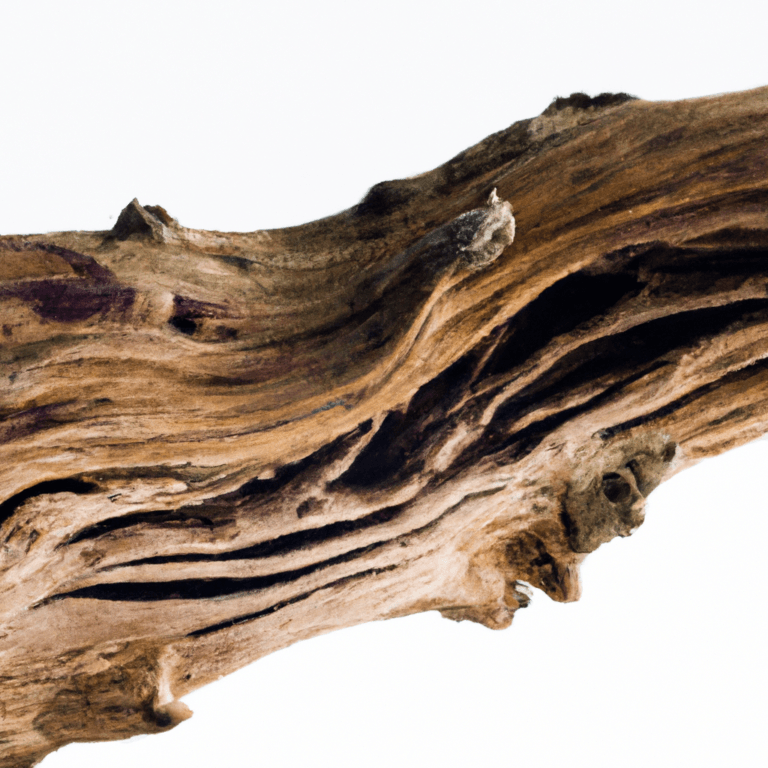
Start by dry-brushing the surface to remove loose sand and salt crust. If the wood is soft or punky, it may need a bath in a wood stabilizer like Cactus Juice or a low-viscosity epoxy. These resins soak into the fibers and cure, turning a fragile piece of wood into something as hard as stone.
Pest removal is the next priority. Many craftsmen soak driftwood in a mild bleach and water solution for 12 to 24 hours to kill larvae and bacteria. Following the soak, the wood must be allowed to dry completely in a low-humidity environment. Wood with high moisture content will warp after installation, potentially loosening your mounting hardware.
Once dry, plane the back edge of the driftwood. Floating shelves require a perfectly flat surface to sit flush against the drywall. If the back is irregular, the shelf will rock or create unsightly gaps that reveal the hidden brackets.
Choosing the Right Floating Shelf Hardware
The hardware is the skeleton of your shelf. For heavy driftwood, you have three primary options, each with different weight capacities and installation requirements.
Blind Shelf Supports
These are individual steel rods with a threaded end or a small mounting plate. They are ideal for smaller driftwood pieces where you have limited back surface area. Each rod typically supports 25 to 50 pounds when driven into a stud. However, they offer little room for error; if your holes aren’t perfectly aligned, the rods won’t slide in.
Plate-Based Floating Brackets
Systems like the Sheppard Bracket or Federal Brace use a long steel backplate with multiple rods welded to it. This design is superior because the backplate spans multiple studs, spreading the load across the wall’s structure. These can often support 100 to 150 pounds when properly anchored into three or more studs.
The Hovr System
For the heaviest timbers, the Hovr system uses a male and female aluminum extrusion. One piece mounts to the wall, and the other is recessed into the shelf. This creates a continuous line of support along the entire length of the wood. This system is rated for up to 300 pounds, making it the choice for massive cedar beams or heavy mantels.
Step-by-Step Installation Process
Success begins with a stud finder and a high-quality level. Follow these steps to ensure a rock-solid mount.
- Locate and Mark Studs: Find the center of at least two studs (ideally three for shelves over 36 inches). Mark these clearly on the wall at the desired height.
- Level the Bracket: Hold your mounting plate or individual rods to the wall. Use a 4-foot level to ensure accuracy. A small level can be misleading over longer spans.
- Drill Pilot Holes: Use a bit slightly smaller than your lag screws. Drilling into the center of the stud is critical. If you hit the edge of a stud, the screw may eventually pull through the side under heavy load.
- Secure the Hardware: Drive your lag screws or structural fasteners through the bracket and into the studs. Tighten them until the bracket is flush with the wall. If the bracket wiggles, the shelf will sag.
- Measure and Bore the Wood: Transfer the rod locations to the back of your driftwood. Use a drill guide or a drill press to bore the holes. If you are drilling by hand, use a visual guide to keep the bit perpendicular to the wood.
- Dry Fit: Slide the driftwood onto the rods. If it resists, do not force it. Check for internal obstructions or misaligned holes.
- Lock the Shelf: Some heavy-duty brackets include set screws on the underside. Tighten these to pull the wood tight against the wall and prevent it from sliding forward.
Benefits of Structural Mounting
Investing in heavy-duty hardware and proper engineering provides peace of mind that goes beyond aesthetics. When you mount wood correctly, you are protecting both the timber and your home.
Structural mounting eliminates the “sag” common in cheap floating shelves. This keeps your valuables level and prevents the wood from putting uneven pressure on the drywall, which can lead to cracking or “popped” nails in your wall’s finish.
Longevity is a major factor. Driftwood is a natural material that moves with seasonal humidity changes. A robust internal bracket acts as a spine, helping the wood maintain its shape and position over decades rather than months.
Finally, there is the benefit of capacity. A properly mounted shelf can hold a full library of books or a collection of heavy ceramics without hesitation. This versatility allows the shelf to evolve with your home’s needs.
Challenges and Common Mistakes
The most common failure point is missing the stud. Amateurs often rely on “stud-adjacent” holes where the screw only catches the edge of the wood. Over time, the weight of the shelf causes the wood fibers to crush, and the shelf begins to tilt.
Another frequent error is neglecting the “lever arm” effect. A 12-inch deep shelf puts significantly more stress on a bracket than an 8-inch shelf, even if they weigh the same. For deep driftwood, you must use thicker rods or more frequent stud attachments.
Drilling crooked holes in the wood is a nightmare to fix. If the holes are angled downward, the shelf will naturally sag. If they are angled sideways, the shelf won’t slide onto the rods at all. Always use a drilling jig or a self-centering dowel jig to ensure the holes are true.
Limitations of Floating Driftwood
Not every piece of driftwood is a candidate for a floating mount. If the wood is too thin (less than 2 inches thick), it may not have enough meat to hide the mounting rods. In these cases, you might need visible corbels or a different mounting strategy.
Wall type matters. If you are mounting to a plaster and lath wall, or a wall with metal studs, standard wood-mounting techniques won’t work. Metal studs require toggle bolts or specialized anchors like Snaptoggles, which have much lower weight ratings for cantilevered loads.
Environmental factors can also limit success. In extremely humid coastal areas, driftwood may expand and contract significantly. If the shelf is locked too tightly to a rigid steel bracket without room for movement, the wood may split over time.
Comparison: Invisible Brackets vs. Exposed Corbels
Choosing between a clean “floating” look and a traditional “bracketed” look often comes down to the weight of the timber and the strength of the wall.
| Feature | Invisible Brackets | Exposed Corbels |
|---|---|---|
| Max Capacity | 50–300 lbs (System Dependent) | 300+ lbs (Stud Anchored) |
| Visual Impact | Modern, Clean, “Magic” look | Rustic, Industrial, Structural |
| Skill Level | Advanced (Requires precision boring) | Beginner to Intermediate |
| Installation Time | High (Prepping, Routing, Boring) | Low |
Practical Tips for Best Results
Always buy your hardware before you start drilling. Different brands use different rod diameters (usually 1/2 inch, 5/8 inch, or 3/4 inch). You need the exact drill bit to match your specific bracket.
Mark your drill bit with tape to indicate the required depth. If you drill too deep, you risk coming out the front of the shelf. If you don’t drill deep enough, the shelf will sit away from the wall.
Apply a small amount of wax or dry lubricant to the mounting rods before sliding the shelf on. This reduces friction and makes it much easier to remove the shelf later if you need to paint the wall or move the piece.
Check the moisture content with a cheap wood moisture meter. If the driftwood is above 12% moisture, let it sit in your house for two weeks before you install it. This allows the wood to acclimate to your home’s climate.
Advanced Considerations: Recessing the Bracket
For a truly professional finish, the backplate of the bracket should be recessed into the back of the driftwood. This allows the wood to sit tight against the drywall with zero gap.
Using a router with a straight bit, create a shallow channel (usually 3/16 to 1/4 inch deep) that matches the dimensions of your bracket’s backplate. This is “structural depth” in action—it ensures the weight is transferred directly from the wood to the plate to the stud.
If your driftwood is particularly “live edge” and irregular on the back, you may need to scribe the wood to the wall. This involves shaving the back of the timber to follow the subtle waves and bumps in your drywall. It is a time-consuming process used by high-end furniture makers to achieve a perfect fit.
Real-World Example: The Cedar Beam Mantel
Consider a 72-inch cedar beam that weighs 60 pounds. To mount this as a floating mantel, a craftsman might use a heavy-duty bracket with four 12-inch rods. The bracket is secured into four separate studs with eight 3-inch structural lag screws.
The holes in the cedar are bored to 10 inches deep. This leaves 2 inches of solid wood at the front. The backplate is recessed into the cedar. Once installed, the mantel can easily support a 100-pound television or a heavy holiday display without shifting a fraction of an inch.
In this scenario, the leverage is high because the beam is 10 inches deep. The use of structural screws instead of standard wood screws is vital because structural screws have higher shear strength, meaning they won’t snap under the downward pressure of the cantilevered load.
Final Thoughts
A heavy-duty driftwood shelf is a testament to the marriage of natural beauty and human engineering. When you respect the physics of the wall and the integrity of the wood, you create something that lasts for generations. It is the “pioneer grit” of modern woodworking—taking what the ocean discarded and anchoring it firmly in the heart of the home.
The process requires patience, the right tools, and an refusal to cut corners. Whether you are installing a small cedar ledge or a massive oak timber, the principles remain the same: find the studs, use the right hardware, and drill with precision. Once the shelf is up, the secret architecture inside the wood will remain your little secret.
Experiment with different wood types and finishes. Every piece of driftwood has a story to tell, and now you have the skills to make sure it stays on the wall to tell it. As you advance, consider exploring more complex joinery or hidden lighting systems to further elevate your coastal craftsmanship.
Sources
1 youtube.com (https://www.youtube.com/watch?v=c0kpz1OMKqE) | 2 citainterior.com (https://citainterior.com/blogs/news/how-much-weight-can-floating-shelves-hold) | 3 lifehacker.com (https://lifehacker.com/the-easiest-way-to-guess-how-much-weight-a-floating-she-1850706102?test_uuid=zXnWOLjQQwkYjMVwrvo5w&test_variant=B) | 4 jthomashome.com (https://www.jthomashome.com/content/floating-shelf-installation-guide-2-inch-thick.pdf) | 5 homedepot.com (https://www.homedepot.com/c/ah/how-to-hang-shelves/9ba683603be9fa5395fab90a500e3e8) | 6 homedepot.com (https://www.homedepot.com/c/ap/how-to-install-floating-shelves/9ba683603be9fa5395fab9010eac9457) | 7 shelfexpression.net (https://shelfexpression.net/blogs/topshelf/how-much-weight-can-a-floating-shelf-hold) | 8 woodworkerexpress.com (https://www.woodworkerexpress.com/blog/2026/02/best-floating-shelf-brackets/) | 9 anchorco.com (https://anchorco.com/blogs/pro-tips-and-tricks/how-to-hang-shelves-in-drywall) | 10 wikihow.com (https://www.wikihow.com/Hang-a-Heavy-Shelf) | 11 nookwoodworking.com (https://nookwoodworking.com/blogs/news/the-ultimate-guide-on-how-to-install-floating-shelves) | 12 dksstores.com (https://dksstores.com/blog-post49)