• Skip to main content
  • Skip to primary sidebar
  • Terms and Conditions
  • Privacy Policy
  • Contact

Driftwood 4 Us

Just About Driftwood

crafting

Driftwood Items

January 21, 2025 by admin

Have you ever strolled along the beach and noticed the fascinating shapes and textures of driftwood scattered along the shore? Driftwood can be more than just a piece of wood; it carries stories from its journey across the water, shaped by waves and sun. These unique pieces can be transformed into beautiful items, bringing a piece of nature into your home or outdoor space.

Driftwood Items

What is Driftwood?

Driftwood refers to wood that has been washed onto a shore or beach by the action of winds, tides, or waves. It often travels great distances across oceans, acquiring its distinct shapes and smooth textures through natural processes. Each piece has its own unique history and character, influenced by the type of wood and the conditions it’s exposed to during its journey.

Formation and Journey

The journey of driftwood begins when trees or branches fall into the water, often due to storms, erosion, or as a result of logging activities. These materials then float down rivers or streams, eventually finding their way to the sea. Along their path, they are shaped by the elements—buffeted by waves, baked by the sun, and polished by sand.

Varieties of Driftwood

The variety in driftwood is immense, each piece differing in size, texture, and color. This diversity is due to the different types of trees that originally produce the wood and the varying environmental conditions to which each piece is exposed. Common types include cedar, pine, and oak, each contributing its unique properties and aesthetic.

Driftwood in Art and Decor

Driftwood’s natural beauty makes it a popular choice for art and decoration. Its earthy tones and organic shapes can add a touch of nature to any space, whether in rustic or modern settings. Artists and DIY enthusiasts alike appreciate its versatility and the creative possibilities it offers.

Home Decor

Driftwood can be incorporated into home decor in numerous ways. It can be used to create simple yet elegant features like table centerpieces or wall hangings. More elaborate projects might involve constructing driftwood furniture such as coffee tables, shelves, or headboards, allowing you to showcase its raw beauty in everyday items.

Garden and Outdoor Spaces

In garden and outdoor settings, driftwood can serve as both a functional and decorative element. It can be used as planters, pathways, or sculptures, enhancing the natural beauty of your outdoor area. Driftwood blends seamlessly with plants and rock gardens, complementing the organic vibe of these spaces.

Driftwood Crafting

For those who enjoy DIY projects, crafting with driftwood can be a rewarding experience. Its versatility allows you to create a variety of items, from simple to complex, depending on your skill level and creativity. If you haven’t yet explored this creative outlet, driftwood provides an excellent opportunity to do so.

Simple Craft Ideas

Some simple driftwood craft ideas include creating picture frames, candle holders, or small sculptures. These projects are perfect for beginners, requiring only basic tools and a bit of creativity. You’ll find the process of turning a found piece of wood into a functional or artistic item both relaxing and fulfilling.

Advanced Projects

For the more experienced, driftwood can be used to create intricate projects, such as larger sculptures, furniture, or even lighting fixtures. These advanced projects require additional tools, patience, and sometimes the collaboration of multiple pieces to achieve the desired result. An eye for design and a passion for crafting can help you turn driftwood’s irregular shapes into cohesive and striking finished pieces.

Caring for Driftwood

Once you’ve brought driftwood into your home, it’s essential to care for it properly to maintain its appearance and longevity. Unlike conventional furniture or decor, driftwood requires specific handling due to its unique properties.

Cleaning and Preparation

Before using driftwood in any project, it’s important to clean and prepare it properly. Start by removing any loose debris or organisms. Soaking it in fresh water can help eliminate salt and sand residues. After cleaning, let it dry thoroughly. This process not only preserves the wood but also prevents potential damage or decay.

Preservation and Maintenance

Driftwood typically needs some level of preservation, especially if used in humid or outdoor environments. Applying a clear wood sealant can protect it from moisture and extend its life. For indoor pieces, occasional dusting and careful handling can keep it looking as beautiful as the day you found it.

Driftwood Items

Eco-Friendly and Sustainable Decor

Using driftwood in your home is not only an artistic choice but also an environmentally friendly one. As a natural resource, it doesn’t require the processes associated with manufacturing new materials, making it a sustainable option for those concerned about their environmental footprint.

Environmental Benefits

Repurposing driftwood reduces waste and the need for processed materials. Driftwood naturally occurs and is abundant, requiring no additional energy for production. By utilizing what nature has already provided, you lessen the demand on heavily processed and less sustainable materials.

Supporting Local and Artisanal Efforts

Driftwood items are often crafted by local artisans or small businesses, providing economic support to these creators. By purchasing driftwood crafts, you help sustain these trades and encourage environmentally conscious production. Choosing handmade items ensures quality, uniqueness, and contributes to the cultural and creative economy.

The Symbolism and Spirit of Driftwood

Beyond its physical characteristics and aesthetic appeal, driftwood carries deeper symbolic meanings. It can represent resilience, transformation, and the beauty found in imperfection, resonating on a personal level with many individuals.

Symbolism in Nature

Driftwood symbolizes endurance and adaptation, illustrating the ability to withstand the challenges of time and nature. Each piece tells a story of survival and change, embodying the spirit of renewal and the beauty of unpredictability.

Personal Connections

Many people form personal connections with driftwood pieces, recalling memorable walks on the beach or special moments shared by the sea. Incorporating driftwood into your space can evoke these memories, bringing a sense of peace and connection to nature into your daily life.

Driftwood Items

Driftwood in Historical and Cultural Contexts

Driftwood has been used throughout history and across cultures for various purposes, from practical uses to spiritual symbolism. Understanding its historical and cultural significance can add an extra layer of appreciation for this material.

Historical Use

Historically, driftwood has been a valuable resource for communities living by coastal areas. It has been used for building shelters, making tools, and creating art. Its abundance and durability made it an essential component of day-to-day life, particularly in environments where other materials were scarce.

Cultural Significance

Various cultures have woven driftwood into their traditions and stories. Many indigenous cultures, for example, see driftwood as a link to the spirit world or as gifts from the sea. Its place in folklore and rituals highlights its revered status and the respect for natural elements that sculpt it.

Getting Started with Driftwood Projects

Beginning your journey with driftwood projects is both exciting and fulfilling. To get started, you’ll need a few basic tools and some guidance on finding and selecting the right pieces.

Tools and Materials

Here’s a simple table to help you gather the tools and materials you might need:

Tool/MaterialPurpose
Hand SawCutting pieces to desired sizes
SandpaperSmoothing surfaces
DrillMaking holes for screws or cords
Wood GlueAssembling pieces
Clear SealantPreserving the wood
Safety GearProtecting against dust and injuries

These tools, combined with some creativity, allow you to start crafting your own unique driftwood items.

Finding Driftwood

Locating driftwood involves visiting beaches, riverbanks, or lakesides where it naturally accumulates. Be aware of local regulations regarding the collection of driftwood, as some areas have restrictions to protect ecosystems. When choosing pieces, look for interesting shapes and textures that speak to your creative vision.

Driftwood Items

Tips for Successful Crafting

Crafting with driftwood can be a joyous experience, but it does come with its challenges. Here are some tips to help you navigate the process smoothly.

Embrace Imperfections

Driftwood’s charm lies in its irregularities. Embrace imperfections and let them guide your design. Rather than forcing a piece to conform to rigid standards, work with its natural shape and features.

Be Patient

Crafting with driftwood often requires patience. Due to its unique form and structure, finding the right fit can sometimes be challenging. Allow yourself time to experiment with arrangements and techniques until you achieve your desired outcome.

The Future of Driftwood Use

As more people appreciate the beauty and sustainability of driftwood, its use in art and decor is likely to grow. What might the future hold for this material?

Innovative Designs

Designers continue to discover novel ways to incorporate driftwood into modern aesthetics, blending it with other materials like metal or glass to create contemporary looks. These innovations expand the possibilities for driftwood decor and highlight its adaptability.

Growing Appreciation

As awareness of environmental issues increases, so does the appreciation for sustainable materials like driftwood. Its resurgence can inspire a broader movement towards natural and recycled materials in home design, encouraging sustainable living practices.

Incorporating driftwood into your life, whether as a hobby, decor, or artistic medium, can be a rewarding endeavor. Its unique beauty and sustainable nature resonate with those who appreciate the intricate and the natural. As you explore the world of driftwood, remember that each piece holds a story—the story of its journey through nature and the new chapter you’re crafting for it in your home or art.

Filed Under: Driftwood Ideas Tagged With: crafting, DIY, Driftwood, Handmade, home decor

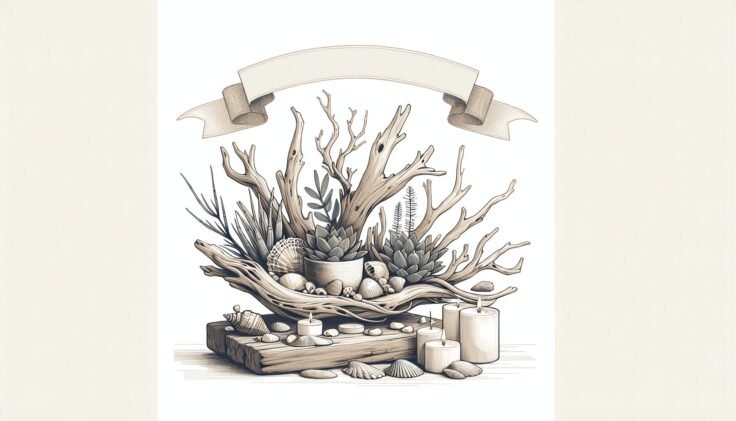
Driftwood Centerpiece Diy

January 20, 2025 by admin

Have you ever found yourself staring at a beautifully crafted driftwood centerpiece in a home decor magazine and wondered, “How can I create something like this on my own?” Your home deserves a touch of nature’s artistry, and driftwood presents the perfect opportunity to bring the outdoors inside in an elegant and unique way. With a few simple materials and steps, you can transform ordinary driftwood into a stunning centerpiece for your dining table, coffee table, or any other spot that could use a bit of rustic charm.

Driftwood Centerpiece Diy

Why Choose Driftwood for Your Home Decor?

Driftwood is not only aesthetically pleasing, but it also tells a story. Each piece has been shaped by time, weather, and water, giving it a unique look and character. Incorporating driftwood into your home decor can add a touch of nature and nostalgia, making your space feel more inviting and serene. Moreover, using driftwood is an eco-friendly way to decorate since it recycles a material that would otherwise just be left to nature’s devices.

The Versatility of Driftwood

Driftwood can be used in a multitude of artistic ways. Whether you’re aiming for rustic farmhouse charm or a minimalist coastal vibe, driftwood can complement a variety of design styles. Its neutral color palette and organic texture allow it to blend seamlessly into almost any decor style. From centerpieces to wall hangings, lamp bases, and even furniture, driftwood offers endless possibilities for creativity.

Environmental Benefits

Opting for driftwood as a material means you’re essentially cleaning up beach areas, which can sometimes be overrun with debris. It’s a sustainable resource since it requires no manufacturing process and has a negligible carbon footprint compared to processed woods or synthetic decorative materials.

Gathering Your Materials

Before you can embark on your driftwood centerpiece journey, you’ll need to gather a few materials. The good news is that many of these can be collected or repurposed, making this project as budget-friendly as it is beautiful.

Find Your Driftwood

The key element, of course, is the driftwood itself. You can find it along beaches, riverbanks, or lakeshores. Be sure to gather a collection of pieces in varying shapes and sizes to give your centerpiece dimension and interest. If access to a natural source is limited, driftwood can also be purchased at craft stores or online.

Other Essential Supplies

To create your driftwood centerpiece, you will also need the following materials:

  • Adhesive: A strong glue or epoxy will help you secure your driftwood pieces together.
  • Base or Tray: This could be a wooden or metal tray, a glass dish, or even a reclaimed piece of wood. It serves as the foundation for your arrangement.
  • Decorative Elements: Consider adding candles, succulents, moss, shells, or stones to enhance your centerpiece’s look.
  • Protective Gear: Gloves and goggles, especially when using adhesives or if you need to sand rough edges.
  • Tools: A small hammer, drill, or saw, depending on your needs for shaping and securing your driftwood.

Preparing Your Driftwood

Once you’ve collected your driftwood, preparation is key to ensure it remains durable and looks its best. Driftwood can sometimes carry bacteria, insects, or other natural impurities, so cleaning and treating it is a crucial step.

Cleaning Your Driftwood

Start by thoroughly rinsing each piece with fresh water. Use a brush to scrub away any remnants of dirt, sand, or algae. Allow the wood to dry completely in the sun, which also helps to naturally disinfect it.

Sanitizing and Sealing

For further cleaning, consider a mild bleach solution soak. Prepare a mixture of one part bleach to ten parts water, and let the wood soak for a couple of hours. Rinse thoroughly after soaking, and again, let it dry completely. Sealing the dried wood with a clear matte varnish can help preserve its appearance and protect it from becoming brittle over time.

Designing Your Driftwood Centerpiece

Now that your driftwood is clean and ready, it’s time to start designing your arrangement. This is where your creativity can shine as you envision how each piece will fit together.

Choosing a Focal Point

Every great centerpiece has a focal point. Decide what aspect of your arrangement will draw the eye first. This could be a particularly interesting piece of driftwood or an added decorative feature such as a tall candle or a cluster of succulents.

Arranging Your Driftwood

Start by laying out your base and arranging your driftwood pieces on top of it without securing them. Experiment with different placements and configurations until you find a design that appeals to you. Consider balance, symmetry (or asymmetry if you prefer), and how the different shapes and sizes of your driftwood complement each other.

Adding Decorative Elements

Once you’re satisfied with the placement of your driftwood, incorporate additional elements to enhance your centerpiece. Natural accents such as moss, shells, or stones can highlight the rustic vibe, while candles or flowers can add a touch of elegance and color. Consider the season or theme you’re designing for, as this can guide your choice of decorations.

Driftwood Centerpiece Diy

Assembling Your Centerpiece

With your design in mind, it’s time to bring your centerpiece together.

Securing the Driftwood

Begin by adhesive bonding your driftwood pieces together according to your layout. Be sure to press them firmly against your base to ensure stability. If necessary, employ tools to drill holes for pegs or use clamps to hold pieces secure while the glue dries.

Final Touches

Once the basic structure is secure and dry, add your decorative elements. Position candles with holders to prevent wax drips, tuck succulents into natural crevices, or scatter your chosen accents across the base. Make sure everything is securely placed and balanced.

Maintaining Your Driftwood Centerpiece

Now that your driftwood centerpiece is complete, some routine maintenance can help keep it looking pristine.

Protecting from Damage

Avoid exposure to direct sunlight or excessive moisture, as these can cause the wood to warp or lose color over time. Dust your centerpiece regularly to prevent dirt build-up, and consider reapplying varnish if any sections begin to look worn.

Seasonal Updates

One of the joys of having a driftwood centerpiece is its versatility. Feel free to update your decorative elements to match seasons or occasions. Add pinecones and acorns in autumn, evergreen sprigs in winter, wildflowers in spring, and seashells in summer.

Troubleshooting Common Issues

As with any DIY project, you may encounter a few hiccups along the way. Here’s a quick guide to overcoming some common issues:

Uneven Balancing

If your centerpiece feels off-balance, try redistributing the weight by adjusting your pieces or adding counter-weighted elements. Experiment with different bases for added stability if needed.

Loose Elements

Should any pieces come loose, reapply your adhesive generously and ensure adequate drying time. For fragile arrangements, consider using craft wire discreetly to secure elements in place.

Cracking or Fading

If you notice cracking or fading, assess your environment for potential causes like too much sun or dryness. Reapply a sealant to protect the driftwood, and consider changing the location if necessary.

Conclusion

By embracing the uniqueness of driftwood, you’re not only creating a centerpiece that is both a conversation starter and a piece of art; you’re also adding a personal touch to your home. Through washing, treating, assembling, and eventually maintaining your centerpiece, you ensure its lasting beauty and charm. With each piece of driftwood requiring a custom approach due to its one-of-a-kind nature, your creativity will continue to grow and be showcased in your future DIY projects. So, pick up that piece of wood that once floated aimlessly, and give it a purpose in your sanctuary.

As you enjoy your handcrafted piece, you’ll likely find that the process itself was just as rewarding as the end result. Whether for personal satisfaction or to impress guests, your driftwood centerpiece is a testament to the creative spirit and the potential found in the natural world.

Filed Under: Driftwood Ideas Tagged With: Centerpiece, crafting, DIY, Driftwood, home decor

Driftwood Buttons

January 9, 2025 by admin

Have you ever found yourself strolling along a beach, your mind absorbed in the calming rhythm of the waves, when suddenly your eyes fall upon a peculiar piece of driftwood? It’s not just any old random branch; it’s shaped intriguingly like a button. This encounter might seem commonplace to some, but these little objets d’art have an unexpected charm and a multitude of uses. Let’s explore the fascinating world of driftwood buttons, from their natural origin to their practical and creative applications.

What Are Driftwood Buttons?

Driftwood buttons are nature-crafted wonders, formed as pieces of wood that have been smoothed and shaped by the ocean’s tides before washing up on the shore. These wooden gems vary in size, shape, and color, and can resemble the circular simplicity of a button. With their unique weathered texture and timeless appeal, they can be used in numerous craft projects and add an organic touch to your designs.

  • majoywoo Natural Coral Driftwood for Aquarium Decor Fish Tank Decorations,
    majoywoo Natural Coral Driftwood for Aquarium Decor Fish Tank Decorations, Assorted Driftwood Branch 6-10" 3 Pcs, Reptile Decor…
    • 【NATURAL DRIFTWOOD】 --- Each piece of driftwood has a distinctive shape and looks different from various angles. Each piecec is unique.the pictures shown are only some of the driftwoods, what your get may be different from pictures show.
    • 【SUITABLE FOR
  • Jorewood Natural Small Aquarium Driftwood for Fish Tanks & Reptile
    Jorewood Natural Small Aquarium Driftwood for Fish Tanks & Reptile Terrariums – 100% Safe Fish Tank Decorations, Unique Twisted Branches 5-Piece 4-8 Inch Low Tannin, Easy to Sink
    • 【Dual Use for Aquariums & Reptiles】Perfect for both freshwater fish tanks and reptile terrariums! natural driftwood provides climbing surfaces for lizards, geckos, and snakes, while creating hiding spots for fish and shrimp.
    • 【Natural & Safety】Carefully hand-Select driftwood. Safe for aquatic
  • 5 Pcs Driftwood Branches Aquarium Wood Decoration Natural Fish Tank
    5 Pcs Driftwood Branches Aquarium Wood Decoration Natural Fish Tank Habitat Decor Wood for Lizard Assorted Size-Small
    • Hamiledyi aquarium driftwood selected good quality natural Mopani Wood to provide a great and beautiful habitat for your aquatic pets and reptiles. Natural wood branches vary due to mother nature each branch is unique
    • Light weight, sturdy branch is great

The Natural Journey of Driftwood

Driftwood has a story of its own, carried by rivers into oceans and lakes. This wood can originate from trees, lumber, or wooden objects left to the mercy of the water’s relentless movement. As it travels, the constant motion of the waves and currents sands away rough edges and softens its form. Saltwater and sun bleach it, giving it a distinctive look that you can’t replicate artificially.

Distinct Characteristics

Each piece of driftwood is an artwork of nature, unique in its appearance. The colors often range from pale greys and whites to warm browns, contributing to their diverse appearances. The texture is equally varied – some are smooth to the touch, while others might have a rustic, rugged feel. These differences are what make driftwood buttons so appealing for unique, personalized projects.

Crafting with Driftwood Buttons

Embracing creativity using driftwood buttons opens up a world of artistic possibilities. While they’re charming in their own right, knowing how to integrate them into projects is the key to utilizing their full potential.

Home Decor Enhancements

One of the most rewarding uses for driftwood buttons is in home decor. Their rustic aesthetic pairs wonderfully with a variety of styles, from coastal themes to rustic farmhouse settings. Consider using them as embellishments on picture frames, mirror borders, or as part of a homemade wreath. Each button adds a touch of natural warmth and personalized beauty.

Jewelry and Fashion Accessories

Driftwood buttons make unique elements in jewelry designs. By turning them into pendants or adding them to bracelets and necklaces, you can create accessories that have a story and connection to nature. For those interested in fashion, these buttons can also replace conventional buttons on clothing items – adding a distinctive and eco-friendly twist to your wardrobe.

DIY Projects

If you’re inclined towards Do-it-Yourself projects, driftwood buttons will quickly become favorites in your crafting arsenal. Whether you’re embellishing handmade bags, creating wall art, or personalizing gifts, incorporating driftwood into your projects elevates them from ordinary to extraordinary. Let your imagination roam, and you’ll find numerous ways these versatile pieces can contribute.

Driftwood Buttons

Collecting and Preparing Driftwood

While collecting driftwood buttons yourselves can be an enjoyable activity, requiring a respectful approach and a bit of knowledge to ensure you’re collecting safely and sustainably.

Respect the Environment

Be sure to follow local regulations regarding the collection of driftwood, as there may be restrictions in place to preserve natural habitats. Collecting modest amounts from publicly accessible areas is usually acceptable. Always keep the environment in mind and leave no trace behind at the beach.

Selecting Quality Pieces

When collecting, look for pieces that are naturally smooth and appealing without needing further modification. Check for structural integrity; avoid pieces that easily splinter or crumble.

Cleaning and Preserving

Once you have your driftwood buttons, clean them by soaking in mild soap and water to remove any debris. Rinse thoroughly and let them dry completely. Some people like to seal their driftwood with a clear varnish to preserve its color and texture, but this is up to personal preference.

The Benefits of Using Driftwood Buttons

Choosing driftwood buttons over conventional materials offers multiple benefits. Not only do they provide visual interest, but they also support sustainable practices and encourage a connection to nature.

Sustainability

Using driftwood buttons reduces reliance on manufactured products, supporting eco-friendly crafting and local resources. Your creativity contributes to reducing waste and gives second life to materials that might otherwise go unused.

Unique Aesthetic Appeal

Each driftwood button carries its own unique pattern and structure, ensuring no two pieces are exactly alike. This individuality fosters a stronger connection to the items you create, as they are each imbued with their own distinct story.

Connection to Nature

Crafting with driftwood fosters an appreciation for natural beauty and the slow, transformative processes of the earth. Incorporating these elements into your life provides constant reminders of the natural world’s beauty and variety.

Driftwood Buttons

Where to Buy Driftwood Buttons

For those who may not have access to coastlines or prefer not to collect their own, many options exist for purchasing driftwood buttons.

Specialty Craft Stores

Certain craft stores specialize in natural materials, and you may be able to find authentic driftwood buttons here. These stores often cater to audiences interested in eco-friendly, unique supplies that contribute to personalized crafting experiences.

Online Marketplaces

The internet is rich with options for acquiring driftwood buttons. Websites like Etsy and eBay host a variety of sellers offering unique, handmade driftwood buttons. These platforms allow you to support small businesses and artists who specialize in crafting these natural gems.

Coastal Artisan Markets

If you’re lucky enough to live near the coast or are visiting, be sure to check out local artisan markets. These often feature pieces made or harvested by local artists, allowing you to find one-of-a-kind driftwood buttons along with other inspiring creations.

Creative Ways to Use Driftwood Buttons

To truly enjoy the full potential of driftwood buttons, consider some innovative applications that go beyond traditional crafting.

Button Magnets

Attach small, strong magnets to the back of driftwood buttons to create artisanal magnets for your refrigerator or office space. These magnets blend practicality with charm, providing a touch of nature each time you pin a note or photo.

Driftwood Button Art

Envision an entire wall of custom art pieces incorporating driftwood buttons. Through intricate arrangements and complementary materials, you can design visually stunning work that commands attention and invites touch.

Garden Art and Signage

For garden enthusiasts, driftwood buttons offer a unique way to label plants or decorate outdoor spaces. Use them to create charming signs, complete with painted or engraved labels identifying plants or pathways in a decorative and natural style.

Custom Furniture Hardware

Revamp furniture by substituting standard knobs and handles with driftwood buttons. This simple switch can transform the look of a piece, instilling it with character and warmth.

Conclusion

Driftwood buttons, with their natural beauty and versatility, provide both a creative outlet and a tactile connection to the natural world. Whether you collect them yourself or purchase them from skilled artisans, incorporating these buttons into your crafts allows you to celebrate the unique charm of natural materials. By advocating for sustainability and creativity, you enrich not only your projects but also your own experience of the world around you. Engage with the rhythm of nature through driftwood and let it inspire your artistic endeavors.

Filed Under: Driftwood Ideas Tagged With: Buttons, crafting, Driftwood, Handmade

Driftwood Butterfly Diy

January 8, 2025 by admin

Have you ever gazed at a piece of driftwood and imagined the creative possibilities it holds? If you love crafting and nature, diving into a Driftwood Butterfly DIY project might be the perfect way to blend these passions. Not only does it give you a chance to be creative, but it also brings a piece of nature into your home in a beautiful and artistic form.

Driftwood Butterfly Diy

Understanding Driftwood

Before starting your project, let’s explore what driftwood is and why it appeals to many DIY enthusiasts. Driftwood is essentially wood that has been washed onto the shore by winds, tides, or waves. Its weathered texture and distinctive forms result from natural elements, making each piece unique.

Why Use Driftwood for Crafts?

There are numerous reasons to love driftwood for DIY projects. Firstly, its natural beauty boasts unique shapes and textures that are often more interesting than commercially processed wood. Secondly, crafting with driftwood is an eco-friendly practice as it involves repurposing materials. Lastly, using driftwood can add a rustic, coastal charm to your crafts that is hard to replicate with other materials.

Sourcing Your Driftwood

Finding and collecting driftwood can be an enjoyable part of the process. You can often gather it along beaches, rivers, or lakes. However, always be respectful to nature—check local regulations regarding collecting natural resources, and make sure you’re not gathering pieces that could be crucial to the ecosystem.

Preparing Your Driftwood

Once you’ve collected your driftwood, it’s important to prepare it for crafting. This step ensures your materials are clean and ready for use.

Cleaning Driftwood

Cleaning is a crucial step to remove salt, algae, or other residues. Start by soaking the driftwood in fresh water for a few days, changing the water daily. This process helps to leach out salts and dirt.

Disinfecting Driftwood

After cleaning, it’s wise to disinfect your driftwood. One method is to soak it in a diluted bleach solution (one part bleach to nine parts water) for a couple of hours. Rinse thoroughly and let it dry completely, preferably in sunlight.

Sanding for Smoothness

Driftwood can have rough edges or splinters. Lightly sanding the piece can make it safer and more pleasant to handle, as well as help it adhere better to other materials during assembly.

Crafting Your Driftwood Butterfly

Now that your driftwood is ready, let’s look at creating a beautiful butterfly.

Designing Your Butterfly

Sketching a basic design can help you visualize how your butterfly will come together. Consider the shape and size of your driftwood pieces, and allow their natural forms to guide your design.

Selecting the Right Pieces

Aim to use a variety of driftwood sizes and shapes to create interest. You might use flat, broad pieces for wings, and smaller, elongated pieces for the body and antennae.

Assembling the Butterfly

When you are satisfied with your arrangement, start assembling. A strong wood glue or epoxy can hold the driftwood pieces together well. Allow ample drying time for your structure to stabilize.

Adding Artistic Flairs

Once assembled, there are numerous ways to enhance your butterfly. You can paint it, add beads, or attach other decorative elements to personalize your creation.

Tools and Materials Needed

To successfully complete your Driftwood Butterfly, you’ll need some basic tools and materials. Here’s a handy table to keep track:

Tool/MaterialPurpose
DriftwoodMain material for crafting
SandpaperSmoothing rough edges
Wood Glue/EpoxyAdhering pieces together
Brushes & PaintsOptional decorative detailing
Pencil & PaperSketching design
Bleach & WaterCleaning and disinfecting driftwood
Protective GearSafety during cleaning and assembly

Driftwood Butterfly Diy

Tips for a Successful DIY Experience

Here are some additional tips to ensure your project is a success:

Patience is Key

Working with natural materials like driftwood requires patience. Allow adequate drying times when cleaning and assembling your pieces to ensure a solid final product.

Let Nature Guide You

Embrace the natural shapes and forms of your driftwood. Rather than forcing the pieces to fit a preconceived notion, let their inherent beauty inspire your design.

Safety First

Always wear protective gear when sanding or using glue and disinfectants to protect yourself from splinters and chemical exposure.

Benefits of Crafting with Driftwood

Engaging in DIY projects with driftwood offers numerous benefits beyond the aesthetic value.

Environmental Impact

By using driftwood, you’re contributing to an eco-friendly cycle, repurposing materials that might otherwise decompose or remain unused on shores.

Creative Expression

Crafting allows for expressive creativity. Each driftwood butterfly is unique, reflecting personal artistic visions and skills.

Mental Well-being

Arts and crafts promote mental wellness. The hands-on, creative process can reduce stress, improve mood, and provide a sense of accomplishment.

Sharing and Displaying Your Driftwood Butterfly

Once your driftwood butterfly is complete, consider how you’d like to share or display your work.

Home Decoration

A driftwood butterfly can be an eye-catching piece of decor, providing a rustic, natural touch to any room.

Gifts and Personal Touches

These creations make thoughtful, personalized gifts. Consider making one for a friend or a loved one who appreciates handmade crafts and nature.

Craft Fairs and Markets

If you’re comfortable, showcasing your work at craft fairs or markets can be a way to share your passion with a wider audience and potentially profit from your hobby.

Troubleshooting Common Issues

Every DIY project can encounter hiccups, so here are solutions to common issues you might face:

Pieces Not Sticking Together

Ensure surfaces are clean and dry before gluing. If pieces won’t hold, try using additional support like clamps until the glue fully cures.

Driftwood Breaking

Handle each piece gently, especially when smaller or more delicate. If something breaks, don’t worry—small pieces can often be repurposed elsewhere in the design.

Unwanted Gaps Between Pieces

Use smaller driftwood fragments or decorative items like shells or beads to fill in any gaps.

Conclusion

Crafting a Driftwood Butterfly is a rewarding experience that connects creativity with the beauty of nature. Each project is unique, reflecting the natural forms of driftwood and the creator’s personal style. Whether you’re making one for yourself or as a gift, this project is a delightful way to bring a touch of the outdoors inside. Embrace the process, enjoy each step, and remember: your butterfly is as unique as you are!

Filed Under: Driftwood Ideas Tagged With: Butterfly, crafting, DIY, Driftwood, home decor

Driftwood Branch Decor Diy

January 7, 2025 by admin

Have you ever walked along a beach and spotted a piece of driftwood that seemed to carry an artistic story waiting to unfold? Driftwood has this unique ability to add a rustic and natural charm to any space, and the best part is, you can create beautiful decor with it yourself! If you have a penchant for crafts and a love for the outdoors, why not combine the two and embark on a creative journey with driftwood branch decor DIY? It’s not only fun, but it also allows you to bring a bit of nature’s artistry into your home.

Understanding Driftwood: Nature’s Artwork

Before you start your creative project, you might wonder why driftwood is such a coveted material for decor. Driftwood is essentially branches, roots, or trunks of trees that have been washed ashore by tides. Over time, the water smooths and shapes the wood, giving each piece a distinct character. This natural process makes every driftwood piece unique, with beautifully weathered textures and shades.

Why Choose Driftwood for Decor?

Driftwood presents an eco-friendly option for home decor. Instead of purchasing new materials, you’re repurposing something that nature has already crafted. This type of decor can seamlessly blend with various interior styles, from coastal and rustic to modern and bohemian. If you’re someone who appreciates sustainable living, using driftwood is also your step toward a greener lifestyle.

How to Source Driftwood

Before setting off to the beach, check local regulations, as some areas restrict the collection of driftwood to preserve local ecosystems. When allowed, it’s good to collect smaller pieces over time. The hunt itself can be a relaxing and invigorating experience, turning your beach visits into treasure hunts. Remember to respect nature and take only what you need.

Preparing Your Driftwood

Once you’ve gathered your driftwood pieces, it’s essential to prepare them for your decor projects. This ensures your pieces last long and remain hygienic.

Cleaning the Driftwood

Start by brushing off any visible sand or debris. Rinse the wood in fresh water to remove any salt. You may also choose to soak the driftwood in a solution of water and bleach. This not only helps in cleaning but also kills any remaining bacteria or organisms. Ensure you rinse thoroughly after soaking to remove any residual bleach.

Drying the Driftwood

Drying the driftwood is a critical step. Place the wood in a sunny area to air-dry naturally. Depending on the size, this may take several days. Alternatively, you can also use an oven for smaller pieces. Set your oven to 200°F (about 93°C) and bake the driftwood for a couple of hours. This helps in killing any pests and speeds up the drying process.

Driftwood Branch Decor Diy

DIY Projects with Driftwood

Once your driftwood is ready, the possibilities for DIY projects are extensive. Let your imagination run wild as you create charming pieces of decor. Let’s look at some inspiring ideas where you can use driftwood to transform your living space.

Driftwood Wall Hanging

Creating a driftwood wall hanging is a perfect start to driftwood DIY. This project is simple yet can produce a striking piece of art for your home. Select pieces of driftwood that vary in length and form; they add more character to your hanging piece.

Steps:

  1. Materials Needed: Gather driftwood, durable twine or rope, scissors, and a drill with a small bit.

  2. Design Your Hanging: Lay out the driftwood on the floor or a flat surface in the design you desire.

  3. Drill Holes: Carefully drill small holes at the points where you will tie the rope through. Make sure to target sturdy areas.

  4. Assemble: Thread twine through the holes and knot securely. Think about varying lengths to enhance visual appeal.

  5. Hang Your Artwork: Use a sturdy hook or nail to hang your piece on the wall.

Driftwood Candle Holder

A driftwood candle holder can add warmth and ambiance to any room. Choose a solid piece of driftwood with a flat surface that could support candles safely.

Steps:

  1. Materials Needed: Driftwood, candles of your choice, a drill with a spade bit (size according to your candle’s base), sandpaper.

  2. Measure and Mark: Decide where you want your candles. Mark these spots evenly across the driftwood.

  3. Drill Candle Holes: Use the spade bit to drill holes at marked spots. The holes should be slightly smaller than the candle’s base for a snug fit.

  4. Smooth Edges: Sand the drilled holes and the entire surface to remove splinters and any rough spots.

  5. Place Candles: Fit your candles into the drilled holes. Consider using LED candles for safety, especially indoors.

Driftwood Coat Rack

Crafting a coat rack from driftwood not only provides functionality but also offers a warm, inviting space as soon as you walk into your home.

Steps:

  1. Materials Needed: A long piece of driftwood, hooks or pegs, screws, hanging hardware, drill, and screwdriver.

  2. Select Your Driftwood: Find a piece of driftwood that is thick and strong enough to hold coats. Test its sturdiness.

  3. Position the Hooks: Decide where you’d like the hooks. Evenly space them out across the driftwood.

  4. Attach the Hooks: Use screws to securely fasten the hooks onto the driftwood.

  5. Prepare for Hanging: Attach suitable hanging hardware to the back of your driftwood piece.

  6. Mount Your Rack: Securely mount the coat rack on a wall in your entryway or hallway at a comfortable height.

Tips for Driftwood Decor Success

Creating driftwood decor involves creativity, attention to detail, and a touch of patience. Here are some tips to ensure your driftwood DIY decor is a highlight in your home.

  1. Safety First: Always wear gloves while handling driftwood to avoid splinters and cuts. Use appropriate safety gear when using tools.

  2. Think Ahead: Visualize where your driftwood decor will fit into your home before starting any project. Think about the color palette and style of the room.

  3. Quality Tools: Ensure you have all necessary tools before starting the project. Using quality tools makes the process smoother and safer.

  4. Experiment and Customize: Don’t be afraid to experiment with your designs. Personalize each item with paints, stains, or additional elements like shells and stones to enhance the natural beauty of the driftwood.

  5. Keepsake Items: Consider using driftwood pieces that hold sentimental value, perhaps from a memorable trip, to create functional keepsake decor.

Understanding Driftwood Maintenance

Once you’ve adorned your home with your handcrafted pieces, it’s worth noting how to maintain driftwood decor over time. Driftwood by nature is resilient, but like any decor, it benefits from a little care.

Cleaning

Dust your driftwood pieces regularly with a soft cloth. For deeper cleaning, use a damp cloth followed by a dry wipe to prevent moisture damage. If displaying pieces outdoors, periodically check for mold, and clean as necessary.

Preservation

To preserve your driftwood decor, consider applying a clear sealant or varnish. Ensure it’s non-toxic and suitable for wood. Test it on a small area first to ensure it doesn’t alter the driftwood’s appearance.

Making Use of Smaller Pieces

Sometimes, you’ll come across driftwood pieces too small for significant decor projects. Fret not! These can be creatively utilized in minor enhancements throughout your home.

Driftwood Photo Holders

Turn petite pieces of driftwood into unique photo holders perfect for displaying your cherished memories. With just a little effort, these can become delightful accents on desks or shelves.

Steps:

  1. Materials Needed: Small driftwood pieces, thin wire, wire cutter, pliers, photos.

  2. Wrap the Wire: Cut a 12-inch piece of wire. Wrap it tightly around the driftwood, leaving some wire towards the top.

  3. Create a Loop: Use pliers to twist the extending wire into a small loop or spiral to hold a photo.

  4. Place Photos: Insert your chosen photos into the loop.

Driftwood Necklace Rack

With just a few small pieces of driftwood and a bit of creativity, you can craft a charming necklace rack that organizes while adding aesthetic value.

Steps:

  1. Materials Needed: A flat piece of driftwood, small hooks or knobs, drill, wall adhesive hooks or screws for hanging.

  2. Place the Hooks: Evenly space and mark where you’ll attach the hooks on the driftwood.

  3. Attach Hooks: Securely fasten hooks onto the driftwood.

  4. Mount the Rack: Use wall adhesive hooks or screws to mount. Hang your necklaces neatly.

Driftwood Branch Decor Diy

Conclusion

Creating DIY driftwood decor is not only a great way to add natural beauty to your home, but it also offers a rewarding crafting experience. From choosing the perfect pieces on a beach walk to seeing the finished artistry hanging on your wall, it’s a journey that connects you to nature and creativity. Enjoy each step — from the creative brainstorming to the nitty-gritty crafting details. Your home gets a piece of nature and art, and you get a story to share with everyone who visits. Now, next time you find yourself strolling along the shore, perhaps you’ll look at driftwood with the eyes of an artist, seeing the potential for a beautiful transformation that suits your unique style.

Filed Under: Driftwood Ideas Tagged With: crafting, Driftwood, Handmade, home decor, Interior Design

Driftwood Branches Ideas

January 5, 2025 by admin

Have you ever come across a beautiful weathered piece of driftwood at the beach and wondered what you could create with it? Driftwood, with its natural charm and unique character, offers endless possibilities for artistic and practical endeavors. Its organic shapes and textures can easily add a rustic, natural element to your home décor or garden. In this article, we’ll explore an array of ideas to help you transform driftwood branches into stunning creations. So, let’s get those creative juices flowing and see how you can bring a touch of nature’s beauty into your living spaces.

Driftwood Branches Ideas

Understanding Driftwood

Before we embark on our creative journey, it’s important to understand what makes driftwood so special. Driftwood is wood that has been washed onto a shore or beach by the action of winds, tides, or waves. The constant movement in water smooths and sculpts the wood, resulting in its distinct character and weathered appearance. Driftwood is often found in various shapes and sizes, which makes it an excellent medium for art and decoration.

Preparation and Selection of Driftwood

Choosing the Right Driftwood

When selecting driftwood for your projects, consider the type, size, and shape of the wood. Look for pieces that are free from rot or pests and have interesting natural lines that could enhance your design. Smaller, detailed branches work well for intricate crafty creations, while larger, robust pieces are ideal for structural elements in larger projects.

Cleaning and Preparing Driftwood

Once you’ve chosen your pieces, it’s essential to clean and prepare the wood. To remove any salt, sand, or debris, start by rinsing the driftwood thoroughly in fresh water. You might want to soak the wood for a few days, changing the water regularly to ensure all the salt is removed. Afterward, let the driftwood dry completely in the sun, which can help further sanitize it and enhance its natural color.

Ideas for Using Driftwood Branches

Driftwood Art and Sculpture

Driftwood naturally lends itself to artistic expression due to its unique shapes. You can create stunning sculptures by assembling various driftwood pieces into abstract forms or themed art. Consider combining driftwood with other natural elements, like stones or shells, to enhance the visual appeal of your sculpture.

Home Decor Elements

Driftwood Mirrors

One popular home décor idea is to create a driftwood mirror. Simply attach an assortment of driftwood branches around the frame of a mirror for a coastal-inspired look. The irregular shapes of driftwood can add a lot of character, making each mirror unique.

Candle Holders

Crafting candle holders from driftwood is another creative endeavor. Carve spaces in the wood to hold small candles, or attach candle platforms to the branches. These rustic candle holders can create a cozy, warm atmosphere in any room.

Picture Frames

Using driftwood to frame pictures is a wonderful way to bring some nature indoors. Arrange the driftwood pieces in a shape that complements the photo while offering an earthy aesthetic. You’ll end up with a memorable and personalized decoration.

Outdoor Uses

Garden Decorations

Driftwood can add charm to any outdoor space. Use driftwood as a feature in your garden by arranging it with potted plants or building small shelving units to display your favorite succulents. It can provide contrast and texture in a setting filled with greenery.

Birdhouses and Feeders

A creative way to invite wildlife into your garden is by constructing birdhouses or feeders. Use larger pieces of driftwood as body structures, adding branches for perches. This project can be functional and visually appealing, blending seamlessly into a natural setting.

Functional Driftwood Creations

Furniture

For those looking to take on a more ambitious project, driftwood furniture can be both stunning and practical. Whether it’s a table with a driftwood base or a series of driftwood stools, pieces will complement any rustic or nautical-themed space. Just ensure the wood is sturdy enough to support your designs.

Wine Racks

Another fantastic driftwood project is a wine rack. Use the natural contours of driftwood branches to cradle wine bottles. This rustic display can add character to any bar or kitchen space, becoming a conversation starter in the process.

Preserving and Maintaining Driftwood

Driftwood, like any natural material, requires some care to maintain its beauty. Periodically clean the pieces to remove dust or insects, and consider applying a sealant or varnish if you’re using driftwood outdoors or in high-humidity areas. This can help protect it from weathering or moisture damage.

Driftwood Branches Ideas

Purchasing Driftwood

While collecting driftwood from nature is a delightful pastime, be mindful of local regulations as some areas may have restrictions. Alternatively, driftwood can be purchased from craft stores or online retailers, often sourced responsibly, ensuring that natural ecosystems remain undisturbed.

Sustainability and Ethical Considerations

Respect for the environment is essential when working with natural materials. When collecting driftwood, only take what you need and avoid damaging ecosystems. Support retailers who source their driftwood sustainably, ensuring that their collection practices have minimal environmental impact.

Driftwood in Culture and Art

Driftwood has been used in art and culture for centuries. Its enduring presence in coastal communities often symbolizes change, adaptability, and the enduring nature of life. Many artists and craftspeople have long celebrated its beauty and versatility, integrating it into traditional and contemporary artworks.

Table of Driftwood Project Ideas

Here’s a quick reference table of ideas and their levels of difficulty:

Project TypeIdeaDifficulty Level
Art & SculptureAbstract Driftwood ArtIntermediate
Home DecorDriftwood MirrorEasy
Driftwood Candle HolderEasy
Driftwood Picture FrameEasy
Outdoor ProjectsGarden DecorationsIntermediate
Birdhouses and FeedersIntermediate
FunctionalDriftwood FurnitureAdvanced
Driftwood Wine RackIntermediate

Conclusion

The possibilities for creating with driftwood branches are as vast as they are inspiring. Whether you’re a seasoned artisan or a beginner looking to experiment with natural materials, driftwood offers you the opportunity to express creativity while bringing a piece of the natural world into your home. Each piece holds the story of its journey through the waters, embedded in its form. Take this opportunity to use that canvas and create something beautiful, wrapped in nature’s charm. Happy crafting, and may your creative endeavors with driftwood help steadfastly anchor your artistry in the beauty and individuality of the natural world.

Filed Under: Driftwood Ideas Tagged With: crafting, DIY, Driftwood, Interior Design, natural materials

Driftwood Boats Diy

January 3, 2025 by admin

Have you ever considered crafting something unique out of the nature around you? Driftwood, with its naturally weathered appearance, offers a fantastic medium for creating beautiful, rustic décor pieces, and boats are a fantastic project to start with. Making a driftwood boat can be a fascinating and rewarding activity, tapping into both your creativity and craftsmanship.

What is Driftwood?

Driftwood refers to wood that has been washed onto the shore by tides, winds, or waves. It often originates from trees and branches that have spent some time in the water, becoming naturally smoothed and bleached by environmental elements. This natural sanding process results in unique textures and shades, making each piece of driftwood perfect for bespoke creations. Because of its free availability along beaches and riverbanks, it’s a popular material among DIY enthusiasts.

Benefits of Using Driftwood

Creating with driftwood isn’t just about crafting; it’s also about reconnecting with nature. Driftwood is an eco-friendly material because it repurposes what otherwise might be considered waste. Using driftwood in your DIY projects can be both sustainable and economical, due to its easy availability and natural aesthetics. You’ll discover that driftwood brings a unique charm to your creations because each piece carries its own history and unique characteristics.

Tools and Materials You’ll Need

Before embarking on your driftwood boat project, it’s important to gather all the necessary tools and materials. This preparation ensures a smooth crafting process without interruptions. Here’s a list to get you started:

  • Driftwood: Various shapes and sizes for the boat body, mast, and sails.
  • Saw: To cut and shape the driftwood pieces.
  • Sandpaper: To smooth rough edges.
  • Wood Glue: For joining pieces together.
  • Drill: Useful for creating holes.
  • Nails and Screws: For securing the pieces (optional).
  • Twine or String: To add finishing details.
  • Paint or Wood Stain (optional): To enhance the appearance or preserve the wood.
  • Varnish: To protect the finished product from wear.

The option to further embellish your driftwood boat with additional materials like sea glass, shells, or pebbles also adds a personal touch, allowing you to make your craft truly one-of-a-kind.

Driftwood Boats Diy

Gathering the Perfect Driftwood

The search for driftwood can be a delightful experience, akin to treasure hunting. Here are some tips for collecting the best pieces:

  • Location: Beaches, riverbanks, and lakeshores are great places to find a variety of driftwood.
  • Weather Conditions: Visit after storms when more driftwood has been washed ashore.
  • Quality: Look for wood that is firm and without too much decay or mold.
  • Variety: Collect a range of sizes and shapes to have options as you design your boat.

Remember to only take driftwood in locations where it is permitted, as some areas have legal restrictions in place for environmental reasons.

Designing Your Driftwood Boat

The design phase is where you let your imagination run wild. Think about the kind of boat you want to create—is it a simple sailboat, a more complex ship, or something abstract? Sketch your ideas on paper, taking into account the pieces of driftwood you’ve collected. Consider the balance and proportions, as this will affect the stability and aesthetic appeal of your finished boat.

Tips for an Efficient Design Process

  • Start Simple: If this is your first driftwood project, begin with a basic design to learn the skills.
  • Incorporate Natural Forms: Use the wood’s natural shapes to your advantage, minimizing the need for excessive cutting.
  • Proportion Balance: Ensure the mast isn’t too heavy for the boat’s base, which could make it tip over.

Constructing the Hull

The hull is the main body of your boat and provides structural stability. Select broad, sturdy pieces of driftwood as the foundation. Lay out the pieces, reminiscent of the boat’s bottom, starting with larger logs that taper into smaller ones.

  • Assembling: Align your chosen pieces to form a base that resembles a canoe or flat-bottomed boat.
  • Joining: Use wood glue to bind pieces together. Reinforcement with nails or screws can add durability.
  • Smoothing: Use sandpaper to even out the edges and surfaces, preventing splinters and creating a pleasing texture.

Construction Tip

Make sure the base of your boat is level, as this ensures stability and prevents tipping when displayed.

Driftwood Boats Diy

Crafting the Sail and Rigging

The sail is a crucial component that brings your driftwood boat to life. For the mast, choose a slender and long piece of driftwood. The sail itself can be fashioned from different materials like fabric, paper, or even leaves, depending on your desired aesthetic.

Steps to Rigging Your Boat

  1. Mast Attachment: Drill a hole into the hull where you want the mast and insert your chosen piece. Secure it with glue.
  2. Sail Creation: Cut your chosen material into a triangular or rectangular shape.
  3. Attach the Sail: Use twine to fasten the fabric securely to the mast.
  4. Add Details: String additional twine around the sail and mast to mimic rigging.

Personalizing Your Driftwood Boat

One of the joys of DIY projects is the opportunity to infuse them with personal touches. Driftwood provides a versatile base for embellishment:

  • Painting: Add colors to your boat using acrylic paints or stains. Consider thematic colors like blues or nauticals.
  • Decorative Accents: Add beads, shells, or small stones for detail and charm.
  • Woodburning: Use a wood-burning tool for intricate patterns or to etch a name or date.

Considerations for Personalization

Each personal touch should reflect your style and enhance the natural beauty of the driftwood, not overwhelm it.

Preserving Your Driftwood Boat

To ensure your driftwood boat maintains its charm over time, apply a protective finish. A quality varnish seals the wood, protecting it from moisture and decay. Opt for a matte finish to maintain that natural look if you prefer, or a glossy finish for a polished appearance.

Steps for Finishing

  1. Choose the Right Varnish: Look for products designed for wooden crafts.
  2. Application: Use a brush to evenly coat the driftwood, applying multiple layers as needed.
  3. Drying Time: Allow sufficient time for each layer to dry before applying the next.

Driftwood Boat Ideas

If you’re unsure where to start or need inspiration, consider these imaginative driftwood boat designs:

Boat TypeCharacteristics
Simple SailboatMinimalist design, single piece mast, fabric sail
Viking ShipCurved hull, oars from sticks, dragon head embellishment
Modern YachtSleek, geometric forms with simple rigging and clean lines
Pirate ShipMulti-tiered, rugged construction, detailed with small skulls

Each of these ideas can be adapted depending on the driftwood you have and your skill level with crafting.

Troubleshooting Common Issues

Despite careful planning, challenges can arise. Here are common issues and how to address them:

  • Unstable Base: Reinforce with additional pieces or flatten uneven parts.
  • Loose Mast: Ensure it’s deeply set and secured with strong glue.
  • Splintered Wood: Sand thoroughly and use wood filler to seal gaps.

Sharing and Displaying Your Driftwood Boat

Once completed, your driftwood boat becomes not just a craft project, but a piece of art to share and enjoy. Here are ways to showcase your creation:

  • Indoor Display: Place on bookshelves or mantels for a cozy, natural accent.
  • Outdoor Décor: Use varnished pieces in gardens or patios, adding a nautical flair.
  • Gifting: Handmade boats make thoughtful and memorable gifts for friends and family.

Maintaining Your Creation

To keep your driftwood boat looking its best:

  • Regular Dusting: Gently wipe with a clean, dry cloth.
  • Avoid Excess Moisture: Position away from humid environments if possible.
  • Re-apply Varnish: Annually check for any signs of wear on the finish.

Concluding Thoughts

Creating driftwood boats is not just a craft; it’s an experience that combines artistry with nature. These projects provide a platform to express individuality and craftsmanship while emphasizing sustainability and creativity. Whatever your skill level, remember the joy is in the process as much as in the final product. Happy crafting!

By crafting your own driftwood boat, you embrace a unique artistry that connects you with nature, and each creation tells its story, one wave at a time. Enjoy the journey, learn from each piece of wood, and let your imagination set sail.

Filed Under: Driftwood Ideas Tagged With: Boats, crafting, DIY, Driftwood, Woodworking

Driftwood Blanket Ladder Diy

December 28, 2024 by admin

Have you ever thought about bringing a touch of the seaside into your home décor? A Driftwood Blanket Ladder can be a perfect way to blend the rustic charm of driftwood with functional design. Whether you’re a seasoned DIY enthusiast or a complete beginner, creating a driftwood blanket ladder is a project that can easily be accomplished over a relaxing weekend. In this guide, we’ll walk you through everything you need to know to craft your very own piece of coastal artistry.

Understanding Driftwood

Before you start your project, it’s essential to have a basic understanding of driftwood. Driftwood is wood that has been washed onto a shore or beach of a sea, river, or lake by the action of winds, tides, or waves. It often has a weathered, bleached appearance because of exposure to the elements. This natural erosion process makes each piece unique in texture, shape, and color.

Sourcing Driftwood

Finding the perfect driftwood for your project can be part of the fun. You can source driftwood from local beaches, riversides, or even lakes. Keep in mind, though, that some areas have restrictions on collecting driftwood, so always check local regulations. Alternatively, if it’s challenging to find natural driftwood, you can purchase driftwood logs from craft stores or online marketplaces.

Selecting the Right Pieces

When selecting driftwood for a blanket ladder, look for pieces that are straight and robust enough to bear a bit of weight. Typically, you’ll want two longer pieces for the side rails and several shorter pieces for the rungs. The character of the driftwood—such as knots or slight curves—can add to the aesthetic appeal.

Preparing Your Wood

After collecting or purchasing your driftwood, the next step is preparation. While driftwood’s naturally weathered appearance is part of its charm, it might also harbor salt, sand, or even small pests.

Cleaning the Driftwood

Start by scrubbing your driftwood with a stiff brush to remove any loose debris or sand. If the driftwood is heavily soiled, you might want to rinse it under running water. After cleaning, allow it to dry thoroughly in a well-ventilated area. This may take several days depending on the humidity and temperature.

Treating the Wood

For longevity, it’s a good idea to treat the driftwood. Soaking it in a mixture of bleach and water (one part bleach to nine parts water) can kill any insects or bacteria. Be sure to rinse it well and dry completely after soaking. Sanding the wood lightly with fine-grit sandpaper will smooth rough spots and prepare the surface for finishing.

Driftwood Blanket Ladder Diy

Planning Your Driftwood Blanket Ladder

Now that you have prepared your driftwood, it’s time to plan your ladder. Planning will involve deciding on the ladder’s dimensions, layout, and design style.

Determining Ladder Dimensions

Typically, a blanket ladder stands between five to six feet tall and has four to five rungs spaced evenly apart. Your ladder’s width will depend on the length of your shorter driftwood pieces, generally between 16 to 20 inches wide.

FeatureTypical Measurement
Height5 to 6 feet
Width16 to 20 inches
Number of rungs4 to 5

Design and Style

Think about how you want your blanket ladder to look. Driftwood has a rustic quality that can be enhanced or subdued, depending on your home décor style. Consider whether you want to leave the driftwood in its natural state for a rustic look or apply a clear sealant to give it a subtle shine. You could also stain the wood if you prefer a different color.

Assembling Your Driftwood Blanket Ladder

Once you have your pieces, dimensions, and design plan ready, you can begin assembling your blanket ladder. This part is where your blanket ladder starts taking shape.

Tools You Might Need

Here’s a list of tools and supplies that will help make the assembly process smooth:

  • A drill with a bit slightly smaller than screws
  • Wood screws (preferably rust-resistant)
  • A measuring tape
  • A screwdriver
  • A wood sealer or stain (optional)

Step-by-Step Assembly

1. Arrange Your Pieces

Lay the two longer pieces parallel to each other. Place each shorter piece (your rungs) between these, spaced evenly apart. Ensure your driftwood rungs are as level as possible.

2. Pre-Drill Holes

To avoid splitting the driftwood, pre-drill holes where you’ll be fixing the rungs to the side rails. This is a crucial step as driftwood can be quite brittle.

3. Attach the Rungs

Using wood screws, attach each rung to the side rails through the pre-drilled holes. Ensure the screws are countersunk slightly so they don’t stick out, which could damage blankets.

4. Secure the Ladder

Once all rungs are attached, gently stand the ladder up to check its stability. If needed, adjust the screws or sand certain areas to achieve a steady, balanced ladder.

Driftwood Blanket Ladder Diy

Finishing Touches

Adding a finishing touch to your driftwood blanket ladder can enhance its look and durability. This is a step that can make your project uniquely yours.

Sealing and Staining

Applying a wood sealant will protect your driftwood blanket ladder from moisture and wear. Use a clear finish to keep the natural look or a light wood stain if you prefer a different hue. Always test your chosen finish on a small, inconspicuous piece of wood first to ensure you like the result.

Adding Decorative Elements

Consider adding personal touches like hanging small ornaments or wrapping twine around the rungs for a boho-chic look. These elements can make the ladder a real statement piece in your home.

Placing Your Driftwood Blanket Ladder

Once your ladder is finished, consider where to place it. You’ll want it to be easily accessible while adding to the room’s décor.

Choosing the Right Spot

Place your blanket ladder in a living room corner or beside a sofa for easy blanket access. Bedrooms or guest rooms are also good options. Ensure it’s in a spot where it can lean securely against the wall.

Coordinating with Home Decor

Your driftwood blanket ladder will naturally complement other coastal or rustic décor pieces. Consider using earthy tones, nautical motifs, or vintage items nearby to create a cohesive look.

Troubleshooting Common Issues

Every DIY project can present challenges. Here are quick fixes for common problems you might encounter:

Uneven Rungs or Rails

If the rungs are uneven, double-check your measurements and adjust as necessary. Re-drilling might be needed, but sanding the uneven sections can also help.

Stability Problems

If the ladder isn’t stable, you may need to reposition it or trim one side slightly to balance it out. Adding non-slip pads to the bottom can also enhance stability.

Conclusion

Crafting a driftwood blanket ladder is not only a fun DIY project but also a wonderful way to introduce the laid-back elegance of coastal living into your home. By following these steps, you can create a functional and decorative piece that adds both charm and practicality to any space. Enjoy your handcrafted ladder, and the tranquil vibe it brings to your surroundings.

Filed Under: Driftwood Ideas Tagged With: Blanket Ladder, crafting, Driftwood, home decor, Woodworking

Driftwood Bird Houses Rustic Birdhouses

December 26, 2024 by admin

Have you ever wondered how to bring a piece of the serene beachside into your garden space? Driftwood birdhouses offer a unique, rustic charm that not only beautifies your outdoor area but also provides a cozy home for local birds. Whether you’re an avid bird watcher or simply seeking to enhance your garden’s aesthetic appeal, these birdhouses can be a delightful addition.

Understanding Driftwood Birdhouses

Driftwood birdhouses are a wonderful fusion of nature and craftsmanship. They are made from wood that has been naturally worn and shaped by water, sun, and wind. This naturally aged wood not only adds a rustic appeal but also brings a piece of the sea into your backyard. It complements various garden styles, from coastal to cottage, with its weathered appearance and unique textures.

What Makes Driftwood Special?

Driftwood is not just a piece of wood; it carries a story. Each piece has traveled through oceans and rivers, bearing the imprints of nature. This makes every driftwood birdhouse uniquely beautiful. The natural curves, holes, and knots in the wood create birdhouses that look organic and unduplicated, perfect for anyone who appreciates individuality in craftsmanship.

The Benefits of Driftwood Birdhouses

Aside from their aesthetic appeal, driftwood birdhouses are beneficial in several ways. First, they offer a sustainable option, as they are made from reclaimed materials. This means you are not contributing to deforestation while enhancing your garden. Additionally, the natural density and sturdiness of driftwood make these birdhouses durable, able to withstand various weather conditions, from scorching sun to heavy rains.

How to Choose the Right Driftwood Birdhouse

Choosing the right driftwood birdhouse involves more than just picking one that looks good. You need to consider several factors to ensure it meets both your needs and the needs of the birds in your locale.

Size and Entrance Hole

Different bird species have varying requirements when it comes to their homes. For instance, smaller birds like wrens prefer a smaller entrance hole, while larger birds such as bluebirds need a larger one. Therefore, knowing what bird species you want to attract can guide your choice.

Bird SpeciesIdeal Entrance Hole Size
Wren1 inch (2.5 cm)
Bluebird1.5 inches (3.8 cm)
Chickadee1.125 inches (2.9 cm)

Location and Installation

Where you place your birdhouse is just as important as the birdhouse itself. Most birds prefer a quiet spot away from bustling human and pet activities. Ideally, the birdhouse should be installed at least 5 to 12 feet above the ground to protect from predators. Attach it securely to a tree, pole, or fence post.

Maintenance Requirements

While driftwood is durable, maintenance is still a consideration. Natural elements can cause decay over time. Check your birdhouse annually for signs of wear and clean out any debris or old nests to ensure a safe, inviting environment for the birds.

Driftwood Bird Houses Rustic Birdhouses

Creating Your Own Driftwood Birdhouse

For the crafty souls out there, creating your own driftwood birdhouse can be a gratifying project. Not only do you get a birdhouse customized to your taste, but you also get the satisfaction of making it with your own hands.

Materials Needed

To start your project, gather the necessary materials, which typically include:

  • Pieces of driftwood
  • Wood screws or non-toxic wood glue
  • Saw
  • Drill with bits
  • Protective finish or sealant

Step-by-Step Instructions

  1. Design Your Birdhouse: Decide on the dimensions and shape. A simple box shape is beginner-friendly.
  2. Cut Driftwood to Size: Use a saw to cut four walls, a base, and a roof. Ensure all pieces fit together snugly.
  3. Assemble the Frame: Attach the walls to the base using screws or glue. Ensure the structure is sturdy.
  4. Create an Entrance: Using a drill, make an appropriately sized entrance hole.
  5. Attach the Roof: Secure the roof on top of the frame; ensure it offers adequate coverage.
  6. Apply Finish: If desired, use a non-toxic sealant to protect the wood from the elements without compromising environmental safety.

Adding Personal Touches

Personalize your birdhouse by adding features like perches or decorations. These could be small pieces of driftwood crafted into unique shapes or adding a finishing touch with natural paints. Just remember to keep it non-toxic as this is crucial for the safety of the birds.

DIY Challenges and Considerations

While crafting your own birdhouse can be fun, it’s not without challenges. Driftwood can be irregular, making cutting and assembly tricky. Working with natural wood requires patience and creativity to utilize its natural features effectively.

Safety Concerns

It’s paramount to ensure the safety of your feathered friends. Use non-toxic materials throughout your construction. Avoid using any sharp objects or toxic paints that could harm the birds. Check for any protruding nails or rough edges that might injure them.

Seasonal Maintenance

After construction, remember that a birdhouse isn’t a set-it-and-forget-it fixture. Over time, natural elements will take their toll. Regular checks and a bit of attention will help prolong its life and usability. Seasonal maintenance can preserve the wood and ensure it remains a welcoming home year after year.

Driftwood Bird Houses Rustic Birdhouses

Driftwood Birdhouse Designs and Inspirations

The beauty of driftwood birdhouses is their versatility. There are numerous designs to inspire you, from quaint cottage-style houses to modern minimalist designs.

Traditional Cottage Style

This style mimics a small, wooden cabin nestled in the forest. It often features multiple pieces of driftwood stacked to resemble log walls and intricate roofs. Add small details like faux windows or a driftwood chimney to enhance the cottage look.

Modern or Minimalist

For those who favor clean lines and simplicity, a minimalist design could be perfect. Use smooth, evenly cut pieces of driftwood for the structure and let the natural colors and textures speak for themselves. This design often fits well in contemporary garden settings.

Whimsical Designs

For anyone with a love for the eclectic, whimsical designs are an exciting option. Think about birdhouses with curved, asymmetrical lines, or those that incorporate brightly colored elements for a playful twist. Remember, the sky’s the limit, and creativity is your best friend here.

The Impact of Driftwood Birdhouses on Local Wildlife

Putting up a birdhouse has more than aesthetic benefits; it impacts the local ecosystem positively. It provides a safe place for birds to live, breed, and find shelter, especially in urban areas where natural habitats may be lacking.

Supporting Bird Populations

By offering accommodation to birds, you help support native bird populations. Many species face habitat losses due to human activity, and providing a place to nest can help them thrive. This is beneficial not just for birds, but for the whole ecosystem, as birds play critical roles in pest control and plant pollination.

Educational Opportunities

For families, having a birdhouse can be a learning experience. Watching birds build nests and raise their young offers unique insights into nature. It’s a wonderful way for children to learn about local wildlife and develop an appreciation for the environment from a young age.

Driftwood Birdhouses as a Gift

If you’re considering giving a driftwood birdhouse as a gift, you’re offering more than just a garden accessory. You’re giving a piece of art, a unique touch of nature, and a new hobby all wrapped into one.

Why They Make Perfect Gifts

Driftwood birdhouses cater to a wide range of interests. They are perfect for bird enthusiasts, garden lovers, or anyone who appreciates handmade crafts. Their uniqueness ensures that you’re giving something truly special.

Personalization Ideas

Elevate your gift by adding a personal touch. Perhaps include a small note on the importance of bird conservation or customize it with the recipient’s favorite colors or themes. The effort put into personalizing the gift can make it far more meaningful.

Conclusion

Driftwood birdhouses are more than just an addition to your garden or a home for the birds; they represent a connection between the wilderness and human craftsmanship. They offer beauty, functionality, and environmental benefits, making them a meaningful project or gift. Whether buying, building, or gifting, these rustic creations provide endless joy and a touch of nature’s whimsy right in your backyard.

Filed Under: Driftwood Ideas Tagged With: Bird Houses, crafting, Driftwood, Handmade, Rustic

How To Attach Driftwood

December 10, 2024 by admin

How often have you admired the rustic, natural beauty of driftwood and wished you could incorporate it into your home or garden decor? Incorporating driftwood into your space can add just the right touch of nature and tranquility. Attaching driftwood properly ensures it becomes a lasting piece of art. Let’s journey through this process together, learning how to secure driftwood in the most effective way.

Understanding Driftwood: Nature’s Artist

Before we get into the nitty-gritty of attaching driftwood, it’s important to understand what driftwood is. Driftwood is usually wood that has been washed ashore by the tides, sanded by the sea, and bleached by the sun over time. It has a distinct bleached and weathered look that varies from piece to piece. Bringing driftwood into your living space is like bringing a piece of the ocean itself, offering both aesthetic and calming benefits.

Why Driftwood is Valuable

The value of driftwood goes beyond its aesthetic appeal. Each piece tells its own story of where it came from, its journey through the sea, and the transformations it underwent. Driftwood can be used in many creative ways—from sculptures to furniture to decorative accent pieces. Its neutral tones and unique texture make it adaptable to various design styles, enhancing the natural atmosphere of any setting.

Sourcing and Preparing Driftwood

Depending on where you live, you might be able to find driftwood at a nearby beach. If not, many craft and hobby stores sell driftwood for crafting purposes. In either case, once you’ve found a piece you like, it’s a good idea to prepare and clean it thoroughly. This ensures that it’s free of any unwanted organisms and ready for your project.

Preparing Driftwood for Attachment

Preparation is crucial for ensuring that your driftwood pieces stay secured in whatever arrangement you choose. Proper cleaning and treatment will also help prevent any premature degradation of the wood.

Cleaning Driftwood

Step 1: Initial Rinse
Begin by rinsing the driftwood with fresh water to remove any sand, salt, or loose debris. For smaller pieces, soak them in water for a few days, changing the water daily to leach out the salt.

Step 2: Bleaching (Optional)
To sanitize the wood, you can use a bleach solution. Mix one part bleach to ten parts water and soak the driftwood for 24 hours. This helps kill any remaining bacteria or algae. Remember to rinse the piece thoroughly afterward to eliminate any bleach residue.

Step 3: Drying
Allow the driftwood to dry completely. You can let it dry in the sun, which will also help to give it a sun-bleached look. Make sure the wood is completely dry before moving on to the next steps, as moisture can hinder adhesion and influence the integrity of your attachment.

How To Attach Driftwood

Tools and Materials for Attaching Driftwood

Having the right tools on hand will make your task easier and more efficient. Depending on the nature of your project, here’s a handy list of essentials for attaching driftwood:

Tool/MaterialPurpose
Wood GlueFor bonding glue-compatible surfaces
Epoxy ResinFor strong, durable adhesion
Drill and ScrewsFor securing driftwood to surfaces
Fishing Line or WireFor hanging driftwood pieces
L-bracketsFor mounting on walls or surfaces
SandpaperFor smoothing surfaces prior to attachment

Choosing the Right Adhesive

Not all adhesives are created equal, especially when working with nature’s own material like driftwood. Depending on the weight of your driftwood and what you’re attaching it to, different adhesives may be appropriate.

Wood Glue

Wood glue is perfect for lighter pieces of driftwood or for projects where you’ll be attaching the wood to other wooden surfaces.

Epoxy Resin

For heavier driftwood or when attaching to non-wooden surfaces such as glass or metal, epoxy resin is your best bet. It creates a durable bond and fills gaps, making it ideal for the irregular surfaces common in driftwood pieces.

Methods for Attaching Driftwood

There’s no one-size-fits-all method when it comes to attaching driftwood, largely because each piece of driftwood is unique. However, several effective methods can help you securely integrate driftwood into your decor.

Attaching with Adhesives

  1. Surface Preparation: Ensure both surfaces (the driftwood and the object to which it will attach) are clean and dry. Lightly sand both surfaces to create a rough area for better adhesion.

  2. Applying Adhesive: Apply a generous amount of your chosen adhesive to one surface. For epoxy resin, mix according to the package instructions before application.

  3. Positioning: Press the driftwood piece firmly against the surface. You may need to hold it in place for the adhesive to bond effectively; consider using clamps or weights if necessary.

  4. Drying Time: Allow ample time for the adhesive to dry and cure fully. This could range from a few hours to a full day, depending on the product used.

Screws and Drilling

For a mechanical attachment, especially for larger or load-bearing applications, screws can provide a more secure hold.

  1. Choosing Screws: Select screws that are slightly longer than the thickness of the driftwood to ensure they penetrate the surface it’s being attached to.

  2. Pre-drilling: Pre-drill holes in the driftwood to avoid splitting. Use a drill bit slightly smaller than the screw’s diameter.

  3. Securing: Use a power drill to drive the screws through the pre-drilled holes into the receiving surface. Be cautious not to over-tighten, as this can crack or split the driftwood.

Using Brackets

L-brackets can be very effective for stabilizing driftwood pieces against walls or flat surfaces.

  1. Position the Bracket: Align the bracket where you want the piece to rest, ensuring that it will hold the weight of your driftwood.

  2. Attaching the Bracket: Secure the bracket to the wall or desired surface with screws, and then place the driftwood onto the bracket. Depending on your aesthetic preference, you can either leave the bracket exposed or conceal it with decorative elements.

Hanging with Wire or Fishing Line

For hanging driftwood pieces, using wire or fishing line can be an artistic and less intrusive way to display your driftwood.

  1. Determine Length: Cut the wire or line to your desired length, ensuring it can hold the weight of the driftwood.

  2. Secure the Line: Loop the line around the driftwood, knotting it securely. For additional strength, you may use two or more strands.

  3. Hanging: Attach the other end to a stable hook or nail. Ensure the anchor point (such as in the wall or ceiling) can bear the driftwood’s weight reliably.

How To Attach Driftwood

Creative Ideas for Using Driftwood

Now that you’ve mastered the techniques for attaching driftwood, let’s look at some creative applications to inspire you.

Incorporating Driftwood into Interior Decor

  1. Wall Art: Attach smaller pieces of driftwood to form a driftwood collage or a central focal piece such as a driftwood heart or star.

  2. Furniture: Use larger pieces as bases or legs for tables and chairs, adding a unique twist to conventional furniture pieces.

  3. Shelves: Install driftwood as floating shelves. Mount the wood securely with brackets or screws for a minimalist, rustic look.

Driftwood in Garden and Outdoor Spaces

  1. Planters: Create a driftwood planter by using driftwood to encase potted plants.

  2. Garden Borders: Use driftwood as natural borders around flower beds or pathways.

  3. Birdhouses and Feeders: Construct birdhouses or feeders by attaching additional wood pieces, creating a natural feeding environment for birds.

Troubleshooting Common Problems

Even with careful preparation and maintenance, things can occasionally go awry. Here are some tips on what to do if issues arise with your driftwood projects:

Loose Attachments

If a piece of driftwood isn’t holding as securely as you’d like, consider reinforcing it with additional screws or a stronger adhesive. Double-check that the surfaces were properly cleaned and sanded before attachment.

Splintering Driftwood

Splintering can occur if driftwood is dry or too brittle. Regularly check the condition of your driftwood and be prepared to sand and retouch finishes to maintain their integrity.

Environmental Deterioration

Outdoor driftwood can degrade if exposed to extreme weather. Consider sealing the driftwood with a clear outdoor sealant to protect it from the elements while preserving its natural beauty.

Conclusion: Crafting with Driftwood

Attaching driftwood to various surfaces and incorporating it into your decor is a satisfying and rewarding endeavor. It allows you to bring the beauty of nature into your personal space, whether indoors or outdoors. By understanding the characteristics of driftwood, preparing it correctly, and using the appropriate methods and tools, you can create stunning and durable works of art. Remember, every piece of driftwood is unique, and with a little creativity and care, you can transform any piece into something that’s perfectly you.

Filed Under: Driftwood Ideas Tagged With: crafting, DIY Projects, Driftwood, home decor, Woodworking

  • « Previous Page
  • Page 1
  • Page 2
  • Page 3
  • Page 4
  • Page 5
  • …
  • Page 7
  • Next Page »

Primary Sidebar

Driftwood4us.com, is a participant in the Amazon Services LLC Associates Program, an affiliate advertising program designed to provide a means for sites to earn advertising fees by advertising and linking to amazon.com.